


Ed's Ziroli B-25 Build

 03-02-2013, 10:50 PM
#127

Thread Starter
My Feedback: (25)

Join Date: Oct 2002
Location: Oakdale,
CT
Posts: 171
Likes: 0
Received 0 Likes
on
0 Posts
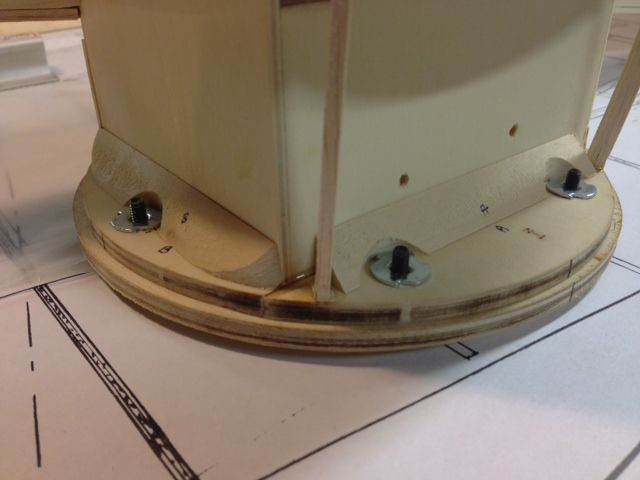
After lots of measuring and double checking, I drilled the holes and attached the firewalls using 8-32 bolts into blind nuts on the back side. Once that was done I cut some pieces of hardwood tri-stock and attached them to the back side of the firewall. Its not called for on the plans but I wanted to add a bit more strength.
Been at it for about a month now and I can tell you that so far this plane is a joy to build. And the more it starts to take shape, the better it gets.
Been at it for about a month now and I can tell you that so far this plane is a joy to build. And the more it starts to take shape, the better it gets.
03-03-2013, 08:44 AM
#128
Senior Member
My Feedback: (1)
Join Date: Dec 2010
Location: Mt Morris, IL
Posts: 1,433
Likes: 0
Received 0 Likes
on
0 Posts
BigE,
looking real good so far.. Glad to here you are enjoying the build and thanks for taking the time to put it all on the computer for us to follow, I know what a chore that can be at times... This plane is my next project this coming fall/winter..........
Jimbo
looking real good so far.. Glad to here you are enjoying the build and thanks for taking the time to put it all on the computer for us to follow, I know what a chore that can be at times... This plane is my next project this coming fall/winter..........
Jimbo
03-03-2013, 06:32 PM
#129
Thread Starter
My Feedback: (25)
Join Date: Oct 2002
Location: Oakdale,
CT
Posts: 171
Likes: 0
Received 0 Likes
on
0 Posts
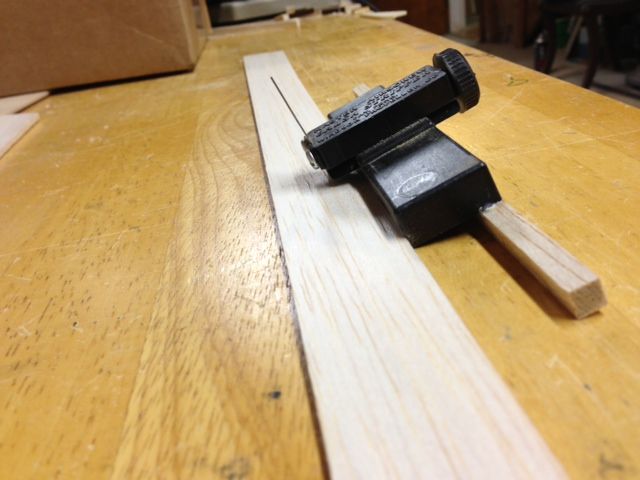
I used RAMflyer's link to teach myself how to strip plank. I used a small length of 1/4"sq balsa glued to the bottom of the stripper and it angles the cuts perfectly. I cut up three sheets to start, but wound up cutting quite a bit more for just one side.

03-03-2013, 06:52 PM
#130
Thread Starter
My Feedback: (25)
Join Date: Oct 2002
Location: Oakdale,
CT
Posts: 171
Likes: 0
Received 0 Likes
on
0 Posts
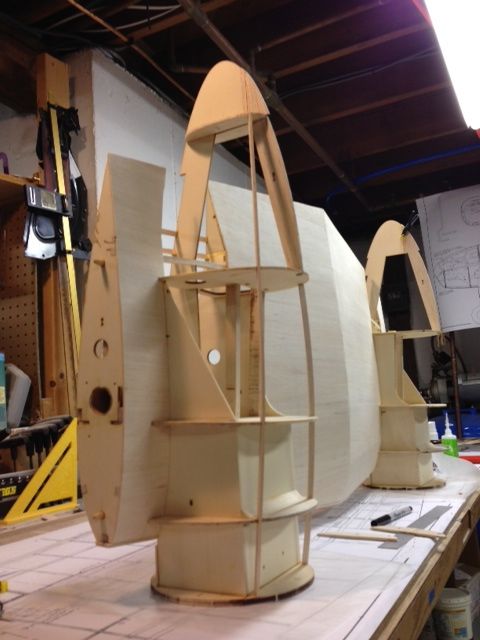
I started by gluing a strip on each side about mid way up to each of the formers except the rear. Then pulled both strips together on the rear former at the same time to try and prevent the rear of the nacelle from pulling to one side. Worked great. Only thing i will do different on the other nacelle is to start the strips at the base and work up.
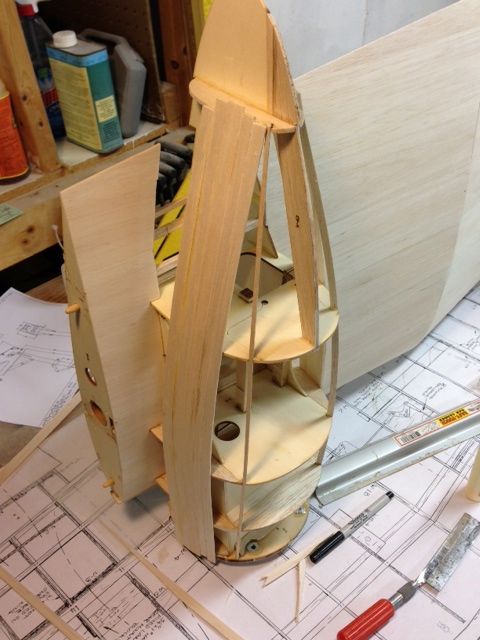
After about 5 or 6 strips on each side, the strips were getting tough to bend so I started a new row about three quarters of the way from the top and then filled the rest in. This is where it starts getting really tedious trying cut each strip at the right angle to make sure there are no gaps...
Started the final row at the top and continued to fill in. This last picture represents a whole days worth of work and its still not finished! This process is time consuming. So far Im really happy with the end result. I'll need to use a little filler here and there, but not much.
03-03-2013, 07:11 PM
#131
My Feedback: (65)
Join Date: Dec 2001
Location: Orlando, FL
Posts: 899
Likes: 0
Received 0 Likes
on
0 Posts
You are doing a great job!! It is tedious, isn't it That is why I put the Me163 fuse away for a while after I had planked half of it... I'll get back to it after I finish a few simpler projects!
That is why I put the Me163 fuse away for a while after I had planked half of it... I'll get back to it after I finish a few simpler projects!
03-03-2013, 07:21 PM
#132
Thread Starter
My Feedback: (25)
Join Date: Oct 2002
Location: Oakdale,
CT
Posts: 171
Likes: 0
Received 0 Likes
on
0 Posts
ORIGINAL: RAMFlyer
You are doing a great job!! It is tedious, isn't it[img][/img] That is why I put the Me163 fuse away for a while after I had planked half of it... I'll get back to it after I finish a few simpler projects!
You are doing a great job!! It is tedious, isn't it[img][/img] That is why I put the Me163 fuse away for a while after I had planked half of it... I'll get back to it after I finish a few simpler projects!
03-03-2013, 07:25 PM
#133
Thread Starter
My Feedback: (25)
Join Date: Oct 2002
Location: Oakdale,
CT
Posts: 171
Likes: 0
Received 0 Likes
on
0 Posts
ORIGINAL: Mustangman40
BigE,
looking real good so far.. Glad to here you are enjoying the build and thanks for taking the time to put it all on the computer for us to follow, I know what a chore that can be at times... This plane is my next project this coming fall/winter..........[img][/img]
Jimbo
BigE,
looking real good so far.. Glad to here you are enjoying the build and thanks for taking the time to put it all on the computer for us to follow, I know what a chore that can be at times... This plane is my next project this coming fall/winter..........[img][/img]
Jimbo
03-04-2013, 12:12 AM
#134
Member
Join Date: Mar 2011
Location: ponteranica, ITALY
Posts: 49
Likes: 0
Received 0 Likes
on
0 Posts
Ed
Excuse me, but I've seen in the pic a cutter never seen before ( it slides on a sort of rail, if I see well). It seems to be very usefull. Where did you buy it, in a normal hardware shop or is it from a modeller one?
If yes can you please indicate it to me?
Thanks
Fabrizio
Excuse me, but I've seen in the pic a cutter never seen before ( it slides on a sort of rail, if I see well). It seems to be very usefull. Where did you buy it, in a normal hardware shop or is it from a modeller one?
If yes can you please indicate it to me?
Thanks
Fabrizio
03-04-2013, 07:19 PM
#135
Thread Starter
My Feedback: (25)
Join Date: Oct 2002
Location: Oakdale,
CT
Posts: 171
Likes: 0
Received 0 Likes
on
0 Posts
ORIGINAL: fabfal
Ed
Excuse me, but I've seen in the pic a cutter never seen before ( it slides on a sort of rail, if I see well). It seems to be very usefull. Where did you buy it, in a normal hardware shop or is it from a modeller one?
If yes can you please indicate it to me?
Thanks
Fabrizio
Ed
Excuse me, but I've seen in the pic a cutter never seen before ( it slides on a sort of rail, if I see well). It seems to be very usefull. Where did you buy it, in a normal hardware shop or is it from a modeller one?
If yes can you please indicate it to me?
Thanks
Fabrizio
03-04-2013, 07:24 PM
#136
Thread Starter
My Feedback: (25)
Join Date: Oct 2002
Location: Oakdale,
CT
Posts: 171
Likes: 0
Received 0 Likes
on
0 Posts
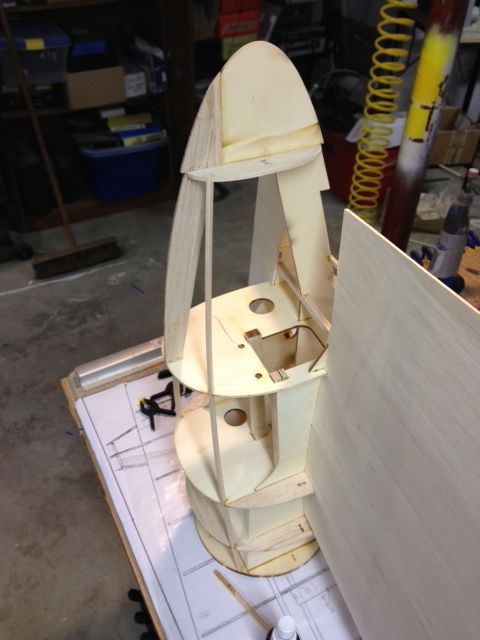
Working the second nacelle now. Now that I have the technique down its going a lot smoother. Still seriously tedious though. Glad picture posting is working again.
03-04-2013, 08:32 PM
#137
Thread Starter
My Feedback: (25)
Join Date: Oct 2002
Location: Oakdale,
CT
Posts: 171
Likes: 0
Received 0 Likes
on
0 Posts
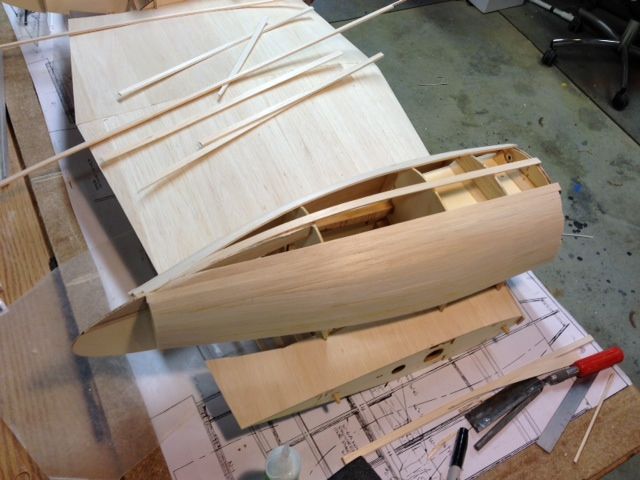
Here's an example of the tedious part- for this particular strip, it has to be angle cut to fit perfectly in the gap- sounds easy. But in that same spot it has to twist to follow the contour of the strip it's being joined to. It's hard to tell in the picture but where the strip ends at the firewall it's almost perpendicular to the other end of the strip. That's a lot of twist! So what I do is wet the strip with windex except for the very end where it's a v shape. I glue that end in the slot. Then I carefully bend the strip so it conforms to the strip it's being joined to and pin it in place. Once it dries it holds the shape perfectly and easy to glue in place. Problem is it takes quite a bit of time for just one strip! So while the balsa dries out I do a strip on the other side.
03-06-2013, 08:11 PM
#138
Thread Starter
My Feedback: (25)
Join Date: Oct 2002
Location: Oakdale,
CT
Posts: 171
Likes: 0
Received 0 Likes
on
0 Posts
FINALLY! Both nacelles are sheeted (except for the top front which will get done once the top of the wing is sheeted.) for anyone following along, sorry it's been rather boring the last week while I've been doing that job. Sounds silly, but I just spent an hour staring at the damn thing thinking how cool it looks- and it doesn't even remotely look like anything quite yet! Oh well.
Trying to decide what to do next. Should I work on the flaps? Or set it aside and start the fuse? Opinions are more than welcome!
Trying to decide what to do next. Should I work on the flaps? Or set it aside and start the fuse? Opinions are more than welcome!
03-07-2013, 12:11 PM
#139
Thread Starter
My Feedback: (25)
Join Date: Oct 2002
Location: Oakdale,
CT
Posts: 171
Likes: 0
Received 0 Likes
on
0 Posts
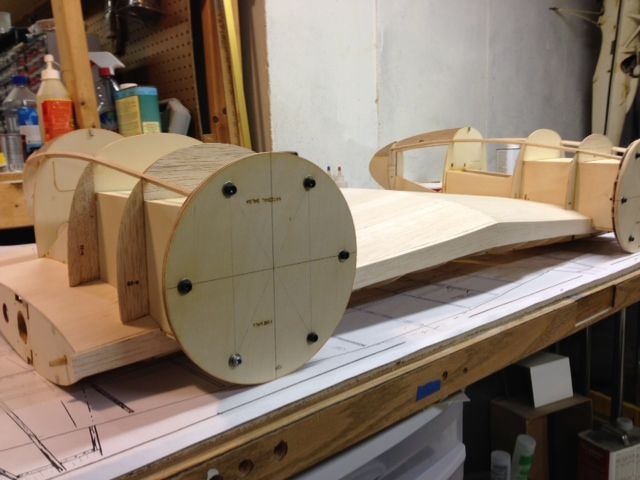
Decided to start the fuselage next. I need a break from the wing. It's built around a central crutch and that gets laid out first.
03-07-2013, 05:29 PM
#142
My Feedback: (20)
Ed, are you going to use the bent wire thru the nacelles to operate the inside and outside flap sections? If so can you still get it thru the nacelle without having to cut the sheeting to get it in? I hope you've still got access to the nacelle and dont have to cut any of that fantastic sheeting job to make it work.
03-07-2013, 05:53 PM
#143
Thread Starter
My Feedback: (25)
Join Date: Oct 2002
Location: Oakdale,
CT
Posts: 171
Likes: 0
Received 0 Likes
on
0 Posts
ORIGINAL: MarvinLoomis
Ed, are you going to use the bent wire thru the nacelles to operate the inside and outside flap sections? If so can you still get it thru the nacelle without having to cut the sheeting to get it in? I hope you've still got access to the nacelle and dont have to cut any of that fantastic sheeting job to make it work.
Ed, are you going to use the bent wire thru the nacelles to operate the inside and outside flap sections? If so can you still get it thru the nacelle without having to cut the sheeting to get it in? I hope you've still got access to the nacelle and dont have to cut any of that fantastic sheeting job to make it work.
03-07-2013, 06:14 PM
#144
My Feedback: (20)
I was hoping that you were going to use servos. I bought mine partially built, had no flaps and fixed gear. I retrofitted it with flaps and installed retractable gear. I used the bent wire on the flap sections and it took a pretty large cut in the sheeting of the nacelles to get it installed, but it worked out very well. Flaps operate very good with the wire connection. Looks like yer doing a fantastic job on the build! Keep up the good work!


 03-08-2013, 04:48 AM
#148
Thread Starter
My Feedback: (25)
Join Date: Oct 2002
Location: Oakdale,
CT
Posts: 171
Likes: 0
Received 0 Likes
on
0 Posts
ORIGINAL: OldScaleGuy
Great work Ed. Seperate servos is the way to go on the flaps. For me, when scratch building, thinking about the next step(s) (scratching your head ) is about as time consuming as the building.
Great work Ed. Seperate servos is the way to go on the flaps. For me, when scratch building, thinking about the next step(s) (scratching your head
) is about as time consuming as the building.
03-08-2013, 09:44 PM
#149
Thread Starter
My Feedback: (25)
Join Date: Oct 2002
Location: Oakdale,
CT
Posts: 171
Likes: 0
Received 0 Likes
on
0 Posts
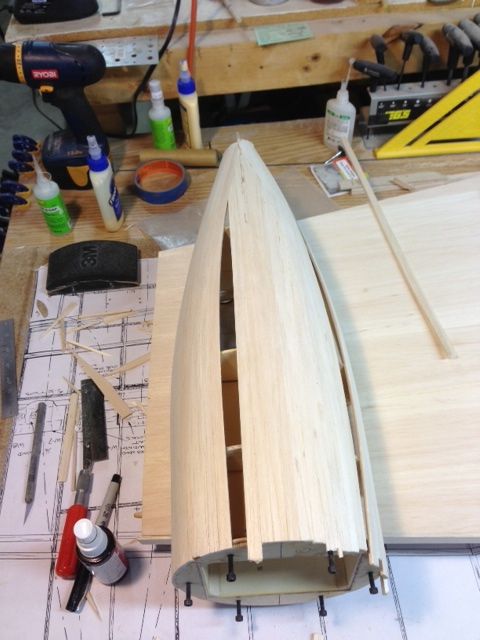
All the formers are glued in and a few stringers to hold everything square. Used builders triangles to ensure each former was perpendicular to the crutch and in the right spot over the plan. Found my next hiccup with the kit- only one stab saddle. Not really a big deal, just an inconvenience since I'm running out of spare 1/8" light ply. I wound up using a template from the last plane I built. In the picture you can still see residue from the plan still on the wood. Once finished nobody will see it anyway. Another mistake I made- the crutch between the last two formers is supposed to be cut at an angle to compensate for the outer sheeting, and a couple pieces of 1/2x1/4 gets glued to the top of the crutch in that section for the last former. Pain in the but to carefully make that cut while propped up like it is. If your building this- make the cut before you assemble the crutch!
03-08-2013, 09:55 PM
#150
Thread Starter
My Feedback: (25)
Join Date: Oct 2002
Location: Oakdale,
CT
Posts: 171
Likes: 0
Received 0 Likes
on
0 Posts
This picture explains what I meant by the angle cut. Lesson learned for me- look at ALL the views on the plans, not just one. Duh.