


View Poll Results: Would you like to see a Bro******** e-book published
Yes - that would be great !


17
73.91%
Not particularly


6
26.09%
Voters: 23. You may not vote on this poll
Bro rc Surfer Custom Boards

 04-01-2014, 09:56 AM
#703

Thread Starter

Join Date: May 2009
Location: Cape Towm, SOUTH AFRICA
Posts: 2,769
Likes: 0
Received 0 Likes
on
0 Posts
Had 'another' sweet session this afternoon .... It's amazing what 20 minutes of rc Surfing can do for the mind - body and soul ...
 recommended daily !
https://www.youtube.com/watch?v=jNf_qU_An-M
It's amazing what 20 minutes of rc Surfing can do for the mind - body and soul ... recommended daily !https://www.youtube.com/watch?v=jNf_qU_An-M
04-02-2014, 02:02 AM
#704
Thread Starter
Join Date: May 2009
Location: Cape Towm, SOUTH AFRICA
Posts: 2,769
Likes: 0
Received 0 Likes
on
0 Posts
Cloth is left extended beyond the housing wall to be trimmed only once the white flow coat has been applied and cured to prevent any mess.
Board is held up to light to mark the POD's profile.


Cut out and hollow as with the housing.


remove all foam and wipe out with acetone in preparation for white flow coat.


Drive shaft housing area is cleaned out entirely of foam as it will be filed with epoxy when fitting the drive shaft housing.
Tape up drive shaft housing exit to avoid ant spillage.


Liberal coat of white flow coat ( gel coat with wax mixed in it) seals and strengthens the housing area.


Leave overnight to cure 100% before trimming down the exess cloth extending beyond the housing walls.

Board is held up to light to mark the POD's profile.
Cut out and hollow as with the housing.
remove all foam and wipe out with acetone in preparation for white flow coat.
Drive shaft housing area is cleaned out entirely of foam as it will be filed with epoxy when fitting the drive shaft housing.
Tape up drive shaft housing exit to avoid ant spillage.
Liberal coat of white flow coat ( gel coat with wax mixed in it) seals and strengthens the housing area.
Leave overnight to cure 100% before trimming down the exess cloth extending beyond the housing walls.
04-02-2014, 02:46 AM
#705
Thread Starter
Join Date: May 2009
Location: Cape Towm, SOUTH AFRICA
Posts: 2,769
Likes: 0
Received 0 Likes
on
0 Posts
I use a 10mm sheet of glass to ensure a flat surface around the housing flange - then have a raised insert to accommodate a 4s battery - board being 30mm's thick.
If the entire housing area of the board was made 'thicker' to accommodate the 4s battery- it would increase the overall 'volume' of the board - requiring more weight to right it. - hence the minimum volume area is introduced....


Surface is prepared with a few layers of release wax and a PVA release agent...left to dry 100%


Start with a thin layer of coloured Gel coat - left to cure touch dry - then the first couple of woven cloth layers
are applied with the colour pigment mixed into the laminating resin to ensure the depth of colour. The aim is to
create a waxed deck type of look. (fused).so.. the balance of the laminated layers will be applied with clear laminating
resin , with the decals laid in....


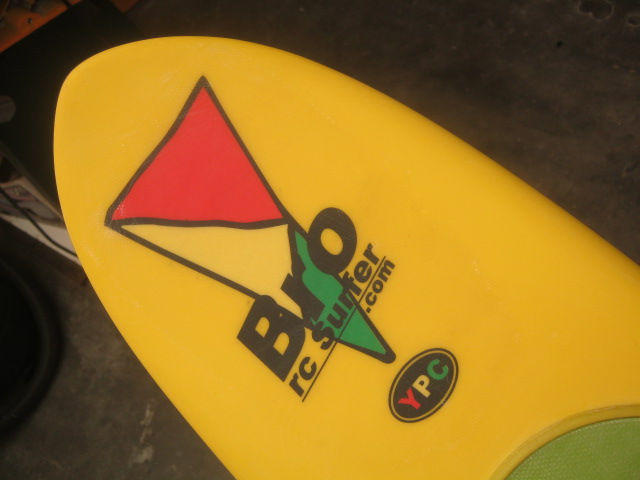
For those who are interested in 'the logo's significance?'....it's a pretty standard recycle logo - which I thought would be
appropriate for a Bro board - You get to use it 'Over and Over and Over again".......LOL....


Rough cut to size and shape - to be accurately within the deflection rim of the board.
Recess in the hatch cover is to accommodate the 4s battery pack.


If the entire housing area of the board was made 'thicker' to accommodate the 4s battery- it would increase the overall 'volume' of the board - requiring more weight to right it. - hence the minimum volume area is introduced....
Surface is prepared with a few layers of release wax and a PVA release agent...left to dry 100%
Start with a thin layer of coloured Gel coat - left to cure touch dry - then the first couple of woven cloth layers
are applied with the colour pigment mixed into the laminating resin to ensure the depth of colour. The aim is to
create a waxed deck type of look. (fused).so.. the balance of the laminated layers will be applied with clear laminating
resin , with the decals laid in....
For those who are interested in 'the logo's significance?'....it's a pretty standard recycle logo - which I thought would be
appropriate for a Bro board - You get to use it 'Over and Over and Over again".......LOL....
Rough cut to size and shape - to be accurately within the deflection rim of the board.
Recess in the hatch cover is to accommodate the 4s battery pack.
Last edited by YPC; 04-02-2014 at 11:50 PM.
04-02-2014, 10:34 AM
#707
Thread Starter
Join Date: May 2009
Location: Cape Towm, SOUTH AFRICA
Posts: 2,769
Likes: 0
Received 0 Likes
on
0 Posts
...it dawned on me today ! that whilst I'm out having my afternoon fix / workout/ session - surf permitting ! - some good folk are stuck in the traffic - patiently waiting to get home... ....couldn't do it
Nick did some 'deep sea fishing'.....
https://www.youtube.com/watch?v=dJE-8BdprNI

....couldn't do it Nick did some 'deep sea fishing'.....
https://www.youtube.com/watch?v=dJE-8BdprNI
Last edited by YPC; 04-03-2014 at 12:37 AM.
04-03-2014, 02:24 AM
#708
Thread Starter
Join Date: May 2009
Location: Cape Towm, SOUTH AFRICA
Posts: 2,769
Likes: 0
Received 0 Likes
on
0 Posts
Sand down the rough extended housing wall side cloth


Mark out the perimeter of the hatch cover.


Fit the Deflection rim ( high density foam to be resin coated)
Deflects water from impacting between the seal and deck.


Fine fit the hatch cover to suite the deflection rim.
Has a textured finish to emulate the surfboard texture decks.


Whalla ! hatch cover / deflection rim fitted....phew !....

Mark out the perimeter of the hatch cover.
Fit the Deflection rim ( high density foam to be resin coated)
Deflects water from impacting between the seal and deck.
Fine fit the hatch cover to suite the deflection rim.
Has a textured finish to emulate the surfboard texture decks.
Whalla ! hatch cover / deflection rim fitted....phew !....
04-03-2014, 04:36 AM
#709
Thread Starter
Join Date: May 2009
Location: Cape Towm, SOUTH AFRICA
Posts: 2,769
Likes: 0
Received 0 Likes
on
0 Posts
Before installing the rudder tube - a first coat of colour resin over the Deflection Rim. Its important to seal over the edge where the deck flange meets with the top of the housing wall....to be sanded down once cured - to receive a second coat.


The rudder tube needs to be secured very well ! The rudder takes so much impact - driving the boards direction and
enduring impact from landing on the sand - hitting objects in the water - landing big airs etc...etc..you dont want it coming lose - EVER !
Firstly - you need to position the tube in an oversize hole to ensure that the epoxy flows completely around the tube in its full length, ensuring a good bond
/ key between the tube and the foam.
Secondly - the epoxy needs to flow well around the tube and the fibre- glass surface - keying the brass tube to the fibre -glass - a small mound of epoxy around the
brass tube is good for added strength.
Thirdly - leave the tube extended whilst applying seal and gloss coats - as each coat built up around the tube will add to it overall strength.


It's been a good day in the workshop - - Unfortunately the surf is blown out this afternoon ..

The rudder tube needs to be secured very well ! The rudder takes so much impact - driving the boards direction and
enduring impact from landing on the sand - hitting objects in the water - landing big airs etc...etc..you dont want it coming lose - EVER !
Firstly - you need to position the tube in an oversize hole to ensure that the epoxy flows completely around the tube in its full length, ensuring a good bond
/ key between the tube and the foam.
Secondly - the epoxy needs to flow well around the tube and the fibre- glass surface - keying the brass tube to the fibre -glass - a small mound of epoxy around the
brass tube is good for added strength.
Thirdly - leave the tube extended whilst applying seal and gloss coats - as each coat built up around the tube will add to it overall strength.
It's been a good day in the workshop -
- Unfortunately the surf is blown out this afternoon ..
04-04-2014, 02:35 AM
#710
Thread Starter
Join Date: May 2009
Location: Cape Towm, SOUTH AFRICA
Posts: 2,769
Likes: 0
Received 0 Likes
on
0 Posts
Once the epoxy, bonding the rudder tube, has cured - another filler coat of pigmented resin is applied to the board to fill in any small blemishes..pin holes.
.....special care is taken to pool the resin around the protruding rudder tube... to add further strength....


As with the deck - the hull / bottom of the board receives another coloured filler coat.
What is critical is to ensure that the board is level so that the filler coat flows equally and true to the boards surface.


Rudder tube filler coat pooled around the rudder tube for strength.


Once cured - light sand - then the decals are applied covered by a clear sanding coat.
.....special care is taken to pool the resin around the protruding rudder tube... to add further strength....
As with the deck - the hull / bottom of the board receives another coloured filler coat.
What is critical is to ensure that the board is level so that the filler coat flows equally and true to the boards surface.
Rudder tube filler coat pooled around the rudder tube for strength.
Once cured - light sand - then the decals are applied covered by a clear sanding coat.
Last edited by YPC; 04-04-2014 at 05:32 AM.
04-06-2014, 09:25 AM
#711
Thread Starter
Join Date: May 2009
Location: Cape Towm, SOUTH AFRICA
Posts: 2,769
Likes: 0
Received 0 Likes
on
0 Posts
Saturday Session..Howling South Easter ...just Surf it !
https://www.youtube.com/watch?v=EDmalUj2uZs
https://www.youtube.com/watch?v=EDmalUj2uZs
04-06-2014, 09:27 AM
#712
Thread Starter
Join Date: May 2009
Location: Cape Towm, SOUTH AFRICA
Posts: 2,769
Likes: 0
Received 0 Likes
on
0 Posts
Sunday Surf Session....West Cost - Table Bay !......stunning scenery !
https://www.youtube.com/watch?v=af0LQ4voHPI
...stunning scenery !https://www.youtube.com/watch?v=af0LQ4voHPI
04-07-2014, 02:40 AM
#713
Thread Starter
Join Date: May 2009
Location: Cape Towm, SOUTH AFRICA
Posts: 2,769
Likes: 0
Received 0 Likes
on
0 Posts
Always great to receive a note of how things are going........thanks Geoff..
Hi Dominic
Been enjoying watching your vids and board updates on rc universe
I was driving home on Sunday afternoon with the family after enjoying Bro and thought how great it must be for you knowing your boards are being used all over the world including kettering uk!!!!!!!!!! Keep up the great work
Bro sure is getting some comments
....thanks Geoff..Hi Dominic
Been enjoying watching your vids and board updates on rc universe
I was driving home on Sunday afternoon with the family after enjoying Bro and thought how great it must be for you knowing your boards are being used all over the world including kettering uk!!!!!!!!!! Keep up the great work
Bro sure is getting some comments
Last edited by YPC; 04-07-2014 at 02:44 AM.
04-07-2014, 09:36 PM
#714
Thread Starter
Join Date: May 2009
Location: Cape Towm, SOUTH AFRICA
Posts: 2,769
Likes: 0
Received 0 Likes
on
0 Posts
Monday Arvi session - fun 2ft face - ( Amps + Time) = STOKE
Some rc Surfers seem stuck on surfing 'Big Surf only'- lol - bit of an irony .. Surfing 1ft face surf can be as much fun as taking on some 6ft face ....there is always some STOKE to be had......in this video I ran a single pack, left over from the previous days session - had 20 odd minutes on my hands between family sport activities - less than average surf conditions - had a few great waves to savour ..Airs - Cut backs - Bottom turns Rodeo's - Off the lips'- Tail snaps - down the line pumps ....the stuff surfing is all about....
https://www.youtube.com/watch?v=bP9a6NfCo9g
fun 2ft face - ( Amps + Time) = STOKESome rc Surfers seem stuck on surfing 'Big Surf only'- lol - bit of an irony .. Surfing 1ft face surf can be as much fun as taking on some 6ft face ....there is always some STOKE to be had...
...in this video I ran a single pack, left over from the previous days session - had 20 odd minutes on my hands between family sport activities - less than average surf conditions - had a few great waves to savour ..Airs - Cut backs - Bottom turns Rodeo's - Off the lips'- Tail snaps - down the line pumps ....the stuff surfing is all about.... https://www.youtube.com/watch?v=bP9a6NfCo9g
Last edited by YPC; 04-07-2014 at 09:44 PM.
04-08-2014, 01:14 AM
#715
Thread Starter
Join Date: May 2009
Location: Cape Towm, SOUTH AFRICA
Posts: 2,769
Likes: 0
Received 0 Likes
on
0 Posts
Final decals applied - saturated with clear resin covered over with a very fine woven cloth


sanded when dry - prepared for a final clear coat..


Final clear gloss coat applied - leave foe a few days before sanding.


Bottom / Hull sanded with final clear coat applied.


sanded when dry - prepared for a final clear coat..
Final clear gloss coat applied - leave foe a few days before sanding.
Bottom / Hull sanded with final clear coat applied.
Last edited by YPC; 04-10-2014 at 04:14 AM.
04-09-2014, 01:33 AM
#717
Thread Starter
Join Date: May 2009
Location: Cape Towm, SOUTH AFRICA
Posts: 2,769
Likes: 0
Received 0 Likes
on
0 Posts
Besides the obvious floatation requirement the rc Surfer dude needs, for the purpose of self righting - there are a number of other critical factors that need to be considered, to create a lasting - well performance capable - rc surfer dude....as important as every other aspect of the board.
Most all rc surfer dudes are made of rigid foam / covered with light glass fibre / wetted out with either polyester or epoxy resin....resulting in a 'rigid' figure that has absolutely no flex ....to absorb any impact. ... many breaking rather easily and regularly, mostly at the head and arms, when experiencing any severe impact.....limiting the performance level and reliability of the board.
If more required strength is to be built into the figure, by way of adding more layers of cloth /resin etc .... the figure simply becomes 'heavier' requiring more counter weight to be added to the low CG point of the board, making the overall board heavier..(less efficient)....as well as..due to the added weight of the surfer dude... producing more outward centrifugal forces in the sharp turns...upsetting the balance of the boards performance......resulting in the outer rail tripping/digging.....board flapping over.
The goal is to create a surfer dude that is: very durable - has sufficient floatation - flexibility to absorb impact - as light as possible to minimise counter weight and outward centrifugal forces.....once those factors are covered.....the ascetics can be dialled in to personal preference.
IMO - some make far more of the detailed ascetics of the surfer dude, than what it is worth - ( some call it playing with dolls)- at 30 plus yards in the surf, all one is left 'seaing' is the dimensional silhouette of the surfer dude. The bigger the stance of the surfer dude, the better the presence of the surfer dude, at a distance. Bright colours and black work well against the colour of the ocean and white water..to be able to quickly identify the surfer dude.
The YPC Bro surfer dude - is unique- has come a long way since its initial design - well proving to be : very durable - buoyant - flexible - lightweight - and - in the eyes of the beholder - looks rather realistic in the surf...
Bro's structural make up consists of a moulded flexible 3D stanced silhouette core (made up of fibre glass and carbon fibre / wetted out with epoxy) - then laminated with closed cell neoprene on either side - its head is moulded using 2 part polyester closed cell foam ( very light 8 grams)
The complete finished Bro Surfer Dude product - including an authentic Lycra rash vest - weighs in around 140 grams...
flexible 3D silhouette core laid up and curing in the mould - to be trimmed to outline once cured.
Carbon fibre layers for added strength in strategic areas.
Last edited by YPC; 04-10-2014 at 04:22 AM.
04-11-2014, 02:02 AM
#718
Thread Starter
Join Date: May 2009
Location: Cape Towm, SOUTH AFRICA
Posts: 2,769
Likes: 0
Received 0 Likes
on
0 Posts
Once cured - the moulded figure is trimmed to the accurate profile


https://www.youtube.com/watch?v=2jAXmxD8TAI Establishing the figures position is critical for balance and self righting rotation.


https://www.youtube.com/watch?v=aysHKDTcUxw or your dude will have to look something like this

The carbon fibre bonding foot pads are moulded to the figure and to the hatch cover at the same time, to ensure a snug profile fit.


https://www.youtube.com/watch?v=2jAXmxD8TAI Establishing the figures position is critical for balance and self righting rotation.
https://www.youtube.com/watch?v=aysHKDTcUxw or your dude will have to look something like this
The carbon fibre bonding foot pads are moulded to the figure and to the hatch cover at the same time, to ensure a snug profile fit.
Last edited by YPC; 04-11-2014 at 03:59 AM.
04-12-2014, 01:04 PM
#719
Thread Starter
Join Date: May 2009
Location: Cape Towm, SOUTH AFRICA
Posts: 2,769
Likes: 0
Received 0 Likes
on
0 Posts
Saturday Arvi
Enjoyed a cool session (in the baking heat) down at cemetery beach - showing Bro off to a very old legendary surf mate of mine... from years gone by......
https://www.youtube.com/watch?v=2uVt0GUtZJE
Enjoyed a cool session (in the baking heat) down at cemetery beach - showing Bro off to a very old legendary surf mate of mine... from years gone by......
https://www.youtube.com/watch?v=2uVt0GUtZJE
04-14-2014, 01:40 AM
#720
Thread Starter
Join Date: May 2009
Location: Cape Towm, SOUTH AFRICA
Posts: 2,769
Likes: 0
Received 0 Likes
on
0 Posts
Sunday Arvi
,,the surf had dropped off a touch - but-,,there were a few young local beach kids who had never seen an rc Surfer before and were just so enthralled with it... I so enjoyed the depth and excitement in their laughter..made the session so worth while....SHARING THE STOKE !..
https://www.youtube.com/watch?v=9enCRParbNs
04-16-2014, 05:01 AM
#722
Thread Starter
Join Date: May 2009
Location: Cape Towm, SOUTH AFRICA
Posts: 2,769
Likes: 0
Received 0 Likes
on
0 Posts
slow progress over the past few days - to much going on in the workshop !
Putting a face to SUP Bro


Rash Vest....still working on the paddle securing method
(it will be able to be fitted and removed very easily)


Hatch cover studs ....fitted ! ...epoxy curing.


Putting a face to SUP Bro
Rash Vest....still working on the paddle securing method
(it will be able to be fitted and removed very easily)
Hatch cover studs ....fitted ! ...epoxy curing.
Last edited by YPC; 04-16-2014 at 05:04 AM.
04-16-2014, 11:28 PM
#723
Thread Starter
Join Date: May 2009
Location: Cape Towm, SOUTH AFRICA
Posts: 2,769
Likes: 0
Received 0 Likes
on
0 Posts
S/S studs bonded in place - knurled nuts are great ascetically - and - prevent one from over torquing the nuts
which can rupture the studs bond into the foam.


If this was an actual surf board we would be just about ready to 'surf it'....still have a few steps to go !

Detailed process for fitting studs : http://www.rcuniverse.com/forum/rc-b...l#post11742043
which can rupture the studs bond into the foam.
If this was an actual surf board we would be just about ready to 'surf it'....still have a few steps to go !
Detailed process for fitting studs : http://www.rcuniverse.com/forum/rc-b...l#post11742043
Last edited by YPC; 04-16-2014 at 11:33 PM.
04-17-2014, 01:24 AM
#724
Thread Starter
Join Date: May 2009
Location: Cape Towm, SOUTH AFRICA
Posts: 2,769
Likes: 0
Received 0 Likes
on
0 Posts
The SUP (added paddle) idea has been brewing for some time - on several occasions whilst surfing Bro, some one would suggest the SUP concept...reinforced by Gary and Ivan...SA.SUP Pro's....a novel idea...
In designing the paddle add on - I wanted to design a paddle that could simply be attached / removed to/from the existing Bro figure - be light - durable - be able rotate to minimize impact - have travel within its mounts ( ie not rigidly mounted) - look authentic - not protrude beyond the rails br streamlined in the forward travel...
For most of the list above, I have been able to tick the boxes....
The paddle is simply held in place by a small nylock s/s nut ( fitted into a servo disc) which is screwed
onto a 3mm threaded stud. protruding from the paddle shaft end....Loosen the disc - slide the shaft out.


The paddle shaft fits through the Bro figures right hand and through a
Velcro strap, which is bound around the left wrist, under the sleeve.


The paddle feels very secure - having the ability to rotate and travel on impact
as well as Bro's figure being flexible to absorb the impact...I reckon it should hold
up pretty well.....
Its going to be interesting to see if the paddle adds any further 'movement' ( spin)
to the Rodeo's etc...
In designing the paddle add on - I wanted to design a paddle that could simply be attached / removed to/from the existing Bro figure - be light - durable - be able rotate to minimize impact - have travel within its mounts ( ie not rigidly mounted) - look authentic - not protrude beyond the rails br streamlined in the forward travel...
For most of the list above, I have been able to tick the boxes....
The paddle is simply held in place by a small nylock s/s nut ( fitted into a servo disc) which is screwed
onto a 3mm threaded stud. protruding from the paddle shaft end....Loosen the disc - slide the shaft out.
The paddle shaft fits through the Bro figures right hand and through a
Velcro strap, which is bound around the left wrist, under the sleeve.
The paddle feels very secure - having the ability to rotate and travel on impact
as well as Bro's figure being flexible to absorb the impact...I reckon it should hold
up pretty well.....
Its going to be interesting to see if the paddle adds any further 'movement' ( spin)
to the Rodeo's etc...
04-17-2014, 10:58 AM
#725
Thread Starter
Join Date: May 2009
Location: Cape Towm, SOUTH AFRICA
Posts: 2,769
Likes: 0
Received 0 Likes
on
0 Posts
Happy Easter All !.. not to many eggs !...
Started the weekend early with a sweet session down at Cemetery Beach !......again ...")
https://www.youtube.com/watch?v=pC4laKMloIo
not to many eggs !...Started the weekend early with a sweet session down at Cemetery Beach !......again ...
https://www.youtube.com/watch?v=pC4laKMloIo