


Allure Glow Build
 02-13-2017, 12:31 PM
#26

My Feedback: (1)
Join Date: May 2011
Location: Scott,
LA
Posts: 225
Likes: 0
Received 0 Likes
on
0 Posts
Assure the fuselage and motor are aligned straight andvertical in the opening, then ease in the beam plate into position. Check thefit, remove and make any final trim to fit to the fuselage, and trim to achievethe wanted clearance around the motor. At this point I coated the bare wooddoublers with a very light coat of thinned finishing epoxy to fuel proof them.Allow to dry. With the motor still hanging in place on the jig, position thebeam plate in the nose and make contact with the nose ring and motor mountwithout moving the alignment of the motor, and tack the beam plate in placewith just a few spots of medium CA. Drill the holes for the motor mount andnose ring. Remove the mounting jig and then the engine. Install the blind nutsfor the motor mount and nose ring, place the motor assembly in place andinstall the mount and nose ring bolts. Check the spinner back plate alignmentwith the nose of the plane by installing the back plate, and sighting the gapbetween the back plate and the nose. Then check the engine down thrustalignment by leveling the Allure using the left canopy rail, and check theengine thrust using a thrust alignment tool. If needed the tacks that hold thebeam plate can be broke as needed and re-tacked to adjust the beam plateposition to get the alignment correct. Once it is in place and you aresatisfied with the alignment, remove the motor and secure the beam plate with afew more tacks to assure it will not break loose too easily during the nextsteps of fitting the firewall.
 02-13-2017, 12:35 PM
#27
My Feedback: (1)
Join Date: May 2011
Location: Scott,
LA
Posts: 225
Likes: 0
Received 0 Likes
on
0 Posts
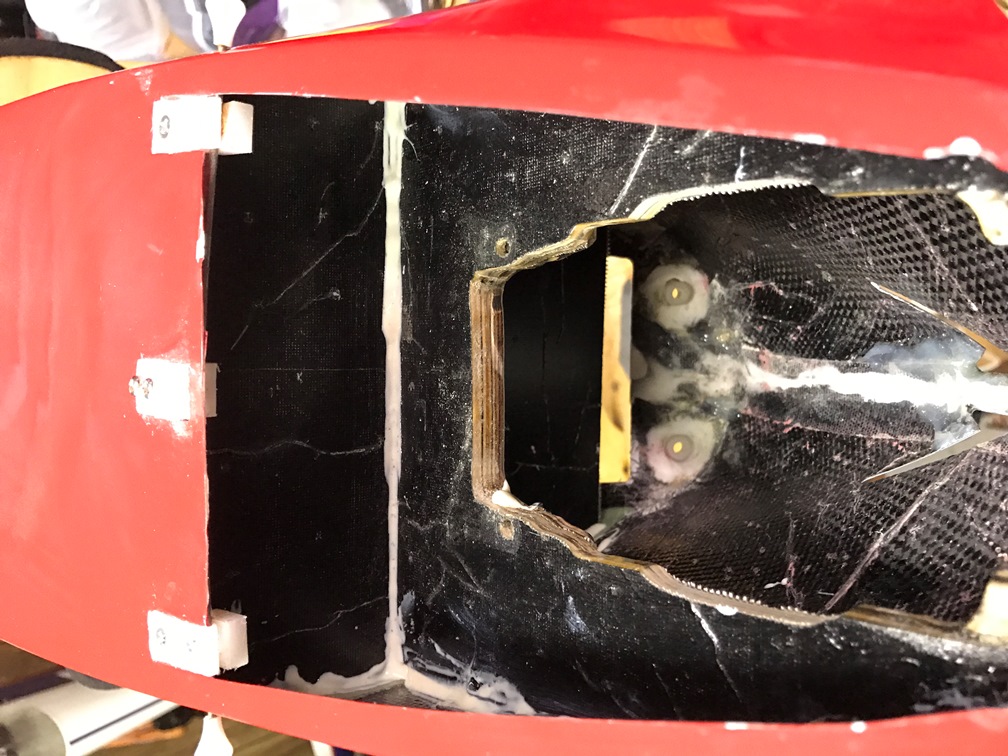
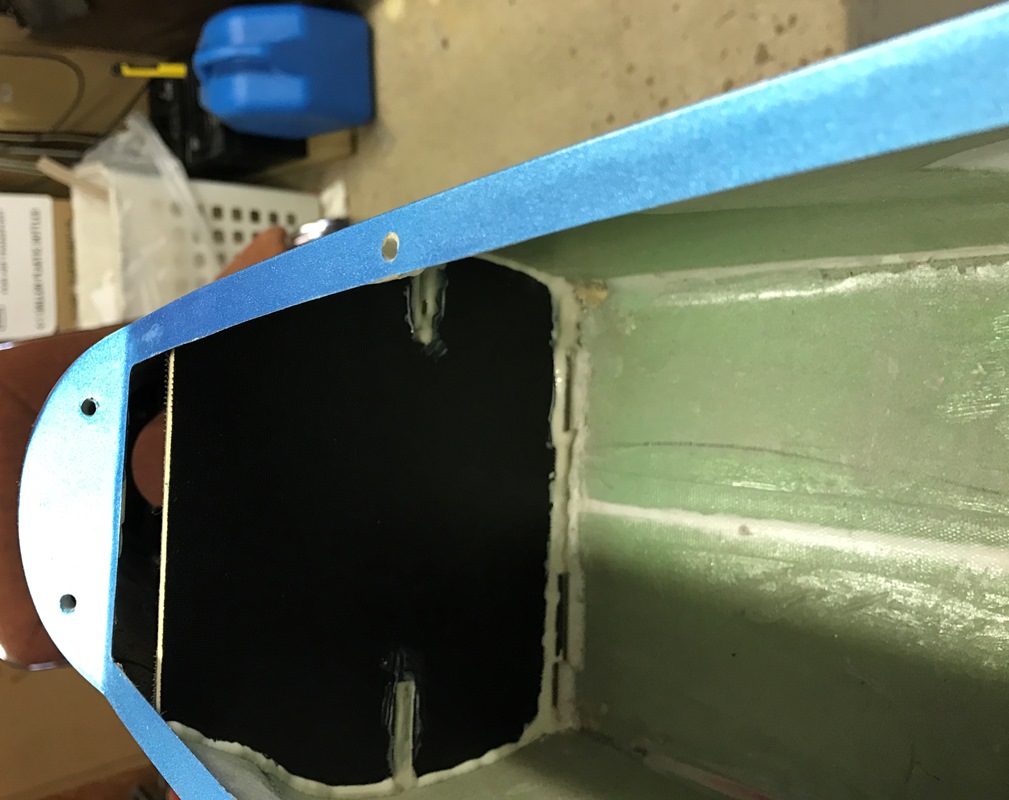
Next, trim and fit the fire wall plate to fit in place inthe fuse behind the beam plate. Be sure it keys into the beam plate asintended. It will fall behind front edge the canopy opening and sit on top ofthe plate that holds the chin cowl latch. Once it is fit in place, tack it witha couple drops of medium CA. Fit the small cap plate to sit on top of the firewall and the fuse to close the top of the firewall engine compartment, butdon’t tack it in place yet. Using a syringe gun and thixotropic epoxy (i.e. itstays where you put it) like Aeropoxy, run a bead along both sides of the beamplate and firewall to secure it in place. Then set the cap plate in place andtack it with medium CA, and seal it to the firewall and fuse with the Epoxy.Make sure the engine compartment is totally sealed from the radio compartment.Allow to dry overnight. See pictures below.
02-13-2017, 12:36 PM
#28
My Feedback: (1)
Join Date: May 2011
Location: Scott,
LA
Posts: 225
Likes: 0
Received 0 Likes
on
0 Posts
Set the motor with mount and nose ring in place and look atthe clearance between the beam plate and the motor. Pull the motor assembly outand trim the beam plate to assure that when the motor torques it clears thebeam plate. Check and be sure to trim the beam plate at the motor mountattaching points to flush with the motor mount, i.e. don’t leave beam platewhere it can damage the rubber of the motor mount (Hyde YS type) as it moveswhen the motor torques.
Once the trimming is complete, install the motor assembly,prop and spinner and be sure all is aligned properly and satisfactory. Thenmark the locations for the throttle control cable and fuel tubing openings onthe firewall. Remove the motor assembly and drill the appropriate holes for thethrottle control cable and fuel lines.
Once the trimming is complete, install the motor assembly,prop and spinner and be sure all is aligned properly and satisfactory. Thenmark the locations for the throttle control cable and fuel tubing openings onthe firewall. Remove the motor assembly and drill the appropriate holes for thethrottle control cable and fuel lines.

