


P 47 Meister Scale - Mirce's second Jug...
 09-03-2014, 11:42 AM
#1

Thread Starter
OK guys, after we move to another town, build new house and start new business, finally I have little time to think about new warbird project.
First, I want to apologize on my "Tarzan" English, but, you will understand what I want to say.
Of course, same like in all my topics before, many pictures will be made and every step of building will be describe.
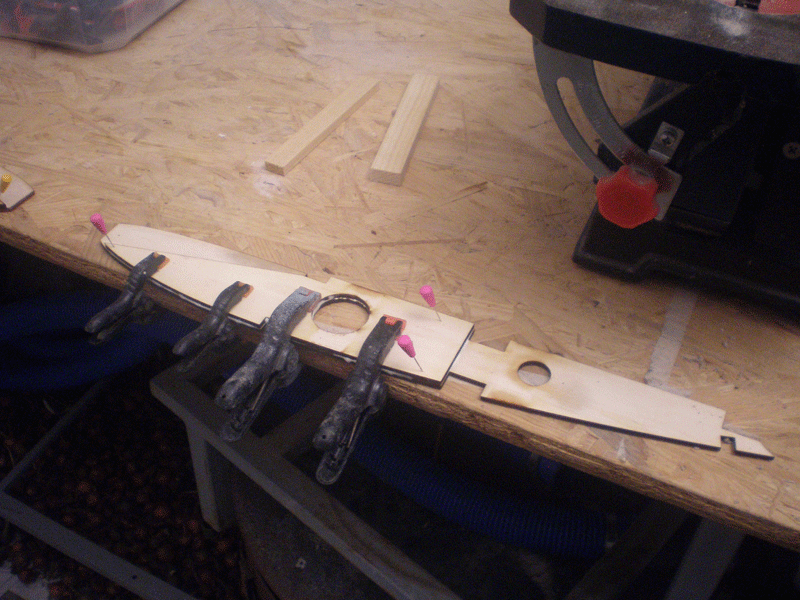
Many readers from RC Universe know that I was made one Meister Scale P 47 few years ago. If someone miss that, here is a link:
http://www.rcuniverse.com/forum/rc-w...step-step.html
After few big warbirds I made before, I can tell that Meister Scale Thunderbolt was best of all.
It is big, fly nice and stable and P 47 is very attractive, on the ground and in the air.
But, Thunderbolt size of 102" or 2600 mm is maybe only bad thing.
One person hardly can work on model on airfield, especially if you made one piece wing (my case)...
Because that, in this new build I will made three piece wing - center panel with two wing tips.
Unfortunately from the end to the end of the flaps, distance is 1400 mm, so it will be again hard, better to say, no way, to transport model on main wheels.
But, 1400 mm center panel will be much easier to put on fuselage than 2600 mm one piece wing...
My second change will be more powerful engine.
MVVS 80 (Evolution 80 for USA market) is not strong enough. Best option will be Moki 180, but in my case DLE 111 will be new choice.
When I build my first Meister P 47 I order short kit and many other parts I need for building.
In meantime I work on my project, ex Yugoslavia jet model Galeb G2 and in that build I have great cooperation with two guys.
First is Martin who made all 3D drawings in Catia and second is Dragan, my friend who have laser cut machine.
For this build, my idea is to we ourselves made all wooden parts for P 47. OK, maybe not all, but everything which is necessary for basic build.
For that job, my third "subcontractor" Misha will draw in Corel Draw all wing and fuselage ribs, tail ribs and some other parts...
He is already working on that...
As everybody know, when you bought Thunderbolt plan from Meister Scale firm, few sheets are all parts you need for building.
Modeler have option to cut parts from drawings from paper sheet.
Misha will made file from that paper draw, which we will send later to Dragan's laser cut.
Wing ribs will be send to Martin and he will made 3D wing draw. That give us option to made exactly place for wing joiner in wing tip and holes in center panel.
I have few more ideas, first is to made cowl from wood. For that, Martin will again made 3D draw, but now of cowl.
Wooden cowl will be (maybe) made because cheaper building. Price for original cowl from Meister Scale is not high, but when I add shipping cost and tax which I need to pay on my custom, price will be almost three time higher.
In that case, wooden cowl sound like good option.
Vladimir, from "RC Serbia" hobby shop, have 3D printer, so my next idea is to made some parts for this model on 3D printer.
First will be dummy engine, than instrument panel, seat and some other cockpit parts, landing light, wing tail red and green light...
For this project, landing gears will be from same firm - Siera Giant, pneumatic parts will come from Robart, servos will be again Hitec HS 645 MG for all control surface...
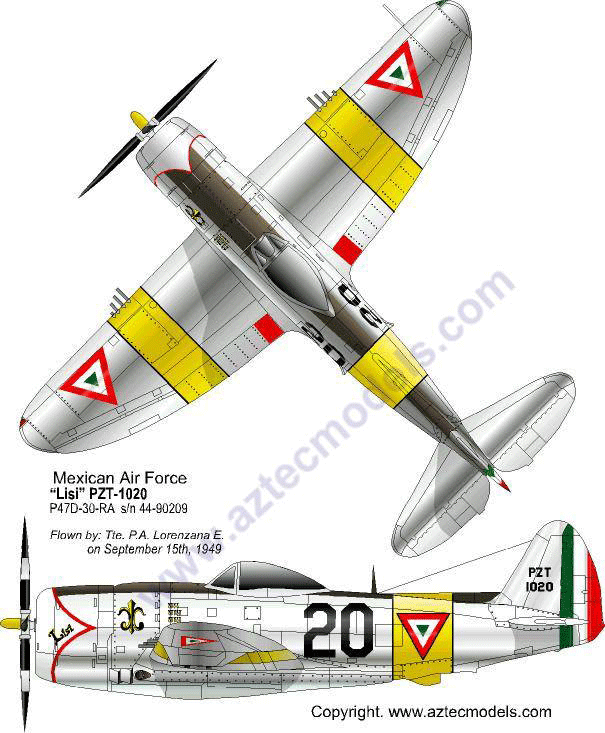
I always made some unusual color scheme, so for this time P 47 will be like this:
OK, that all for this first text...
Regards from Senta, Serbia
Mirce
First, I want to apologize on my "Tarzan" English, but, you will understand what I want to say.
Of course, same like in all my topics before, many pictures will be made and every step of building will be describe.
Many readers from RC Universe know that I was made one Meister Scale P 47 few years ago. If someone miss that, here is a link:
http://www.rcuniverse.com/forum/rc-w...step-step.html
After few big warbirds I made before, I can tell that Meister Scale Thunderbolt was best of all.
It is big, fly nice and stable and P 47 is very attractive, on the ground and in the air.
But, Thunderbolt size of 102" or 2600 mm is maybe only bad thing.
One person hardly can work on model on airfield, especially if you made one piece wing (my case)...
Because that, in this new build I will made three piece wing - center panel with two wing tips.
Unfortunately from the end to the end of the flaps, distance is 1400 mm, so it will be again hard, better to say, no way, to transport model on main wheels.
But, 1400 mm center panel will be much easier to put on fuselage than 2600 mm one piece wing...
My second change will be more powerful engine.
MVVS 80 (Evolution 80 for USA market) is not strong enough. Best option will be Moki 180, but in my case DLE 111 will be new choice.
When I build my first Meister P 47 I order short kit and many other parts I need for building.
In meantime I work on my project, ex Yugoslavia jet model Galeb G2 and in that build I have great cooperation with two guys.
First is Martin who made all 3D drawings in Catia and second is Dragan, my friend who have laser cut machine.
For this build, my idea is to we ourselves made all wooden parts for P 47. OK, maybe not all, but everything which is necessary for basic build.
For that job, my third "subcontractor" Misha will draw in Corel Draw all wing and fuselage ribs, tail ribs and some other parts...
He is already working on that...
As everybody know, when you bought Thunderbolt plan from Meister Scale firm, few sheets are all parts you need for building.
Modeler have option to cut parts from drawings from paper sheet.
Misha will made file from that paper draw, which we will send later to Dragan's laser cut.
Wing ribs will be send to Martin and he will made 3D wing draw. That give us option to made exactly place for wing joiner in wing tip and holes in center panel.
I have few more ideas, first is to made cowl from wood. For that, Martin will again made 3D draw, but now of cowl.
Wooden cowl will be (maybe) made because cheaper building. Price for original cowl from Meister Scale is not high, but when I add shipping cost and tax which I need to pay on my custom, price will be almost three time higher.
In that case, wooden cowl sound like good option.
Vladimir, from "RC Serbia" hobby shop, have 3D printer, so my next idea is to made some parts for this model on 3D printer.
First will be dummy engine, than instrument panel, seat and some other cockpit parts, landing light, wing tail red and green light...
For this project, landing gears will be from same firm - Siera Giant, pneumatic parts will come from Robart, servos will be again Hitec HS 645 MG for all control surface...
I always made some unusual color scheme, so for this time P 47 will be like this:

OK, that all for this first text...
Regards from Senta, Serbia
Mirce
 09-03-2014, 01:51 PM
#2
Join Date: Oct 2011
Location: London, UNITED KINGDOM
Posts: 71
Likes: 0
Received 0 Likes
on
0 Posts
Mirce, I read your last jug build thread 6months late so this time I will follow 'as it happens'! I will be eagerly awaiting your updates 
Your supporter in the UK
Ryan
Your supporter in the UK
Ryan
09-10-2014, 12:11 PM
#4


Join Date: Feb 2006
Location: Peoria , AZ
Posts: 497
Likes: 0
Received 0 Likes
on
0 Posts
I just acquired a Meister and it currently has a Zenoah GT80...I will be installing my BME 110 Extreme. The BME's are shorter from plug to plug than most twins and make good power. Warbirds are more fun if the hair stands up on the back of your neck!!! You guys are AMAZING builders and I only wish I had the building talent. Good luck and look forward to following this build! Your other build was great and thanks for taking the time to show it to us.
Last edited by bzyguy01; 09-10-2014 at 12:31 PM.
09-11-2014, 02:37 AM
#5

Mirce, you might want to look at the EME 120 with a bowman ring, one of if not the best engine I have ever hade. Almost 200 flights and I have never touched the engine and it runs like a top, starts every time and never has quit.
Better then the DLE in my opinion.
TB
Better then the DLE in my opinion.
TB
 09-21-2014, 03:01 PM
#7
Thread Starter
Thank you guys for kind words and advice for engine...
I'm not sure that EME 120 I can buy in Europe. Is name of engine same in Europe?
I ask that, because in USA MVVS engines have name Evolution...
In mean time, my friends are working on P 47 drawings. As I told, Misha scan and drew all wing, tail surfaces and fuselage ribs.
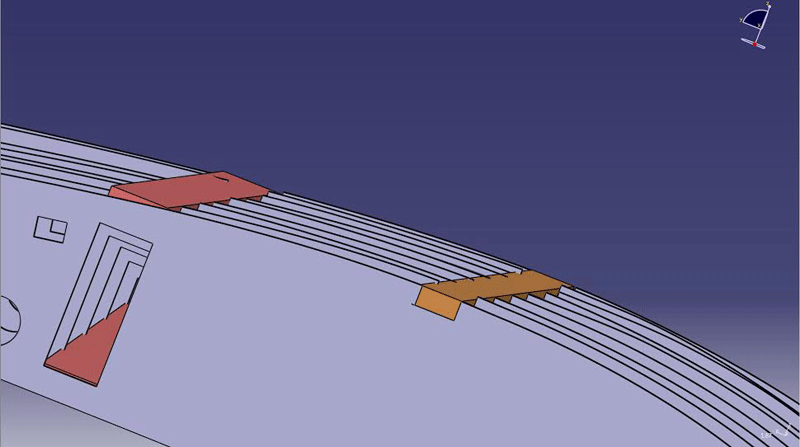
On my first Meistar Scale P 47 build I bought short kit. To be frank, many hours are involved to made everything to fit perfect. Some ribs was shorter, some longer, lower, taller, etc...
When you look plans, or better to tell, sheets with ribs, you will see that ribs and other parts was draw with hand. That was made, probably, Dino's father many years ago.
Someone need to scan and draw all that parts and after that all pieces can be cut for short kit. But, problem is, if drawings are not precise on the beginning, later, wooden parts will be bad to.
OK, not bad, but no precise...
Experienced model will fix all that mistakes, but you need to invest extra time to do it right.
To avoid that, best option is to all parts put in some 3D program. Bad part is that every hour in Catia, Auto CAD or similar, cost in USA, about 50 - 60,00$ per hour.
You need many, many hours to made complete P 47 model in 3D.
Here in Serbia situation is little different. Price for working hour is much cheaper, but that don't mean that quality is on lower level. No....
In last two - three years, my friend Martin and I sped more than 250 hours to made 3D drawings of ex Yugoslavia jet model Galeb G2.
After made first model, first prototype last year, now we are working on some modifications.
Read this, it is very interesting..
http://www.rcuniverse.com/forum/rc-j...-serbia-2.html
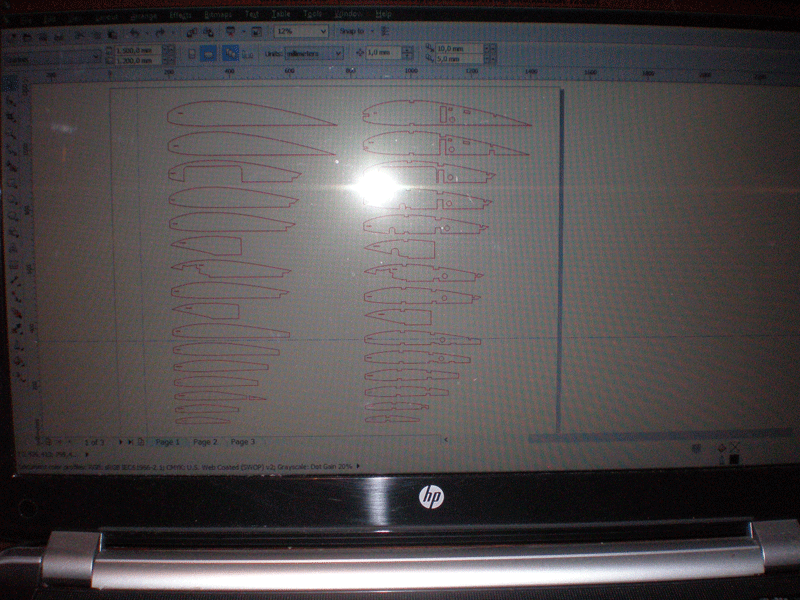
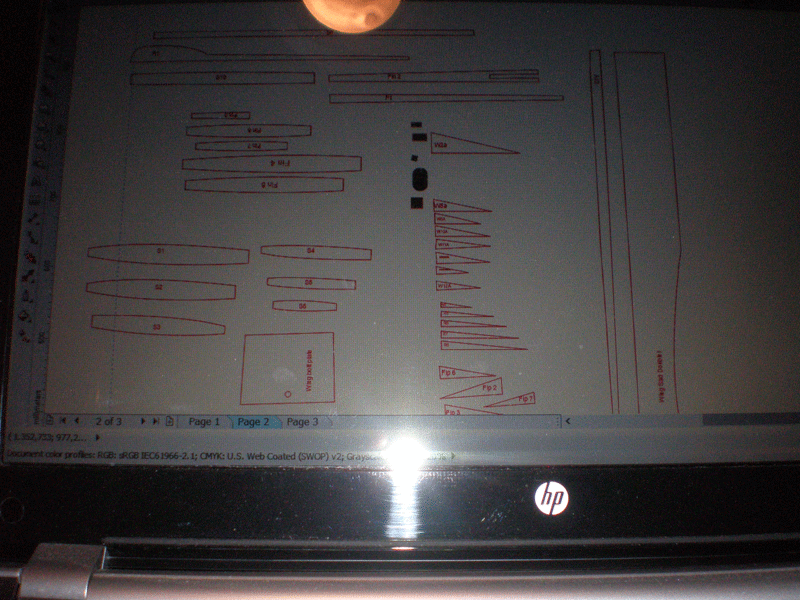
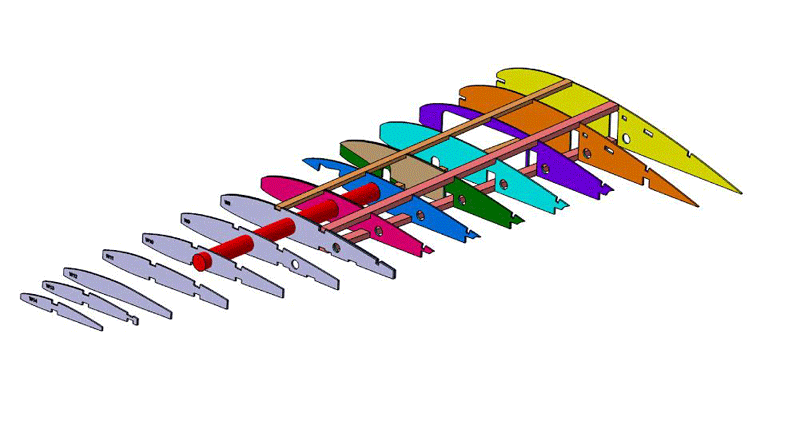
Experience we have from that project, now I want to use in this P 47. So, Misha's files i send to Martin. Here are first few pictures...
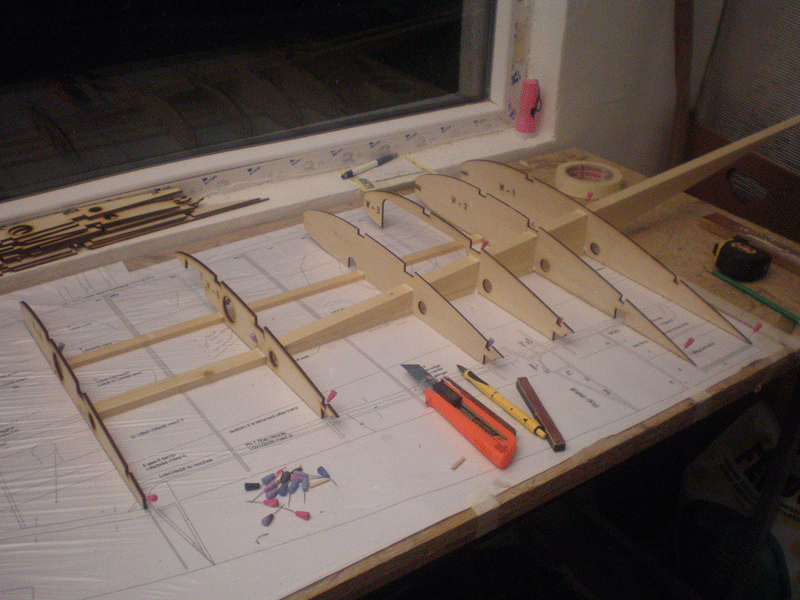
Ribs of the complete left wing piece:
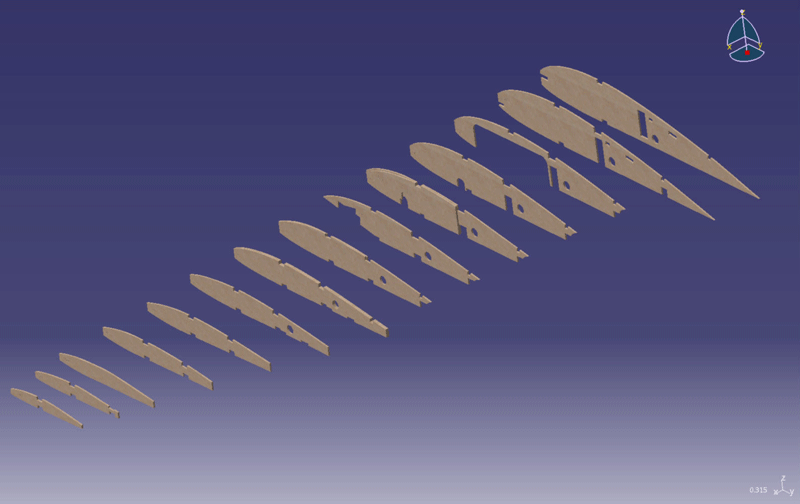
Left center panel ribs...

Left wing tip ribs...
Martin will in next few days put spars, leading edge, wing joiner and some other details...
To be continued...
I'm not sure that EME 120 I can buy in Europe. Is name of engine same in Europe?
I ask that, because in USA MVVS engines have name Evolution...
In mean time, my friends are working on P 47 drawings. As I told, Misha scan and drew all wing, tail surfaces and fuselage ribs.


On my first Meistar Scale P 47 build I bought short kit. To be frank, many hours are involved to made everything to fit perfect. Some ribs was shorter, some longer, lower, taller, etc...
When you look plans, or better to tell, sheets with ribs, you will see that ribs and other parts was draw with hand. That was made, probably, Dino's father many years ago.
Someone need to scan and draw all that parts and after that all pieces can be cut for short kit. But, problem is, if drawings are not precise on the beginning, later, wooden parts will be bad to.
OK, not bad, but no precise...

Experienced model will fix all that mistakes, but you need to invest extra time to do it right.
To avoid that, best option is to all parts put in some 3D program. Bad part is that every hour in Catia, Auto CAD or similar, cost in USA, about 50 - 60,00$ per hour.
You need many, many hours to made complete P 47 model in 3D.
Here in Serbia situation is little different. Price for working hour is much cheaper, but that don't mean that quality is on lower level. No....
In last two - three years, my friend Martin and I sped more than 250 hours to made 3D drawings of ex Yugoslavia jet model Galeb G2.
After made first model, first prototype last year, now we are working on some modifications.
Read this, it is very interesting..
http://www.rcuniverse.com/forum/rc-j...-serbia-2.html
Experience we have from that project, now I want to use in this P 47. So, Misha's files i send to Martin. Here are first few pictures...
Ribs of the complete left wing piece:

Left center panel ribs...

Left wing tip ribs...

Martin will in next few days put spars, leading edge, wing joiner and some other details...
To be continued...
 10-30-2014, 11:50 AM
#12
Thread Starter
OK, here I am again...
Sorry for delay, but Martin wasn't here for almost one month, so project was dormant. Few days ago he return from Germany and drawing continues.
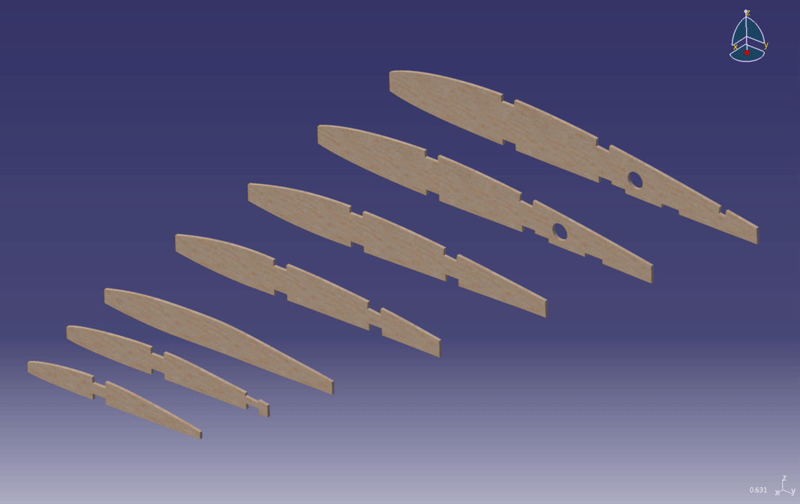
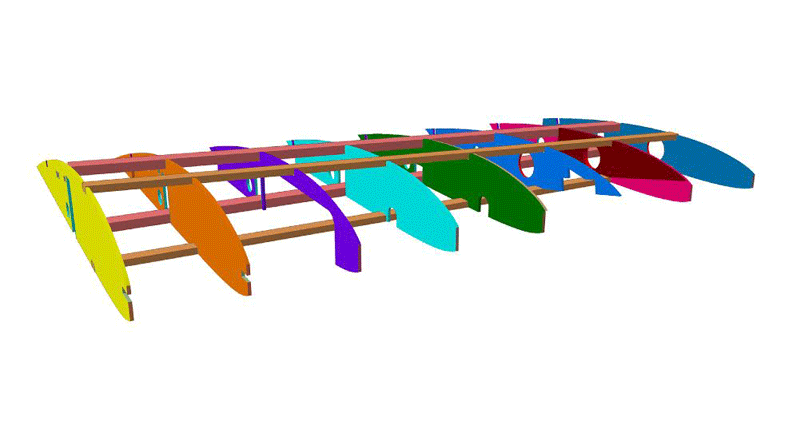
Last time I wright that Martin set all ribs of the left wing half. Next step is to put spars on place, than wing joiner.
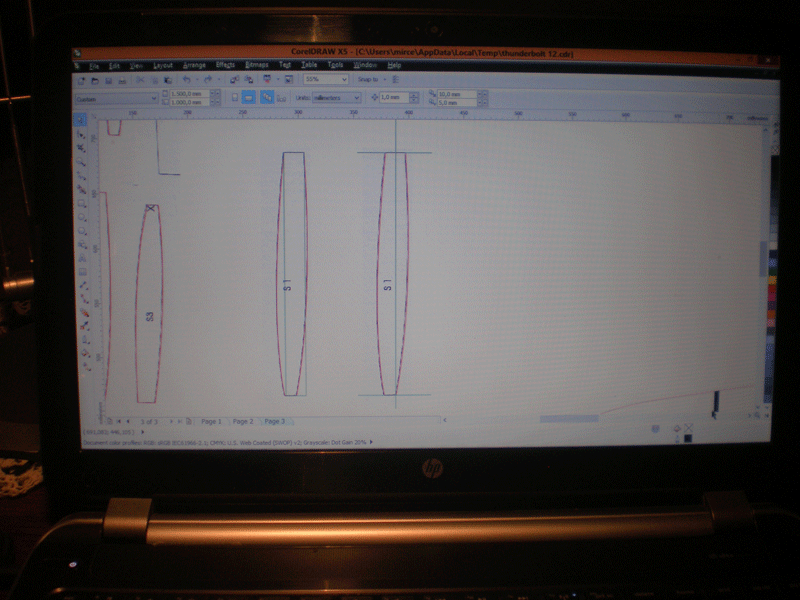
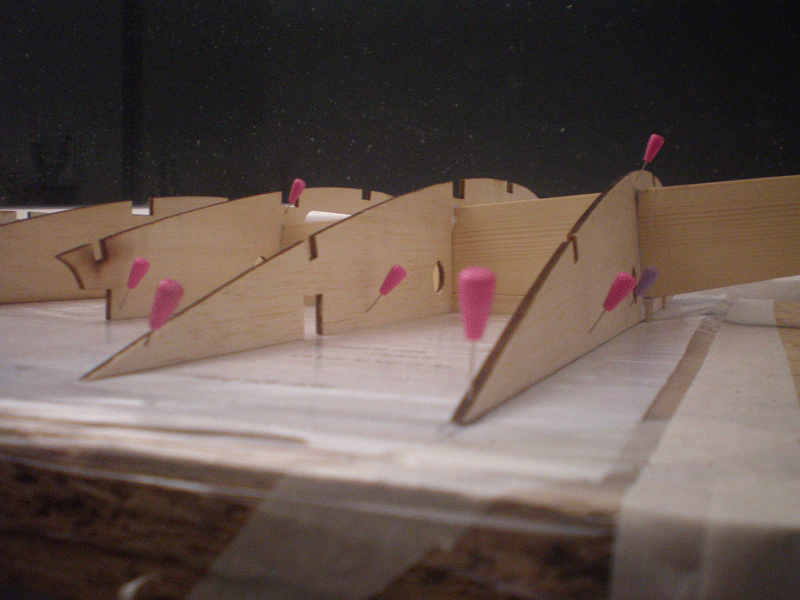
But, when Martin aligned ribs, everyone is different... You can see that on next pictures...
Now what?
He start to work on ribs, but much faster way to fix the problem is to find most similar profile and use it instead of the original...

As you can see, blue is new and red is original one. There are almost no differences.
So, tomorrow he will continue work on wing half...
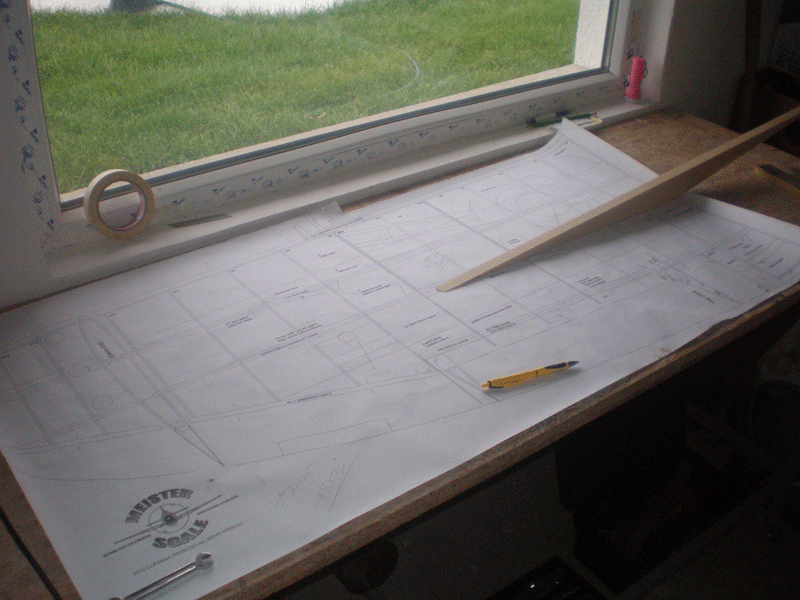
In meantime I bought 3 mm ply and balsa sheets for ribs, so when Martin finish his job, drawings and material will be send on laser cut machine. Hope that will be soon, because my fingers itch to start working on a model...
Regards
Mirce
Sorry for delay, but Martin wasn't here for almost one month, so project was dormant. Few days ago he return from Germany and drawing continues.
Last time I wright that Martin set all ribs of the left wing half. Next step is to put spars on place, than wing joiner.

But, when Martin aligned ribs, everyone is different... You can see that on next pictures...


Now what?
He start to work on ribs, but much faster way to fix the problem is to find most similar profile and use it instead of the original...

As you can see, blue is new and red is original one. There are almost no differences.
So, tomorrow he will continue work on wing half...
In meantime I bought 3 mm ply and balsa sheets for ribs, so when Martin finish his job, drawings and material will be send on laser cut machine. Hope that will be soon, because my fingers itch to start working on a model...
Regards
Mirce
11-30-2014, 11:50 AM
#13
Thread Starter
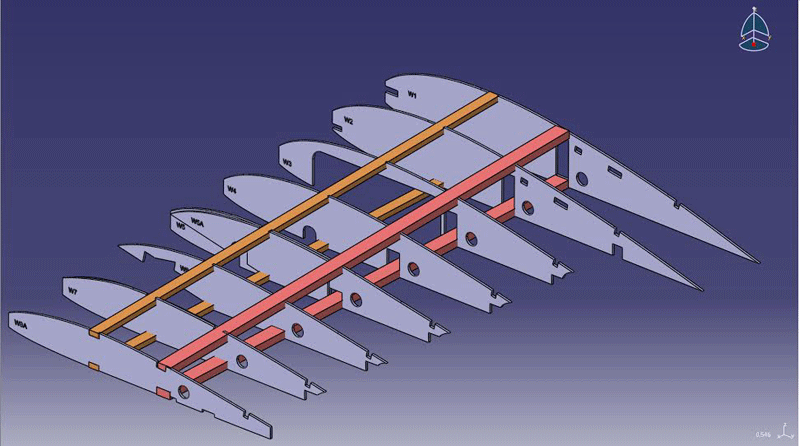
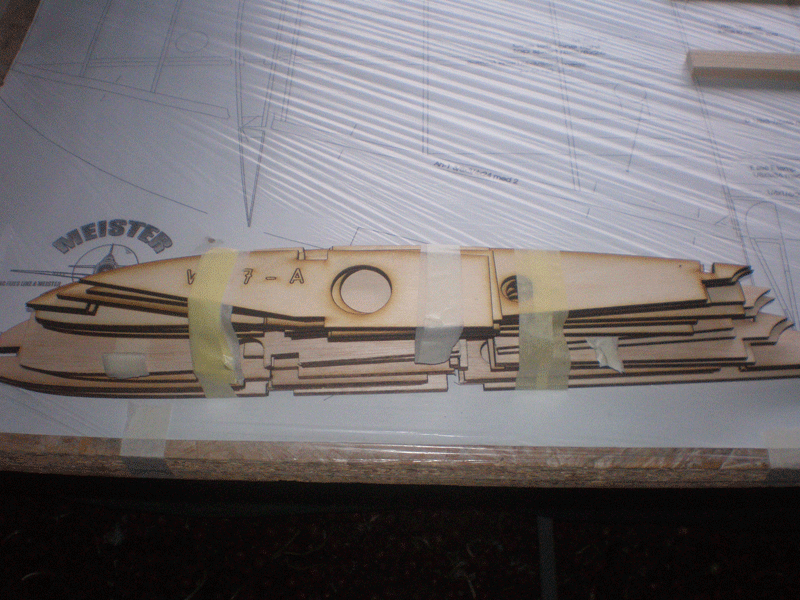
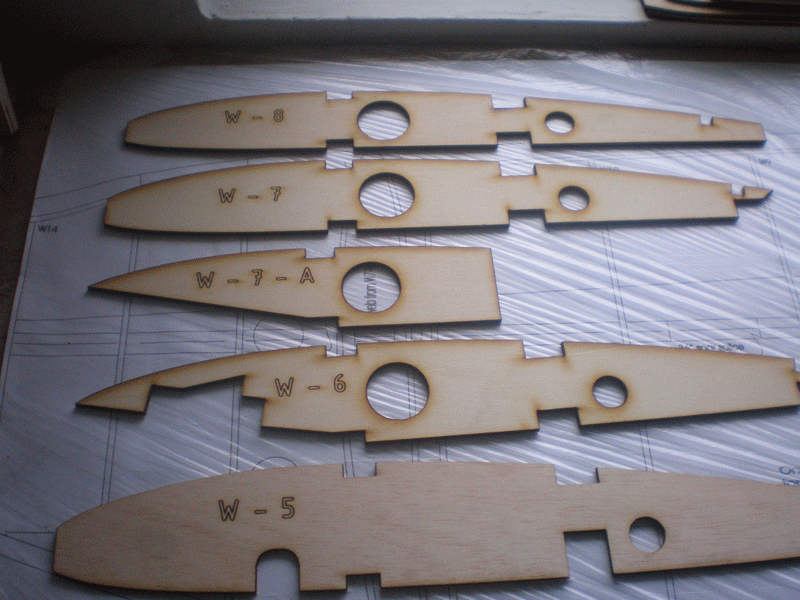
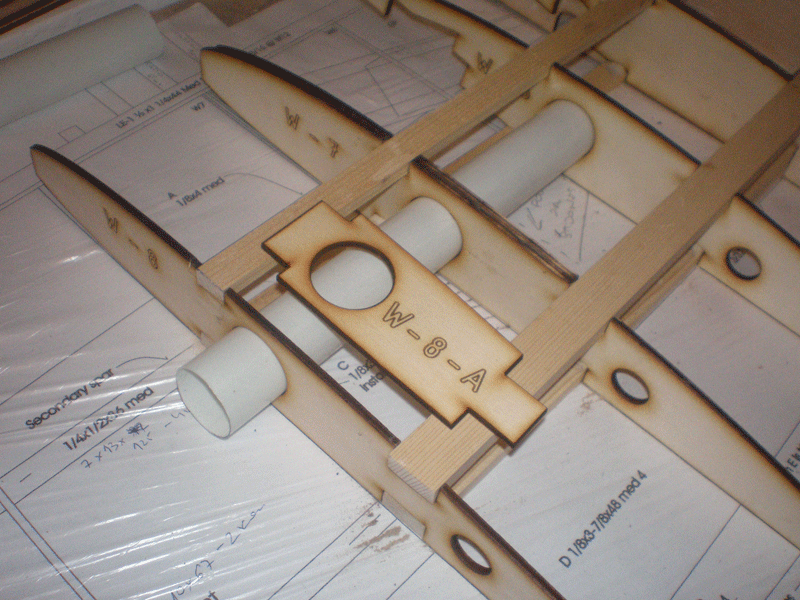
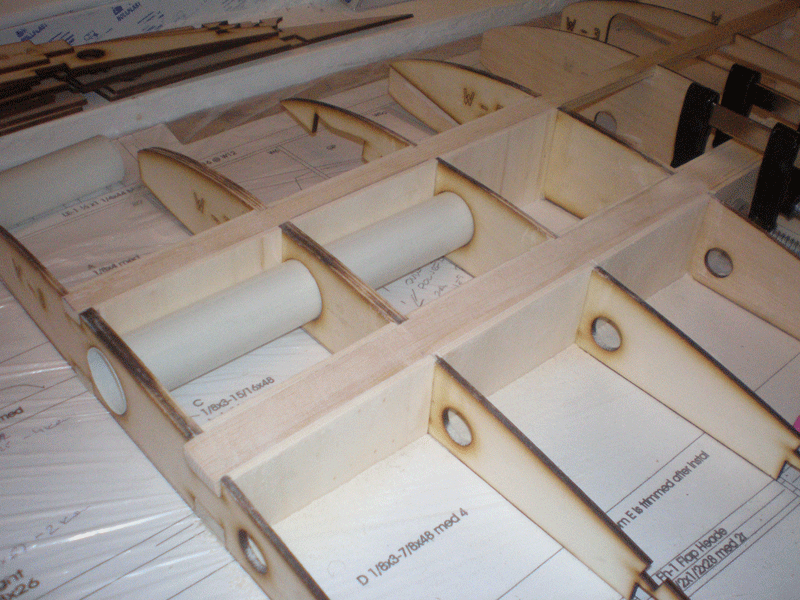
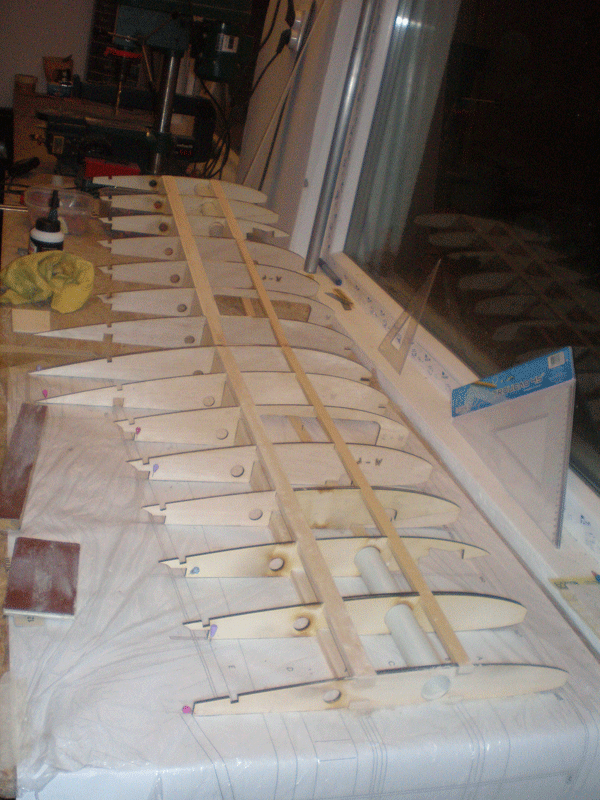
Few day ago Martin finally send me some wing ribs. For now I get ribs for center panel section.
I send it immediately to my friend Dragan, owner of the laser cut, so I think during this week balsa ribs for be here in my work shop...
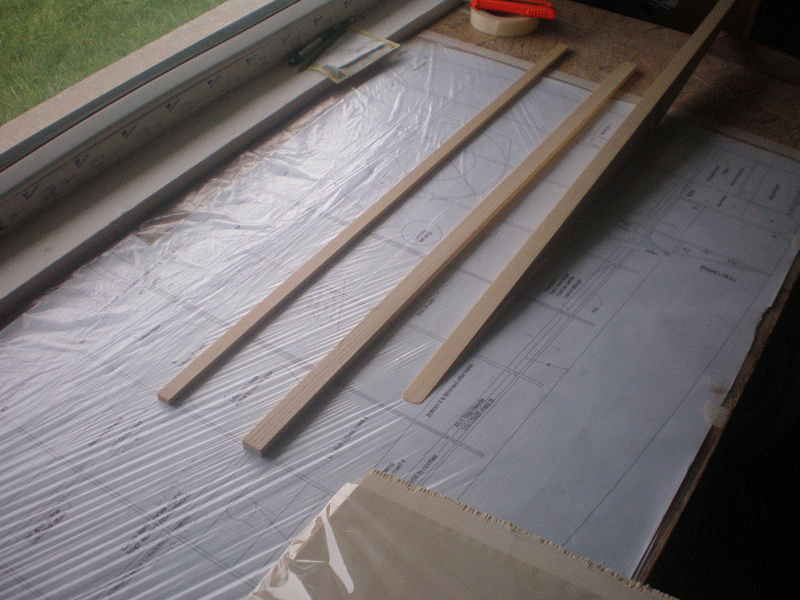
In meantime I get wooden wing joiner for the middle of the centar panel, all spars are here and I wait every day to arrive 30 mm aluminum wing joiner.
With ribs, finally work on wing can start...
Few picture of wing ribs...
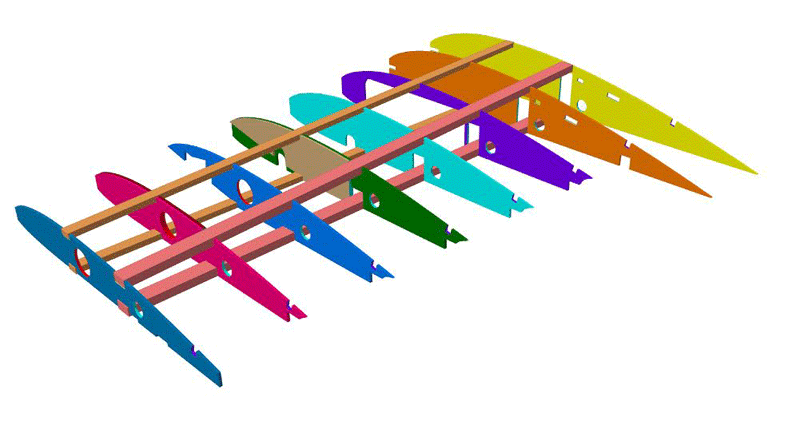

I don't want to "struggle" Martin to made very detailed drawings about ribs. Only important thing for me was to get holes for aluminum wing joiner on right place, all ribs to be in good shape and spars hole to bi in same line...
To be continued....
I send it immediately to my friend Dragan, owner of the laser cut, so I think during this week balsa ribs for be here in my work shop...
In meantime I get wooden wing joiner for the middle of the centar panel, all spars are here and I wait every day to arrive 30 mm aluminum wing joiner.
With ribs, finally work on wing can start...
Few picture of wing ribs...


I don't want to "struggle" Martin to made very detailed drawings about ribs. Only important thing for me was to get holes for aluminum wing joiner on right place, all ribs to be in good shape and spars hole to bi in same line...
To be continued....
12-13-2014, 02:12 PM
#14
Thread Starter
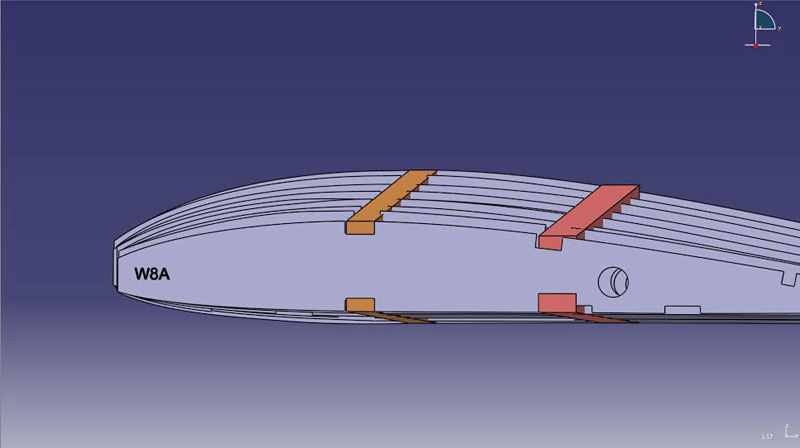
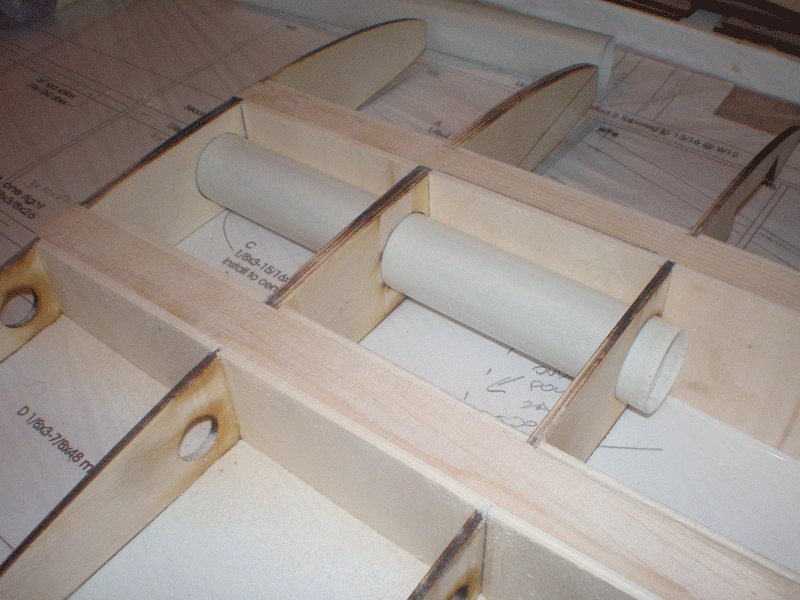
During last few weeks I got some parts... First quantity of balsa arrive, same like spars, wooden wing joiner and aluminum tube...

Dragan, my friend, owner of the laser cut machine, cur ribs for center panel...
On original Meister Scale plane or short kit, all ribs are from 3 mm balsa. Because I made 3 piece wing, I must change that, and some ribs made from 3 mm ply.
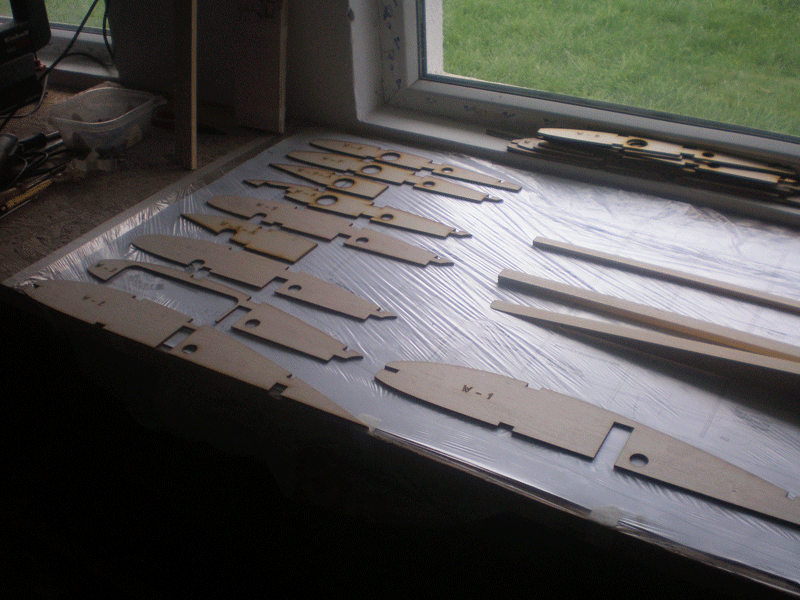
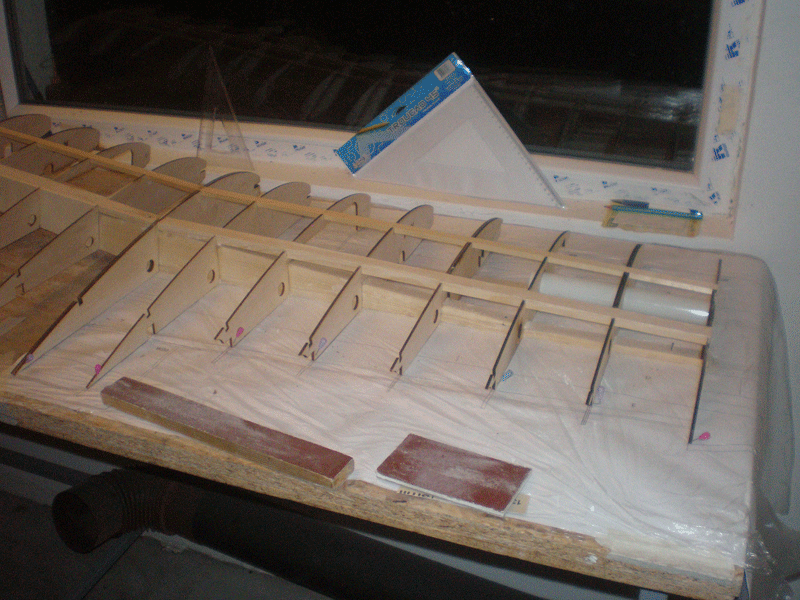
And finally, building can start...
Meister Scale models are easy for build. I enjoyed making the previous P 47 model...

Profile is Clark Y, so bottom rib side is flat and lies over the entire plan...
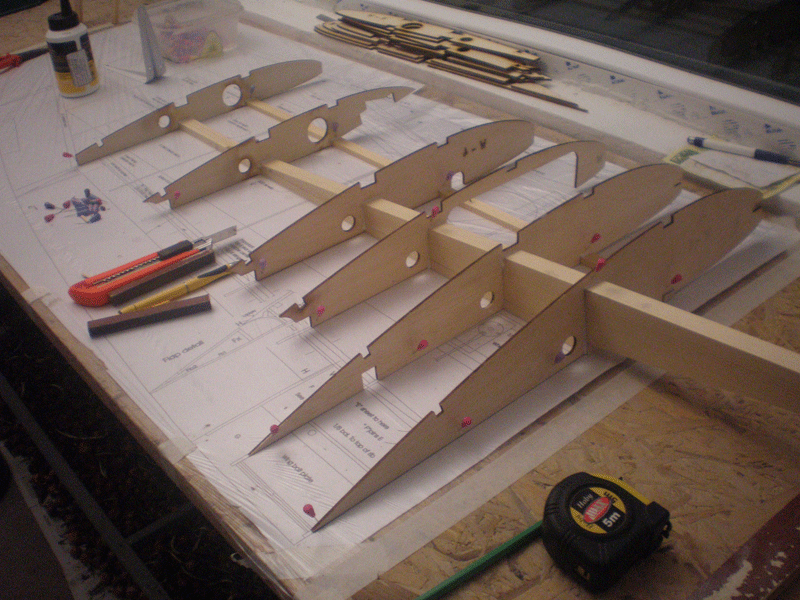

Ribs 5 & 7 must have ply half ribs, on which will later come plate for landing gear... First I glue those two parts together...

Thanks to 3D draw and laser cur technology, all parts fit great...


Regards from Senta, Serbia
Mirce

Dragan, my friend, owner of the laser cut machine, cur ribs for center panel...

On original Meister Scale plane or short kit, all ribs are from 3 mm balsa. Because I made 3 piece wing, I must change that, and some ribs made from 3 mm ply.


And finally, building can start...


Meister Scale models are easy for build. I enjoyed making the previous P 47 model...

Profile is Clark Y, so bottom rib side is flat and lies over the entire plan...


Ribs 5 & 7 must have ply half ribs, on which will later come plate for landing gear... First I glue those two parts together...


Thanks to 3D draw and laser cur technology, all parts fit great...


Regards from Senta, Serbia
Mirce
Last edited by mirce; 12-13-2014 at 02:15 PM.
12-13-2014, 03:24 PM
#16
Thread Starter
I use Henkel Moment white glue (carpenter glue).
http://www.rcuniverse.com/forum/rc-w...ep-step-2.html
Somewhere in the middle of this page (post #45) is picture of the bottle.
Regards
Mirce
http://www.rcuniverse.com/forum/rc-w...ep-step-2.html
Somewhere in the middle of this page (post #45) is picture of the bottle.
Regards
Mirce
12-24-2014, 03:13 PM
#19
Thread Starter
From last post I was working every day on P 47 center wing panel. OK, to be frank, intensity of working is not like on first Meister Thunderbolt I made, but, as I told on the start of this topic, for me speed of building is not important this time.
What has been done in the meantime?
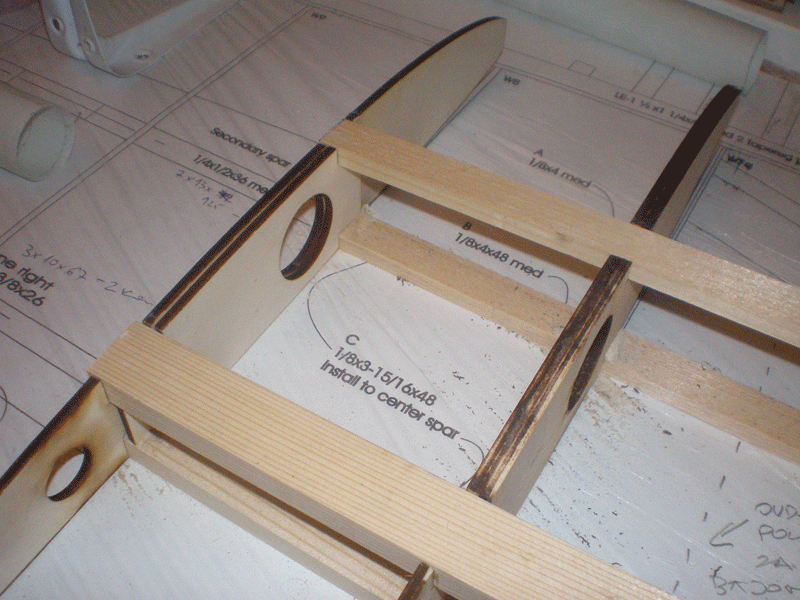
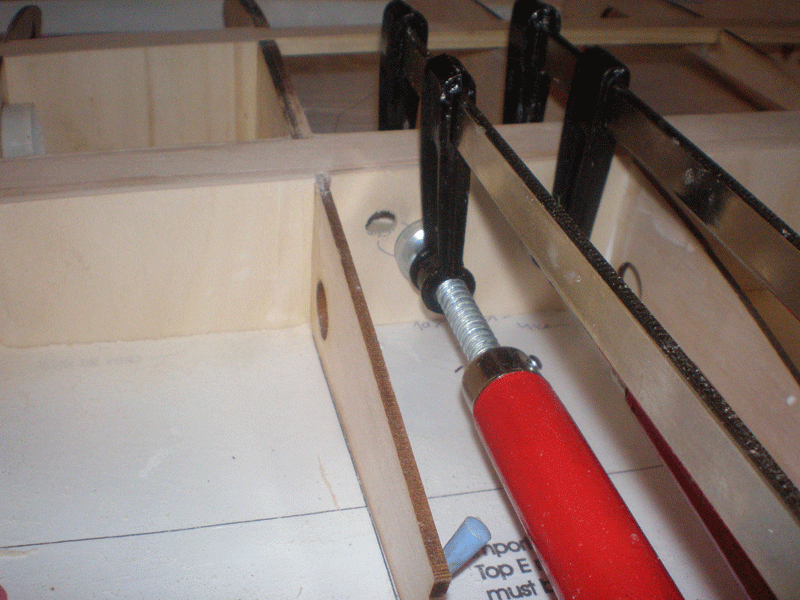
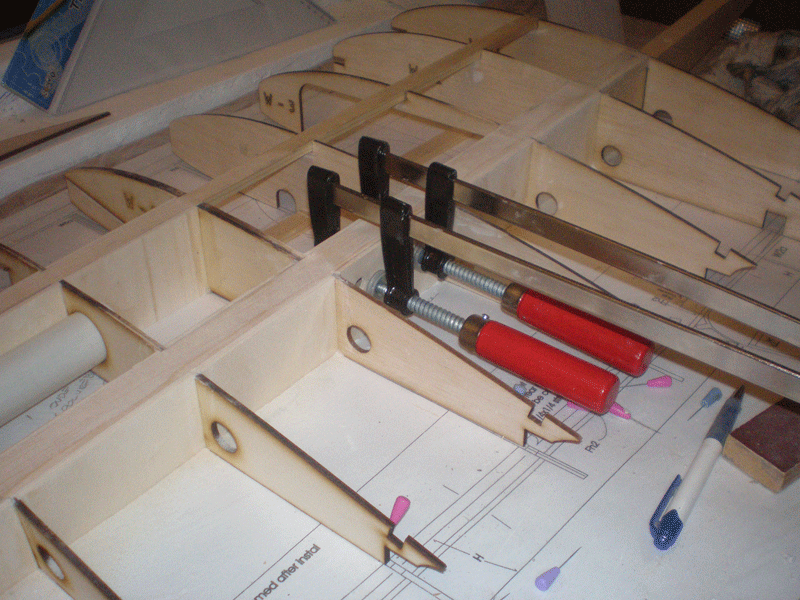
On left side of the center panel after putting all ribs I glued front and rear spar. They are bigger than on the plan, an was made from fir wood (hope google translaotor translate this right).
Rear, main spar is 20x10 mm and front is 15x8 mm.
For rib number 8 I made one half rib, because that is last rib through which passes the tube for aluminum wing joiner.
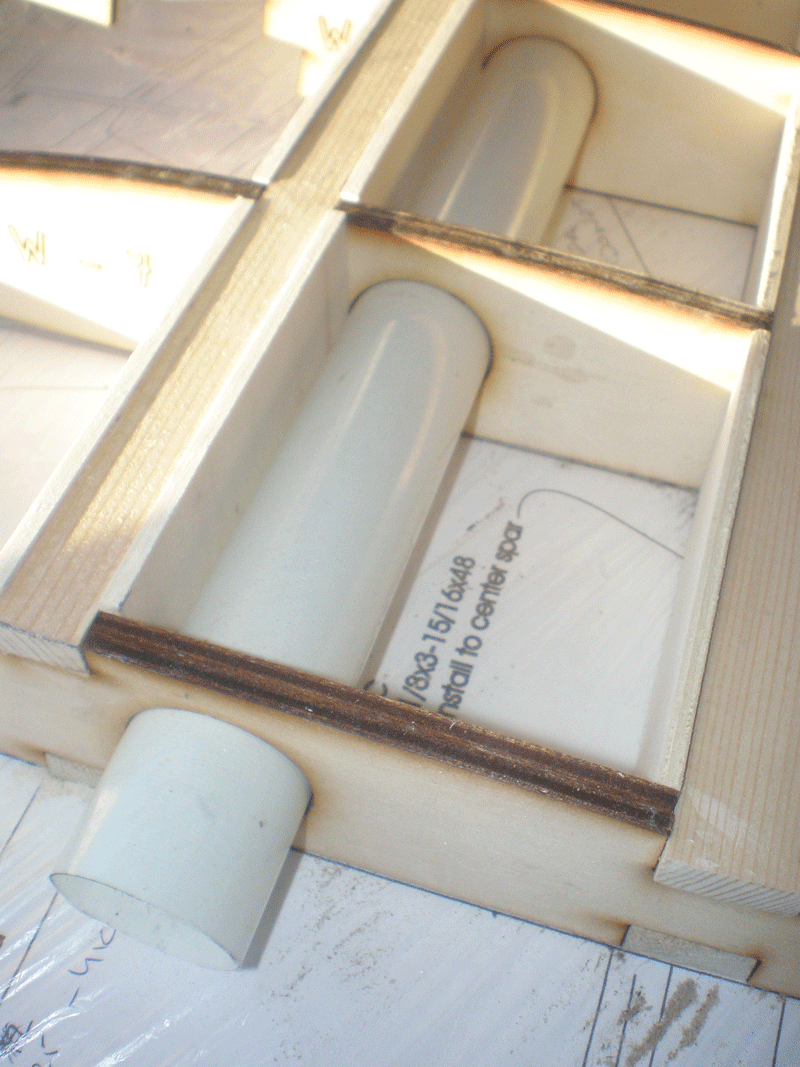
Wing tube made my friend. I ordered Aluminum wing joiner with tube from Austrian firm Lindinger, but made mistake in order number and when package arrived I got just aluminum tube.
Sava, my friend, made tube from few layers of the glass cloth and epoxy resin... It's perfect...
Because curved ribs, upper spar is from one side lower (deeper)...
But, that is easy for fix, I apply one strip of 1 mm balsa, which was, after glue dry, sand on right height...
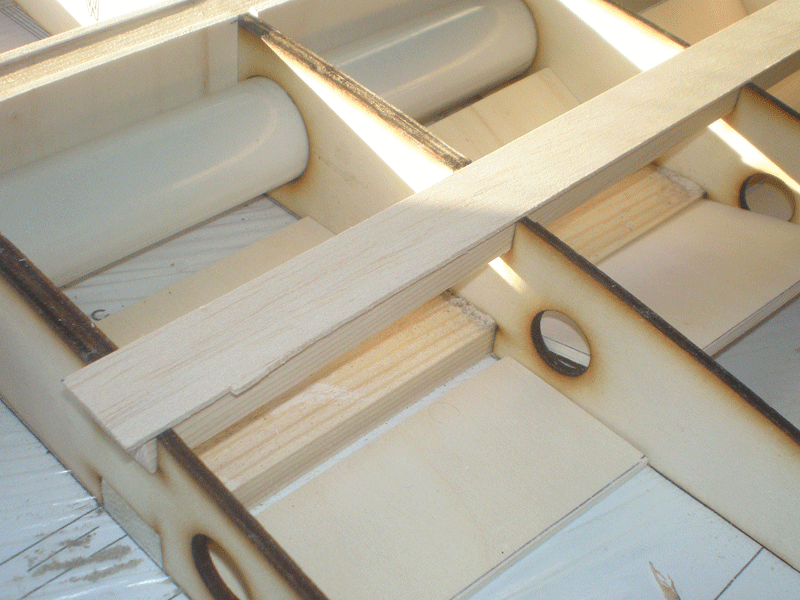
Next step was to made ply plates which connect upper and lower spar. Ply was made from 3 mm poplar ply, which is easy for work with...
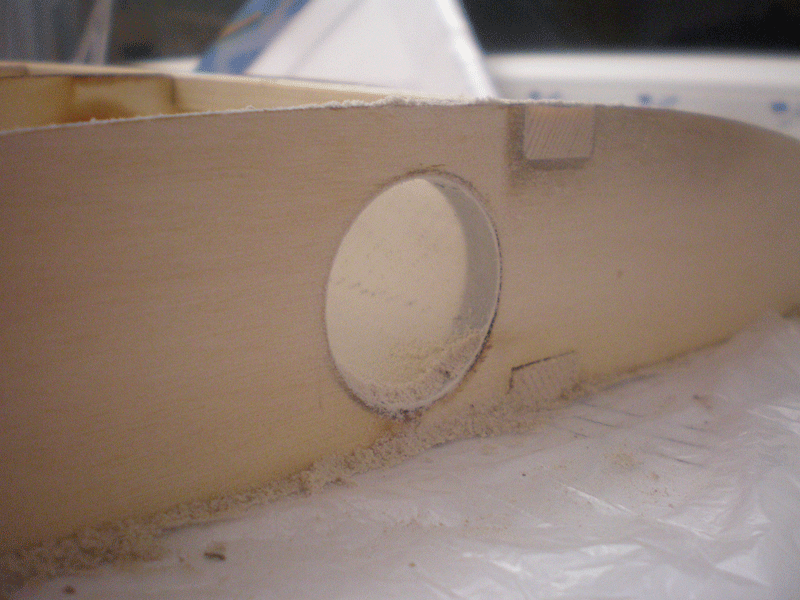
Hole for landing light and servo wire must be made...
After this I pick up my center panel section from work bench.
Before start working on right center panel side I first glued lower main spar. It's easier to do it right now...


Than "copy - paste" steps from left center panel side...

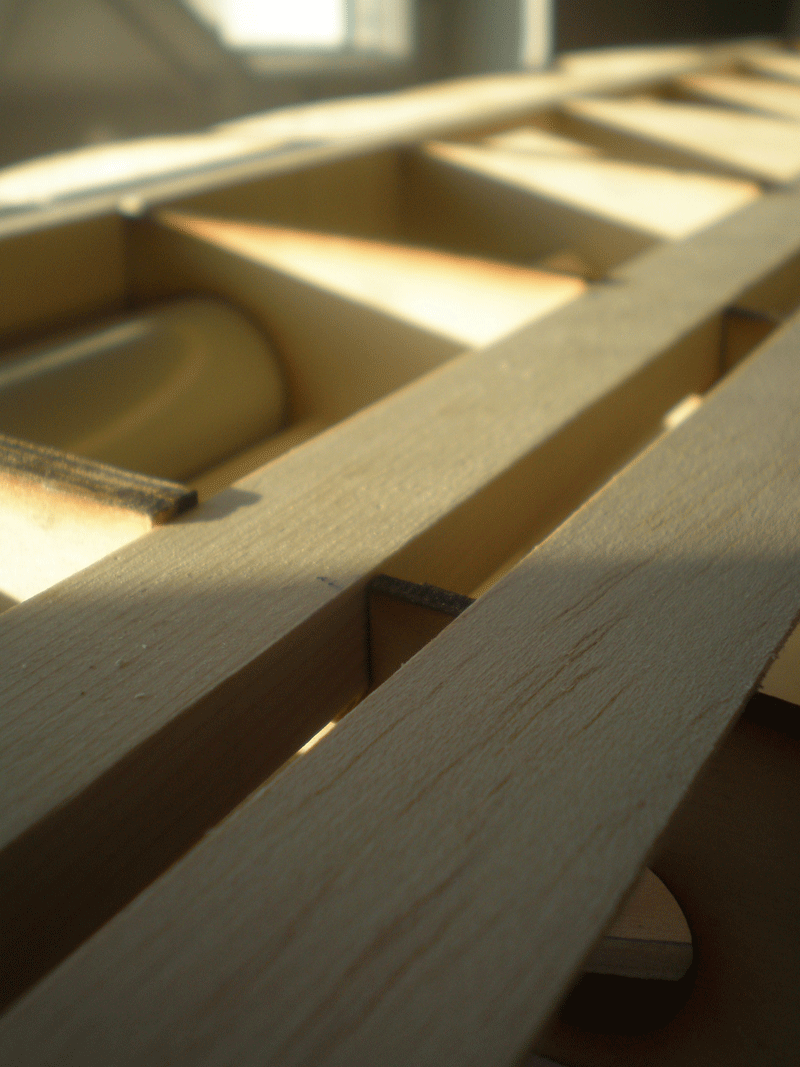
And one close picture of how everything fits...
Marry Christmas and all the best from Senta, Serbia wish
Mirce
P.S. For all my scale products, during Christmas holiday I give 10% discount on price... www.nsmodelers.rs
What has been done in the meantime?
On left side of the center panel after putting all ribs I glued front and rear spar. They are bigger than on the plan, an was made from fir wood (hope google translaotor translate this right).
Rear, main spar is 20x10 mm and front is 15x8 mm.
For rib number 8 I made one half rib, because that is last rib through which passes the tube for aluminum wing joiner.


Wing tube made my friend. I ordered Aluminum wing joiner with tube from Austrian firm Lindinger, but made mistake in order number and when package arrived I got just aluminum tube.
Sava, my friend, made tube from few layers of the glass cloth and epoxy resin... It's perfect...
Because curved ribs, upper spar is from one side lower (deeper)...

But, that is easy for fix, I apply one strip of 1 mm balsa, which was, after glue dry, sand on right height...

Next step was to made ply plates which connect upper and lower spar. Ply was made from 3 mm poplar ply, which is easy for work with...

Hole for landing light and servo wire must be made...


After this I pick up my center panel section from work bench.
Before start working on right center panel side I first glued lower main spar. It's easier to do it right now...


Than "copy - paste" steps from left center panel side...


And one close picture of how everything fits...

Marry Christmas and all the best from Senta, Serbia wish
Mirce
P.S. For all my scale products, during Christmas holiday I give 10% discount on price... www.nsmodelers.rs
Last edited by mirce; 12-24-2014 at 03:18 PM.
12-24-2014, 04:26 PM
#21
Thread Starter
Tony, my idea is to offer three piece wing kit for this model. Right now I'm not sure what exactly will be in kit, probably ribs, spars, wing tube, aluminum wing joiners...
But, first I want to made complete P 47 model...
About ailerons, to be frank, I wasn't understand what you asked me, sorry my English is far away from good...
Ailerons and flaps will be made same like on my first Meister Scale Thunderbolt.
Best regards
Mirce
But, first I want to made complete P 47 model...
About ailerons, to be frank, I wasn't understand what you asked me, sorry my English is far away from good...
Ailerons and flaps will be made same like on my first Meister Scale Thunderbolt.
Best regards
Mirce
12-24-2014, 04:59 PM
#23
Thread Starter
Aha, thank you for tip...
When I made Galeb G2 my jet model, my friend made 3D drawings of the complete airplane (model).
In that case you can made every detail and later, on laser cut machine, every part are same, all components fits perfectly and, all in all, that is best way to made model from kit.
Bad part of story is that need to invest few hundreds hours in drawing.
Martin, guy who draw wing for this P 47, and work on G2 project, have now no time.
I don't know Catia 3D, Solidworks or some similar program.
For this ribs, I was waiting two months, and still wasn't get ribs for outher panels!
I'll get it, but want to say, it is very slow process, when you depend on someone.
I think that ailerons will not be like picture you send. On my model, model I made now, ailerons will be for sure like on first P 47 I made...
Regards
Mirce
12-25-2014, 09:44 AM
#24

Join Date: Sep 2004
Location: ChelmsfordESSEX, UNITED KINGDOM
Posts: 514
Likes: 0
Received 2 Likes
on
1 Post
Hi guys,
will be be watching this build! I have a set of retracts, but not sure if they would fit this bird without buying the plans? Could you possibly have a measure on your plan and tell me what the length is between the pivot point and the centre of the wheel please?
Thank you,
Dave.
will be be watching this build! I have a set of retracts, but not sure if they would fit this bird without buying the plans? Could you possibly have a measure on your plan and tell me what the length is between the pivot point and the centre of the wheel please?
Thank you,
Dave.
12-25-2014, 10:36 AM
#25
Thread Starter
Hello Dave,
I haven't retracts yet, so can't help yu with measure you need.
On first Meister scale P 47 I used Siera Giant retracts... http://www.sierragiant.com/itemorderlist.html
Maybe Garry (ram 3500) can help. I think he have this retracts on his model.
Marry Christmas...
Regards
Mirce
I haven't retracts yet, so can't help yu with measure you need.
On first Meister scale P 47 I used Siera Giant retracts... http://www.sierragiant.com/itemorderlist.html
Maybe Garry (ram 3500) can help. I think he have this retracts on his model.
Marry Christmas...
Regards
Mirce
Last edited by mirce; 12-25-2014 at 10:39 AM.