


ESM Hawker Typhoon ARF build thread
 06-24-2012, 08:22 AM
#101
Senior Member
Join Date: Jun 2004
Location: Toronto,
ON, CANADA
Posts: 143
Likes: 0
Received 0 Likes
on
0 Posts
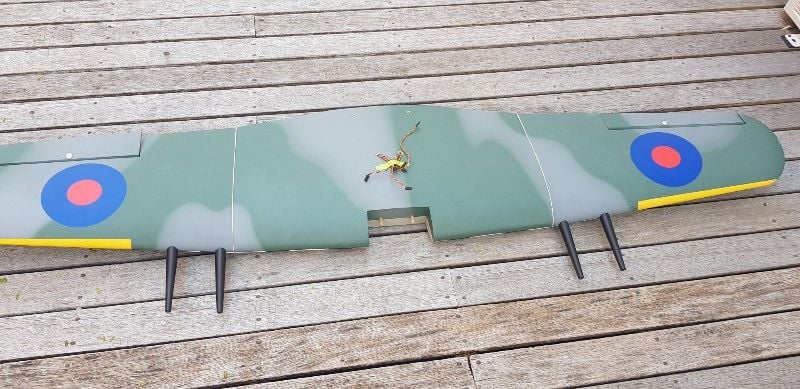
Hey all, I'm finally getting around to finishing this plane but i/m really puzzled by the flap joiner wire ... does the whole length insert into the flaps? Seems awfully long for the purpose.
Also is it suposed to be loose within the flap? I figured it should be glued in but the flaps kinda splays apart as they open .. so the wire would restrict that movement if glued in no?
Colin
Also is it suposed to be loose within the flap? I figured it should be glued in but the flaps kinda splays apart as they open .. so the wire would restrict that movement if glued in no?
Colin
 09-04-2013, 06:11 PM
#103
Junior Member
Join Date: Mar 2011
Location: Savannah, GA
Posts: 4
Likes: 0
Received 0 Likes
on
0 Posts
I have purchased and built the ESM Hawker Typhoon and I learned many things during the build, and I hope this will assist someone in their builds. I ended up using a gas engine so I had to figure out how to mount the choke linkage so as to not take away from the scale look of the plane. I ended up running a steel rod through a rubber grommet mounted on the cowling. I have pics available if needed. There were several issues that I ran into that I had to address. First once the plane was almost assembled I seemed to run out of room to install the retract assembly, regulator, the reversing Y harness and the electronic kill. I ended up fabing a tray over the pull pulls for the elevator and the rudder. It also protected the cable extensions from falling into the pull pulls. Believe me you don't want that, there is a build thread explaining the issues with that. Once that was solved the final issue was getting the plane balanced. I ended up having to add 3 pounds 5 ounces. I built some L Brackets mounted them to the top two motor mount bolts. I used lead bars that I got from Bass Pro Shop. They use the bars to melt down for black powder bullets. Anyway they were easy to form to the shape of the cowling and glue together. I had to glue 11 5 ounce bars together drilled a 632 hole in each side and bolted them to the L bracket on the motor mount. Worked perfectly I have pics if needed. That's all I have today but I do have a few other suggestions if needed, just let me know.
09-04-2013, 07:36 PM
#104
Senior Member
Join Date: Jun 2004
Location: Toronto,
ON, CANADA
Posts: 143
Likes: 0
Received 0 Likes
on
0 Posts
I have purchased and built the ESM Hawker Typhoon and I learned many things during the build, and I hope this will assist someone in their builds. I ended up using a gas engine so I had to figure out how to mount the choke linkage so as to not take away from the scale look of the plane. I ended up running a steel rod through a rubber grommet mounted on the cowling. I have pics available if needed. There were several issues that I ran into that I had to address. First once the plane was almost assembled I seemed to run out of room to install the retract assembly, regulator, the reversing Y harness and the electronic kill. I ended up fabing a tray over the pull pulls for the elevator and the rudder. It also protected the cable extensions from falling into the pull pulls. Believe me you don't want that, there is a build thread explaining the issues with that. Once that was solved the final issue was getting the plane balanced. I ended up having to add 3 pounds 5 ounces. I built some L Brackets mounted them to the top two motor mount bolts. I used lead bars that I got from Bass Pro Shop. They use the bars to melt down for black powder bullets. Anyway they were easy to form to the shape of the cowling and glue together. I had to glue 11 5 ounce bars together drilled a 632 hole in each side and bolted them to the L bracket on the motor mount. Worked perfectly I have pics if needed. That's all I have today but I do have a few other suggestions if needed, just let me know.
09-04-2013, 09:43 PM
#105

I have been eyeballing the ESM typhoon for a while. I have a BME 50 engine looking for a home. How significant is the tail heavy issue? I am not interested in buying any plane that requires adding pounds of lead to the nose. It is contrary to good aerodynamic principles.......IMHO.
")
Last edited by kwik; 09-04-2013 at 09:46 PM.
09-05-2013, 01:19 AM
#106

My Feedback: (15)
Every report on the build of this plane was that it needed a ton of nose weight .
Now if you want to reduce that issues it takes some building but you can move the wing , flap servos farther forward in the wing , this requires surgery and adding 4-40 rods ect , but this moves a good amount of weight forward .
Second move the fuse servos forward as well , move everything possible as far as batterys on the nose , all of this helps .
THe MAN review had this plane with dead weight needed close to 17 or 19 lbs , cant remember because it was aprox 4 or 5 years ago
09-05-2013, 02:33 PM
#107
Every report on the build of this plane was that it needed a ton of nose weight .
Now if you want to reduce that issues it takes some building but you can move the wing , flap servos farther forward in the wing , this requires surgery and adding 4-40 rods ect , but this moves a good amount of weight forward .
Second move the fuse servos forward as well , move everything possible as far as batterys on the nose , all of this helps .
THe MAN review had this plane with dead weight needed close to 17 or 19 lbs , cant remember because it was aprox 4 or 5 years ago
Now if you want to reduce that issues it takes some building but you can move the wing , flap servos farther forward in the wing , this requires surgery and adding 4-40 rods ect , but this moves a good amount of weight forward .
Second move the fuse servos forward as well , move everything possible as far as batterys on the nose , all of this helps .
THe MAN review had this plane with dead weight needed close to 17 or 19 lbs , cant remember because it was aprox 4 or 5 years ago
After my test-flight with the BT-24 ( It never even managed to take off), I conluded that it was highly probable they never never flew the plane?
But that was just my personal conclusion, I don't know for sure. It just could not fly with that engine, it was too weak.
A Zenoah G-38, or a Saito FG-36 flies it well, though. I tried both.
Last edited by kwik; 09-05-2013 at 02:38 PM.
11-16-2019, 04:32 AM
#108

A long time since the last post regarding this model. I have had one in a box for years and decided to build it. Had a good read of this thread.
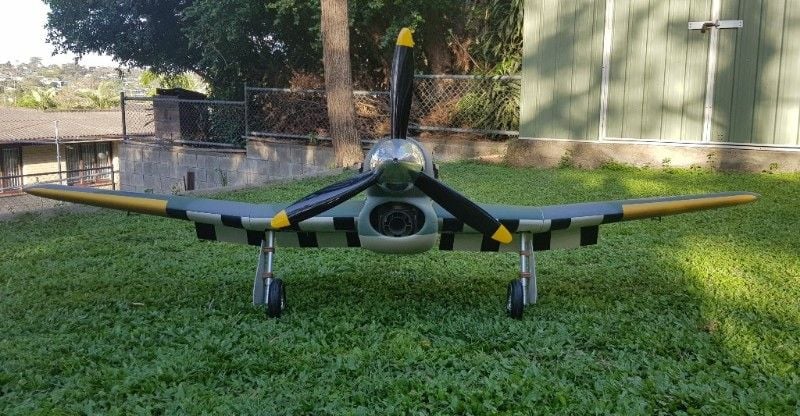
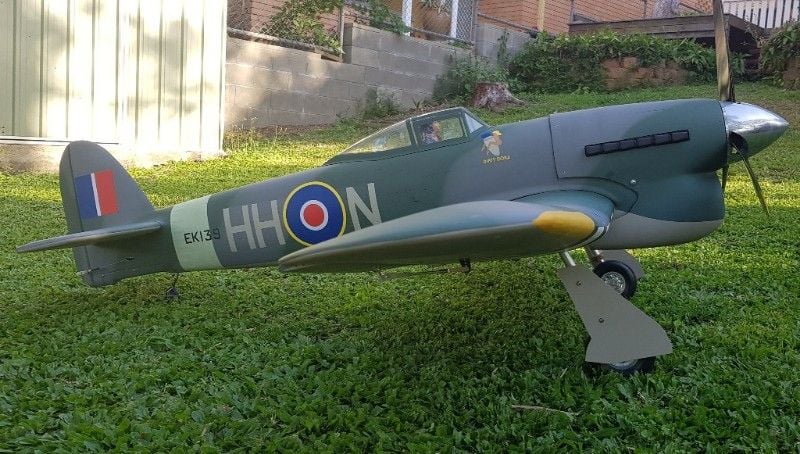
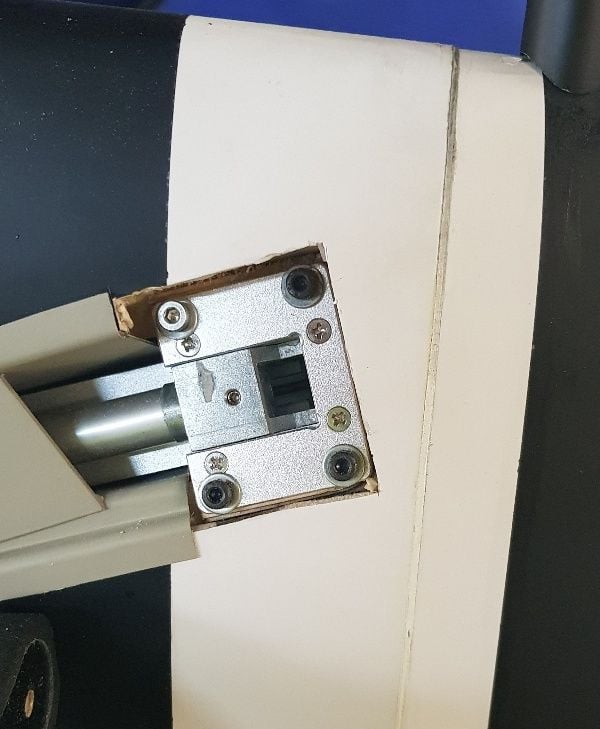
To reduce the nose weight, I lightened the back end. Swapped the stab tube for carbon, added fin post holes, removed glass joining dags and excess filler etc. Was careful adding glue. The motor is a DLE35RA with the fuse altered to fit the exhaust, also fitted electric landing gear. I 3D printed an intake and frame to support the cowl bottom in a nose over and add weight up front. Added 3D printed removable cannons. Also turned up a brass slug for inside the spinner. Final weight is 7.4kg - 16lbs 5oz at 105mm CG.
The prop is a 24x10 3 blade just for the pic. It will fly with a 20x8 2 blade. Should fly soon.
 12-17-2020, 03:13 PM
#110
I forgot to post that it did fly after a few aborted attempts.
I had engine overheat issues with the DLE35RA as it would start and run up fine, I'd taxi out to the strip then it would die and not restart. Putting a heat shield between the carby and exhaust fixed that annoying problem.
I can't say yet that it flies great. The flight was short. After lift off the motor ran rich, so I did a slow climb and left the gear down in case it quit, then the right gear door swung 90deg sideways as the CA let go and it snapped into a descending roll, I let it go until I was sure I had good speed, recovered (just above the dirt) and carefully flew it back to land. Apart from holding aileron input, the landing was uneventful. I haven't had a chance to fly it again. Before that I will epoxy the landing gear doors to the struts, put a remote air source to the carby diapraghm cover and move my CG a bit further aft. I think it will be OK then.
