


ESM 50cc Corsair
 10-06-2014, 01:14 AM
#2476

Join Date: Jun 2007
Location: ChristchurchCanterbury, NEW ZEALAND
Posts: 128
Received 0 Likes
on
0 Posts
I have the smaller 120 size corsair and I'm keen to find out if this version is similarly afflicted.
 10-06-2014, 08:06 PM
#2477
http://youtu.be/I6dEIcJs9j0
Finally got the gear doors set up. Now on to stuffing the landing gear in here. The servo in the center is the servo I will use for the air valve. I am installing a BVM high flow air valve.
Finally got the gear doors set up. Now on to stuffing the landing gear in here. The servo in the center is the servo I will use for the air valve. I am installing a BVM high flow air valve.
10-20-2014, 03:48 AM
#2478

My Feedback: (49)
My F4U is off to the new owner. I have a contract on a new (for me) home and hope to close soon. I will miss the bird as she only flew 3 times. Brand new. About a year's worth of labor. Hate to see her go, but I can do another Zeke one day. If I do another one, will likely be a Meister Scale Zero at 108 inches.
After I get moved and situated, I will continue work on my CARF P-51D. I have an MVVS 80cc gasser on order from Chief Aircraft. I have seen several videos showing that engine pulling a CARF and Flying Legends P-51D around the sky in good fashion. Maybe next summer I can have her flying.
After I get moved and situated, I will continue work on my CARF P-51D. I have an MVVS 80cc gasser on order from Chief Aircraft. I have seen several videos showing that engine pulling a CARF and Flying Legends P-51D around the sky in good fashion. Maybe next summer I can have her flying.
Last edited by LBJ; 10-20-2014 at 03:51 AM.
10-20-2014, 05:50 AM
#2480
These are prt way thru the fix.
I've made doublers with 6mm ply on the main "spar" Also made a new spar fwd of the main. Applied carbon fibre to the top skin and made carbon fillets with cf rovings. Primarily used Hysol for the ply wood bondings and gap filling.
I run outta Hysol, so I have stopped till my order arrives from DA in Brissy. Then I will apply hysol to the front spar wing skin. Once cured I will attatch the bottom skin with hysol, once cured I'm gonna fill the front voids with expanding foam. I forgot to say I will also make some doublers for all the ribs I can get to.
These pics are the job about half done. Already it has made a marked difference.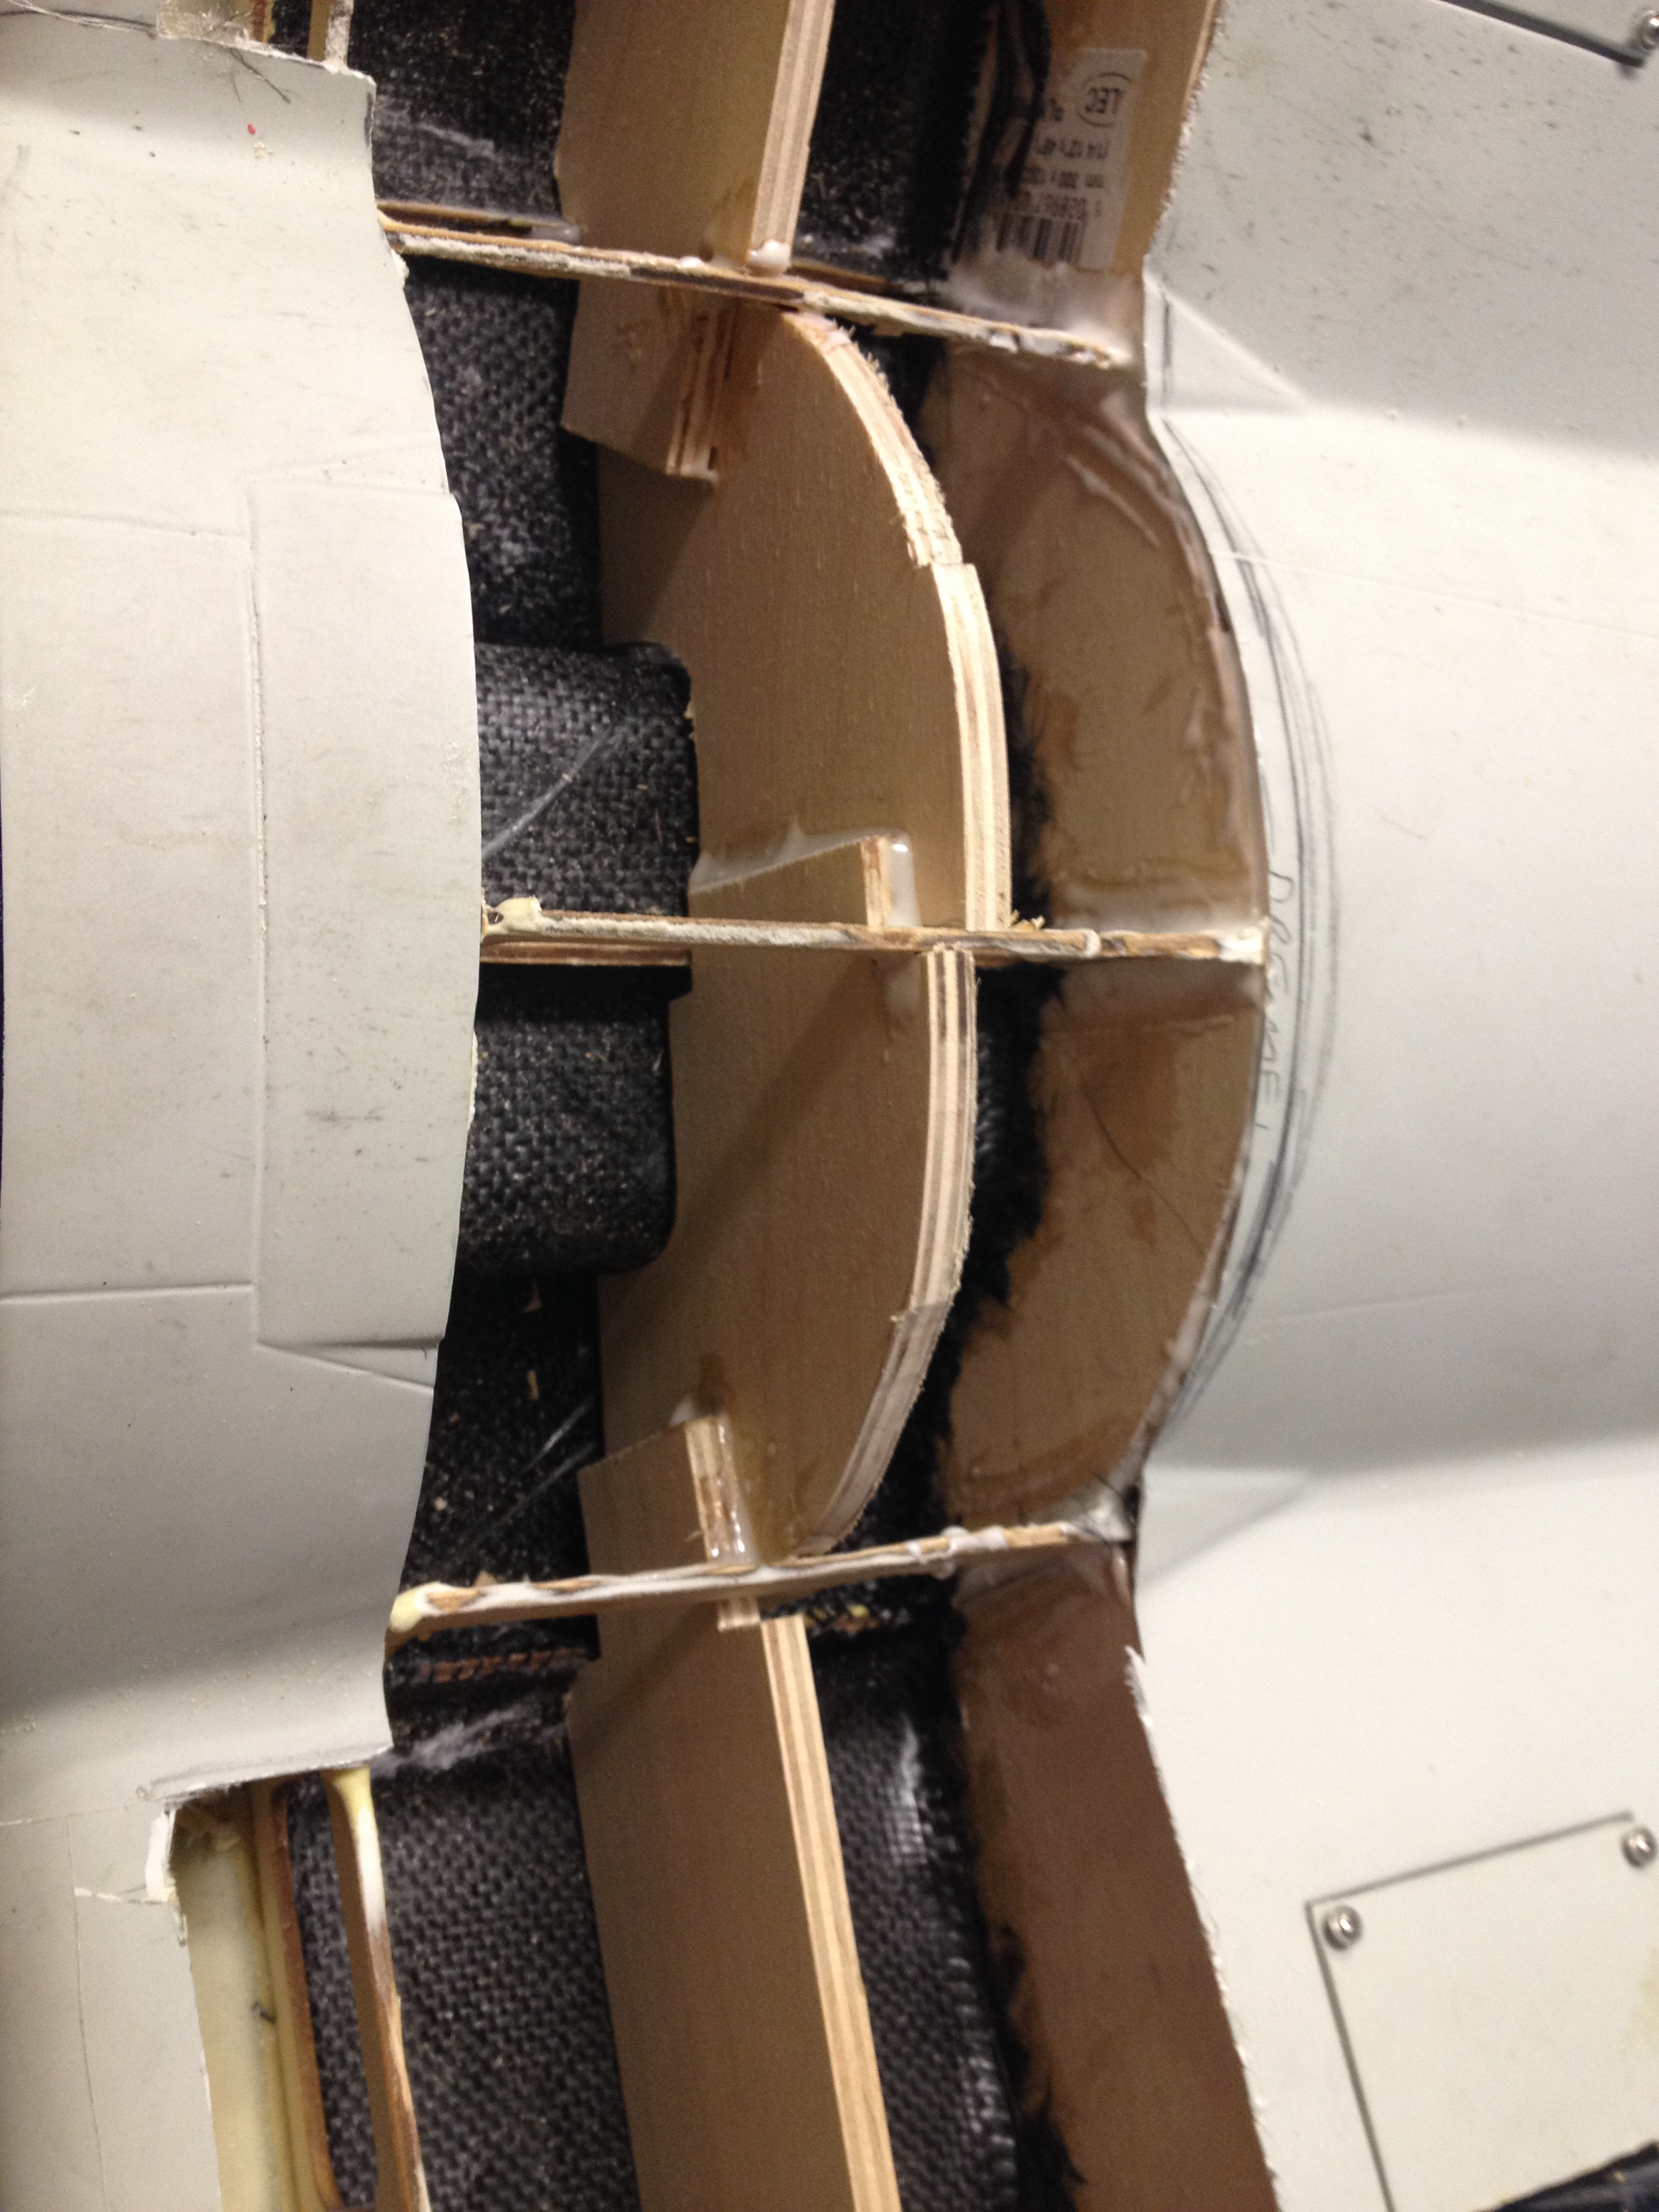
How are you doing on your repair? I'm getting ready to tackle the center section as well. Did you save the skins? How are you going to cover those open bays?
10-20-2014, 06:09 AM
#2481
G�day all, I picked up one of these a few weeks back, it is the version with the wing tubes, have only just made a start on it, so after reading this forum, I have cut the top of the skin on the centre section, plan is to put another layer of glass on the bottom skin, plus put a ply skin over the spar, both sides. Any other suggestions will be appreciated.
Oldtimer.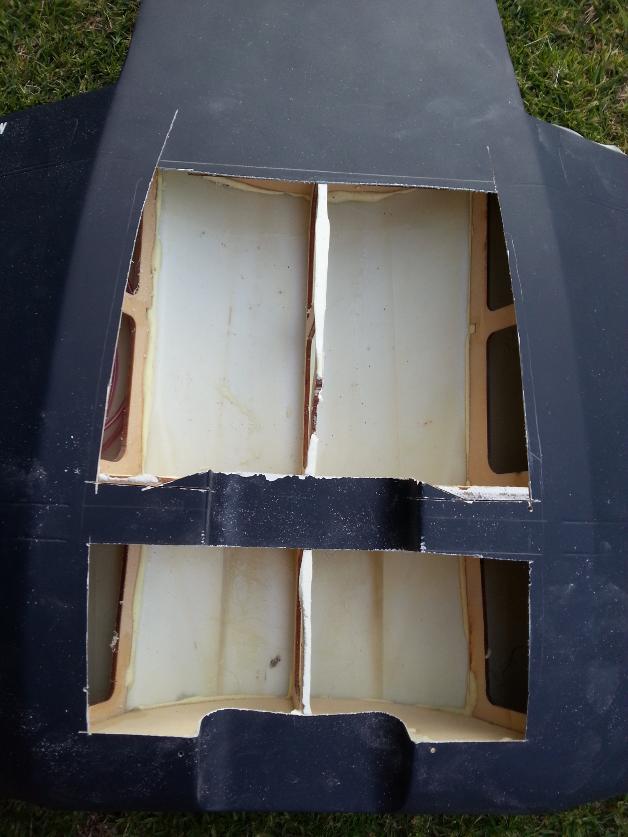
Oldtimer.
Wtih Cosmo's repair, you expose more of the main spar area (more bays) but have to fix a lot cosmetically...plus there might be problems aft of the main spar you will never see.
Obviously, Balancing most effective with least intrusive is our challenge.
jim
10-20-2014, 04:18 PM
#2482
Join Date: Apr 2007
Location: Qld, AUSTRALIA
Posts: 309
Likes: 0
Received 0 Likes
on
0 Posts
G�day Jim,
you can see into the bay on either side, with the aid of a mirror, I have put a layer of Glass on the inside of mine, very tricky to get to in some spots, didnt bother about a 100% coverage inside the bays, but it has made a big difference, before when I put a bit of pressure on the skin it would depress a bit, it is a LOT more rigid now,
but lets face it, how many of these birds were made, we have only heard of a few fail, maybe they were Friday arvo models.
just about finished the flap setup on the centre section, well the hinge pins (Robarts) are epoxied in, I am going to put the elevator servo�s down the back inside the Fuselage under the tail plane, I ordered an engine the other day, an EME 70 twin, getting a new Cowl ring lazer cut out of good ply,
Oldtimer
10-20-2014, 06:39 PM
#2483
G�day Jim,
you can see into the bay on either side, with the aid of a mirror, I have put a layer of Glass on the inside of mine, very tricky to get to in some spots, didnt bother about a 100% coverage inside the bays, but it has made a big difference, before when I put a bit of pressure on the skin it would depress a bit, it is a LOT more rigid now,
but lets face it, how many of these birds were made, we have only heard of a few fail, maybe they were Friday arvo models.
just about finished the flap setup on the centre section, well the hinge pins (Robarts) are epoxied in, I am going to put the elevator servo�s down the back inside the Fuselage under the tail plane, I ordered an engine the other day, an EME 70 twin, getting a new Cowl ring lazer cut out of good ply,
Oldtimer
you can see into the bay on either side, with the aid of a mirror, I have put a layer of Glass on the inside of mine, very tricky to get to in some spots, didnt bother about a 100% coverage inside the bays, but it has made a big difference, before when I put a bit of pressure on the skin it would depress a bit, it is a LOT more rigid now,
but lets face it, how many of these birds were made, we have only heard of a few fail, maybe they were Friday arvo models.
just about finished the flap setup on the centre section, well the hinge pins (Robarts) are epoxied in, I am going to put the elevator servo�s down the back inside the Fuselage under the tail plane, I ordered an engine the other day, an EME 70 twin, getting a new Cowl ring lazer cut out of good ply,
Oldtimer
I'm leaning towards your method of fixing the center section...just getting up the courage to make the cuts.

My plane is complete and weighs in at 32lbs with extras like scale landing gear doors (4 servos), scale tail retract with doors, full cockpit details and pilot with turning head with rudder movement. Saito 57 twin is the engine. I was able to run the exhaust through the firewall and into a more scale position. I even added a few extra exhaust stacks to each side. I put two servos, one for each half, on the elevator. I've got them embedded into the bottom of the horizontal stab. I've got all switches in a hatch in front of the cockpit. Fuel hatch is on side of fuselage in one of the scale hatches. Robart electric landing gear and a very cool very scale tail wheel that is made for the Hangar Nine Corsair. This is a must. Two pounds of nose weight was needed to balance.
Most of these ideas are from this forum. Guys like Kwik, Cosmos, LBJ, Stoat(now deceased) and others were extremely helpful in putting together this very challenging ARF.
jim
10-21-2014, 01:41 PM
#2484
Banned
My Feedback: (1)
Join Date: Jun 2002
Location: Brisbane, Queensland, AUSTRALIA
Posts: 7,744
Likes: 0
Received 2 Likes
on
2 Posts
Hey Lou,
hope the move goes well mate. Been a long time no chat. all well with you I hope.
Did you get the MVVS 80 with onboard starter?
Mate of mine has one that is going into a 1/4 scale Mick Reeves Spitfire.
cheers
Peter
hope the move goes well mate. Been a long time no chat. all well with you I hope.
Did you get the MVVS 80 with onboard starter?
Mate of mine has one that is going into a 1/4 scale Mick Reeves Spitfire.
cheers
Peter
10-21-2014, 06:33 PM
#2485
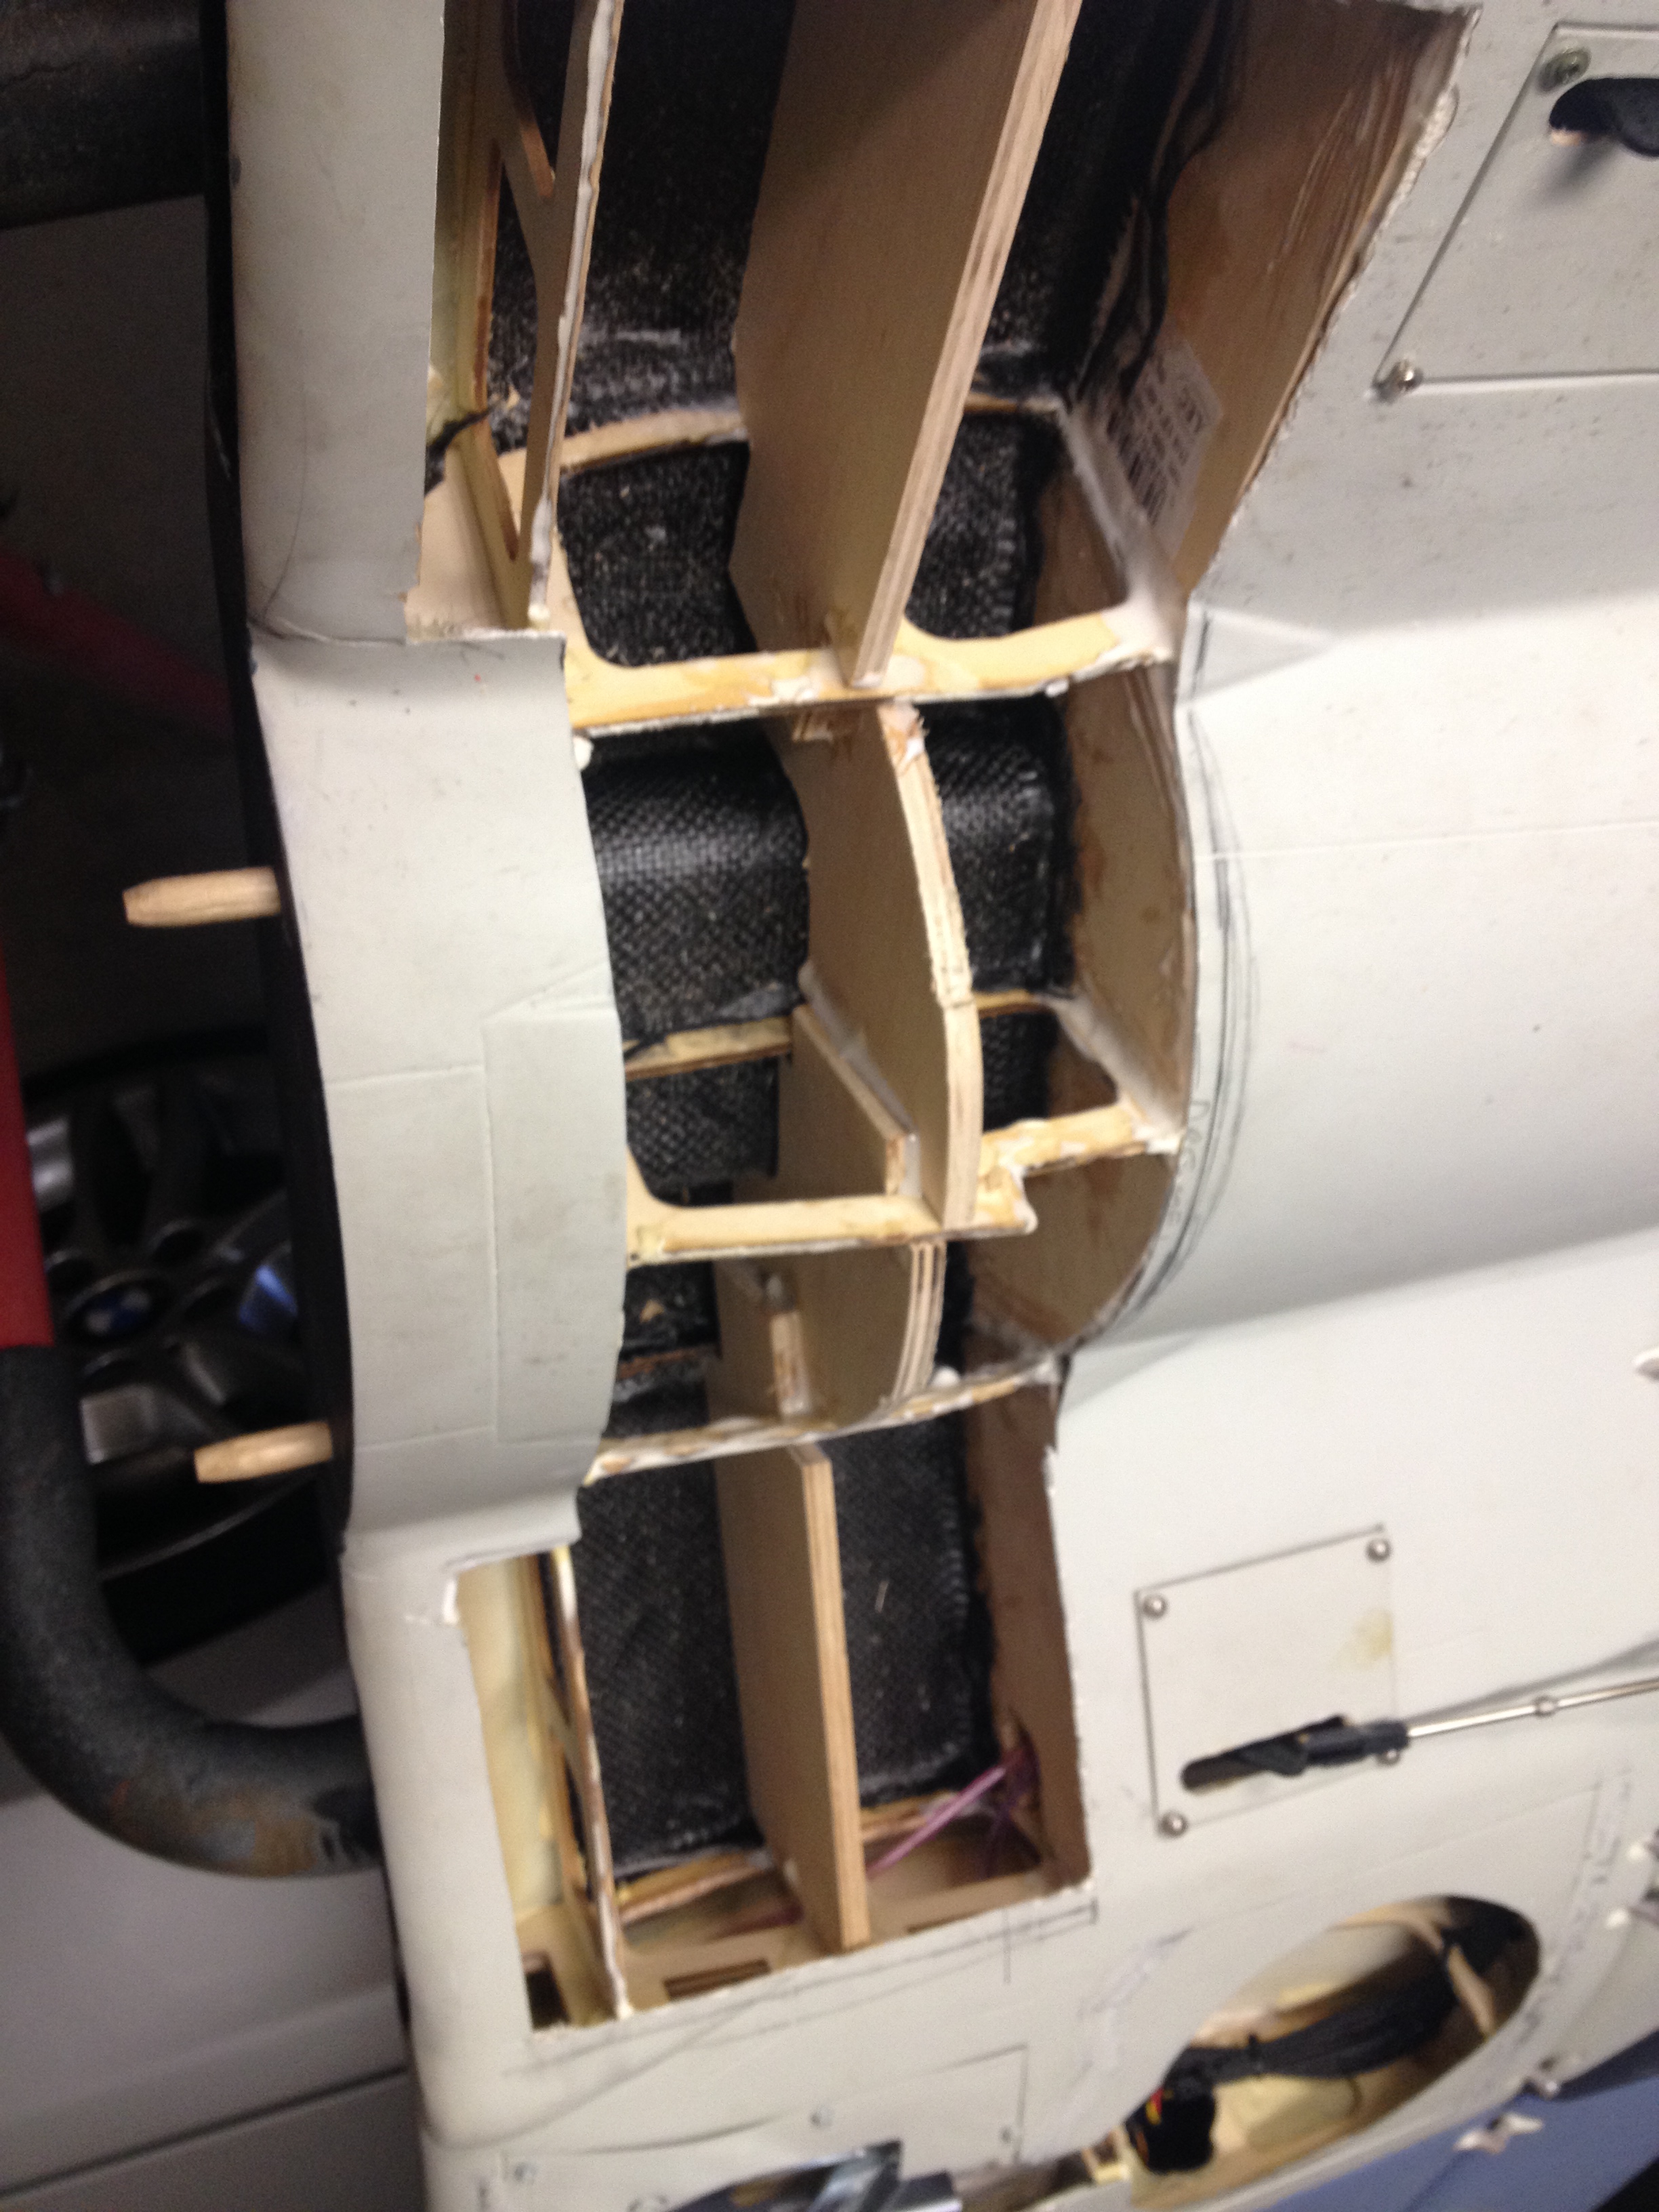
Ok, did some open wing surgery. Chinese glueing sucks but most of the ribbing was good...some clear gaps though. Wing skins came off of ribs sort of easily. Might have been ok to fly but why take the chance. Glad I did it.


10-21-2014, 06:37 PM
#2486
Plan is to re-glue what I can reach in the other bays and drop some carbon fiber where I can. I'll create a frame around the big hole I just made...then lay the wing skin back in place with some Hysol and carbon fiber all the seams on the top to finish the repair.
10-21-2014, 09:00 PM
#2487
Banned
My Feedback: (1)
Join Date: Jun 2002
Location: Brisbane, Queensland, AUSTRALIA
Posts: 7,744
Likes: 0
Received 2 Likes
on
2 Posts
Ron,
I'd suggest beefing up those ribs with light ply doublers. The large cut outs leave no strength and they will split and separate under load.
See photo with red circles.
cheers
Peter

I'd suggest beefing up those ribs with light ply doublers. The large cut outs leave no strength and they will split and separate under load.
See photo with red circles.
cheers
Peter
10-22-2014, 12:04 AM
#2488
Join Date: Oct 2011
Location: , AUSTRALIA
Posts: 177
Likes: 0
Received 0 Likes
on
0 Posts
I cut the bottm skins, easier to hide. I saved the skins and the were reattached. Hardly notice the repair, with some weathering.
The wing seems much much stronger, and certainly the skins are a lot stiffer. Happy I did it.
She is finished, I'll do a maiden shortly.
Weight about 15kg.
Looking fwd to flying her.
Matt
10-28-2014, 02:18 PM
#2494
My Feedback: (49)
Several guys at the field have the TopFlite 85" Corsair and they use the 148's. Seems to work well. I used the 150's in mine and worked well since the plane weighed in at 34 pounds plus gas wts. Robart has a sale on now so might be a good time to buy. The Robart retracts and Robart aluminum wheels add up $$$ pretty quick. 5%, 10%, and 15% off, depending on total sales price.
10-28-2014, 02:26 PM
#2495
Join Date: Oct 2011
Location: , AUSTRALIA
Posts: 177
Likes: 0
Received 0 Likes
on
0 Posts
Midas, I got mine from Robart.
They have the specific retracts for this plane, (adaptor plate), mine fit like a glove.
Like LBJ said the more ya spend the better the discount. I would also use the robart air system. Always use Robart valves ect, and they never leak.
Matt
They have the specific retracts for this plane, (adaptor plate), mine fit like a glove.
Like LBJ said the more ya spend the better the discount. I would also use the robart air system. Always use Robart valves ect, and they never leak.
Matt
10-28-2014, 06:21 PM
#2496
My Feedback: (27)

Join Date: May 2011
Location: Corona, CA
Posts: 160
Likes: 0
Received 0 Likes
on
0 Posts
My complete air system is Robart besides the retracts... looking at the 148s the look similar to the 150s... I've seen a YouTube video of a guy using the 148s on the Esm corsair..
 10-29-2014, 02:21 PM
#2499
My Feedback: (27)
Join Date: May 2011
Location: Corona, CA
Posts: 160
Likes: 0
Received 0 Likes
on
0 Posts
The retracts develop excessive play. So excessive the wheels tend to tow in or out more and more.. the wheels shouldn't have any slop when you wiggle them.. the play is excessive enough to cause the plane to noise over on landing...
10-29-2014, 02:48 PM
#2500
Join Date: Apr 2007
Location: Qld, AUSTRALIA
Posts: 309
Likes: 0
Received 0 Likes
on
0 Posts
hello Midas, thanks for that info, just a bit more, is the slop in the top of the strut where the pin goes through that rotates the strut, a previous forum thread said about that point but it wasnt all that clear as to how it was fixed.
thanks, Oldtimer
thanks, Oldtimer