ORIGINAL: tsull
Now we are getting some information:
Craig, when you plugged in your RX to the TK20 leads, did you follow the directions on Clarke's website and if so, did the controls work according to the Diagram that was provided with respect to the stock positions. If not, could you please explain what you changed and if you are running the controls on the TX in the manner that the Clarke diagram indicates?
If you are running your sticks in a different manner, perhaps you could explain it.
Thanks
tjs
Todd, it was a couple months ago when I first set up the first board with my new CT6B Tx, but if I recall correctly the controls weren't exactly as the diagram, maybe do to the mode my Tx was in from factory didn't match. I'm brand new to the 2.4GHz Tx/Rx pairing / setup game, as the FlySky CT6B controllers are my very first ever. But I did manage to get it going pretty quickly, & after setting up my Tx that first time with the board initially, all new Clark boards I connect to the Rx paired with that Tx, now work without me having to go through any kind of setup steps at all.
I do believe I at least hooked all the Rx cables up to the board with all channels matching what the board plugs show on the board, from channel 1 through 4.
Maybe everyone else understands the control diagram clearly & got it. What I can say is that diagram of the controls confused the heck out of me, in looking at it, I thought for each single action, both sticks needed to be in the position showing in each side of the double picture. For instance, when I looked at the diagram, I thought to turn the engine On/Off, I would have to pull the right stick all the way down, hold it there, then move the left stick from center position, all the way to the right before the engine would start.
But that wasn't the case for me. To turn on the engine, just one stick had to be moved, but in both those directions indicated in both pictures. So to turn on the engine, I just had to pull the left stick down, then push the left stick all the way to the left, which was the opposite direction of what the diagram showed for engine On/Off going to the right, but again, I think my Tx mode was different.
I think I can safely say though, that if you can get the machine gun to work, then moving the same stick in the opposite direction should start the engine, no matter which mode the Tx is set to at the time.
I think I'm a little odd to most with how I like my controller setup, because I want all tank movement on the left stick alone, while the right stick does everything else. So my controls are as follows right now:
<div style="margin-left: 40px;">Left stick pushed Up = Forward
Left stick pushed Down = Backward
Left stick pushed Left = Left
Left stick pushed Right = Right
Right stick pushed Up Fully = Main Cannon Fire
Right stick pushed Up Half & then Pushed Right = Gun Barrel Elevation Up
Right stick pushed Up Half & then Pushed Left = Gun Barrel Elevation Down
Right stick pushed Left = Turret Traverse Left
Right stick pushed Right = Turret Traverse Right
Right stick pushed Down Fully & then Pushed Right = Machine Gun
Right stick pushed Down Fully & then Pushed Left = Engine Start Up / Shut Down
Right stick pushed Down Half & then Pushed Right = Light On / Off</div>
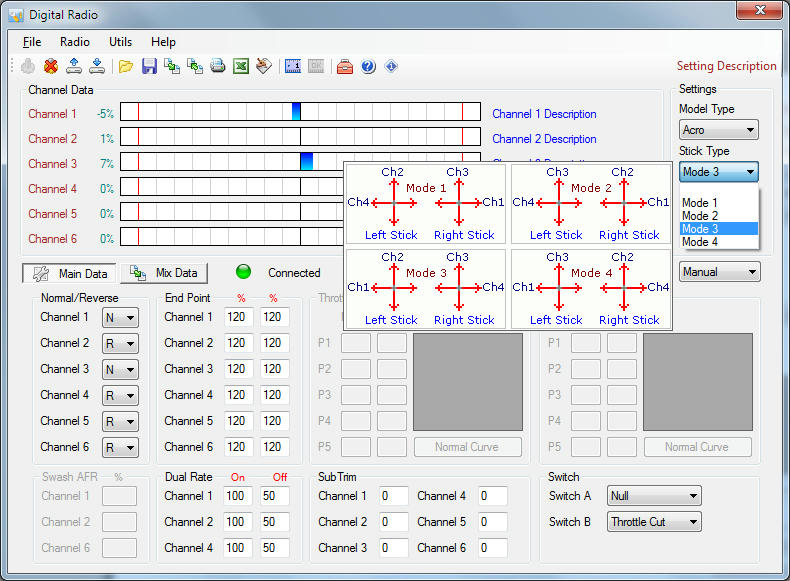
For this to work on my CT6B that way I have channels 2 & 4 reversed in the Tx programming with channels 1 & 3 normal, & my Tx is set to Mode 3 according to Digital Radio, where channels 1 & 2 are on the left stick, channels 3 & 4 on the right stick.
Here was a shot of DigitalRadio for the setup:
~ Craig ~