Wow, you work a lot faster than I do... or you have a lot more time.... Ha Ha
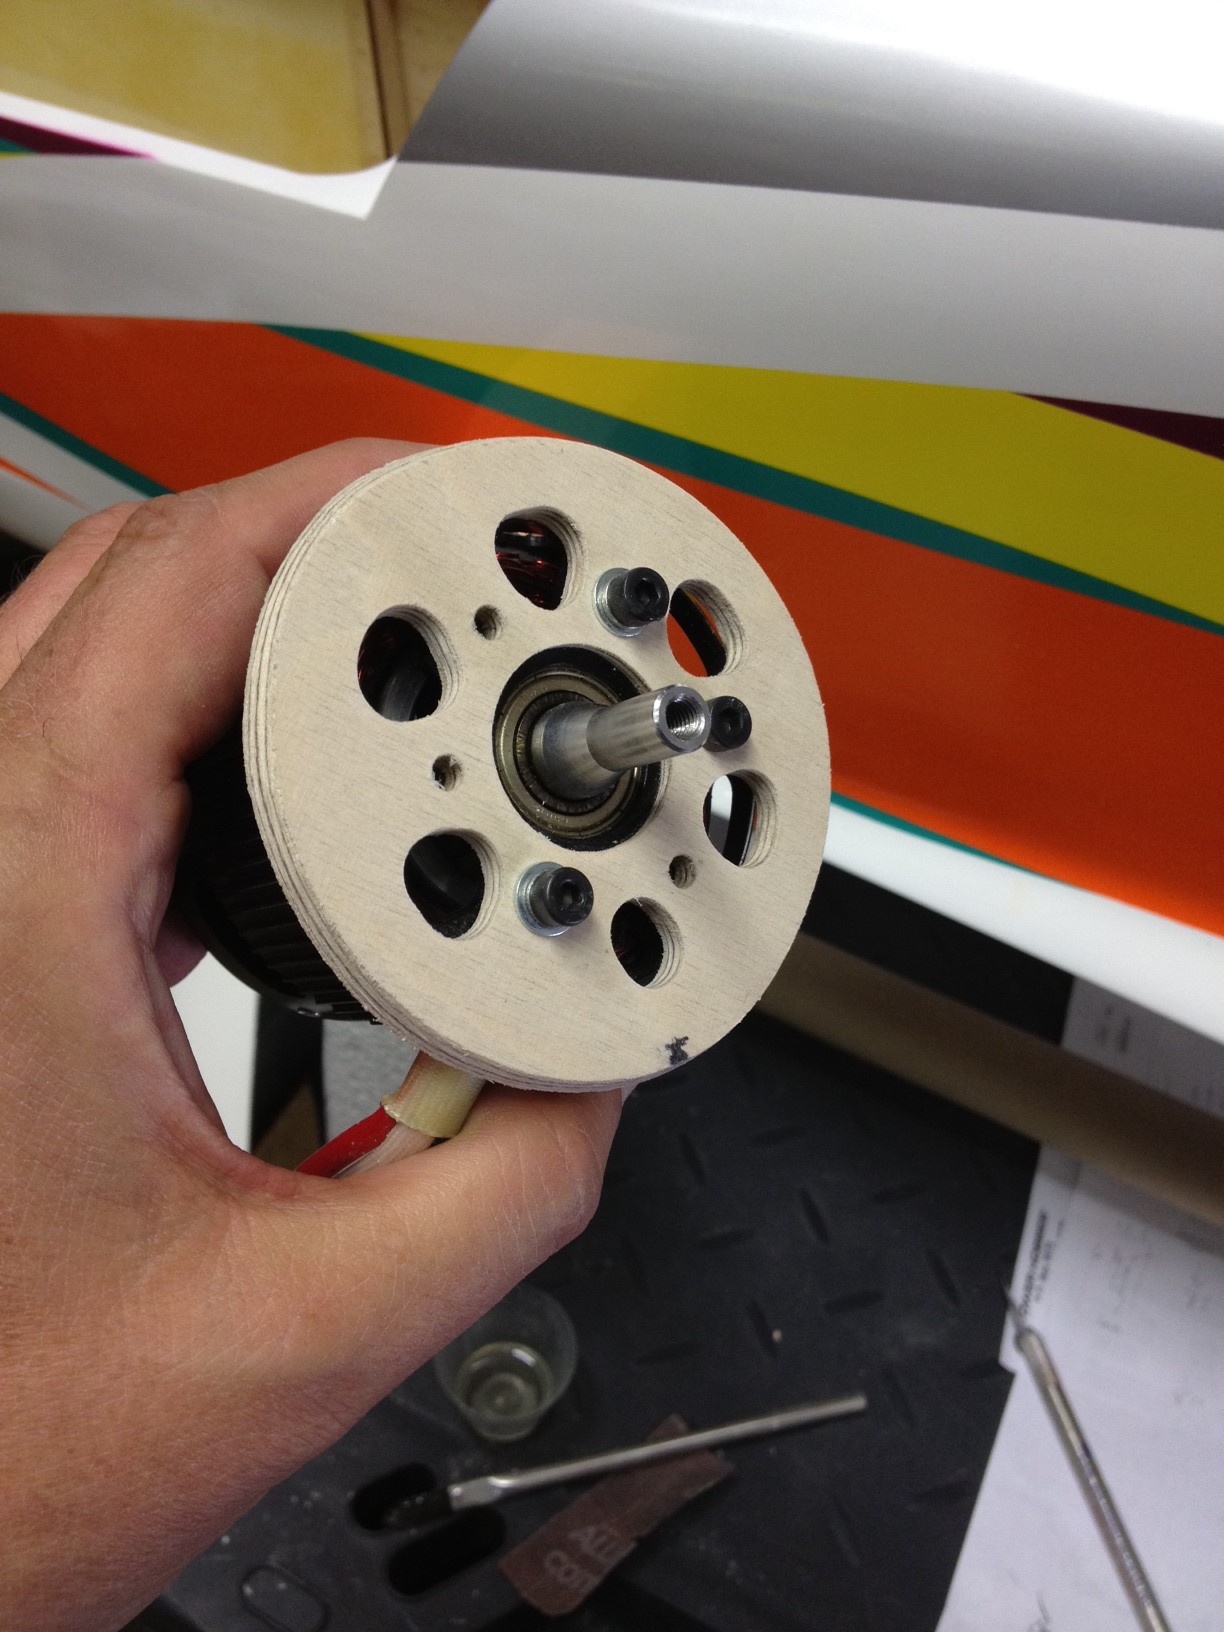
As for my construction: I completed the motor installation activity. That is always my least favorite part of building a new plane. The mount fabrication was pretty easy since it is basically circular in shape. I am installing the Plettenberg Advance 30-10 so the procedure is pretty similar to what I did for the Episode. However the size of the mount is different since the Bi Side nose is a bit larger. It is sized for a 3” spinner.
The steps I took are as follows
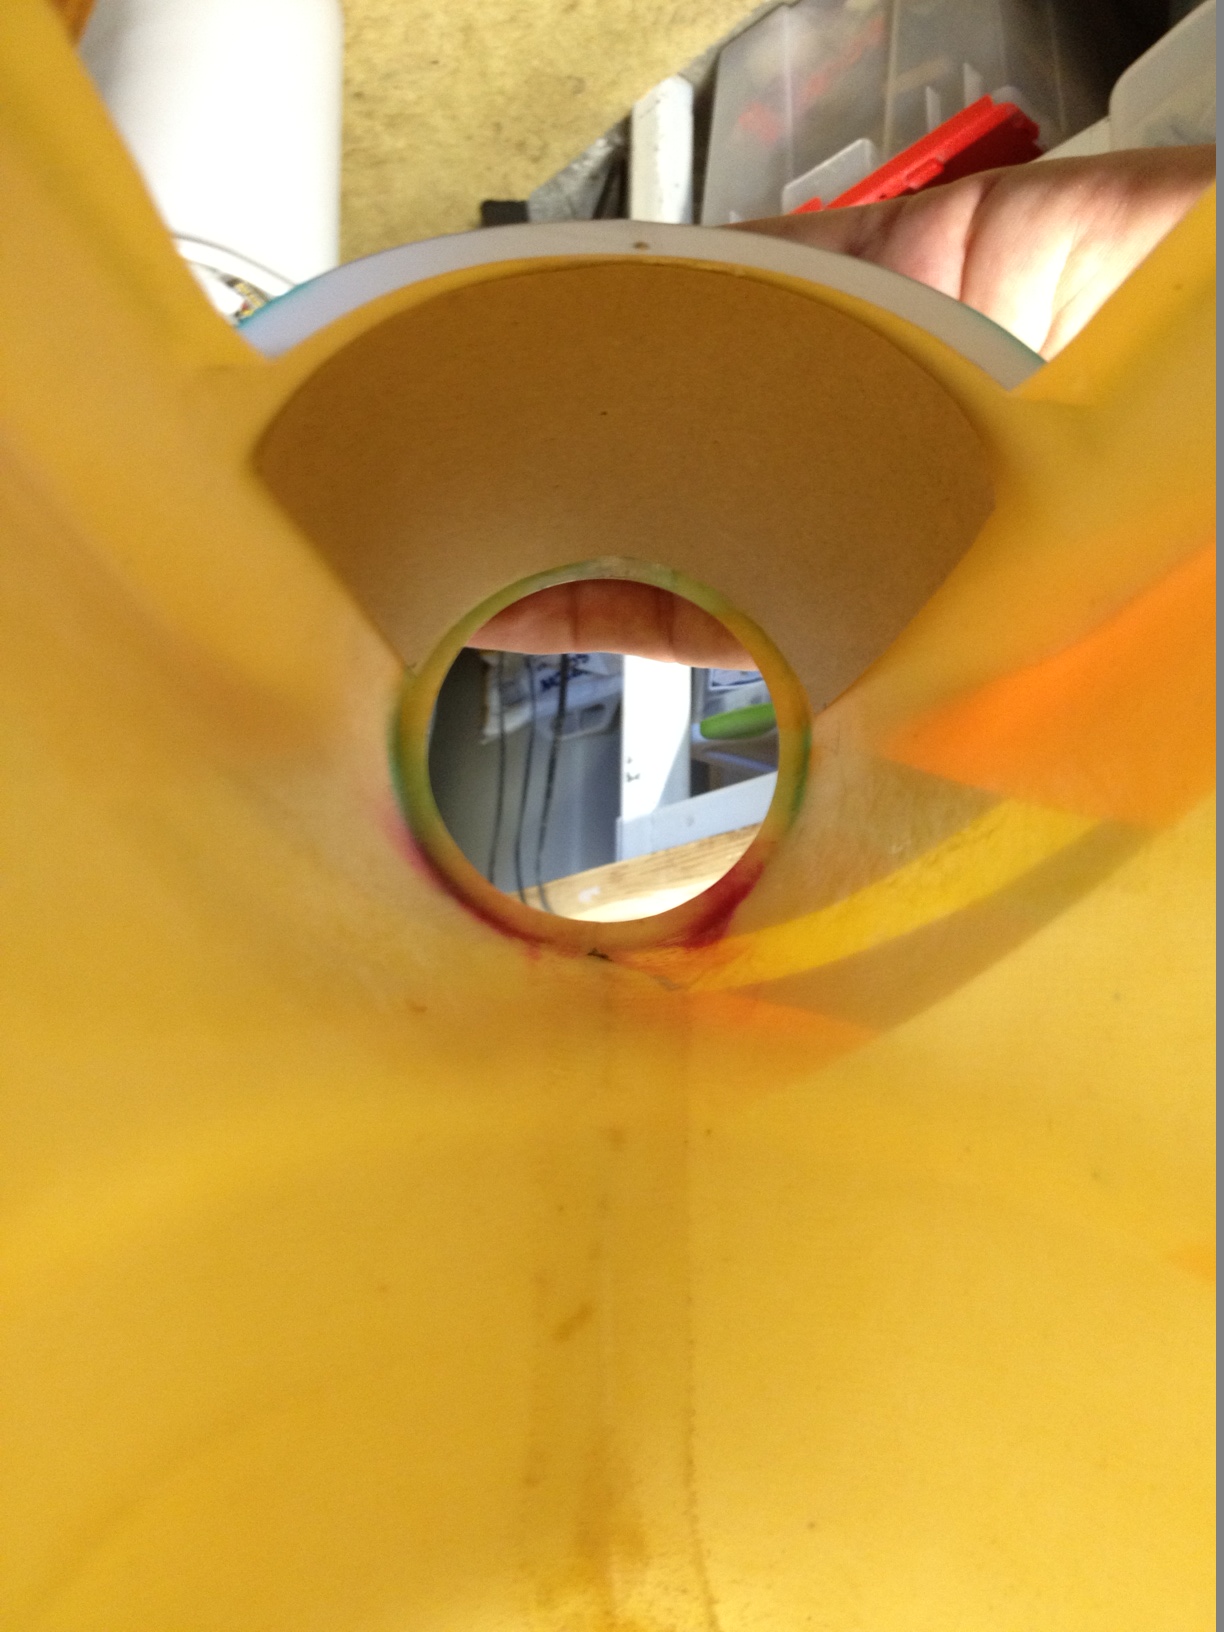
- First make a cardboard template just to check the diameter required. I cut two pieces of cardboard so that I would have a thickness close to the 3/16” plywood I am using. The front cardboard template was 82mm and the rear was 85mm.
- Next I cut out the plywood mount and cut the cooling holes. I used the 40mm bolt circle template for drilling the 4mm mounting bolt holes and the 27mm center cutout. I have a PDF of the bolt circle template (not the full motor mount, just the bolt pattern) for anyone that is interested, but I can't figure out how to attach the PDF to this thread. You can PM me.
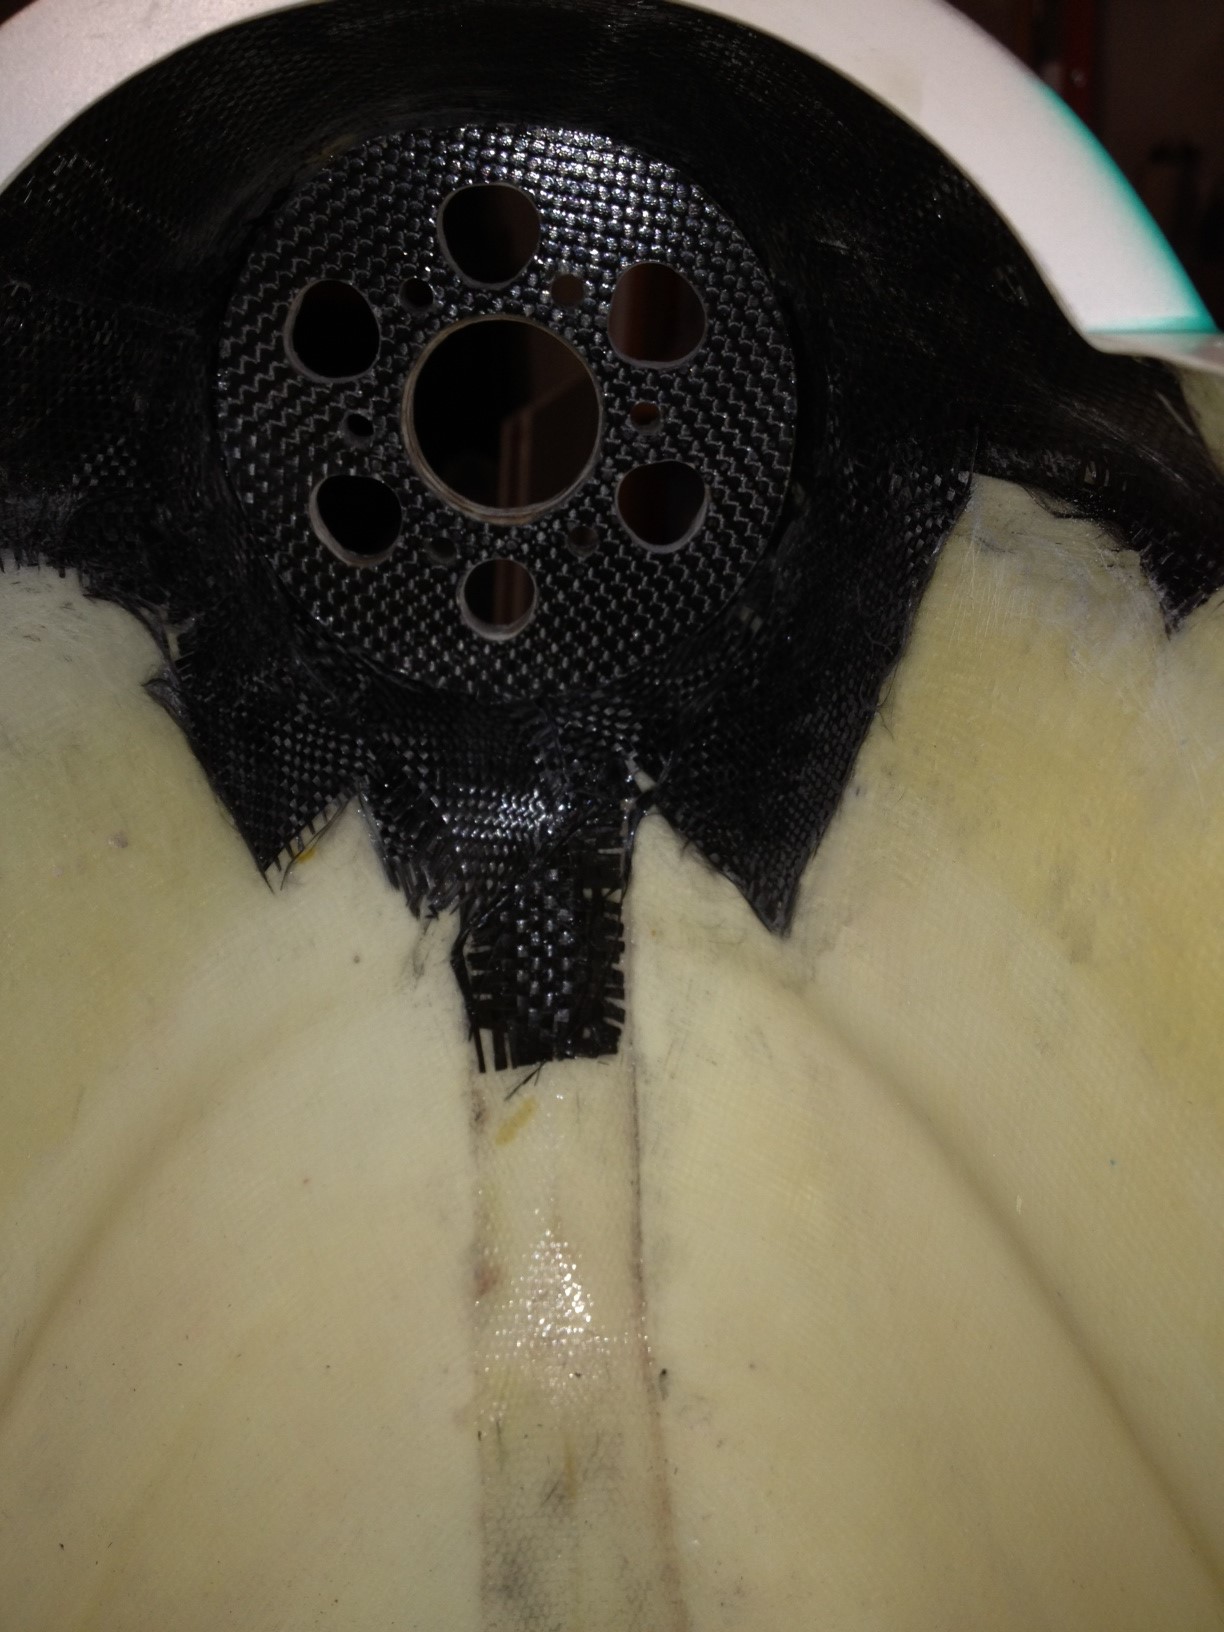
- As I was installing and fitting the mount I noticed that the nose had a bit more flex than the Nuance or Episode. So I elected to add some CF reinforcing. B.J. said that he did not do this on his Neu powered prototype. But the Plettenberg is going to be hard mounted and it has a larger rotor than the Neu so I felt it might be wise to beef up the nose a bit. I would extend the reinforcing if running a Hacker Q80 or other outrunner. I installed 3oz CF from the hatch to nose and then some strips running down to the chin. It really firmed it up. In order to fit the piece to the nose I made a template out of paper and used it to cut the CF mat. That helped a lot.
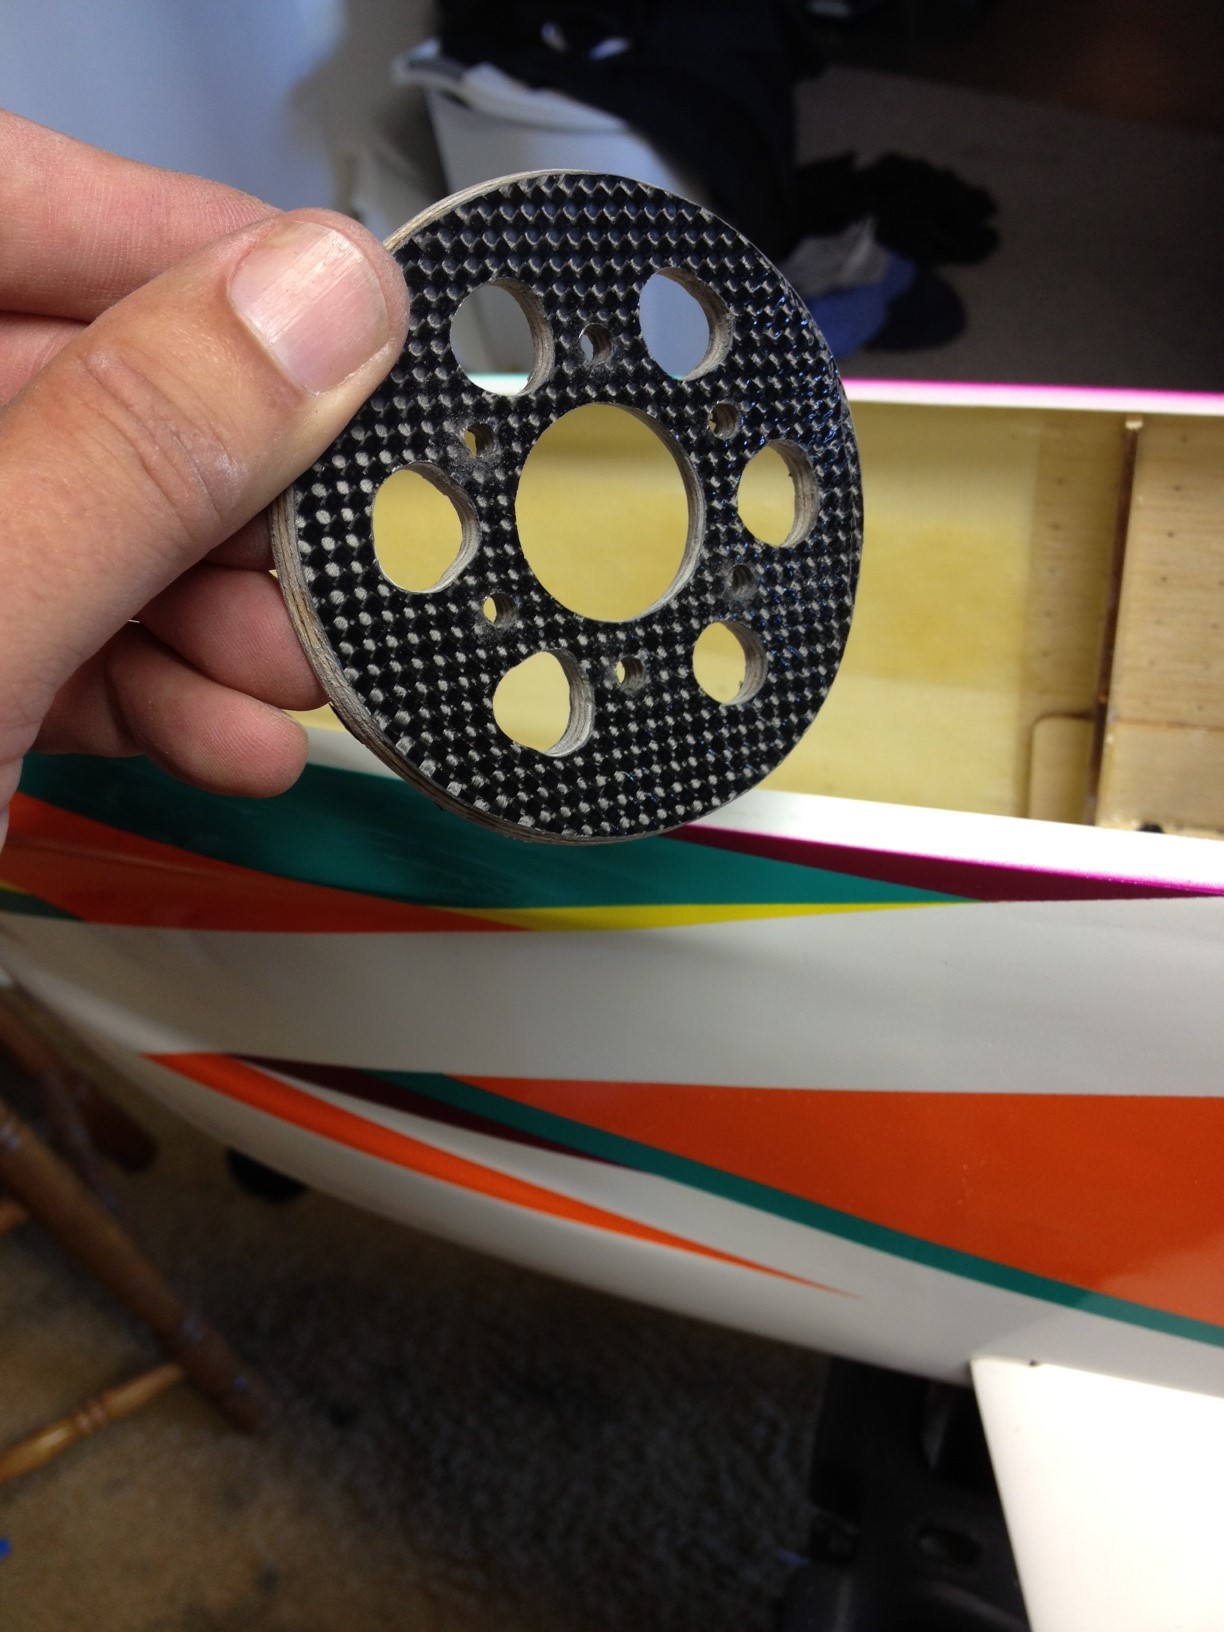
- I finished the fitting of the firewall then laminated it with CF
- Next I mounted the motor to the firewall and finished the fitting. Then I tacked it in with some CA The CF reinforcement looks ugly, but it will do the job.
- Lastly, I added the Aeropoxy fillet to the front and backside of the firewall.
I hope to have mine in the air next weekend, that is if I can get out of work at a reasonable hour every night and put in an hour or so. The major stuff is done so now it is a matter of installing control horns and servos and the rest of the gear.