I started the day (after my morning dose of caffeine, of course) with a trip to the Church of Our Lady of Miniature Vehicles, A.K.A. The Hobby Shop to get some .250" thin walled brass tubing to cut some holes in the ribs. Turns out they also had some larger sizes too. No .500", but they did have .625" so I got a short tube of that too. I guess I won't have to go searching at Lowe's or Michael's or Hobby Lobby for something to cut the midsize circles with.

I Also got a pair of .750 tapered TE pieces for, well, the wing's trailing edge. Unfortunately all they had this in was "hard" balsa. Oh well. I also traded in one of the 1.250 tapered pieces I had gotten for the Cambflexers, as I noticed it was unstraightenably* warped. Proprietor said no problem. As he also sold UltraCote I asked him to order a couple of rolls each in the two colors that he didn't have in stock for the plumage that I plan to dress this bird in.
I'm still wondering if I should cover the fuse or just paint it? I have the color paints I wish to use.
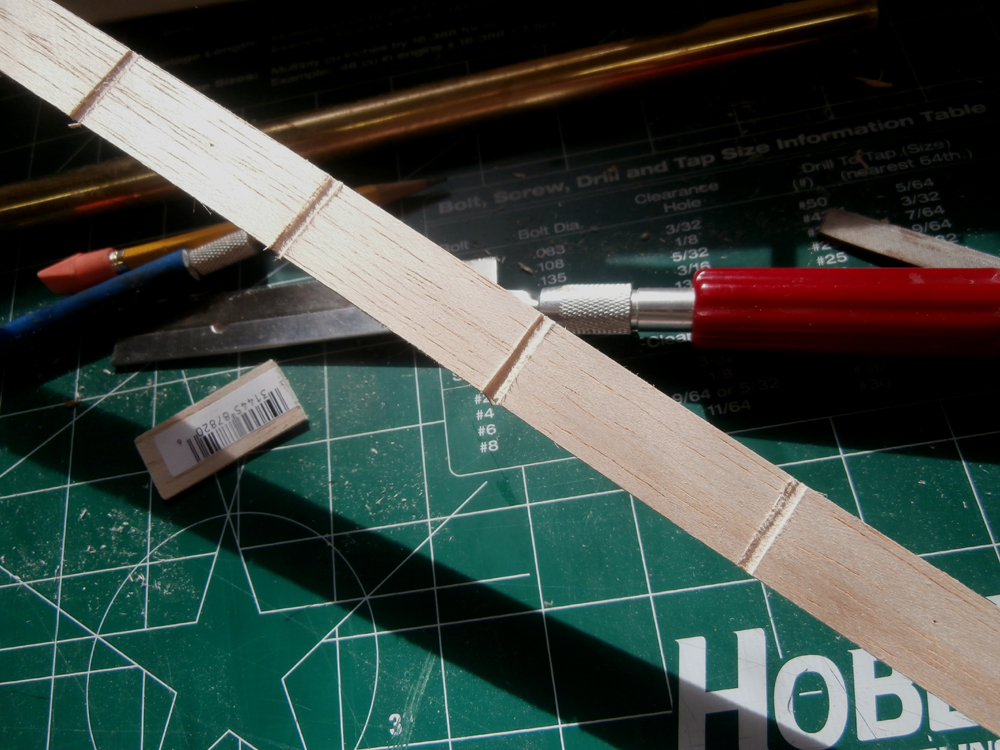
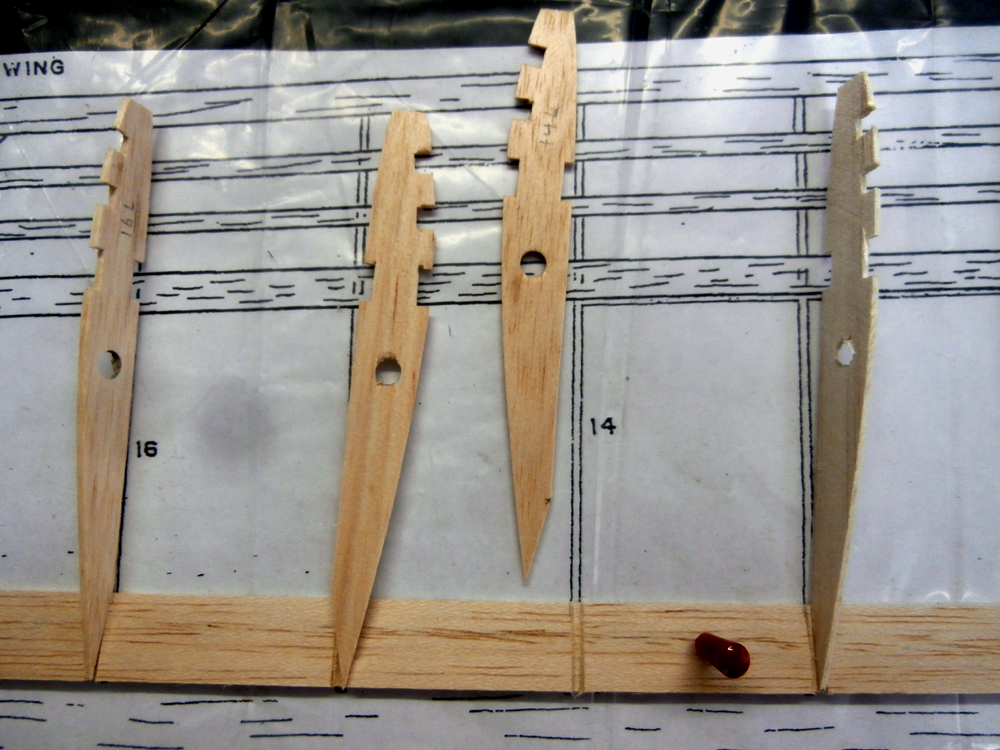
I used a round file to sharpen one end of both the .250" and .625" TW tubes. I cut the .250 into a shorter piece as it was small enough that it could be chucked into my drill. I used it to bore the holes for the servo wires through the set of ribs with the spar slots lined up with a short piece of spruce. I will have to widen some of these to allow the plug to pass through, obviously. Once drilled I used that hole to clamp them all together with a 1/4-20 bolt and wing-nut so I could shape and sand out the irregularities of the die cut (which were rather nice, I might add, I guess the dies were sharp for this batch of wood).


I then marked the 1.250 cambflexers and used the .625" TWB tube as a hand 'hole saw' to drill it out. When I was finished I didn't notice any significant lessening in stiffness, so I guess with the covering they should work fine. Exactly how much lighter they will be I have no idea, all the 'holes' didn't weight much. Then again 1 penny isn't that much either, but enough pennies all together will buy you a house, right?


Last thing I did was to cut and file notches into the .750 TE and cut and trim the ends of the ribs to fit. At least those for the left wing.
Who knows? Tomorrow I may actually be able to start gluing it together.!
 *Yes that's a real word. Because I typed it and I say it is!