I then made windows for it. I originally had the plan to laser cut acrylic, make custom 3d printed mounting brackets, and on hour 2 of making a template I said screw it(well the real word started with f...) grabbed the rest of the costco pie container top, a pair of scissors, and cut em out. Then grabbed a hot glue gun to hold them in, and honestly I am quite happy with the results
Well with it painted, wired up, and having windows I still wasn't happy with some things
Namely I hated how it sat with the stock wheely king shocks
So I ordered a set of 70mm shocks which from what I saw are the same length as scx10 shocks which brought the ride height down a lot(I think the WK were 120mm >.> ), makes it look better, and it also isn't wobbly anymore... The WK shocks the body would sit a bit slanted(there isn't a pic it is something seen in person), but now it is perfectly straight.

But the new shocks introduced a new problem
I had less then 2mm's travel before the steering servo would slam into the bumper mount....
SO I had to redesign the steering servo mount moving the servo around 20mm's farther back, remove the front battery tray mount, and design a completely new battery tray with spacers.
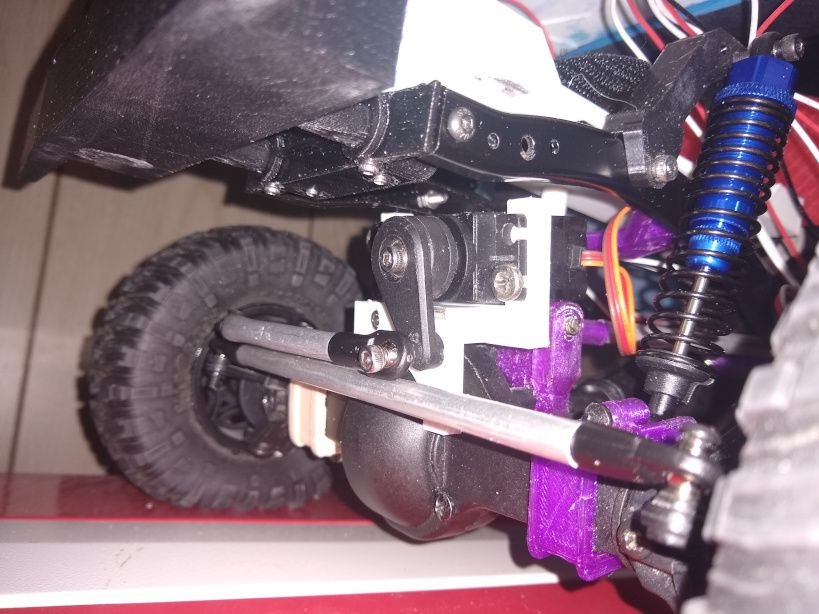
I wanted to go farther back, but the servo horn couldn't be moved back even 1 more millimeter before it wouldn't work anymore it is JUST clearing the mount now, but with the battery mount removed it clears perfectly.
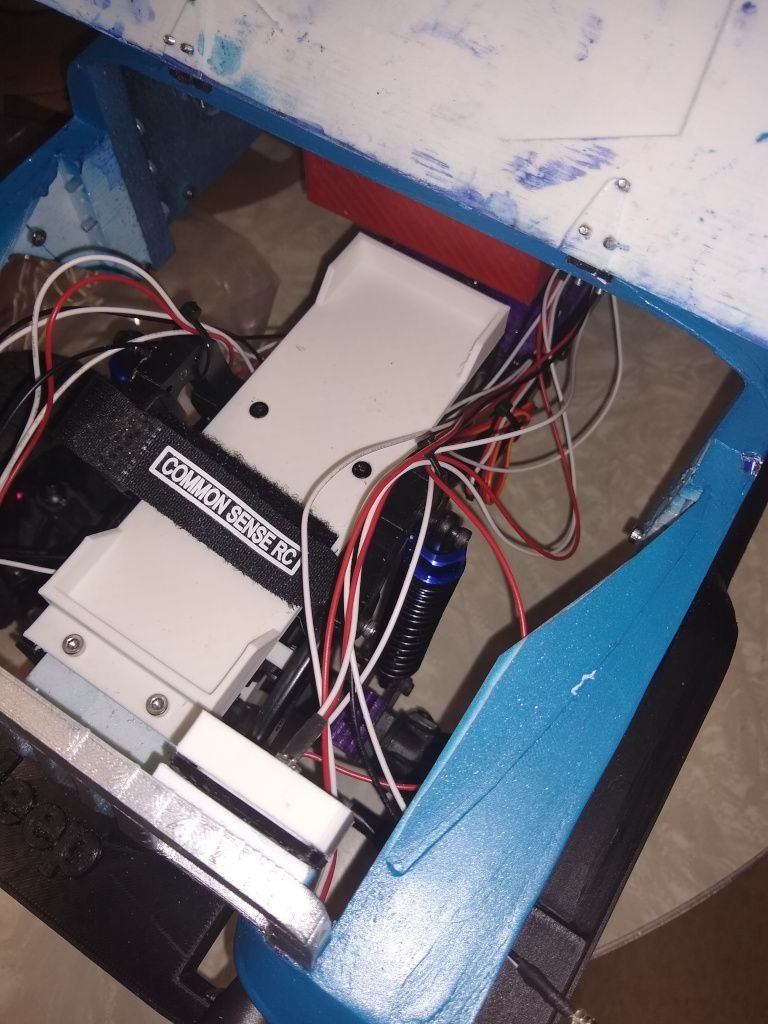
The new battery box which now screws into the front body mount. It also only needs one strap now due to having a front, and back on it so the battery can't slide around.
With these changes the front shocks can now almost bottom out(they have like 1mm left in travel) before the servo hits the strap of the battery tray
In the bottom picture you might notice the LED sticking out of the side turn signal marker location... yea that is all that is left to make for this thing, and it is done. I designed a part, and printed it in white to test fit it, but I need clear filament to make it so it looks right, and works. I plan on ordering a roll soon when I restock on printer supplies.
I did forget to say a few things.
One is I had to rotate the hinges for the hood 90 degrees, and reprint them. I originally printed them flat and one broke on the layer line a few days after I made them so with the rotation in printing it made it stronger.
Also the windshield hinges are actually hinges that can articulate even though the windshield doesn't fold down. I did this as it was easier to design working hinges which I also figured would look better then to get the slight angle right, and print them with it.
All in all so far I'm happy with how it went I do wish I got the roof smoother as you can see some 3d printed layer lines in it, but I pretty much smoothed out where the 2 parts connected in the back. I might eventually get a little softer spring for it as the ones that it has I think are for a buggy or something, and are a little hard for crawling.
Ohh this also has locked diffs. Turns out the rear diff was from a crawler king, and had a diff locker in it, and I made one for the front.
Also when I get more black PLA, and some time I might remake all the visible parts in black to get rid of the random purple pieces, and the white servo mount you can easily see. But I got other things I'm currently working on that are more important. I could also just wait till they break as the clear purple parts kinda seem a bit fragile after the 6 or so years I initially printed them.