Today's post brings another significant update to the custom rally RS4 build, this time in the realm of suspension.
The 65mm Yeah Racing shocks I've had on the chassis for a number of years now have worked out really well overall, but have started to show some serious wear and tear. They don't seem to hold their oil for as long as they used to between servicing. To be clear this is through no fault of their own, and nothing is wrong with their design-- running off-road and at-speed is a harsh existence. While I'd generally be happy to pick up a new set and move along, I wanted to take this opportunity to give the suspension setup a little love. Ultimately I made a post on Reddit asking which aftermarket shocks the RC community likes, and of the many answers, Associated 12mm dampers were mentioned pretty consistently across the board. I liked that they sell all the shock components and internals separately, so that I could not only learn how to assemble a shock from scratch myself (the Yeah Racing ones I've previously used are factory-assembled), but also, this would allow me to replace individual components that fail or experience wear, as opposed to buying all new shocks.
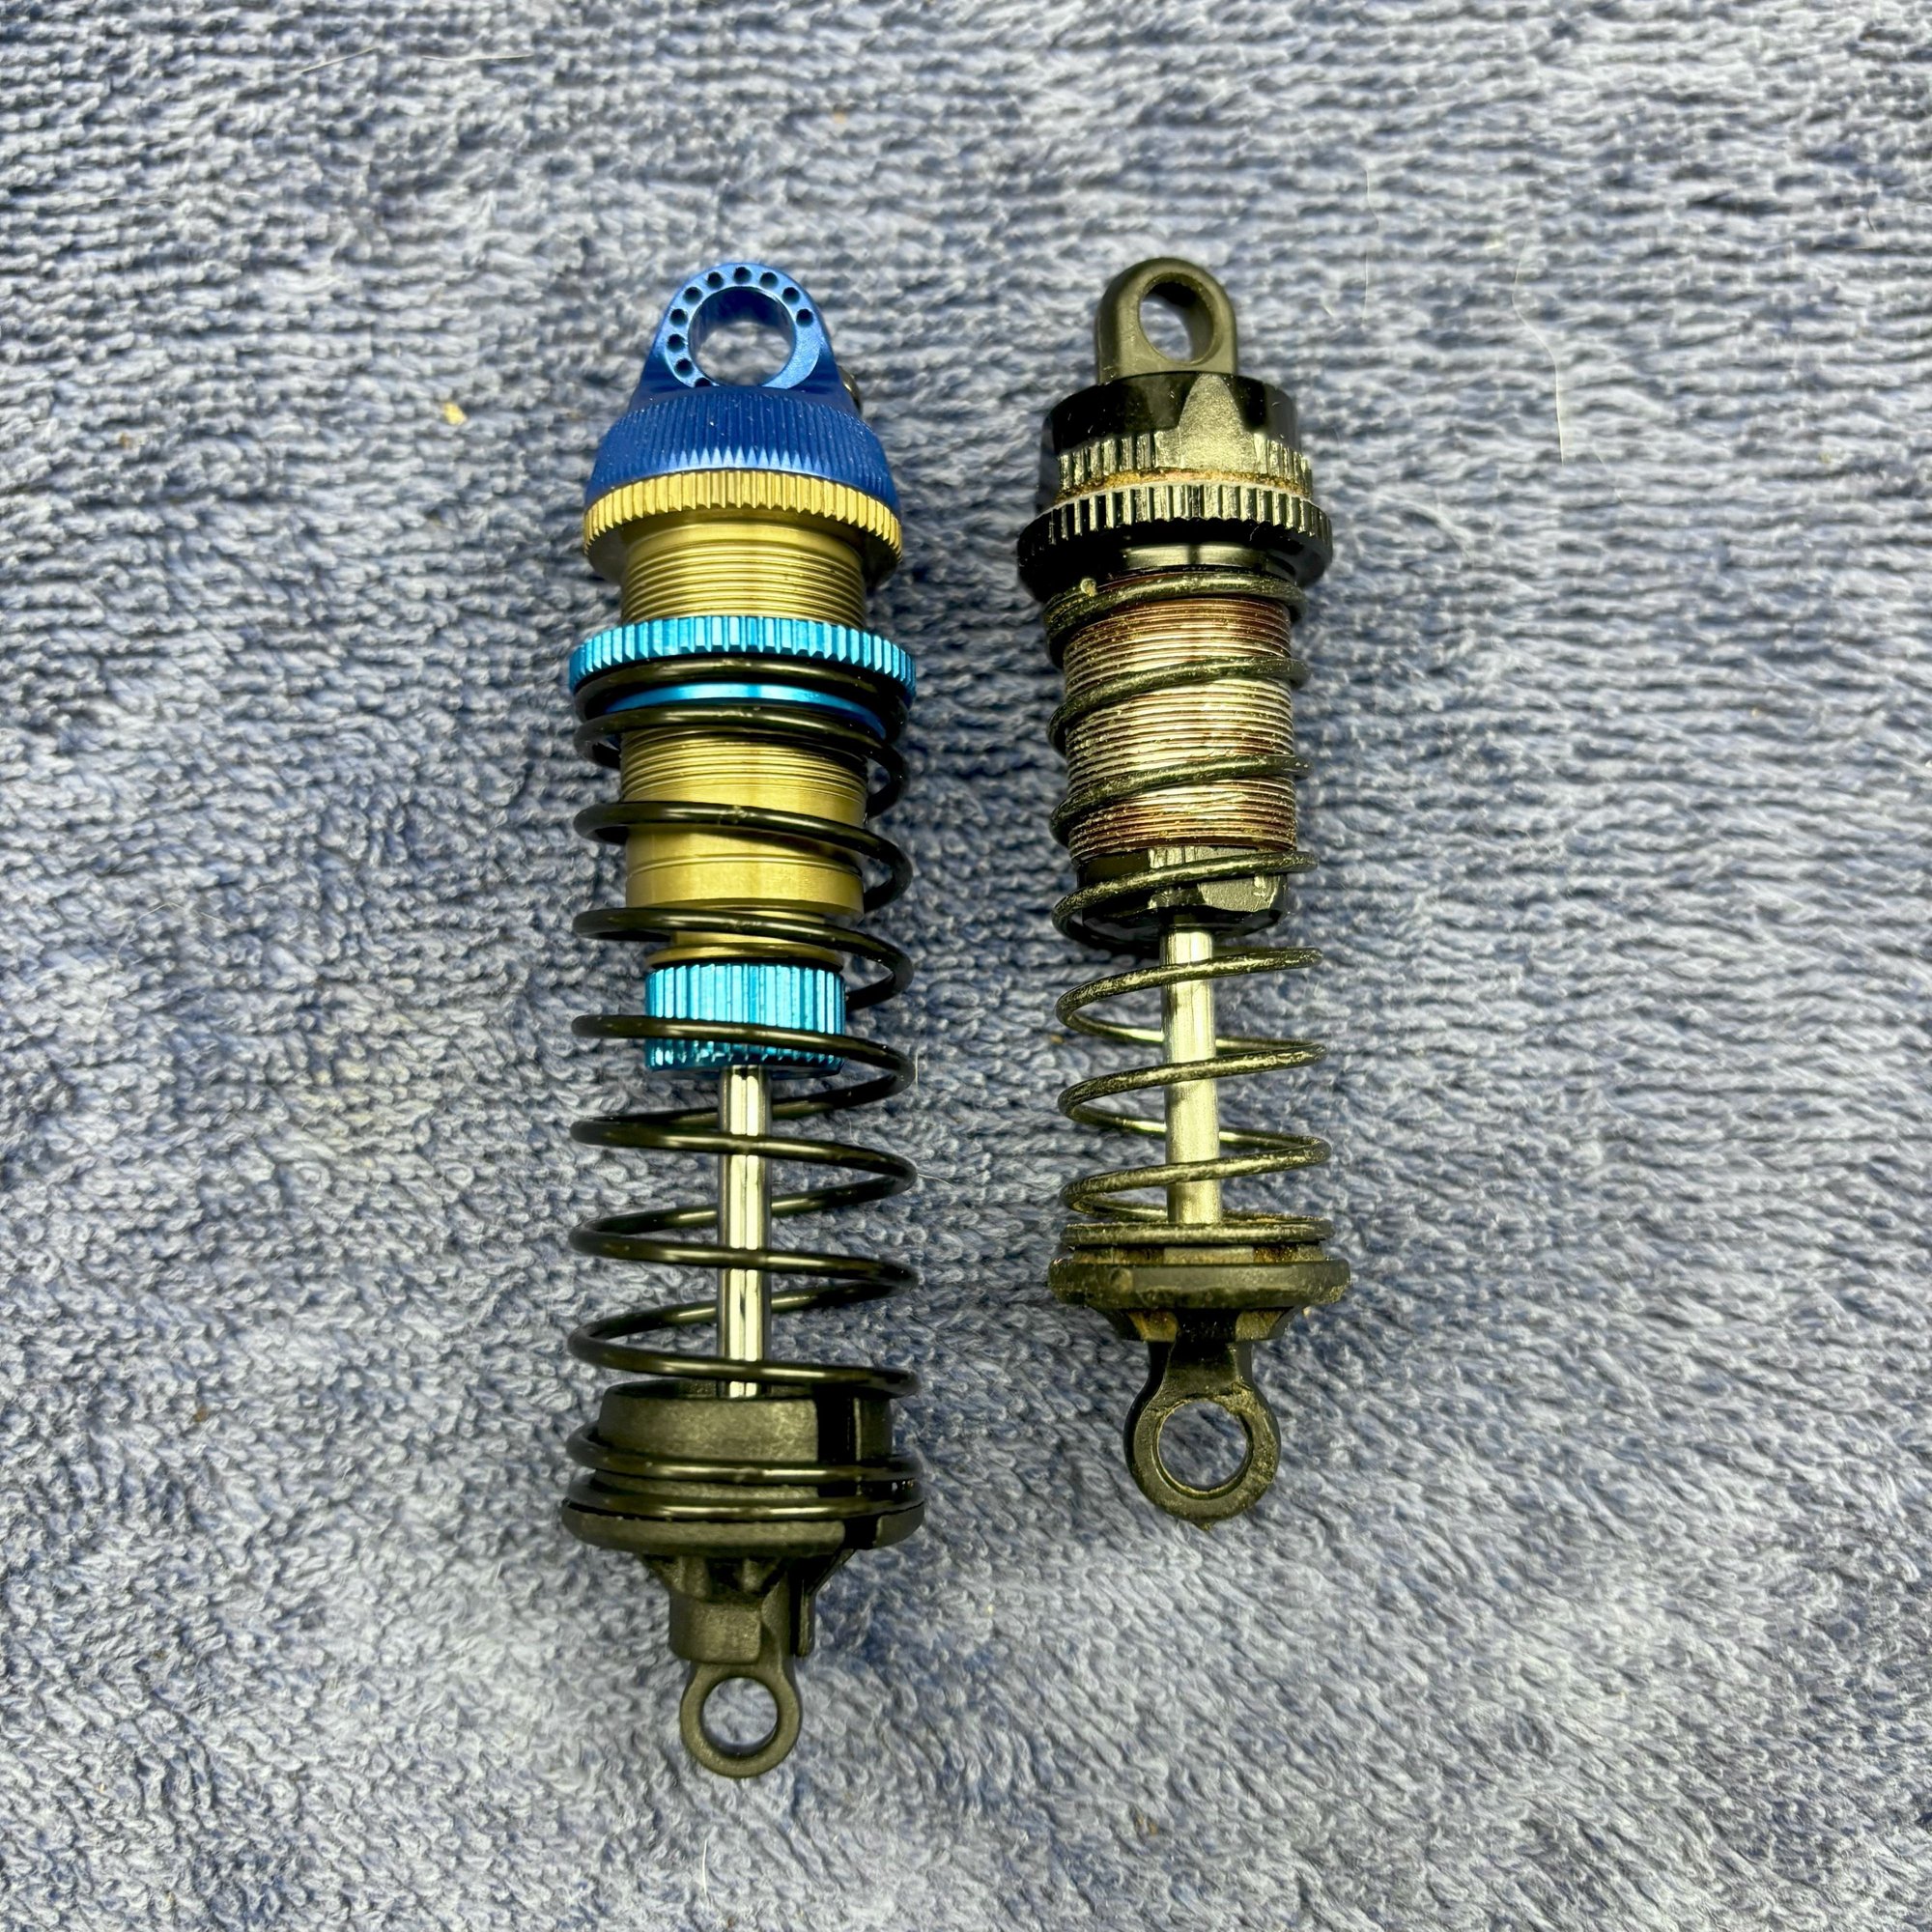 New Associated shocks (left); old Yeah Racing shocks (right)
The one thing I'll say about these Associated shocks is that, for as nice as the finished product is, the company sure didn't make anything easy on me. I found it harder than I expected to simply create a shopping list of all the parts needed to build four complete, working shocks. I even emailed customer service, and they couldn't tell me either. I ended up having to pick one of their RTR models (I used the SR10), download the manual, and use that as a sort of 'guide' for what components are needed. The number of parts that go into these shocks that have literally zero specifications or measurements listed on the Associated website was baffling. In many cases the Amain product page for the same part had more information than the Associated website. Why does Associated have a 'specifications' tab on every product, but most of the time there's no info listed? I had no fewer than three email chains going with Associated customer support, and they couldn't tell me almost anything about their parts...for example, what sized pivot balls to get for a specific shock rod eyelet, or how long the overall shock is once assembled if I use xyz sized shaft and body. I also found more than one product manual where the graphic had mislabeled parts-- the image would be correct, but the part number listed for the part in the image was wrong, or mixed up with a different part in the diagram.
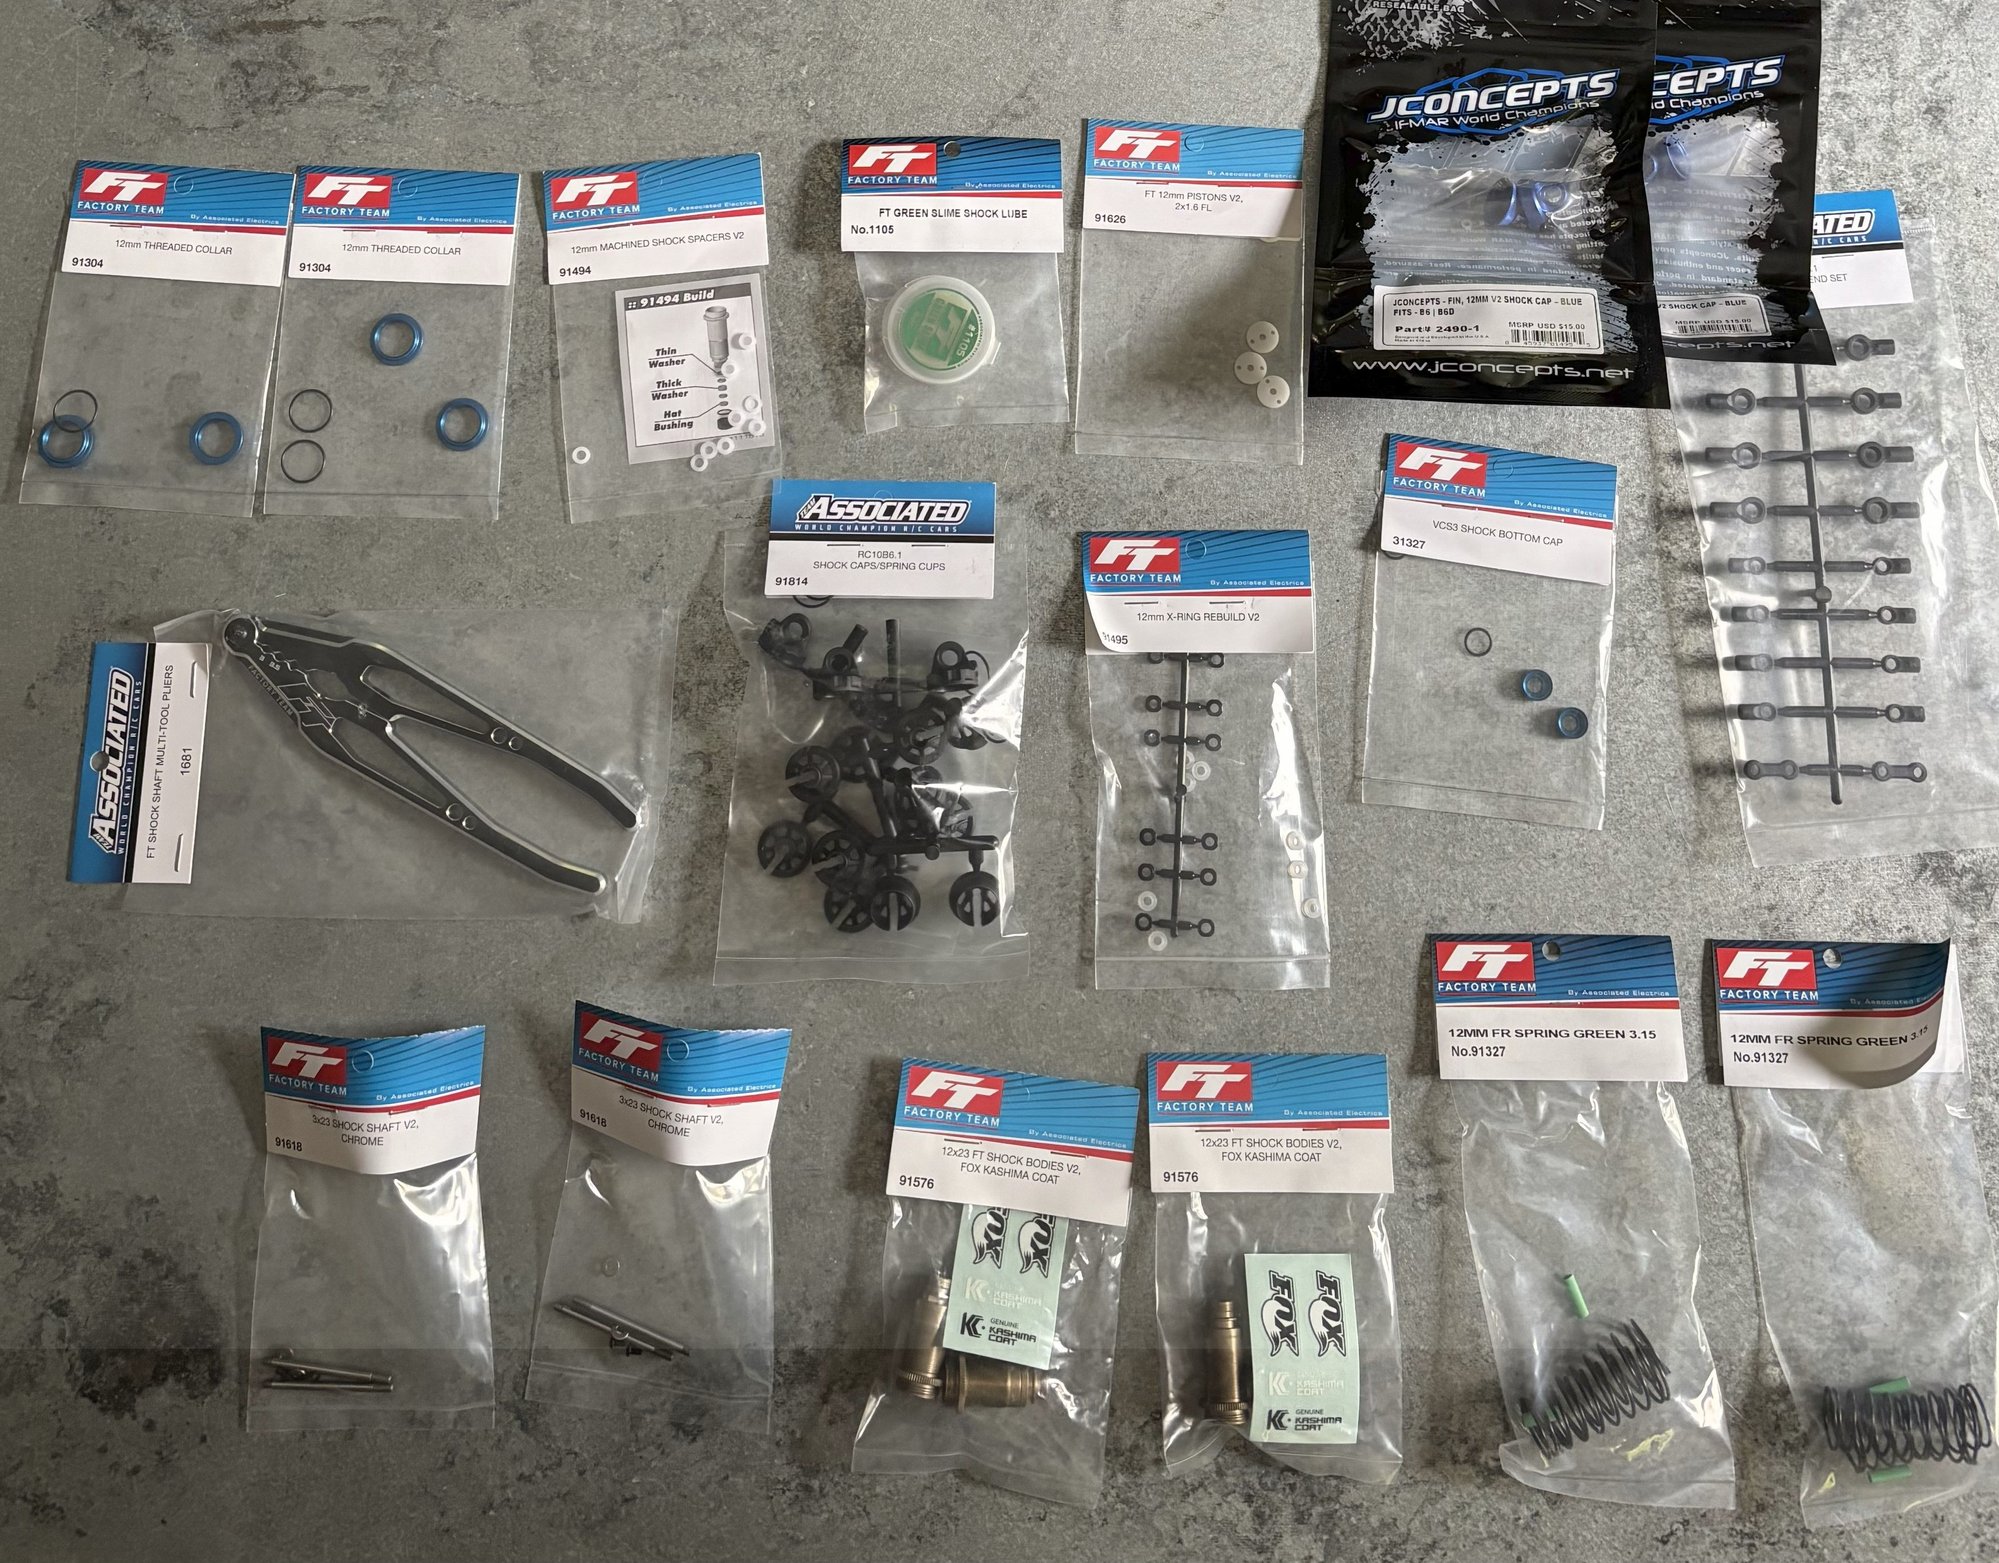
Anyway, after way too many emails and lots of research, I finally was able to assemble four complete "12mm" (diameter) shocks. I splurged and went with the Fox "genuine kashima coat" shock bodies, as well as some aluminum caps from J Concepts. They went together nicely, and feel great in the hand. The build quality almost made me forget how much trouble it was to figure out what I needed to buy in the first place lol
This then brought me to my next challenge, which was mounting hardware and overall fitment.
The assembled Associated shocks, using 23mm shock shafts and 23mm shock bodies, are roughly 78mm eye-to-eye, as compared to the 65mm eye-to-eye Yeah Racing shocks I had been using. Technically you can mount the Associated shocks to the stock RS4 chassis, but they are basically fully compressed when at rest with only 1-2mm of travel, which obviously was not going to work. So, I either needed the lower suspension arms to be able to drop lower than they do stock, or have a taller shock tower.
I first tried to modify the lower suspension arms and bottom chassis plate to allow them to extend/ angle down further than they do stock. The work itself was easy enough and took a single afternoon of measuring and removing material with the circular saw and sanding attachments on my Dremel. The finished product, however, was not viable. The angle of the universal shafts going from the diff cups to the wheels was too extreme. Under power, the car damn near rattled itself apart, and the shafts popped out of the diff cups almost immediately during the one and only on-road test I performed, which was on perfectly smooth asphalt too-- not a promising design if I'm meant to be running on rough terrain befitting of a rally car. Also, the suspension geometry got altered in the process, such that the toe of the wheels would change over the course of the shock compressing. It was worth a try, but clearly not a good final solution.
I then went the route of trying to hand-fabricate a taller shock tower design. I picked up some 3mm thick carbon fiber plate on amazon, and simply cut four bars (two for the front, two for the rear) that I could use as extension brackets to raise the stock arms taller than they normally sit. I did this free-hand using the Dremel, and while they aren't exactly perfect, the design is sound and the fitment was actually quite sturdy.
I tried a few other designs too (see below), but the simple bars shown above were about the level of DIY design I was able to successfully implement with the tools I have available.
 One of the failed designs-- way too complicated to cut and drill free-hand.
I then designed a more complex and durable H-shape bracket which I was not successful at making myself, but I sent a technical sketch to a buddy who drew it in CAD, and sent it off to PCBWay to have it professionally cut using CNC/ lasers. Having that CAD file, I can now also order spares/ replacements easily if anything breaks.
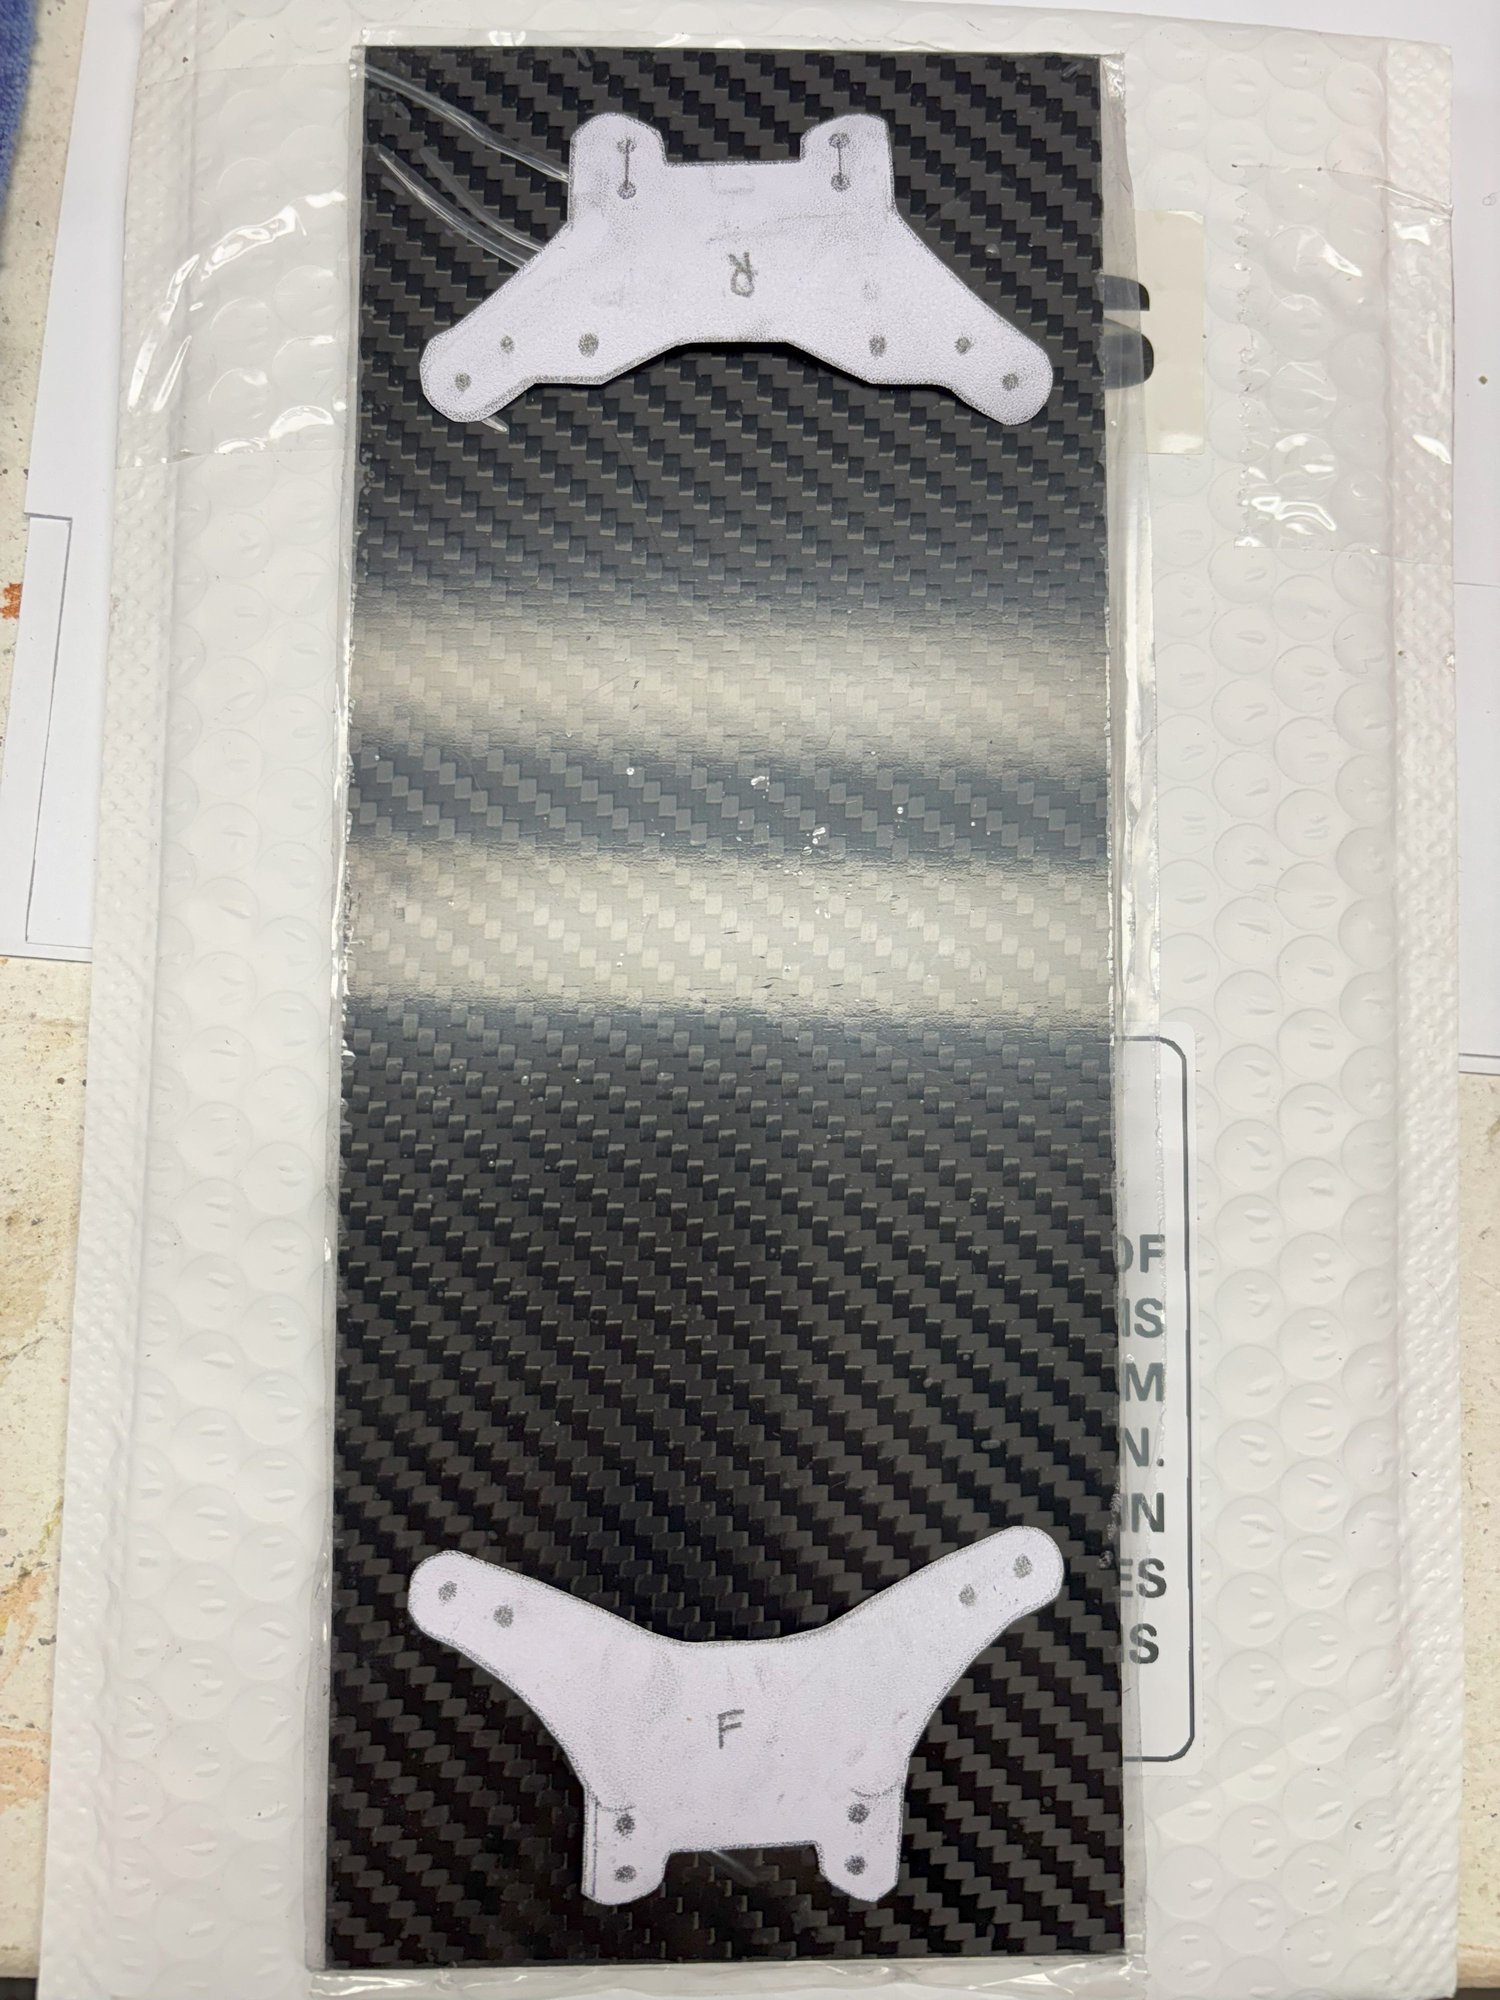
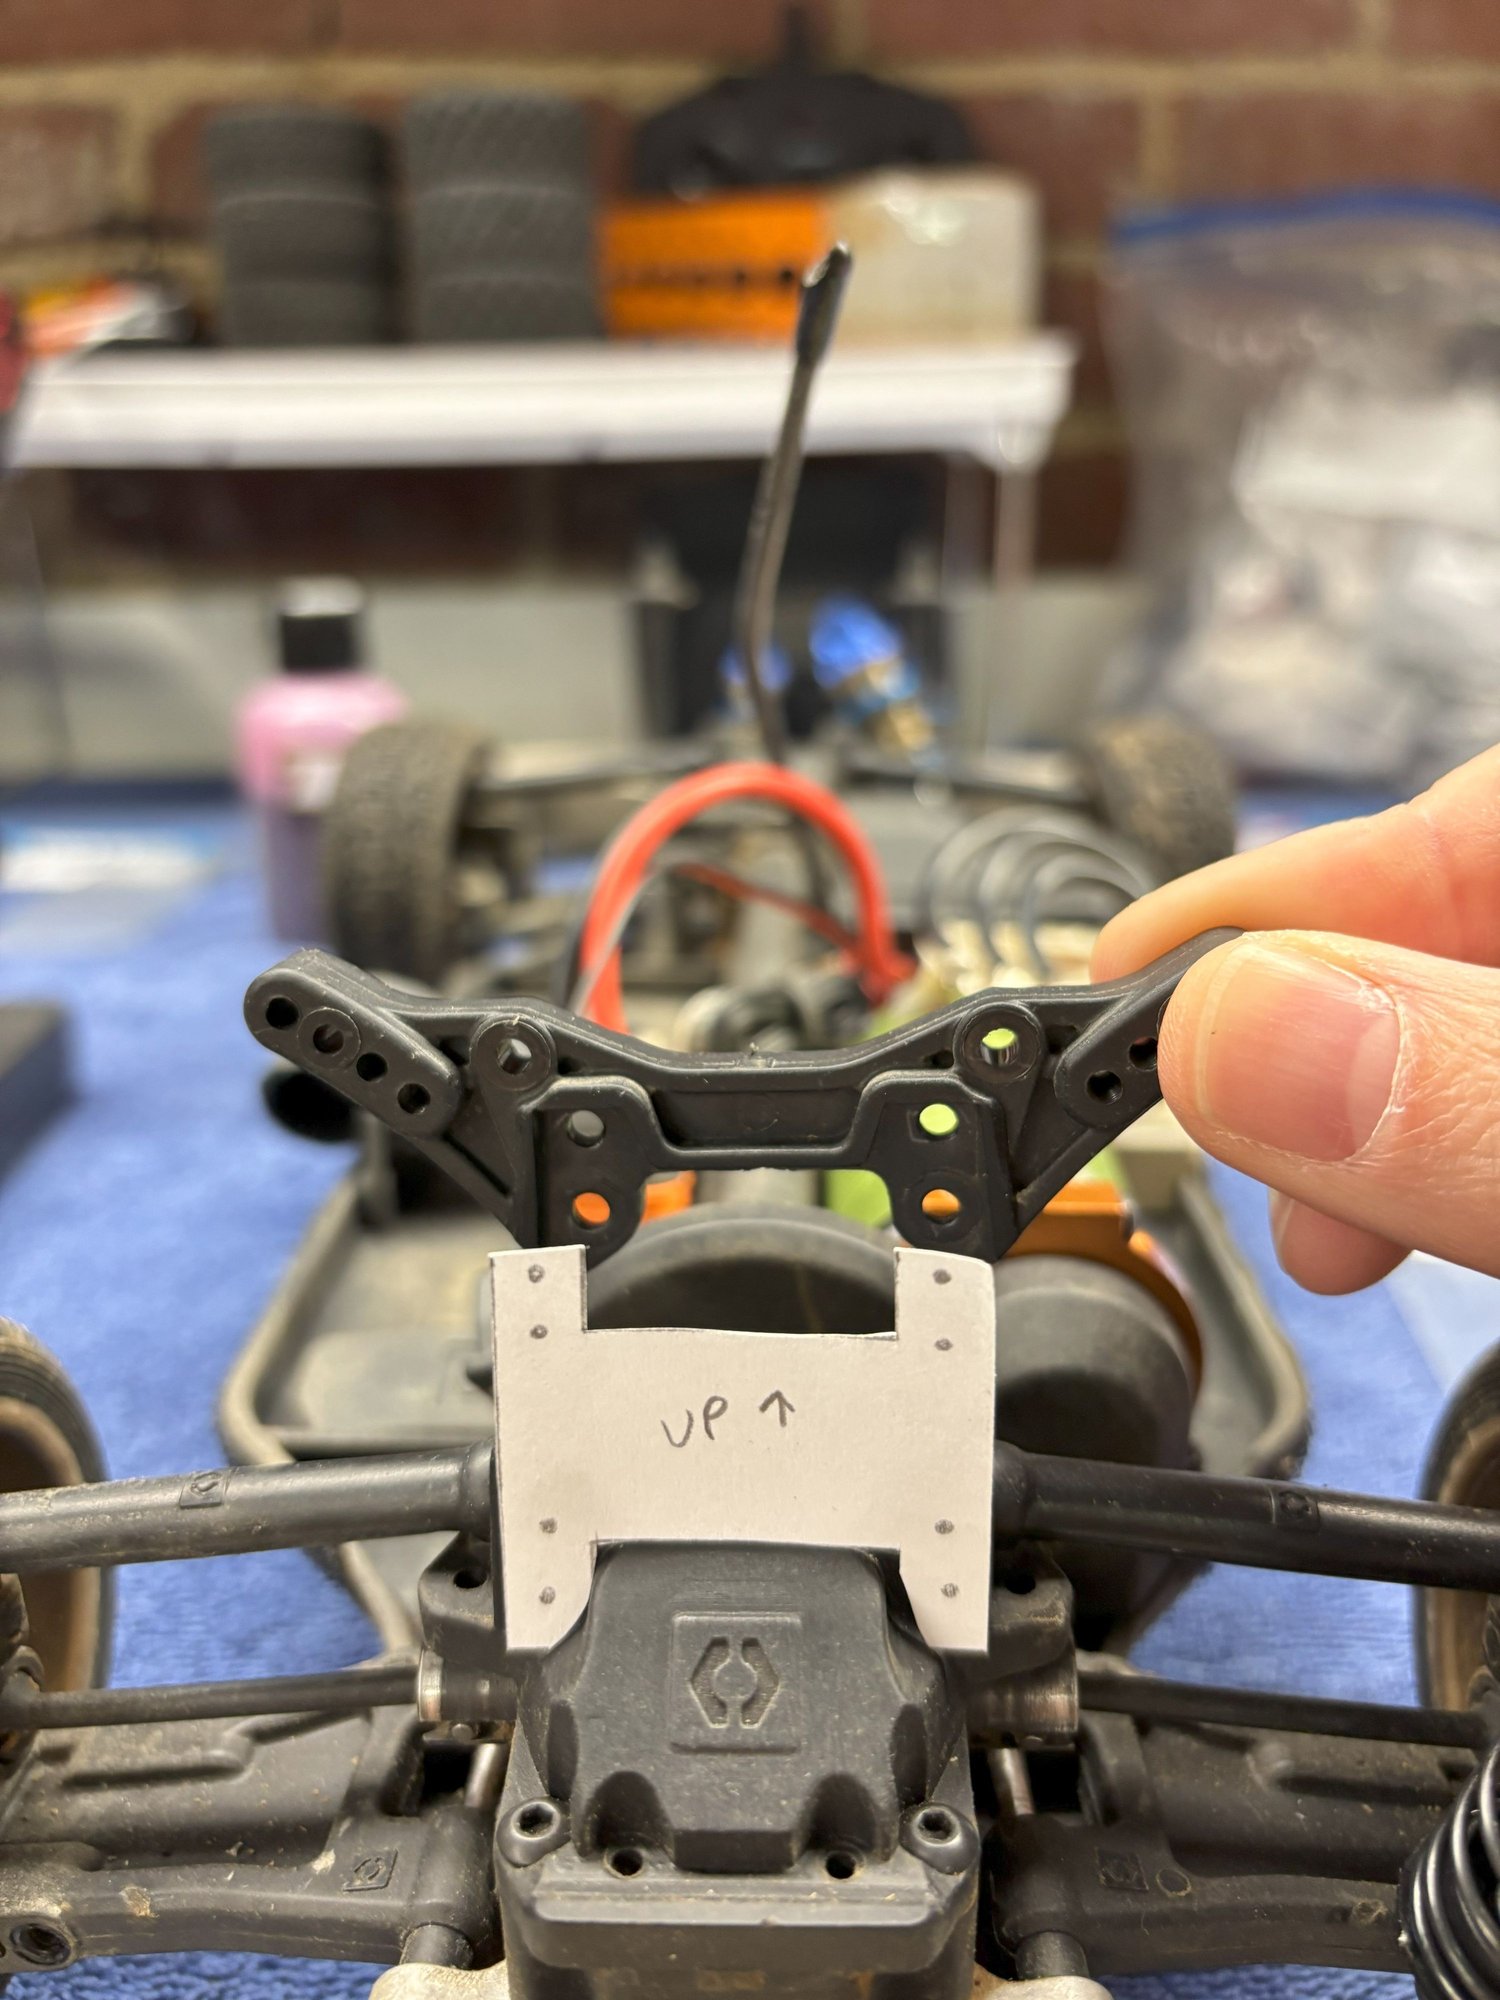 Mock-up stencil of H shape, pre-production
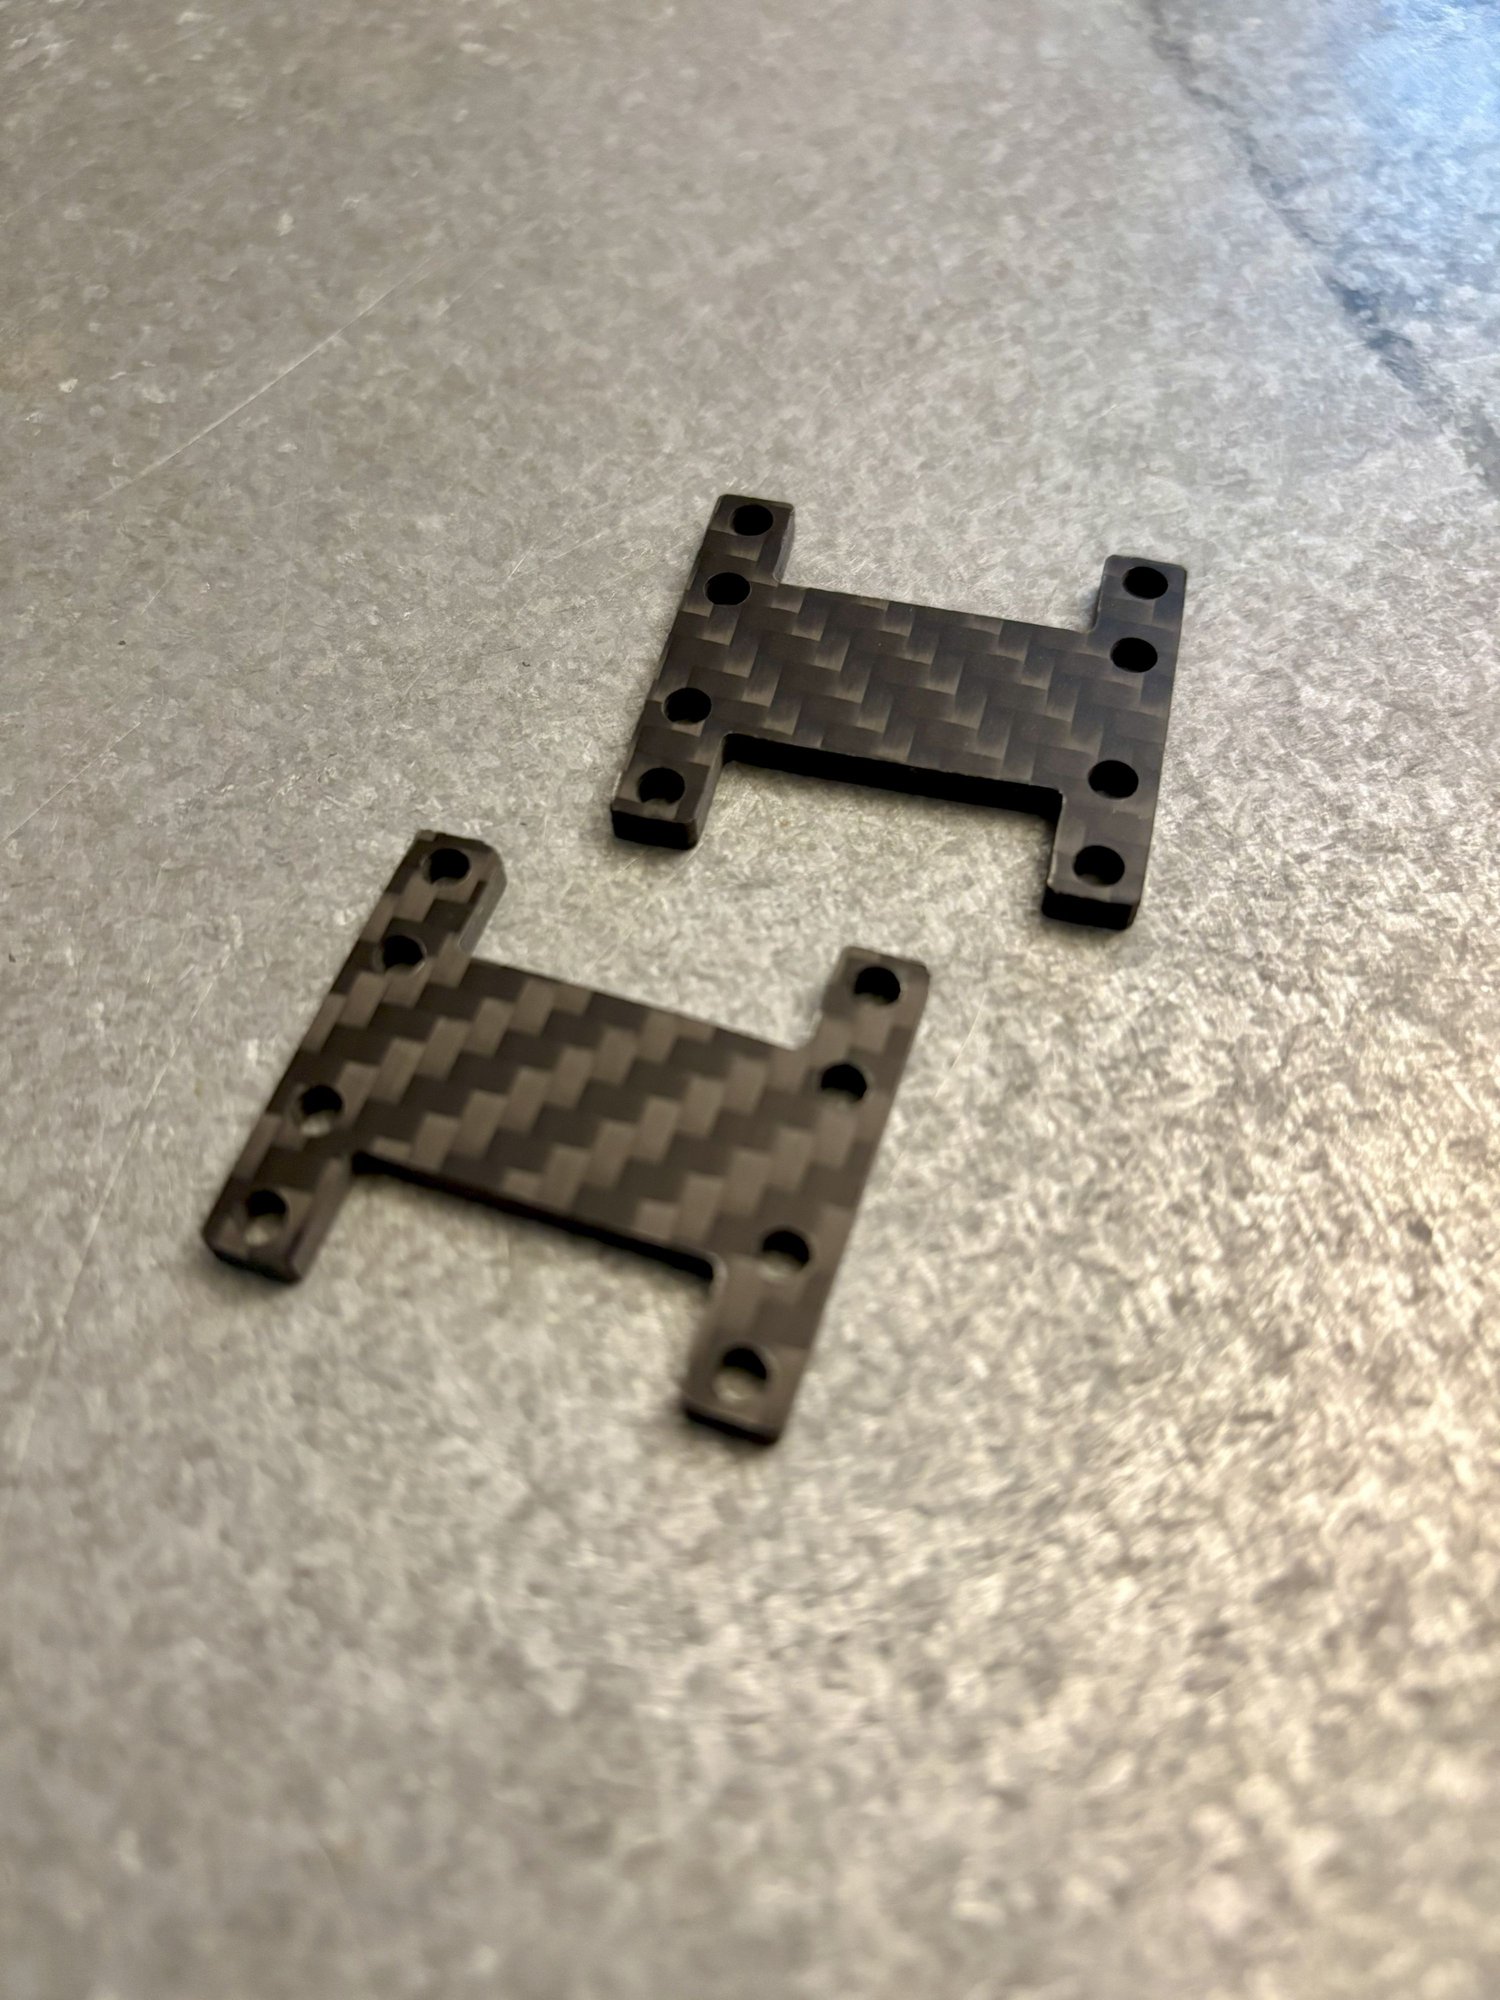 Finished product from PCBWay
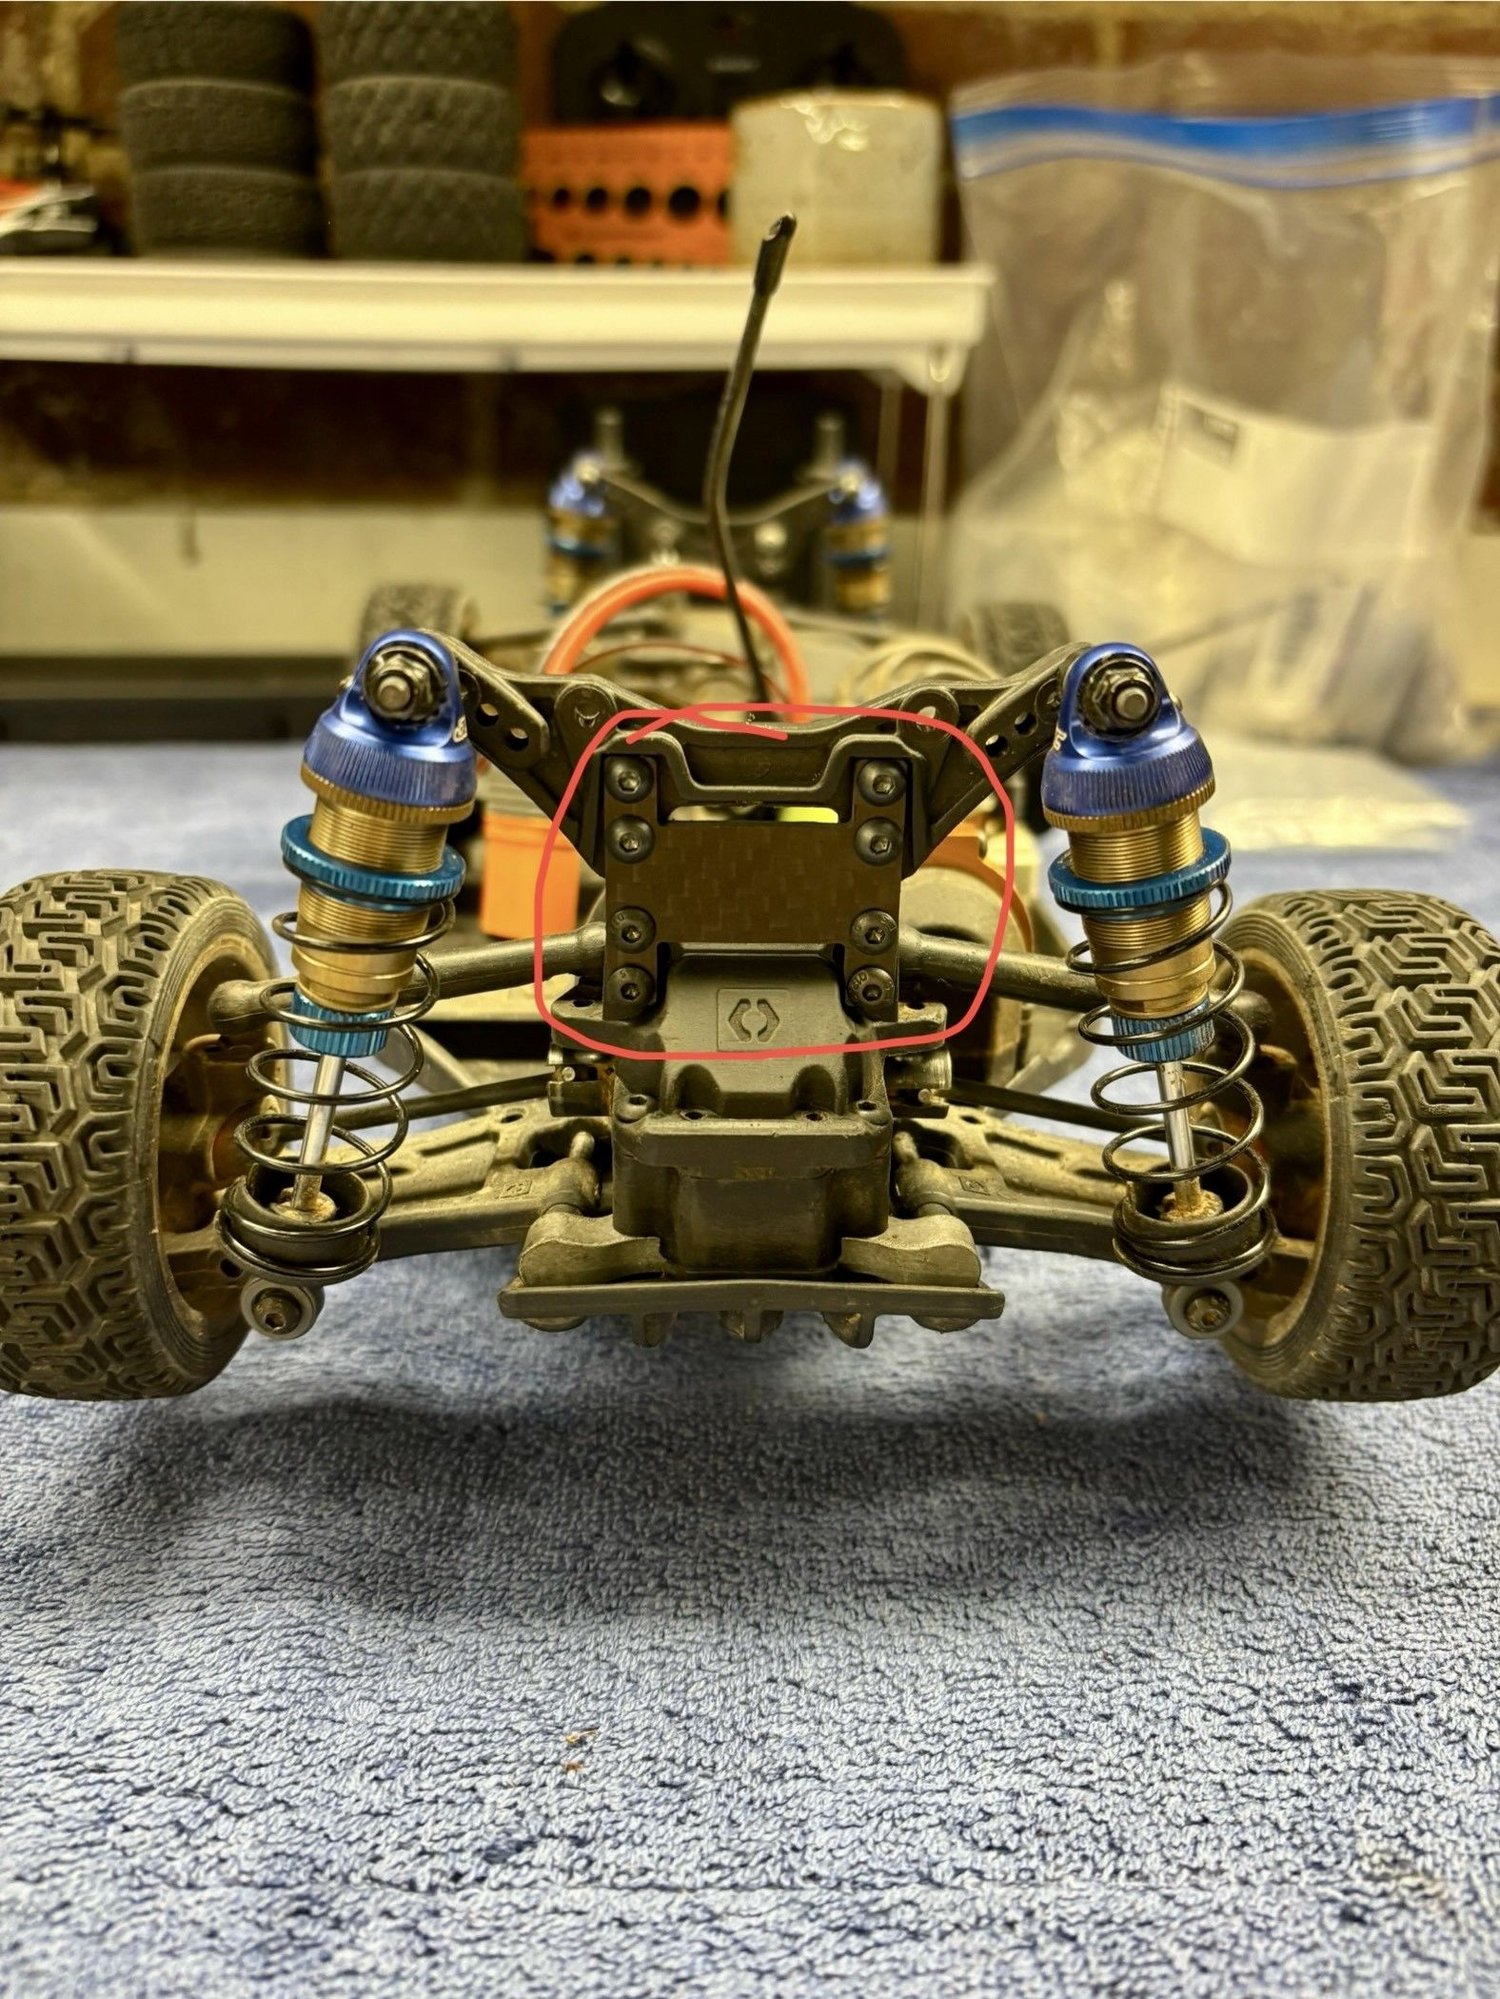 Final production design, mounted to the car
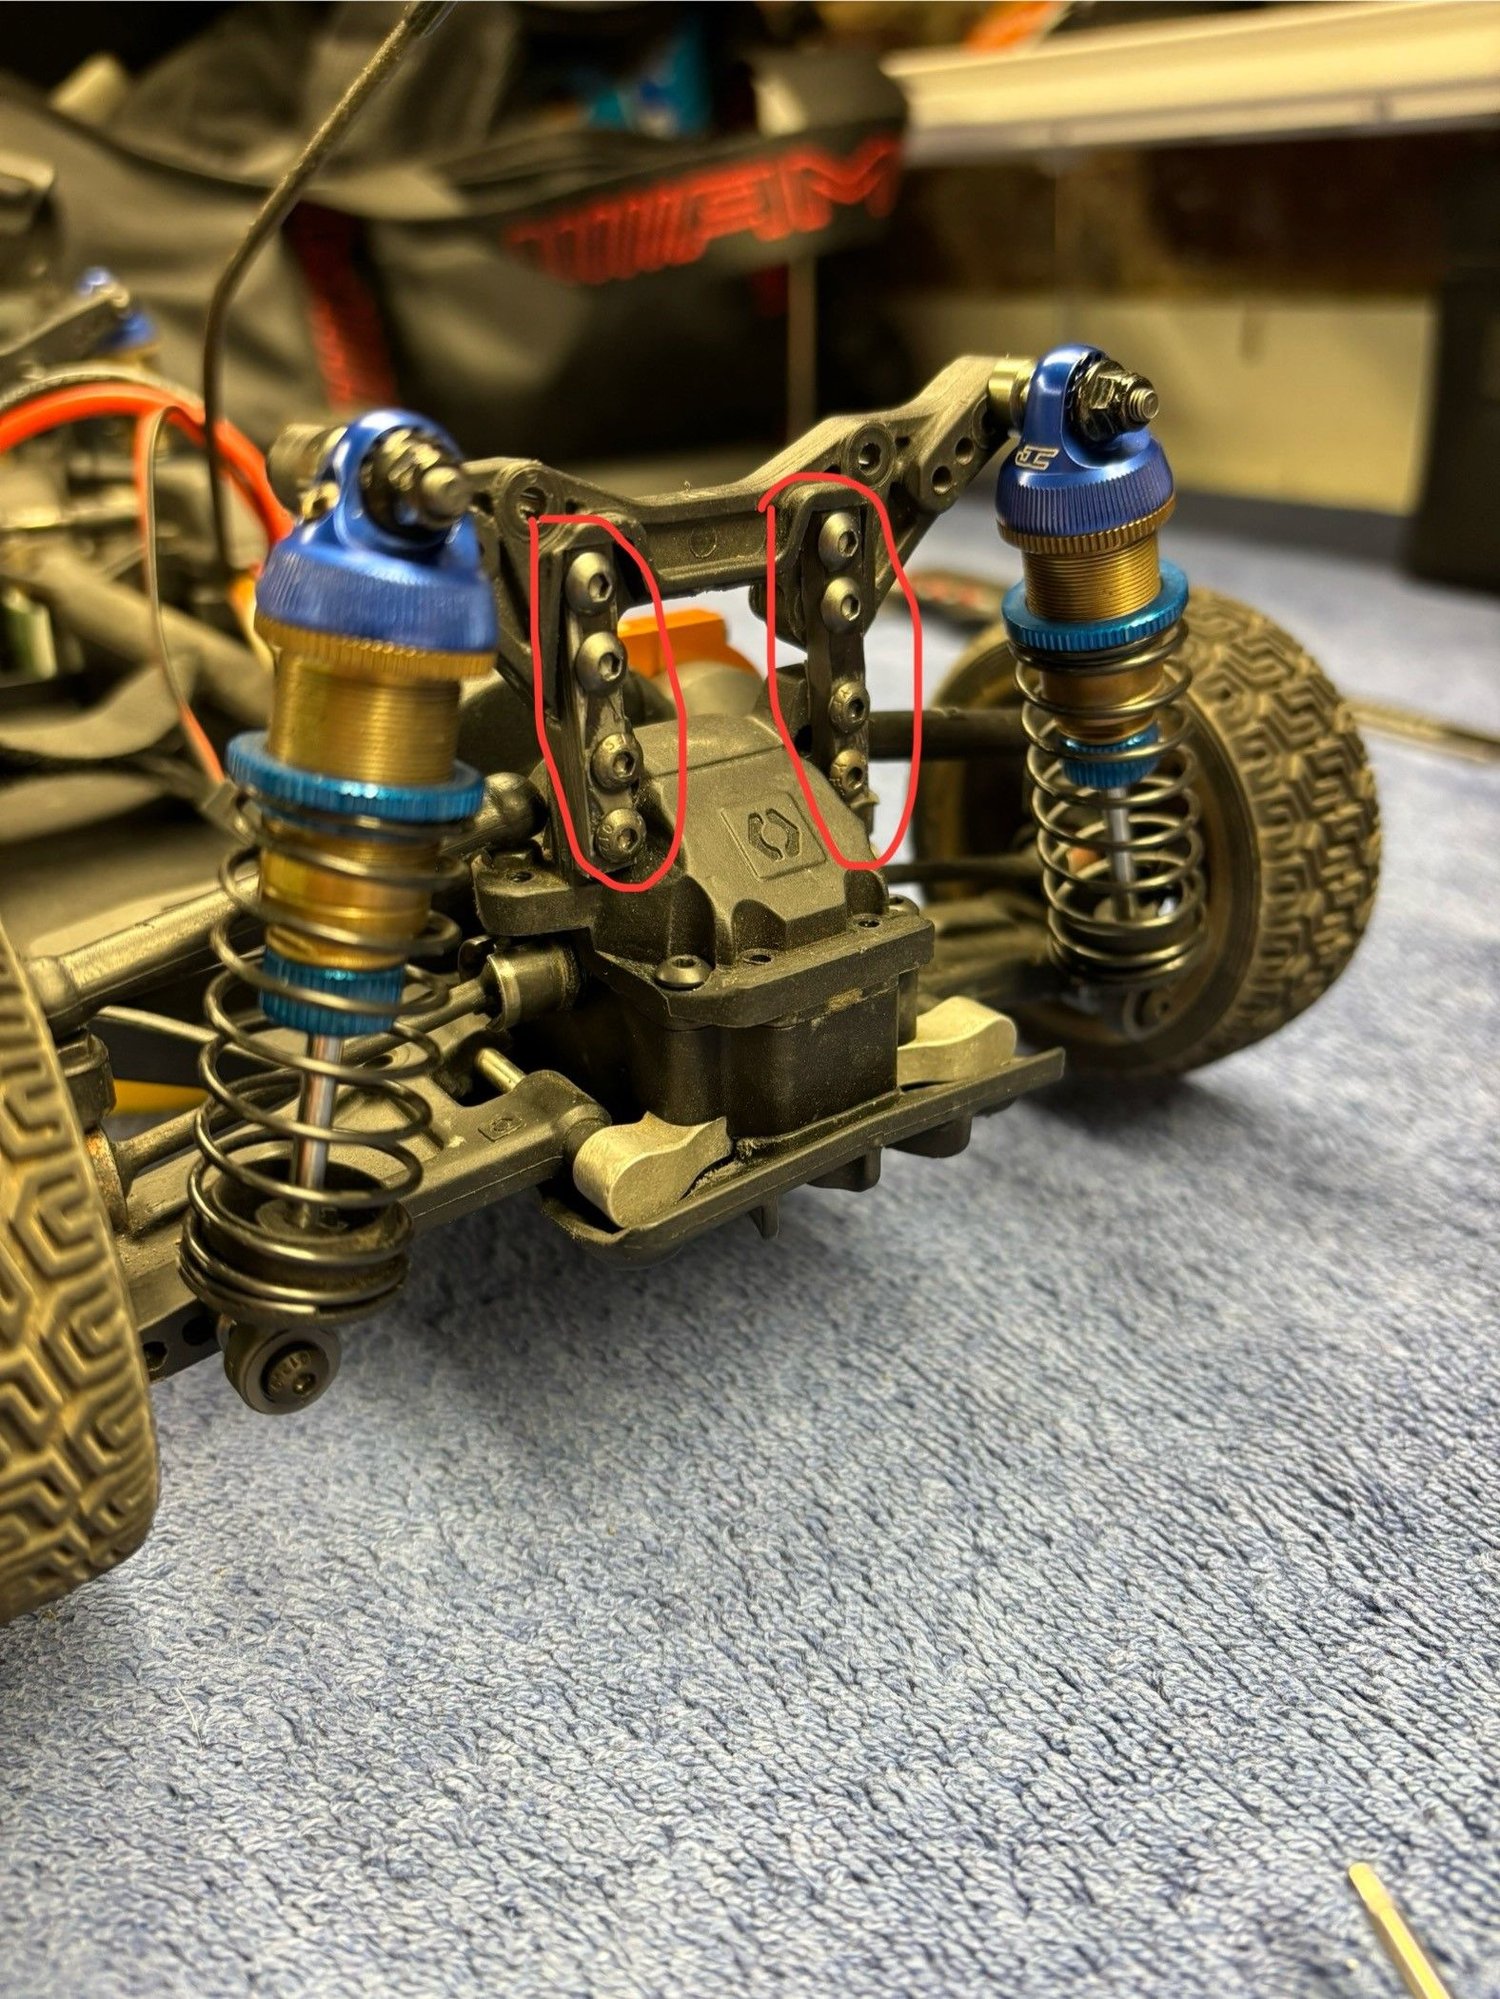
The final piece of the puzzle was that, with the beefier shock bodies and stand-off bushings, I had to mess with the body posts a bit.
That's about it for now! Now onto the REAL fun-- testing different shock oils and spring rates the best way I know how--by getting out there and having fun driving!
Footnote: For as great as carbon fiber is as an application in RC, you really need to take PPE seriously. It is a quite dangerous material to work with if you're flinging dust into the air. I did all my work outdoors, in goggles, a respirator, latex gloves, and plastic sleeves. If you have an extra set of hands to keep the nozzle of a shop vac directly on your cutting bit, maybe you can get away with less PPE than I did. But either way, you want to take it seriously.