


I turned an HPI RS4 Sport 3 into a formidable rally car (so you don't have to)
 04-25-2024 | 06:54 AM
#1
Thread Starter
Junior Member
Video
Intro
The primary purpose of this post is that, against my better judgement, I converted this on-road 1/10th touring car platform into a formidable mixed-surface demon, which I wanted to share with the community. While the end result turned out great, it's been one heck of a journey, and I can't in all honesty recommend it for a beginner. There is not great parts support to begin with, but I think an even bigger challenge was simply that there is not a lot of institutional knowledge out there online about this particular platform-- what aftermarket parts are and are not compatible, for example. This resulted in a LOT of trial and error. Which leads me to the other reason for this post-- to help document the things I learned along the way such that the next person who goes searching online might be able to avoid some of the pitfalls I experienced throughout the build. I would also say even if you�re not interested in a rally build, but simply want to understand this car better, or maybe you already have one and are looking for some recommendations on upgrades or longevity-- you should still find this article helpful given how little info there is to be found out there.
Chassis
I started with the HPI RS4 Sport 3 �Creator Edition� chassis. The Creator Edition is no different than their various RTRs, it simply doesn�t come with electronics, wheels, or a body-- allowing you to choose your parts rather than go with what HPI delivers factory. It comes pre-assembled, but as with anything that comes pre-assembled, I�d recommend giving it a once-over with your tools to make sure screws are nice and tight, and parts that are supposed to move freely don�t have any binding. Mine was issue-free, but I've seen a number of videos online where people experienced shoddy quality control out of the box.
The chassis itself is well-designed and laid out. There�s not a gratuitous amount of screws to get to crucial parts, the steering and wheel alignment linkages are very simple and not over-engineered, there is plenty of space for standard electronics and various battery sizes, etc. The main drive shaft can be accessed from both top and bottom which makes swapping out gears and bearings a breeze. That said, one easy recommendation I can make is that if you�re going to be doing any off-road running, placing some masking/ painters/ duct tape along the bottom of the chassis will help keep fine dust and dirt out of your drivetrain, which is advertised as �sealed�, but in practice, I would say �covered� is a more accurate description�it�s not 100% water-tight or anything, just not wide-open either.
Of all of the OEM chassis parts, I haven�t had any issues with quality except for two: 1) The plastic spur gear, and 2) the aluminum motor mount. In the spur gear�s defense, the main problem is really just that it�s not well suited for a brushless motor and LiPo batteries�it�s simply too soft. If you�re running brushed or maybe only on-road only, it�ll probably hold up for a little while, but I definitely recommend upgrading to metal which is covered in more detail below. As for the motor-mount, the OEM aluminum quality is not very good in my experience�it�s also too soft, which generally results in the mount not holding the motor steady, which means your mesh might often come unaligned and/or you may strip some gears if not replaced. This is also covered below.
Suspension
For my use-case I definitely needed to beef up the shock situation in order to handle gravel, shallow jumps, uneven tarmac, etc. I tried a few different products over time, but what ended up �sticking� have been 60mm Yeah Racing big bore shocks which will want bigger (5.5mm) threaded ball studs than stock in order to install. These offer more travel than the 50mm stock shocks, and have thicker shock shafts for added durability. I�m running mine on the softest springs, and . I have tried every combination of oil and spring from 20WT to 60WT, and at least for off-road use, a soft spring with thicker oil has given me the best handling and stability.
Speed and Power!
From square one I�ve been running my build with the following core components:
Motor � Castle Creations 1410 3800kv sensored, brushless motor
ESC � Castle Creations Copperhead 10
Battery � 2S and 3S LiPo, 5000mAh, 50C
As mentioned above, the stock plastic spur gear absolutely cannot handle this. I also tried Kimbrough plastic gears, which require a different spur mount, and they don�t survive either. After searching far and wide, I�ve come to the conclusion that at the time of this posting, the one design-fit metal option on the market worth your time and money is this one from SpeedTek RC. I have ordered and tried, no joke, nine other metal spur options from across trusted hobby shops, Amazon, and AliExpress�and they always are either slightly off, straight-up need heavy modification and tooling to be able to fit, or were terrible quality. Trust me on this one, I spent a lot of time and effort on spur gears�learn from my experimentation and save your money!
And again, as mentioned above, the stock motor mount gave me so many issues. I�ve tried, had success with, and can recommend both this one from GPM, and this one from Powerhobby.
The final comment I would make about this setup is that 3S is�unusably fast. As in, if you�re not running on an air strip or trying to set a PB speed record, you will seldom find yourself charging the 3S, instead opting for 2S. When the 3S pack I bought for this build eventually kicks the bucket one day�I will not be replacing. 1/10th scale cars are just too narrow to be able to keep it going straight, and using that much power off-road is just going to result in broken or melted parts.
Off-road Enhancements
Chassis Weather Protection
Being a touring car chassis at heart, the chassis is quite shallow, and other than the drivetrain being covered, there�s no OEM dust cover/ chassis protection available from HPI. I experimented with a number of DIY options, but ultimately have stuck with a chassis �shroud� from DustyMotors.com, size �S�. All you have to do is cut some sticky Velcro tape and affix it to either side of the chassis edge, which takes all of 3 minutes, and you�re ready to run. This has been an absolute life-saver for running in mud, snow, and gravel.
Steering
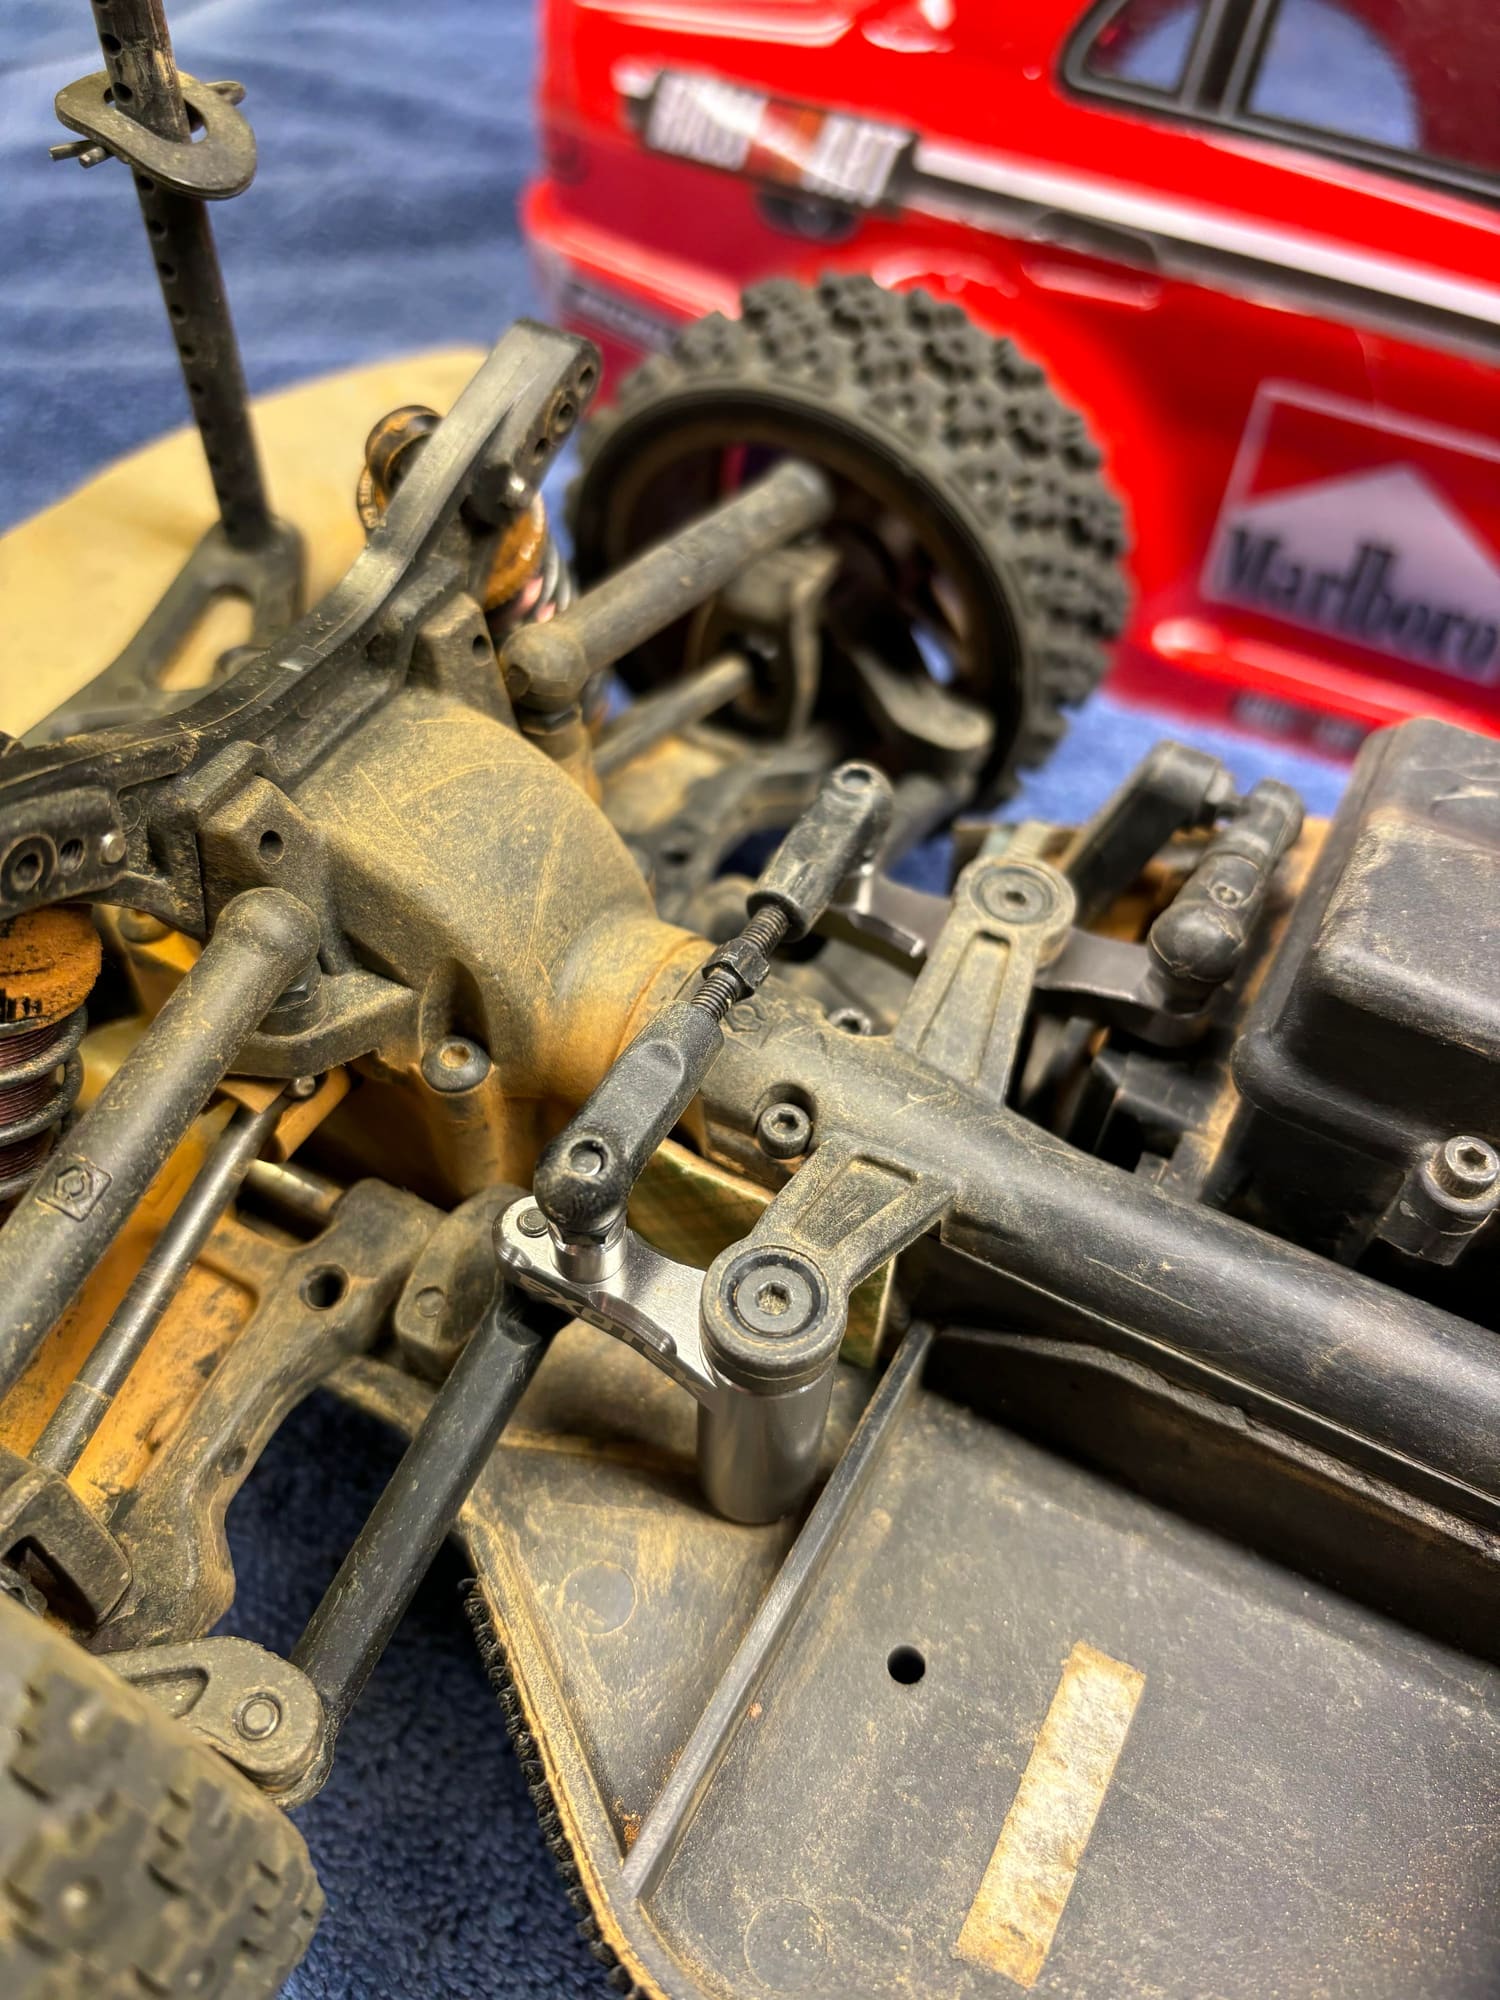
The stock steering design is not conducive to off-road application. Even with the above chassis cover, I still was getting small pebbles that would work their way into the space between the steering servo horn and the chassis bottom, and freeze up all the linkages. Do yourself a favor and pick up this aftermarket set from Exotek RC, which routes the linkages up and over the driveshaft, and alleviates this common problem. Now that said, one issue I did have with this set is that the solid link which crosses over the top of the driveshaft needs to be screwed down tightly in order for said screws to not rattle loose. However, if you do so, it prevents the linkages from moving freely, and puts a ton of strain on your steering servo. I�m not sure why they designed it that way or how it passed their testing prior to release, but the simple work-around solution I found was to simply replace that one fixed-length metal bar with an adjustable turnbuckle instead. Using ball studs means that not only can the linkages move freely, but also, even if a screw does come loose, it will stay in its ball socket, as opposed to leaving the chat entirely for you to never find ever again on whatever surface you�re running on. The added bonus of this modification is that you can adjust the turnbuckle to give your ride customized wheel toe-in or toe-out. Here's a picture of what it looks like installed, which you can compare to the images on the Exotek website (and, excuse the dirt...it's a rally car remember!):
Tires
I tried four different off-road-marketed 26mm tires and have found Tamiya�s rally block tires to not only last the longest, but provide the best traction and handling. Can recommend! Only tangentially related but I will take this opportunity to note: the first wheels I purchased to fill said Tamiya tires were also Tamiya in make, and they actually didn�t work for this chassis. The spokes inside the wheel physically impacted with the steering geometry and knuckle. I bought HPI wheels next, which obviously work given it�s an HPI chassis but�I haven�t had a chance (or desire, if I�m honest) to try out other wheels from different manufacturers yet.
Other/ Misc.
Given the long-travel shocks, you�ll need to set your body of choice quite high up on the body posts, else the body will hit the ground before the shocks are fully compressed. This gives it a comically stilted appearance when on the shelf, but once you�re out running it doesn�t look so weird eating up all the dips and bumps with ease.
I didn�t mention my steering servo, transmitter, nor receiver choices because I don�t think they really matter. The steering servo and receiver mounting options are standard sizes for 1/10th. Obviously recommend getting a servo that is waterproof and has metal gears if you�re going to run off-road and in realistic rally weather conditions (snow, mud, rain, etc.).
Conclusion
I think that�s the extent of the knowledge I wanted to share about this car. Knowing what I know now, I�d say it�s absolutely possible to make the HPI RS4 Sport 3 a rally car, but especially if you�re a beginner, it�s going to be easier to look at purpose-marketed options like the Tamiya XV-02 or Kyosho Fazer Mk2 FZ02-R. I would consider the high-clearance steering linkage kit to be an essential upgrade regardless of where you like to run yours. Similarly I would say upgrading to the aftermarket motor mount, and hardened steel spur, are "musts".
If you have a mod for this car you have tried from experience and like, definitely leave a comment below. I�d love to see what others are doing, even if it�s not a rally build specifically. And obviously I�m open to answering any questions or providing more detailed instructions about anything if you have one of these cars today and need help with an issue.

Intro
The primary purpose of this post is that, against my better judgement, I converted this on-road 1/10th touring car platform into a formidable mixed-surface demon, which I wanted to share with the community. While the end result turned out great, it's been one heck of a journey, and I can't in all honesty recommend it for a beginner. There is not great parts support to begin with, but I think an even bigger challenge was simply that there is not a lot of institutional knowledge out there online about this particular platform-- what aftermarket parts are and are not compatible, for example. This resulted in a LOT of trial and error. Which leads me to the other reason for this post-- to help document the things I learned along the way such that the next person who goes searching online might be able to avoid some of the pitfalls I experienced throughout the build. I would also say even if you�re not interested in a rally build, but simply want to understand this car better, or maybe you already have one and are looking for some recommendations on upgrades or longevity-- you should still find this article helpful given how little info there is to be found out there.
Chassis
I started with the HPI RS4 Sport 3 �Creator Edition� chassis. The Creator Edition is no different than their various RTRs, it simply doesn�t come with electronics, wheels, or a body-- allowing you to choose your parts rather than go with what HPI delivers factory. It comes pre-assembled, but as with anything that comes pre-assembled, I�d recommend giving it a once-over with your tools to make sure screws are nice and tight, and parts that are supposed to move freely don�t have any binding. Mine was issue-free, but I've seen a number of videos online where people experienced shoddy quality control out of the box.
The chassis itself is well-designed and laid out. There�s not a gratuitous amount of screws to get to crucial parts, the steering and wheel alignment linkages are very simple and not over-engineered, there is plenty of space for standard electronics and various battery sizes, etc. The main drive shaft can be accessed from both top and bottom which makes swapping out gears and bearings a breeze. That said, one easy recommendation I can make is that if you�re going to be doing any off-road running, placing some masking/ painters/ duct tape along the bottom of the chassis will help keep fine dust and dirt out of your drivetrain, which is advertised as �sealed�, but in practice, I would say �covered� is a more accurate description�it�s not 100% water-tight or anything, just not wide-open either.
Of all of the OEM chassis parts, I haven�t had any issues with quality except for two: 1) The plastic spur gear, and 2) the aluminum motor mount. In the spur gear�s defense, the main problem is really just that it�s not well suited for a brushless motor and LiPo batteries�it�s simply too soft. If you�re running brushed or maybe only on-road only, it�ll probably hold up for a little while, but I definitely recommend upgrading to metal which is covered in more detail below. As for the motor-mount, the OEM aluminum quality is not very good in my experience�it�s also too soft, which generally results in the mount not holding the motor steady, which means your mesh might often come unaligned and/or you may strip some gears if not replaced. This is also covered below.
Suspension
For my use-case I definitely needed to beef up the shock situation in order to handle gravel, shallow jumps, uneven tarmac, etc. I tried a few different products over time, but what ended up �sticking� have been 60mm Yeah Racing big bore shocks which will want bigger (5.5mm) threaded ball studs than stock in order to install. These offer more travel than the 50mm stock shocks, and have thicker shock shafts for added durability. I�m running mine on the softest springs, and . I have tried every combination of oil and spring from 20WT to 60WT, and at least for off-road use, a soft spring with thicker oil has given me the best handling and stability.
Speed and Power!
From square one I�ve been running my build with the following core components:
Motor � Castle Creations 1410 3800kv sensored, brushless motor
ESC � Castle Creations Copperhead 10
Battery � 2S and 3S LiPo, 5000mAh, 50C
As mentioned above, the stock plastic spur gear absolutely cannot handle this. I also tried Kimbrough plastic gears, which require a different spur mount, and they don�t survive either. After searching far and wide, I�ve come to the conclusion that at the time of this posting, the one design-fit metal option on the market worth your time and money is this one from SpeedTek RC. I have ordered and tried, no joke, nine other metal spur options from across trusted hobby shops, Amazon, and AliExpress�and they always are either slightly off, straight-up need heavy modification and tooling to be able to fit, or were terrible quality. Trust me on this one, I spent a lot of time and effort on spur gears�learn from my experimentation and save your money!
And again, as mentioned above, the stock motor mount gave me so many issues. I�ve tried, had success with, and can recommend both this one from GPM, and this one from Powerhobby.
The final comment I would make about this setup is that 3S is�unusably fast. As in, if you�re not running on an air strip or trying to set a PB speed record, you will seldom find yourself charging the 3S, instead opting for 2S. When the 3S pack I bought for this build eventually kicks the bucket one day�I will not be replacing. 1/10th scale cars are just too narrow to be able to keep it going straight, and using that much power off-road is just going to result in broken or melted parts.
Off-road Enhancements
Chassis Weather Protection
Being a touring car chassis at heart, the chassis is quite shallow, and other than the drivetrain being covered, there�s no OEM dust cover/ chassis protection available from HPI. I experimented with a number of DIY options, but ultimately have stuck with a chassis �shroud� from DustyMotors.com, size �S�. All you have to do is cut some sticky Velcro tape and affix it to either side of the chassis edge, which takes all of 3 minutes, and you�re ready to run. This has been an absolute life-saver for running in mud, snow, and gravel.
Steering
The stock steering design is not conducive to off-road application. Even with the above chassis cover, I still was getting small pebbles that would work their way into the space between the steering servo horn and the chassis bottom, and freeze up all the linkages. Do yourself a favor and pick up this aftermarket set from Exotek RC, which routes the linkages up and over the driveshaft, and alleviates this common problem. Now that said, one issue I did have with this set is that the solid link which crosses over the top of the driveshaft needs to be screwed down tightly in order for said screws to not rattle loose. However, if you do so, it prevents the linkages from moving freely, and puts a ton of strain on your steering servo. I�m not sure why they designed it that way or how it passed their testing prior to release, but the simple work-around solution I found was to simply replace that one fixed-length metal bar with an adjustable turnbuckle instead. Using ball studs means that not only can the linkages move freely, but also, even if a screw does come loose, it will stay in its ball socket, as opposed to leaving the chat entirely for you to never find ever again on whatever surface you�re running on. The added bonus of this modification is that you can adjust the turnbuckle to give your ride customized wheel toe-in or toe-out. Here's a picture of what it looks like installed, which you can compare to the images on the Exotek website (and, excuse the dirt...it's a rally car remember!):
Tires
I tried four different off-road-marketed 26mm tires and have found Tamiya�s rally block tires to not only last the longest, but provide the best traction and handling. Can recommend! Only tangentially related but I will take this opportunity to note: the first wheels I purchased to fill said Tamiya tires were also Tamiya in make, and they actually didn�t work for this chassis. The spokes inside the wheel physically impacted with the steering geometry and knuckle. I bought HPI wheels next, which obviously work given it�s an HPI chassis but�I haven�t had a chance (or desire, if I�m honest) to try out other wheels from different manufacturers yet.
Other/ Misc.
Given the long-travel shocks, you�ll need to set your body of choice quite high up on the body posts, else the body will hit the ground before the shocks are fully compressed. This gives it a comically stilted appearance when on the shelf, but once you�re out running it doesn�t look so weird eating up all the dips and bumps with ease.
I didn�t mention my steering servo, transmitter, nor receiver choices because I don�t think they really matter. The steering servo and receiver mounting options are standard sizes for 1/10th. Obviously recommend getting a servo that is waterproof and has metal gears if you�re going to run off-road and in realistic rally weather conditions (snow, mud, rain, etc.).
Conclusion
I think that�s the extent of the knowledge I wanted to share about this car. Knowing what I know now, I�d say it�s absolutely possible to make the HPI RS4 Sport 3 a rally car, but especially if you�re a beginner, it�s going to be easier to look at purpose-marketed options like the Tamiya XV-02 or Kyosho Fazer Mk2 FZ02-R. I would consider the high-clearance steering linkage kit to be an essential upgrade regardless of where you like to run yours. Similarly I would say upgrading to the aftermarket motor mount, and hardened steel spur, are "musts".
If you have a mod for this car you have tried from experience and like, definitely leave a comment below. I�d love to see what others are doing, even if it�s not a rally build specifically. And obviously I�m open to answering any questions or providing more detailed instructions about anything if you have one of these cars today and need help with an issue.

The following users liked this post:
RustyUs (04-27-2024)
06-09-2024 | 10:29 AM
#2
Thread Starter
Junior Member
Just a minor clarification, and a build update:
I made a typo in my original post, but I guess the forum restricts editing after a certain period of time has passed. I'm running 65mm dampers from Yeah Racing, not 60mm as stated above. I started the build originally at 60mm but bumped up to 65mm after a few months, hence the confusion. Every little bit of clearance helps!
And the update-- I wanted more plush suspension than I felt I was getting with the factory Yeah Racing "soft" springs, which seem to really be best suited for on-road application. After sourcing some options from the community, I've swapped those out for 15x38mm G Made soft (green) springs from Korea, which has given a much more 'pillowy' feel to the car (more like you would get on a buggy or short-course truck), and markedly improved off-road driving characteristic. I will note they just barely fit around the shock body, but they do work nonetheless. Can recommend!
07-04-2024 | 01:13 PM
#3

Nice I had plans to do something similar to your idea 20ish years ago, but using a Nitro RS4 converted over, but just never finished it as I ran into a few snags, and fell out of the hobby.
The following users liked this post:
7h3C47 (07-06-2024)
08-19-2024 | 04:21 AM
#4
Thread Starter
Junior Member
I finally caved and picked up a GPS from SkyRC to see how fast this build is. On-road, that answer is 37mph on 2s, 55mph on 3s. I think a fun game will be to see how close I can now get to these numbers off-road!


08-24-2024 | 12:09 PM
#5
Thread Starter
Junior Member
I took the rig out for a bash at my local public park this morning. It wasn't a dedicated off-road speed run session, but I did keep the GPS on the whole time I was on dirt and gravel. Looks like my max off-road pull on 2s was 29mph (compared to 37mph on-road). I need to find something bigger than a baseball diamond to try 3s.
 09-05-2024 | 12:34 PM
#6
Thread Starter
Junior Member

This is my first GPS-monitored 3s run off-road. The run was on the same baseball diamond as the 29mph 2s run from my previous post, and so while I know it didn't have enough room to get fully up to speed, it's a starting point. I'm thinking I might need to take it to a beach in order to get an area large and flat enough to beat this, but my hope is that I can find a nice, wide dirt or gravel path somewhere in my area soon for testing purposes.
02-02-2025 | 07:15 AM
#8
Thread Starter
Junior Member
This is one of the bigger, milestone changes to my custom rally build since its inception. In its long-standing configuration I've had over the past two years, the rig was simply running too hot much of the time, and the impetus for change is that I effectively burnt out my second Castle 1410 3800kv motor. As with the original 1410--it still technically runs, but performance has degraded, and it was too hot to touch at the end of my last bash, which is a bad sign for magnet depolarization. I normally would have kept the same setup but geared-down for motor #3. My issue is that I have only ever been able to source a 66t hardened steel spur gear for this rig, which limits the amount of gearing down I can do to the pinion. I'm dropping from 31t to 28t on the pinion, which helps, but is not significant enough of a decrease to solve the heat issues entirely. HPI and several aftermarket manufacturers make a 75t spur gear, which would be much better, but I have not been able to find one in steel or even aluminum. The last time I ran the rig with one of the plastic 75t spurs, it didn't even survive a full battery pack, which is only slightly worse than what happened the preceding two times I ran a plastic spur, and is a no-go for me. The brushless setup really wants metal gears.
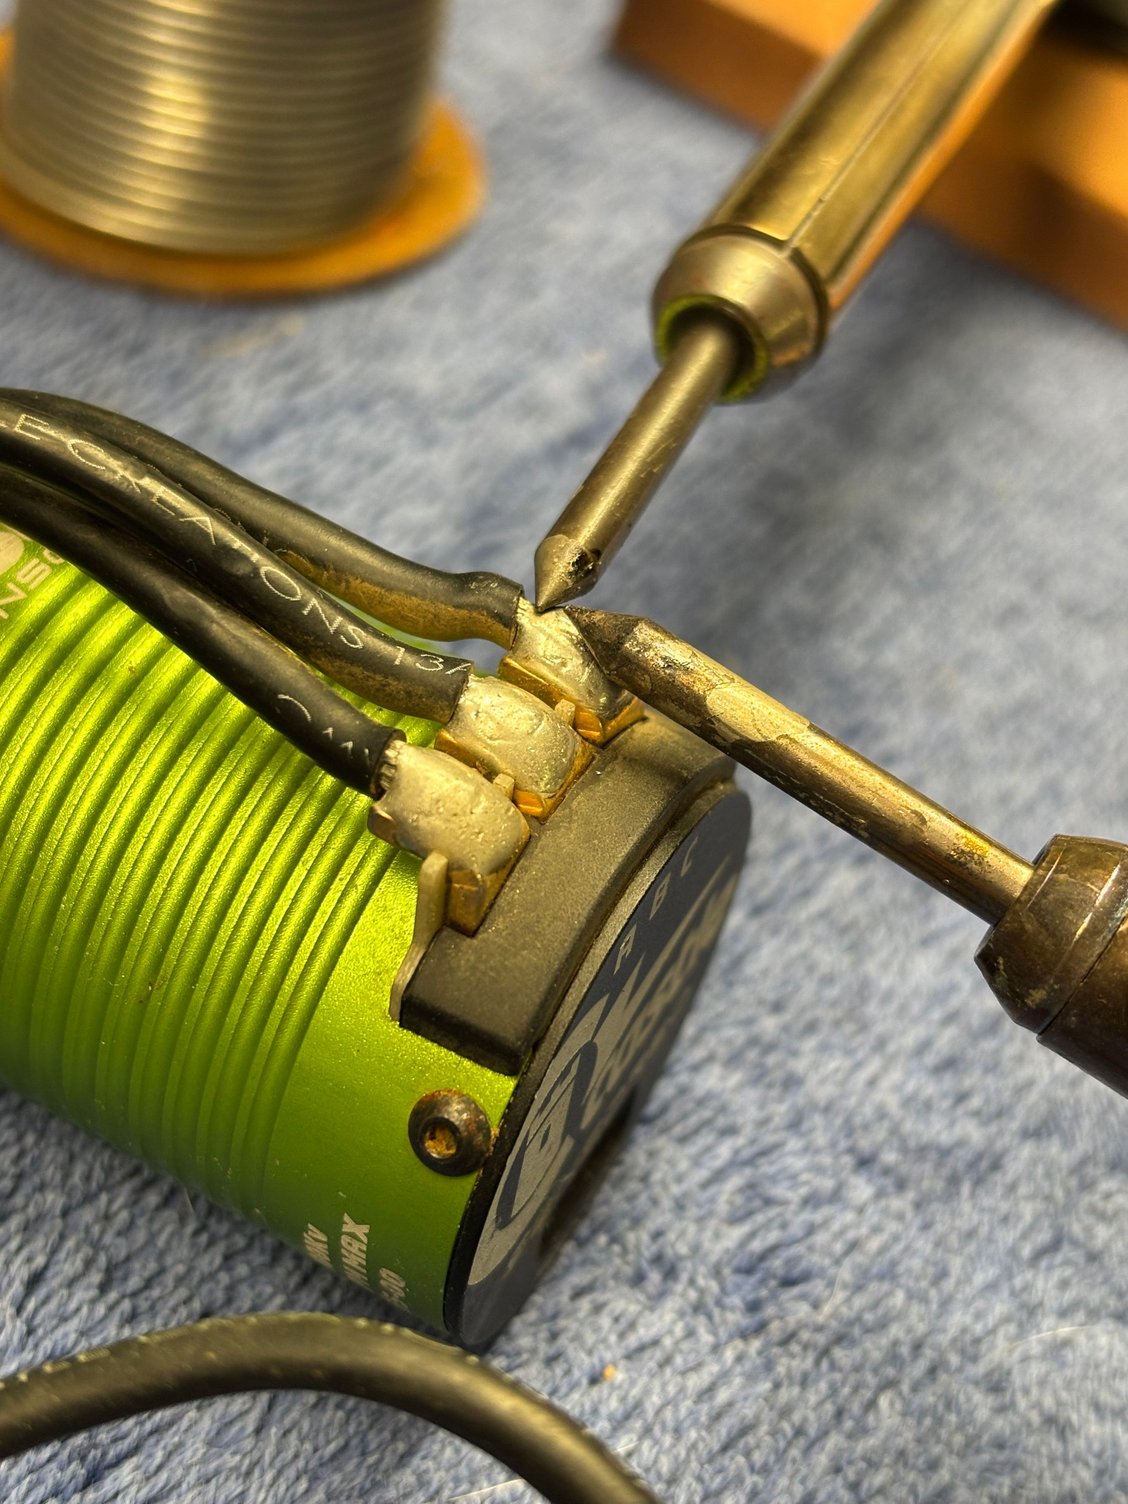
With gearing limitations like these, my next best choice was to look at a cooler-running, lower-top-speed-but-more-torque-motor. Enter the Castle 1412 3200kv. As you can see by the photos, it's considerably larger of a can compared to the 1410. This required me to rotate my ESC by 90 degrees, hence the chassis side-wall delete, as it doesn't fit in the sideways orientation. Since I was already doing all this work, I also took the opportunity to shorten the motor leads and re-solder them to point 'backwards' towards the ESC as shown. This is so much neater, and I regret not doing it sooner. FYI--I learned in the process that Castle uses a solder mix of 96.5% tin, 3% gold, and 0.5% copper, which needs at least 400C temps to melt. I had to buy a new soldering station in order to complete this work, as my plug-and-play irons couldn't melt the solder on the motor terminals.
With the chassis modified, new motor reconfigured, and drop to a 28t pinion, I can confidently say this has been an improvement. We're slower-running*, but with cooler temps, and I think this new setup will last longer than my previous two motors did.
*For comparison, regarding speeds:
On the old 1410 3800kv motor with a 31t pinion
2s: 37mph
3s: 55mph
Test conducted on a 100F degree day
On the new 1412 3200kv motor with a 28t pinion
2s: 25mph
3s: 39mph
Test conducted on a 24F degree day
Honestly the original 1410 setup was waaaay faster than necessary for something designed to run on mixed surfaces. With this being a narrow little 1/10th scale touring car chassis at heart, you really can't control something this small and light moving that fast off-road.
With temp issues under control, it's not lost on me that I've swapped to a power plant with more torque and may be shifting my issues to elsewhere in the rig. I will be keeping a close eye on the drivetrain to see if the increase in torque starts to wear out components that were previously doing fine. Ultimately I'd rather be faced with replacing bearings and diff gears from time to time as opposed to motors, which was much more costly.
Pictures:
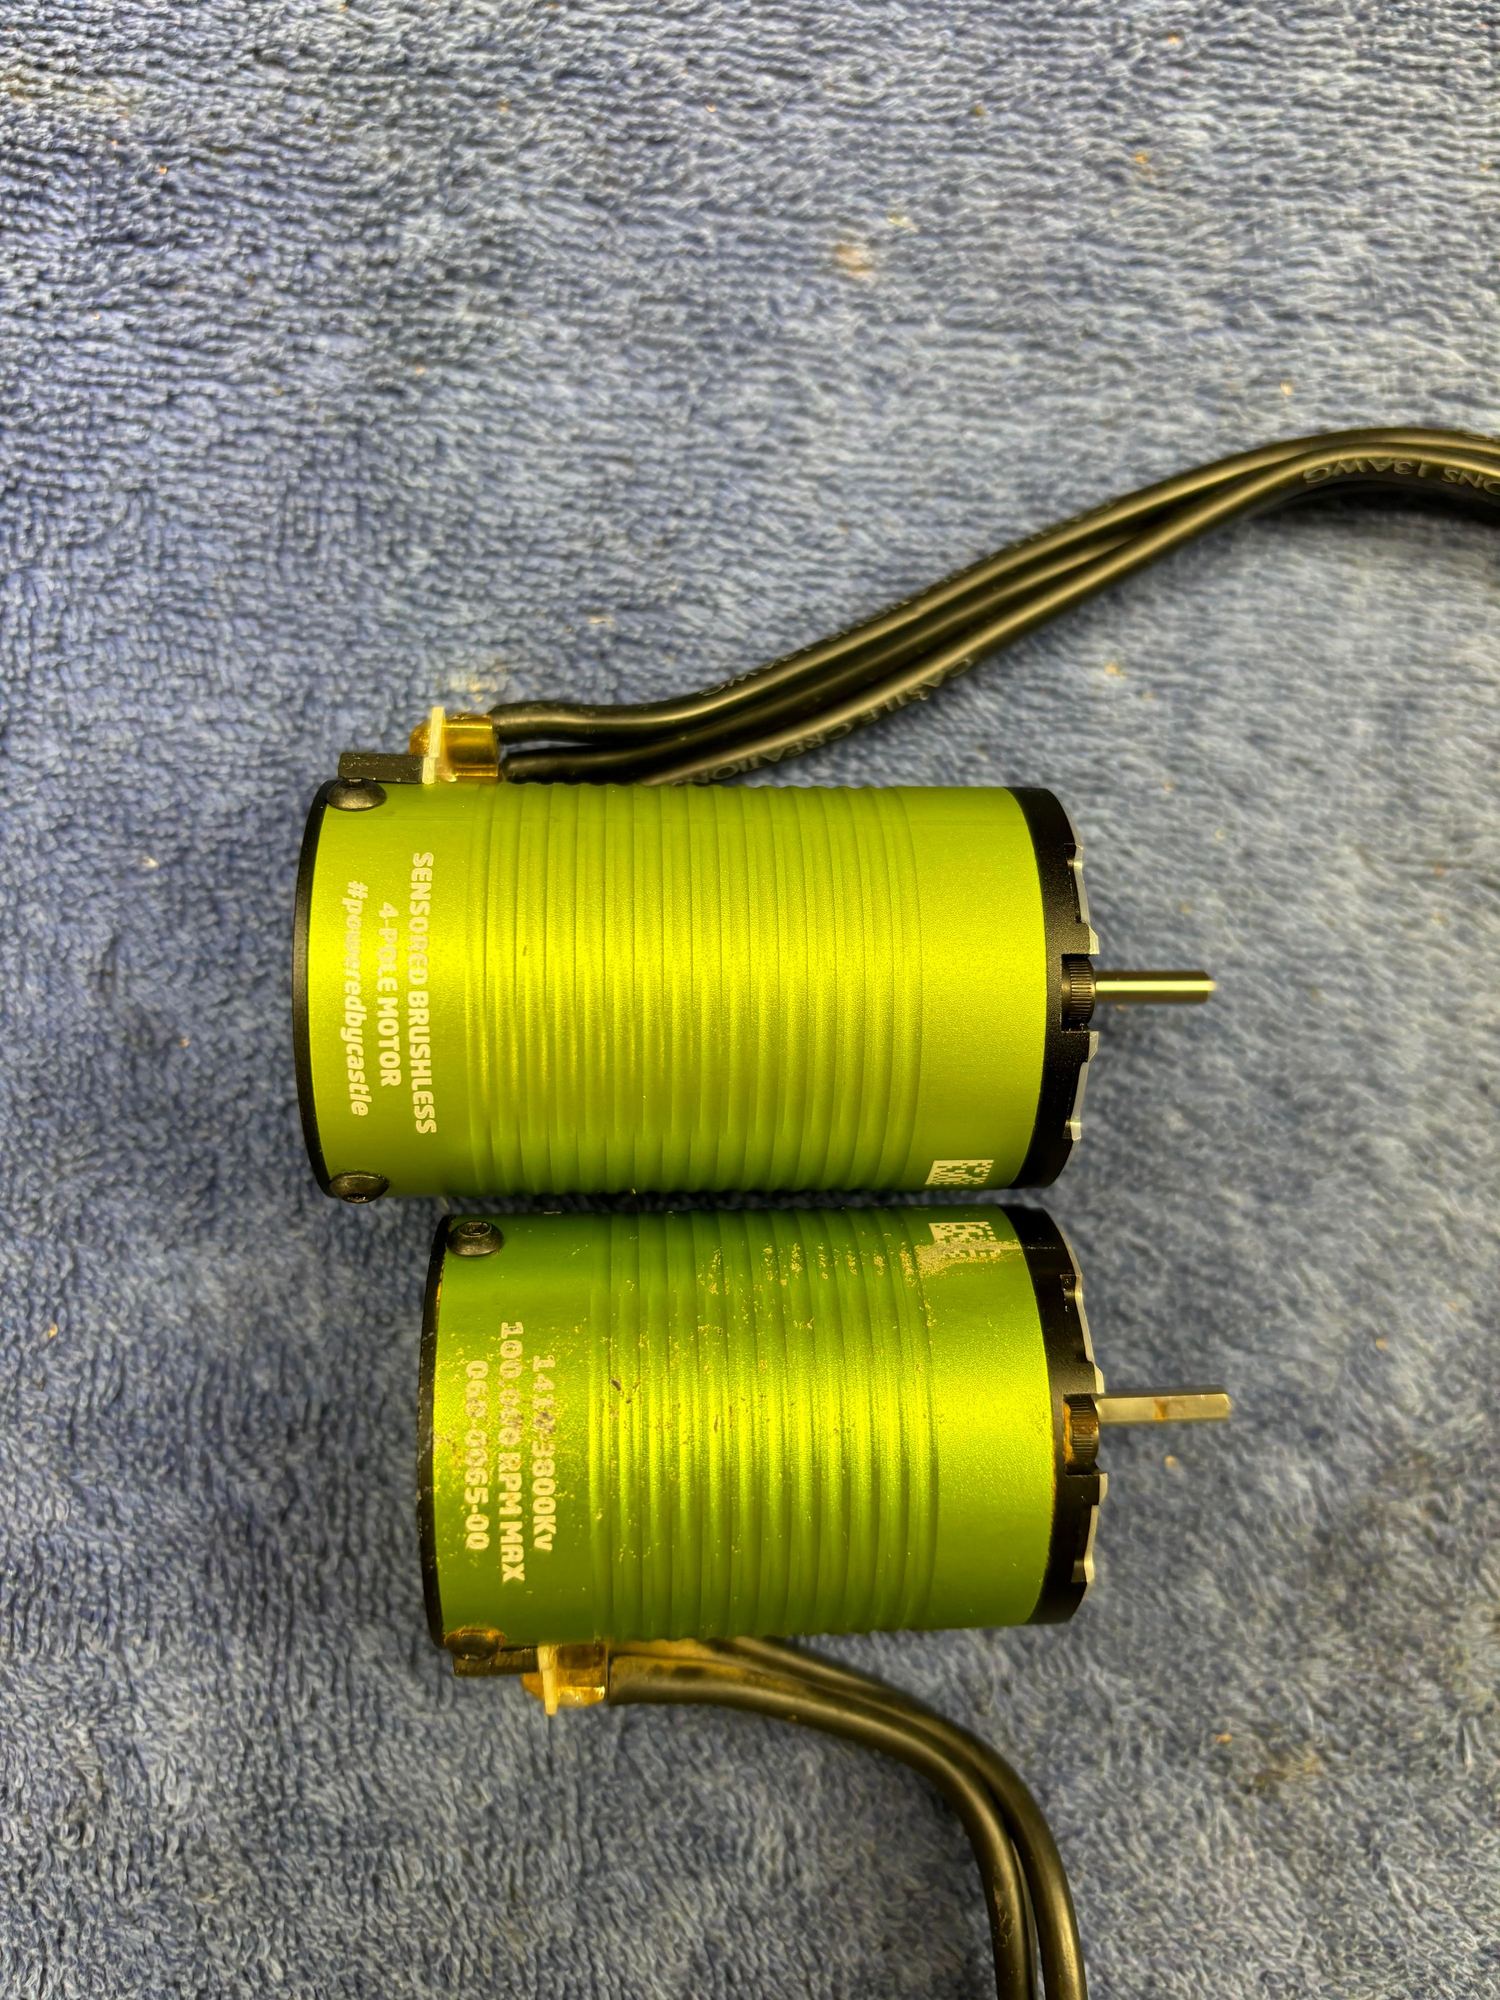
Comparison between the new motor (top), and old motor (bottom).
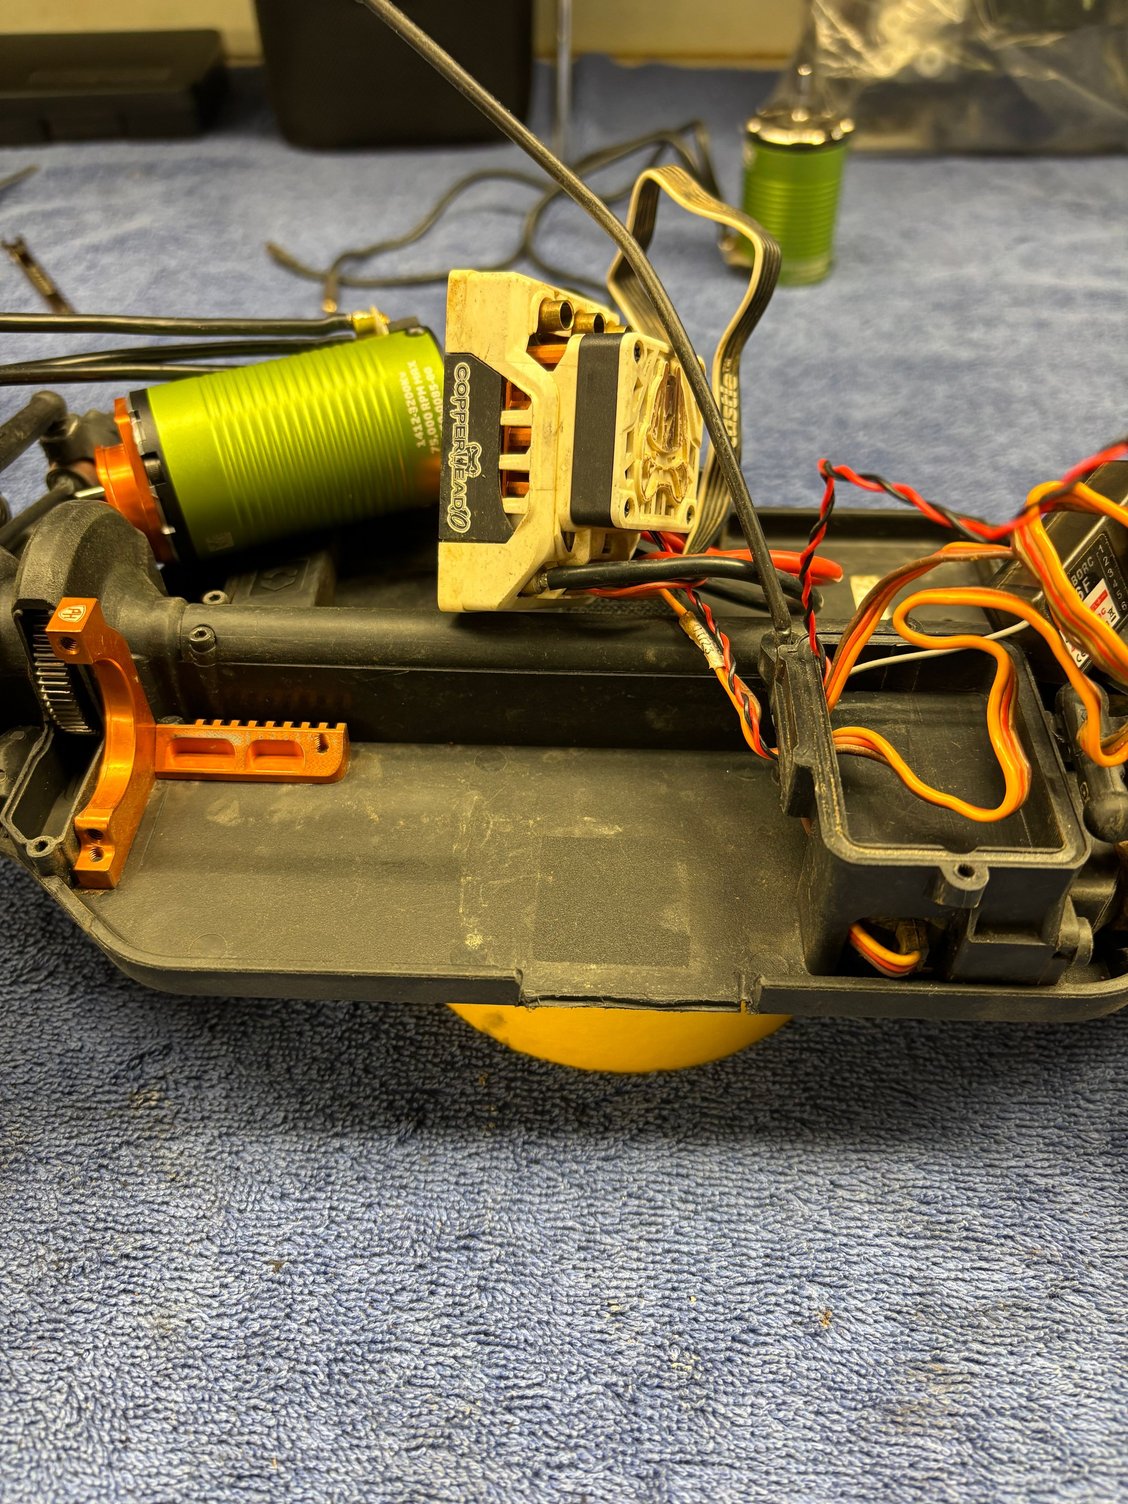
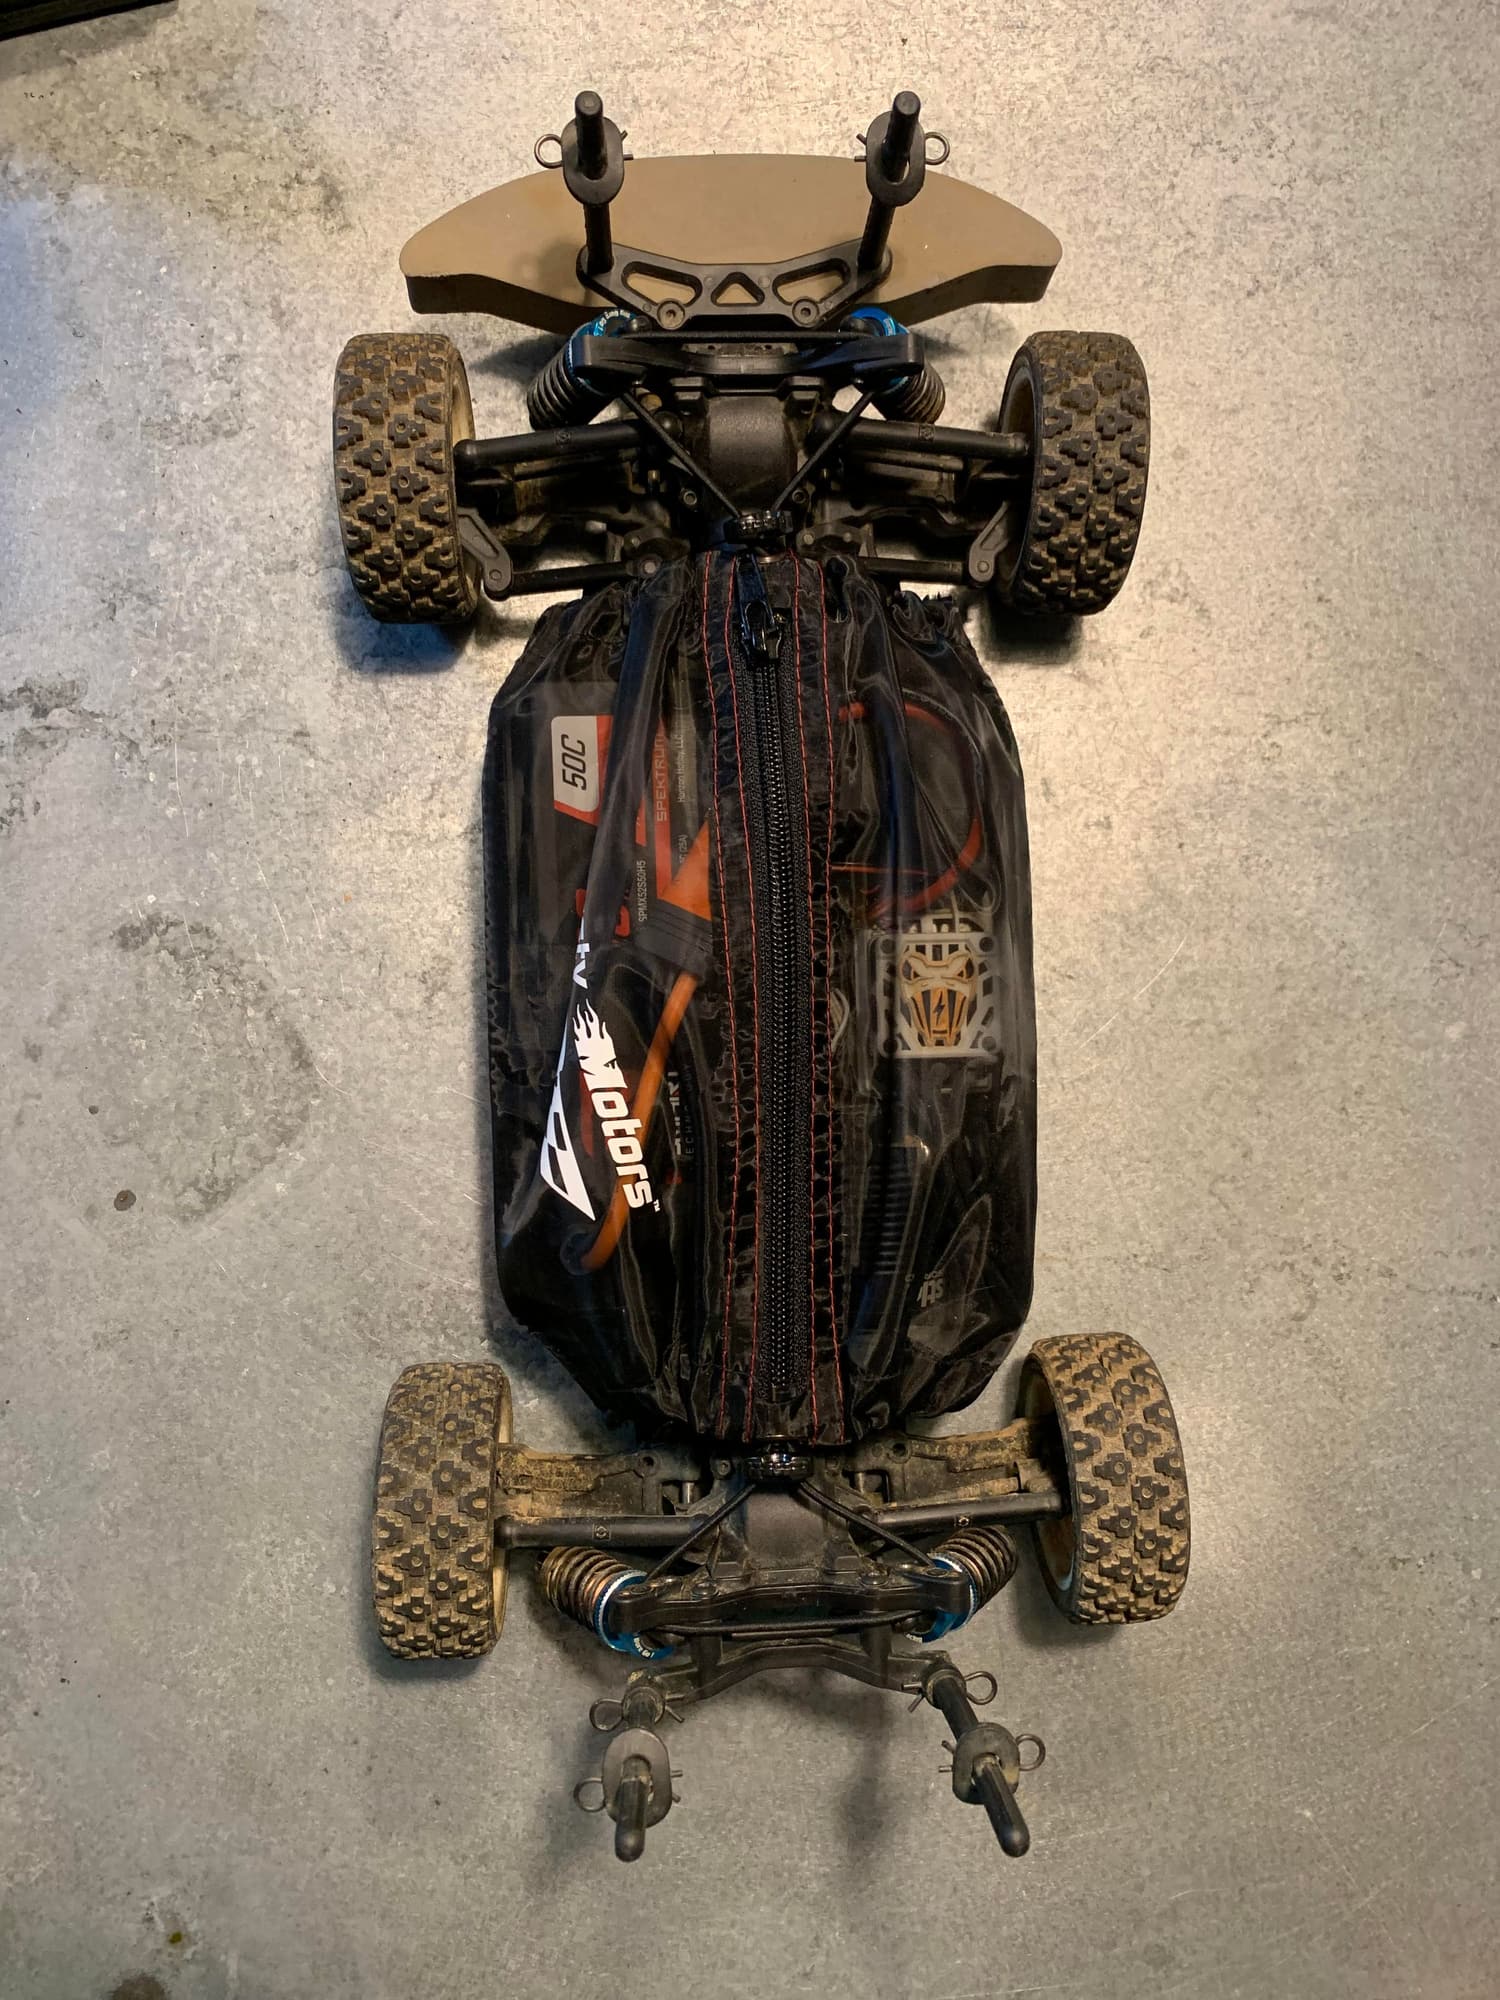
Deleting the chassis side-wall so that the ESC can be turned 90 degrees, to allow for the larger (longer) motor can.
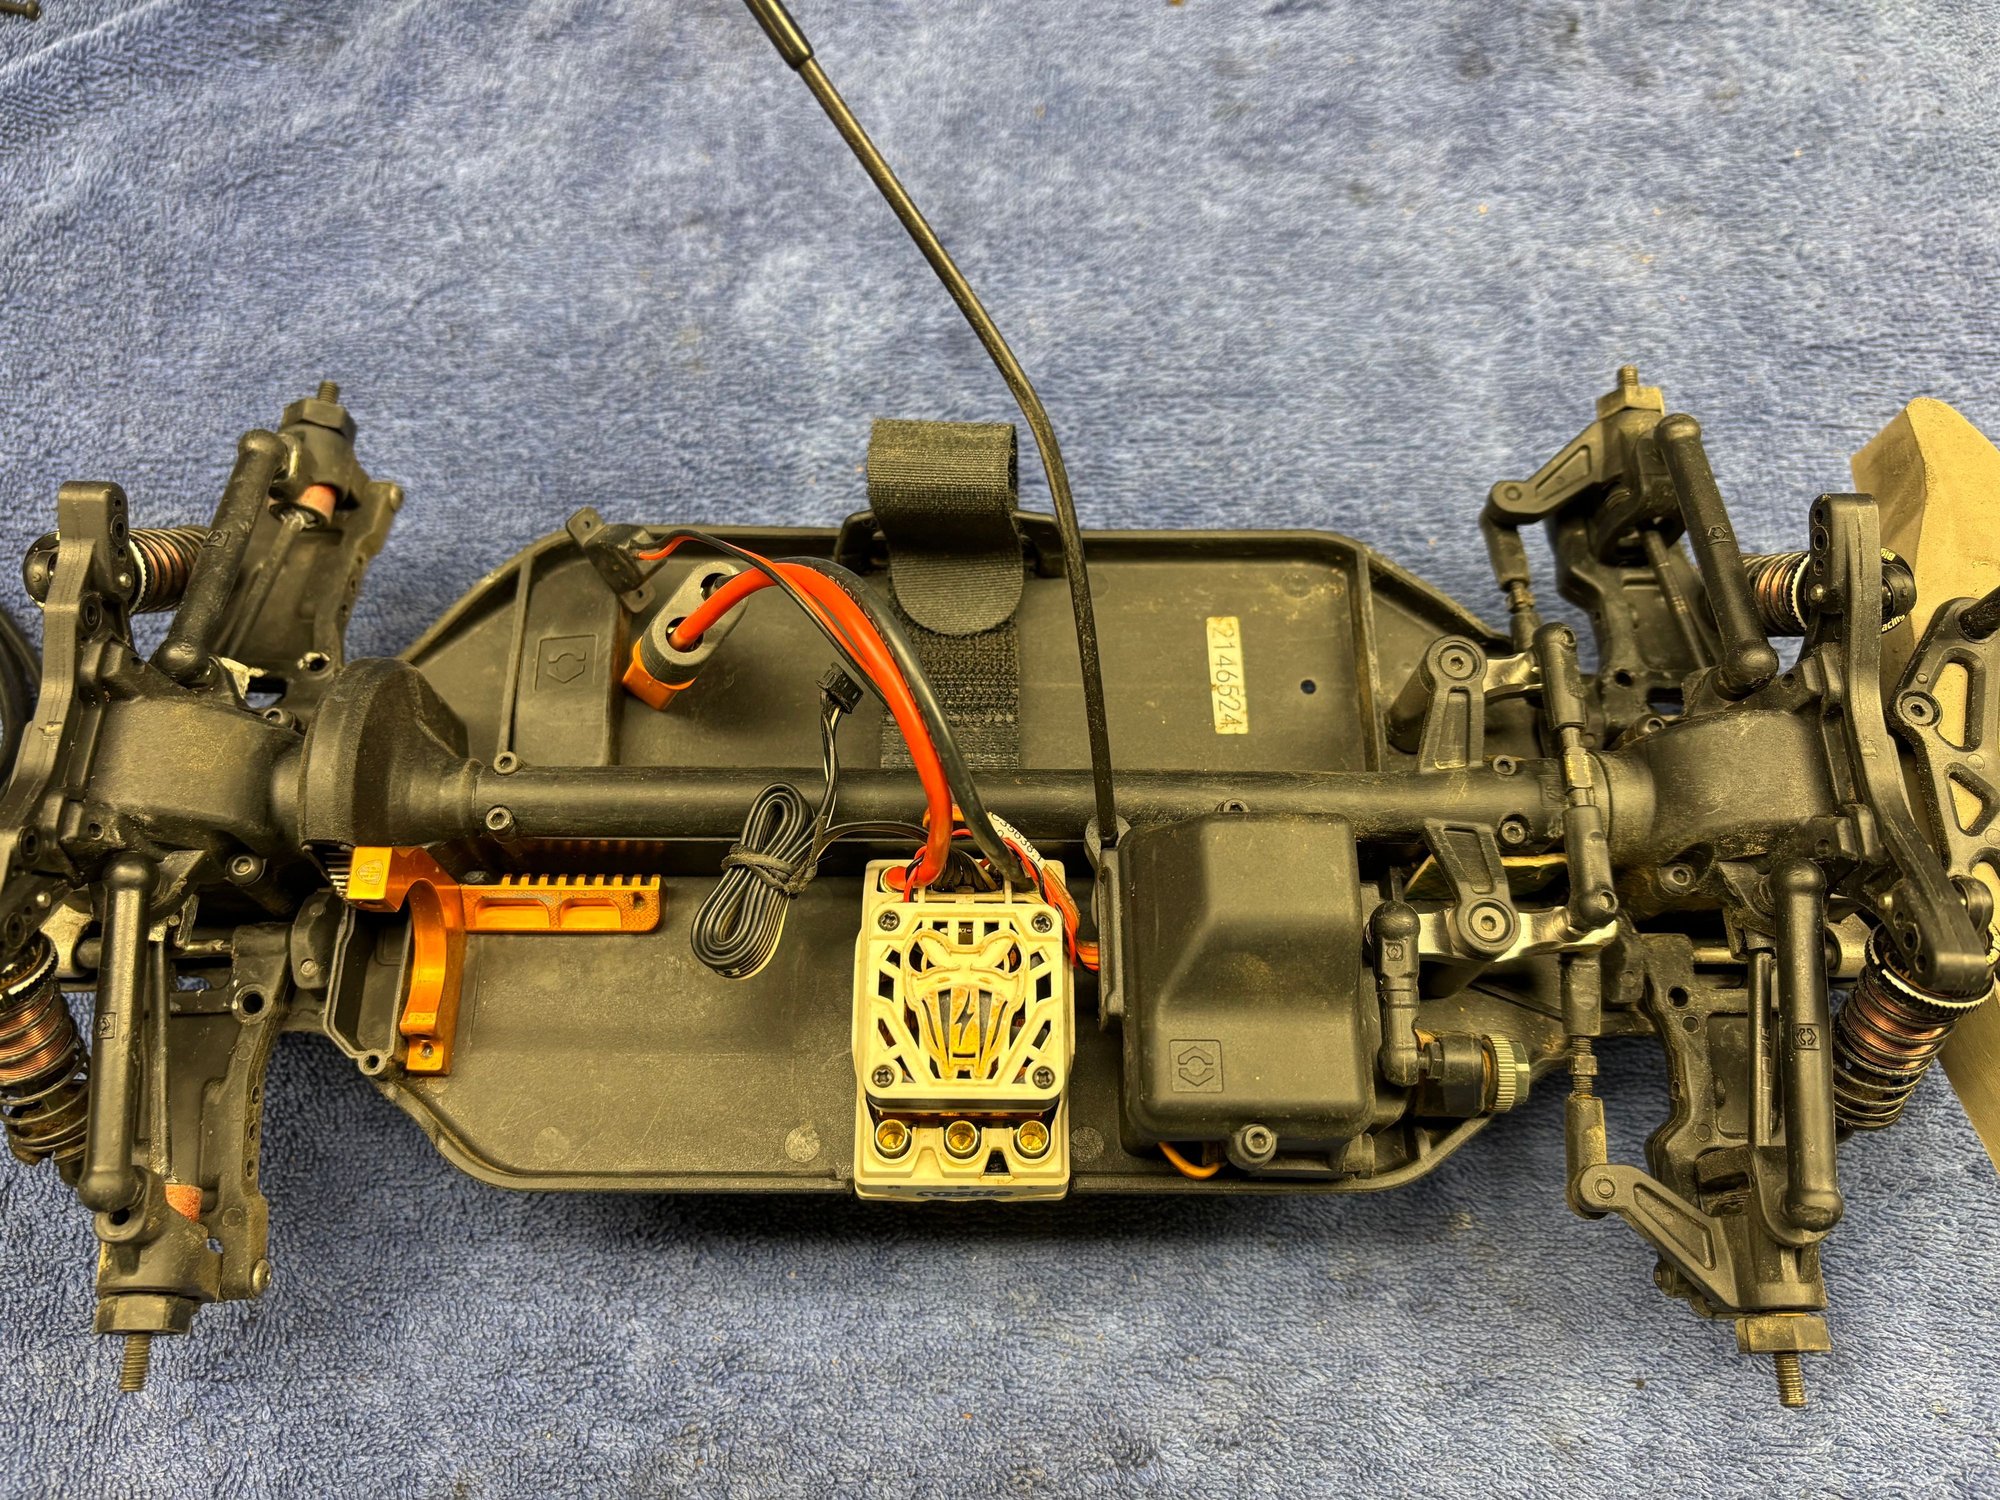
ESC now fits in sideways.
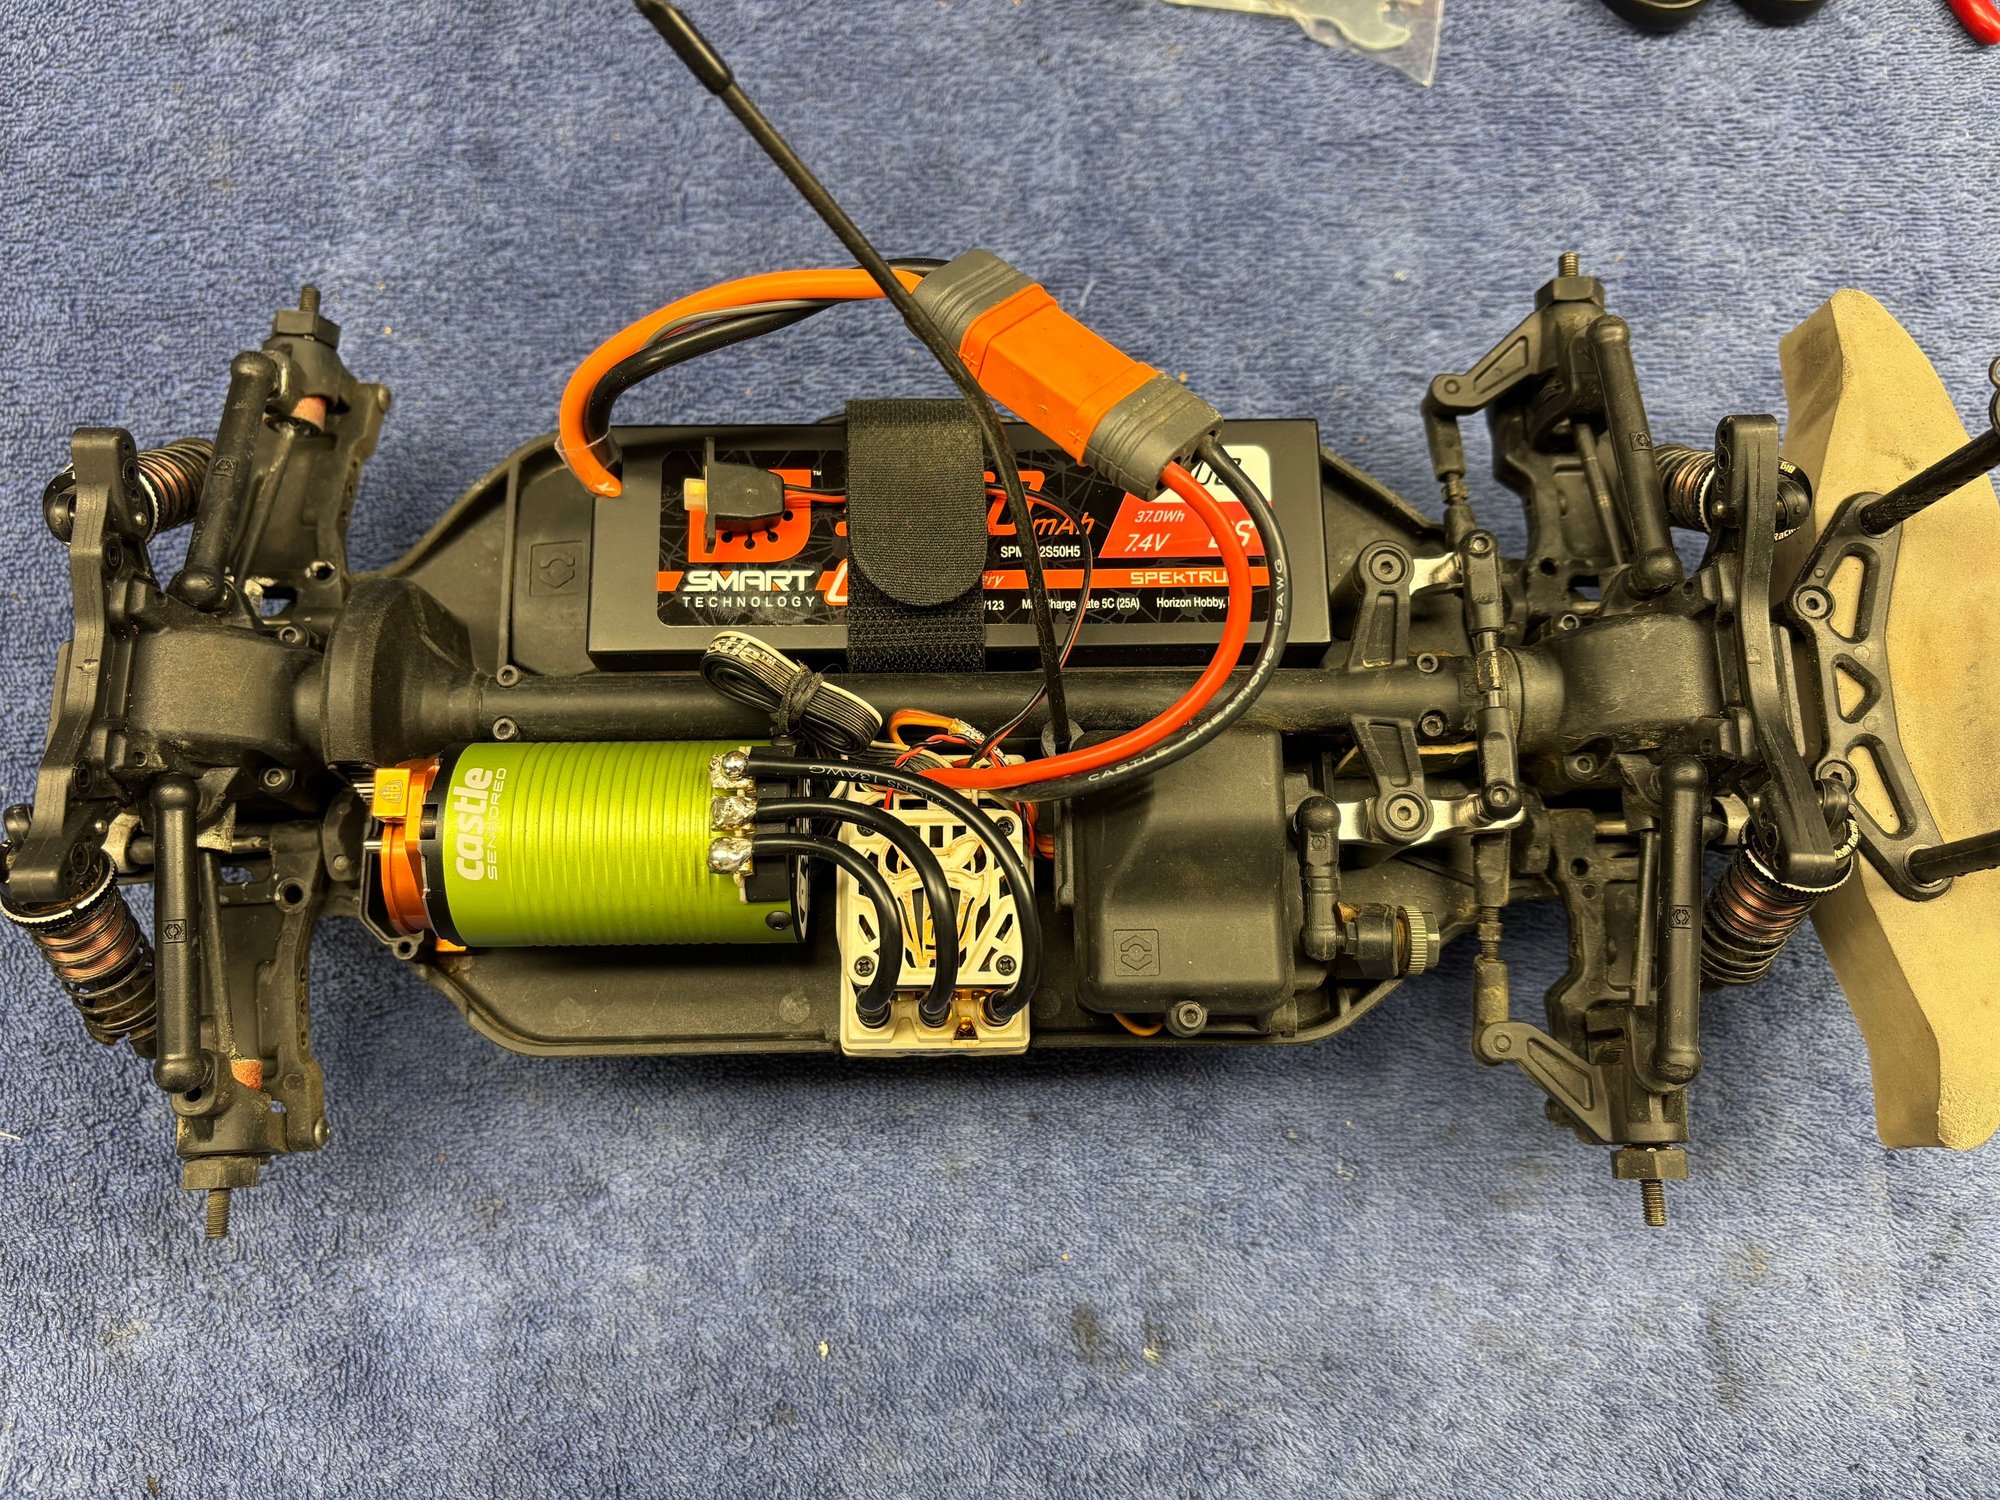
This is what it looks like with the new motor in, and ESC rotated. Just barely enough room, but it works.
Two plug-and-play irons not hot enough to melt Castle factory solder.
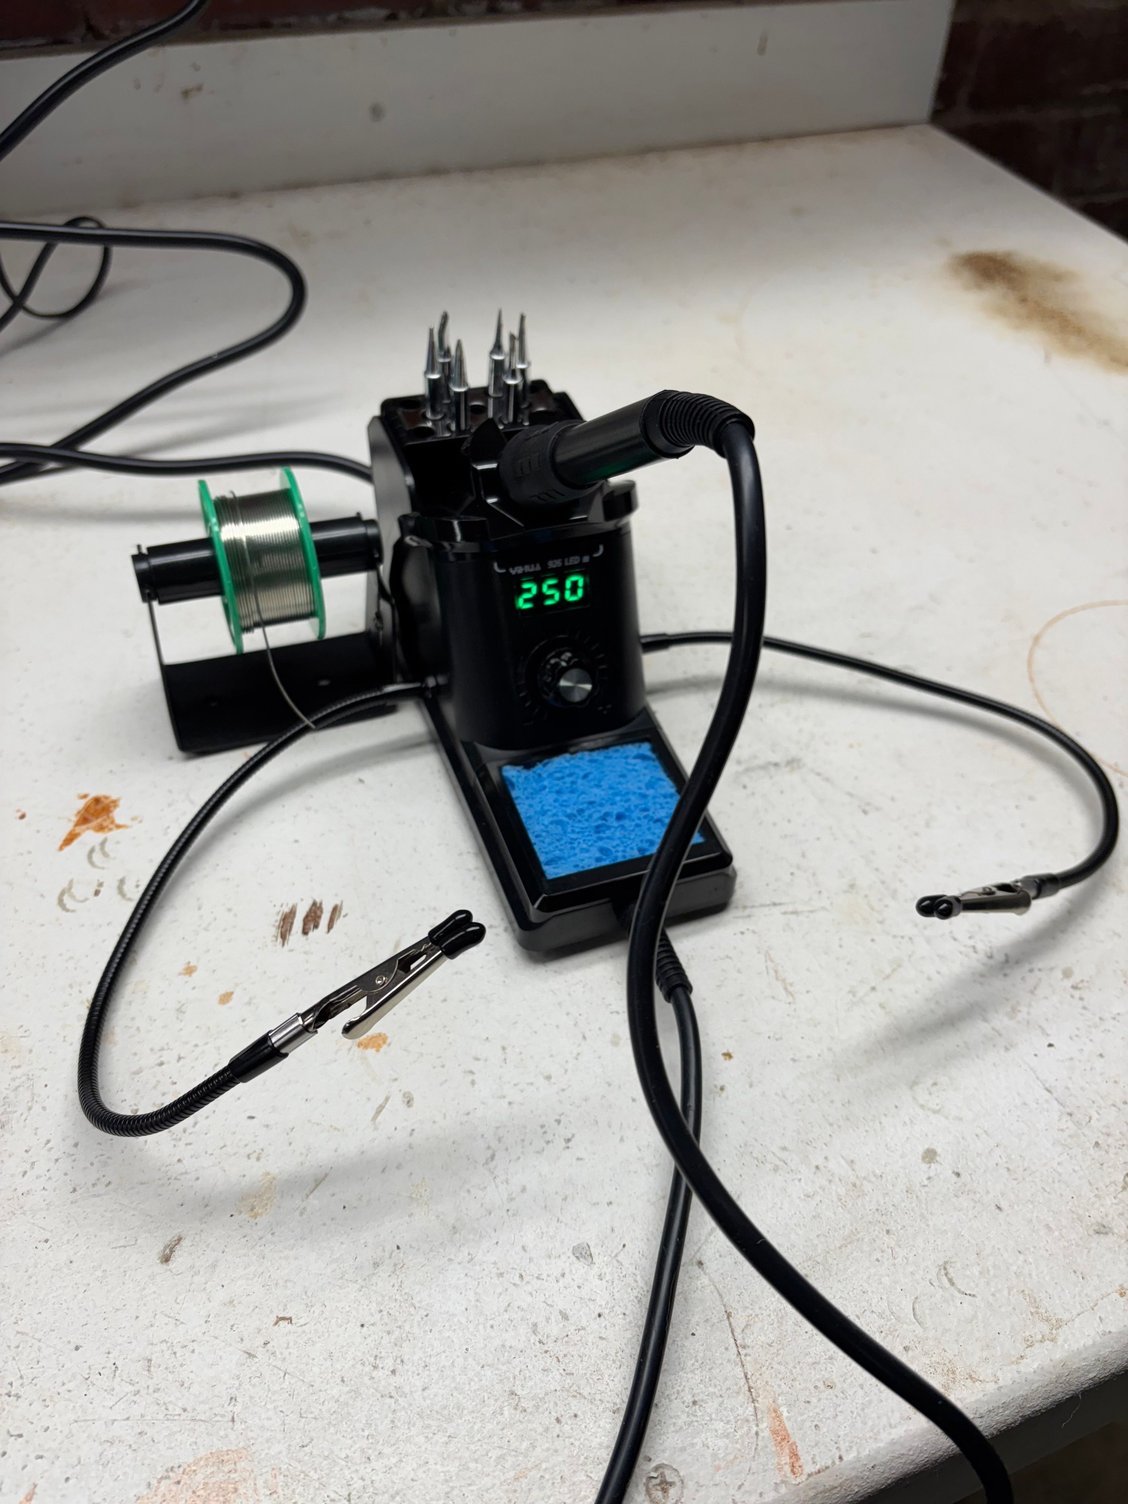
Bought this new beast which can get the solder job done.
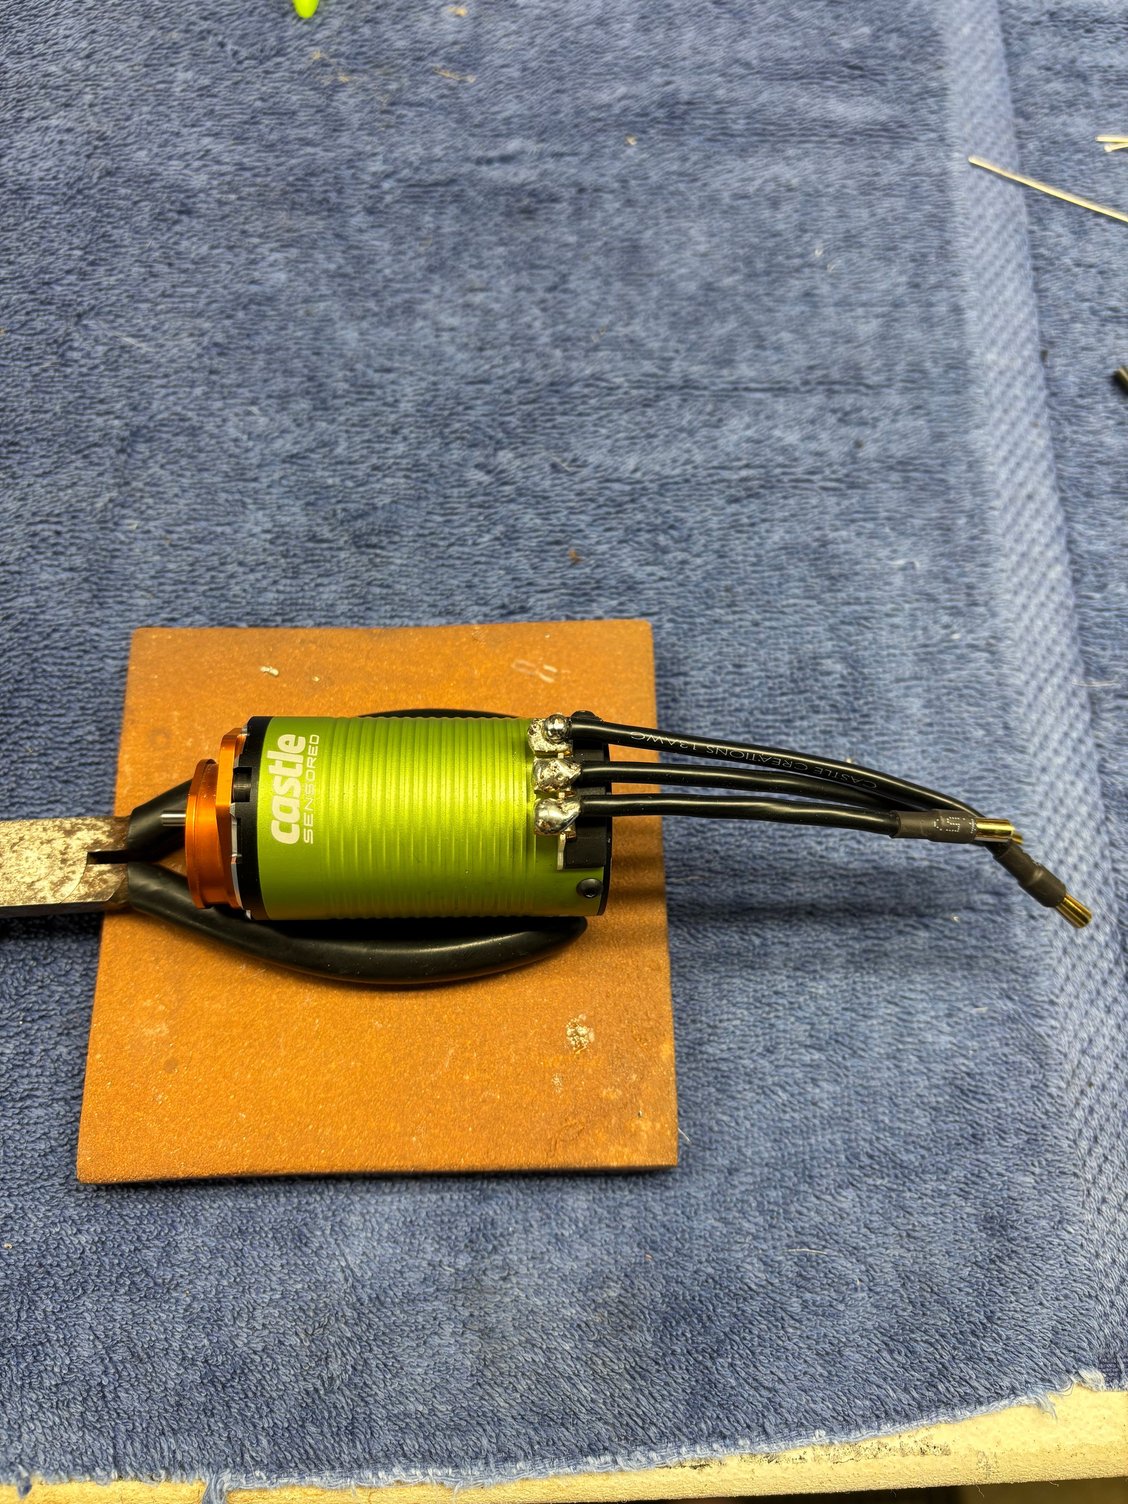
Leads on the new motor shortened, and now pointing backwards towards the ESC.

New motor speed run on 2s.

New motor speed run on 3s.

With gearing limitations like these, my next best choice was to look at a cooler-running, lower-top-speed-but-more-torque-motor. Enter the Castle 1412 3200kv. As you can see by the photos, it's considerably larger of a can compared to the 1410. This required me to rotate my ESC by 90 degrees, hence the chassis side-wall delete, as it doesn't fit in the sideways orientation. Since I was already doing all this work, I also took the opportunity to shorten the motor leads and re-solder them to point 'backwards' towards the ESC as shown. This is so much neater, and I regret not doing it sooner. FYI--I learned in the process that Castle uses a solder mix of 96.5% tin, 3% gold, and 0.5% copper, which needs at least 400C temps to melt. I had to buy a new soldering station in order to complete this work, as my plug-and-play irons couldn't melt the solder on the motor terminals.
With the chassis modified, new motor reconfigured, and drop to a 28t pinion, I can confidently say this has been an improvement. We're slower-running*, but with cooler temps, and I think this new setup will last longer than my previous two motors did.
*For comparison, regarding speeds:
On the old 1410 3800kv motor with a 31t pinion
2s: 37mph
3s: 55mph
Test conducted on a 100F degree day
On the new 1412 3200kv motor with a 28t pinion
2s: 25mph
3s: 39mph
Test conducted on a 24F degree day
Honestly the original 1410 setup was waaaay faster than necessary for something designed to run on mixed surfaces. With this being a narrow little 1/10th scale touring car chassis at heart, you really can't control something this small and light moving that fast off-road.
With temp issues under control, it's not lost on me that I've swapped to a power plant with more torque and may be shifting my issues to elsewhere in the rig. I will be keeping a close eye on the drivetrain to see if the increase in torque starts to wear out components that were previously doing fine. Ultimately I'd rather be faced with replacing bearings and diff gears from time to time as opposed to motors, which was much more costly.
Pictures:
Comparison between the new motor (top), and old motor (bottom).
Deleting the chassis side-wall so that the ESC can be turned 90 degrees, to allow for the larger (longer) motor can.
ESC now fits in sideways.
This is what it looks like with the new motor in, and ESC rotated. Just barely enough room, but it works.
Two plug-and-play irons not hot enough to melt Castle factory solder.
Bought this new beast which can get the solder job done.
Leads on the new motor shortened, and now pointing backwards towards the ESC.
New motor speed run on 2s.
New motor speed run on 3s.
07-12-2025 | 09:23 AM
#9
Thread Starter
Junior Member
Today's post brings another significant update to the custom rally RS4 build, this time in the realm of suspension.
The 65mm Yeah Racing shocks I've had on the chassis for a number of years now have worked out really well overall, but have started to show some serious wear and tear. They don't seem to hold their oil for as long as they used to between servicing. To be clear this is through no fault of their own, and nothing is wrong with their design-- running off-road and at-speed is a harsh existence. While I'd generally be happy to pick up a new set and move along, I wanted to take this opportunity to give the suspension setup a little love. Ultimately I made a post on Reddit asking which aftermarket shocks the RC community likes, and of the many answers, Associated 12mm dampers were mentioned pretty consistently across the board. I liked that they sell all the shock components and internals separately, so that I could not only learn how to assemble a shock from scratch myself (the Yeah Racing ones I've previously used are factory-assembled), but also, this would allow me to replace individual components that fail or experience wear, as opposed to buying all new shocks.
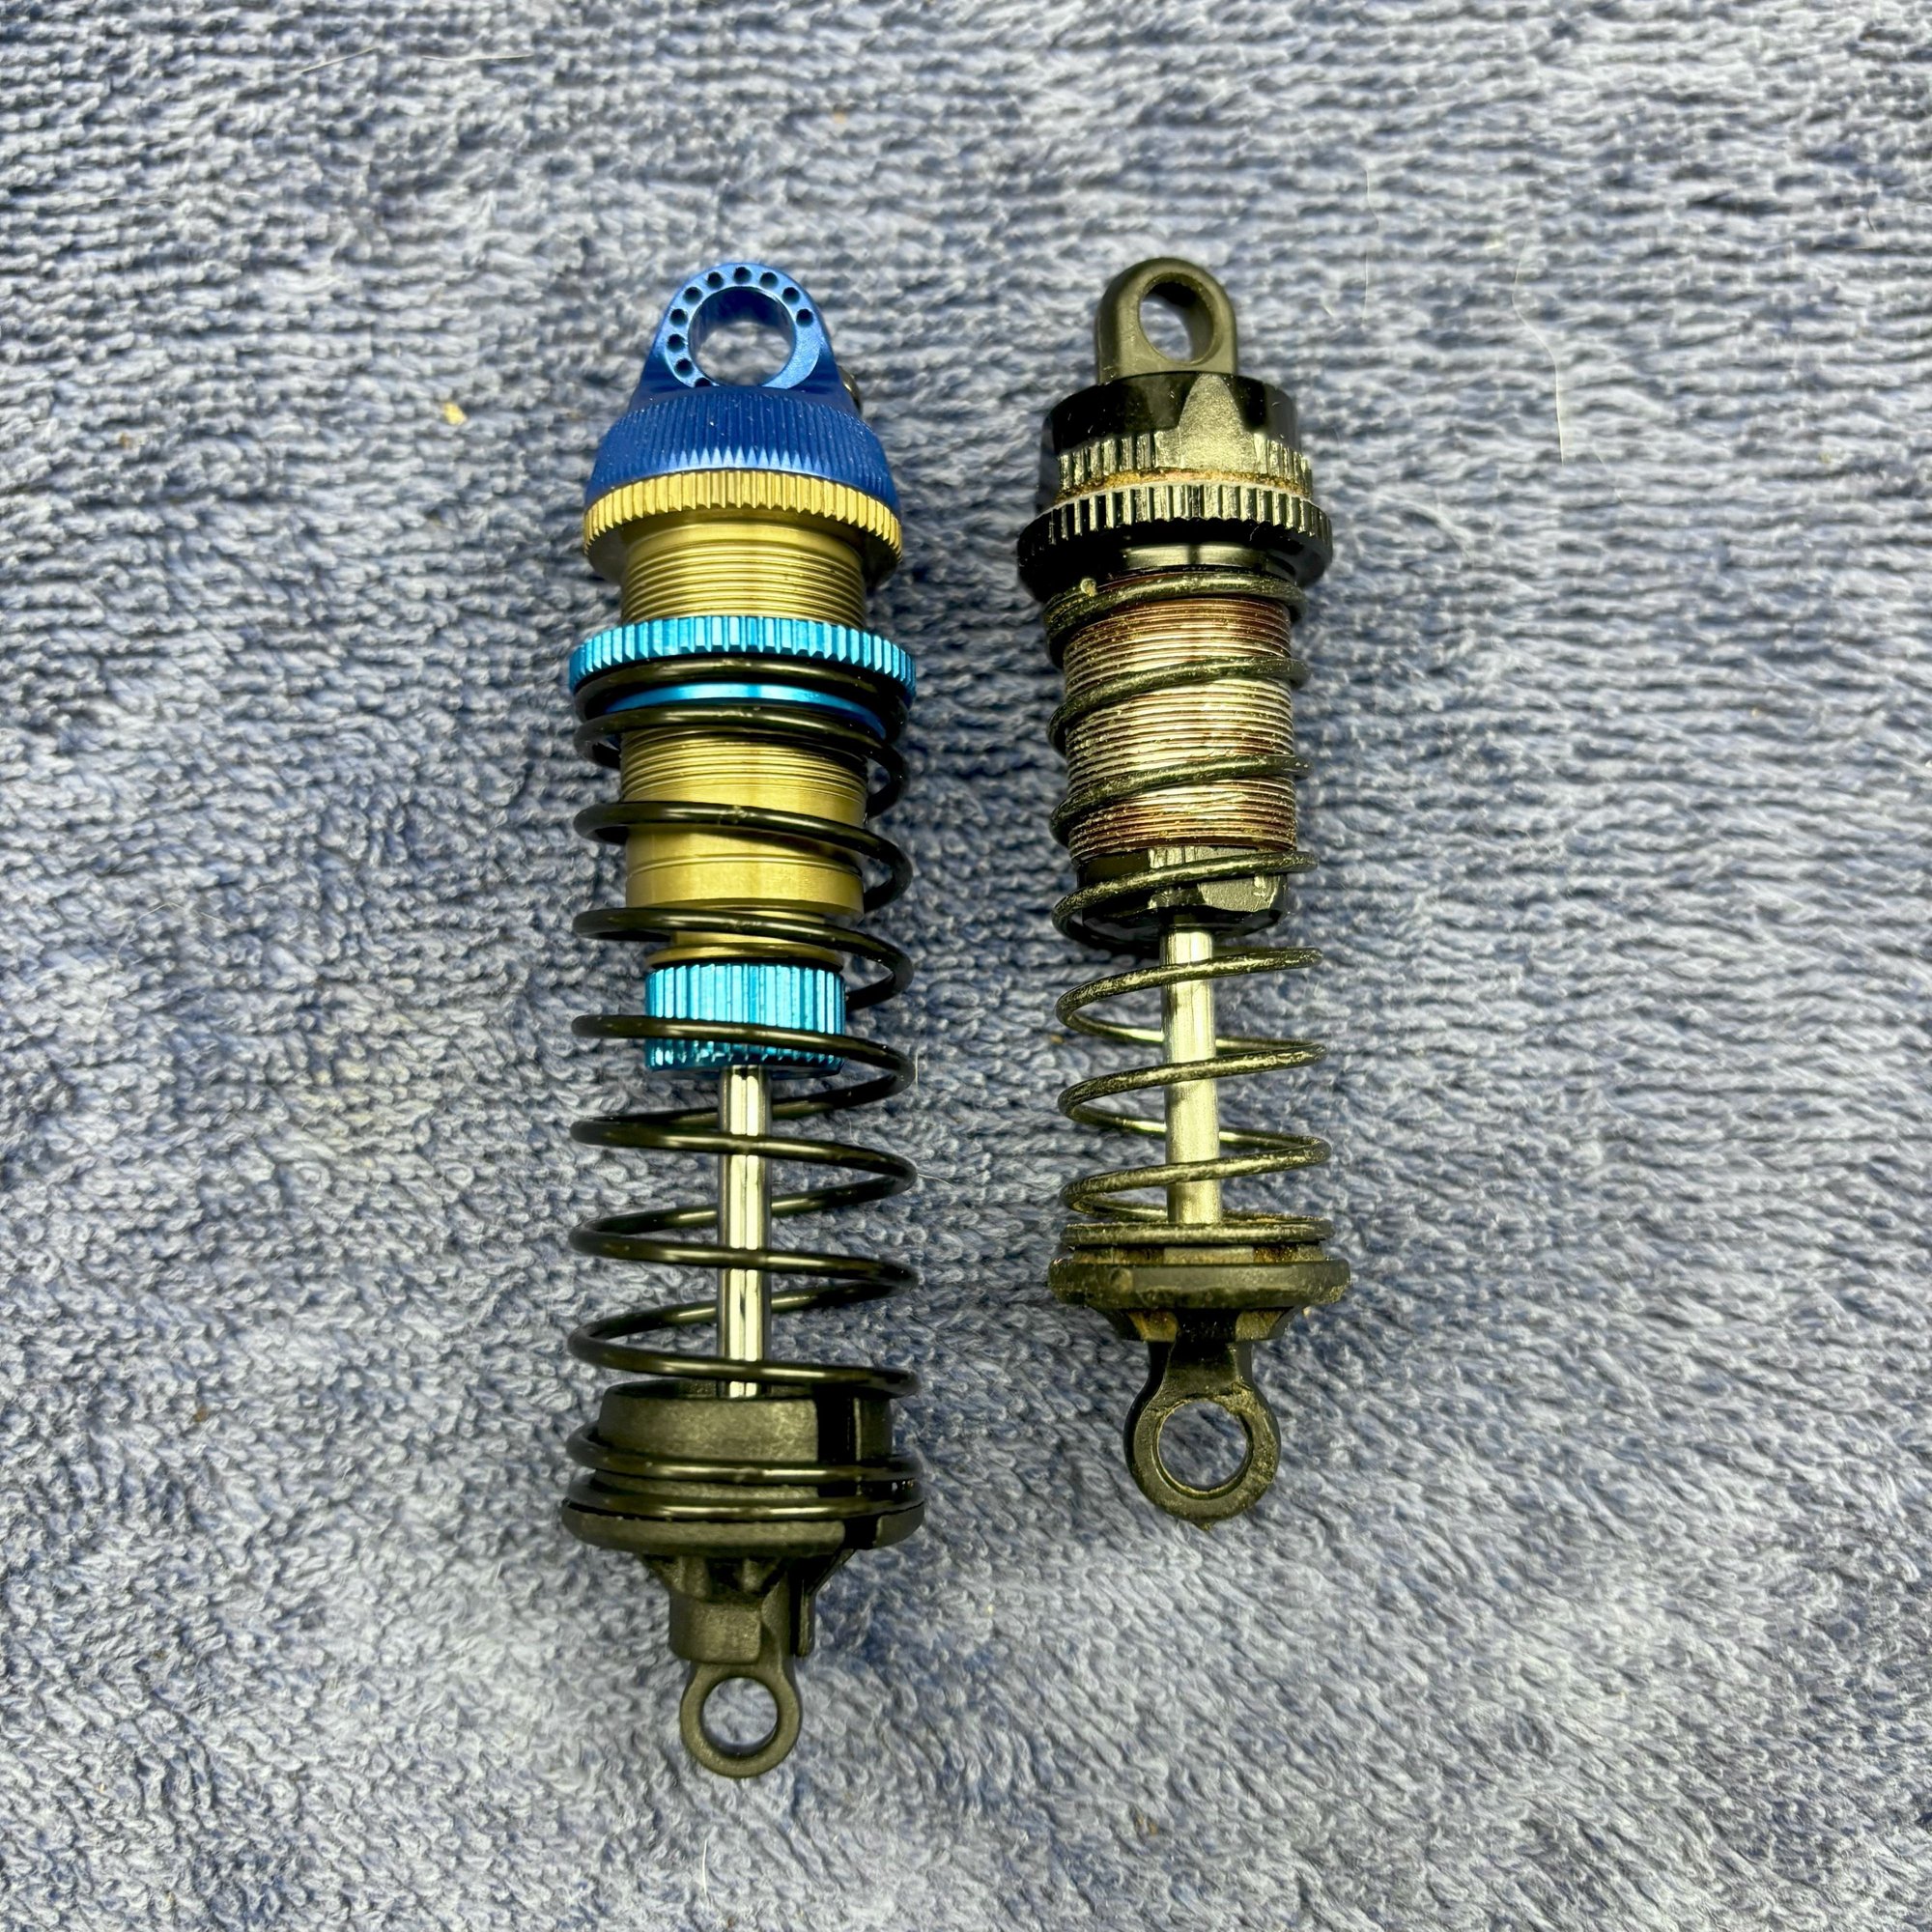
New Associated shocks (left); old Yeah Racing shocks (right)
The one thing I'll say about these Associated shocks is that, for as nice as the finished product is, the company sure didn't make anything easy on me. I found it harder than I expected to simply create a shopping list of all the parts needed to build four complete, working shocks. I even emailed customer service, and they couldn't tell me either. I ended up having to pick one of their RTR models (I used the SR10), download the manual, and use that as a sort of 'guide' for what components are needed. The number of parts that go into these shocks that have literally zero specifications or measurements listed on the Associated website was baffling. In many cases the Amain product page for the same part had more information than the Associated website. Why does Associated have a 'specifications' tab on every product, but most of the time there's no info listed? I had no fewer than three email chains going with Associated customer support, and they couldn't tell me almost anything about their parts...for example, what sized pivot balls to get for a specific shock rod eyelet, or how long the overall shock is once assembled if I use xyz sized shaft and body. I also found more than one product manual where the graphic had mislabeled parts-- the image would be correct, but the part number listed for the part in the image was wrong, or mixed up with a different part in the diagram.
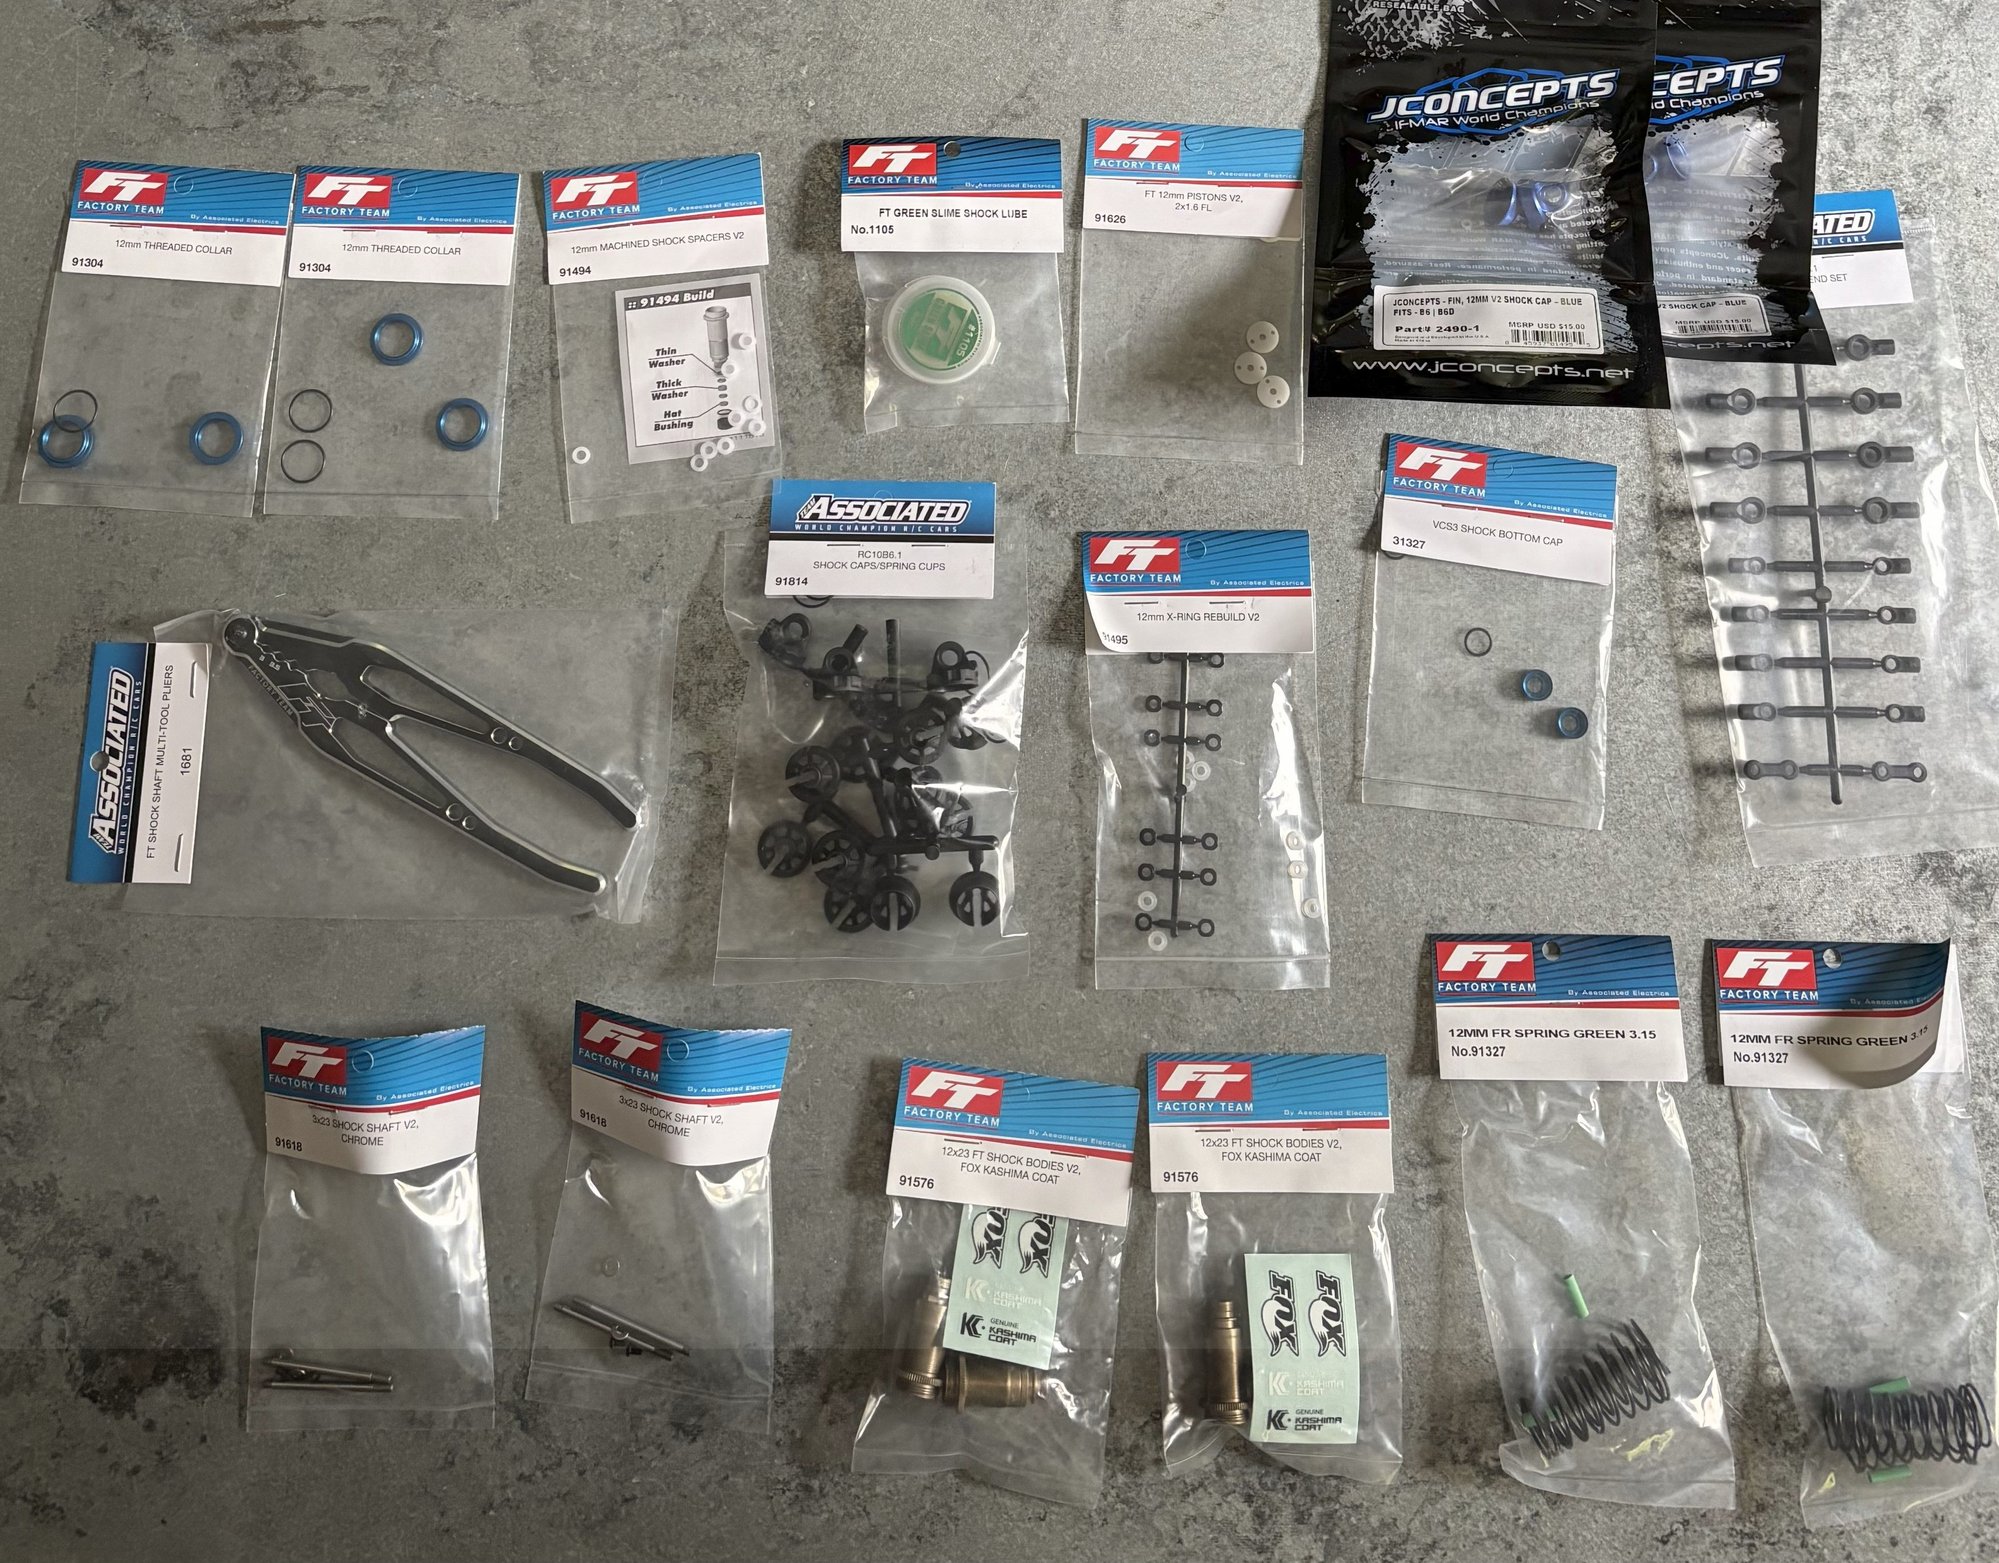
Anyway, after way too many emails and lots of research, I finally was able to assemble four complete "12mm" (diameter) shocks. I splurged and went with the Fox "genuine kashima coat" shock bodies, as well as some aluminum caps from J Concepts. They went together nicely, and feel great in the hand. The build quality almost made me forget how much trouble it was to figure out what I needed to buy in the first place lol
This then brought me to my next challenge, which was mounting hardware and overall fitment.
The assembled Associated shocks, using 23mm shock shafts and 23mm shock bodies, are roughly 78mm eye-to-eye, as compared to the 65mm eye-to-eye Yeah Racing shocks I had been using. Technically you can mount the Associated shocks to the stock RS4 chassis, but they are basically fully compressed when at rest with only 1-2mm of travel, which obviously was not going to work. So, I either needed the lower suspension arms to be able to drop lower than they do stock, or have a taller shock tower.
I first tried to modify the lower suspension arms and bottom chassis plate to allow them to extend/ angle down further than they do stock. The work itself was easy enough and took a single afternoon of measuring and removing material with the circular saw and sanding attachments on my Dremel. The finished product, however, was not viable. The angle of the universal shafts going from the diff cups to the wheels was too extreme. Under power, the car damn near rattled itself apart, and the shafts popped out of the diff cups almost immediately during the one and only on-road test I performed, which was on perfectly smooth asphalt too-- not a promising design if I'm meant to be running on rough terrain befitting of a rally car. Also, the suspension geometry got altered in the process, such that the toe of the wheels would change over the course of the shock compressing. It was worth a try, but clearly not a good final solution.
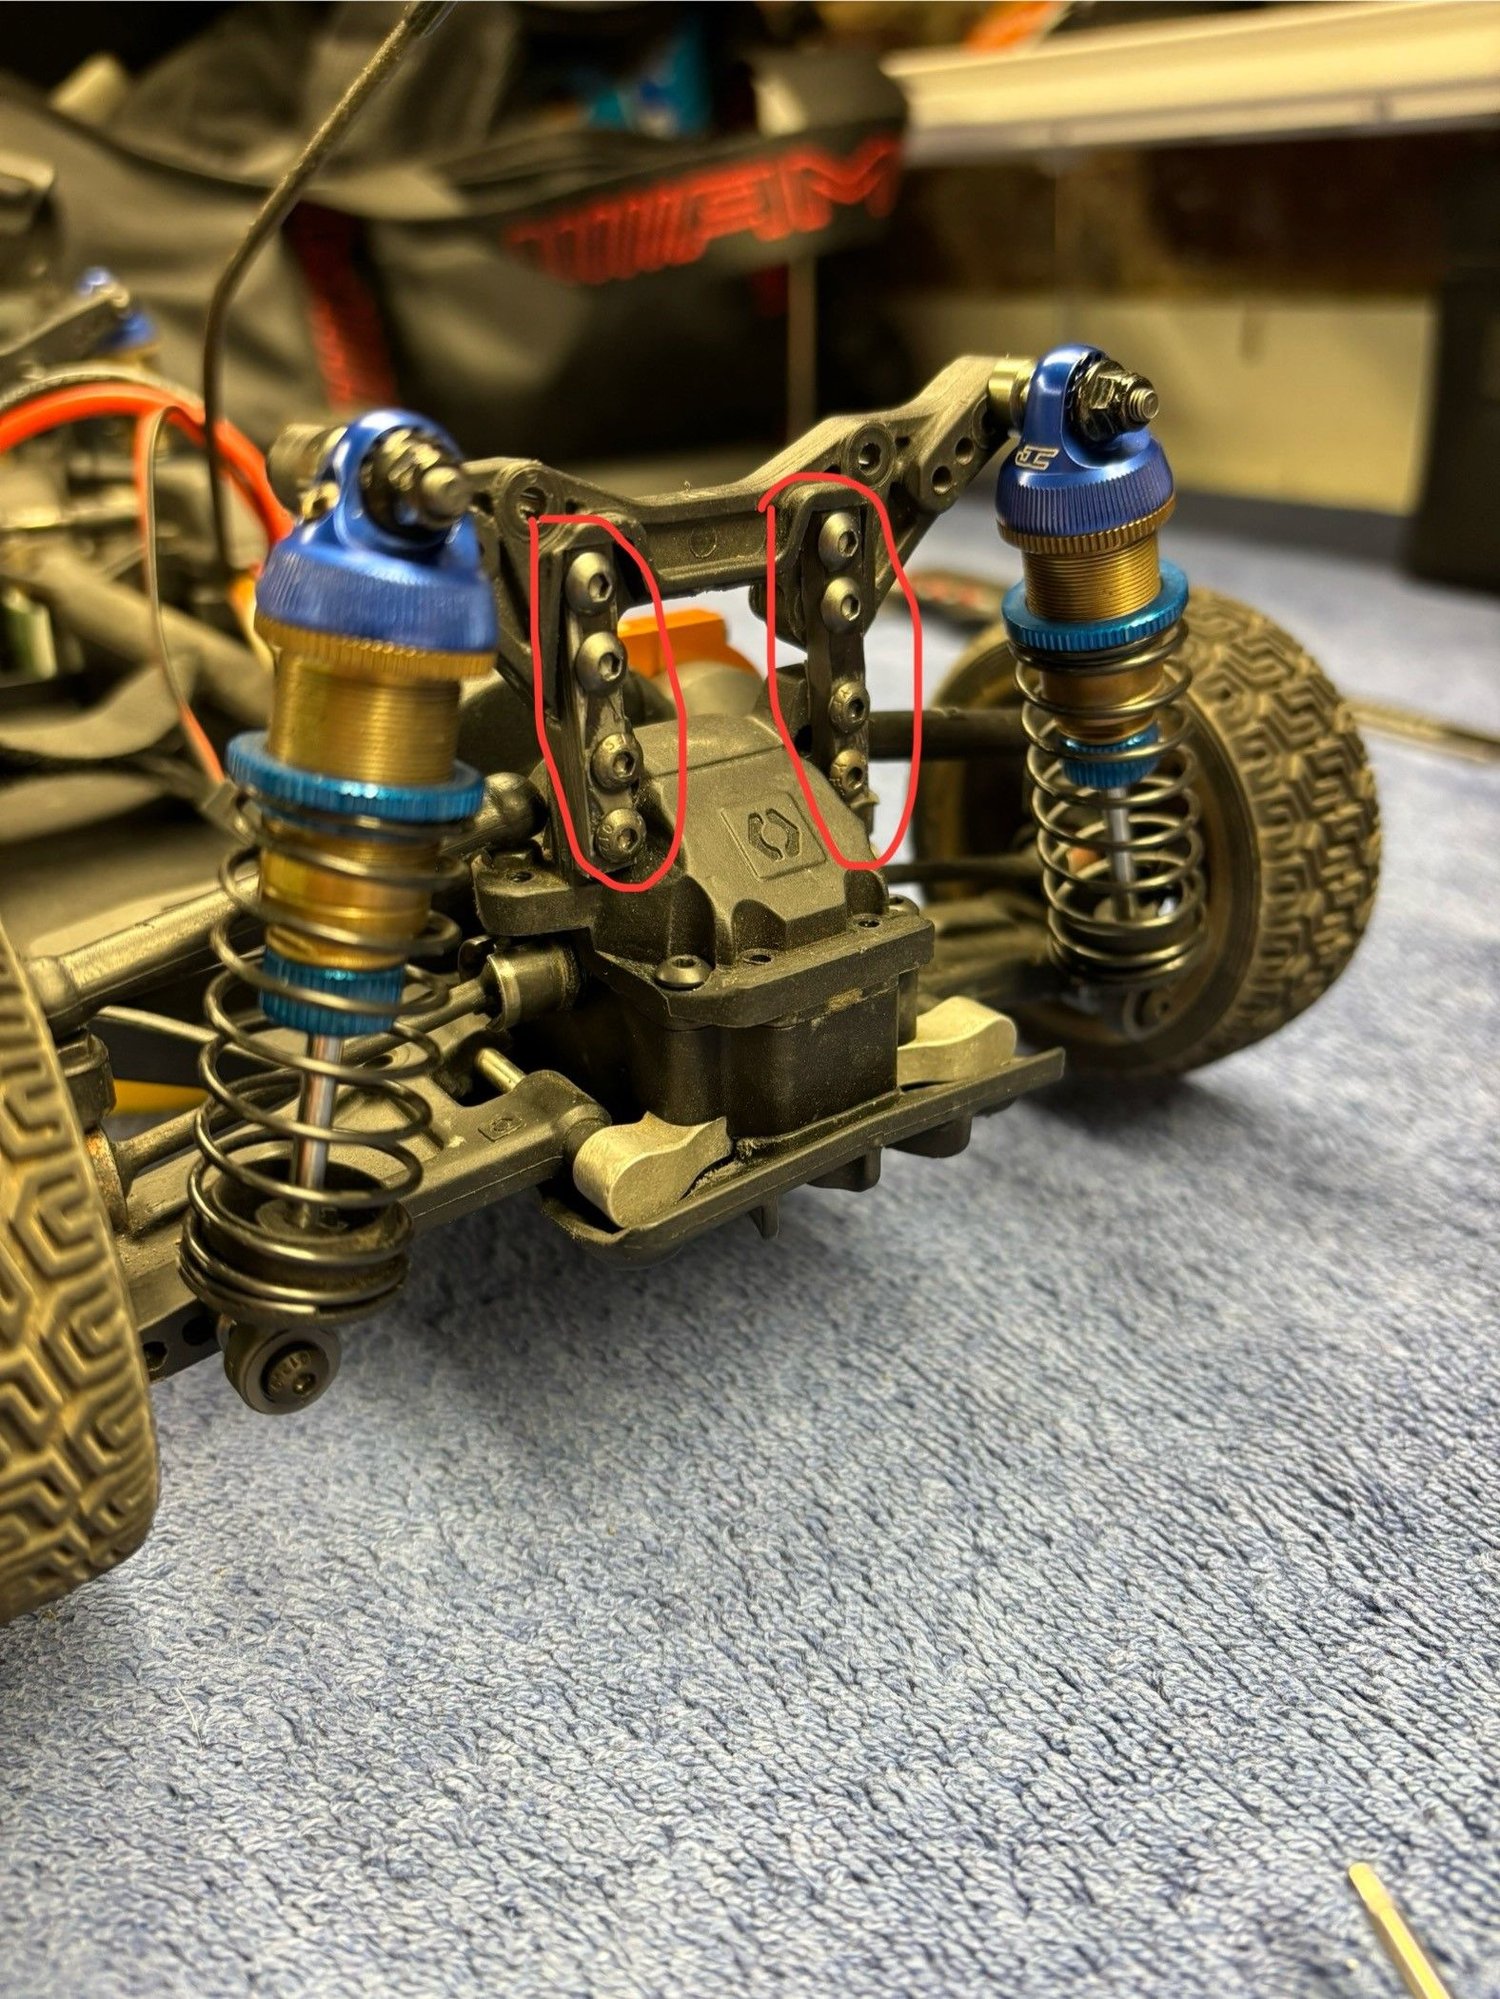
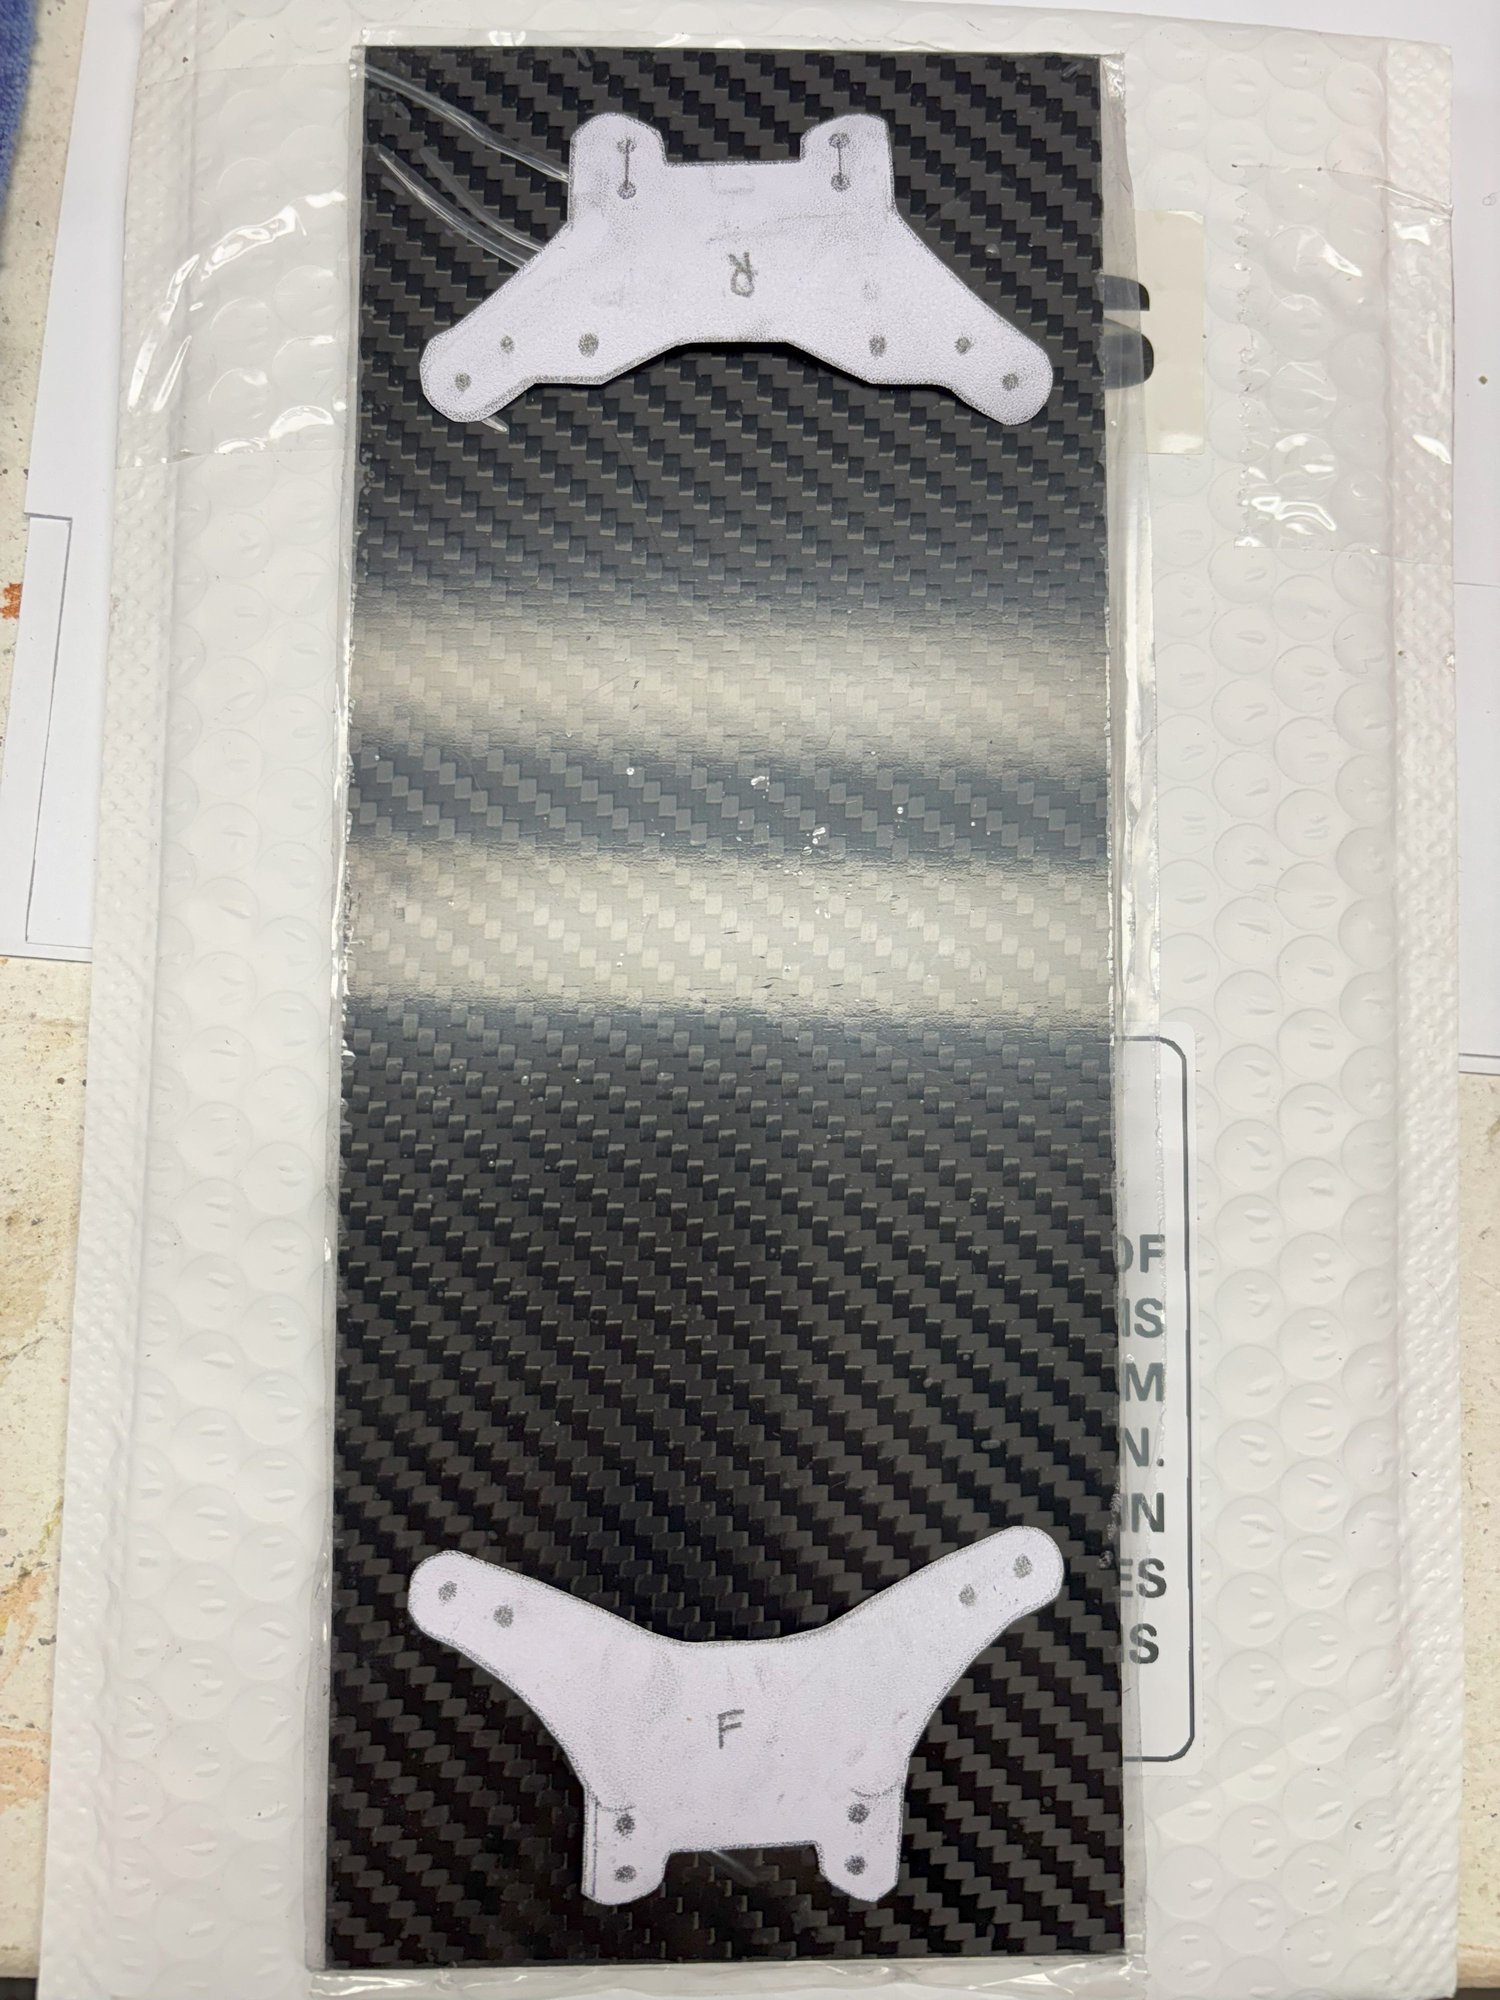
I then went the route of trying to hand-fabricate a taller shock tower design. I picked up some 3mm thick carbon fiber plate on amazon, and simply cut four bars (two for the front, two for the rear) that I could use as extension brackets to raise the stock arms taller than they normally sit. I did this free-hand using the Dremel, and while they aren't exactly perfect, the design is sound and the fitment was actually quite sturdy.
I tried a few other designs too (see below), but the simple bars shown above were about the level of DIY design I was able to successfully implement with the tools I have available.
One of the failed designs-- way too complicated to cut and drill free-hand.
I then designed a more complex and durable H-shape bracket which I was not successful at making myself, but I sent a technical sketch to a buddy who drew it in CAD, and sent it off to PCBWay to have it professionally cut using CNC/ lasers. Having that CAD file, I can now also order spares/ replacements easily if anything breaks.
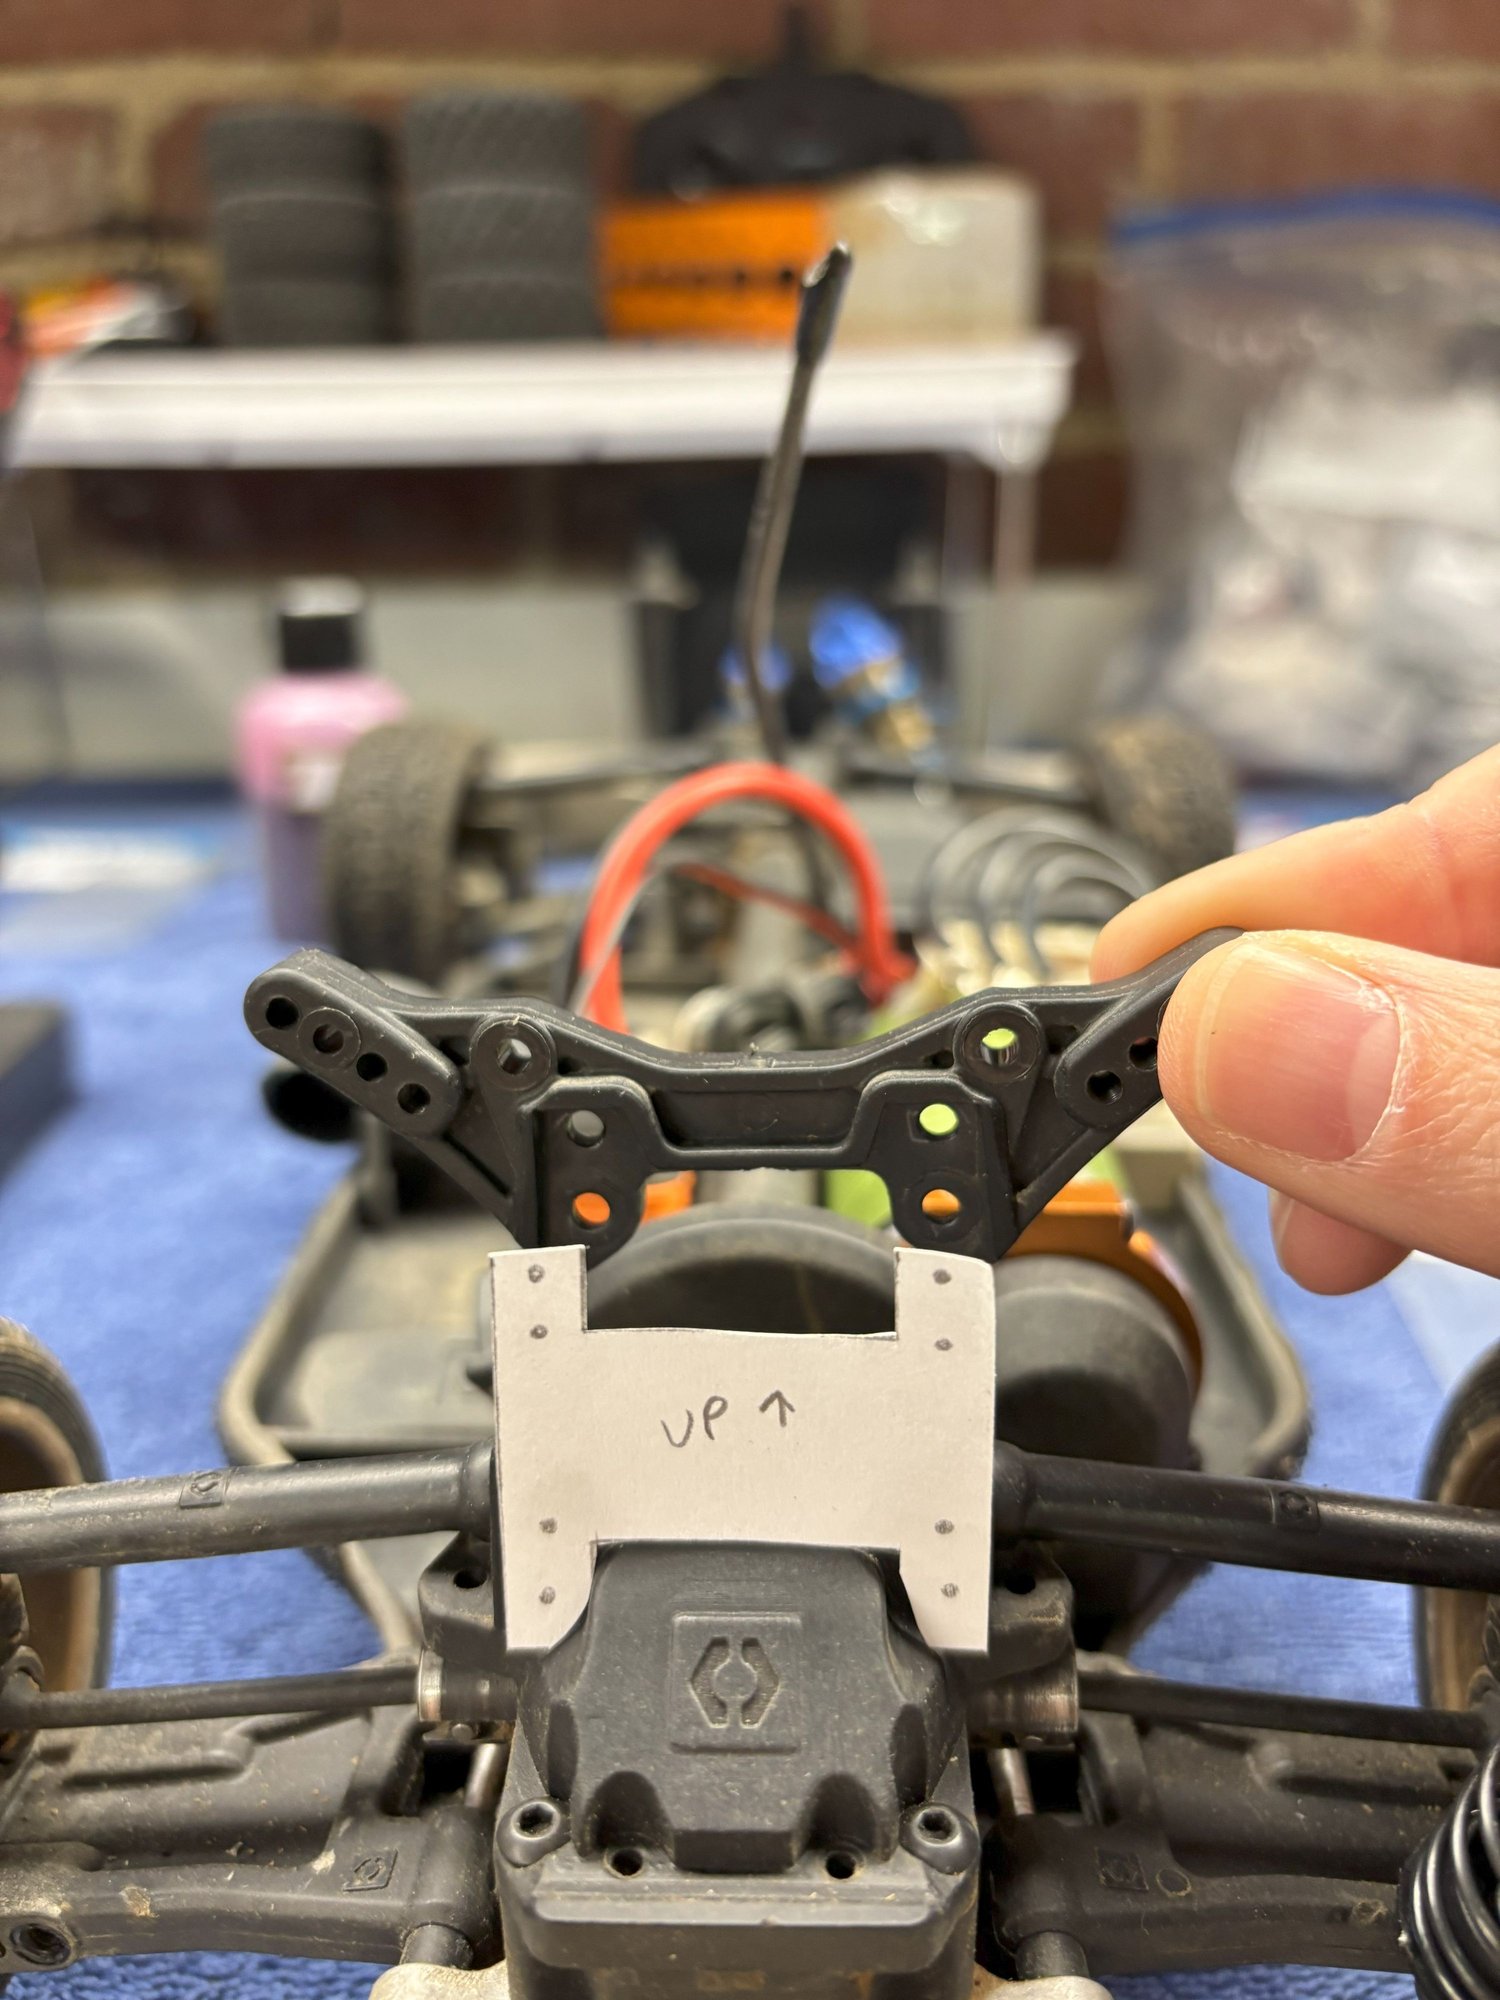
Mock-up stencil of H shape, pre-production
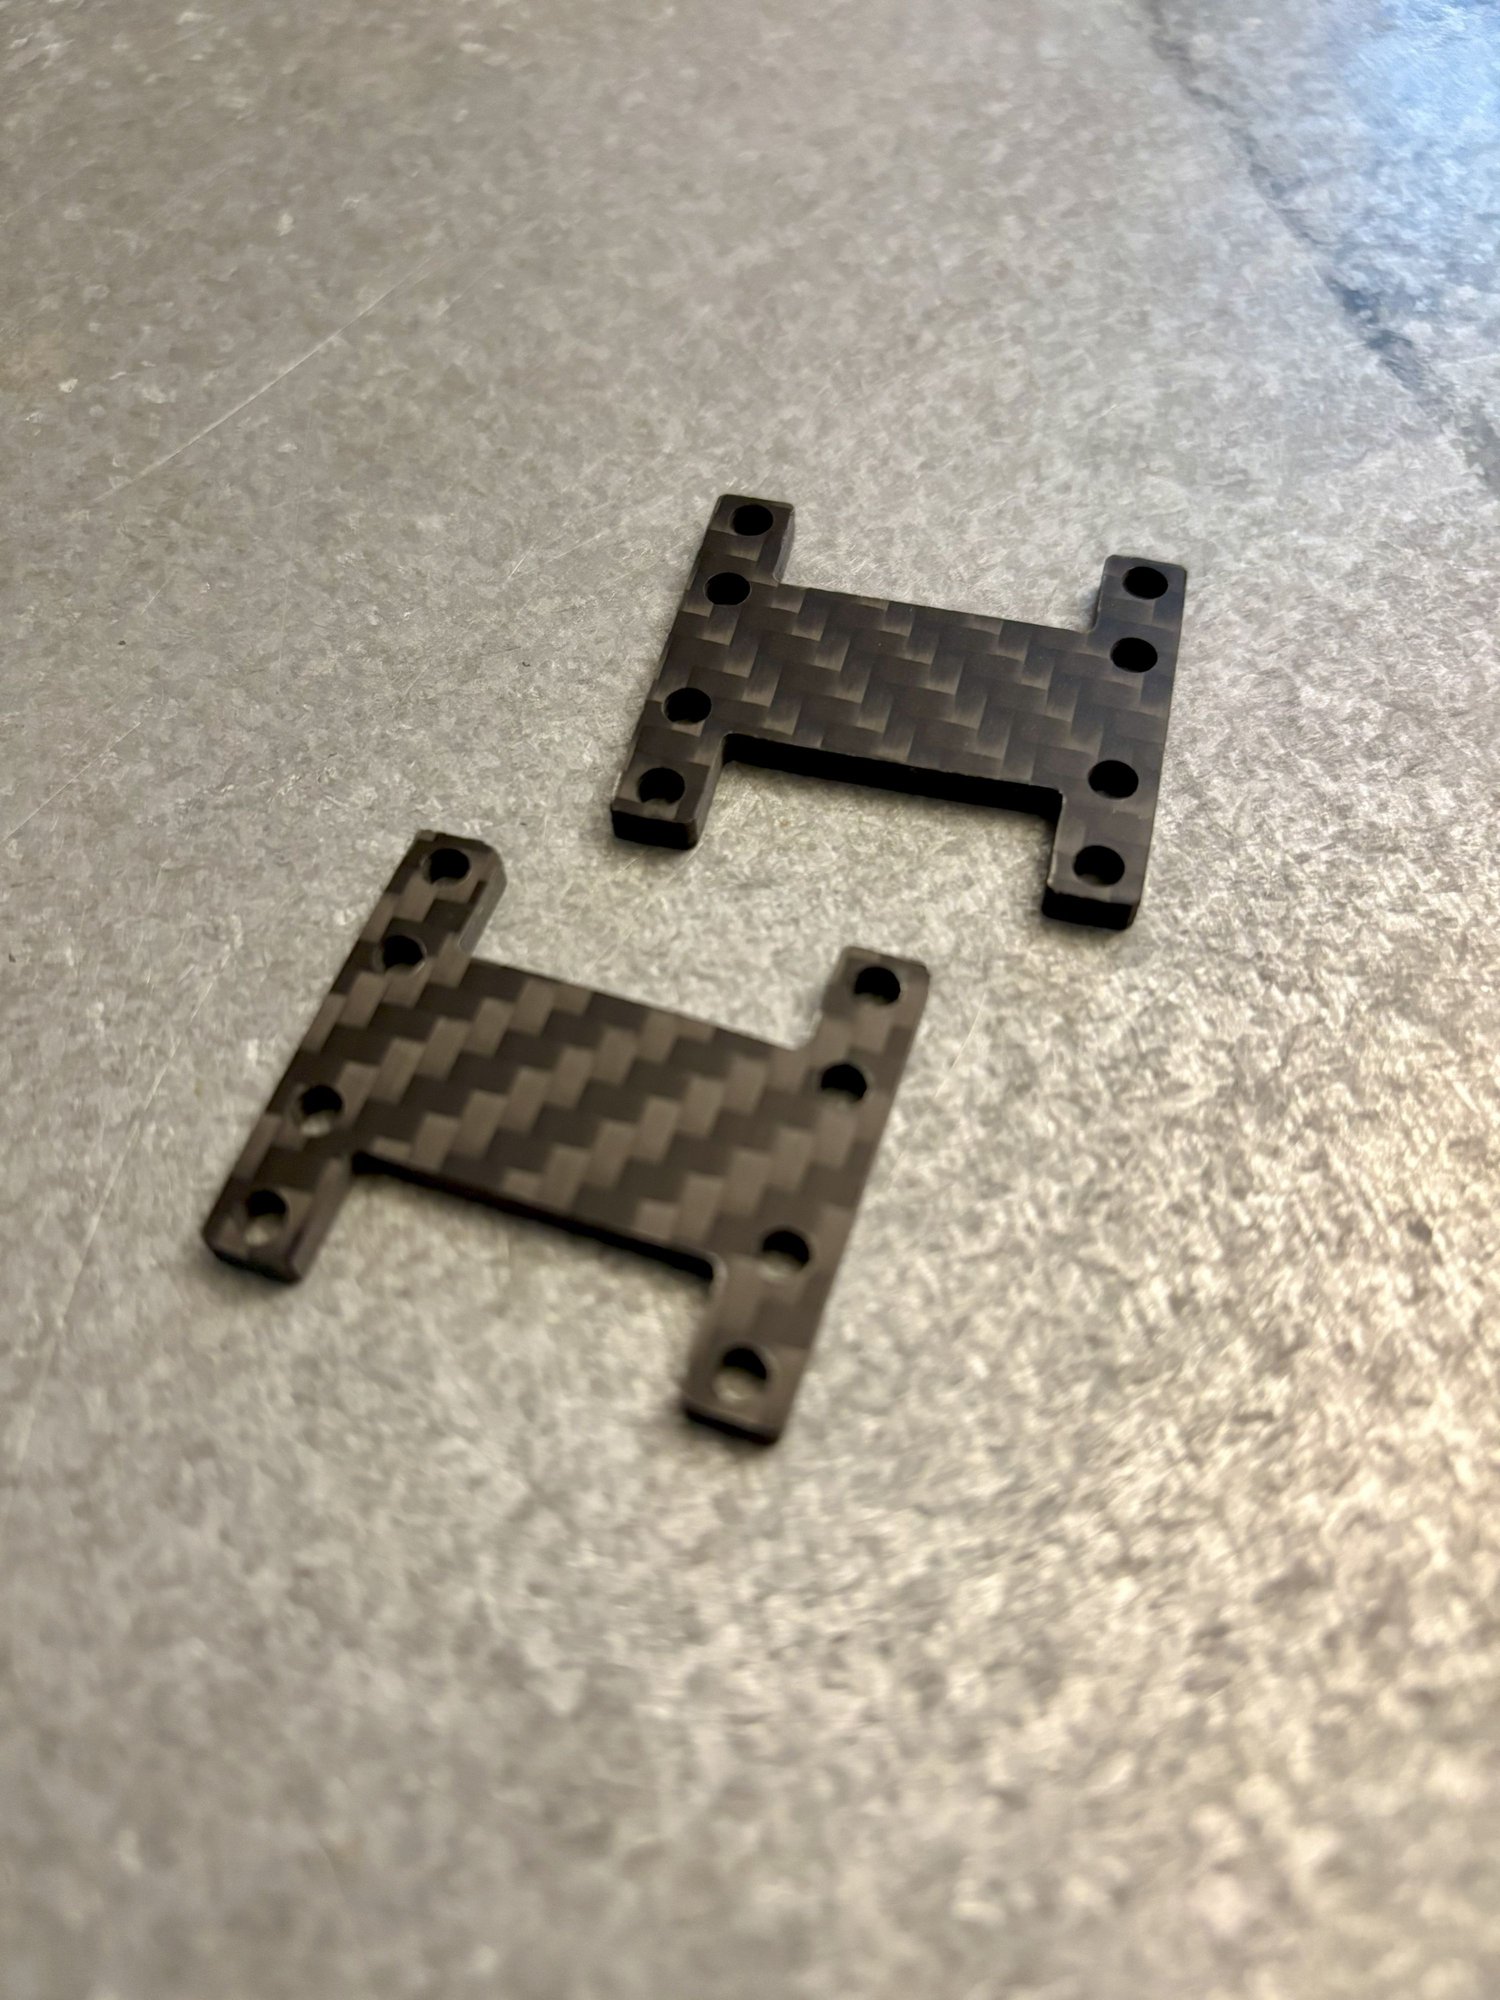
Finished product from PCBWay
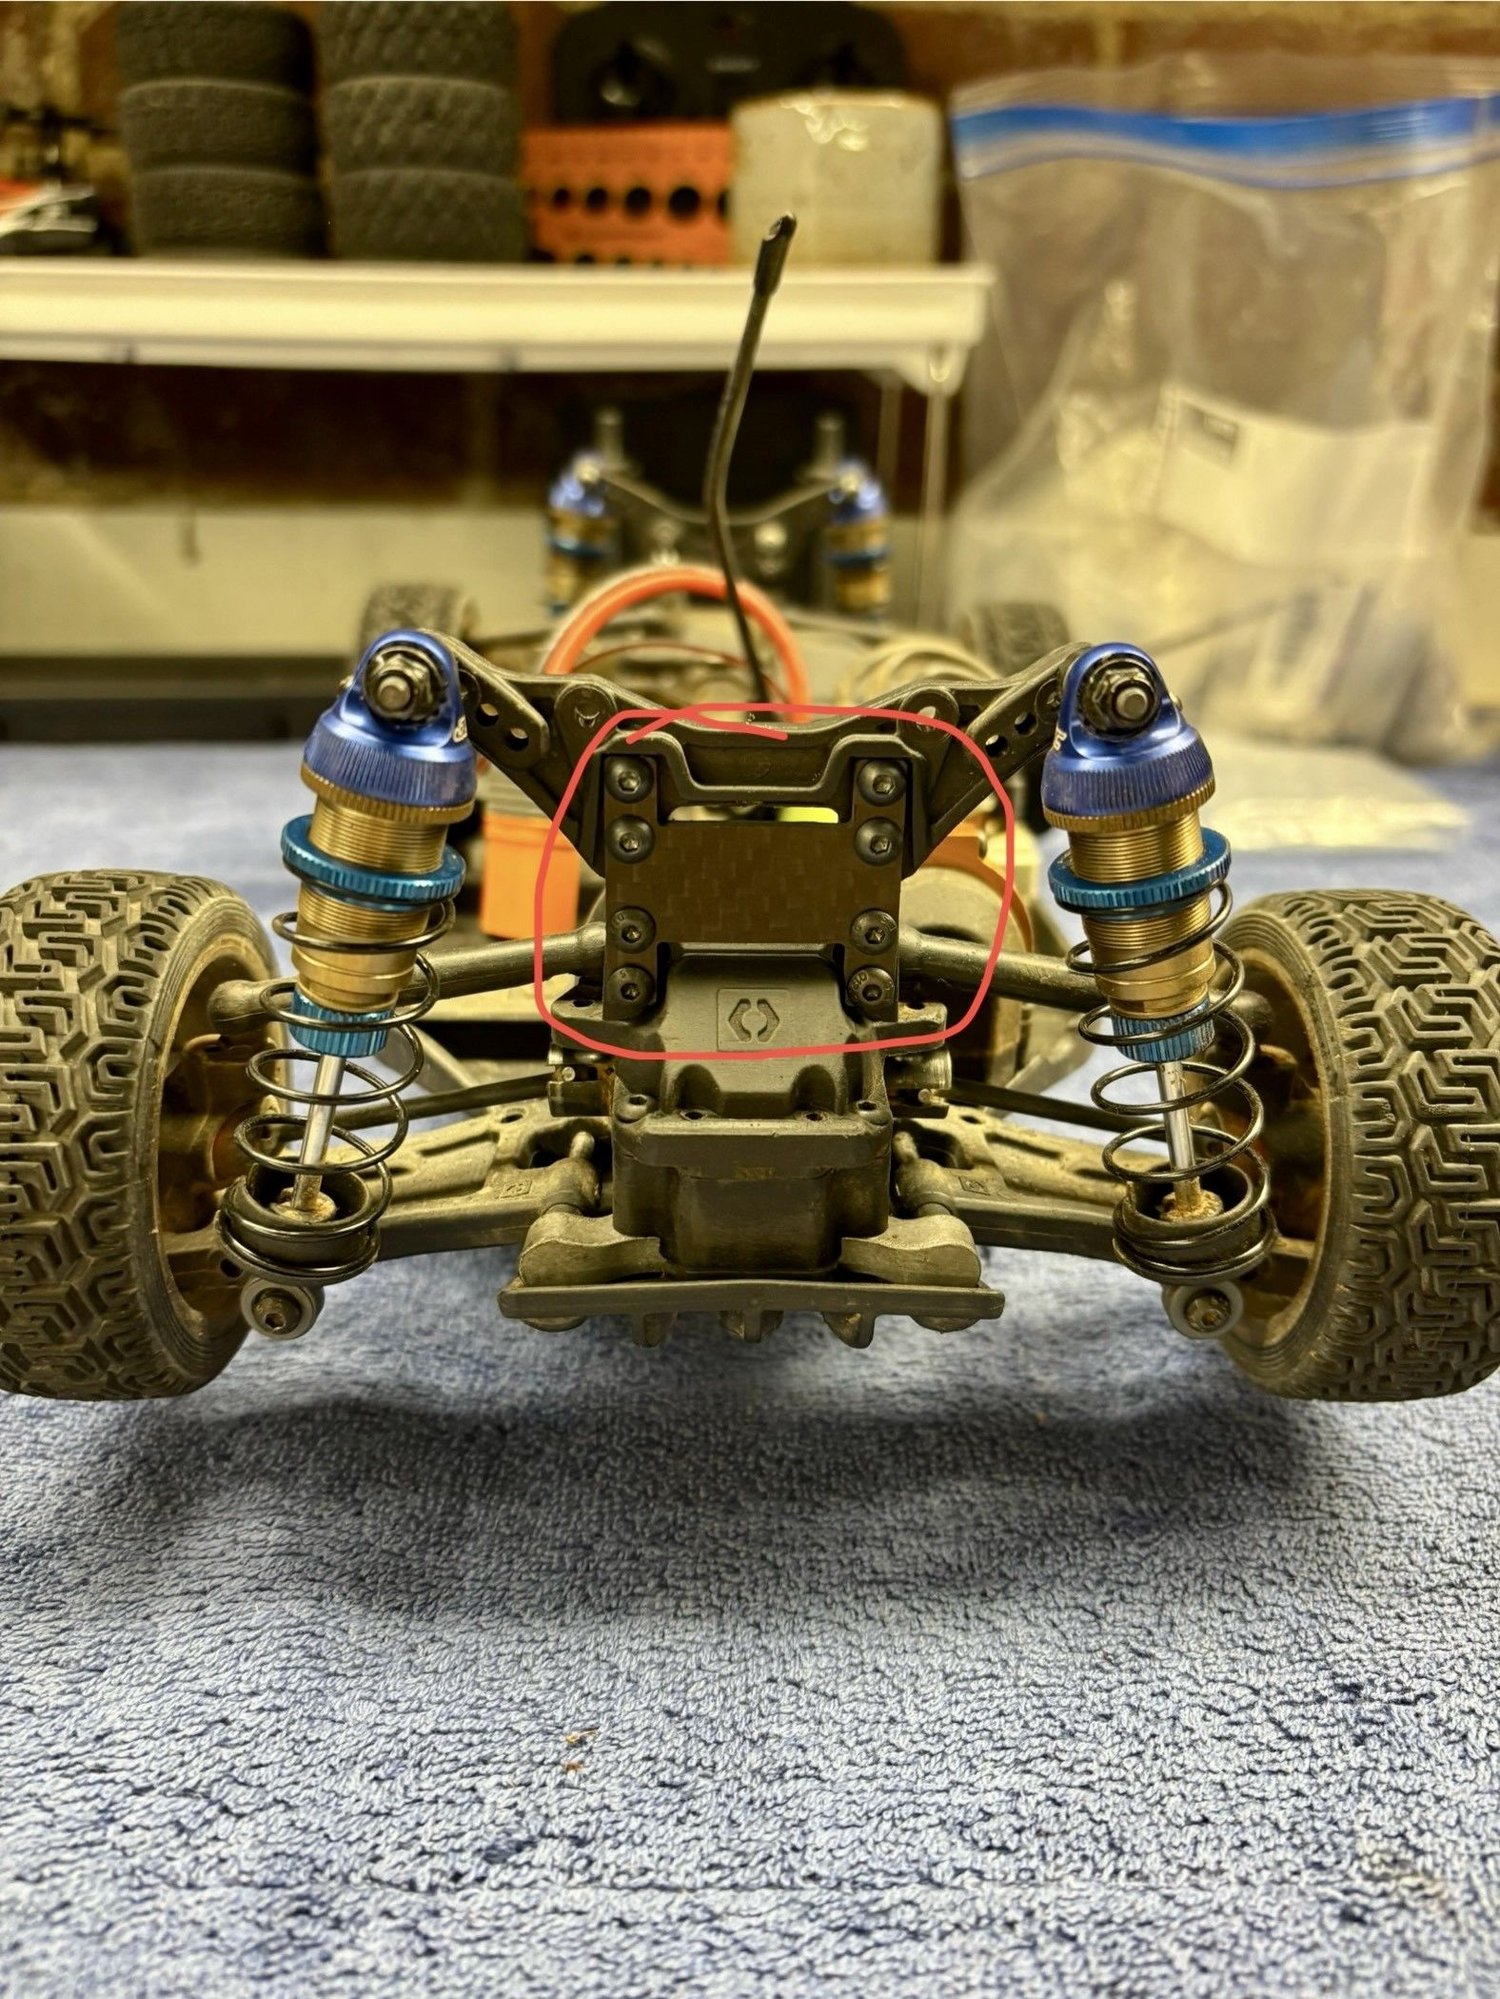
Final production design, mounted to the car
The final piece of the puzzle was that, with the beefier shock bodies and stand-off bushings, I had to mess with the body posts a bit.
That's about it for now! Now onto the REAL fun-- testing different shock oils and spring rates the best way I know how--by getting out there and having fun driving!
Footnote: For as great as carbon fiber is as an application in RC, you really need to take PPE seriously. It is a quite dangerous material to work with if you're flinging dust into the air. I did all my work outdoors, in goggles, a respirator, latex gloves, and plastic sleeves. If you have an extra set of hands to keep the nozzle of a shop vac directly on your cutting bit, maybe you can get away with less PPE than I did. But either way, you want to take it seriously.
The 65mm Yeah Racing shocks I've had on the chassis for a number of years now have worked out really well overall, but have started to show some serious wear and tear. They don't seem to hold their oil for as long as they used to between servicing. To be clear this is through no fault of their own, and nothing is wrong with their design-- running off-road and at-speed is a harsh existence. While I'd generally be happy to pick up a new set and move along, I wanted to take this opportunity to give the suspension setup a little love. Ultimately I made a post on Reddit asking which aftermarket shocks the RC community likes, and of the many answers, Associated 12mm dampers were mentioned pretty consistently across the board. I liked that they sell all the shock components and internals separately, so that I could not only learn how to assemble a shock from scratch myself (the Yeah Racing ones I've previously used are factory-assembled), but also, this would allow me to replace individual components that fail or experience wear, as opposed to buying all new shocks.
New Associated shocks (left); old Yeah Racing shocks (right)
The one thing I'll say about these Associated shocks is that, for as nice as the finished product is, the company sure didn't make anything easy on me. I found it harder than I expected to simply create a shopping list of all the parts needed to build four complete, working shocks. I even emailed customer service, and they couldn't tell me either. I ended up having to pick one of their RTR models (I used the SR10), download the manual, and use that as a sort of 'guide' for what components are needed. The number of parts that go into these shocks that have literally zero specifications or measurements listed on the Associated website was baffling. In many cases the Amain product page for the same part had more information than the Associated website. Why does Associated have a 'specifications' tab on every product, but most of the time there's no info listed? I had no fewer than three email chains going with Associated customer support, and they couldn't tell me almost anything about their parts...for example, what sized pivot balls to get for a specific shock rod eyelet, or how long the overall shock is once assembled if I use xyz sized shaft and body. I also found more than one product manual where the graphic had mislabeled parts-- the image would be correct, but the part number listed for the part in the image was wrong, or mixed up with a different part in the diagram.
Anyway, after way too many emails and lots of research, I finally was able to assemble four complete "12mm" (diameter) shocks. I splurged and went with the Fox "genuine kashima coat" shock bodies, as well as some aluminum caps from J Concepts. They went together nicely, and feel great in the hand. The build quality almost made me forget how much trouble it was to figure out what I needed to buy in the first place lol
This then brought me to my next challenge, which was mounting hardware and overall fitment.
The assembled Associated shocks, using 23mm shock shafts and 23mm shock bodies, are roughly 78mm eye-to-eye, as compared to the 65mm eye-to-eye Yeah Racing shocks I had been using. Technically you can mount the Associated shocks to the stock RS4 chassis, but they are basically fully compressed when at rest with only 1-2mm of travel, which obviously was not going to work. So, I either needed the lower suspension arms to be able to drop lower than they do stock, or have a taller shock tower.
I first tried to modify the lower suspension arms and bottom chassis plate to allow them to extend/ angle down further than they do stock. The work itself was easy enough and took a single afternoon of measuring and removing material with the circular saw and sanding attachments on my Dremel. The finished product, however, was not viable. The angle of the universal shafts going from the diff cups to the wheels was too extreme. Under power, the car damn near rattled itself apart, and the shafts popped out of the diff cups almost immediately during the one and only on-road test I performed, which was on perfectly smooth asphalt too-- not a promising design if I'm meant to be running on rough terrain befitting of a rally car. Also, the suspension geometry got altered in the process, such that the toe of the wheels would change over the course of the shock compressing. It was worth a try, but clearly not a good final solution.
I then went the route of trying to hand-fabricate a taller shock tower design. I picked up some 3mm thick carbon fiber plate on amazon, and simply cut four bars (two for the front, two for the rear) that I could use as extension brackets to raise the stock arms taller than they normally sit. I did this free-hand using the Dremel, and while they aren't exactly perfect, the design is sound and the fitment was actually quite sturdy.
I tried a few other designs too (see below), but the simple bars shown above were about the level of DIY design I was able to successfully implement with the tools I have available.
One of the failed designs-- way too complicated to cut and drill free-hand.
I then designed a more complex and durable H-shape bracket which I was not successful at making myself, but I sent a technical sketch to a buddy who drew it in CAD, and sent it off to PCBWay to have it professionally cut using CNC/ lasers. Having that CAD file, I can now also order spares/ replacements easily if anything breaks.
Mock-up stencil of H shape, pre-production
Finished product from PCBWay
Final production design, mounted to the car
The final piece of the puzzle was that, with the beefier shock bodies and stand-off bushings, I had to mess with the body posts a bit.
That's about it for now! Now onto the REAL fun-- testing different shock oils and spring rates the best way I know how--by getting out there and having fun driving!
Footnote: For as great as carbon fiber is as an application in RC, you really need to take PPE seriously. It is a quite dangerous material to work with if you're flinging dust into the air. I did all my work outdoors, in goggles, a respirator, latex gloves, and plastic sleeves. If you have an extra set of hands to keep the nozzle of a shop vac directly on your cutting bit, maybe you can get away with less PPE than I did. But either way, you want to take it seriously.
07-16-2025 | 01:43 AM
#10

Nice work and I will definitely have to say you are completely dedicated to your project.
07-16-2025 | 01:20 PM
#11
Thread Starter
Junior Member
 07-27-2025 | 12:26 PM
#12
Thank you! For someone who doesn't have any access to nor skills with some tools you frequently find in this hobby, like 3D printing, CNC routers, CAD/coding skills etc., I think I've done well against my original goal of converting a touring car to something that thrives in an off-road environment-- and something I can call my own. I know it's nothing compared to guys who basically make their entire car from scratch and almost every single part is custom (thinking of the ROSSA speed run dudes), but I'm really happy with its performance, and it has been a very fun journey so far

As long as you are happy that is all that matters.
09-01-2025 | 04:42 PM
#13
Thread Starter
Junior Member
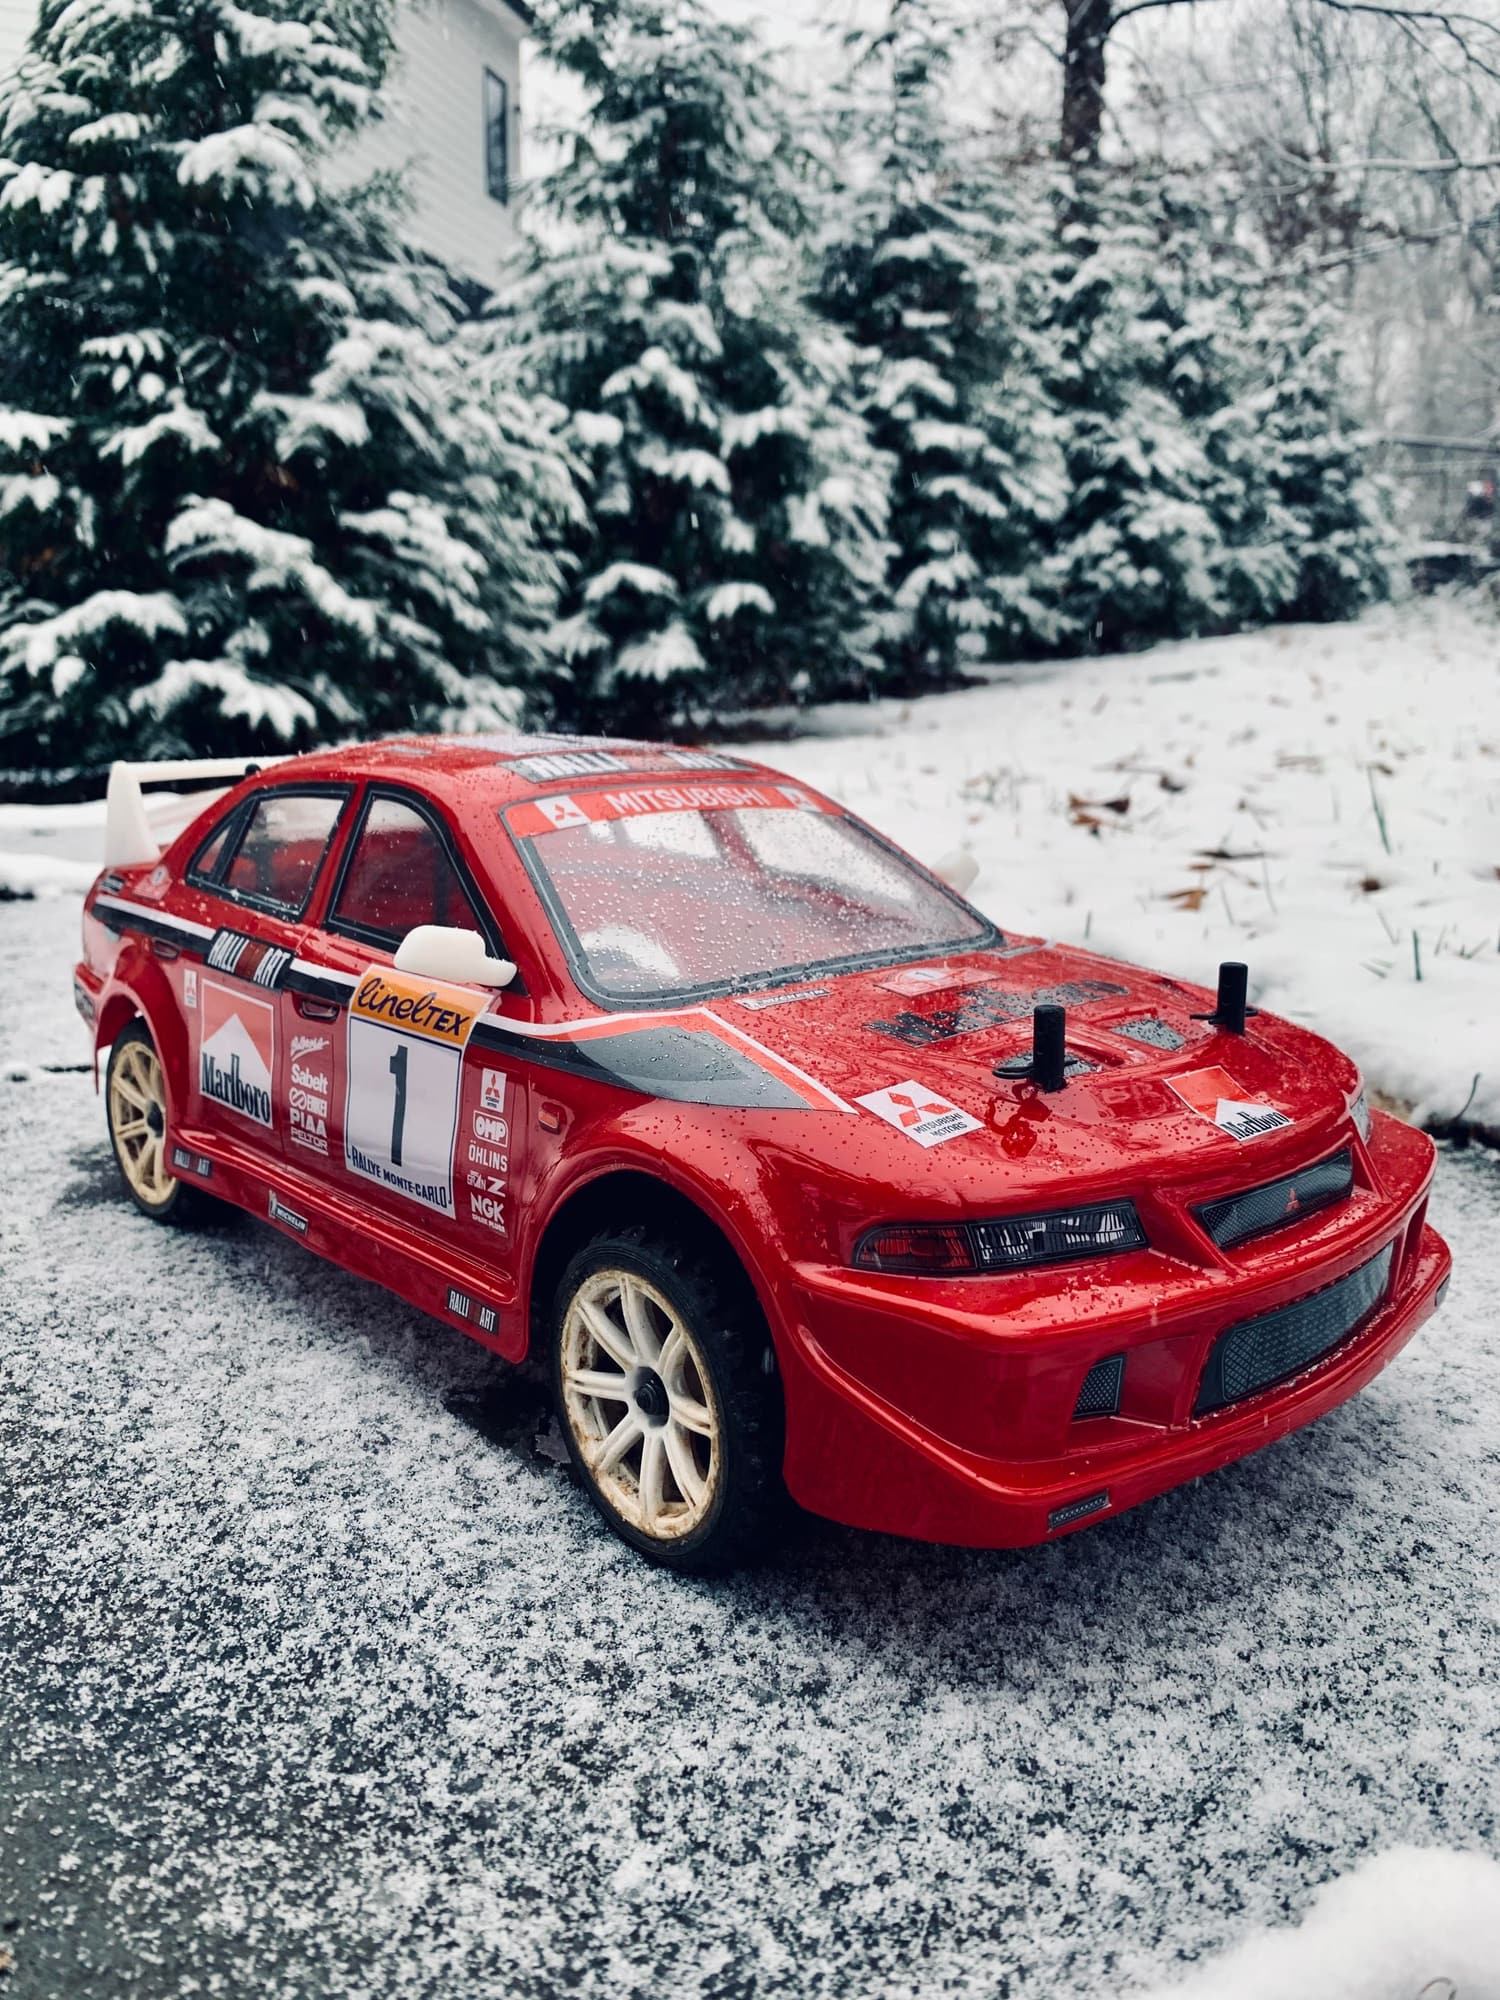
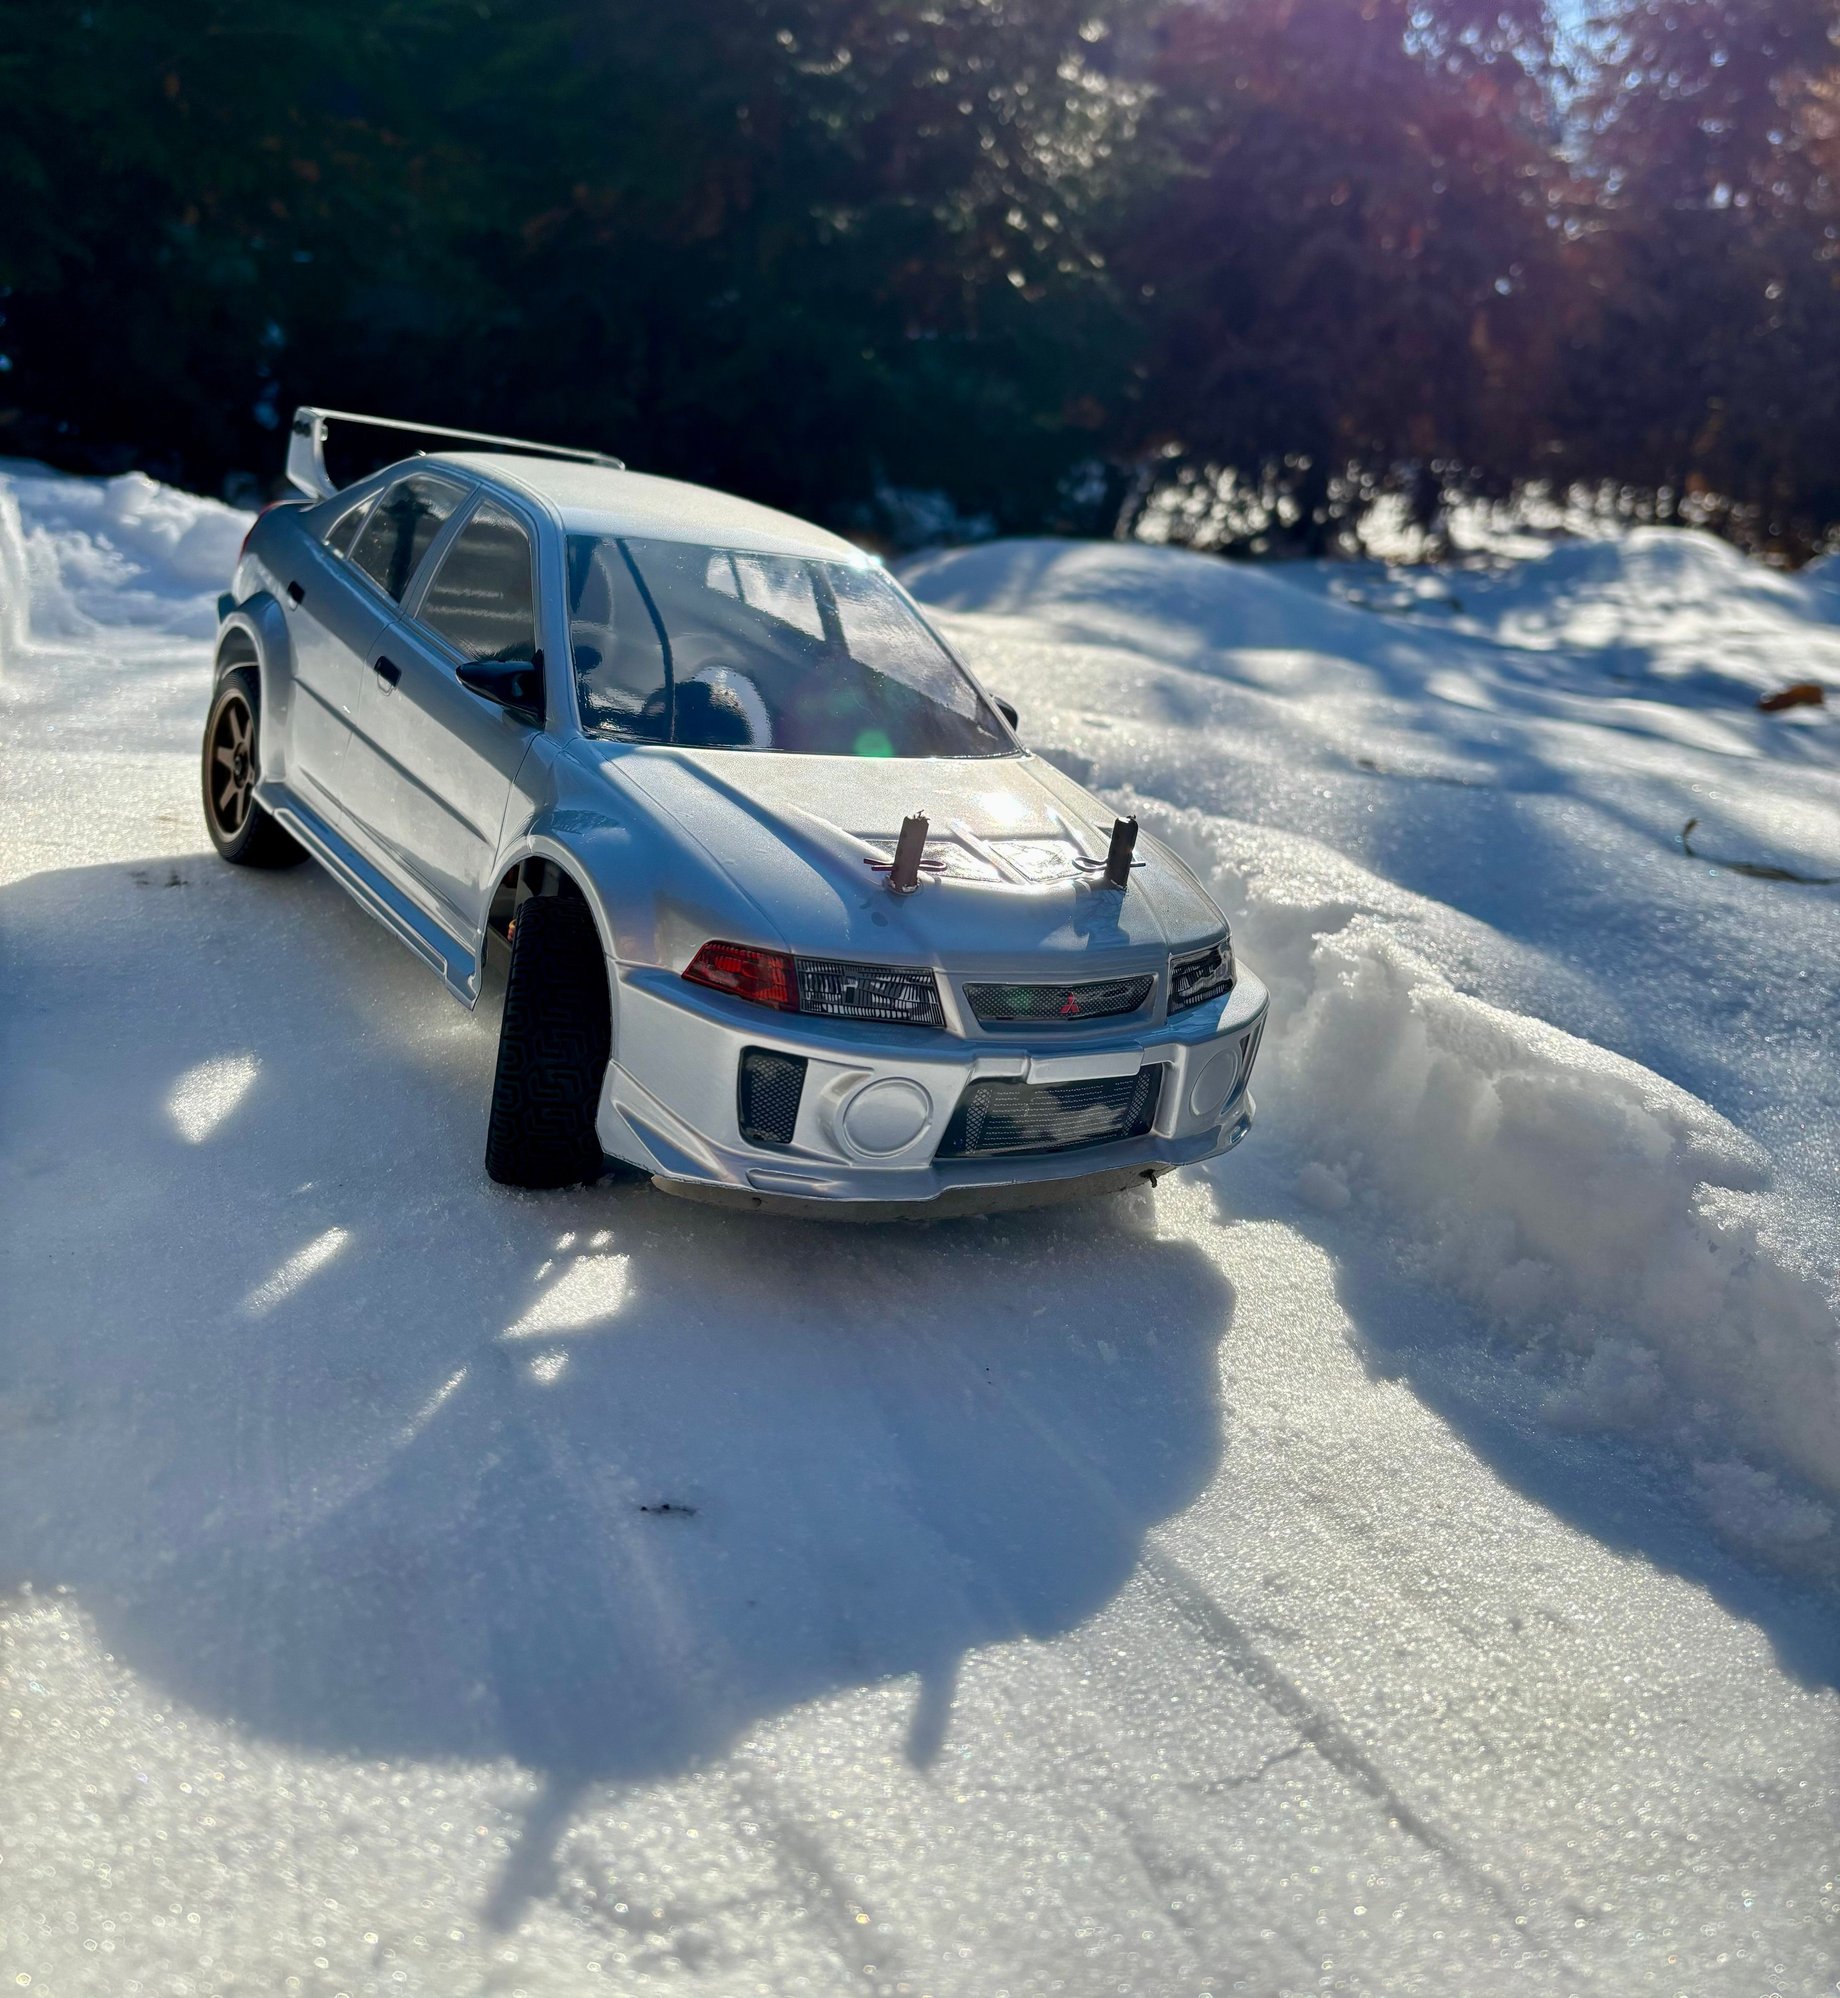
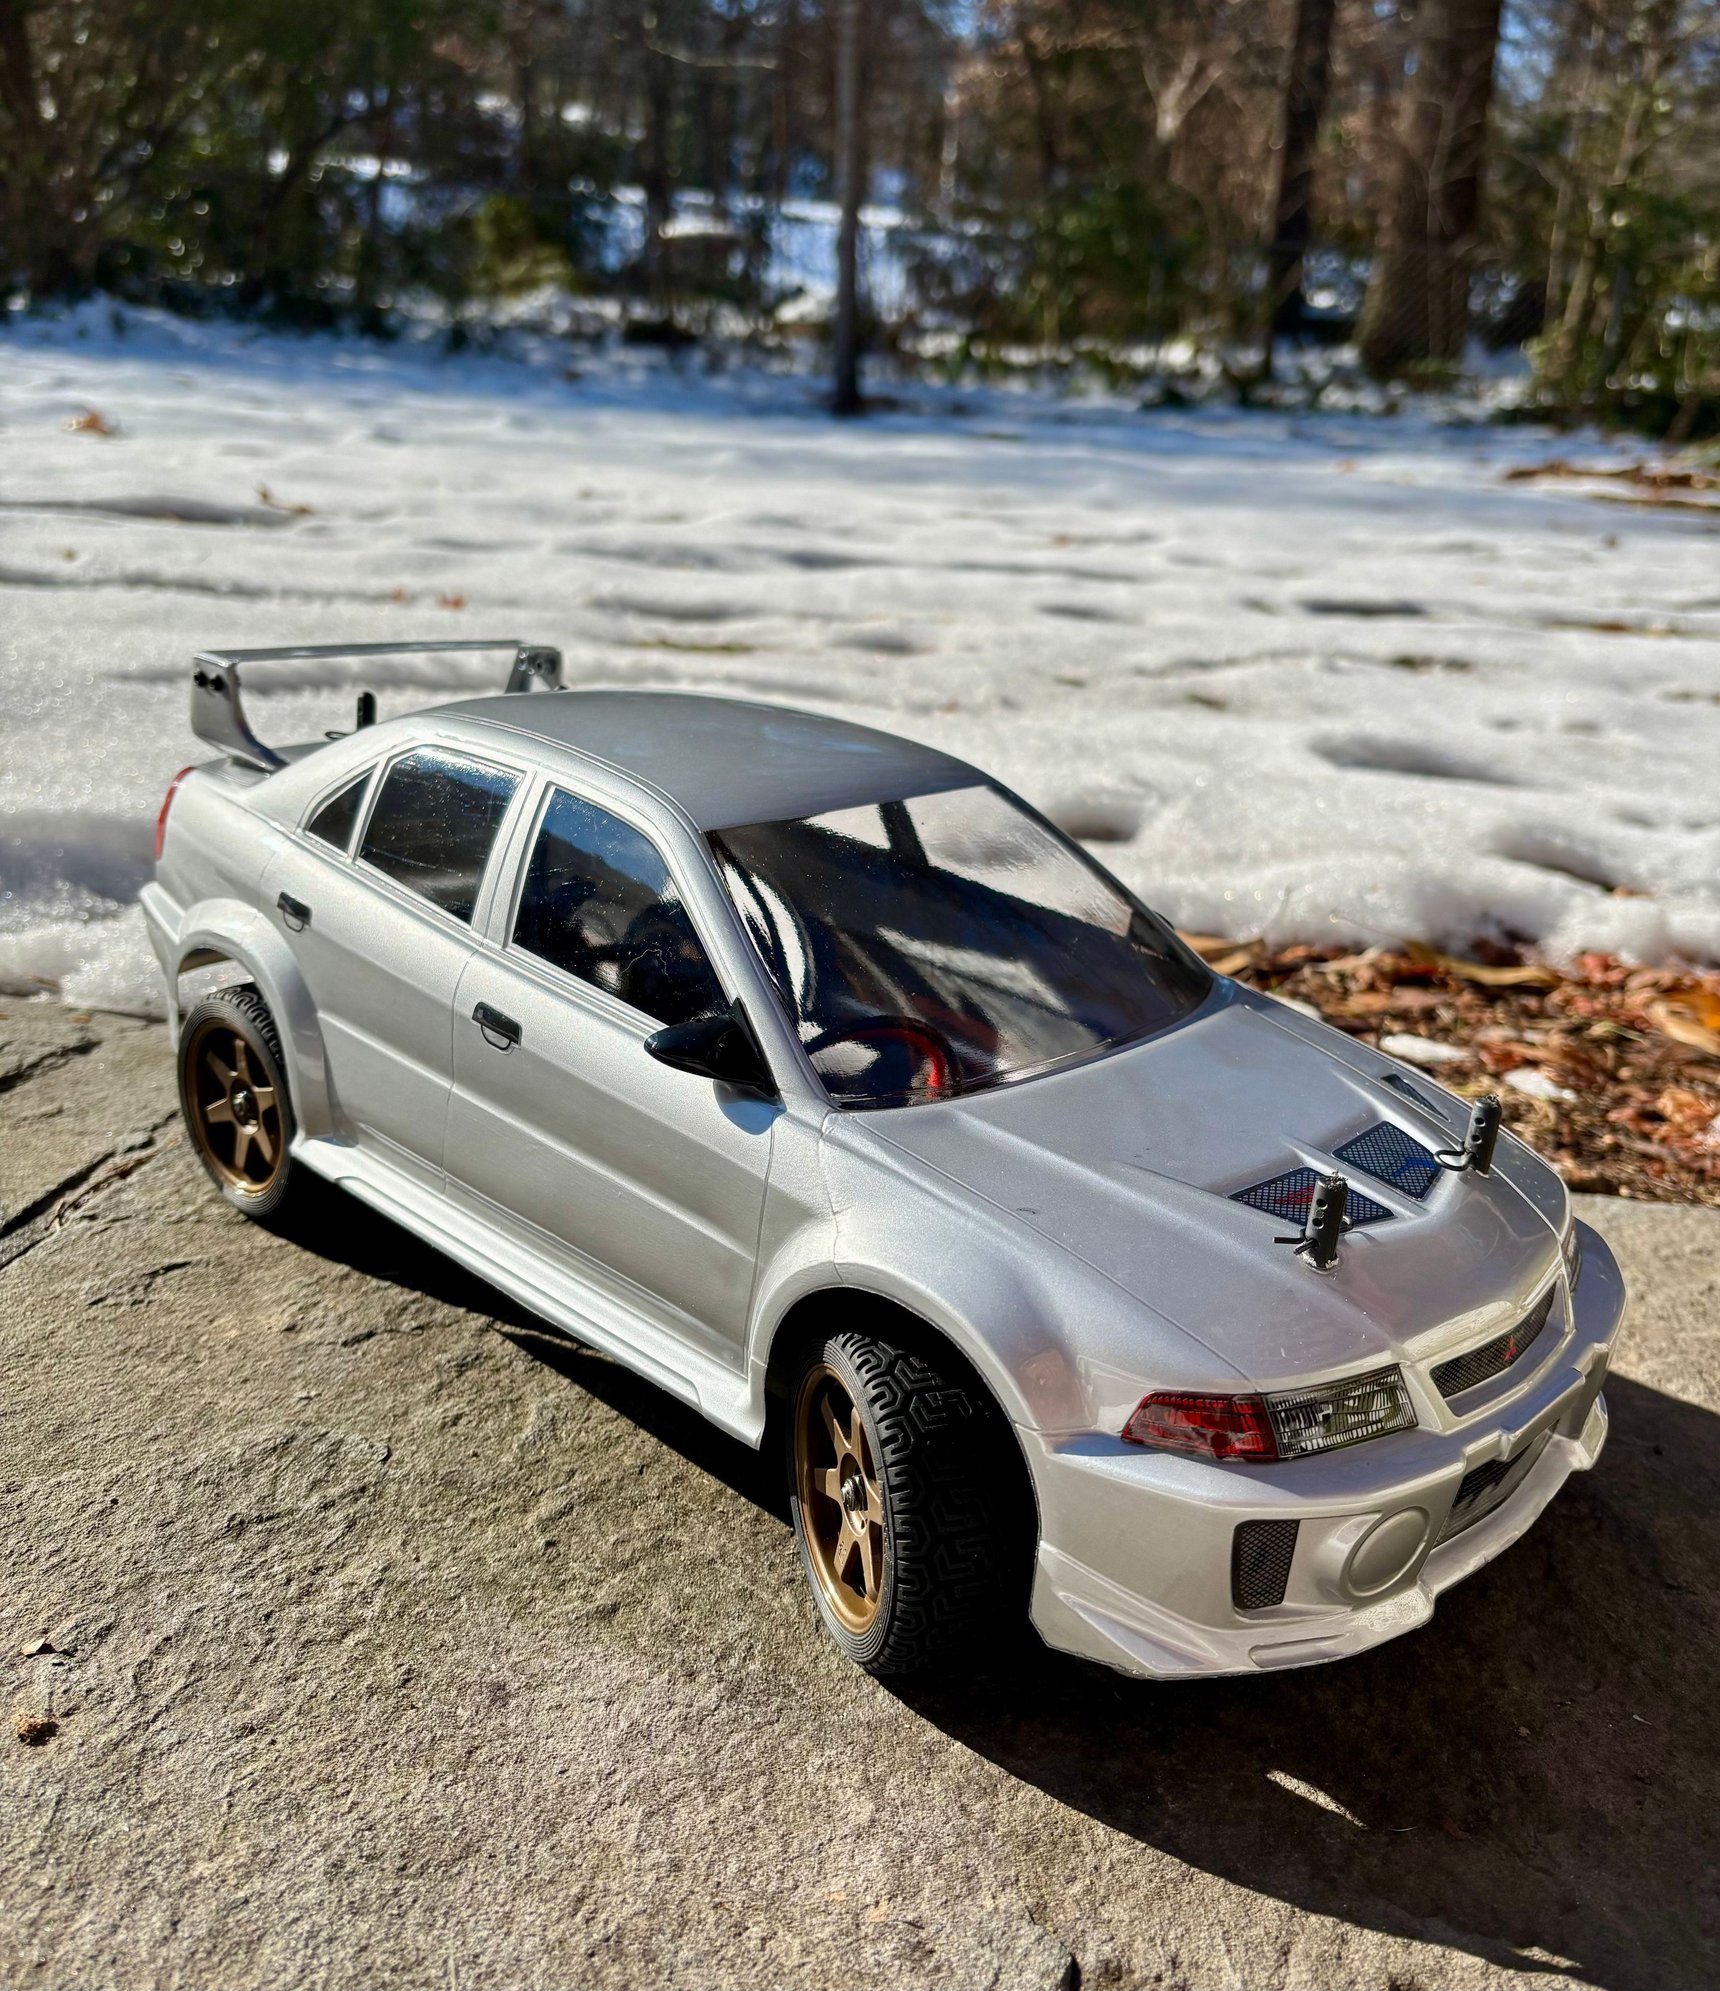
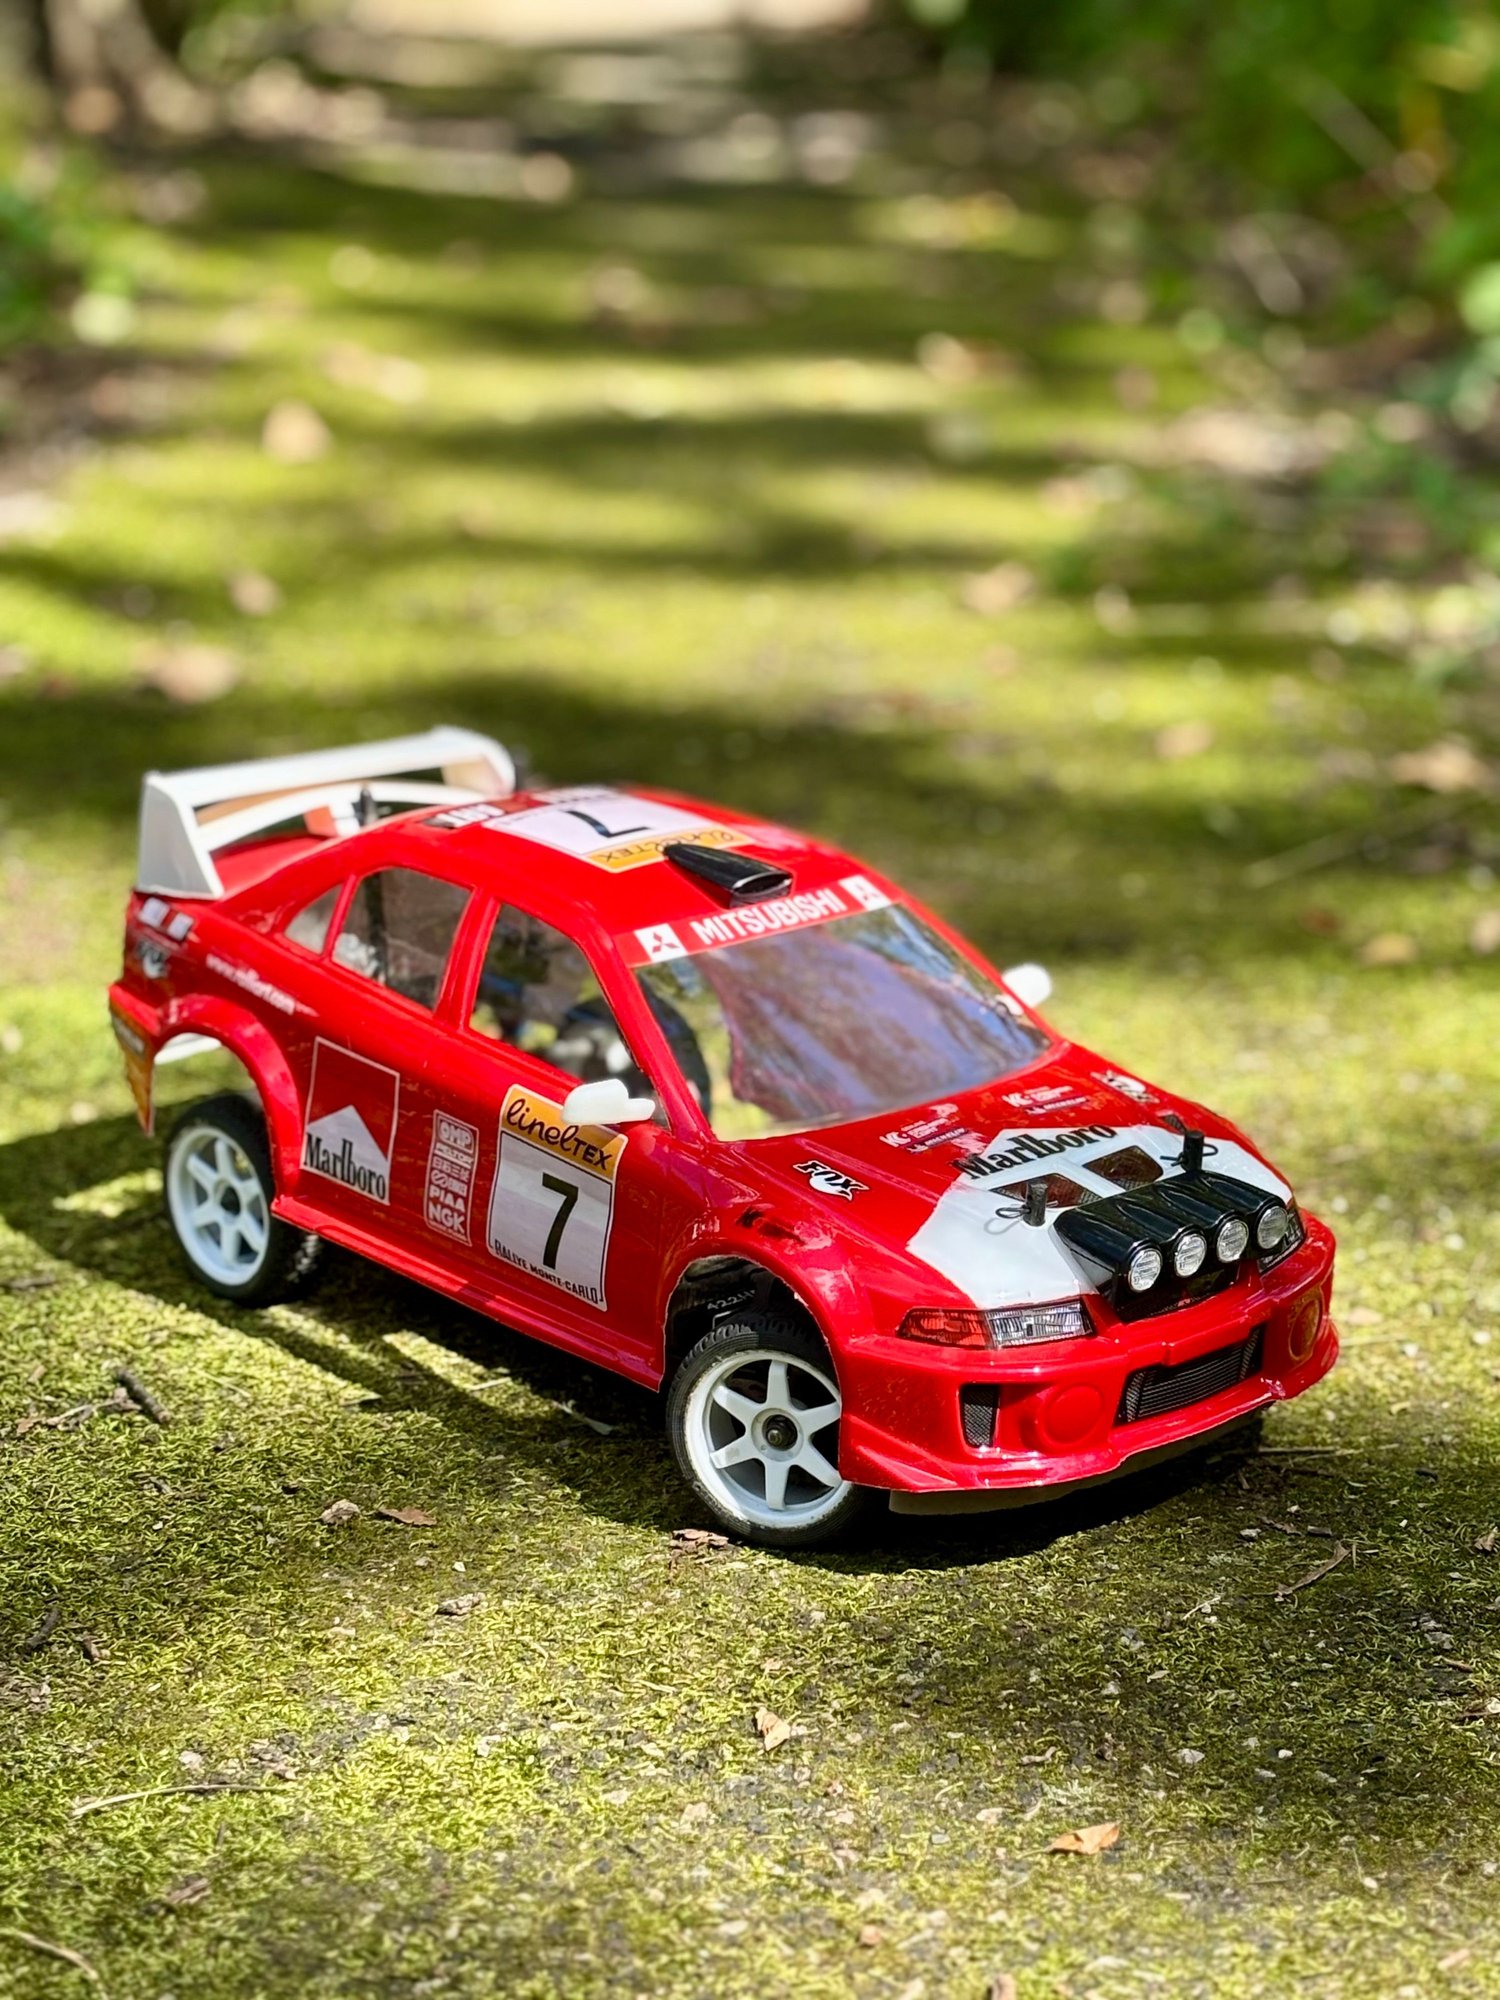
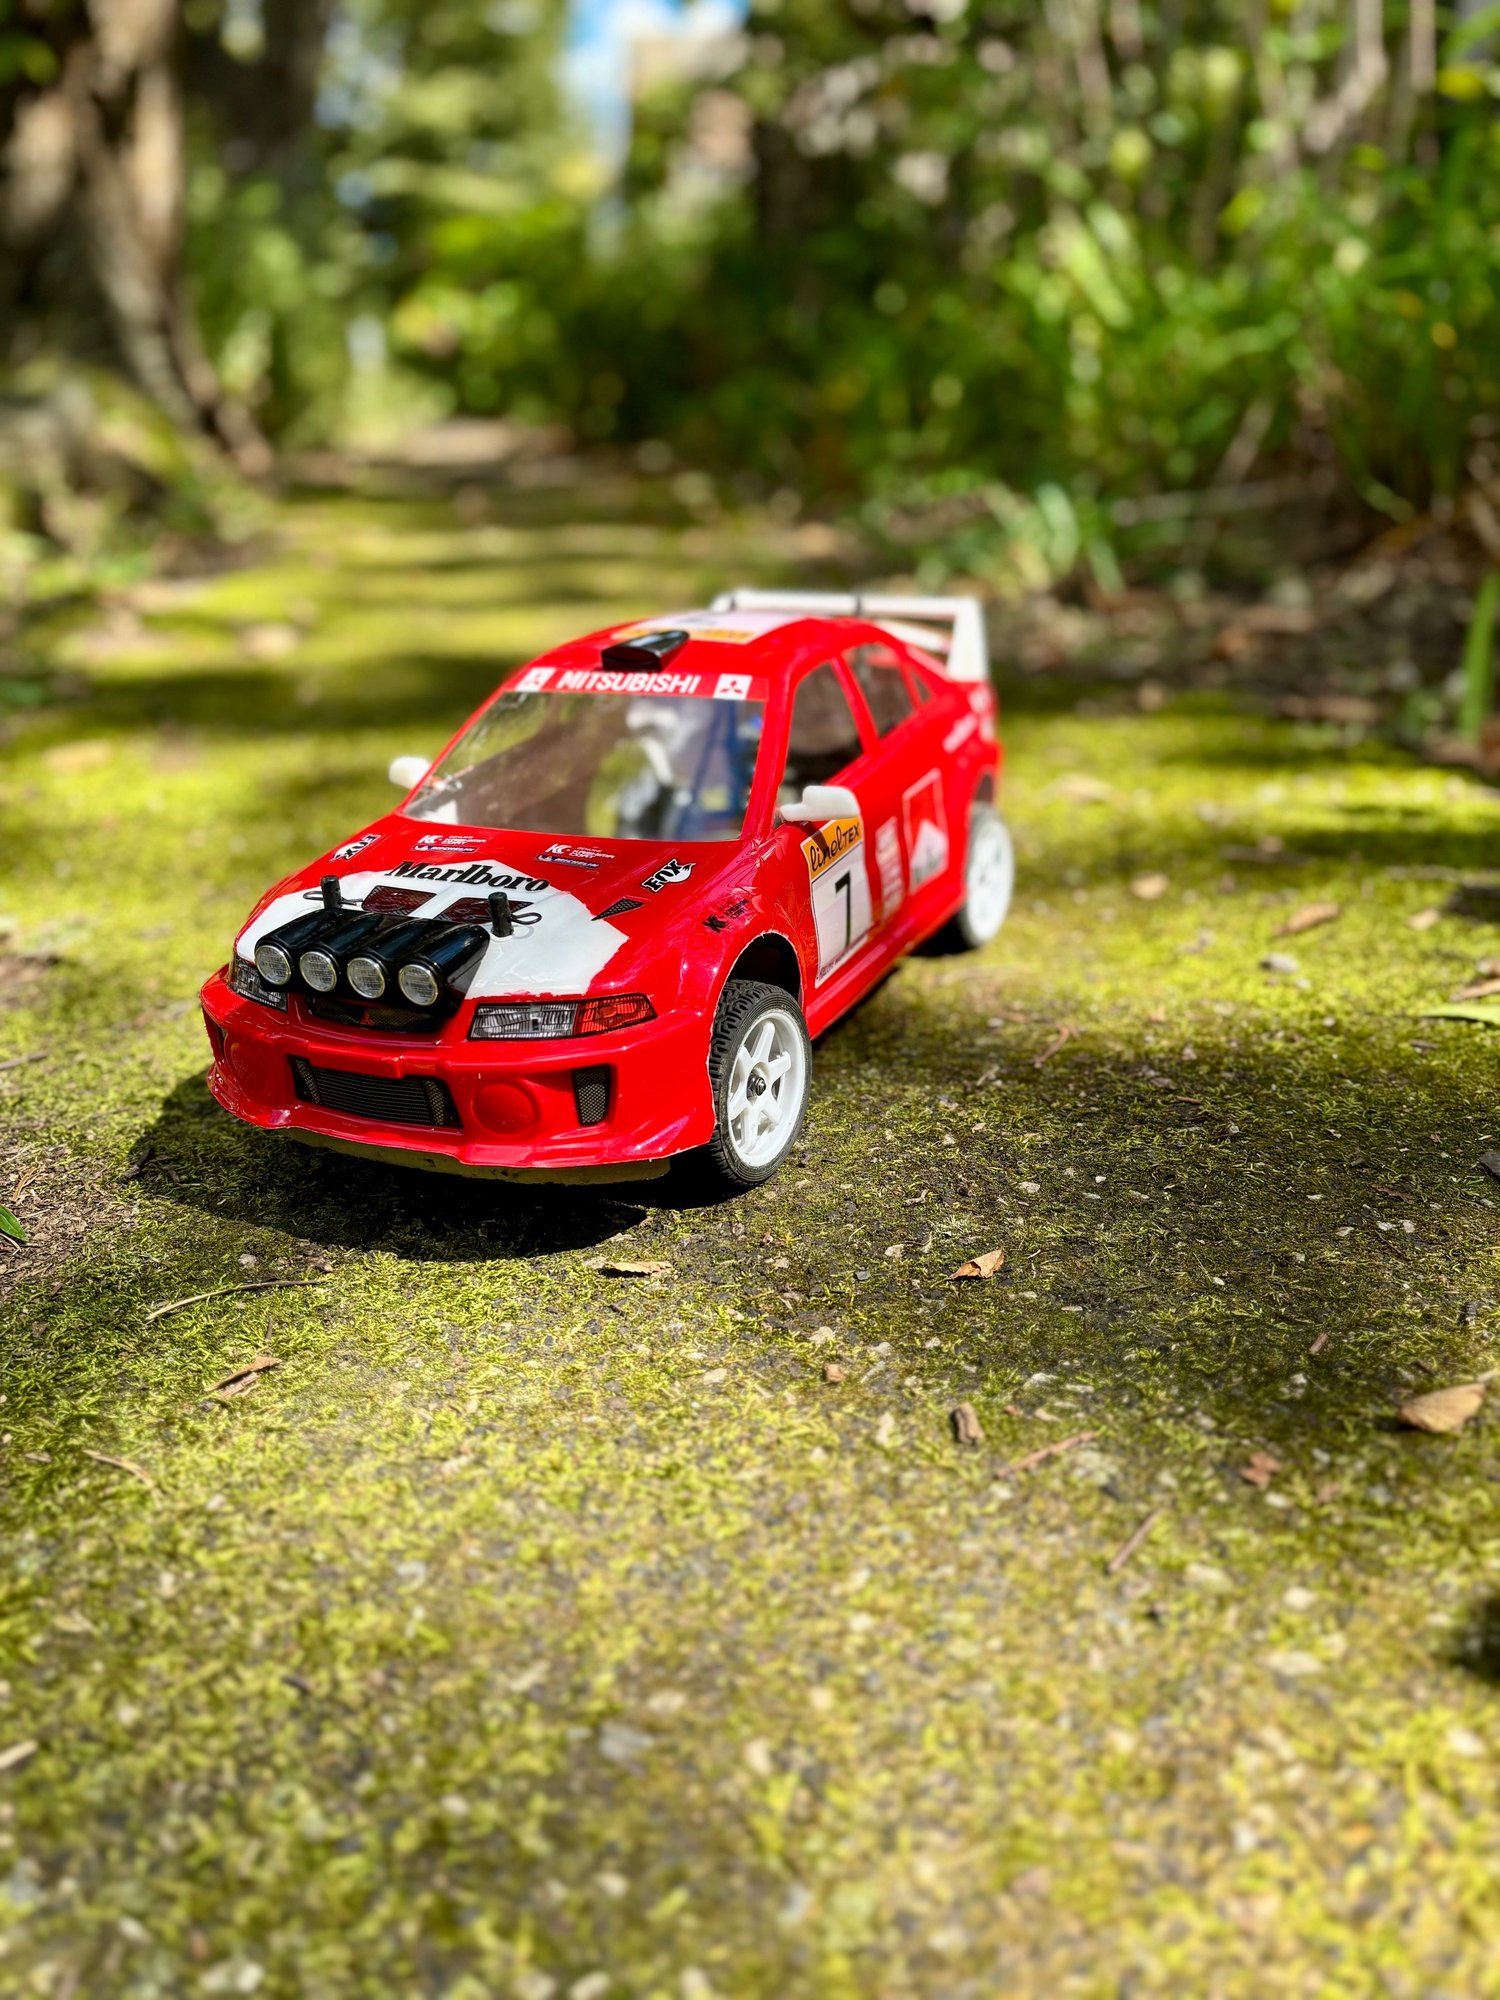
Finally picked up the rally headlamp cluster and roof scoop set from Killerbody (part 48058). Really pleased with how this looks, at least given how bad my skills are when it comes to painting clear lexan bodies. I'm way better at the mechanical tinkering side of the hobby, but practice makes perfect as they say, so maybe one day I'll get better at this. For now, this is as good as it's going to get
09-01-2025 | 06:32 PM
#14
the painting looks fine IMO not like anyone will notice it from 1-2 feet away.
Did you use an airbrush, paint brush or spray paint?
I noticed taping lines with a paintbrush doesn't work as well and allows bleed under where an airbrush, or even spray paint would give a crisp line as long as you keep the coats real light.
Did you use an airbrush, paint brush or spray paint?
I noticed taping lines with a paintbrush doesn't work as well and allows bleed under where an airbrush, or even spray paint would give a crisp line as long as you keep the coats real light.
The following users liked this post:
7h3C47 (09-02-2025)
09-02-2025 | 04:55 AM
#15
Thread Starter
Junior Member
the painting looks fine IMO not like anyone will notice it from 1-2 feet away.
Did you use an airbrush, paint brush or spray paint?
I noticed taping lines with a paintbrush doesn't work as well and allows bleed under where an airbrush, or even spray paint would give a crisp line as long as you keep the coats real light.
Did you use an airbrush, paint brush or spray paint?
I noticed taping lines with a paintbrush doesn't work as well and allows bleed under where an airbrush, or even spray paint would give a crisp line as long as you keep the coats real light.


