


phoenix models yak 54
 10-10-2008, 08:59 PM
#26
Senior Member

Join Date: Apr 2007
Location: Coventry,
RI
Posts: 313
Likes: 0
Received 0 Likes
on
0 Posts
There are no negatives with this plane, its really that simple. It builds great, flies great and will truly become one of your favorites for sure. I have mine charging now for tomorrow along with my Gene Soucy Extra. Its a regular flyer now and some of my other planes wil hang around more because of it...Oh well, everyone as their favorites....
 10-10-2008, 10:32 PM
#27

Join Date: Mar 2008
Location: Austin,
TX
Posts: 29
Likes: 0
Received 0 Likes
on
0 Posts
ORIGINAL: Brainiax
There are no negatives with this plane, its really that simple. It builds great, flies great and will truly become one of your favorites for sure. I have mine charging now for tomorrow along with my Gene Soucy Extra. Its a regular flyer now and some of my other planes wil hang around more because of it...Oh well, everyone as their favorites....
There are no negatives with this plane, its really that simple. It builds great, flies great and will truly become one of your favorites for sure. I have mine charging now for tomorrow along with my Gene Soucy Extra. Its a regular flyer now and some of my other planes wil hang around more because of it...Oh well, everyone as their favorites....
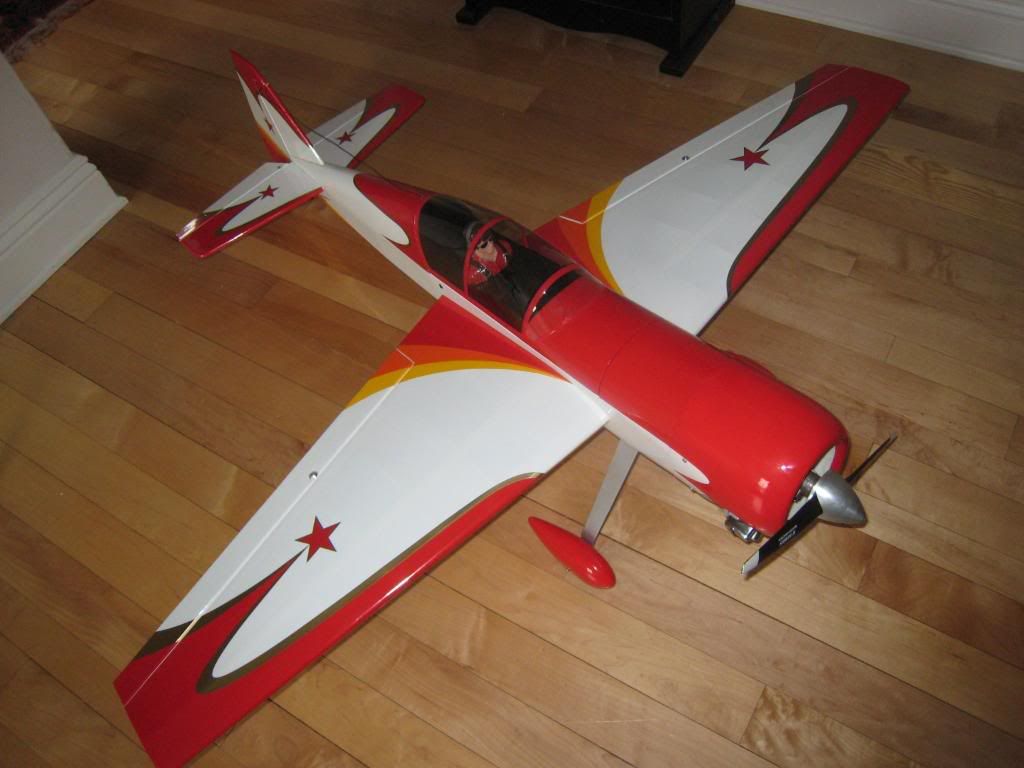
It is most definitely the sharpest looking plane I have!
I'm not even charging my planes tonight. My club has a warbird event this weekend, so probably no chance to fly (since I don't have a warbird). Off Monday though.
 10-11-2008, 07:33 AM
#28

My Feedback: (2)
Join Date: Oct 2003
Location: Huntsburg,
OH
Posts: 261
Likes: 0
Received 0 Likes
on
0 Posts
sonds like I may need to try one of these, The others I was considering were the aero works edge but it seems like everyone is putting much larger engines in that one it is more like a 60 size I think.
Chris
Chris
10-11-2008, 07:16 PM
#30
Join Date: Mar 2008
Location: Austin,
TX
Posts: 29
Likes: 0
Received 0 Likes
on
0 Posts
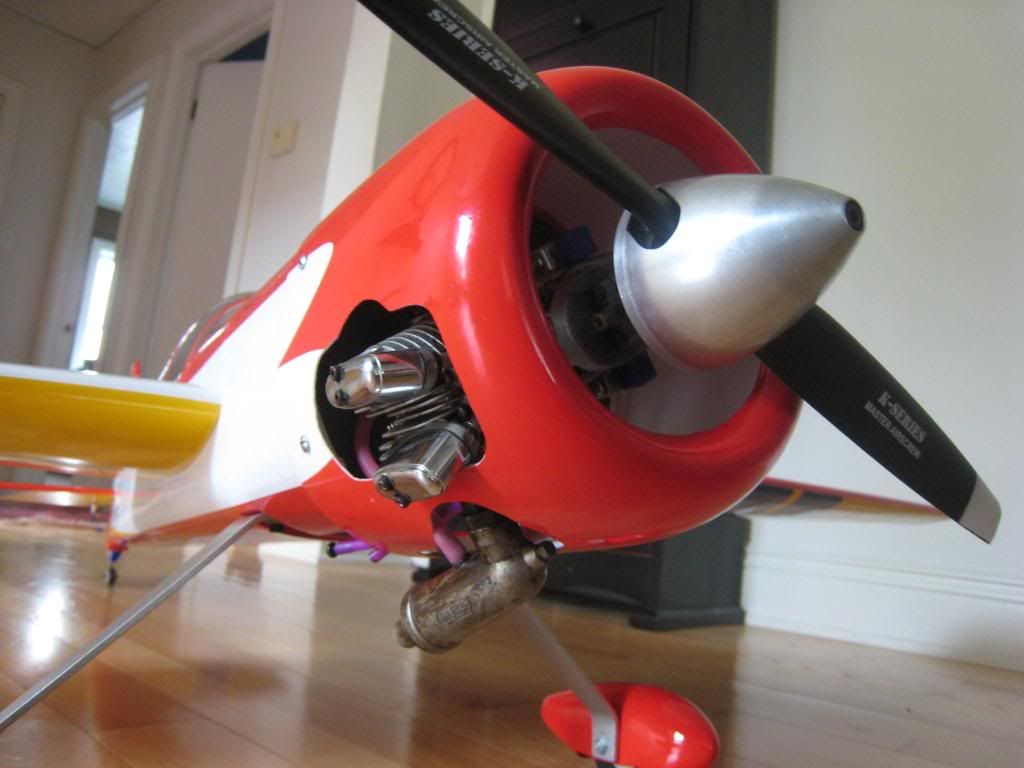
The engine mounts with the head pointed at about 220 deg. This plane has been really easy to build so far. The ONLY thing I can see that you might consider changing is the engine mount. It is one of the typical Phoenix nylon engine mounts. You may stress it a little with a Saito 72.
You won't be sorry; this is a really nice model.
You won't be sorry; this is a really nice model.
10-11-2008, 08:57 PM
#31
My Feedback: (2)
Join Date: Oct 2003
Location: Huntsburg,
OH
Posts: 261
Likes: 0
Received 0 Likes
on
0 Posts
I have mounts I can use, do you think the fuel tank is big enough? It looks very much like how most of the 50 cc planes are built. I cant wait, thanks for the pictures I really appreciate it. I have been looking for a model like this for a while.
10-16-2008, 10:24 PM
#34
My Feedback: (2)
Join Date: Oct 2003
Location: Huntsburg,
OH
Posts: 261
Likes: 0
Received 0 Likes
on
0 Posts
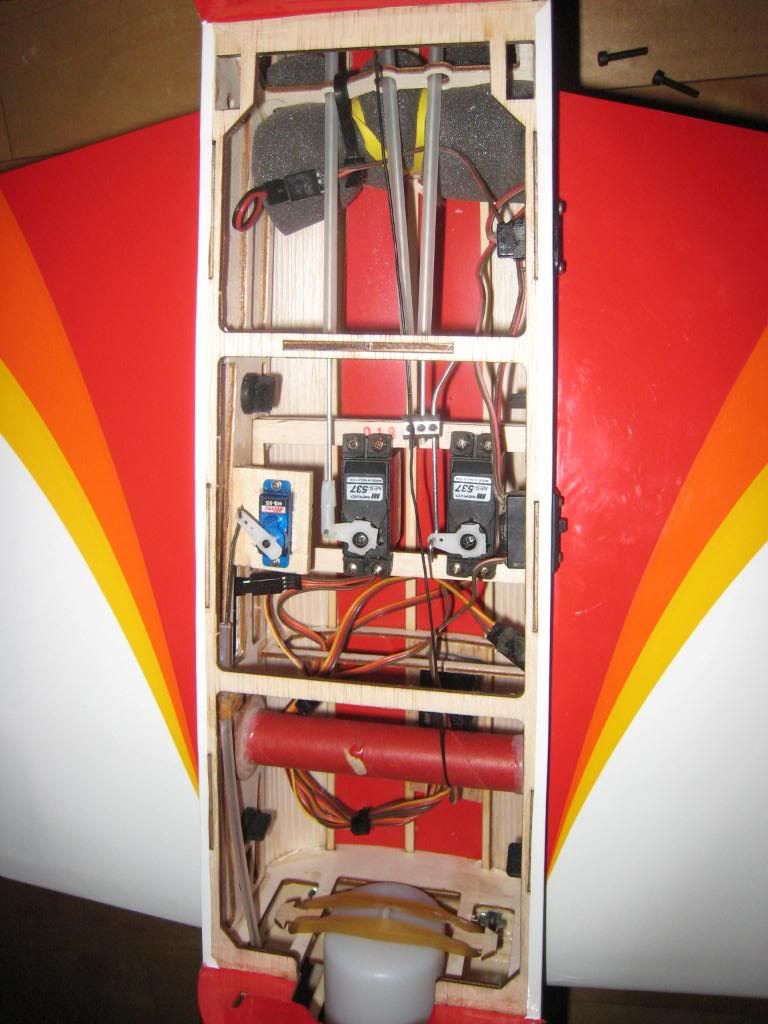
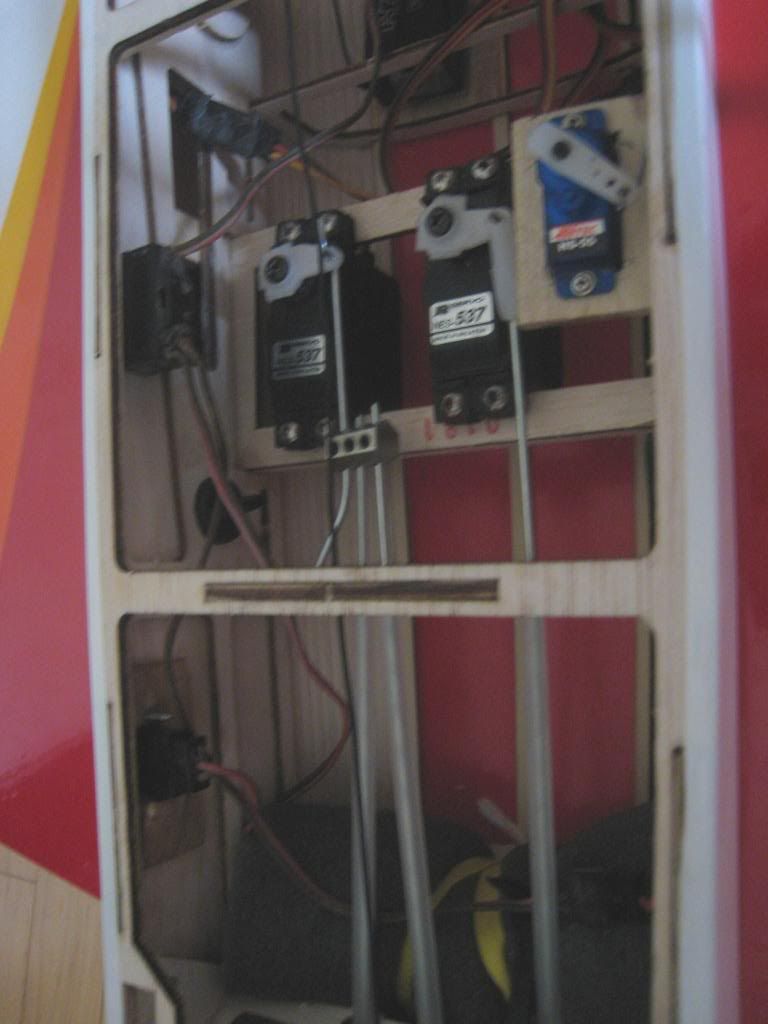
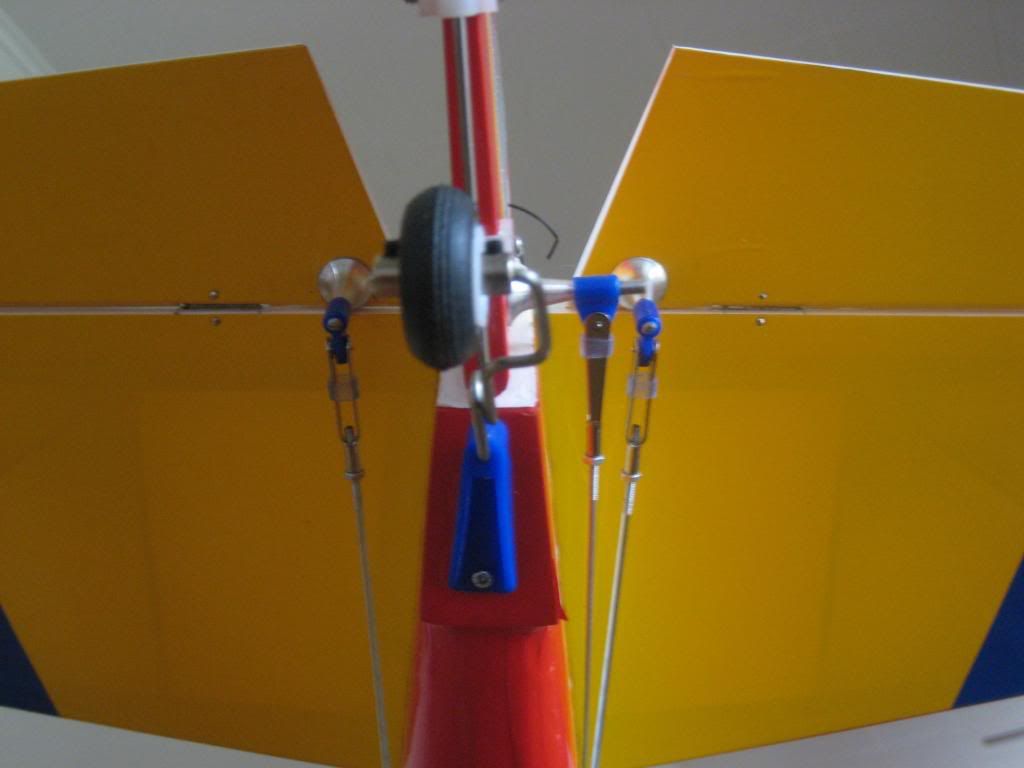
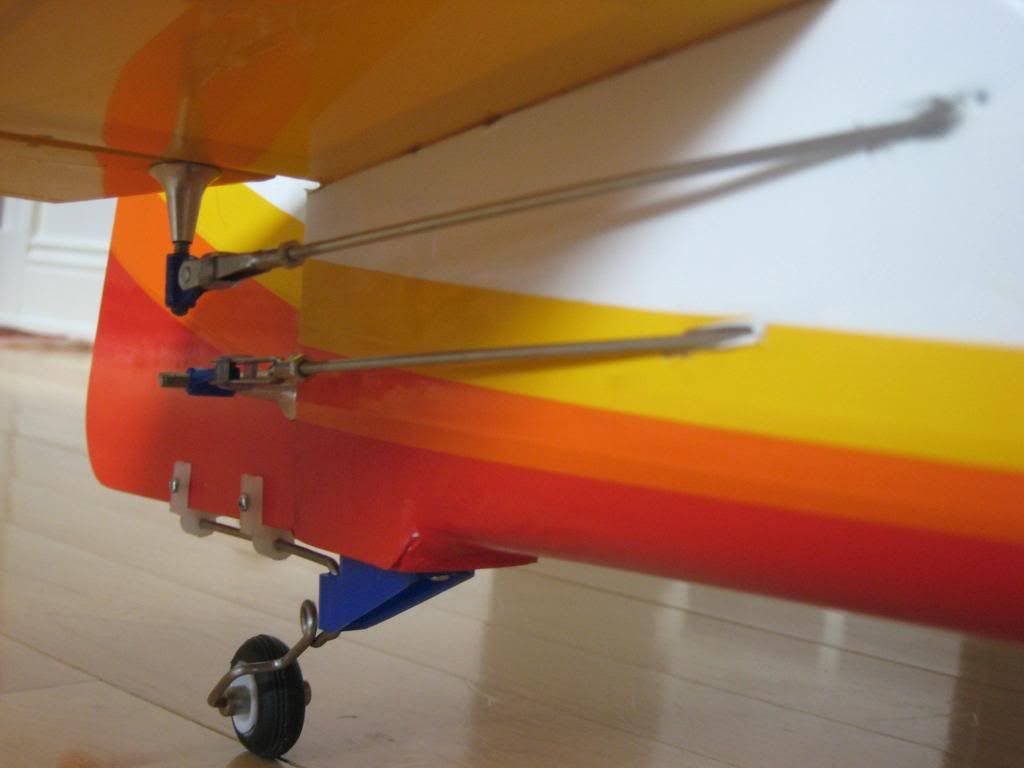
I got the aileron servos mounted and linkages done and the tail feathers epoxied onto the tail, I also temporarily mounted the engine to see how it is going to work out, seems OK! I like the hardware so far, although I am not sure about the two piece landing gear, seems like it should be 1 piece and the motor mount looks kind of cheap! but we will see how it holds up.
Chris
Chris
10-17-2008, 07:06 PM
#35
My Feedback: (2)
Join Date: Oct 2003
Location: Huntsburg,
OH
Posts: 261
Likes: 0
Received 0 Likes
on
0 Posts
how did you run your 4-stroke throttle linkages? mine is on the opposite side from a 2-stroke, is anything in the way? does anyone have a picture?
Chris
Chris
10-17-2008, 08:48 PM
#36
Senior Member
Join Date: Apr 2007
Location: Coventry,
RI
Posts: 313
Likes: 0
Received 0 Likes
on
0 Posts
Use steel wire cable instead of solid pushrod. I had the same problem but since I've been using the flexible cable:[link=http://www3.towerhobbies.com/cgi-bin/wti0001p?&I=LXK056]use this stuff forever[/link]
going around corners and weird angles doesn't matter. Be creative, you'll be fine.
going around corners and weird angles doesn't matter. Be creative, you'll be fine.
10-18-2008, 09:56 PM
#37
Join Date: Mar 2008
Location: Austin,
TX
Posts: 29
Likes: 0
Received 0 Likes
on
0 Posts
I did the maiden on mine today. It flies great! A gusty crosswind helped me scratch the covering on one wing tip and break a prop though. The ailerons and elevator look pretty tame, but it is actually very snappy. This little plane gets lots of attention on the flight line. I ended up putting in a used .46 2 stroke (about all the budget will allow right now). Maybe I can replace it soon. It is a blast to fly, even at that. Loops, rolls, and inverted flight are very precise and elegant-looking.
Btw, does anyone have a suggested technique for installing the cowling so the screws aren't constantly pulling the balsa loose from the fuse? There's got to be a better way than what I am doing.
David.
Btw, does anyone have a suggested technique for installing the cowling so the screws aren't constantly pulling the balsa loose from the fuse? There's got to be a better way than what I am doing.
David.
10-19-2008, 07:35 AM
#38
My Feedback: (2)
Join Date: Oct 2003
Location: Huntsburg,
OH
Posts: 261
Likes: 0
Received 0 Likes
on
0 Posts
you need to get them into the side of the firewall, I marked where the back fo the cowl is on the covering on the sides of the fuse and then measured foreward to just behind the front edge of the firewall and then put the holes in the cowl right there so tey have more meat to bight into. you could also , after you run the screws in the holes the first time put some thin CA in the holes to harden the wood to make it more difficult to pull out.
Or you could glue some hardwood blocks to the firewall and mount the cowl to those.
Chris
Or you could glue some hardwood blocks to the firewall and mount the cowl to those.
Chris
10-19-2008, 12:30 PM
#39
My Feedback: (2)
Join Date: Oct 2003
Location: Huntsburg,
OH
Posts: 261
Likes: 0
Received 0 Likes
on
0 Posts
David (Heffingtond) how did it fly? how are the slow speed characteristics, takeoff, landing? really interrested in what you thought of it!
Chris
Chris
10-19-2008, 02:00 PM
#40
Join Date: Mar 2008
Location: Austin,
TX
Posts: 29
Likes: 0
Received 0 Likes
on
0 Posts
ORIGINAL: moparcolt
you need to get them into the side of the firewall, I marked where the back fo the cowl is on the covering on the sides of the fuse and then measured foreward to just behind the front edge of the firewall and then put the holes in the cowl right there so tey have more meat to bight into. you could also , after you run the screws in the holes the first time put some thin CA in the holes to harden the wood to make it more difficult to pull out.
Or you could glue some hardwood blocks to the firewall and mount the cowl to those.
Chris
The takeoffs are really easy. I didn't set any exponentials or D/R settings on the rudder. Cosequently, I was a little squirrelly on the first couple of take offs since the rudder is so large. Once you learn to be easy-on-the-input it is fine. You may want to at least set the exponentials to like -30% on the rudder. I believe I will before the next flight. I would suggest no D/R setting on the rudder so you can taxi easily on high or low setting.
Landings are really easy as well. Don't over flare and it floats in like a dream. You won't believe how snappy and fun the thing is. Low, inverted passes are just about as easy as flying right side up. Till yesterday, my 90 size Extra was my favorite flyer; I believe the Yak beats it out though. Let me know what you think when you get there.
David.
10-19-2008, 04:57 PM
#41
My Feedback: (2)
Join Date: Oct 2003
Location: Huntsburg,
OH
Posts: 261
Likes: 0
Received 0 Likes
on
0 Posts
sounds great, I can't wait. I got the motor mounted the cowl fitted and the tail wheel and landing gear on, I still need to mount the tank and install the electonics and I will be ready to go. Did you use the stock engine mount? or get a different one?
10-24-2008, 03:22 PM
#43
My Feedback: (2)
Join Date: Oct 2003
Location: Huntsburg,
OH
Posts: 261
Likes: 0
Received 0 Likes
on
0 Posts
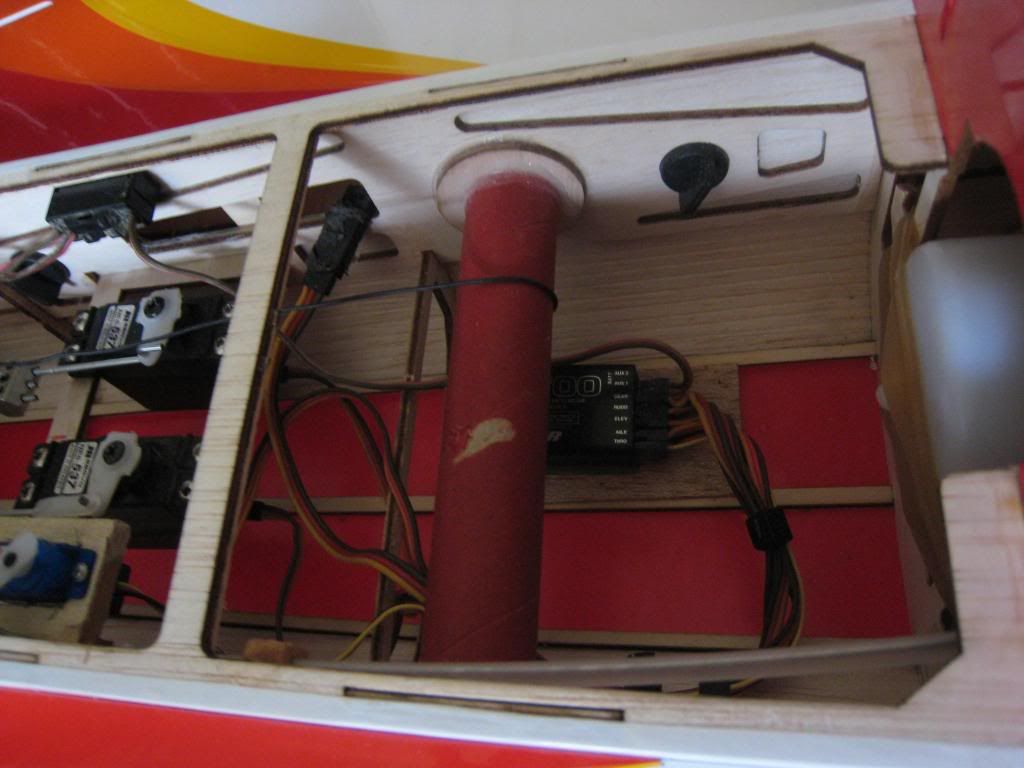
I just finished mine, I ran it a couple of times, got the motor all tuned up, it is running great. Saito .72 on 20% nitro with a 13x6 MAS prop, and an aluminum spinner. I used mostly Jr 537 servos except for a Hitek 55 micro servo for the throttle, and a 1200ma NIMH 4 cell battery to shave a little weight. I took some pictures I will post later,(my battery in my camera went dead just as I was finishing up)
I was a little worried about the stock motor mount but it really seems OK when the motor is running. I am not sure when I will get to fly her but I can't wait!
I was a little worried about the stock motor mount but it really seems OK when the motor is running. I am not sure when I will get to fly her but I can't wait!
 10-26-2008, 09:44 AM
#46
Join Date: Mar 2008
Location: Austin,
TX
Posts: 29
Likes: 0
Received 0 Likes
on
0 Posts
The aluminum spinner was a great move. I've already had to replace my nylon spinner because I over-tightened it and it flew off while running.
Let me know how it performs with the .72!
Let me know how it performs with the .72!
10-26-2008, 07:25 PM
#47
My Feedback: (2)
Join Date: Oct 2003
Location: Huntsburg,
OH
Posts: 261
Likes: 0
Received 0 Likes
on
0 Posts
I will keep you informed! I had the aluminum spinner on this engine when it was in My 40 size super decathalon,since I heard that people had been having trouble with the stock sponner and I had this one already on the motor it was really the only choice. and it looks great with the other aluminum hardware as well.
Chris
Chris
10-27-2008, 09:14 AM
#48
Senior Member
Join Date: Sep 2008
Location: , TX
Posts: 124
Likes: 0
Received 0 Likes
on
0 Posts
Can anybody tell me if the phoenix su-31 has the same capabilities and quality as the yak does? Throws look to small to be 3d capable. Honestly I think the sukhoi looks better but they are still both beautifull. As long as it performs like a great sports plane I am happy. Somebody post a video.
What is the best way to cut through fiberglass cowling? It seems like everytime I do it the fiberglass paint cracks and such. I have a giles 202 from cmp and the paint was beautifull but I screwed up with the cowling. Something I must not be doing right. And also, could give me a tip on how to put an easy fueling system that allows me to cut less holes in the cowling for a cleaner more aerodynamic look.
on a side note..the hardware looks great. I dont see no plastic.
10-27-2008, 03:51 PM
#49
My Feedback: (2)
Join Date: Oct 2003
Location: Huntsburg,
OH
Posts: 261
Likes: 0
Received 0 Likes
on
0 Posts
I would say it is not a 3D plane, because the surfaces are too small, but it should be very aerobatic. I trim my fiberglass by first drilling a hole in it with a stepped drill bit (uni-bit) and then using a dremmel tool with a sanding drum on it to get the right size and contours of the hole I am making. It is dusty but easy on the paint.
I haven't seen the Sukhoi up close yet.
I haven't seen the Sukhoi up close yet.
10-27-2008, 05:20 PM
#50
Senior Member
Join Date: Sep 2008
Location: , TX
Posts: 124
Likes: 0
Received 0 Likes
on
0 Posts
ORIGINAL: moparcolt
I would say it is not a 3D plane, because the surfaces are too small, but it should be very aerobatic. I trim my fiberglass by first drilling a hole in it with a stepped drill bit (uni-bit) and then using a dremmel tool with a sanding drum on it to get the right size and contours of the hole I am making. It is dusty but easy on the paint.
I haven't seen the Sukhoi up close yet.