


Fuel proofing
 09-16-2015 | 03:05 AM
#1
Thread Starter
Senior Member
Joined: Mar 2014
Posts: 108
Likes: 0
Received 0 Likes
on
0 Posts
I was wondering about using thinned epoxy as a fuel proofing method for the glow fuel tank area and engine compartment. Is it common to use? If not, I've read here that a water based polyurethane will also work. Any recommendations?
I'm building an Aerodrome kit from 1986 of the DH Gypsy Moth. It will be powered by a Saito FA62A.
I'm building an Aerodrome kit from 1986 of the DH Gypsy Moth. It will be powered by a Saito FA62A.

 09-16-2015 | 05:34 AM
#5

I found out that if you can warm the item or area, epoxy will spread thinner. Use a heat gun or even a hair dryer and get your compartment warmed up nicely, the epoxy will brush out easier. I use a plumbers acid brush that I have cut the bristles down to have stiff bristles. Heated, it will setup quicker. If I'm doing an area like a tank compartment, I'll use two hour epoxy to get some extra time. With alcohol or acetone, you're really changing the chemistry while heat doesn't change it that much.
09-16-2015 | 06:33 AM
#6

My Feedback: (1)
Tom, So do you not thin the 2 hr epoxy? On my last engine compartment fuel proofing I tried your suggestion (made on another thread a short while back) to heat the epoxy with a heat gun but saw only a marginal improvement in finished surface smoothness. I didn't understand that I was supposed to heat the compartment before I put the epoxy on, I just heated it after I brushed it on. I also was using 30 min. epoxy thinned with 90% alcohol. I will try it again on my next build, whenever that is, so should I seek out 2 hour epoxy and not thin it? Do you use the heat gun on the surface before and on the applied epoxy after? Thanks for your help, Larry
09-16-2015 | 08:02 AM
#7


My Feedback: (2)
Joined: Jun 2004
Posts: 4,045
Likes: 0
Received 2 Likes
on
2 Posts
From: Sailing in the Eastern Caribbean
Tom, So do you not thin the 2 hr epoxy? On my last engine compartment fuel proofing I tried your suggestion (made on another thread a short while back) to heat the epoxy with a heat gun but saw only a marginal improvement in finished surface smoothness. I didn't understand that I was supposed to heat the compartment before I put the epoxy on, I just heated it after I brushed it on. I also was using 30 min. epoxy thinned with 90% alcohol. I will try it again on my next build, whenever that is, so should I seek out 2 hour epoxy and not thin it? Do you use the heat gun on the surface before and on the applied epoxy after? Thanks for your help, Larry
09-16-2015 | 08:28 AM
#8

Joined: May 2007
Posts: 176
Likes: 0
Received 0 Likes
on
0 Posts
From: winchester, va. VA
For thinning, consult the epoxy manufacturer's instructions for thinning. Recommendations vary by brand. I run/race nitro wood hull boats/65% nitro, Bob Smith Ind. finish cure epoxy thinned with 97% isopropyl alcohol per their instructions has held up remarkably well in the engine & fuel tank bays. Automotive 2 part/catalyzed clear holds up very well, also & is lighter than epoxy. I have never had any luck with any single stage product, if you can buy it in the paint dept. at a big box home improvement store, it ain't gonna work for long or very well. The only exception I have found in single stage products is Lustrecoat spray clear. But you need to let it set up for a while, a month minimum in my experience with higher nitro percentages. Claims to be fuel proof to 25%, but I wouldn't spray it today & fly Sat. With an extended cure time, it holds up OK for me. I will only use it on the outside of my models, mainly due to ease of use. It is lacquer based, & goes well over the Tamiya spray bombs. Quick & easy for a down & dirty job when I need to. Like any finishing, base, mid & top coats need to be compatible & manufacturer's instructions need to be followed for best results.
09-16-2015 | 08:33 AM
#9
Senior Member
Clear epoxy paint such as Klass Kote, works exceedingly well and is lightweight. If surface smoothness is desired, the surface will require sanding after the paint cures (12 hours or so) and one more coat to get a much smoother finish
09-16-2015 | 09:37 AM
#10
I like to use Z-poxy finishing resin...I use it straight without thinning but I also make sure to minimize the amount used to save weight. Heating the compartment first is very helpful and will allow the epoxy to flow into the crevices and make a little resin spread a long way.
09-16-2015 | 10:03 AM
#11
Senior Member
My Feedback: (5)
I like to use Z-poxy finishing resin...I use it straight without thinning but I also make sure to minimize the amount used to save weight. Heating the compartment first is very helpful and will allow the epoxy to flow into the crevices and make a little resin spread a long way.
 09-16-2015 | 11:05 AM
#12
Yes, I've found heating really well the surface first, has helped in spreading out the epoxy. Just going back and forth with the heat gun and warming up the whole area. Since you're going for fuel proofing, you don't need a thick buildup of the epoxy to prevent fuel from soaking into the wood. Also any extra is just extra weight. I've had (my personal experience) had problems with thinning it out with anything. Just my opinion. I like having and using 2 hour epoxy for certain applications where time helps in getting parts aligned and for spreading out purposes. You might just want to try a test on piece of scrap wood if you have some epoxy to spare.
09-16-2015 | 11:35 AM
#13
Joined: May 2007
Posts: 176
Likes: 0
Received 0 Likes
on
0 Posts
From: winchester, va. VA
Since most wood boat racers seal their entire hull inside and out to waterproof it, weight build up is a huge issue. When sealing, allow the thinned expoy to soak in for 10-15 minutes. Then take an old credit card or similar stiff plastic scraper & hold it 90� to the surface & scrape off all the epoxy you can. After it has cured, do the same with a single edge razor or utility knife blade. Scrape it down smooth. Repeat the entire process one more time. Leaves you with a well sealed, smooth surface that needs VERY little sanding for final finish with minimal weight gain. My personal preference is an epoxy that calls for a thinning agent that flashes off comparatively slowly. I believe this allows the epoxy to stay thinner longer letting it penetrate into the wood deeper.
Last edited by moparbarn; 09-16-2015 at 11:39 AM.
") 09-16-2015 | 12:46 PM
09-16-2015 | 12:46 PM
#15
I use SIG clear buterate dope ,to fuel proof my stuff ,since the late 1950's
I use to do silk and dope to cover my wing open bays ,back in the day
It dries super fast ,and is lighter than epoxy ,both of which are important to me ,to keep my airframes as light as possible
In a pinch ,you can paint and it will be dry by the time you get to the field
Good Glo fuel protection ,up to 15 % nitro
I fly RC Glo engines for 23 years ,no mushie balsa for me. LOL
09-16-2015 | 04:43 PM
#19

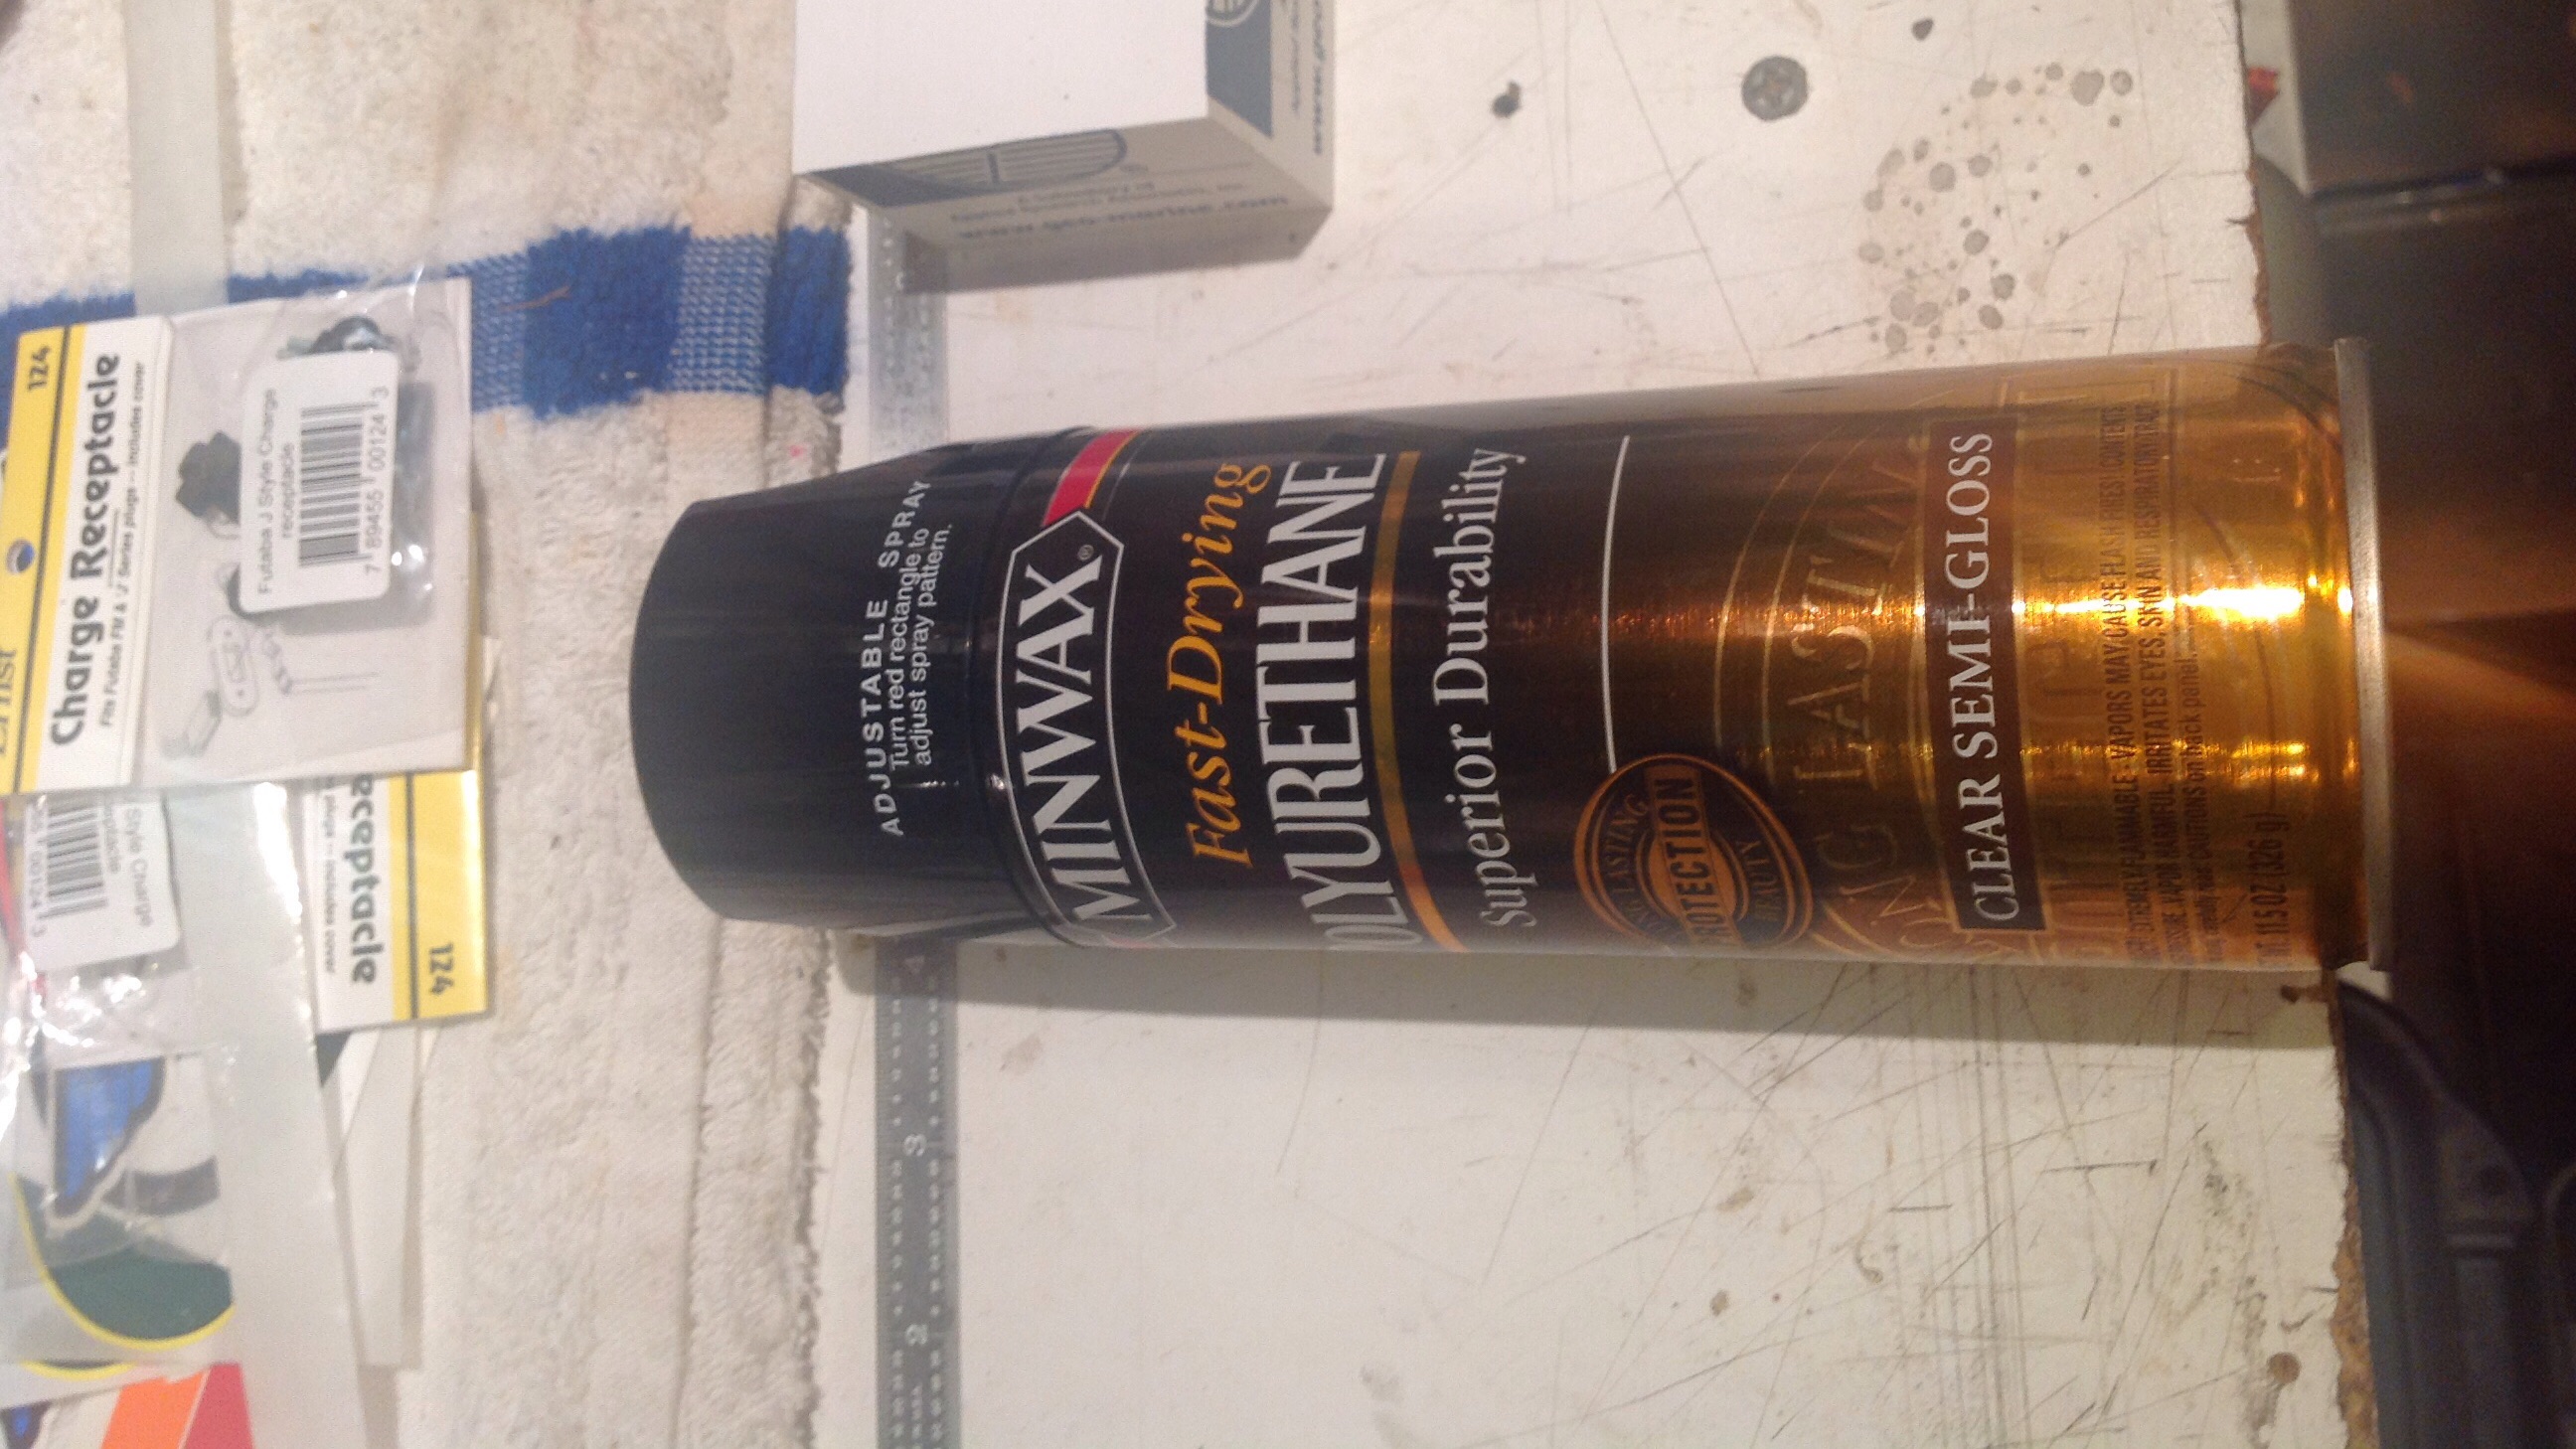
Thinned epoxy and dope work but I have found that this works just as well and is much easier to apply to firewalls and fuel tank areas. Get it at your local box store. Turn can upside down to clear nozzle and it will last for many years.
09-16-2015 | 07:28 PM
#21
I have an Aerodrome dh 60 moth that I finished building in 2012, another club member started it in 1992, great flying plane in all wind conditions, I have it overpowered with an os 55ax. I like it so much that 2 years ago I had the plans blown up to 1/4 scale, great flying plane also, powered with an os gt22, at 16 lbs it is not overpowered


