


Tiporare 120
 08-14-2013 | 01:16 PM
#1
Thread Starter

Joined: Sep 2007
Posts: 72
Likes: 0
Received 0 Likes
on
0 Posts
From: Doral,
FL
Hi:
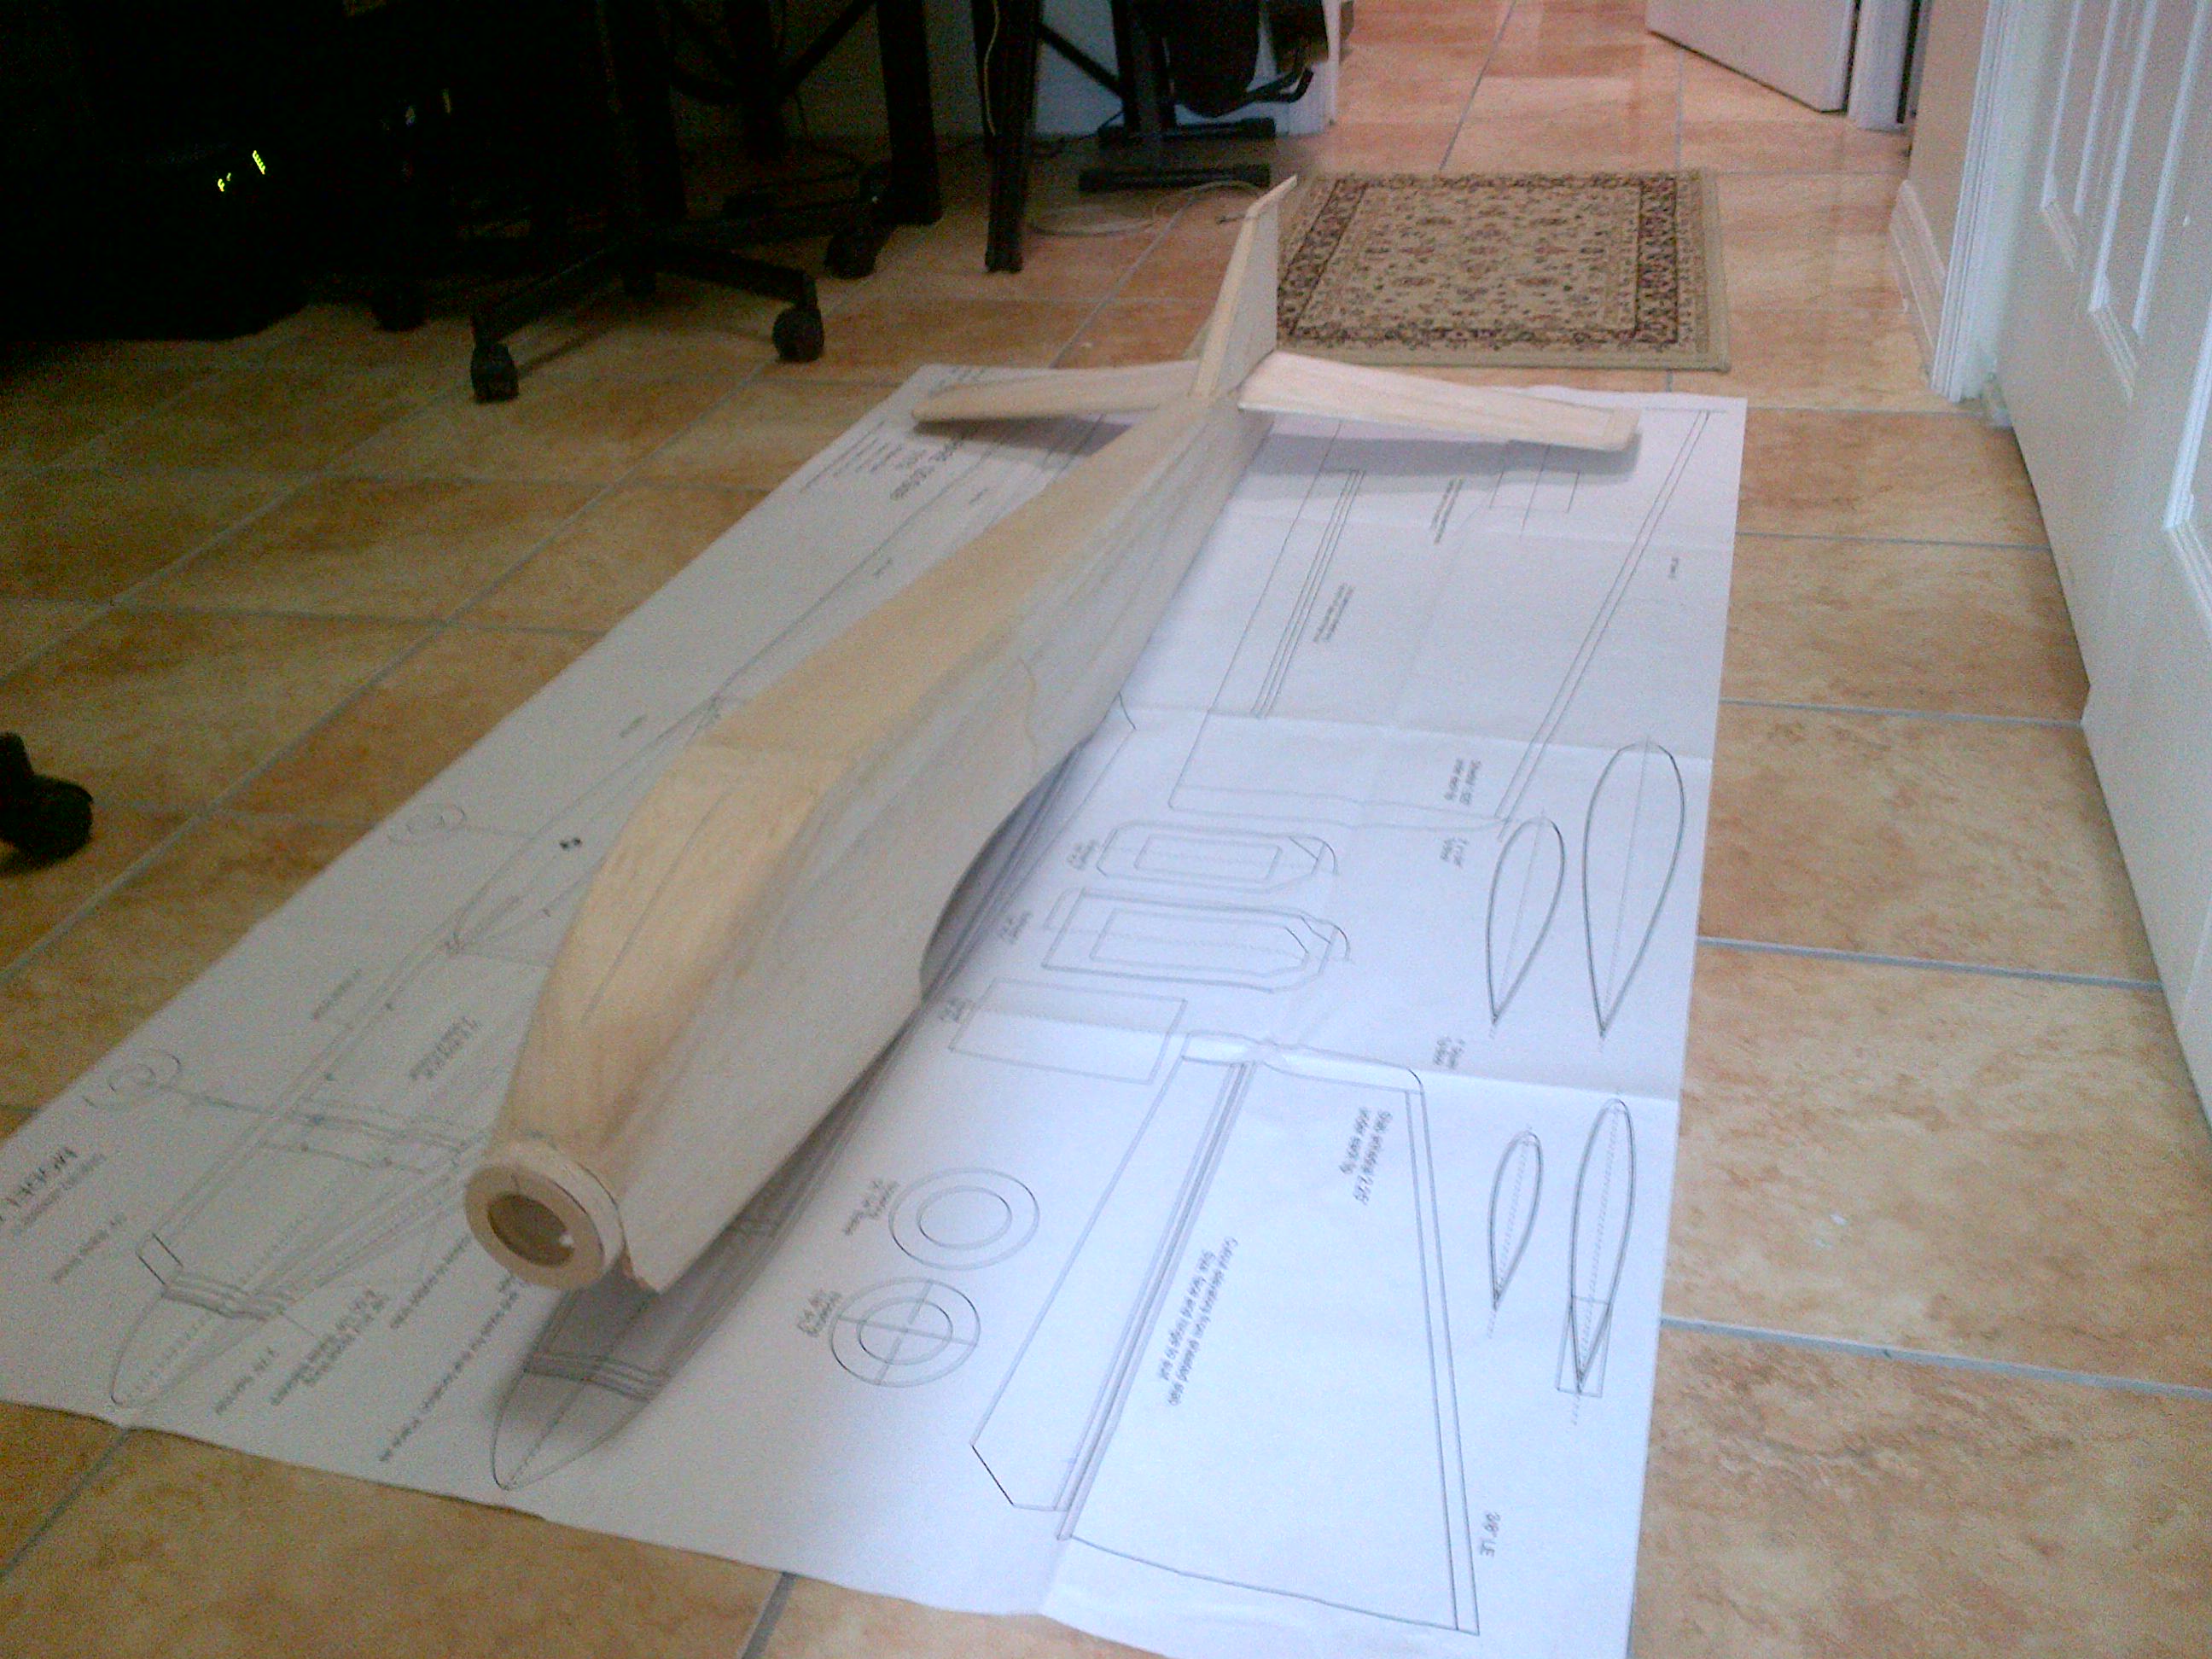
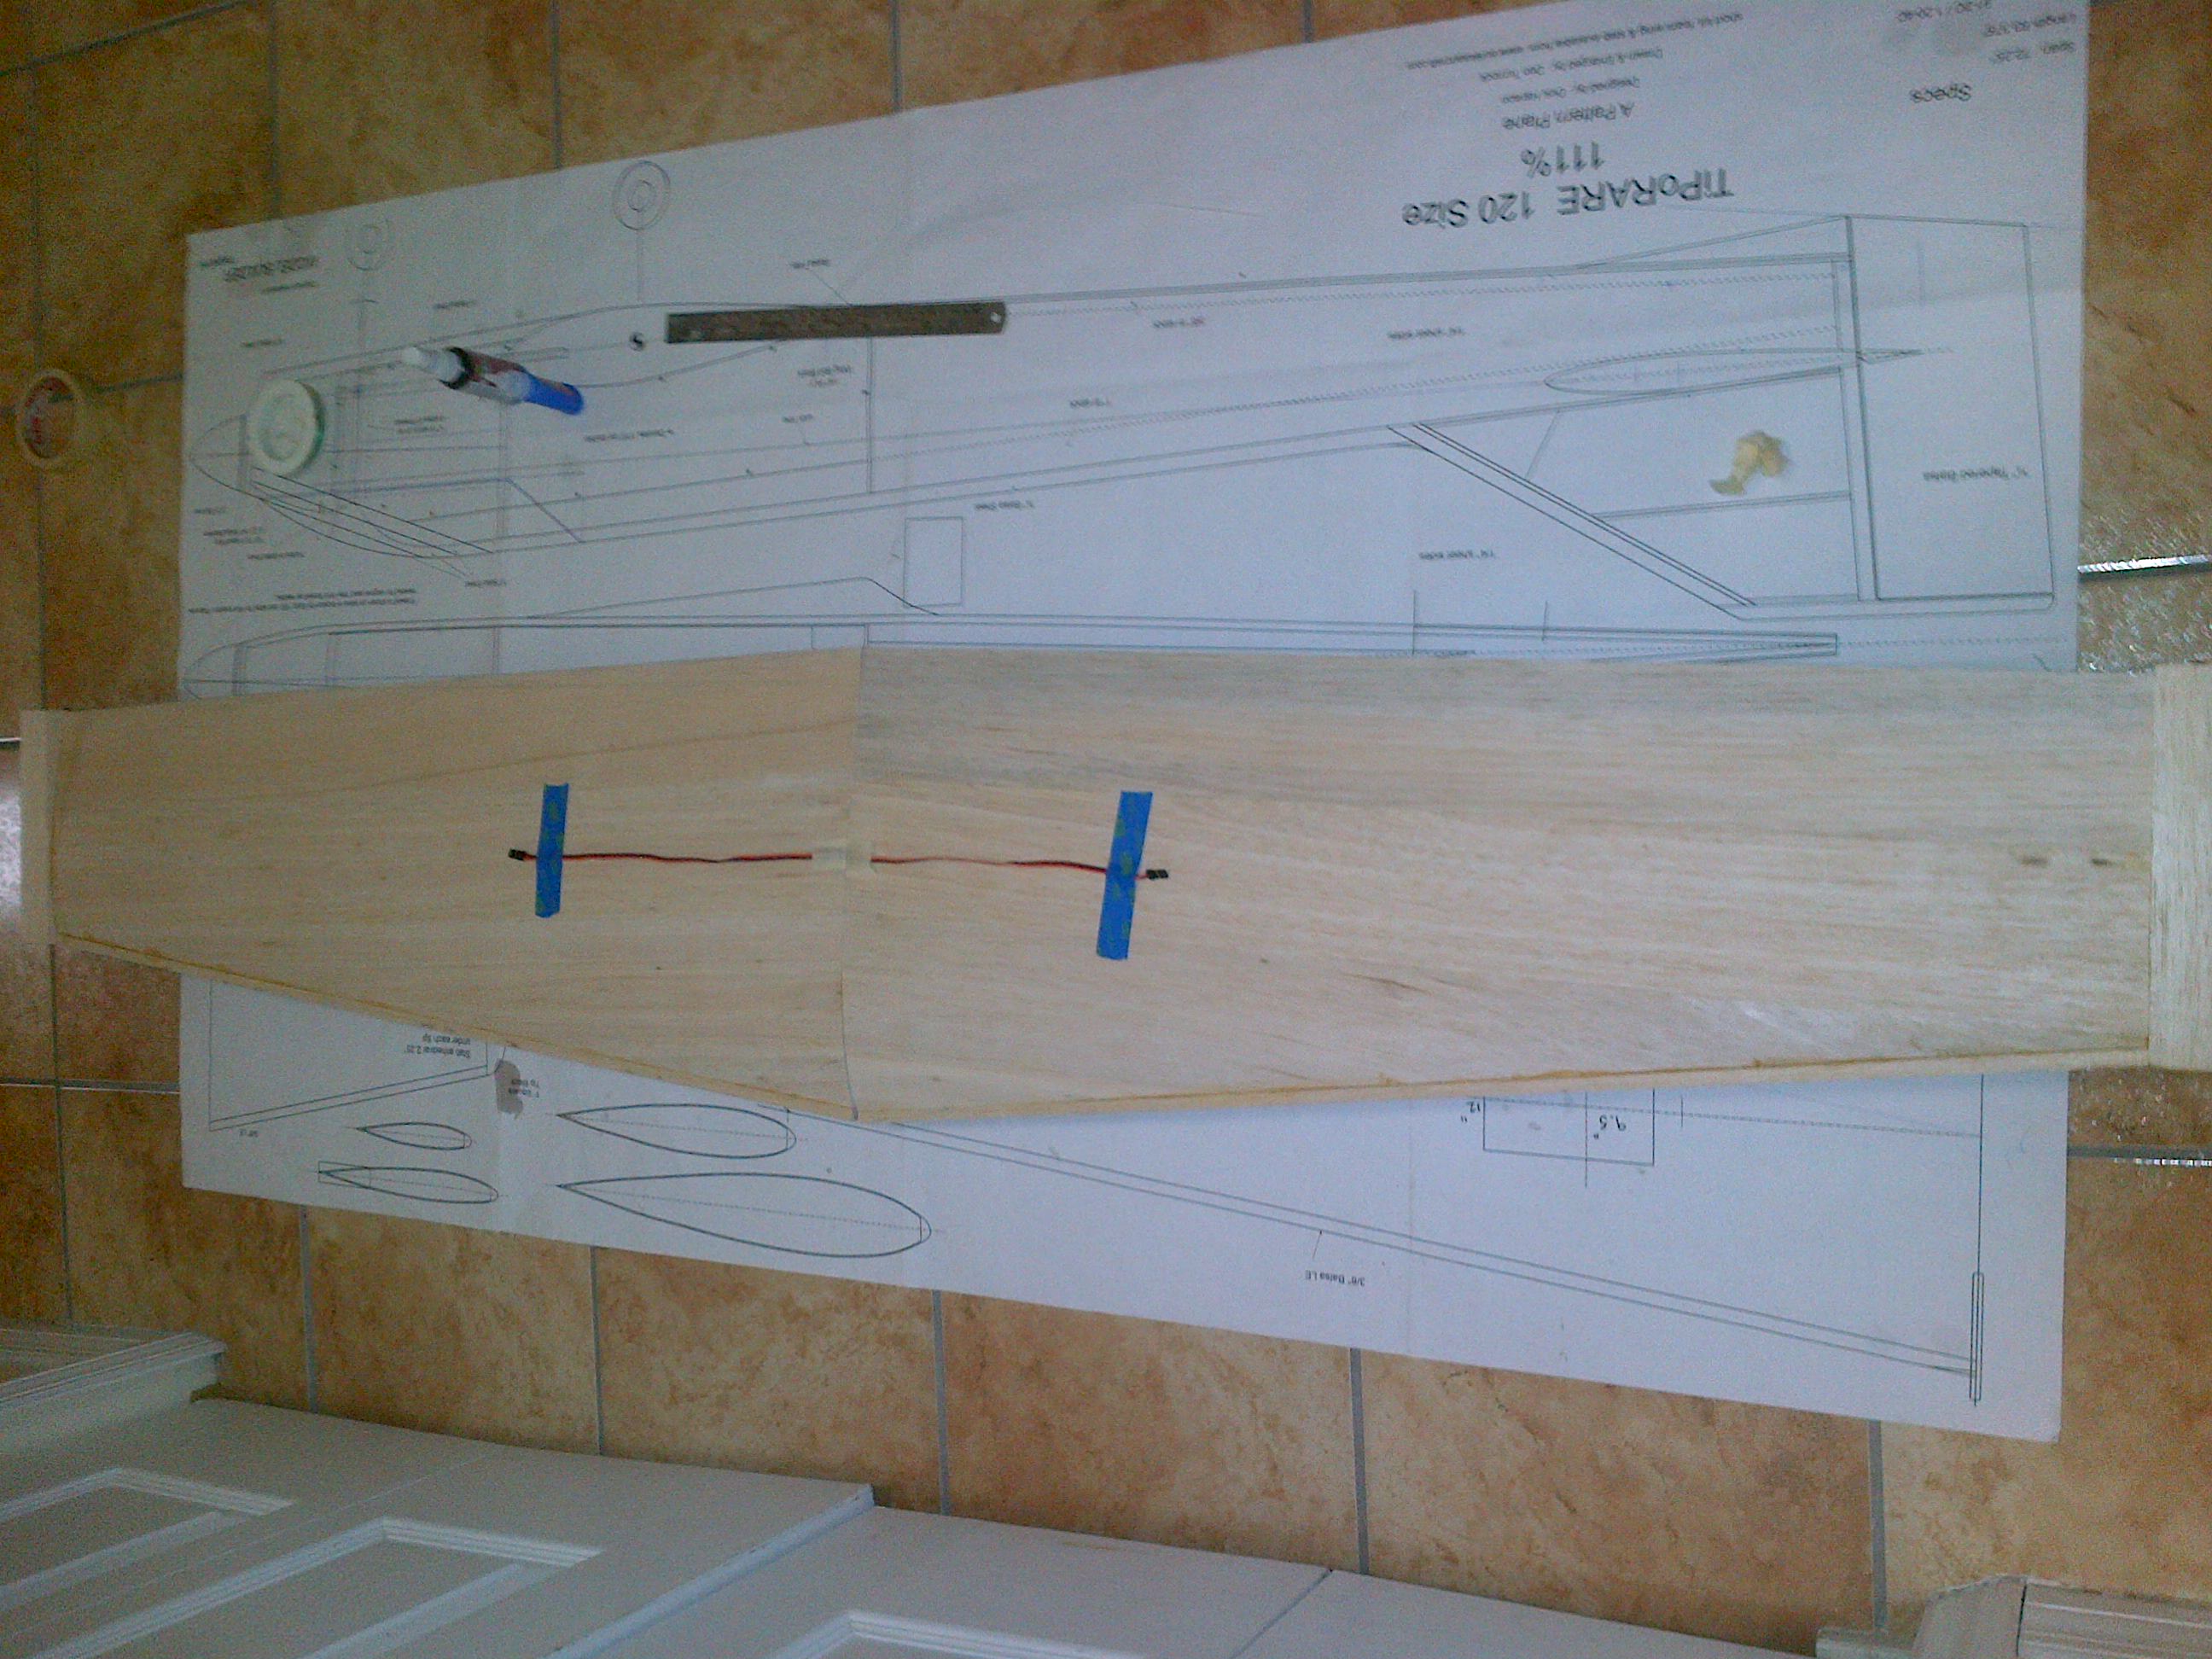
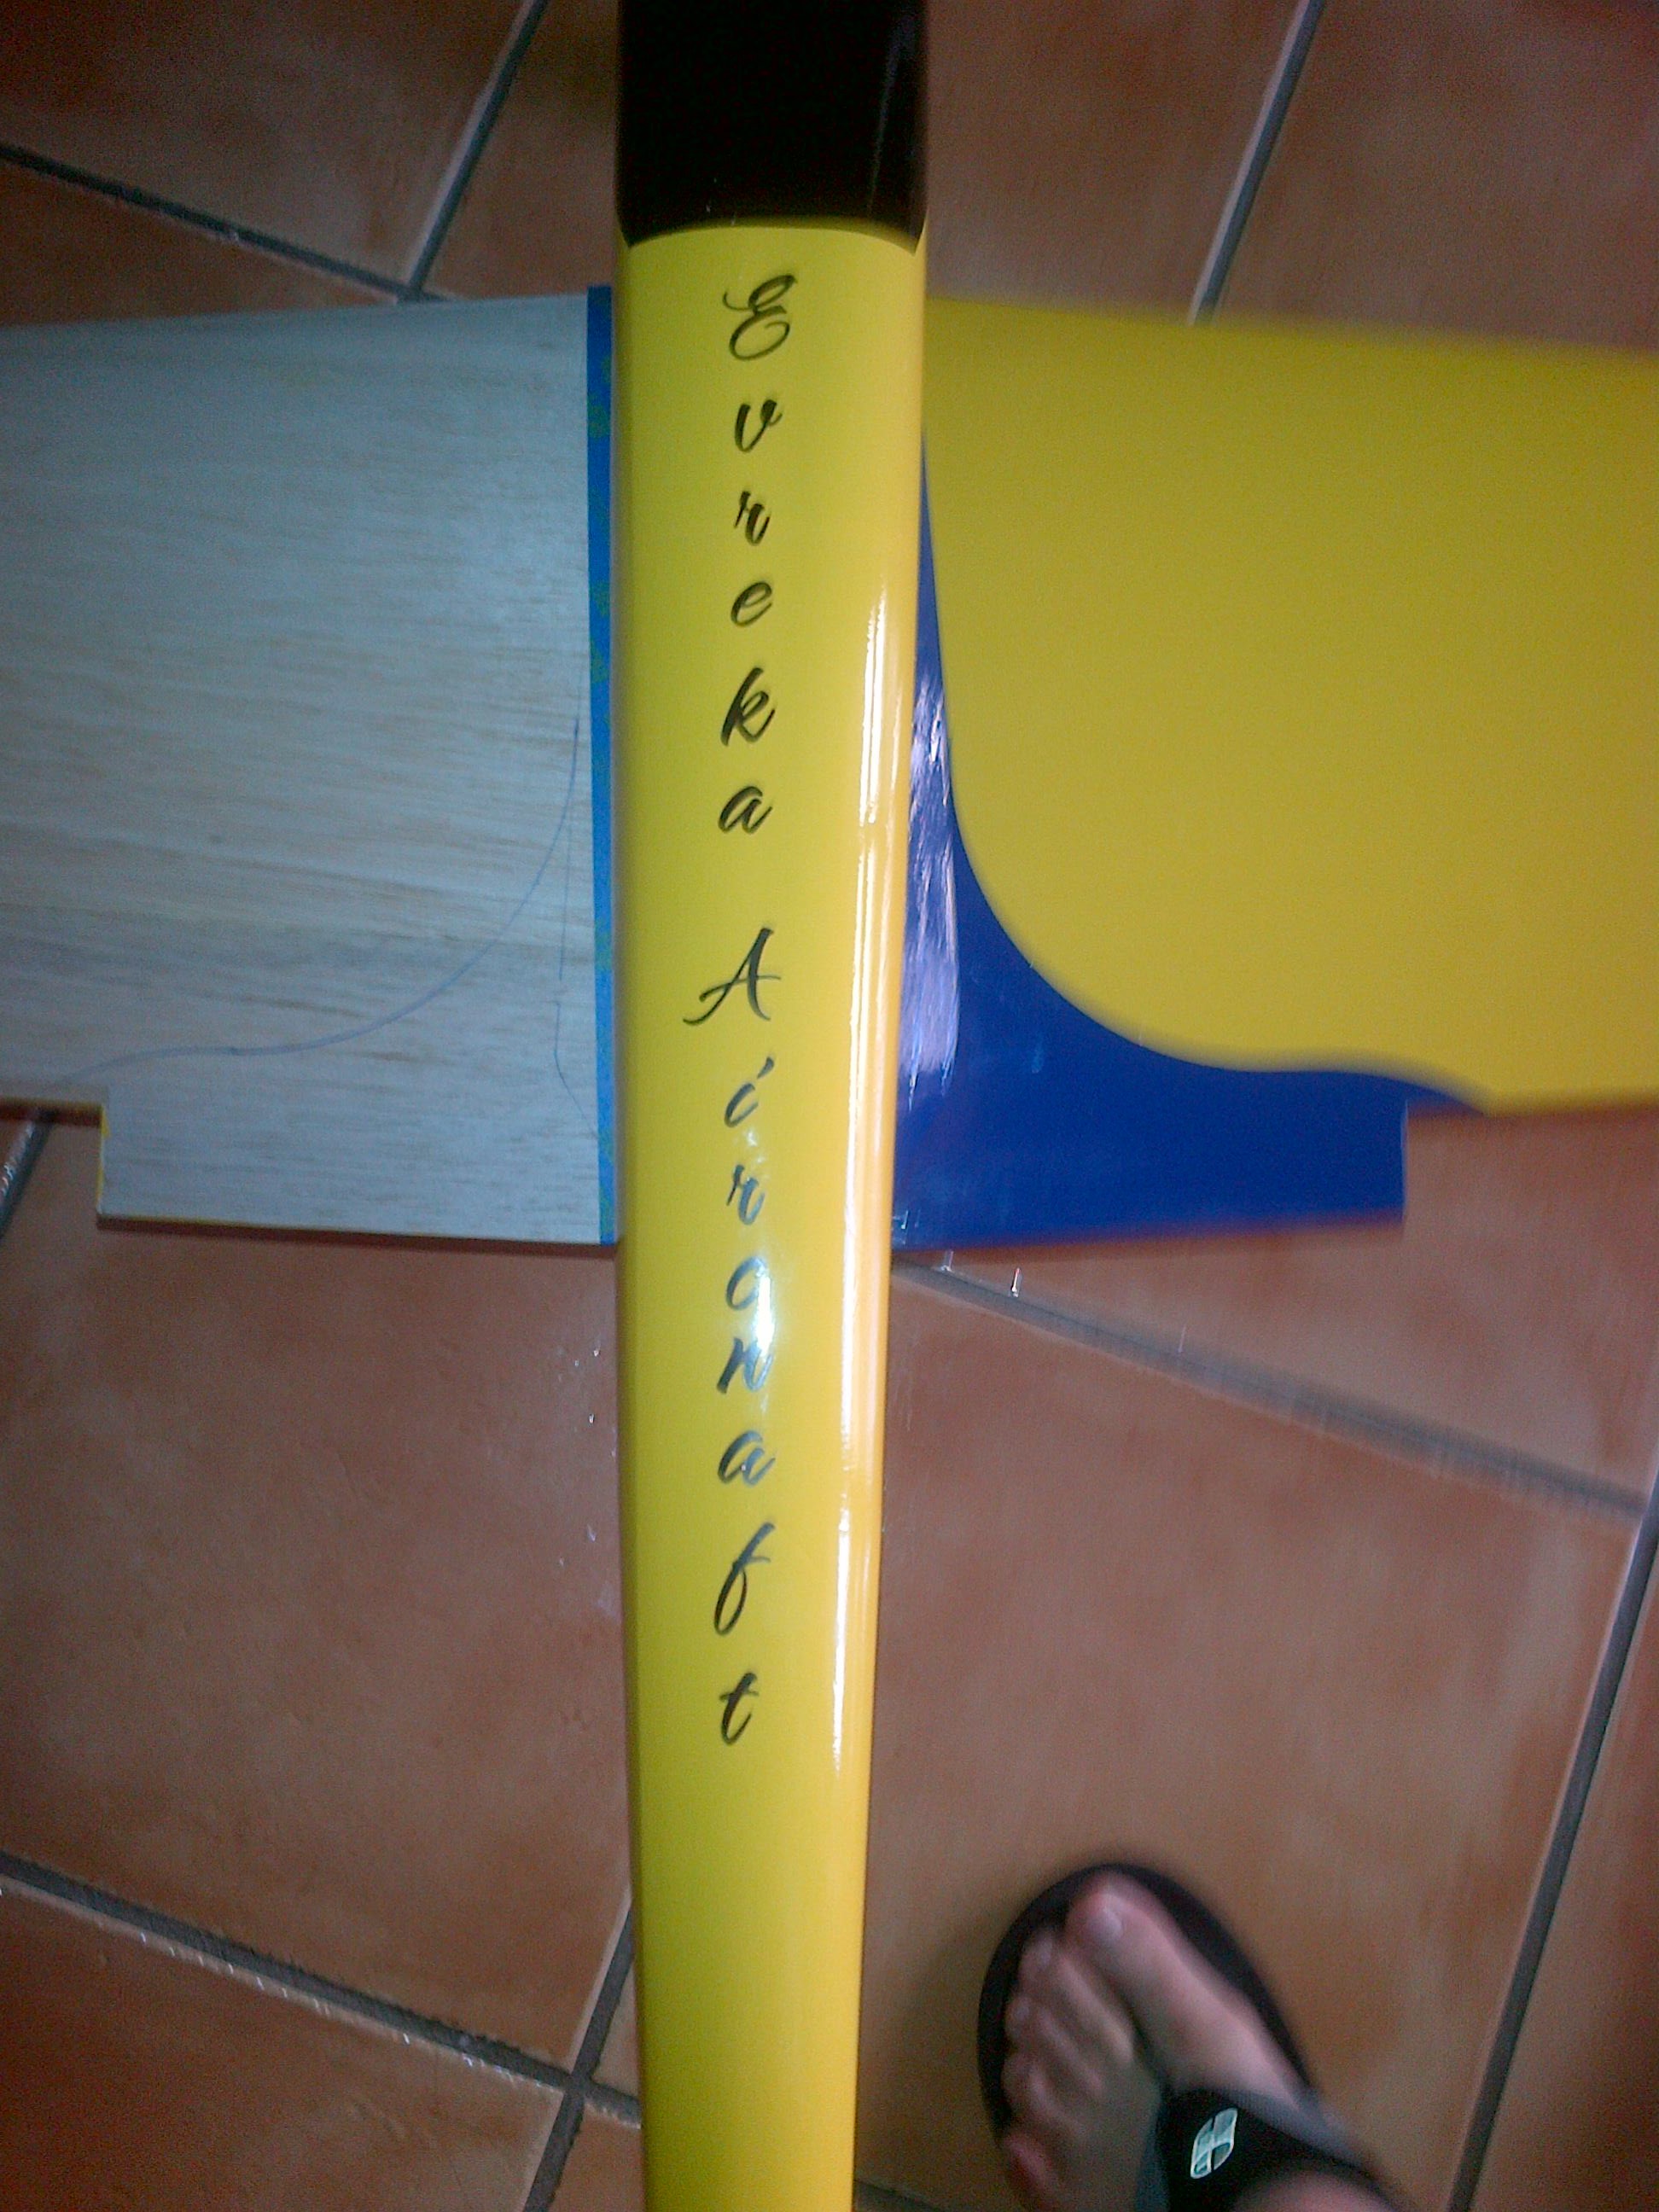
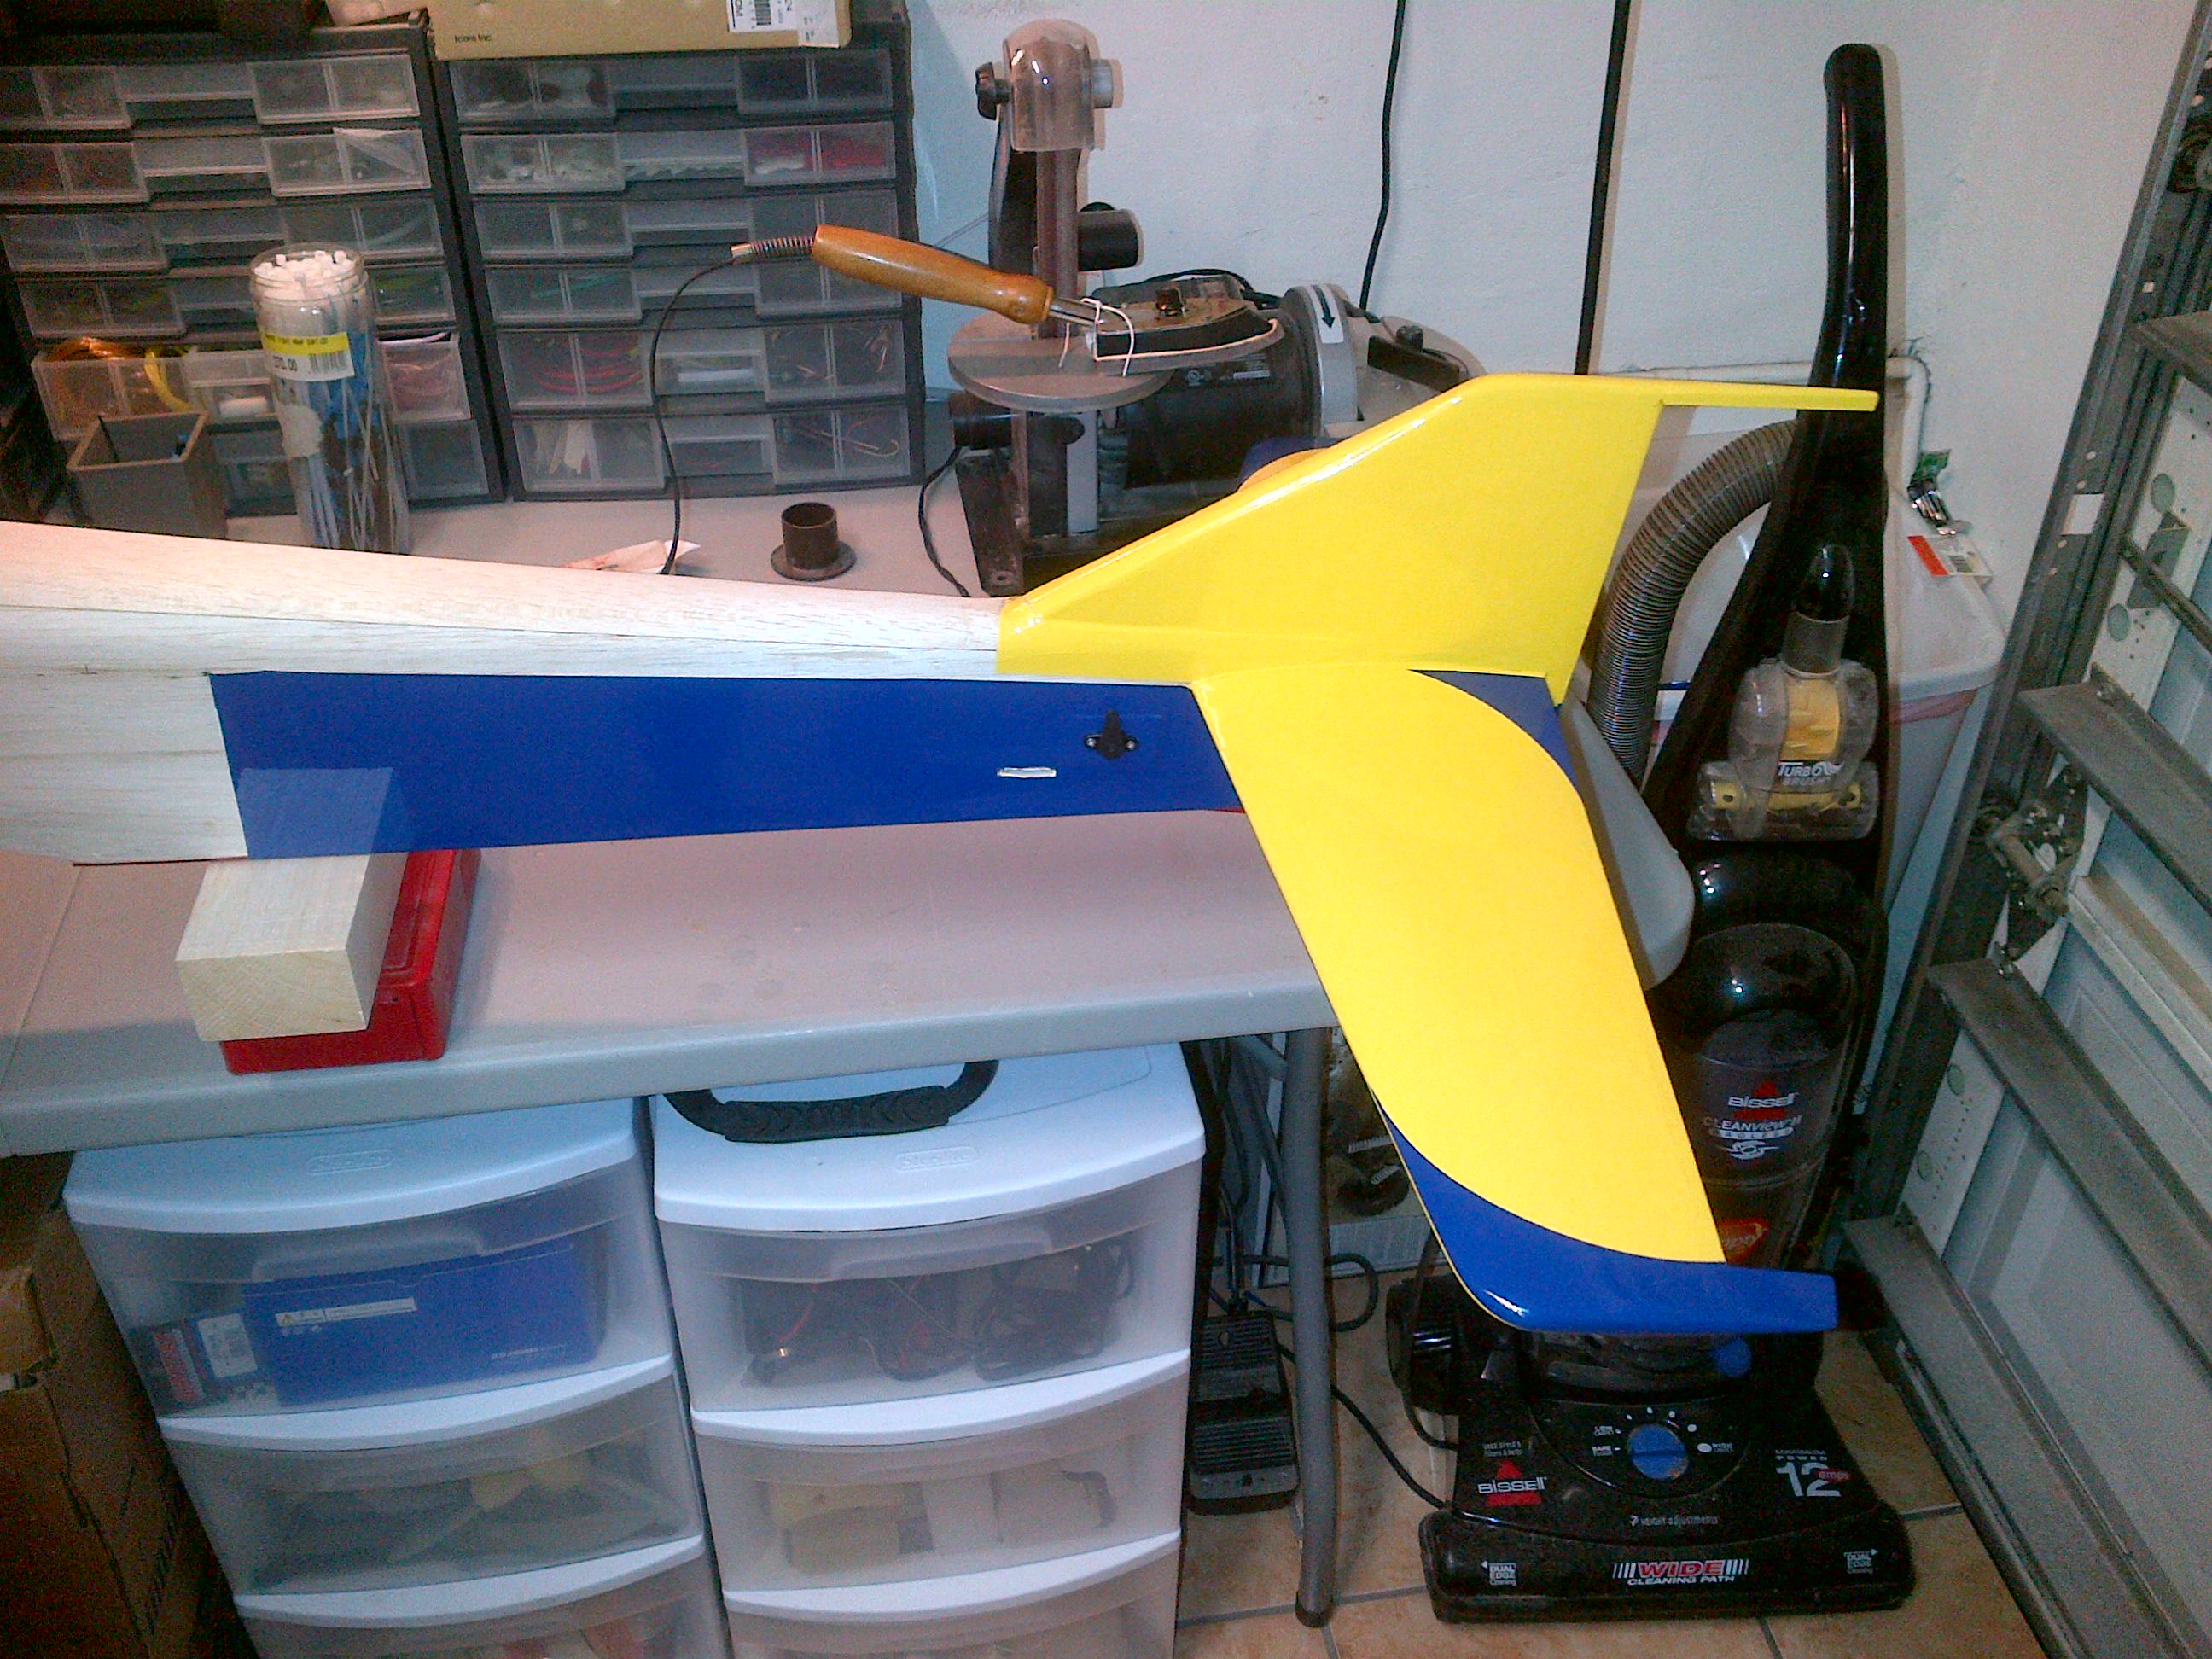
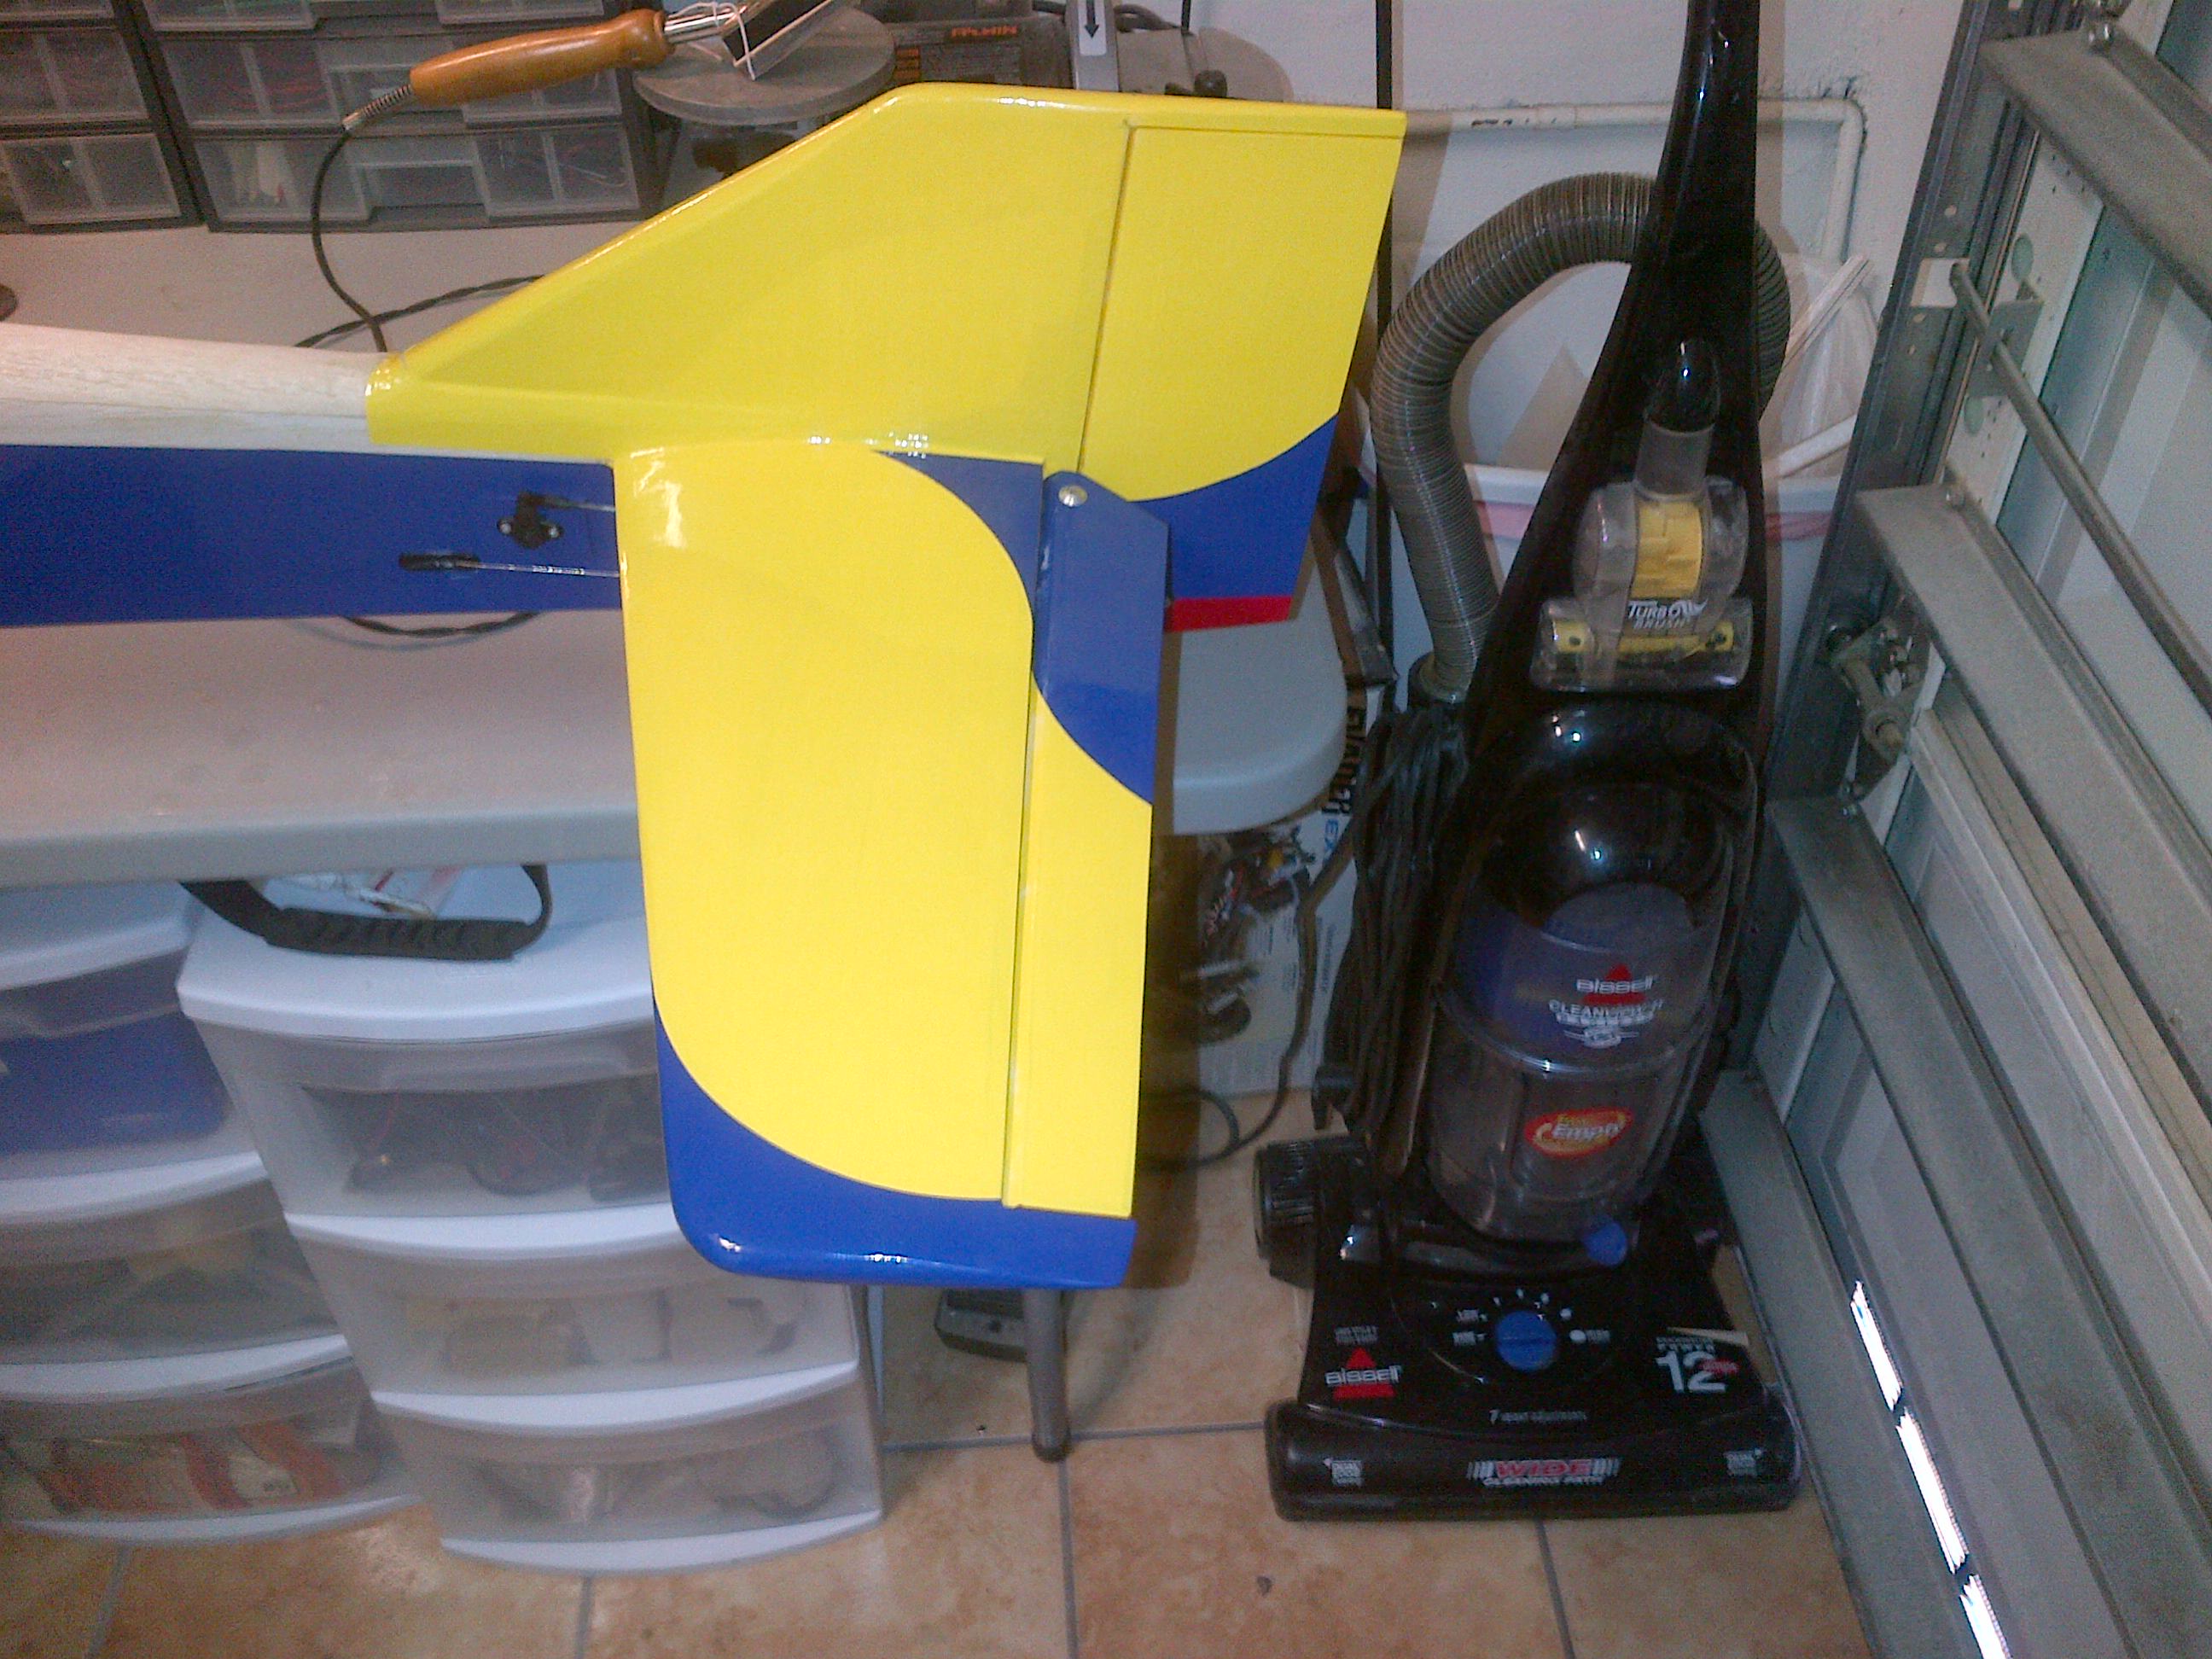
I would like to share with you my latest build. A Tiporare 120. Why 120?, Because its the 111% enlarged version I got from Don Turnock from Eureka Aircraft. At the time (about 2 years or more) Don only had a partial kit offering the foam wing and stab, plans and semi kit but was kind enough to calculate the remaining needed wood I would needed to finish the plane. It is now included in his list as a standard option.
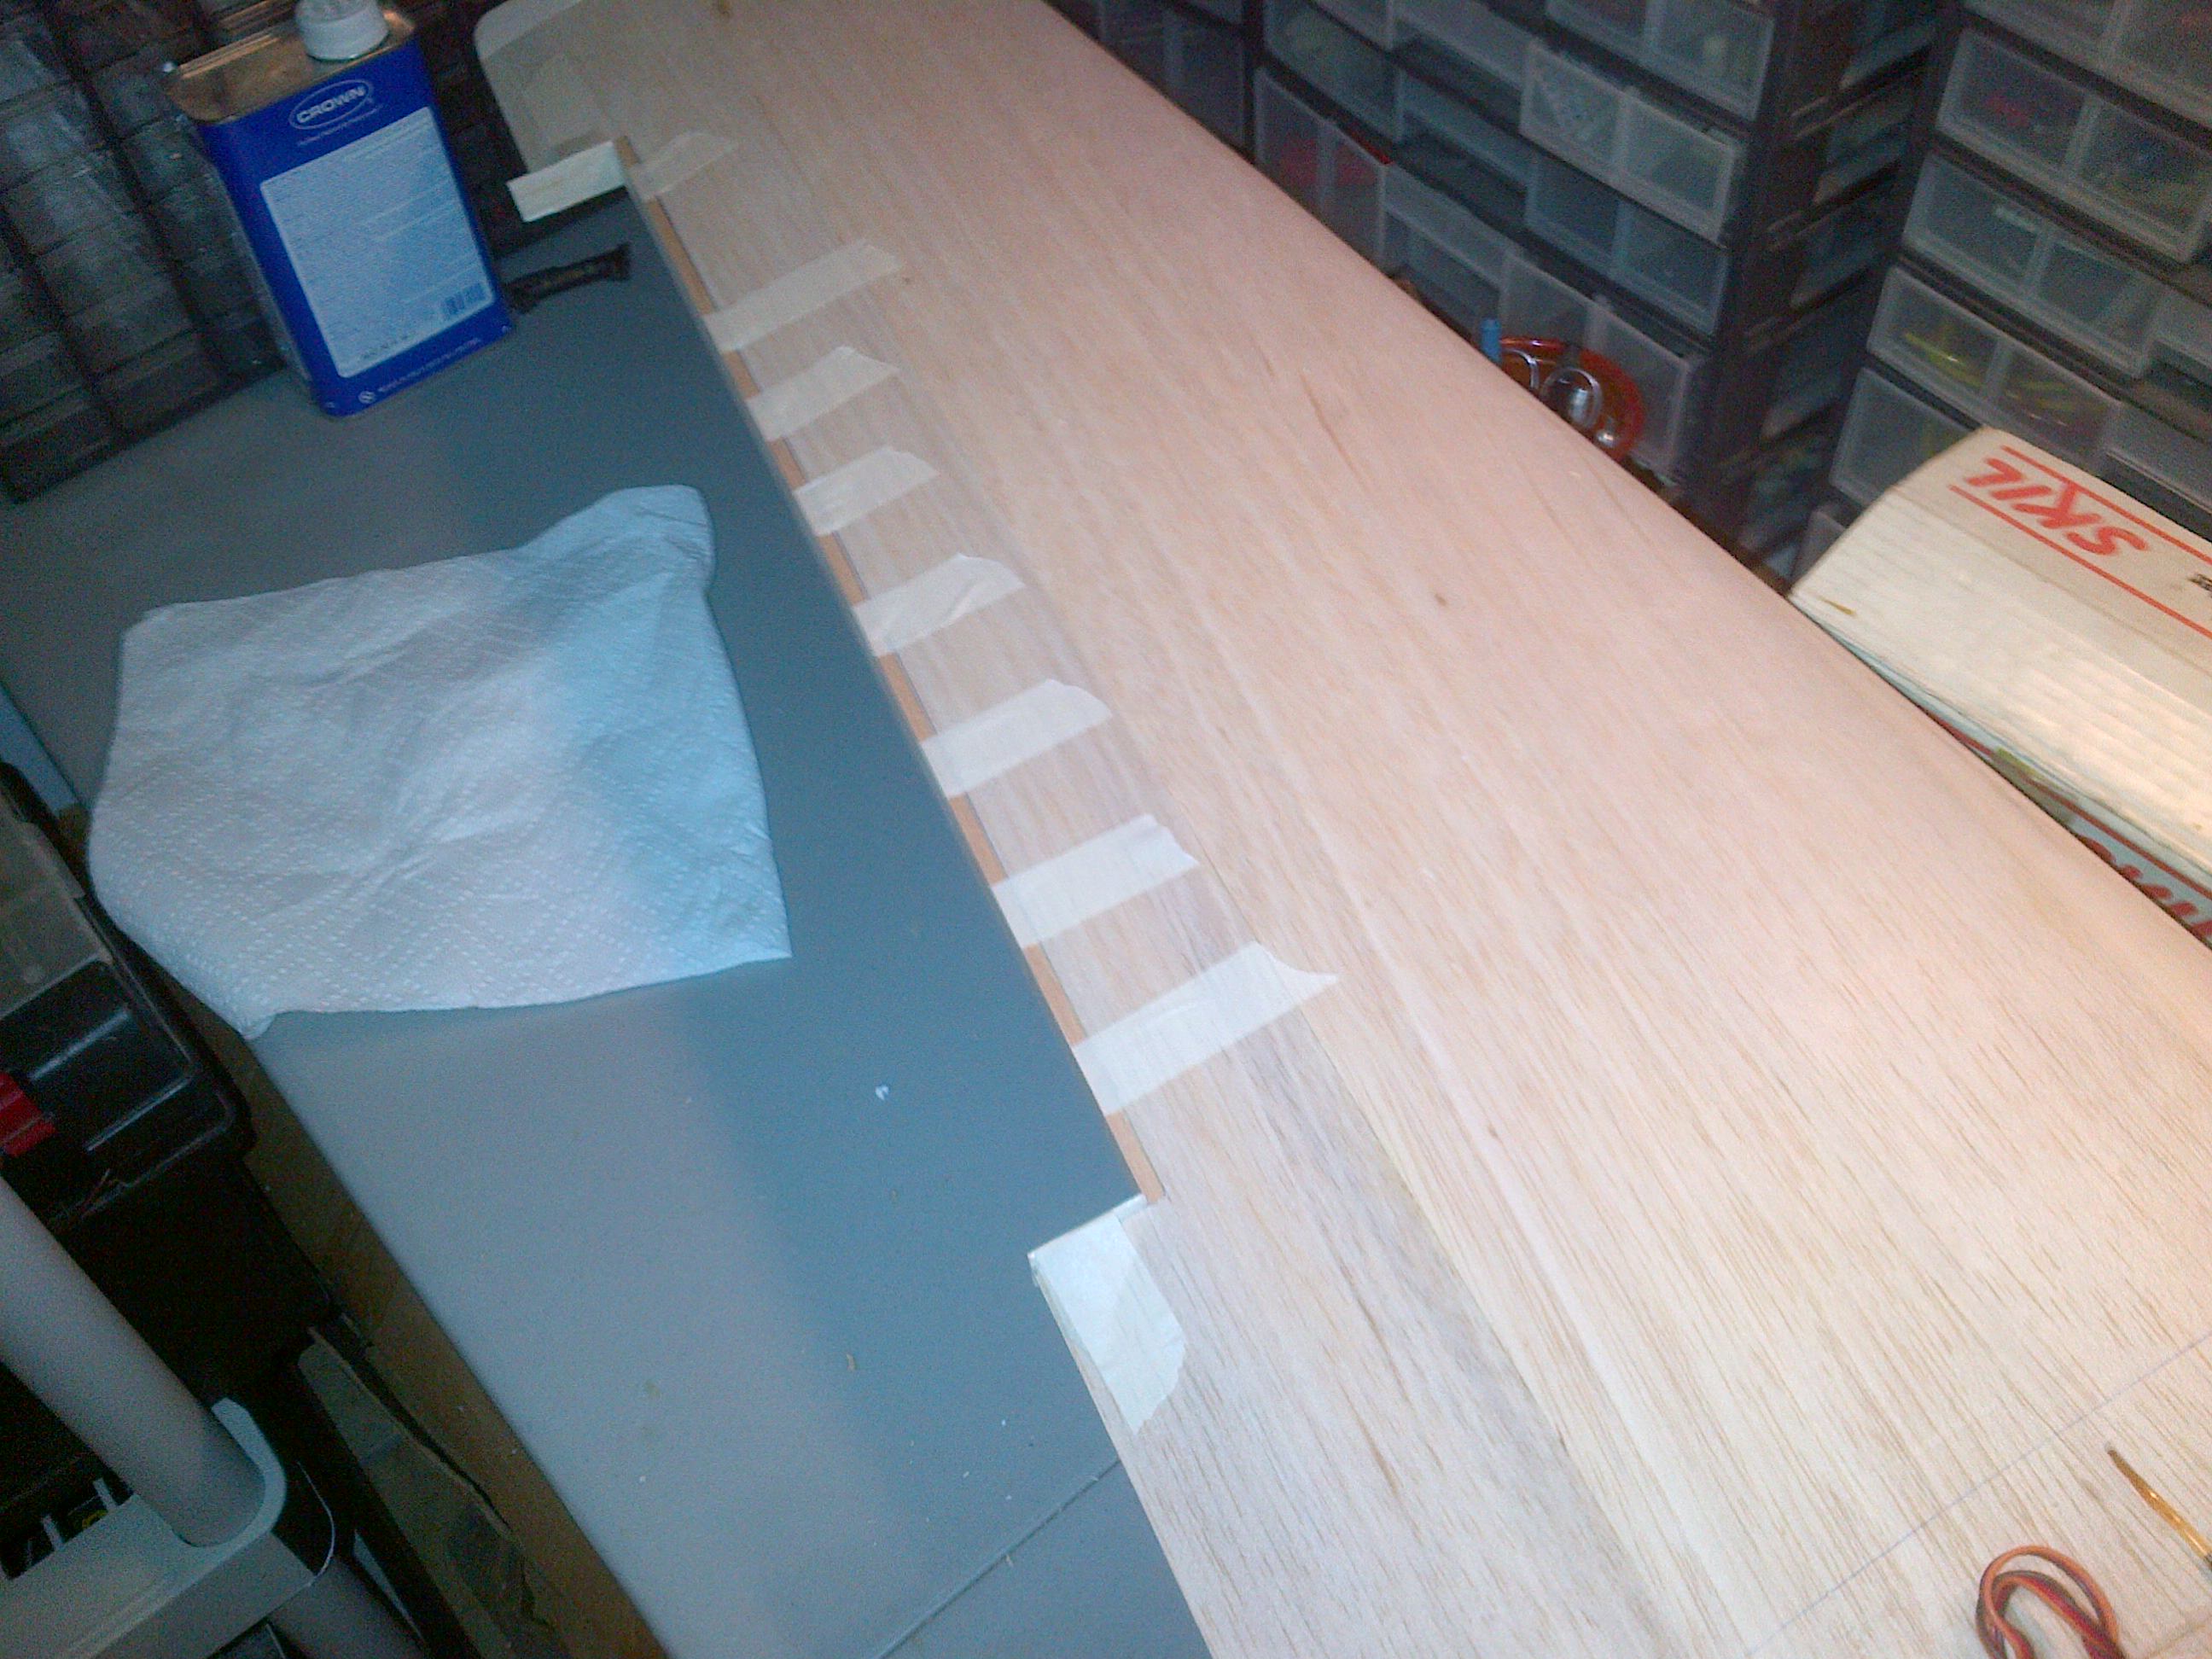
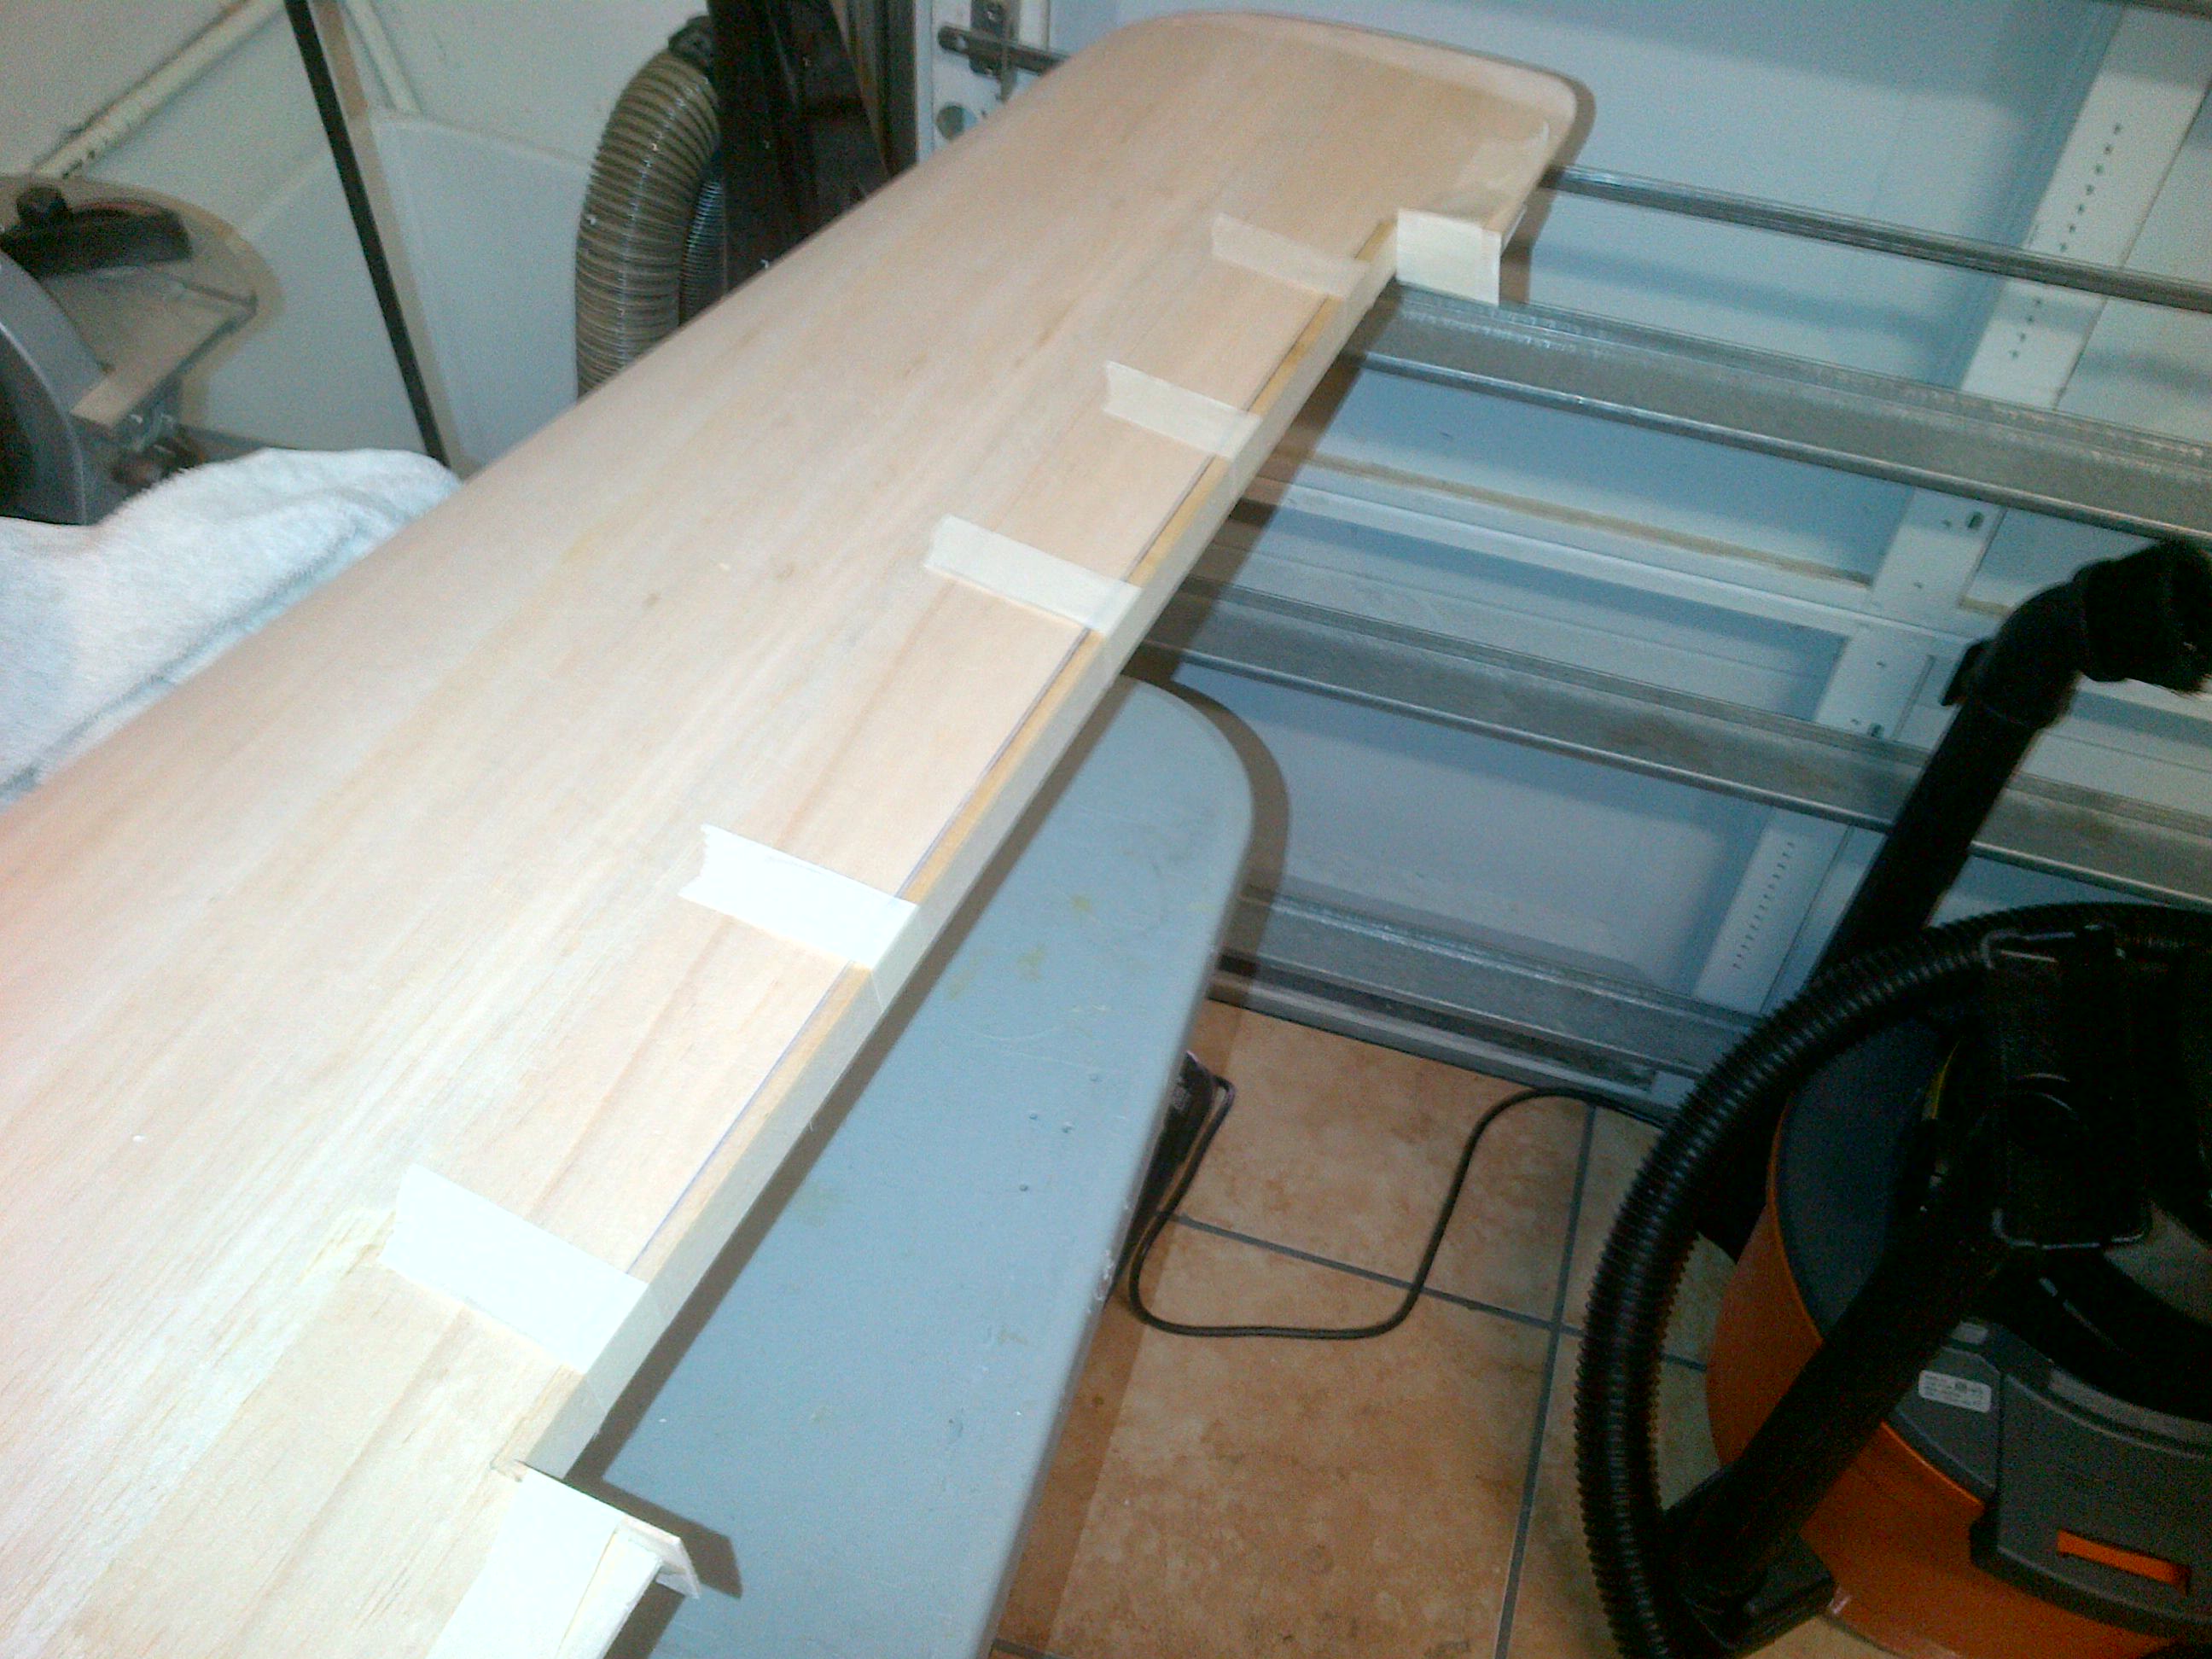
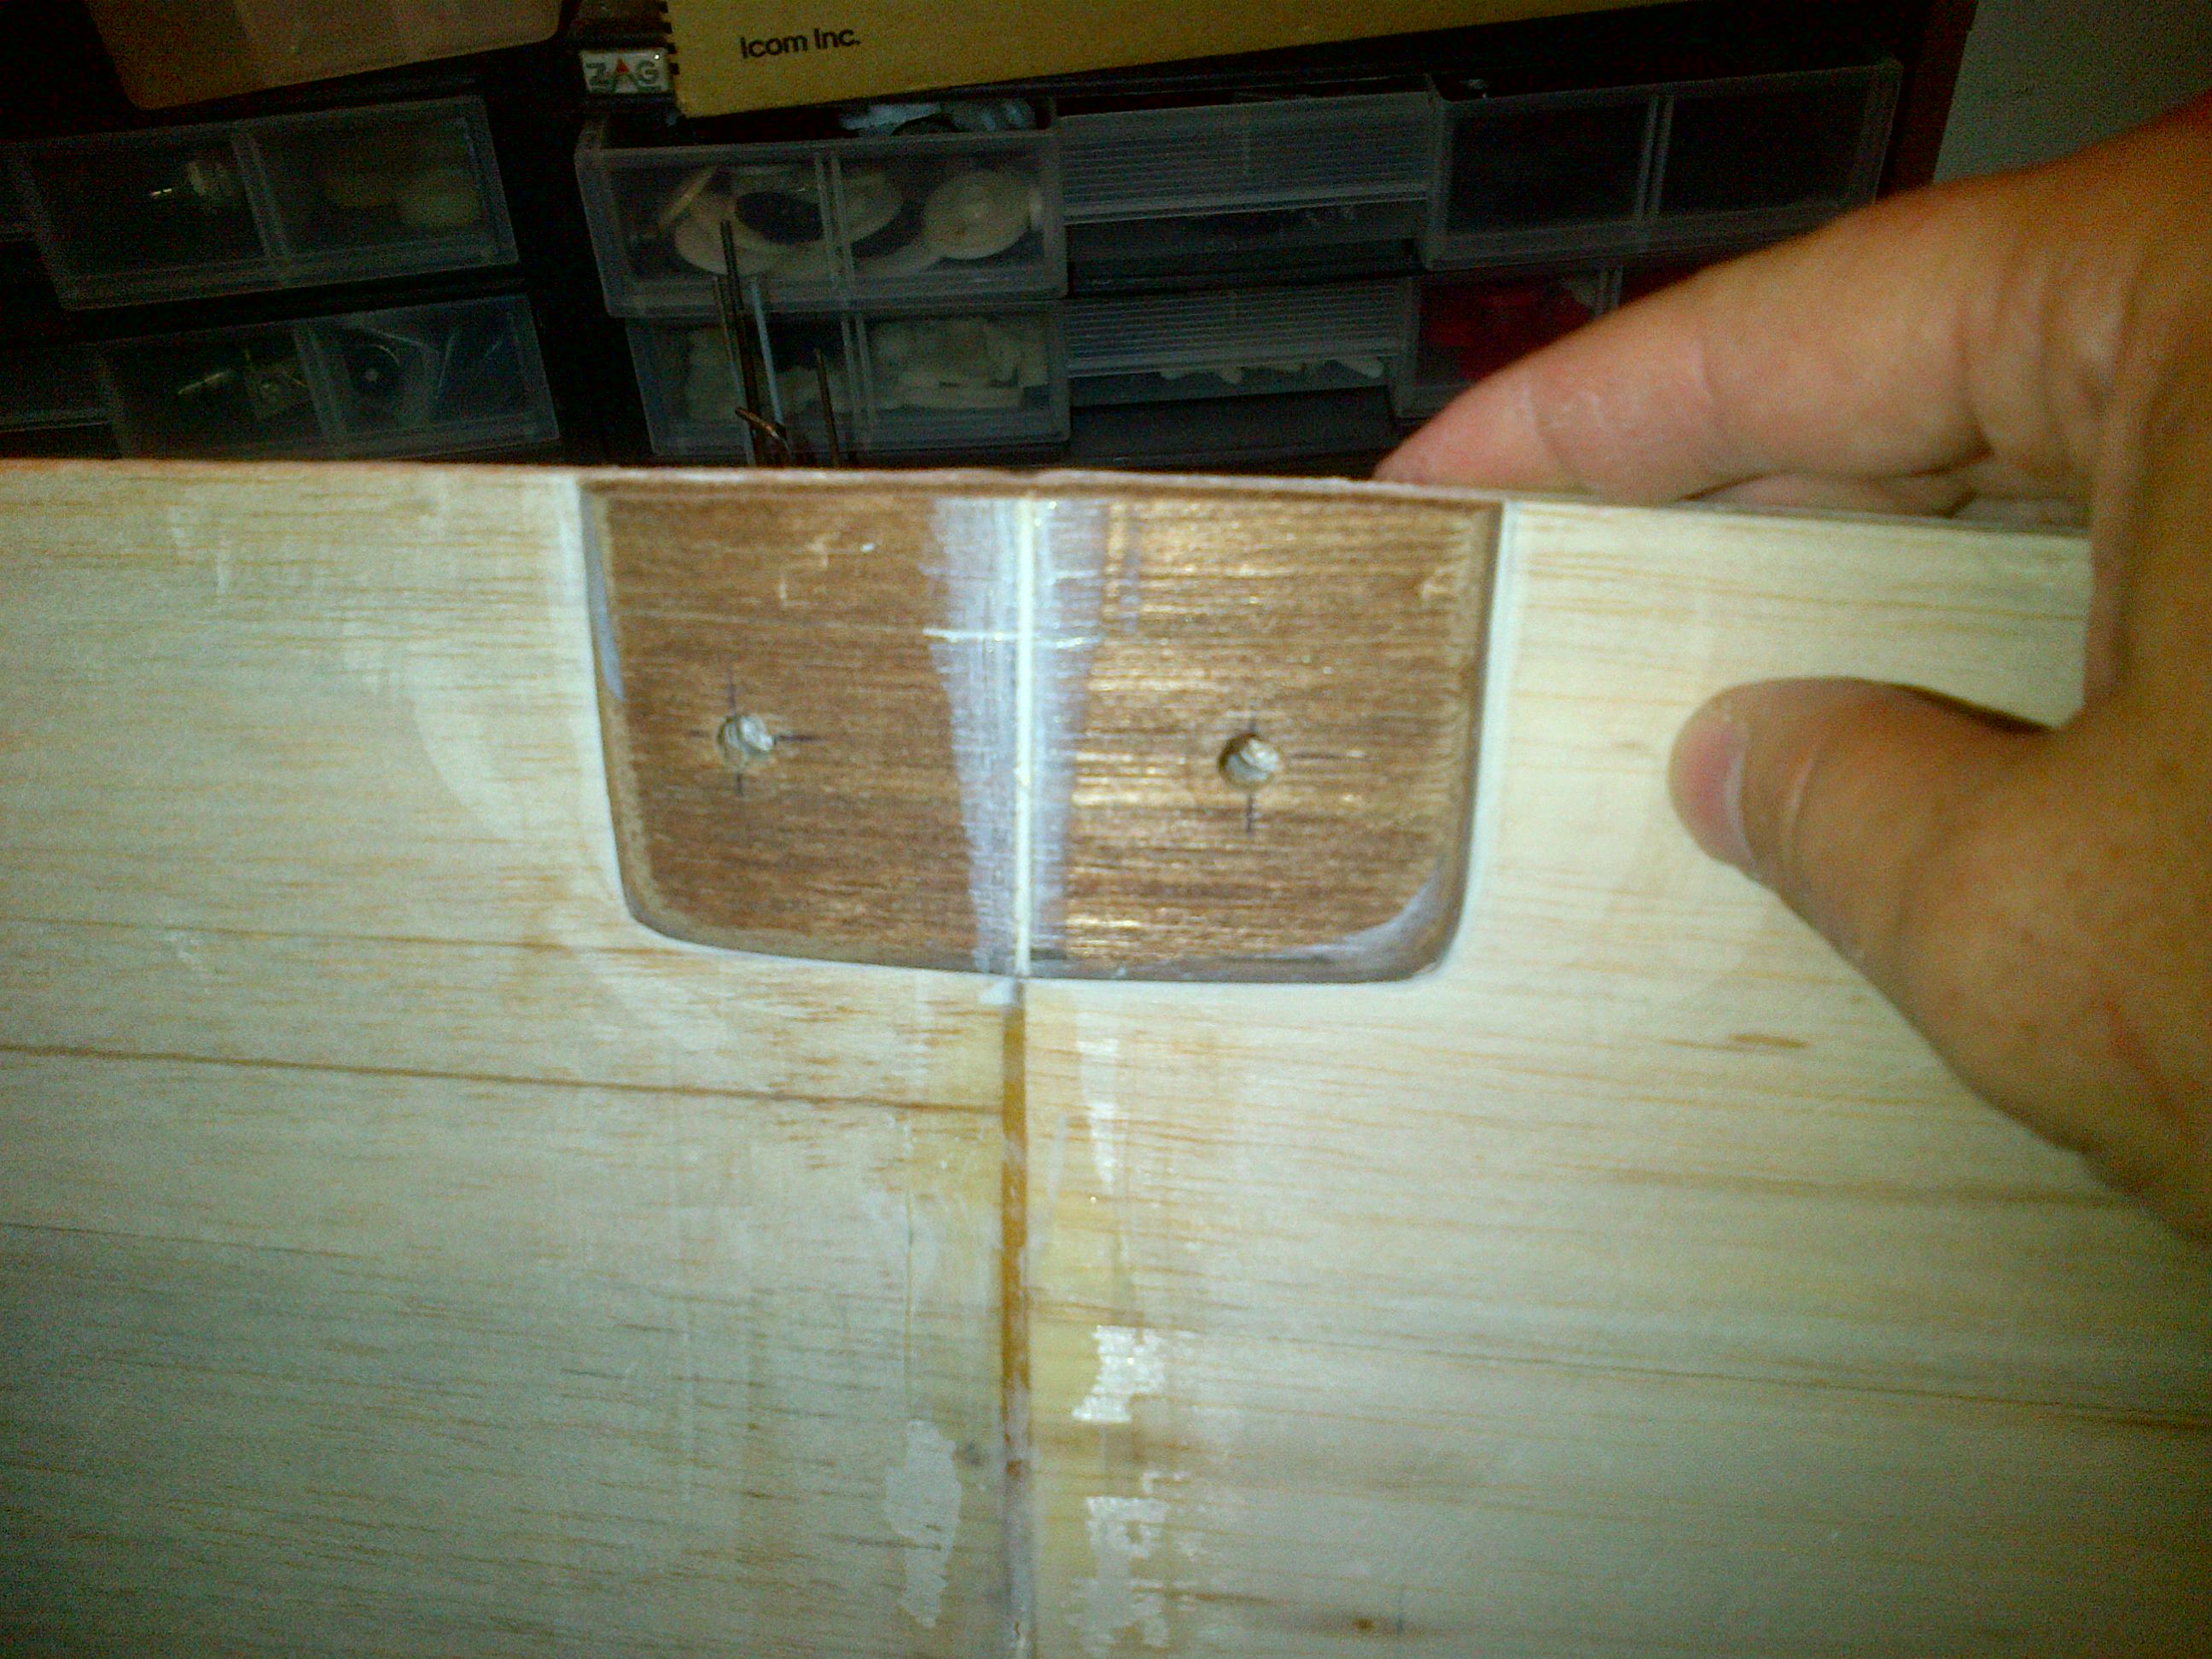
Although I do not have the complete build I want to share some pic through out the build. The pictures are not in order but I will give you a brief description:
Tiporare 120
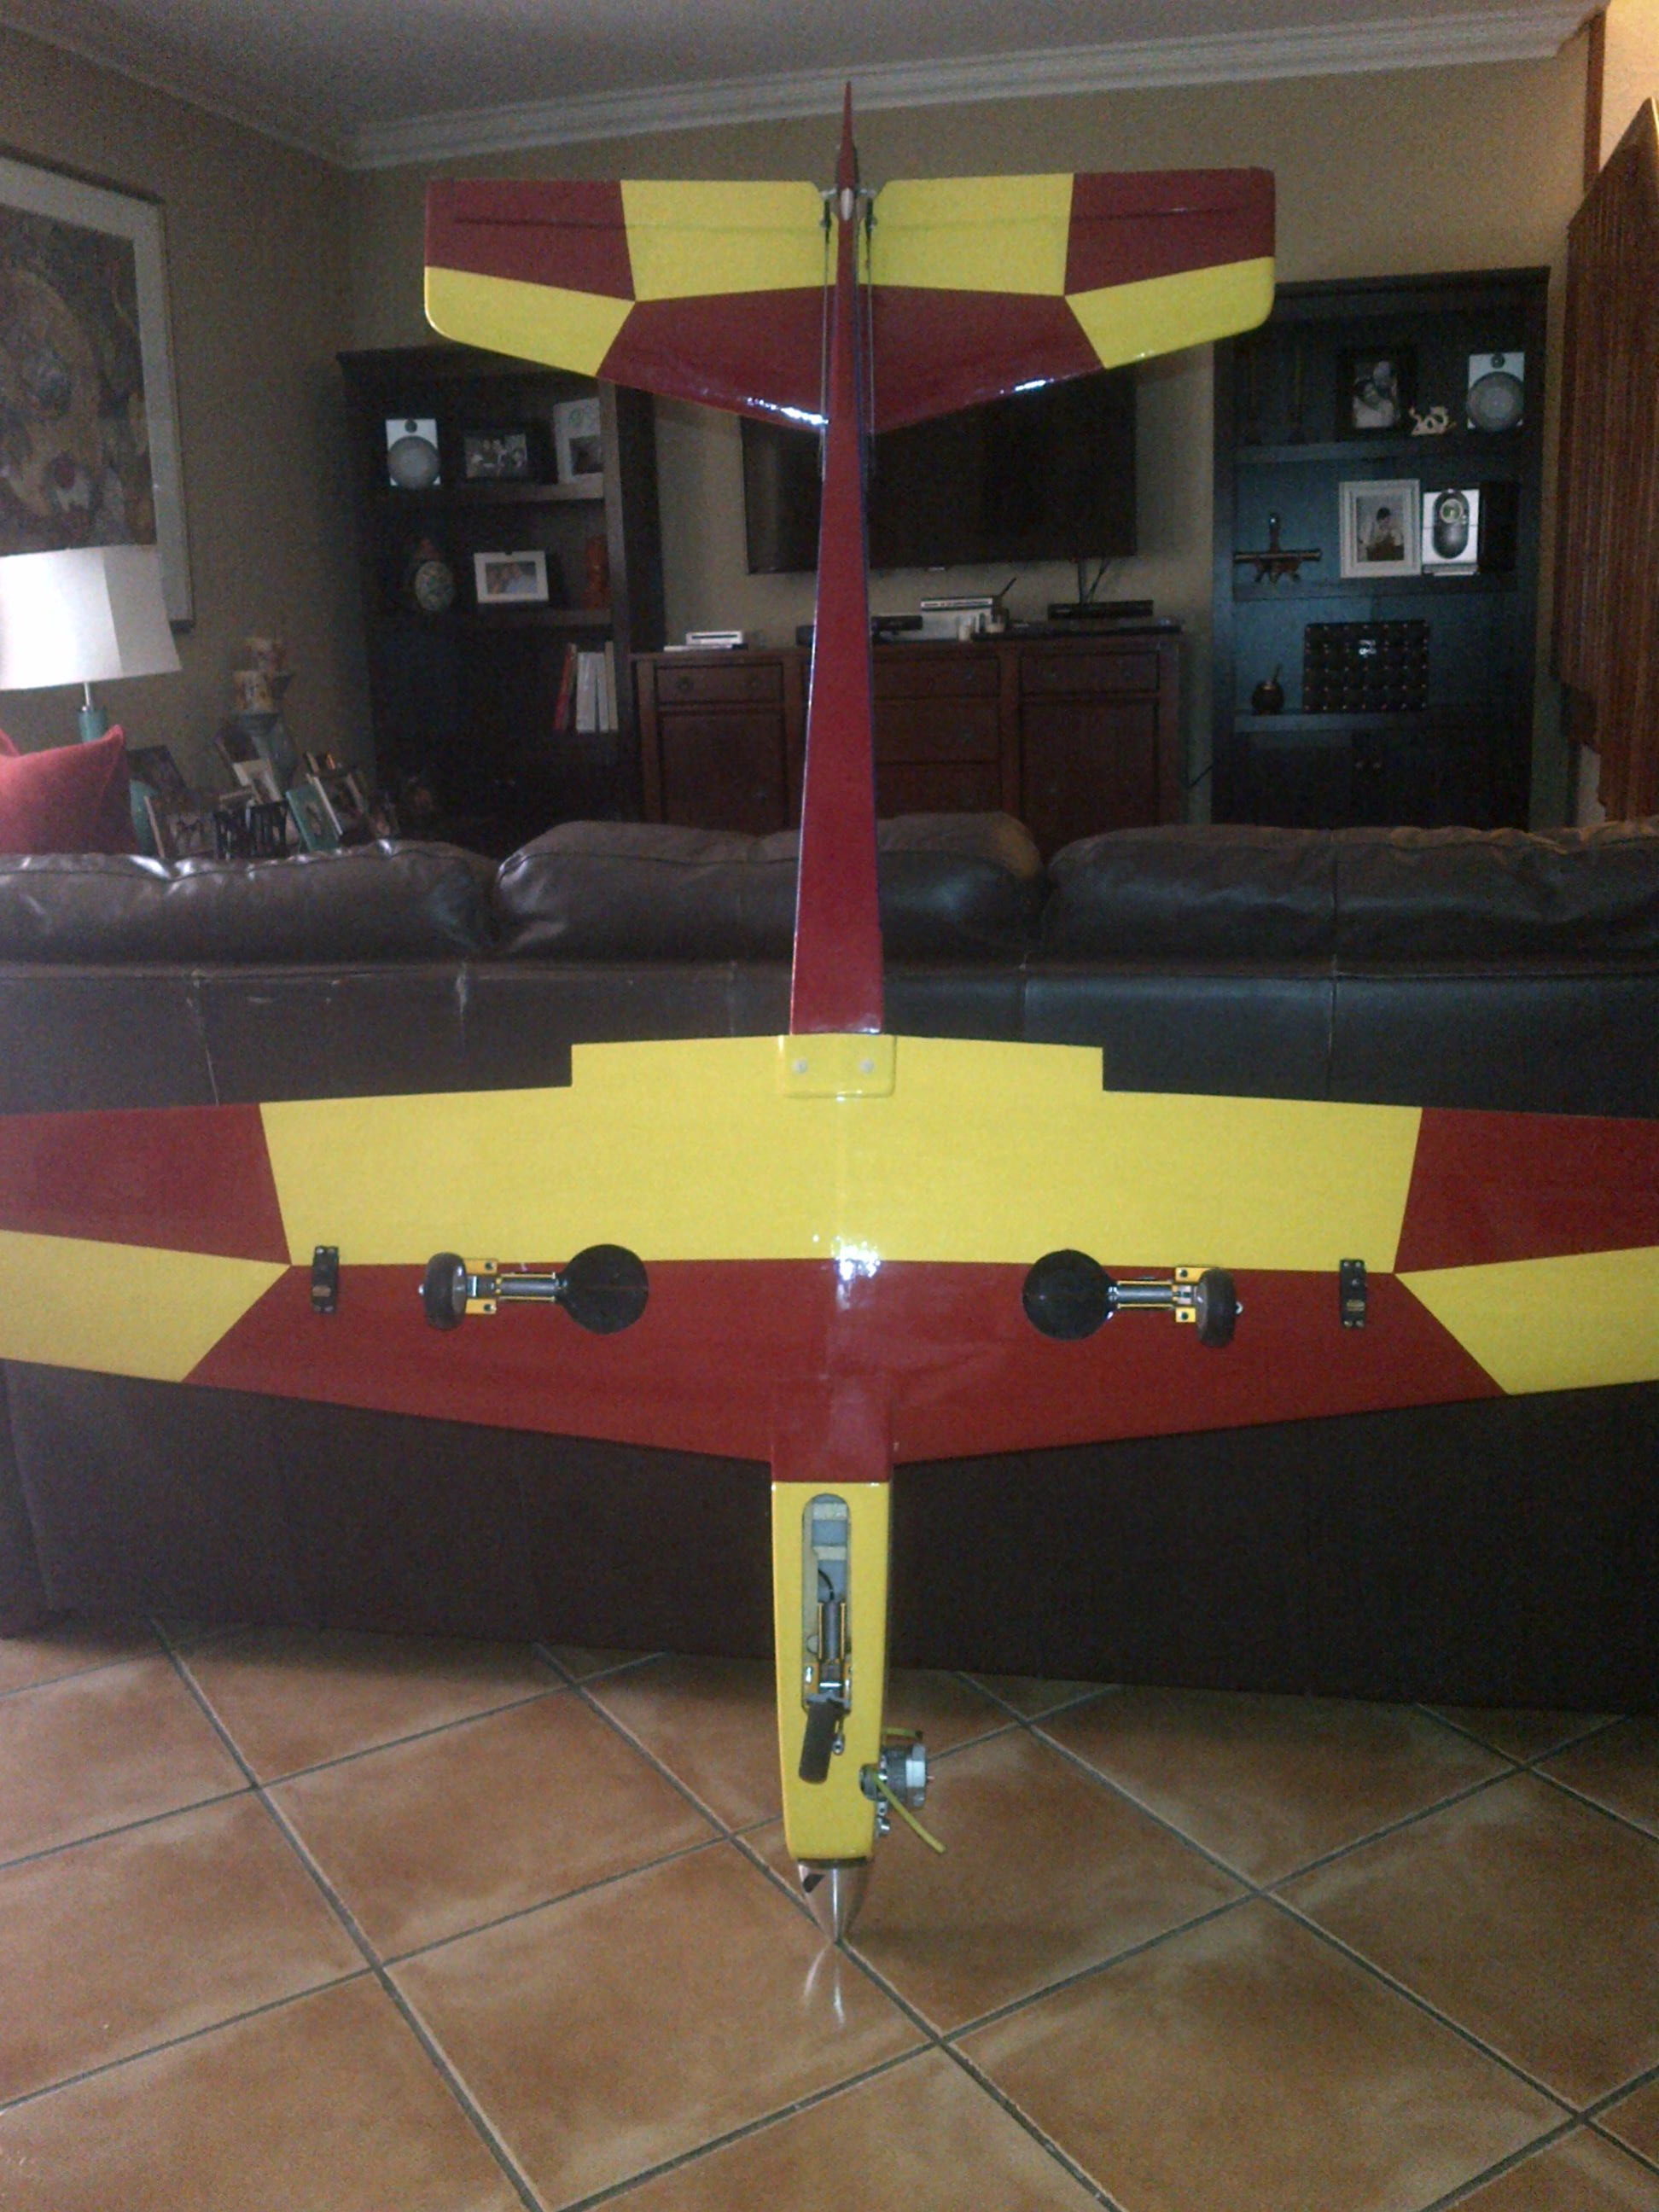
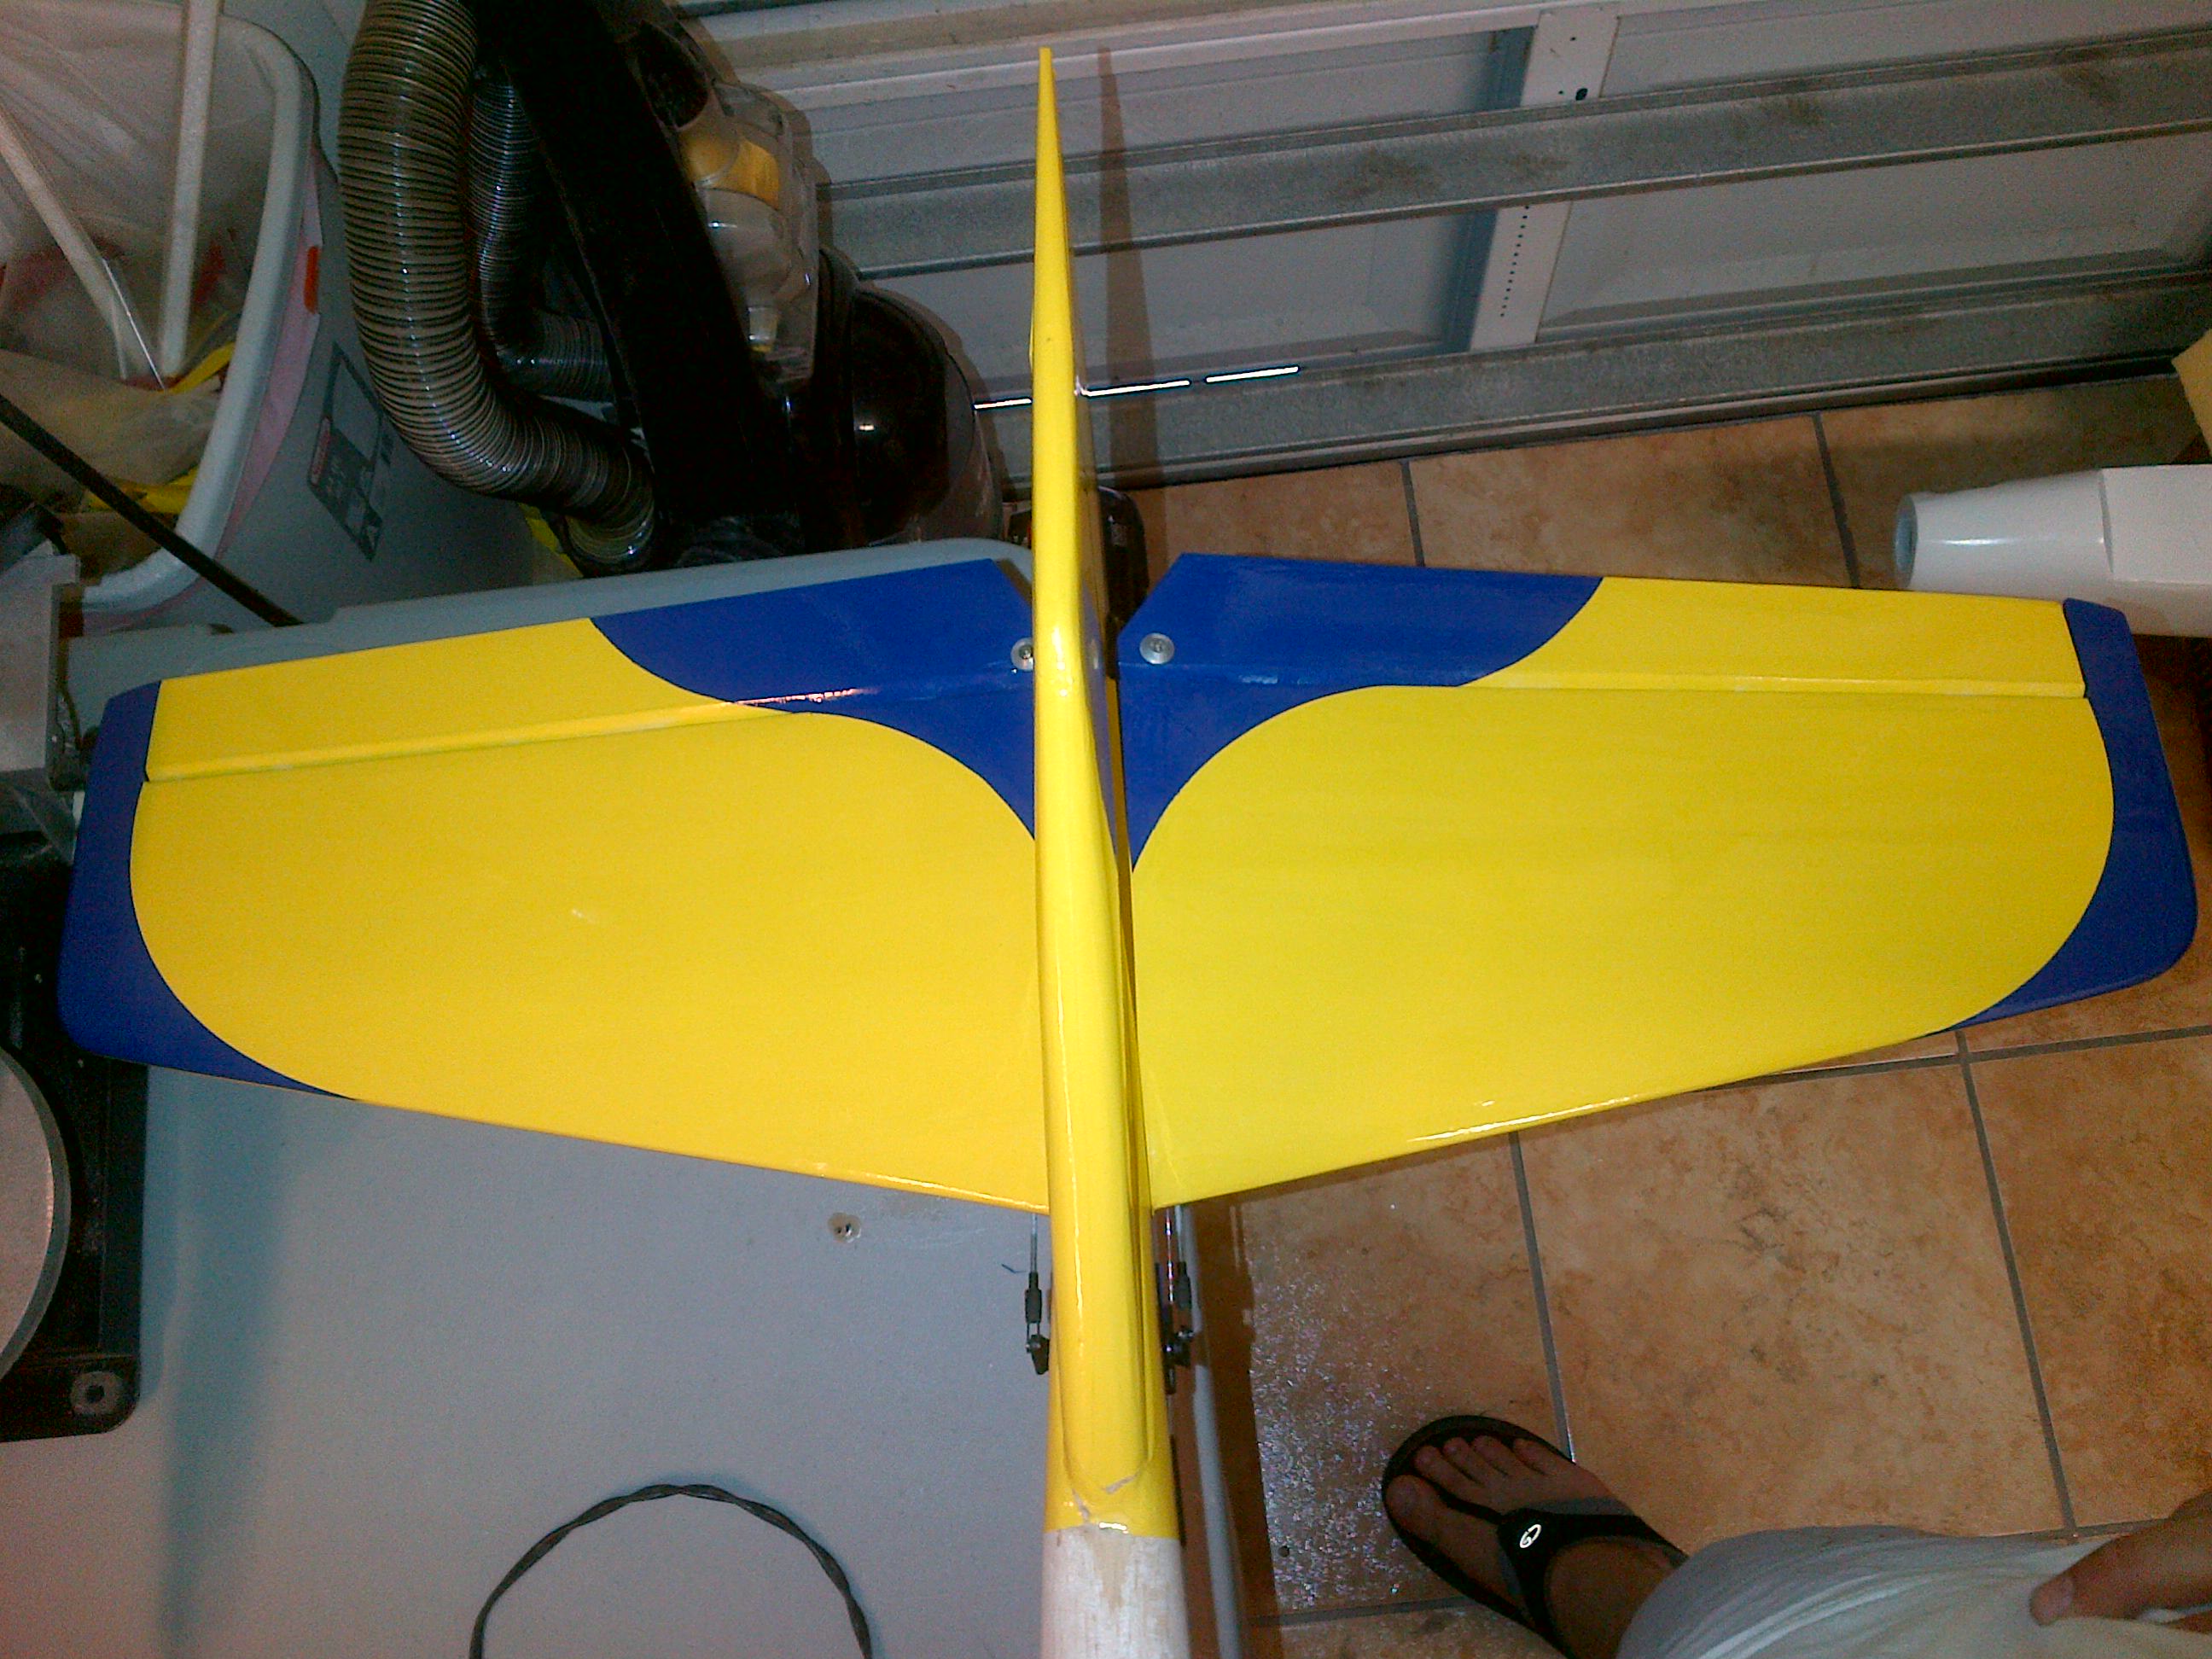
Span 72.25
Length 63.375
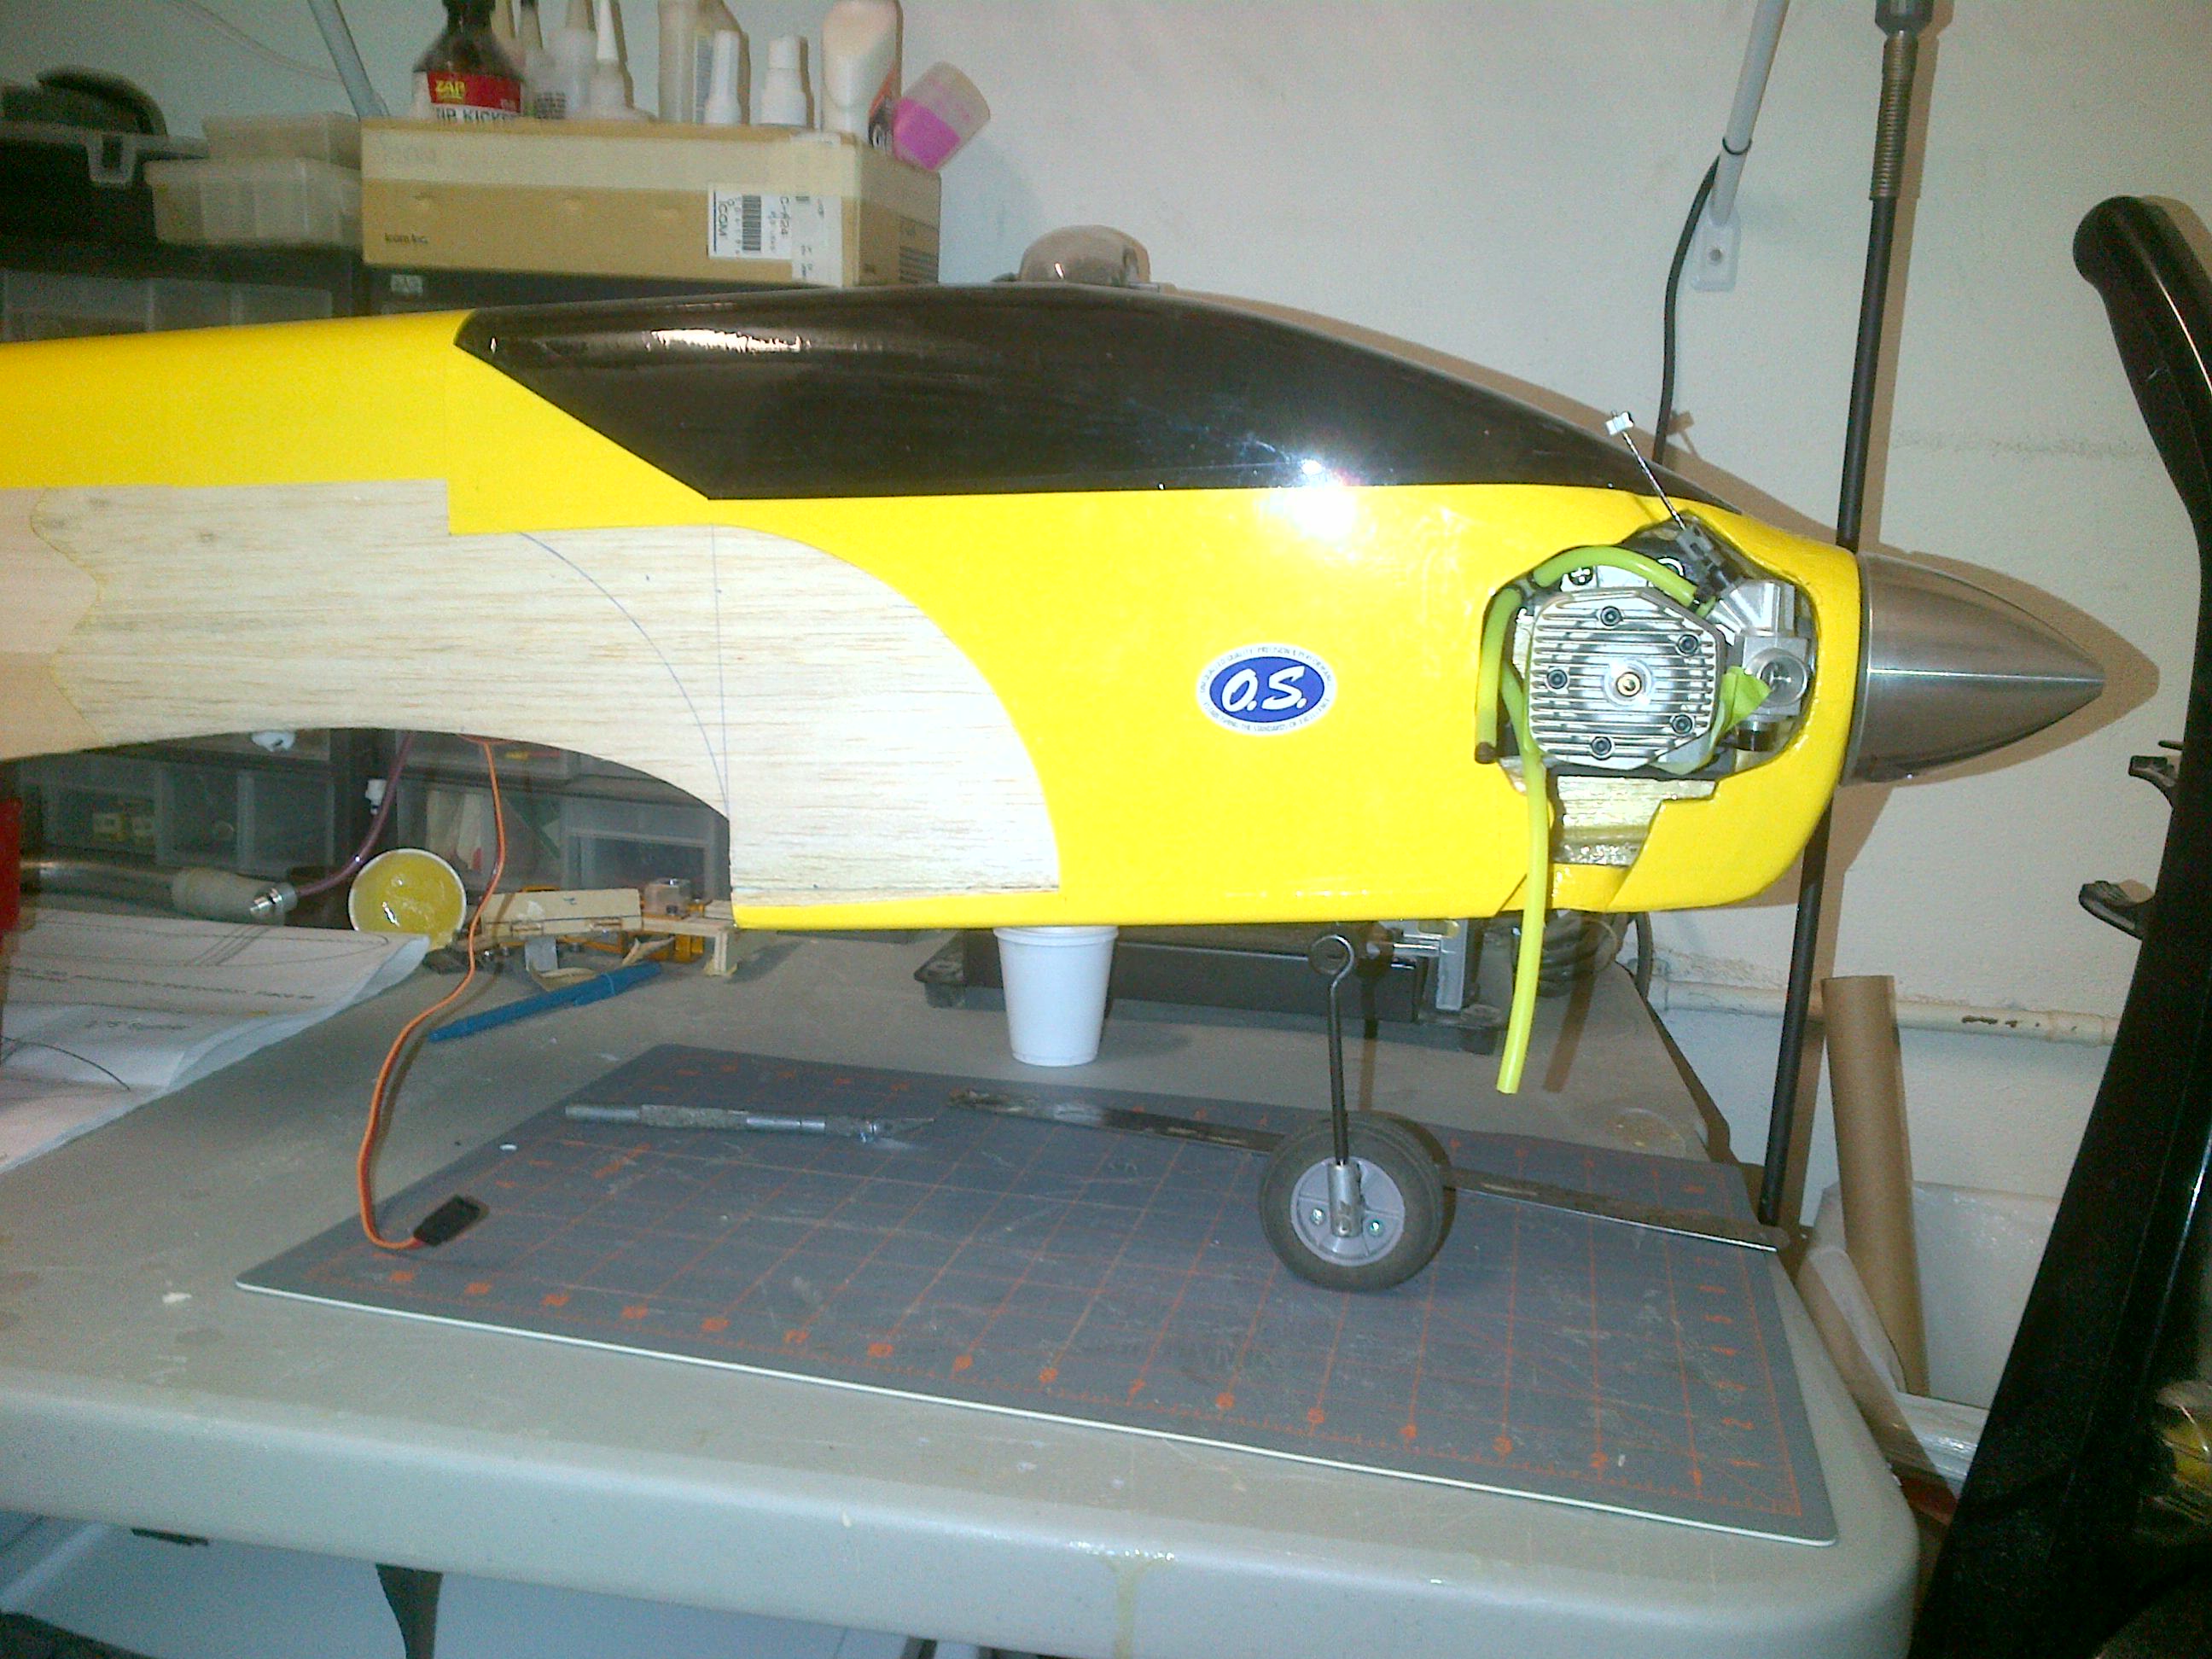
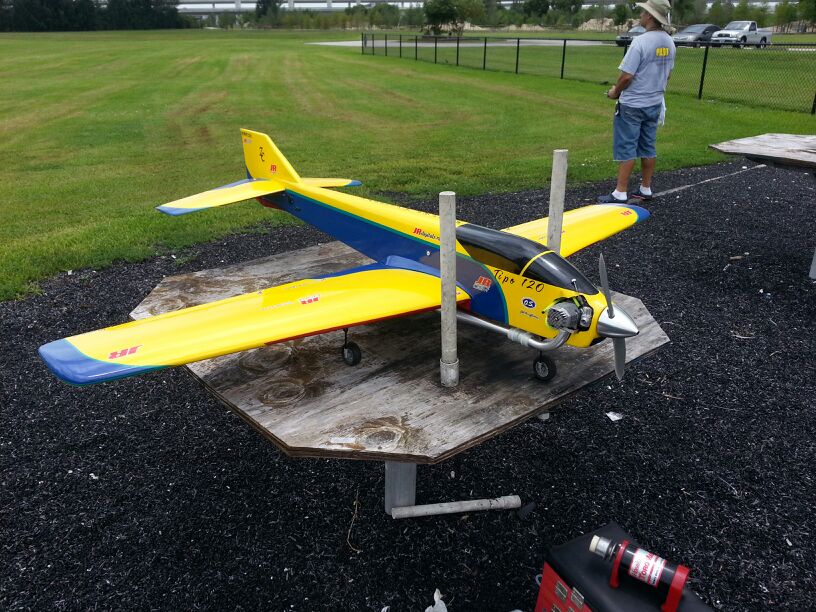
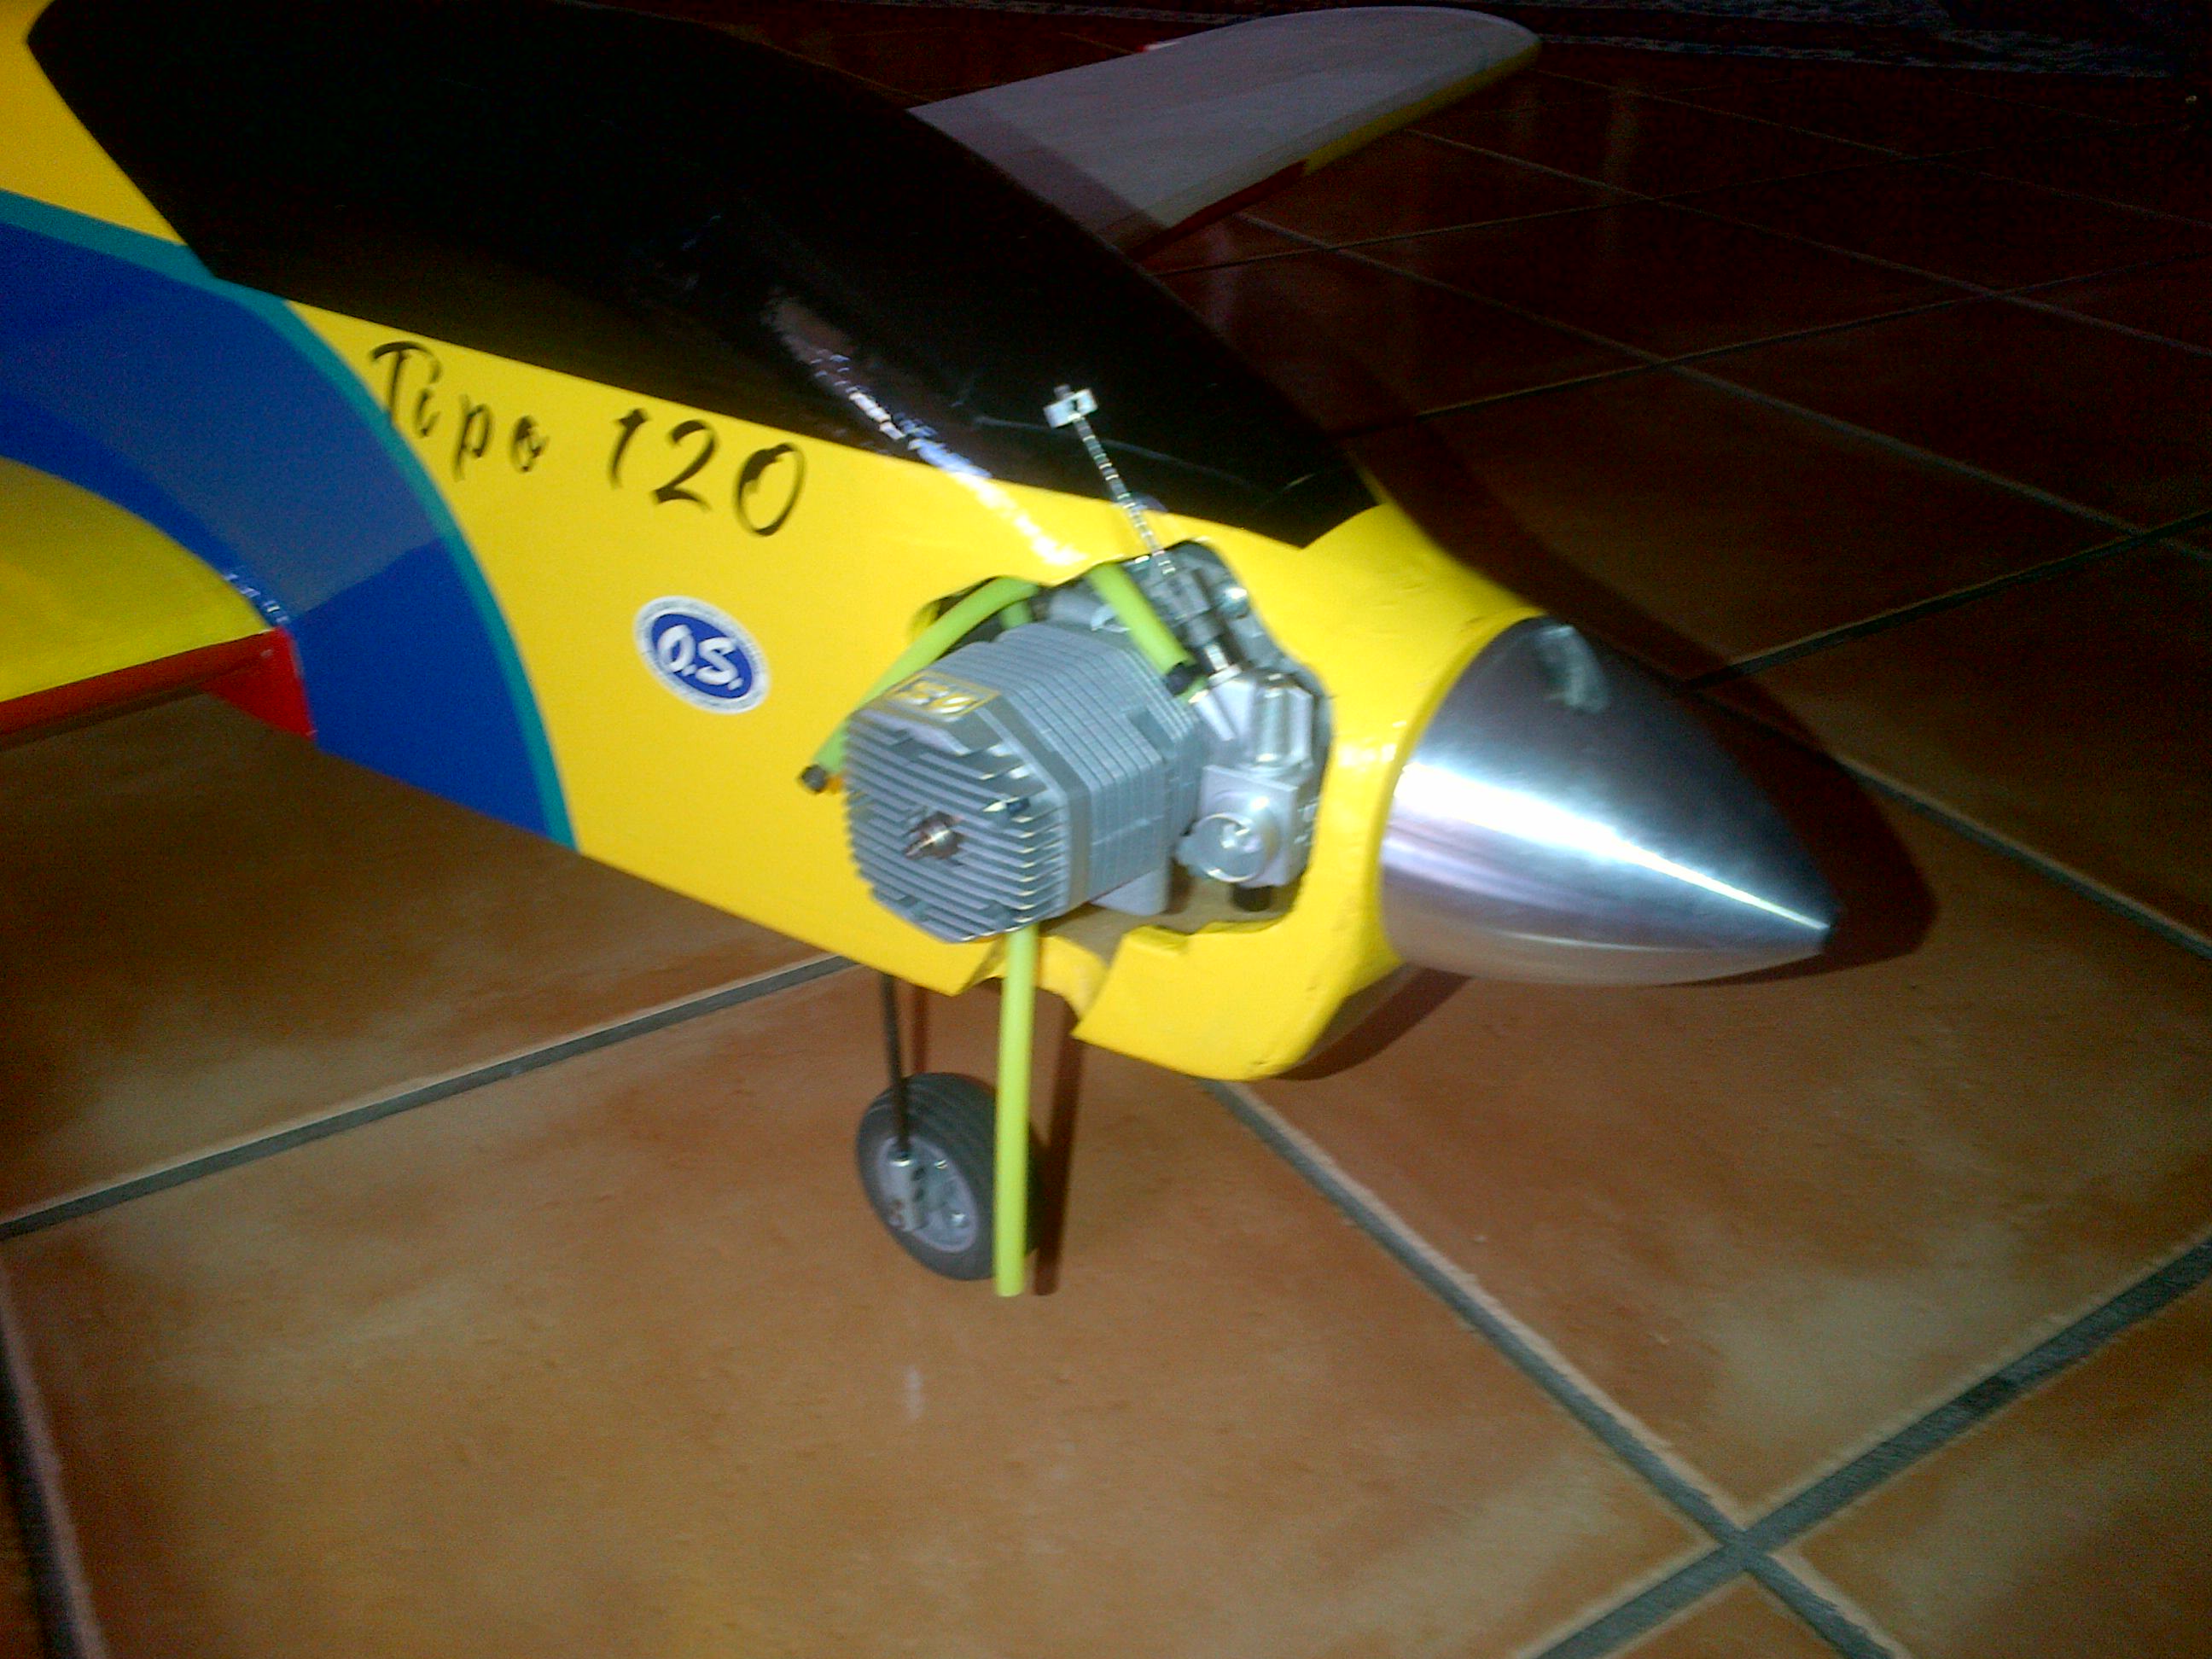
Power OS95 AX with Macs Pipe
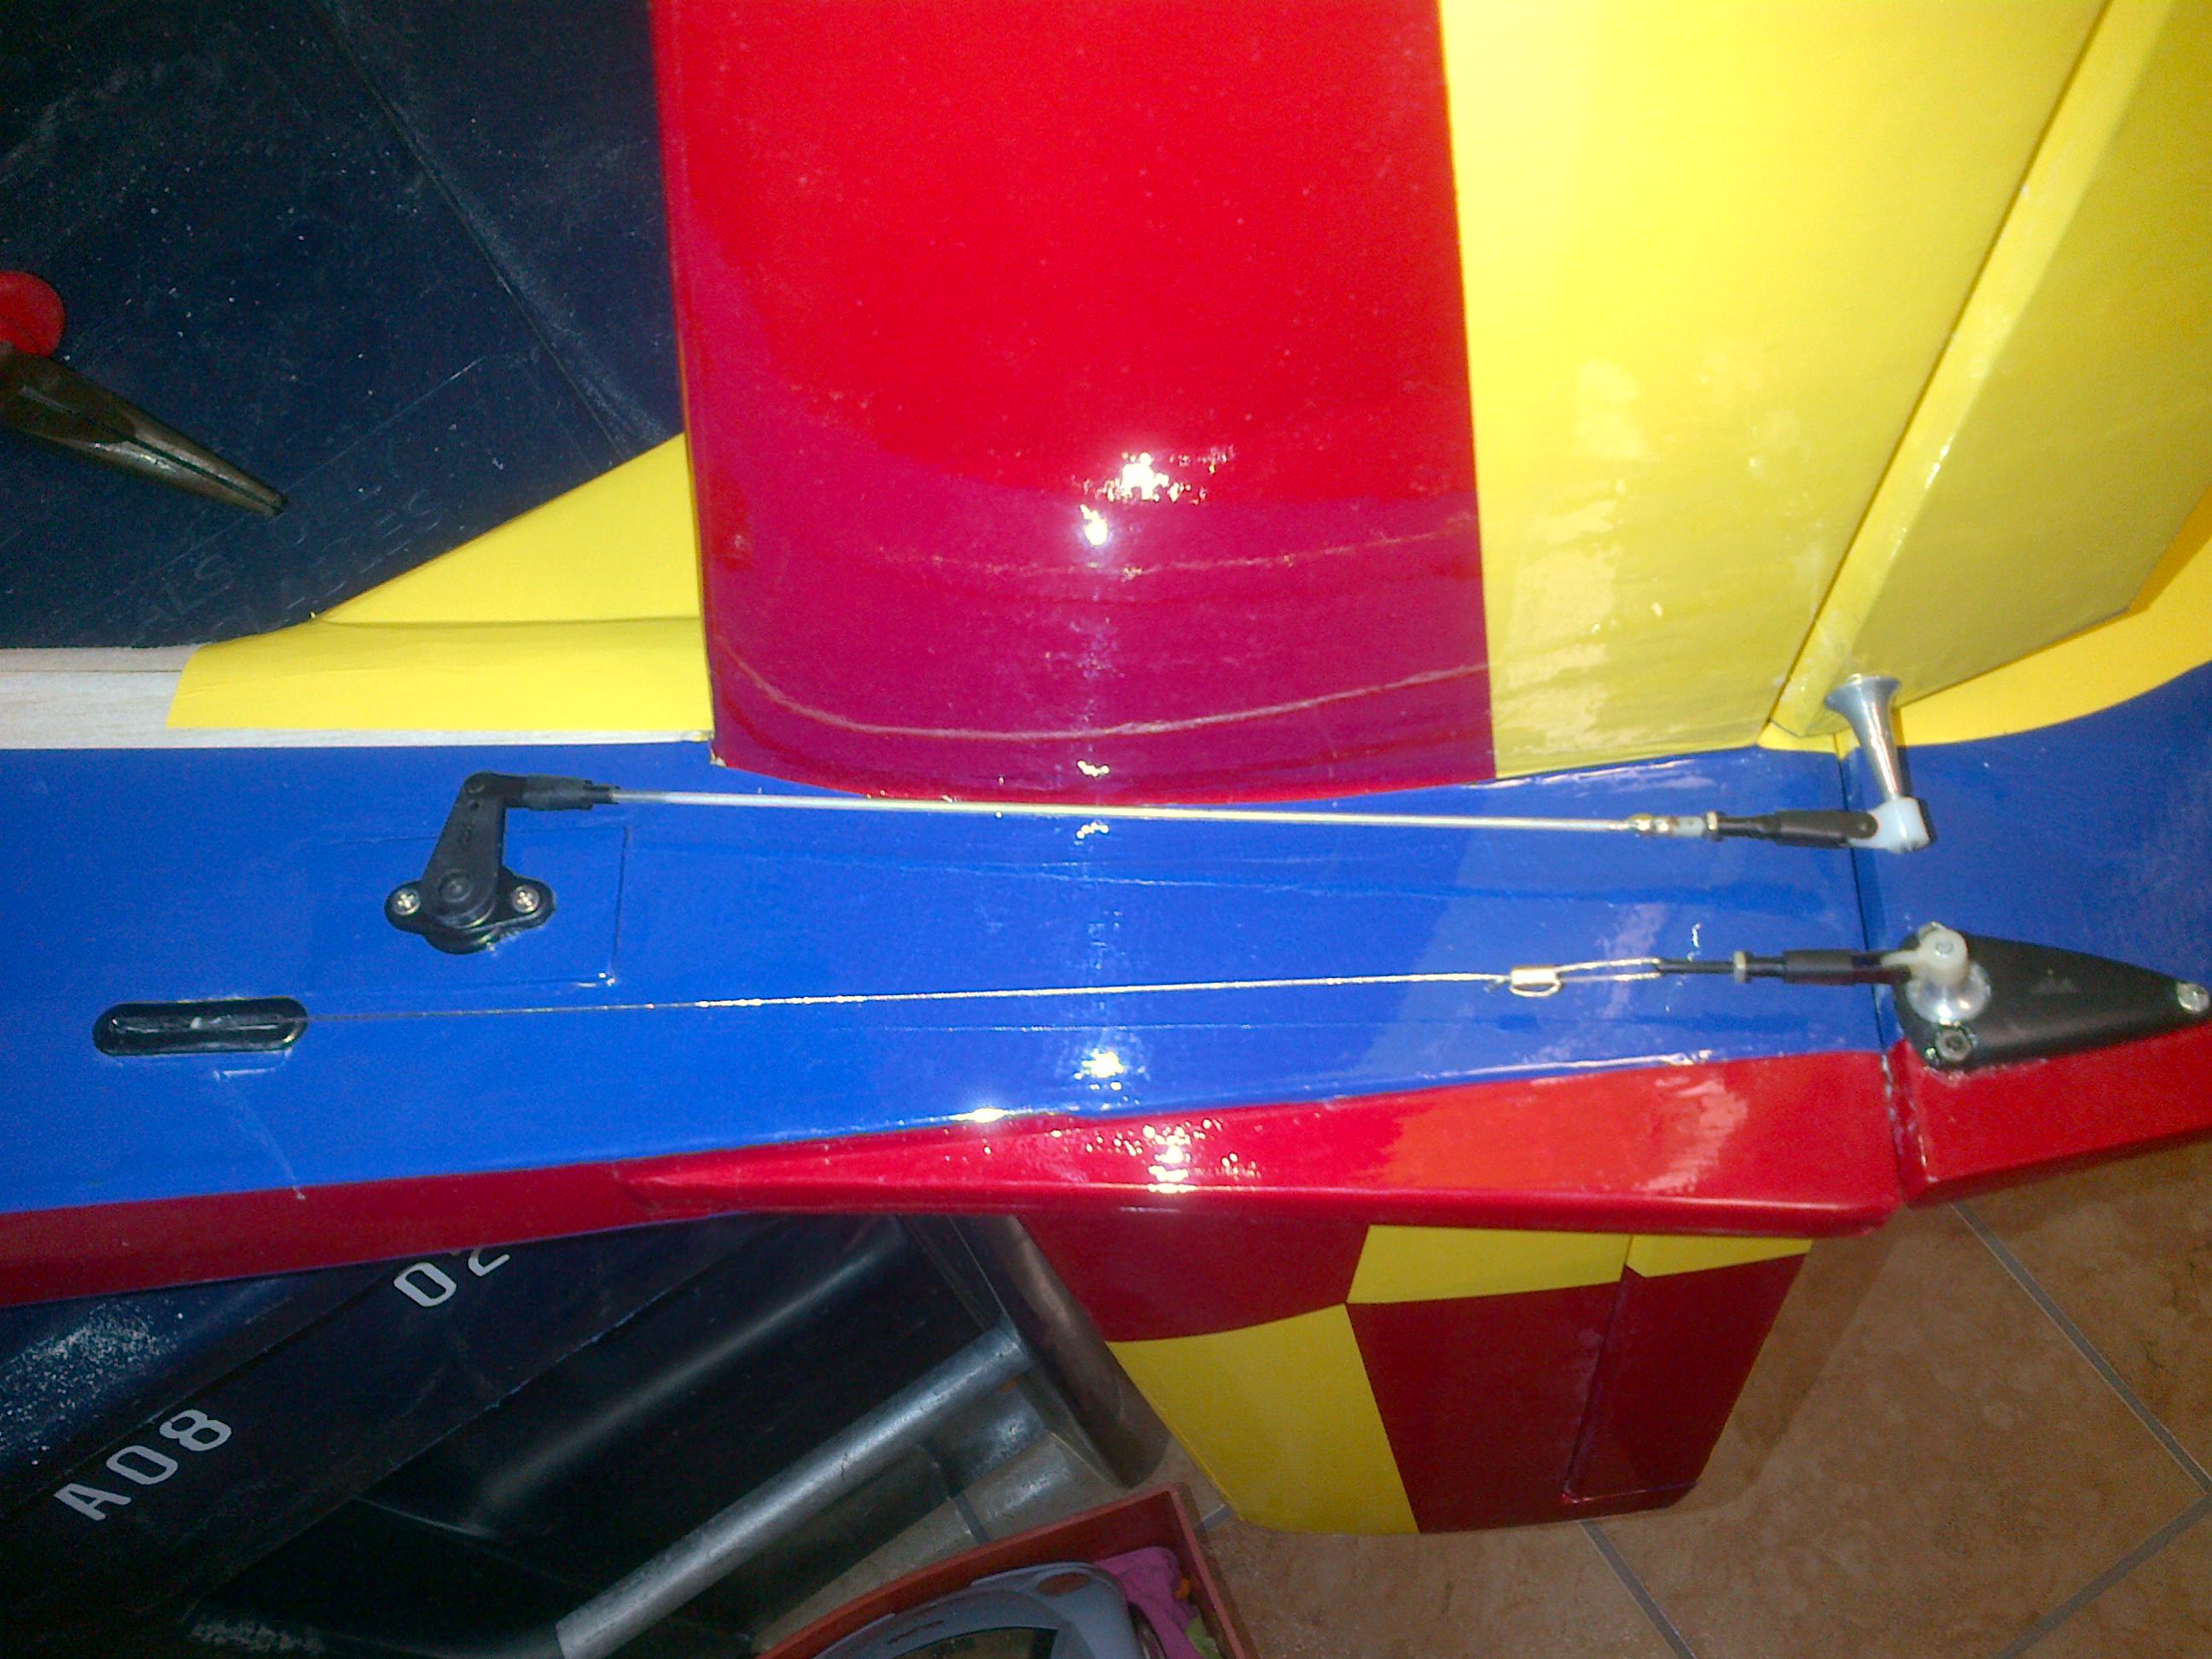
Servos JR8411 on Elevator (elevator has a bearing bellcrank from RC City for double elevators) and Ailerons, Rudder JR8611 with pull pull system, Throttle JR4131 and gear JR 3421
Radio is a JR 12X DSM
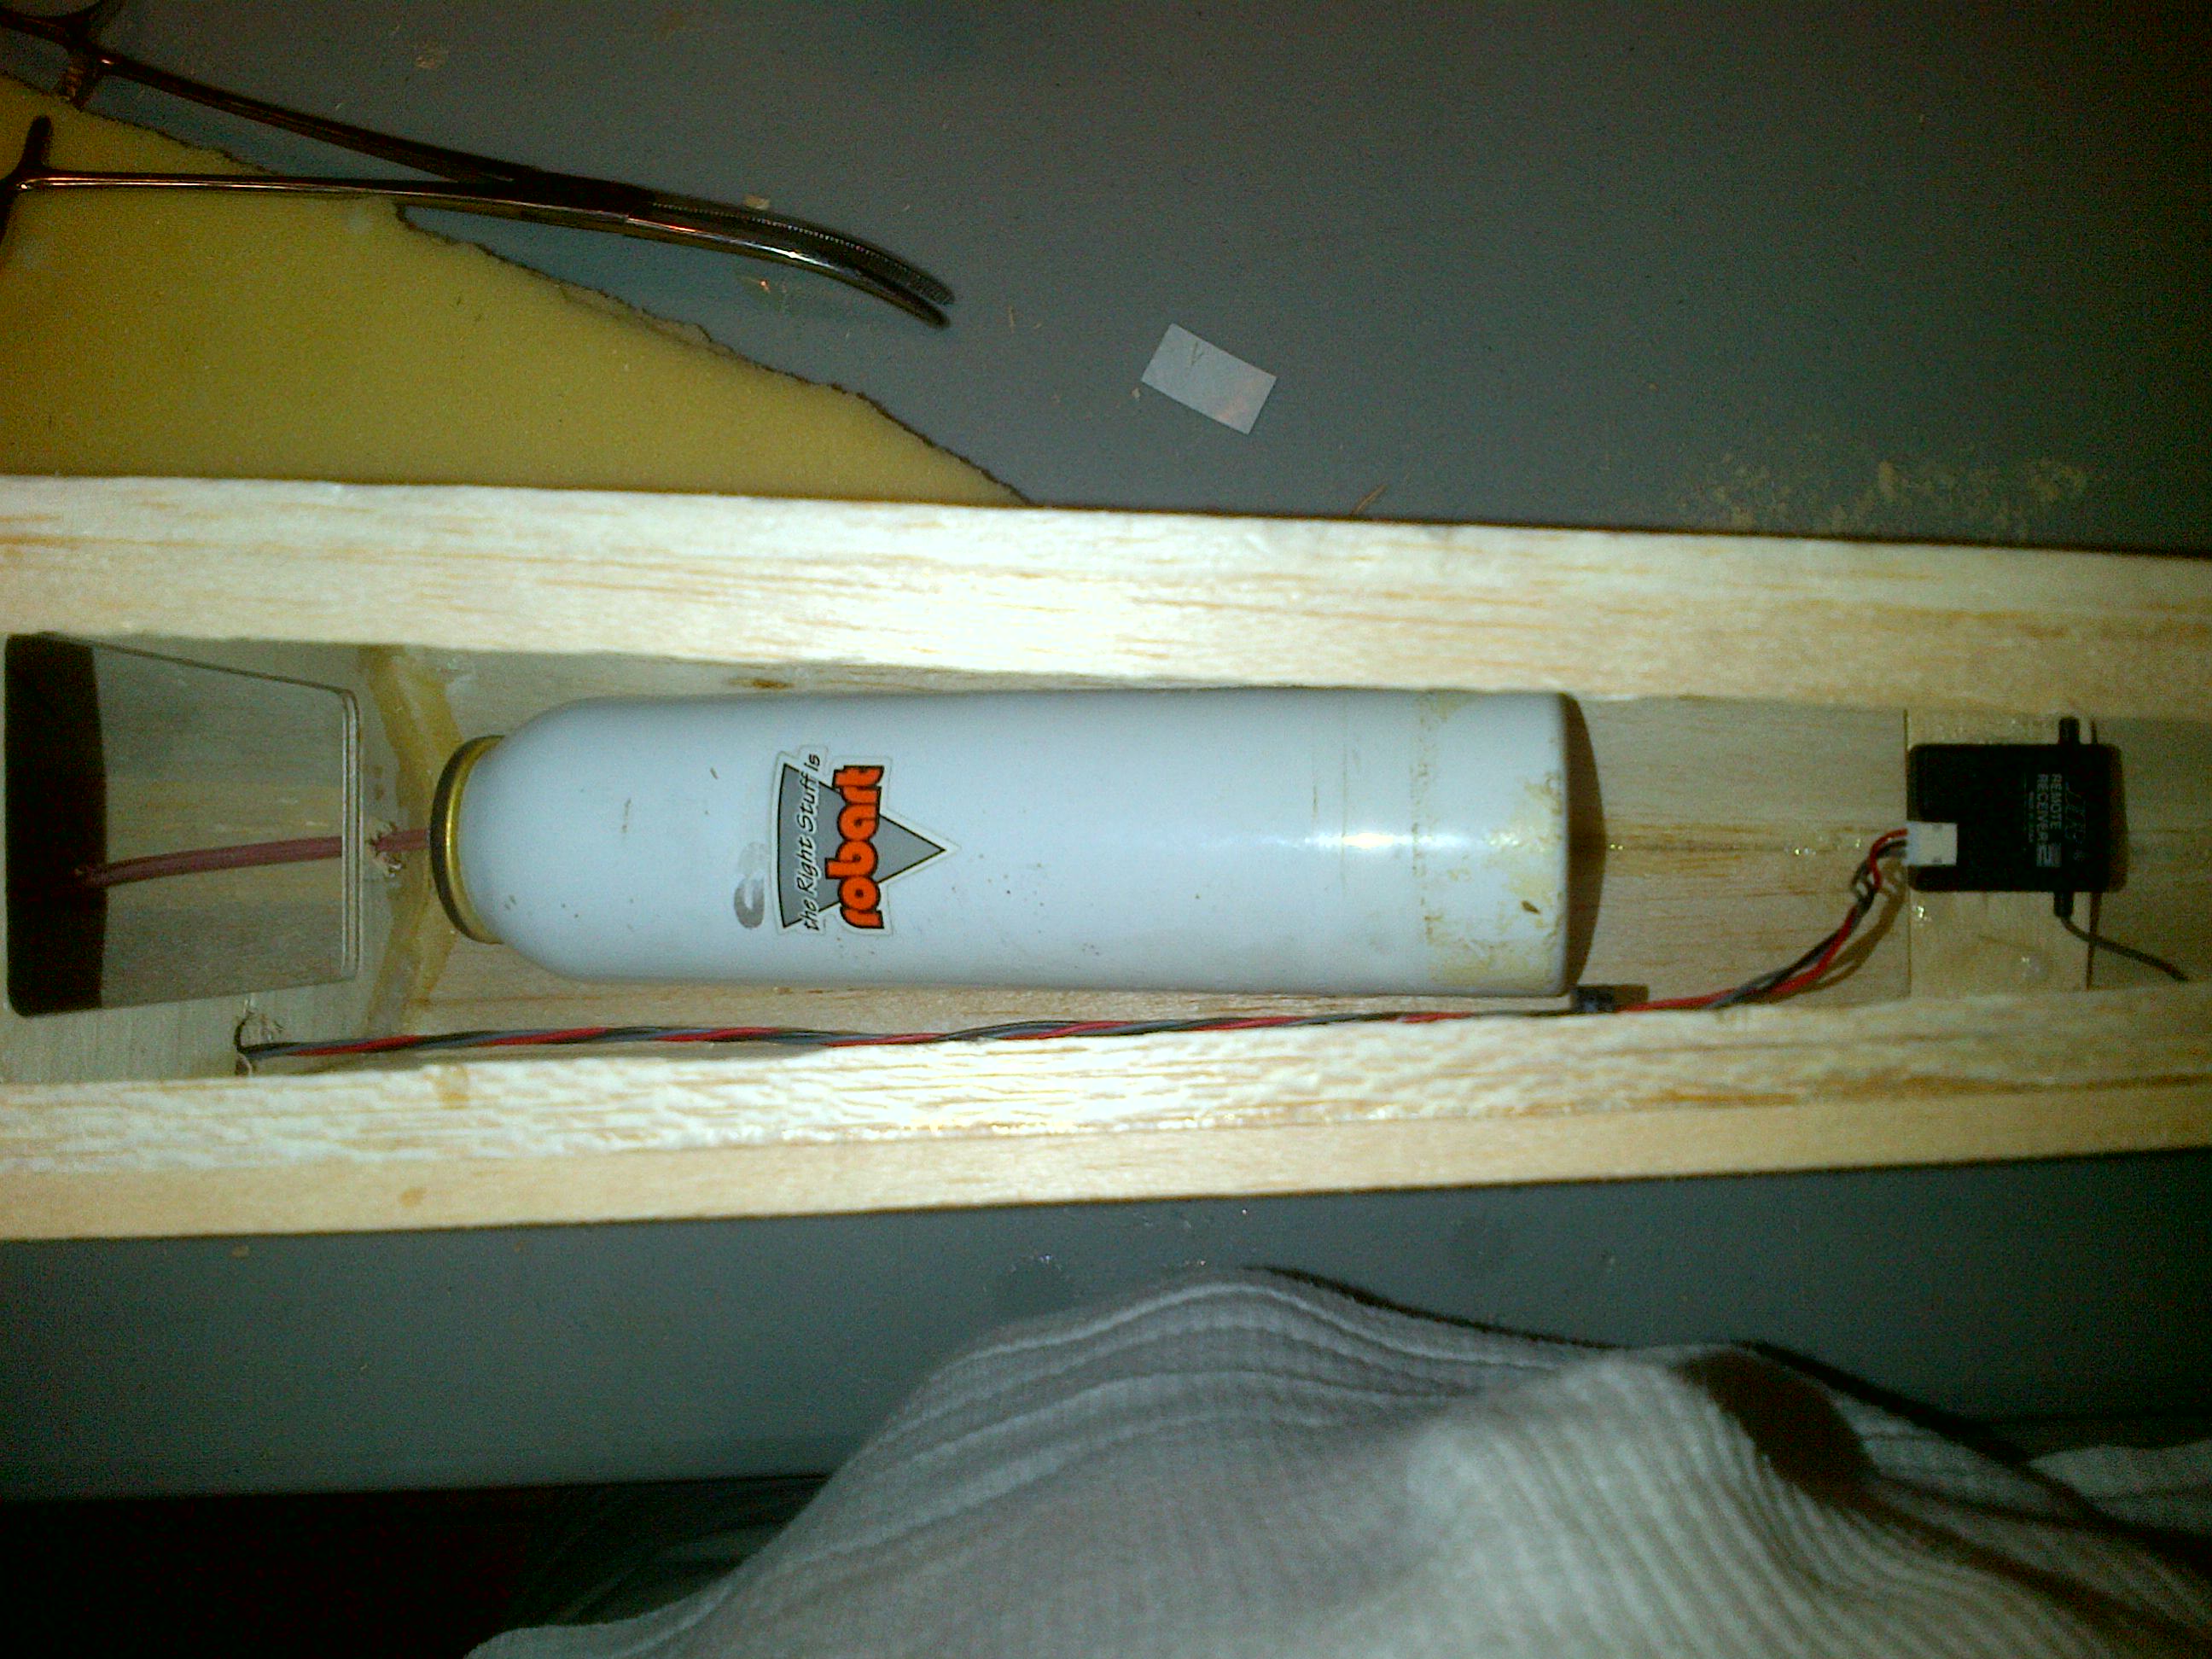
Gear is Robart springdown
Construction is very straightforward, not for the beginner, lots of sanding,not much info on the plan but basics and no building manual (lots of guessing). Incidence and correct angle measuring on anhedral stab gave me a hard time. I just broke the engine a week ago and finished balancing last night (a bit nose heavy). Plan to test fly my Tipo this weekend.
If you have any questions I will do my best to answer them for you. Thanks.
Christian


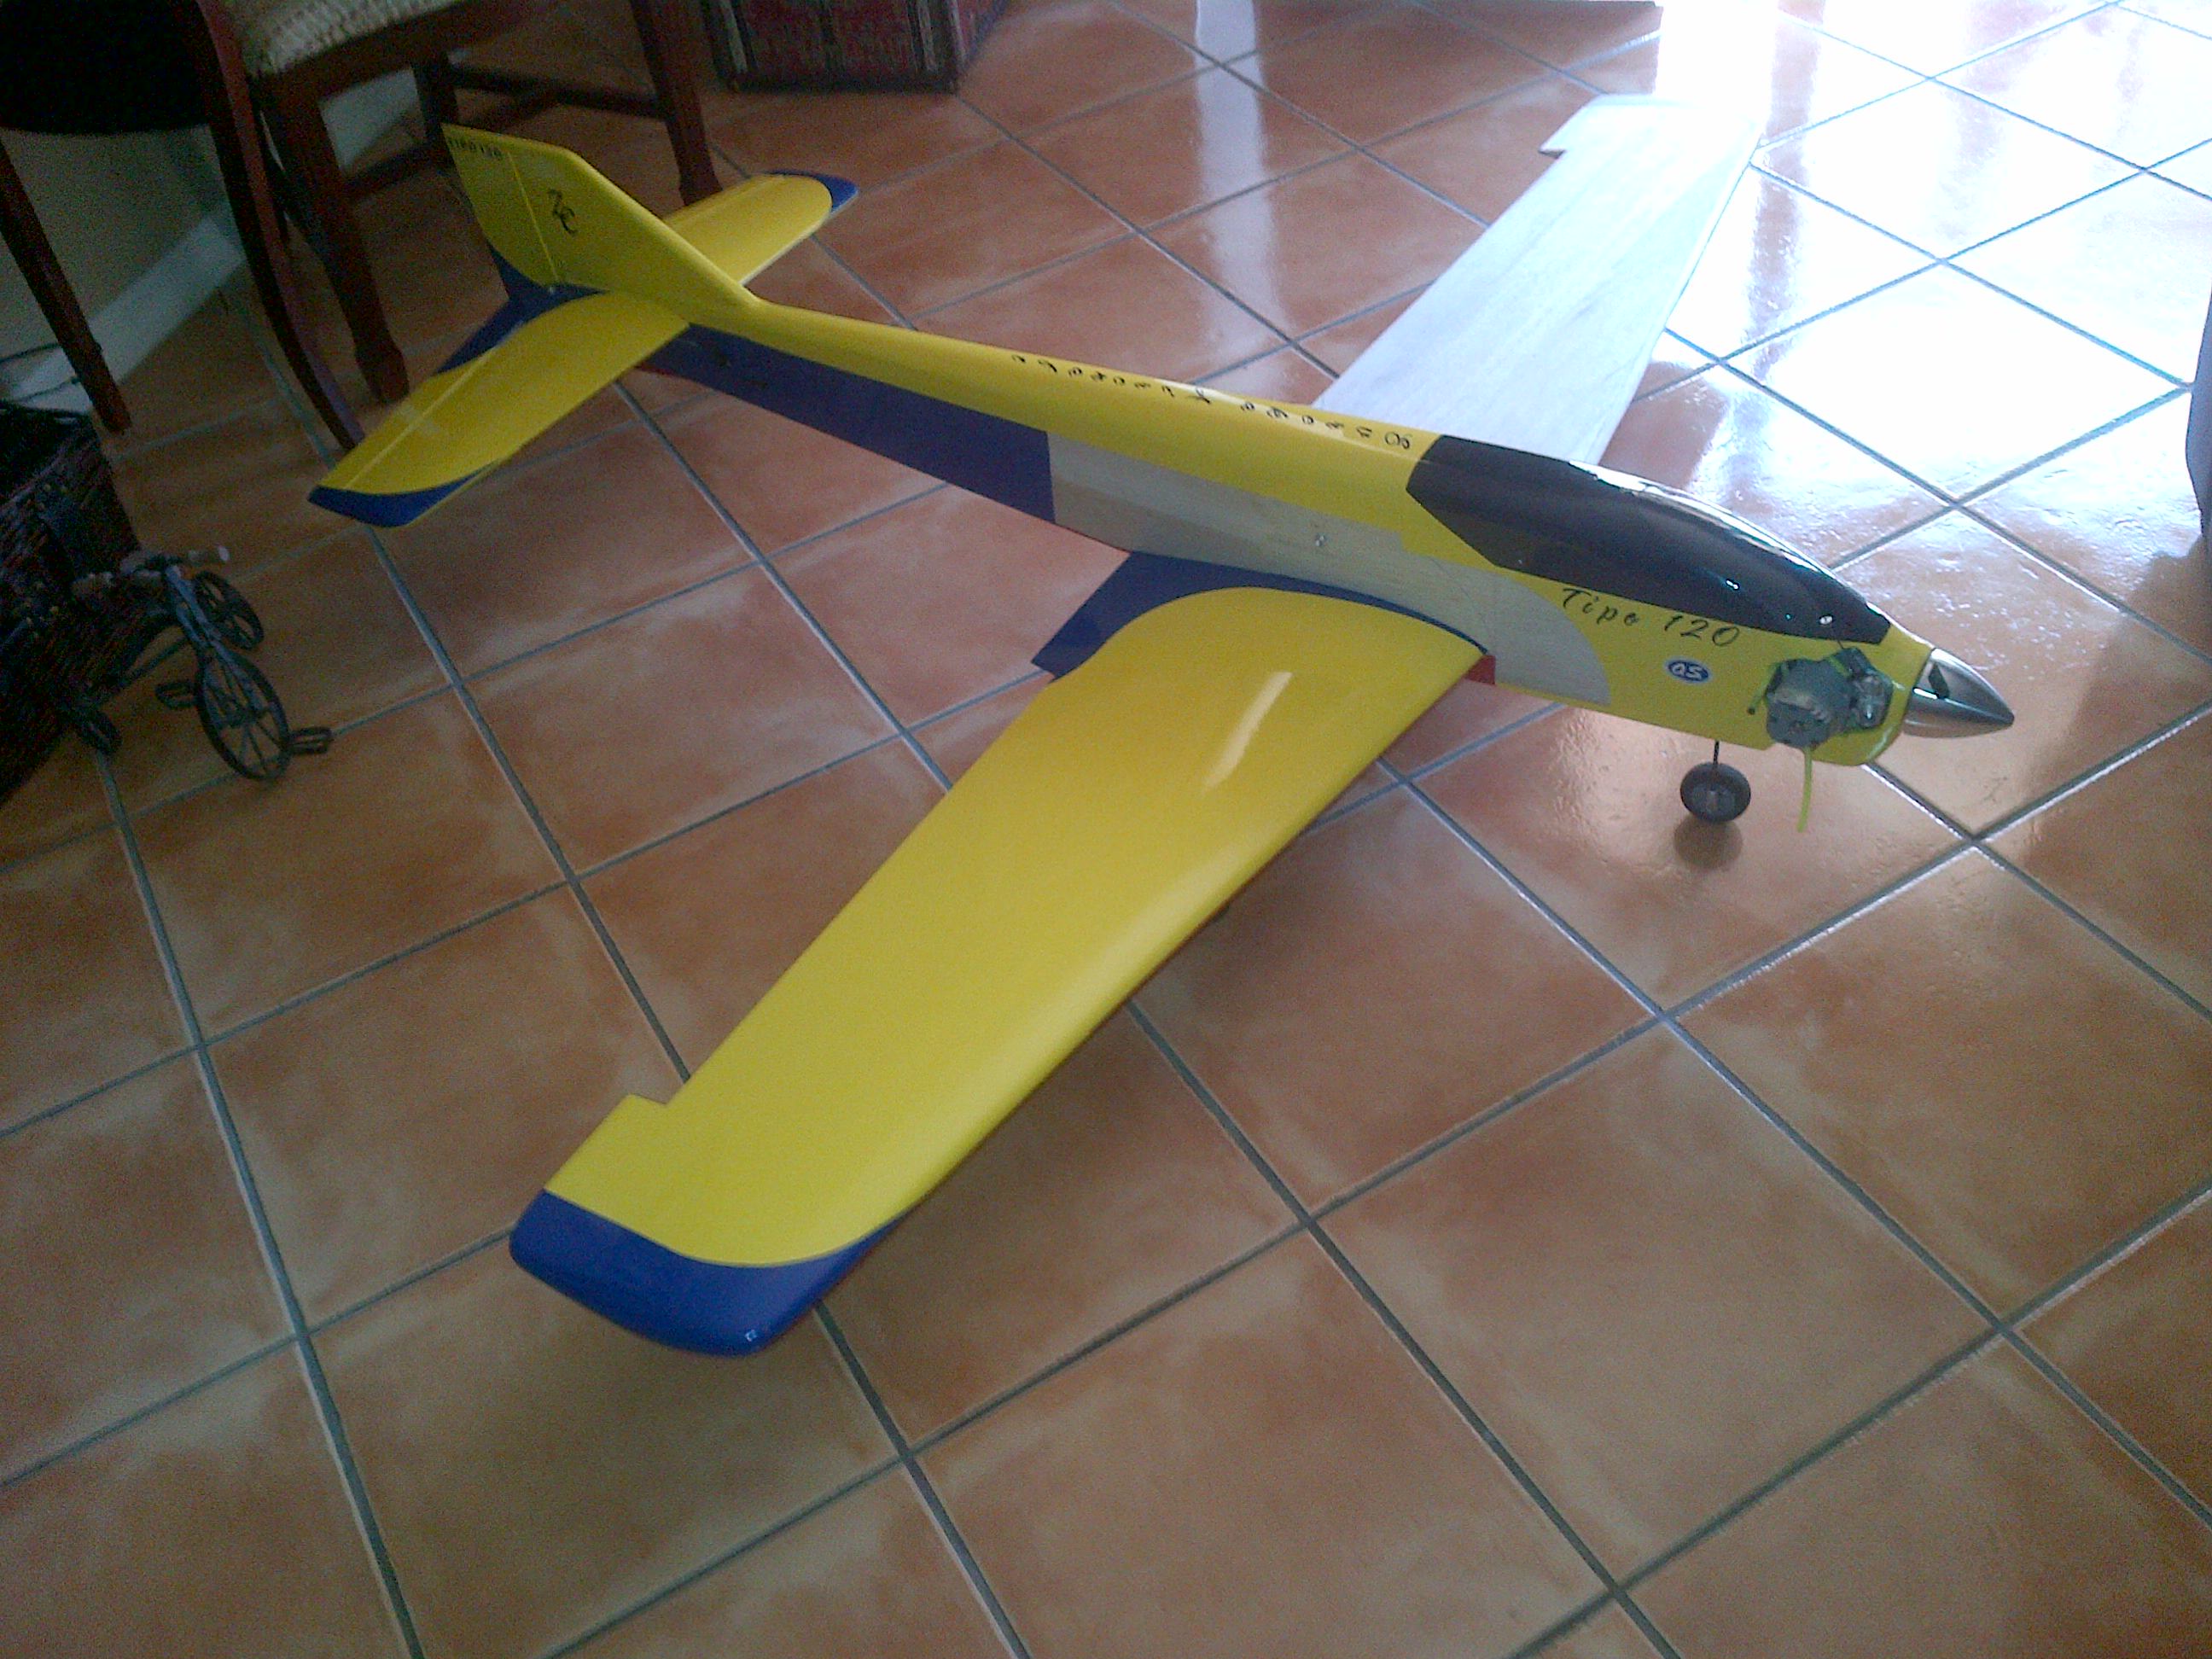


I would like to share with you my latest build. A Tiporare 120. Why 120?, Because its the 111% enlarged version I got from Don Turnock from Eureka Aircraft. At the time (about 2 years or more) Don only had a partial kit offering the foam wing and stab, plans and semi kit but was kind enough to calculate the remaining needed wood I would needed to finish the plane. It is now included in his list as a standard option.
Although I do not have the complete build I want to share some pic through out the build. The pictures are not in order but I will give you a brief description:
Tiporare 120
Span 72.25
Length 63.375
Power OS95 AX with Macs Pipe
Servos JR8411 on Elevator (elevator has a bearing bellcrank from RC City for double elevators) and Ailerons, Rudder JR8611 with pull pull system, Throttle JR4131 and gear JR 3421
Radio is a JR 12X DSM
Gear is Robart springdown
Construction is very straightforward, not for the beginner, lots of sanding,not much info on the plan but basics and no building manual (lots of guessing). Incidence and correct angle measuring on anhedral stab gave me a hard time. I just broke the engine a week ago and finished balancing last night (a bit nose heavy). Plan to test fly my Tipo this weekend.
If you have any questions I will do my best to answer them for you. Thanks.
Christian
Last edited by HI847; 08-14-2013 at 01:24 PM.
 08-15-2013 | 05:52 AM
#3

My Feedback: (3)
Christian,
nicely done! It's nice to see my brainchild come to fruition. The scaled Tipo's were an idea and project I had some five years ago or so. I also have cores for this bird and wanted to build one as an all electric model one day using vintage Kraft e-tracts. Given their hefty weight, they are ideally suited to this larger bird. However, I'll probably build a 30 size 50" span version instead.
Ehsan,
the scaled Tipo's are exactly that. Their airfoils, unless requested differently, are scaled down (or up in this case), versions of the original 60. As such, the percentage thickness is the same on all versions. I think it is a ~16.8% foil if memory serves - thick!
David
08-15-2013 | 08:50 AM
#5
Thread Starter
Joined: Sep 2007
Posts: 72
Likes: 0
Received 0 Likes
on
0 Posts
From: Doral,
FL
Christian
08-15-2013 | 10:25 AM
#6
My Feedback: (3)
Christian,
thanks for the info. The CAD re-design looked a little hefty. I think this bird can be built to 10-11 lbs using 3/16" sides, a 1/32" lightened doubler and a 3/32" skinned deck rather than using the block balsa. The nose top can be done in a "keeled and glassed foam".
Still, at 12.5 lbs, it should be ok in terms of loading (I think it is around 1000 squares). I suspect a 120 AX might be needed for thrills but the 95 should fly it nicely and in TOC style.
David
08-17-2013 | 10:06 AM
#7
Thread Starter
Joined: Sep 2007
Posts: 72
Likes: 0
Received 0 Likes
on
0 Posts
From: Doral,
FL
Hi,
I would like to report on the first flight of my Tipo 120. After tweaking a bit the low needle I got my 95 where I wanted (sorry no rpm meter at the moment but I will get it to measure the rpm output of my 95 with pipe). Taxing was fine, a bit of right drift that I have to correct on the steering servo mix, plane accelerated without effort and took into to the air with just a bit of elevator (I had taken of the weight I initially put on the tail as I found out my balancing was out of place), balance was perfect, I left aileron about 4 clicks and down elevator about 3 clicks to get the plane flying straight.
Rolls where very axial (I have aileron differential dialed in) and loops where well on line although I have to watch a bit un the upline as there is a slight drift to the left. Coming out of the loop was very straight. Plane was flown mostly at half throttle and it felt like driving a card in third gear all the time (steady run but with extra power left). Knife edge where more straight than I expected with very low input to keep it straight.
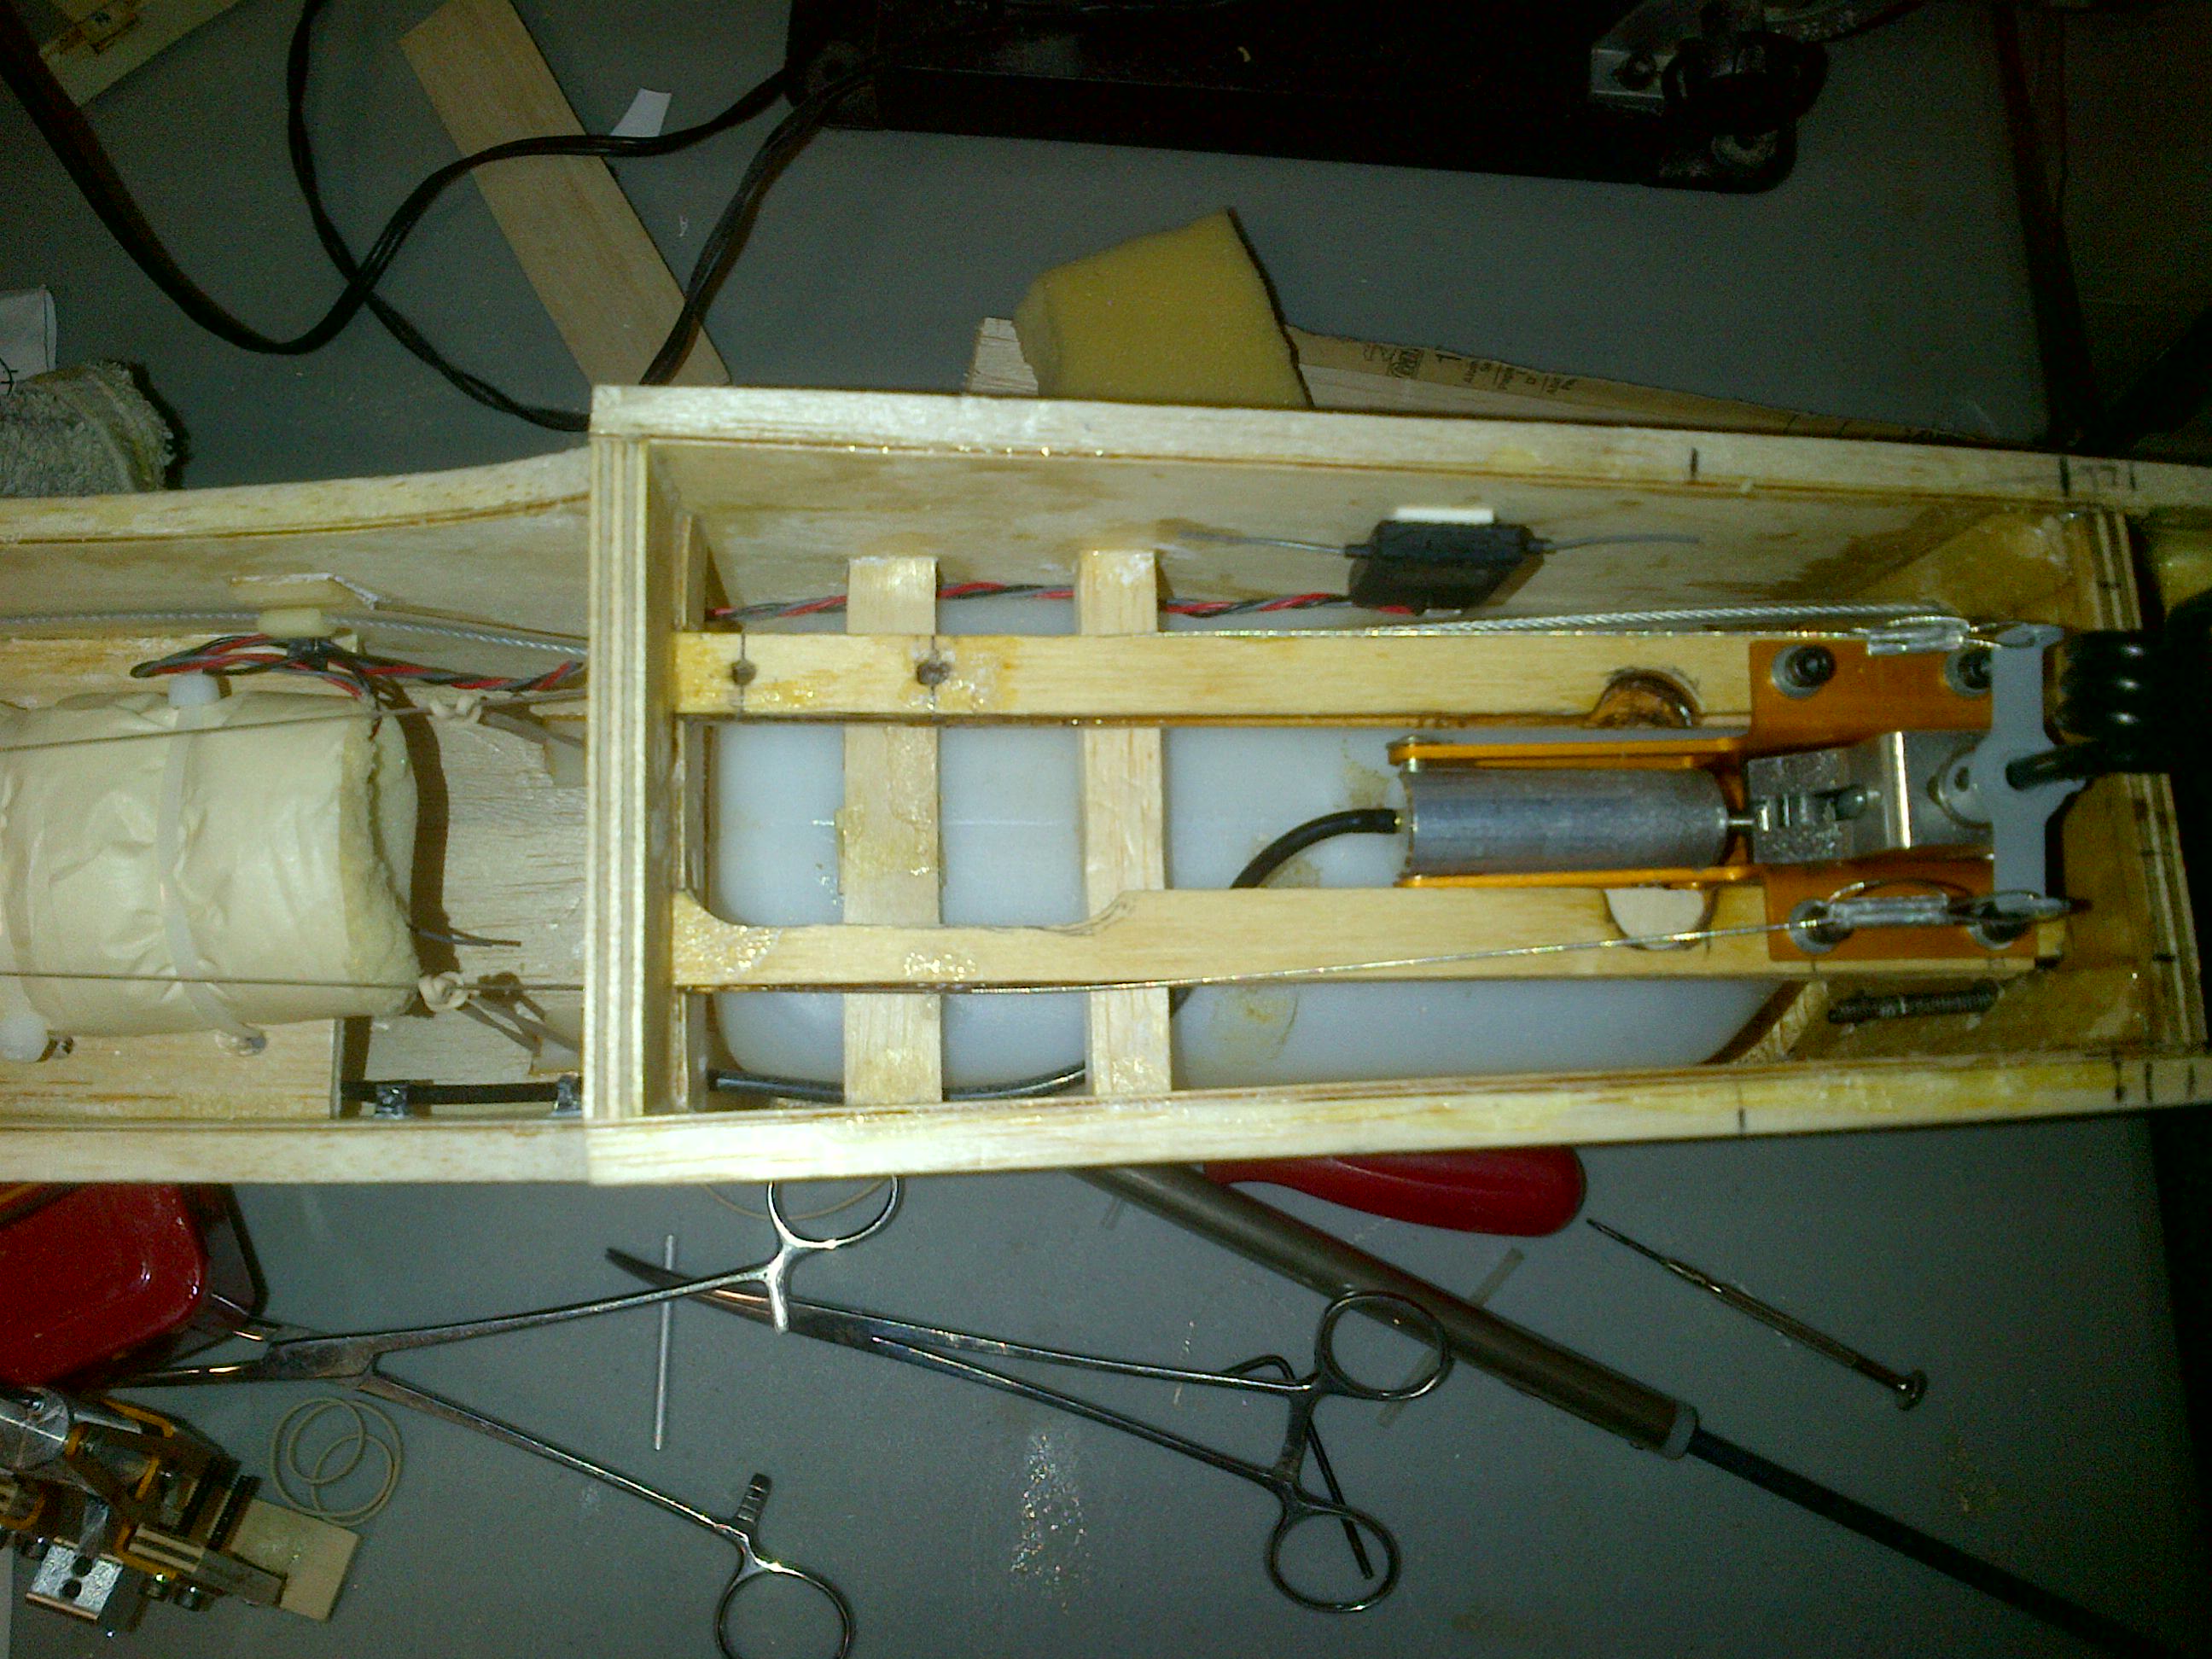
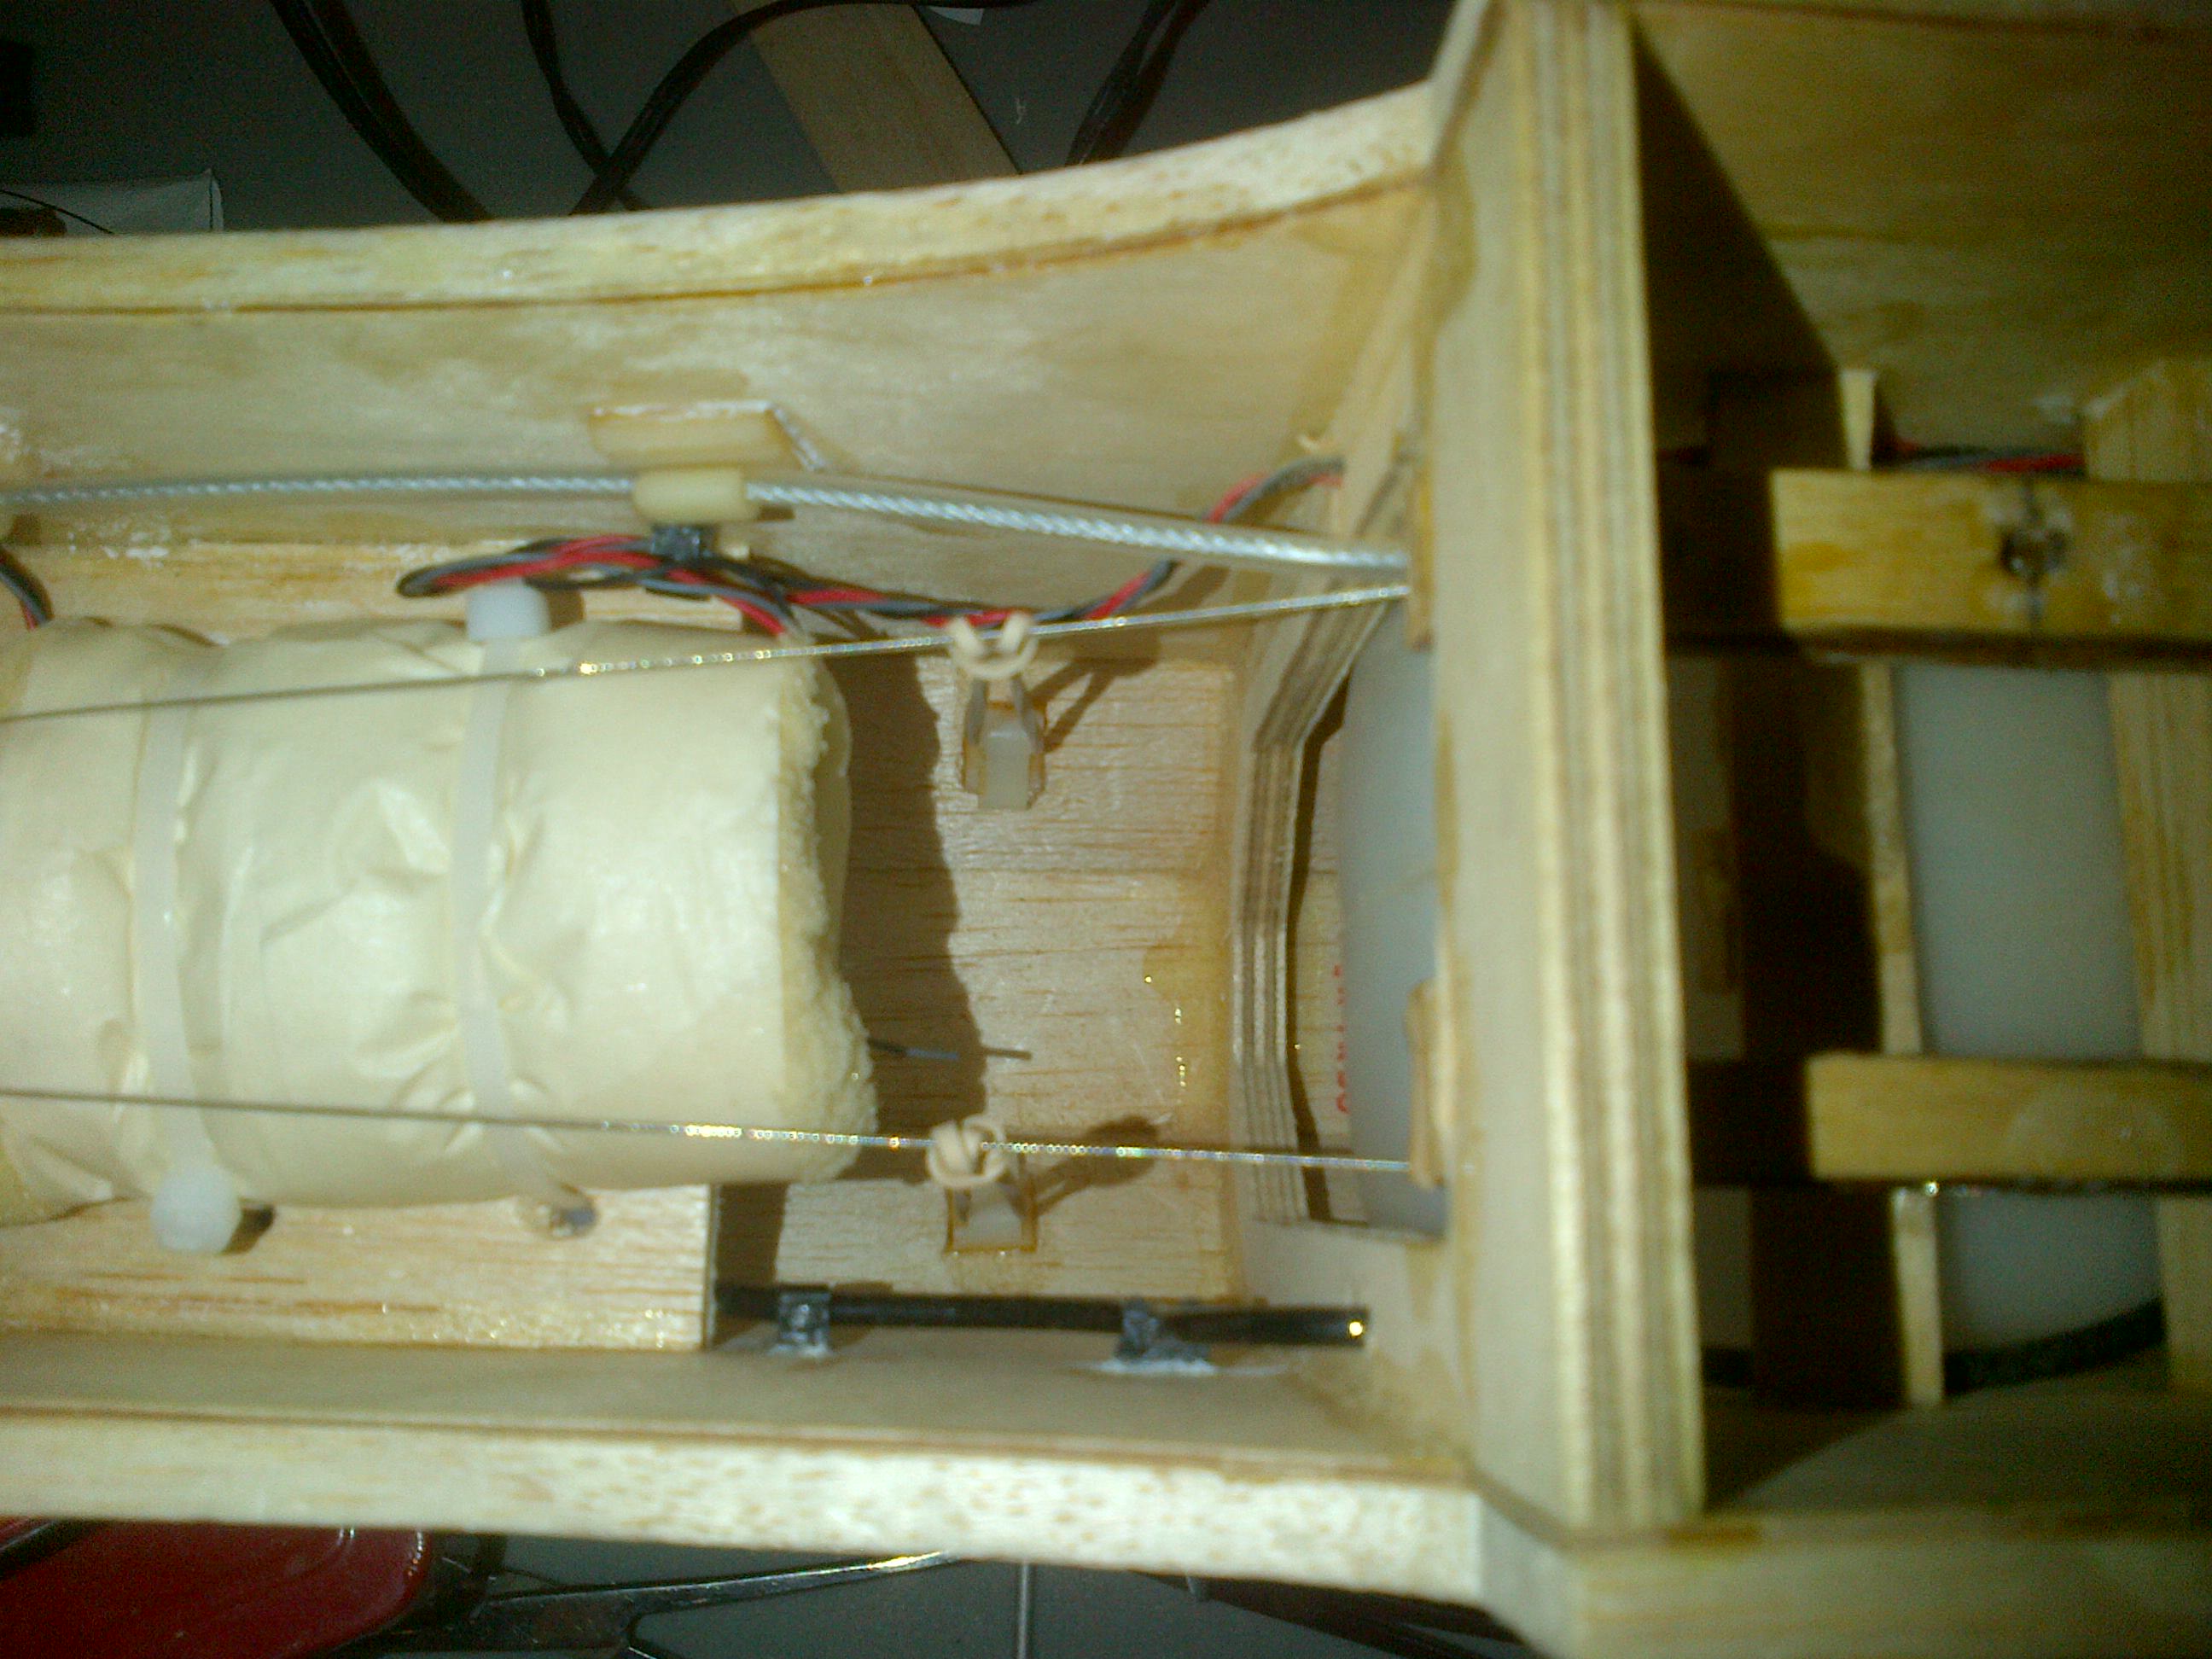
This plane is not a speeder as wing airfoil is kinda thick. But I liked the average speed. Did not try the retracts out on this occasion. As I prepared for landing I lowered speed and made a large final pattern ( I usually do that ), plane lowered speed accordingly, I had to give some gas to get it closer, wing tips stayed level at all moment with no intention to stall at low speed, as normal elevators can get a bit saggy but a first landing it was fine. Then it happened, as soon as main gear touched ground both wheels turned 90 degrees turning themselves into an emergency brake stopping the plane on a dime, lowering my nose thus breaking my prop tips and putting wholes in both my wheels.
I knew somewhere I was missing some additional fastening. Nevertheless the flight was superb, I packed and went back home to fix the landing gear issue and get ready for my next flight for more fine tuning and some more flying. I must say the plane catches the attention of some pilots as they are not much used to see the old type of pattern planes.
See you at the field.
I would like to report on the first flight of my Tipo 120. After tweaking a bit the low needle I got my 95 where I wanted (sorry no rpm meter at the moment but I will get it to measure the rpm output of my 95 with pipe). Taxing was fine, a bit of right drift that I have to correct on the steering servo mix, plane accelerated without effort and took into to the air with just a bit of elevator (I had taken of the weight I initially put on the tail as I found out my balancing was out of place), balance was perfect, I left aileron about 4 clicks and down elevator about 3 clicks to get the plane flying straight.
Rolls where very axial (I have aileron differential dialed in) and loops where well on line although I have to watch a bit un the upline as there is a slight drift to the left. Coming out of the loop was very straight. Plane was flown mostly at half throttle and it felt like driving a card in third gear all the time (steady run but with extra power left). Knife edge where more straight than I expected with very low input to keep it straight.
This plane is not a speeder as wing airfoil is kinda thick. But I liked the average speed. Did not try the retracts out on this occasion. As I prepared for landing I lowered speed and made a large final pattern ( I usually do that ), plane lowered speed accordingly, I had to give some gas to get it closer, wing tips stayed level at all moment with no intention to stall at low speed, as normal elevators can get a bit saggy but a first landing it was fine. Then it happened, as soon as main gear touched ground both wheels turned 90 degrees turning themselves into an emergency brake stopping the plane on a dime, lowering my nose thus breaking my prop tips and putting wholes in both my wheels.
I knew somewhere I was missing some additional fastening. Nevertheless the flight was superb, I packed and went back home to fix the landing gear issue and get ready for my next flight for more fine tuning and some more flying. I must say the plane catches the attention of some pilots as they are not much used to see the old type of pattern planes.
See you at the field.
08-17-2013 | 11:16 AM
#8
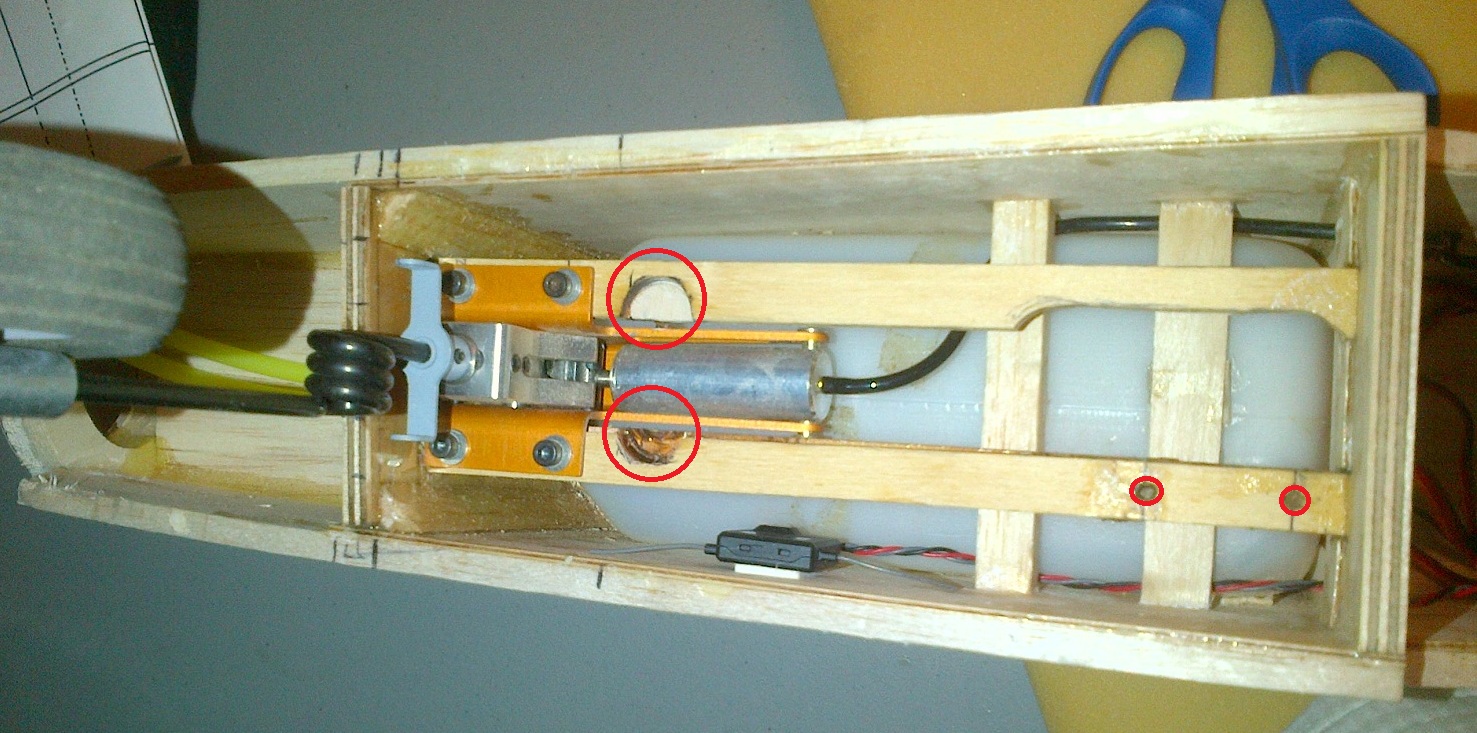
Hi Christian,
Congrats for the good flying behaviour of your big Tipo and sorry because of the tips and the wheels, I guess some hours working on your Tipo will heal the wounds.
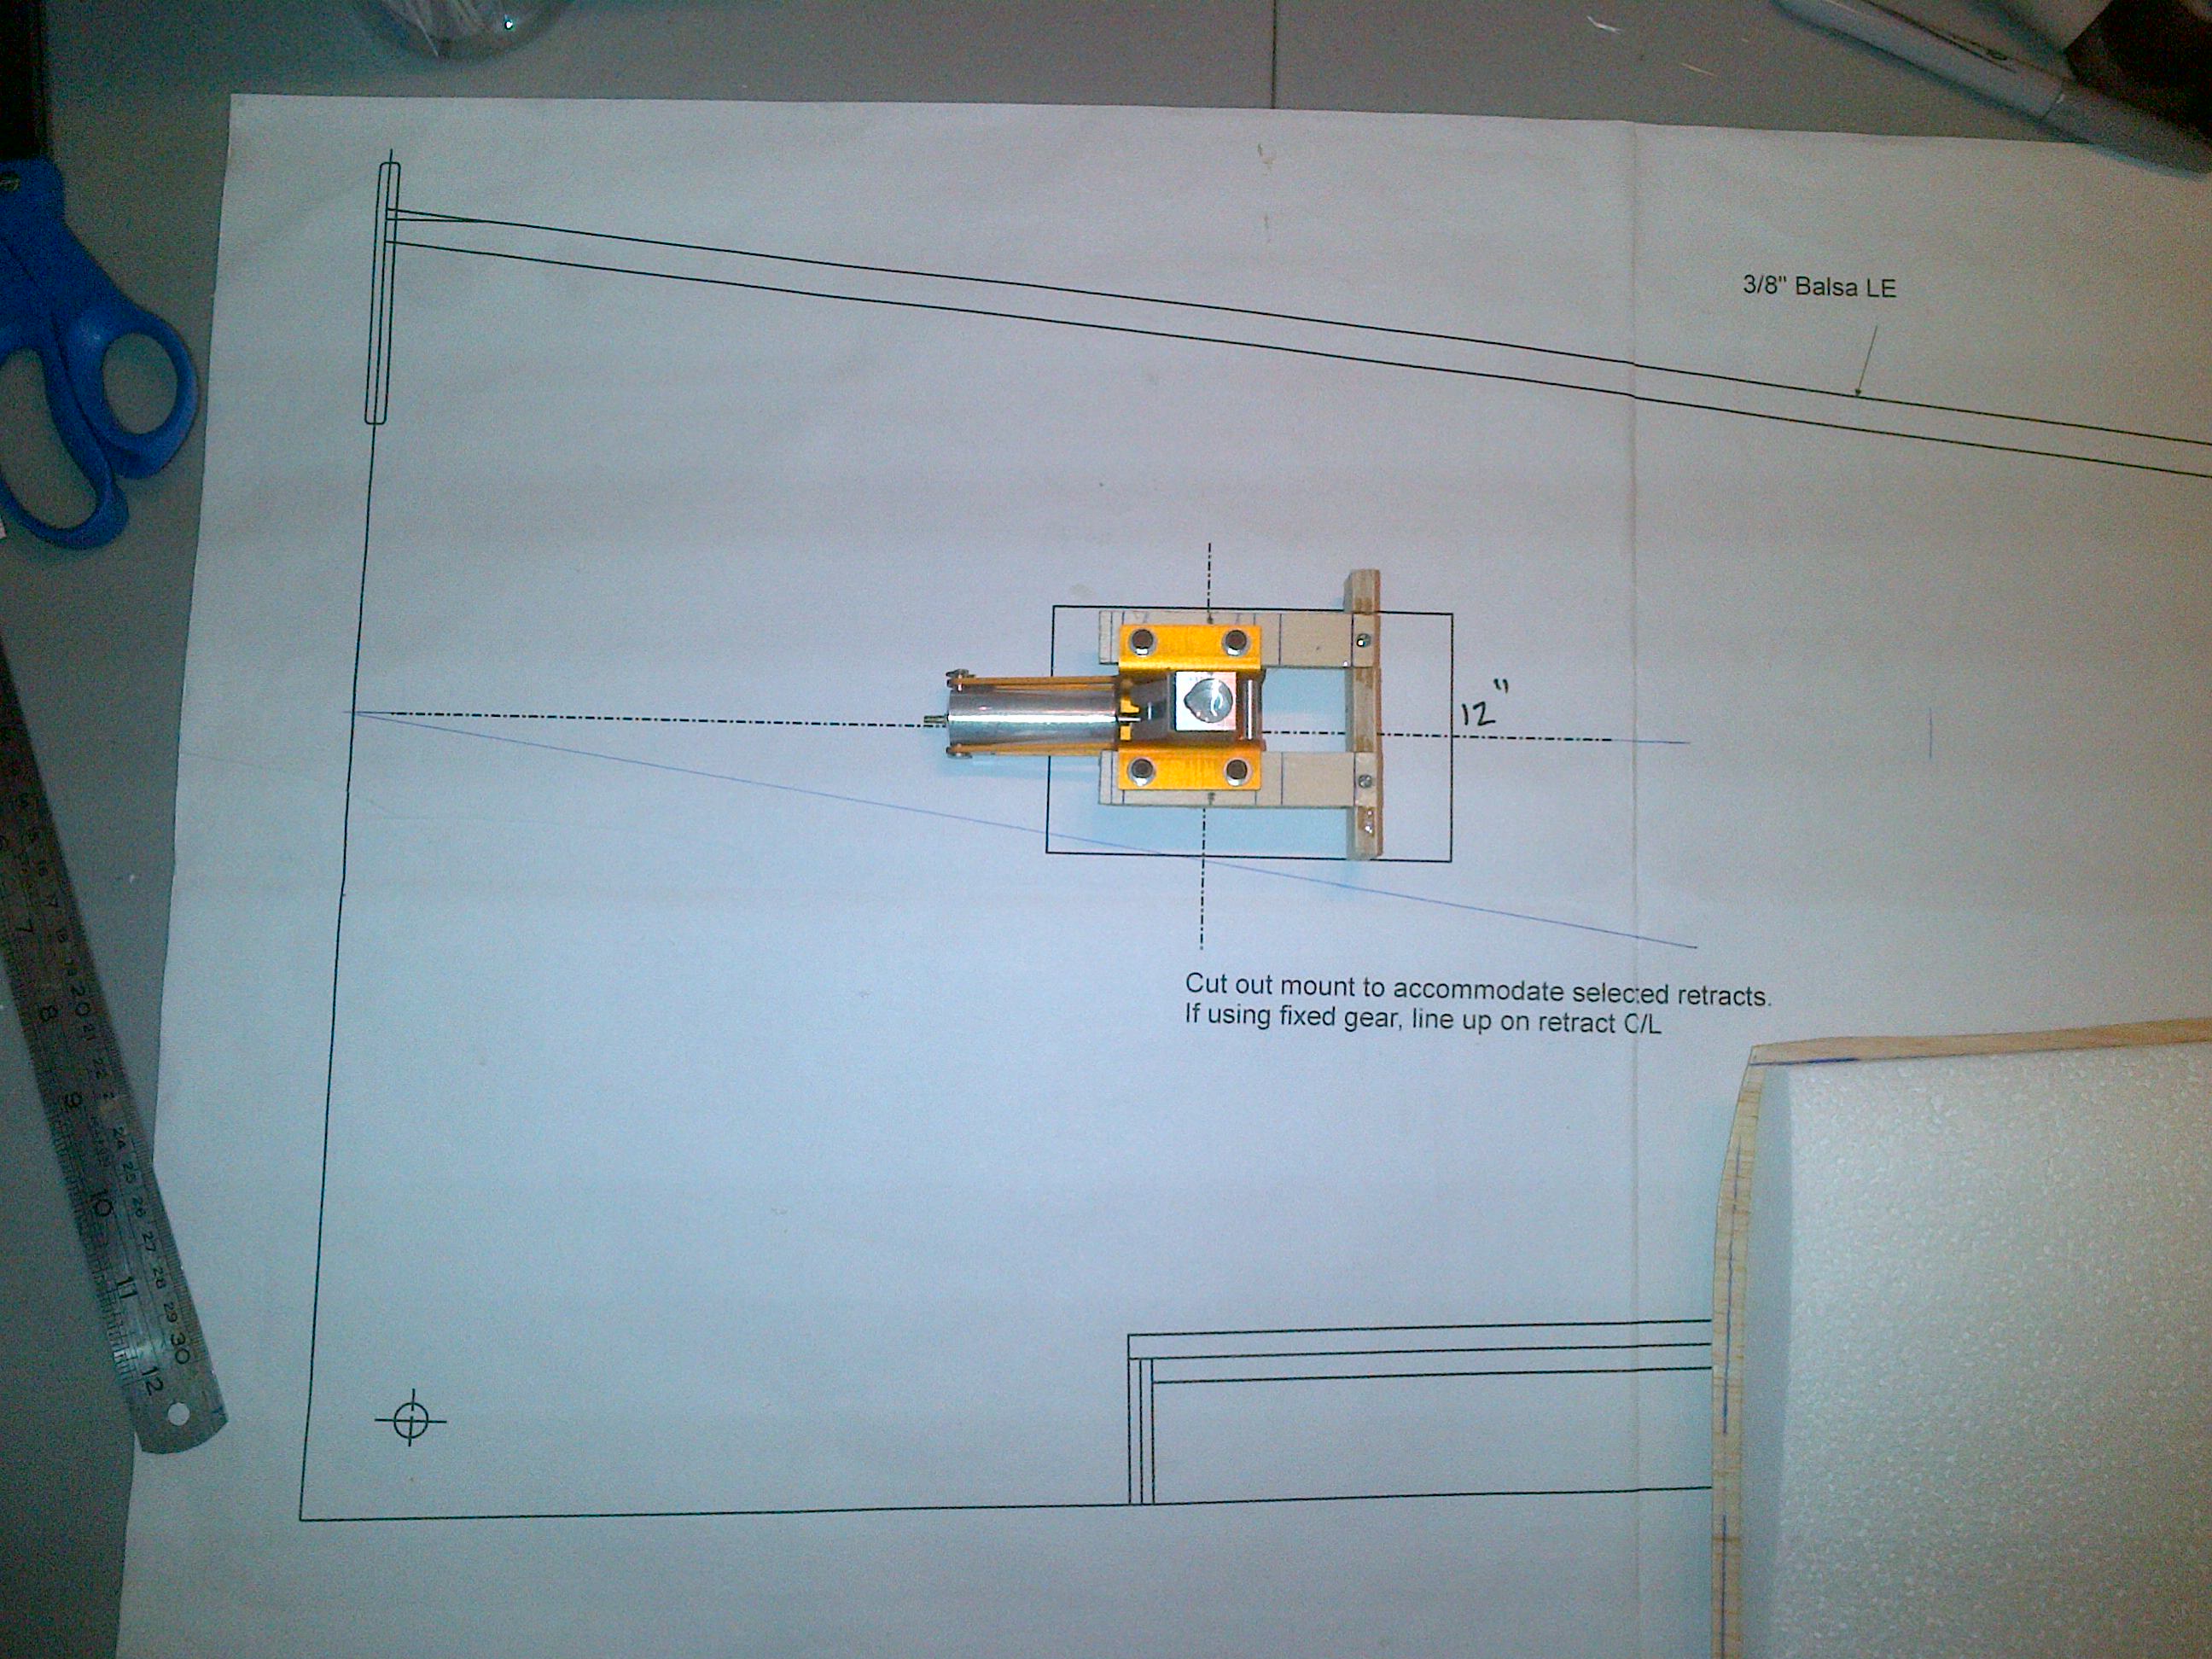
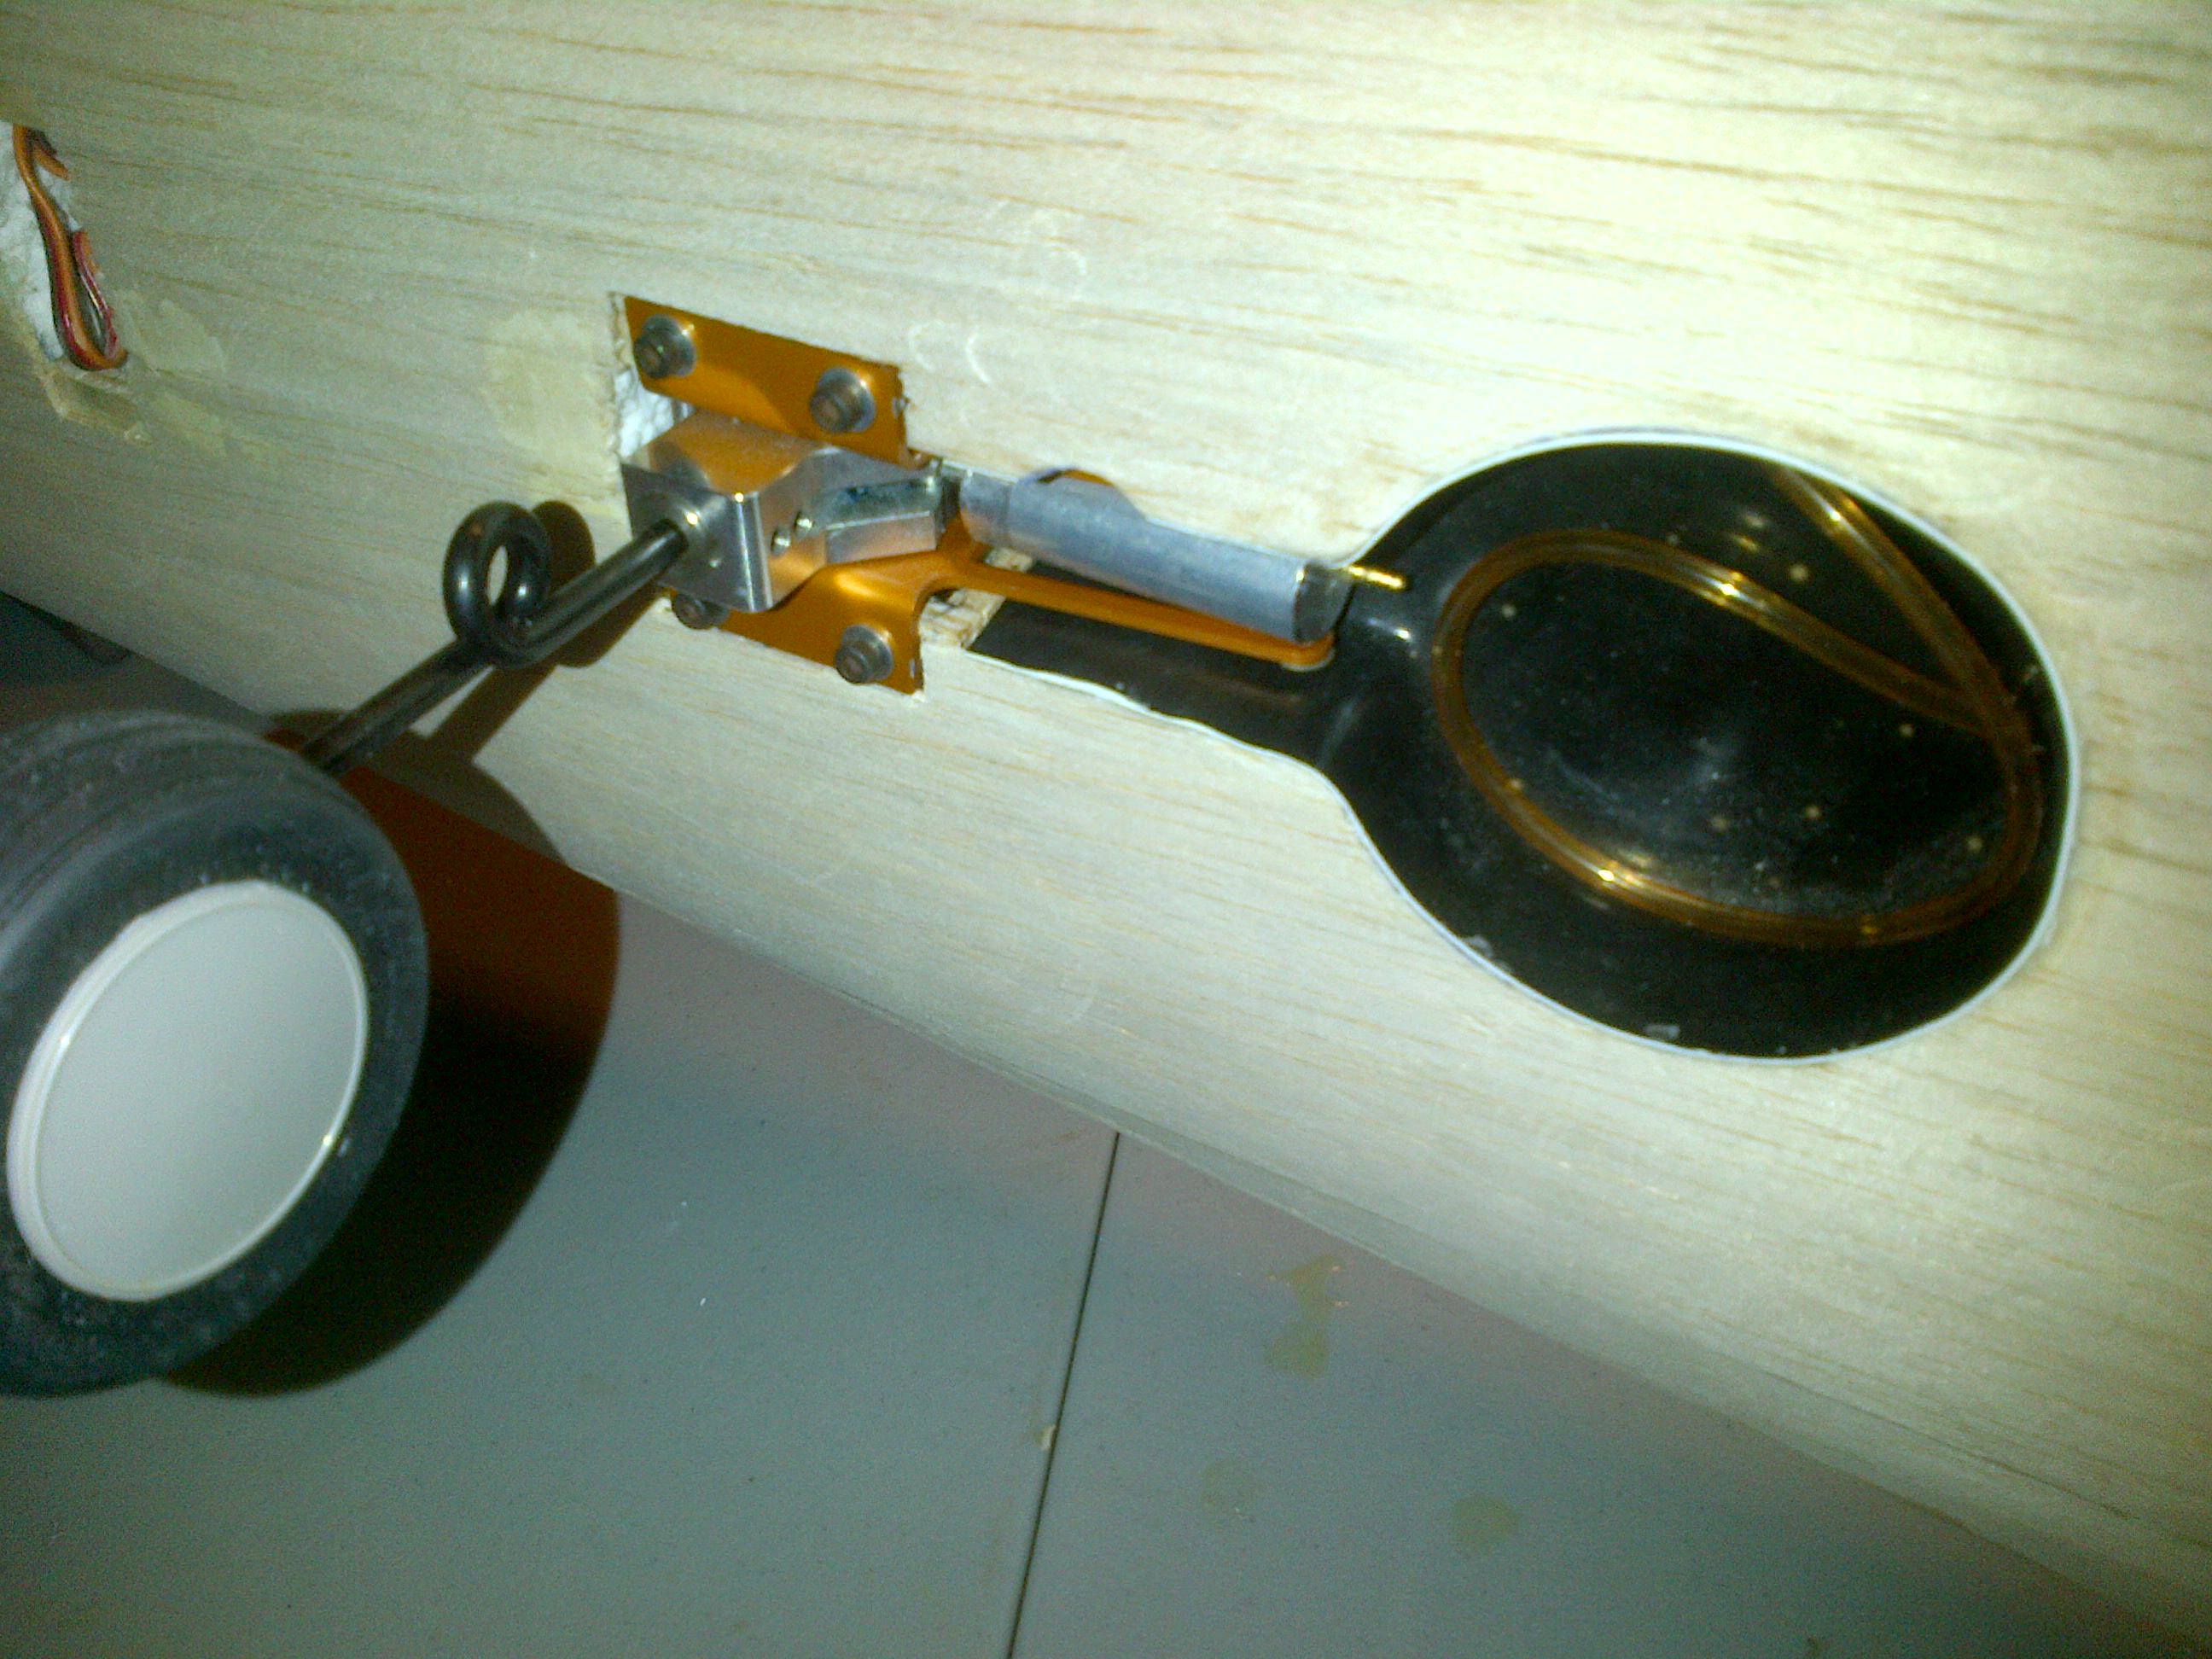
I could'nt see the nose wheel mount well in the images you attached, because of the position of the camera while taking photographs, but it is obvious that you have used 2 hard wood rails as beam to hold the nose retract, I just wanna say my point of view and maybe it's wrong, I feel there are some weak points which could be a crack starter in the wood rails, as i said maye be these weak point are felt to be just because of the restricted angle of camera. If this pretty tipo was mine I would reinforce these rails whith epoxy and cloth or better with carbon fiber straps which just add a little weight to nose and this excess weight can be nutralized by restoring your elevator trim into its former position.the other more difficault choice would be changing the rails with wider and even reinforced rails in addition to some triangles glued at the coners. I wish no hard landing and no bouncing for your bird.
Ehsan
Congrats for the good flying behaviour of your big Tipo and sorry because of the tips and the wheels, I guess some hours working on your Tipo will heal the wounds.
I could'nt see the nose wheel mount well in the images you attached, because of the position of the camera while taking photographs, but it is obvious that you have used 2 hard wood rails as beam to hold the nose retract, I just wanna say my point of view and maybe it's wrong, I feel there are some weak points which could be a crack starter in the wood rails, as i said maye be these weak point are felt to be just because of the restricted angle of camera. If this pretty tipo was mine I would reinforce these rails whith epoxy and cloth or better with carbon fiber straps which just add a little weight to nose and this excess weight can be nutralized by restoring your elevator trim into its former position.the other more difficault choice would be changing the rails with wider and even reinforced rails in addition to some triangles glued at the coners. I wish no hard landing and no bouncing for your bird.
Ehsan
08-18-2013 | 05:06 AM
#9
Thread Starter
Joined: Sep 2007
Posts: 72
Likes: 0
Received 0 Likes
on
0 Posts
From: Doral,
FL
Hi Ehsan,
Thanks for pointing out the details on the rails. Beefing up is not a bad idea. However I like to think sometimes to having the rail system as a "fuse" in case a hard landing shows up, better have the rails to give away that harming the fuse. Regarding the spots you circled, the two next to the base of the retract I had to carve out in order to have the steering arms to fit in. Otherwise the retract would not lock when the wheel is up. The two others holes where errors I must admit and I was to lazy to cut new rails and just turned them around.
Never the less I will take your advise in and do some reinforcement. I appreciate your advise.
Christian
08-24-2013 | 05:23 PM
#10
Joined: Apr 2006
Posts: 20
Likes: 0
Received 0 Likes
on
0 Posts
From: sao paulosao paulo, BRAZIL
Dear Mr. Sanchez,
congratulations on your beautiful Tipo. Maybe you can help me with some of my questions. I have a Rossi .91 rear exhaust engine with respective tuned pipe. Do you think it would be enough to fly this plane happily ? Or would a stronger engine be required ?
I was always suspicious about simply enlarging a plan, because we all know it is not that simple, especially when it comes to airfoils. Usually airfoils must be redesigned rather than simply enlarging them. After flying the plane, do you have an opinion about this ? Would you use a less thick airfoil ?
About weight, would you circle holes on the fuselage to reduce weight or would this compromise the fuse�s strength ? What else would you do to save weight if building a second one ?
Would you consider fixed landing gear in order to save weight ?
Best regards,
Caio.
08-25-2013 | 05:41 AM
#11
Thread Starter
Joined: Sep 2007
Posts: 72
Likes: 0
Received 0 Likes
on
0 Posts
From: Doral,
FL
Hi Ehsan:
Took some time to check on the rails of the nose gear and definitively some reinforcement was needed. I finished last night reinforcing the rails and now they feel really strong. Thanks for the advise.
Christian
Took some time to check on the rails of the nose gear and definitively some reinforcement was needed. I finished last night reinforcing the rails and now they feel really strong. Thanks for the advise.
Christian
08-25-2013 | 05:55 AM
#12
Thread Starter
Joined: Sep 2007
Posts: 72
Likes: 0
Received 0 Likes
on
0 Posts
From: Doral,
FL
Hi Caio:
Thank you for your interest in my Tipo. As Doxilia (David) pointed out this is not a speeder even though I have plenty of power. If I would put a 120AX I would have serious concerns about the prop tip hitting the ground under certain circumstances. Now having said that I have to agree with you regarding the plan enlargement. When enlarging plans it does not necessarily mean increasing wood thickness and airfoil proportionally. In my humble opinion If I would build the same kit again, I would consider reducing the airfoil thickness and the thickness of the wood in certain areas. I don't believe putting lightening holes would compromise the strength of the fuse however I would rather work on the top of the fuse and hollowing the wood to be used or maybe just make a foam top to save some weight. Reducing the thickness of the fuse sides would also help. Rossi is a great engine but you might be a bit on the down side I believe. Although fixed gear is the easy way I like to complicate myself with retracts. Besides it would give the clean line of the Tipo that so many people like. Hope this helps. If you have any other questions I will be happy to help you out.
Christian
08-25-2013 | 07:10 AM
#13
My Feedback: (3)
Adding to Christian's comments, I should mention that when I embarked on the Tipo scaling project, my goal was to hit target scales for a given class of engines. In that light, I never intended for the models to be built "verbatim" per the scale up or down of the plan. Naturally, a 60 sized design that uses 3/16" sides doesn't need to have 1/4" sides if scaled up to a 120 class model.
As one departs further from design scale (60), the reduction or augmentation of structural material becomes more critical. As one departs strongly from linear scale, one has to further lighten the model during the material selection and built phase. For example, a 61% linear scale model (the Picorare, Tipo 15), needs 3/32" sides (or lighter) which represent a 50% linear material reduction. By the same token, the T120 doesn't need 1/4" or 5/16" sides at ~12% linear enlargement. One can still use 3/16" sides with no structural loss of strength.
As it turns out, my scaling factors resulted in 1/8" linear steps in scale (almost exactly) all the way from the T15 to the T160 (yes, a 2m version was conceived as well). That was a very interesting discovery.
I have since redesigned the Tipo to not only make it easier to build using interlocking construction but also to result in a substantially lighter model. I'd venture that up to a 12-15% weight reduction can be achieved compared to the original structure. Use of 1/32" wing/stab skins (along with strategic CF) as well as a skinned former (or foam) fuse top are key to this redesign and restructuring.
Last but not least, design parameters like airfoil, decalage, moments, thrust to weight, Reynolds numbers and even planform are all factors that can be altered by the builder/redesigner. The extent to which one alters these, affects how much your final model looks (or "is") a Tipo or an entirely different design.
I will be cutting a laser kit of my redesigned T30 later this year for a couple of builds and if I'm happy with the results, I may extend this "modern" structure version to other scales.
David
Last edited by doxilia; 08-26-2013 at 06:36 AM.
10-06-2013 | 06:18 PM
#14
Senior Member
Joined: Sep 2003
Posts: 138
Likes: 0
Received 0 Likes
on
0 Posts
From: Eureka Springs,
AR
I agree with some of the scaled plans comments, but not all of them.. I disagree with changing the airfoil when scaling. The idea of scaling is to maintain the flying properties of the plane, just a different size. Builders want it to fly like the original, if they want it to fly differently, why pick THAT plane to scale. Pick one that flies the way you want it to.
The fuse side thickness is another issue. Due to the mandatory 'tipo tuck' that has to be sanded in, 3/16 will not be thick enough. The tuck, acording the the designer, does affect the flying characteristics. The .60 size has 1/4" sides, not 3/16" for that reason. I tried 3/16 on a batch of kits, and builders had issues getting the tuck cut in properly, builders said to go back to the 1/4" sides. There is very little weight difference between them anyway.
I considered doing the sheeted turtle deck, but once all the wood is sanded away, the result is not that much different either way, there isn't much wood left. Built 60 size prototypes both ways... There are plenty of ways to lighten the tipo if you desire, such as carving out the canopy area, which most guys don't do, and being sure to carve the the turtle deck all the way, a lot of builders don't sand planes all the way to the proper shape. Lightening holes can be put in the fuse sides, but the tuck makes placement a little tricky, and unless you need to put them in for balance purposes, they may be a negative....
Going by quantities sold of the kits that I offer turtle deck both ways, the pretty close to 50-50 split tells me a lot of builders still like the old simple stick the top on and carve method. I think most of it depends on when the builders did their building.
Remember, the Tipo was designed as a simple quick to build replacement for the complicated Curare, hence the name, and it lives up to this well.
Just my opinions to add to the others.
Don @ Eureka Aircraft
Last edited by dfturnock; 10-07-2013 at 05:13 AM. Reason: sp
10-07-2013 | 12:17 PM
#15
Thread Starter
Joined: Sep 2007
Posts: 72
Likes: 0
Received 0 Likes
on
0 Posts
From: Doral,
FL
I had the opportunity to fly the Tipo again this past Sunday and in my humble opinion it fits the bill perfectly for my style of flying. Straight flight, very axial rolls (although at highest rate the rolls aren't that fast as I would expect - more in the book maneuver style), verticals need a bit of correction, knife edge need a small correction only, inverted barely need correction and landings are slow and predictable. I'm still trimming the plane for my taste. What does the flying have to do with the plan scaling? well that at the end if the flying is of your liking then you got a winning plane. Where would I work a bit? maybe on the weight, fin leading edge at its root is quite thick, access to tank having retracts installed can be very tricky, but at the end I'm getting the results I wanted so I really don't need to complain. Am a happy camper. Thank you for the input.
Christian
Christian
10-08-2013 | 07:04 PM
#16
Senior Member
Christian,
thanks for the info. The CAD re-design looked a little hefty. I think this bird can be built to 10-11 lbs using 3/16" sides, a 1/32" lightened doubler and a 3/32" skinned deck rather than using the block balsa. The nose top can be done in a "keeled and glassed foam".
Still, at 12.5 lbs, it should be ok in terms of loading (I think it is around 1000 squares). I suspect a 120 AX might be needed for thrills but the 95 should fly it nicely and in TOC style.
David
thanks for the info. The CAD re-design looked a little hefty. I think this bird can be built to 10-11 lbs using 3/16" sides, a 1/32" lightened doubler and a 3/32" skinned deck rather than using the block balsa. The nose top can be done in a "keeled and glassed foam".
Still, at 12.5 lbs, it should be ok in terms of loading (I think it is around 1000 squares). I suspect a 120 AX might be needed for thrills but the 95 should fly it nicely and in TOC style.
David
Have you considered building up fuse sides and other similar larger structures from 1/16" basswood ply and 1/16" balsa. Basswood ply from AS&S is reasonably priced and it can come in 4x8 foot sheets. About as light as light ply and as strong as birch a/c types. Laser out 85% of the bassply of course for a very light composite structure that stands up to DLE55 pounding. Should be fine for anything smaller and is lighter than 3/16" contest balsa. Just a tid bit


