


Glider Crash....Fixable?
 06-21-2019, 04:09 AM
#1

Thread Starter
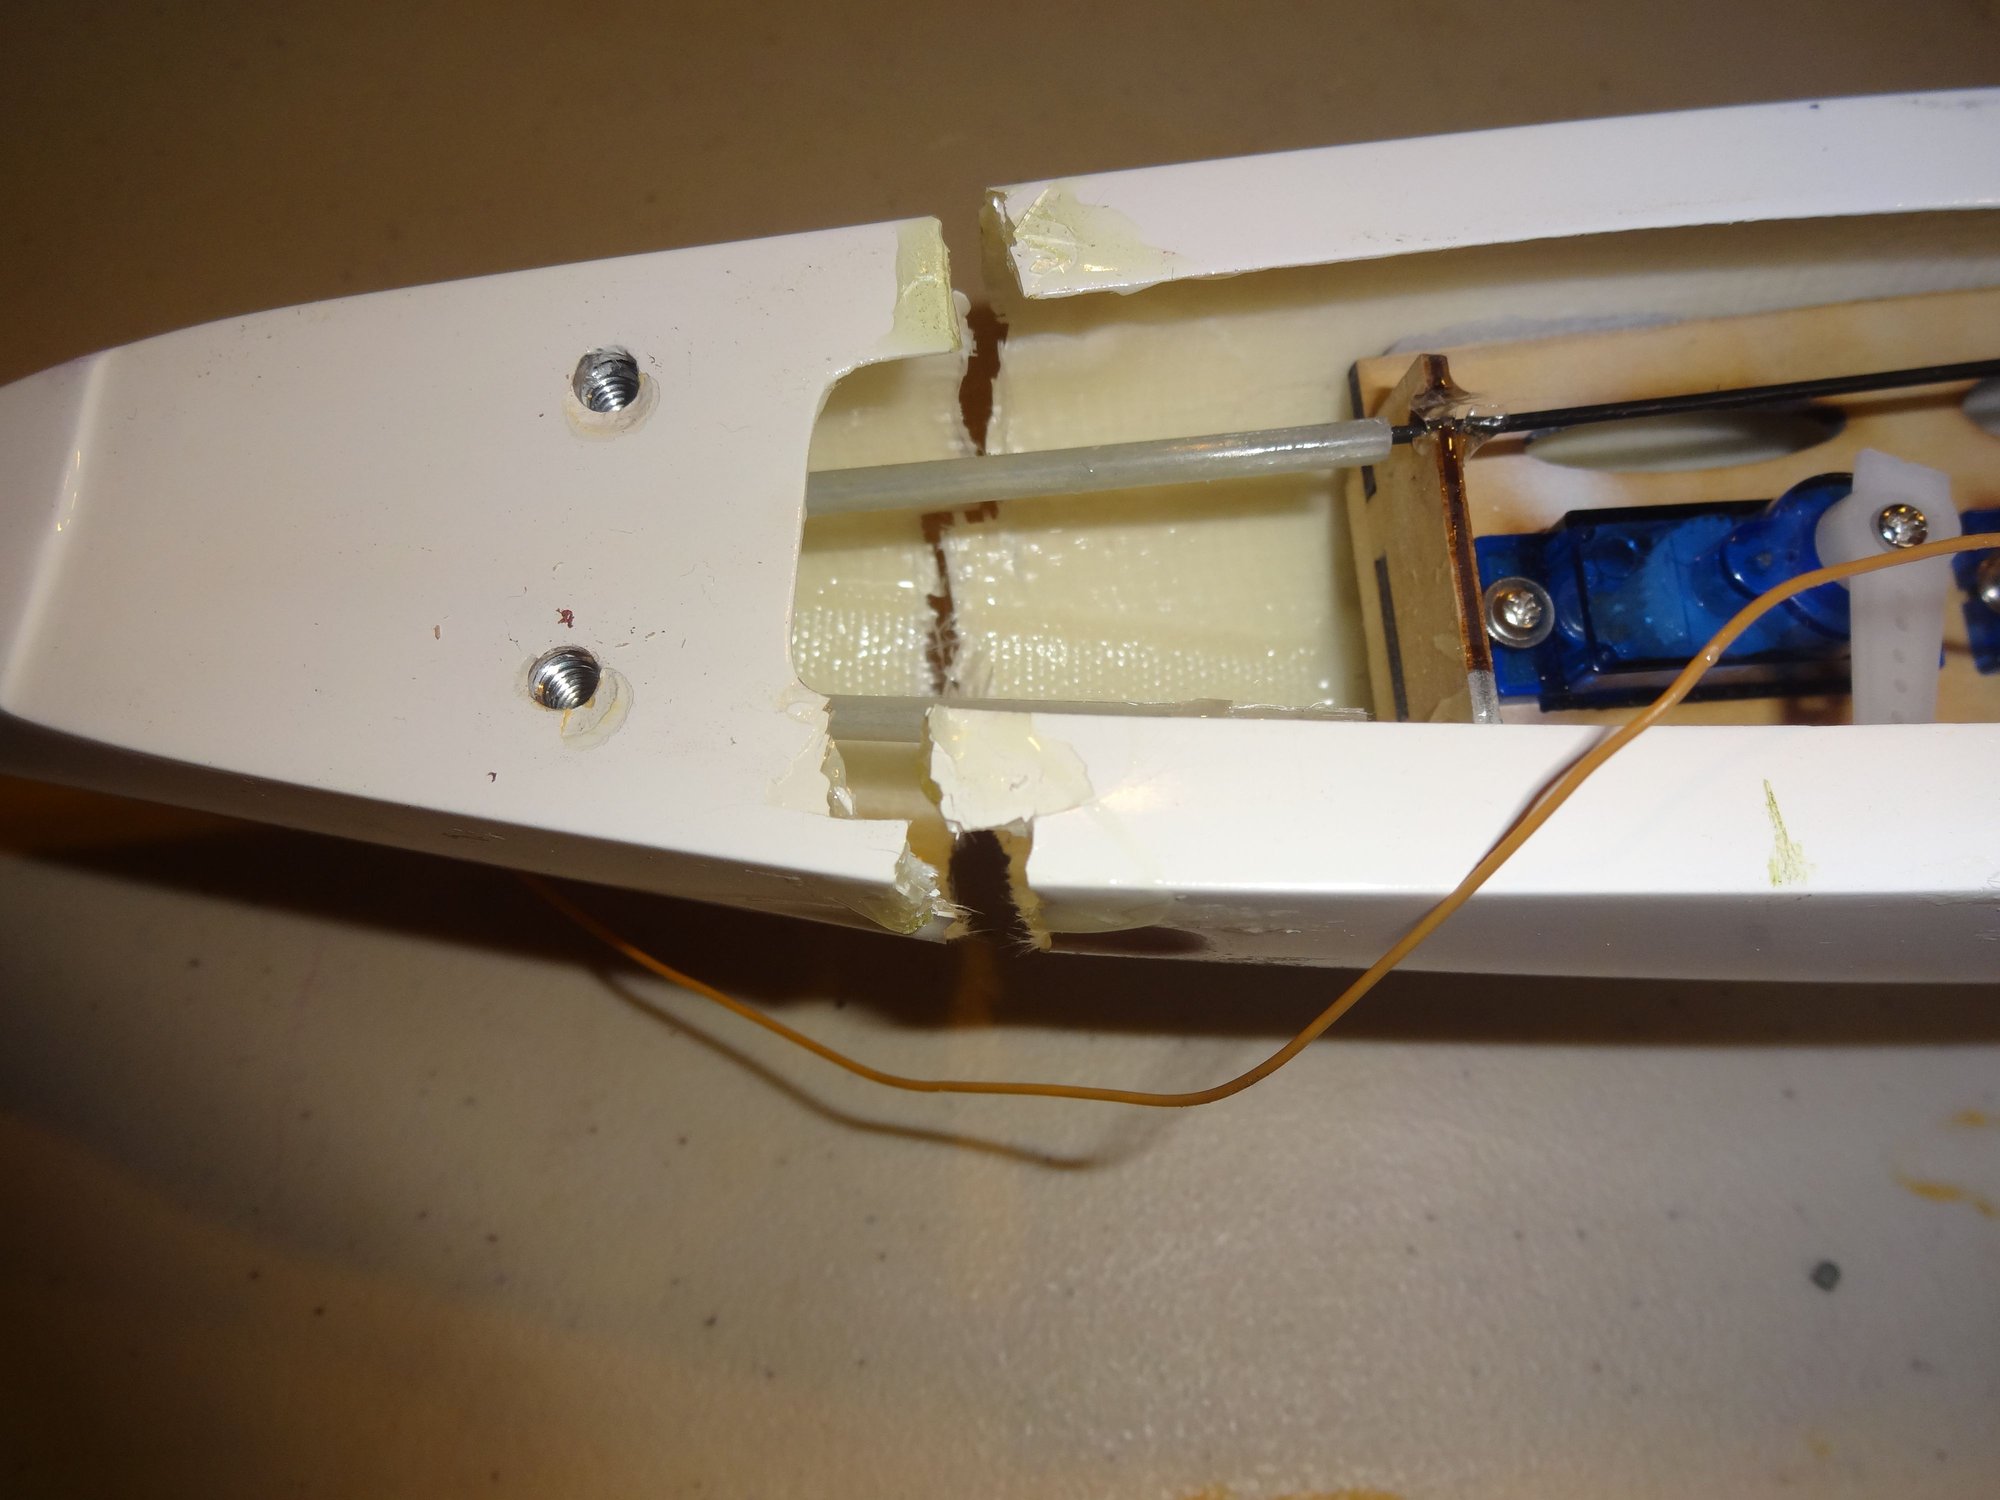
I had an "incident" involving aft CG, a stall, a spin and a tree.
The glider was intact, except the fiberglass fuselage broke.
How fixable is this? I cant add a ton of weight, as it was already tail heavy. Any ideas?
-Dave
The glider was intact, except the fiberglass fuselage broke.
How fixable is this? I cant add a ton of weight, as it was already tail heavy. Any ideas?
-Dave
 06-21-2019, 08:32 AM
#2

A little glass, a little epoxy resin. It can be glued back together after you sand the fuzz off the fracture with CA. Then sand the inside well with 220 grit, clean, and apply a few layers of 3oz fiberglass with epoxy laminating resin. Make each layer just a little wider then the previous. You double then sand the outside smooth, apply a single layer of 1.4oz cloth over the break, feather sand the edges and reprint. Done right it shouldn't add more then an once of weight. If you choose to do the repair you can PM me your address and I would be happy to send you the required cloth. The repair can be documented here, I will talk you through it and then others will have access to the information.
06-21-2019, 04:30 PM
#3
Thread Starter
Ok....I'll give it a go. I'll check the LHS for the cloth first, but thanks for the kind offer.
To clarify: sand off the fuzz with CA? Glue it with CA and then sand off the fuzz?
The cloth on the inside should be in strips going 90 degrees to the axis of the fuselage? So the first perhaps 3/8 wide, then 3/4 1 1/2 then 2 inches (or something like that?)
-Dave
To clarify: sand off the fuzz with CA? Glue it with CA and then sand off the fuzz?
The cloth on the inside should be in strips going 90 degrees to the axis of the fuselage? So the first perhaps 3/8 wide, then 3/4 1 1/2 then 2 inches (or something like that?)
-Dave
06-21-2019, 04:47 PM
#4
Dave, sand the edges of the break a little first. The tears will not completely mesh back together unless you remove a tiny bit. Once you glue back together with CA tape the outside for some added strength then sand the inside. The glass weave should run 45 degrees to the break, alternating directions with each layer. 4 layers for a balanced layup. Once cured you can sand the outside smooth and apply a layer of lighter cloth as any orientation and feather sand prior to repaint. The exterior cloth will prevent the crack reappearing in the finish.
06-23-2019, 07:50 AM
#5
Thread Starter
One issue I have is how do I make sure that I have the two parts inline and true? If I do not get the tail put on exactly true, It is not going to fly straight. I was thinking about clamping small beams on the inside to try to hold it true?
Thanks,
-Dave
Thanks,
-Dave
06-25-2019, 06:32 AM
#7

Ok, I have to add this just for fun .. I am not trying to start a problem !!! hahahaha
Since you say it is tail heavy, it would be tempting to me to extend the fuse about 3 inches so it would balance easier. You would still mount the wing to the current rear threaded inserts.. But you would have to rework the front of the wing saddle and fuse/canopy area..
just thought I'd mention it
Since you say it is tail heavy, it would be tempting to me to extend the fuse about 3 inches so it would balance easier. You would still mount the wing to the current rear threaded inserts.. But you would have to rework the front of the wing saddle and fuse/canopy area..
just thought I'd mention it
