


Portable Charging Case
 02-17-2011 | 07:50 AM
#1
I thought I would share a few pictures of a portable charging station I built to power my FMA Power Lab 8v2. I considered some cases Chris Moon and others have built to design this case. This setup is compact, looks sharp, and features the FMA Power Lab 8v2 charger which is capable of putting out over 1500 Watts when connected to a 24V power supply; connected to a 12V power supply it can put out just over 750 Watts which means I can charge six 5S 5000mAh batteries at 1C. This charging station comprises of the following: 12V, 55Amp Power supply; FMA Power Lab 8v2 charger; a storage compartment for all the charging wires; removable top lid; 2 sets of banana plug receptacles and 2 sets of Anderson Power Pole receptacles for additional plug-in chargers. The power supply and charger both have cooling fans internal to their design, but I installed two computer cooling fans to keep the airflow through the case. Works and looks great.
Steve
Steve

 02-17-2011 | 09:02 AM
#3
Hi Chad - I got the case off Amazon, delivered to my house for $40. It's designed by Odyssey and made to carry CD cases http://www.amazon.com/gp/product/B00...ef=oss_product There are some other options out there but I went with the Odyssey because the specs show it to be about 1 inch taller and I needed this extra height for the Power Lab. Of course when it arrived I found that it wasn't as tall as spec'ed so I had to recess the PowerLab into the top shelf so it sits on top of the power supply - it probably worked out better this way so I'm very happy with the results.
All in all I believe I spent about $80 to make this case (does not include cost of power supply or charger). Here’s all the parts I used:
• 1 – aluminum Case (by Odyssey, KCD200BLK) (http://www.amazon.com/gp/product/B00...ef=oss_product)
• 2 - 80mm fans Antec Blue Led 80MM Fans http://www.amazon.com/gp/product/B00...ef=oss_product)
• 2 – fan grills (http://www.amazon.com/gp/product/B00...ef=oss_product)
• 2 sets of banana plug receptacles with binding post (Maxx Products)
• 1 - Anderson Power Pole receptacle (http://www.powerwerx.com/anderson-po...nt-2-sets.html)
• 10 - #6, 10 gauge ring connectors (radio shack)
• 3 feet of 10 or 12 gauge wire
• 1 - FMA Power Lab 8
• 1 - 12V/55 Amp power supply by Luminex
• 3 - 1/8”x 12”x18” foam sheets (available at Michaels for $1 each)
• 4 sets of Anderson Power Poles
• 1 IEC C-14 socket and power cable
Here’s the basic building steps:
• Remove all foam from the bottom compartment of the case (leave the foam lining in the removable case top).
• Use Goo Gone to remove any remaining adhesive on the upper metal trim of the bottom case.
• Cut holes for cooling fans, using grill as template. Cut out with a hand held sabre saw on high speed, then file or sand with sandpaper wrapped around a small bottle to clean up hole.
• Install cooling fans and grills using screws included with grills.
• Install IEC socket.
• Secure power supply to bottom of case using bolts. If you want a front compartment, you’ll want to slide the power supply toward the back of the case (leave at least ¼” for cooling), but keep it centered left to right so the case balances.
• Cut top shelf using scroll saw. This took some work to get it to fit perfectly, so it takes some time.
• If you want a front storage compartment, cut the flap out using a scroll saw. I curved the corners so I could do it in one pass and use the cutout as the flap.
• Epoxy mounting blocks to screw the top shelf into.
• If needed, cut recess hole for charger in top shelf - the Power Lab is fairly tall, so I had to recess it into the top shelf. This also provides additional cooling for the unit since cooling fans are on the bottom of the unit. I then secured it using small right angle pieces of metal epoxied to the plywood and screwed into the lower sides of the charger (be sure to screw into an area where you will not damage charger). With this unit I secured the back by screwing into the feet that extend below the unit and secured the front by screwing into a hole that they bored out from the bottom to recess a screw.
• Cut plywood divider to the right height and width.
• Paint all edges of divider and top shelf black.
• Line compartment side of divider with foam, using 3M adhesive spray.
• Epoxy divider in place with triangle stock on the unfinished side.
• Line remainder of compartment and top of top shelf using 3M spray.
• Drill holes through top shelf into anchoring blocks.
• Install hinges and handle onto flap.
• Glue use rare-Earth magnets on ply tabs to hold the flap closed.
• Drill holes for banana plug receptacles and cut hole for APP outlet.
• Connect the Charger and another set of wires directly to the Power supply (doubling these large guage wires up in the charger outlet was no problem). Install a set of APPs so the lid may be removed, and crimped the fan power leads into the set of wires that comes out of the power supply that are for the banana plug receptacles.
• Wire the banana plug receptacles using ring connectors.
• Plug the Anderson Power Poles together.
• Screw lid in place!
02-18-2011 | 12:11 AM
#5

My Feedback: (1)
If you have no time to build one, ask Victor at 678-799-0518 or email to [email protected]
http://www.rcuniverse.com/forum/m_10226353/tm.htm
Very nice job
http://www.rcuniverse.com/forum/m_10226353/tm.htm
Very nice job
06-29-2012 | 06:20 PM
#6


My Feedback: (71)
ORIGINAL: J-P
If you have no time to build one, ask Victor at 678-799-0518 or email to [email protected]
http://www.rcuniverse.com/forum/m_10226353/tm.htm
Very nice job
If you have no time to build one, ask Victor at 678-799-0518 or email to [email protected]
http://www.rcuniverse.com/forum/m_10226353/tm.htm
Very nice job
06-30-2012 | 04:47 AM
#7
Hey Chad,
I was following the post. You can also use a generic metal/airport approved gun/pistol case. They look just like this one and vary in sizes.
Cabella's
Gander Mountian
Bass Proshop, etc.
Later,
bholsten
I was following the post. You can also use a generic metal/airport approved gun/pistol case. They look just like this one and vary in sizes.
Cabella's
Gander Mountian
Bass Proshop, etc.
Later,
bholsten
06-30-2012 | 06:04 AM
#8
Joined: Jul 2006
Posts: 2,819
Likes: 0
Received 0 Likes
on
0 Posts
From: Ossining,
NY
Yes, there are lots of options.
I used a Stanley "Fat Max" toolbox and made a shelf for the chargers from a plywood/particle board sandwich, covered with white Ultracote. The PS is a Meanwell 24v/42A and the exhaust fan is from Radio Shack.
Various battery adapters and cords are kept in the plastic box that fits in the shelf area for transport.
10-10-2020 | 06:15 AM
#11
My Feedback: (3)
Joined: Dec 2010
Posts: 44
Likes: 0
Received 0 Likes
on
0 Posts
From: Palos Park, IL
I thought I would share a few pictures of a portable charging station I built to power my FMA Power Lab 8v2. I considered some cases Chris Moon and others have built to design this case. This setup is compact, looks sharp, and features the FMA Power Lab 8v2 charger which is capable of putting out over 1500 Watts when connected to a 24V power supply; connected to a 12V power supply it can put out just over 750 Watts which means I can charge six 5S 5000mAh batteries at 1C. This charging station comprises of the following: 12V, 55Amp Power supply; FMA Power Lab 8v2 charger; a storage compartment for all the charging wires; removable top lid; 2 sets of banana plug receptacles and 2 sets of Anderson Power Pole receptacles for additional plug-in chargers. The power supply and charger both have cooling fans internal to their design, but I installed two computer cooling fans to keep the airflow through the case. Works and looks great.
Steve
Steve
10-15-2020 | 10:02 AM
#12
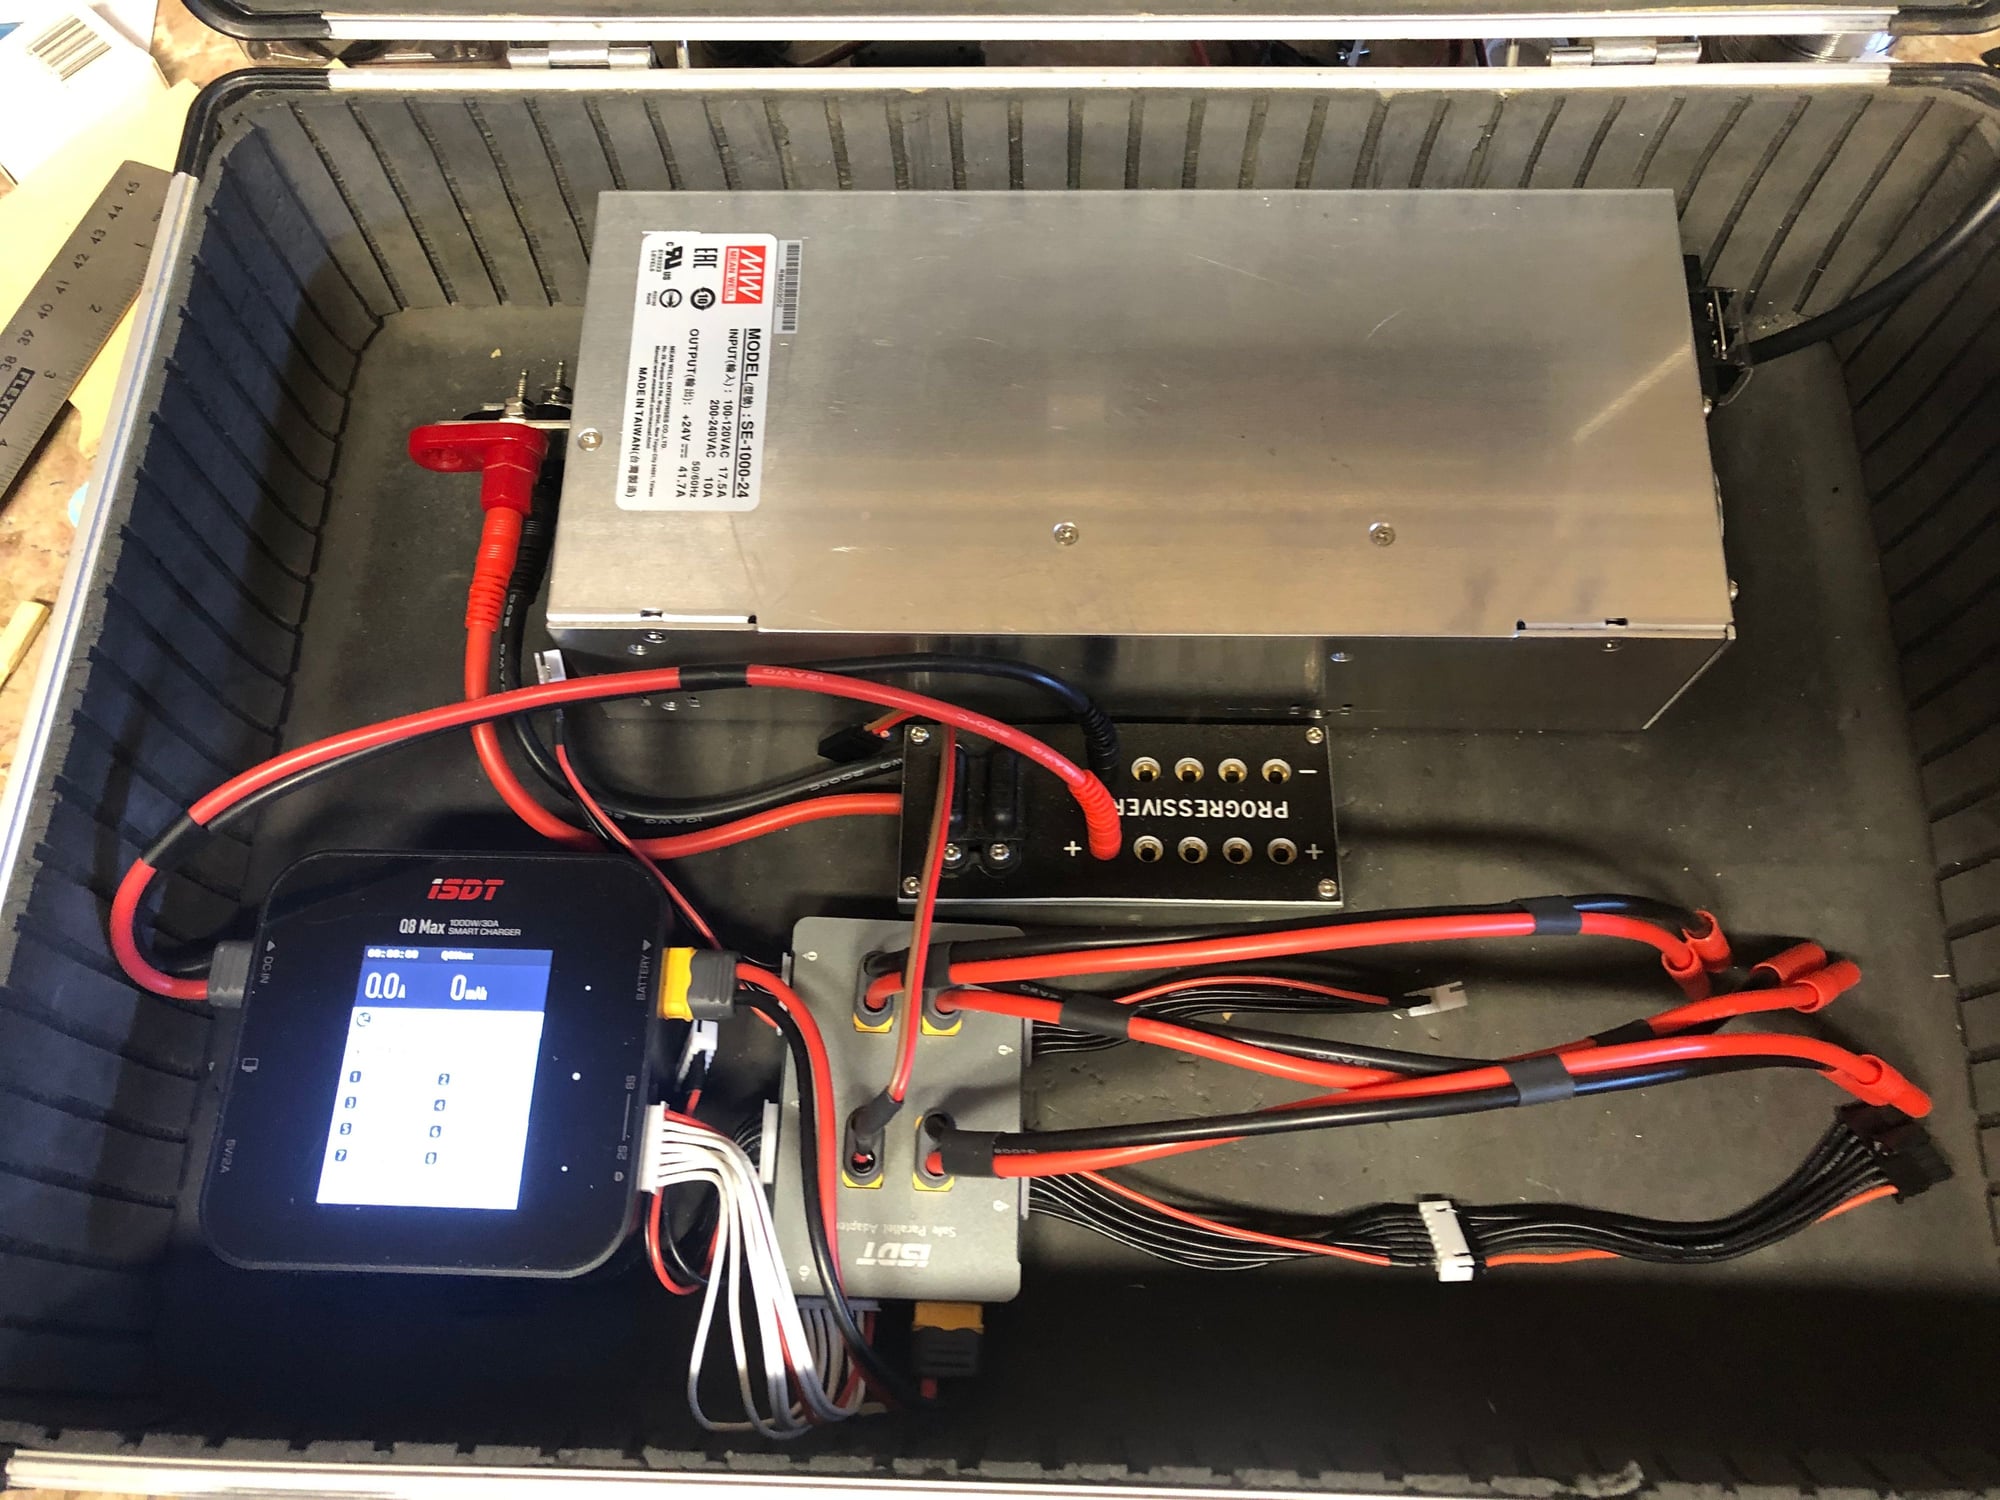
After about 15 years I decided to update my charging system that had evolved as chargers improved but always used a 12 volt 55 Amp power supply. I went to a 24 volt supply and a 1000 watt charger capable of charging many LiPos in parallel. I was a little concerned about parallel charging but I'm now convinced it is the way to go. I've been flying 6s packs in a 62 inch Acuity this year and am able to charge my four packs at the same time in a half hour just before I leave for the field. When I get home I can charge them all at the same time to storage voltage in about the same time. The fact that it is easy to use this routine means I will do it and results in the packs being at high voltage for the minimum amount of time which should improve battery life.
I use the ISDT Q8 Max (inspired by Chad) which is small and runs very cool. I've left room for a second one for when I get back to flying 2 meter planes and will want to be charging while I'm flying so I will want to start a second set charging before the previous set is complete.
I use the ISDT Q8 Max (inspired by Chad) which is small and runs very cool. I've left room for a second one for when I get back to flying 2 meter planes and will want to be charging while I'm flying so I will want to start a second set charging before the previous set is complete.


