


Allure by Bryan Hebert


 02-16-2016, 03:56 AM
#477

Thread Starter

Join Date: Aug 2005
Location: Sydney, AUSTRALIA
Posts: 1,341
Likes: 0
Received 0 Likes
on
0 Posts
Shortly I'll be building a set of built-up wings and stabs for the Allure builders kit. See the pictures of the kit below. The structure/kit was designed by Mark Hunt and this particular kit was laser cut by Doug Tebbit in Queensland. This will be the first kit to be cut and built down under. The design is quite ingenious by integrating the jig into the ribs along with a frame that aligns all the ribs correctly.
I'll post some more details once construction commences.
Cheers,
Jason.


I'll post some more details once construction commences.
Cheers,
Jason.
02-26-2016, 09:11 AM
#479
I really wanted a bigger painted canopy than the stock scheme. After seeing a yellow Shinden being flown at a contest last year I thought my older eyes could see it in the air better than the typical red white and blue planes or worse yet the sky blue base color of my older Oxai Berryl. So I worked off the current Allure schemes and the Shinden scheme to come up with this.
Can't wait to see it in person.
Can't wait to see it in person.
02-28-2016, 12:09 PM
#480
Thread Starter
Join Date: Aug 2005
Location: Sydney, AUSTRALIA
Posts: 1,341
Likes: 0
Received 0 Likes
on
0 Posts
A flock of Allures were seen competing at Hamilton, New Zealand last Saturday in preparation for an assault on the 2016 Australian Masters. Three different power plants - Hacker Q80, Plettenberg Advance and a Hacker C54 powered Brenner V3 Contra.


03-07-2016, 12:25 PM
#481
Thread Starter
Join Date: Aug 2005
Location: Sydney, AUSTRALIA
Posts: 1,341
Likes: 0
Received 0 Likes
on
0 Posts
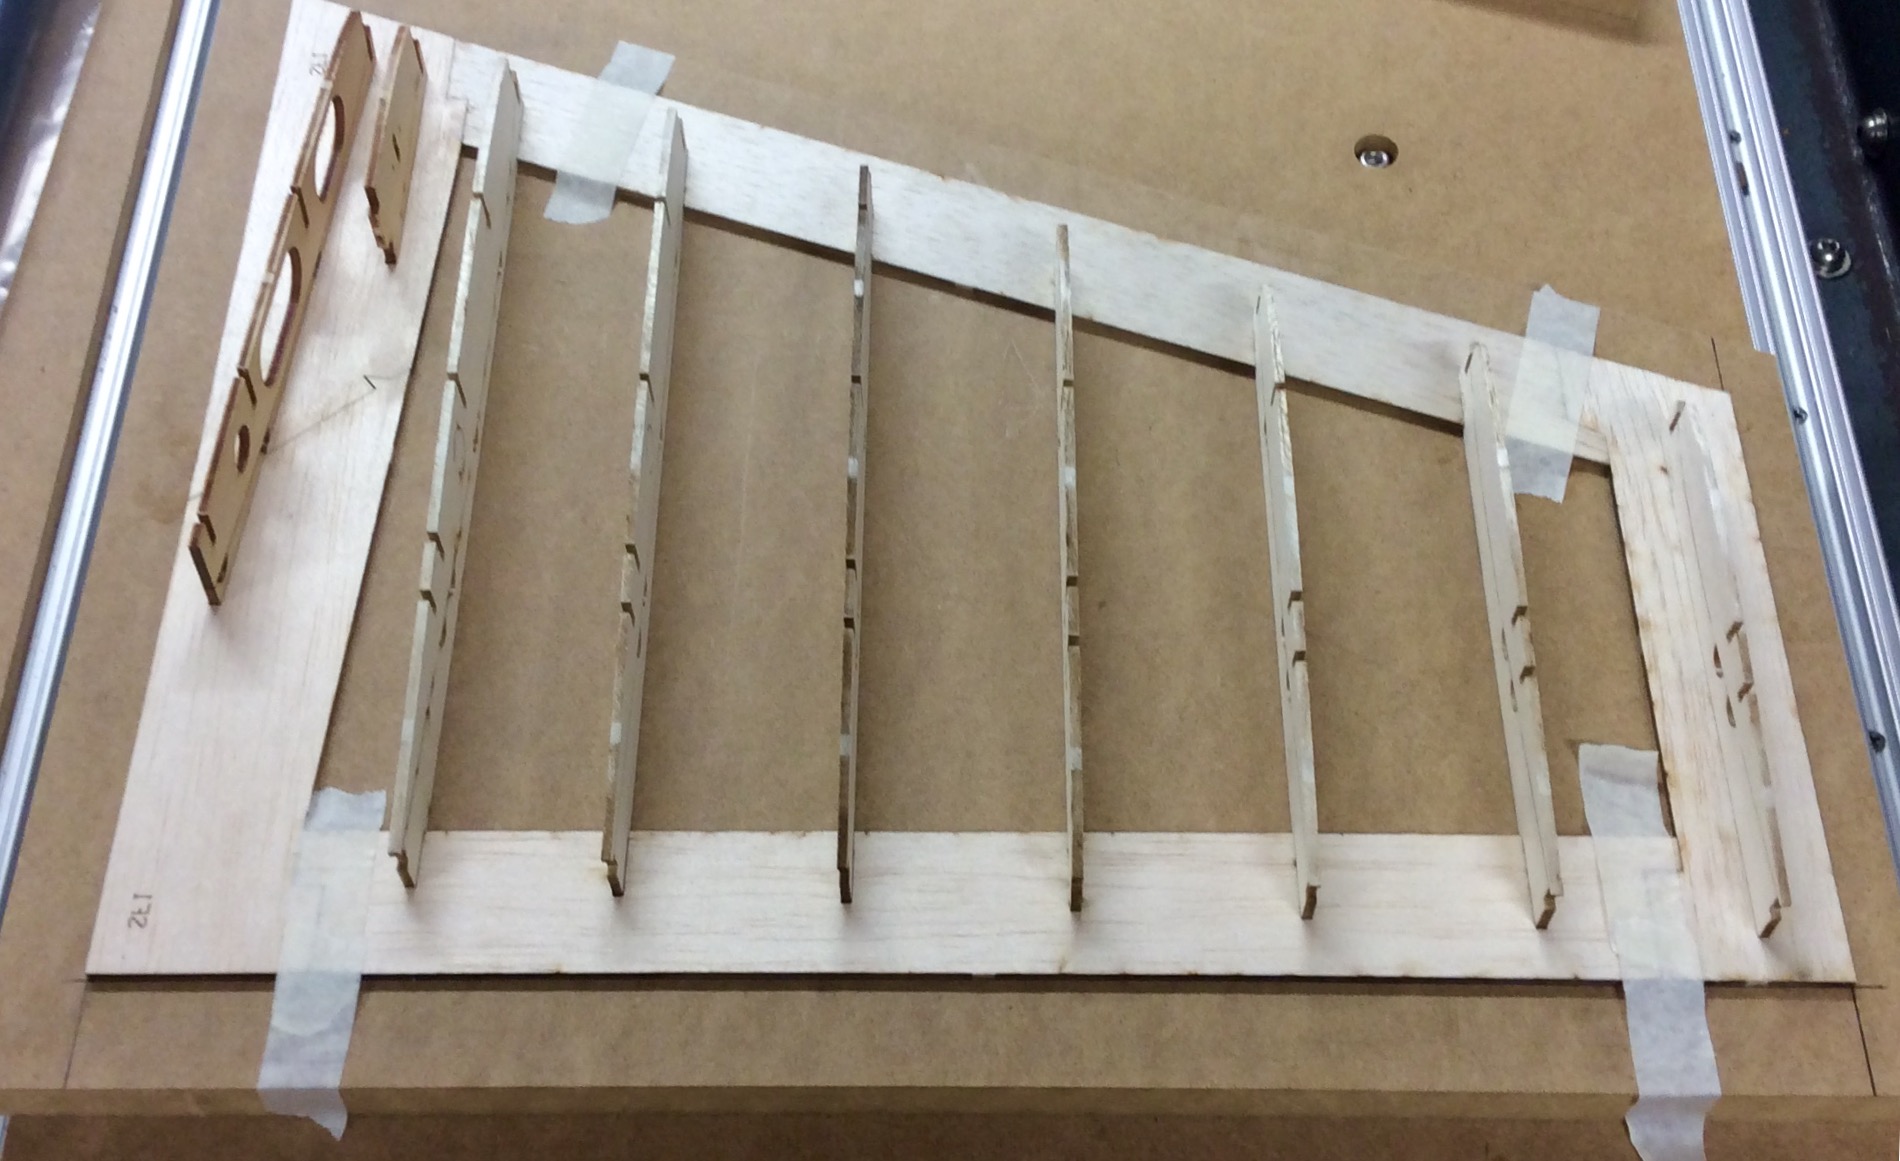
Stab construction has commenced!
I cut up some MDF to use as a building board for the jig. This stuff is nice and flat plus I had it in the workshop.
The TE of the jig base is 90 degrees at both ends so marks were made on the MDF with a square to help get the jig base aligned correctly.
A dry fit of the ribs was also done. Make sure you have a right and left stab!
03-08-2016, 04:53 PM
#482
Got home from work to see a really big box sitting by my garage doors.
Very awkward to try to carry
May be a day or two before I can clear my workbench to get it opened.
Very awkward to try to carry
May be a day or two before I can clear my workbench to get it opened.
Last edited by Stuart Chale; 03-08-2016 at 05:03 PM.
03-10-2016, 02:02 PM
#483
I really want to do a full spring cleaning of my workshop prior to starting the Allure. Several years of accumulation of "stuff" has made some of my work surfaces un-findable. (if that's a word).
However I couldn't really wait that long to at least have a look
I'll start a new build thread to not clutter this one with lots and lots of pictures. I know there are a few other threads already but I just like to do them. Makes a nice reference for me as well later on.
It has been said before and I will say it again. This thing is big! You really realize it when you pull the fuse out of the box.
03-10-2016, 04:15 PM
#485
Thread Starter
Join Date: Aug 2005
Location: Sydney, AUSTRALIA
Posts: 1,341
Likes: 0
Received 0 Likes
on
0 Posts
I really want to do a full spring cleaning of my workshop prior to starting the Allure. Several years of accumulation of "stuff" has made some of my work surfaces un-findable. (if that's a word).
However I couldn't really wait that long to at least have a look
I'll start a new build thread to not clutter this one with lots and lots of pictures. I know there are a few other threads already but I just like to do them. Makes a nice reference for me as well later on.
It has been said before and I will say it again. This thing is big! You really realize it when you pull the fuse out of the box.
However I couldn't really wait that long to at least have a look
I'll start a new build thread to not clutter this one with lots and lots of pictures. I know there are a few other threads already but I just like to do them. Makes a nice reference for me as well later on.
It has been said before and I will say it again. This thing is big! You really realize it when you pull the fuse out of the box.
Feel free to post your build on this thread. That's what it's for....

Cheers,
Jason.
03-23-2016, 12:20 PM
#487
Thread Starter
Join Date: Aug 2005
Location: Sydney, AUSTRALIA
Posts: 1,341
Likes: 0
Received 0 Likes
on
0 Posts
The frame on one stab half is all glued up and separated from the jig. Firstly I put some wax paper under the whole frame and glued in the jig ribs. Glad I kept the waste bits taken out of the ply parts. One of the round parts worked out perfect to block the end of the stab socket.
Need to glue in the horn hard point and servo tray and it's then ready for sheeting. Need to complete the other frame first though cause we need the second jig to do the sheeting. Weight of first frame is 29 grams as it stands.


Need to glue in the horn hard point and servo tray and it's then ready for sheeting. Need to complete the other frame first though cause we need the second jig to do the sheeting. Weight of first frame is 29 grams as it stands.
 03-28-2016, 05:14 PM
#489
Thread Starter
Join Date: Aug 2005
Location: Sydney, AUSTRALIA
Posts: 1,341
Likes: 0
Received 0 Likes
on
0 Posts
04-04-2016, 03:15 AM
#492
Thread Starter
Join Date: Aug 2005
Location: Sydney, AUSTRALIA
Posts: 1,341
Likes: 0
Received 0 Likes
on
0 Posts
04-04-2016, 02:23 PM
#495
Thread Starter
Join Date: Aug 2005
Location: Sydney, AUSTRALIA
Posts: 1,341
Likes: 0
Received 0 Likes
on
0 Posts
and here: http://precisionaeroproducts.com.au/...build-fuselage
Your exit location will depend on the servo arm and rudder horns used.
Cheers,
Jason.
04-17-2016, 10:59 PM
#497
Thread Starter
Join Date: Aug 2005
Location: Sydney, AUSTRALIA
Posts: 1,341
Likes: 0
Received 0 Likes
on
0 Posts
The elevators have now been cut from the stabs. First I marked out where to cut with a pen and the cut from both sides with a sharp scalpel. Then sand the stab and elevator flush and cap with the supplied 1/4" laser cut balsa parts. Glue used was aliphatic resin.
Next step is to sand the capping flush to the stab and elevator, fit and shape the tips and then bevel the elevator capping.


Next step is to sand the capping flush to the stab and elevator, fit and shape the tips and then bevel the elevator capping.
04-19-2016, 12:54 PM
#498
Thread Starter
Join Date: Aug 2005
Location: Sydney, AUSTRALIA
Posts: 1,341
Likes: 0
Received 0 Likes
on
0 Posts
The capping has now been sanded down flush with the stab and elevators. Next job is to fit the tips and shape them. The heavier stab is the first one skinned. Why is it that we always do the second one better? Lol
Cheers,
Jason.


Cheers,
Jason.
