


CDI gr8flyer55

 10-23-2012, 08:46 AM
#727

Join Date: Oct 2005
Location: Parma Heights,
OH
Posts: 168
Likes: 0
Received 0 Likes
on
0 Posts
Here's a small suggestion from a hobbyist perspective. Servos used to have ground the middle pin, signal and V+ were the outer pins of a 3-pin plug. That was instant death to the servo, if it accidentally got reversed. Now, the middle pin on almost all servos is V+.
I don't believe the pin sequence for ICSP is critical (lead length must be kept short), so you might consider for a 5-pin plug making the center pin Vdd, which is different from what the link shows. Then, your PIC may survive getting it plugged in wrong. You might also consider making Vdd at pin 5. A reversal would simply put MCLR at V+, which won't damage anything. Of course, some sort of keyed system is also advisable.
John
10-23-2012, 09:20 AM
#729
Join Date: Oct 2005
Location: Parma Heights,
OH
Posts: 168
Likes: 0
Received 0 Likes
on
0 Posts
ORIGINAL: Gompy
Why is it not possible to put computerleads wrong to the motherboard ????
Why is it not possible to put computerleads wrong to the motherboard ????
Maybe you haven't tried hard enough?

Most of the motherboard connections are "keyed" in some way. That is, the receptacle and plug are not symmetrical. A simple pinheader and in-line contact plug are symmetrical. A 6th pin can be added and make it a blank/solid plug is another way to add asymmetry.
John
 10-23-2012, 11:48 AM
#731
Senior Member
Join Date: Aug 2011
Location: Moscow,
ID
Posts: 144
Likes: 0
Received 0 Likes
on
0 Posts
ORIGINAL: jpanhalt
I don't believe the pin sequence for ICSP is critical (lead length must be kept short), so you might consider for a 5-pin plug making the center pin Vdd, which is different from what the link shows. Then, your PIC may survive getting it plugged in wrong.
I don't believe the pin sequence for ICSP is critical (lead length must be kept short), so you might consider for a 5-pin plug making the center pin Vdd, which is different from what the link shows. Then, your PIC may survive getting it plugged in wrong.
It's pretty easy to get the orientation right. Red stripe goes to the square pad.
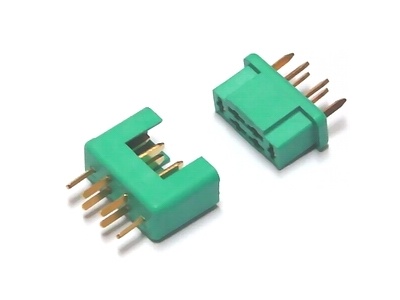
One other thing I should mention, the connector is a 6-pin header-type connector. The 6th pin is not connected, or even present on the board. So remember to leave room for that extra empty header pin connector.
-Jake
10-23-2012, 02:09 PM
#732
Senior Member

Join Date: Jul 2010
Location: Alkmaar, NETHERLANDS
Posts: 404
Likes: 0
Received 0 Likes
on
0 Posts
We use for allmost 20 years PS2 to DIN, DIN to USB for keybords, SUB9 and SUB 25 to USB for communicationsports.
For every GSM we have a differend plug but one loader.
We can connect our computer with 5 differend cables to the TV.
I think I have at least 8 differend cables for programming PLC's and the use all Hart protocol.
And we can't use a adaptercable with two differend plugs between the programmer and the CDI for ICP ?
A programmable CDI is not only a other kind of ignition, with a programmable CDI you gone try to get more from your engine.
If you don't know how to handle a programmer, don't start with a programmable CDI, you blow the engine or the programmer.
I say allway: If you don't know wat you are doing, don't do it.
10-23-2012, 02:45 PM
#733
Join Date: Oct 2005
Location: Parma Heights,
OH
Posts: 168
Likes: 0
Received 0 Likes
on
0 Posts
ORIGINAL: Gompy
I say allway: If you don't know wat you are doing, don't do it.
I say allway: If you don't know wat you are doing, don't do it.
A little bit ago, you described how to calculate the advance of your engines:
ORIGINAL: Gompy
I calculate the timing with a micrometer.
I put the pin into the cilinder and turn the piston up and down.
A complete up down of the piston will be 28.5 mm.
1 degree will be 28,5 / 360 = 0,079 mm
30 degrees BTDC = 2,37 mm
The LED must be on if the piston is 2,37mm BTDC, thats 30 degrees BTDC.
I calculate the timing with a micrometer.
I put the pin into the cilinder and turn the piston up and down.
A complete up down of the piston will be 28.5 mm.
1 degree will be 28,5 / 360 = 0,079 mm
30 degrees BTDC = 2,37 mm
The LED must be on if the piston is 2,37mm BTDC, thats 30 degrees BTDC.
http://en.wikipedia.org/wiki/Piston_motion_equations
http://www.epi-eng.com/piston_engine...ion_basics.htm
The first is a mathematical analysis. The second is mostly non-math. I wonder if that could be why some of your results are different than others' results?
Regards,
John
10-23-2012, 03:14 PM
#734
Senior Member
Join Date: Jul 2010
Location: Alkmaar, NETHERLANDS
Posts: 404
Likes: 0
Received 0 Likes
on
0 Posts
I know it isn't very exact calculation for degrees, but you need the *pin* tool the get TDC.
Normaly you porting / tuning a cilinder, the in and output *holes* are not timed by degrees, but by distance.
RC people use only the degreescale to set the hallsensor, thats it.
Why want you have a programmable CDI if you don't do any thing with timing and tuning of the engine ?
And NO you can't tune a engine with a degreescale, you can set the ignitiontime (BTDC) with it.
10-23-2012, 04:54 PM
#735
Senior Member
Join Date: Nov 2005
Location: Hamburg,
PA
Posts: 805
Likes: 0
Received 0 Likes
on
0 Posts
Jake, just ordered that USB PIC programmer from PicCircuit.
Might take a few weeks to get here from Malaysia!
Hope it works so I can do in circuit programming.
It said nothing about any software though. What do I use?
John
Might take a few weeks to get here from Malaysia!
Hope it works so I can do in circuit programming.
It said nothing about any software though. What do I use?
John
10-23-2012, 05:17 PM
#736
Join Date: Oct 2005
Location: Parma Heights,
OH
Posts: 168
Likes: 0
Received 0 Likes
on
0 Posts
@gr8flyer55,
I don't recall whether you have any programmer. I used to have a PicStart Plus programmer that was easily adapted to ICSP. All I had to do was keep the connecting lines less than 8". I would never had gotten rid of it, except for the enhanced mid-range chips, which are not supported. So, if you have any programmer at all, you may be able to use it for ICSP until your new one arrives.
John
10-23-2012, 07:47 PM
#737

Join Date: Sep 2012
Location: Winnipeg, MB, CANADA
Posts: 50
Likes: 0
Received 0 Likes
on
0 Posts
jpanhalt I know where Rob is coming from. For years the only wayto time a 2 stroke was by using a piston stop type tool that measured depth instead, I still use a dial depth gauge for small engines. Anyway we use to look up the factory timingspec. which was given as distance to TDC, some gave both distance and degree. Unless you had access to a 12 volt battery, a timing light was useless, so we measured distance. I know on newersnowmobiles that they have batteries or 12 volt power to hook up a timing light or we use aself powered timinglight and you can go by degrees, if there are timing marks. But yah, unless you have the OEM spec a self powered timing light and degree wheel is the way to go. I've seen battery poweredLED timing lights for small enginesand want to make one this winter.
Ray
Ray
10-23-2012, 07:50 PM
#738
Senior Member
Join Date: Aug 2011
Location: Moscow,
ID
Posts: 144
Likes: 0
Received 0 Likes
on
0 Posts
It uses the standard PIC Kit 2 software from microchip.com.
It will program the 683 right from MPLAB. For some reason it won't do the 1840 from MPLAB though. You have to open the hex in the PK2 software to flash it.
-Jake
It will program the 683 right from MPLAB. For some reason it won't do the 1840 from MPLAB though. You have to open the hex in the PK2 software to flash it.
-Jake
10-23-2012, 08:05 PM
#739
Member
ORIGINAL: jakestew
For some reason it won't do the 1840 from MPLAB though. You have to open the hex in the PK2 software to flash it.
For some reason it won't do the 1840 from MPLAB though. You have to open the hex in the PK2 software to flash it.
Jay.
10-23-2012, 08:23 PM
#740
Senior Member
Join Date: Nov 2005
Location: Hamburg,
PA
Posts: 805
Likes: 0
Received 0 Likes
on
0 Posts
A few years ago I built a simple serial port programmer which I still use today, in fact I just used it tonight to program my last 25 pic12f683 chips for the batch of timer boards I built today. The problem with it is there is no support for the 1840 chip. That's why I ordered the USB programmer from PicCircuit.com.
I'm not sure where to get the Pickit2 software though. Jake said that's what he uses with it. Is it free from Microchip? Never saw it on the site when I was on there. Lots of other crap but not what am looking for.
I'll just have to wait till I find something to work with it after the programmer comes in the mail.
John
10-23-2012, 09:57 PM
#741
Member
ORIGINAL: gr8flyer55
I'm not sure where to get the Pickit2 software though. Jake said that's what he uses with it. Is it free from Microchip? Never saw it on the site when I was on there. Lots of other crap but not what am looking for.
I'll just have to wait till I find something to work with it after the programmer comes in the mail.
John
You need two files, PICkit 2 v2.61 and Device File 1.62.14 (New device support. Compatible with application version 2.61.)
http://www.microchip.com/stellent/id...cName=en023805
Jay.
10-24-2012, 01:10 AM
#742
Senior Member
Join Date: Aug 2011
Location: Moscow,
ID
Posts: 144
Likes: 0
Received 0 Likes
on
0 Posts
Yep, that's the link. I can verify that it programs the 12F1840 just fine. I've run my engine with one.
Not sure if you need the updated device file or not. It was there when I downloaded the software, so I installed it.
I've just gotten serial transmission working with the 1840! I've got it printing out the RPM once per sec. I also got my bluetooth module working, so now I can monitor the RPM wirelessly!
The module you want can be found by searching ebay for: "serial bluetooth backplane". They're about $8 shipped!
You'll also want a bluetooth adapter for your computer. They cost $1 for class 2, or a few bucks for class 1. The cheap class 1 module they sell that has an antenna, actually has a fake antenna. It's just plastic, so you might as well break/cut it off or remove it. It's still the cheapest class 1 bluetooth module out there, and it's the one I'm currently using.
I'm just giving you guys a heads up since it takes awhile to get these cheap parts from China. Hopefully I'll have some nice code written by the time they come. I'm figuring that most people here will think it worthwhile to have wireless monitoring for under $10.
I still have to write a program to monitor things with gauges and bells and whistles, unless you like watching numbers scroll by in a terminal window. The real handy thing will be when I write an Android app to do the monitoring on your phone! I'll probably have to charge a couple bucks for that since it costs to register as a developer and get into the app store, and it will be my first Android app so it will take quite a bit of time to learn everything and write it.
Don't wait, get your bluetooth gear now so you have it in hand when I turn out the code. It will be worth it! (you can still use cables I guess, but that's no fun)
-Jake
10-24-2012, 01:34 AM
#743
Senior Member
Join Date: Jul 2010
Location: Alkmaar, NETHERLANDS
Posts: 404
Likes: 0
Received 0 Likes
on
0 Posts
ORIGINAL: Nav-Aids
John I know where Rob is coming from. For years the only way to time a 2 stroke was by using a piston stop type tool that measured depth instead, I still use a dial depth gauge for small engines. Anyway we use to look up the factory timing spec. which was given as distance to TDC, some gave both distance and degree. Unless you had access to a 12 volt battery, a timing light was useless, so we measured distance. I know on newer snowmobiles that they have batteries or 12 volt power to hook up a timing light or we use a self powered timing light and you can go by degrees, if there are timing marks. But yah, unless you have the OEM spec a self powered timing light and degree wheel is the way to go. I've seen battery powered LED timing lights for small engines and want to make one this winter.
Ray
English http://translate.google.nl/translate...li%2Findex.htm
Start with the engine left up picture with 1.2 hp and ended with ~19 hp, thats wat you can do with a engine.
Playing with programmable CDI is fun, but you also have to use it.
Batterie powered flashlight http://www.electronics.gompy.net/strobelight/index.htm
10-24-2012, 01:59 AM
#744
Senior Member
Join Date: Jul 2010
Location: Alkmaar, NETHERLANDS
Posts: 404
Likes: 0
Received 0 Likes
on
0 Posts
ORIGINAL: jakestew
I've just gotten serial transmission working with the 1840! I've got it printing out the RPM once per sec. I also got my bluetooth module working, so now I can monitor the RPM wirelessly!
I've just gotten serial transmission working with the 1840! I've got it printing out the RPM once per sec. I also got my bluetooth module working, so now I can monitor the RPM wirelessly!
Given gas and wait for a second to see wat happen ?
Why don't you use the TX and RX of the micro to communicate ?
Even USB 1.1 will be faster then one second.
THis is wat we need, realtime monitoring and change on the fly, plug and play.

It's not fun if packman will do wat you want todo after one second.
Even my first "computer", the ZX80 was faster when I play snake.
The PIC program wasn't work well, but the monitor program was good.
http://www.electronics.gompy.net/cdi/index.html
Without reprogramming the chip we can change the ignitiontable......not the tables but the timing, we don't use tables.
The program was making realtime calculations after every rotation the hallsensor will be trigger and put the ignitiontime ready for the next round.
I'm a tuner, not a player, maybe thats why I have other intrest how programs work and wat todo with it.
I'm the man at the startgrid with the laptop connected to the bike to change at the last moment the values to win.
I'm also a _ user_ and not a programmer, I wish I was and I'm happy with your knowledge about programming.
But most programmers put to much *toys* or *nice to have* into there programs.
Again, I don't shoot you down.......It's positive critrical comment I given.
10-24-2012, 03:03 AM
#745
Senior Member
THis is wat we need, realtime monitoring and change on the fly, plug and play
Don't you already have that?
The PIC program wasn't work well, but the monitor program was good.
10-24-2012, 03:57 AM
#746
Senior Member
Join Date: Jul 2010
Location: Alkmaar, NETHERLANDS
Posts: 404
Likes: 0
Received 0 Likes
on
0 Posts
ORIGINAL: COM
THis is wat we need, realtime monitoring and change on the fly, plug and play
Rob,
Don't you already have that?
So your program did not do what you wanted? I thought you and the programmer were going to make a commercial unit. I saw a bug in how the pic operated, but everyone thought I was crazy.
THis is wat we need, realtime monitoring and change on the fly, plug and play
Don't you already have that?
The PIC program wasn't work well, but the monitor program was good.
You got mail [&o]
10-24-2012, 06:45 AM
#747
Join Date: Sep 2012
Location: Winnipeg, MB, CANADA
Posts: 50
Likes: 0
Received 0 Likes
on
0 Posts
ORIGINAL: Gompy
Dutch http://www.kreidler.gompy.net/Kreidl...elli/index.htm
English http://translate.google.nl/translate...li%2Findex.htm
Start with the engine left up picture with 1.2 hp and ended with ~19 hp, thats wat you can do with a engine.
Playing with programmable CDI is fun, but you also have to use it.
Batterie powered flashlight http://www.electronics.gompy.net/strobelight/index.htm
Ray
10-24-2012, 07:10 AM
#748
Senior Member
Join Date: Nov 2005
Location: Hamburg,
PA
Posts: 805
Likes: 0
Received 0 Likes
on
0 Posts
Ray, I have built Rob's timing light. It sure works nice, now that we can't use the led on the timer board!
I've tried Rob's suggestion for the cheap led flashlight for a multiple led bright strobe. That thing works really good and in near daylight conditions too. Worth the time spent on it.
Rob, is there a point on that board to make a direct connect to it and the timer board without having to use the antenna pickup coil over the sparkplug wire???
John
10-24-2012, 07:20 AM
#749
Senior Member
Join Date: Jul 2010
Location: Alkmaar, NETHERLANDS
Posts: 404
Likes: 0
Received 0 Likes
on
0 Posts
There is, use the SCR output from the PIC.
I was work on it, but you send me the CDI boards so I have to stop with the flashlights.......your fault
I was just into town to buy some new SCR to use the strobe flashlight with Xenontube.
When I test the first desgne, I forgot the Voltage is turn backwards when the light flash.
The SCR don't like it and blowup, now I'allmost done with it, only findout the switching points wothout disturbe the CDI.
10-24-2012, 07:41 AM
#750
Senior Member
Join Date: Nov 2005
Location: Hamburg,
PA
Posts: 805
Likes: 0
Received 0 Likes
on
0 Posts
Thanks Rob!!
Post a small picture or schematic showing where to hook it up and extra parts needed to do it. I'm sure everyone will want to know how to do it!
I was testing this morning on my engine. Made a few new curves and now I need a curve for a small 4 stroke. Tried the 2 stroke curves but it just throws my prop off when I rev it up, a little dangerous!
Anyone experimenting with 4 stroke curves at all?
John