


Electronic solutions to modifying glow engines of all sizes to gasoline
 08-26-2022, 09:00 AM
#551

as soon as i start printing in ASA (ABS, which is coming very soon) and you tell me the dimensions you need in millimeters (because everything in 3d printer world is in metric) : collar diameter, offset distance of sensor turret from collar diameter, and height of turret. if you need the turret sloped towards the prop hub i'll need the diameter at the top of the turret or the angle of the slope.
i'm pretty sure i'll need a separate design for saitos because of the gussets and cam housing at the front of the engine but this design should work on OS, Magnum, and ASP engines.
i'm pretty sure i'll need a separate design for saitos because of the gussets and cam housing at the front of the engine but this design should work on OS, Magnum, and ASP engines.
 08-26-2022, 09:54 AM
#552

AM wondering about the fuel draw issue.
What if there is a sleeve inserted in the carb to reduce the diameter of the opening of the barrel?
That part is easy to take out of the carb by just removing one easy to get at screw from the top.
Was thinking of taking some sheet plastic, cut a strip and roll it into a cylinder shape and slide that in the barrel.
There need to be 2 holes cut in the sleeve for the needles to pass trough but that should not be to dificult.
What do you guys think? might this work or does the sleeve need to be mounted above the barrel part?
08-26-2022, 10:28 AM
#553
Senior Member
Thread Starter
Some succes and the next problem.
Was able to get the engine to fire but it only runs a short while off it prime.
It does not draw fuel unless i put a finger over the air intake.
In all am verry happy with the result; it tried to escape the tub twice so there is life in the bugger.
No video it where just short burst so no time to start recording
AM wondering about the fuel draw issue.
What if there is a sleeve inserted in the carb to reduce the diameter of the opening of the barrel?
That part is easy to take out of the carb by just removing one easy to get at screw from the top.
Was thinking of taking some sheet plastic, cut a strip and roll it into a cylinder shape and slide that in the barrel.
There need to be 2 holes cut in the sleeve for the needles to pass trough but that should not be to dificult.
What do you guys think? might this work or does the sleeve need to be mounted above the barrel part?
What if there is a sleeve inserted in the carb to reduce the diameter of the opening of the barrel?
That part is easy to take out of the carb by just removing one easy to get at screw from the top.
Was thinking of taking some sheet plastic, cut a strip and roll it into a cylinder shape and slide that in the barrel.
There need to be 2 holes cut in the sleeve for the needles to pass trough but that should not be to dificult.
What do you guys think? might this work or does the sleeve need to be mounted above the barrel part?
If it draws fuel with a finger over the carb, but not when "running free", the needle is not opened far enough or there is an obstruction of fuel flow.
08-26-2022, 11:08 AM
#554
Am worried about ever revving so am starting in the water.
The engine starts if it has fuel but it just doesn't draw it from the tank by itself.
The carb has been apart so have no idea about the needle setting.
Will also put some fuel tubing around the needle just in case there is a air leak there
Try again in a few days and see .
The fact this thing starts at all after being stored with water inside is already amazing.
08-26-2022, 12:11 PM
#555
Senior Member
Thread Starter
08-26-2022, 01:19 PM
#556
Am worried about ever revving so am starting in the water.
The engine starts if it has fuel but it just doesn't draw it from the tank by itself.
The carb has been apart so have no idea about the needle setting.
Will also put some fuel tubing around the needle just in case there is a air leak there
Try again in a few days and see .
The fact this thing starts at all after being stored with water inside is already amazing.
The engine starts if it has fuel but it just doesn't draw it from the tank by itself.
The carb has been apart so have no idea about the needle setting.
Will also put some fuel tubing around the needle just in case there is a air leak there
Try again in a few days and see .
The fact this thing starts at all after being stored with water inside is already amazing.
Leaky or missing oring at the carb base
Leaky or missing back plate gasket
Leaky or missing crankcase gasket (2 piece crankcase)
Obstruction in carb spray bar
Obstruction in carb fuel nipple
Obstruction in fuel line or clunk
Obstruction in crankshaft fuel passage (front mounted carb)
Split or hole in fuel line
High speed needle not opened enough
Leaky or missing high speed needle oring
Leaky or missing low speed needle oring
Throttle not opened far enough (airbleed carb)
Very weak compression
08-26-2022, 02:06 PM
#557
A few things that may cause a 2 stroke glow engine to not draw fuel:
Leaky or missing oring at the carb base
Leaky or missing back plate gasket
Leaky or missing crankcase gasket (2 piece crankcase)
Obstruction in carb spray bar
Obstruction in carb fuel nipple
Obstruction in fuel line or clunk
Obstruction in crankshaft fuel passage (front mounted carb)
Split or hole in fuel line
High speed needle not opened enough
Leaky or missing high speed needle oring
Leaky or missing low speed needle oring
Throttle not opened far enough (airbleed carb)
Very weak compression
Back plate gasket yes that is a suspect.
On piece crankcase so no leak there
Carb was taken apart and cleaned so no obstrutions there.
Hole in fuel line. checked and no leak that i can see.
High speed needle not open enough; likely since i had no idea about the settings.
High speed needle has its o-ring but its a suspect (harderned?) so i put a bit of fuel tubing over the outside of the needle for now.
Its a 2 needle carb s no air bleed to worry about
Verry weak compression. compression is good; it even still has this "pinch" at the top.
Tomorrow if all goes well try again and see if opening the main more with the fuel tubing over it helps
If that fails might have to pull the backplate and change that gasket
Also priming is done by puting a finger over the air intake witht the carb open/ full throttle and it does draw that way.
This also implies the carb is not blocked.
This does not prove the main needle is open enough though or the needle does not have a air leak.
If these things fail then il put a carb from another engine on it and see if that changes performance.
08-26-2022, 02:55 PM
#559
On the solenoid that could be a feature to slowly incease the amount of fuel until the engine fires.
Then flick a switch on your tx to "save" that setting as a start position.
Anyone else who thinks that could be usefull?
08-26-2022, 03:00 PM
#560
Senior Member
Thread Starter
08-26-2022, 03:22 PM
#561
You just never know what kind of trouble will show up on your doorstep when buying used.
08-27-2022, 07:38 AM
#562
White smoke ?
So engine runs and draws fuel.
Needless to say it showed the next problems.
The pressure nipple from the exhoust fell off relative easy fix once i can borrow a rivet tool to close the hole and make a better one.
Bigger is that the cooling loop isnt working. there is no pressure from the pickup (think its way to far from the screw)
Once a electric pump was hooked up the next cooling problem showed.
There is a blokage at the head and a leak so there is water running out the side of the head but none out of the top part of the cooling (there are 2 rings)
If you rename the atatched zip to mp4 you can see a higly compressed clip.
Only 7 sec that is how long i could keep the boat onder controll, hold the camera (forget steady ) and hold my breath
Going to dry everything and start thinking on how to get the cooling head both sealed and clear so the water goes where it needs to.
Anyway good progress
Last edited by cmulder; 08-27-2022 at 10:08 AM.
08-27-2022, 07:42 AM
#563
This thing needs to be stripped down and rebuild from the ground up.
Last edited by cmulder; 08-27-2022 at 08:27 AM.
08-27-2022, 05:06 PM
#564

Yes sir. The 200ti however is documented in the inverted mounting orientation, that's how Saito designed it to run. So once flipped over inverted the rear cylinder is the right, the front is the left. Tricky! That threw me at first too.
I would agree that the cam profiles could be slightly different, however this is a preowned engine with different wear patterns on each tappet. One of them is worn into a domed shape and two of them have flat spots at the edges.
As it is, the opening and closing events are measured from just off the base circle of the lobe, so irregularly worn tappets could easily account for a few degrees of crank angle variance when measuring. The only way to be 100% sure is to measure using new parts and zero valve lash.
That threw me at first too.I would agree that the cam profiles could be slightly different, however this is a preowned engine with different wear patterns on each tappet. One of them is worn into a domed shape and two of them have flat spots at the edges.
As it is, the opening and closing events are measured from just off the base circle of the lobe, so irregularly worn tappets could easily account for a few degrees of crank angle variance when measuring. The only way to be 100% sure is to measure using new parts and zero valve lash.
Not surprised about the lobe wear, its not the highest grade sintered powdered metal. You got the info for a set of cams, just about $75 and some shipping, probably wouldn't tell the difference, but that engine being limited production, it may be worth picking up a set before they become scarce.
08-27-2022, 05:27 PM
#565
That engine would pair nicely with a 1/4 scale tiger moth.
Not surprised about the lobe wear, its not the highest grade sintered powdered metal. You got the info for a set of cams, just about $75 and some shipping, probably wouldn't tell the difference, but that engine being limited production, it may be worth picking up a set before they become scarce.
Not surprised about the lobe wear, its not the highest grade sintered powdered metal. You got the info for a set of cams, just about $75 and some shipping, probably wouldn't tell the difference, but that engine being limited production, it may be worth picking up a set before they become scarce.
The 200TI will get mounted on a 25% Taylorcraft Clipped Wing for flight testing purposes and then get moved to a 25% Dave Platt Fairchild PT-19 kit I have. Probably won't get to that for a few years yet. Yes, a Tiger Moth is an excellent choice as well.
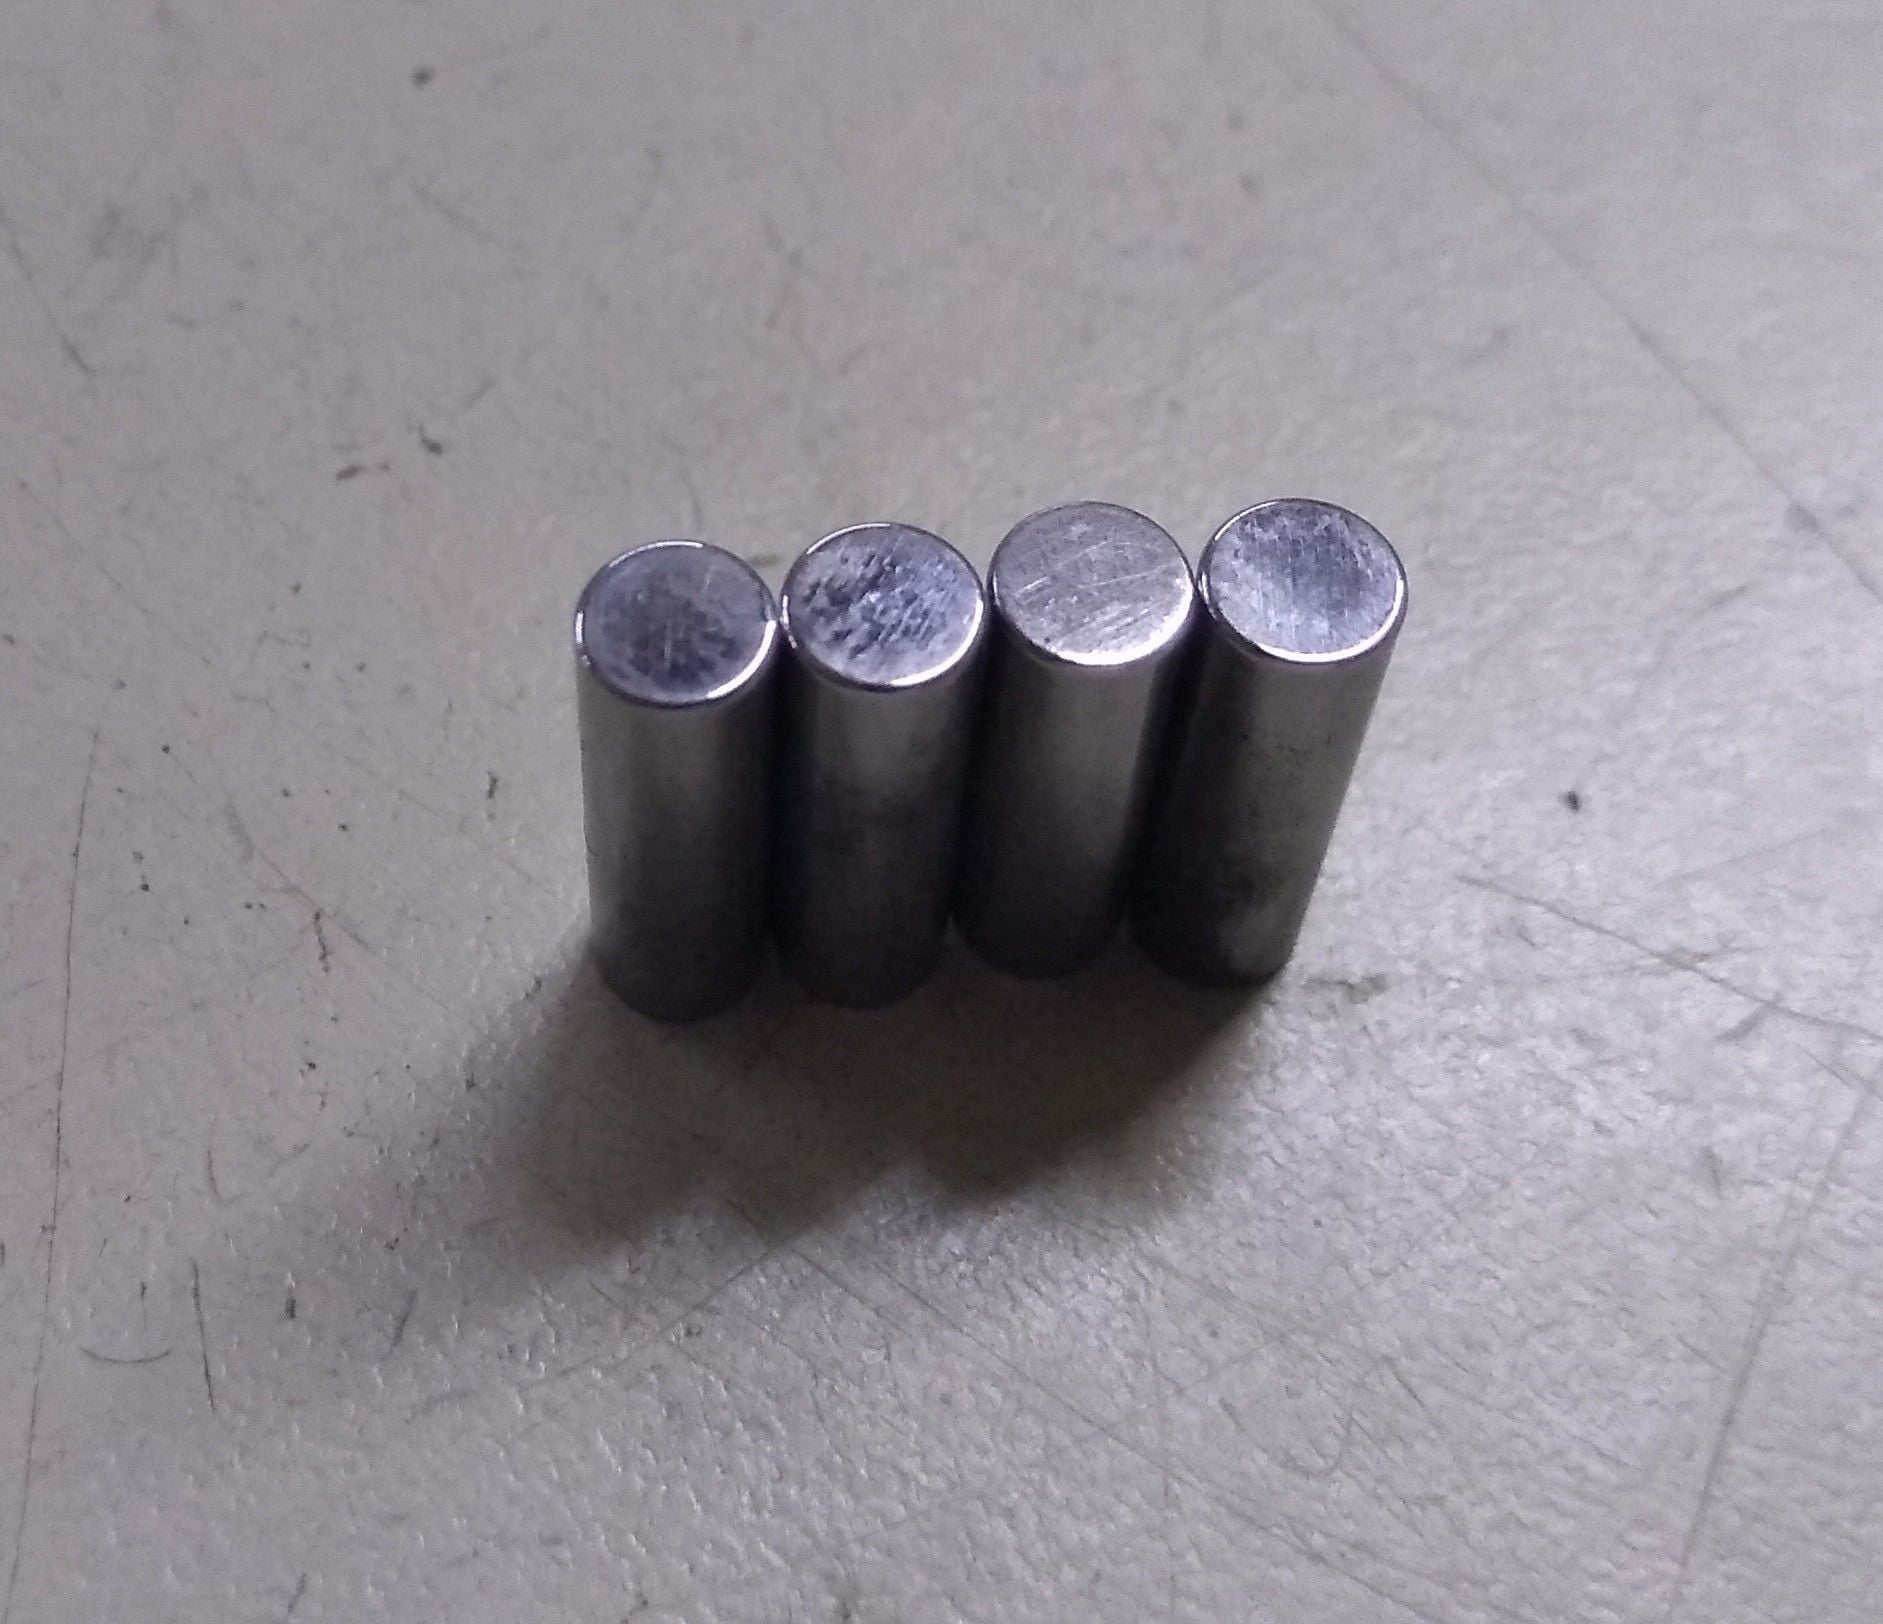
Now that I've zoomed in on the pic I may hit face faces with a finer grit sandpaper. I don't like seeing those sanding lines after polishing.
Last edited by Glowgeek; 08-27-2022 at 05:29 PM.
08-27-2022, 09:56 PM
#566
Thats why I stopped using castor oil in the 4 strokes, isn't really necessary.... valve float can happen when under propping the engine, valve lash doesn't matter at that point, the followers bounce off the cam face... the smaller dia followers, follower the cam profile, and the cam profile is designed around the followers, they work together as a set... large flat button head followers change the valve duration.
Animation: Cam follower types
https://ibb.co/x1Z9pMB
Animation: Cam follower types
https://ibb.co/x1Z9pMB
 08-28-2022, 01:27 AM
#568
Some plastics that dissolve in acetone can be made smooth with a procedure called "vapor smoothing"
This might also work on asa .
It looks nice but does not really make the part stronger.
This might also work on asa .
It looks nice but does not really make the part stronger.
08-28-2022, 01:49 AM
#569
Senior Member
Thread Starter
A buddy of mine got himself a resin printer. Those things do print really smooth and without the "porosity" that I see sometimes with filament printers.
No idea if it is just as strong though.
No idea if it is just as strong though.
08-28-2022, 04:38 AM
#570
That is basicly the same as the graupner and master airscrew prop plastics.
Resin needs to be translucent enough to allow uv light to reach every part of the inside to make it cure/harden.
The printer only part cures the resin to speed up printing; a part needs to be "post cured" to reach full strength.
This limits what you can mix with the plastics to reinforce it.
For example there is resin that has ceramic powder. The procedure is to place the printed part in a oven/kiln that burns off the resin and bakes/sinters the ceramic.
That results in a part that can hande high heat. In this aplication the resin only needs to cure enough for the part to hold it shape until burns off so the fact this resin is far less translucent is less of a problem.
In general when common "hobby grade" materials are used then fdm/filament prints are stronger/ less brittle at reduced resolution.
Last edited by cmulder; 08-28-2022 at 06:45 AM.
08-28-2022, 08:32 AM
#571
Thats why I stopped using castor oil in the 4 strokes, isn't really necessary.... valve float can happen when under propping the engine, valve lash doesn't matter at that point, the followers bounce off the cam face... the smaller dia followers, follower the cam profile, and the cam profile is designed around the followers, they work together as a set... large flat button head followers change the valve duration.
Animation: Cam follower types
https://ibb.co/x1Z9pMB
Animation: Cam follower types
https://ibb.co/x1Z9pMB
Interesting that the large case Saitos don't suffer the tappet wear found with the small/mid sized case displacements. Even though the cams are made of the same sintered metal the large Saitos have "mushroom" tappets (larger diameter adjacent to the lobes). I have never had to replace tappets on used large case Saitos but have had to replace tappets on more than 80% of the used small/mid case Saitos I have overhauled. The cam profiles are indeed different between those case sizes, have to be.
OS engines, and their clones, also have larger diameter tappets. I have never had to replace any of them during overhauls either. Not a single one.
I think Saito used lighter weight drive train components in those small/mid size cased engines to hold higher revs before valve float. They were competing for market share where 2 strokes ruled and needed to push the rpm limits. The Saito 50 makes peak HP at over 13k, the 56 & 62 at over 12K. With no valve float BTW. A bit beyond the reaches of similar sized OS and clones.
I know Bert won't like this but I LOVE the sound of screaming 4 strokes.

Last edited by Glowgeek; 08-28-2022 at 08:57 AM.
08-28-2022, 09:13 AM
#572
Well one interesting thing about OS, they machine their cams, not form them from powdered metal... OS boxers mimic a VW boxer with the mushroom followers, then look at the cam profile that is designed to work with those followers... The saito cam followers on the small engines have a well balanced valve train in relationship to to valve spring tension and the reciprocating masses... but another interesting thing on the 50cc 4 stroke I run, I can barely push the valves down with my fingers... They control RPM with varying valve spring tension between the intake, and the exhaust... The standing height on the exhaust valve spring is a third of that of the intake, and when the exhaust valve spring reaches it critical rpm where the valve begins to float, it limits rpm ( built it rev limiter ).
08-28-2022, 09:26 AM
#573
Well one interesting thing about OS, they machine their cams, not form them from powdered metal... OS boxers mimic a VW boxer with the mushroom followers, then look at the cam profile that is designed to work with those followers... The saito cam followers on the small engines have a well balanced valve train in relationship to to valve spring tension and the reciprocating masses... but another interesting thing on the 50cc 4 stroke I run, I can barely push the valves down with my fingers... They control RPM with varying valve spring tension between the intake, and the exhaust... The standing height on the exhaust valve spring is a third of that of the intake, and when the exhaust valve spring reaches it critical rpm where the valve begins to float, it limits rpm ( built it rev limiter ).

What engine is that? Gaui?
Last edited by Glowgeek; 08-28-2022 at 09:31 AM.
08-28-2022, 05:32 PM
#574
When the inserts arrive for the 200ti I plan on starting it on methanol and CDI first to check that all is ok. This engine has a C/R of 13.68:1. Quite high. Hobbsy/I TOBOR had trouble with detonation running his high compression Saito 80 engine at 34� btdc on methanol, said he had to dial it back to 30� before it behaved. The early 80 had 15.5:1 CR.
Perhaps 30� is where I should start, then sneak up on optimum? That brings up the questions, What is optimum? Peak power minus 1 degree? 2 degrees? Is it the same for methanol as for gas?
Perhaps 30� is where I should start, then sneak up on optimum? That brings up the questions, What is optimum? Peak power minus 1 degree? 2 degrees? Is it the same for methanol as for gas?
08-29-2022, 07:21 PM
#575
The Gaui F-50R 50cc 4 stroke.
You'll want to setup ign timing at 28� with the 13.68:1 cr, and keep the plug gap at around 0.20" - 0.25" mox... depends on the spark energy, those Saito boxes don't put out much... the later CH boxes put out 30k I believe, nice crisp blue spark... you'll know when the plug gap it too wide, the engine will faulter badly as rpm increases.
You'll want to setup ign timing at 28� with the 13.68:1 cr, and keep the plug gap at around 0.20" - 0.25" mox... depends on the spark energy, those Saito boxes don't put out much... the later CH boxes put out 30k I believe, nice crisp blue spark... you'll know when the plug gap it too wide, the engine will faulter badly as rpm increases.