


Saito FG-60R3


 04-17-2019, 08:27 PM
#2227

Join Date: Jan 2007
Location: Dubai, UNITED ARAB EMIRATES
Posts: 500
Likes: 0
Received 2 Likes
on
2 Posts
The original plugs that come with the engine have a �groove� cut into the edges of where the spanner goes (don�t know the tech term), others do not. My solution to that was to whip a mm if the bottom of the plug caps so the spring clips fit.
 04-18-2019, 04:20 AM
#2229
Join Date: Jan 2007
Location: Dubai, UNITED ARAB EMIRATES
Posts: 500
Likes: 0
Received 2 Likes
on
2 Posts
Fantastic! Great flying.
its certainly busy at that field...jets, trains, cars, power lines...you got the whole deal there 😄😄
you have the new piston/cylinder style engine, right? Did you have any other mods or just standard.
i wish mine went like that!
its certainly busy at that field...jets, trains, cars, power lines...you got the whole deal there 😄😄
you have the new piston/cylinder style engine, right? Did you have any other mods or just standard.
i wish mine went like that!
04-18-2019, 02:04 PM
#2230
Senior Member

Yeah, I have the new piston/cylinder style Saito. The only mod I did was the MMM ignition ring.
I baffled the engine really well and the temps never exceed 135 degrees C. The engine runs really cool.
In my point of view the engine is the most happy between 6-7 KRPM.
04-26-2019, 01:01 PM
#2231
Join Date: May 2007
Location: Sherwood,
OR
Posts: 76
Likes: 0
Received 0 Likes
on
0 Posts
All,
I purchased the Morris Mini intake mod for my Fg60r3 and while doing the install I noticed two things that did not make sense. First is that the intake tube, internal diameter is only 7mm versus the 8.5mm on the stock intake. Second is that the location of the carburetor to manifold set screw is about 8* from the stock part. (stock is bottom center) That causes the carb to set at an angle and the throttle linkage now hits the motor mount. I have sent an inquiry to Mr Morris last week, but no response.
What dimensions and set screw location did you guys find on your intake mods? I am thinking I got the wrong manifold....
TX Jeff
04-27-2019, 09:34 AM
#2232
Join Date: Nov 2003
Location: Link�ping, SWEDEN
Posts: 47
Likes: 0
Received 0 Likes
on
0 Posts
Jeff
I have same problem . Found carb set at an angle, was lucky that i have not finnished throttle
linkage installation and did minor modification of pushrod.
First was it impossible to install intake tube , after some grease on tube i made it but it was difficult. this part should have same dimensions as original saito intake.
04-27-2019, 10:09 AM
#2233
Join Date: May 2007
Location: Sherwood,
OR
Posts: 76
Likes: 0
Received 0 Likes
on
0 Posts
F3A, the first time I put the carb on it was really tight, but after a couple of R/R it loosened up enough to go on OK. I had to start over on my linkage because of the location of the servo,hole in the firewall, etx. It is done now so my main concern is the intake ID being so much smaller. It could be the wrong part (like maybe for the FG33r3 or ?) or it could be Morris found the the higher velocity was needed for better fuel/air atomization or ? In any case I thought I would have heard back from him by now. Also, no instructions came with the new part, but I remember him saying to plug the crankcase vent, and I did that. I hope to run it tomorrow. I am going to run it with the 20/1 Stihl oil to start with and I hope to get some feedback on what the best oil/fuel mixture is for this setup.
04-27-2019, 11:41 PM
#2234
Join Date: Jan 2007
Location: Dubai, UNITED ARAB EMIRATES
Posts: 500
Likes: 0
Received 2 Likes
on
2 Posts
Jeff, when you say the intake tube, do you mean the phenolic tube between the carb and the backplate or are you talking about the backplate hole itself? Or are you talking about the three red inserts that they install? sorry, just want to make sure we are all on the same page. It will affect the flow of the fuel/air mix, whether positive or negative, I can say, but usually a restriction is not good. Just so I know...when you sent your backplates in to Morris, was the phenolic tube (the orange coloured one) still in the back plate or did you remove it first?
With regards to the location of the set screw, I never really noticed any difference, so maybe mine is in the right place. It went back on the same old plane and didnt encounter any problems with the linkages....not sure until I get a chance to check on mine, and I am nowhere near the engine at the moment....will have a look when I can. Modding the linkages is mostly easy, but I understand how it could be a little irritating.
There are no instructions, but its a simple thing to do really. The backplate can only be installed ONE way around, and the little pipe for blocking the breather is simple enough. If you dont want to use that, you could always just put a short screw in there with a fiber washer I suppose....
I did ask Morris about the fuel mix, and he is running this conversion on 30:1 since the crank is getting lube from the fuel mix as it goes through the crankcase, this means a less concentrated mix is used. I imagine 30:1 would be ok then.
Regards
BTW, I havent spoke to Morris in a while, but I know he travels sometimes so hopefully he will get back to you soon...
04-28-2019, 06:07 AM
#2235
Join Date: May 2007
Location: Sherwood,
OR
Posts: 76
Likes: 0
Received 0 Likes
on
0 Posts
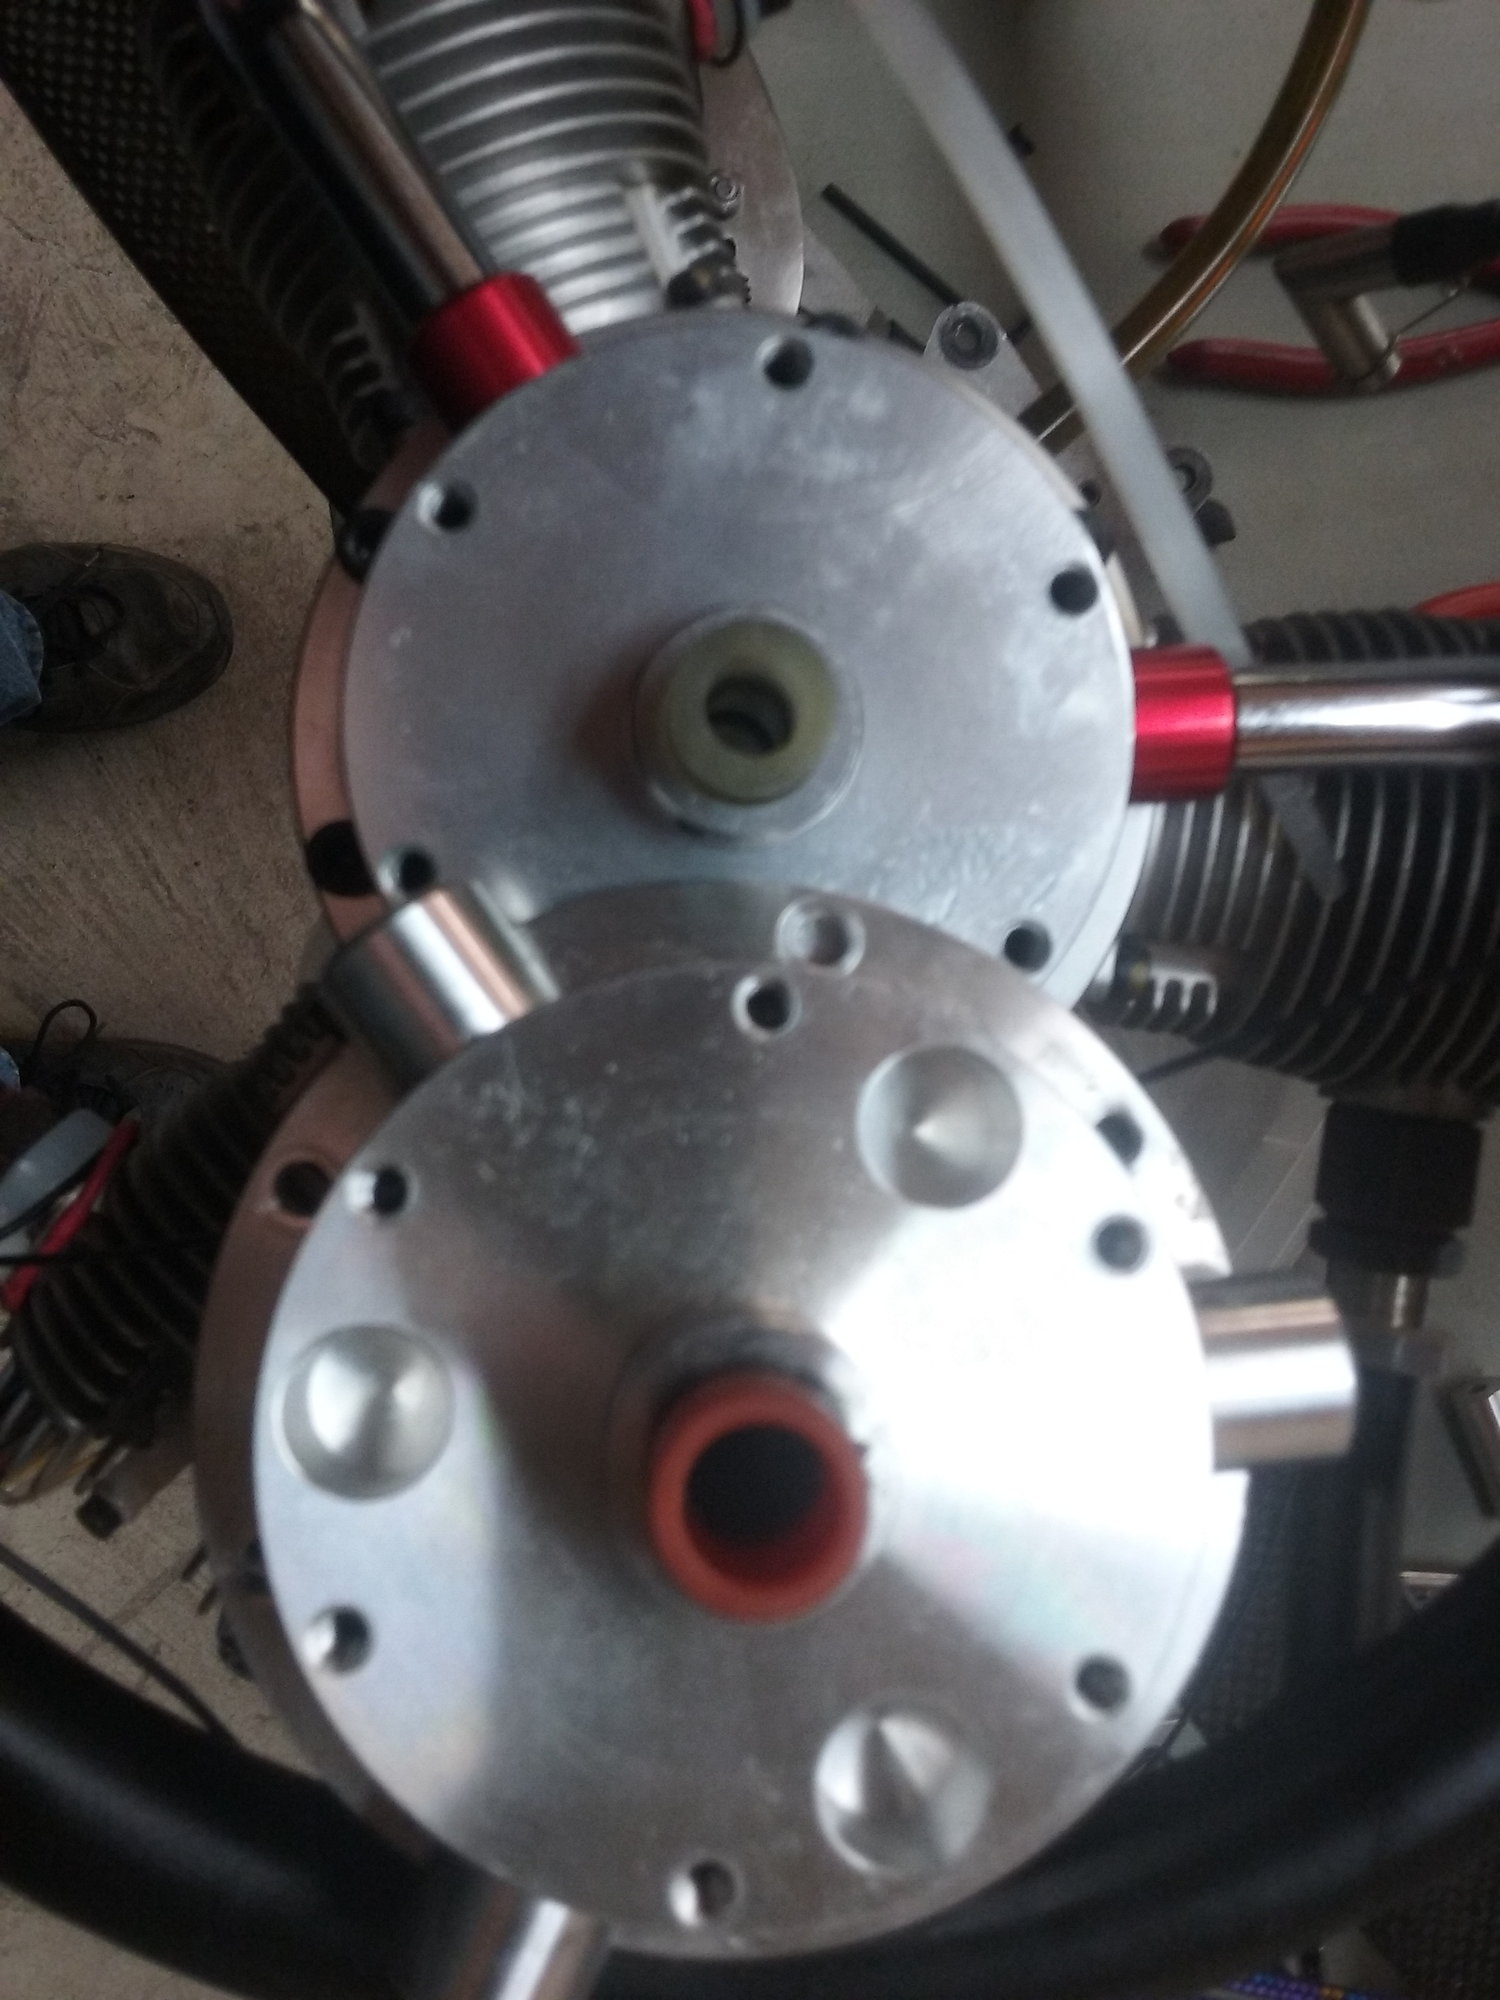
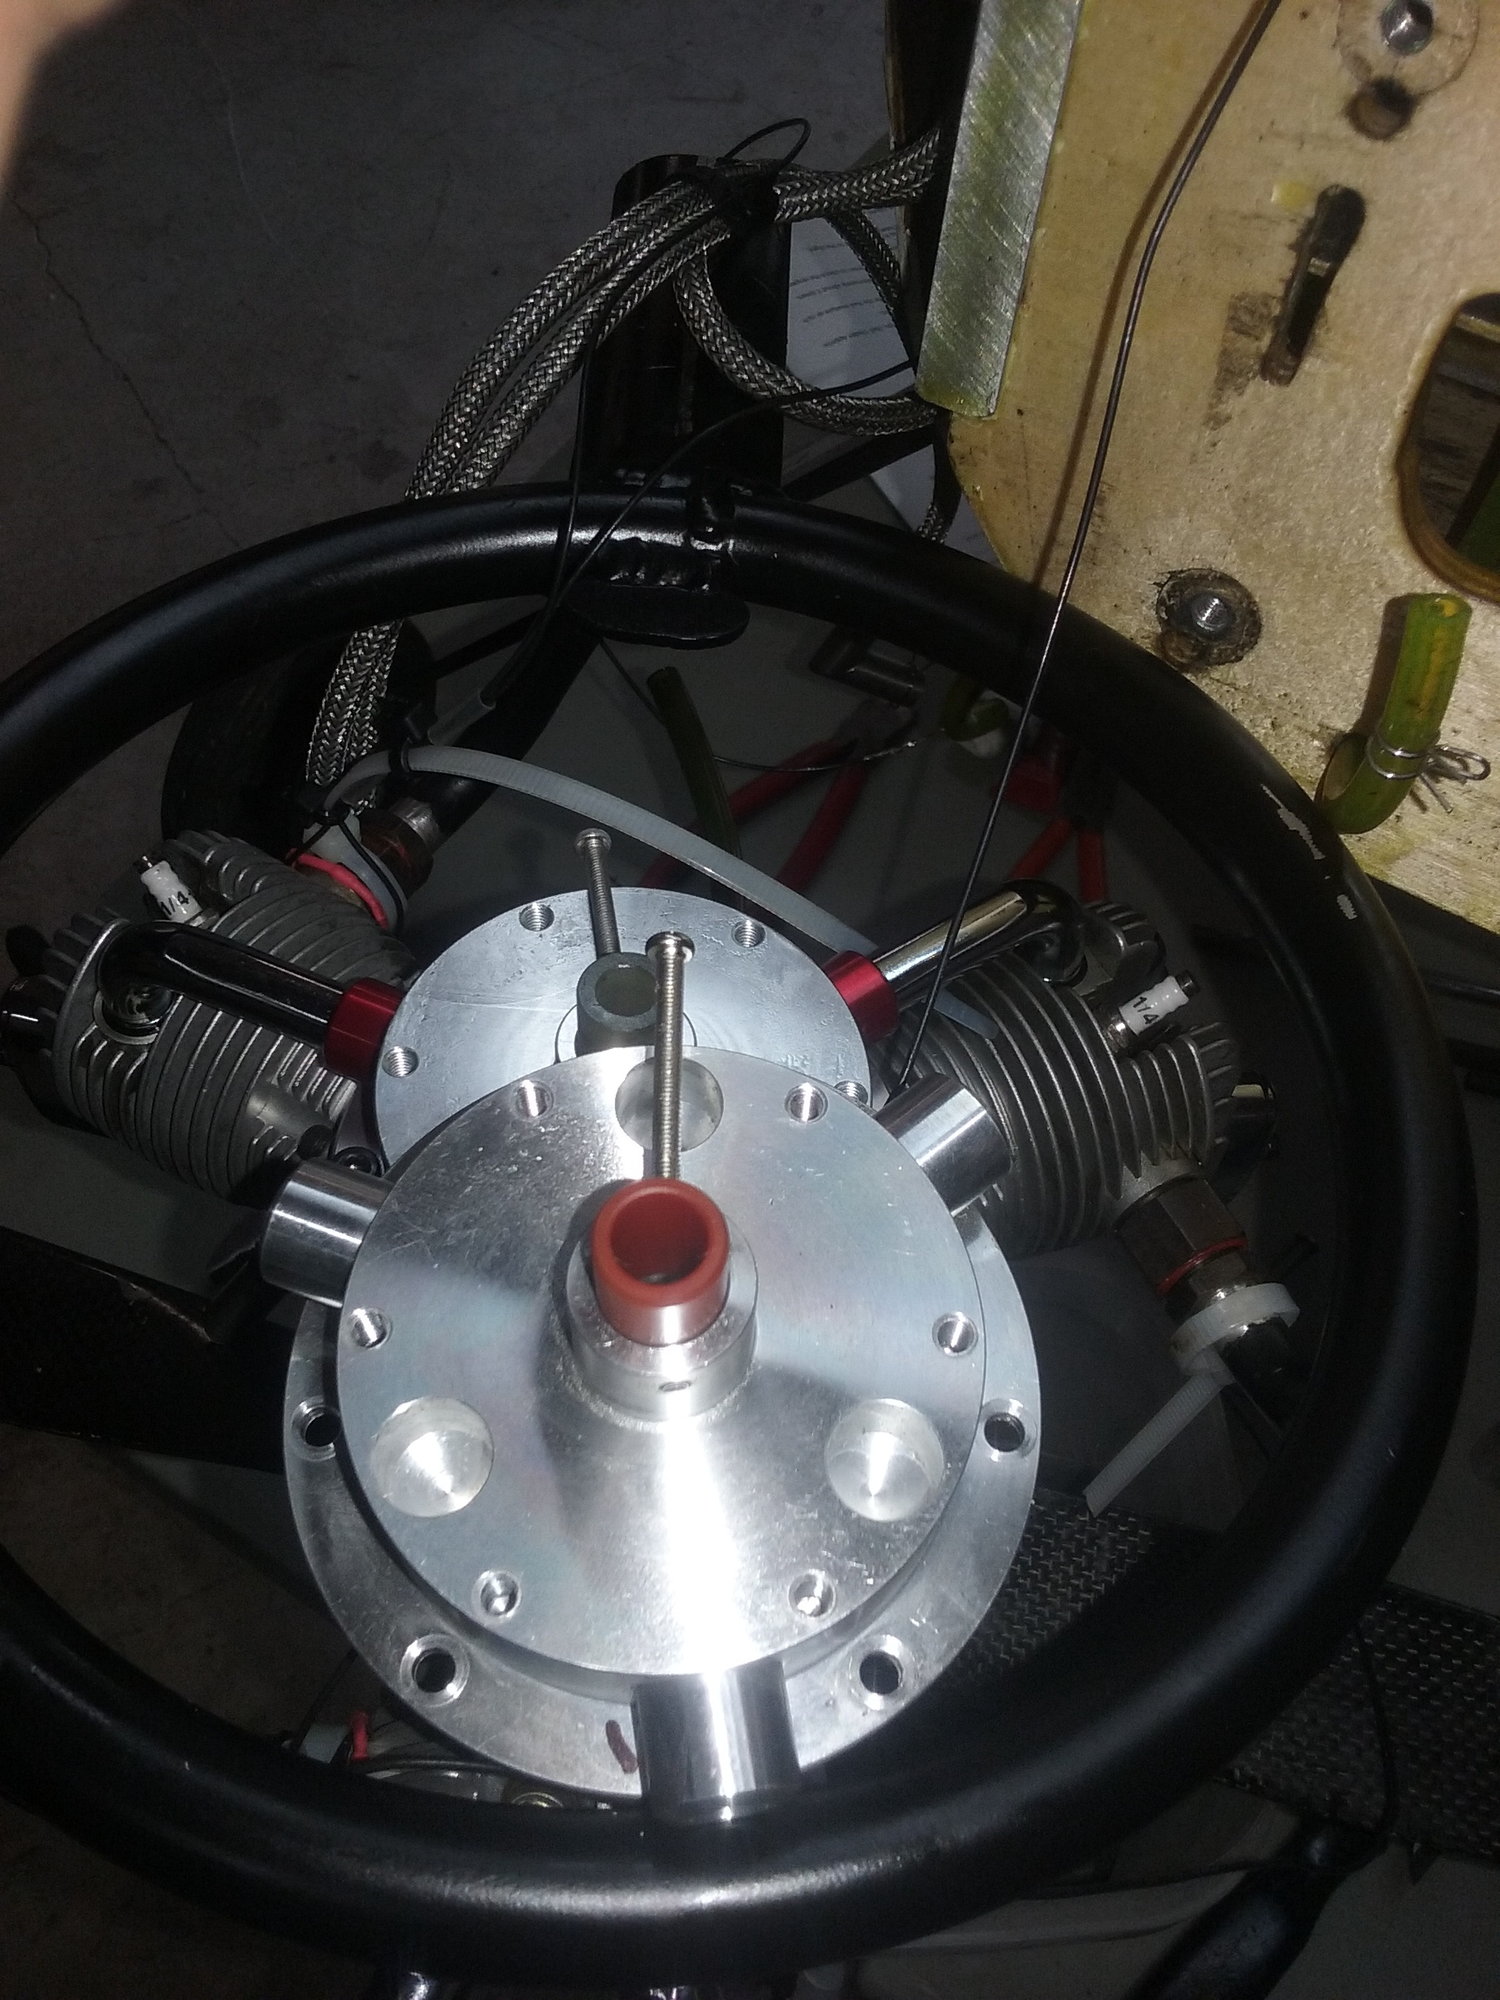
Cathurga, I am talking about the ID of the phenolic tube that the carb attaches to. I did not send my backplate to Morris. I purchased the new complete assembly. In the second pic you can see the shift in the set screw position. I put the long screws in just to show the positions. The pictures do not seem to be uploading.
Can I just exchange the original tube for the one that can with Morris's unit? or does the modification require the smaller diameter tube?
Can I just exchange the original tube for the one that can with Morris's unit? or does the modification require the smaller diameter tube?
04-28-2019, 06:11 AM
#2236
Join Date: May 2007
Location: Sherwood,
OR
Posts: 76
Likes: 0
Received 0 Likes
on
0 Posts
Cathurga, I am talking about the ID of the phenolic tube that the carb attaches to. See the pics below. I did not send my backplate to Morris. I purchased the new complete assembly. In the second pic you can see the shift in the set screw position. I put the long screws in just to show the positions.
04-28-2019, 09:10 AM
#2237
Join Date: Jan 2007
Location: Dubai, UNITED ARAB EMIRATES
Posts: 500
Likes: 0
Received 2 Likes
on
2 Posts
Yeah, ok. I see what you mean. I had my plate modded so they never touched the set screw, its still in the same place. As far as that phenolic tube is concerned, I dont know the scientific reason, if one exists, as to why a smaller aperture would benefit, but perhaps just remove it and drill it out to a larger diameter, there is plenty of material there. Just use a drill press or a lathe if you have one. I dont know if anyone has ever tried to remove that tube....I have.... the original one had to be dug out, and eventually, drilled out. I find that bakelite is the material, and it can be bought in rods so pretty simple to make a new one, only if you know someone with a lathe. If anyone wants, I have a diagram of the sizes it needs to be turned to...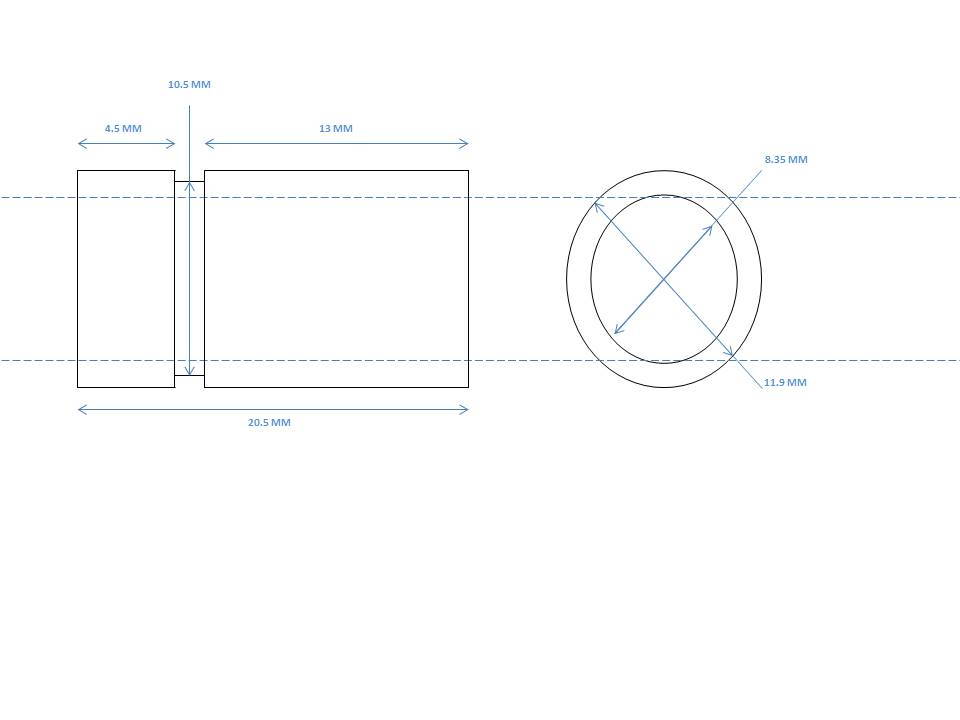
Last edited by cathurga; 04-28-2019 at 09:22 AM.
04-28-2019, 08:59 PM
#2239
Join Date: Jan 2007
Location: Dubai, UNITED ARAB EMIRATES
Posts: 500
Likes: 0
Received 2 Likes
on
2 Posts
Jeff,
With the way that had to get the first one out, you would have thought so, but I recall many people saying earlier in this thread, that theirs came out quite easily, so I dont think it is. I dont know if Morris is glueing his one in or not.
The ones that I had turned down according to the diagram above, are pretty tight, but I can get them out. I normally slide them in with a bit of grease around it so that it creates a seal, but I can get them out, with some encouragement. I recently bought a carb throttle body and noted that Saito are now shipping them with a 'white' tube and the tube is pre-installed in the throttle body so I dont expect they want you to glue it in to the backplate, that is why the set (grub) screw and the other screw are there, to ensure it doesnt come out. I suppose that if there was any airgap there, it could possibly cause the engine to lean out, but I have run the engine and sprayed 'easy start' around the joint to see if there is any rev change or sign of fluid being sucked in there, and not seen any evidence of leaking air.
I actually had a tube turned down out of teflon tube to the same spec and although it worked, there was some flex there which I didnt like, and Teflon does seem to get a little softer whenit gets hot, so I dismissed that as an option and just went with the bakelite. One option when inserting, if you did want it a little more secure, is to put some locktite flange sealant on the tube before sliding it in.
05-01-2019, 06:48 AM
#2240
My Feedback: (3)
If Morris doesn't answer just call him he will pick up the phone. I just went through the conversion on my smaller FG-19R3 radial (I haven't done my FG-60R3 yet since it runs rather well and I'm not concerned about it yet).
Anyways what you are saying is your carb screws no longer line up when sliding your carb onto Morris' intake right? This is because his carb isolator is too long. You will need to find someone with a lathe, chuck up the entire intake, and turn the carb isloator down a bit so the carb fits on square and the mounting screws line up. This is what I needed to do. I could not remove his carb islolator. Its either glued in or pressed in really tight and I figured if I gripped it hard enough with a pliars I would crush it.
Did you buy the adjustable timing prop hub/ring too? Make sure you seat the prop hub (and ring too) first by putting the propeller on and tightening the entire assembly down so it presses the prop hub onto the engine squarely. Then use a little blue threadlock on the grub screw and tighten that down 2nd. If you tighten the grub screw first, then put your prop on, the prop hub will move backwards and drag the grub screw causing it to bend, and you will never get it out again without cutting the prop hub off. At least this was my experience with the 19, and I think the same will apply to the 60.
I did the conversion myself, no need to send it to him. It worked rather well on my FG-19R3 on the ground, I'm waiting for the rain to stop so I can try it in the air.
Cathurga, I am talking about the ID of the phenolic tube that the carb attaches to. See the pics below. I did not send my backplate to Morris. I purchased the new complete assembly. In the second pic you can see the shift in the set screw position. I put the long screws in just to show the positions.
05-02-2019, 12:20 PM
#2241
Join Date: May 2007
Location: Sherwood,
OR
Posts: 76
Likes: 0
Received 0 Likes
on
0 Posts
I talked to Mr Morris yesterday by phone. He said I should have gotten a carb tube with the 8.35mm hole, and he is sending me a replacement. In any case he said to go ahead and run the engine with the 7mm hole tube since it matches the carb throat diameter. He said the OEM red carb tube from saito is glued in, but his are sealed with an O-ring and held with the grub screw, so they can be replaced. The FG60r3 carb to manifold screw alignment is not the same as the other motors and he has corrected his for future shipments. I have restructured my carb linkage to make it work. I have plugged the crankcase vent and changed the fuel/oil ratio to 30/1. Timing is set at 30btdc on cyl #1 (green) magnet. Timbers, Thanks for the tip on tightening the prop hub and timing ring.
I ran the motor for 22 minutes yesterday. The results are promising. The cylinder temperature spread is reduced dramatically, but still high on the idle range. The throttle response is good at all rpms, max rpm is the same (6600) with the 22x8" prop. I did richen the HS needle from 1 1/4 out to 1 1/2 turns. LS needle is still at 4.5 turns. I don't have thrust measurements yet. When I have optimized the carb settings, I will post the temps and thrust numbers.
I ran the motor for 22 minutes yesterday. The results are promising. The cylinder temperature spread is reduced dramatically, but still high on the idle range. The throttle response is good at all rpms, max rpm is the same (6600) with the 22x8" prop. I did richen the HS needle from 1 1/4 out to 1 1/2 turns. LS needle is still at 4.5 turns. I don't have thrust measurements yet. When I have optimized the carb settings, I will post the temps and thrust numbers.
05-13-2019, 12:52 PM
#2242
Junior Member
Join Date: May 2019
Posts: 3
Likes: 0
Received 0 Likes
on
0 Posts
Good day. I had trouble.
Broken: 2 Cylinder, Rocker, Rocker Cover..........
I have a question: Maybe someone has a broken motor? I would buy parts
http://www.youtube.com/watch?time_co...&v=phZXT_2iFxM
Broken: 2 Cylinder, Rocker, Rocker Cover..........
I have a question: Maybe someone has a broken motor? I would buy parts
http://www.youtube.com/watch?time_co...&v=phZXT_2iFxM
05-19-2019, 11:43 PM
#2245
Join Date: Jan 2007
Location: Dubai, UNITED ARAB EMIRATES
Posts: 500
Likes: 0
Received 2 Likes
on
2 Posts
How are things going out there in FG60R3 land?! Its a bit quiet in here so assuming all is well.
Not so on my side. I put the engine back together, with the timing ring and the induction mod from MM and thought I would get 'clever' and see if it would run on a Walbro carb. I had a spare from a DLE55RA that I had lying about, as well as the MM Walbro conversion kit. Installed on my test stand, and managed to get it running. The geometry on the throttle linkage to the servo on my stand was not good, and a quarter stick movement on the Tx was idle to full ball on the engine. I mad some changes purely for testing, but it was not ideal and at one start up, I had the throttle too far forward and the thing screamed into life and almost immediately 'dropped' a cylinder and I stopped it. I feared the worst and rotated it gently through and noticed that I definately only had 2 compression strokes. The only potential diagnoses without stripping it was either bent, or a tuck valve. There were no 'loose parts' Removing the plugs revealed no compresison on No3, and removing the valve covers revealed that one of the pushrods had come out of its adjustor and jammed the rocker open. The adjuster appeared to have stripped out. Replaced and all is well. This is an interference engine, so if that valve had stuck any further open, it would probably have bent. I think this one was lucky though....I say lucky, but I should have got the throttle geometry right, and this wouldnt have happened. Only myself to blame.
Decided to put the original carb back on, and got her started up again. It needed 6 turns out on the LSN to get it to be rich enough to run and transition, with 1.5 turns out on the HSN...There is something not right with this setup. I dont believe its the carb, so I am going to look for where it could be sucking air in. Its either at the carb fitting to the engine, the phenolic tube, the inlet manifold gaskets or now that its a negative crank setup, it could be leaking air at the breather. Will investigate and report back.
My DISCLAIMER to all of you is that you should NOT be doing all the tinkering I am doing! I am purely doing this out of interest, and in the interest of having the results somewhere for others to read. I say this because a lot of the guys at my club have suggested that I should never have done all the mods and tinkering with the engine, and should have just run it. Well, thats what I did originally, and this engine has just never.run.properly from the start. It had a good run in, it was installed properly on a plane, and correct fuel/oil ratios....and it has simply not performed at all..
So now, my fun is not from FLYING this engine, but tooling around with it. I have been out flying my Yak55M with 70cc Twin RCGF engine, so at least getting my fly-time in....
05-21-2019, 08:34 AM
#2246
Join Date: May 2007
Location: Sherwood,
OR
Posts: 76
Likes: 0
Received 0 Likes
on
0 Posts
cathurga,
Sorry to hear that you had more troubles with your saito. I had a pushrod/adjuster failure early on. It looked like a defective adjuster as the cupped portion of the adjuster was deformed. Also, since the motor would only run at a very high rpm until it was warmed up, the sudden start at 5k was too much for the pushrod. Anyway, with the new adjuster and the modifications (morris ignition and intake mods), I can now start it at a reasonable rpm.
Re: Not doing the mods; I have to take exception to that input. First of all, the motor has numerous faults that make using it a messy and unpleasant experience. With $2000 invested in this motor, I expected better. Second, modifications and customization is a primary learning tool. This is like hot rodding was in the 60's, and I personally enjoy the learning from the cause and effect. If all I did was follow the instructions on the package, I wouldn't know squat about how these planes, motors and electronics work. Besides, it is a joy to make one of these machines fly great. And the frosting on the cake is to modify one to be my own unique design. So, keep up the good work and enjoy the ride. Jeff
PS: When it finally stops raining around here, I will get out on the field and to some tuning runs with the morris mods combinations. I hope to get some better temp and thrust information then.
05-21-2019, 09:45 AM
#2247
My Feedback: (3)
Funny you mention the pushrod being off the adjuster. I had no compression on a cylinder, and I opened the valve cover up and found one of my pushrods was off the adjuster, so I put it back on and its ok now.
I haven't modified anything on my engine yet. Do you think there is a problem? Maybe I should open it back up and check the cups to make sure none of them are deformed.
I also agree on the tinkering around aspect, yah I've spent a lot of money on these Saito radials too but I've learned a lot in the process.
cathurga,
Sorry to hear that you had more troubles with your saito. I had a pushrod/adjuster failure early on. It looked like a defective adjuster as the cupped portion of the adjuster was deformed. Also, since the motor would only run at a very high rpm until it was warmed up, the sudden start at 5k was too much for the pushrod. Anyway, with the new adjuster and the modifications (morris ignition and intake mods), I can now start it at a reasonable rpm.
Re: Not doing the mods; I have to take exception to that input. First of all, the motor has numerous faults that make using it a messy and unpleasant experience. With $2000 invested in this motor, I expected better. Second, modifications and customization is a primary learning tool. This is like hot rodding was in the 60's, and I personally enjoy the learning from the cause and effect. If all I did was follow the instructions on the package, I wouldn't know squat about how these planes, motors and electronics work. Besides, it is a joy to make one of these machines fly great. And the frosting on the cake is to modify one to be my own unique design. So, keep up the good work and enjoy the ride. Jeff
PS: When it finally stops raining around here, I will get out on the field and to some tuning runs with the morris mods combinations. I hope to get some better temp and thrust information then.
Sorry to hear that you had more troubles with your saito. I had a pushrod/adjuster failure early on. It looked like a defective adjuster as the cupped portion of the adjuster was deformed. Also, since the motor would only run at a very high rpm until it was warmed up, the sudden start at 5k was too much for the pushrod. Anyway, with the new adjuster and the modifications (morris ignition and intake mods), I can now start it at a reasonable rpm.
Re: Not doing the mods; I have to take exception to that input. First of all, the motor has numerous faults that make using it a messy and unpleasant experience. With $2000 invested in this motor, I expected better. Second, modifications and customization is a primary learning tool. This is like hot rodding was in the 60's, and I personally enjoy the learning from the cause and effect. If all I did was follow the instructions on the package, I wouldn't know squat about how these planes, motors and electronics work. Besides, it is a joy to make one of these machines fly great. And the frosting on the cake is to modify one to be my own unique design. So, keep up the good work and enjoy the ride. Jeff
PS: When it finally stops raining around here, I will get out on the field and to some tuning runs with the morris mods combinations. I hope to get some better temp and thrust information then.
05-21-2019, 10:15 AM
#2248
Join Date: May 2007
Location: Sherwood,
OR
Posts: 76
Likes: 0
Received 0 Likes
on
0 Posts
Timbers, The replacement pushrod and adjuster had a more well defined cup than the oem part. So you could order one now to have on hand. Once they pop off, I suspect the shallow oem cup edge has been hammered and will not hold well over time.
The mods that I have done were in response to #3 cylinder loading up and dropping out due to the poor mixing and fuel build up. Also, startups required a very high rpm (5000) and 4 minutes to get #3 working and the engine would not idle down below 2000 rpm without dying after a few minutes. The re-timing down to 30 * btdc helped with the starting, and the intake mod helped with the #3 cylinder running too cold/wet.
Note: I am flying this engine in an acrobatic plane (Extra 330L) and need a high level of performance (throttle response and thrust), so these motor behaviors are important for my application. If you are happy with how it runs for your application, you don't have to upgrade these parts. Enjoy Jeff
05-21-2019, 10:33 AM
#2249
My Feedback: (3)
Thanks I better check the cups then if its a known problem. My FG-60R3 flys pretty well so I haven't modified it yet. In temps 50F or under yes it takes probably 2 minutes to warm up before all cylinders start firing. I just installed all the Morris mods on my FG-19R3 because that piece of junk would take 4 minutes to warm up before the bottom cylinders would start firing. The mods made it easy to start and the throttle response is incredible compared to stock. Probably takes 30-45 seconds now to warm up before I can get to full RPM at about 60F. I'm sure its the same on the FG-60R3 from what you are saying.
05-23-2019, 08:25 AM
#2250
Member
How are things going out there in FG60R3 land?! Its a bit quiet in here so assuming all is well.
Not so on my side. I put the engine back together, with the timing ring and the induction mod from MM and thought I would get 'clever' and see if it would run on a Walbro carb. I had a spare from a DLE55RA that I had lying about, as well as the MM Walbro conversion kit. Installed on my test stand, and managed to get it running. The geometry on the throttle linkage to the servo on my stand was not good, and a quarter stick movement on the Tx was idle to full ball on the engine. I mad some changes purely for testing, but it was not ideal and at one start up, I had the throttle too far forward and the thing screamed into life and almost immediately 'dropped' a cylinder and I stopped it. I feared the worst and rotated it gently through and noticed that I definately only had 2 compression strokes. The only potential diagnoses without stripping it was either bent, or a tuck valve. There were no 'loose parts' Removing the plugs revealed no compresison on No3, and removing the valve covers revealed that one of the pushrods had come out of its adjustor and jammed the rocker open. The adjuster appeared to have stripped out. Replaced and all is well. This is an interference engine, so if that valve had stuck any further open, it would probably have bent. I think this one was lucky though....I say lucky, but I should have got the throttle geometry right, and this wouldnt have happened. Only myself to blame.
Decided to put the original carb back on, and got her started up again. It needed 6 turns out on the LSN to get it to be rich enough to run and transition, with 1.5 turns out on the HSN...There is something not right with this setup. I dont believe its the carb, so I am going to look for where it could be sucking air in. Its either at the carb fitting to the engine, the phenolic tube, the inlet manifold gaskets or now that its a negative crank setup, it could be leaking air at the breather. Will investigate and report back.
My DISCLAIMER to all of you is that you should NOT be doing all the tinkering I am doing! I am purely doing this out of interest, and in the interest of having the results somewhere for others to read. I say this because a lot of the guys at my club have suggested that I should never have done all the mods and tinkering with the engine, and should have just run it. Well, thats what I did originally, and this engine has just never.run.properly from the start. It had a good run in, it was installed properly on a plane, and correct fuel/oil ratios....and it has simply not performed at all..
So now, my fun is not from FLYING this engine, but tooling around with it. I have been out flying my Yak55M with 70cc Twin RCGF engine, so at least getting my fly-time in....
Not so on my side. I put the engine back together, with the timing ring and the induction mod from MM and thought I would get 'clever' and see if it would run on a Walbro carb. I had a spare from a DLE55RA that I had lying about, as well as the MM Walbro conversion kit. Installed on my test stand, and managed to get it running. The geometry on the throttle linkage to the servo on my stand was not good, and a quarter stick movement on the Tx was idle to full ball on the engine. I mad some changes purely for testing, but it was not ideal and at one start up, I had the throttle too far forward and the thing screamed into life and almost immediately 'dropped' a cylinder and I stopped it. I feared the worst and rotated it gently through and noticed that I definately only had 2 compression strokes. The only potential diagnoses without stripping it was either bent, or a tuck valve. There were no 'loose parts' Removing the plugs revealed no compresison on No3, and removing the valve covers revealed that one of the pushrods had come out of its adjustor and jammed the rocker open. The adjuster appeared to have stripped out. Replaced and all is well. This is an interference engine, so if that valve had stuck any further open, it would probably have bent. I think this one was lucky though....I say lucky, but I should have got the throttle geometry right, and this wouldnt have happened. Only myself to blame.
Decided to put the original carb back on, and got her started up again. It needed 6 turns out on the LSN to get it to be rich enough to run and transition, with 1.5 turns out on the HSN...There is something not right with this setup. I dont believe its the carb, so I am going to look for where it could be sucking air in. Its either at the carb fitting to the engine, the phenolic tube, the inlet manifold gaskets or now that its a negative crank setup, it could be leaking air at the breather. Will investigate and report back.
My DISCLAIMER to all of you is that you should NOT be doing all the tinkering I am doing! I am purely doing this out of interest, and in the interest of having the results somewhere for others to read. I say this because a lot of the guys at my club have suggested that I should never have done all the mods and tinkering with the engine, and should have just run it. Well, thats what I did originally, and this engine has just never.run.properly from the start. It had a good run in, it was installed properly on a plane, and correct fuel/oil ratios....and it has simply not performed at all..
So now, my fun is not from FLYING this engine, but tooling around with it. I have been out flying my Yak55M with 70cc Twin RCGF engine, so at least getting my fly-time in....
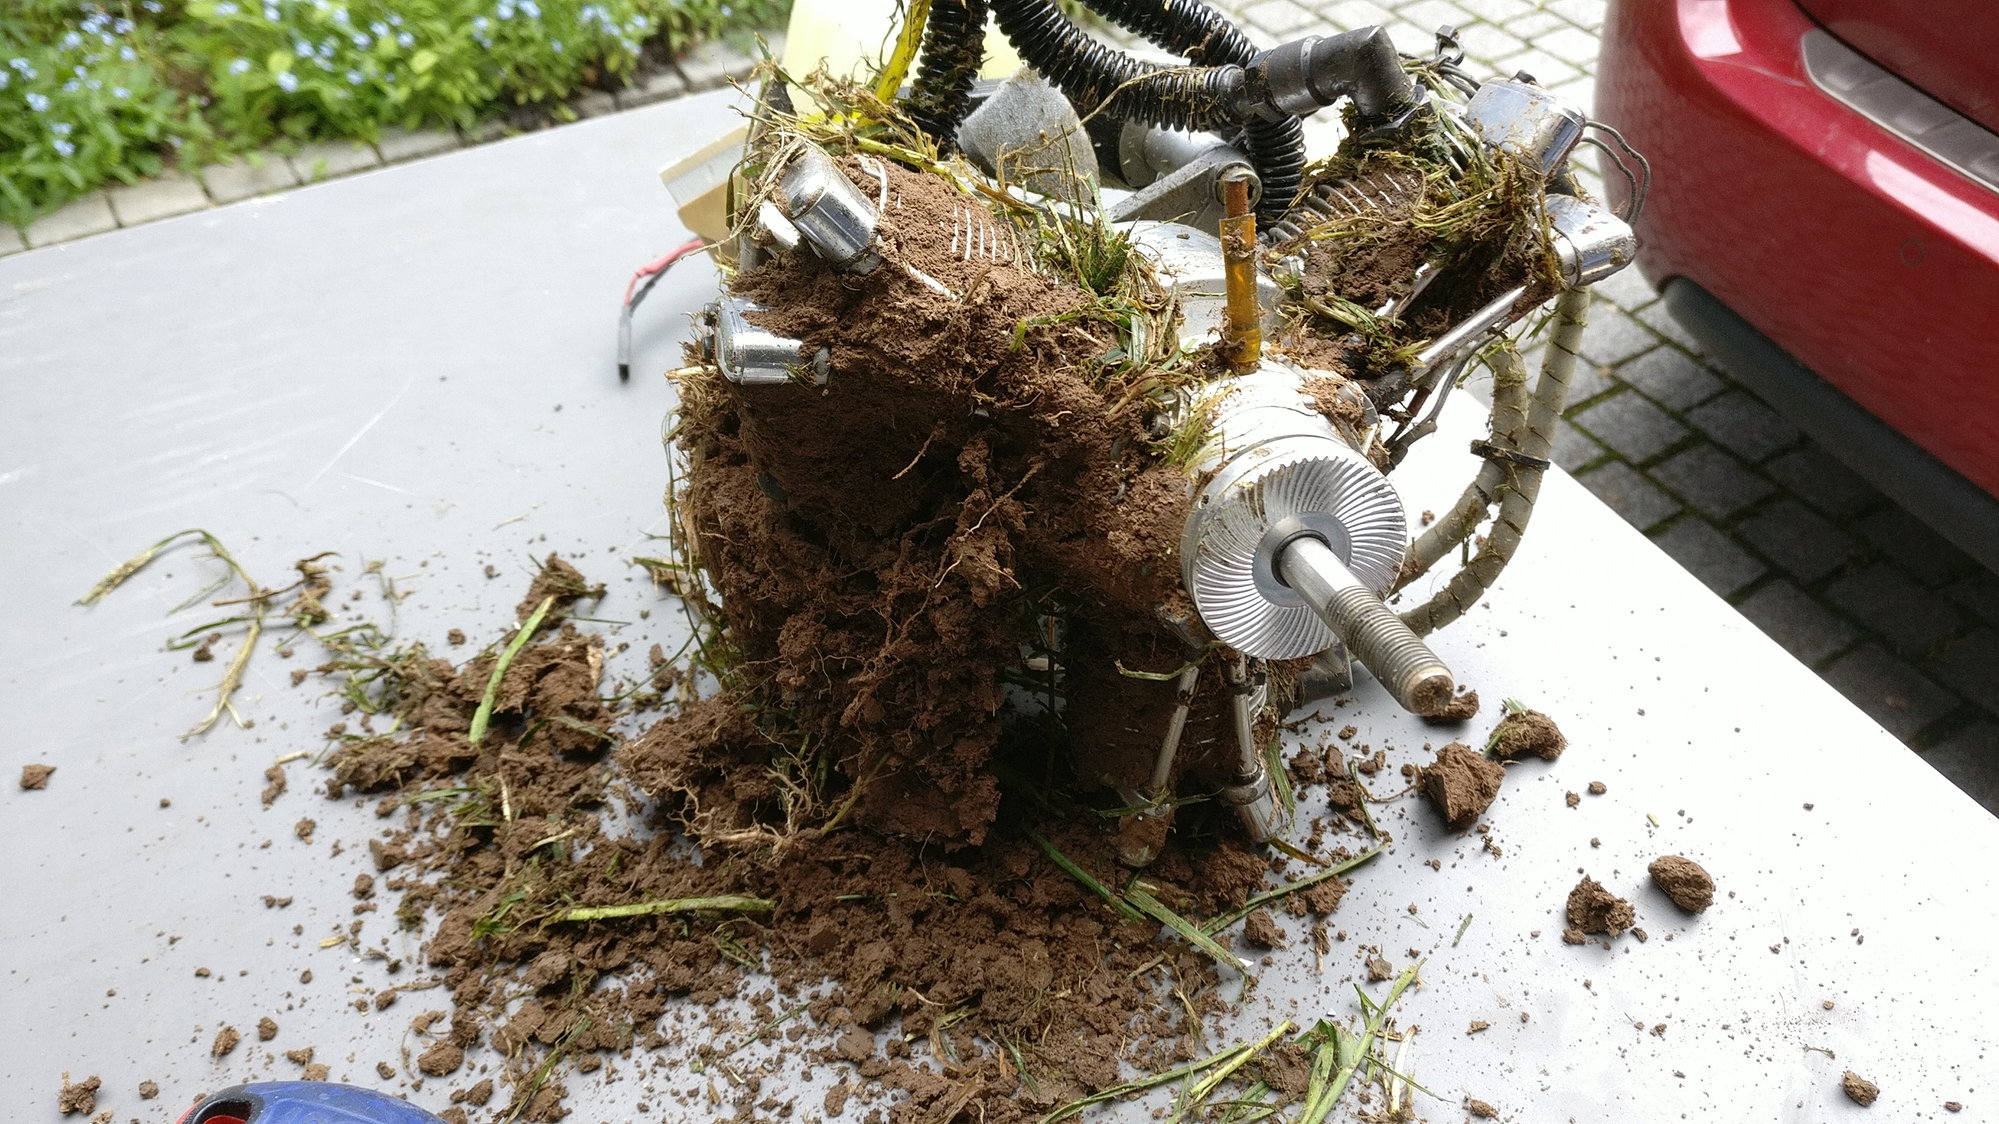
I had some problems during flight due to a total electrical power failure not yet explained to date.
The plane is now closer to a 5000-pieces puzzle than a nice DHC-2 Beaver, and I had to dig 15cm (6 inches) to get the engine out of the field.
But as incredible as it sounds, the engine has not suffered any damage and works perfectly again. (1 spark cap broken + 2 sparks broken, 1 twisted air intake tube and 2 twisted fins)
As the engine was on the bench for disassembling and control, I have also decided to replace the MMM carb by the original Saito card. The reason is that iddle seems to be more stable with the Saito carb, espacially when the engine is warn/hot. On the other hand I had less troubles to have hight revs with the MMM carb.
And last point, espacially for all people that use the negative crank setup, don't forget that all air leaking have to be fixed and closed, not only the breather, but also the rubbers on the pusher and the seals on the rocker covers. Some time ago I had the symptoms of a too lean carburation, and it was linked to a rocker cover that let in air.
Ok, now I am looking for the same kind of cool plane, as a other Beaver, or a Stinson Reliant...
JM