1/3 Scale Aeronca Champ build


 05-20-2021, 03:27 AM
#79
Final assembly has begun, working on the seats, hope mine are 1/4 as good as the ones you made!
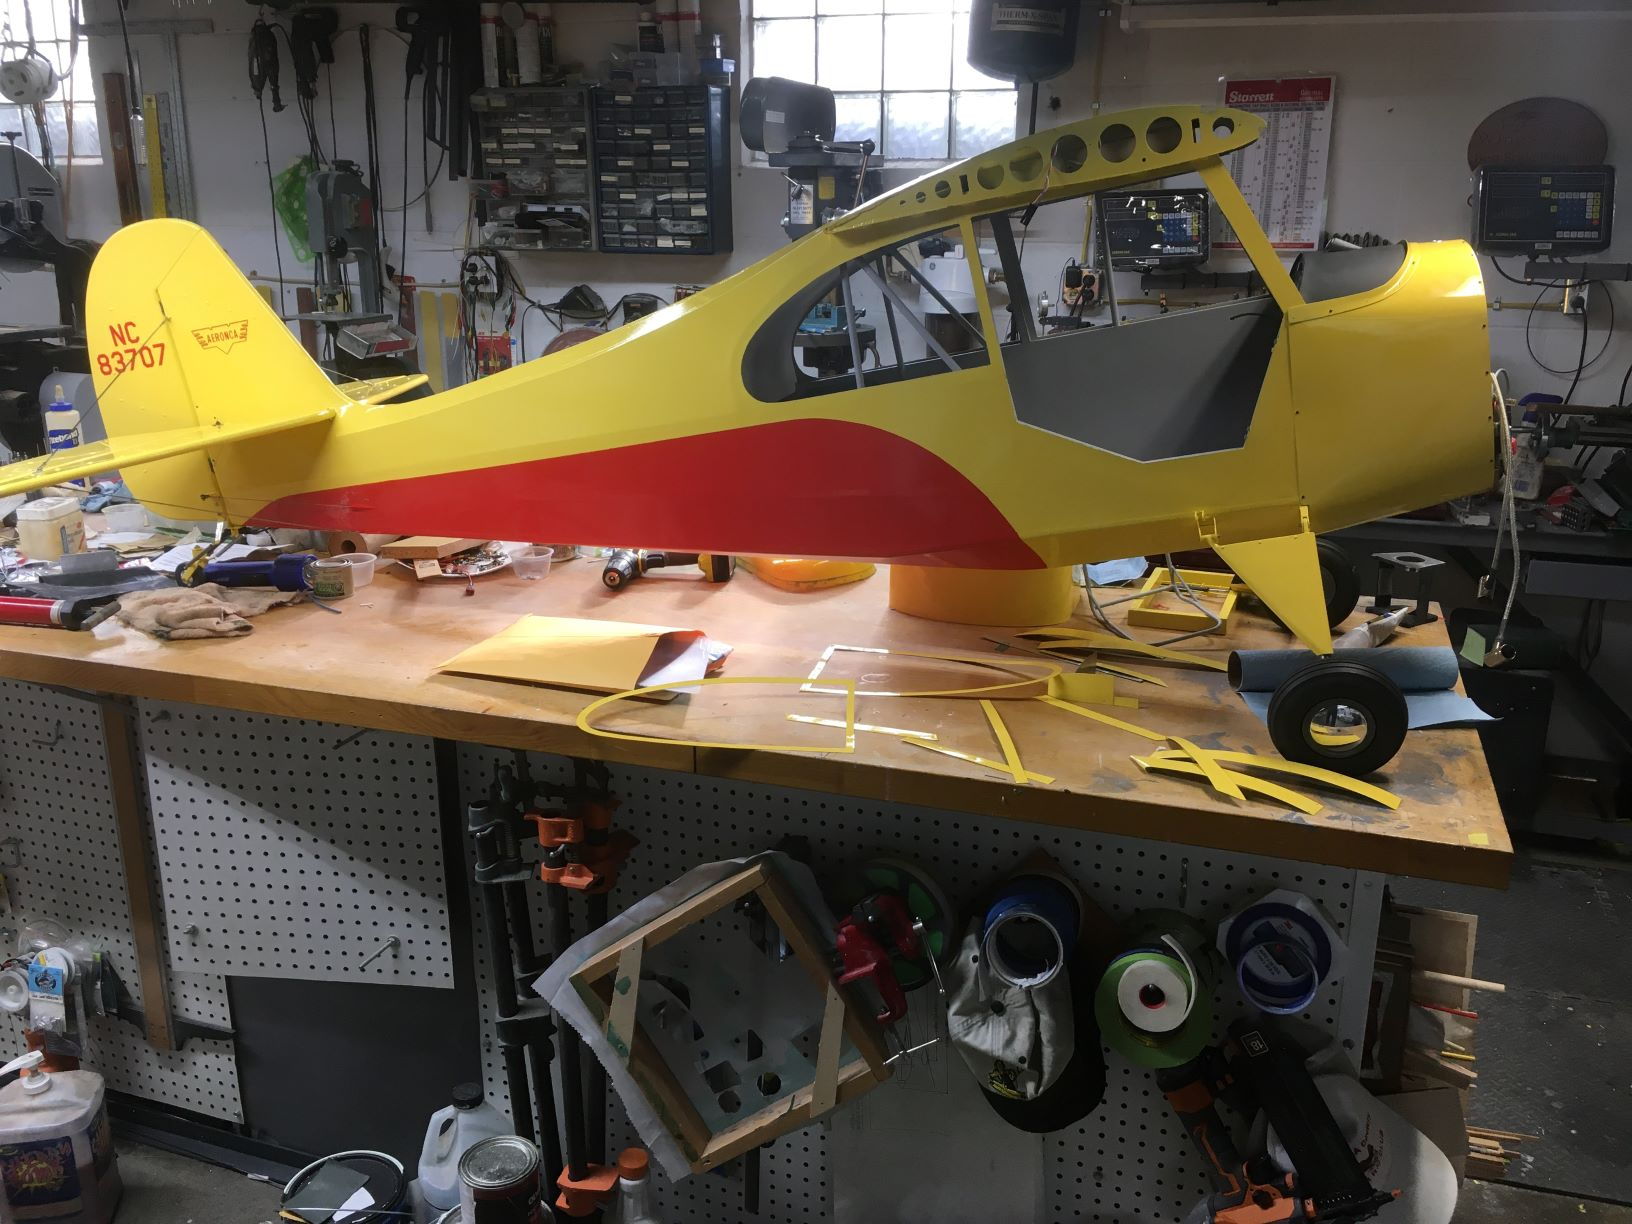
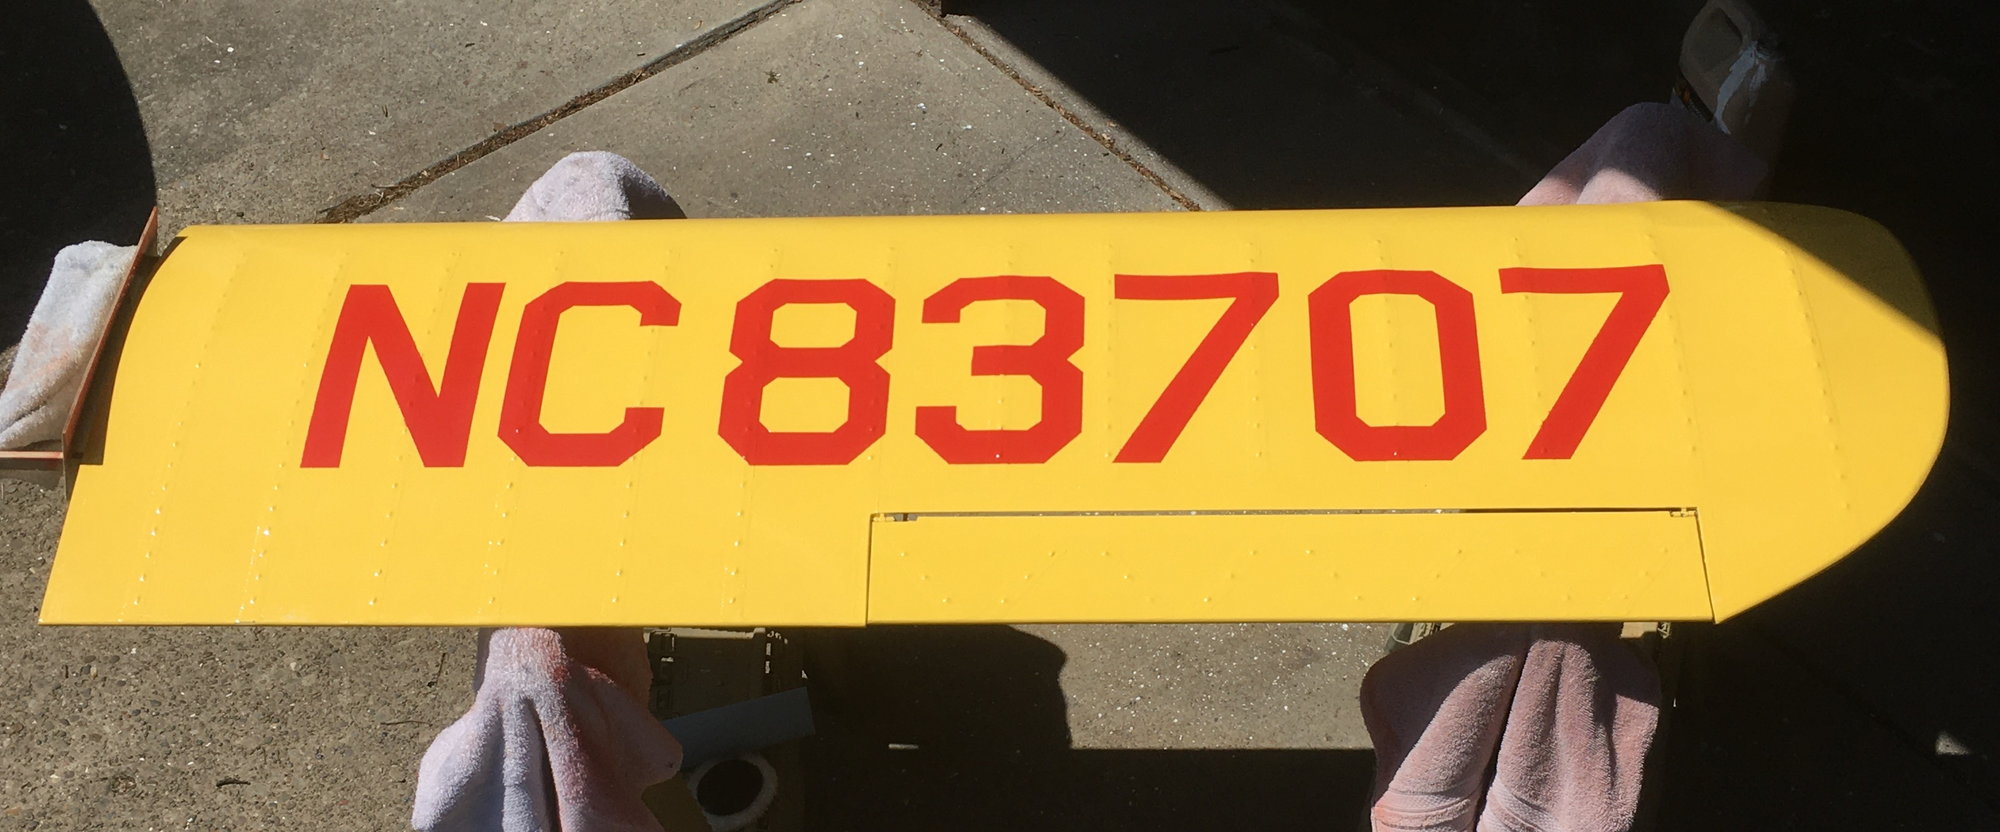
The paint is Steward Systems water base, first time I used it, works good with no fumes. Original Aeronca 7AC yellow and orange.
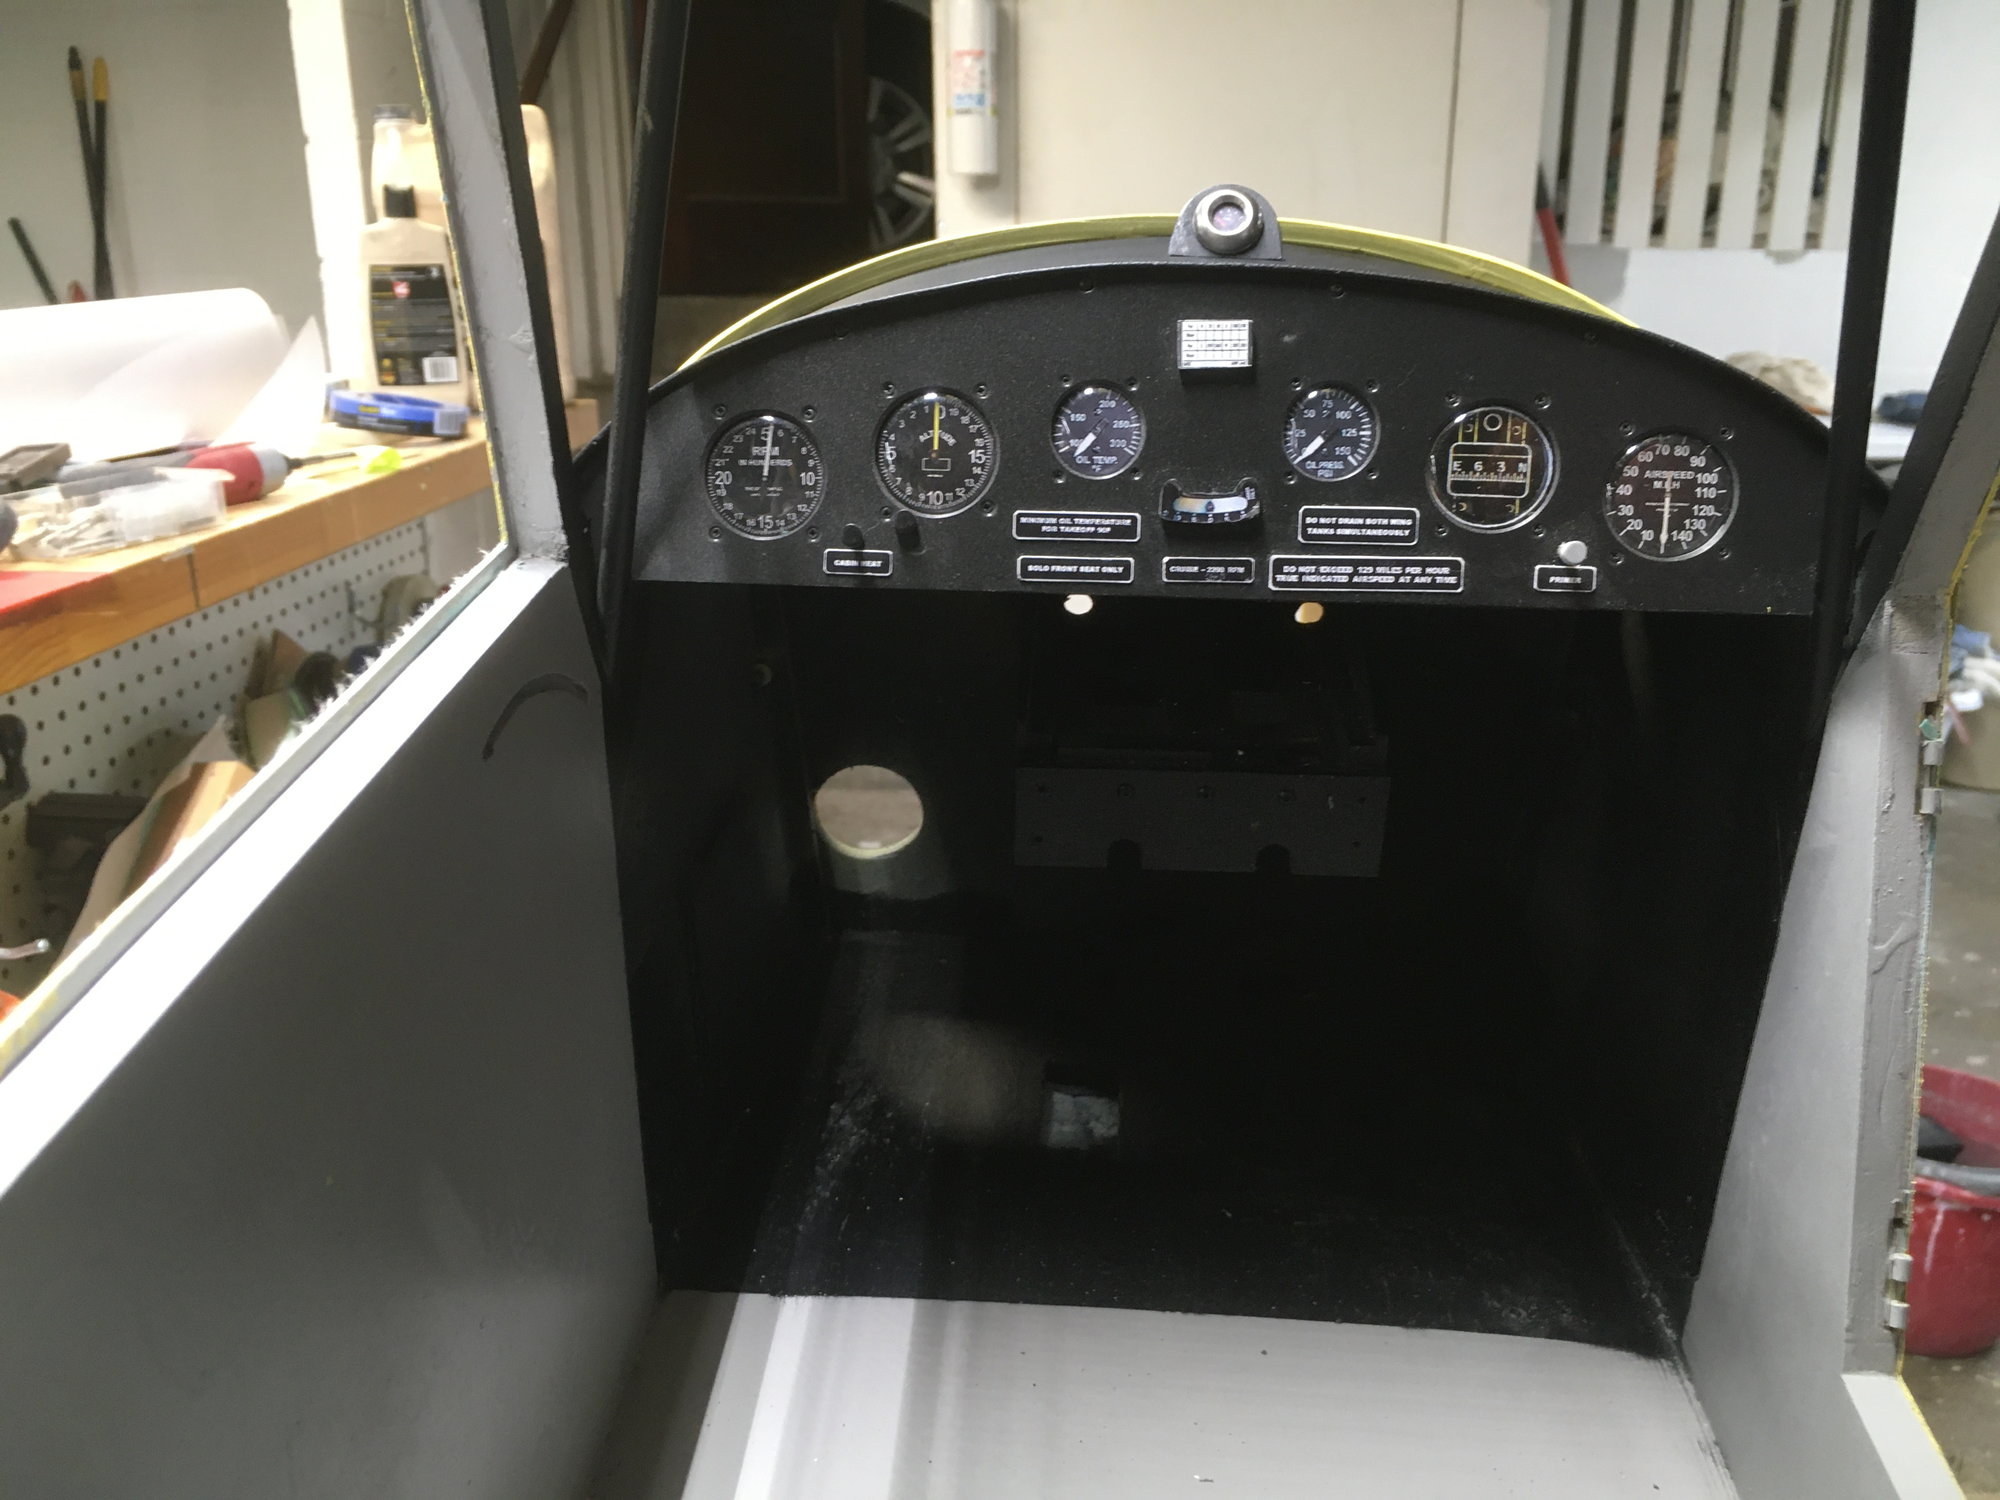
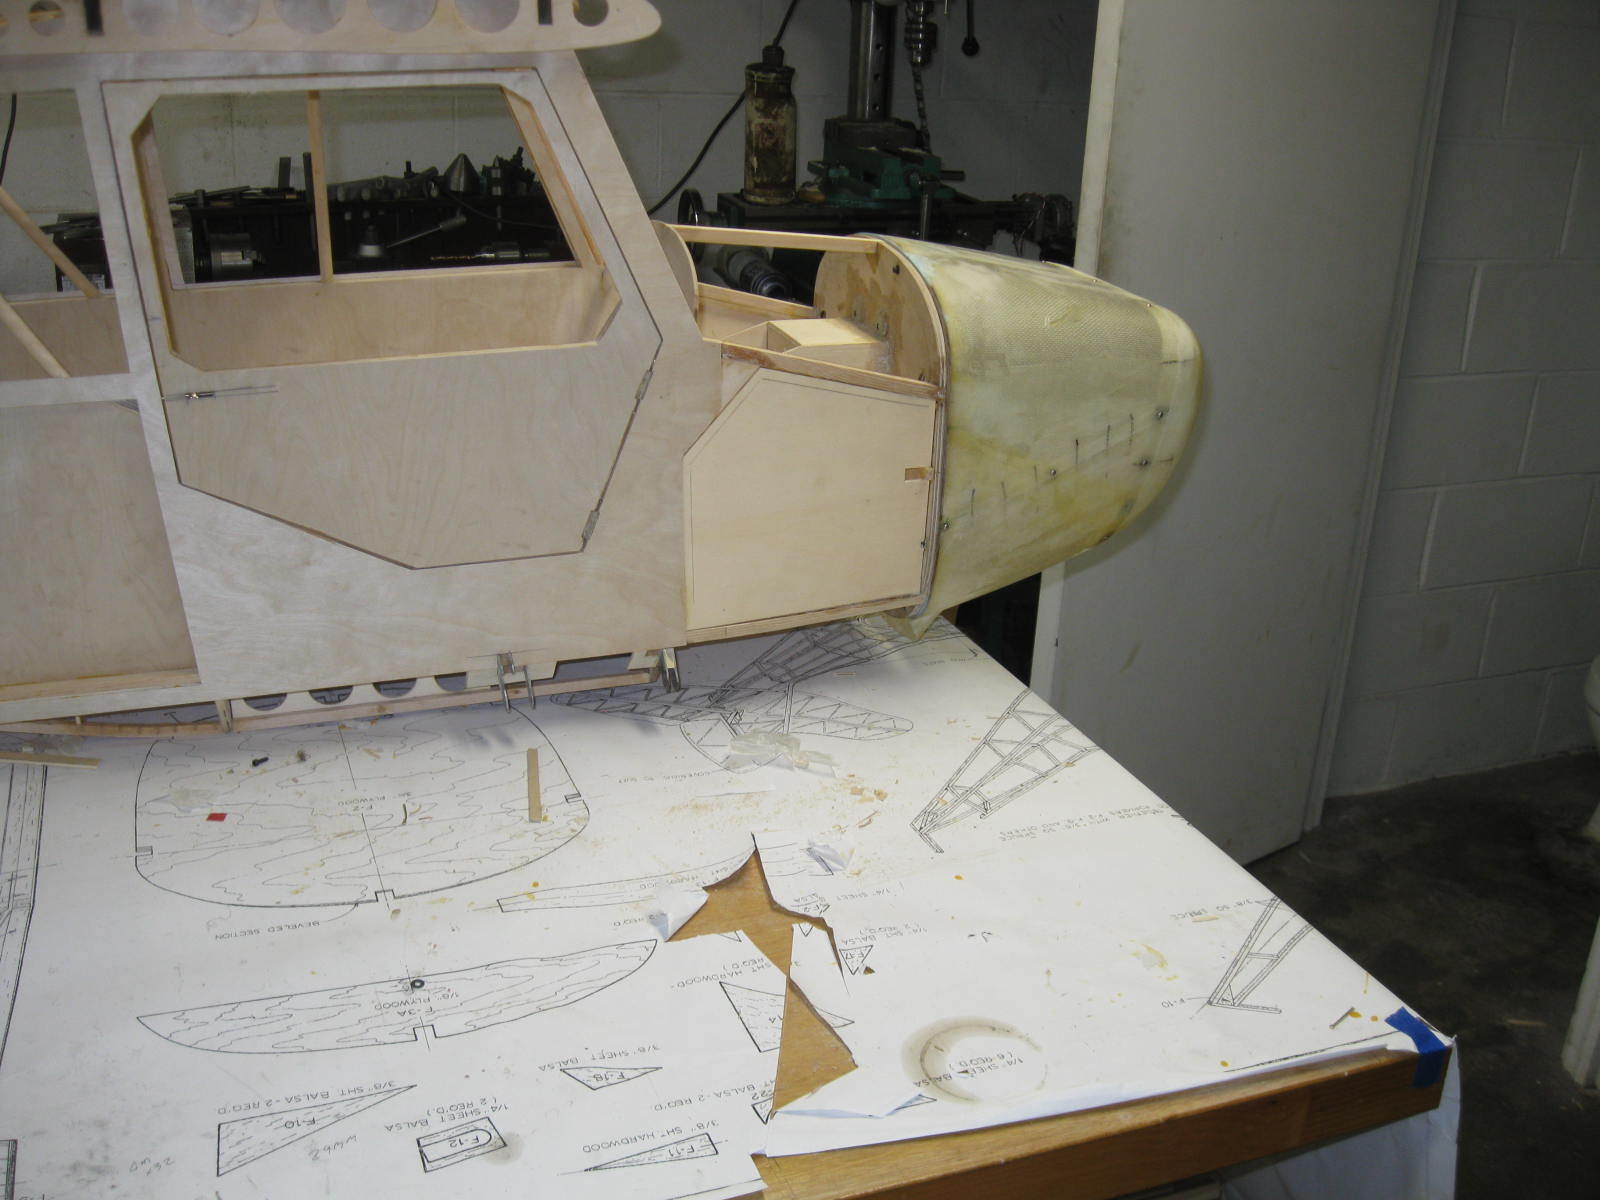
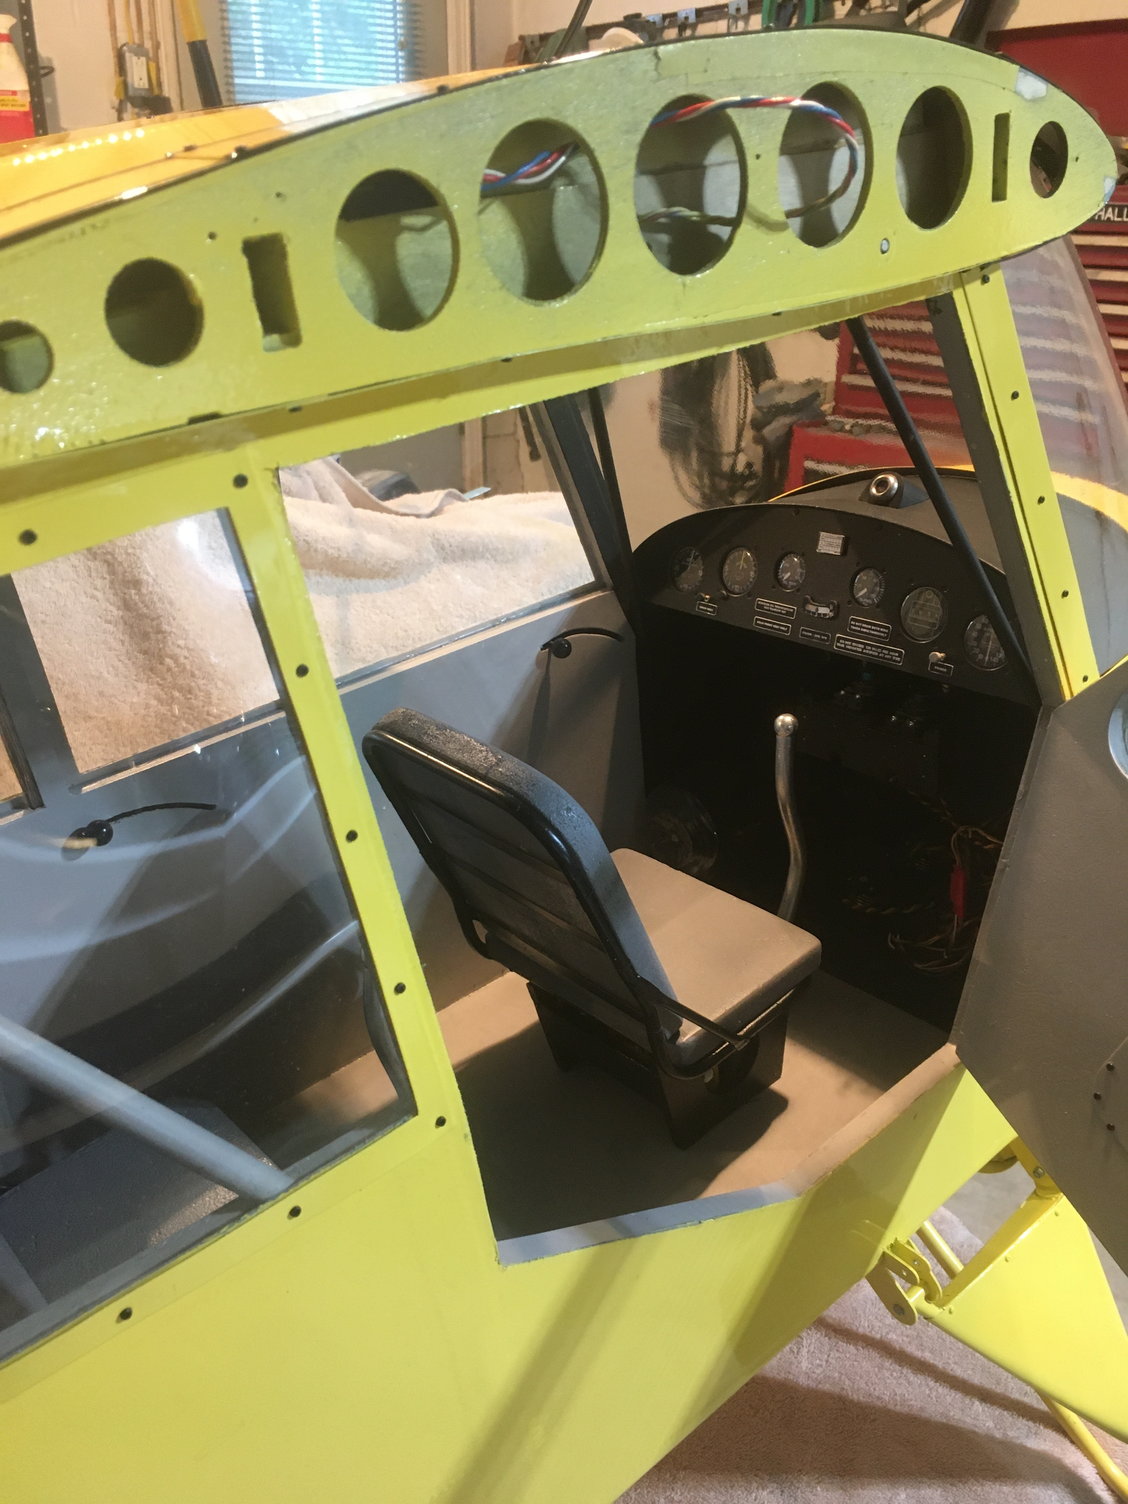
The dash panel is from Small Aircraft Components
The paint is Steward Systems water base, first time I used it, works good with no fumes. Original Aeronca 7AC yellow and orange.
The dash panel is from Small Aircraft Components
Last edited by Tony Hallo; 05-20-2021 at 03:44 AM.
The following users liked this post:
Steve (04-28-2022)
 05-20-2021, 03:53 AM
#81

Paint masks were supplied by Aero Graphics, worked great.
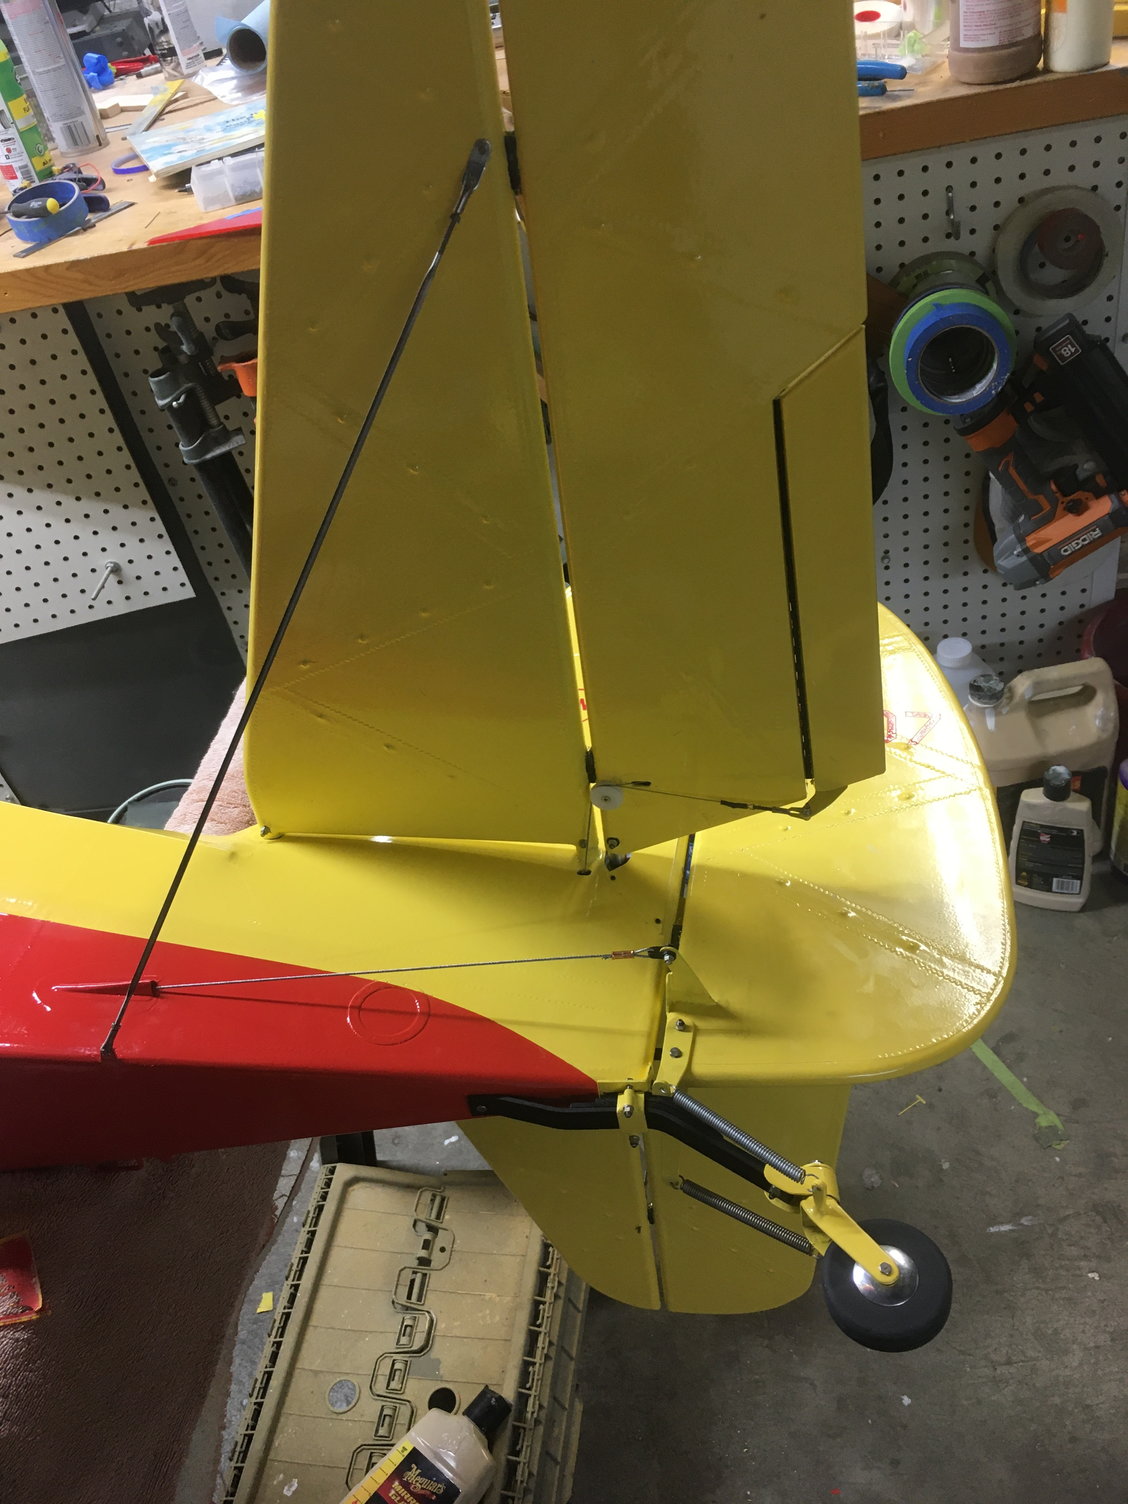
The trim tab is functional, separate servo on 3 way switch, can turn off, operate from elevator trim or work as a boost tab from elevator control. Will probably be turned off all the time.
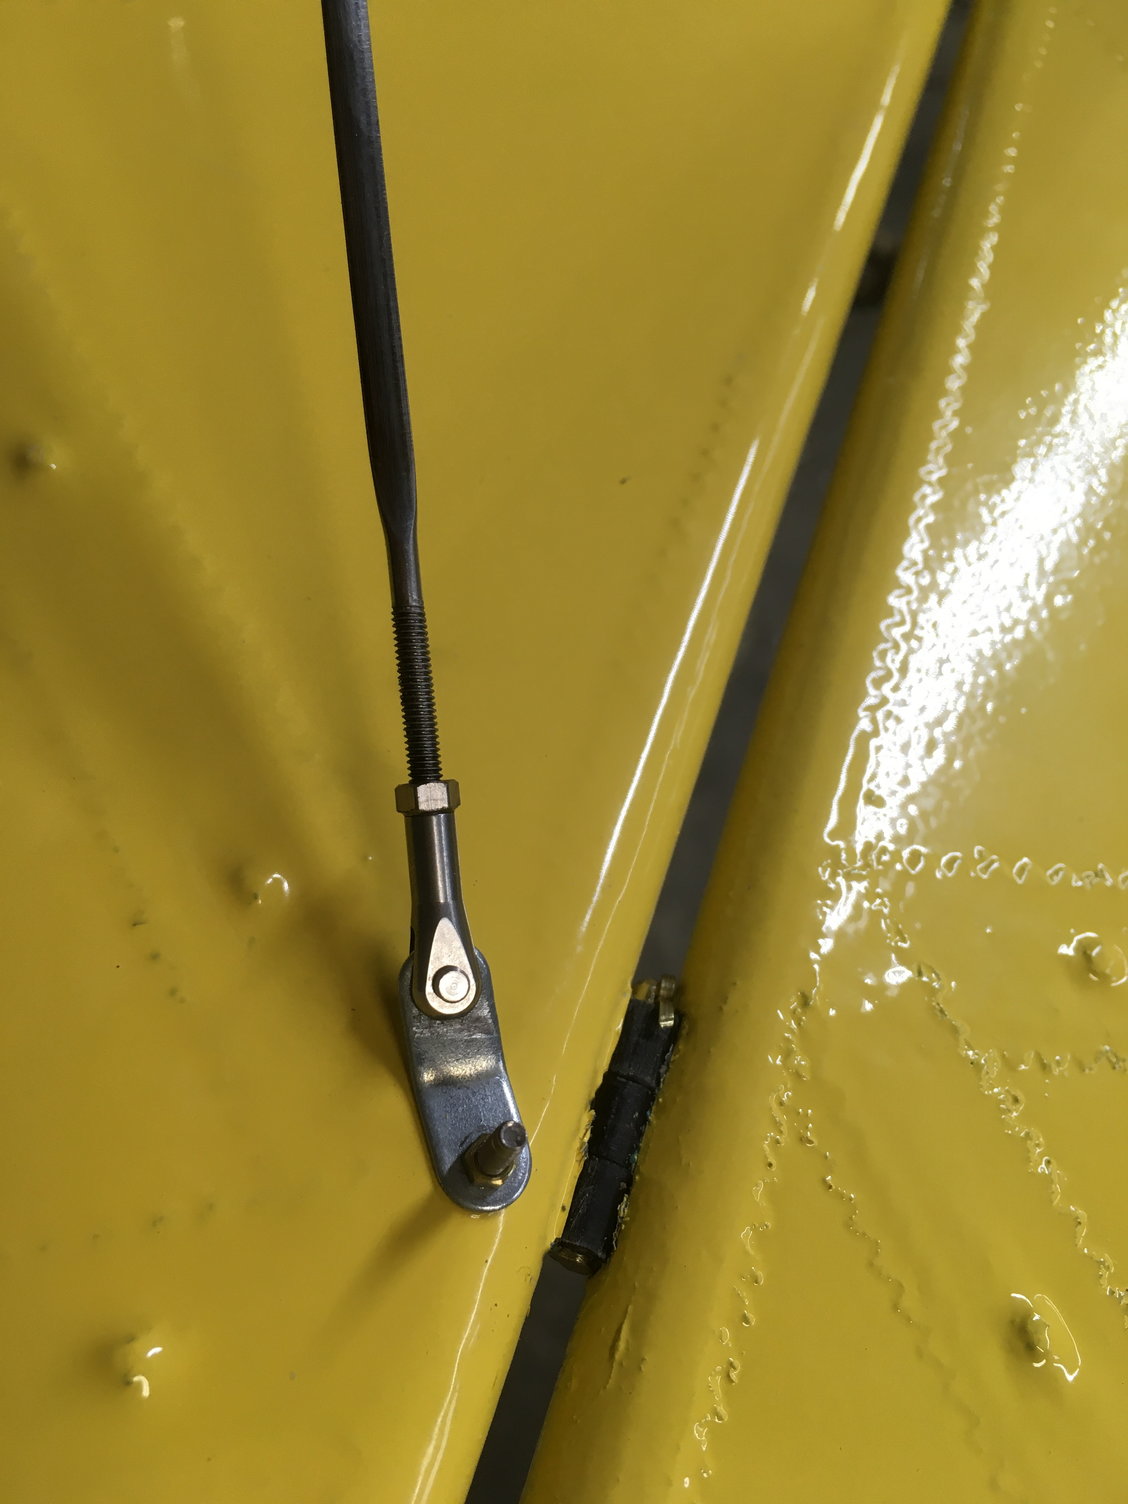
The flying wires are from Aero Scale Products
05-20-2021, 11:21 AM
#82
..........Beautiful work Tony, I wish I was that close to finishing...........The working trim tab is interesting, the flying wires look just like the real thing, so is the dash panel complete and ready to install from small aircraft components?....or is it a kit.........I think you are doing a wonderful job.......great looking build.
Thanks for the update and great photos!
Thanks for the update and great photos!
05-20-2021, 04:03 PM
#83
The dash is just as it came from SAC. Just install. Nothing like the work you did on your dash. I tried to make my own from I Fly Tallies Gauges but didn't like the way it was going so I tried SAC based on their web site, I'm pleased with the result and will use them again.
It's so close I can taste it, can't wait to fly it.
It's so close I can taste it, can't wait to fly it.
05-20-2021, 05:35 PM
#84
.......That's a good looking panel, I suppose it is true to Aeronca........the Cessna panel was unique to the Bobcat, duel engines and duel instruments.......
there are instruments I have never seen on any other plane........I bought all kinds of ready made faces, but only found one or two that matched, like the altimeter, bank and turn and the clock, that's about it.............The Aeronca and the Taylorcraft were always on my top of the list........in fact, when I was a kid, I built an Aeronca Champ from a Comet kit.......the overall shape was the same as the one you are building except the nose was very narrow and the engine was a horizontally opposed and the cylinders protruded out into the wind.........this model was 54 inches had a working door on both sides.......in fact I have since bought the two kits on E-bay but don't intend to build..........just collect them .........you have plenty of detail on the model, stitches, finishing tape,working tab really nice job on the seat's..........on the cushion that you are having trouble you might try an alteration shop......I stitched my first seat and it is fair........but I had no luck doing the second.........so, I took my material and pattern to an alteration shop and ......they do a lot better job sewing.
Well, I just finished re-doing a compass bracket that I got wrong..............
Rich.....
05-20-2021, 06:54 PM
#85
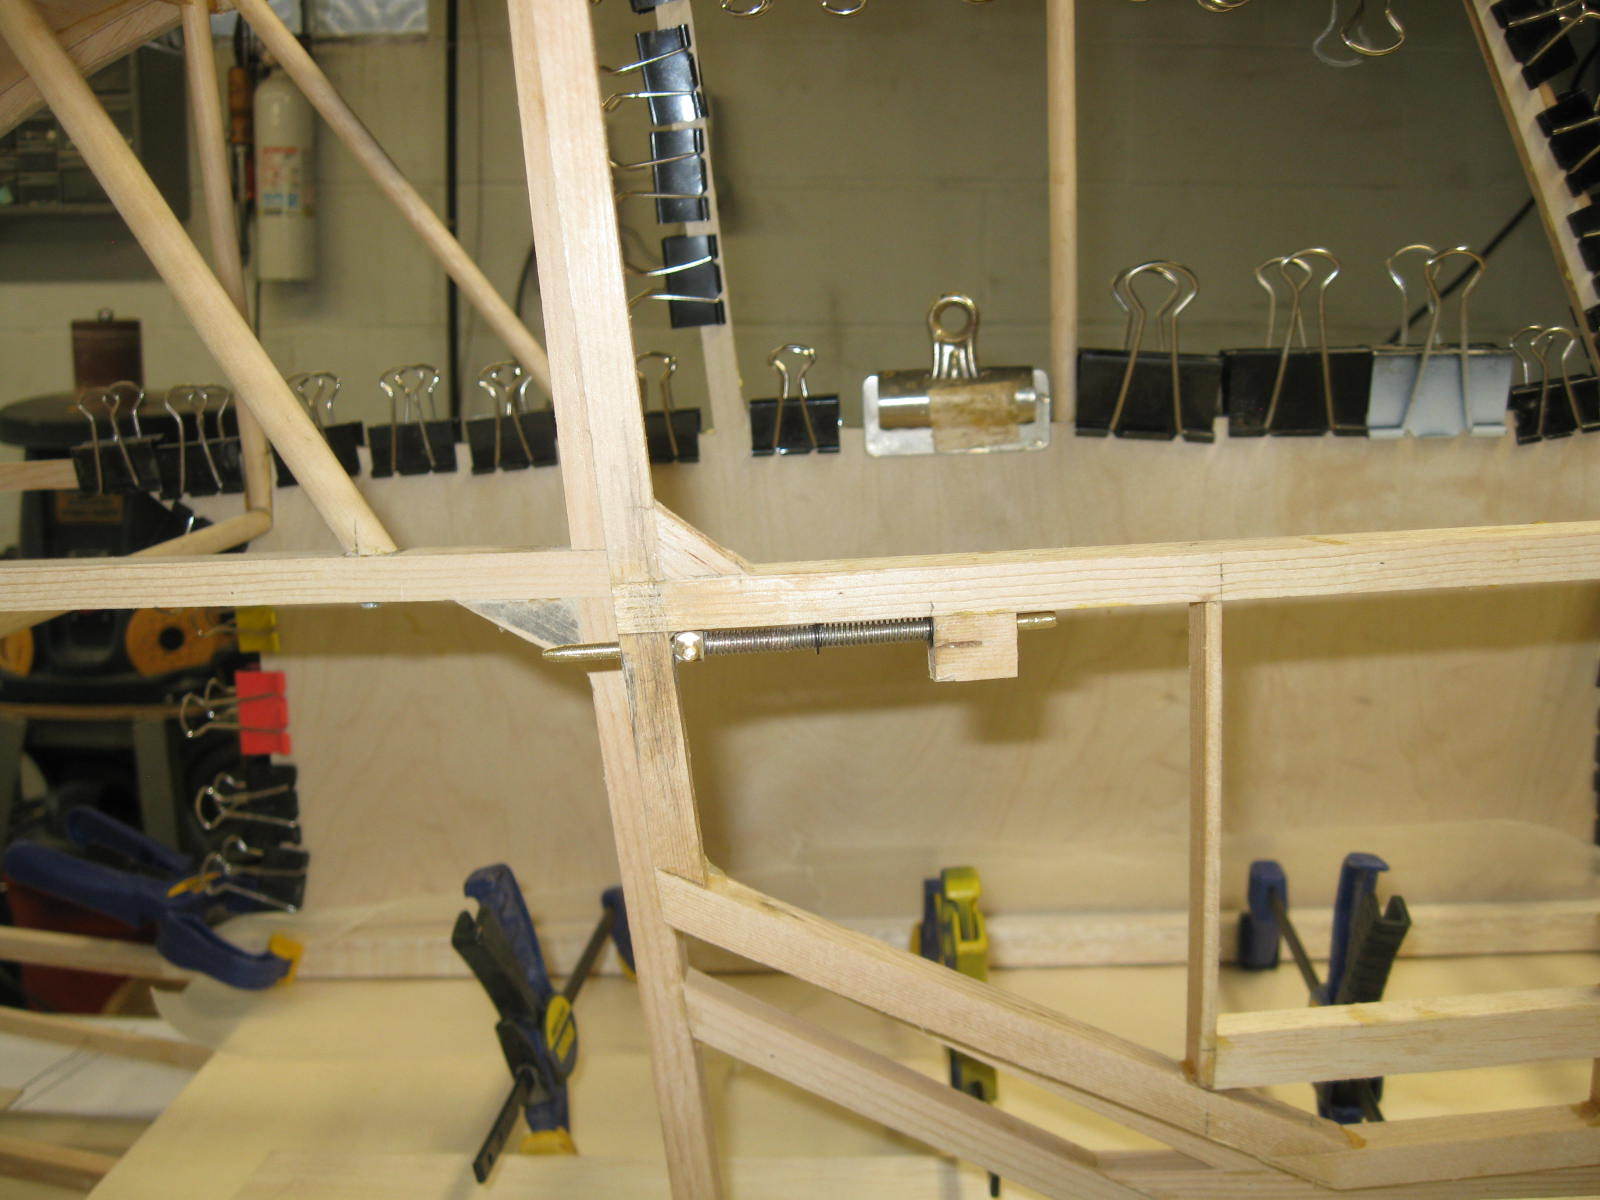
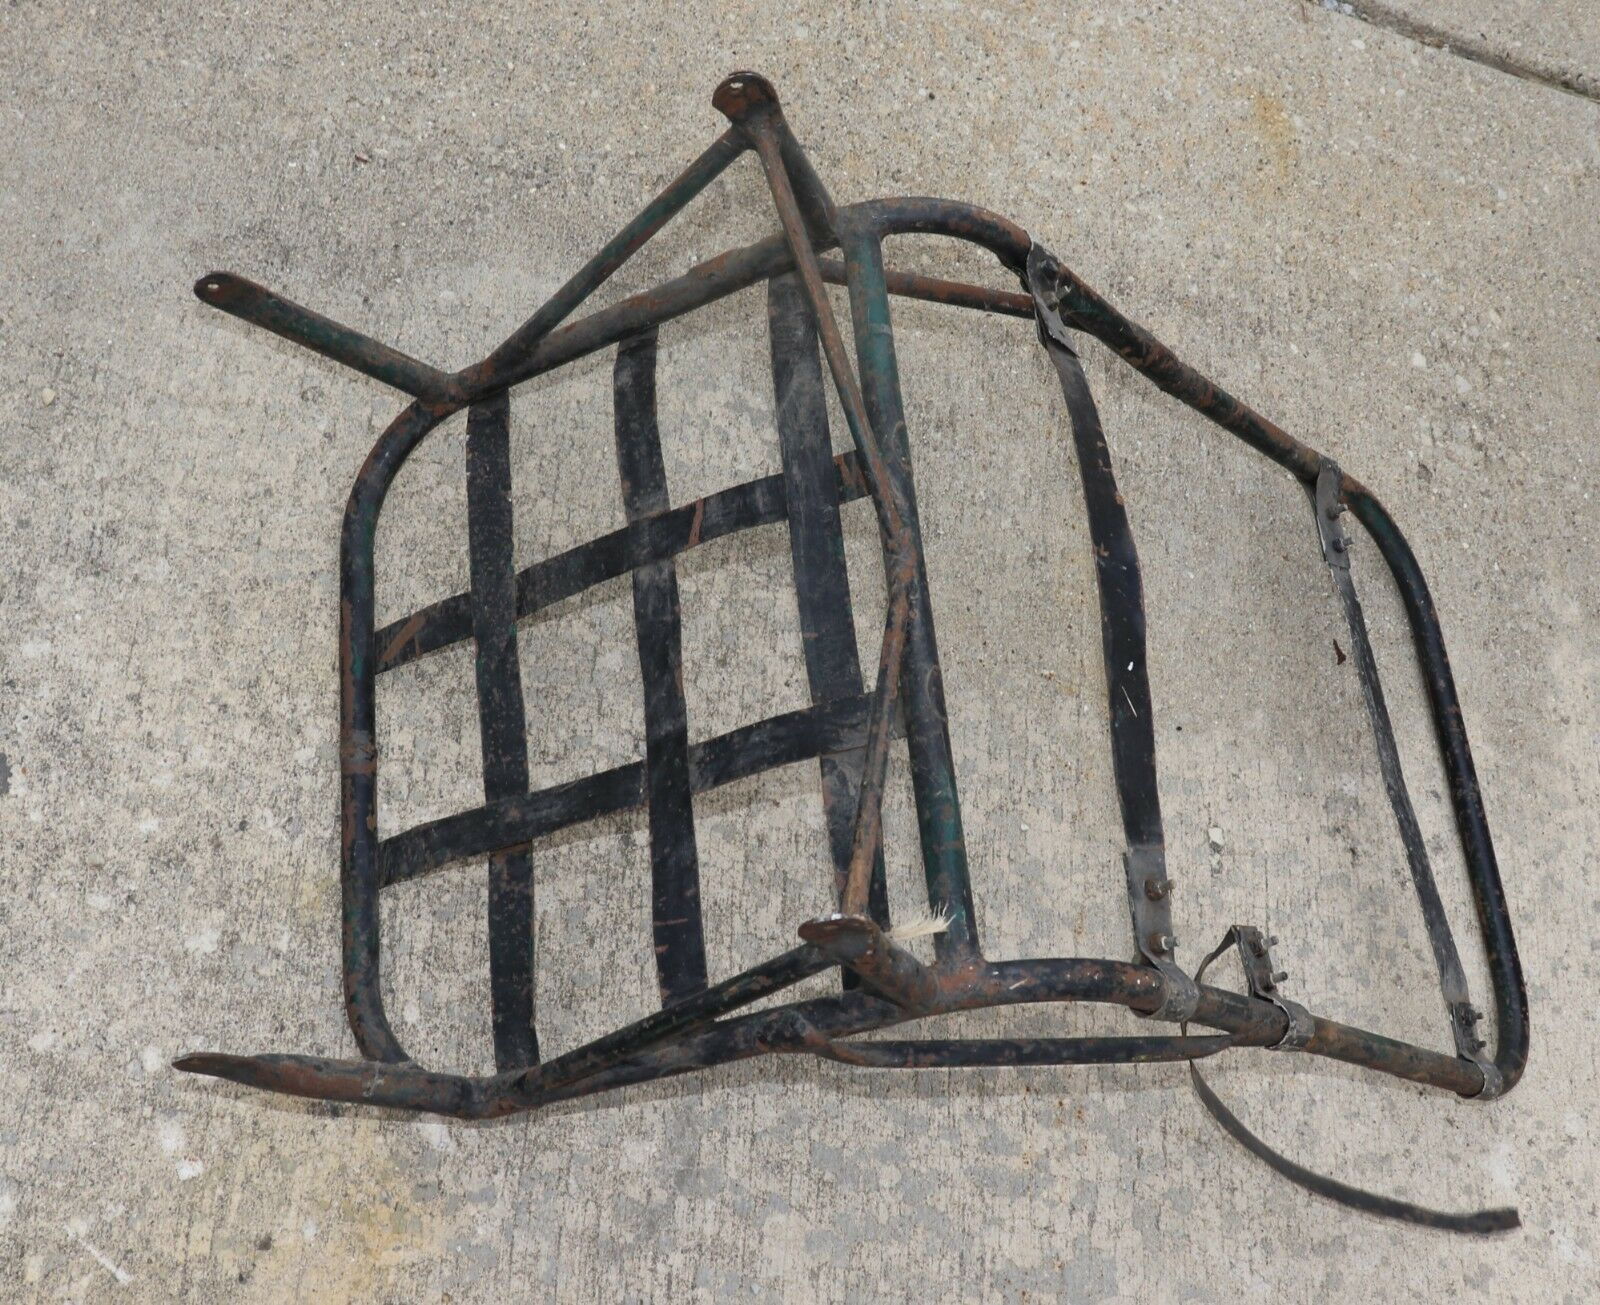
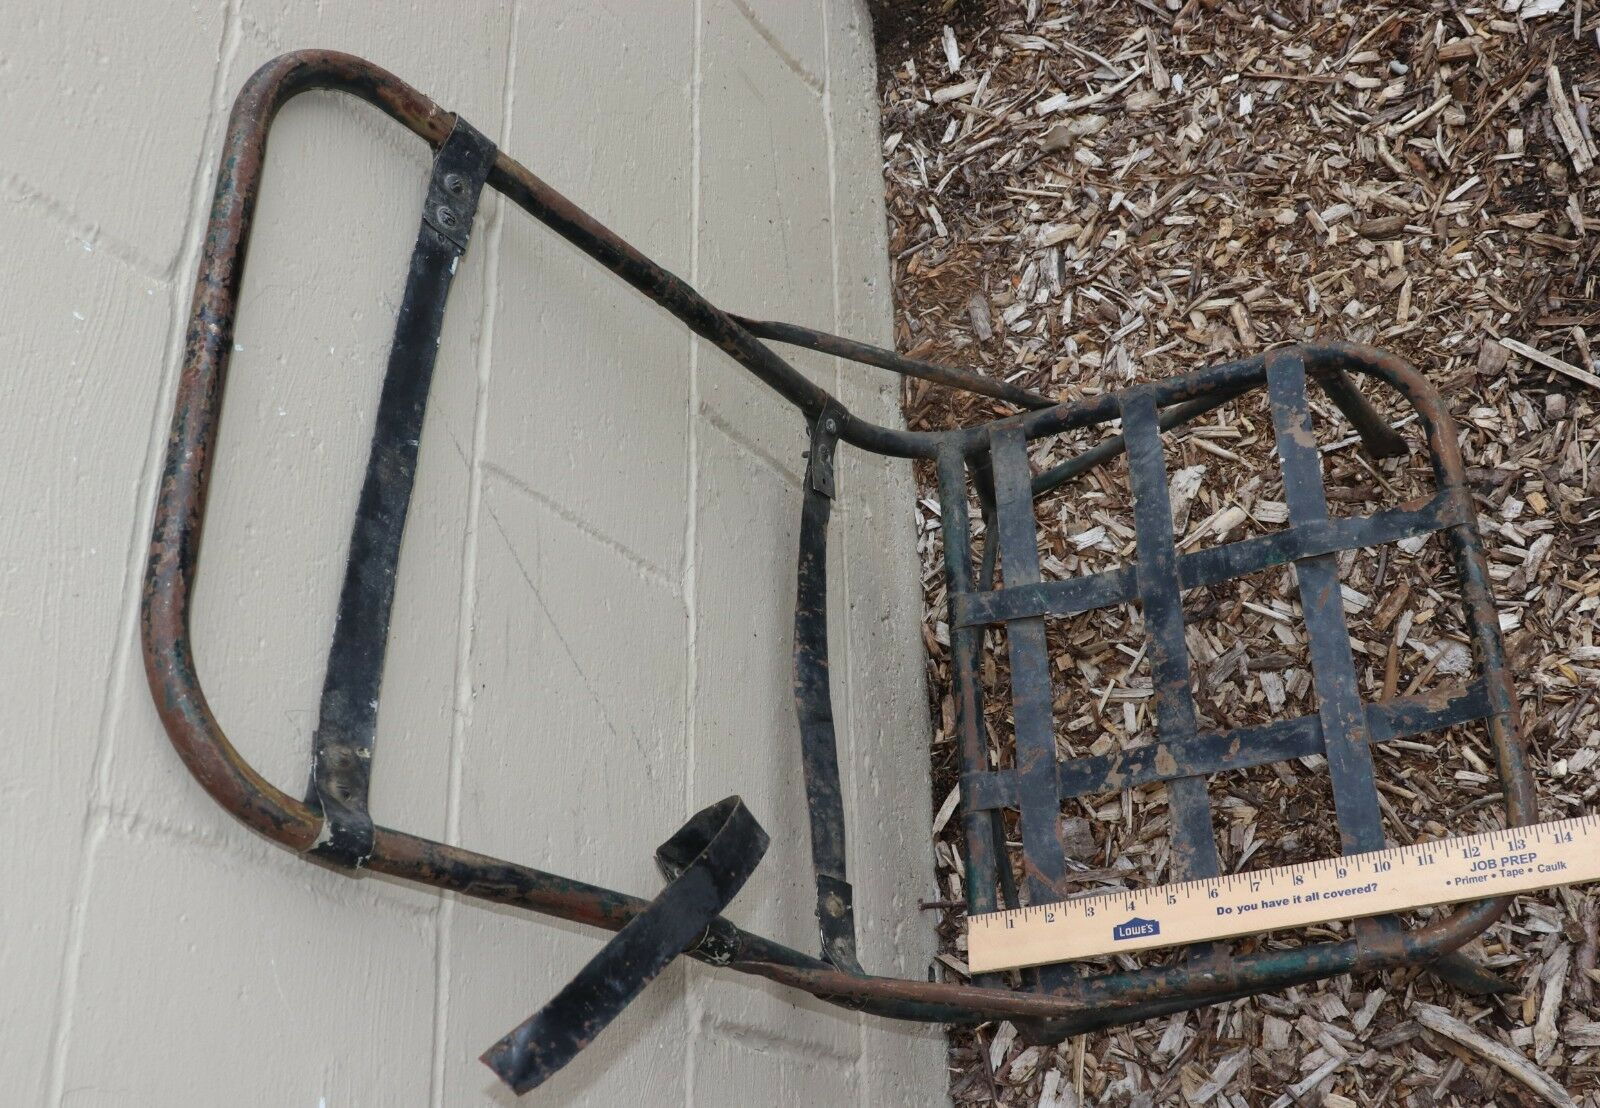
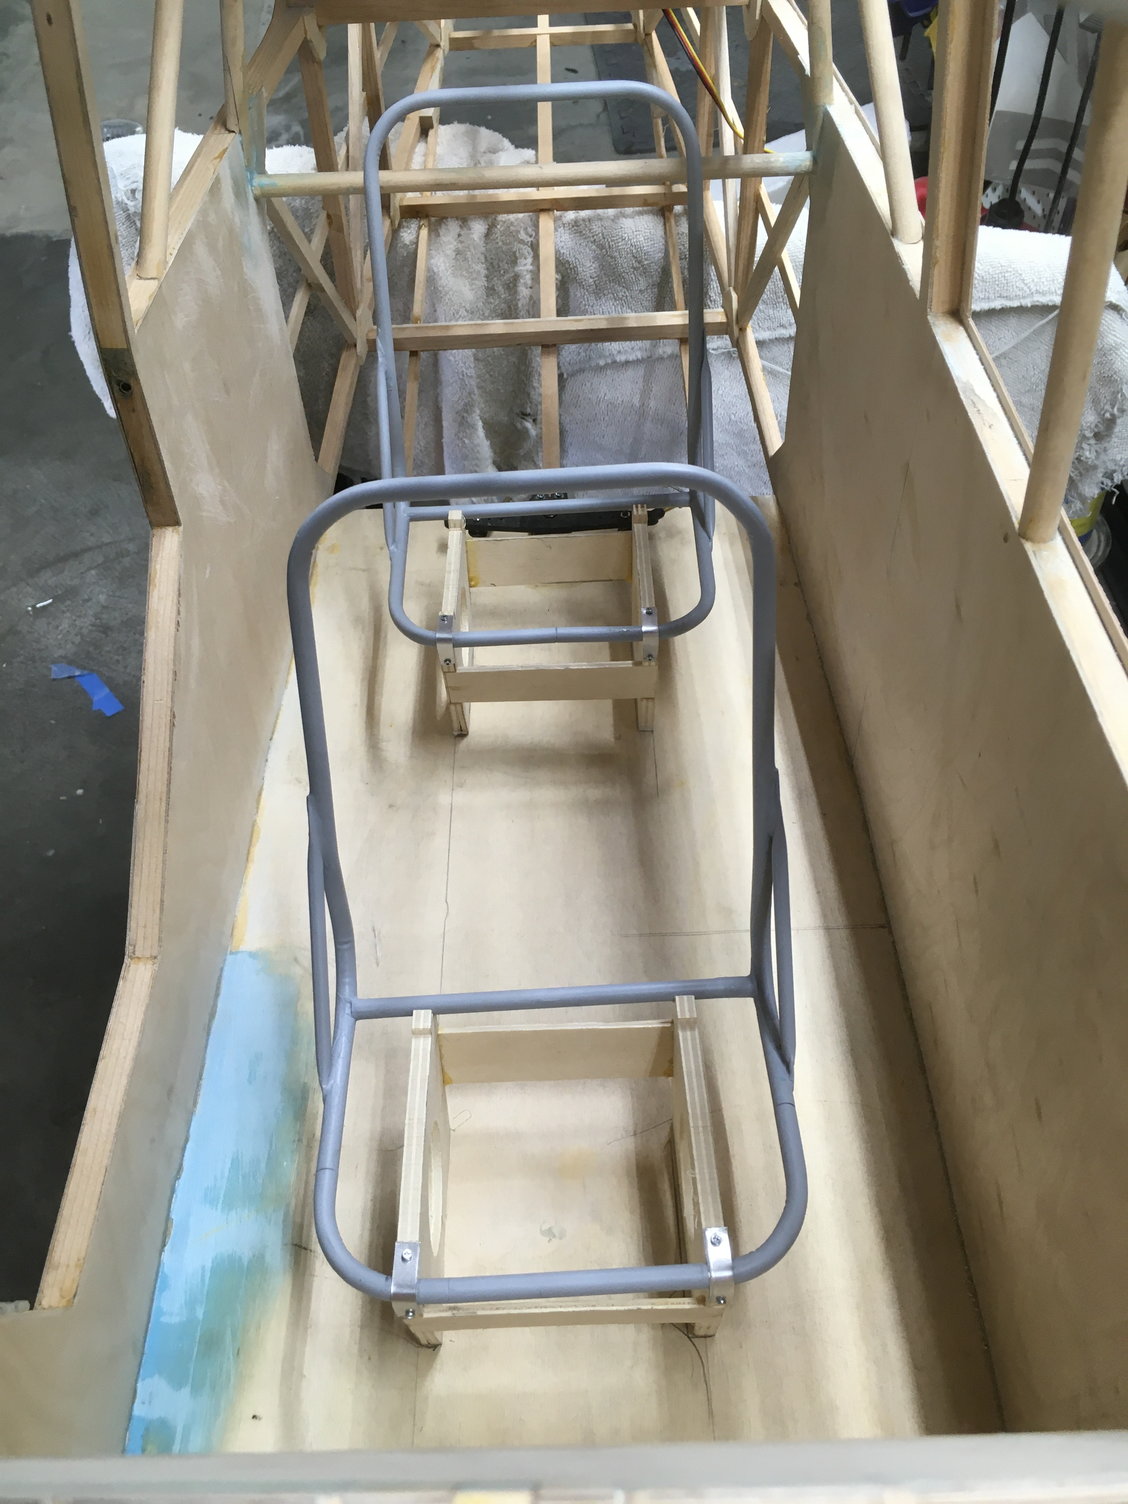
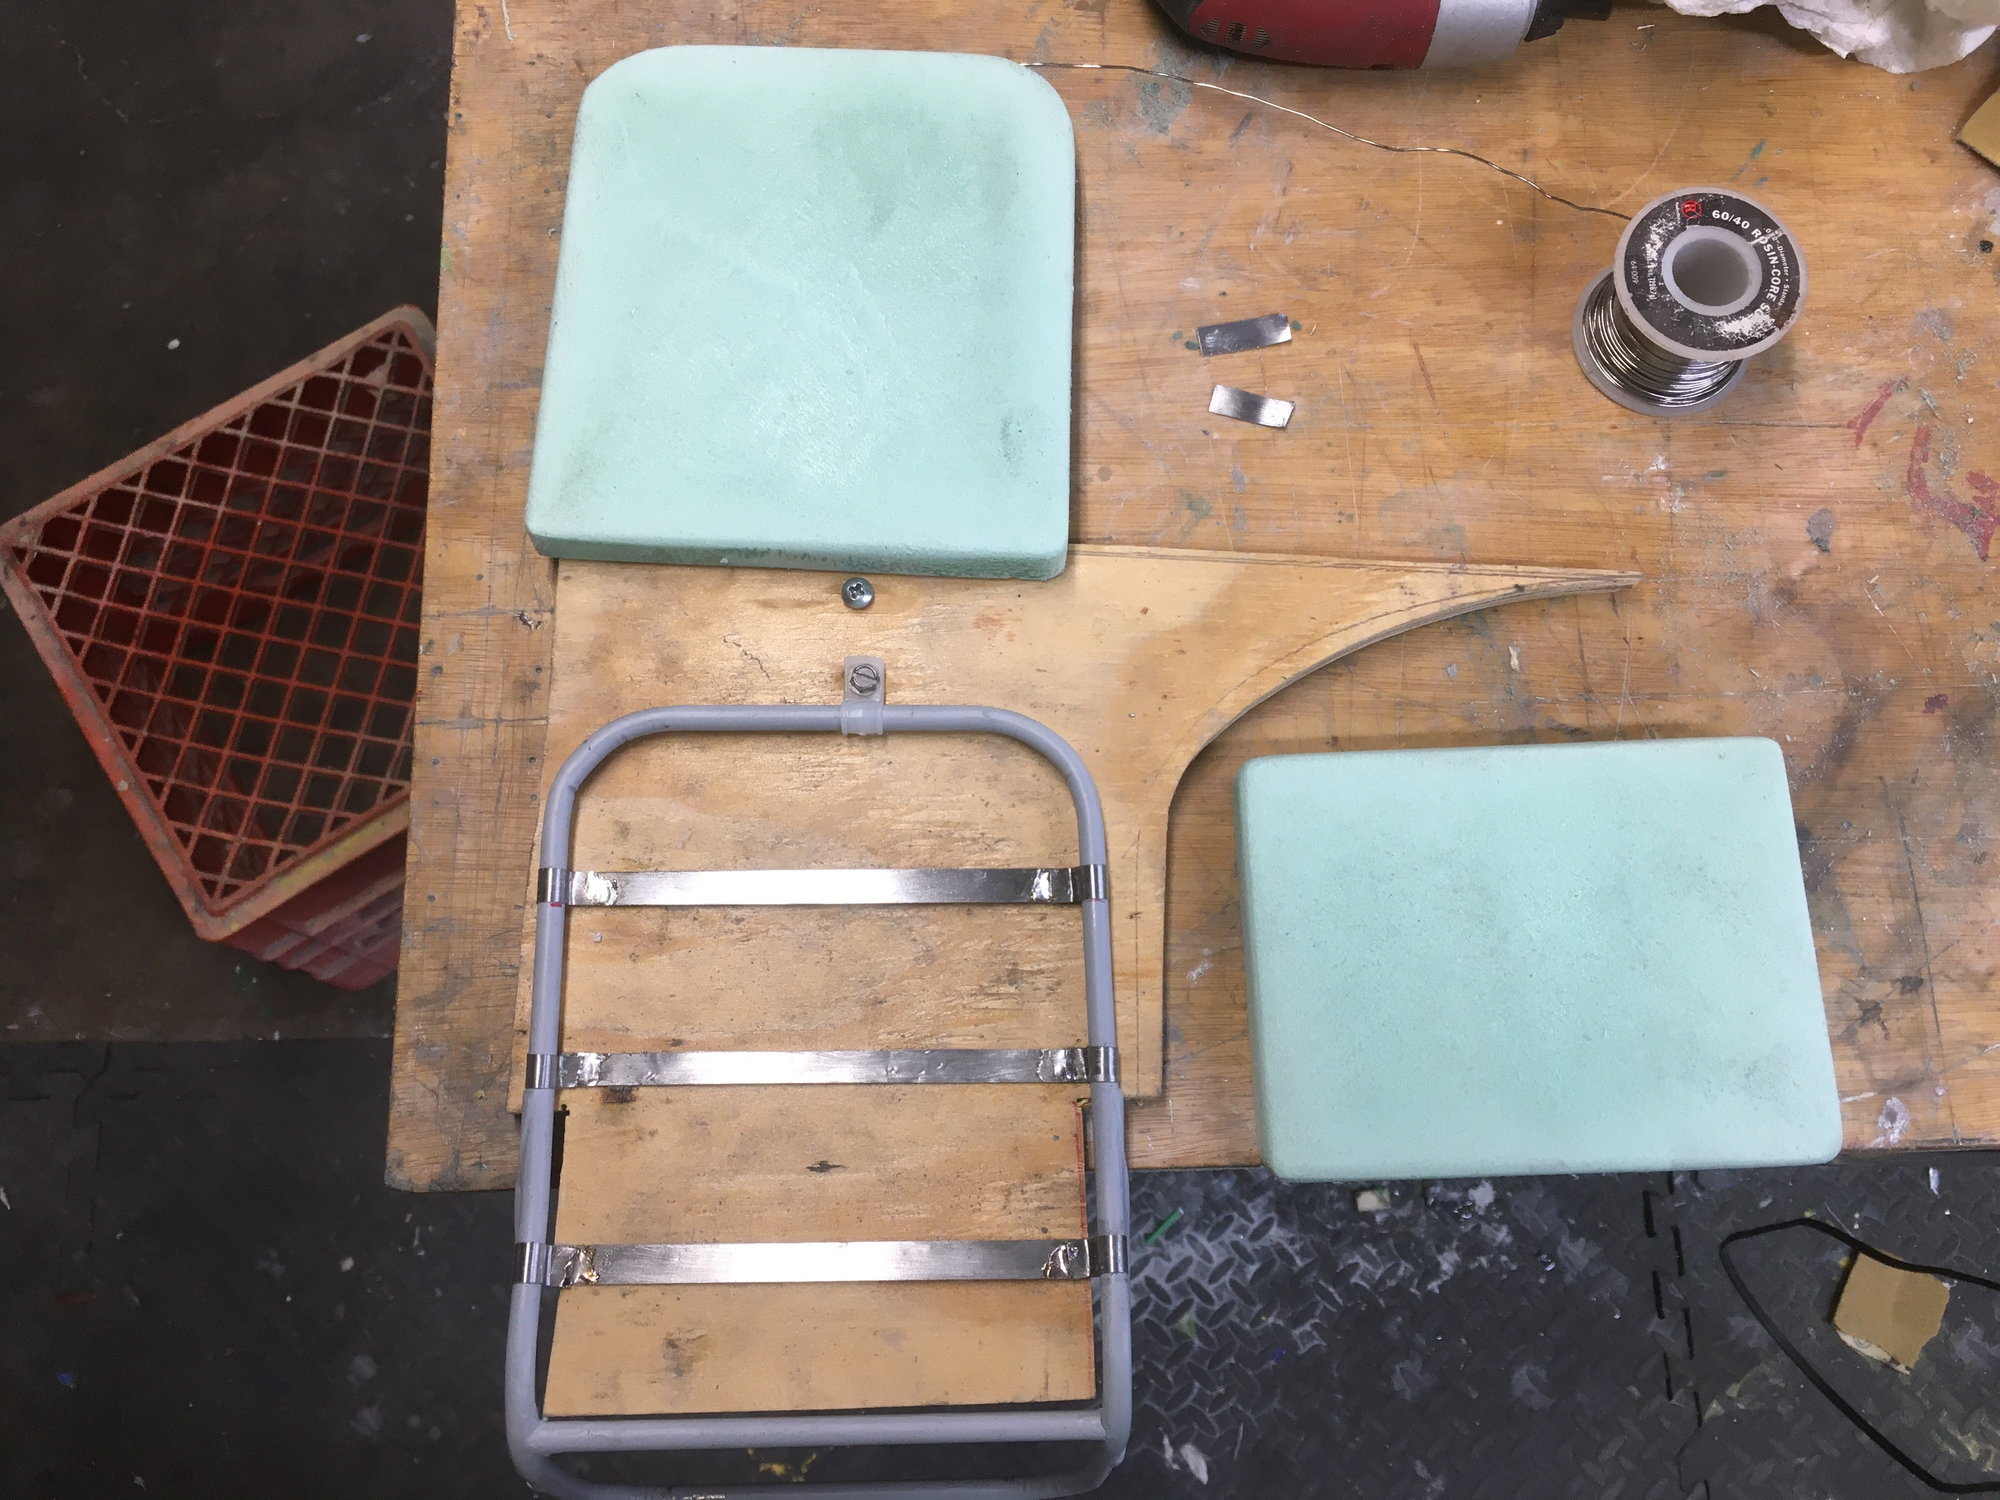
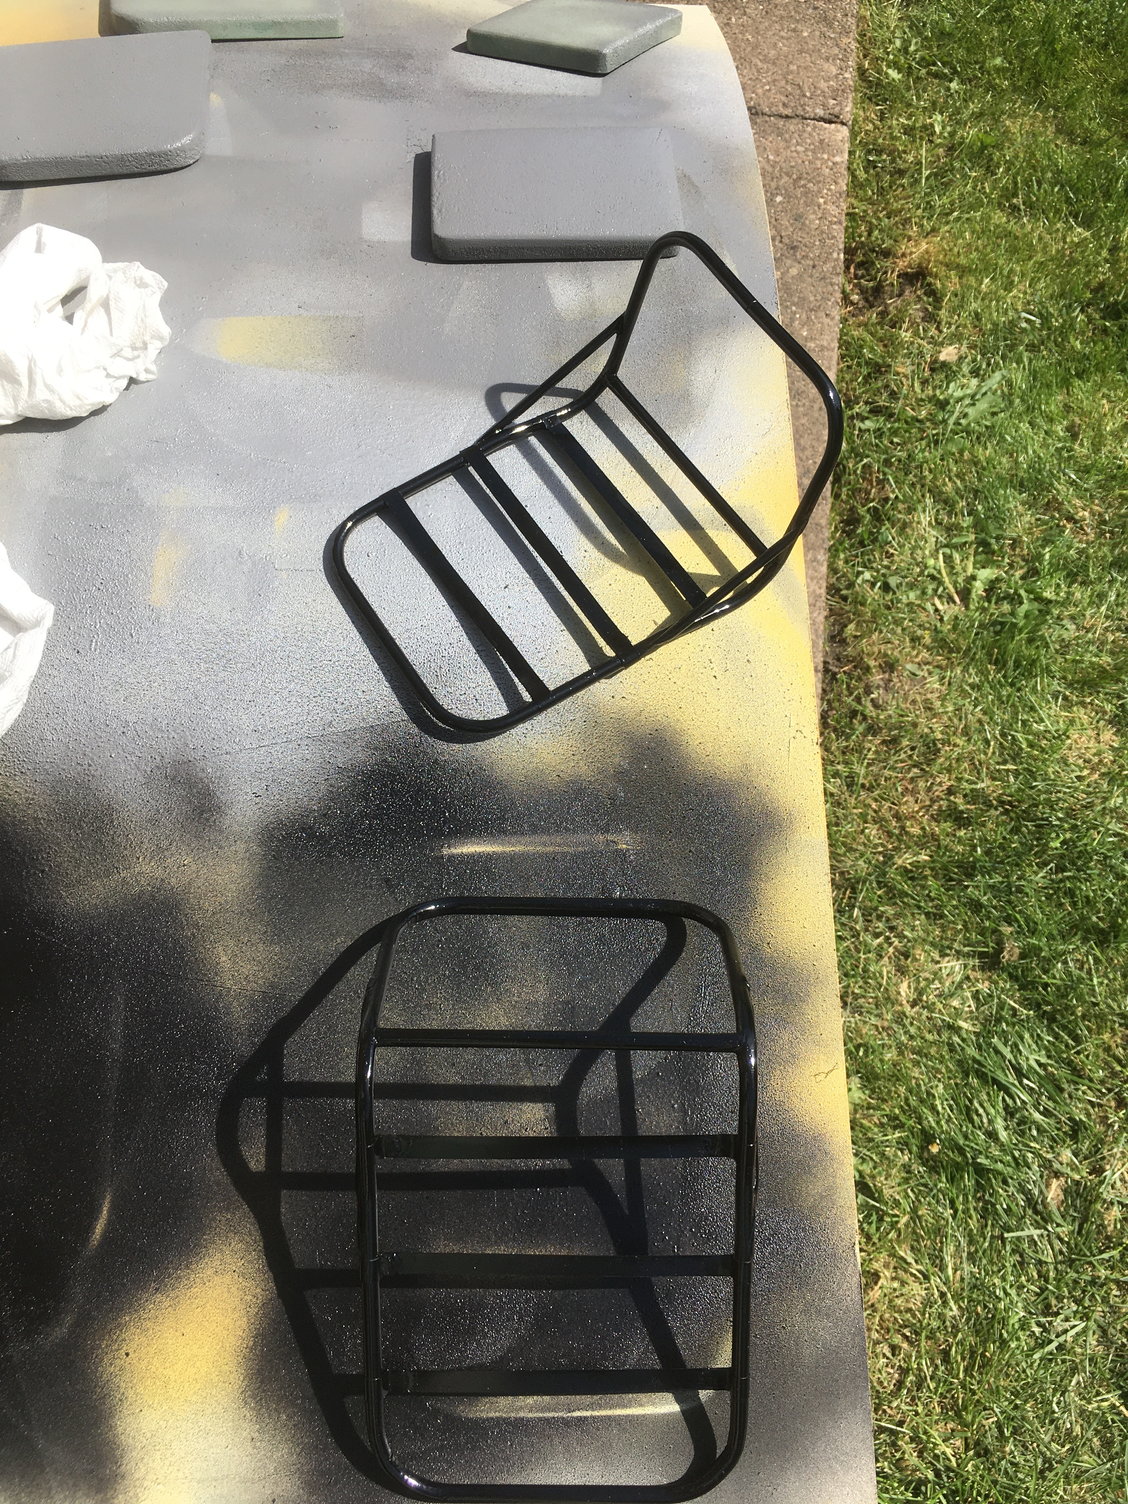
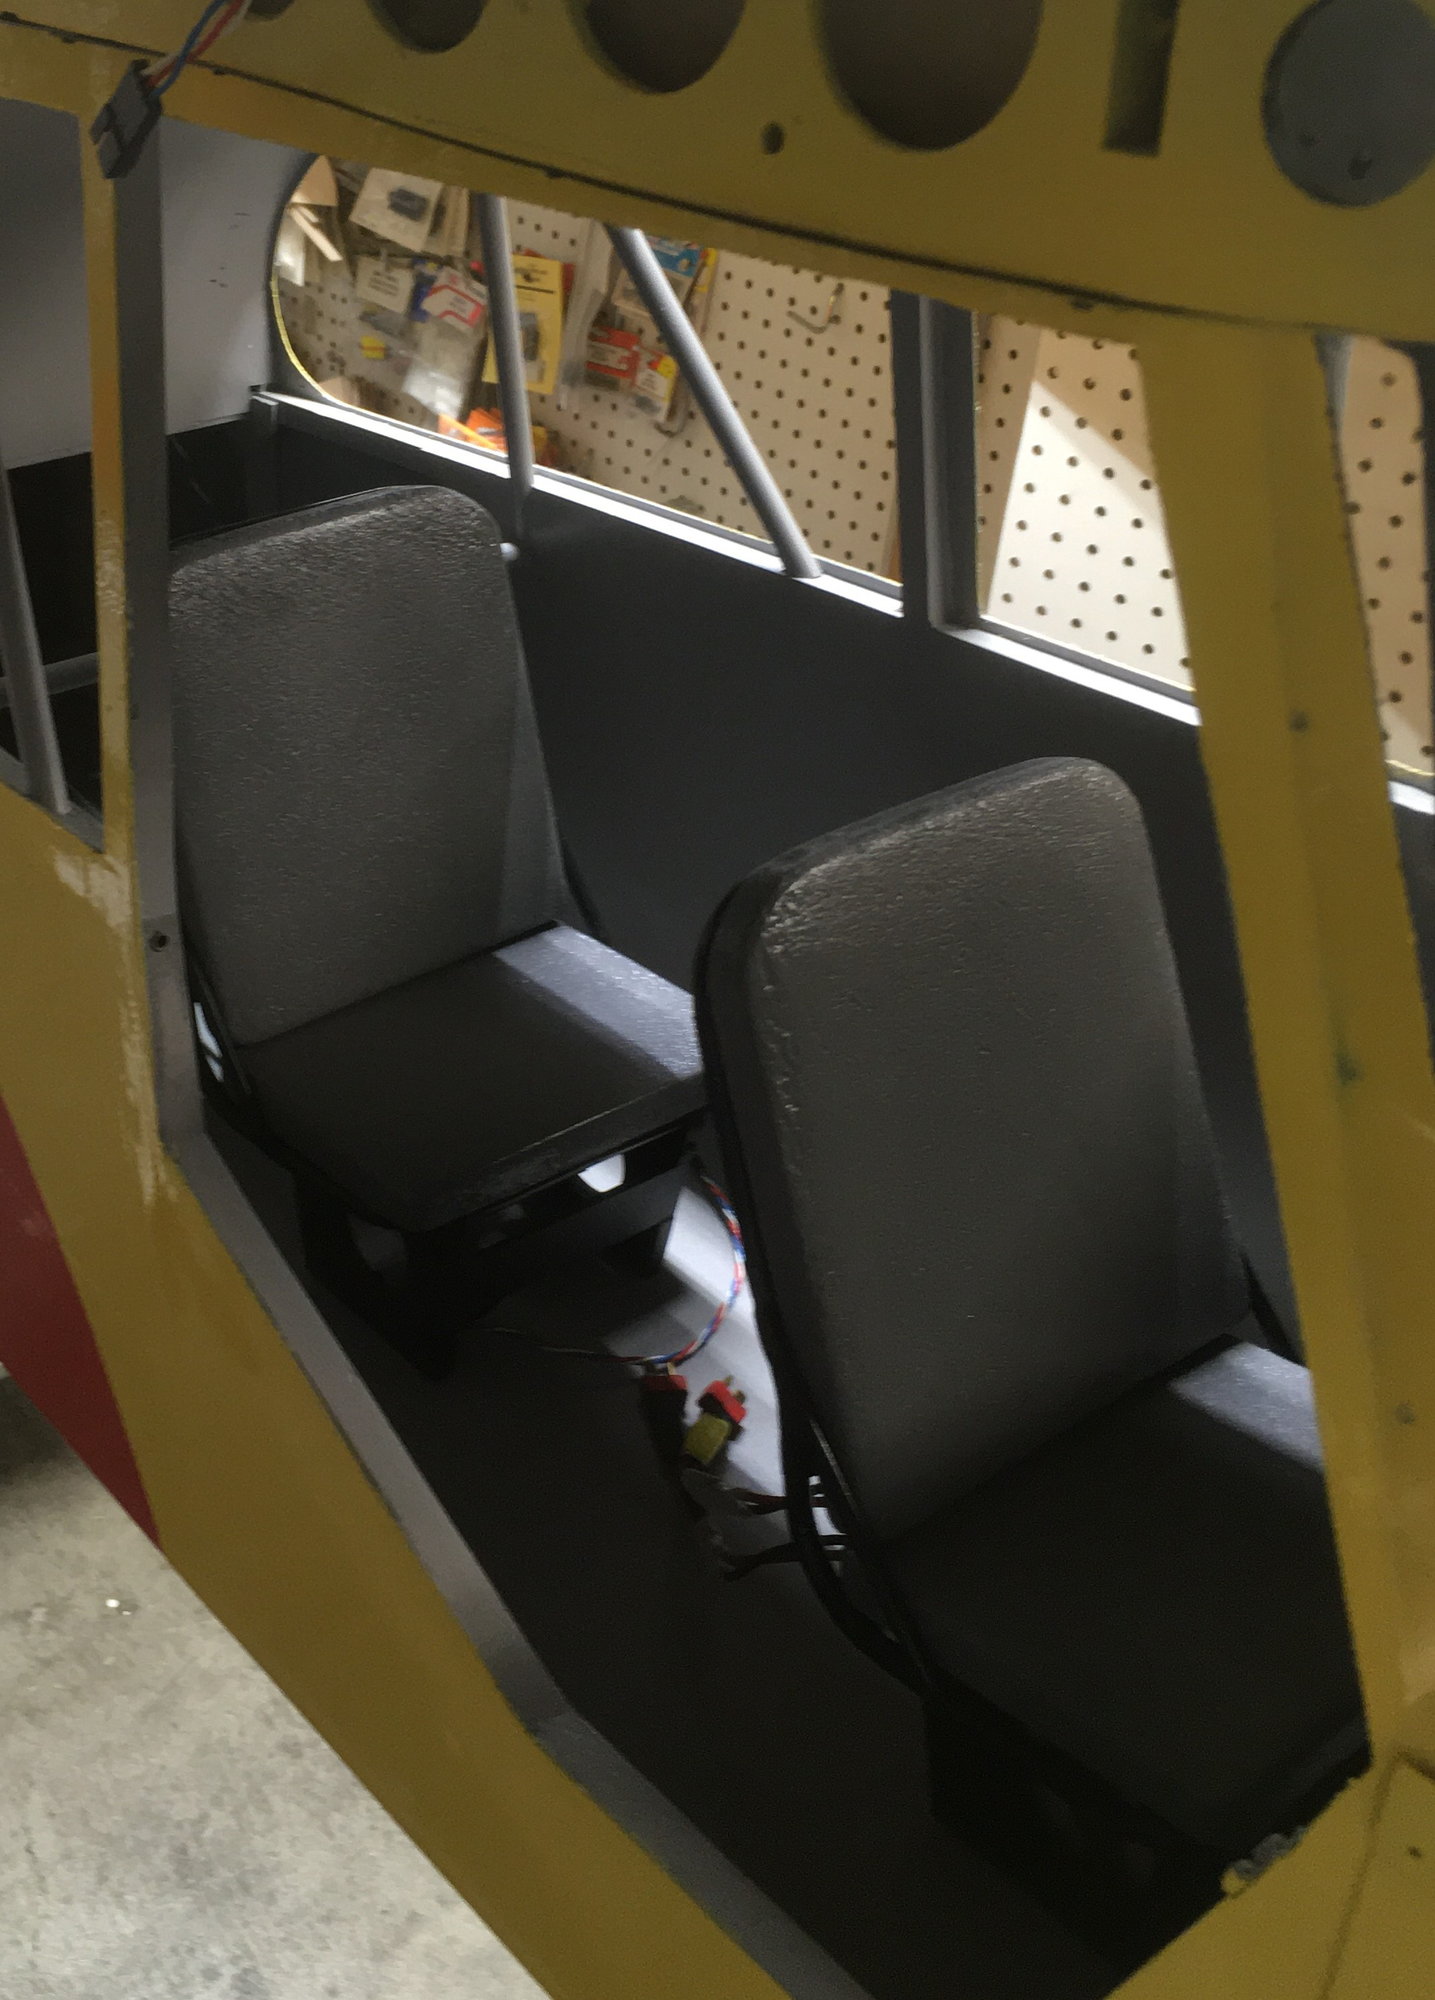
We spend more time re-doing things until it's right, but once it's right, it looks good. I cut the cushions out of 2# foam and painted a darker shade of gray, I think once I wet sand them and recoat they will look just fine. I added some more detail to the seat frames and painted with semi gloss black
05-21-2021, 02:49 AM
#88
It Rustoluem paint that goes on all surfaces including plastic. Once I get the paint built up I think it will look good if not until I figure out a different approach. I was thinking about spraying the foam with water based EkoFill from Steward Systems, water based and rubbery feeling. Does not take long to make a new set of seats.
Last edited by Tony Hallo; 05-21-2021 at 04:17 AM.
05-22-2021, 06:15 PM
#89
........I think I mentioned using the steward system and the EkoFill on a full size Vought O3U-3 that we are scratch building as a static display only.
using the EkoFill for the cushions is a good idea.........I think dipping it might produce a smooth overall apperance.
using the EkoFill for the cushions is a good idea.........I think dipping it might produce a smooth overall apperance.
05-23-2021, 03:15 AM
#90
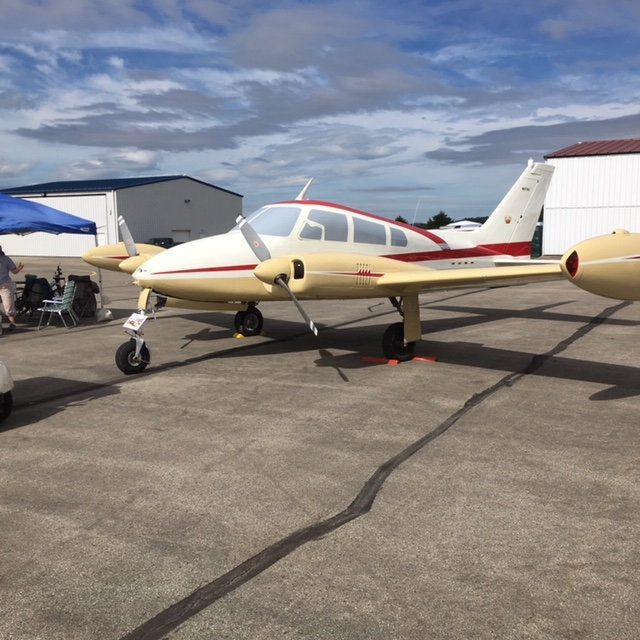
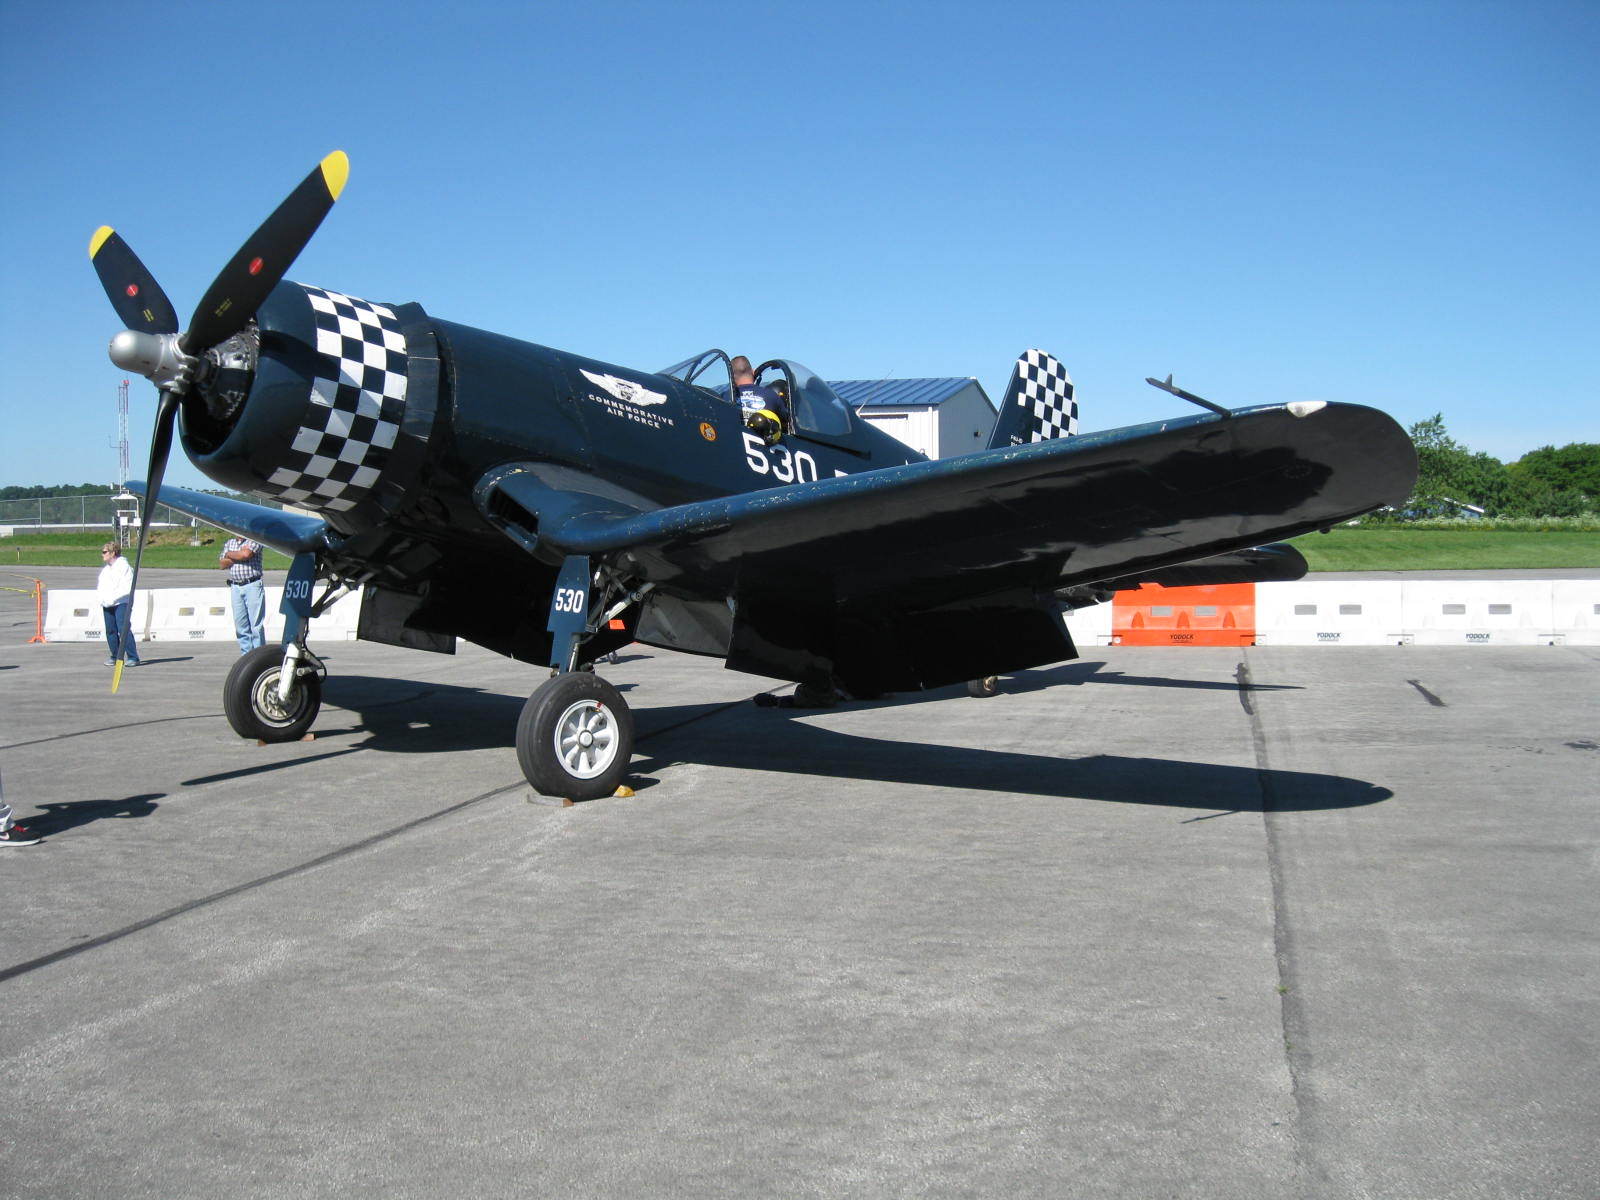
I'm pretty sure that will be my next try. The seats look fine for the time being, would like to fly the Champ at our 7th Annual Summer Solstice Fun Fly on June 19 in Indiana, PA, yours truly is the CD. Also hope to fly the Champ at the Jimmy Steward Air Show in July, our club does a static display and we get to to fly for 2 20 minute windows if the schedule allows. The local EAA is restoring Jimmy's Cessna 310 for display at the Airport mane after him. The Corsair below flew at the 2019 show. At the 2017 show I hit a marker light on the runway while landing, rather embarrassing in front of several hundred spectators!!! The 2020 show was canceled
05-24-2021, 09:29 PM
#91
Member
Tony, if you don't mind, I might ask from time to time for a tip or two. Or where you sourced a component. I've made notes on the posts, but I'm sure I've missed a few.
Should be seeing a kit headed to my house soon. Another Champ coming into the world!
Should be seeing a kit headed to my house soon. Another Champ coming into the world!
06-01-2021, 04:20 PM
#95
..........do you have a working door on the Aeronca?.......it can be made with a variety of materials depending on the shape of it.....the outside handle on the Cessna was made from a an Aluminum push pin and a 1/8" solid alum rod........joined together using part of the pointed shaft running thru it..........the inside handle was cut to shape from a single piece of sheet alum ........drilled at the big end for a shaft to be installed, then a square tube added to that.........then a bezel from Hobby Town added to finish it off.........