


Welcome to Club SAITO !
 03-20-2026 | 07:19 AM

Senior Member
My Feedback: (3)
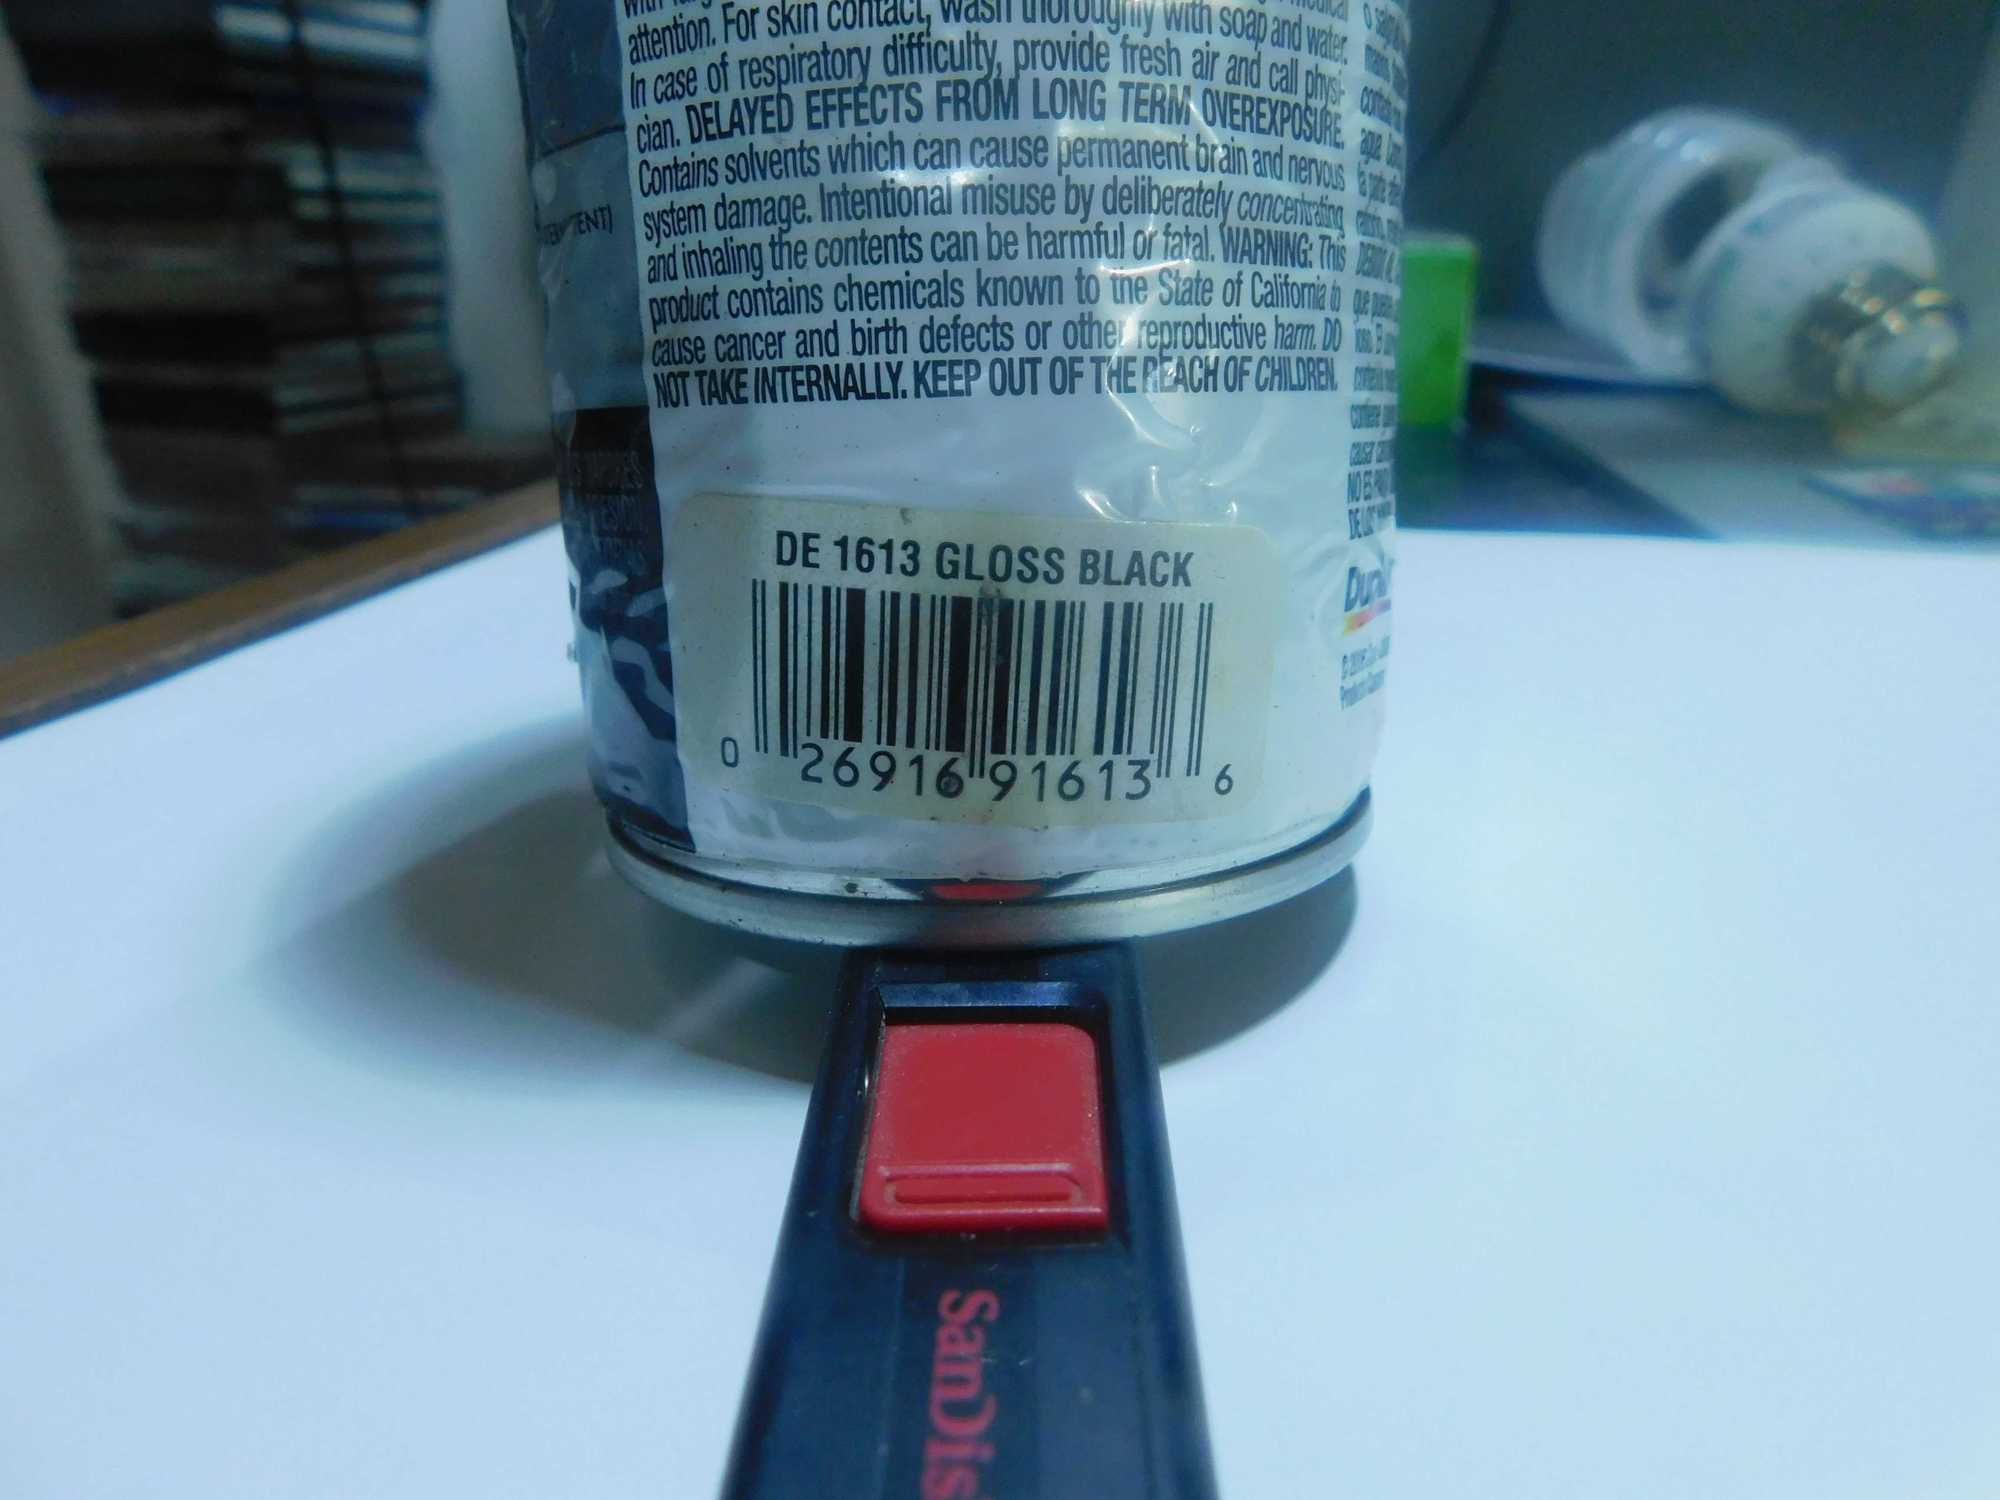
Can't remember if asked before, but wanted to know what black paint you used on the engine(s). Most of what we have up here isn't fuelproof.


 03-21-2026 | 05:46 AM

My Feedback: (2)
Look for it from other sources.
Over the past several months and longer, I have found out that Amazon prices can be very high (some are out of sight) compared to other retailers. Even for those of us with Prime service. I'm considering dropping prime. Amazon, IMHO, isn't the great online retailer that they used to be.
I see that O'Reilly's Auto Parts has this for $14 and other sites have it for as low as $11
Just my $.02
Bob
Last edited by N1EDM; 03-21-2026 at 06:52 AM.
03-21-2026 | 10:39 AM
Senior Member
My Feedback: (3)
Thanks guys. I did find it here at a brick and mortar store for $19 CDN, but they have different formats, (flat, gloss, matte and semi-gloss). Which one do you use?
The following users liked this post:
SigMan (03-26-2026)
03-23-2026 | 12:05 AM
My Feedback: (2)
Great design on the finish. Is that paint or film??
Either way it looks fantastic. My imagination could never cobble up a design as pretty as that turned out
Bob
Either way it looks fantastic. My imagination could never cobble up a design as pretty as that turned out
Bob
03-23-2026 | 03:49 AM


Thanks Bob. Its heatshrink film and its a nice colour scheme and easy to see against any sky. Will put a video up soon of the maiden flight.
 03-24-2026 | 01:32 AM
Wow, Thanks, a nice smooth flight, and smooth camera person also. Did you happen to buy it from J. Perkins, thanks, Dave
Last edited by 1200SportsterRider; 03-24-2026 at 01:37 AM. Reason: Add info
03-24-2026 | 02:58 AM
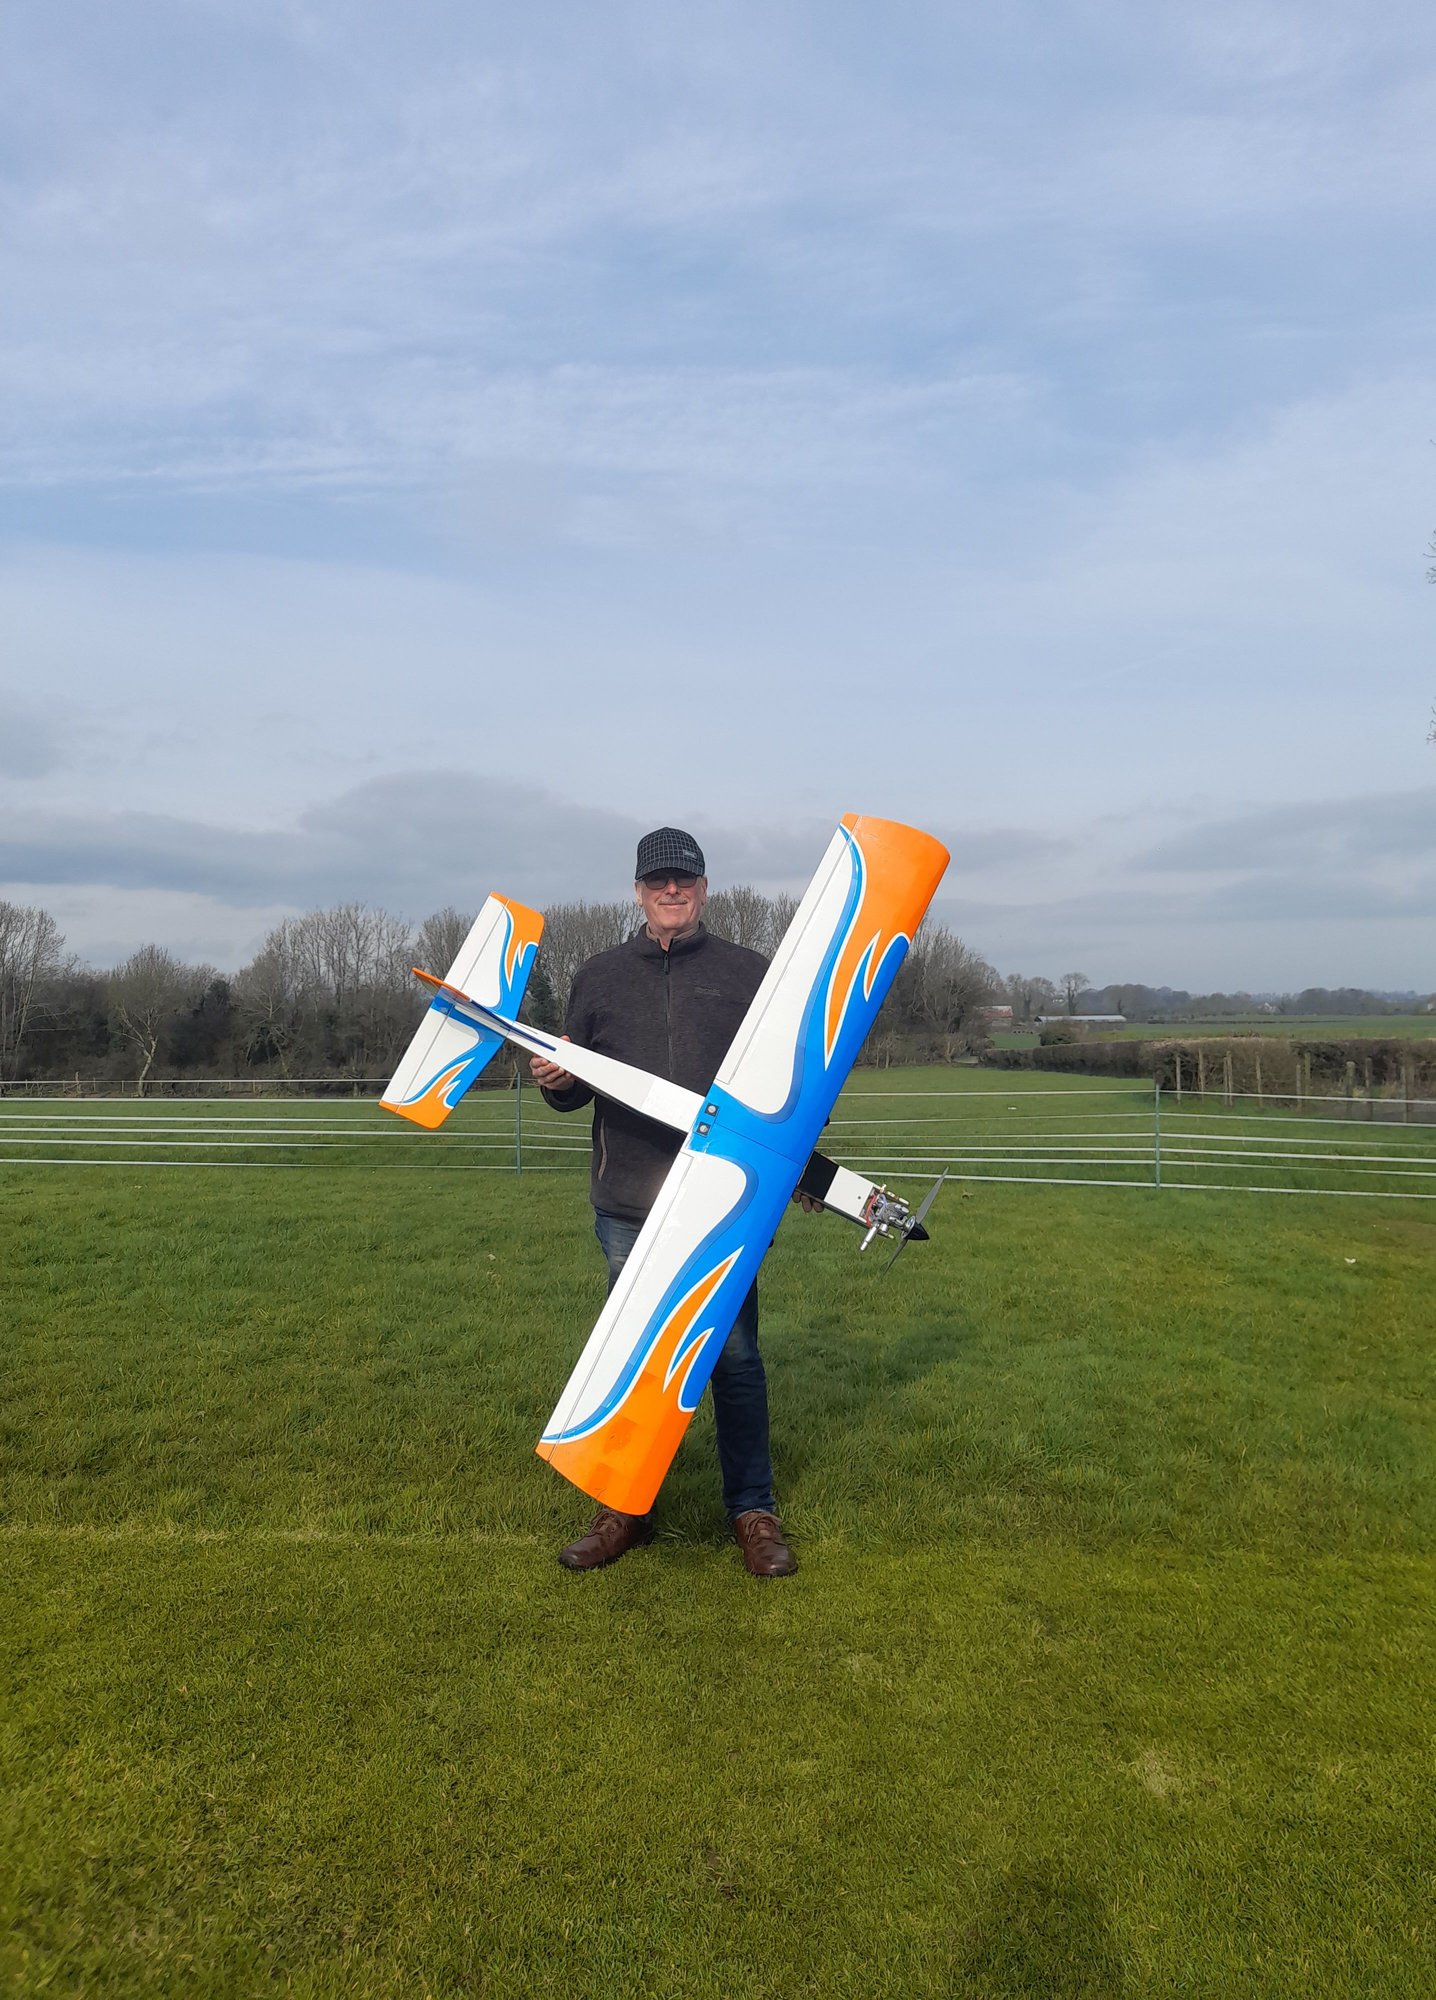
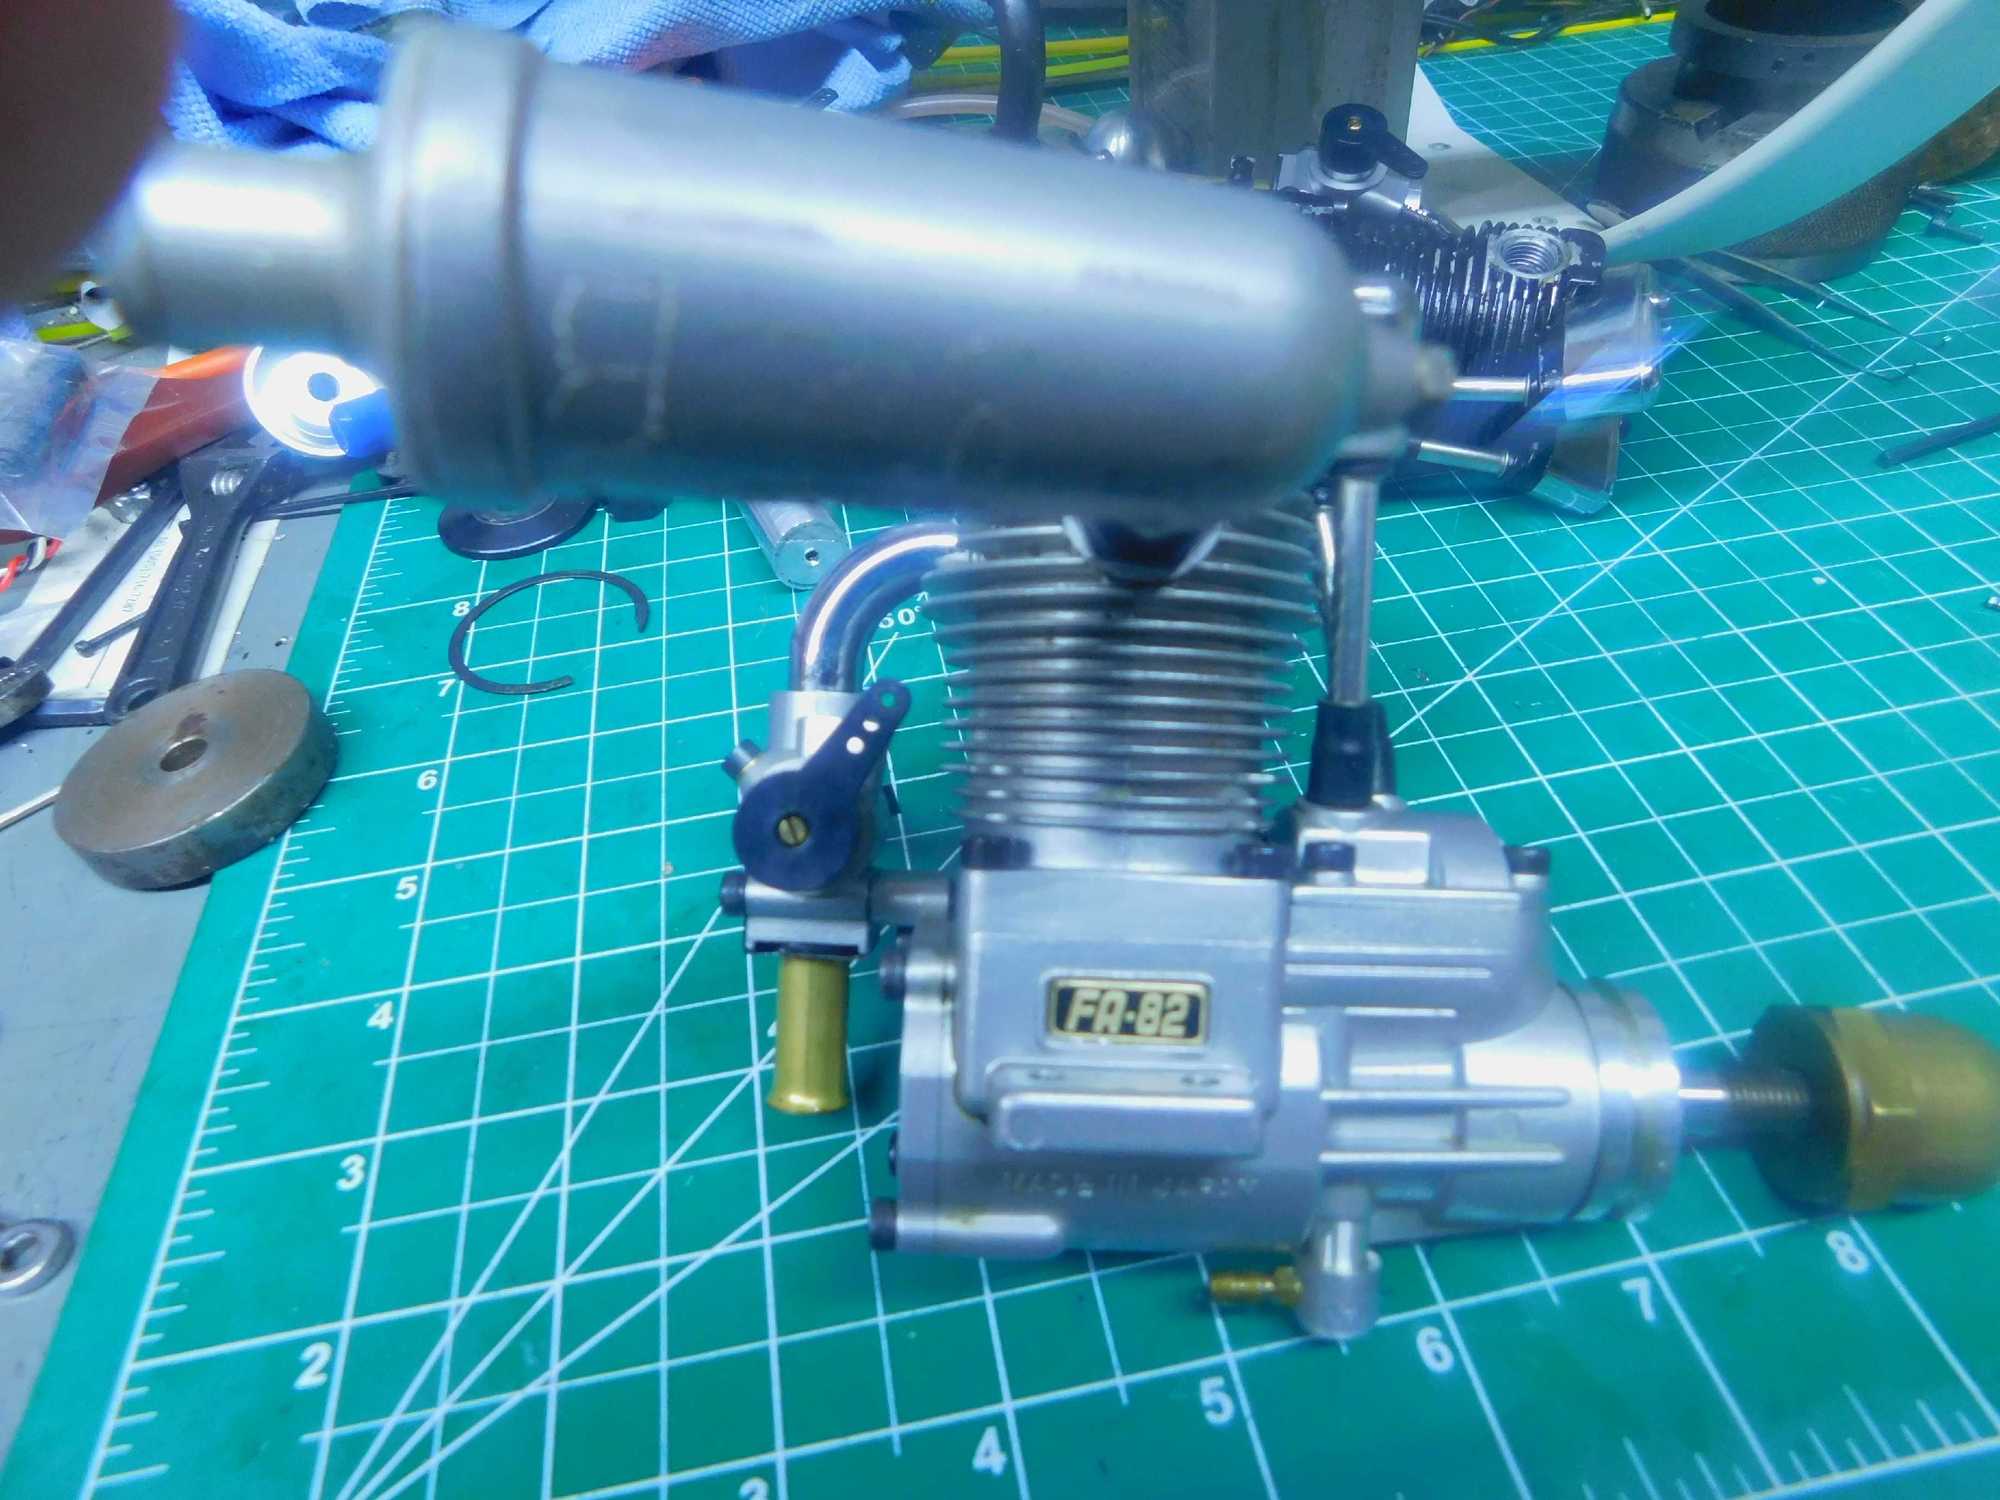
Thanks Dave, yes it came from J.Perkins. it's a nice plane to fly and the vibrant colour scheme stands out well against the cloudy skies. But the icing on the cake is the Saito 82.
 03-24-2026 | 03:28 AM
Yes Dave, it's an 82b. Brilliant engine and for the first time I didn't use the stock muffler. Instead I bought a turboheader muffler for it and it gives off a very pleasant note. I did forget to add that the young man with the camera always does a good job for it is not the easiest thing in the world to follow a plane around the sky.
03-24-2026 | 04:39 AM
 03-24-2026 | 04:41 AM
Yes Dave, it's an 82b. Brilliant engine and for the first time I didn't use the stock muffler. Instead I bought a turboheader muffler for it and it gives off a very pleasant note. I did forget to add that the young man with the camera always does a good job for it is not the easiest thing in the world to follow a plane around the sky.
My home made 82b.
Last edited by 1200SportsterRider; 03-24-2026 at 04:44 AM. Reason: Add info
The following users liked this post:
easystar123 (03-26-2026)
03-24-2026 | 09:34 AM
The following users liked this post:
easystar123 (03-26-2026)
03-25-2026 | 01:30 PM

 03-29-2026 | 12:38 PM
Today | 11:55 AM
03-29-2026 | 12:38 PM
Today | 11:55 AM
Hi Guys.
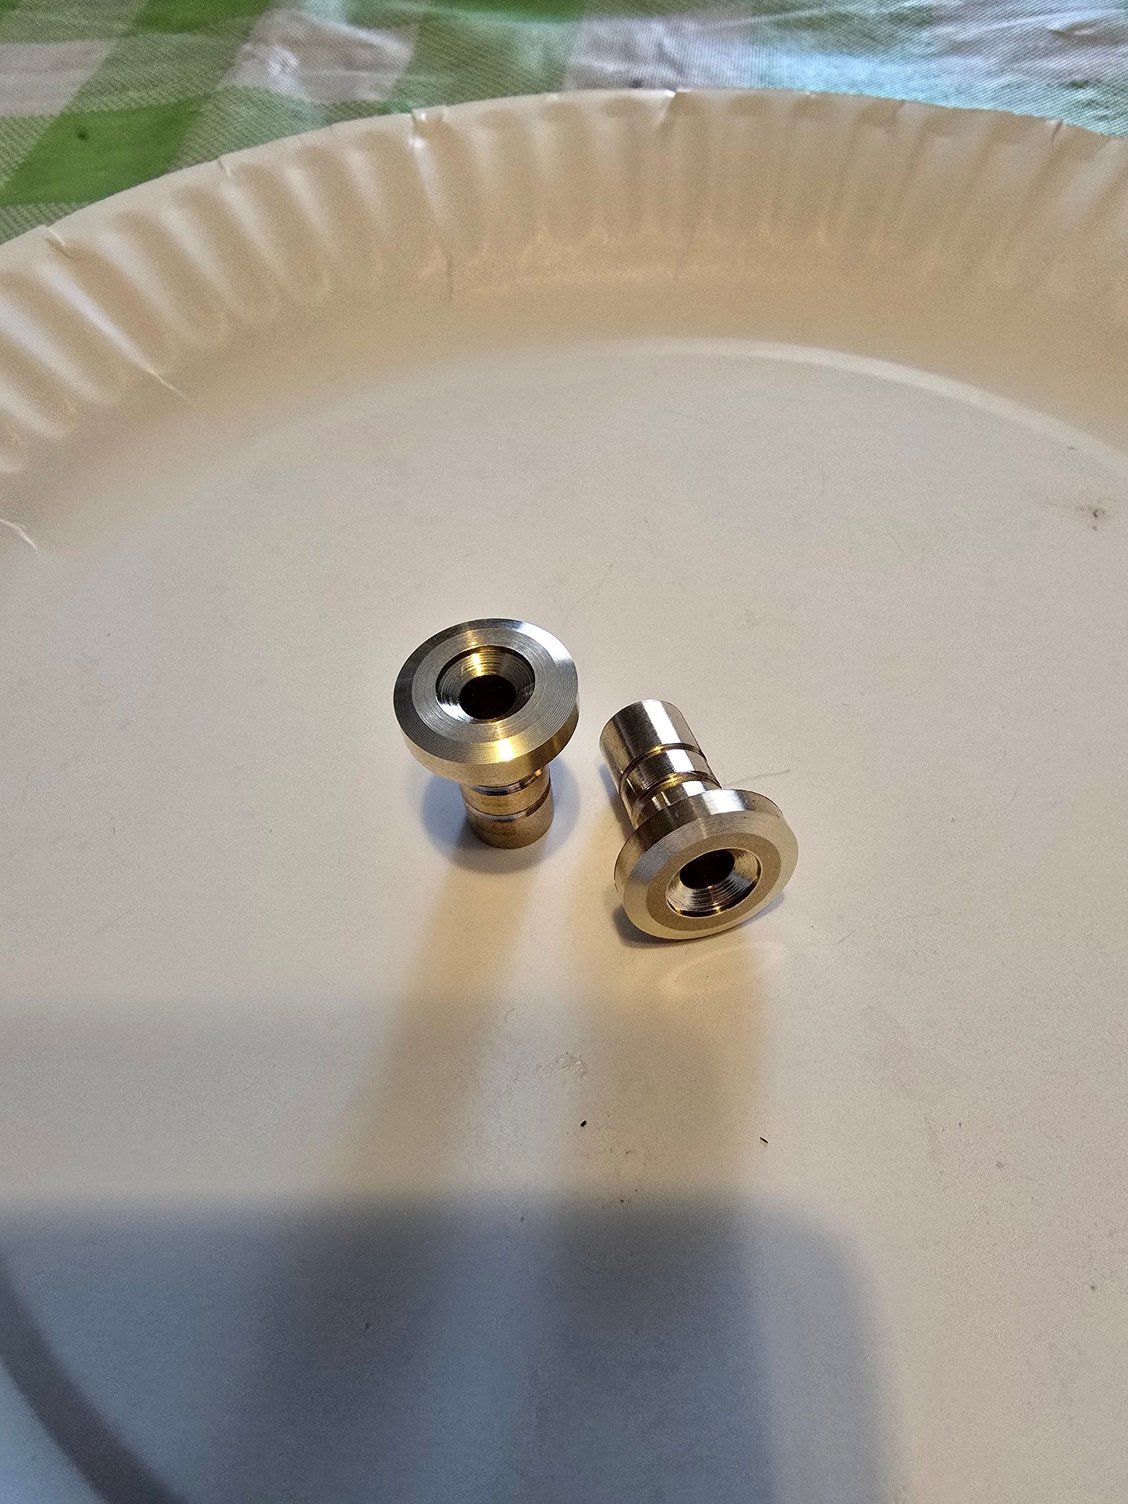
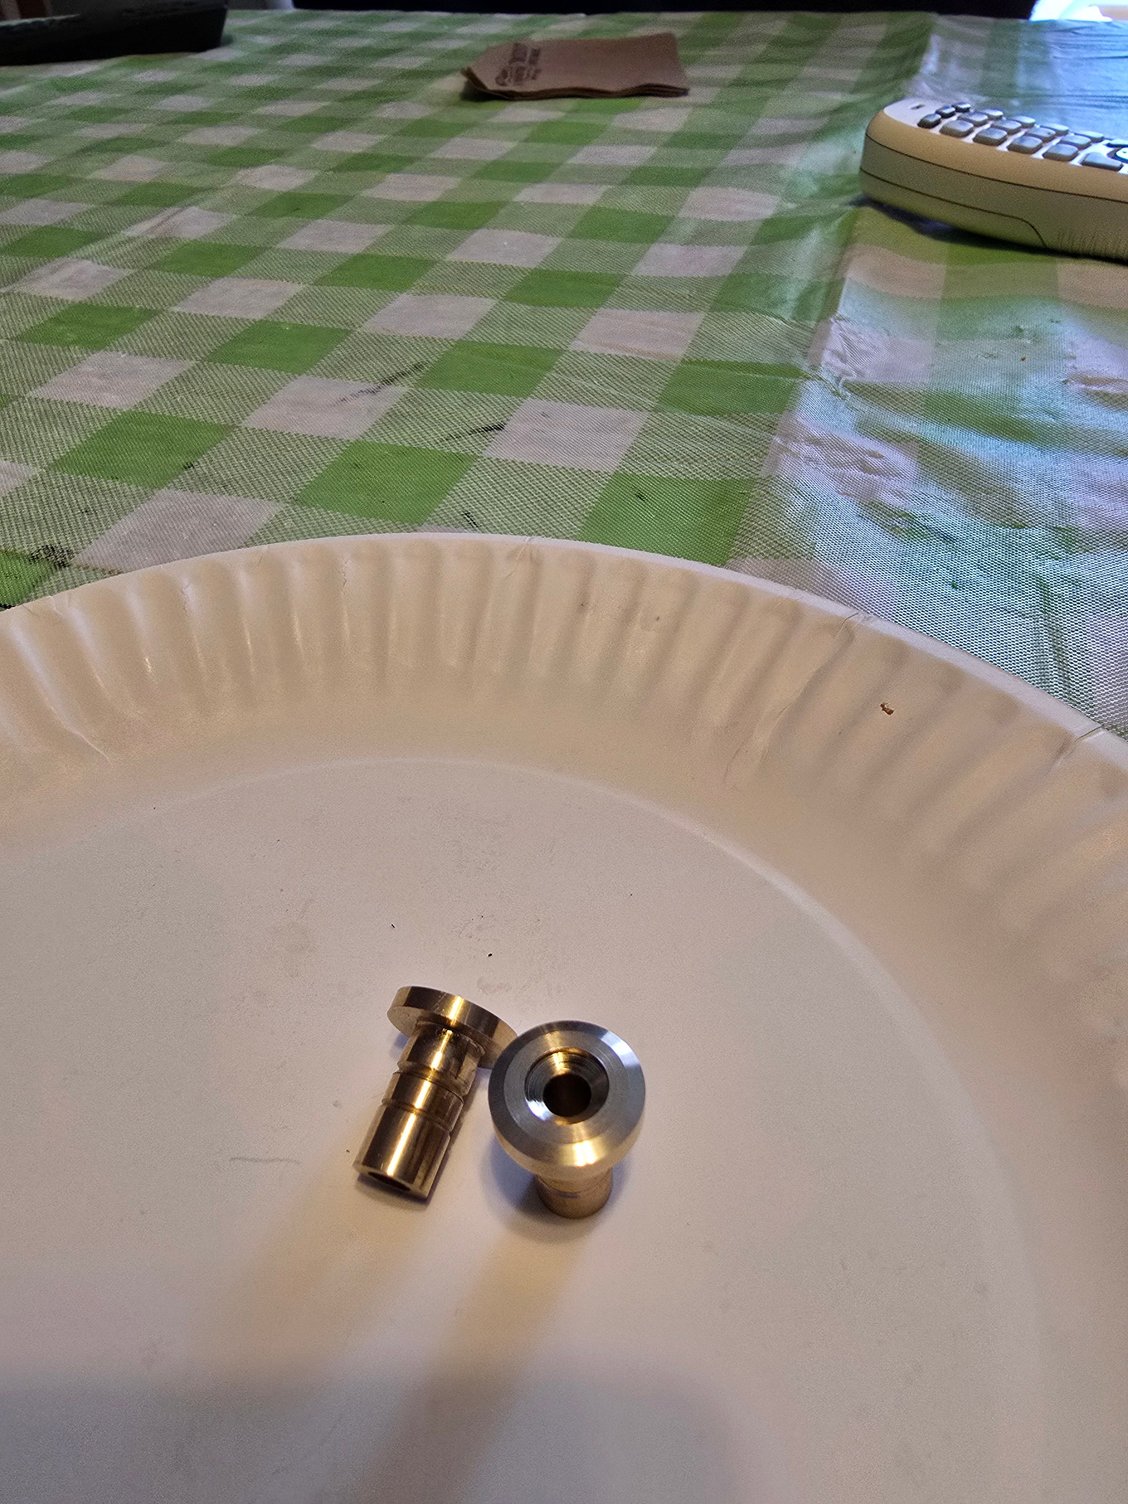
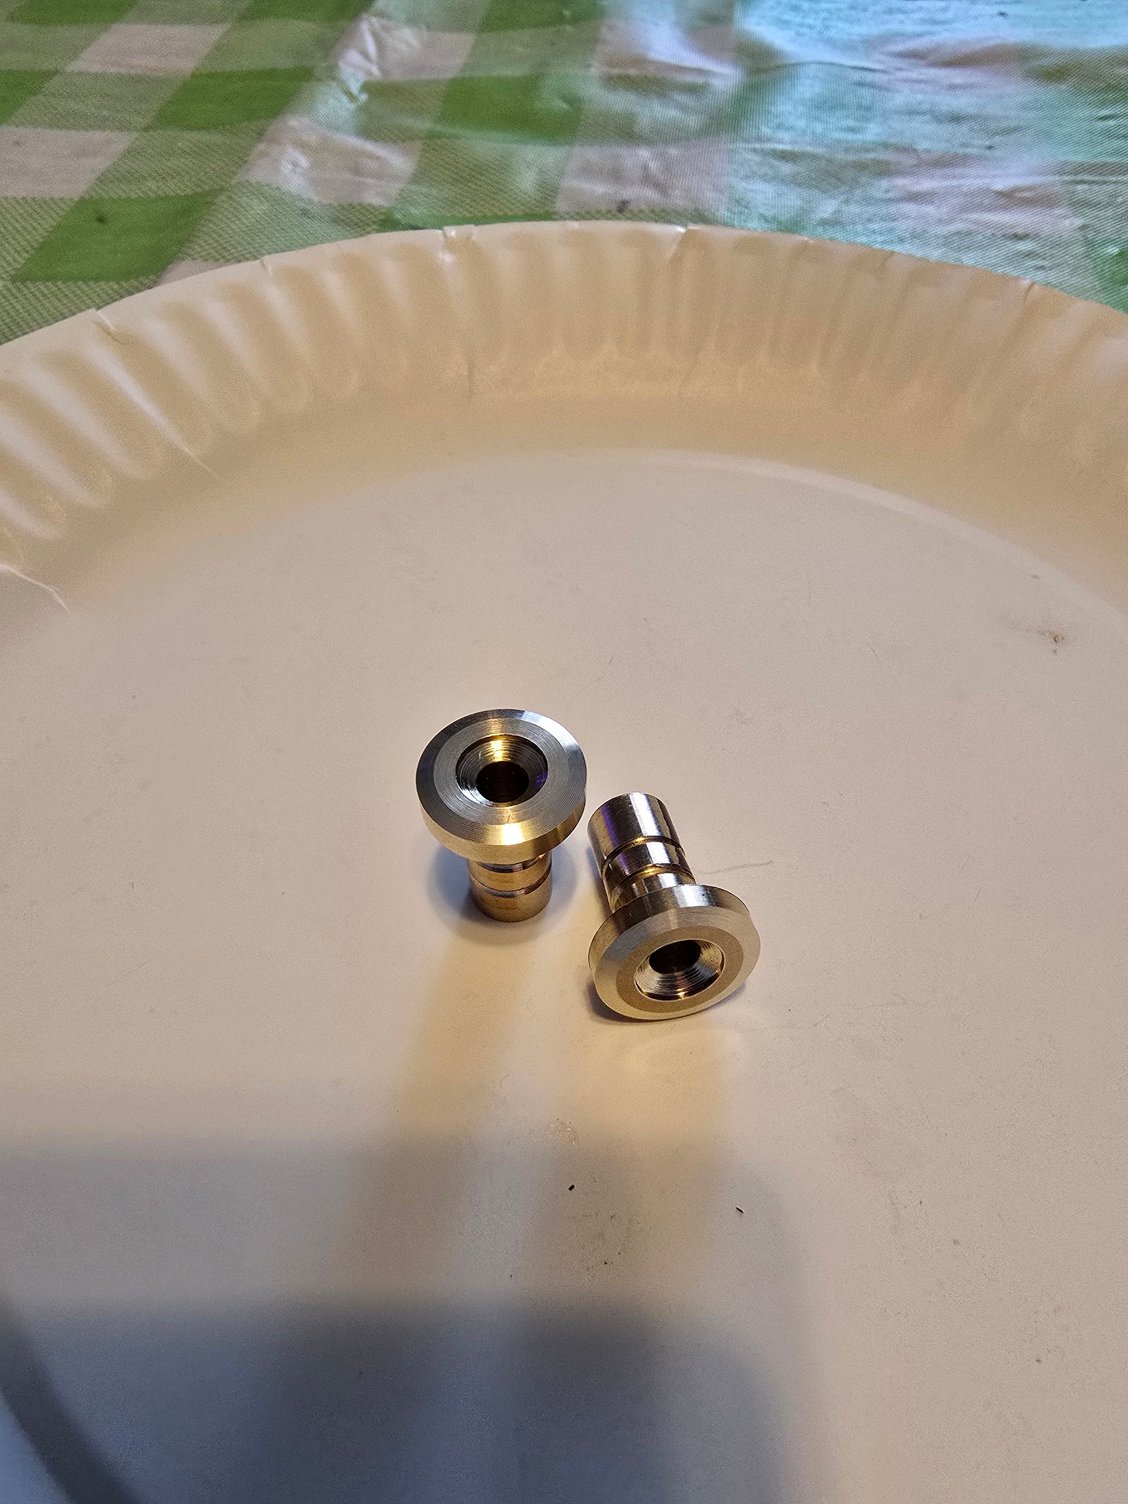
I finely got my lathe parts and have my lathe back together. yes, it took that long to get my parts. the machinist is a contractor, and he is going to do a $20.000 or $200 job before he does my $100 job. well, my lathe cuts fantastic.
you guys with these smaller lathes I highly suggest you should Hone-Lapp your dove tails, all 8. or I should say all 6 and the 2 gibs. I also lapped where the leadscrew stops and feedweels rub against thire mounts, (that is IF your lathe is setup like mine). my god the feed on this 33y.o. boy is finely smooth as warm butter.
as for my engine test stand. so with my lathe fixed I finely got the stand's inserts finished. these inserts will be glued into the stand to hold it to the old tabel I have under the back deck.
now all I have to do is make a fuel tank mount for the stand. I want it strong and look good. I think I will buy some exotic hobby wood to start with.
see pic below for the inserts.
NOTE, the top flat center cut was done some 4 months ago with an insert type cutter. the angle cut was done just the other day. with a cheap $8 type cuter. yes my lathe is cutting much better.
Last edited by the Wasp; Today at 12:07 PM.
Today | 02:59 PM
Senior Member
My Feedback: (3)
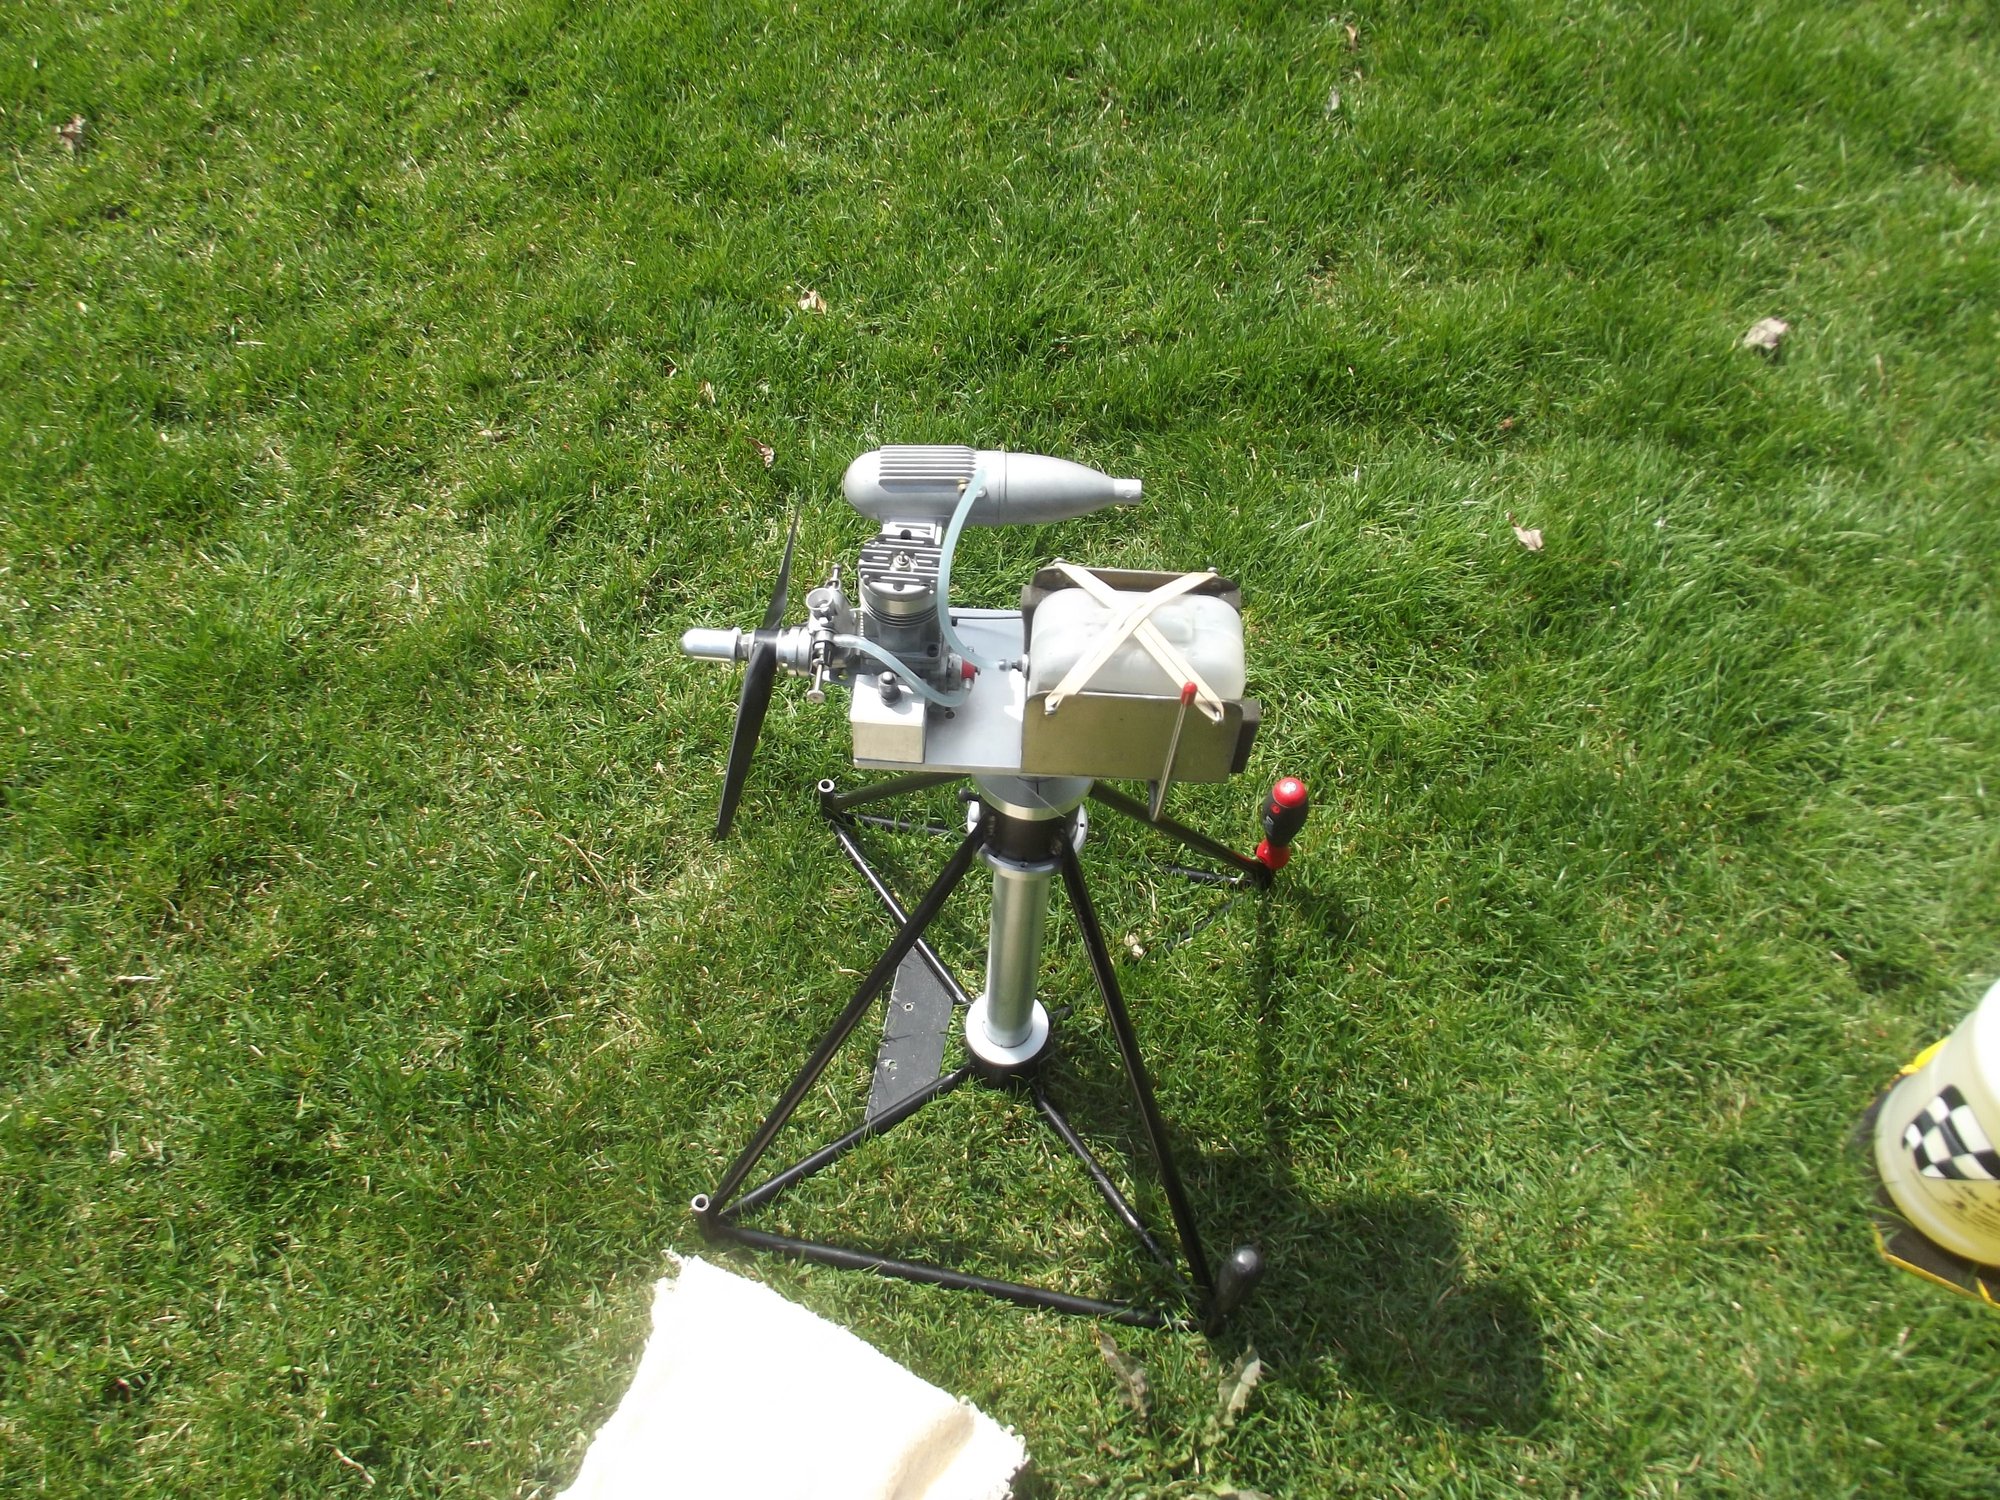
I've posted pics with several different Saitos running on my test stand over the years, but figured would describe how it developed:
I had to make mine self contained as there was no guarantee I could find a table or deck to clamp the standard setups to.I lucked out when we had some waste 6061 alloy could machine to form the deck, as well as material to form the uprights and clamps. Spare tooling bolts used to hold down options to a mill deck tighten the clamps along the slot to fit everything from a COX 049 mounted to an angle iron adapter plate, a Fox 30 stunter with the baffle plate linked to the throttle, all the way up to a Saito 180, (so far). In the last year only issue was with a 46 I did for my friend that had a Pitts muffler. I pulled a stock muffler from spares and was able to set up what was a way out of tune carb after the standard treatment, (new bearings, etc.).
The frame itself was from another setup purchased so long ago cannot remember the source. I welded 4 T-rods used to anchor into the ground from stainless to avoid corrosion, (found only 2 necessary, but these pics show screwdrivers as the ends were getting painted yellow) and they have held up now for almost 2 decades without issue. I do have to bring a claw hammer to sometimes work them back out of hard ground.
I adapted two nosewheel steering mounts and a bent rod for my throttle, a wheel collar and spring against one to add a friction stop. That is hidden under the tank holder spaced off the deck for clearance and to adjust height to match the inlet fittings on most 2-strokes, (the centerline height doesn't match that of the uprights, but does not seem to affect 4-strokes that much). A steering arm also forms the lever for the rod up to the engines, using another spring loaded thumb clamp in the outer hole to adjust the 2-56 wire. That allows for infinite adjustment and changes to reach different carb setups.
Only mod early on was to reverse the throttle to the left hand side to avoid the exhaust. Can't believe didn't think of that during assy, but it showed up early with hot, oily exhaust exiting right aboot where your hand would be.Another future change hoping to accomplish is a taller pipe to raise it up to make my aging knees complain less. Still looking for alloy as it makes it lighter and easier to carry.
For anyone thinking of anything similar, I'm sure this design could clamp to a table, and there could be a servo operated throttle, as well. I just thought making it completely manual kept things simple.
ps. Unfortunately went looking and found the latest media wipe lost a lot of the pics in my engine folder. Included is a link to the initial run of a Tecnopower 7-cyl radial I built last year.
Hope someone else can find these ideas useful.
Last edited by Cougar429; Today at 03:08 PM.


