


G&L 1/5 DHC chipmunk - diary of a build.
 09-02-2014, 03:33 AM
#626


On the bench for today, more setup and installing gear. Still waiting on the KK primmer to get back on the wing.
I did get the ignition module installed. the cowl is so tight this was the only place I could fit it.


The vent and overflow line is hard piped with brass to come out of the end of the cowl opening.


This should keep it in place and nice and clean.


The fuel Tee is in and I will hook it to the carb in final install. I still need to do the RPM and heat sensors, that's next.
TB
I did get the ignition module installed. the cowl is so tight this was the only place I could fit it.
The vent and overflow line is hard piped with brass to come out of the end of the cowl opening.
This should keep it in place and nice and clean.
The fuel Tee is in and I will hook it to the carb in final install. I still need to do the RPM and heat sensors, that's next.
TB

 09-02-2014, 03:12 PM
#629
Daily progress
It is amazing how much time one can spend just installing gear.
I spent all day just on the engine and cowl.
The engine is installed. I like using the Nord Lock washer, they are great, no thread lock is needed.
I am going to install the fuel dot inside the cowl for now. I can always move it if I don't like it there.
Being I will be opening the door to fuel I made a kickstand for the door.
Nothing fancy just a 2-56 rod on a ball link.


RPM sensor is in. I used the 2 sided tope that came with it. I am not sure this will work but I will try.
I mainly want this for Angie. With the round cowl it will be easy to install and should work.
The heat sensor is strapped to the spark plug cape and at the head. hope that works.

I installed the doors for the first time since I painted, they fit great.
I made new latches. This time I used brass washers instead of the zinc ones.
I wanted a bigger hole in the center and brass on brass solders better, had one break loos before.


Going to paint the overlay black next, then the cowl will be done, just the doors get the 671 on them.
TB
It is amazing how much time one can spend just installing gear.
I spent all day just on the engine and cowl.
The engine is installed. I like using the Nord Lock washer, they are great, no thread lock is needed.
I am going to install the fuel dot inside the cowl for now. I can always move it if I don't like it there.
Being I will be opening the door to fuel I made a kickstand for the door.
Nothing fancy just a 2-56 rod on a ball link.
RPM sensor is in. I used the 2 sided tope that came with it. I am not sure this will work but I will try.
I mainly want this for Angie. With the round cowl it will be easy to install and should work.
The heat sensor is strapped to the spark plug cape and at the head. hope that works.
I installed the doors for the first time since I painted, they fit great.
I made new latches. This time I used brass washers instead of the zinc ones.
I wanted a bigger hole in the center and brass on brass solders better, had one break loos before.
Going to paint the overlay black next, then the cowl will be done, just the doors get the 671 on them.
TB
Last edited by TonyBuilder; 09-02-2014 at 03:23 PM.
09-02-2014, 06:31 PM
#630


Join Date: Sep 2006
Location: The Sunshine state, when it's not raining!
Posts: 8,131
Likes: 0
Received 2 Likes
on
2 Posts
Hello Tony, fantastic build you have going on here, late subscriber. Flyer is speaking of me with the vent pipe. I put an extension on my engine and it killed the rpm, dropped from 4600"ish to 2100. Of course I was extending it 5 feet on a 170cc four stroke and have no clue as to your application.
09-03-2014, 08:20 AM
#633
Morning progress.
So I shot the overlay black today, that went well.
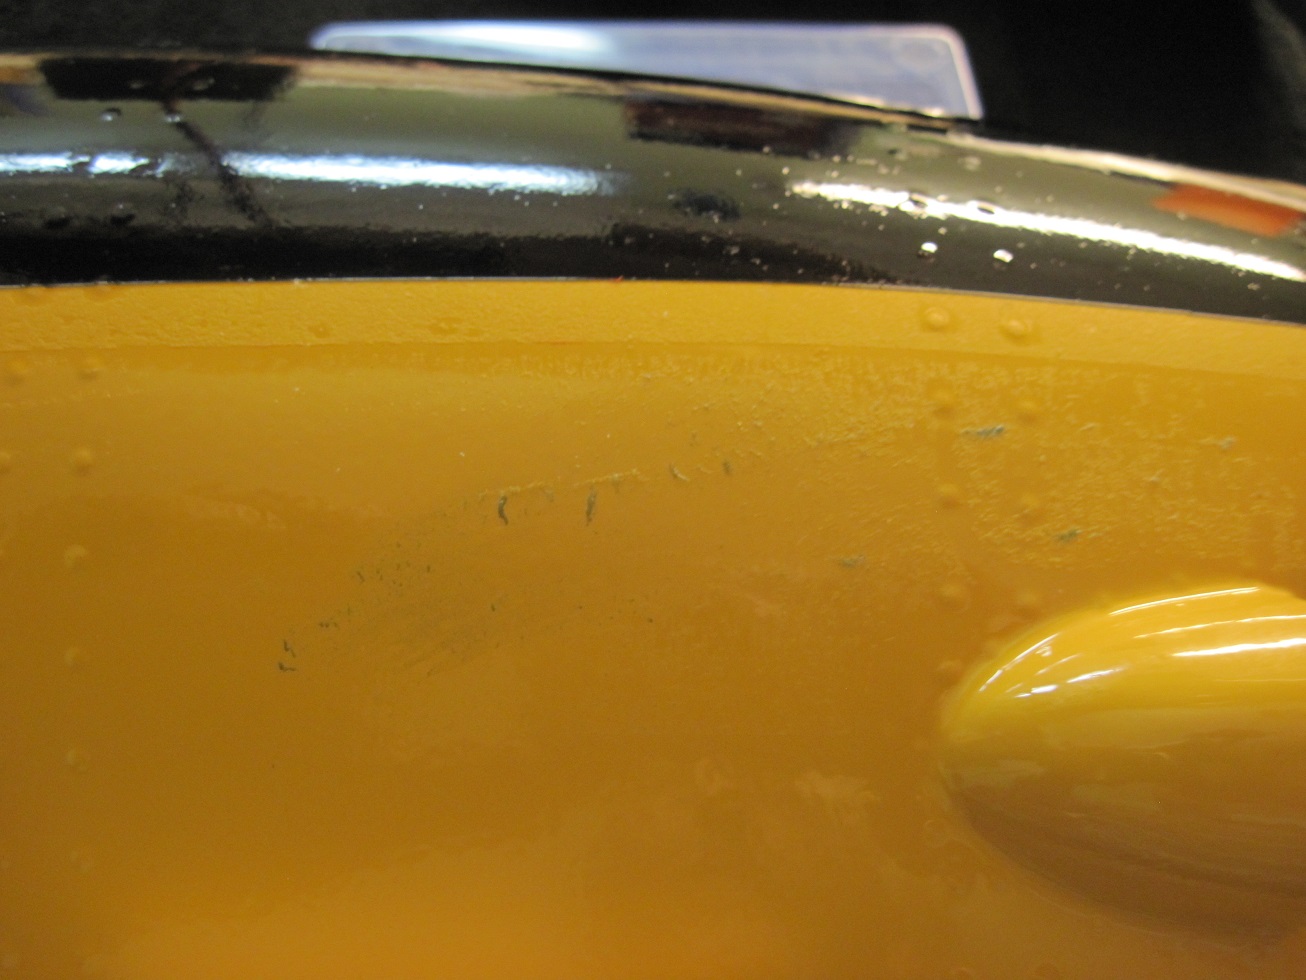
But some of the glue from the vinyl masking tape stuck to the yellow paint.
I masked it off last night and shot clear to seal the tape.
I unmasked one of the doors first and freaked when I saw all the tape sticking to the yellow paint.
Both the vinyl tape and the blue tape stuck and was really hard to get it off.
No paint pulled up and the lines came out nice and crisp.
The fuselage came out really nice and only a little glue on the left side.
Acetone took it off without harming the paint.


Here you can see the glue from the tape. I think my mistake was masking last night. I left the tape on to long is my guess.
Only a few minor bleed threw. All in all not bad for my first overlay job.


The doors got it the worse and on the inside I could not get the blue tape off without acetone.


The left door will need some touch up with the airbrush.
I am learning and I am happy with the results, short of the tape issue, could have been a lot worse.


I am getting the landing gear ready to paint. One thing about the Robart mount is it don't work worth crap.
The bolt that is to keep the strut from rotating does nothing no mater how tight you tighten it.
I can still rotate the gear. So I drilled two holes and tapped threaded the bracket and the strut with 8-36 set screws. Now it is one with the mount, not going to rotate on me.

TB
So I shot the overlay black today, that went well.
But some of the glue from the vinyl masking tape stuck to the yellow paint.
I masked it off last night and shot clear to seal the tape.
I unmasked one of the doors first and freaked when I saw all the tape sticking to the yellow paint.
Both the vinyl tape and the blue tape stuck and was really hard to get it off.
No paint pulled up and the lines came out nice and crisp.
The fuselage came out really nice and only a little glue on the left side.
Acetone took it off without harming the paint.
Here you can see the glue from the tape. I think my mistake was masking last night. I left the tape on to long is my guess.
Only a few minor bleed threw. All in all not bad for my first overlay job.
The doors got it the worse and on the inside I could not get the blue tape off without acetone.
The left door will need some touch up with the airbrush.
I am learning and I am happy with the results, short of the tape issue, could have been a lot worse.
I am getting the landing gear ready to paint. One thing about the Robart mount is it don't work worth crap.
The bolt that is to keep the strut from rotating does nothing no mater how tight you tighten it.
I can still rotate the gear. So I drilled two holes and tapped threaded the bracket and the strut with 8-36 set screws. Now it is one with the mount, not going to rotate on me.
TB
Last edited by TonyBuilder; 09-03-2014 at 08:24 AM.
09-03-2014, 12:32 PM
#634
My Feedback: (6)
T/B
For Great sharp lines with KK try automotive blue fine Line tape I have never had it stick or leave a trace, peal, or pull paint. I do go along the edge with a plastic pin and press the edge down. also I have left it on for as much as a week, with no problems.
Cheers Bob T
PS. I use the 1/4 wide as it goes around corners vary well
09-03-2014, 12:55 PM
#635
T/B
For Great sharp lines with KK try automotive blue fine Line tape I have never had it stick or leave a trace, peal, or pull paint. I do go along the edge with a plastic pin and press the edge down. also I have left it on for as much as a week, with no problems.
Cheers Bob T
PS. I use the 1/4 wide as it goes around corners vary well
For Great sharp lines with KK try automotive blue fine Line tape I have never had it stick or leave a trace, peal, or pull paint. I do go along the edge with a plastic pin and press the edge down. also I have left it on for as much as a week, with no problems.
Cheers Bob T
PS. I use the 1/4 wide as it goes around corners vary well
Thanks
TB
09-03-2014, 03:13 PM
#636
Progress
Plugging away on setup.
Got the landing gear all painted and will assemble tomorrow.
Electronics are going in, hooking up receivers, tying cables and just doing what ever I can.
The cowl is mounted and I wont hinge the doors until tomorrow, still curing.
I will do a more aggressive cleaning tomorrow and even do some touch up.
My stencils should be here by the end of the week, and primer for the wing too.
Meantime I am trying to get the fuselage all done as fare as equipment and setup.
I wont install the canopy until it is ready for test flights, to hard to put it on and taker it off.


Moving along")
TB
Plugging away on setup.
Got the landing gear all painted and will assemble tomorrow.
Electronics are going in, hooking up receivers, tying cables and just doing what ever I can.
The cowl is mounted and I wont hinge the doors until tomorrow, still curing.
I will do a more aggressive cleaning tomorrow and even do some touch up.
My stencils should be here by the end of the week, and primer for the wing too.
Meantime I am trying to get the fuselage all done as fare as equipment and setup.
I wont install the canopy until it is ready for test flights, to hard to put it on and taker it off.
Moving along
TB
09-04-2014, 02:50 AM
#637
On the bench today, paint the cockpit, install the panels, touch up paint on the cowl doors, finish installing gear in fuselage.
My hope is to finish the fuselage completely today so I can start on the wing tomorrow.
One thing I am noticing is that the vinyl rivets on this plane are presenting like raised rivets more then flush rivets. The more paint the higher the rivets.
This is good for this plane and looks better then I thought with the flush rivets. Glue drops would have been to much.
So for Angie I will have to keep the paint thin and light, nor recoating and all that biz. I have learned so much doing this plane and I am so glad I waited to do Angie. By then I will know how to paint, masking, overlay colors, stencils, dry ink transfers and clear coating.
I have never done a fully painted plane with all these details, hatches, how they fit after paint, the control surfaces, and all these new things. This Chippie has served well as a test bead for finishing.
I only have two weeks to finish this plane before I go back to work. Once I do finish this plane I will put Angie on the bench and start chipping away, even if it is only a few hours a weekend.
TB
Last edited by TonyBuilder; 09-04-2014 at 02:56 AM.
09-04-2014, 06:57 AM
#638
Morning progress
I mixed up some white to paint the center section and the floor of the cockpit.
I am using my airbrush to see how it works and the results.
For this it worked well. It takes longer but masking is much less with hardily any over spray with exception to the immediate surrounding areas.
I want to use the airbrush for all my stencils. I have a cheap entry level gun so I may look into a nicer gun for the touch up and stencils.
Nice thing about this KK paint is it has a long pot life, up to 8hr so you can retouch, and it brushes on good to for touchup.
I will brush the rest of the cockpit.


The canopy scree over lay part fits nice into the canopy screen.
This allows one to install the screen, then paint the fuselage and inner fuselage part.
Then install it after. It would be impossible to paint this area after the screen is installed.

TB
I mixed up some white to paint the center section and the floor of the cockpit.
I am using my airbrush to see how it works and the results.
For this it worked well. It takes longer but masking is much less with hardily any over spray with exception to the immediate surrounding areas.
I want to use the airbrush for all my stencils. I have a cheap entry level gun so I may look into a nicer gun for the touch up and stencils.
Nice thing about this KK paint is it has a long pot life, up to 8hr so you can retouch, and it brushes on good to for touchup.
I will brush the rest of the cockpit.
The canopy scree over lay part fits nice into the canopy screen.
This allows one to install the screen, then paint the fuselage and inner fuselage part.
Then install it after. It would be impossible to paint this area after the screen is installed.
TB
09-04-2014, 10:56 AM
#640
I went ahead and got a new airbrush, got a Paashe. What a difference. I painted a part almost the same size as the center section in seconds, this gun really puts out if you want it to. This will be great for all my stencils and would even be great for the black.....if I have to redo it!
TB
TB
09-04-2014, 11:00 AM
#641
Yellow color update. So I mixed up a small batch this morning while I was on the phone with a tech from KK. He said it is still a mixing issue and that I need to mix the paint in the can before I pour it out. I did that and still got the orange color. He said he would mix some up tomorrow at the shop and see what he gets. I told him I get about 50% yellow and 50% orange so fare and I have gone threw almost two pints, he said he would get me more paint. man all I got to do is get this wing painted.
I just mixed up a new batch to touch up the cowl doors, hoping it will be the yellow. It starts out yellow then as it inducts it turns orange so we will see.
TB
I just mixed up a new batch to touch up the cowl doors, hoping it will be the yellow. It starts out yellow then as it inducts it turns orange so we will see.
TB

 09-04-2014, 03:22 PM
#644
I mixed up two batches today and they both started out yellow and by the time I reduced them they were the butterscotch orange. I only have a half of a pint left, that should be enough to paint the wing, 3-4oz will do it but I will mix the hole thing and see..
Tomorrow Klass Kote will do some tests in the re shop and I will ask them to send me another pint of yellow and part B.
This yellow has been the most frustrating and I will do cartwheels and jump for joy when I am done with it.
TB
09-04-2014, 03:34 PM
#645
Dailey progress.
With the white primer here I will paint tomorrow morning so I readied the wing.
All sanded and ready for masking and a cleaning, then white primer.


This Dupli-color primer is great, so much better then the rattle can.


I am only going to put a light coat of the white, just enough to cover the gray.
I will mix a 1-1-1 mix. I got the no wait catalyst, you just mix and go. No induction necessary.


TB
With the white primer here I will paint tomorrow morning so I readied the wing.
All sanded and ready for masking and a cleaning, then white primer.
This Dupli-color primer is great, so much better then the rattle can.
I am only going to put a light coat of the white, just enough to cover the gray.
I will mix a 1-1-1 mix. I got the no wait catalyst, you just mix and go. No induction necessary.
TB
09-05-2014, 05:35 AM
#648
The mornings progress.
The white primer went on nicely.
It looks grayish in the pics but it is white.
I did a few light coats and then one wet coat. I wanted to make sure I did not burry the panel lines.


I could still see most of the lines so I should be good.
I wont sand until tomorrow, want to let this primer set up.
I only hit the ailerons and flaps with one pass, they don't have panel lines so just needs enough to cover.
I did weigh the wing before I put the white primer on, 5lb-13-1/2 oz. that is just the wing with the hatches.
So the fuselage is around 13lb and the wing is around 6lb, just need paint on the wing, the canopy, landing gear, wheels and servos in the wing.
Still shooting for 25-26lb.


TB
The white primer went on nicely.
It looks grayish in the pics but it is white.
I did a few light coats and then one wet coat. I wanted to make sure I did not burry the panel lines.
I could still see most of the lines so I should be good.
I wont sand until tomorrow, want to let this primer set up.
I only hit the ailerons and flaps with one pass, they don't have panel lines so just needs enough to cover.
I did weigh the wing before I put the white primer on, 5lb-13-1/2 oz. that is just the wing with the hatches.
So the fuselage is around 13lb and the wing is around 6lb, just need paint on the wing, the canopy, landing gear, wheels and servos in the wing.
Still shooting for 25-26lb.
TB
09-05-2014, 07:34 AM
#649
Progress
The gear is assembled and ready for the fairings. Speaking of the fairings.
I forgot to prime them with the white this morning.
The Paasche airbrush worked great. The primer has a long pot life so I just cover it up and I can prime as I need to.


I am working on the tail section. I am forming the end detail with easy sand, trying to get it primed today

TB
The gear is assembled and ready for the fairings. Speaking of the fairings.
I forgot to prime them with the white this morning.
The Paasche airbrush worked great. The primer has a long pot life so I just cover it up and I can prime as I need to.
I am working on the tail section. I am forming the end detail with easy sand, trying to get it primed today
TB