


G&L 1/5 DHC chipmunk - diary of a build.


 06-23-2014, 04:39 PM
#179

I got the 5/8" strait struts. You can find them at Tower, http://www3.towerhobbies.com/cgi-bin...?&I=LXWZB6&P=7 that's where I got mine. On the first build I used the 1/2" struts, they work fine.
TB
Last edited by TonyBuilder; 06-23-2014 at 04:43 PM.
06-23-2014, 05:04 PM
#181
The canopy frame is looking really good. I pulled it off the fuselage and it is drying.


I will use the first frame attempt as a template to cut the frame on the new one.


I glued the firewall in so I can mount the cowl and the engine. Two 2/8" birch ply, one in and one out.
I will glass the inside when I have time.


I started to cut my templates for the baffle / cowl ring, and the mounting cowl ring.
The front ring will act as a baffle and as a structural ring for when I cut the doors.


The back ring will hold the cowl and bolt to the firewall.


I have a piece of 1/8" G-10 I have been wondering what I would use it for. I will make the cowl rings out of the G-10. I will laminate it to 1/8" birch ply then glue and pine them in.
On the first build I added 32oz of lead to the noes to balance. After I installed the DLE55 I ended up with 16oz of weight still so all the weight I can build into the front will be less lead to balance.


I primed the ruder I need to prime the stab and get it ready to finish before I glue it in, lots to do
 ")

TB
I will use the first frame attempt as a template to cut the frame on the new one.
I glued the firewall in so I can mount the cowl and the engine. Two 2/8" birch ply, one in and one out.
I will glass the inside when I have time.
I started to cut my templates for the baffle / cowl ring, and the mounting cowl ring.
The front ring will act as a baffle and as a structural ring for when I cut the doors.
The back ring will hold the cowl and bolt to the firewall.
I have a piece of 1/8" G-10 I have been wondering what I would use it for. I will make the cowl rings out of the G-10. I will laminate it to 1/8" birch ply then glue and pine them in.
On the first build I added 32oz of lead to the noes to balance. After I installed the DLE55 I ended up with 16oz of weight still so all the weight I can build into the front will be less lead to balance.
I primed the ruder
I need to prime the stab and get it ready to finish before I glue it in, lots to do TB
06-24-2014, 02:16 AM
#183
On the bench for today will be mounting the cowl and the engine. I like to first mount the cowl and get it all centered on the fuselage. Then I stand the fuselage on its tail and place the engine on the firewall. Then I place the cowl over the engine and in place on the fuselage. I center the engine to the cowl opening and mark it.
This gives me a perfect centering with the cowl.
TB
This gives me a perfect centering with the cowl.
TB
06-24-2014, 11:34 AM
#184
Progress on the engine and cowl is coming along. I'm in the design and engineering stage.
The hardest part is getting the engine mounted in the right location and the cowl fitted. The rest is easy.
Should have the engine and the cowl ring mounted today, taking a short break.
TB
The hardest part is getting the engine mounted in the right location and the cowl fitted. The rest is easy.
Should have the engine and the cowl ring mounted today, taking a short break.
TB
Last edited by TonyBuilder; 06-24-2014 at 11:38 AM.
06-24-2014, 01:10 PM
#185
Engine is mounted.
I stand the fuselage up on its tail and from there I can adjust the engine and the cowl.


Once I get it looking good I tack the cowl with tape and move the engine into place.
I use a template of the spinner to center the engine on the cowl.


Some temp screws to holed the cowl in place.


I am moving the engine forward as I fit the cowl


I am fiting the cowl ring next once I am happy with the engine distance. You kind of have to do them all at the same time to see how it all comes together, no hurry here


TB
I stand the fuselage up on its tail and from there I can adjust the engine and the cowl.
Once I get it looking good I tack the cowl with tape and move the engine into place.
I use a template of the spinner to center the engine on the cowl.
Some temp screws to holed the cowl in place.
I am moving the engine forward as I fit the cowl
I am fiting the cowl ring next once I am happy with the engine distance. You kind of have to do them all at the same time to see how it all comes together, no hurry here
TB
Last edited by TonyBuilder; 06-24-2014 at 01:16 PM.
06-24-2014, 05:24 PM
#186
I moved the engine forward 3/4" and that will help with fitting the cowl.
I installed the center top rail support for the front of the cowl. This will help stabilize the front portion of the cowl. The rail will run threw the cowl ring. I drilled a hole threw the top portion of the firewall for the rail to seat into.
The rail is bolted to the front baffle with a 10-32 stainless steel button head screw.


I laid up the cowl doors and I will start to work on the cowl tomorrow, let the fun begin.


TB
I installed the center top rail support for the front of the cowl. This will help stabilize the front portion of the cowl. The rail will run threw the cowl ring. I drilled a hole threw the top portion of the firewall for the rail to seat into.
The rail is bolted to the front baffle with a 10-32 stainless steel button head screw.
I laid up the cowl doors and I will start to work on the cowl tomorrow, let the fun begin.
TB
Last edited by TonyBuilder; 06-24-2014 at 05:29 PM.
06-25-2014, 02:03 AM
#187
One the bench for today will be the cowl.
My gear came yesterday. It is beefy, that will be good because I will be flying off pavement and grass with this plane.
It fit my mount like a glove, so stoked The gear comes with a pedestal mount that you can mount to a plywood base mounting block.


TB
My gear came yesterday. It is beefy, that will be good because I will be flying off pavement and grass with this plane.
It fit my mount like a glove, so stoked
The gear comes with a pedestal mount that you can mount to a plywood base mounting block. TB
06-25-2014, 06:17 AM
#188
Cowl Progress.
The cowl mounting ring is final fitted before I attach it to the firewall.
It is not a perfect fit but the points that it needs to hit it does. At the top only 7/8" is attached to the cowl ring and at the bottom just the pan of the cowl will be attached.


3/4" x 1" plywood blocks are used to hold the cowl ring off of the firewall the same distance as the engine standoffs.
They are epoxied to the firewall.


Once the blocks have dryed I will drill the cowl ring in.


I drilled threw the cowl ring and blocks into the firewall. I am using 4-5x50mm bolts with T-nuts on the inside.
A temp accsess hole was cut into the cowl so I could remove the cowl during construction.


This will have easy access once the doors are cut in.


Onward.
TB
The cowl mounting ring is final fitted before I attach it to the firewall.
It is not a perfect fit but the points that it needs to hit it does. At the top only 7/8" is attached to the cowl ring and at the bottom just the pan of the cowl will be attached.
3/4" x 1" plywood blocks are used to hold the cowl ring off of the firewall the same distance as the engine standoffs.
They are epoxied to the firewall.
Once the blocks have dryed I will drill the cowl ring in.
I drilled threw the cowl ring and blocks into the firewall. I am using 4-5x50mm bolts with T-nuts on the inside.
A temp accsess hole was cut into the cowl so I could remove the cowl during construction.
This will have easy access once the doors are cut in.
Onward.
TB
06-25-2014, 06:53 AM
#189

My Feedback: (19)
Join Date: Sep 2010
Location: Garrison, MT
Posts: 171
Likes: 0
Received 0 Likes
on
0 Posts
One the bench for today will be the cowl.
My gear came yesterday. It is beefy, that will be good because I will be flying off pavement and grass with this plane.
It fit my mount like a glove, so stoked The gear comes with a pedestal mount that you can mount to a plywood base mounting block.
TB
My gear came yesterday. It is beefy, that will be good because I will be flying off pavement and grass with this plane.
It fit my mount like a glove, so stoked
The gear comes with a pedestal mount that you can mount to a plywood base mounting block. TB
Where did you get your LG Blocks?
06-25-2014, 06:59 AM
#190
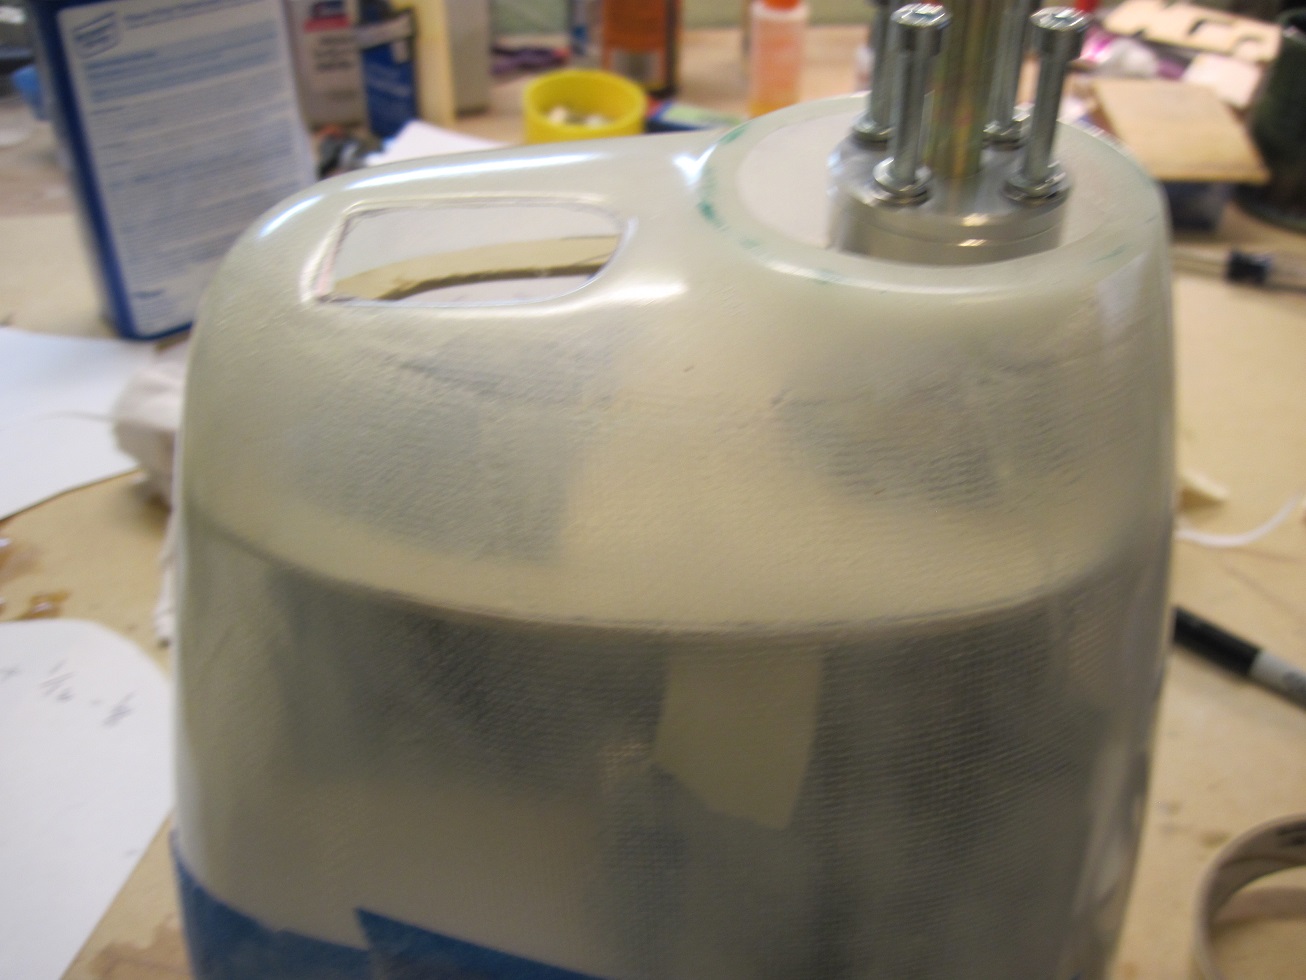
With the cowl ring mounted I put the cowl on and secured it to the fuselage checking the alignment with the spinner jig.
I need to layout the cowl doors before I go any further.
First I level the fuselage to the building board. Using a laser I marked the bottom cut (cowl pan).


Once I like the laser I check using paper templates to insure both sides are equal. Then I mark with a sharpie.


At the top where ther is only a 7/8" strip of the top of the cowl attached to the ring I drilled and taped two button head #72 screws into the G-10.
At the bottom pan of the cowl three more screws taped into the ring.
four temp screws in the sides to hold it in place wile the glue dries.


The attachment points as you can see are just the pan and the top. The rest will be the doors.


The fuselage tapers a bit at the front for the super chipmunk cowl. I want a nice smooth transition so you can see I will need to fill that in once I have the cowl doors done.


The doors are next.
TB
I need to layout the cowl doors before I go any further.
First I level the fuselage to the building board. Using a laser I marked the bottom cut (cowl pan).
Once I like the laser I check using paper templates to insure both sides are equal. Then I mark with a sharpie.
At the top where ther is only a 7/8" strip of the top of the cowl attached to the ring I drilled and taped two button head #72 screws into the G-10.
At the bottom pan of the cowl three more screws taped into the ring.
four temp screws in the sides to hold it in place wile the glue dries.
The attachment points as you can see are just the pan and the top. The rest will be the doors.
The fuselage tapers a bit at the front for the super chipmunk cowl. I want a nice smooth transition so you can see I will need to fill that in once I have the cowl doors done.
The doors are next.
TB
06-25-2014, 12:12 PM
#192
The cowl is coming along, it gets better with every step I get threw. There was a moment I thought " this is a big mistake" but it is coming along. The cowl is securely mounted, doors are all cut. I need to do some work on the doors, then cut the openings, hinge them and that will do it. Should have them done by tomorrow, then onto the canopy.
TB
TB
06-25-2014, 04:39 PM
#193


Join Date: Jul 2012
Location: Missouri
Posts: 1,127
Likes: 0
Received 0 Likes
on
0 Posts
On the road of any very cool endeavor with risk and uncertainty. There usually is a moment where one stops and thinks "this is a big mistake".
For the sane anyway. The insane plow ahead unabated.
This is a very cool endeavor, indeed. Kudos.
For the sane anyway. The insane plow ahead unabated.
This is a very cool endeavor, indeed. Kudos.
06-26-2014, 04:47 AM
#195
The engine doors are first rough cut and matched for equal sizing.


Some test fitting of the doors to mark for the cowl cut out.


Before I cut the door opening I glued a 1/32" ply backer to the center section.

I rough cut the opening leaving a good 1/2" all the way around with exception to the center rail. I need to hinge the door before I cut the rest.


Now begins the hinging proses. Offset hinges would be the best choice but there are limitations to the area to hinge to. The center section is only 7/8" wide and with the center support rod there is not a lot of room, plus there is the engine to consider.

The offset hinges will not work and the small plastic hinges are too weak for this application. I have larger aluminum offset hinges but they are too big.
So the best hinge for this door will be the piano hinge. It is strong and solid all the way threw the hinge line.


The hinge is first tacked with thin CA then threw bolted with 8 # 80 button head screws.


On this model most if not all structural screws will be used as visuals details so they will be exposed unlike the countersunk screws used on my P-47. The top portion of the fuselage is black so I will swap out the stainless steel for black during final setup.


The top of the cowl has a slight curve to it and the hinge works because the rear section of the center rail floats, it straitens as the doors open then in the closed position it goes back to its shape.


Now that the door is hinged I can start to fine tune the opening / door and install the lip that the door rest on in the closed position. The door will fit snug when it is closed and secured with the two pins that will hold it closed.
I get some leeway being the full scale in some pics show the door gap off in a few areas, but I will do my best to get it tight.

So far it looks good and I have a good solid foundation to work with, it was rough going for a while


The pan section of the cowl is strong and with the cowl ring it does not move at all. I will add some support to the front baffle for good measure.
The center support rod is over engineered but I don't want to take any chances with vibration and all.


I am playing with some air cylinders for the kickstand. I want to have a way of holding the doors open without having to jump threw a bunch of hoops and have external objects, I can also just have a kickstand from wire that pops down manually, but lets see how the air goes first.

Having the doors removable is key and with the piano hinge you just simply pull the pin and the door is off. This will come in handy for initial run-ups, and even the first few flights to ensure there is cooling and smooth operation.
Tuning will be a breeze too


TB
Some test fitting of the doors to mark for the cowl cut out.
Before I cut the door opening I glued a 1/32" ply backer to the center section.
I rough cut the opening leaving a good 1/2" all the way around with exception to the center rail. I need to hinge the door before I cut the rest.
Now begins the hinging proses. Offset hinges would be the best choice but there are limitations to the area to hinge to. The center section is only 7/8" wide and with the center support rod there is not a lot of room, plus there is the engine to consider.
The offset hinges will not work and the small plastic hinges are too weak for this application. I have larger aluminum offset hinges but they are too big.
So the best hinge for this door will be the piano hinge. It is strong and solid all the way threw the hinge line.
The hinge is first tacked with thin CA then threw bolted with 8 # 80 button head screws.
On this model most if not all structural screws will be used as visuals details so they will be exposed unlike the countersunk screws used on my P-47. The top portion of the fuselage is black so I will swap out the stainless steel for black during final setup.
The top of the cowl has a slight curve to it and the hinge works because the rear section of the center rail floats, it straitens as the doors open then in the closed position it goes back to its shape.
Now that the door is hinged I can start to fine tune the opening / door and install the lip that the door rest on in the closed position. The door will fit snug when it is closed and secured with the two pins that will hold it closed.
I get some leeway being the full scale in some pics show the door gap off in a few areas, but I will do my best to get it tight.
So far it looks good and I have a good solid foundation to work with, it was rough going for a while
The pan section of the cowl is strong and with the cowl ring it does not move at all. I will add some support to the front baffle for good measure.
The center support rod is over engineered but I don't want to take any chances with vibration and all.
I am playing with some air cylinders for the kickstand. I want to have a way of holding the doors open without having to jump threw a bunch of hoops and have external objects, I can also just have a kickstand from wire that pops down manually, but lets see how the air goes first.
Having the doors removable is key and with the piano hinge you just simply pull the pin and the door is off. This will come in handy for initial run-ups, and even the first few flights to ensure there is cooling and smooth operation.
Tuning will be a breeze too
TB
Last edited by TonyBuilder; 06-26-2014 at 04:54 AM.
 06-26-2014, 06:34 AM
#198
Join Date: Jul 2012
Location: Missouri
Posts: 1,127
Likes: 0
Received 0 Likes
on
0 Posts
At the start of there trek up the mountain. The men felt excitement in there hearts. At the half way point the sense of dread and mistake came over them, but they pressed on.
Now only yards from the precipice, the sense of dread was replaced with jubilation and a feeling of great accomplishment.
Well done, Tony
Kevin
Now only yards from the precipice, the sense of dread was replaced with jubilation and a feeling of great accomplishment.
Well done, Tony
Kevin