


Sig Senior kadet
 01-01-2019, 02:43 PM
#1

Thread Starter
My Feedback: (5)
Join Date: Jan 2002
Location: Evansville,
IN
Posts: 415
Likes: 0
Received 0 Likes
on
0 Posts
any suggestions on how to eliminate mounting wing without rubber bands
nylon bolts in the trailing edge?
suggestions needed regarding the leading edge
nylon bolts in the trailing edge?
suggestions needed regarding the leading edge
 01-02-2019, 12:58 AM
#2


Many times there's a dowel or tab built into the leading edge, that gets inserted into a built in recepticle in the fuselage, then the trailing edge is where you locate the bolts. It's not hard to do if you can locate a few examples of similar applications. If done decently it makes it a whole bunch easier to install and remove the wing.
Instead of a dowel or tab, some builders might use four bolts(two in front near leading edge, and two near the trailing edge)... I'd be much more inclined to do the tab or dowel type of mod though.
A tab could possibly be incorporated into the center rib area, as the center rib(s) are installed... possibly even make new center ribs out of ply, and use the original ribs for a template, and when they're traced, draw in a tab type of design on the lower part. on the inside of the trailing edge of the wing, fabricate some blocks that fit where you're going to want the bolts, and place those under the sheeting so it makes that area solid.
From there you'll have to configure the fuselage to accept the tab, and the bolts. Again a simple task if you study it a bit. the frontal area(upper cockpit) will need a bit of wood, and need to be fabricated to accept the tab/ or dowel, and be strong enough to hold the wing of course.. strategically placed ply.. a structure can be made strong enough. Same same for the trailing edge bolt plate... probably easier then the frontal area. Use 1/4x20 wing bolts, nylon, and they will be plenty, and they're standard in the hobby for holding wings on.
I would say the tab should be about a 1/4" total(probably 2 pieces of 1/8" ply laminated).. maybe make the whole center ribs out of ply and incorporate the tab that way.
These are just suggestions and ideas of course. I've done a few conversions, and done many that were designed like this, so I've seen quite a few... Your best bet is to keep studying and learning and you'll find what's best for you and your skill level. You might even look up some plans on the outerzone.org and see if you can find a plane that has plans for what you're wanting to do. It doesn't have to be the same plane, just similar to borrow the design from. You'll like a bolt on wing... it's well worth it... and the Kadet family of planes are among the best flying planes ever designed.
Good luck.
01-02-2019, 05:09 AM
#3

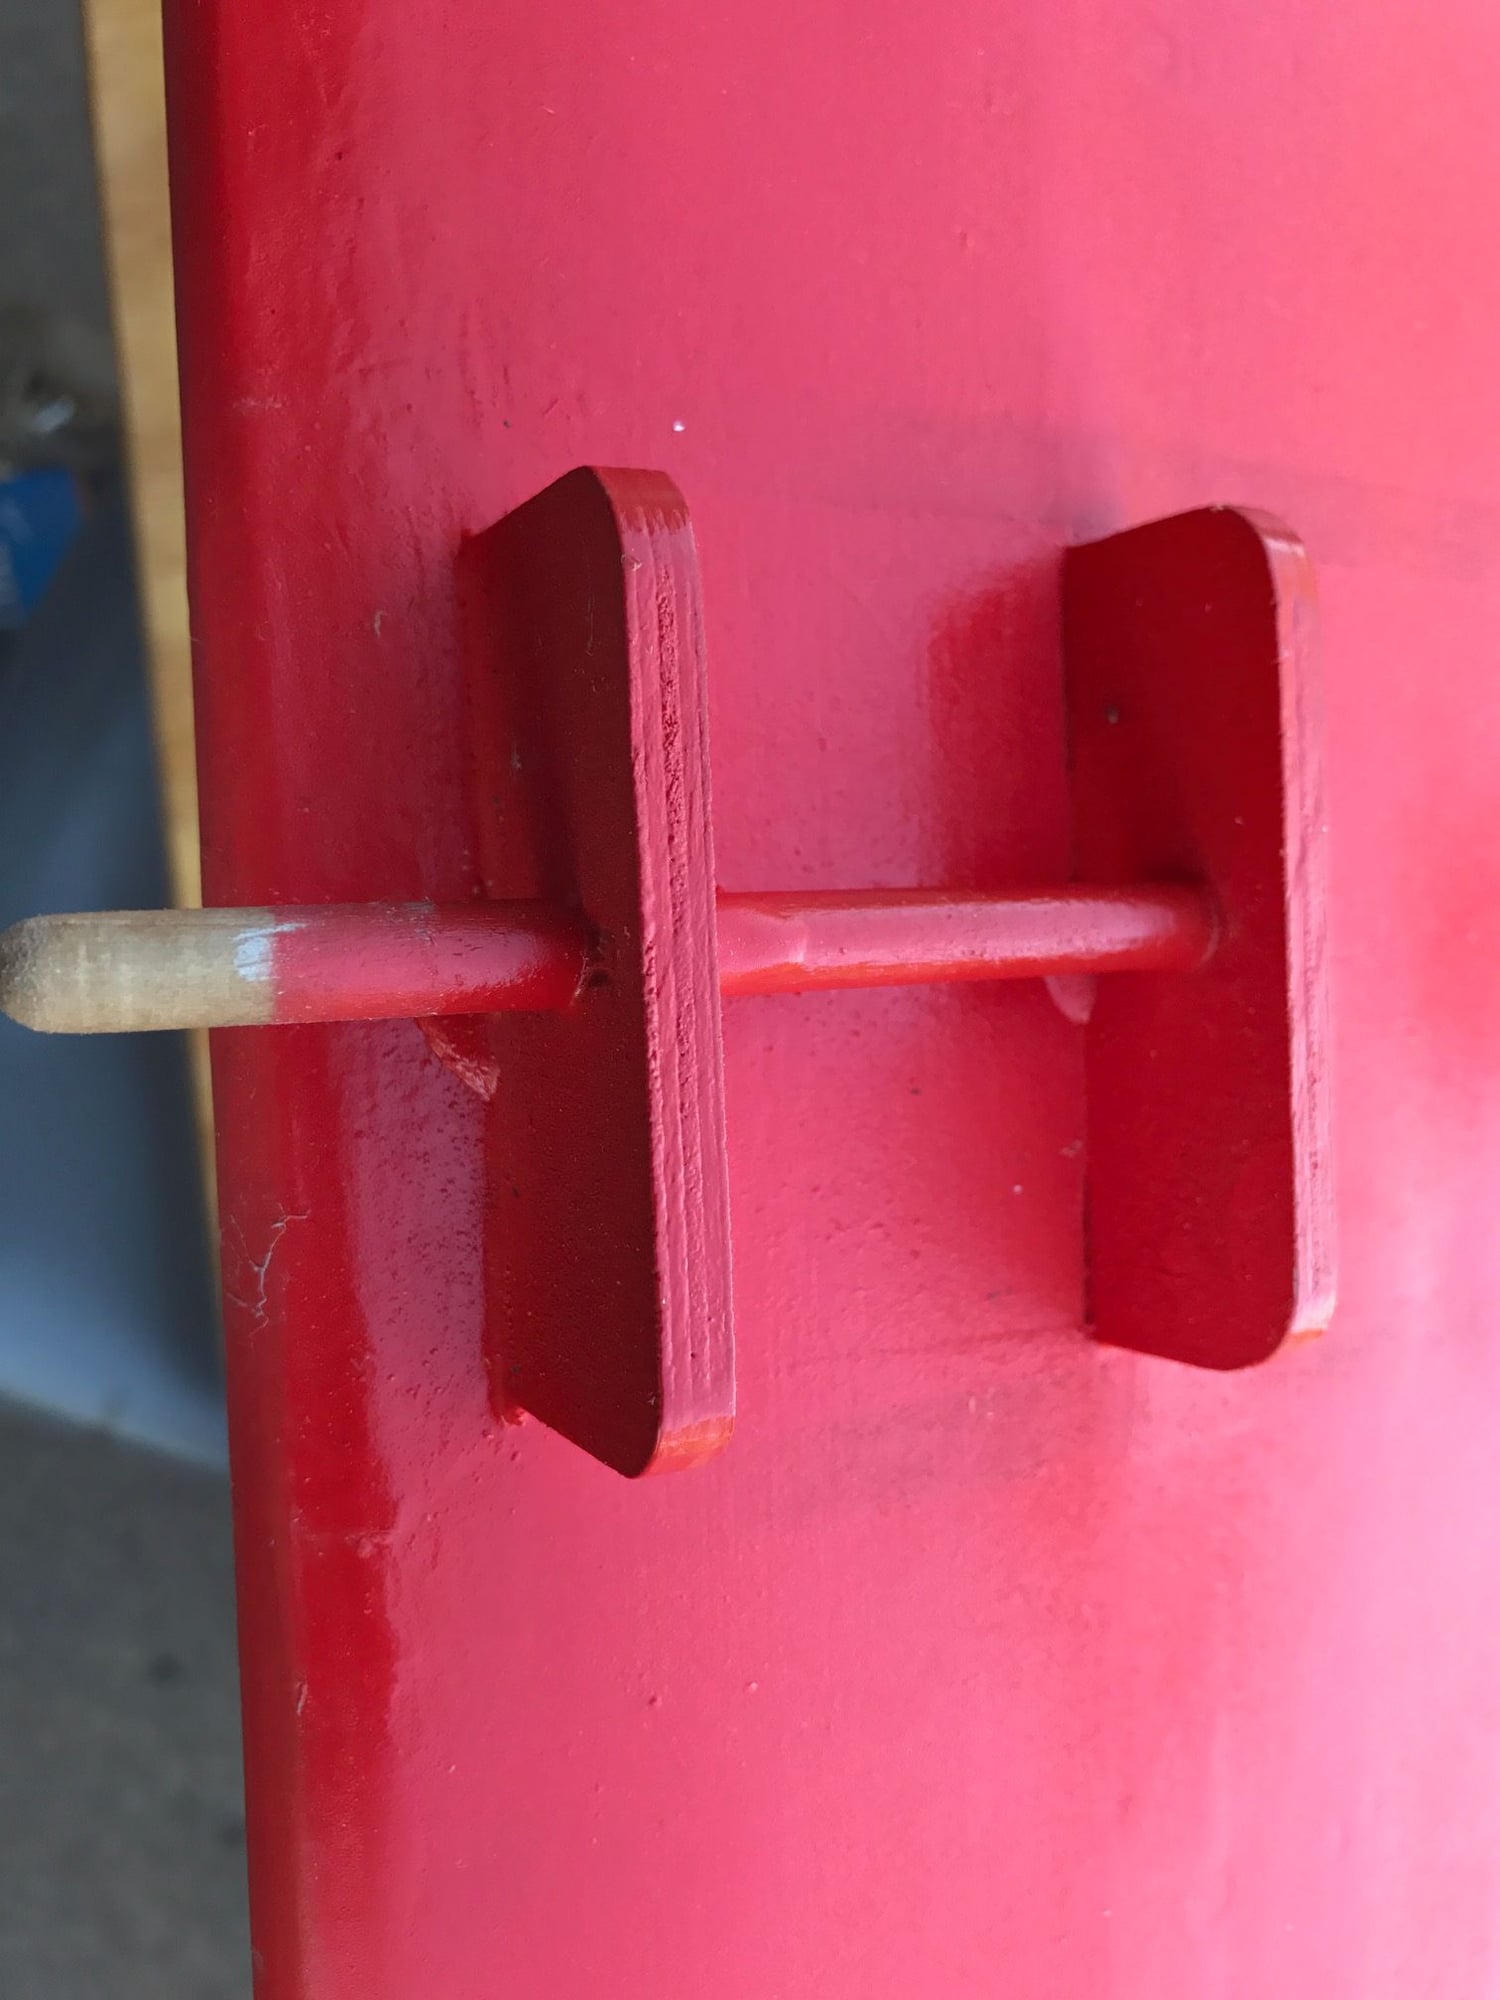
I�ve been using the dowel in LE with bolts on TE on several airplanes. Since I scratch build I work this configuration out as I build. On several airplane I placed the dowel centered on the leading edge into a plywood rib. Or a rib with plywood side reinforcement pieces. On my Kadet LT40 I mounted the dowel below the wing as pictured. I use � or ⅜� plywood for the holding piece in the fuselage.
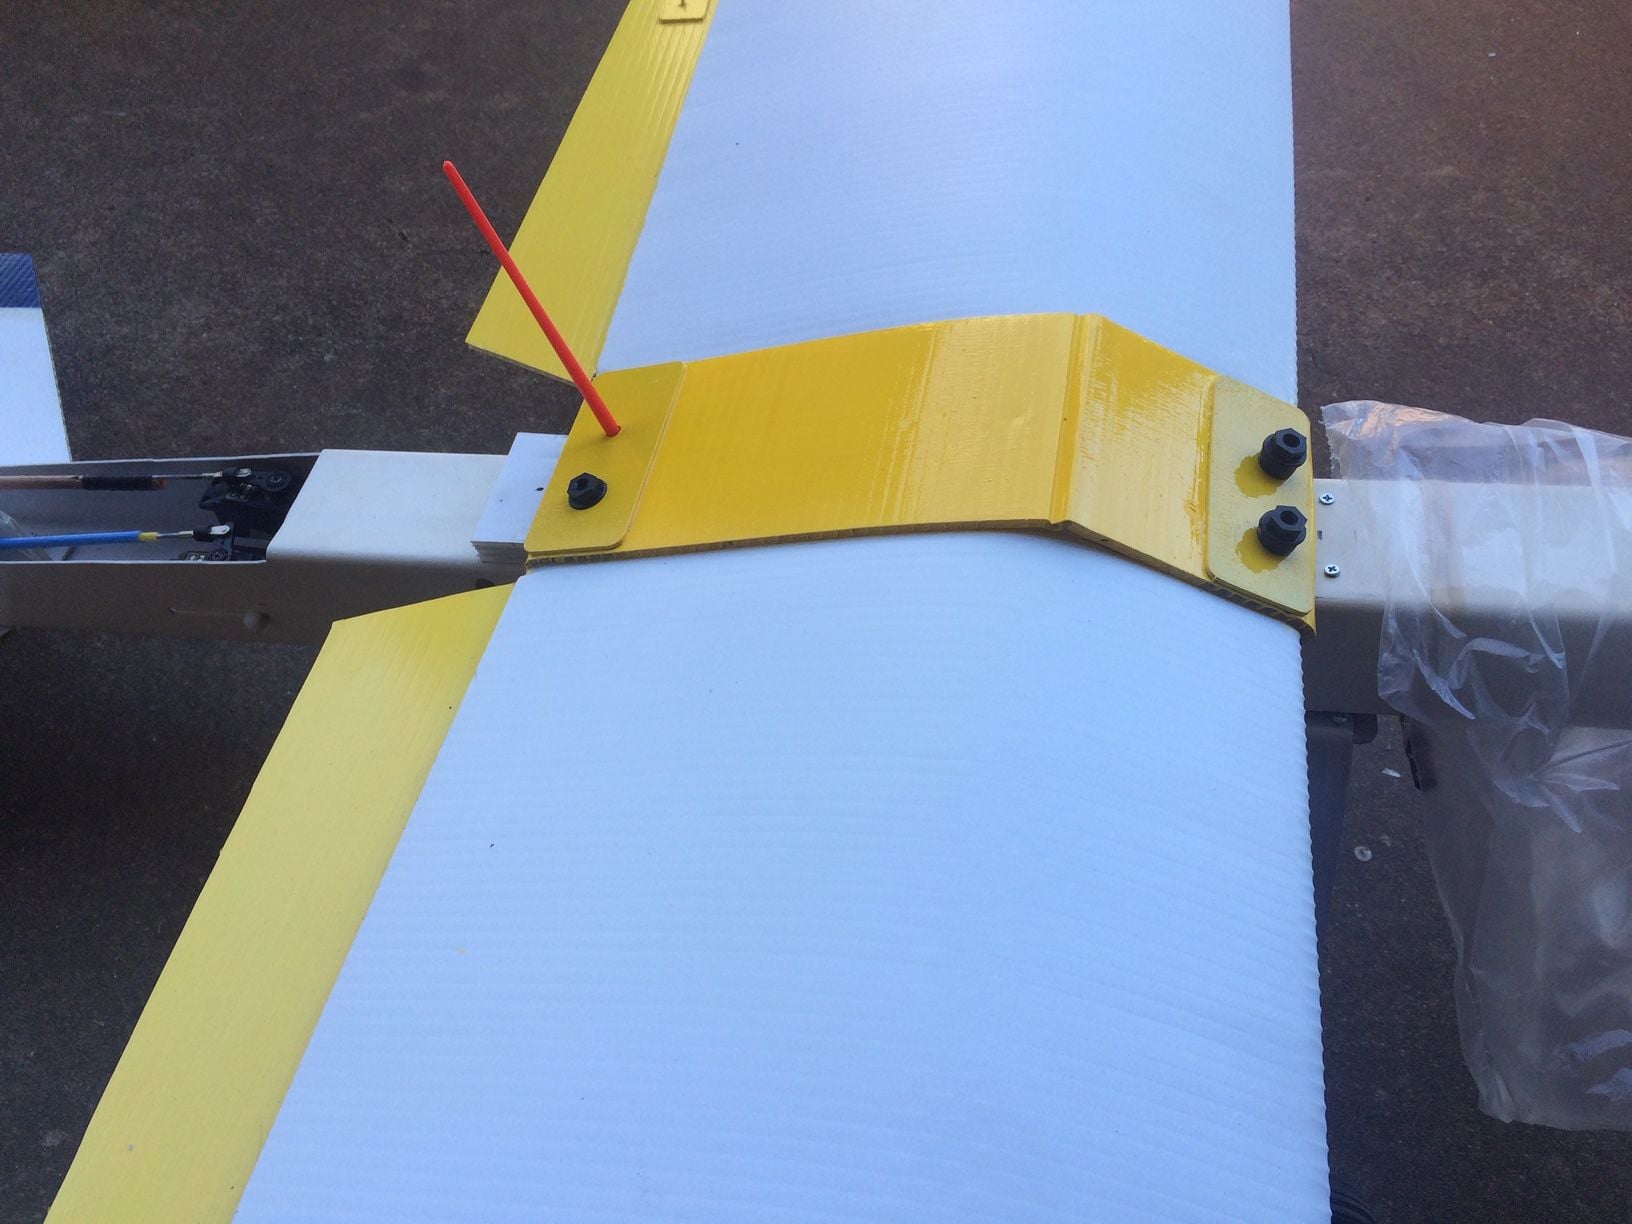
On a SPAD airplane I had I changed from rubber bands to 4 bolts. I use paint brush handles as an alignment tool.
Not too hard to do. Study some plans that show that detail. Then you can figure out how to do your install.
 01-02-2019, 06:22 AM
#4

Gee, ETpilot, that SPAD wing mounting looks like overkill to me. I would probably have stopped with the upper plates and not used the full-cord yellow one. Then again, if you're happy with it, who am I to say you're wrong? 
01-02-2019, 08:33 AM
#5

In this thread, I illustrated how I mounted the wing on my Kadet Senior. http://www.rcuniverse.com/forum/kit-...ior-sport.html
The fuselage will require some mods, too, which are pictured in the thread.
01-02-2019, 12:43 PM
#6
Works good but I don�t like rubber bands. I finally did this mod. So I screwed wooden blocks in the fuselage. Then I drilled the wing wrap and blocks for the bolts. So far it has worked great.
01-02-2019, 12:58 PM
#7
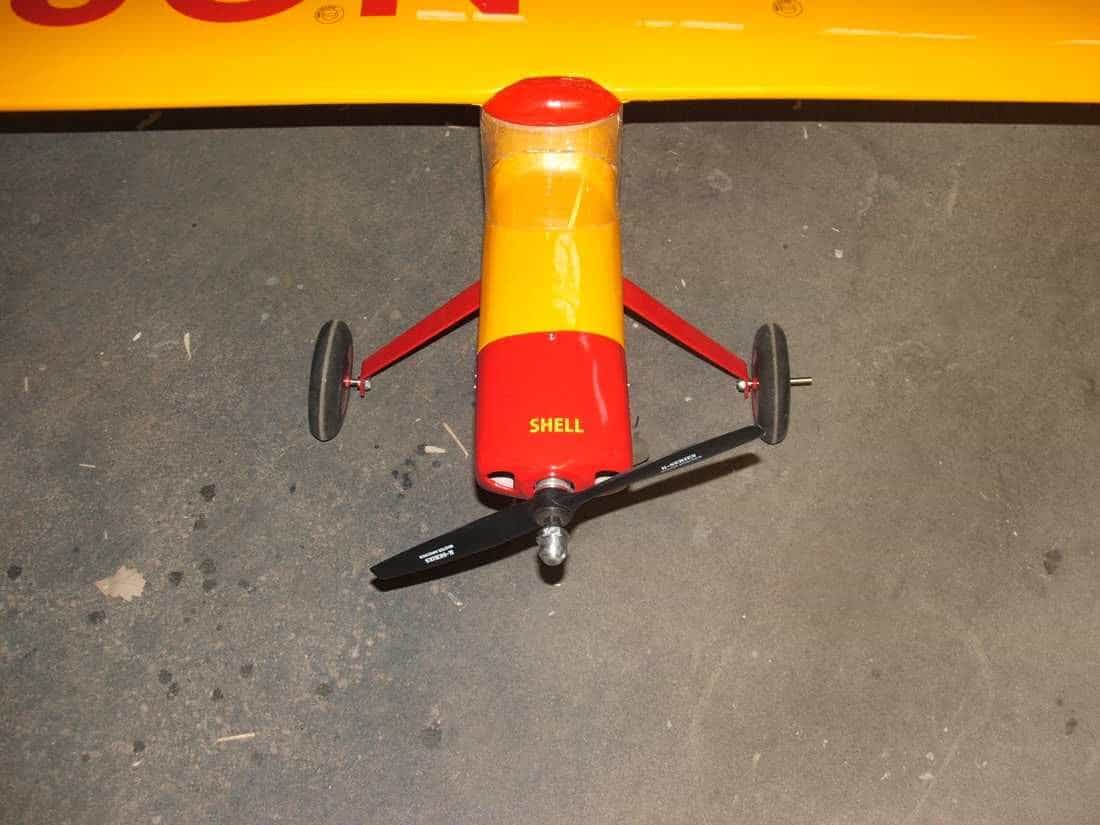
Tom, I remember your build thread from when I built my Kadet LT40. I needed ideas on how to do the tail wheel assembly. Store bought would not work for me. So I made my own assembly and formed my tail wheel wire. Certainly different when the rudder sits well in front of the elevator. Your pictures helped a lot. Thanks.
