


Weeks Solution 70WS
 12-11-2020 | 03:48 PM
#76
Man after being away from RC for a lil over 10 years i gotta say my construction techniques sure need a tune up, no wonder arfs are ruling the world right now!
These inter plane struts were KICKING my a** for 2 days. Finally got em done good enough and they will do the job they need to do. Need to get them sanded to shape still but i believe all the hard parts are now done


These inter plane struts were KICKING my a** for 2 days. Finally got em done good enough and they will do the job they need to do. Need to get them sanded to shape still but i believe all the hard parts are now done
 12-12-2020 | 05:19 AM
#77
I have read some oils will make a bigger mess then others. I don't remember off hand what was considered the best but i will get it when the time comes. Im also getting a couple of the BadDog smoke oil nozzles. cleanup can't be worse then a rich running glow engine can it?
"cleanup can't be worse then a rich running glow engine can it?" yes! It made such a mess I used it a half dozen times and removed the system.
The plane is coming along nicely and looking great.
12-12-2020 | 08:11 AM
#78
Thanks Tony!!
The struts look rough but they just need some more tuning up is all now thank goodness!
Yeah the more i research smoke the im starting to wonder if i really want it. My plan was not to have it on all the time tied to the throttle and just use it as a simple on/off. Need to think on it more i guess.
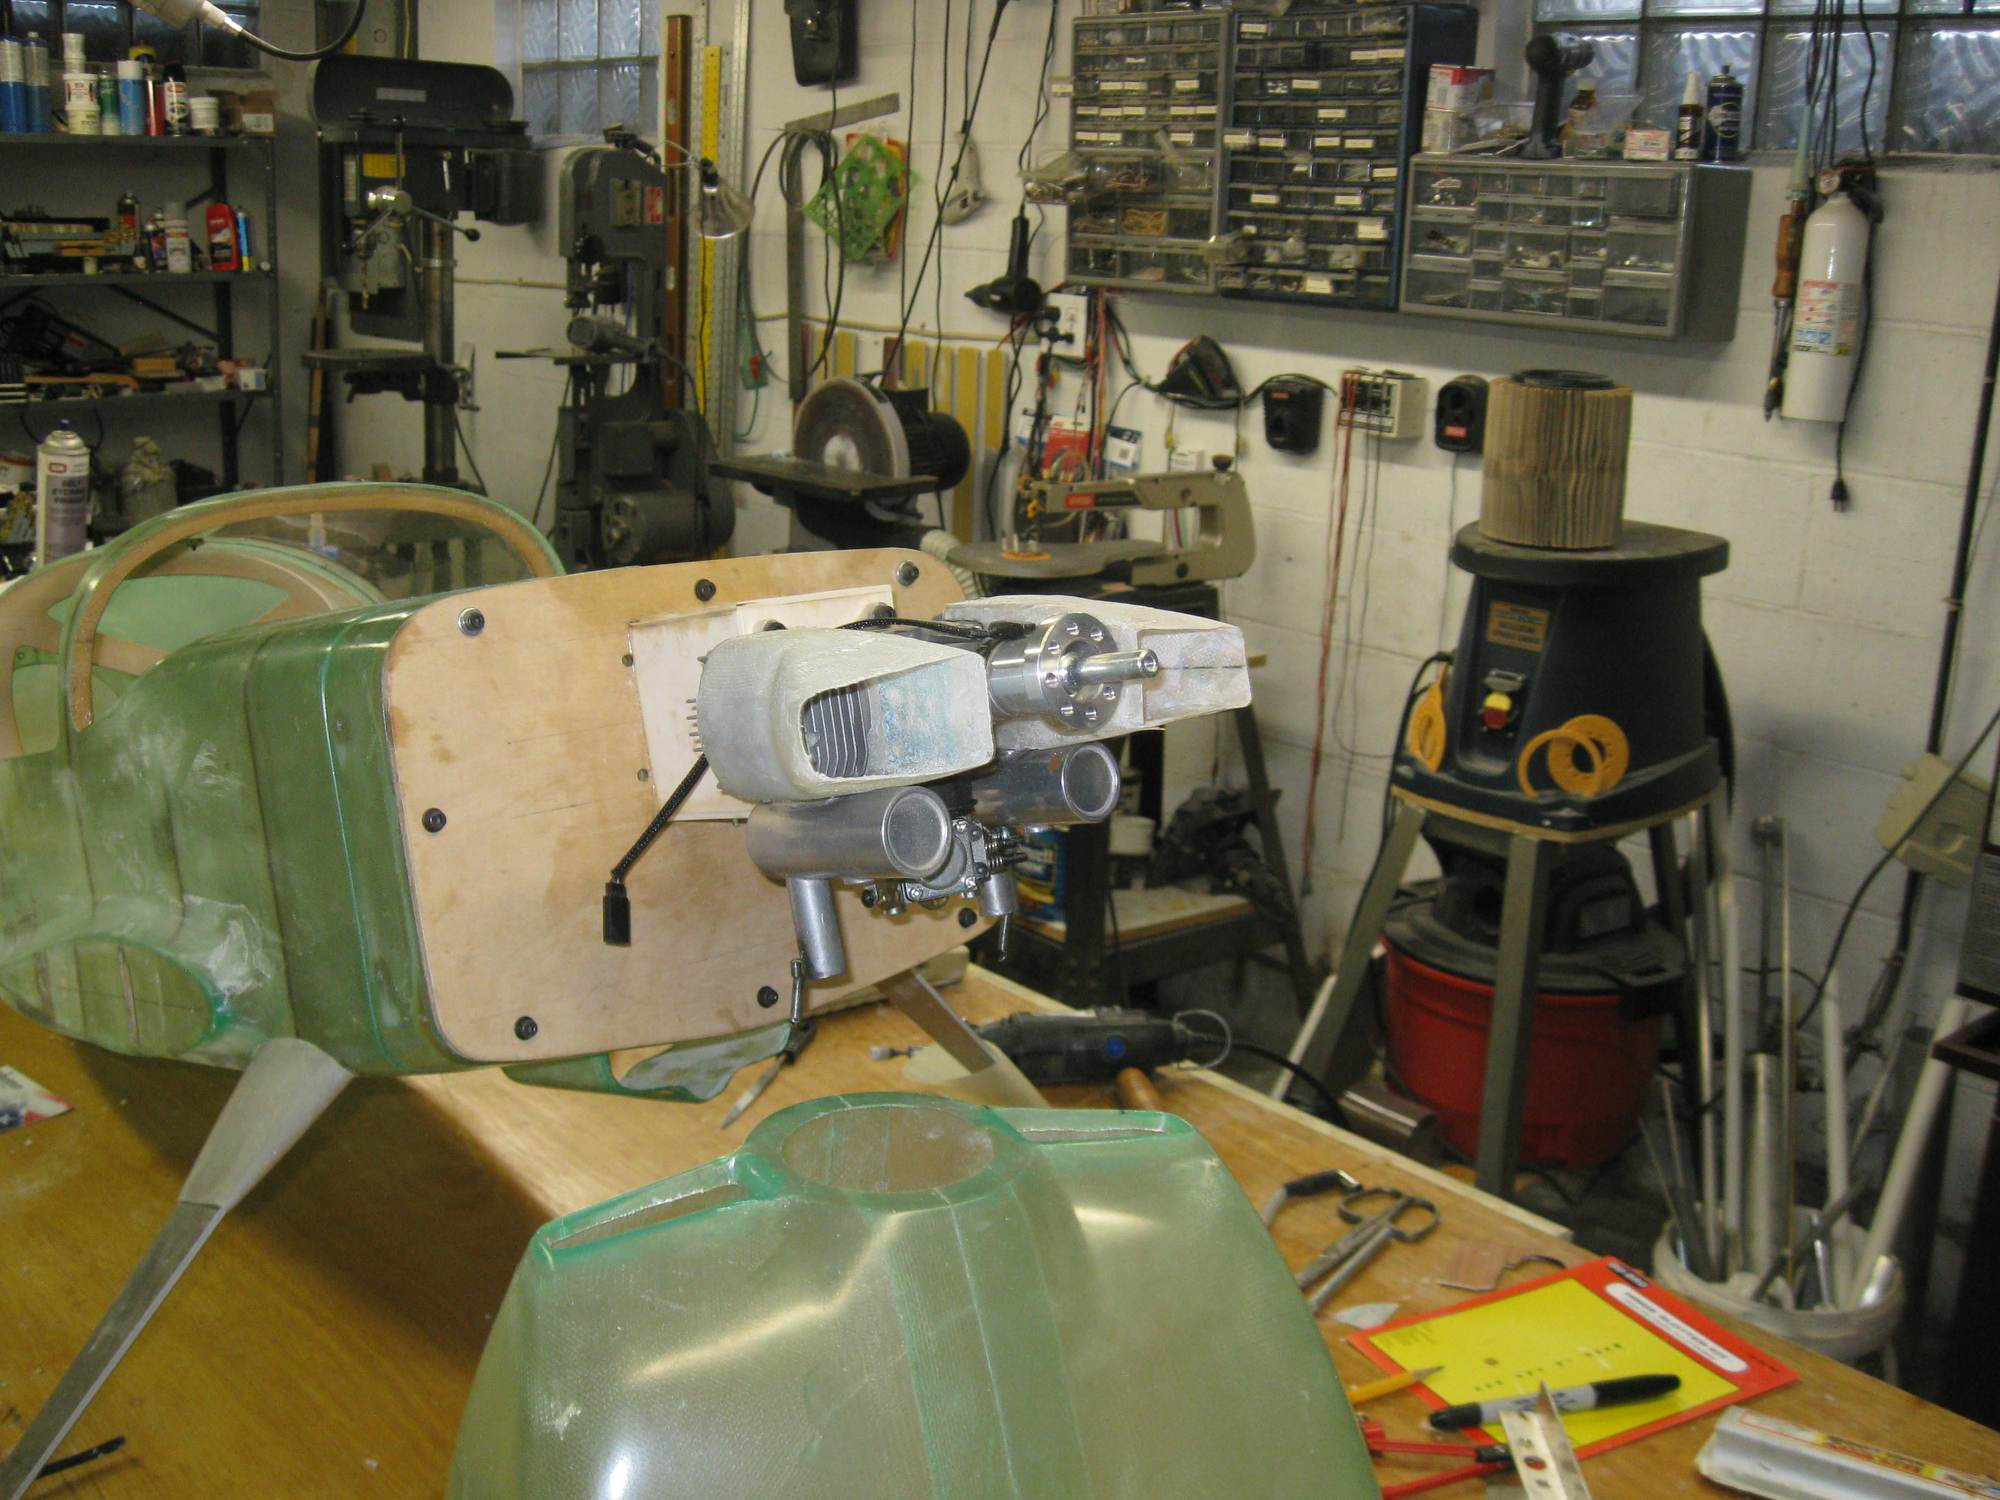
Working on making a cockpit today and taking a break from them pesky struts.
The struts look rough but they just need some more tuning up is all now thank goodness!
Yeah the more i research smoke the im starting to wonder if i really want it. My plan was not to have it on all the time tied to the throttle and just use it as a simple on/off. Need to think on it more i guess.
Working on making a cockpit today and taking a break from them pesky struts.

 12-16-2020 | 05:02 PM
#81


My Feedback: (4)
Those metal vents look sweet, but I would only use them as decorative items, don't count on them alone to vent your cowl.
12-16-2020 | 06:24 PM
#82
Yes two times the intake area is recommended.
So here is my thinking, from the pic you can see each vent is almost the same exact size as the intake so two vents will give me 1 to 1 intake exhaust.
adding two more on the bottom will give me almost exactly 2 to 1 exhaust/intake. I can't say for certain but i believe they will act like scuppers and draw more air as a low pressure will be created behind the vents
Im going to give this arrangement a try. I certainly may need to cut some more exit area after testing.
Also i sure have thought about making some duct work to force the airflow over the cylinders and heads as there is just to much room inside the cowl for any air to flow over the engine.
12-17-2020 | 06:16 AM
#83
My Feedback: (4)
Bank, I don't mean to be argumentative, but I don't think those louvers alone (even 4 of them) will cut it. I would just hate to see you burn-up an engine due to overheating. See the attached pic of my old Bucker for the size of exit area I usually set up.

12-17-2020 | 06:16 PM
#84
Oh i don't think your arguing at all man just trying to pass on your experience and lessons you have learned.
I have decided the best option is to make some baffling to direct the air over the engine and also cut out some of the bottom of the cowl trying to maintain the clean look im hoping to achieve.
I have decided the best option is to make some baffling to direct the air over the engine and also cut out some of the bottom of the cowl trying to maintain the clean look im hoping to achieve.
12-17-2020 | 06:22 PM
#85
My Feedback: (4)
Oh i don't think your arguing at all man just trying to pass on your experience and lessons you have learned.
I have decided the best option is to make some baffling to direct the air over the engine and also cut out some of the bottom of the cowl trying to maintain the clean look im hoping to achieve.
I have decided the best option is to make some baffling to direct the air over the engine and also cut out some of the bottom of the cowl trying to maintain the clean look im hoping to achieve.
12-18-2020 | 05:44 AM
#86
I build ducts that direct the air over the cylinders, these are glassed to the cowl so that all the inlet at air lasses over the cylinder heads. On this Byron Glasair the scale exhaust seen on the bottom of firewall had an area of 4 1/4 square inches while the scale inlet openings were 4 square inches, not additional openings are provided. Valley View 40 Twin, head temps under the plug were less than 300F measured with telemetry. With proper baffling you can get by with less than the 3 to 1. Study a full scale, they don't have huge openings, just get the air directed over what needs cooled.
12-18-2020 | 06:49 AM
#87
Yeah im going to work on that this weekend for sure but i do have a question about the engine ignition.
This is really my first gas engine setup more or less and im trying to understand why i need a opto kill switch and i may not be understanding this correctly.
My ignition box has 3 sets of wires coming out of it. 1 plug goes to power, 1 plug goes to the engine pickup, and the last one goes to a RX channel. Correct?
So if i adjust the throttle to shut off the engine using throttle trim that is one way to kill the engine. The plug from the ignition going to the RX is on say Ch7 switch thats either on/off and thats a second way to kill the engine.
My ignition gets power from the power board and when i turn that off it kills power to everything.
Seems like i don't really need a opto kill switch?
12-19-2020 | 06:10 PM
#88
12-20-2020 | 02:22 PM
#89
Yeah i have a buddy coming over this week to help me out with the ignition wiring and i do have a RCEXL opto kill switch to install. He has years of gas engine experience. Ignition power will come from the flight batteries. 2X 7.4v 2200 lipo's.
So on the engine baffling what a BI**H that is to do with a one piece cowl! I have some installed. Definitely not great but i figure its like grease, any is better then none. What i managed to hack in there is solid and directs most air over the cylinders.
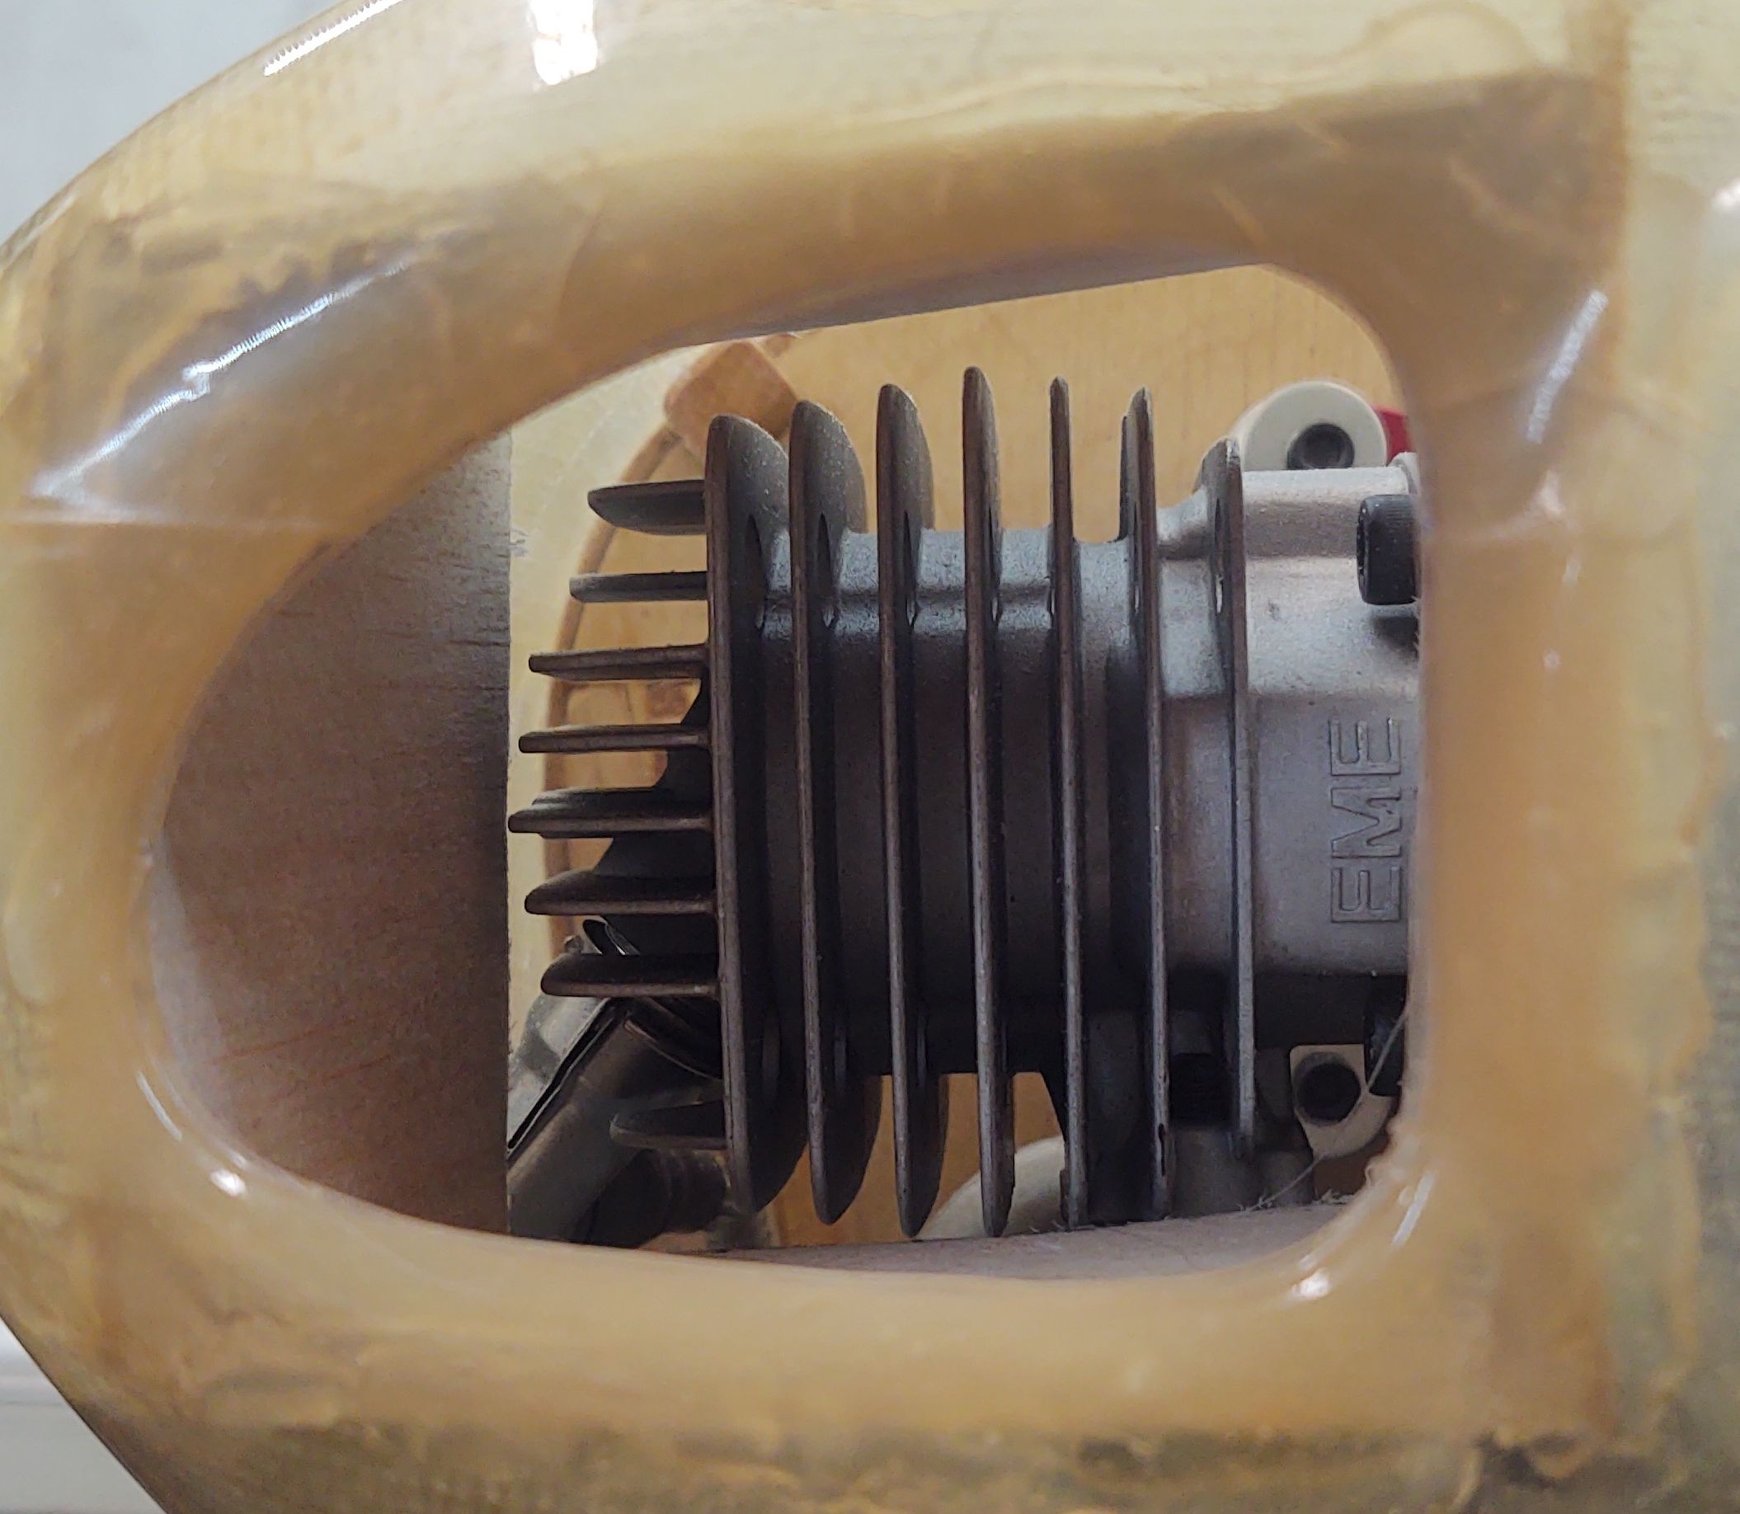

So on the engine baffling what a BI**H that is to do with a one piece cowl! I have some installed. Definitely not great but i figure its like grease, any is better then none. What i managed to hack in there is solid and directs most air over the cylinders.
12-20-2020 | 06:48 PM
#91
The ducts in the previous photo were glassed onto the the cowl through the openings with the engine installed. Once joined they were sealed with the cowl removed.
Last edited by Tony Hallo; 12-21-2020 at 04:01 AM.
11-07-2022 | 10:14 AM
#93
Junior Member
Beautiful build Sir !
the Ultimate you pictured for covering scheme is actually mine and even though I didn't build or cover it I am glad you like it !
She is a Goldberg with a DLE 20 that is a beautiful flying airplane .
the Ultimate you pictured for covering scheme is actually mine and even though I didn't build or cover it I am glad you like it !
She is a Goldberg with a DLE 20 that is a beautiful flying airplane .
12-17-2023 | 07:32 AM
#94
Junior Member
Apologies this an old thread but, I’d appreciate help in locating the Miles Reed Building Instructions for the Weeks Solution 70”. I have the plans just need the manual. Any help appreciated.
Jack
Jack
03-09-2024 | 06:39 AM
#96
The plans have suffice detail to build the plane. I would start a build thread and ask questions when you need help, someone here can help you for sure. Do you have to kit?
03-09-2024 | 02:53 PM
#99
Junior Member
I normally just copy bits of the plan and then stick it to the wood with my kids glue stick they use in school.
The reason why I wanted the materials list and Building Instructions (Recommended Building Technique I think Miles called it, is that it just makes things easier, sequence wise. I guess you don�t have these?
The reason why I wanted the materials list and Building Instructions (Recommended Building Technique I think Miles called it, is that it just makes things easier, sequence wise. I guess you don�t have these?

