


Meister Scale P 47 - step by step
 11-03-2011 | 02:57 AM
#1
Thread Starter

Few months ago I decided to made new war bird model. After I finished and made first flights with my Ziroli Hellcat, I moved into a new project...
Here on RCU I saw few topics about Meister P 47, my friends Frank Tiano and Scott Prossen have these models, and they told me that it fly very well. So, in May I bought one...
Dino was very kind, we exchanged a lot of mails, and to made this story shorter, at October I get first of two boxes with parts...

I bought plans, short kit, cowl, canopy, cockpit, Siera landing gears and Siera tail wheel retract. Dino send me manual for building and DVD with photos...


Siera laning gear are top quality...


This is my first Meister Scale model, and after few models I made from Ziroli plans, this will be new experience.
Before start, I want to see how other modelers made this Thunderbolt, and was little disappointing to not find many topics about it. OK, I find some, but there are no photos from the start of building.
Because that I decided to show how I will made this model, all the way from the beginning to first flight...
Some photos I will add here, in this topic, but more you will find on my web site - www.nsmodelers.rs
When I get wooden parts, first want to see what is what... Man, how many parts...


To be easy for me I put every part to plan, but than I saw that some are missing.


I wrote mail to Dino, and after few days he prepare all missing parts... Dino is great for collaboration.
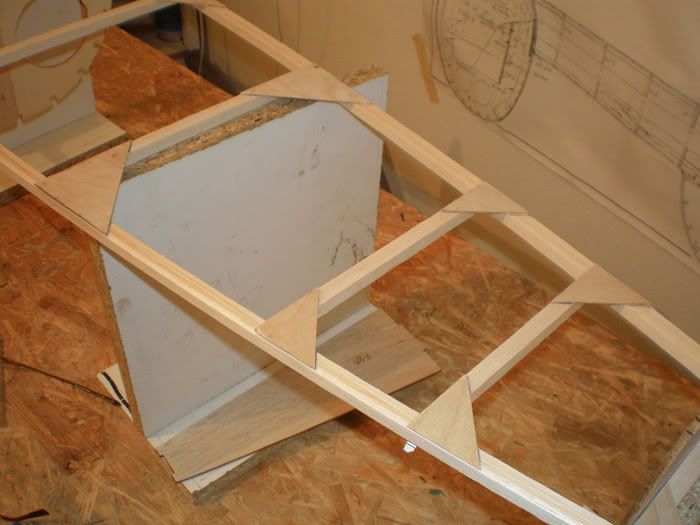
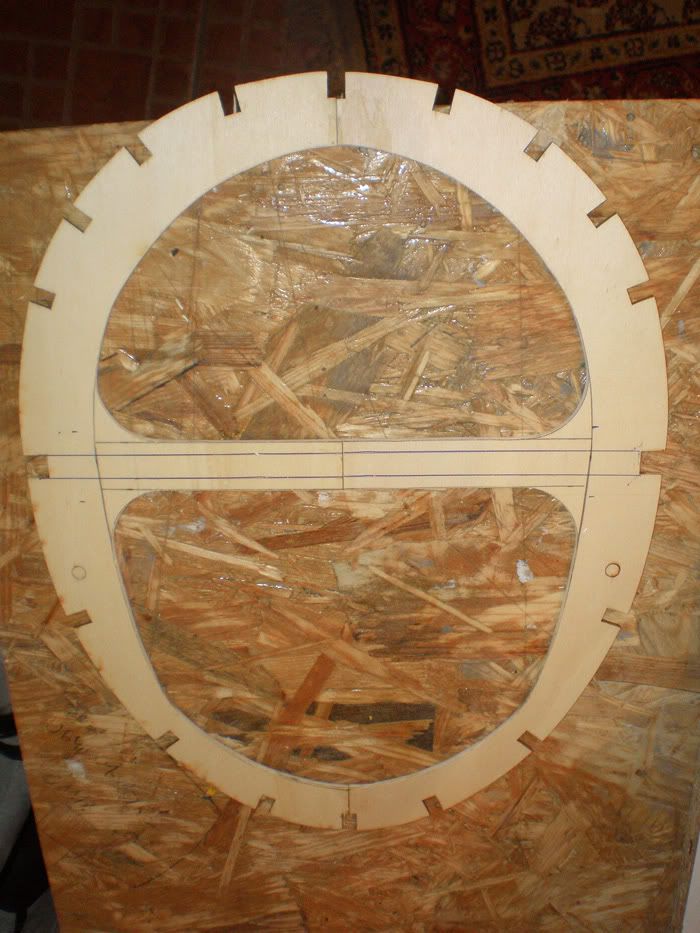
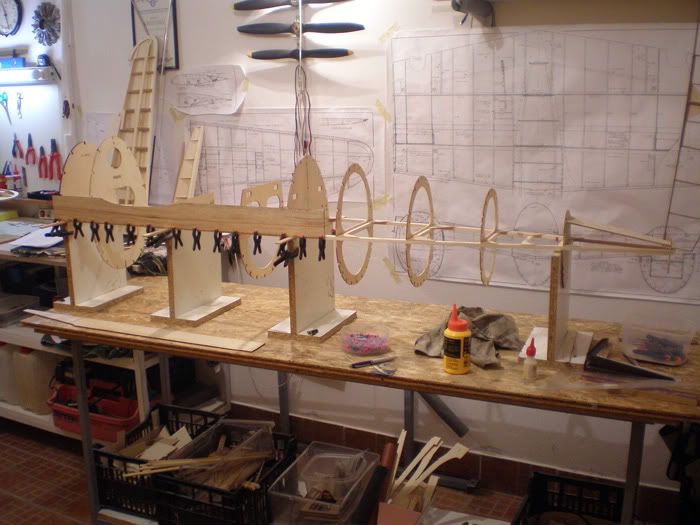
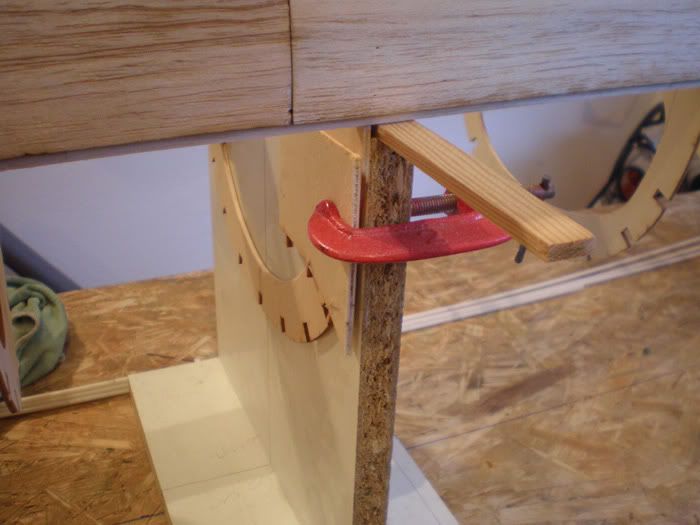
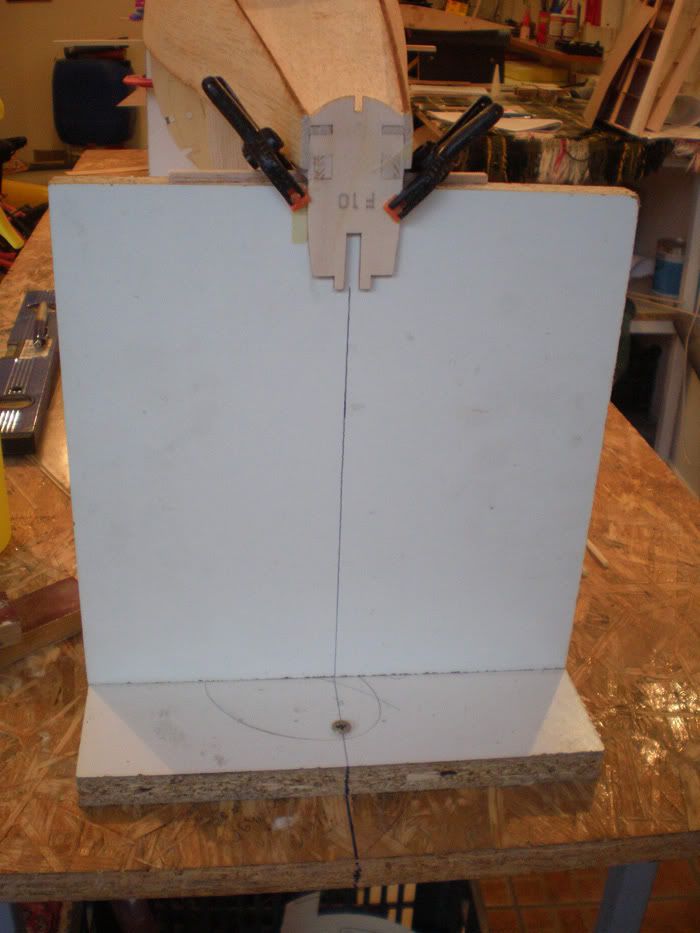
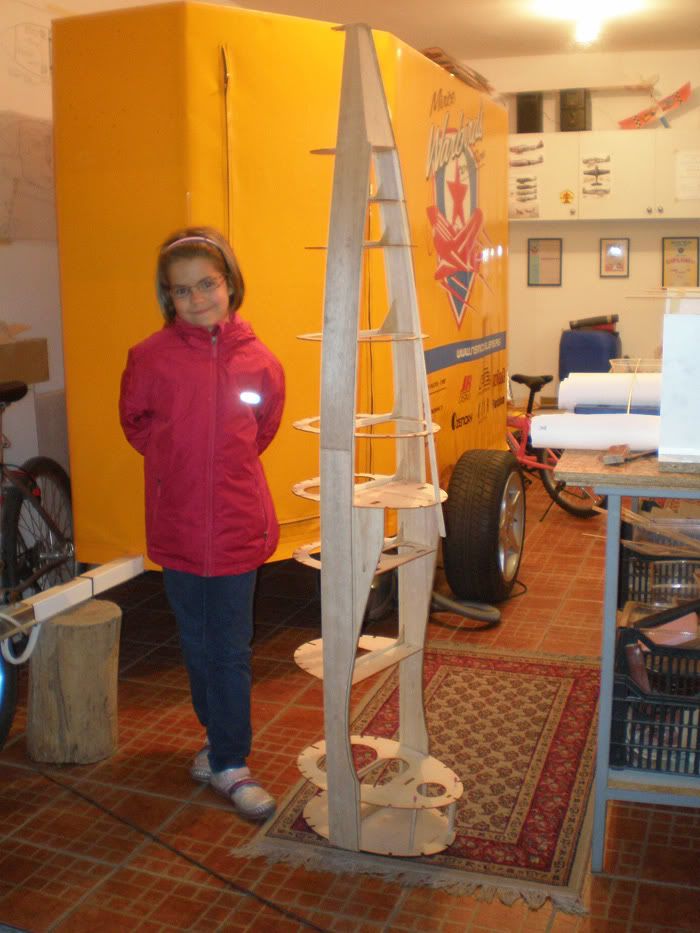
I start work at tail section.


Wing on photo is from some other model...

Moving part of the vertical stabilizer...

...are made from two balsa pieces which must be glued first...


Than I add little ribs...


... and put off those parts until further notice...
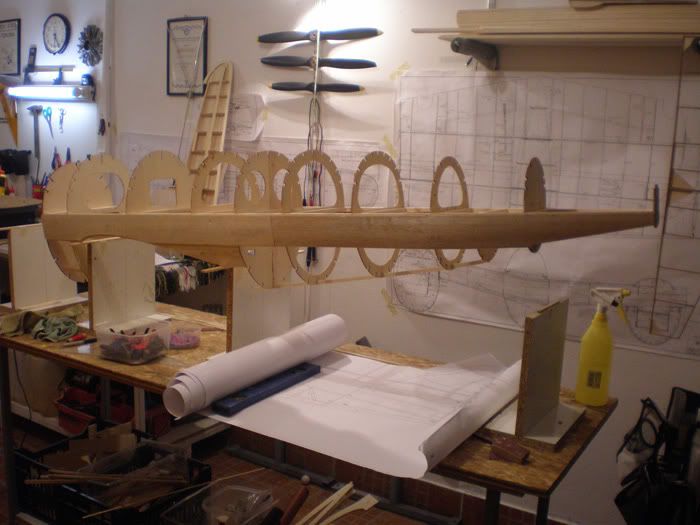
Now I start work on fuselage.
First I made wooden crutch.

On plan it is made from balsa 10x10 mm. It is almost 1,8 meter long...
I want to add some hardened, so I made it from two 10x2 mm spruce which I glued together. I misaligned joint for 100 mm, so I get very strong base...

On the outside I add two balsa strips 10x3 mm


After sending ti look like this

Parts which connect left and right side, I made from 10x10 mm balsa...


To be continued...
Here on RCU I saw few topics about Meister P 47, my friends Frank Tiano and Scott Prossen have these models, and they told me that it fly very well. So, in May I bought one...
Dino was very kind, we exchanged a lot of mails, and to made this story shorter, at October I get first of two boxes with parts...
I bought plans, short kit, cowl, canopy, cockpit, Siera landing gears and Siera tail wheel retract. Dino send me manual for building and DVD with photos...
Siera laning gear are top quality...
This is my first Meister Scale model, and after few models I made from Ziroli plans, this will be new experience.
Before start, I want to see how other modelers made this Thunderbolt, and was little disappointing to not find many topics about it. OK, I find some, but there are no photos from the start of building.
Because that I decided to show how I will made this model, all the way from the beginning to first flight...
Some photos I will add here, in this topic, but more you will find on my web site - www.nsmodelers.rs
When I get wooden parts, first want to see what is what... Man, how many parts...
To be easy for me I put every part to plan, but than I saw that some are missing.
I wrote mail to Dino, and after few days he prepare all missing parts... Dino is great for collaboration.
I start work at tail section.
Wing on photo is from some other model...
Moving part of the vertical stabilizer...
...are made from two balsa pieces which must be glued first...
Than I add little ribs...
... and put off those parts until further notice...
Now I start work on fuselage.
First I made wooden crutch.
On plan it is made from balsa 10x10 mm. It is almost 1,8 meter long...
I want to add some hardened, so I made it from two 10x2 mm spruce which I glued together. I misaligned joint for 100 mm, so I get very strong base...
On the outside I add two balsa strips 10x3 mm
After sending ti look like this
Parts which connect left and right side, I made from 10x10 mm balsa...
To be continued...
 11-03-2011 | 03:11 AM
#2

Mirce,
Your build is progressing nicely!
I met Dino at Monster Planes last month, and I agree that he is a really nice man, and an outstanding pilot!
Jerry
Your build is progressing nicely!
I met Dino at Monster Planes last month, and I agree that he is a really nice man, and an outstanding pilot!
Jerry
11-03-2011 | 04:22 AM
#3
The Meister p47 another outstanding kit. Were watching and good luck on your build. Im glad to see people are getting back in to the sticks and sand paper part of the hobby.
11-03-2011 | 06:14 AM
#4

My Feedback: (73)
Hey guys,
First off I would like to thank Mirce for starting another thread. We all can learn from each other.
Thats the best part about sharing. Also just to let everyone know that sometimes we do miss packing parts and we do correct that. However, Mirce failed to note that there are many parts that are located on the plans are not laser cut. Just because the parts are located on the plans does not mean automatically they are laser cut. This varies depending on the model design and part. Some parts need to be hand cut and shaped from inventory stock.
I am glad too that there is still hope when it comes to modelers building again! Good luck Mirce!! :-)
The following users liked this post:
chuckf77j (11-17-2020)
11-03-2011 | 06:20 AM
#5
Senior Member
Joined: Jun 2003
Posts: 167
Likes: 0
Received 0 Likes
on
0 Posts
From: coral springs,
FL
We at Meisterland South will also be watching. I am also about to build the same aircraft. I have previously owned two. One fell to a midair and the other to a dumb radio mistake. Great flying aircraft.......can't be without one. Good luck........Doug
11-03-2011 | 06:23 AM
#6
mirce,
I'm very interested in your build and will be watching closely................Gonna do one of these. Gonna cheat and do the fiberglass fuse.
I'm not sure which Dino you guys met......The one I met at WOTHR, Ft Collins, Colorado, was veru cocky, very stand offish.....rather short and paunchy and couldn't even land a simple Top Flite GS P-51.[X(]
GO FIGURE............
DANG! I LOVE THIS HOBBY............................................. ..............CAPTAIN RON
11-03-2011 | 06:44 AM
#8
ROTHL!!!!!!!
A FRIEND INDEED DINO.....!
mirce,
Looking forward to as many pics of the wing build that you can possibly post. I've only built one other GS wing and that was the Top Flite GS P-47 wing.........Even down to the glassing and painting.....GOOD LUCK MAN!
DANG! I LOVE THIS HOBBY............................................C APTAIN RON
11-03-2011 | 06:44 AM
#9
ORIGINAL: captainron
mirce,
I'm very interested in your build and will be watching closely................Gonna do one of these. Gonna cheat and do the fiberglass fuse.
I'm not sure which Dino you guys met......The one I met at WOTHR, Ft Collins, Colorado, was veru cocky, very stand offish.....rather short and paunchy and couldn't even land a simple Top Flite GS P-51.[X(]
GO FIGURE............
DANG! I LOVE THIS HOBBY............................................. ..............CAPTAIN RON
11-03-2011 | 07:11 AM
#11
My Feedback: (7)
Joined: Apr 2010
Posts: 675
Likes: 0
Received 0 Likes
on
0 Posts
I'm glad to see so many pictures of this build to start with, I hope you continue to do as thorough a job as you have up to this point, impressive, I dont have the patience for it.
I too will be starting a Meister P-47 build as soon as I can get moved into my first house(purchased). Until then I have to salivate and drool on myself waiting. I am also cheating like Doug and using a Fiberglass fuse. Mostly in the interest in saving time but also Dino said I would be very happy with the quality of the latest production run of fuselages. He was not wrong. I understand though, that you would have had to pay a small fortune to ship that over to your location. Good Luck and keep it going! I'm not sure if I want to bother with a thread either, time will tell and maybe some of the guys can convince me to change my mind and fire that old thread back up.
I too will be starting a Meister P-47 build as soon as I can get moved into my first house(purchased). Until then I have to salivate and drool on myself waiting. I am also cheating like Doug and using a Fiberglass fuse. Mostly in the interest in saving time but also Dino said I would be very happy with the quality of the latest production run of fuselages. He was not wrong. I understand though, that you would have had to pay a small fortune to ship that over to your location. Good Luck and keep it going! I'm not sure if I want to bother with a thread either, time will tell and maybe some of the guys can convince me to change my mind and fire that old thread back up.
11-03-2011 | 07:53 AM
#12
Thread Starter
OK guys, here I am again...
First I want to apologize for my English. It is not perfect, but hope all will understand what I want to say...
I'm glad Dino took part and explained about short kit. One more time, Dino prepare all parts they forgot to put in the box and sent it to me...
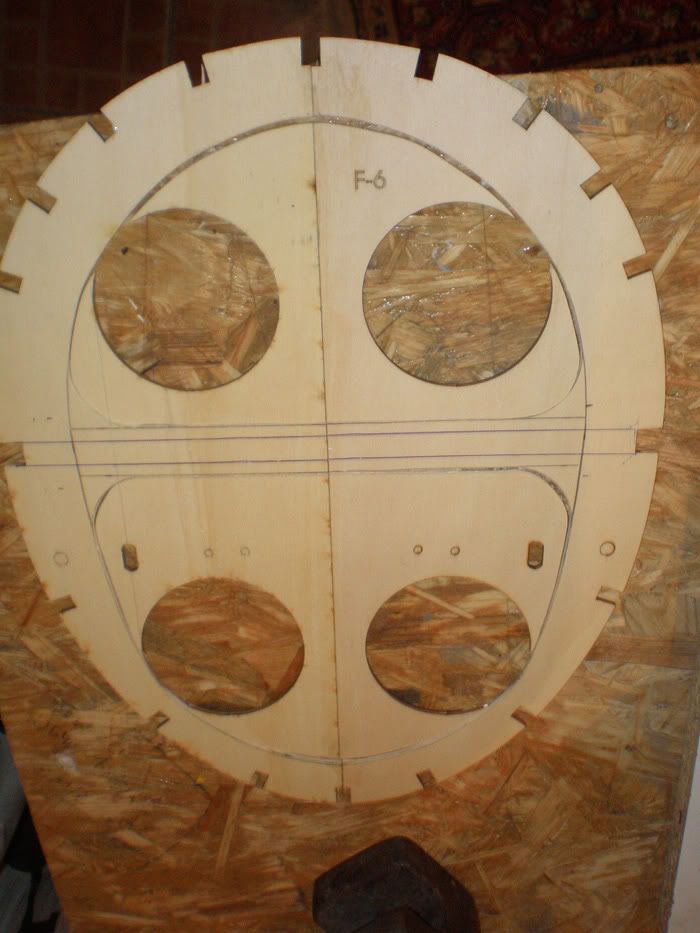
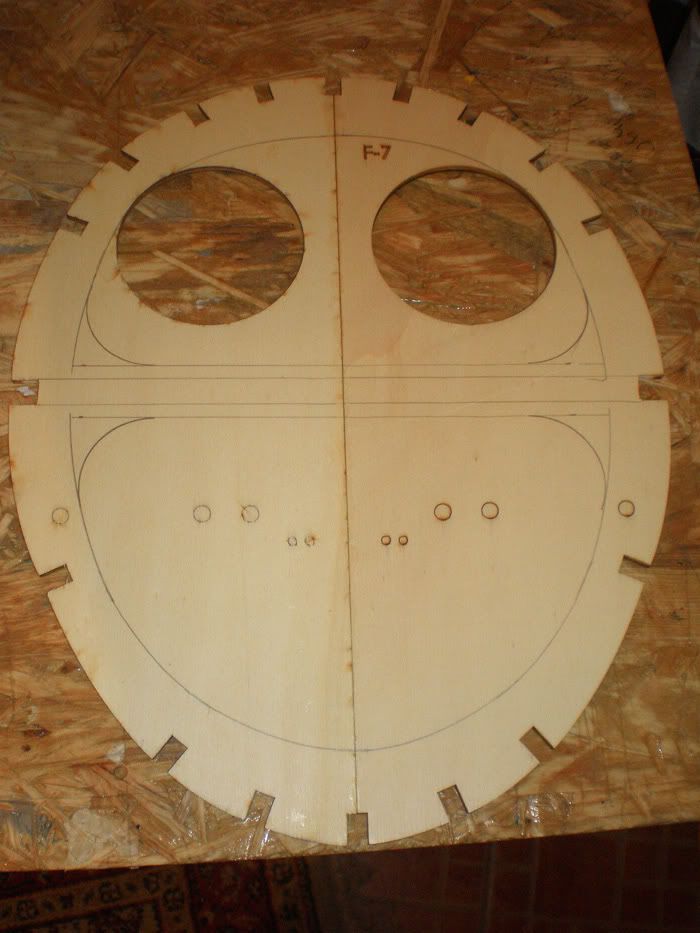
Also, I was pleasantly surprised when find all balsa plates for covering fuselage.
Now back to building...
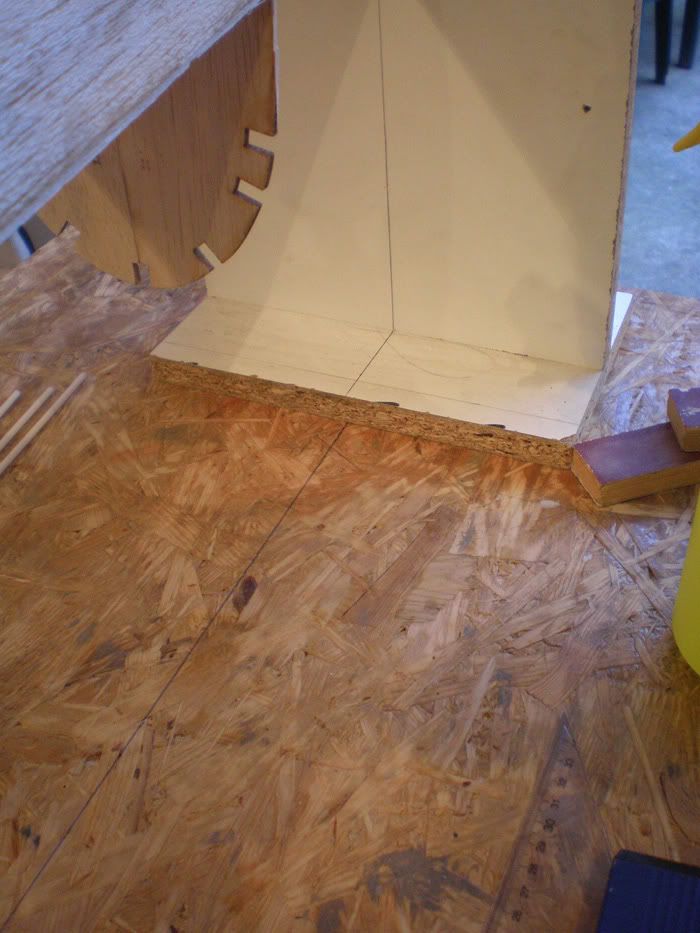
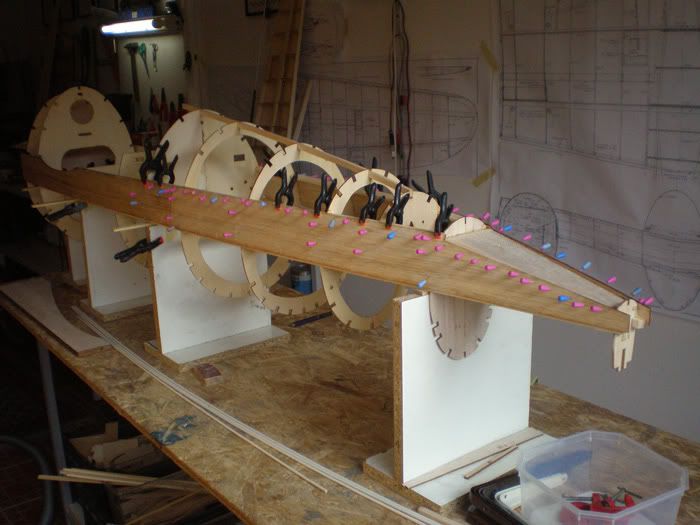
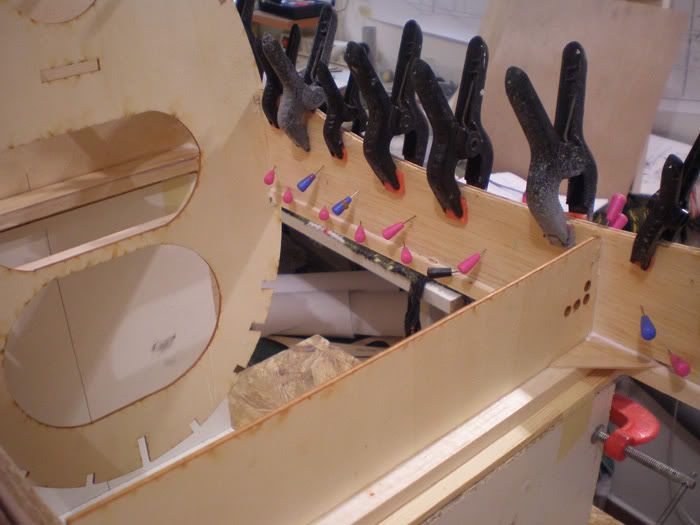
On all corners I add triangle of 1,2 mm ply.
Some ribs I must send just a little to pulled on crutch. First I put it without glue.
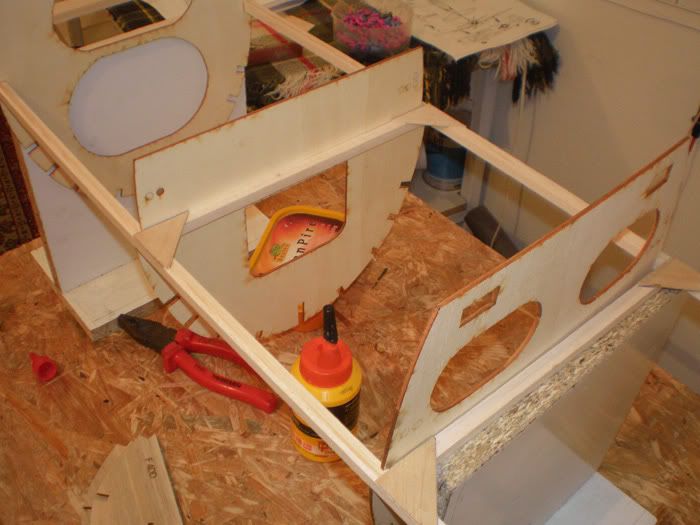
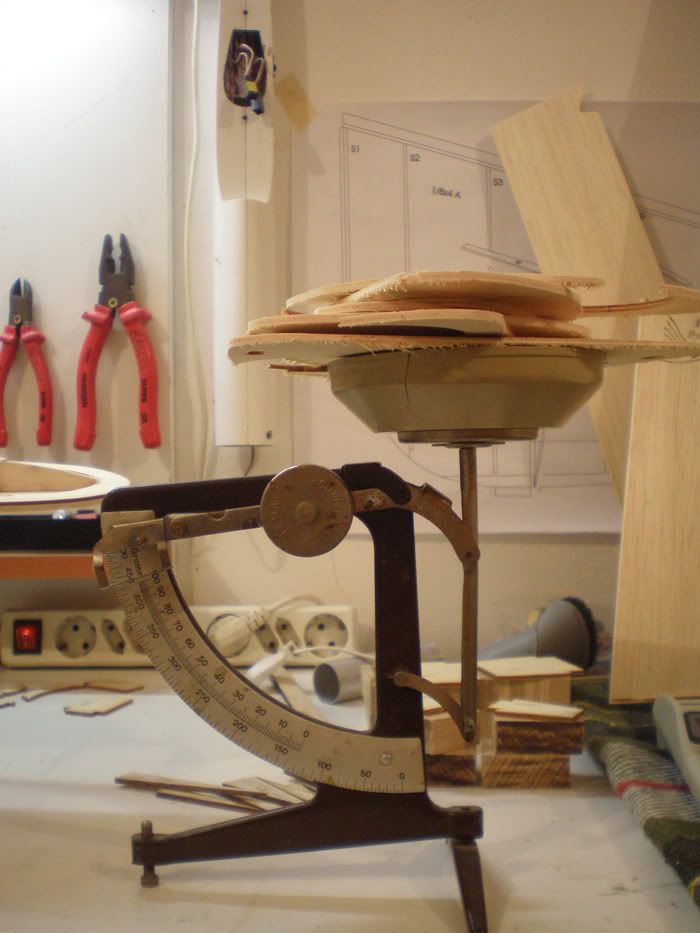
I saw on Internet that some modelers take out piece of ribs which are behind CG. I do it too...
On four ribs I shaved more than 100 gr.
After that I glued all ribs on crutch...
Next was to glue first balsa plate. In manual it was described how to do it right.
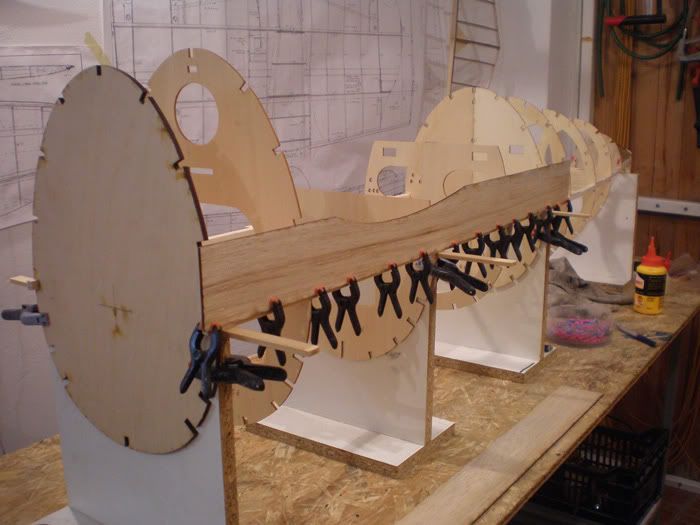
That plate for now is glued just on crutch...
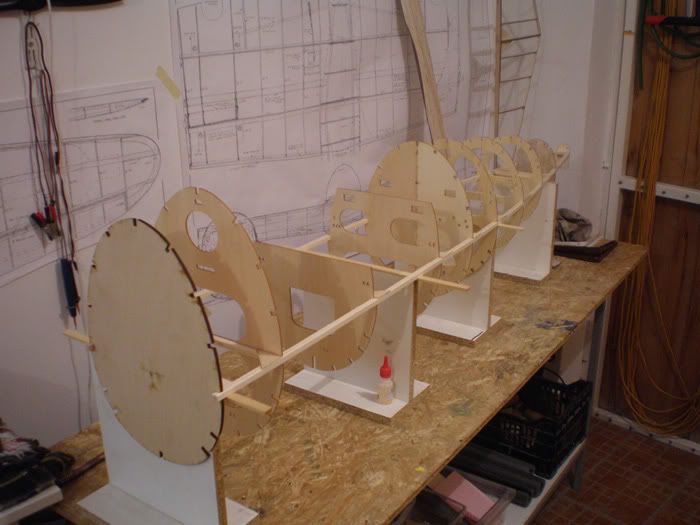
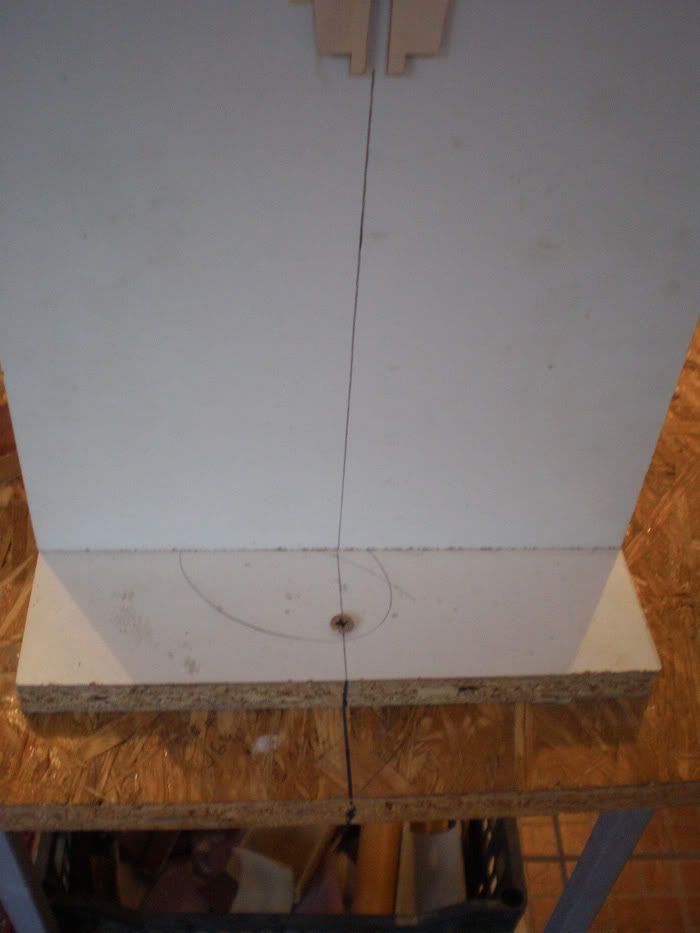
After that I aligned all my mounts... First I put a line on my work bench, and after that on all my mounts
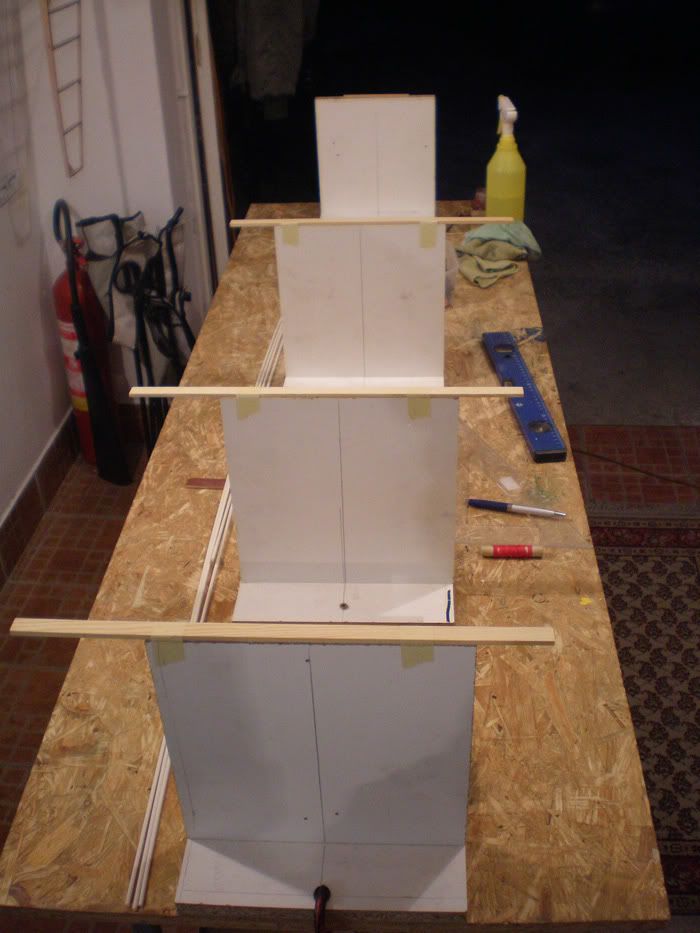
When I fix all mounts, I put fuselage on them and fix it on mounts...
Than I glued plate which is in the extension of the first plate...
Next step was to fill space between first balsa plate and fuselage ribs.
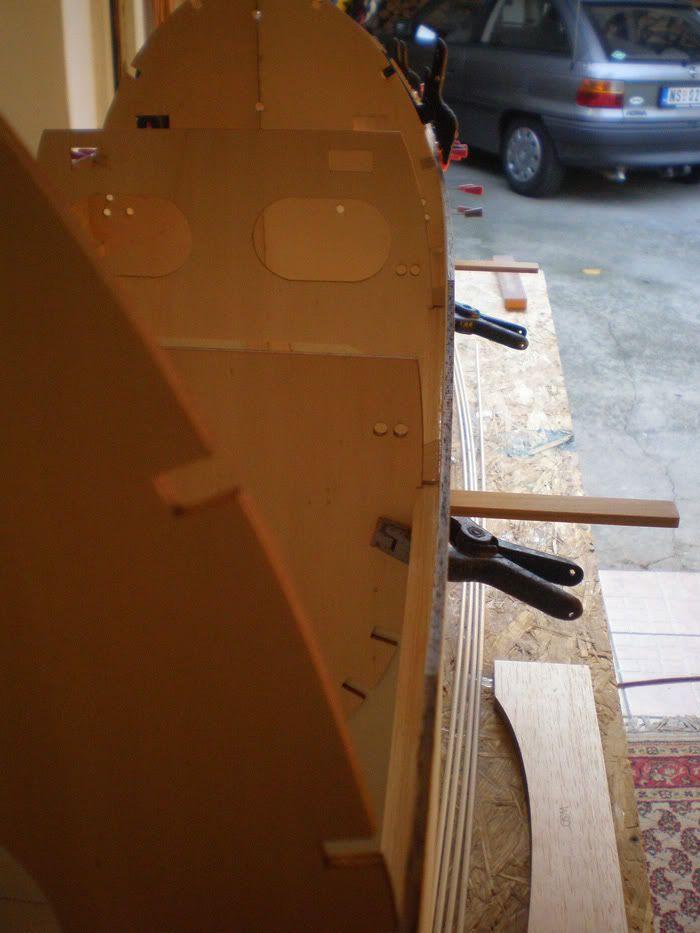
In that space should be added two more balsa plates.
I forgot to say, all gluing was made with whit glue (carpenter's glue).
Before all gluing I was put every balsa plate in a hot water. That made balsa more soft, and it aligned better on rib edge.
Two balsas plate was also wet, and glued with white glue...

I was working parallel on both side...
Tomorrow, when all was dry, I take down fuselage from the mounts. It was very stiff, firm and was not distorted...
To be continued...
First I want to apologize for my English. It is not perfect, but hope all will understand what I want to say...
I'm glad Dino took part and explained about short kit. One more time, Dino prepare all parts they forgot to put in the box and sent it to me...
Also, I was pleasantly surprised when find all balsa plates for covering fuselage.
Now back to building...
On all corners I add triangle of 1,2 mm ply.
Some ribs I must send just a little to pulled on crutch. First I put it without glue.
I saw on Internet that some modelers take out piece of ribs which are behind CG. I do it too...
On four ribs I shaved more than 100 gr.
After that I glued all ribs on crutch...
Next was to glue first balsa plate. In manual it was described how to do it right.
That plate for now is glued just on crutch...
After that I aligned all my mounts... First I put a line on my work bench, and after that on all my mounts
When I fix all mounts, I put fuselage on them and fix it on mounts...
Than I glued plate which is in the extension of the first plate...
Next step was to fill space between first balsa plate and fuselage ribs.
In that space should be added two more balsa plates.
I forgot to say, all gluing was made with whit glue (carpenter's glue).
Before all gluing I was put every balsa plate in a hot water. That made balsa more soft, and it aligned better on rib edge.
Two balsas plate was also wet, and glued with white glue...
I was working parallel on both side...
Tomorrow, when all was dry, I take down fuselage from the mounts. It was very stiff, firm and was not distorted...
To be continued...
11-03-2011 | 08:28 AM
#14
WOW!
Nice work mirce............ya got me thinking.........................OK, DONE THINKING, Still gonna do the fiberglass fuse...
Love the pics and the live model.....
DANG! I LOVE THIS HOBBY...................................CAPTAIN RON
Nice work mirce............ya got me thinking.........................OK, DONE THINKING, Still gonna do the fiberglass fuse...
Love the pics and the live model.....
DANG! I LOVE THIS HOBBY...................................CAPTAIN RON
11-03-2011 | 11:07 AM
#15
Junior Member
Joined: Oct 2007
Posts: 3
Likes: 0
Received 0 Likes
on
0 Posts
From: Novi sadVojvodina, YUGOSLAVIA
Very good job Mirce!
Mogu i usmeno da te pohvalim za ovakvu prezentaciju ali mislim da je efektnije preko ovog foruma.
Ovakvim radom siguran sam da možeš postici jako mnogo u prezentovanju svoga rada i naravno našeg sajta.
Pozdrav,
Jole
11-03-2011 | 12:43 PM
#16

My Feedback: (14)
Joined: Aug 2002
Posts: 453
Likes: 0
Received 0 Likes
on
0 Posts
From: Copeville,
TX
ORIGINAL: marold
Very good job Mirce!
Mogu i usmeno da te pohvalim za ovakvu prezentaciju ali mislim da je efektnije preko ovog foruma.
Ovakvim radom siguran sam da možeš postici jako mnogo u prezentovanju svoga rada i naravno našeg sajta.
Pozdrav,
Jole
Very good job Mirce!
Mogu i usmeno da te pohvalim za ovakvu prezentaciju ali mislim da je efektnije preko ovog foruma.
Ovakvim radom siguran sam da možeš postici jako mnogo u prezentovanju svoga rada i naravno našeg sajta.
Pozdrav,
Jole
11-03-2011 | 01:35 PM
#17

Joined: Aug 2008
Posts: 202
Likes: 0
Received 0 Likes
on
0 Posts
From: KragujevacSerbia, YUGOSLAVIA
ORIGINAL: marold
Very good job Mirce!
Mogu i usmeno da te pohvalim za ovakvu prezentaciju ali mislim da je efektnije preko ovog foruma.
Ovakvim radom siguran sam da možeš postici jako mnogo u prezentovanju svoga rada i naravno našeg sajta.
Pozdrav,
Jole
Very good job Mirce!
Mogu i usmeno da te pohvalim za ovakvu prezentaciju ali mislim da je efektnije preko ovog foruma.
Ovakvim radom siguran sam da možeš postici jako mnogo u prezentovanju svoga rada i naravno našeg sajta.
Pozdrav,
Jole
11-03-2011 | 01:59 PM
#18

Senior Member
My Feedback: (5)
I'll Be watching. Here is a picture of mine. Its a glass fuse, but all the rest is good old balsa wood. The pictures below are of the second one I have built. The first being wood.
Here is a link to RC Scale builder with my build thread. http://www.rcscalebuilder.com/forum/...TID=14564&PN=1
Good luck with the build.
Here is a link to RC Scale builder with my build thread. http://www.rcscalebuilder.com/forum/...TID=14564&PN=1
Good luck with the build.
11-04-2011 | 04:33 AM
#22
Senior Member
Joined: Jun 2003
Posts: 167
Likes: 0
Received 0 Likes
on
0 Posts
From: coral springs,
FL
All of this pumps me up to get rolling on my new one. I will build the fuse( I feel it's easier to repair)( not all of us are the Iceman). I love the lightening he is doing. I will copy. I usually put the servos aft ( ala aerobatic planes) but have learned to keep as much weight forward as possible.I love the breathtaking aircraft that can be created out of this relatively inexpensive and great flying kit. Plus the fact that it lives through the beatings we give it. I will copy Wayne with the engine choice and the mods to install it. Tired of vibration issues.............Doug
11-04-2011 | 04:48 AM
#24
My Feedback: (7)
Joined: Apr 2010
Posts: 675
Likes: 0
Received 0 Likes
on
0 Posts
Man this Meister 47 building is like the best drug available! Everyone has plans for builds lined up(myself included) and the more we talk about it, the more everyone gets revved up for it. That also applies to me.

