


OMP KatanaP Kit Build-Along Thread!
 10-08-2004 | 09:40 PM
#26
Thread Starter
Senior Member
My Feedback: (13)
Joined: Jan 2002
Posts: 194
Likes: 0
Received 0 Likes
on
0 Posts
From: Ypsilanti,
MI
 RE: OMP KatanaP Kit Build-Along Thread!
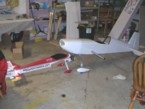
OK, time for some serious airplane noises! Nothing like getting an airplane on it's gear for the first time. My kit has the "teatherite" gear which needs to be drilled to accomodate the 6-32 mounting bolts and 5/32" axles. The gear looks good - plenty of ground clearance for swinging those big props, huh?
I will be using my tried and true .46 FX. This is the third airframe for this engine and it runs great. Mounting hardware is 6-32 cap screws at 1 1/4" long.
The wheels are from my UcanDo3D .46 kit, and I have installed a Sullivan tailwheel bracket and 1" Sullivan tail wheel. I invested in quality tailwheel hardware because I intend to drag the tail in on every landing .
.
Say...where did you guys find an 8-oz tank that will fit between the wing and the fuse cut-out? The only one that I could find that fit was the 6-oz Sullivan shown in the photo.
I'm going to get all the holes and cut-outs done before covering. The more I get done now the easier it will be after assembly.
JC
I will be using my tried and true .46 FX. This is the third airframe for this engine and it runs great. Mounting hardware is 6-32 cap screws at 1 1/4" long.
The wheels are from my UcanDo3D .46 kit, and I have installed a Sullivan tailwheel bracket and 1" Sullivan tail wheel. I invested in quality tailwheel hardware because I intend to drag the tail in on every landing
.Say...where did you guys find an 8-oz tank that will fit between the wing and the fuse cut-out? The only one that I could find that fit was the 6-oz Sullivan shown in the photo.
I'm going to get all the holes and cut-outs done before covering. The more I get done now the easier it will be after assembly.
JC

 10-08-2004 | 10:56 PM
#28
Thread Starter
Senior Member
My Feedback: (13)
Joined: Jan 2002
Posts: 194
Likes: 0
Received 0 Likes
on
0 Posts
From: Ypsilanti,
MI
RE: OMP KatanaP Kit Build-Along Thread!
Quicksand,
No, I am going to try to make it as light as possible - the closer to 4lbs the better.
JC
No, I am going to try to make it as light as possible - the closer to 4lbs the better.
JC
ORIGINAL: quicksand
Are you installing smoke system in this plane your building?
Are you installing smoke system in this plane your building?

 10-13-2004 | 07:14 PM
#30
Thread Starter
Senior Member
My Feedback: (13)
Joined: Jan 2002
Posts: 194
Likes: 0
Received 0 Likes
on
0 Posts
From: Ypsilanti,
MI
RE: OMP KatanaP Kit Build-Along Thread!
I am at the point in the project where an evening of work doesn't really show up in pictures. I drilled the control horn mounting holes, elevator and rudder servos were fitted and pilot holes drilled, and all control surface hinge slots were cut. I will be using CA type hinges.
Here are some shots of the hinged surfaces:
JC
Here are some shots of the hinged surfaces:
JC
10-13-2004 | 07:17 PM
#31
Thread Starter
Senior Member
My Feedback: (13)
Joined: Jan 2002
Posts: 194
Likes: 0
Received 0 Likes
on
0 Posts
From: Ypsilanti,
MI
RE: OMP KatanaP Kit Build-Along Thread!
I will be using an HS-80 micro throttle servo mounted up front as shown on the plans. Here is the hole that was cut for the servo.
JC
JC
10-13-2004 | 07:23 PM
#32
Thread Starter
Senior Member
My Feedback: (13)
Joined: Jan 2002
Posts: 194
Likes: 0
Received 0 Likes
on
0 Posts
From: Ypsilanti,
MI
RE: OMP KatanaP Kit Build-Along Thread!
The next step will be finish sanding and covering ...wahoo! I love the smell of hot covering. Before covering I need to mark where the wing/fuse and elevator/fuse will join and leave that area uncovered.
I had to do a little sanding to get the wing to fit. I will then mark lines on the wing and cover up to those points. I'll do the same for the elevator. Note the use of a vise to hold the fuse? One of the benefits of building a profile! Second photo shows the straight top and tapered bottom profile of the wing.
JC
I had to do a little sanding to get the wing to fit. I will then mark lines on the wing and cover up to those points. I'll do the same for the elevator. Note the use of a vise to hold the fuse? One of the benefits of building a profile! Second photo shows the straight top and tapered bottom profile of the wing.
JC
10-14-2004 | 04:08 PM
#33

Senior Member
My Feedback: (8)
Joined: Dec 2001
Posts: 325
Likes: 0
Received 0 Likes
on
0 Posts
From: Columbia, TN
RE: OMP KatanaP Kit Build-Along Thread!
Somewhere in the old 'PB' forum I had a build thread for the first kit built (besides the prototypes). In it I noted this issue. Since mine was a 'first run' short kit I tried to use spruce hardwood for the lower joiner, no way to bend it enough. So I ended up making a laminated ply V-brace joiner.
You will enjoy the KatP. It is the best knife edging 40 size bird I've ever flown and does high alpha knife edge almost as easy as regular knife.
You will enjoy the KatP. It is the best knife edging 40 size bird I've ever flown and does high alpha knife edge almost as easy as regular knife.
ORIGINAL: rc4me2
OK, First Boo-Boo!
The lower spar pictures lead me to believe that it was cut in the middle and joined. The "cut" I saw on the pictures is a mark from a pen or felt-tip marker and not a cut. BTW, I also discovered that you can enlarge the pictures on the CD-ROM manual to your liking before printing them out. This might have helped, but I also think that the instructions could be clearer here - that you have to BEND the lower spar into place.
I remember wondering why they would have you cut the lower spar? But I thought that bending it into place was not possible because of the stiffness of the hardwood. So I cut my lower spar . I did the same for the servo rails - but these are not structural.
I'll put a little glass tape on the bottom joint as reinforcement. Blenders are negative G's anyway, right?
JC
OK, First Boo-Boo!
The lower spar pictures lead me to believe that it was cut in the middle and joined. The "cut" I saw on the pictures is a mark from a pen or felt-tip marker and not a cut. BTW, I also discovered that you can enlarge the pictures on the CD-ROM manual to your liking before printing them out. This might have helped, but I also think that the instructions could be clearer here - that you have to BEND the lower spar into place.
I remember wondering why they would have you cut the lower spar? But I thought that bending it into place was not possible because of the stiffness of the hardwood. So I cut my lower spar
. I did the same for the servo rails - but these are not structural.I'll put a little glass tape on the bottom joint as reinforcement. Blenders are negative G's anyway, right?
JC
ORIGINAL: AFSalmon
What was hard about bending the basswood servo spars down? I know Matt and Clay have said this was somewhat difficult but I was able to do it with a little CA and kicker.
What was hard about bending the basswood servo spars down? I know Matt and Clay have said this was somewhat difficult but I was able to do it with a little CA and kicker.


 10-15-2004 | 09:25 AM
#36
Thread Starter
Senior Member
My Feedback: (13)
Joined: Jan 2002
Posts: 194
Likes: 0
Received 0 Likes
on
0 Posts
From: Ypsilanti,
MI
RE: OMP KatanaP Kit Build-Along Thread!
Matt,
Great, I guess that OMP now has the new Katana ARF in stock now, huh?
Pleass note that these are two different designs - ARF and kit.
It looks like the ARF has a little more wing - like two inches. The kit has a tapering airfoil section that tapers from the bottom only. My GP Giles 202 has a taper like this and it had excellent stability despite being very much overweight (7.5 lbs).
Looking forward to the pictures!
JC
Great, I guess that OMP now has the new Katana ARF in stock now, huh?
Pleass note that these are two different designs - ARF and kit.
It looks like the ARF has a little more wing - like two inches. The kit has a tapering airfoil section that tapers from the bottom only. My GP Giles 202 has a taper like this and it had excellent stability despite being very much overweight (7.5 lbs).
Looking forward to the pictures!
JC
ORIGINAL: DiabloKid
lookin good JC!
I just got this plane but in ARF form though. Looks exactly the same. Ill post pics of it this weekend.
matt
lookin good JC!
I just got this plane but in ARF form though. Looks exactly the same. Ill post pics of it this weekend.
matt
10-15-2004 | 09:30 AM
#37
Thread Starter
Senior Member
My Feedback: (13)
Joined: Jan 2002
Posts: 194
Likes: 0
Received 0 Likes
on
0 Posts
From: Ypsilanti,
MI
RE: OMP KatanaP Kit Build-Along Thread!
Jim,
Yes, the laminated plywood is a good idea. I think that I had all the sheeting on before I realized my boo-boo. I appled some glass tape to the bottom of the wing to hold it together.
I am looking forward to flying this bird before the snow flies!
JC
Yes, the laminated plywood is a good idea. I think that I had all the sheeting on before I realized my boo-boo. I appled some glass tape to the bottom of the wing to hold it together.
I am looking forward to flying this bird before the snow flies!
JC
ORIGINAL: Jim D
Somewhere in the old 'PB' forum I had a build thread for the first kit built (besides the prototypes). In it I noted this issue. Since mine was a 'first run' short kit I tried to use spruce hardwood for the lower joiner, no way to bend it enough. So I ended up making a laminated ply V-brace joiner.
You will enjoy the KatP. It is the best knife edging 40 size bird I've ever flown and does high alpha knife edge almost as easy as regular knife.
Somewhere in the old 'PB' forum I had a build thread for the first kit built (besides the prototypes). In it I noted this issue. Since mine was a 'first run' short kit I tried to use spruce hardwood for the lower joiner, no way to bend it enough. So I ended up making a laminated ply V-brace joiner.
You will enjoy the KatP. It is the best knife edging 40 size bird I've ever flown and does high alpha knife edge almost as easy as regular knife.
10-16-2004 | 08:59 AM
#39
Thread Starter
Senior Member
My Feedback: (13)
Joined: Jan 2002
Posts: 194
Likes: 0
Received 0 Likes
on
0 Posts
From: Ypsilanti,
MI
RE: OMP KatanaP Kit Build-Along Thread!
Diablo,
Started covering and it is progressing fast. First time with Ultracote. I started really liking it once I turned the temp down on the iron a little.
JC
Started covering and it is progressing fast. First time with Ultracote. I started really liking it once I turned the temp down on the iron a little.
JC
ORIGINAL: DiabloKid
thanks for the info JC, I was not aware of the difference in the wings. I hope it flies well, now if I can make the wind go away id be ok
how is your project coming along?
matt
thanks for the info JC, I was not aware of the difference in the wings. I hope it flies well, now if I can make the wind go away id be ok
how is your project coming along?
matt
10-18-2004 | 09:46 AM
#40
Senior Member
Joined: Oct 2003
Posts: 209
Likes: 0
Received 0 Likes
on
0 Posts
From: Moscow, RUSSIA
RE: OMP KatanaP Kit Build-Along Thread!
hi guys,
Can anybody provide me with drawings of this plane, please ! I will fill the whole Russia with Kit of Katana. And we will do this plane a real top item in Russia from the USA[>:]
Can anybody provide me with drawings of this plane, please ! I will fill the whole Russia with Kit of Katana. And we will do this plane a real top item in Russia from the USA[>:]
 10-19-2004 | 05:57 PM
#42
Thread Starter
Senior Member
My Feedback: (13)
Joined: Jan 2002
Posts: 194
Likes: 0
Received 0 Likes
on
0 Posts
From: Ypsilanti,
MI
RE: OMP KatanaP Kit Build-Along Thread!
Yep, trans blue on the bottom with bright yellow on the top. I'll also do that checkerboard thing as well.
JC
JC
ORIGINAL: DMehalko(DM)
Lemmme guess.....Yellow?
Lemmme guess.....Yellow?
10-21-2004 | 09:32 AM
#44
Thread Starter
Senior Member
My Feedback: (13)
Joined: Jan 2002
Posts: 194
Likes: 0
Received 0 Likes
on
0 Posts
From: Ypsilanti,
MI
RE: OMP KatanaP Kit Build-Along Thread!
I got some covering done - about half. Work got in the way[ ].
].
I'll try to post some tonight.
JC
].I'll try to post some tonight.
JC
ORIGINAL: Slyder
Have you gotten any farther? Keep those pics commin.
Have you gotten any farther? Keep those pics commin.
10-21-2004 | 06:54 PM
#45
Thread Starter
Senior Member
My Feedback: (13)
Joined: Jan 2002
Posts: 194
Likes: 0
Received 0 Likes
on
0 Posts
From: Ypsilanti,
MI
RE: OMP KatanaP Kit Build-Along Thread!
Hello all,
Work has put a damper on my progress, but I have been doing some covering. I have all the control surfaces and tail feathers covered. I have most of the wing done as well. The sheme will be ultracote bright yellow on top and transparent blue on the bottom. Attached are two photos, one of which shows the effect of the transparent blue on the underside of the stab/elevator. This is my first ultracote project after covering many with monokote. I have enjoyed working with the ultracote so far.
JC
Work has put a damper on my progress, but I have been doing some covering. I have all the control surfaces and tail feathers covered. I have most of the wing done as well. The sheme will be ultracote bright yellow on top and transparent blue on the bottom. Attached are two photos, one of which shows the effect of the transparent blue on the underside of the stab/elevator. This is my first ultracote project after covering many with monokote. I have enjoyed working with the ultracote so far.
JC
10-22-2004 | 09:45 AM
#47
Thread Starter
Senior Member
My Feedback: (13)
Joined: Jan 2002
Posts: 194
Likes: 0
Received 0 Likes
on
0 Posts
From: Ypsilanti,
MI
RE: OMP KatanaP Kit Build-Along Thread!
Thanks,
I'll put some yellow bars underneath to aid in vertical orientation when the belly is facing me. Checkerboard will be ultracote "deep blue."
JC
I'll put some yellow bars underneath to aid in vertical orientation when the belly is facing me. Checkerboard will be ultracote "deep blue."
JC
ORIGINAL: LVS
Very nice covering job! I really like the transparent blue under yellow!
Very nice covering job! I really like the transparent blue under yellow!
10-24-2004 | 10:15 AM
#48
Thread Starter
Senior Member
My Feedback: (13)
Joined: Jan 2002
Posts: 194
Likes: 0
Received 0 Likes
on
0 Posts
From: Ypsilanti,
MI
RE: OMP KatanaP Kit Build-Along Thread!
Greeting Pro Bro's!
Things are starting to take shape on the KatanaP. I epoxied the wing and stab in place last night. This part of the assembly was an area of concern since starting the project. It turned out to be quite easy. During covering I left a 1/2" center strip on the wing and stab un-covered by film. This would ensure a strong joint.
The fuse was place in a flat vise and level such that it was exactly perpendicular with the building board. I then fit the wing in and moved it around until it was centered and perpendicular to the fuse. I then used a level to ensure that the wing was parallel to the building board. The top of the wing is flat so it gives a good surface to level.
When everything looked good, I made some alignment marks with a pen, applied epoxy, and slipped the wing in. I used the alignment marks to get the wing in position. Excess epoxy was wiped away with pre-prepared cloth wipes dampened with denatured alcohol. Wing alignment was triple checked and allowed to cure. Same process with the stab, using an triangle to ensure that trailing edge was square to fuse. Hey, flat fuselages have their advantages when it comes time to square things up !
!
I took a lot of time to make sure that this airplane is as true as I can get it. I learned from my experience with my UcanDo that alignment and surface deflection are critical to 3D airplanes.
Here is how it looks now. The distinctive Katana wing fillets are to be added next.
JC
Things are starting to take shape on the KatanaP. I epoxied the wing and stab in place last night. This part of the assembly was an area of concern since starting the project. It turned out to be quite easy. During covering I left a 1/2" center strip on the wing and stab un-covered by film. This would ensure a strong joint.
The fuse was place in a flat vise and level such that it was exactly perpendicular with the building board. I then fit the wing in and moved it around until it was centered and perpendicular to the fuse. I then used a level to ensure that the wing was parallel to the building board. The top of the wing is flat so it gives a good surface to level.
When everything looked good, I made some alignment marks with a pen, applied epoxy, and slipped the wing in. I used the alignment marks to get the wing in position. Excess epoxy was wiped away with pre-prepared cloth wipes dampened with denatured alcohol. Wing alignment was triple checked and allowed to cure. Same process with the stab, using an triangle to ensure that trailing edge was square to fuse. Hey, flat fuselages have their advantages when it comes time to square things up
!I took a lot of time to make sure that this airplane is as true as I can get it. I learned from my experience with my UcanDo that alignment and surface deflection are critical to 3D airplanes.
Here is how it looks now. The distinctive Katana wing fillets are to be added next.
JC
10-24-2004 | 08:24 PM
#49
Thread Starter
Senior Member
My Feedback: (13)
Joined: Jan 2002
Posts: 194
Likes: 0
Received 0 Likes
on
0 Posts
From: Ypsilanti,
MI
RE: OMP KatanaP Kit Build-Along Thread!
This is going to be it for a few days. I will be occupied with work for a while[:@].
The fillets have been added to wing/fuse with epoxy. I cut away the film at the glue joint locations for a wood to wood bond.
Hinge slots have been re-opened and the surfaces trial fitted. Next step is hinging.
JC
The fillets have been added to wing/fuse with epoxy. I cut away the film at the glue joint locations for a wood to wood bond.
Hinge slots have been re-opened and the surfaces trial fitted. Next step is hinging.
JC
10-31-2004 | 09:57 AM
#50
Thread Starter
Senior Member
My Feedback: (13)
Joined: Jan 2002
Posts: 194
Likes: 0
Received 0 Likes
on
0 Posts
From: Ypsilanti,
MI
RE: OMP KatanaP Kit Build-Along Thread!
Hello fellow RCU-ers!
I am back at the KatanaP for trimming and final assembly. I put the distinctive Katana checkerboards on with Ultracote deep blue, and did the canopy with chrome Monokote self-adhesive trim sheet. The bottom is transparent Ultracote blue with four bright yellow strips for orientation during the TR with the belly is facing me. I am kinda stumped as to what to do next as far as decoration[sm=confused.gif].
My scrap box is mostly Monokote. I was thinking of cutting out some script KatanaP designs in black or red, but was not sure if you can iron-on Monokote over ultracote(?). If you have any experience with this let me know.
Here is how she looks now.
I am back at the KatanaP for trimming and final assembly. I put the distinctive Katana checkerboards on with Ultracote deep blue, and did the canopy with chrome Monokote self-adhesive trim sheet. The bottom is transparent Ultracote blue with four bright yellow strips for orientation during the TR with the belly is facing me. I am kinda stumped as to what to do next as far as decoration[sm=confused.gif].
My scrap box is mostly Monokote. I was thinking of cutting out some script KatanaP designs in black or red, but was not sure if you can iron-on Monokote over ultracote(?). If you have any experience with this let me know.
Here is how she looks now.

