


Boomerang Torus Merlin 140 Build
 05-09-2014 | 08:01 AM
#1

Had a slight mishap with my SM Viperjet 2m last Saturday which finally wrote it off  On downwind leg for landing, dirty and low(ish) the engine flamed out so after dragging everything back in I made a beeline for the runway only to have her drop a wing and (quite spectacularly i might add) cart wheel to a stop from about 2m off the deck.
Anyway after going through the mourning stages and leaving the field swearing I'm selling up and getting out of the hobby I came to my senses and have bought two new airframes (as you do). So after sending an email to Boomerang Jets UK last Sunday I am now a proud owner of a Boomerang Torus which will be the new home for my Merlin 140. Reasons for buying was the price, the grass take off capabilities and the flying characteristics which I miss since selling my boomerang intro last year and of course spares support. Not that I'll need anyway because my flying is impeccable *cough*.
Specs are going to be as follows:
Jets Munt Merlin 140
4 x Hitec 7955TG on flaps & ailerons.
2 x Futaba S9551 on elevators
2 x Spektrum A6030 on rudders
1 x Spektrum DS821 on nosewheel
Powerbox Competition SRS with 4 x Spektrum DSMX sats
2 x Hyperion 3800Mah LiFe for RX
1 x Hyperion 5000Mah G3 Lipo for turbine and retracts.
Electron electric retracts with boomerang jets deluxe oleos/wheel set.
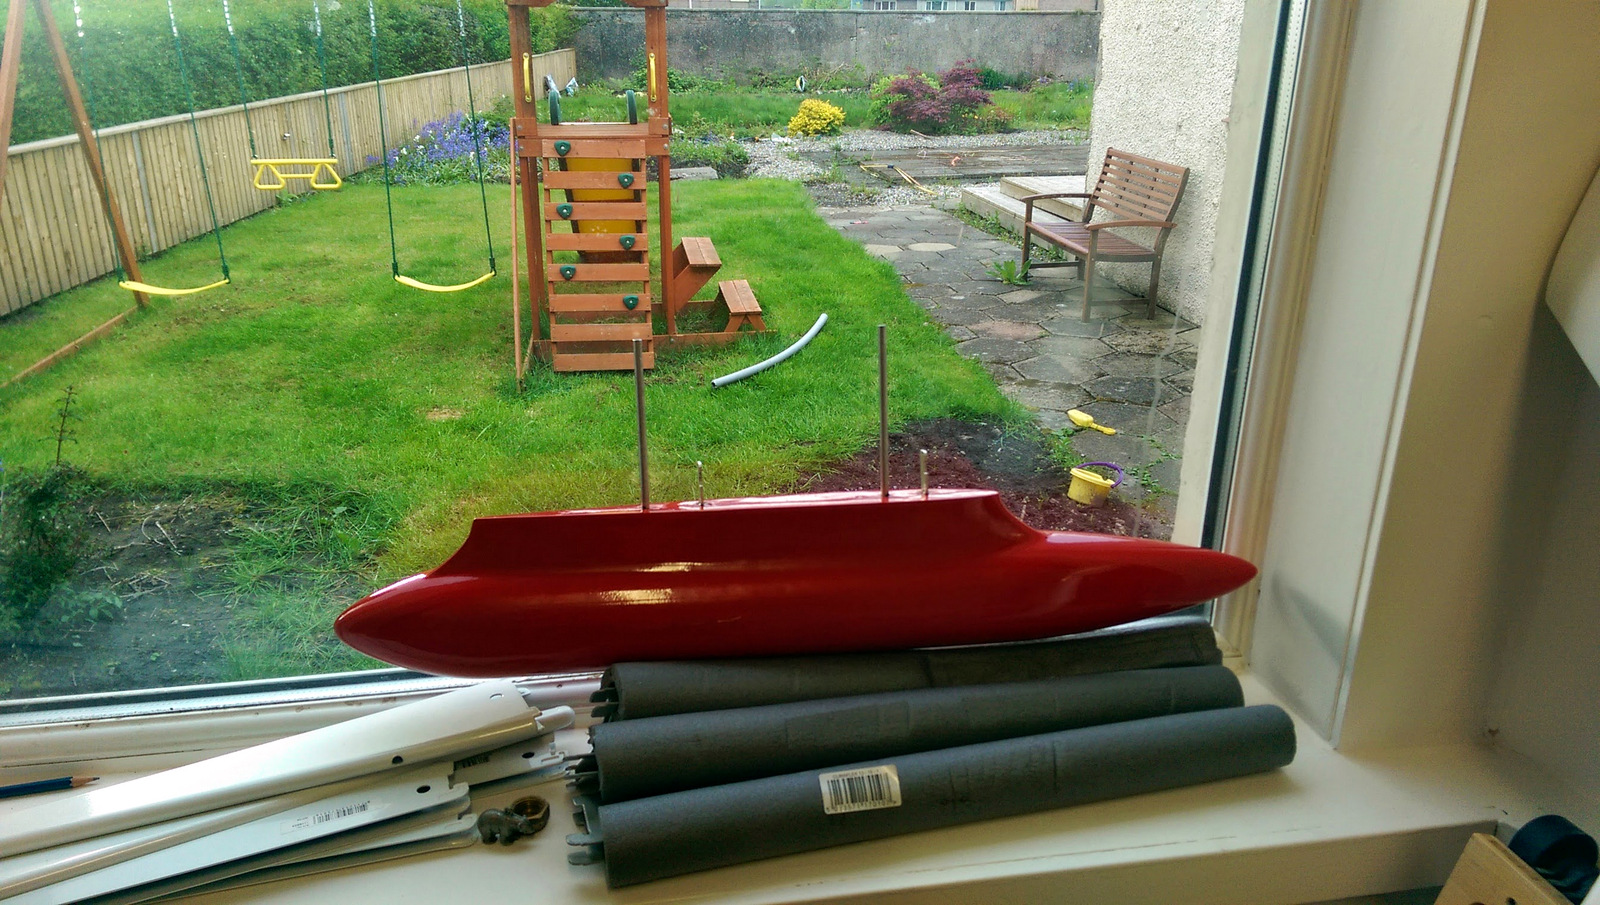
While I'm getting everything out the packaging, here's some photos
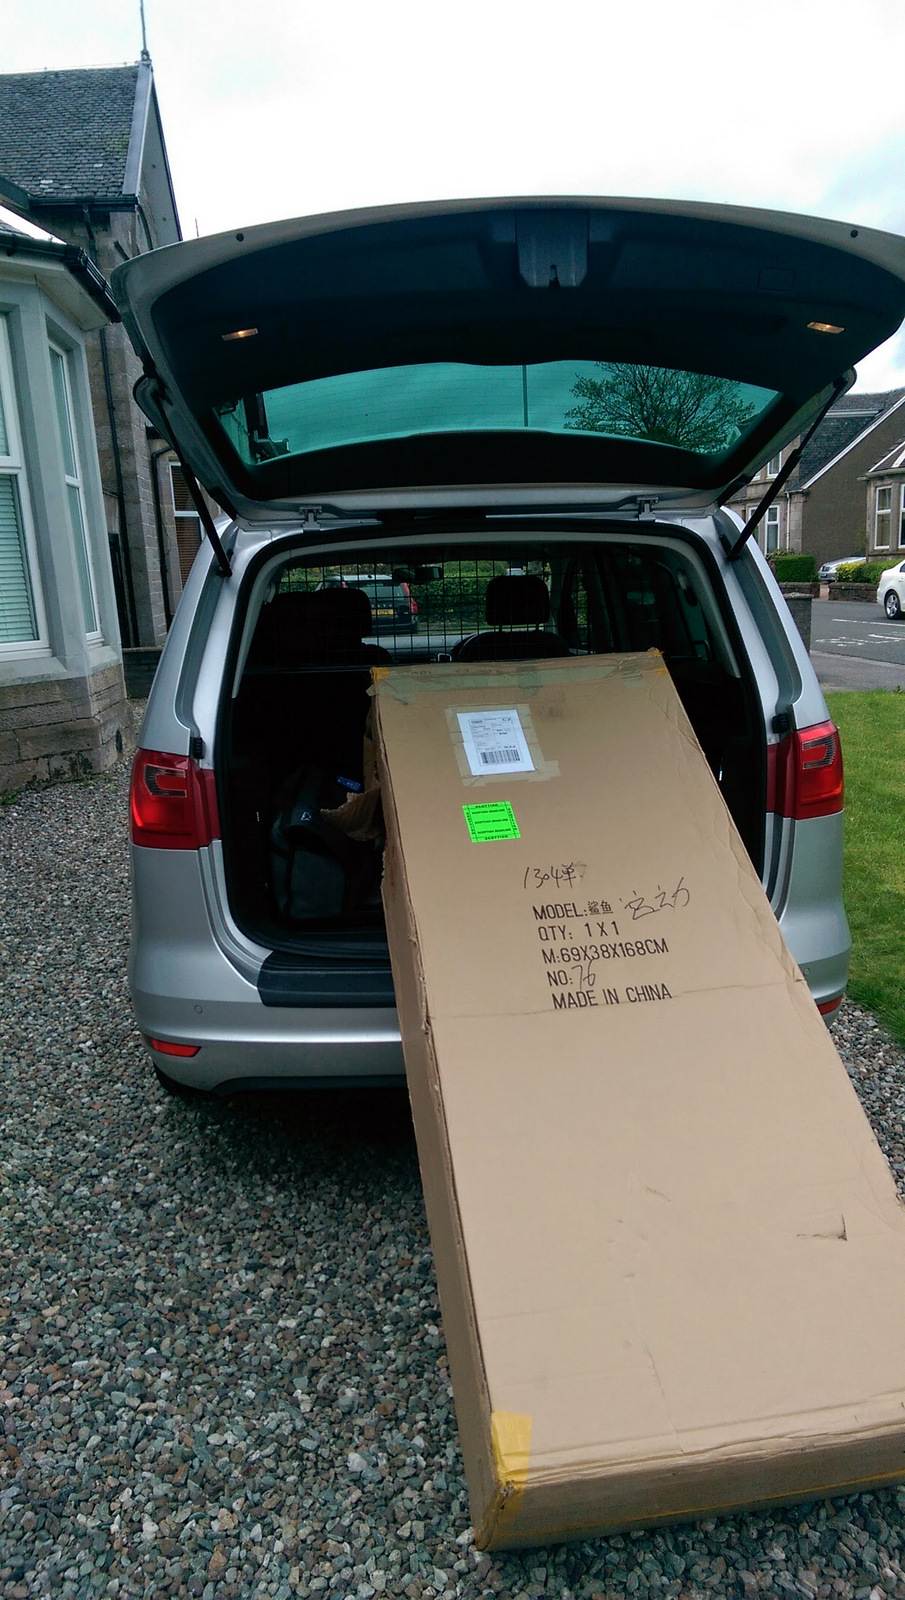


More to follow after dinner
On downwind leg for landing, dirty and low(ish) the engine flamed out so after dragging everything back in I made a beeline for the runway only to have her drop a wing and (quite spectacularly i might add) cart wheel to a stop from about 2m off the deck.Anyway after going through the mourning stages and leaving the field swearing I'm selling up and getting out of the hobby I came to my senses and have bought two new airframes (as you do). So after sending an email to Boomerang Jets UK last Sunday I am now a proud owner of a Boomerang Torus which will be the new home for my Merlin 140. Reasons for buying was the price, the grass take off capabilities and the flying characteristics which I miss since selling my boomerang intro last year and of course spares support. Not that I'll need anyway because my flying is impeccable *cough*.
Specs are going to be as follows:
Jets Munt Merlin 140
4 x Hitec 7955TG on flaps & ailerons.
2 x Futaba S9551 on elevators
2 x Spektrum A6030 on rudders
1 x Spektrum DS821 on nosewheel
Powerbox Competition SRS with 4 x Spektrum DSMX sats
2 x Hyperion 3800Mah LiFe for RX
1 x Hyperion 5000Mah G3 Lipo for turbine and retracts.
Electron electric retracts with boomerang jets deluxe oleos/wheel set.
While I'm getting everything out the packaging, here's some photos
More to follow after dinner
 05-09-2014 | 10:39 AM
#2
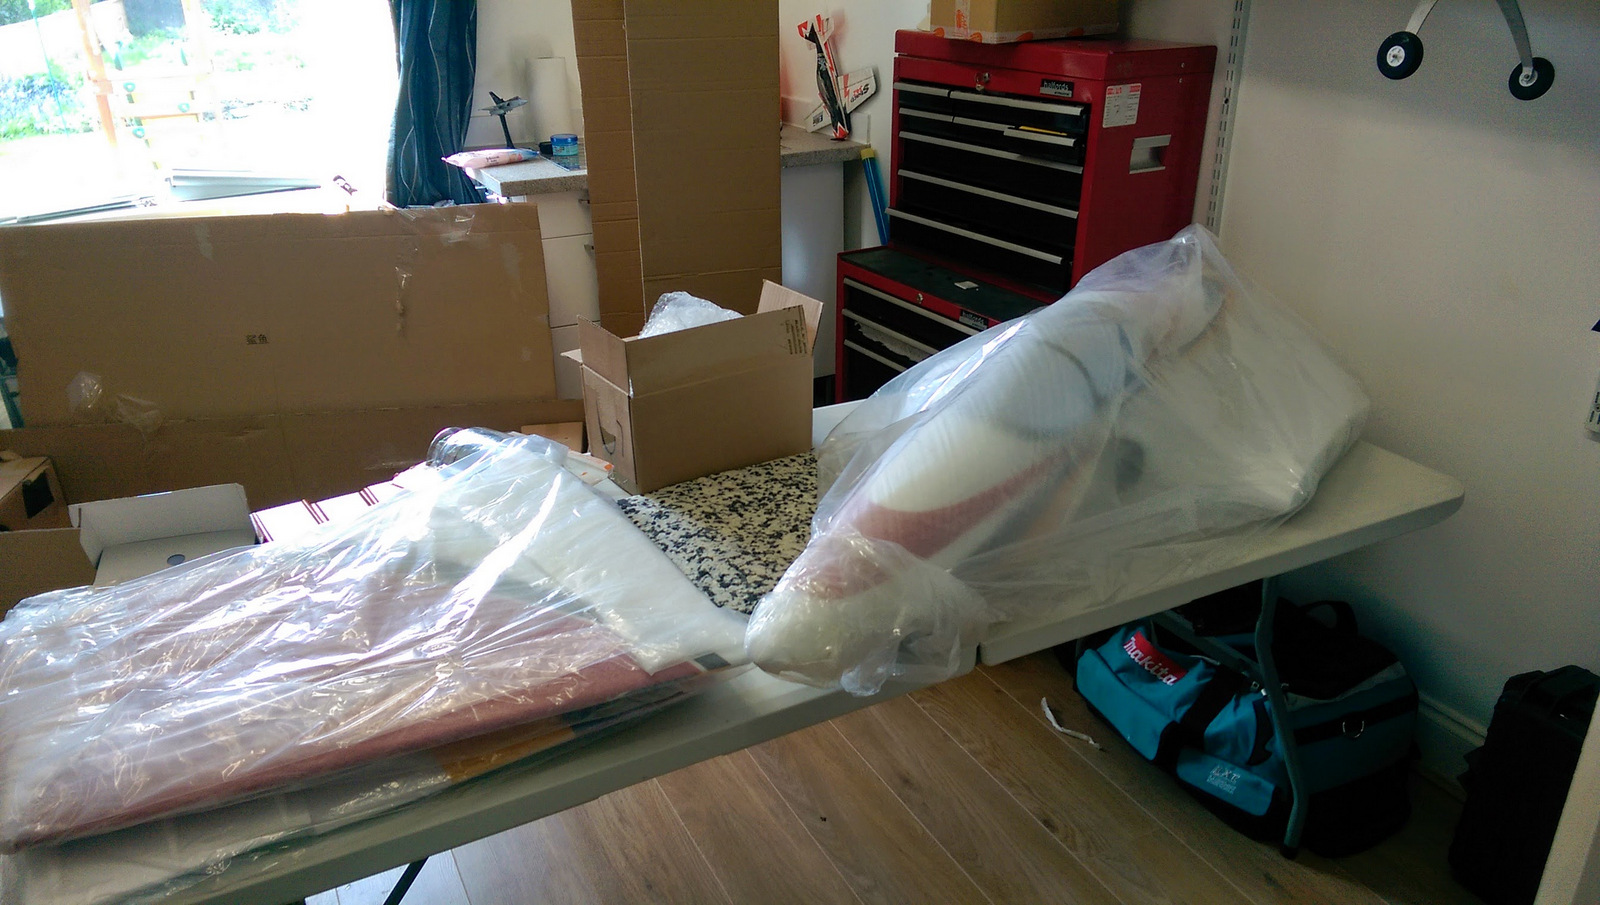
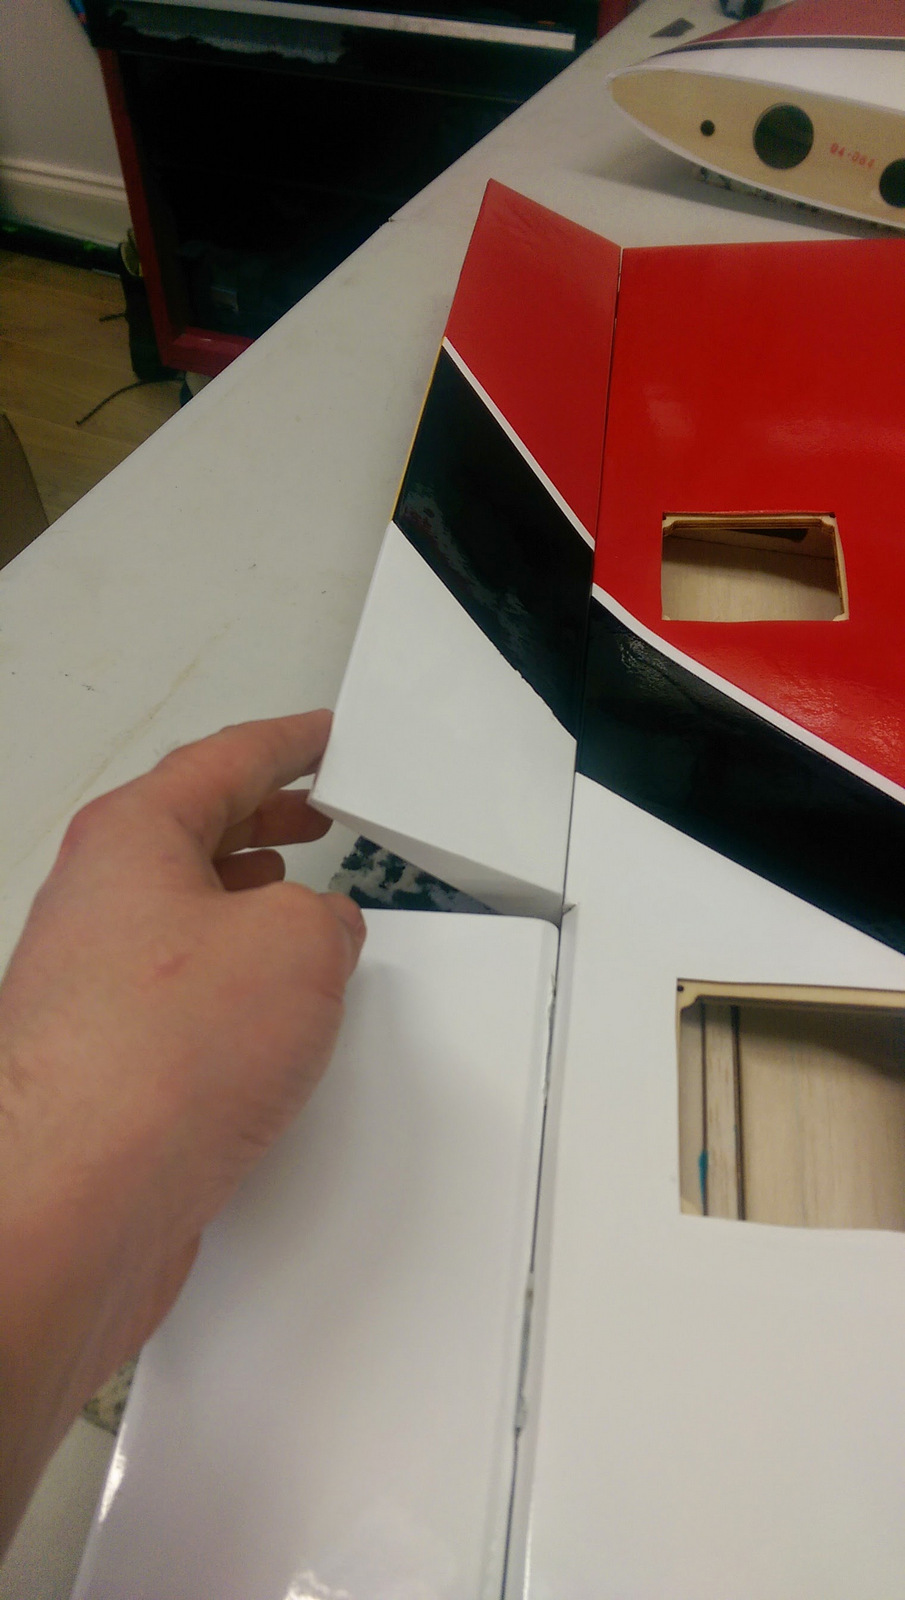
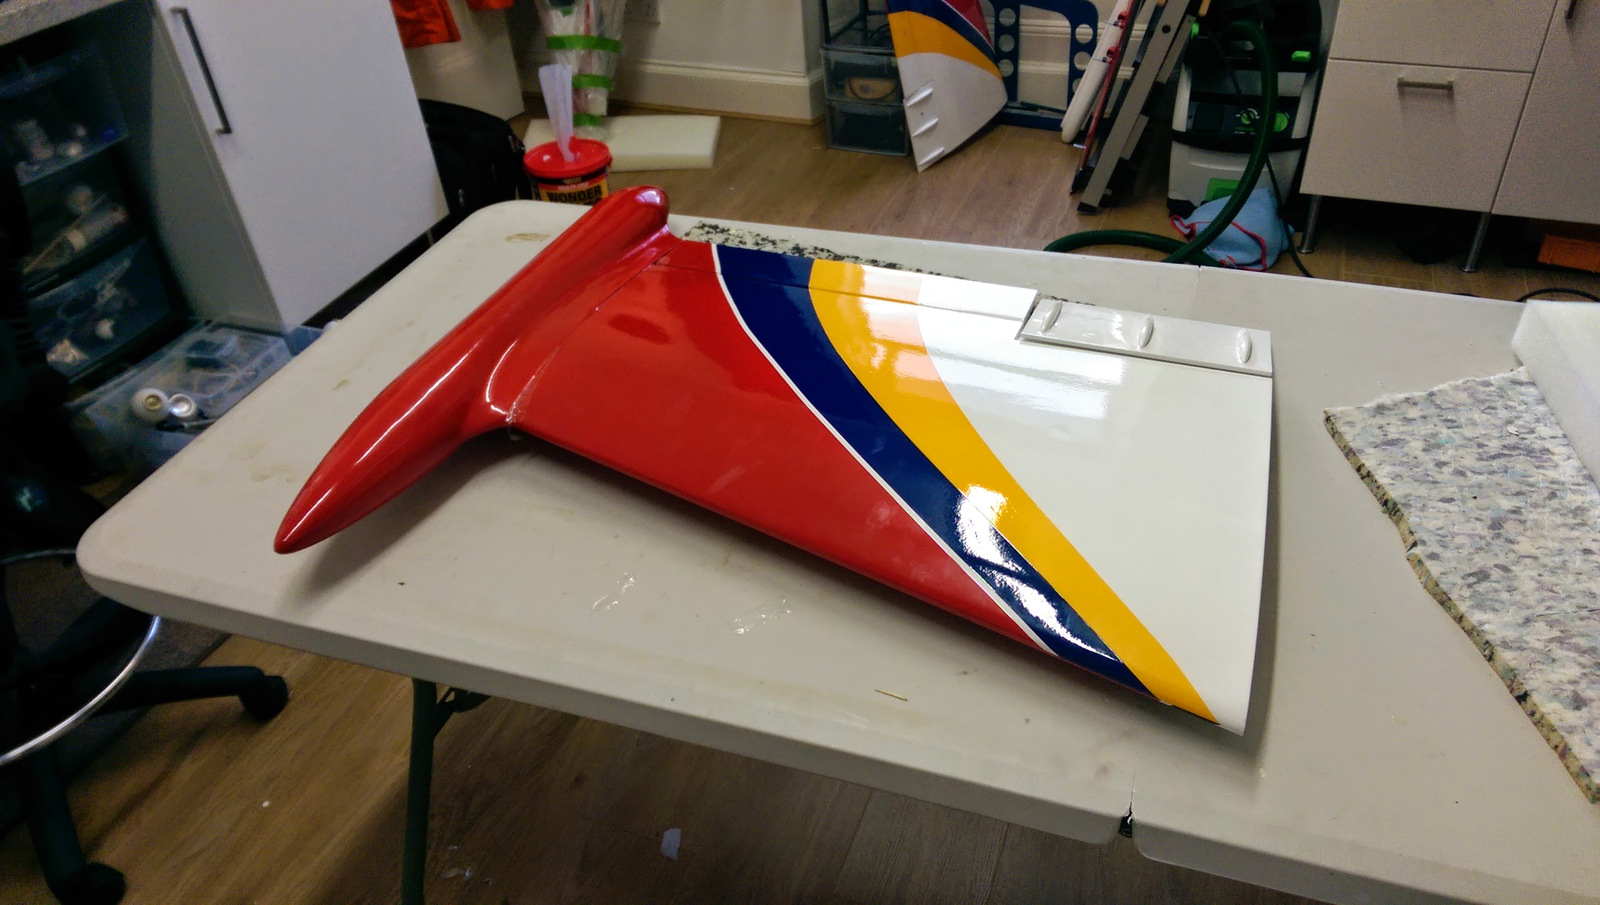
Some more photos.
Dry fit to get a look at the size:


Internal:


Lots of lots of protective packaging, will be handy for masking the exterior later when i paint the internal bay.

Dry fit to get a look at the size:
Internal:
Lots of lots of protective packaging, will be handy for masking the exterior later when i paint the internal bay.
05-09-2014 | 10:58 AM
#3
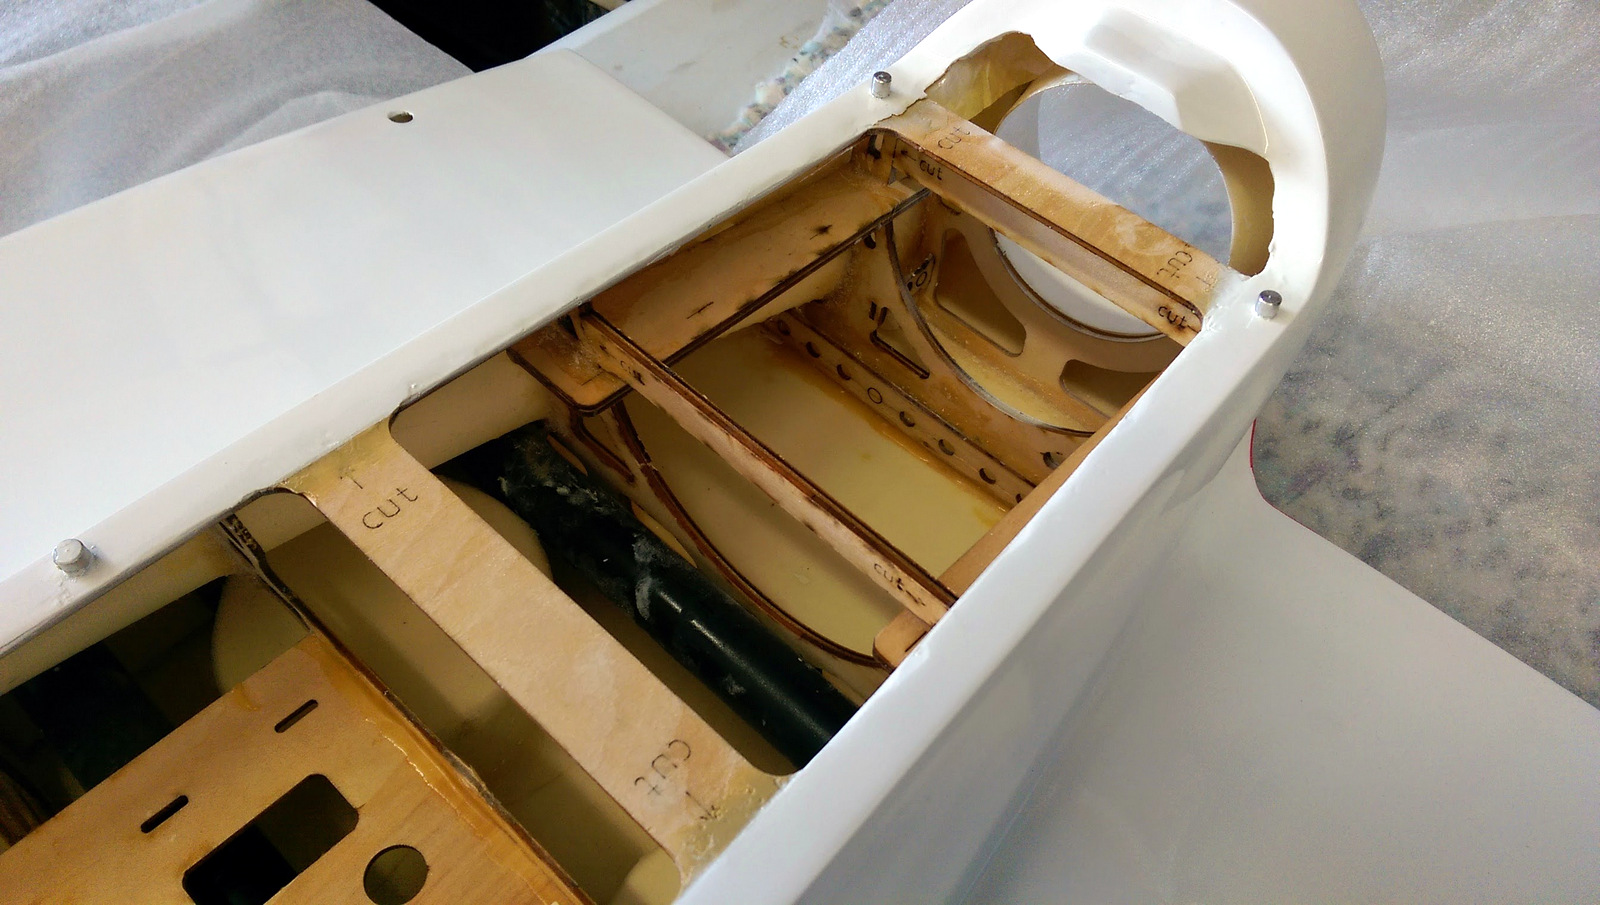
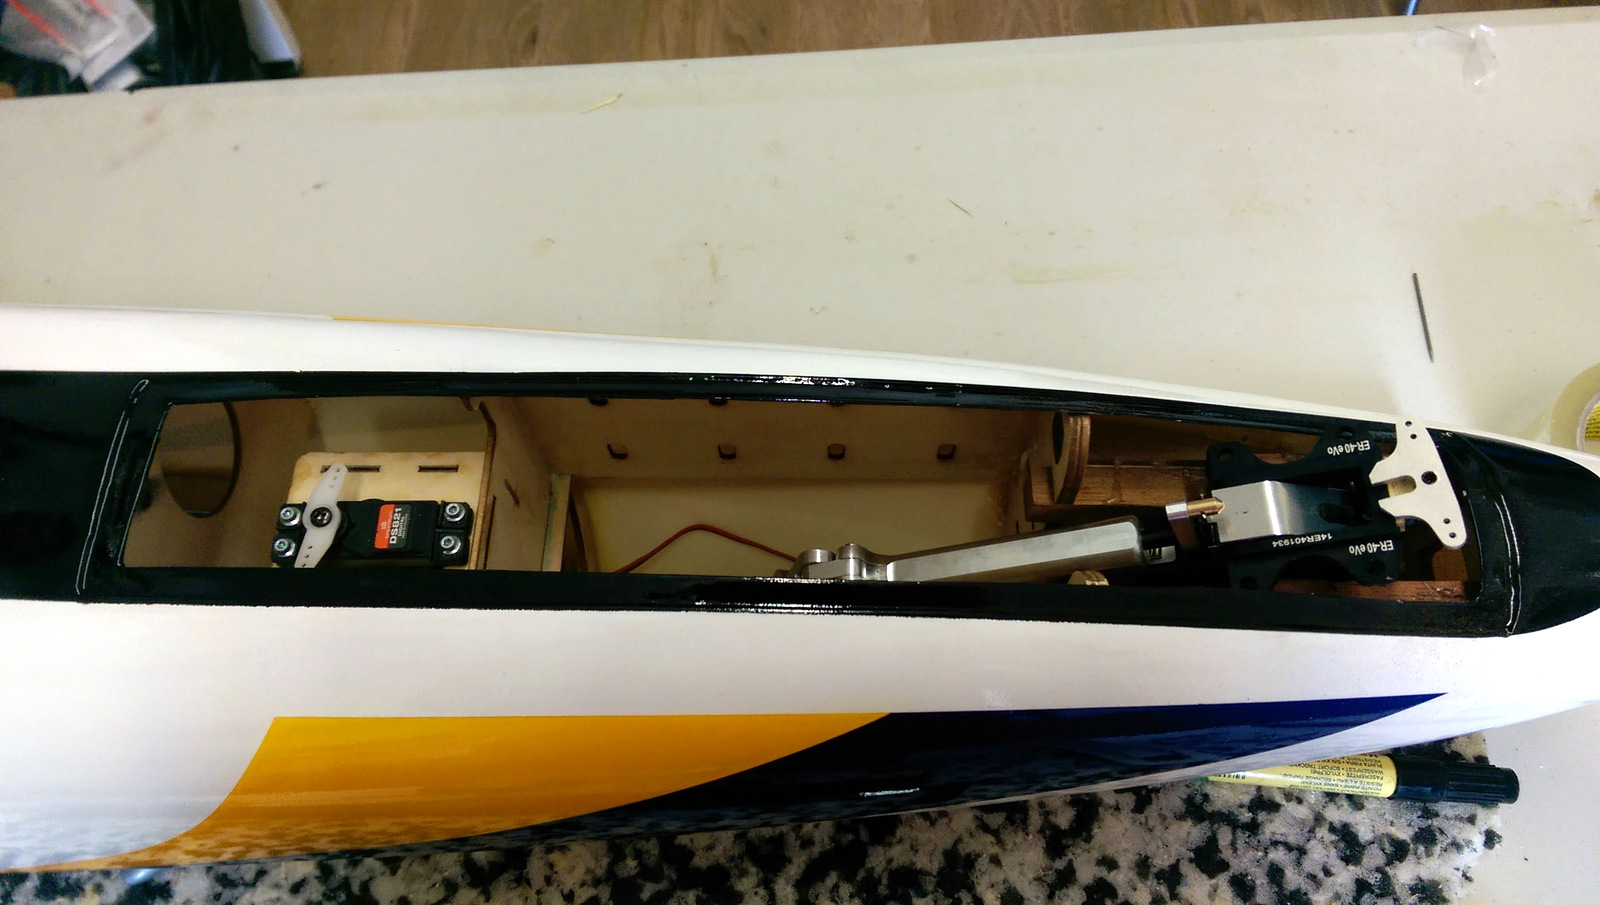
Onto the build!
I'm starting with the gear because I've never seen or used electric retracts or brakes before so I was very curious.
You start by attaching the 'brake disc' which is a circular piece of magnetic material which can then be affected by the electromagnet. These attach by removing the 3 screws you see in blue below and replacing them with longer ones included in the kit, these attach with locking washers but i have added blue loctite just as a belt and braces approach.

Once the wheel is assembled with the brake disc you then put it on the axle and attach with the brake unit itself onto the oleo.

After that you need to attach them to the retract units with the included pins and spacers.
Photos of the electron retracts:

I'm starting with the gear because I've never seen or used electric retracts or brakes before so I was very curious.
You start by attaching the 'brake disc' which is a circular piece of magnetic material which can then be affected by the electromagnet. These attach by removing the 3 screws you see in blue below and replacing them with longer ones included in the kit, these attach with locking washers but i have added blue loctite just as a belt and braces approach.
Once the wheel is assembled with the brake disc you then put it on the axle and attach with the brake unit itself onto the oleo.
After that you need to attach them to the retract units with the included pins and spacers.
Photos of the electron retracts:
05-10-2014 | 03:50 AM
#4
Busy night until i could not stay awake any longer got me as far as
-all control surfaces hinged
-gear installed
-most of the servos mounted
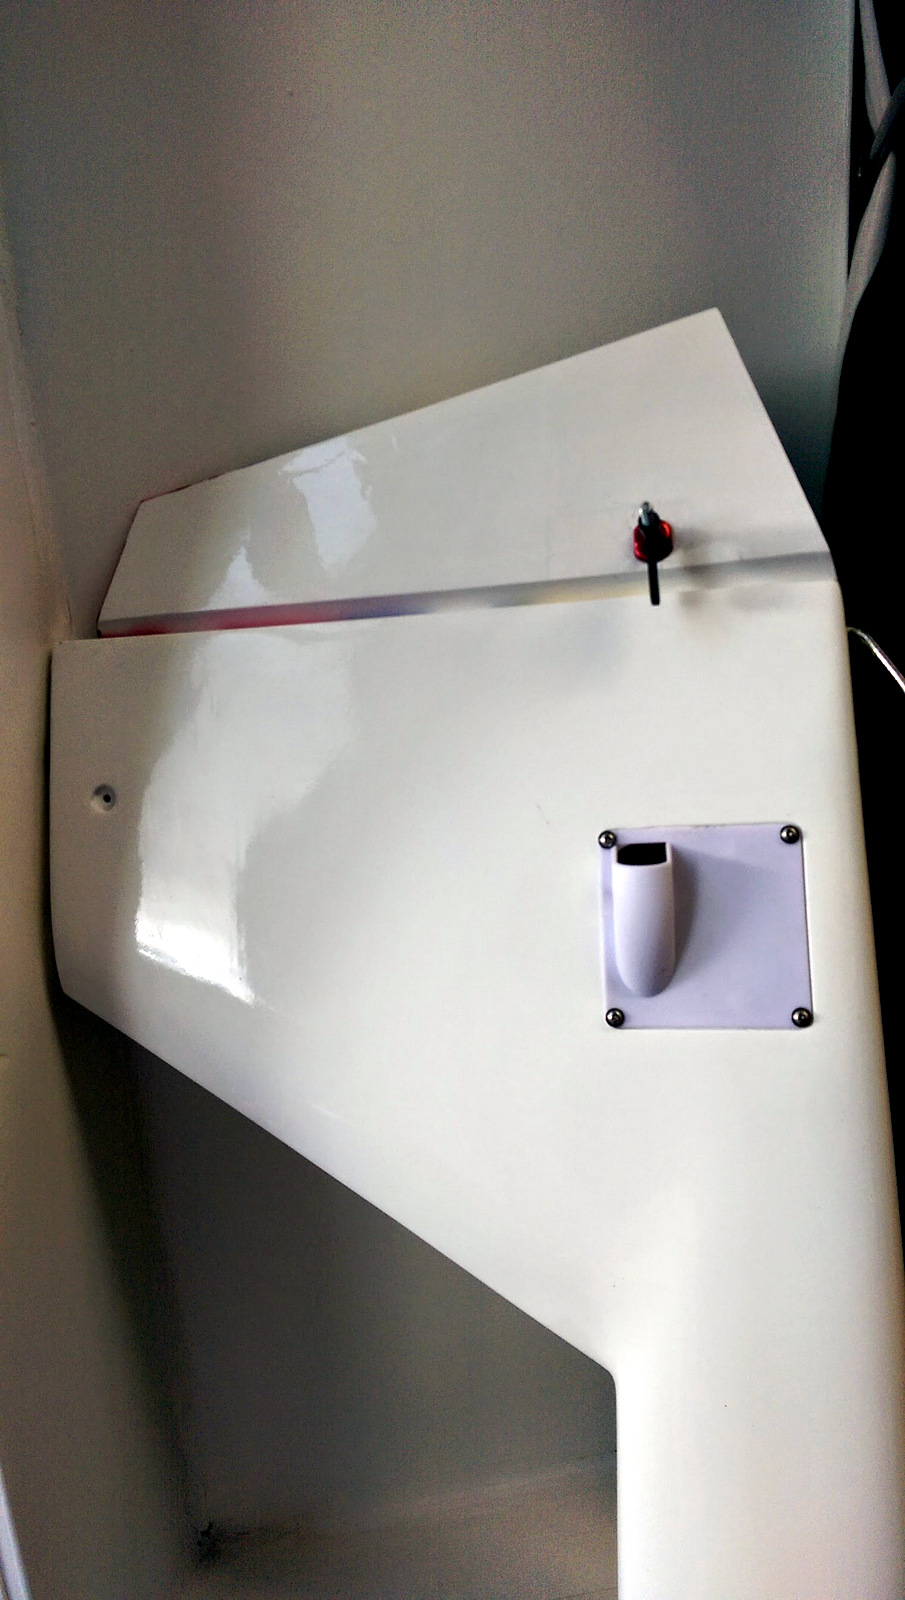
-tip tank mounting hardware glued in
Photos:


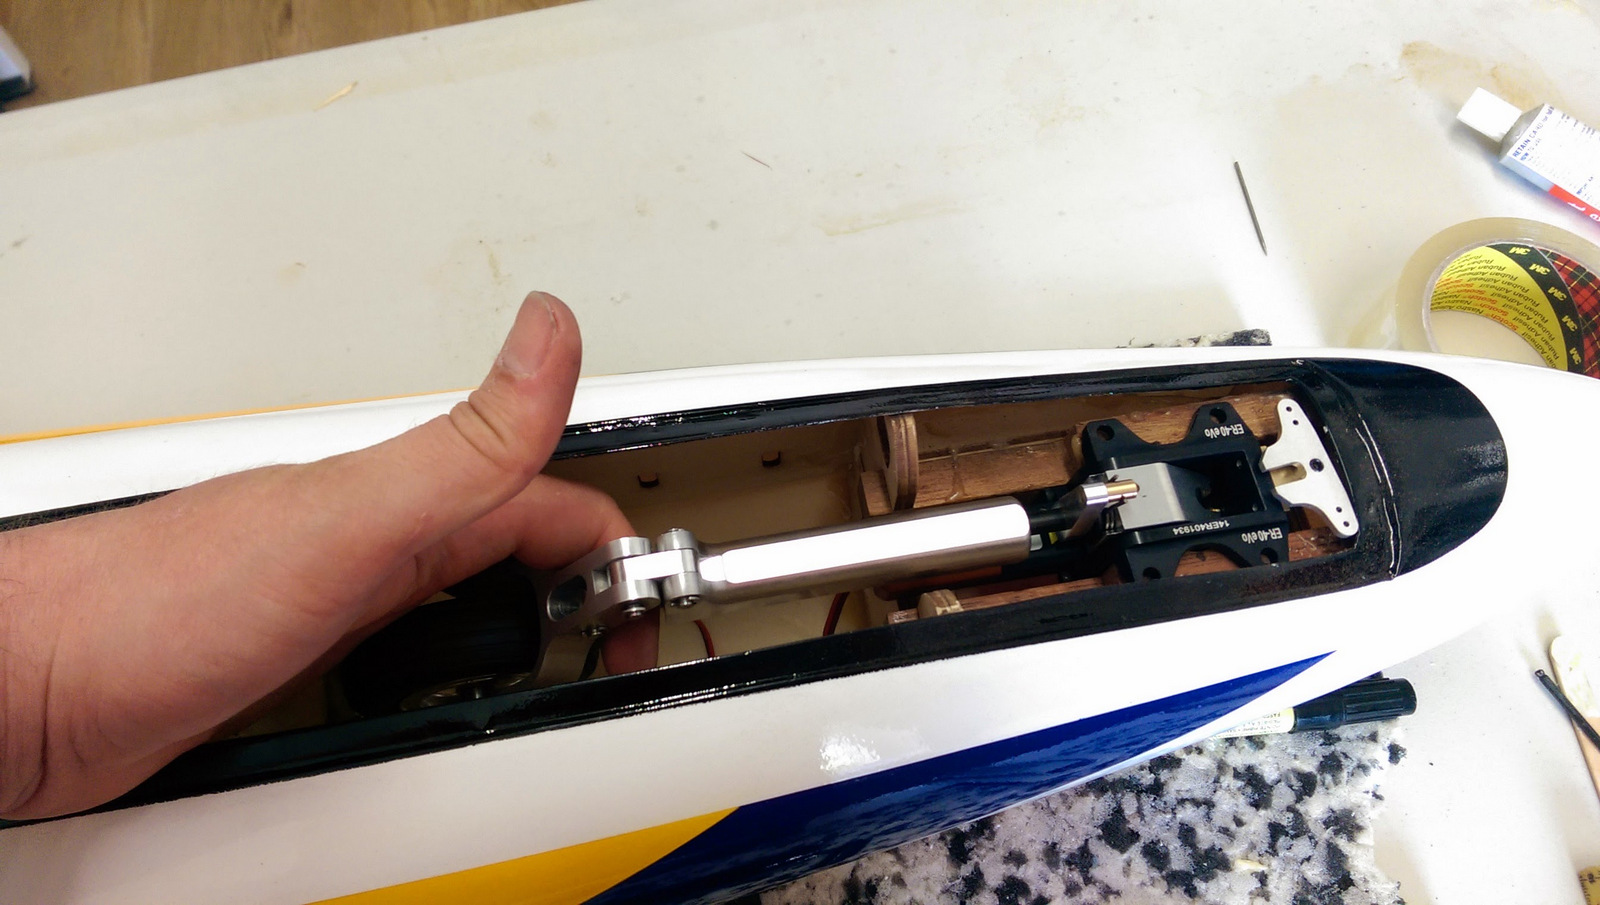


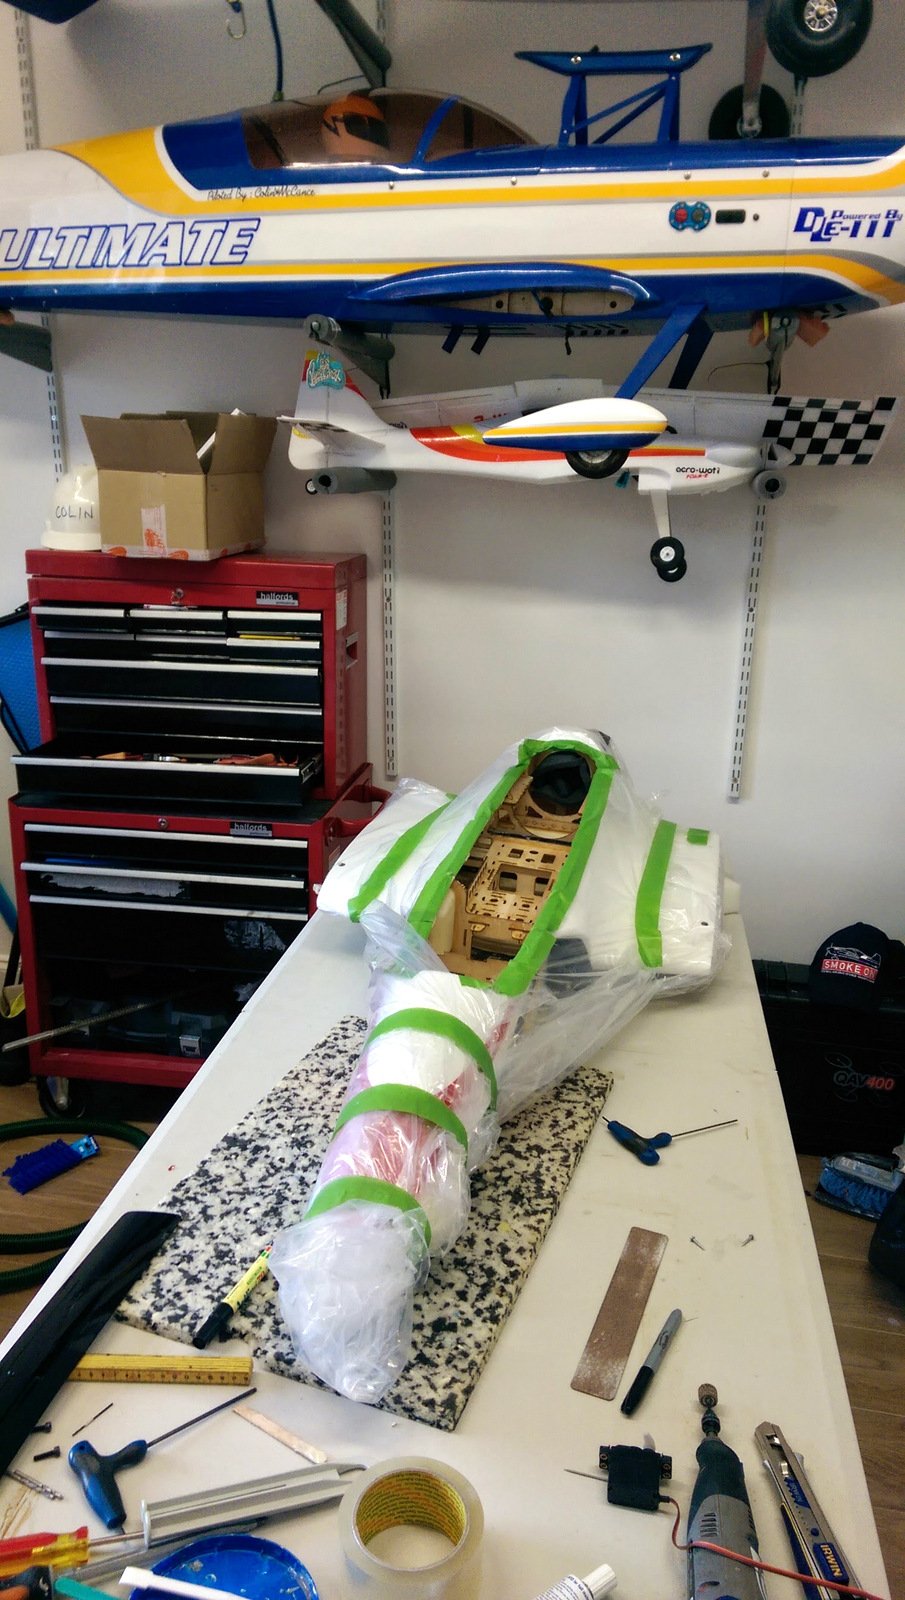
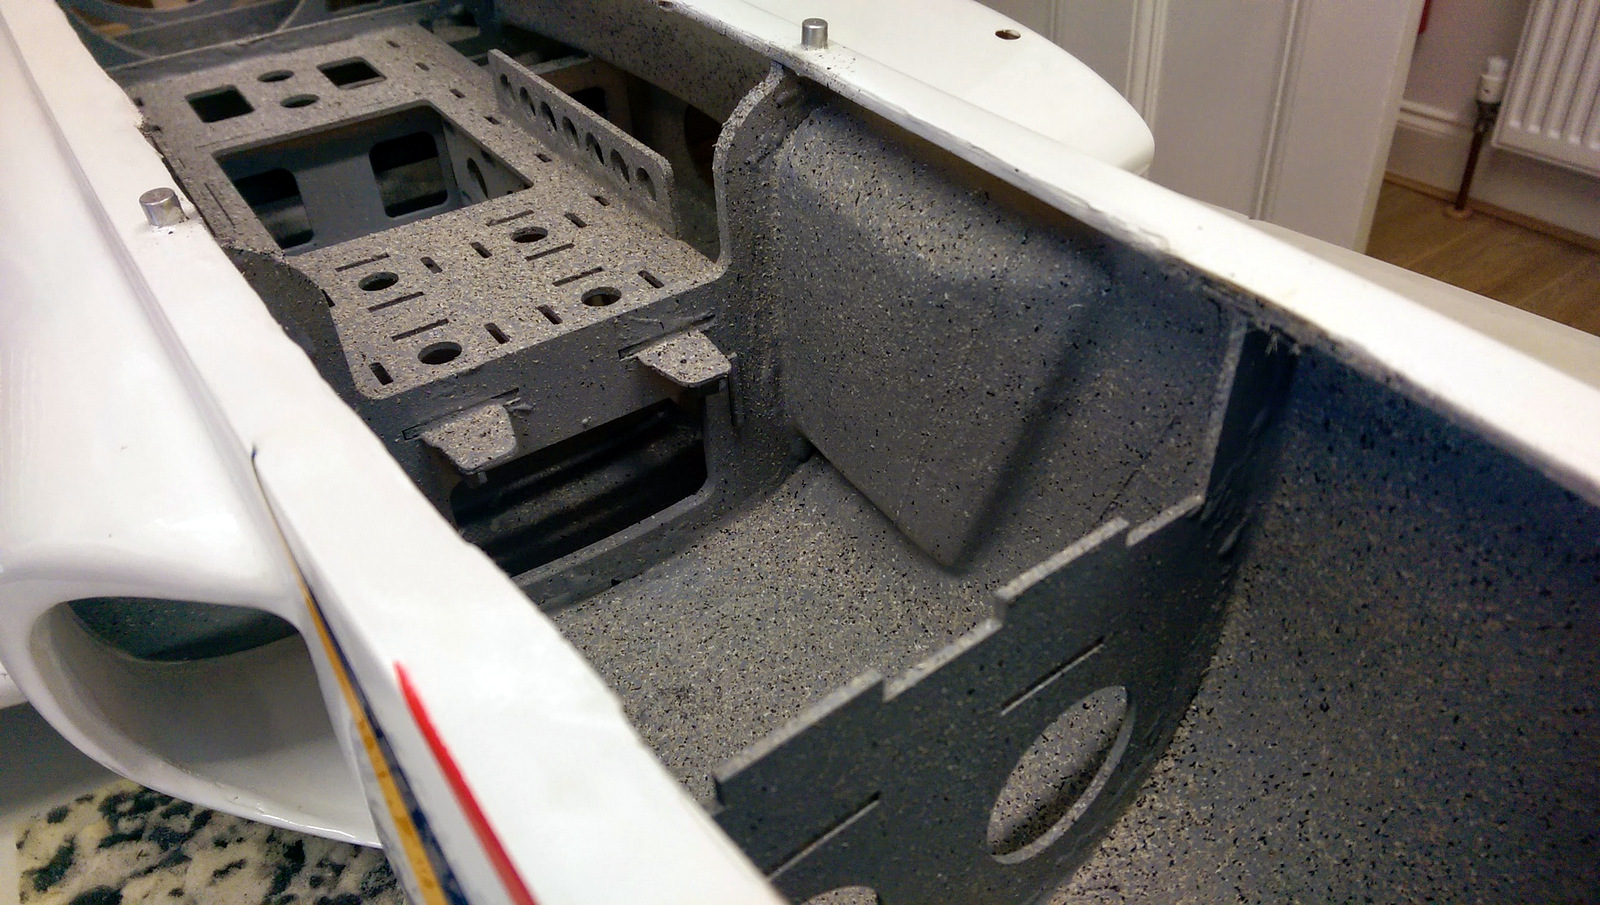
Just prepping the fuselage for painting the interior and then going to paint it after lunch. Daughter made me buy silver glitter paint to go over the primer but I just don't think I can bring myself to spray it on, might just go with good old manly stone fleck

-all control surfaces hinged
-gear installed
-most of the servos mounted
-tip tank mounting hardware glued in
Photos:
Just prepping the fuselage for painting the interior and then going to paint it after lunch. Daughter made me buy silver glitter paint to go over the primer but I just don't think I can bring myself to spray it on, might just go with good old manly stone fleck
Last edited by Colin_Mc; 05-10-2014 at 04:12 AM.
05-10-2014 | 05:40 AM
#5

Looks good Colin!
How does the retracts "feel" ?
I have a friend with a Tourus with a P180RX, unbelieveable what kind of beating the airframe can take with this engine !
(hmmm, maybe )
)
How does the retracts "feel" ?
I have a friend with a Tourus with a P180RX, unbelieveable what kind of beating the airframe can take with this engine !
(hmmm, maybe
)
05-10-2014 | 05:45 AM
#6
Windy and wet outside so just painted in my workshop instead of the garage. I used the box the torus came in as a spray booth to contain overspray.
Bit of a compromise at the moment, pebble stone fleck on the fuse and glitter on the equipment trays


High as a kite at the moment - off for some fresh air!
Bit of a compromise at the moment, pebble stone fleck on the fuse and glitter on the equipment trays
High as a kite at the moment - off for some fresh air!
05-10-2014 | 05:50 AM
#7
I have a set on behotecs coming with my Aurora so it'll be interesting to compare how two companies tackle the same problem.
05-10-2014 | 11:14 AM
#9
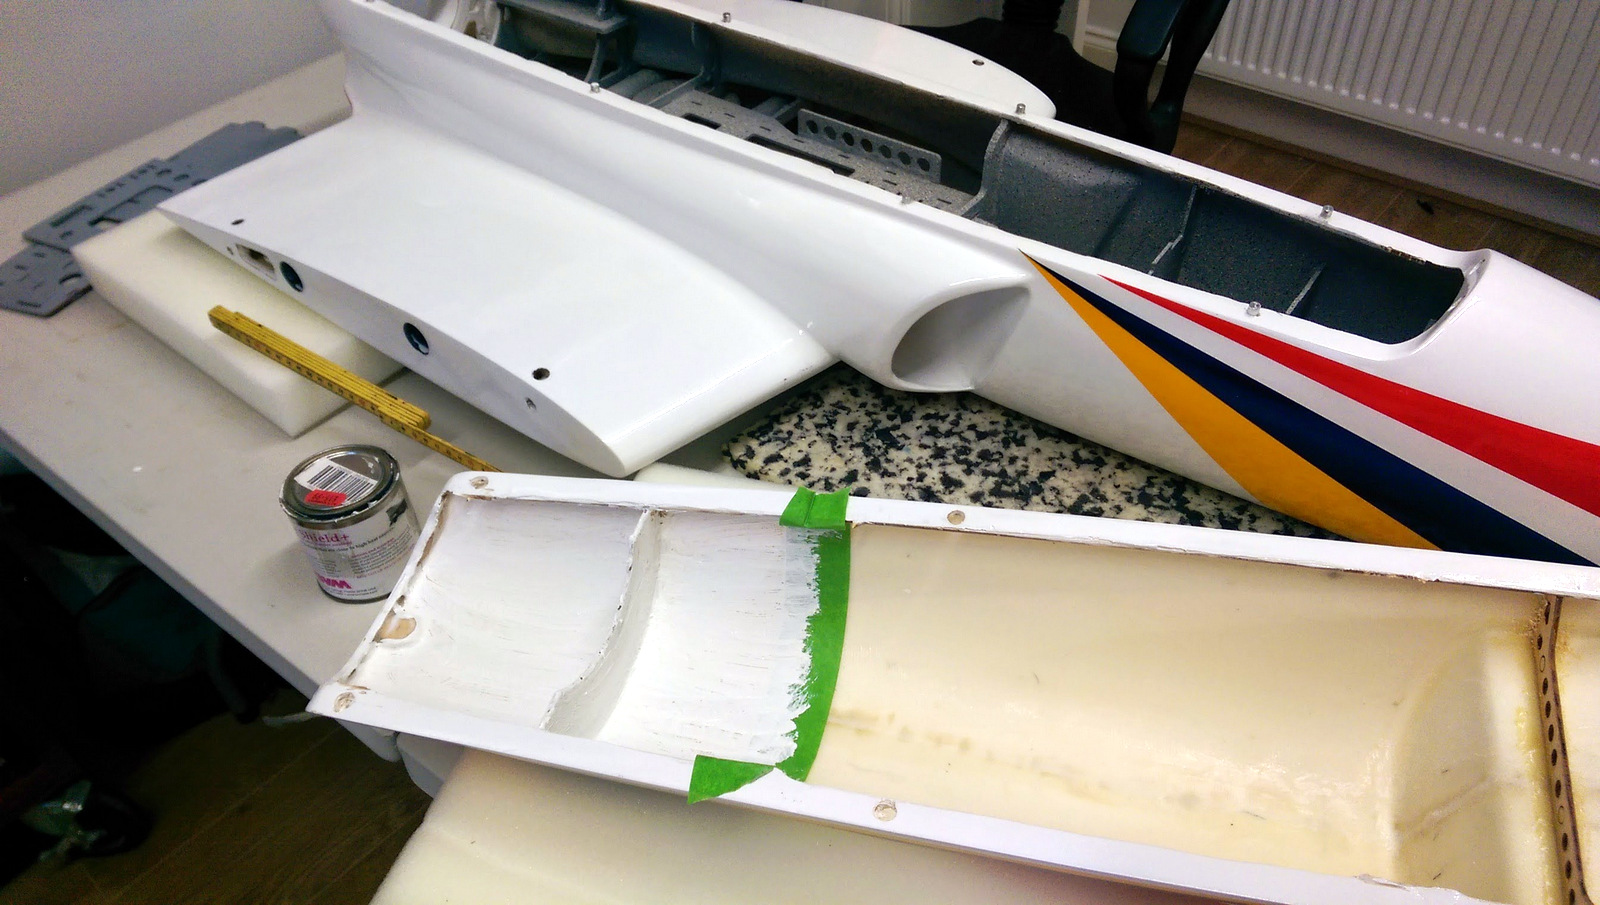
Internal paint is touch dry so can continue with the fuse.

Tip tanks nearly done:
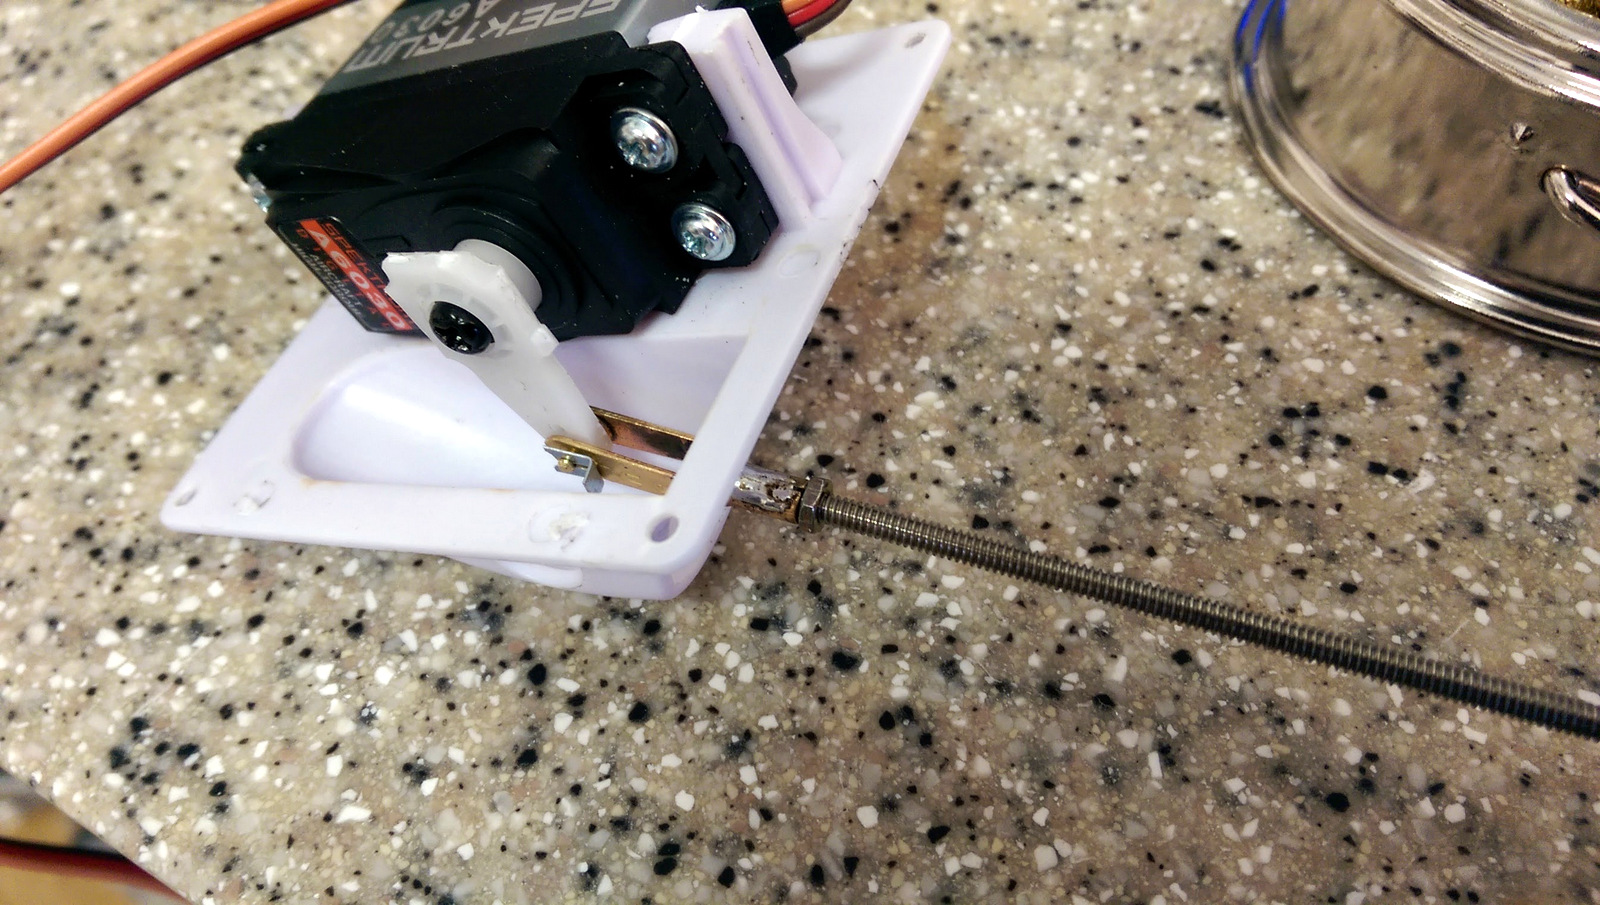
Servo linkages just need to go on now and extensions made.

BVM Heatshield paint applied to rear cone and area above turbine.

Getting the hired help in to tidy up my mess....

Dinner!
Tip tanks nearly done:
Servo linkages just need to go on now and extensions made.
BVM Heatshield paint applied to rear cone and area above turbine.
Getting the hired help in to tidy up my mess....
Dinner!
05-10-2014 | 11:17 AM
#10
Thanks for info Colin!
I have a set of electric Behotec C50 for my new eurosport, they are great!
Small video of them running:
https://www.youtube.com/watch?v=2wU3TpE_iDA
I have a set of electric Behotec C50 for my new eurosport, they are great!
Small video of them running:
https://www.youtube.com/watch?v=2wU3TpE_iDA
05-11-2014 | 05:01 AM
#11
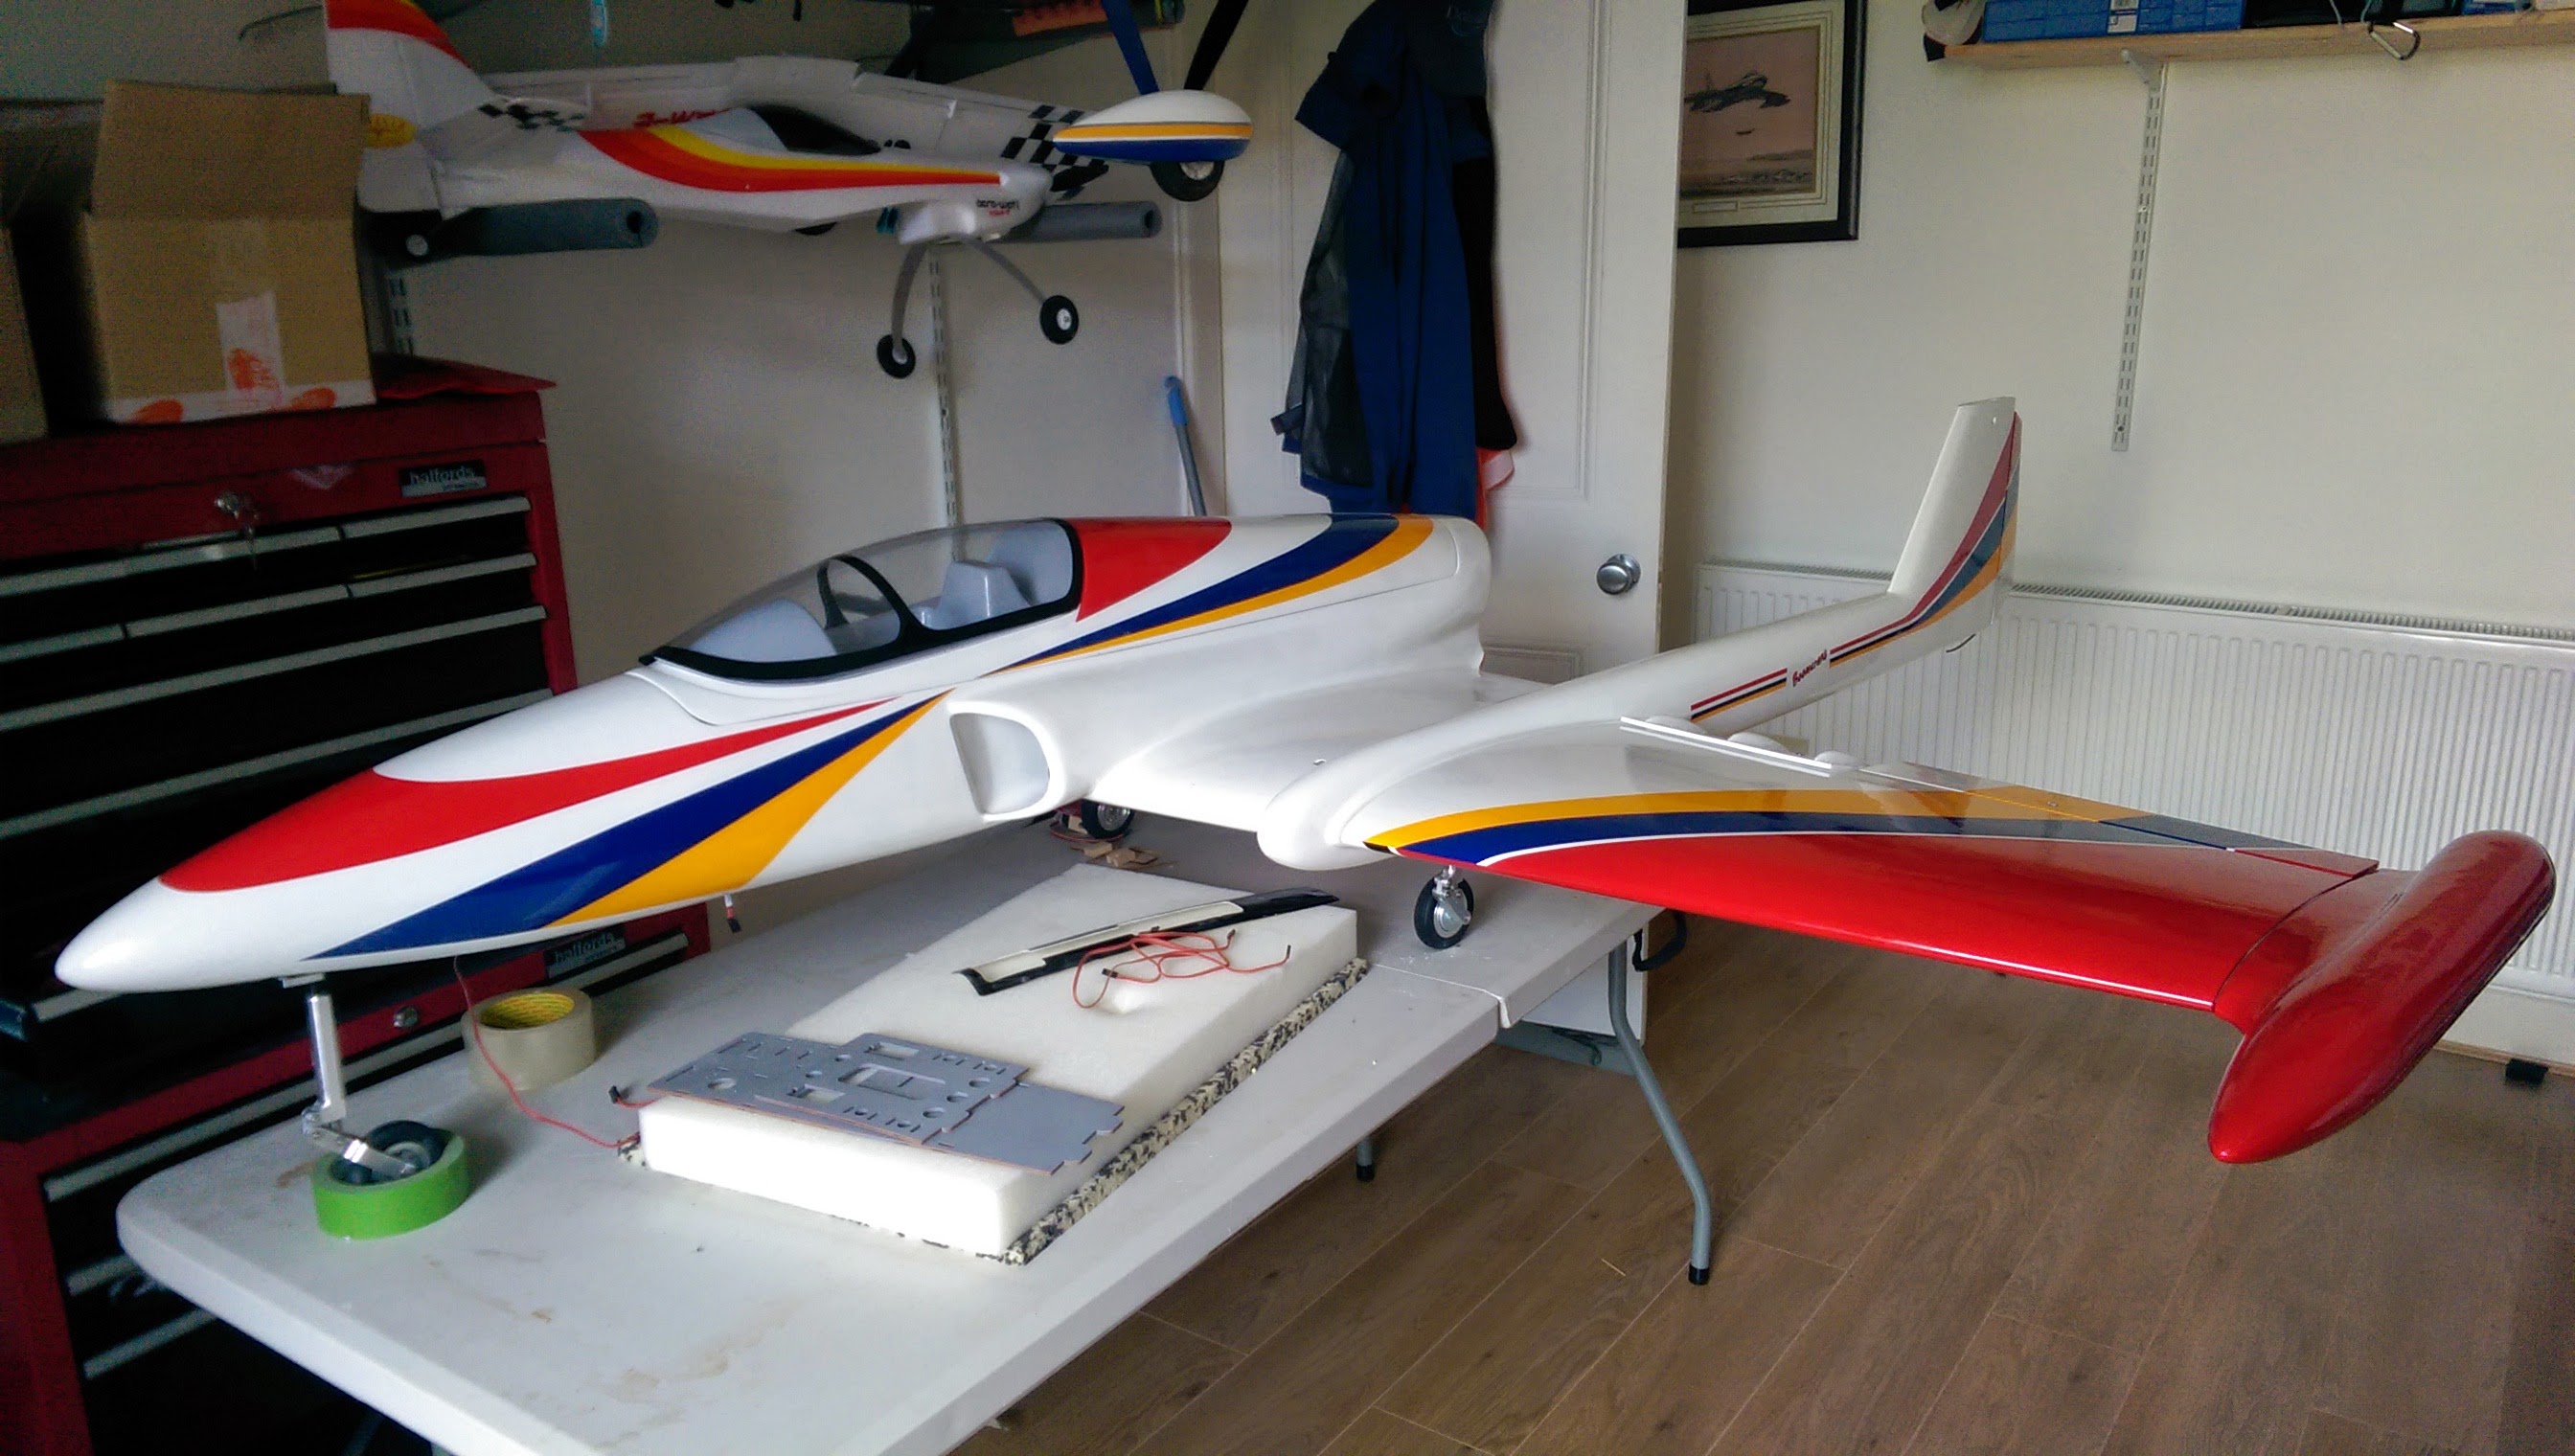
Getting bigger
Undercarriage down and locked, now working on the linkages and servo set up along with the fuse internals.
I had planned on maidening it today but I'm missing a few things to complete so maiden will probably be sometime this week.
Undercarriage down and locked, now working on the linkages and servo set up along with the fuse internals.
I had planned on maidening it today but I'm missing a few things to complete so maiden will probably be sometime this week.
05-11-2014 | 12:16 PM
#13
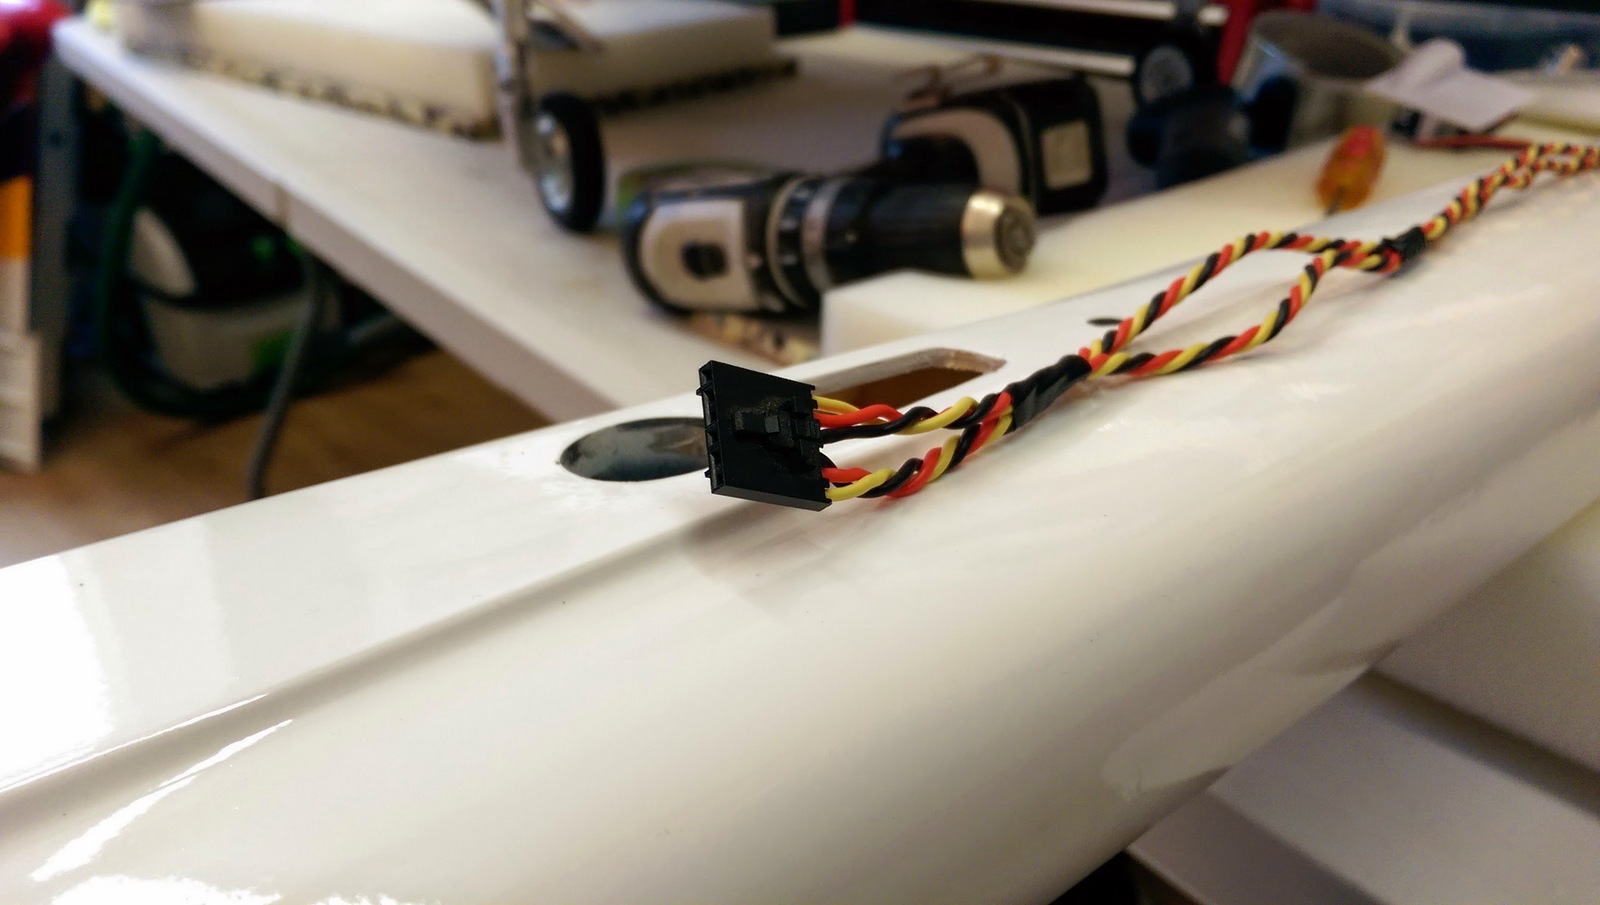
This is how I do servo extensions.
I use ashlok connectors on the interwing connections, 6 pins at the main wing and 3pin at servo ends.

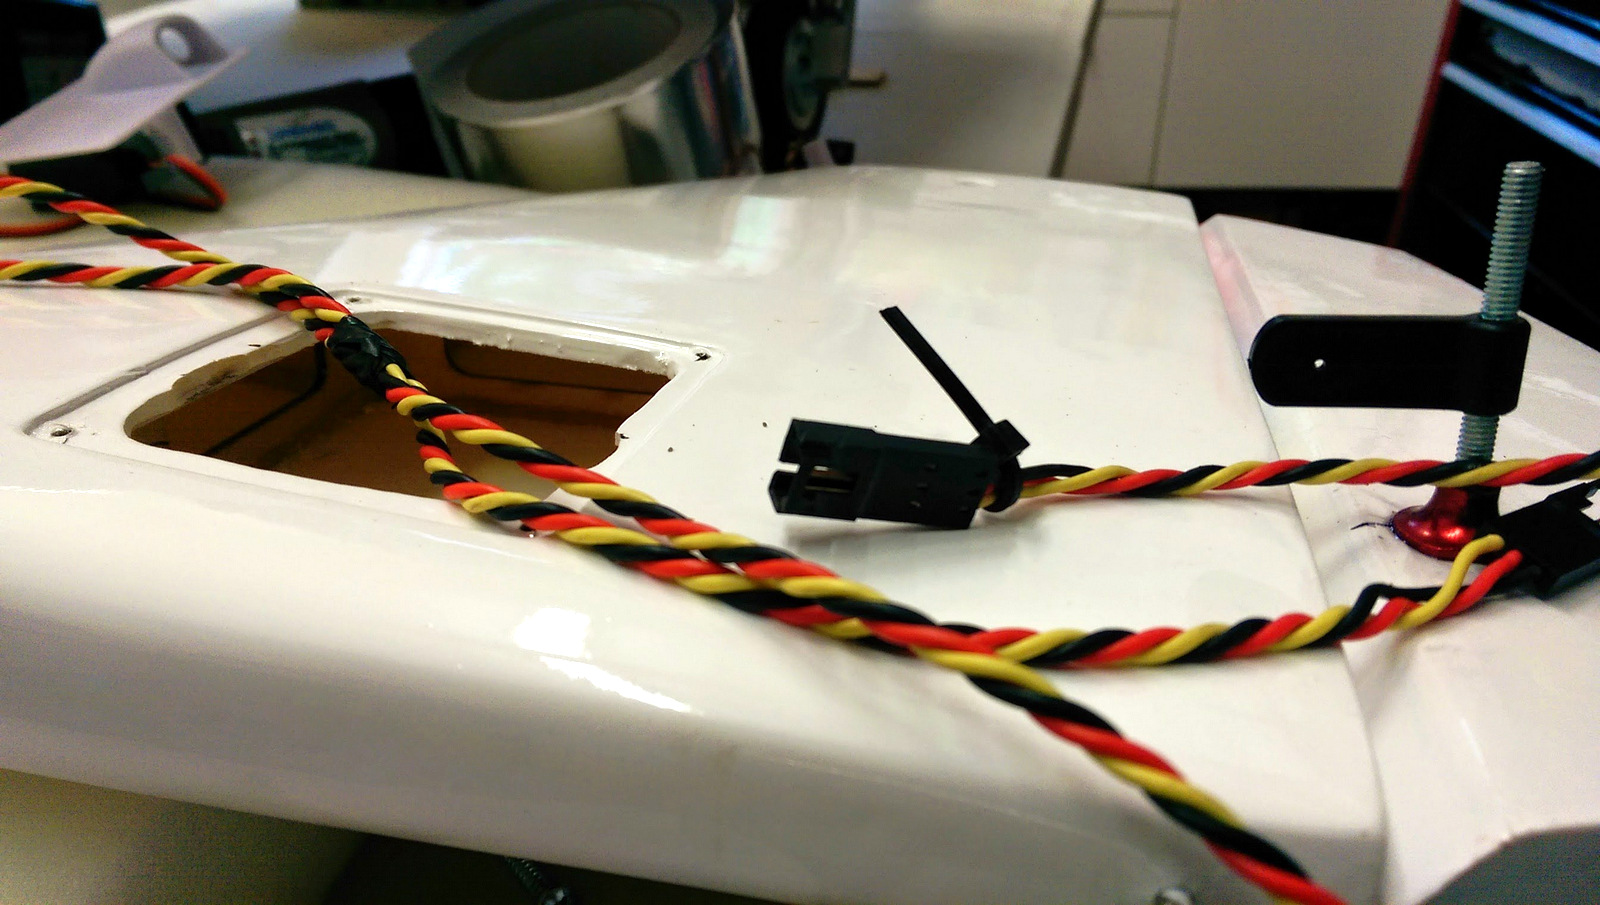
On the linkages I solder one end of the rod to prevent it ever unscrewing itself under vibration. The included nuts do the same thing but again this is just an extra precaution.

Finally I've put foil in the tail cone just a bit of bling and it's protective qualities.


I use ashlok connectors on the interwing connections, 6 pins at the main wing and 3pin at servo ends.
On the linkages I solder one end of the rod to prevent it ever unscrewing itself under vibration. The included nuts do the same thing but again this is just an extra precaution.
Finally I've put foil in the tail cone just a bit of bling and it's protective qualities.
 05-11-2014 | 03:10 PM
#16
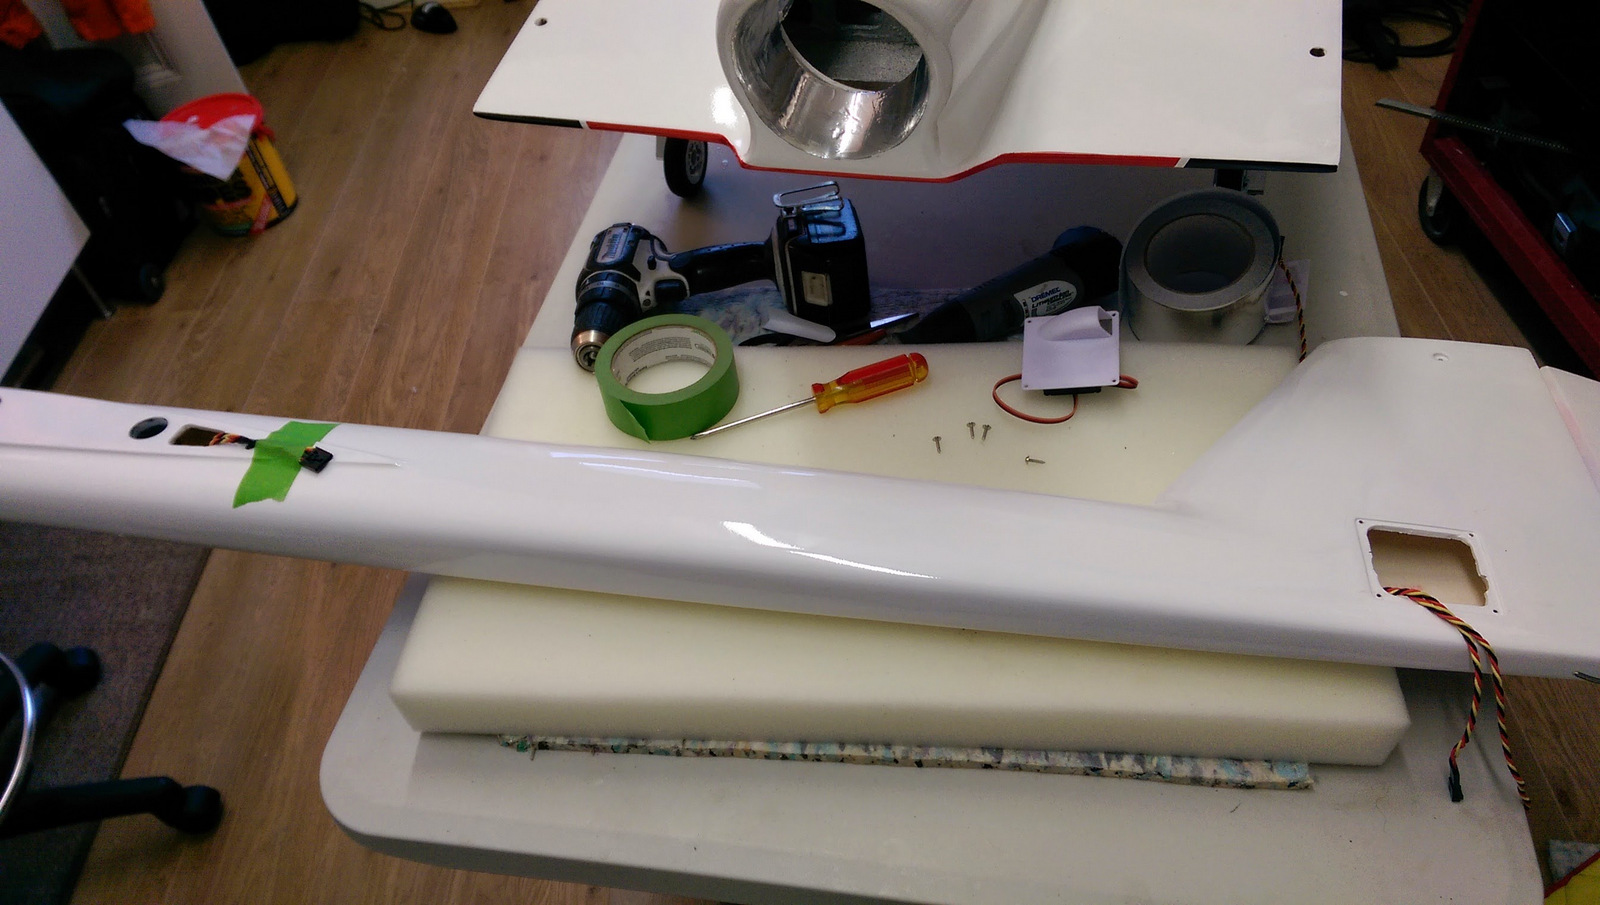
Cabling done, spent more time trying to fish the cable through than making the extensions - the elevators were a right pain!

The main wings are going to be connected via a powerbox multiplex cable that I had spare.


Tomorrow I'm onto the fuselage and if all going well I should be finished by Tuesday
The main wings are going to be connected via a powerbox multiplex cable that I had spare.
Tomorrow I'm onto the fuselage and if all going well I should be finished by Tuesday
05-11-2014 | 03:29 PM
#17
05-12-2014 | 07:09 AM
#19

My Feedback: (39)
I added about 12 oz to mine but worked really hard to shove everything as far forward as possible including 2 - A123 2300's and a 4000 mah 3s Lipo all up in the nose. Also put the UAT right up front as well.
U coming to Princeton? Your sig says you still live in Listowel. :P
Cheers,
Paul
05-12-2014 | 01:14 PM
#21
05-12-2014 | 03:00 PM
#22
Turbine plumbed up as far as the ball valve
The bit underneath the fuel tank looks an ideal place to install the ECU and run a servo extension into the main cockpit area for the data terminal connection.

Edit: It was

The bit underneath the fuel tank looks an ideal place to install the ECU and run a servo extension into the main cockpit area for the data terminal connection.
Edit: It was
Last edited by Colin_Mc; 05-12-2014 at 03:27 PM.
05-13-2014 | 01:22 AM
#25
Joined: Jan 2007
Posts: 3,294
Likes: 0
Received 1 Like
on
1 Post
From: farnborough, , UNITED KINGDOM
Tip for fishing cables through wings and fuselages - buy a long length of 'bath plug' chain, the sort which has loads of tiny spherical balls along its length, tie a thin piece of strong nylon cord to the end to act as a draw line.
The bath chain is heavy enough to allow you to feed it through the most intricate internals, the balls help to prevent snagging and it has saved me hours over the years trying to find routes through wings etc
You mention Ashlok connectors which I know are hard to find as the guy selling them decided to quit, they are made by Molex and sure if someone planned to they could source and sell them - just need a UK model company to do the leg work.......
marcs

