


SM 1/7 Scale F-14 Build
 04-02-2015, 05:40 PM
#126

Thread Starter

Thanks, I cant believe how long this thing is taking to get everything in. For a big jet it has horrible work space, the avanti was easy to get stuff in this thing is a pain! LOL Soles, I will probably only add my GPS sensor for speed telemetry, nobody has made a trust worthy fuel telemetry yet other than the Xicoy one, it lowers your signal strength for some reason so until futaba gets of their butts and catches up to everyone else its limited.
 04-03-2015, 06:35 PM
#127
Thread Starter
Well after two full days of wire running all the electronics are connected to the powerbox and sequencer. I managed to get another servo for the air valves from a local hobby shop so I dont have to wait on the other to get sent back and what not.
I did manage to do some adjustment to the JC sequencer, its a pretty cool little thing the back light makes it easy to see and the programming is very simple once you get the hang of it. I got the data terminal connections added as well as the ECU throttle leads and they all checked out and ready to crank. I have a video uploading and im going to relax a bit and have a beer.
Cheers!
https://www.youtube.com/channel/UCE_...BAxA8bHVCw3VQQ
04-05-2015, 02:23 PM
#128
Thread Starter
The rudders are done, this leaves the control rod install on the wings! I did a couple of videos on the rudders because there are a couple things to watch out for in the rudders. The biggest thing is making sure you can still remove the plastic rod end after the carbon control horns are installed. The first pic is just the back plate painted nothing new there. I may start the wings tomorrow and take a break tonight, have some in-laws in till tomorrow. I am hoping to crank this jet and the Avanti next weekend and maybe get some maidens but well see if the location I am checking on plays ball. Cheers
Videos are uploading
04-06-2015, 07:11 PM
#129
Thread Starter
Just installing the leading edge slats, these require some good alignment on the control horn that glues into the slat. I will do that tomorrow, this was just cutting the exit hole for the rods. cheers!
04-09-2015, 05:36 PM
#130
Thread Starter
Well before I post more build pics I wanted to add in a info post for folks who have their tomcats in the air to help gather data for folks behind them. This will hopefully take some of the guess work out of that first few seconds of the maiden flights and possibly prevent eventful maidens.
Data: ______ CG, Control surface throws before _____ and after _____ maiden, Control surface trim changes after swinging wings_____ and with flap deployment ______ Any other data you feel will help is encouraged, dry weights and any mods or suggested improvements.. Oh and the most important thing that would help folks is getting your neutral location for the stabs!
I hope this will add to the overall helpfulness of the this build thread! Cheers and thanks for your help!
Last edited by FenderBean; 04-10-2015 at 02:54 PM.
04-09-2015, 07:39 PM
#131
Thread Starter
This part took awhile, gluing the horn into the slat was easy it took awhile getting everything else lined and clearance holes cut. I ended up using one channel for all four slat servos and just programmed them in the servo via the Sbus features! Love me some Sbus!!
I also did a video which is uploading on the function of th wings to include the spoilers. I had to tighten all the nuts and locktite the spoiler hardware it was just hand tight.
Next I worked on putting the Sbus 4 block terminal in and cut the hole for the plug/lead. This was the easy way, I could have went through the area on the other side of main spare but it would require a long drill bit and going through spars, I just cut a small hole instead.
I am going to switch gears and finalize my Avanti XXL and get it flying so I have something for MS Jets. I wanted to fly it Saturday but the location I found will require a later date so I possible could get both flown next weekend. The Avanti just needs radio setup like throws and normal programming and a few small things to finish should only take a few hours tomorrow then back to this project.
04-13-2015, 05:57 PM
#132
Thread Starter
Well managed to get the vents installed for the fuel tanks and added the male ends for the Sbus cables on the wings which minus the final cockpit mounting its done! Time to move it down for engines starts and final setup!
I took some time this weekend to finish up the Avanti that way I have one jet for MS jets which is next week. I am hoping to test fly both this weekend so I hope I get some good weather!


I took some time this weekend to finish up the Avanti that way I have one jet for MS jets which is next week. I am hoping to test fly both this weekend so I hope I get some good weather!

 07-02-2015, 08:57 PM
#135
Thread Starter
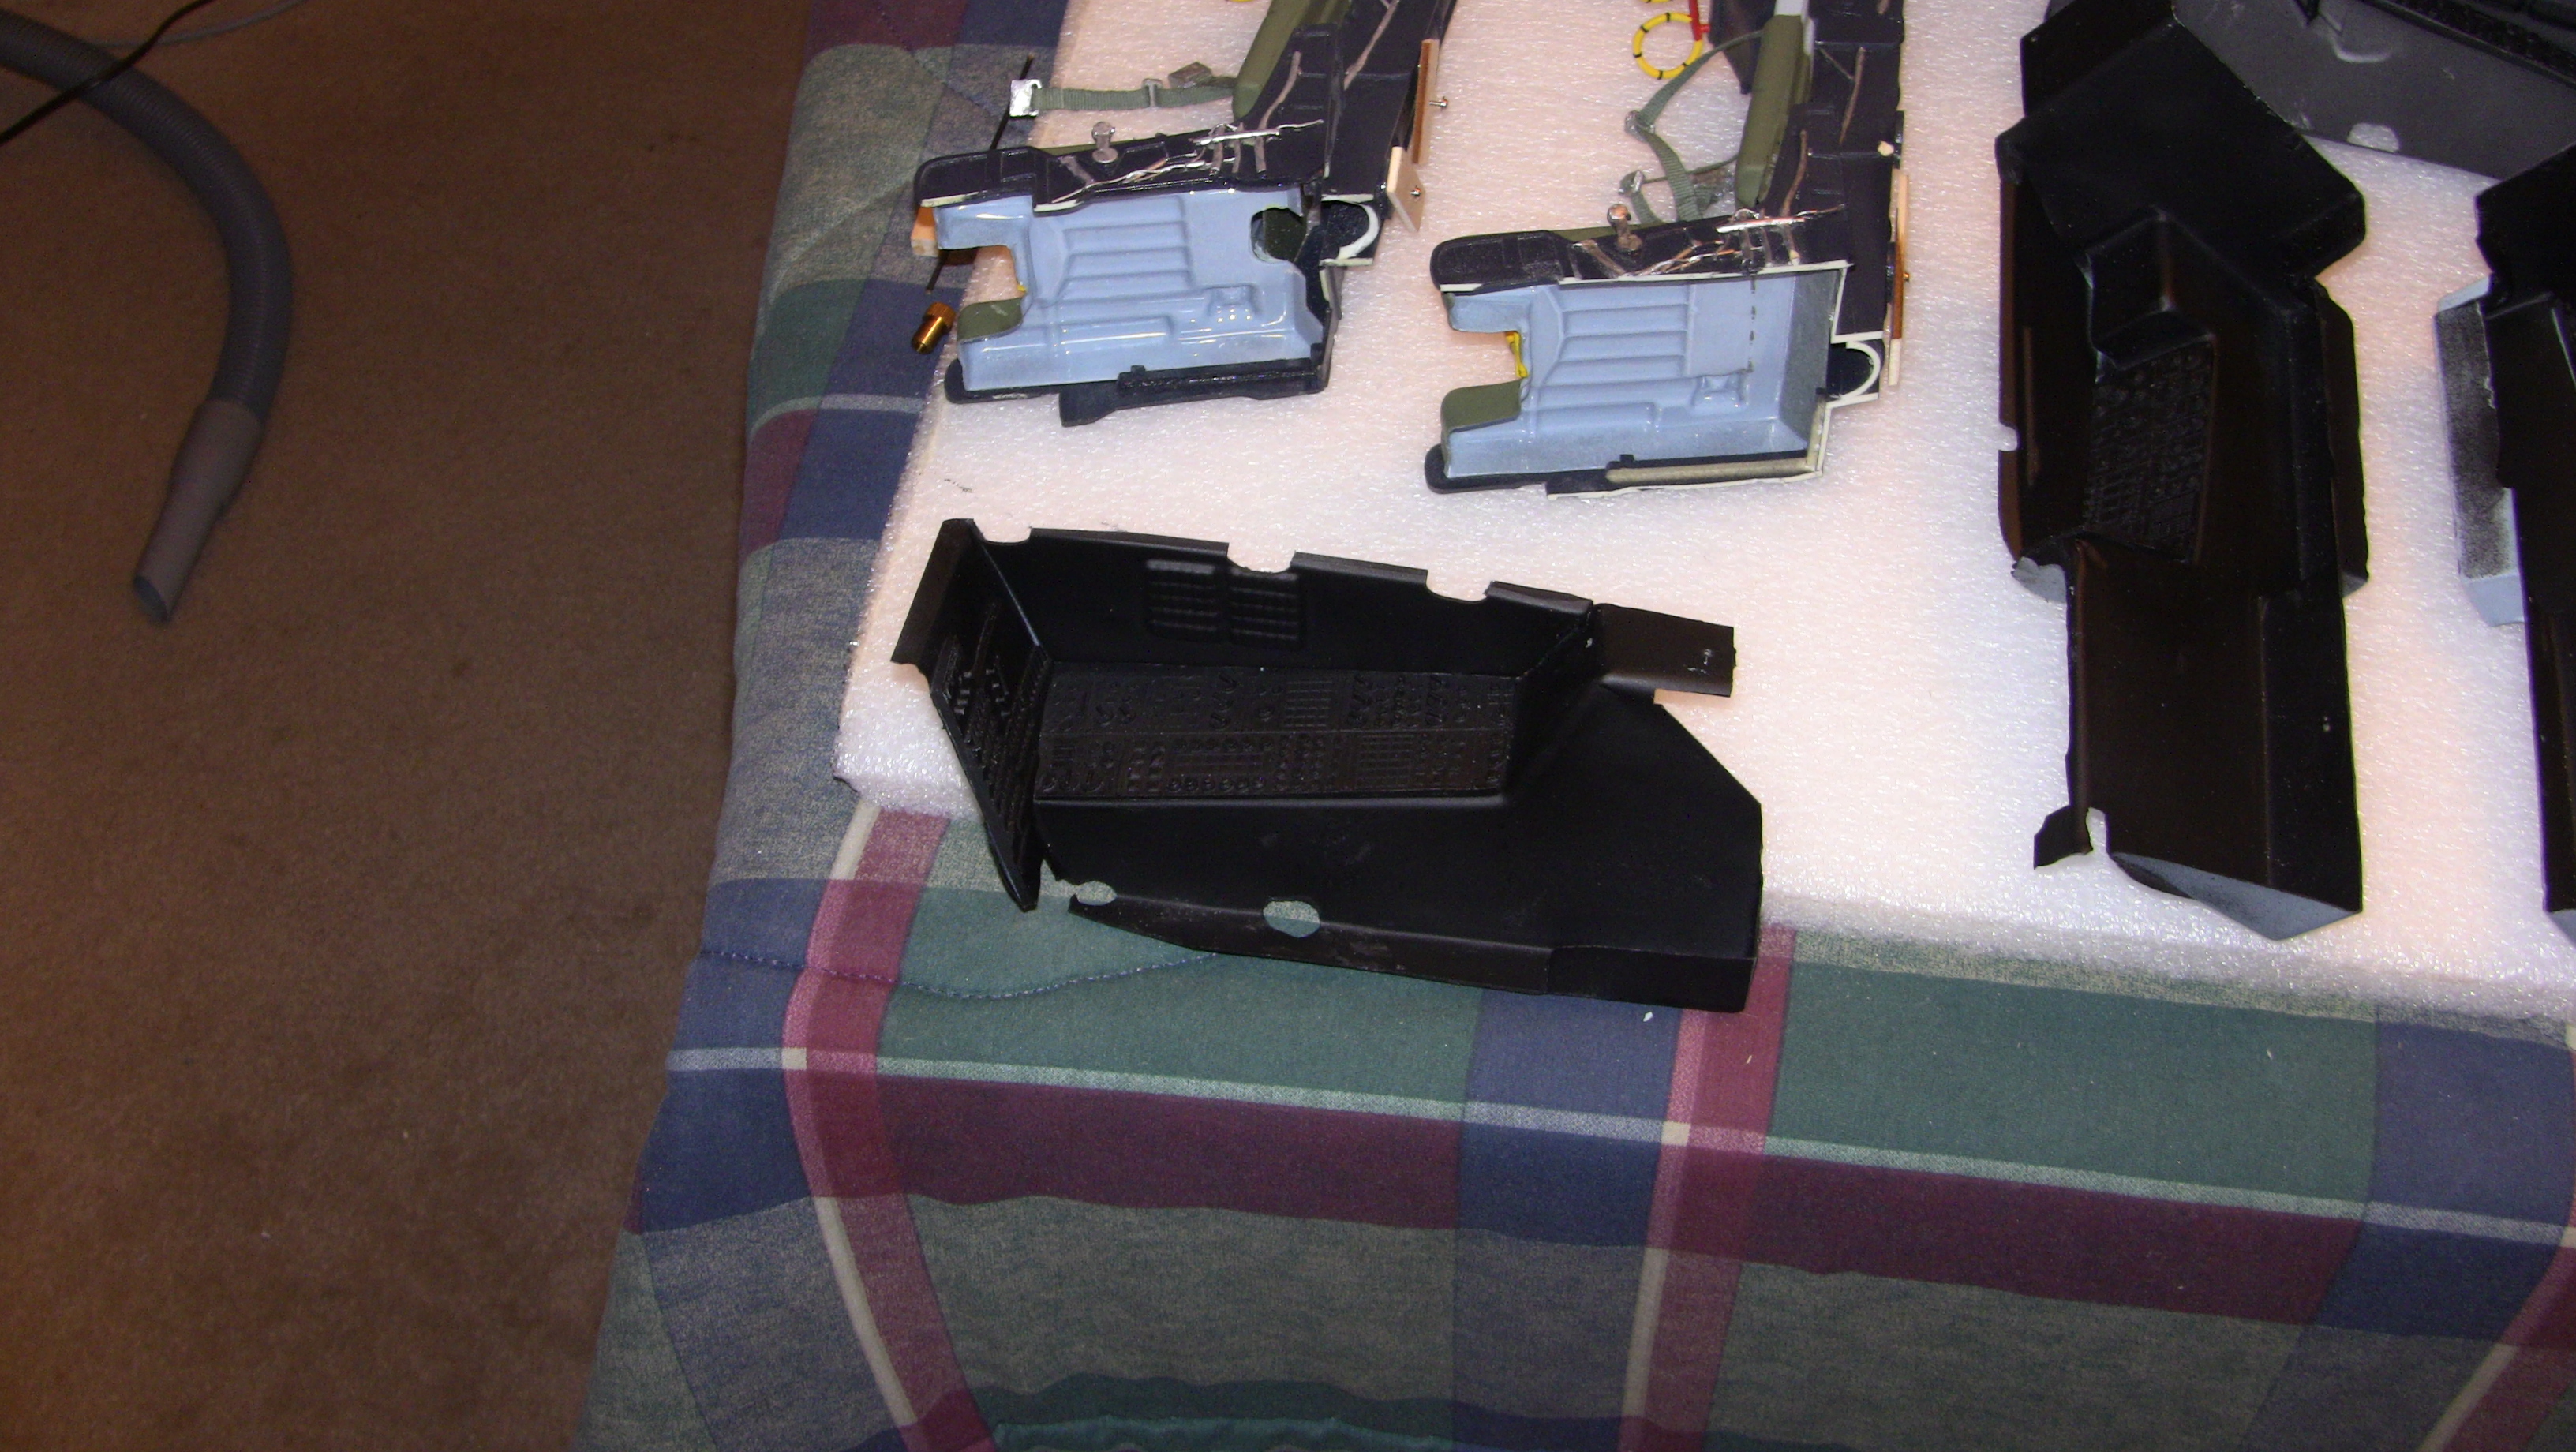
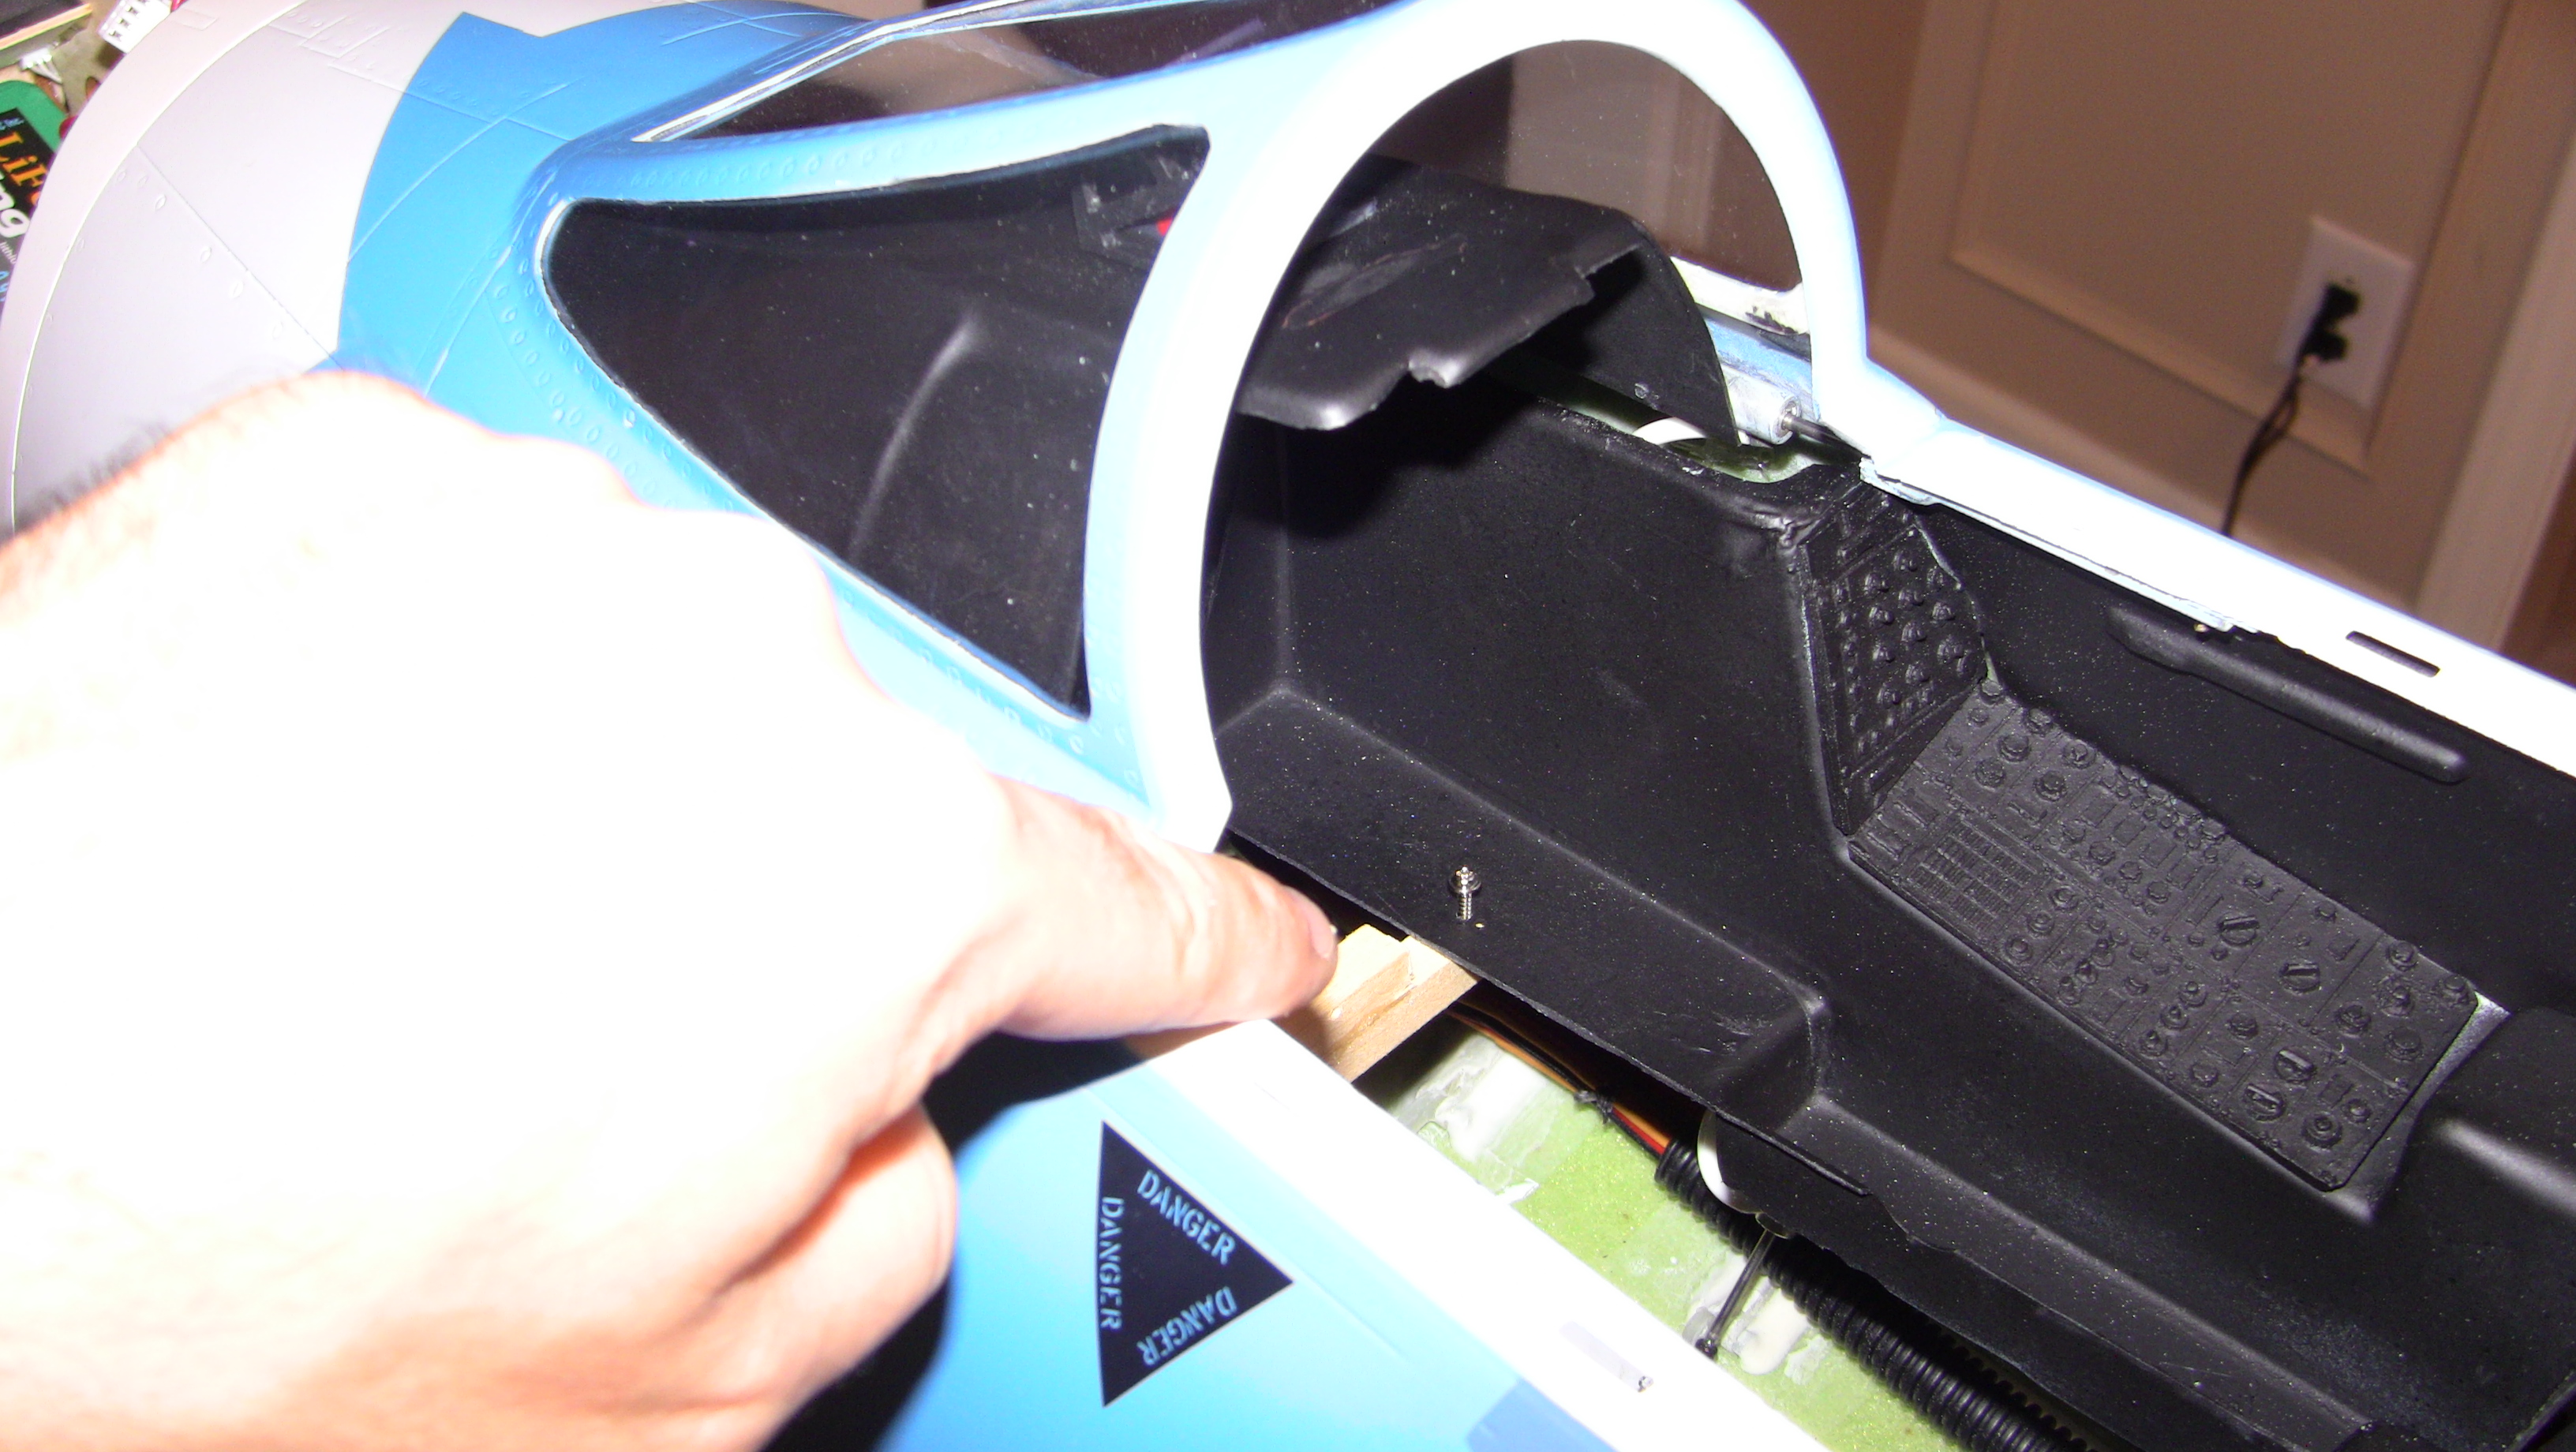
Lots of pics of the cockpit install, instead of a long video I just took pictures of each step on installing it. It took weeks to come up with a nice secure east to install and remove cockpit


Long video on the progress so far are uploading, lots of noise due to the digital servos buzzing. Not to mention im a bit tired. Cheers!
Oh and I still need to paint the instrument panels, they look horrible so I will paint them black like the rest and repaint all the buttons and switches.
Long video on the progress so far are uploading, lots of noise due to the digital servos buzzing. Not to mention im a bit tired. Cheers!
Oh and I still need to paint the instrument panels, they look horrible so I will paint them black like the rest and repaint all the buttons and switches.
Last edited by FenderBean; 07-02-2015 at 09:07 PM.
07-06-2015, 04:06 PM
#136
Thread Starter
Well finished what I needed to today and ran the engines, after I got my wires straight they cranked very nice. ") taxi test was great no problems and no hot spots on the jet. The CG was tail heavy and without the missiles on it I had to add about 200 grams for CG, this is not bad considering I still need to add a few things to the nose I will be able to remove the weight. Then I will fine tune it with my swing battery placement..... Even with my back to missile rails on it was just tilting down past level so im happy. I will finish the throw setup tonight and then pack up the jet. The Avanti is already in the trailer!!
taxi test was great no problems and no hot spots on the jet. The CG was tail heavy and without the missiles on it I had to add about 200 grams for CG, this is not bad considering I still need to add a few things to the nose I will be able to remove the weight. Then I will fine tune it with my swing battery placement..... Even with my back to missile rails on it was just tilting down past level so im happy. I will finish the throw setup tonight and then pack up the jet. The Avanti is already in the trailer!!
I have some videos uploading of engine runs and taxi, cheers!


Just a note the tail hook is held up by a small set screw
taxi test was great no problems and no hot spots on the jet. The CG was tail heavy and without the missiles on it I had to add about 200 grams for CG, this is not bad considering I still need to add a few things to the nose I will be able to remove the weight. Then I will fine tune it with my swing battery placement..... Even with my back to missile rails on it was just tilting down past level so im happy. I will finish the throw setup tonight and then pack up the jet. The Avanti is already in the trailer!!I have some videos uploading of engine runs and taxi, cheers!
Just a note the tail hook is held up by a small set screw
03-30-2016, 06:52 PM
#137
Thread Starter
Welp knocking the dust off this thread with some mods, I dont have any pictures just uploading a video that shows what I have done/doing to make this thing as safe as possible.
Cheers!
https://www.youtube.com/watch?v=GN5b...ature=youtu.be
Cheers!
https://www.youtube.com/watch?v=GN5b...ature=youtu.be
03-31-2016, 06:07 AM
#138
Hey Fender,
I just looked at your vid on the Tomcat.
Mine has been maidened some months ago as you may know, but sadly due to different circumstances I haven't gotten around to do any more flights with it. On the maiden, I had some scary moments as there appeared to be a misalignment in the wing swing mechanism, due to me taking it out to reach the main tanks. So my advice there to all Tomcat owners: check your wing incidence!!
easy way to accomplish that is to check the height of the tips above your workbench with the wings swept back. a fraction of a degree off will show a large difference in height due to the lenght of the wings.to clarify: with the plane sitting level on your workbench, not on its gear, measure from each wingtip down to your workbench. measurments should be equal. after my maiden, there was a difference of about 2cm... we trimmed out the difference, but this is not something you'd want on the maiden of such an expensive beast.
I agree on the elevator servo fixing. As I do use Jr Servo's, I don't have the posibillity to add blocks. instead i'm going to stiffen the wood with thin carbon plates on both sides, and go with a bolt-through solution.
I also suspect that the arm bending is not what caused the crash of that one Tomcat. the way this system is laid out, there are as good as no bending forces on the arms. the bushing in the elevator is the depth of the three bearings. So all three ride in that sleeve. If the arm was bent in the amount that I saw, this would mean that the bushing would have been torn out of the elevator. no way this arm can bend. only way I see this happening is that the elevator was not fully locked in, and started to slide out of the fuse. ALWAYS tug hard on the elevators to confirm they are fully locked in!!! If the elevator slides out, and comes to the point that the the bushing would ride only ont the last bearing, well, then indeed it could bend. but no way that bending of that arm was the root cause.
Then, the rudders: there is indeed excessive play on the hinge pin. It's a question of finding a pin with the correct diameter, or filling the holes in the hinge tabs.
Furthermore I'm going to investigate adding thin carbon sub formers to the aluminium block that clamps the rear CF rod on the verticals. this too is if i'm not mistaken the same "soft" plywood.
On the gear: From what i hear on your video, I suppose you're not really familiar on how a pneumatic system works.
Slowing the servo on a mechanical valve will do nothing on the speed at which your gear lowers or raises. this needs to be done with restrictors on the air lines, and preferably on the exhaust side of your valves. This way you can regulate the speed on either side of the throw. Again, this is also why adding more valves or 'high flow valves" does nothing on how good the gear raises. (exept of course when you slam dunk the gear up and down, but that is NOT a good idea on this gear. any gear for that matter). The only way you can get your gear to go up better, is to add pressure, not flow. of course, if you don't restrict the flow, the gear will go up fast, and the momentum will make it go up completely. Certainly not a good idea on this gear.
So, what you'd want id to have a valve where you can regulate the speed by a 'throttle' on the exhaust side. this way you can make the gear lower at a slower rate than on the up-cycle. the best mechanical example of this kind of valve is the Robart #167 variable rate valve. the restriction is on the air coming out of the cylinder, not on the air going in. restricting on the out-side also had the added benefit of making the action "smoother"
Wim
Last edited by WimB; 03-31-2016 at 06:11 AM.
03-31-2016, 10:07 AM
#139
Thread Starter
Thanks wim, my only worry using the variable adjustment robart is if im correct the valve regulates both up and down with that adjustment. I would only want to slow the down. I will check the valve and see if it has a control for up and down.
03-31-2016, 10:31 AM
#140
Fender,
you regulate the up and down separately. I must warn you however: I have these valves on my Ziroli B25, with Robart retracts. this gear has big cylinders as well, and this particular valve is quite restrictive. I even removed the "throttle" valves on this gear, because it moved too slowly. I have electronic valves on my Tomcat, with robart in line restrictors on one side of each cylinder. I'd have to check on which side of the stroke they are. the nosegear is super smooth and realisticly slow, the right main is always a bit slow, but is driven home by the wheel door closing. I need to switch the valves, since the ones I have now start leaking at 7bar. I want to go up to 10 bar to increase the 'push' on the main gear.
Wim
03-31-2016, 02:39 PM
#141
Thread Starter
Thanks Wim I figured put a restriction on one side of the air cylinder would have have the same effect slowing the air as it was pushed the other way like on the up essentially slowing both side with only one side restricted.
I finish up the stabs and I am really glad I added some blocks and cut them to the perfect size to get rid of the spacers plus now you will break the servo mounts before the wood comes loose. On left side I ran into a little problem, that side has always been harder to get on once the servo bearing reached the bracket. It was binding due to the angle of the servo, this is the area that I think is most critical, since the servo needs to be perpendicular to the from on the face of the bracket in the shaft for the stab. It only took a paper thin shim on the top of servo to make it perfect like the other side. Next step is to go over the wing surfaces again to make sure all is prefect there, the only worry is slop in the flaps due to the same issue all these rod type hinges are having oversized holes.
I finish up the stabs and I am really glad I added some blocks and cut them to the perfect size to get rid of the spacers plus now you will break the servo mounts before the wood comes loose. On left side I ran into a little problem, that side has always been harder to get on once the servo bearing reached the bracket. It was binding due to the angle of the servo, this is the area that I think is most critical, since the servo needs to be perpendicular to the from on the face of the bracket in the shaft for the stab. It only took a paper thin shim on the top of servo to make it perfect like the other side. Next step is to go over the wing surfaces again to make sure all is prefect there, the only worry is slop in the flaps due to the same issue all these rod type hinges are having oversized holes.
05-21-2016, 09:19 AM
#142
Thread Starter
Small update, I am finishing up this project after many rework and fixes. I fixed the gear issue by using the Jettronic valves with the throttle function enabled to slow the gear coming down to prevent breaking the lock cylinders. Currently I am replacing all the stock gear door cylinders because they are leaking to much to use. I think from now on I will just add this to my normal build and replace everything from the get go. Video uploading now cheers
https://www.youtube.com/watch?v=1FXr...ature=youtu.be
https://www.youtube.com/watch?v=1FXr...ature=youtu.be
07-30-2016, 12:39 PM
#143
Thread Starter
Well managed to get this project in air at KY jets this time around. The first flight wasn't very eventful I had to put a few clicks of down trim and a little left roll other than that it went pretty well. I have two small issues to fix, the stock flaps have too much play and the nose steering has too much play near center which cause the steering to be a bit squirly on landing. I flew three times at the event and besides getting a bit slow in a turn causing a few seconds of "P" factor I'm happy! It lands like a kitty cat and had plenty of power even with the tanks and pylons on.
10-20-2016, 01:23 PM
#144
Thread Starter
Just some bling for the Tomcat, the sidwinders and sparrows still need some yellow and red stripes but for the most part the ordnance is done. NOTE to self never again buy ordnance unpainted ugghhhh

 10-03-2018, 12:03 AM
#147
Just reviving this thread to ask a quick question: can anyone kindly measure the max width of the fuselage (as seen from above) below the canopy, just before the intakes?
Thanks
Thanks
11-09-2018, 12:12 PM
#148
Well managed to get the vents installed for the fuel tanks and added the male ends for the Sbus cables on the wings which minus the final cockpit mounting its done! Time to move it down for engines starts and final setup!
I took some time this weekend to finish up the Avanti that way I have one jet for MS jets which is next week. I am hoping to test fly both this weekend so I hope I get some good weather!
I took some time this weekend to finish up the Avanti that way I have one jet for MS jets which is next week. I am hoping to test fly both this weekend so I hope I get some good weather!
I'm going to ride an F-14 and wanted to know if they had problems with the F-14's wing actuator?
Bruno
01-25-2019, 02:00 AM
#150
Hi guys,
from one of Keith's videos, I noticed my fins are substantially different internally.
They dont seem to have a 'middle' spar, or hardwood block, like his has.
From the pictures you can see the skin on his is carbon reinforced and the carbon pin on the back is either in a hardwood block or a full length spar.
Can anyone confirm? Could my version (older) have been updated because of inflight break ups?
Thanks all!
My fin, same area
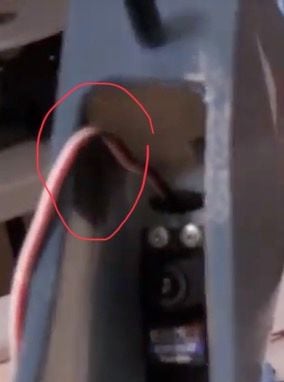
From Fender's video
from one of Keith's videos, I noticed my fins are substantially different internally.
They dont seem to have a 'middle' spar, or hardwood block, like his has.
From the pictures you can see the skin on his is carbon reinforced and the carbon pin on the back is either in a hardwood block or a full length spar.
Can anyone confirm? Could my version (older) have been updated because of inflight break ups?
Thanks all!
My fin, same area
From Fender's video