


Discuss size for a new build table please!
 12-01-2015 | 09:54 AM
#1
Thread Starter
Member
Joined: Oct 2015
Posts: 54
Likes: 0
Received 0 Likes
on
0 Posts
I've been building on my 3' x 6' "build table" for 20+ years. It's pretty much had it structurally, it's no longer flat or level AND it's just too small.
I've been looking around RCU and other woodworking sites to find ideas of how to build what I'd like to use. My garage is an oversize 2 car garage that is 20'x24', there is also a little side room connected to the garage where my shop sink is and I have cabinets and countertops from when our kitchen got remodeled. I just brought all the old stuff out and hung it in the garage. So, I can have a pretty big work table! Yay!
http://www.thewoodwhisperer.com/vide...ject&atid=2631
I'm into flying pattern and really want to get into jets again. With the new jet pattern contests I'm pretty excited to get started.
Models just seem to get bigger and bigger. Transport problems, size and weight regulations etc mean we've pretty much hit the size limit for now.
So so an average pattern plane is 2M square or 6'7" square. The width of the main landing gear is not nearly that wide but looking for a table that is at least 4' wide. Length is where it gets sketchy, where I don't have any plans to build a 40% or larger IMAC plane at this point, I'd like to have the option. The length of a 40% Carden Edge is almost 10'. The Elite Aerosports Shockwave is 8.5' long.
Having said all that we have to think about generally available sizes of materials. Pretty much plywood or MDF and many other commonly available materials for making the build table top out of are limited to 4' x 8'. We could always get around that by simply splicing or even butt jointing two or more pieces together, but do you REALLY need a build table bigger than 4' x 8'?
I've seen some build tables that I thought were some pretty unconventional materials. And by that I mean, "normally" you think of a build table as something you can put a pin in every now and again, however I've seen some incredible builds come off a granite cabinet top..... So let's talk various materials AND sizing for a new build table.
Anyone?
 12-01-2015 | 11:32 AM
#2


My Feedback: (10)
I have 2 solid core doors side by side (so the bench is 80 x 72 inches), with 2x4 framing to hold the perimeter together underneath. Then I used some sort of generic shop (drawer) cabinets at the corners to hold it up at about 42 inches working height. The whole thing is screwed together with big wood screws so you can take it apart. I used to have a glass plate over 1/2 of it, to help make sure it is flat. Getting the thing flat is the tricky part.
make sure you get a height you like, this make a huge difference.
make sure you get a height you like, this make a huge difference.
12-01-2015 | 12:05 PM
#3
Thread Starter
Member
Joined: Oct 2015
Posts: 54
Likes: 0
Received 0 Likes
on
0 Posts
Thanks mr_matt, height is very important as well. I've pretty much settled on 36" to the surface of the finished table. That way my bar stool's fit right up to it!
The old table has worked well at that height. Sometimes when a model is on its wheels you need something to stand on to work on the inside. But I'll take that trade off as that height is comfortable for building where most plane parts are only a couple of inches off the table.
The old table has worked well at that height. Sometimes when a model is on its wheels you need something to stand on to work on the inside. But I'll take that trade off as that height is comfortable for building where most plane parts are only a couple of inches off the table.
12-01-2015 | 02:03 PM
#4
or years I have gone with a 4'x8' table 38" off the ground. The biggest factor for me was to have the table come away from the wall like a pier. You can then walk along both long ends of the table and get to both sides of the plane without moving it. You can also put an assembled plane on the table. In my first shop the tables were like counters running next to the wall. It was a real pain in the butt.
 make to any size you want
12-01-2015 | 02:56 PM
make to any size you want
12-01-2015 | 02:56 PM
#7
My Feedback: (10)
or years I have gone with a 4'x8' table 38" off the ground. The biggest factor for me was to have the table come away from the wall like a pier. You can then walk along both long ends of the table and get to both sides of the plane without moving it. You can also put an assembled plane on the table. In my first shop the tables were like counters running next to the wall. It was a real pain in the butt.
12-01-2015 | 06:28 PM
#9
My Feedback: (20)
I use two 30" x 8' particle board utility tables from office store covered with brown paper for general work.
The are topped with egg crate foam mattress toppers for soft non scratch surface when needed.
When flat is important I lay two solid core door panels on top and shim to level with wood door shims. I check them with a 6' aluminum ruler and 48" bubble level.
They work as an island for all around access, two islands when needed. Can be a big deck with two doors or a huge surface by adding a 3rd door to the end of the first two. Great for sheeting, vacuum bagging, painting, etc etc. Height is 30" (I'm short), good chair height, or ok to stand.
Its modular, moveable, removable, versatile, easy, and cheap.
Tables with foam toppers, one door shimmed level, two doors shimmed level, three doors together
Gary
12-01-2015 | 09:31 PM
#11

My Feedback: (11)
I would look up a local granite counter top fabricator and grab a remnant from him. A lot of time homeowners will select slabs for kitchen/bathroom counters that leave significant remnants that the home owner can do nothing with. The fabricator (at least ours) has hundreds on pieces of granite and quartz that people will never want. I'd go check that out and customize a bench to accommodate the slab you can get. They're dead flat and you can just scrape up glue. I've gotten large pieces for less that $50.....
 12-02-2015 | 09:03 AM
#14


Joined: Feb 2007
Posts: 212
Likes: 0
Received 0 Likes
on
0 Posts
From: Abilene,
TX
I use two of these back to back, leveled and secured together and on casters. Either out in the open with 360 deg access or up against a wall with 270
This gives me drawers on both sides for drivers, hobby knives, calipers ect.
http://www.harborfreight.com/media/c...mage_22222.jpg
This gives me drawers on both sides for drivers, hobby knives, calipers ect.
http://www.harborfreight.com/media/c...mage_22222.jpg
Last edited by Vettdriver; 12-02-2015 at 12:44 PM. Reason: grammar
12-02-2015 | 09:13 AM
#15
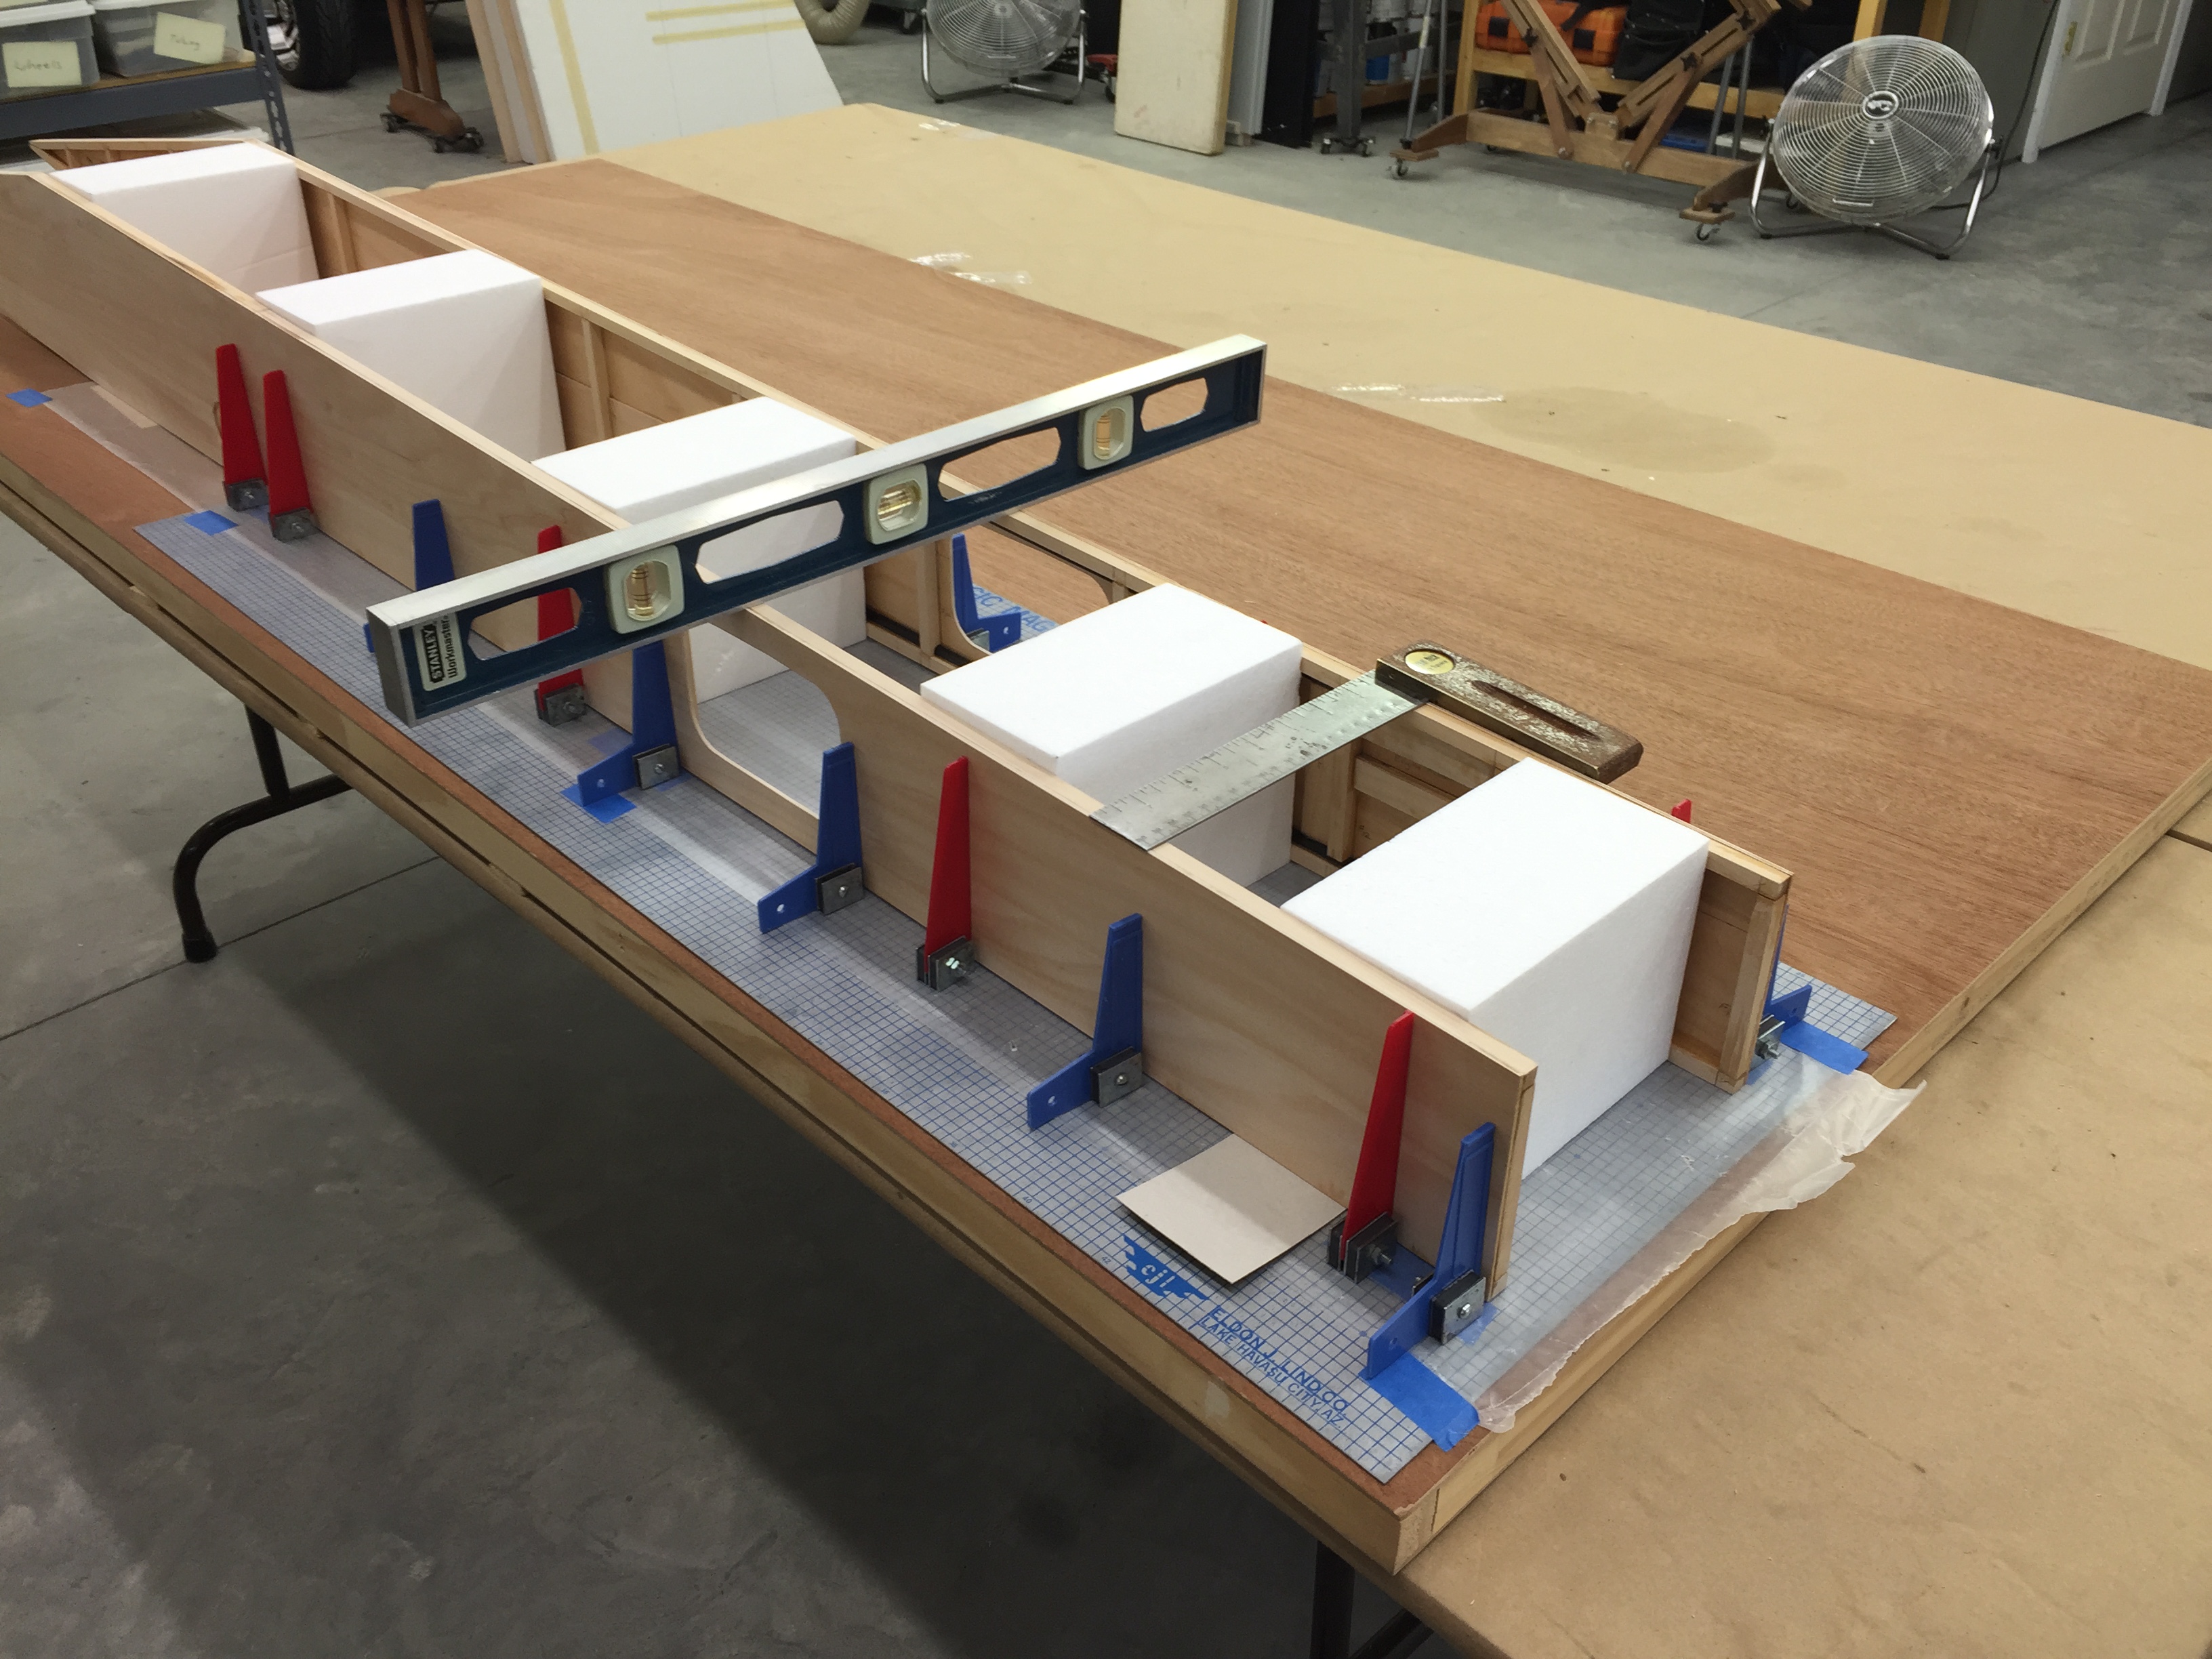
I have two tables for building. One is 31" wide x 39" tall x 77" long. The 31" side is against the wall so I have access to 3 sides while standing. I made it 39" tall because I don't like to bend over and I am 6' 1" tall. This bench has removeable pylons on each end with a 7/8" dia.hole 8" above the bench top surface. I have a 1" square aluminum tube that is the same length as the bench. The tube can rotate 360 degrees and I mount bulkheads on the tube or templates for hot wire foam cutting. I have adjustable length metal feet in the bottom of the legs 6 places that I adjust to keep the table dead flat.
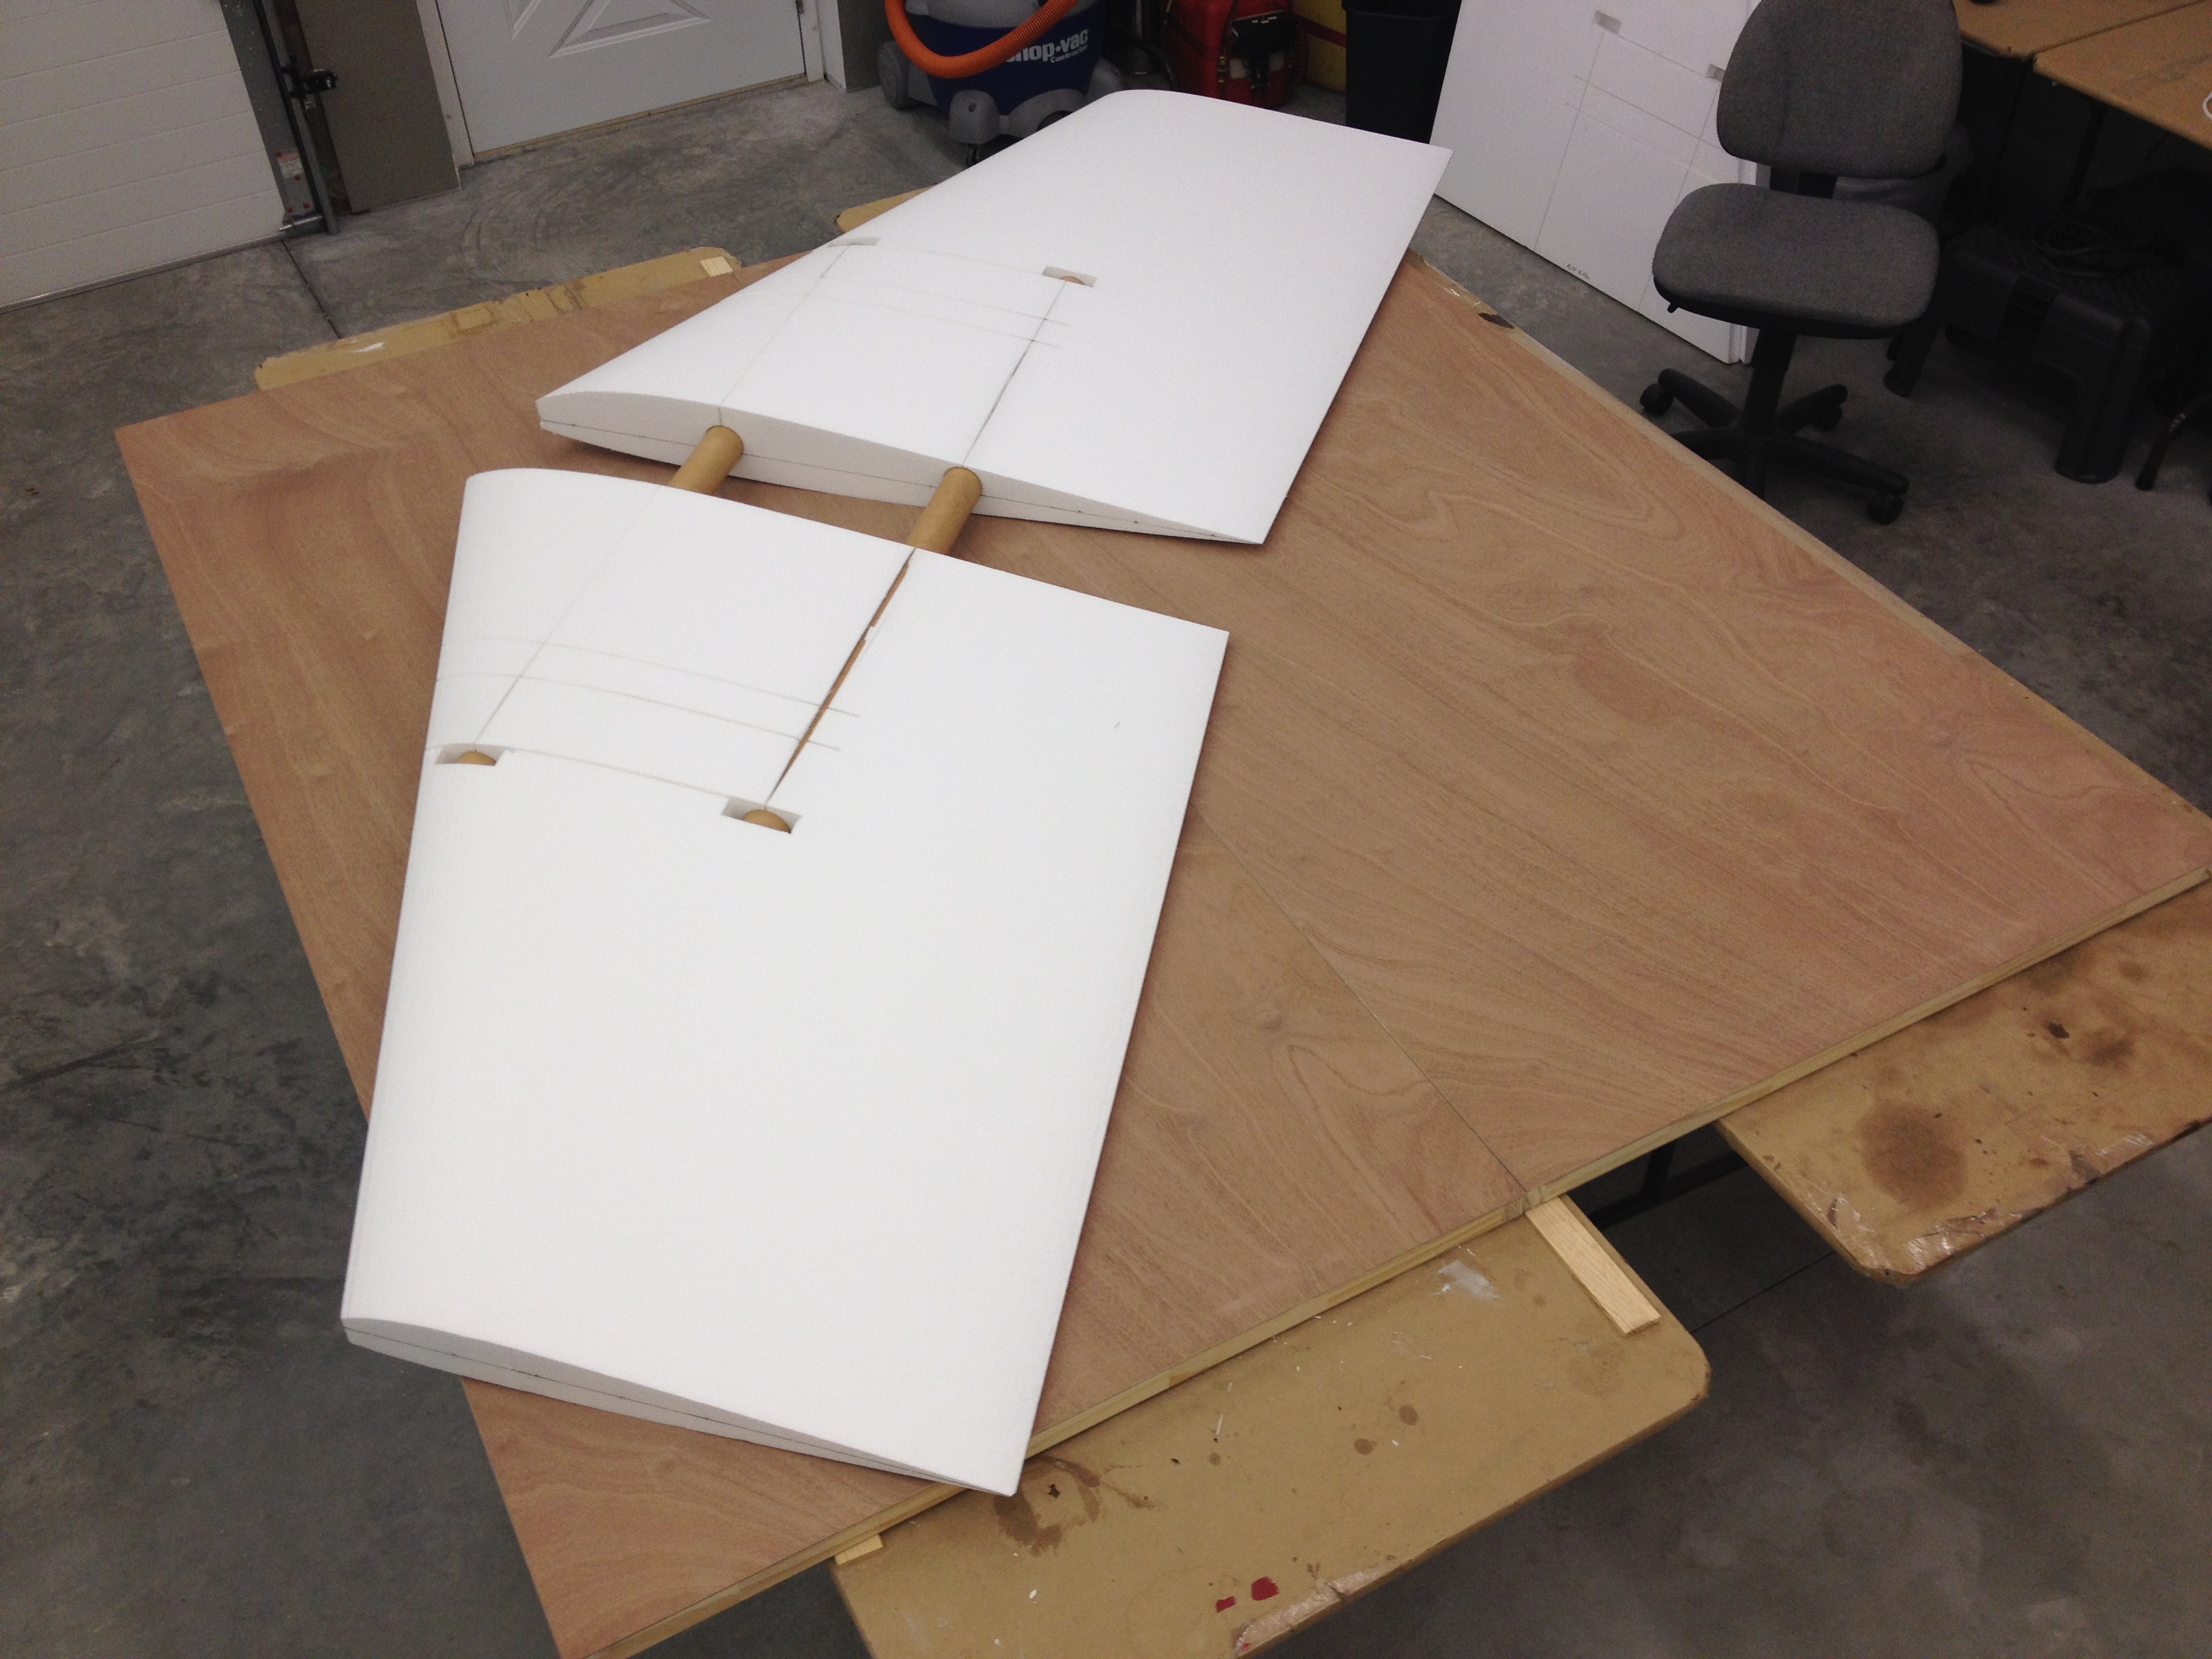
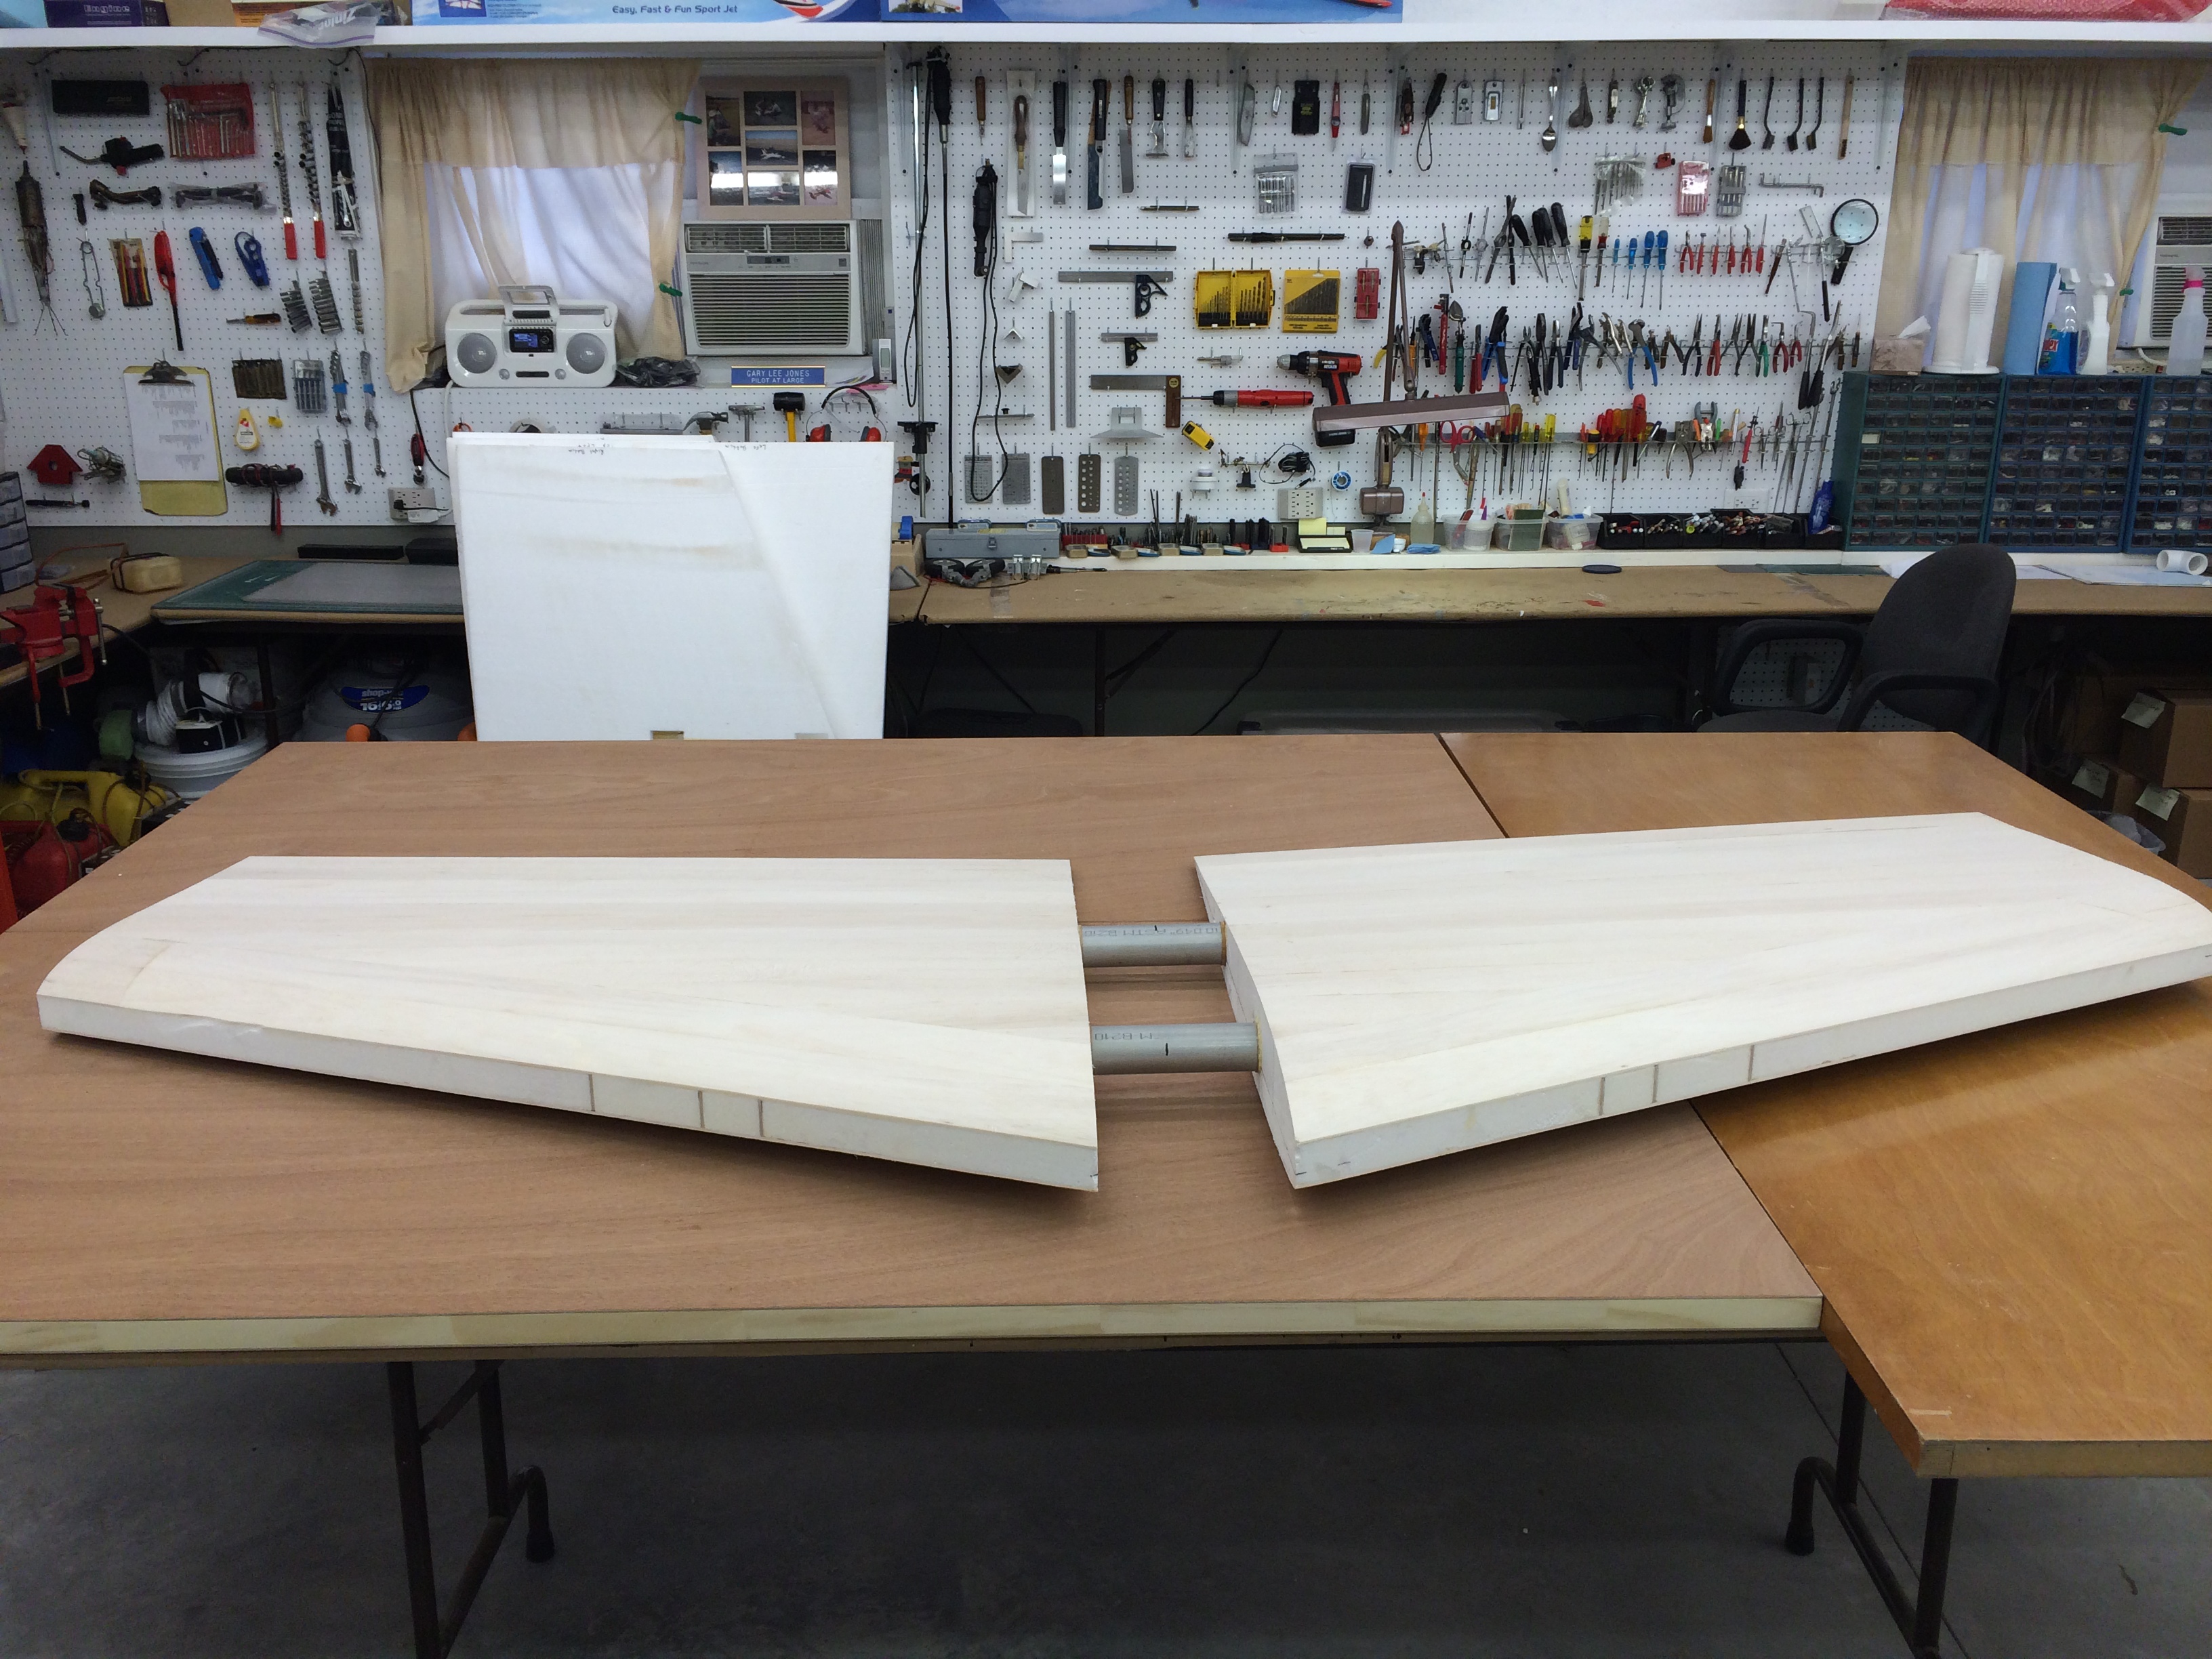
The other table is 29" deep x 30" tall x 96" long. On top of it I have a top out of MDF that is hinged in the middle length wise for setting wing dihedrals. The MDF top is 2" above the plywood top at the hinge line and has height adusting screws approx ever 12" so I can adjust the MDF for flatness no matter what dihedral angle is used. The tables are cover with work today so no pictures right now.
The other table is 29" deep x 30" tall x 96" long. On top of it I have a top out of MDF that is hinged in the middle length wise for setting wing dihedrals. The MDF top is 2" above the plywood top at the hinge line and has height adusting screws approx ever 12" so I can adjust the MDF for flatness no matter what dihedral angle is used. The tables are cover with work today so no pictures right now.
12-02-2015 | 02:31 PM
#16

My Feedback: (38)
Here is something different.
An old bowling alley.....hardwood, 42 inches wide and as long as 20 feet in some cases. Build a heavy duty frame to set in on, cover with insulation board (if you like to build on a soft surface with pins).
Cover with glass if that is your preference.
Cover with a thin sheet of steel and use magnets to hold your work while you build.
My building board is chip board (osb) 4'x8' cut in half lengthwise. This serves as a top and bottom and are screwed to a 2"x2" frame to keep it square and straight. Then it is covered with insulation board and placed on a cabinet base or frame of your choice.
I'll look for a better pic to post.
12-02-2015 | 03:02 PM
#17

My Feedback: (18)
Here's the EAA link. http://www.eaa1000.av.org/technicl/w...l/tablefig.htm
12-02-2015 | 04:05 PM
#18
Joined: Feb 2007
Posts: 212
Likes: 0
Received 0 Likes
on
0 Posts
From: Abilene,
TX
I really like the old butcher block look but around here reclaimed bowling alley, especially the hard maple centers are cost prohibitive. I looked at doing one across the back of my 30x50
shop and even the pine lanes were too rich for my blood.
Everybody is too busy turning them into kitchen islands
shop and even the pine lanes were too rich for my blood.
Everybody is too busy turning them into kitchen islands
12-02-2015 | 07:27 PM
#19
My Feedback: (10)
Dont get it too high, big planes are taller. And too wide doesnt help either. When i built my carf tutor I learned my 25 year old worktable was too tall.I have built thirty or so planes on it-never an issue, but having to reach down inside the tutor was a pain. 40 in wide compounded it as if you had it off to the side you couldnt reach across from the other side to get to it.
12-03-2015 | 09:21 AM
#21

I tried several different sizes before I settled on the ones I have today. The 4 by 8 ft. was great except I was always trying to reach for tools etc. When I moved the garage was empty and the first thing I did was outfit it with benches and cupboard space down the three walls. I purchased 6 solid core doors that had slight damage for around 25 bucks each. They were perfectly straight and putting the damaged side down made for perfect bench tops. I ended up only using 4 for the bench tops and instead of benches I ran full length cupboards down one side and across part of the end of the garage. That left two that I turned into building tables. The full length door is on a 2 by 2 inch steel tube frame I built with casters and leveling jack screws and the second is shorter 5 ft. long on a bench that houses the 36 inch wide zerox machine below. The top swivels up and the front down to access the zerox machine. Both are covered with Homosote and have remained warp free for over 20 yrs. as have the bench tops. When working on big projects I can add ends to lengthen the building surface and move it to the middle of my work space so I can work all around as needed. The 32 inch width is plenty big enough and I can easily reach across from either side.
Dennis
Dennis
12-03-2015 | 10:15 AM
#22
My Feedback: (18)
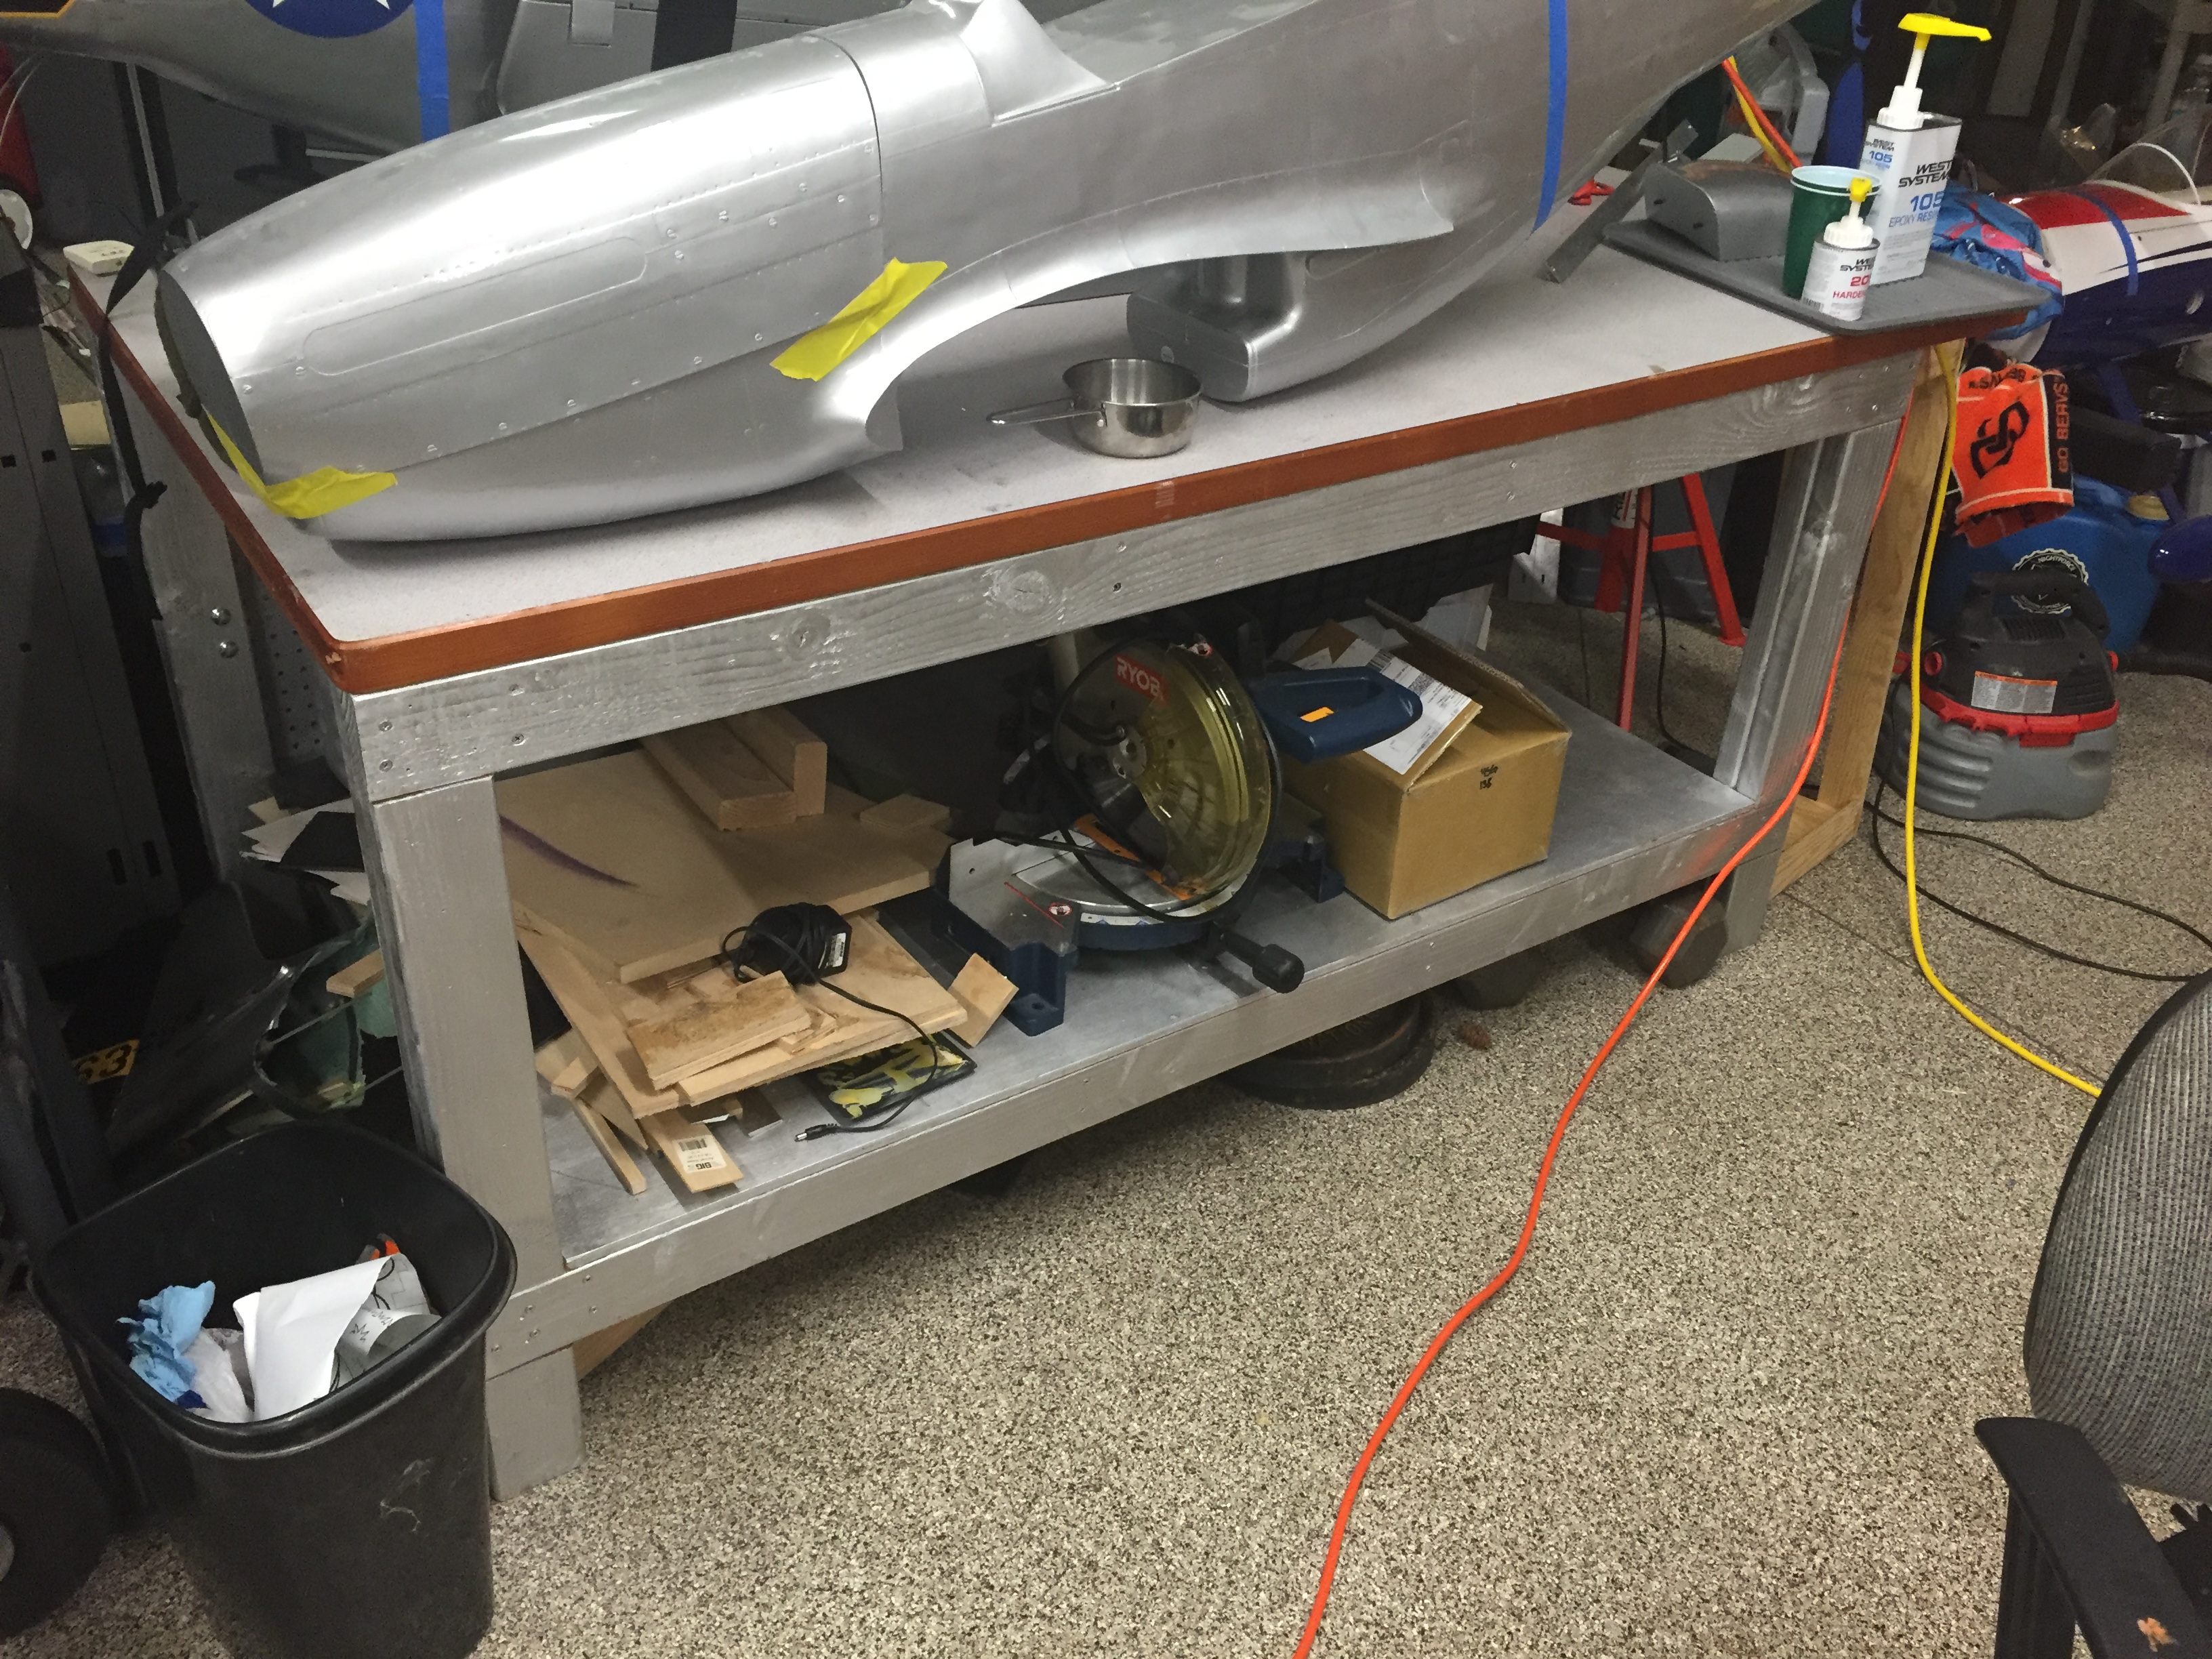
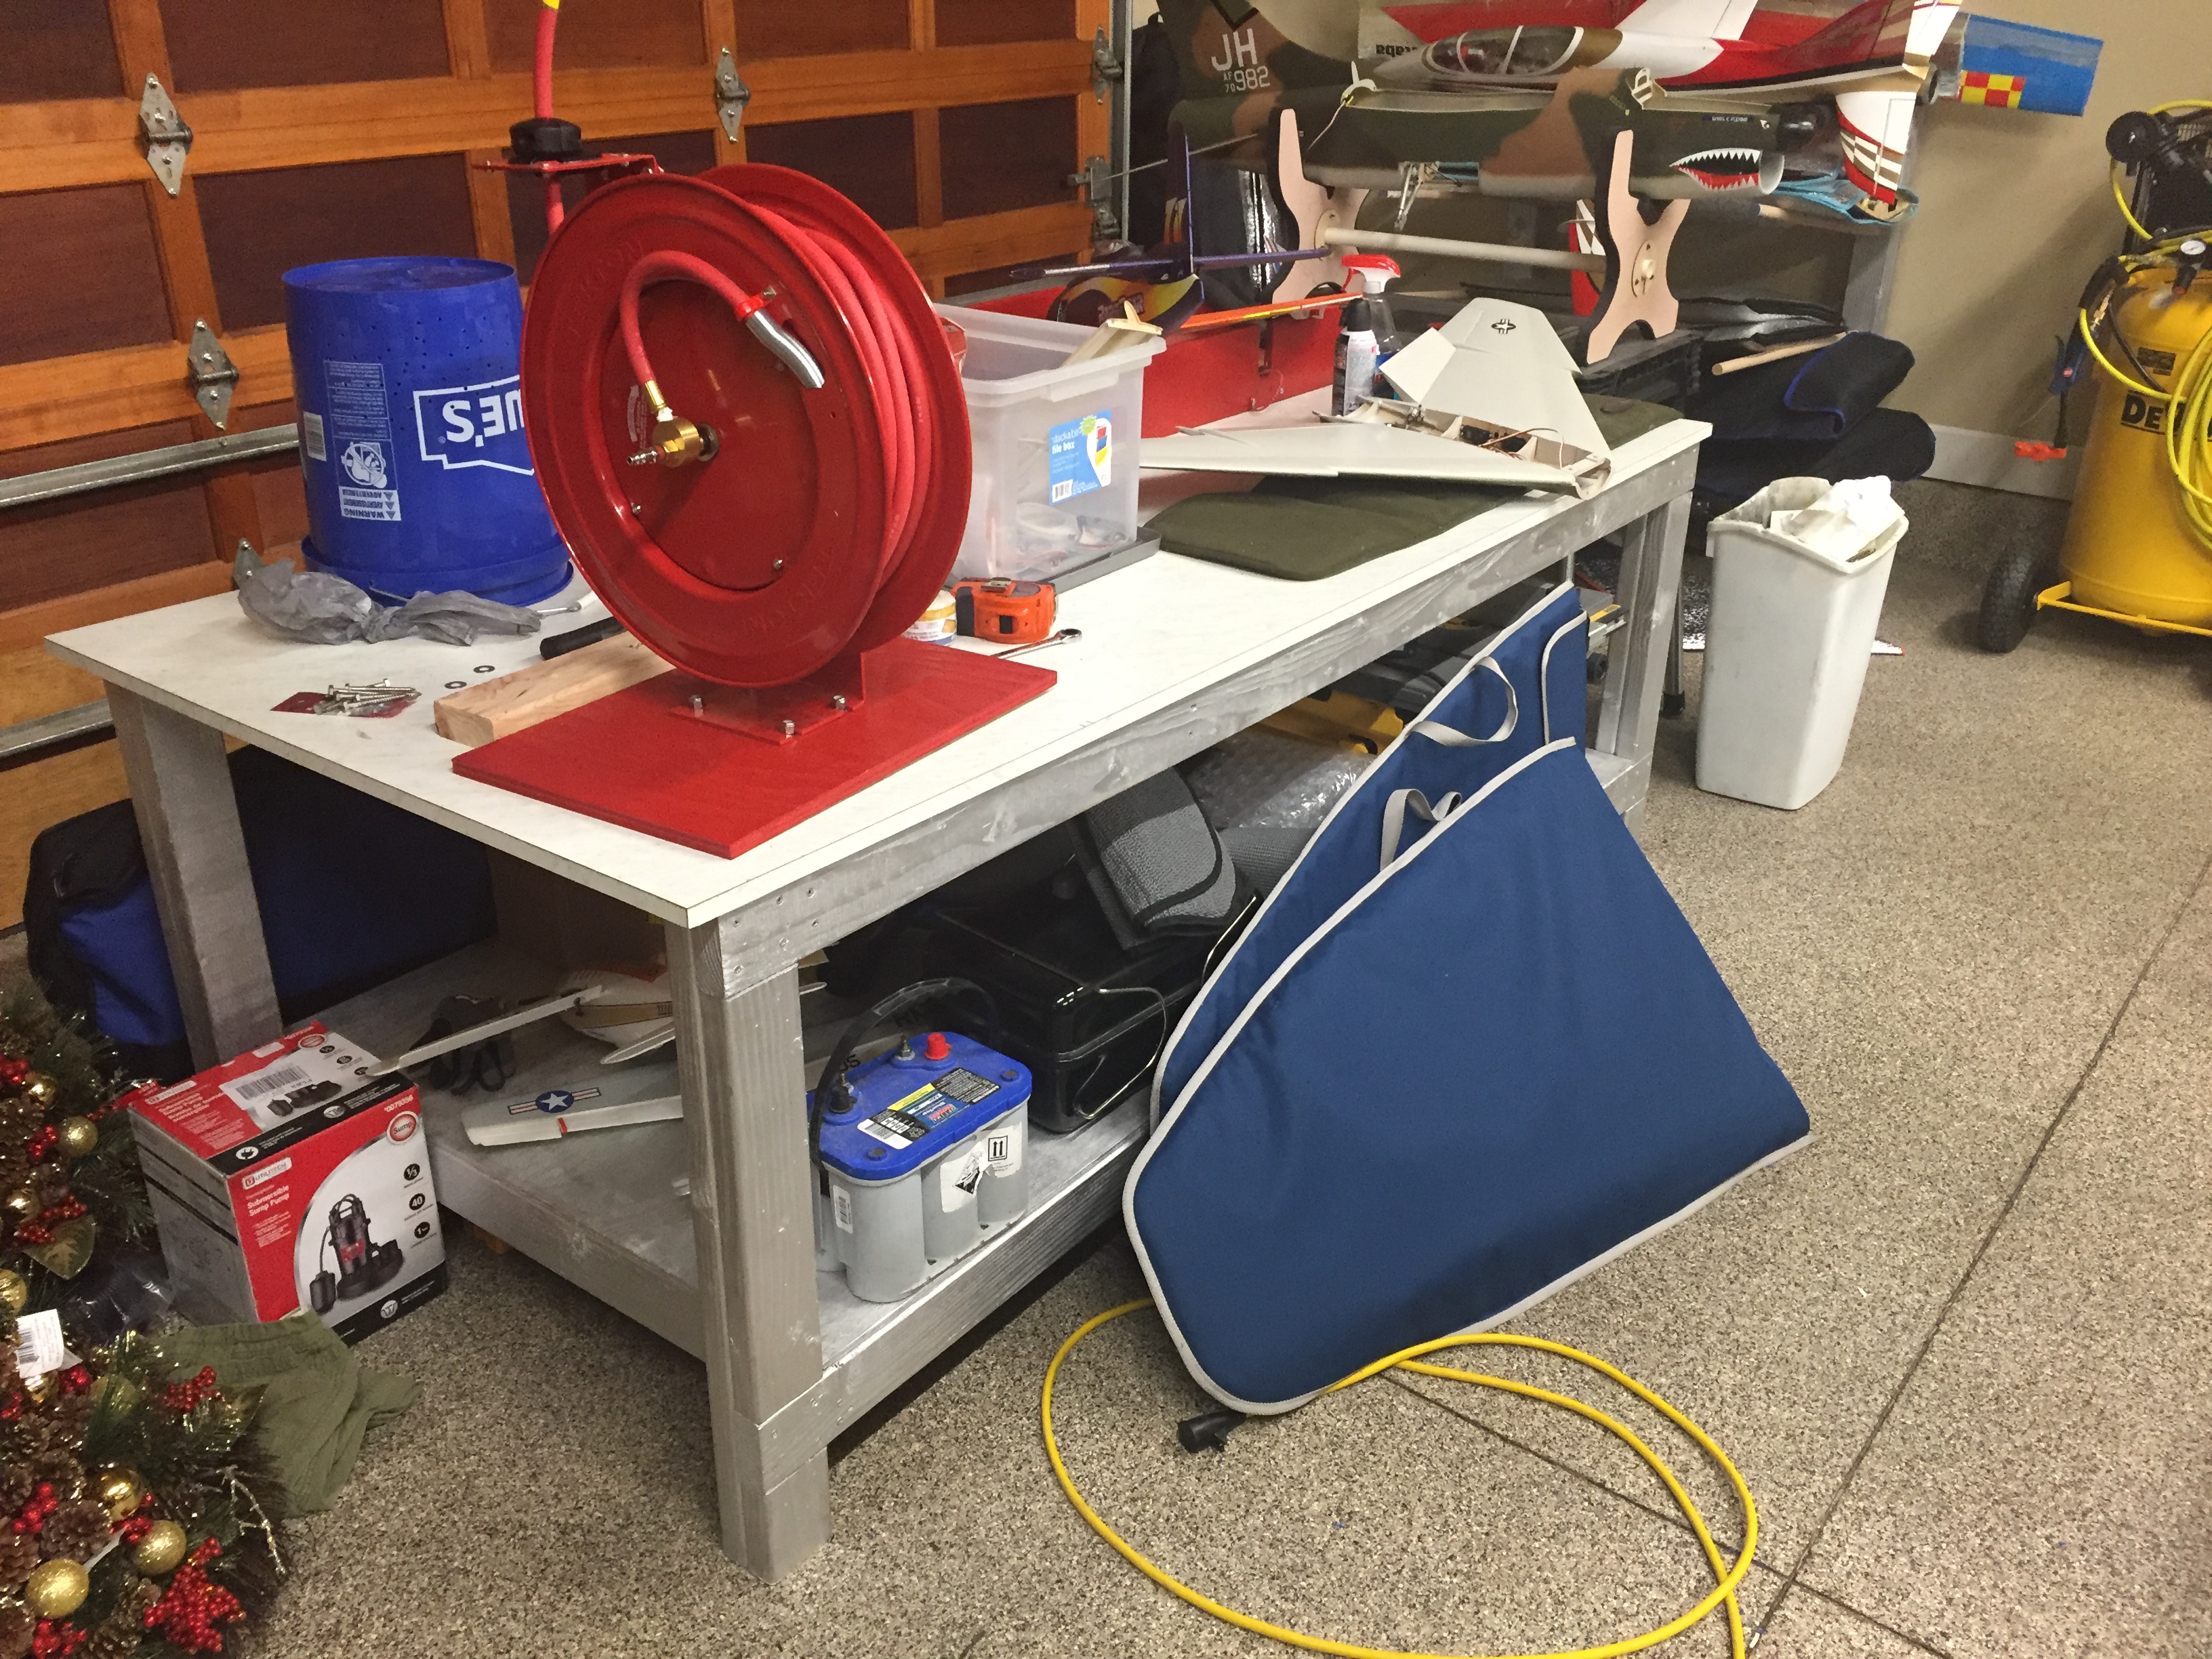
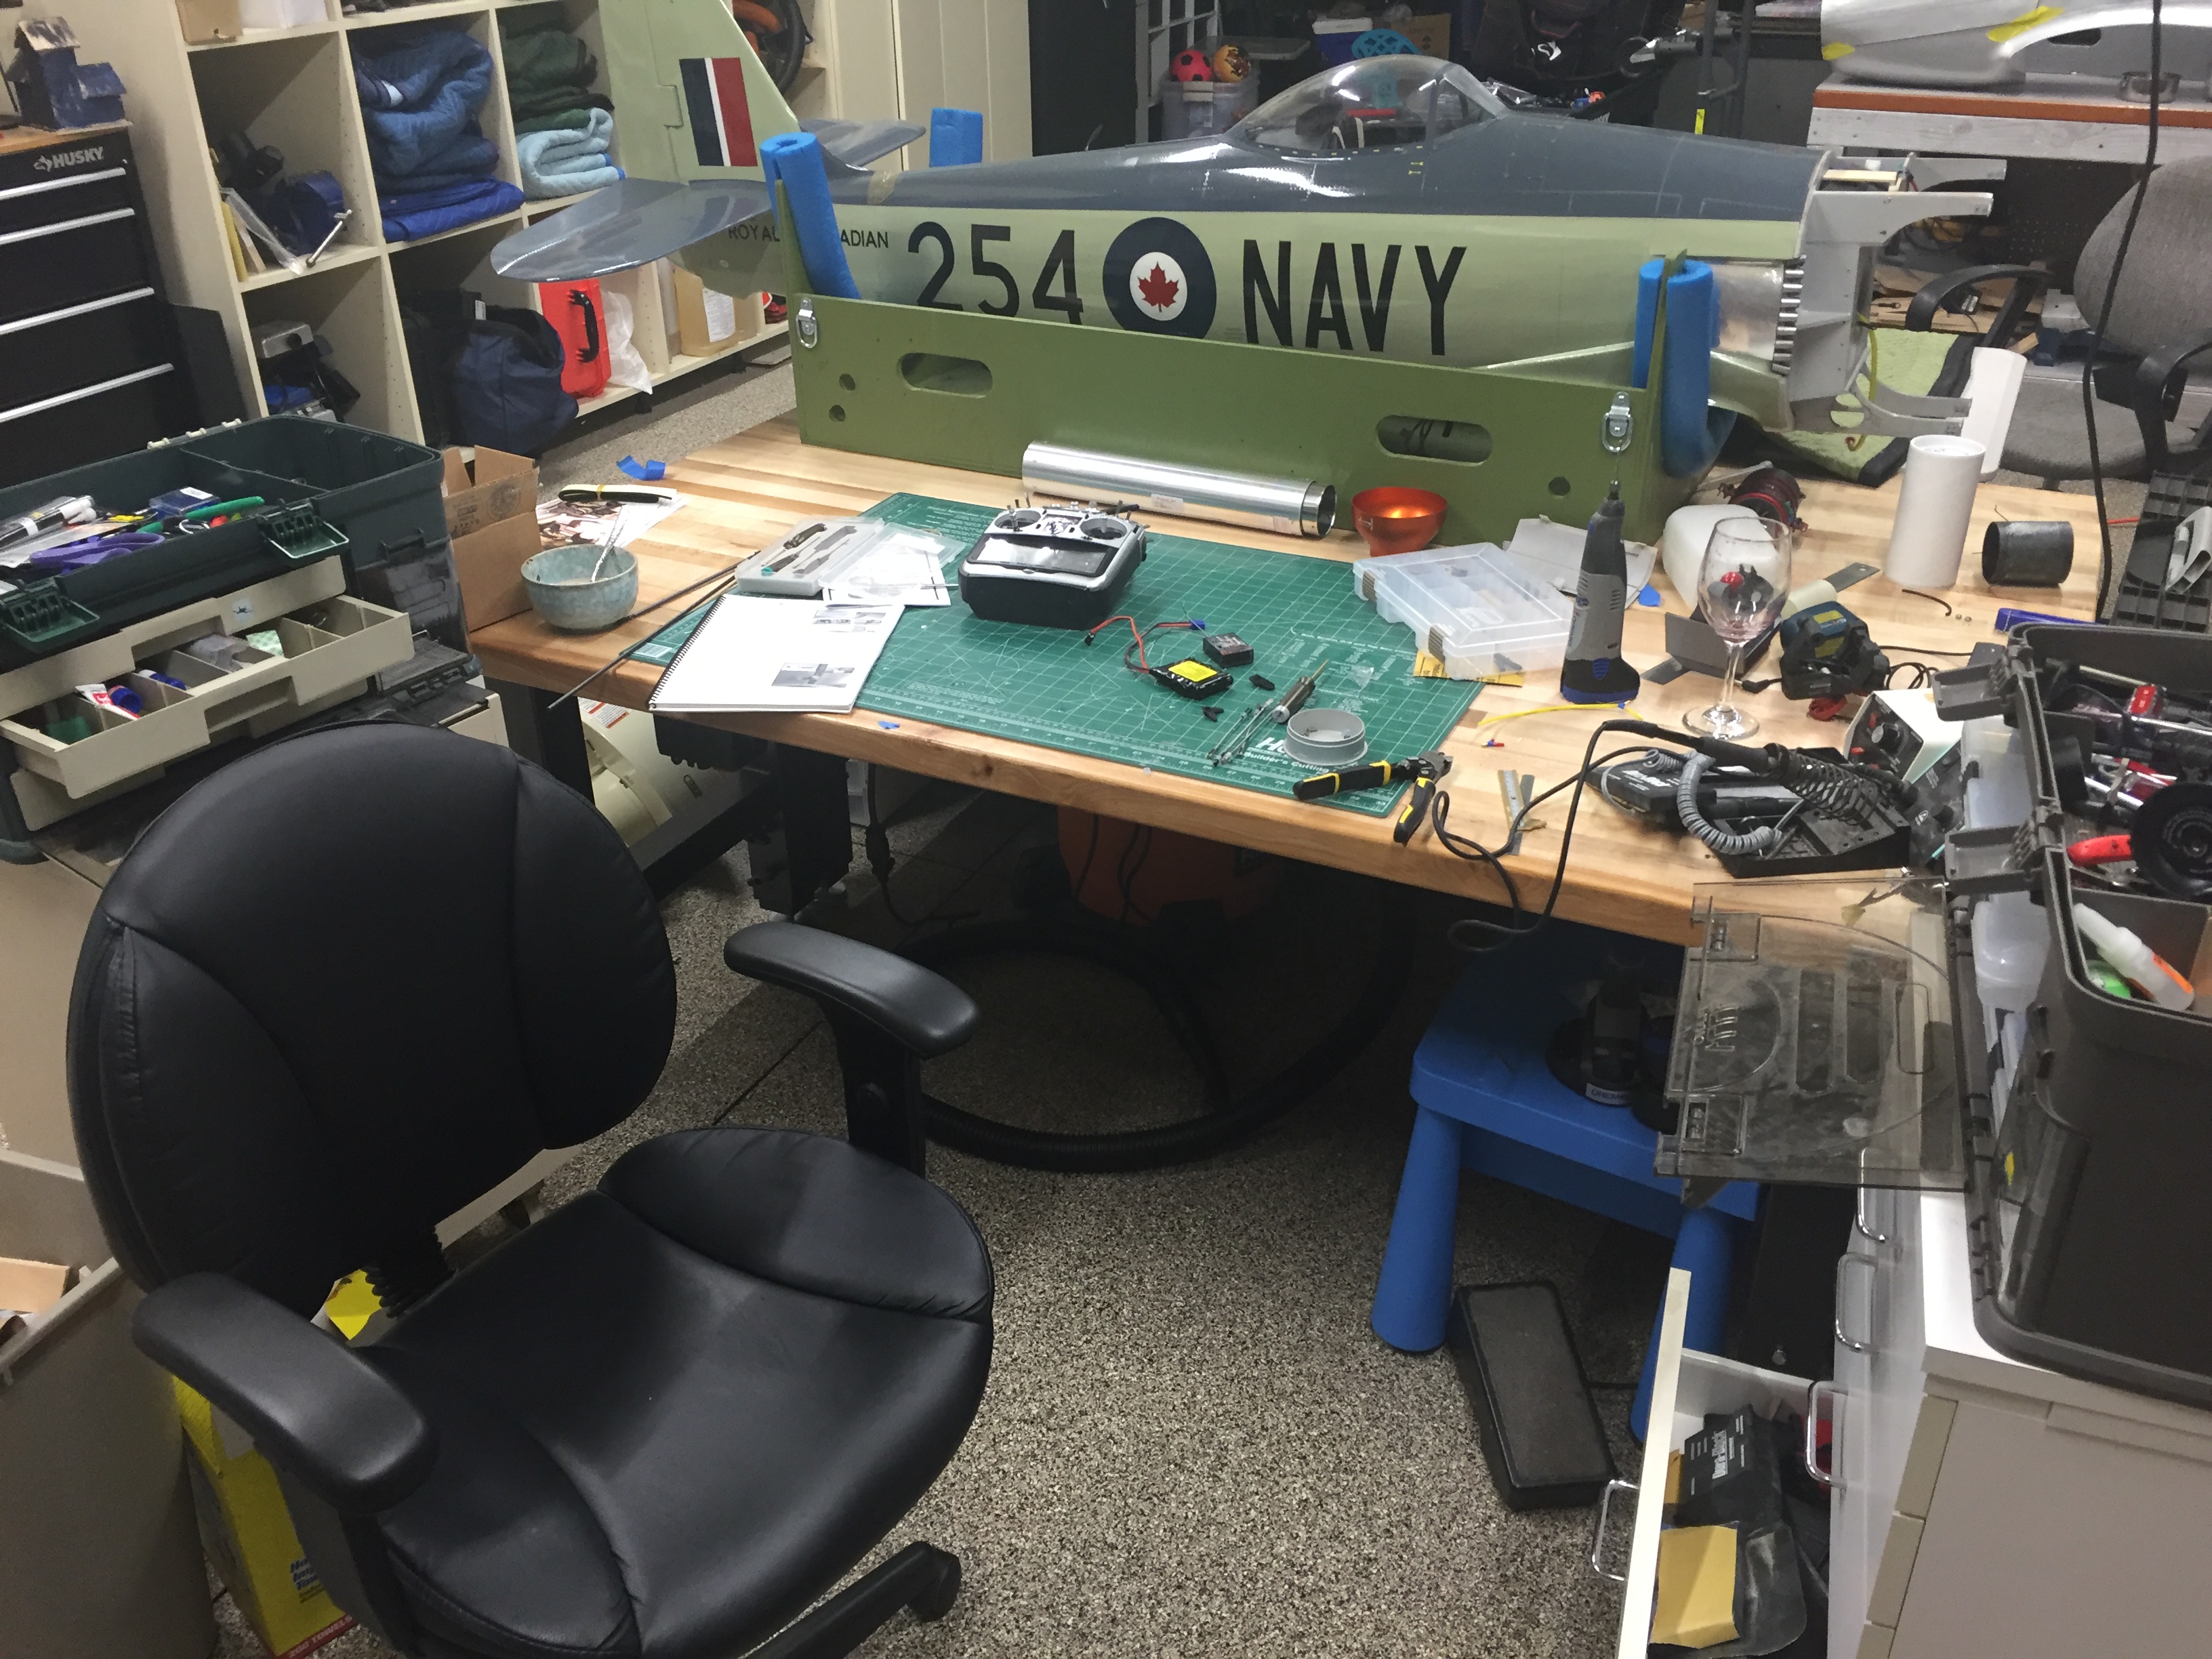
Size does matter…. ;-) Bigger the table, lower I would make it. I made the 7' one much lower, figured I would be working on bigger airplanes on it. One of the other ones, I put higher because I knew I would never sit at that bench and wanted the storage underneath for my radial arm saw and other tools I rarely use. My shop is almost done, once it was functional, kind of gave up on some of the final touches.
12-04-2015 | 08:35 AM
#24
My Feedback: (8)
I use cabinet bases and a 4x8 foot 1 inch thick piece of MDF. On top of that is a 1.5" tick granite table top. Dead true and great for setting up any model type. Although a bit costly in the beginning $1200 for the entire table to include the granite, it is always perfect after ten years. Glue chips away, paint chips away, etc. I love it. Best thing I ever did. Cost me one less model in my stable but the rewards of using it far out weigh that.


