


Compressor fitting/aircraft interface
 08-09-2016 | 01:47 PM
#1

Hello Guys,
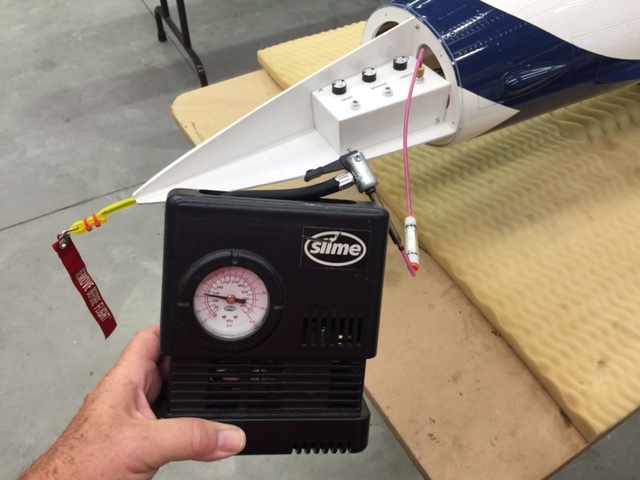
I need some help on how to connect my compressor to my aircraft to fill the tanks. I have 4mm Festo check valves in the aircraft, so how do I connect a 4mm festo tube to my air compressor? Here how I have it now, which is not very good.

There's got to be a better way. I would like to keep it with the Festo fittings in the aircraft, I am not a fan of the "screw in" type connection.


 08-09-2016 | 03:08 PM
#5

Joined: Jan 2011
Posts: 134
Likes: 0
Received 0 Likes
on
0 Posts
From: NewarkNottinghamshire, UNITED KINGDOM
The Rolls Royce solution is to take a piece of hex cross section brass rod and drill it out in a lathe. On one side drill it to the diameter of your football needle and on the other drill it to 4.1mm. Tap the 4.1mm side with a 5mm metric tap - Festo fittings that wil screw securely onto this are readily availabe.
The solder (preferable hard solder) the other side onto your "needle". (Even better to cut a schrader valve thread onto the outside)
Otherwise you could use 3mm tube and a 3mm-4mm Festo adapter. If the 3mm tube won't go over the needle then you could connect via a 2 way nipple and standard airline. In general standard airline (designed for nipples) doesn't work very well with Festo fittings -although Festo 3mm tube works fine on an airline nipple.
Last edited by cmp3cantrj; 08-09-2016 at 03:23 PM. Reason: more detail
08-09-2016 | 04:28 PM
#6

My Feedback: (20)
Many years ago I took the brass metal core out of a discarded tire stem. I cut off and then burned the rubber off with a torch. I then soldered a piece of brass tubing into the non threaded end. Been using it for 35 years.
Another option is to get a piece of tubing that will slide over the ball needle threads and a 4mm Festo straight fitting like a coupler. Then hysol the tube over the ball needle and festo fitting to hold them together. When cured screw in the needle base to the pump and attach 4mm tubing to the Festo fitting.
Lot of other ways also.
08-09-2016 | 06:28 PM
#9
I use an old Robart fill valve I had laying about, but had to remove the internals for it to work right. Works quite well.
08-10-2016 | 08:07 AM
#10
There is nothing to compare with the BVM air fill valve, and I have tried many over the years. Just push in the airline, fill, pullout airline, dead easy, minimal leakage, job done! Most of my jets are, or have been retrofitted with these valves ! oh and don't forget to fit a water trap in the fill line!
David
David
Last edited by David Gladwin; 08-10-2016 at 08:09 AM.
 08-11-2016 | 04:01 AM
#13

Joined: Mar 2004
Posts: 644
Likes: 0
Received 0 Likes
on
0 Posts
From: UK
Or there's my tightwad version if you have a Springair fill valve and a 4mm socket. The screw-in connector complete with soldered-on socket stays put. Works like the BVM $$$$ version; push in the 4mm tube, switch on your compressor and bingo.
08-12-2016 | 11:59 AM
#15
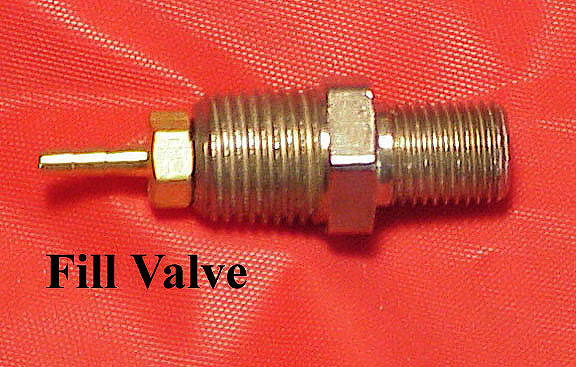
This does not need to be this complicated and painful. I use Sierra Giant Scale fill valves. They have a schrader fitting, never leak, and are bulletproof. I listened to the pros when i first started and got a battery compressor, BVM fittings, and all that crap, but i spent more time working around it, so I got rid of that. Now i just take a bike pump to the field and fill my tanks in three pumps. Easy and simple. I can repressurize brakes and wheels in 1/2 the time of the folks with the electric compressors.
For the small stuff (MAP etc.) I still use the Robarts hand pump and fittings.
Keep it simple. Less to forget, less to break, less leak potential, and cheaper. There is enough complexity on jets without adding it to areas where it need not exist.
For the small stuff (MAP etc.) I still use the Robarts hand pump and fittings.
Keep it simple. Less to forget, less to break, less leak potential, and cheaper. There is enough complexity on jets without adding it to areas where it need not exist.
Last edited by TTRotary; 08-12-2016 at 12:09 PM.
08-13-2016 | 02:17 PM
#16
My Feedback: (49)
I'm with TT on this. I always thought that the tiny screw in fittings were a pain. I have Century Jets fill valves in all my planes. It's also a standard Schrader Valve and I fill it with an electric pump that has a standard tire fitting.
There's no need for overpriced fittings, adapters or tiny tubing. If a valve ever leaks you can fix it for less than $1.
There's no need for overpriced fittings, adapters or tiny tubing. If a valve ever leaks you can fix it for less than $1.
08-14-2016 | 07:18 AM
#17
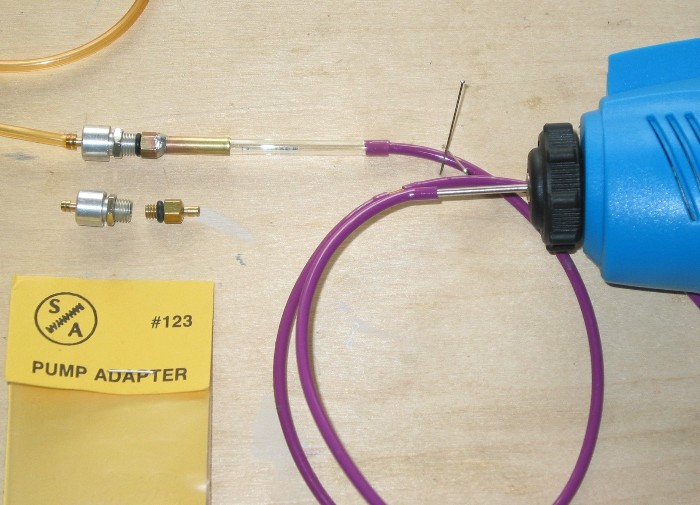
Thanks for the inspiration guys, I as well subscribe to the KISS method. Keep It Simple Stupid... The BVM valve gave me an idea. Found an old Robart fill valve, took out the valve (very simple, it just unscrews) and voila! 3mm festo fits right on, and if you run 4mm then add a 4mm to 3mm adapter and your done!

 08-14-2016 | 03:09 PM
#19
My solution was simple, free, and fast! No leaks no fuss no muss.
08-25-2016 | 06:14 PM
#20
My Feedback: (20)
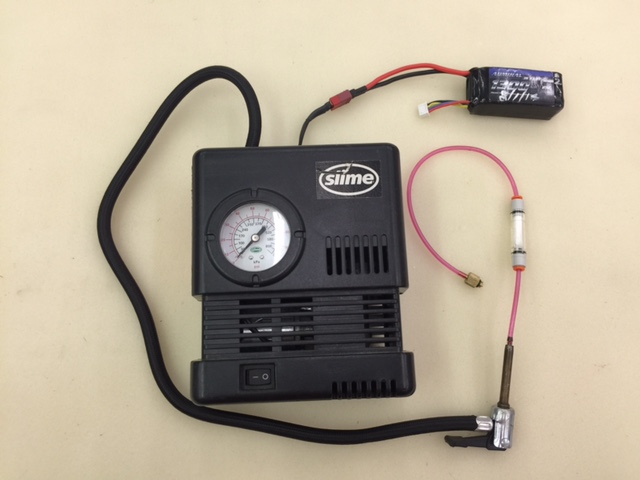
I was installing a water filter on my air pump today so I took some photos of what I use. The connection to the pump is an old tire stem with the rubber stripped off and a brass nipple soldered into the end. I use a 1000-1300 mah 3S LiPo battery. It all stuffs into the top of the pump and it is easily held in one hand. Compressor is a Slime brand from Walmart for $20.


Hope this helps,
Gary
Hope this helps,
Gary
08-25-2016 | 11:46 PM
#21

Just use a FESTO M7 thread to 4mm push on connector (M7 to 3 would be better but not sure if it is available), and screw it directly into the Pump
If they don't do a M7-3 then simply use an additional 4-3 connector. Keep it simple, neat and tidy.
Last edited by darryltarr; 08-25-2016 at 11:48 PM.


