


Old Roo, new engine mount
 04-14-2022 | 01:50 PM
#1

I've been planning for this new engine mount built for about 3 years now, got the info, consulted Ebron and did the research, have the time to work on it right now because I ( like a newby builder ) cut my left index finger pretty bad with an exacto knife, so good that I had to run to the ER ( 6 min away from my place) to get cleaned up and switched, 5 of them 😢 I'm all fixed up now, the finger still works ( if I need to point up to someone ) and moves normal 😀 anyways.
This came about because others have done it, it was decided when on a go around at slow speed some 3 years ago, it took a while to climb, the engine was pushing the Roo forward and down, P80 then ( the engine had to be mounted on the pod with the end up in order for it to fly straight on level pass ) and the wings took time to develop the sufficient lift to climb, heated it, it was like climbing via steps, stopped flying it because of that and here we are now.
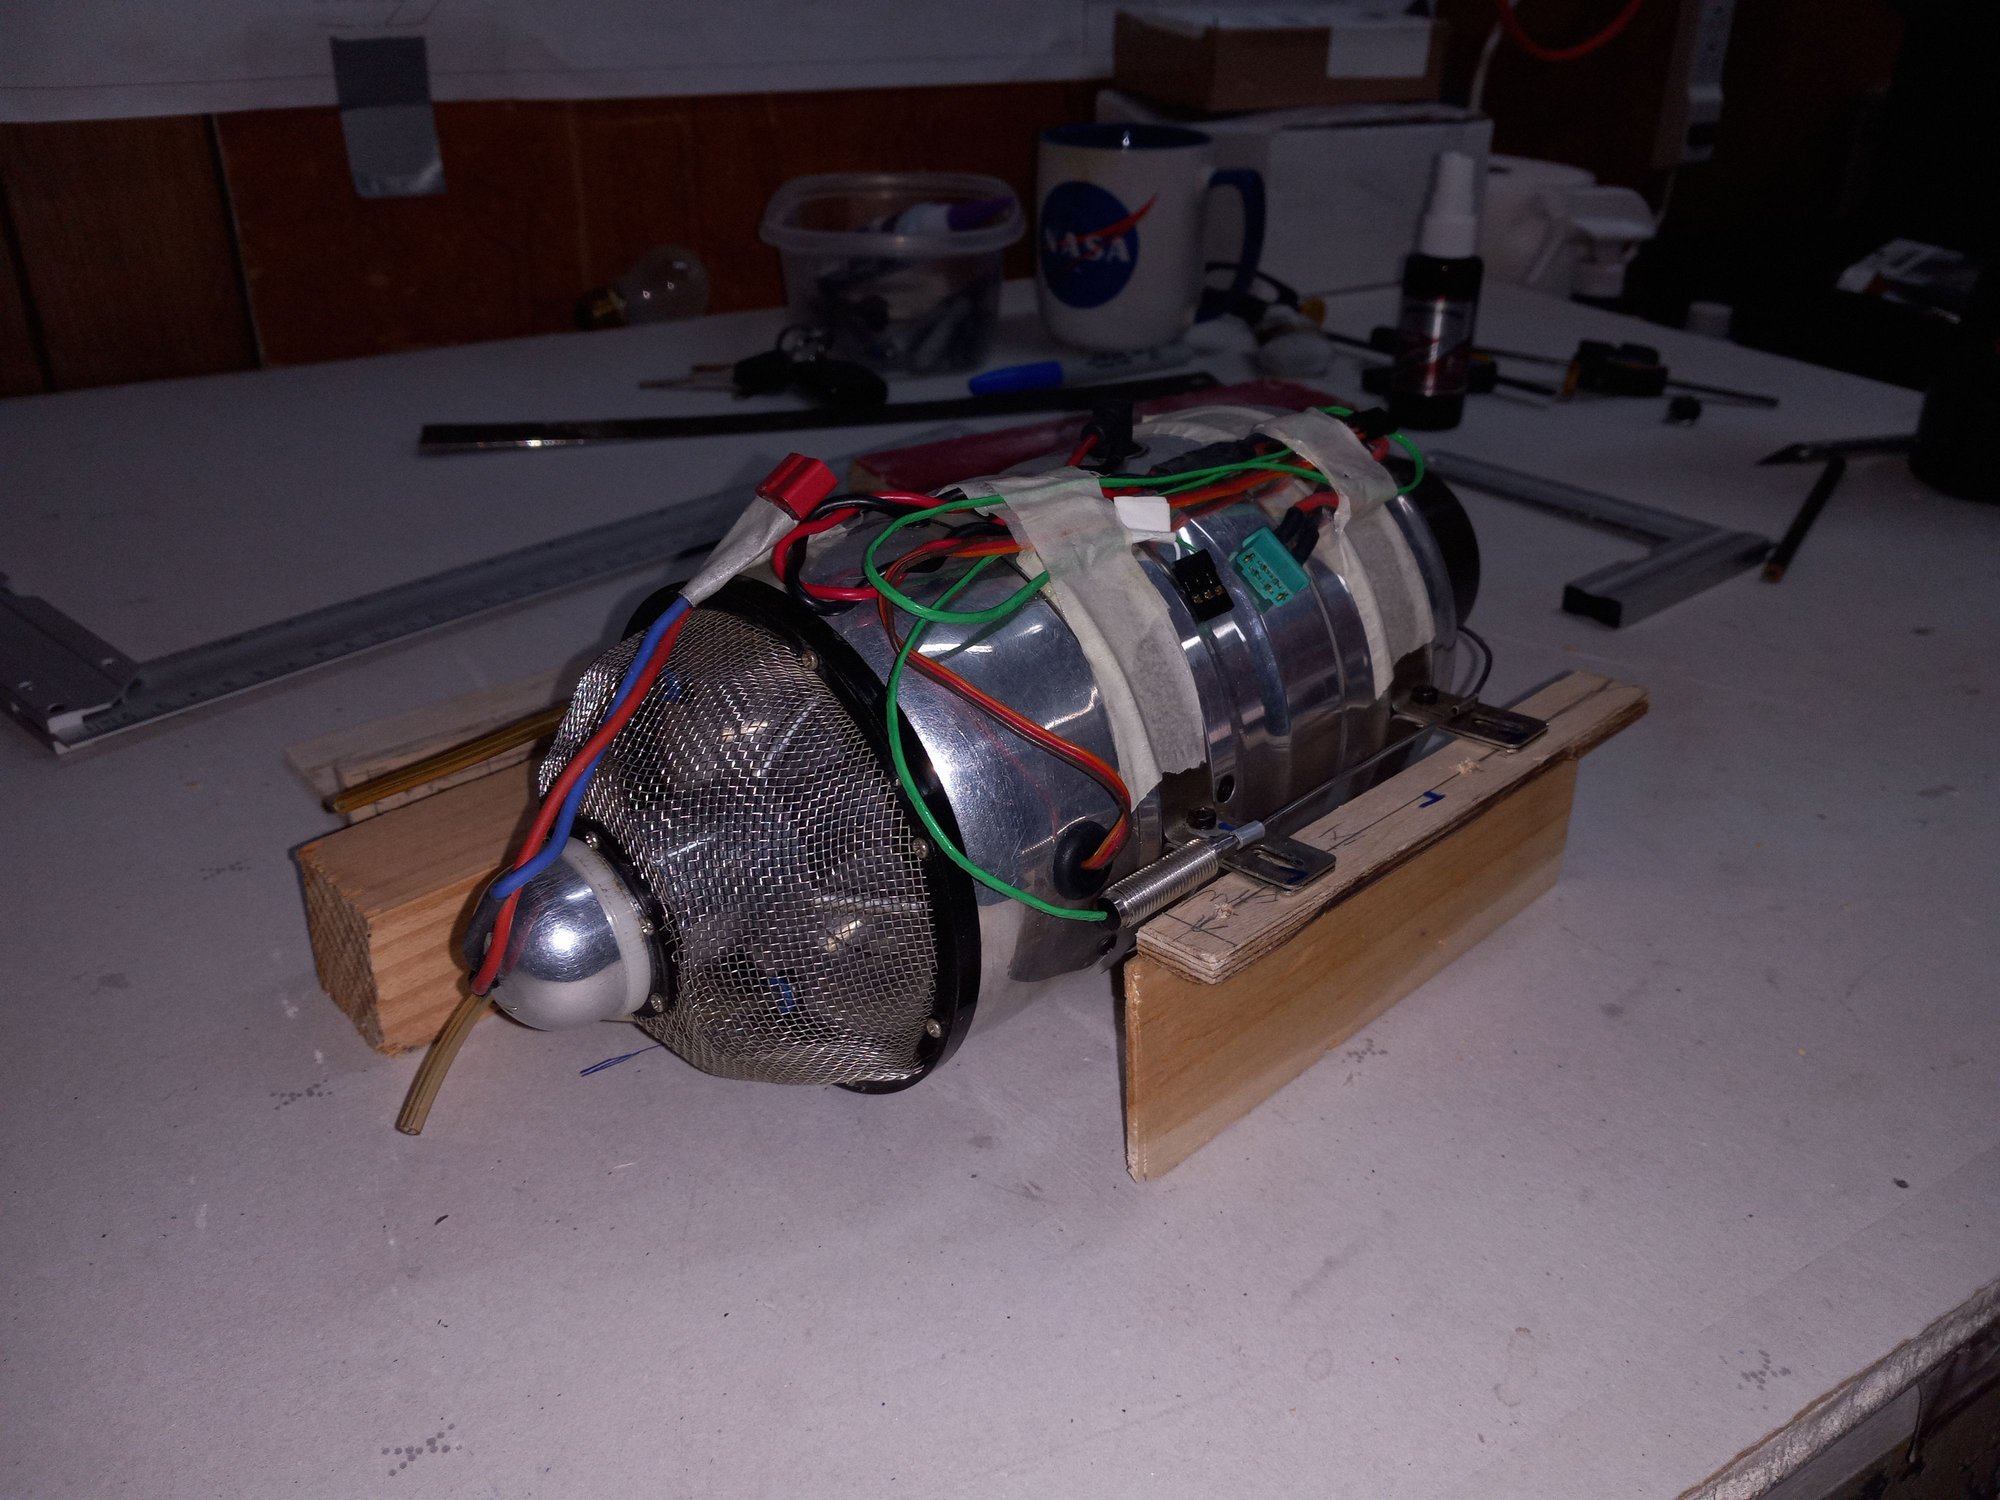
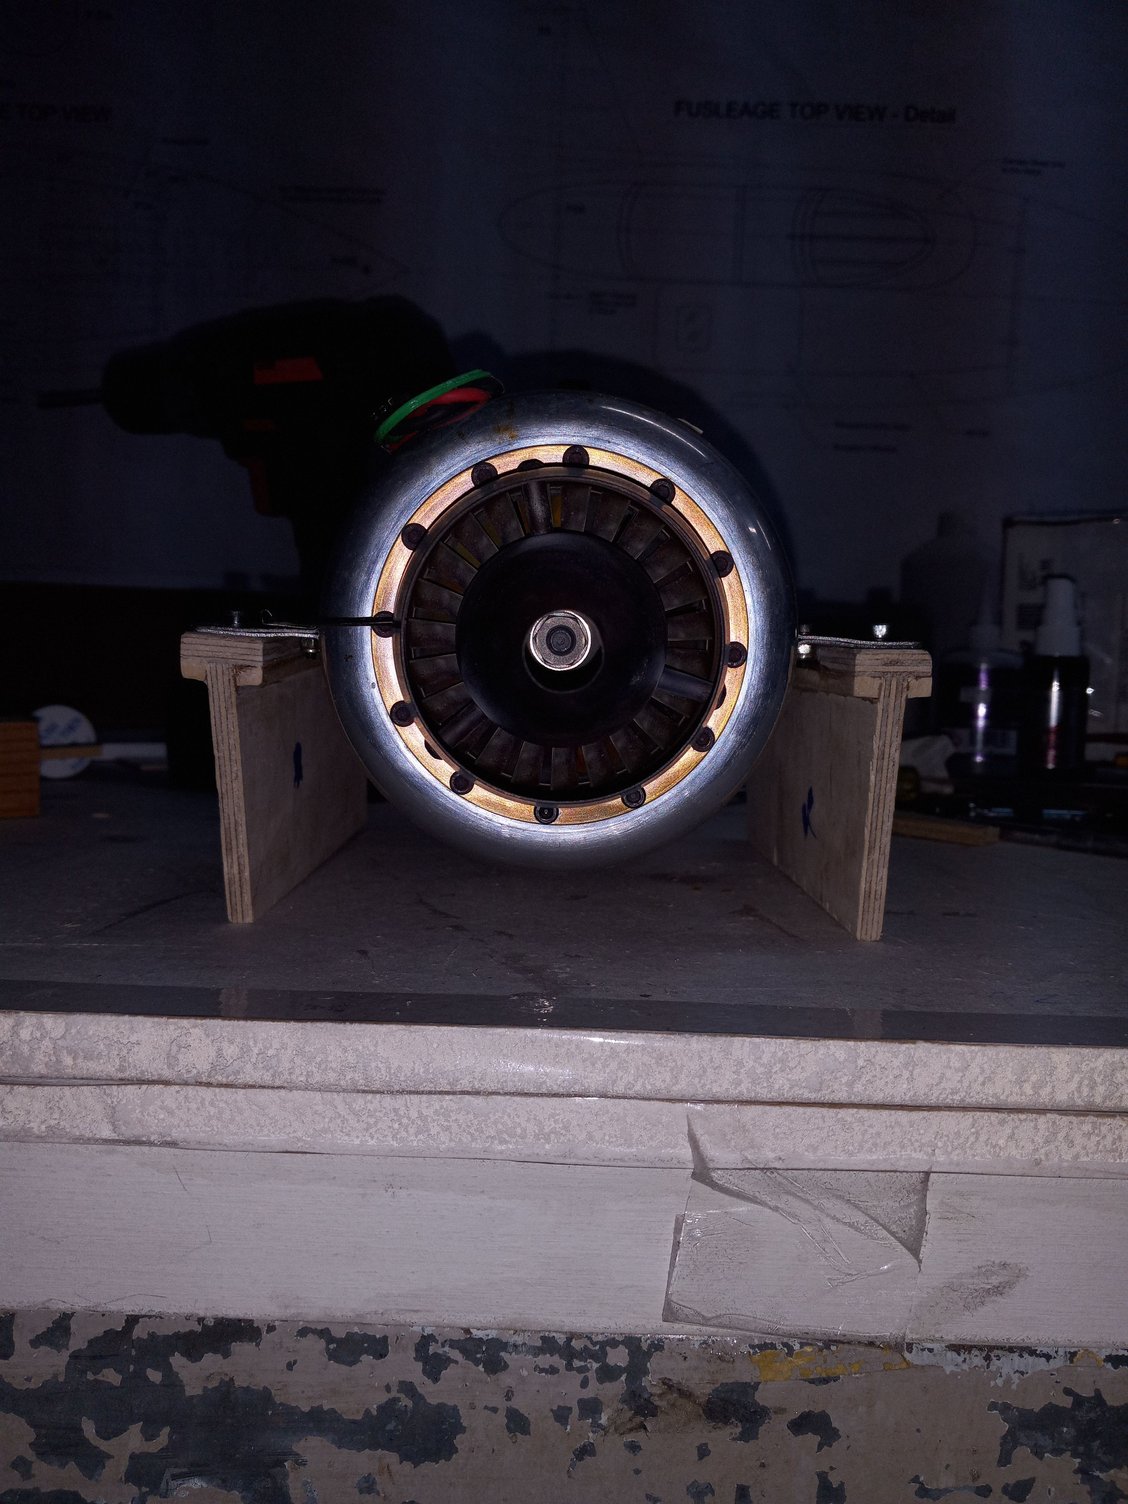
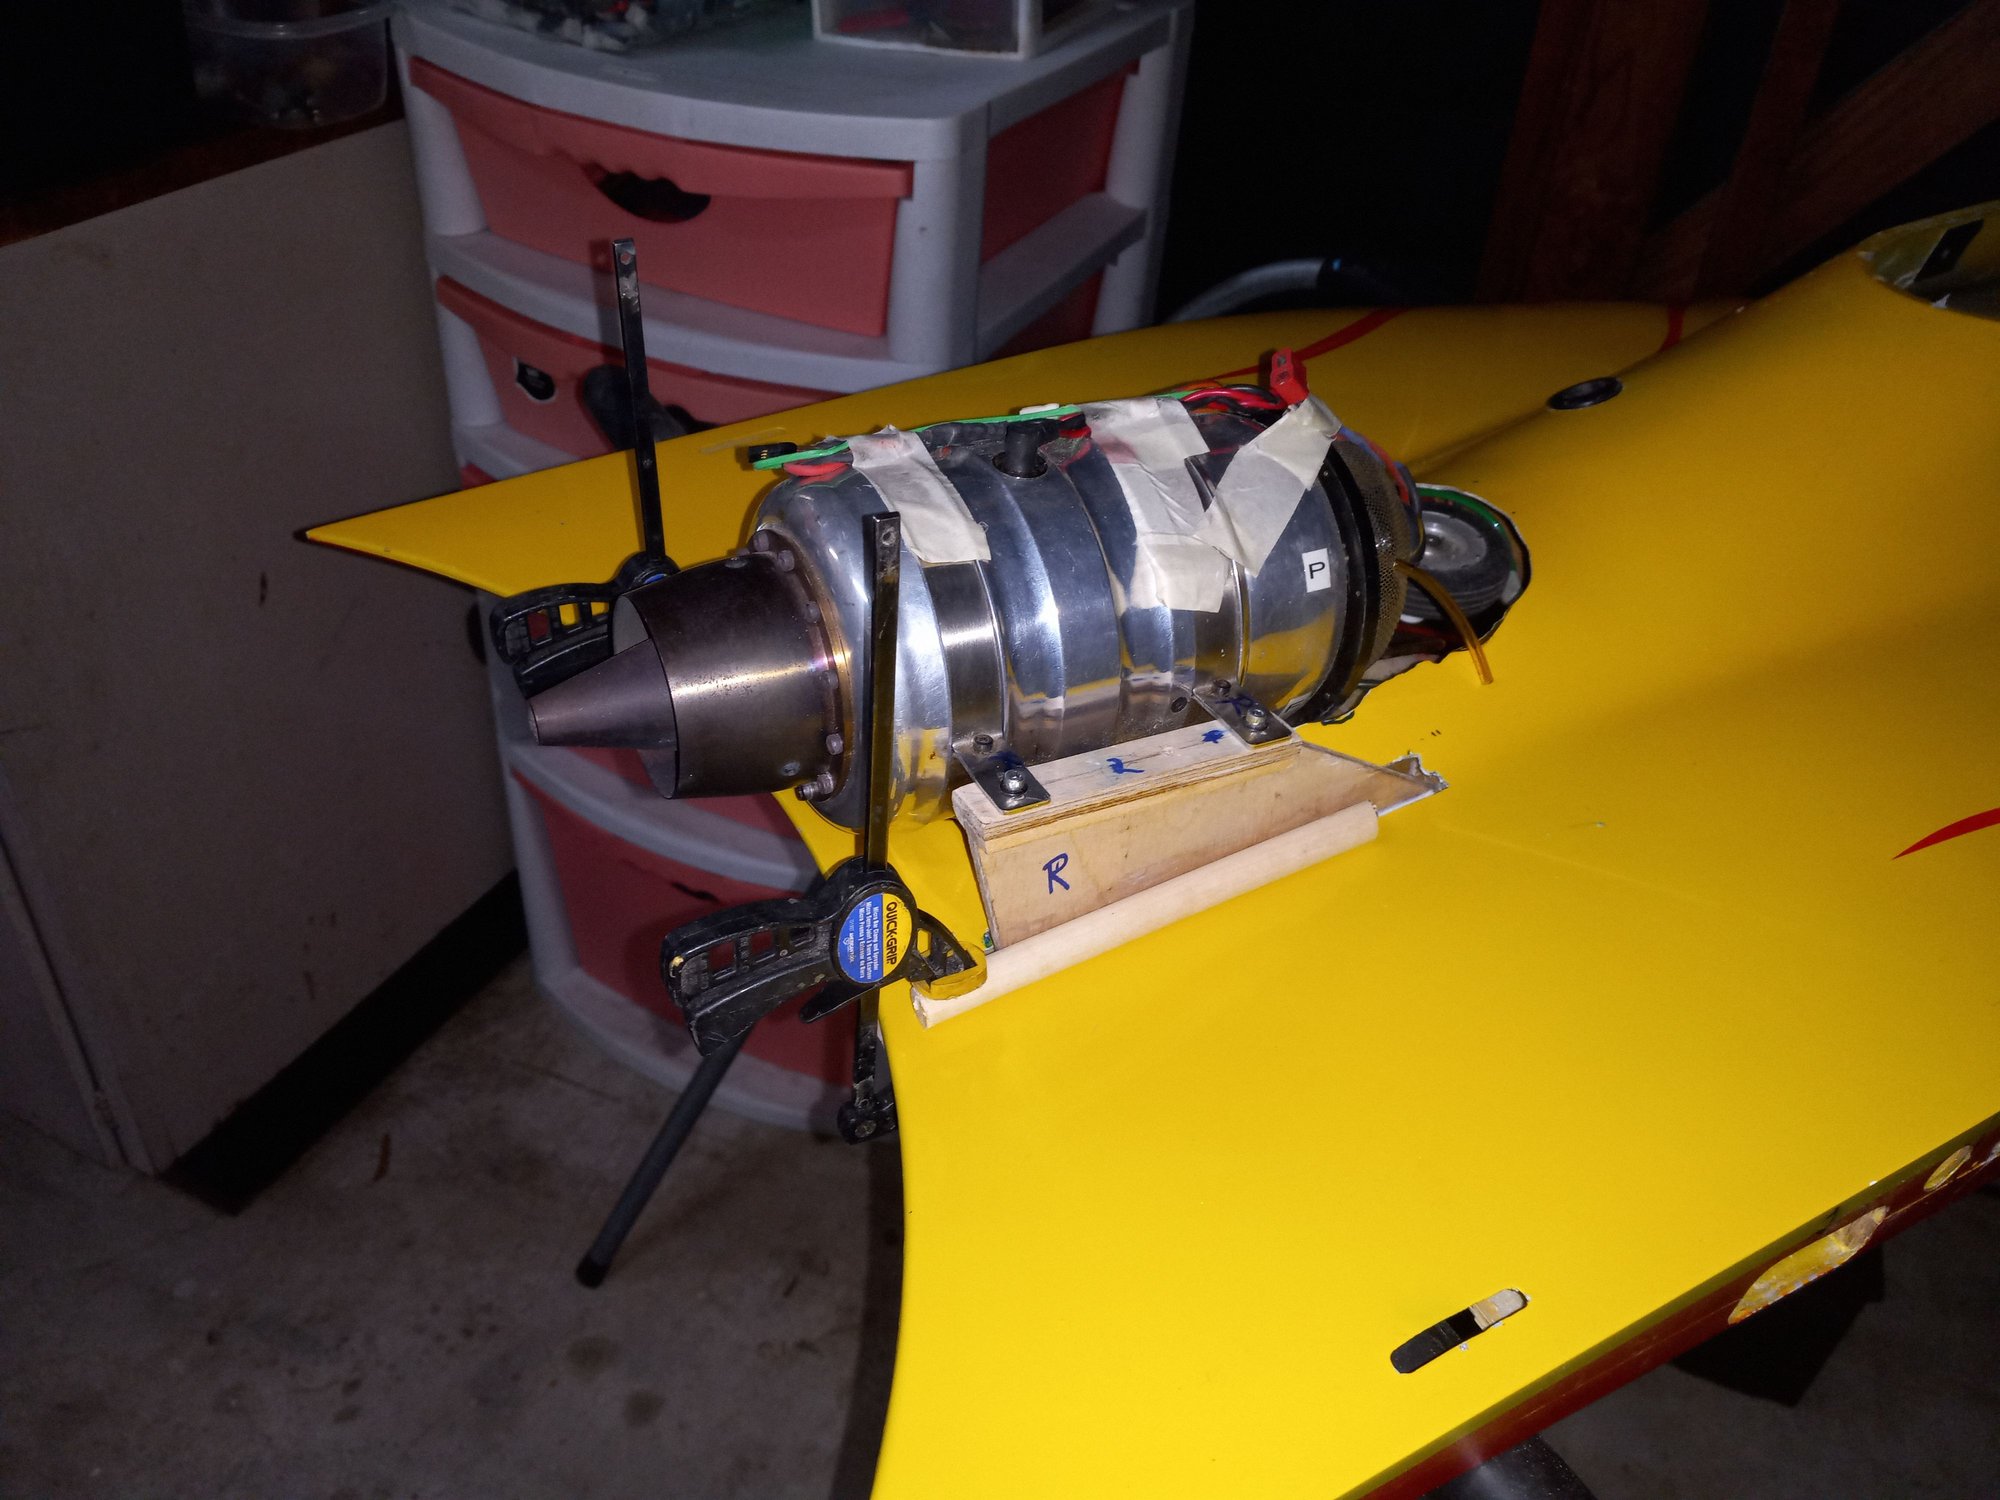
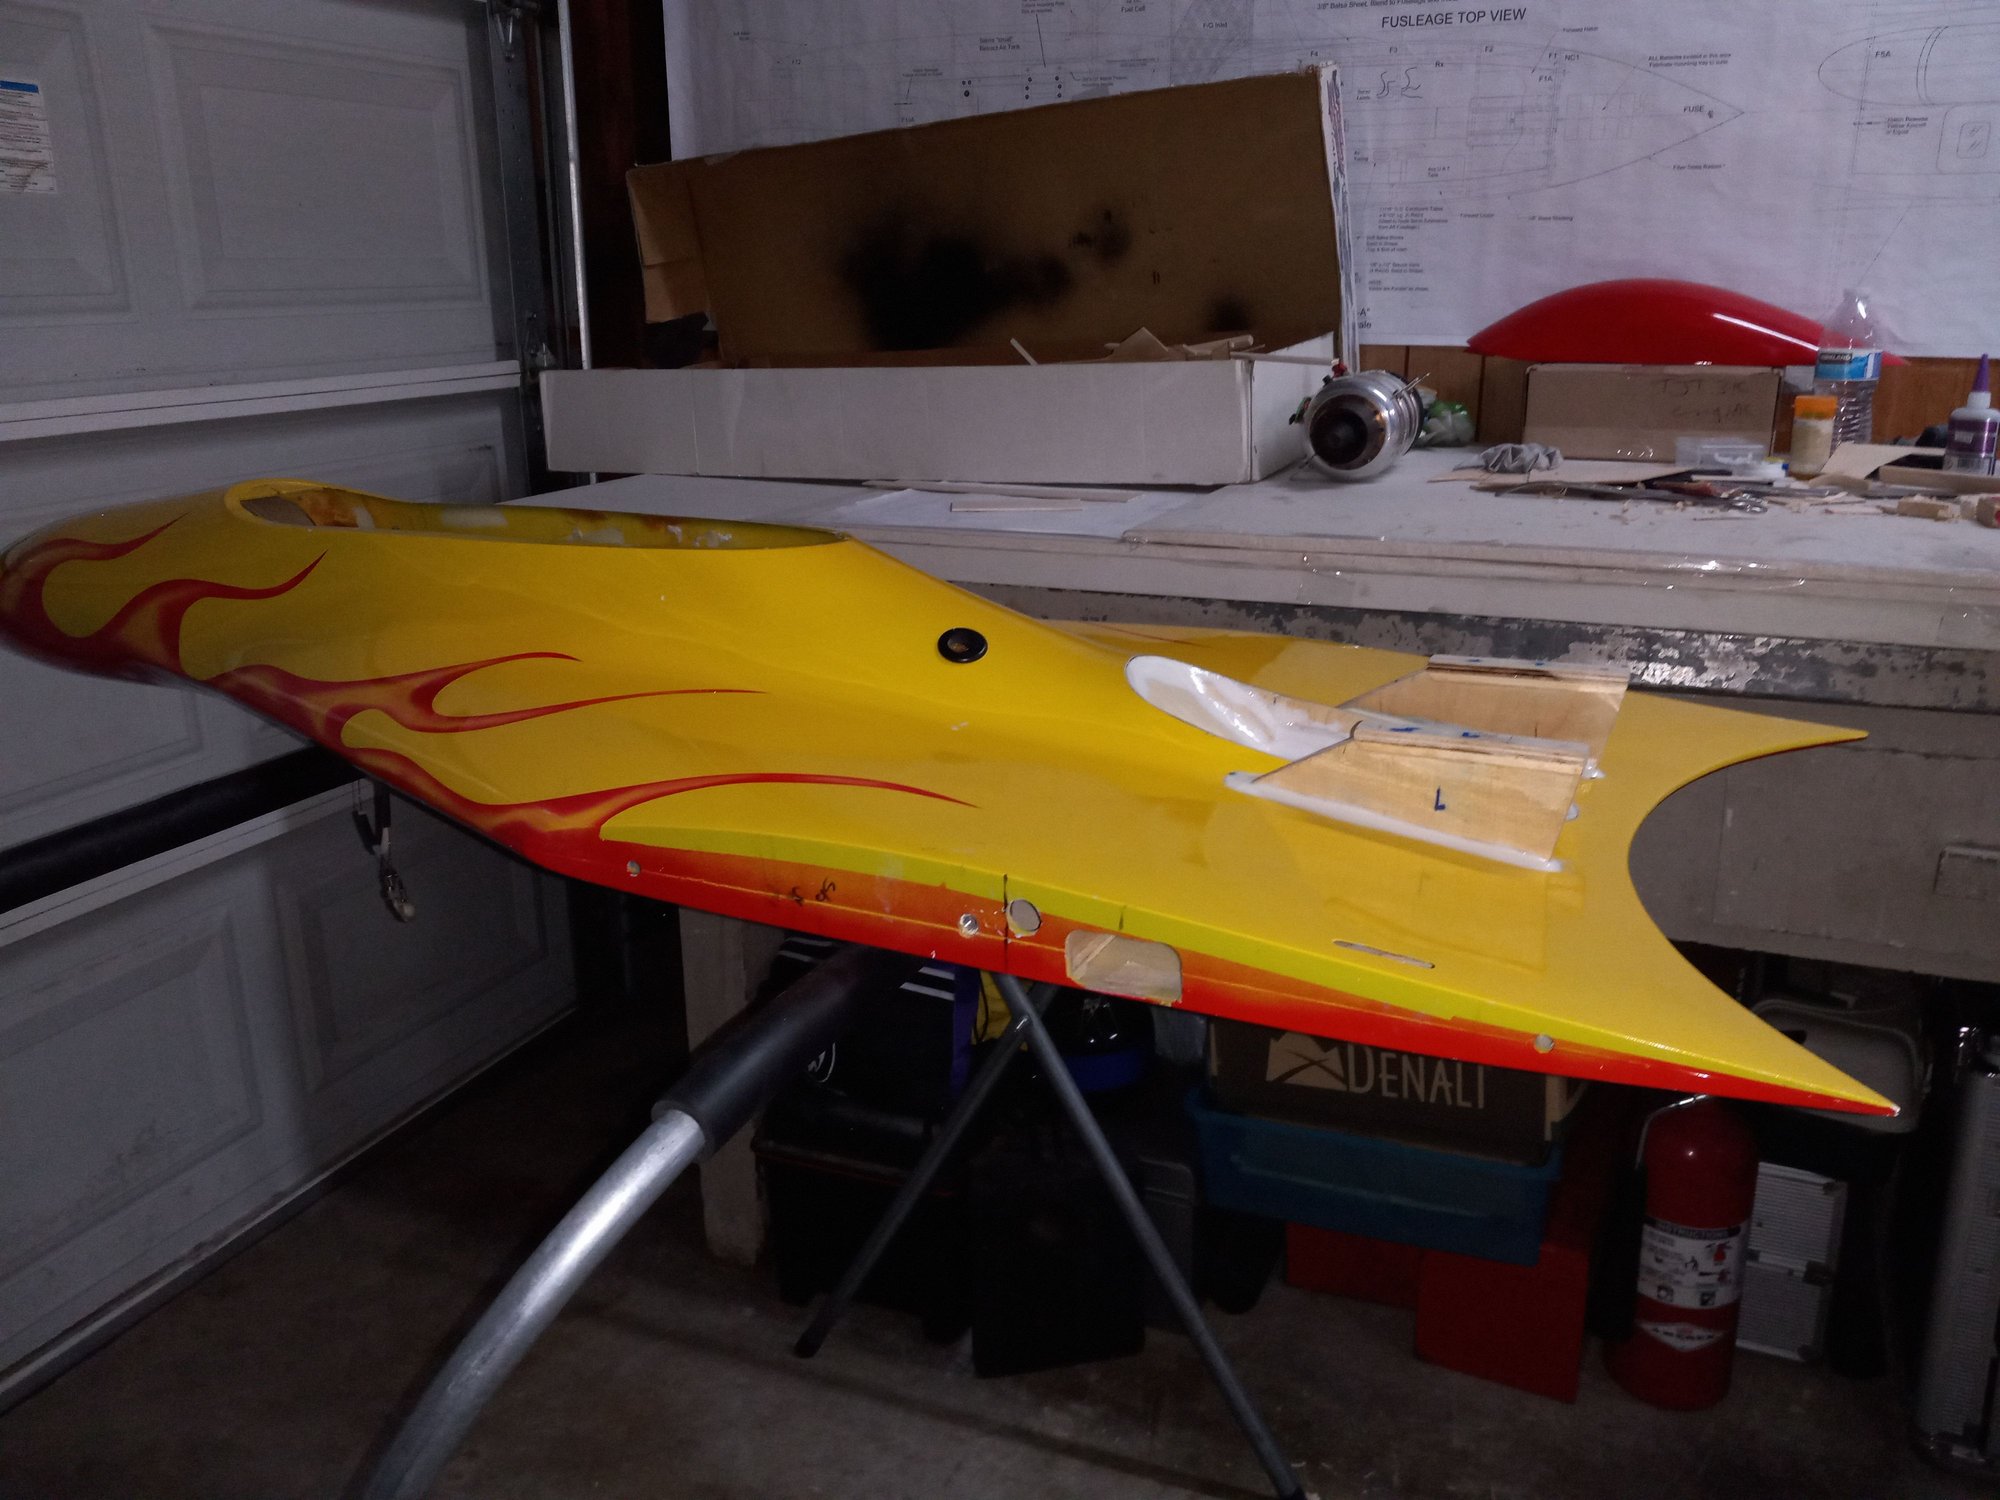
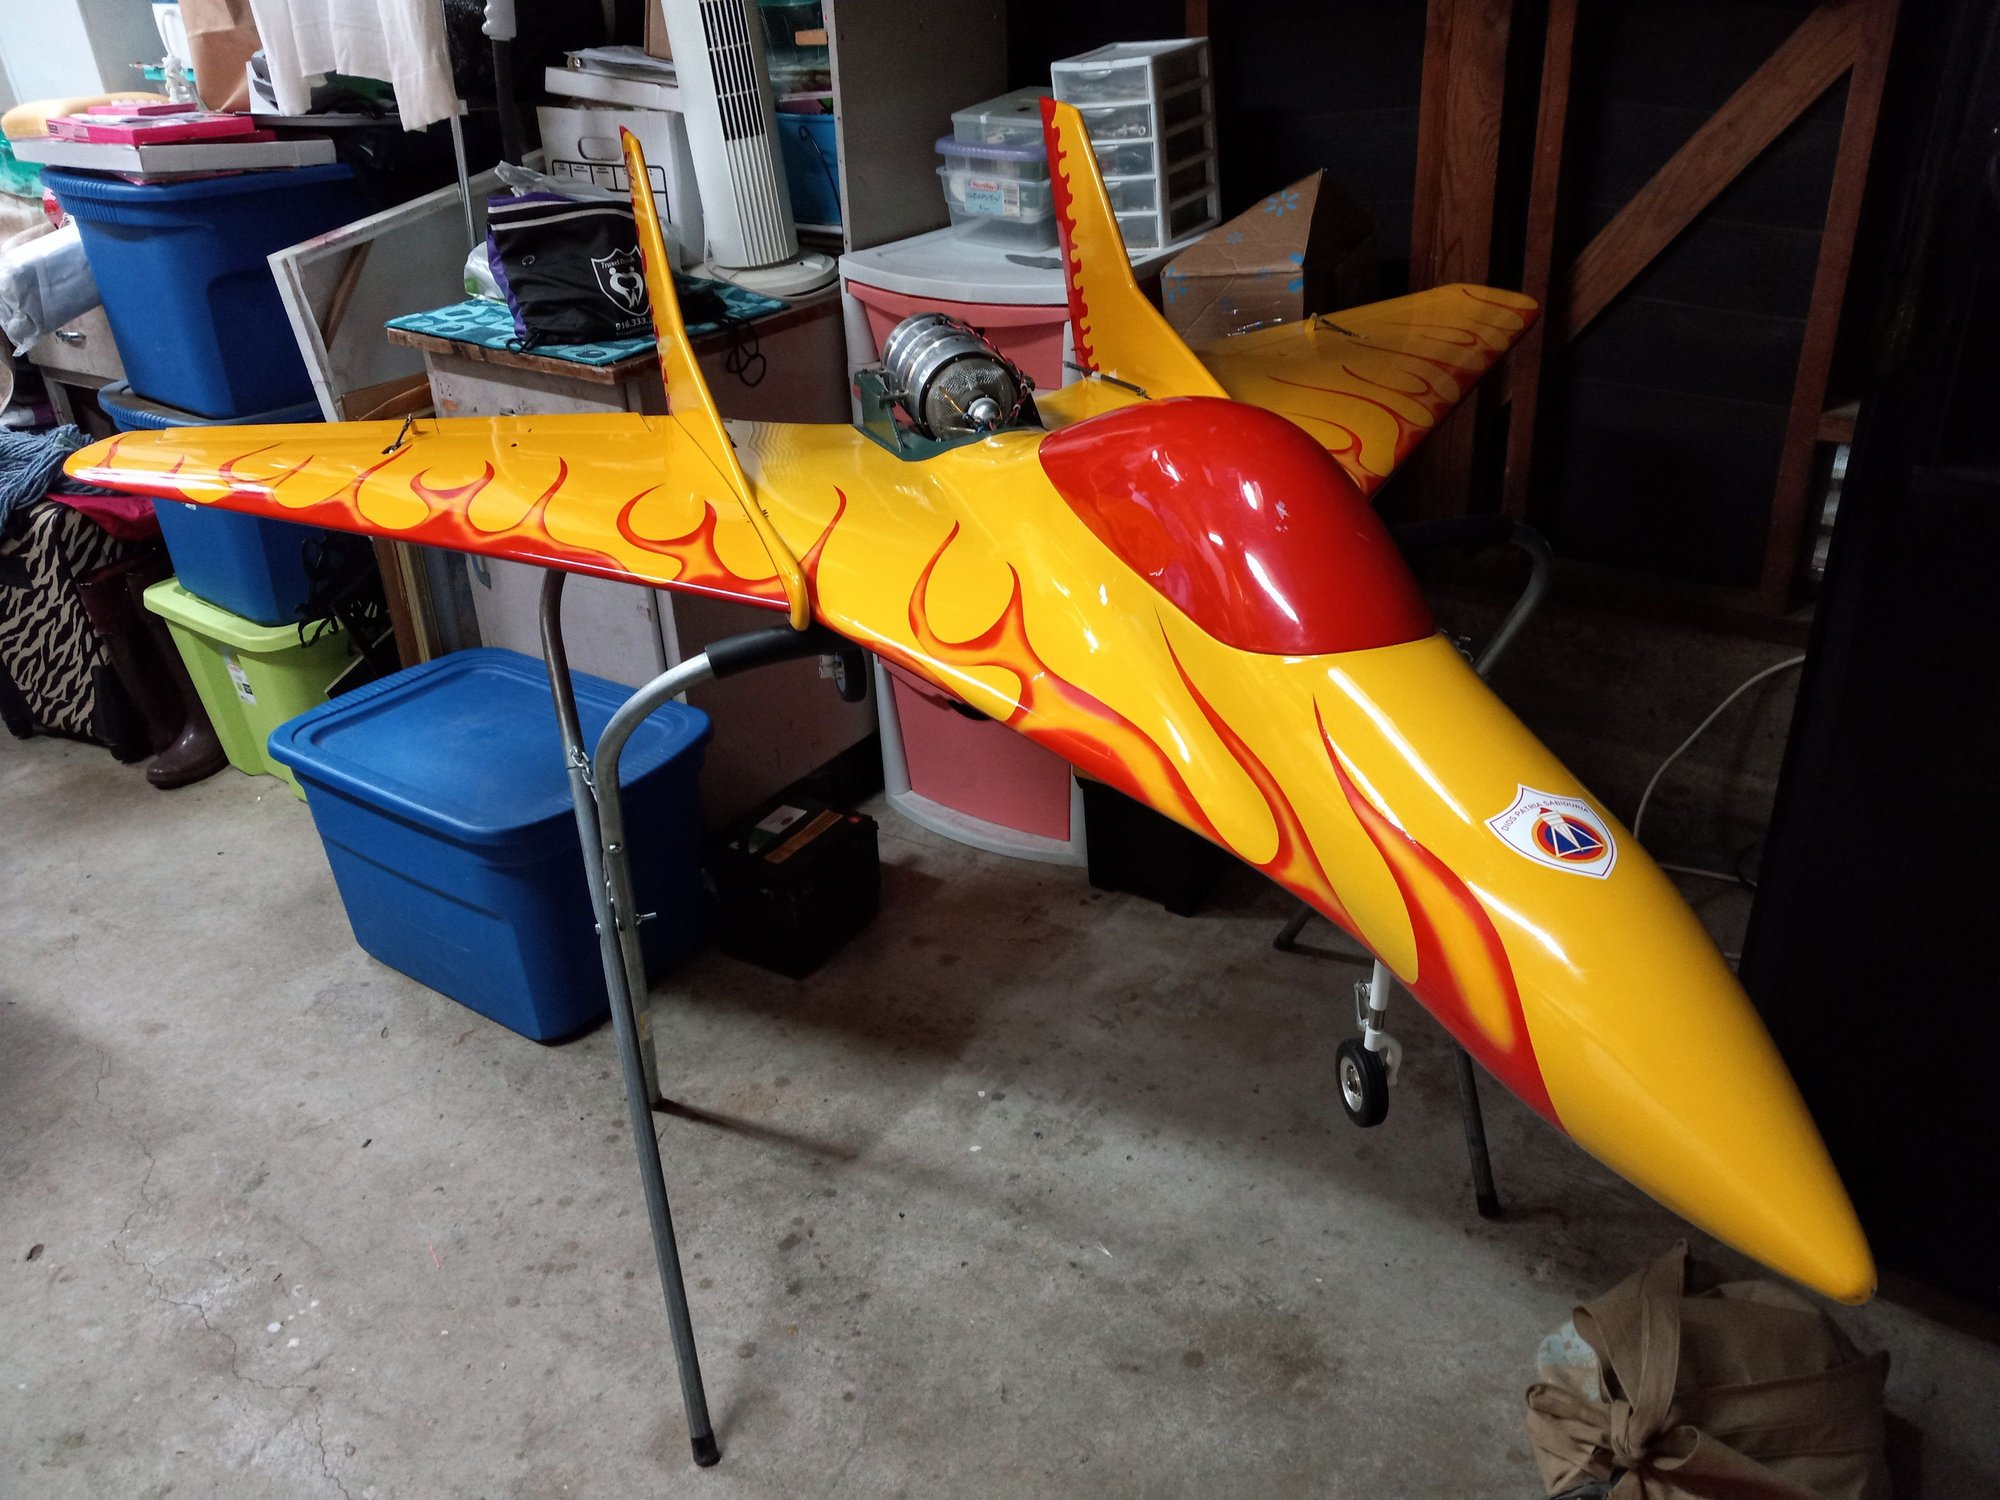
I'm going to build it on the engine first then adjust it and glue it on the Roo then cover the hole, I will be using my TJT3000 engine, it still have lots of life in it, it's heavy and produces 27 lbs of thrust, it was carrying like 2 lbs of lead before, right at the fuse's trealing adge.


This came about because others have done it, it was decided when on a go around at slow speed some 3 years ago, it took a while to climb, the engine was pushing the Roo forward and down, P80 then ( the engine had to be mounted on the pod with the end up in order for it to fly straight on level pass ) and the wings took time to develop the sufficient lift to climb, heated it, it was like climbing via steps, stopped flying it because of that and here we are now.
I'm going to build it on the engine first then adjust it and glue it on the Roo then cover the hole, I will be using my TJT3000 engine, it still have lots of life in it, it's heavy and produces 27 lbs of thrust, it was carrying like 2 lbs of lead before, right at the fuse's trealing adge.
Last edited by CARS II; 04-14-2022 at 07:53 PM.


The following users liked this post:
uncleTom (04-15-2022)


 04-23-2022 | 06:12 PM
#9
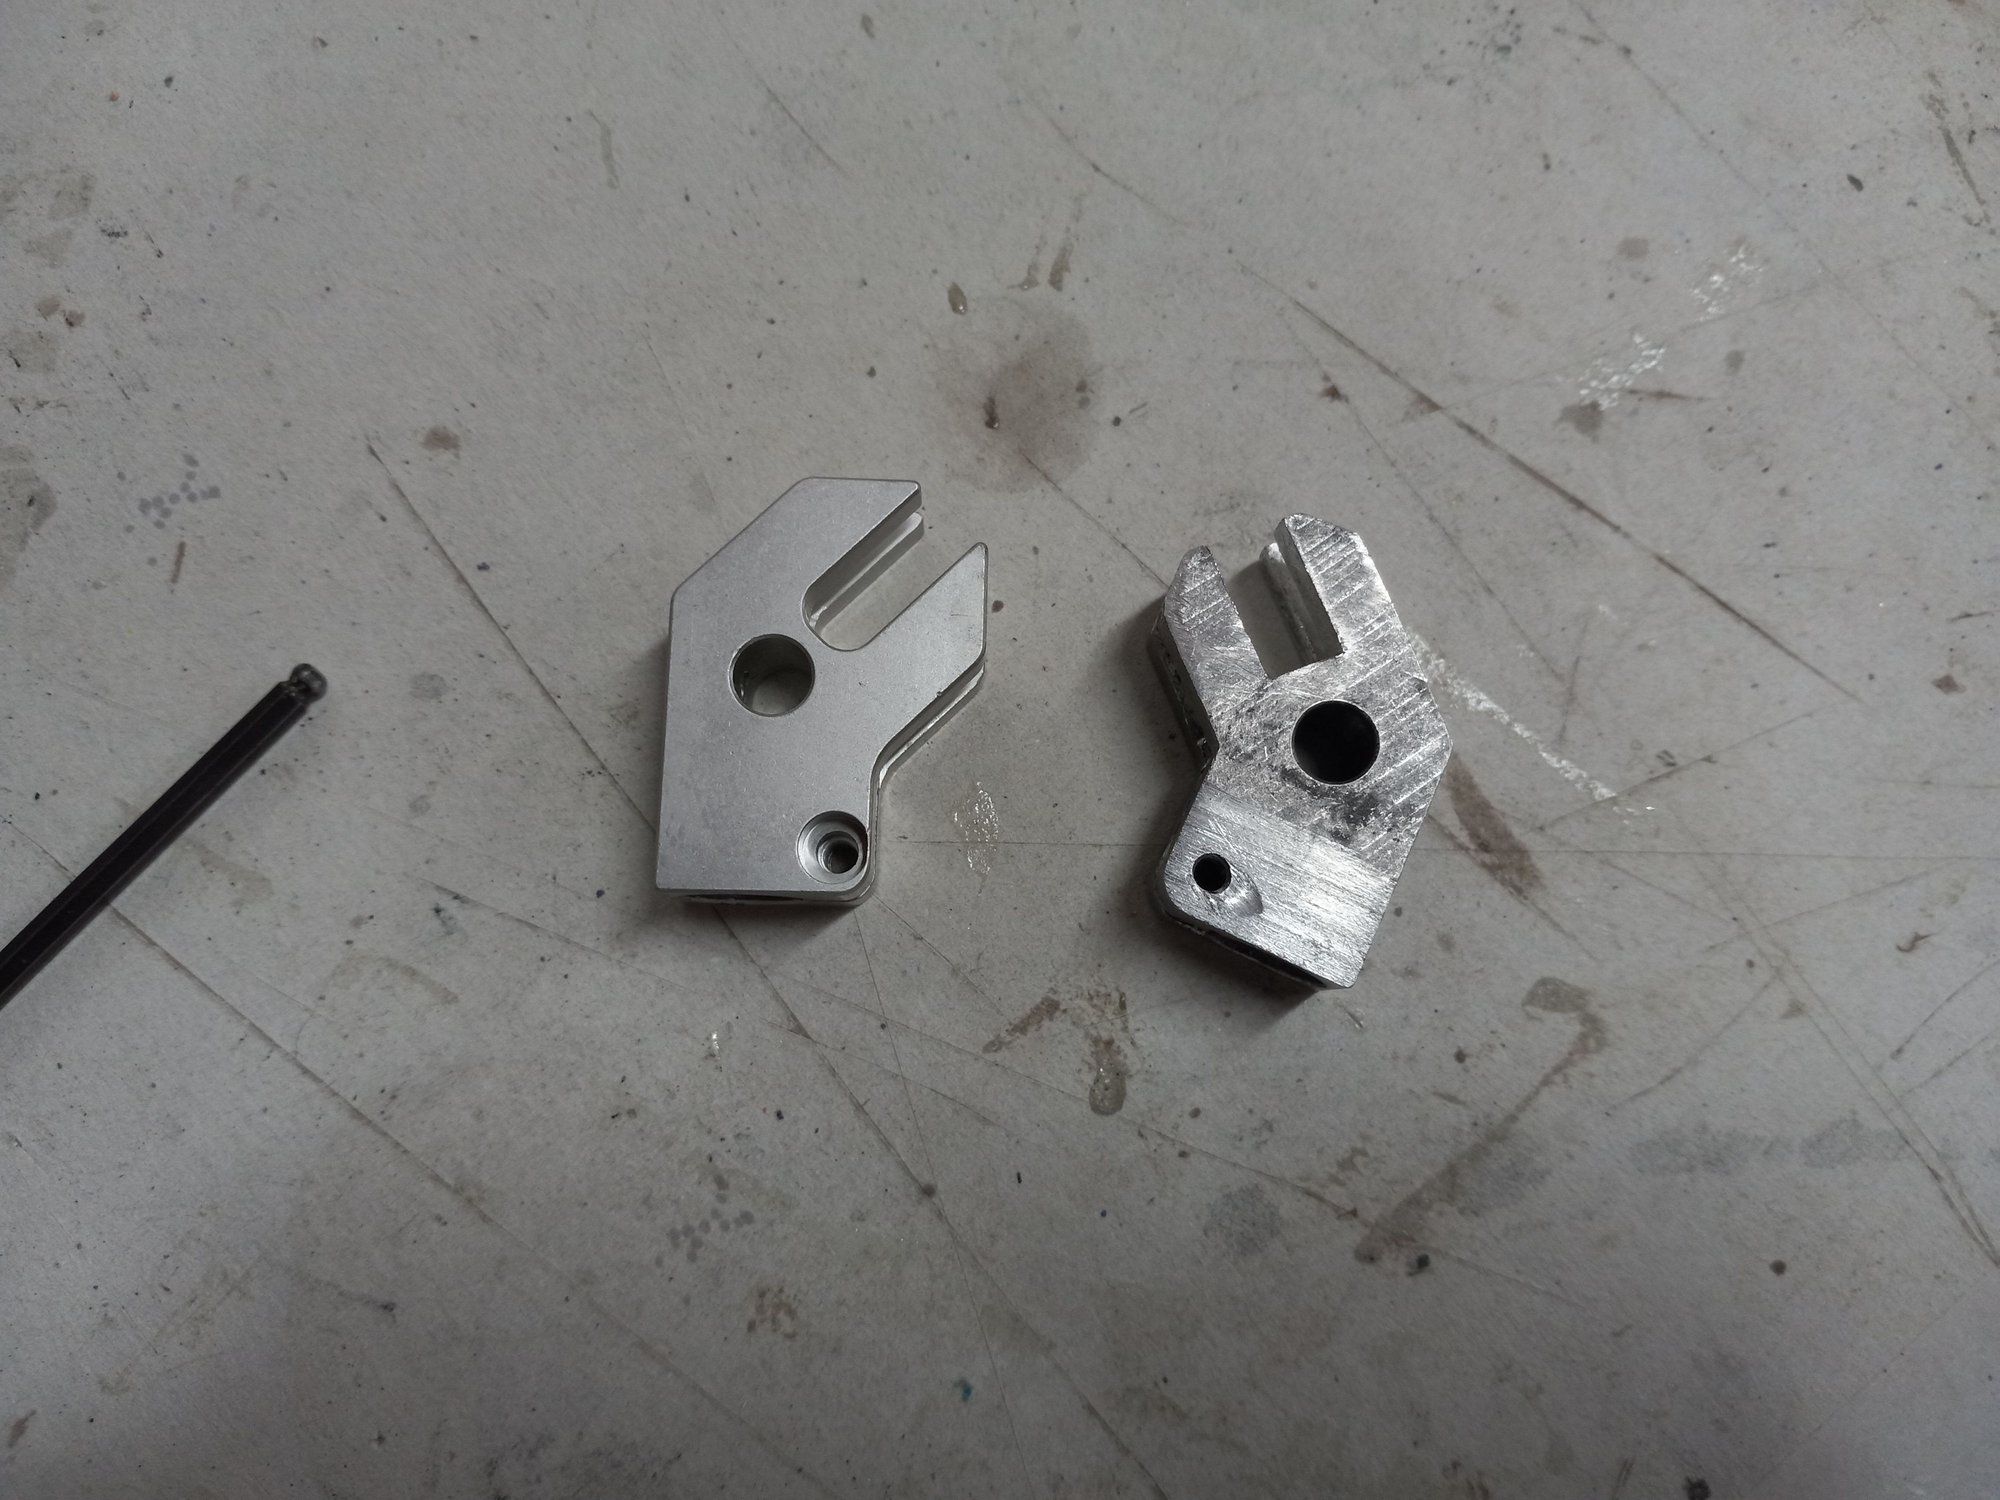
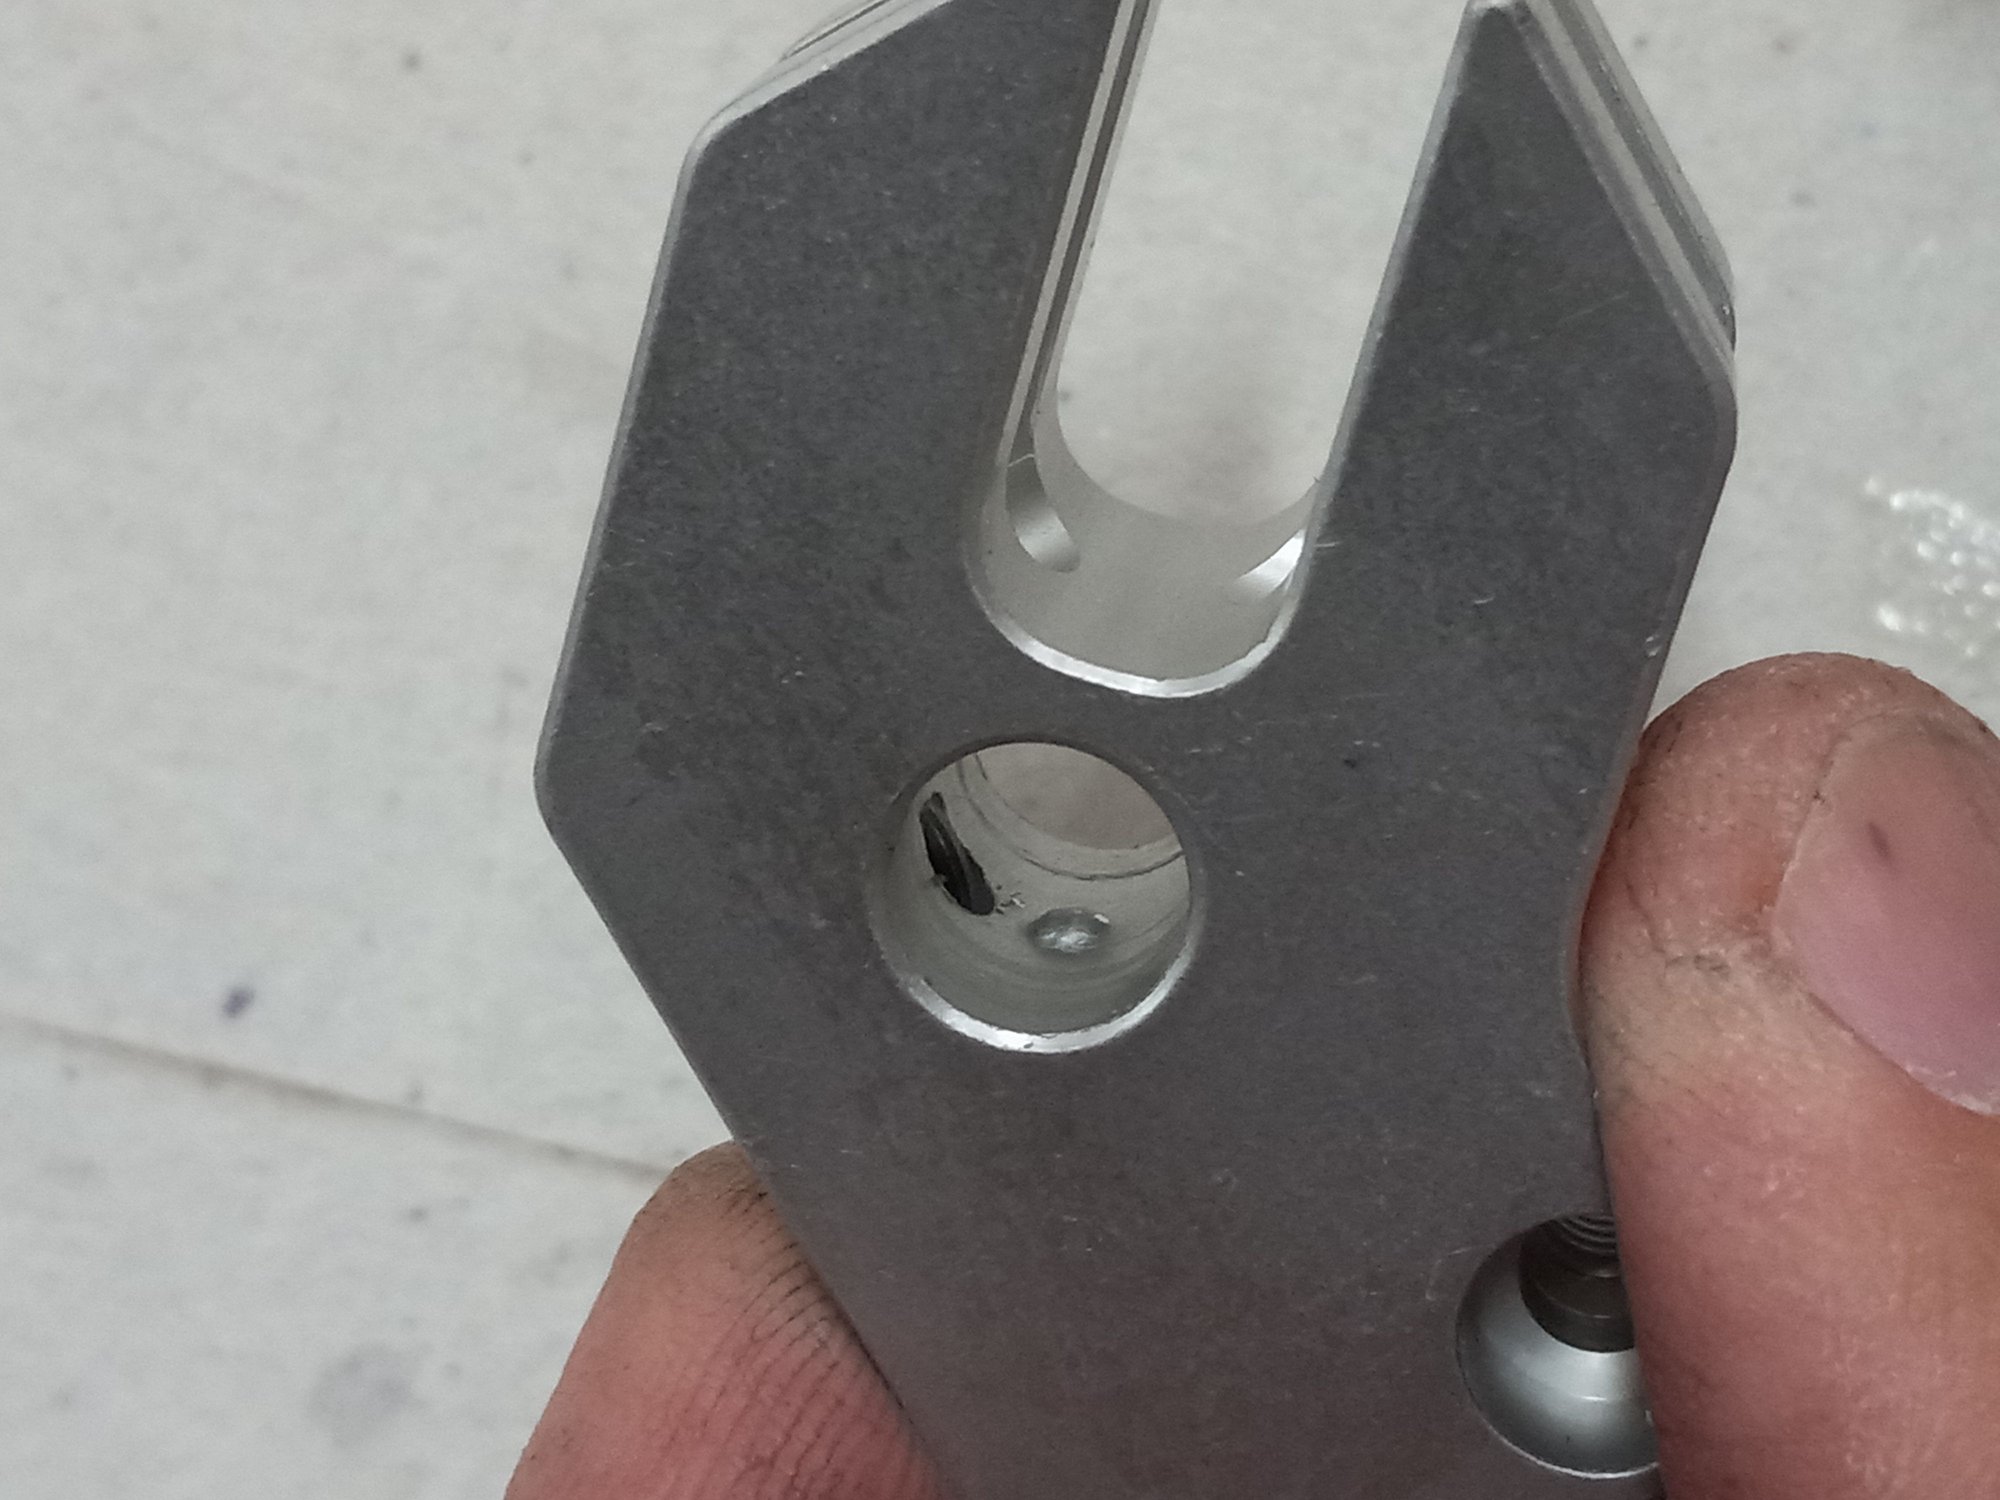
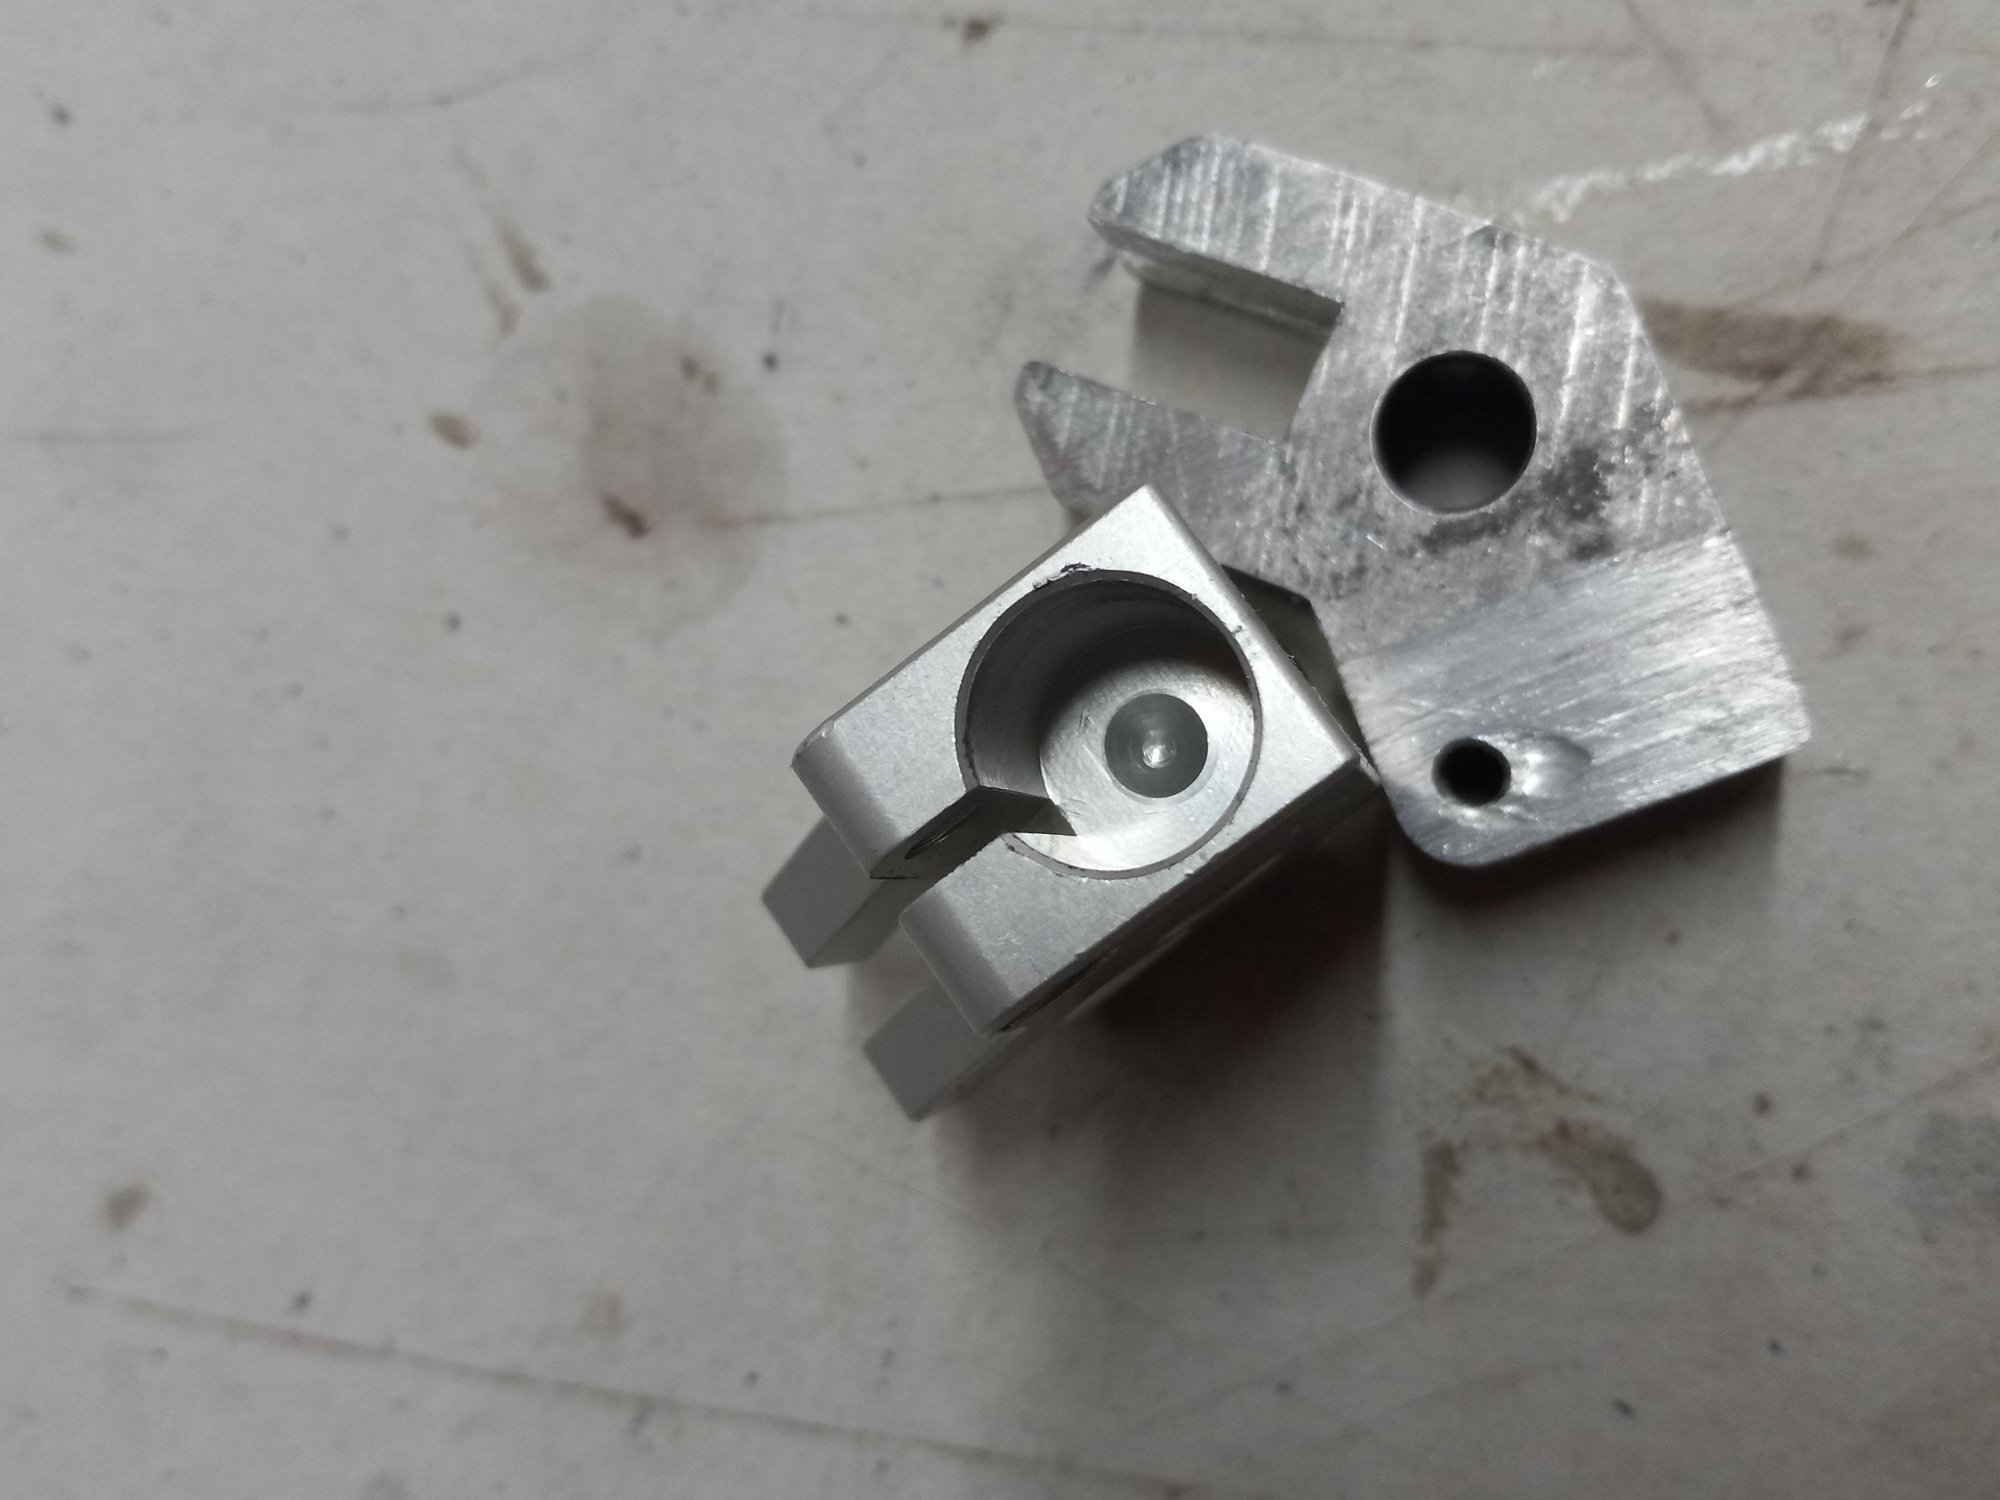
I got me a pair of Prolink trunion forks to replace the loose Robart ones ( I did a bad landing with a lot of side loads when I flew it years ago ) and the difference is there, much stronger forks for sure, so, prolinks for me for future projects.
And on the other hand, the prolinks had a bump inside the pin hole, I had to cut it and honed it to be able to fit the pin, I will send Darrel and DW a note about that small detail.
Side note: the finger is doing well.
Tks.
Last edited by CARS II; 04-23-2022 at 10:12 PM.
04-23-2022 | 10:02 PM
#10

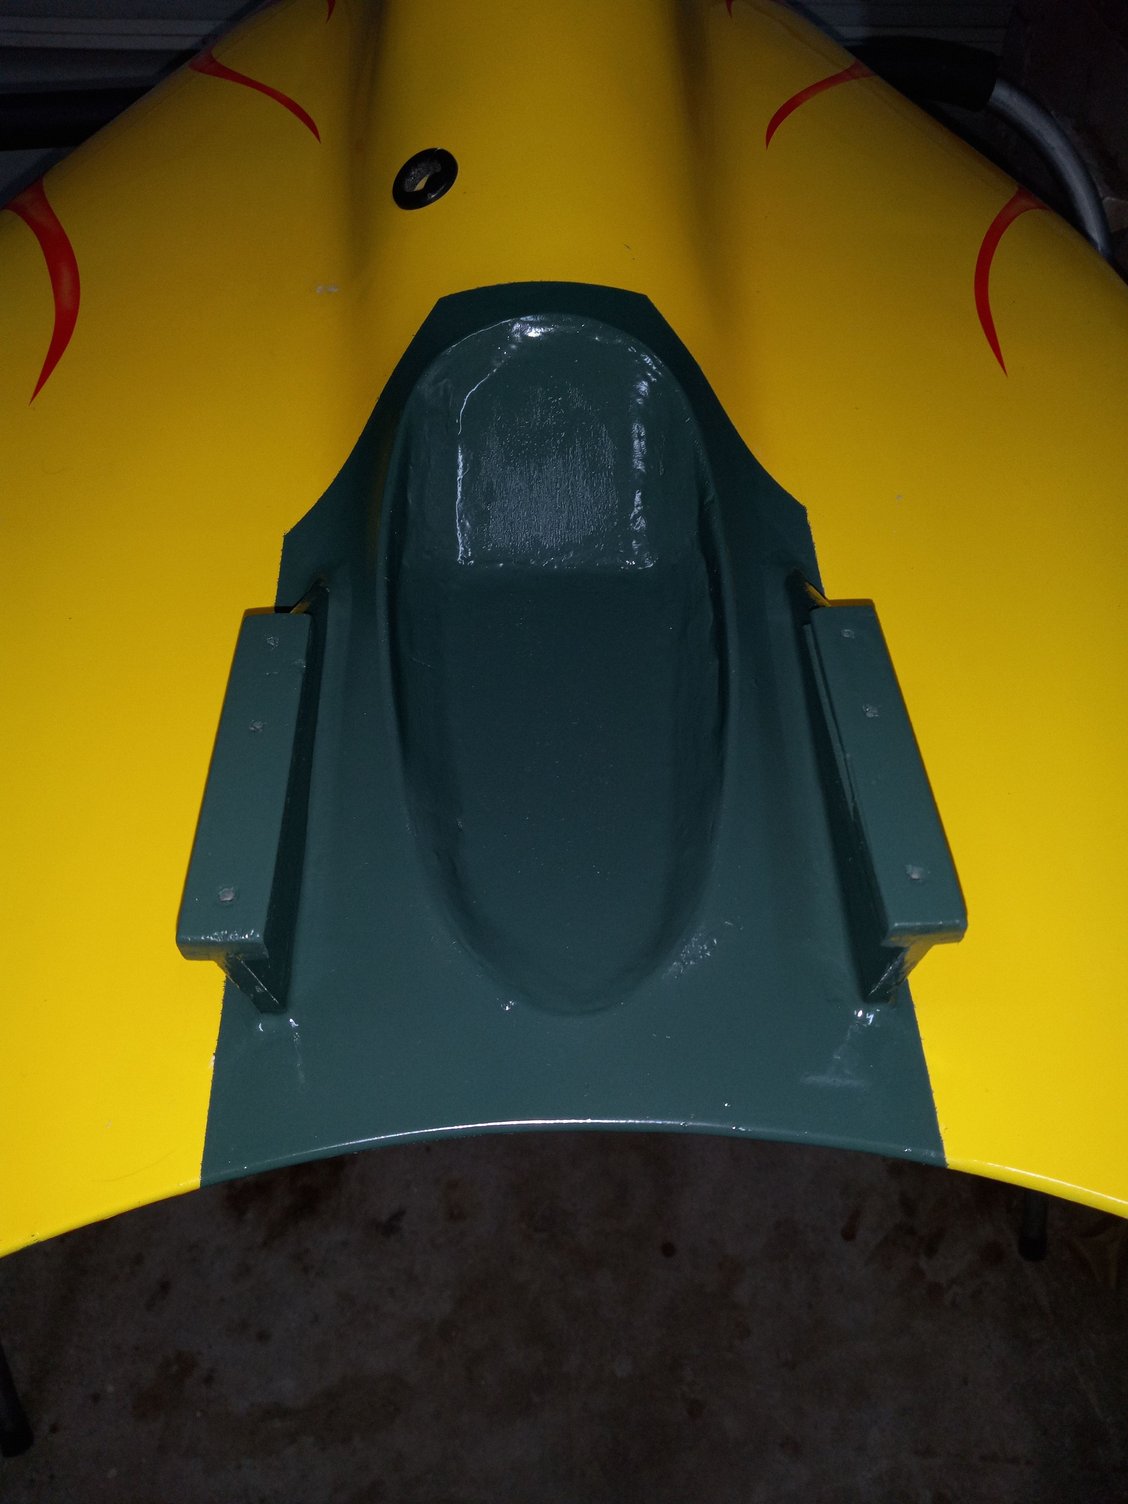

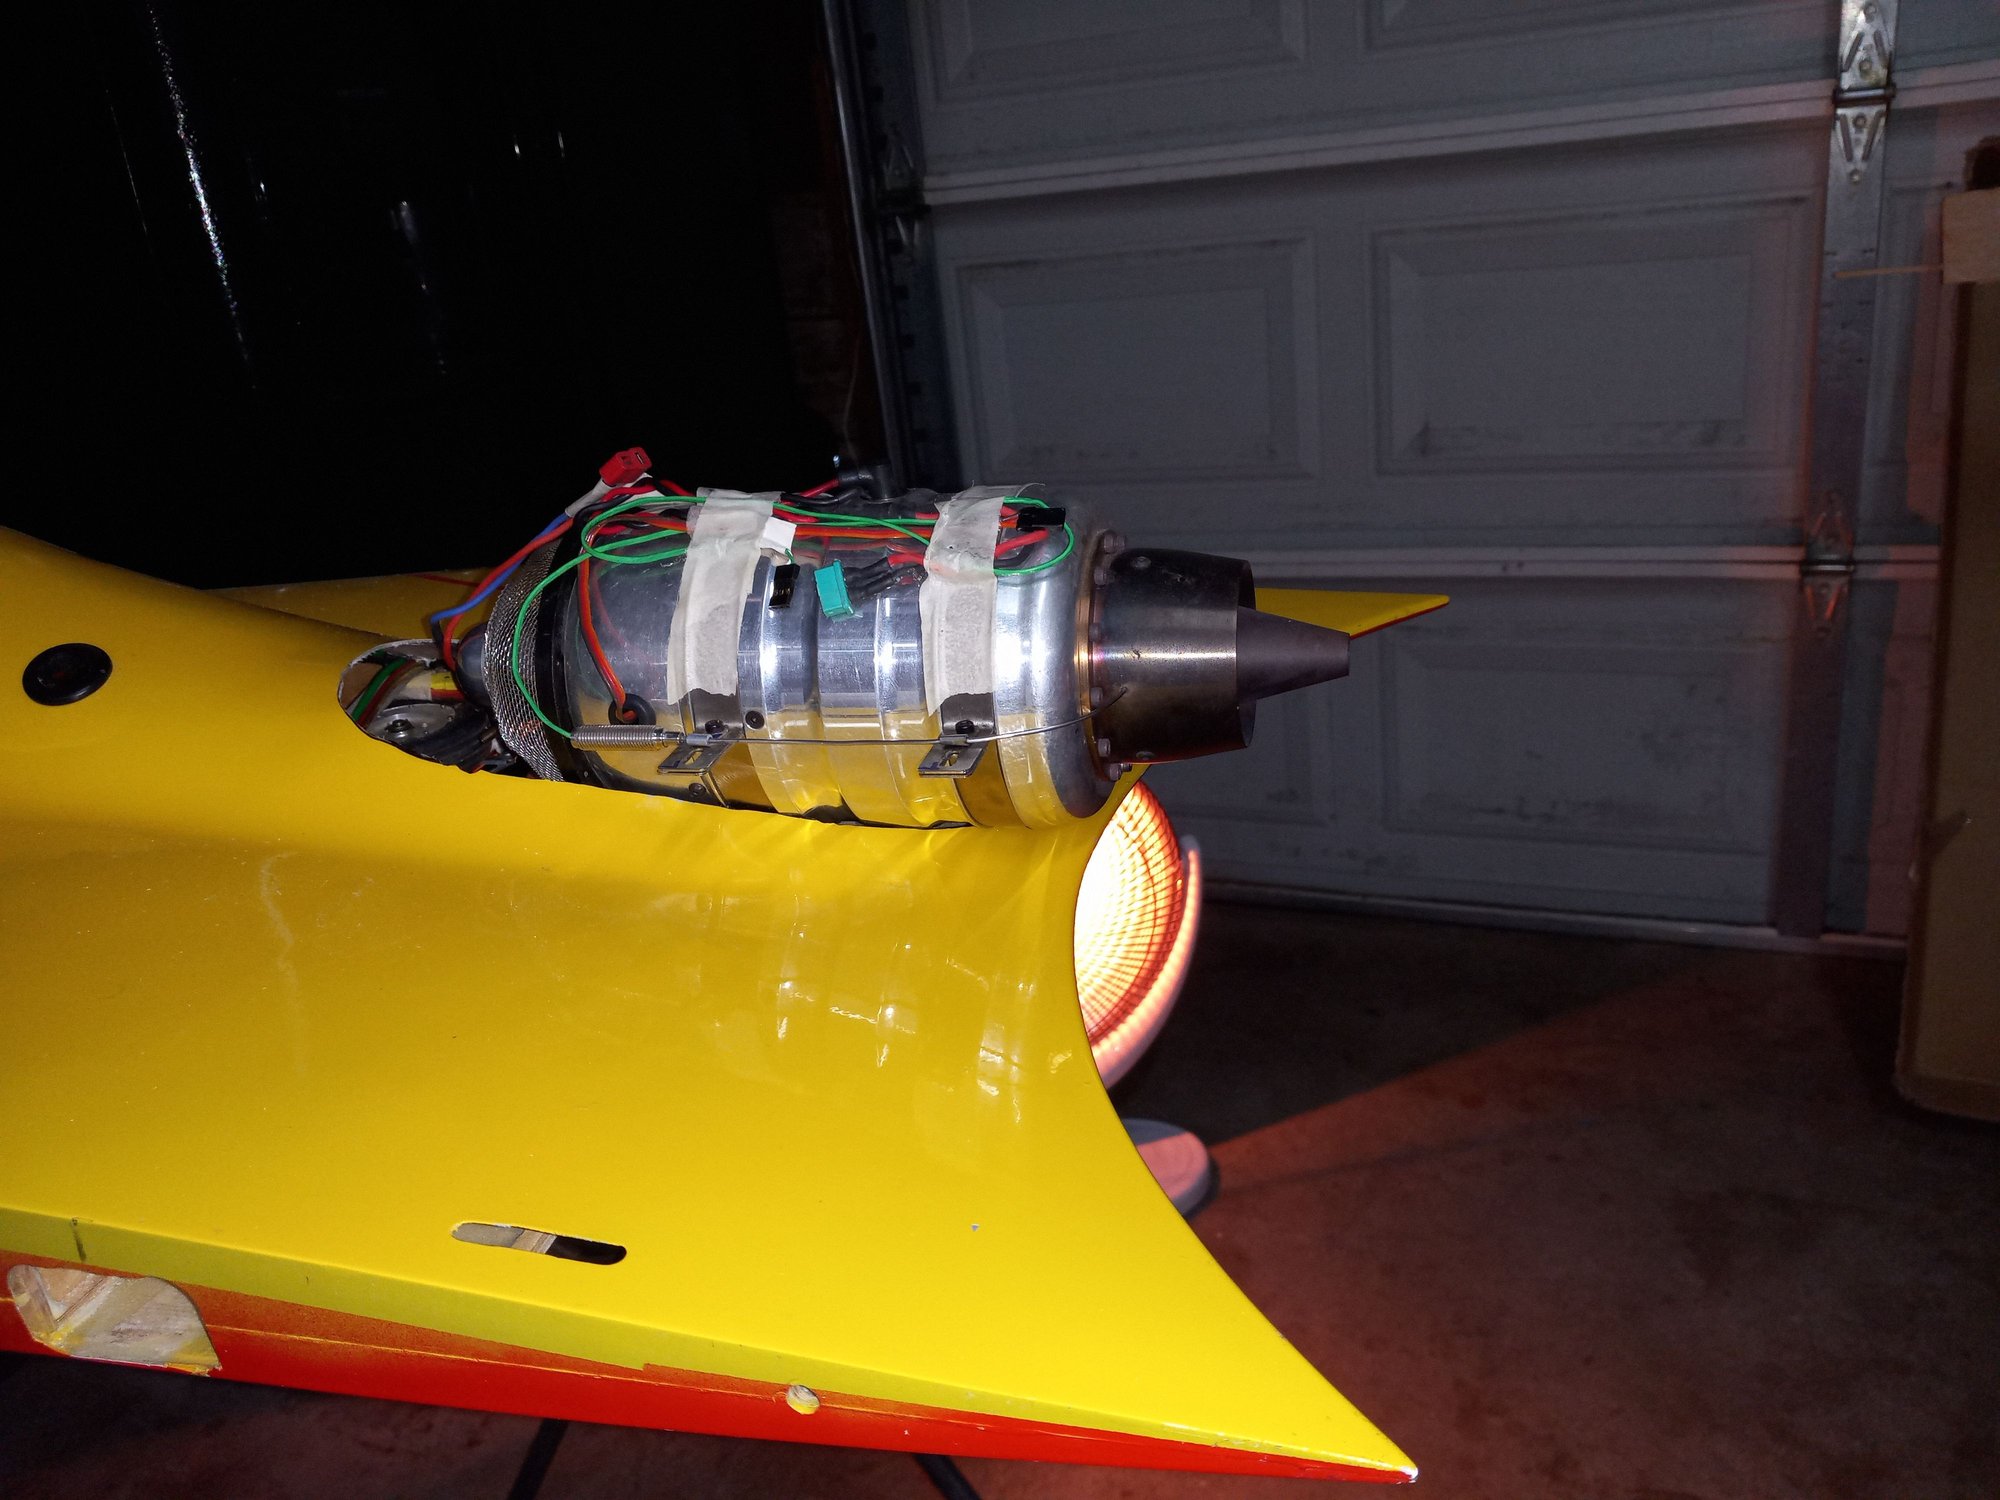
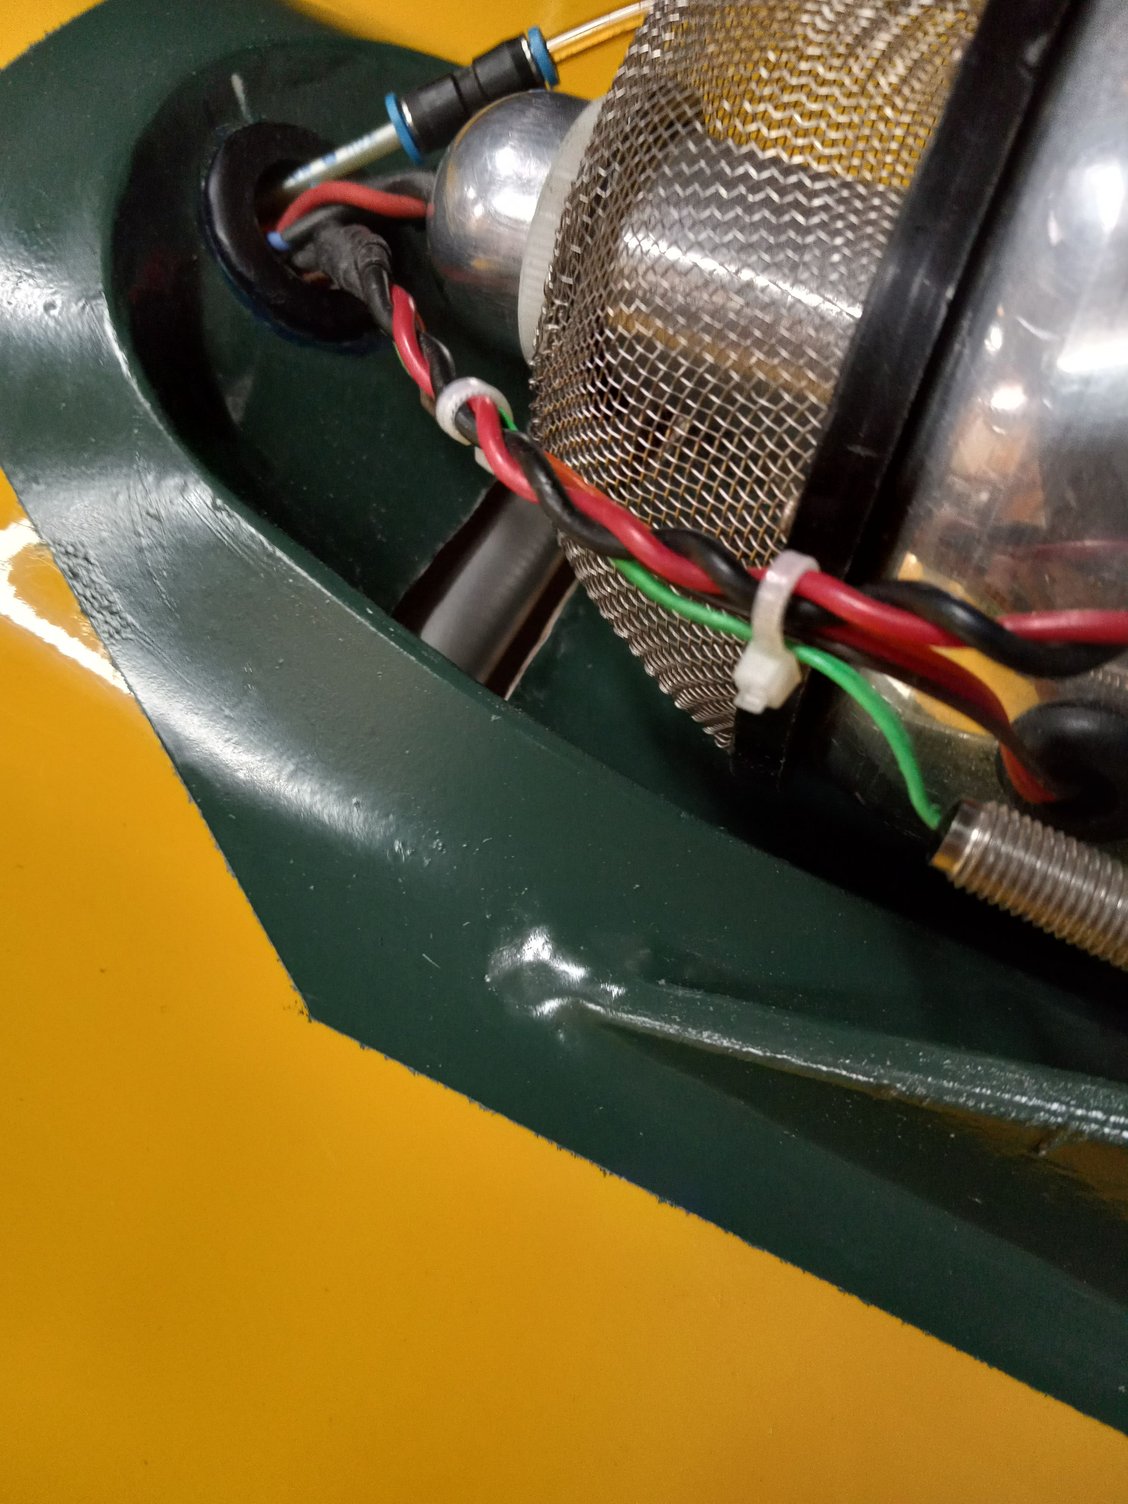
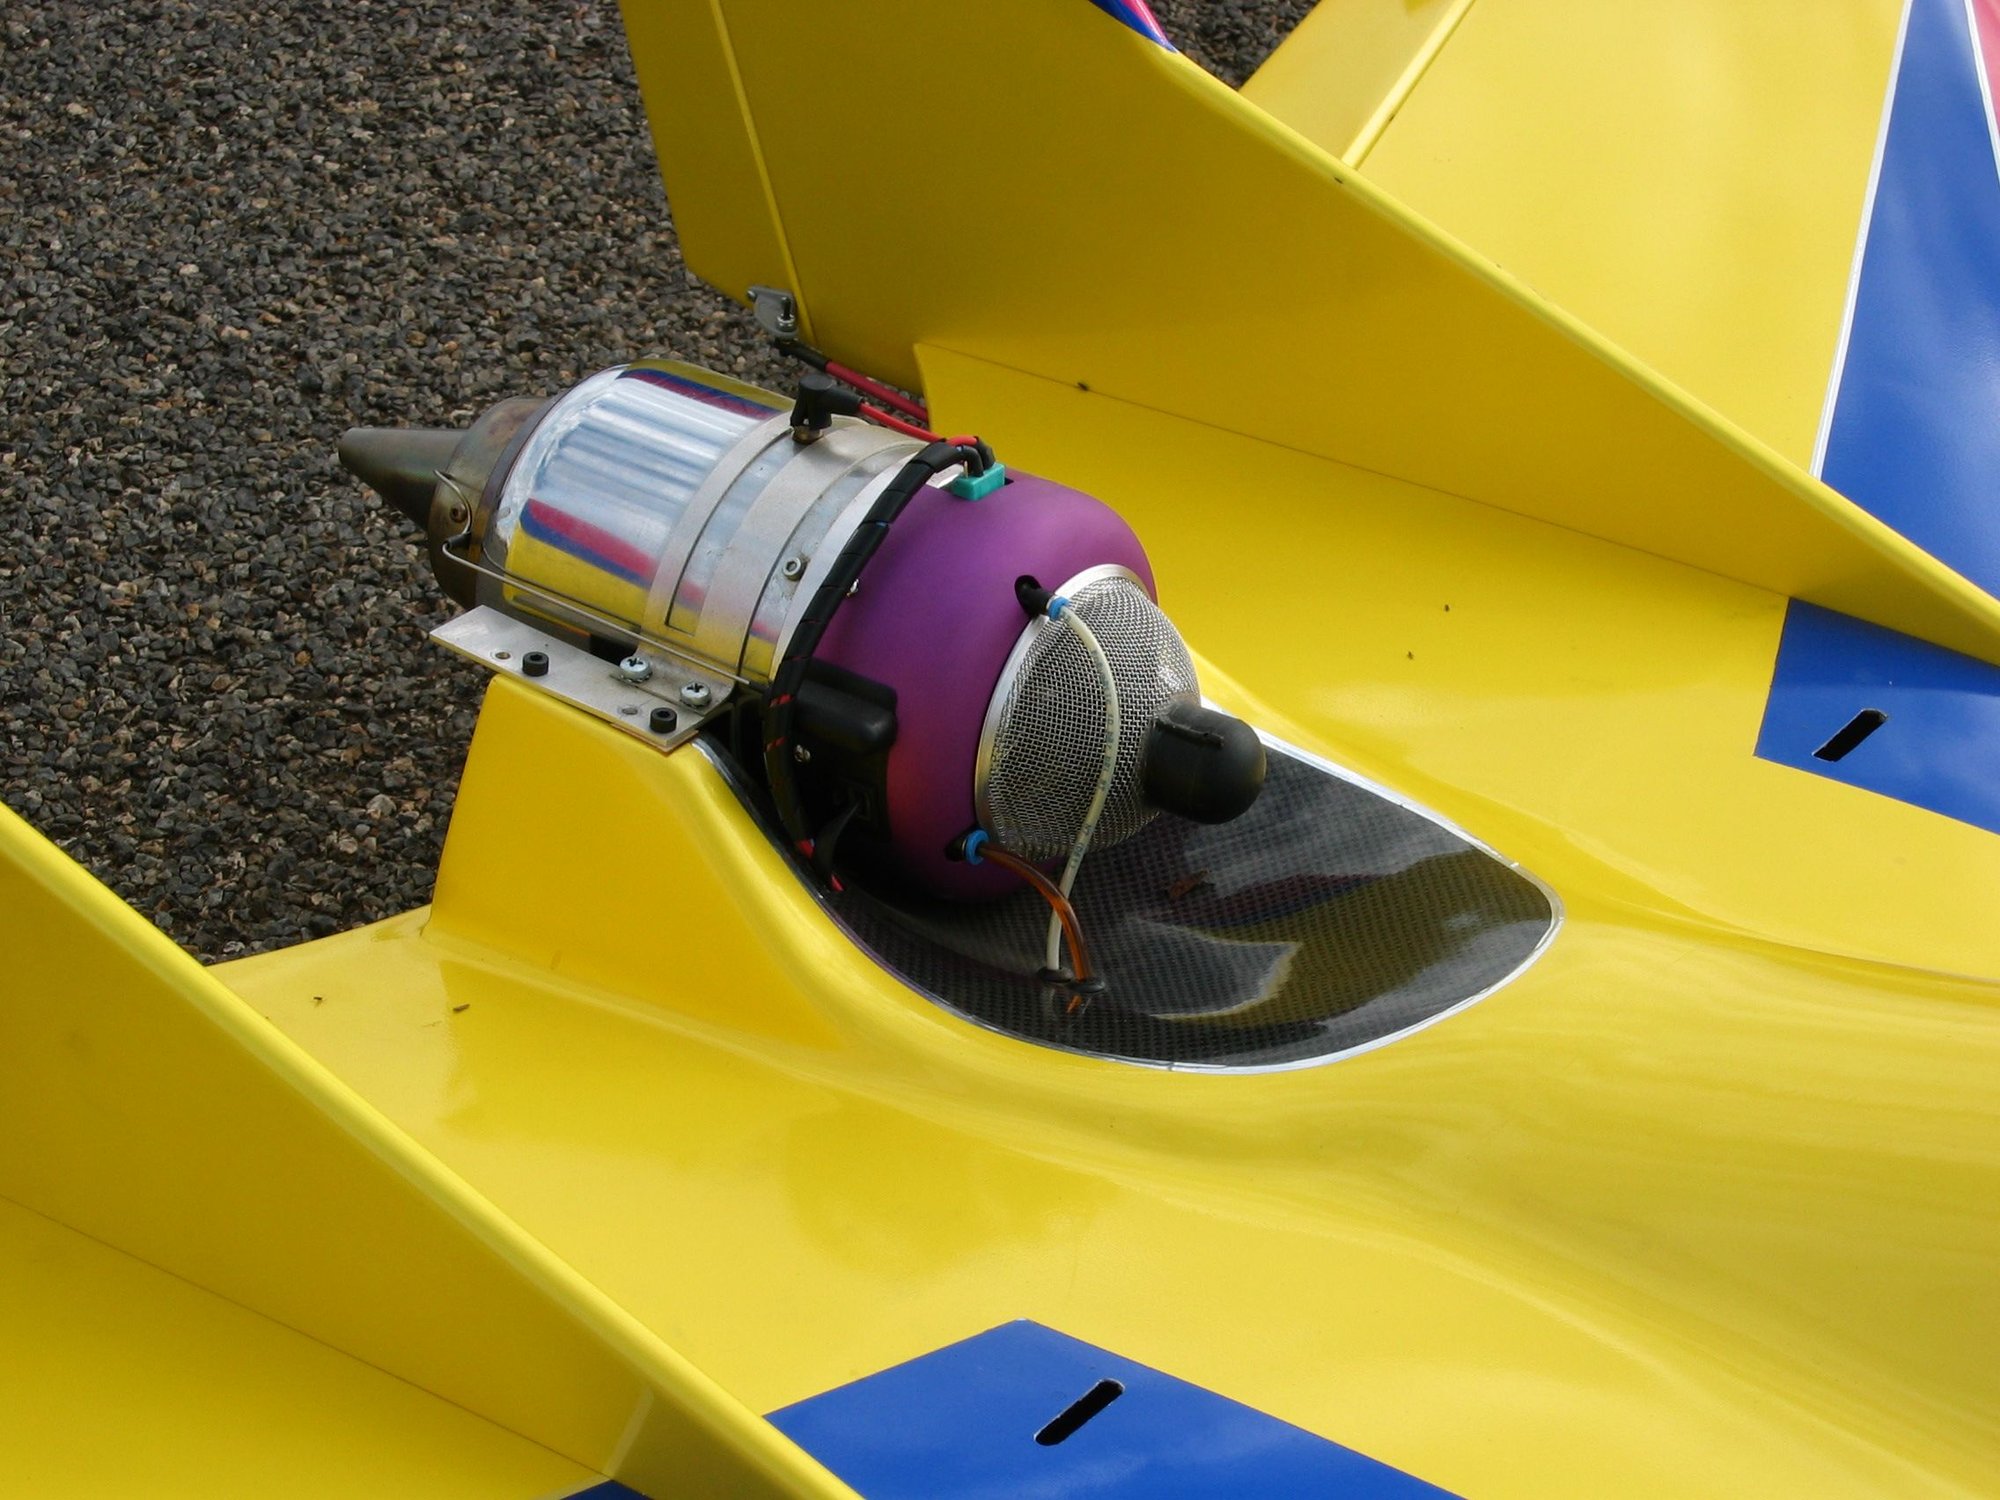
And the engine mount is done now, my first Roo also had a green spot on top that I added after I got it, I may extend this green color to the front after I've flown it a few times.
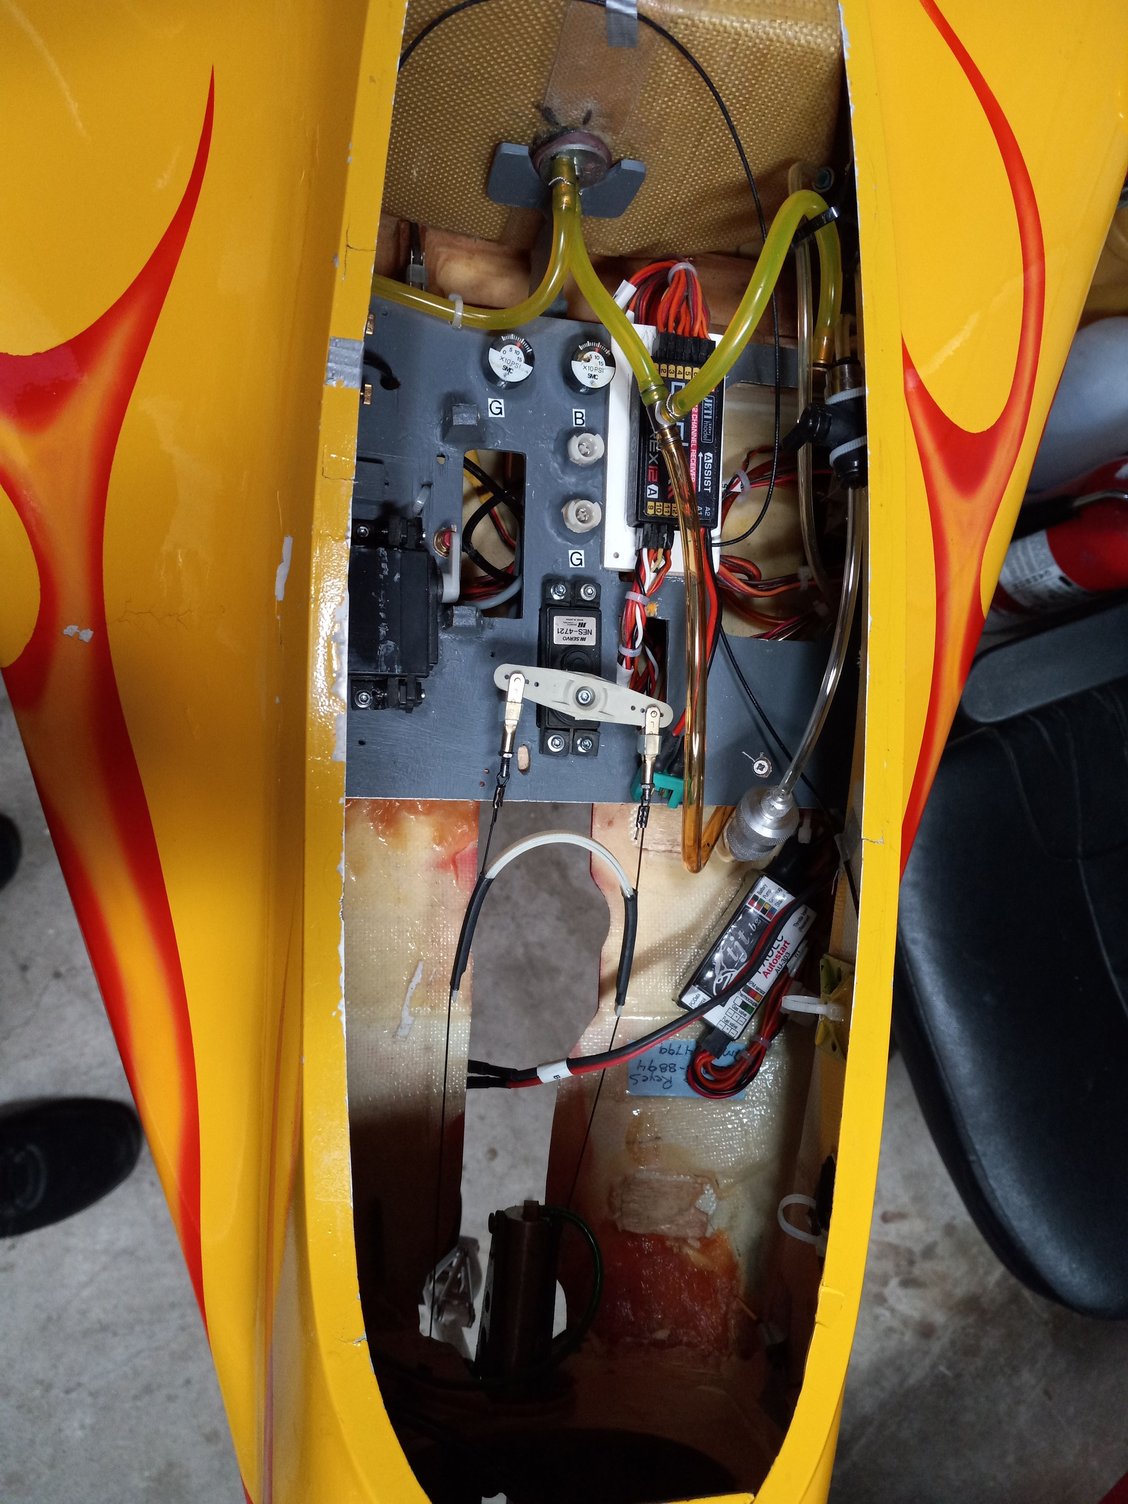
Next is to mount the engine and reinstall the fuel tank, the components tray with a new receiver, batts and UAT.
After that, I will be adding one more servo per wing.
Last edited by CARS II; 04-23-2022 at 10:15 PM.


 04-25-2022 | 08:13 PM
#14

Two things.
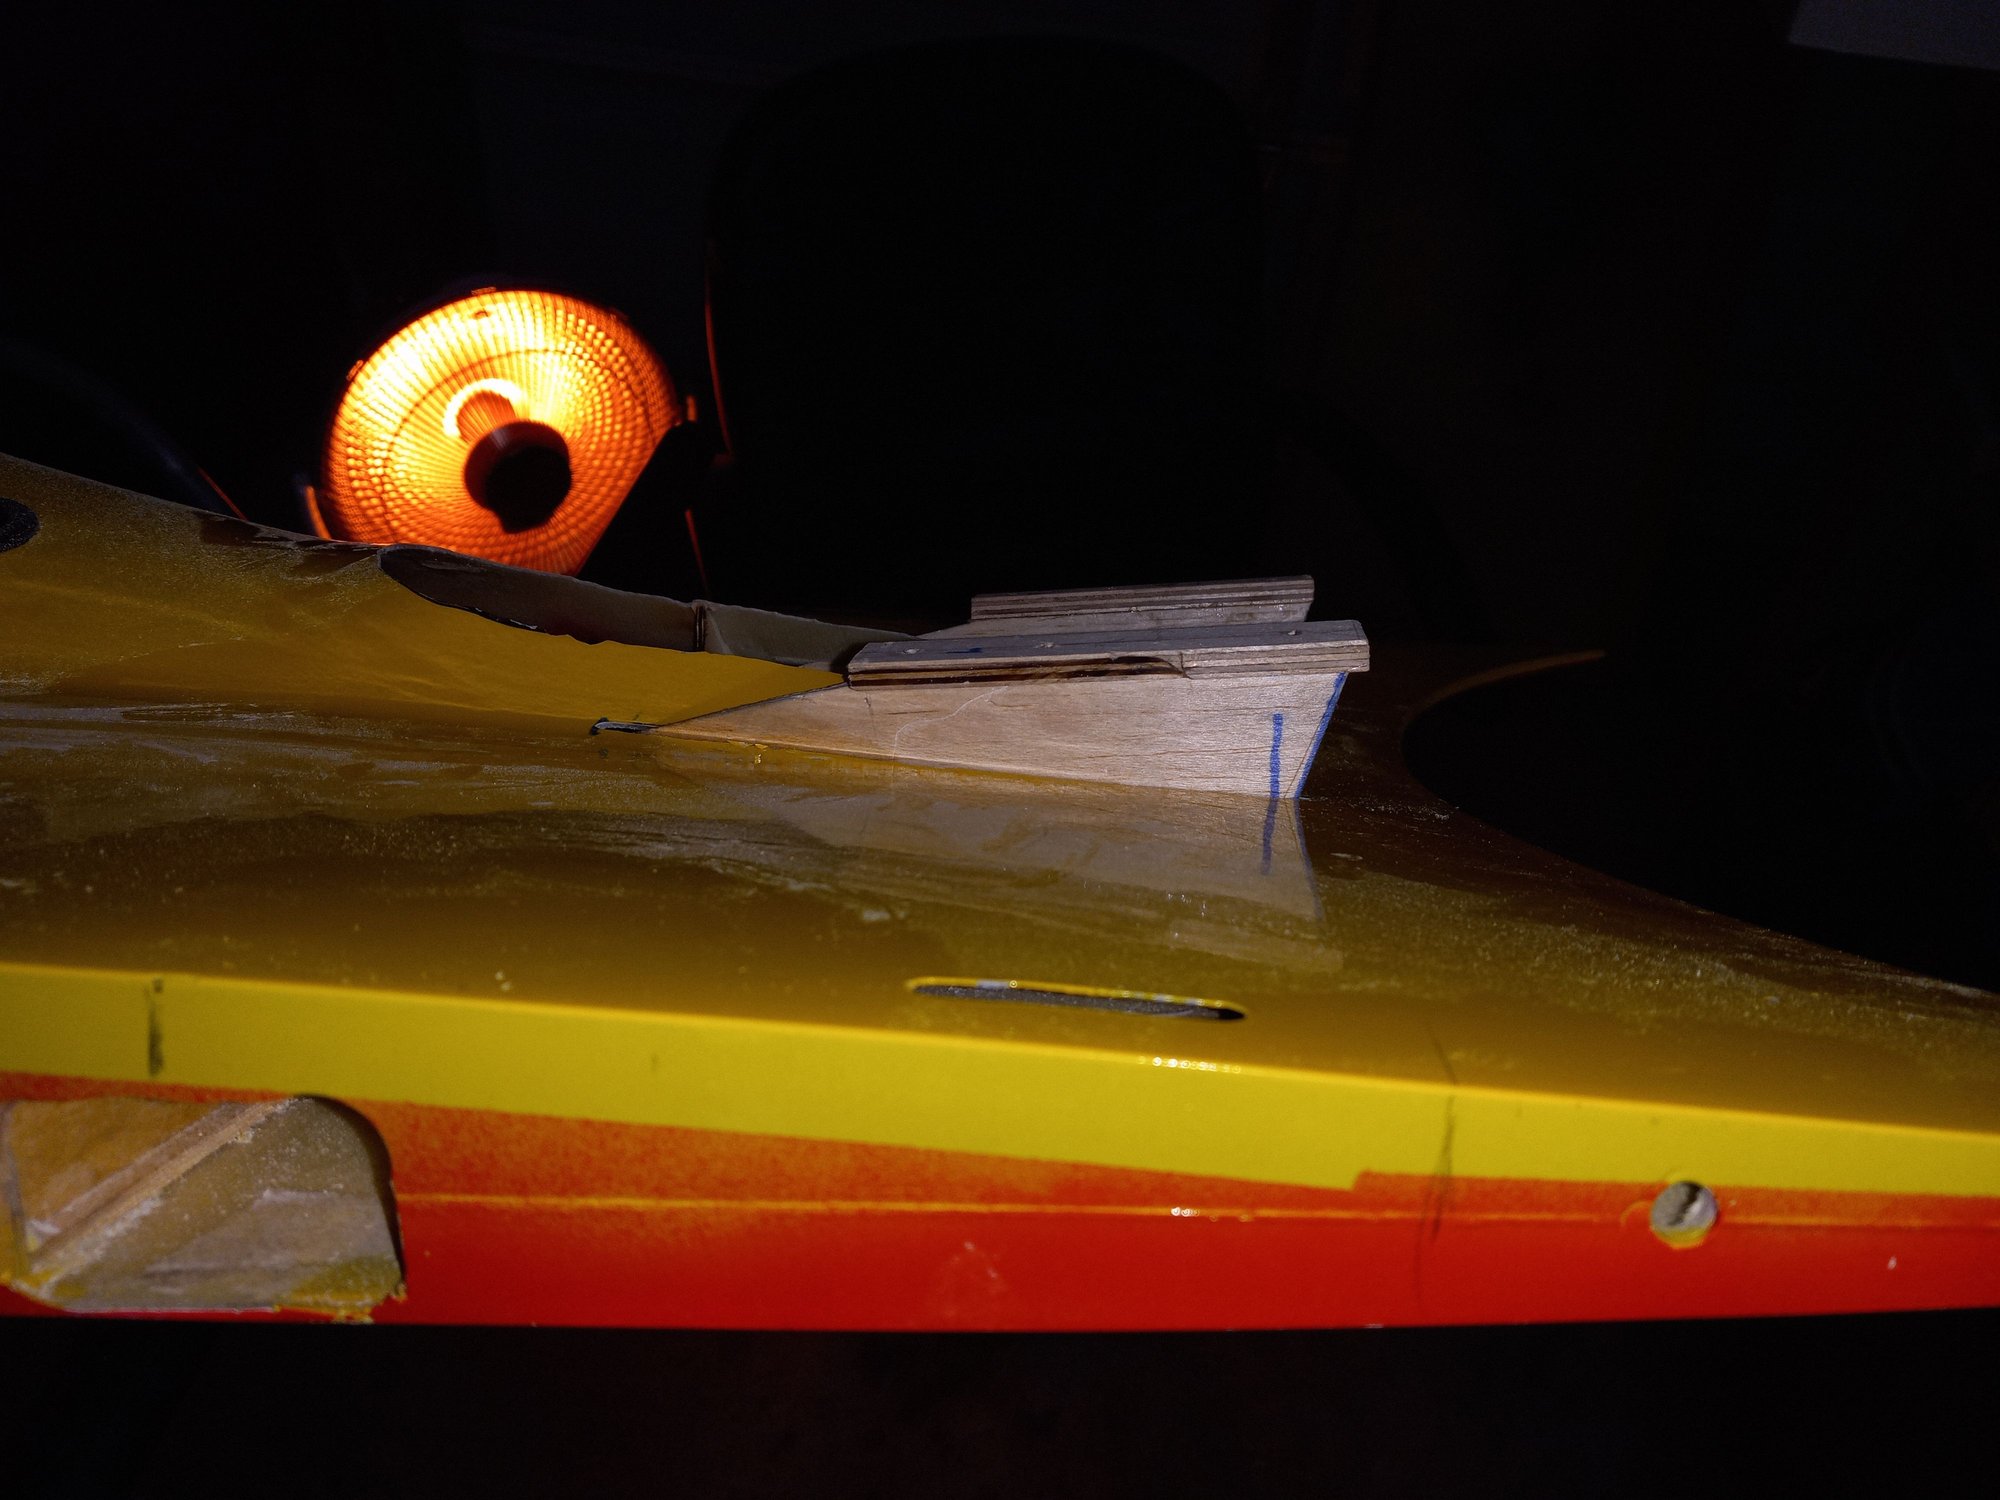
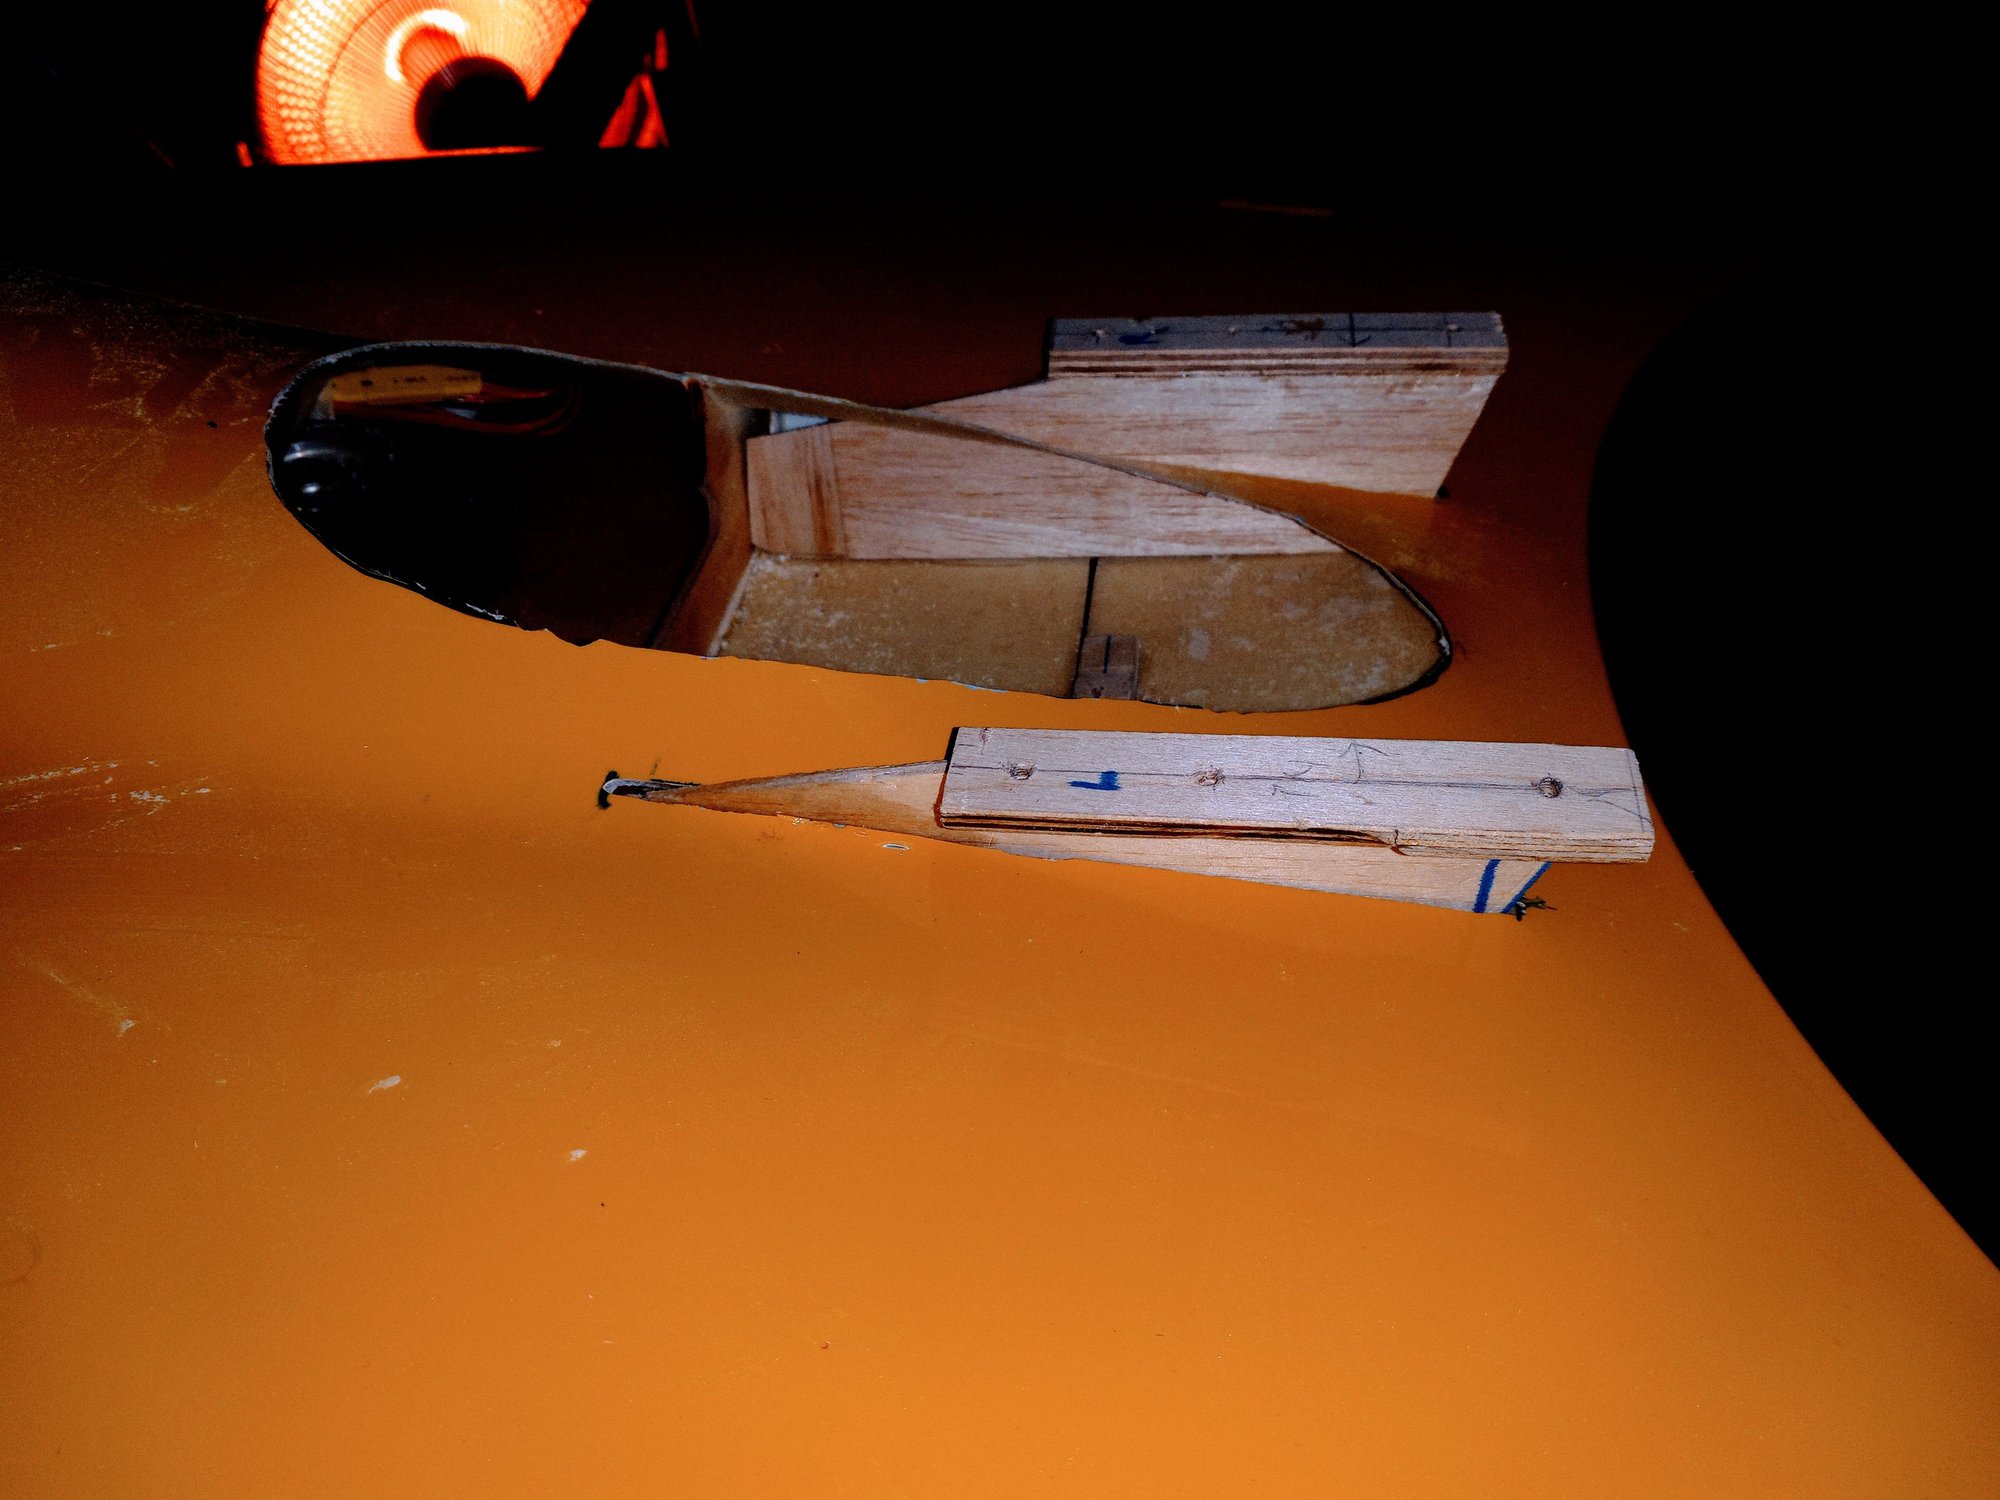
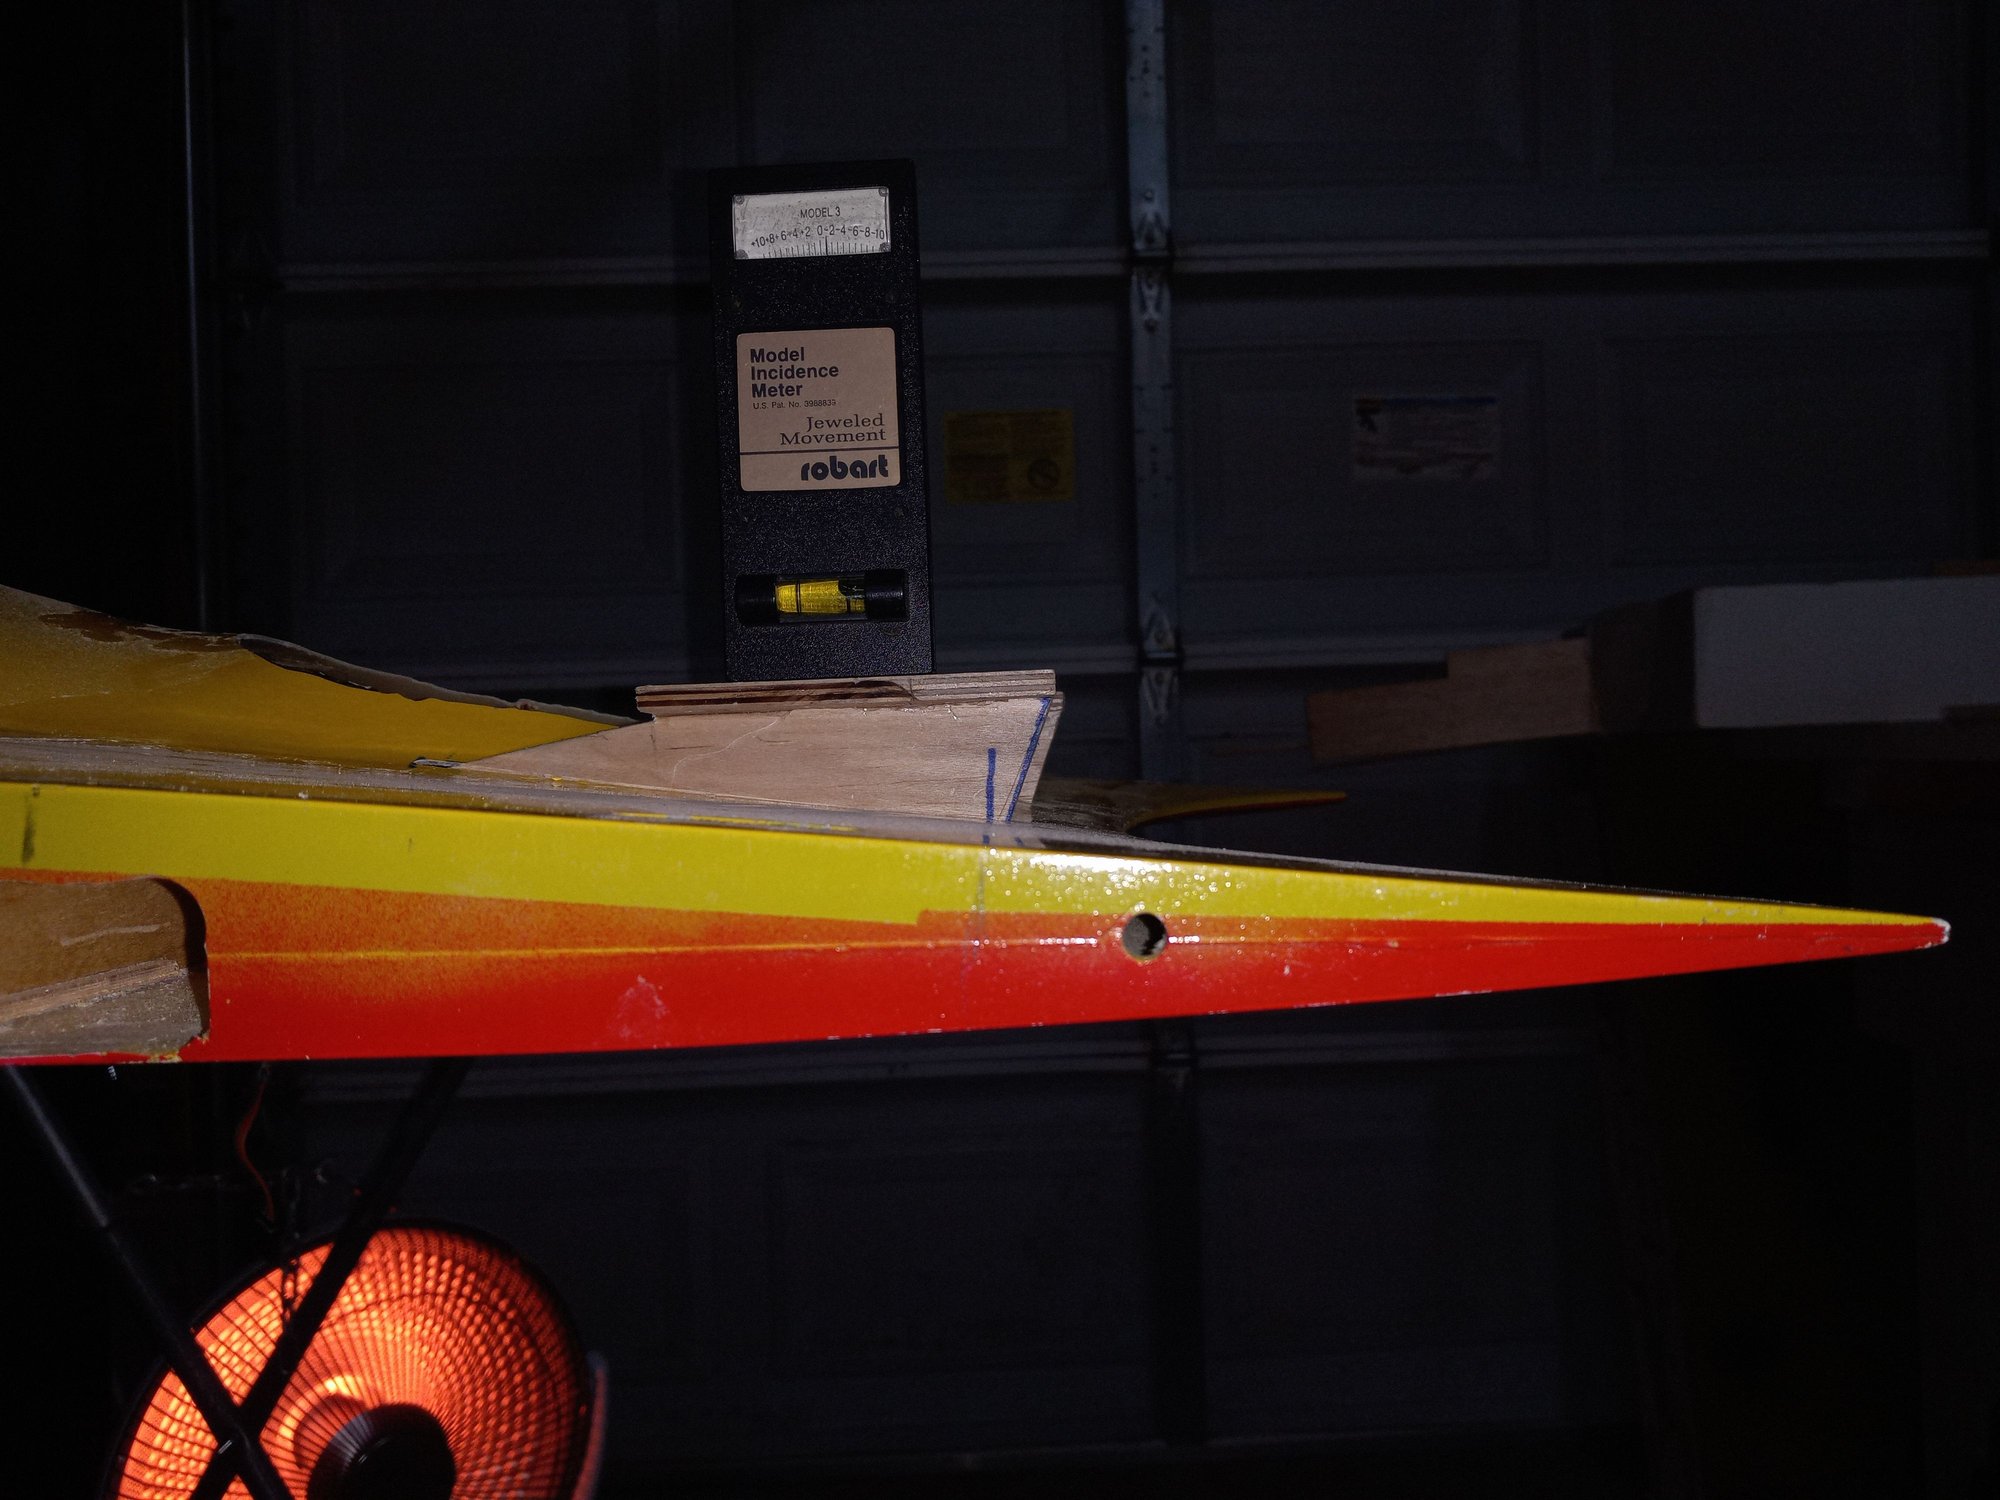
I had to clear some of the plywood under the engine to give room for the aluminum spar to go through and with the added weight of the new mount and the heavier engine I'm not that far from the CG, I had it at around 114 mm last time ( wrote it on the canopy frame ) The CG right now without the fuel tank, which seats forward of the CG and without the batts is at 83 mm from the front of the spar.
All this means, that it will not need the 1 1/2 lbs of lead on the rear of the fuse to get a good CG point and that it will come to a good CG point by locating the batts at the right location.
Last edited by CARS II; 04-26-2022 at 11:46 AM.
04-26-2022 | 06:38 PM
#15
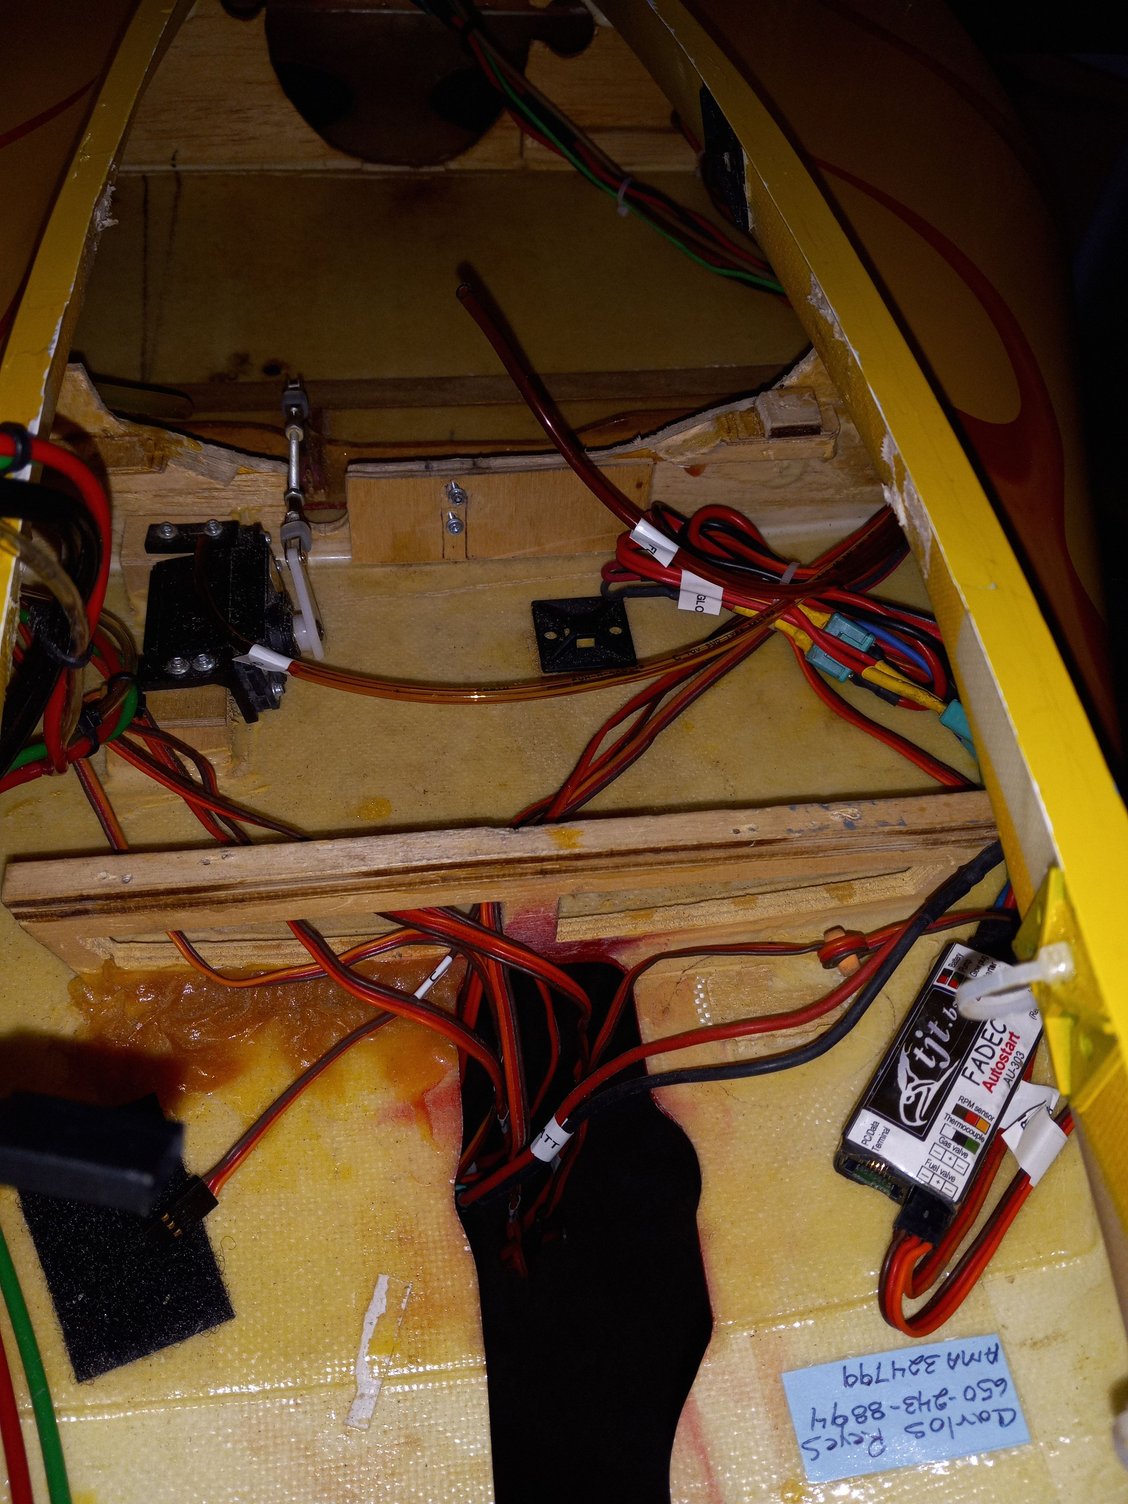
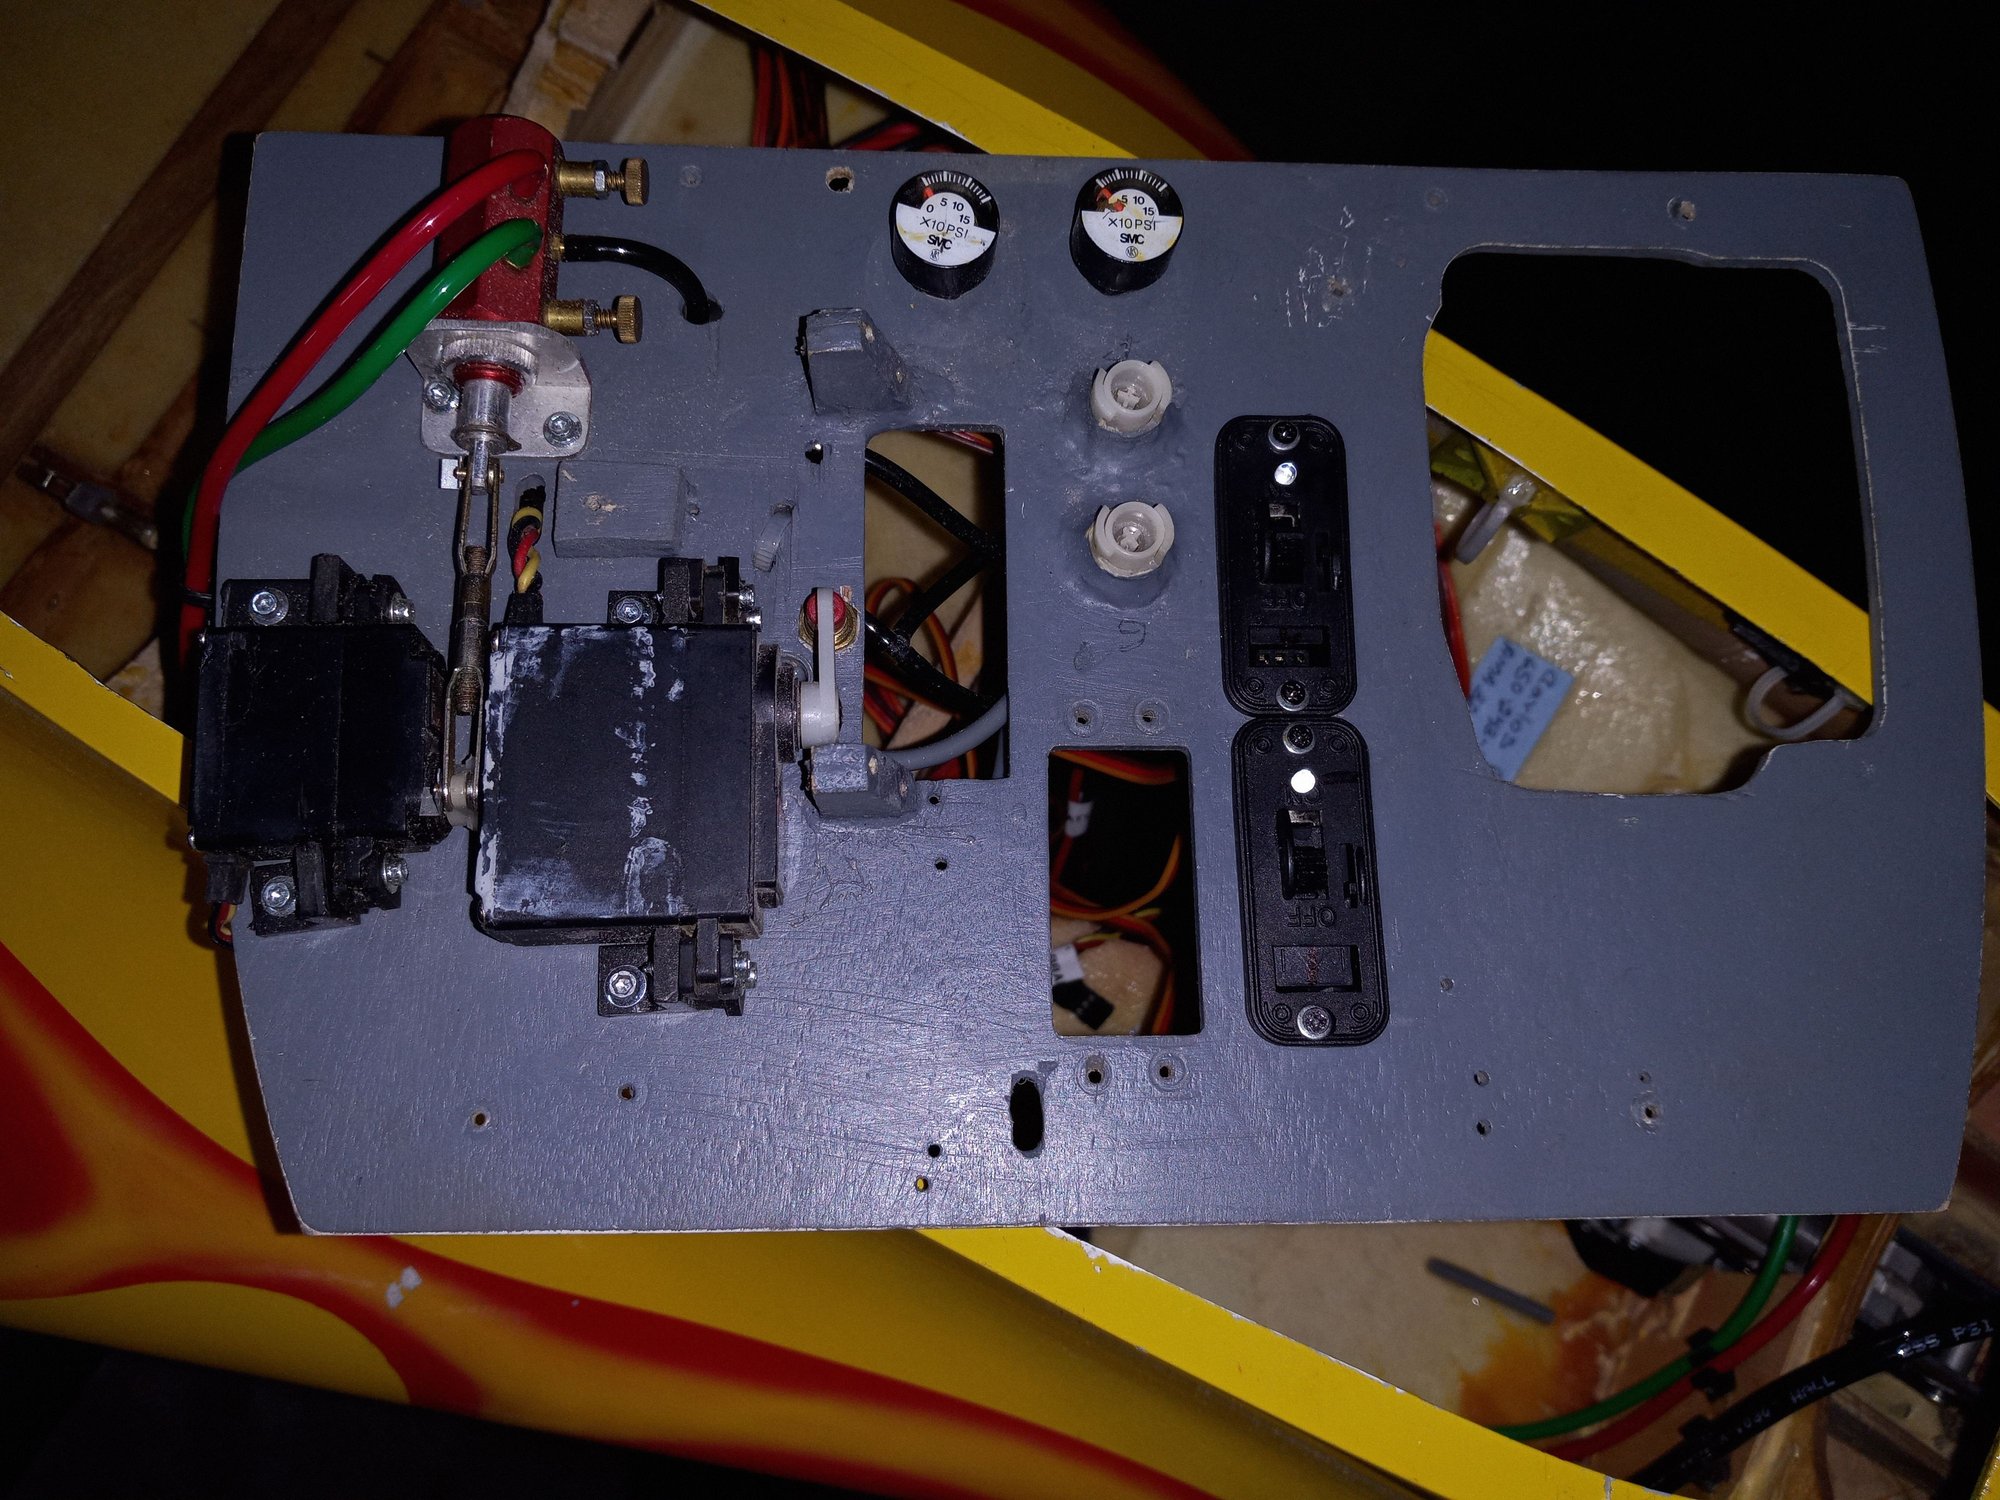
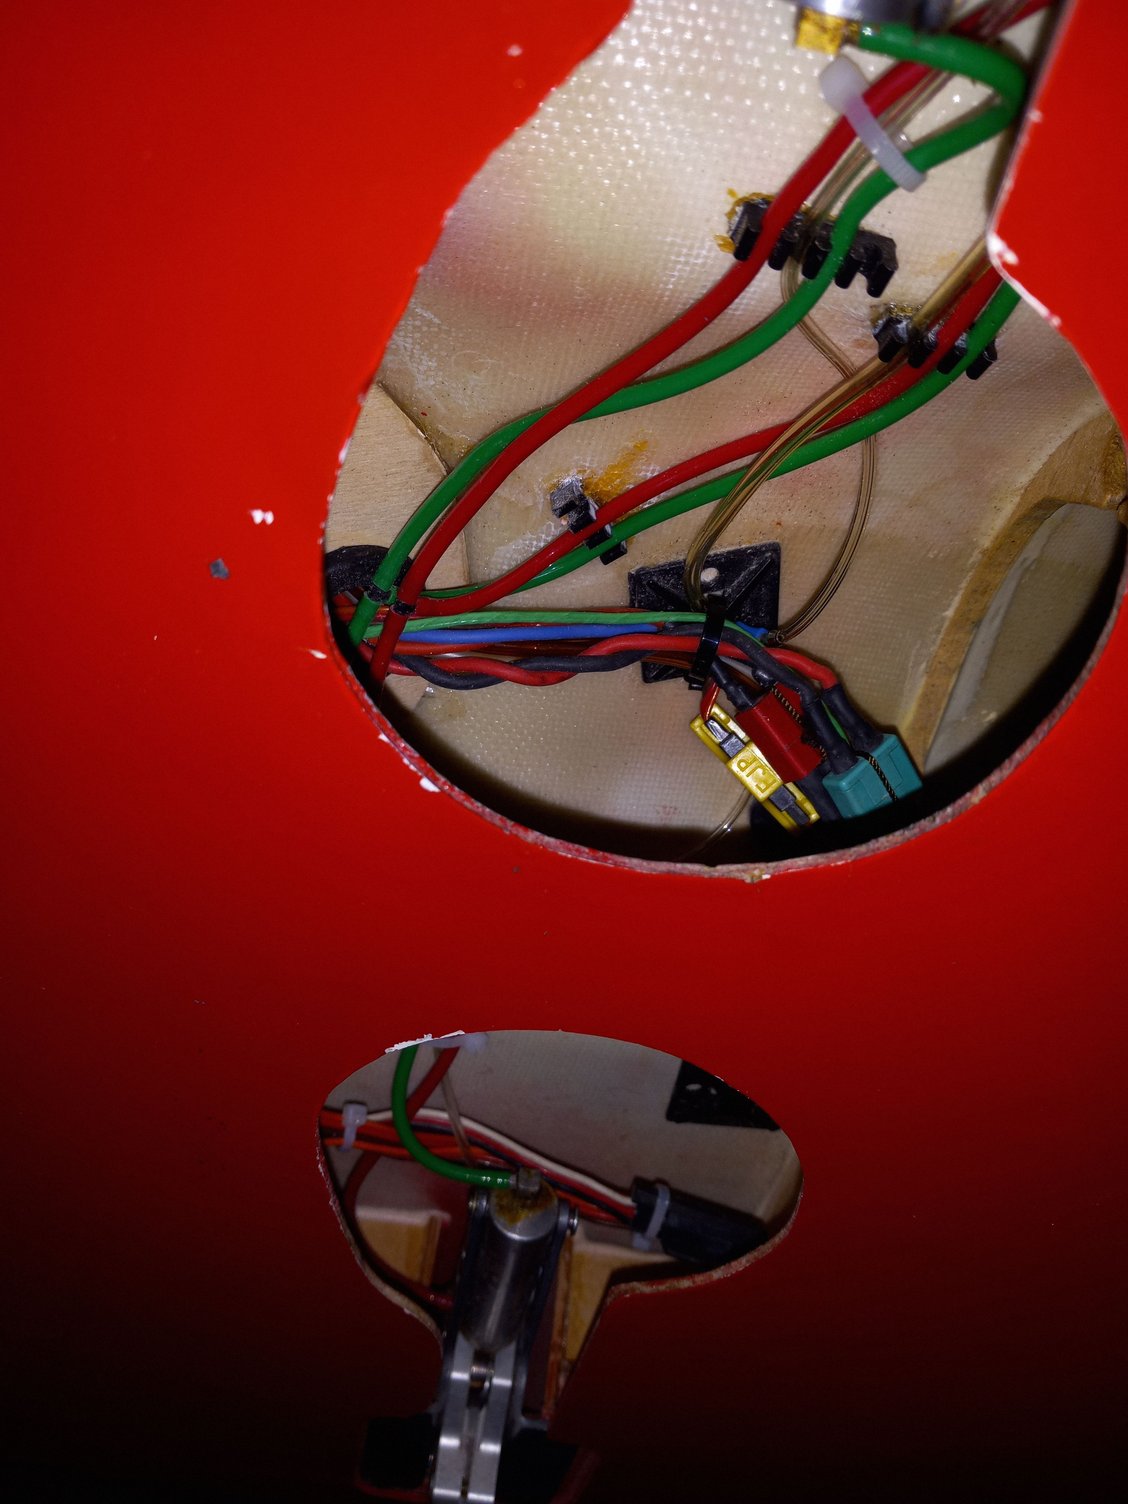
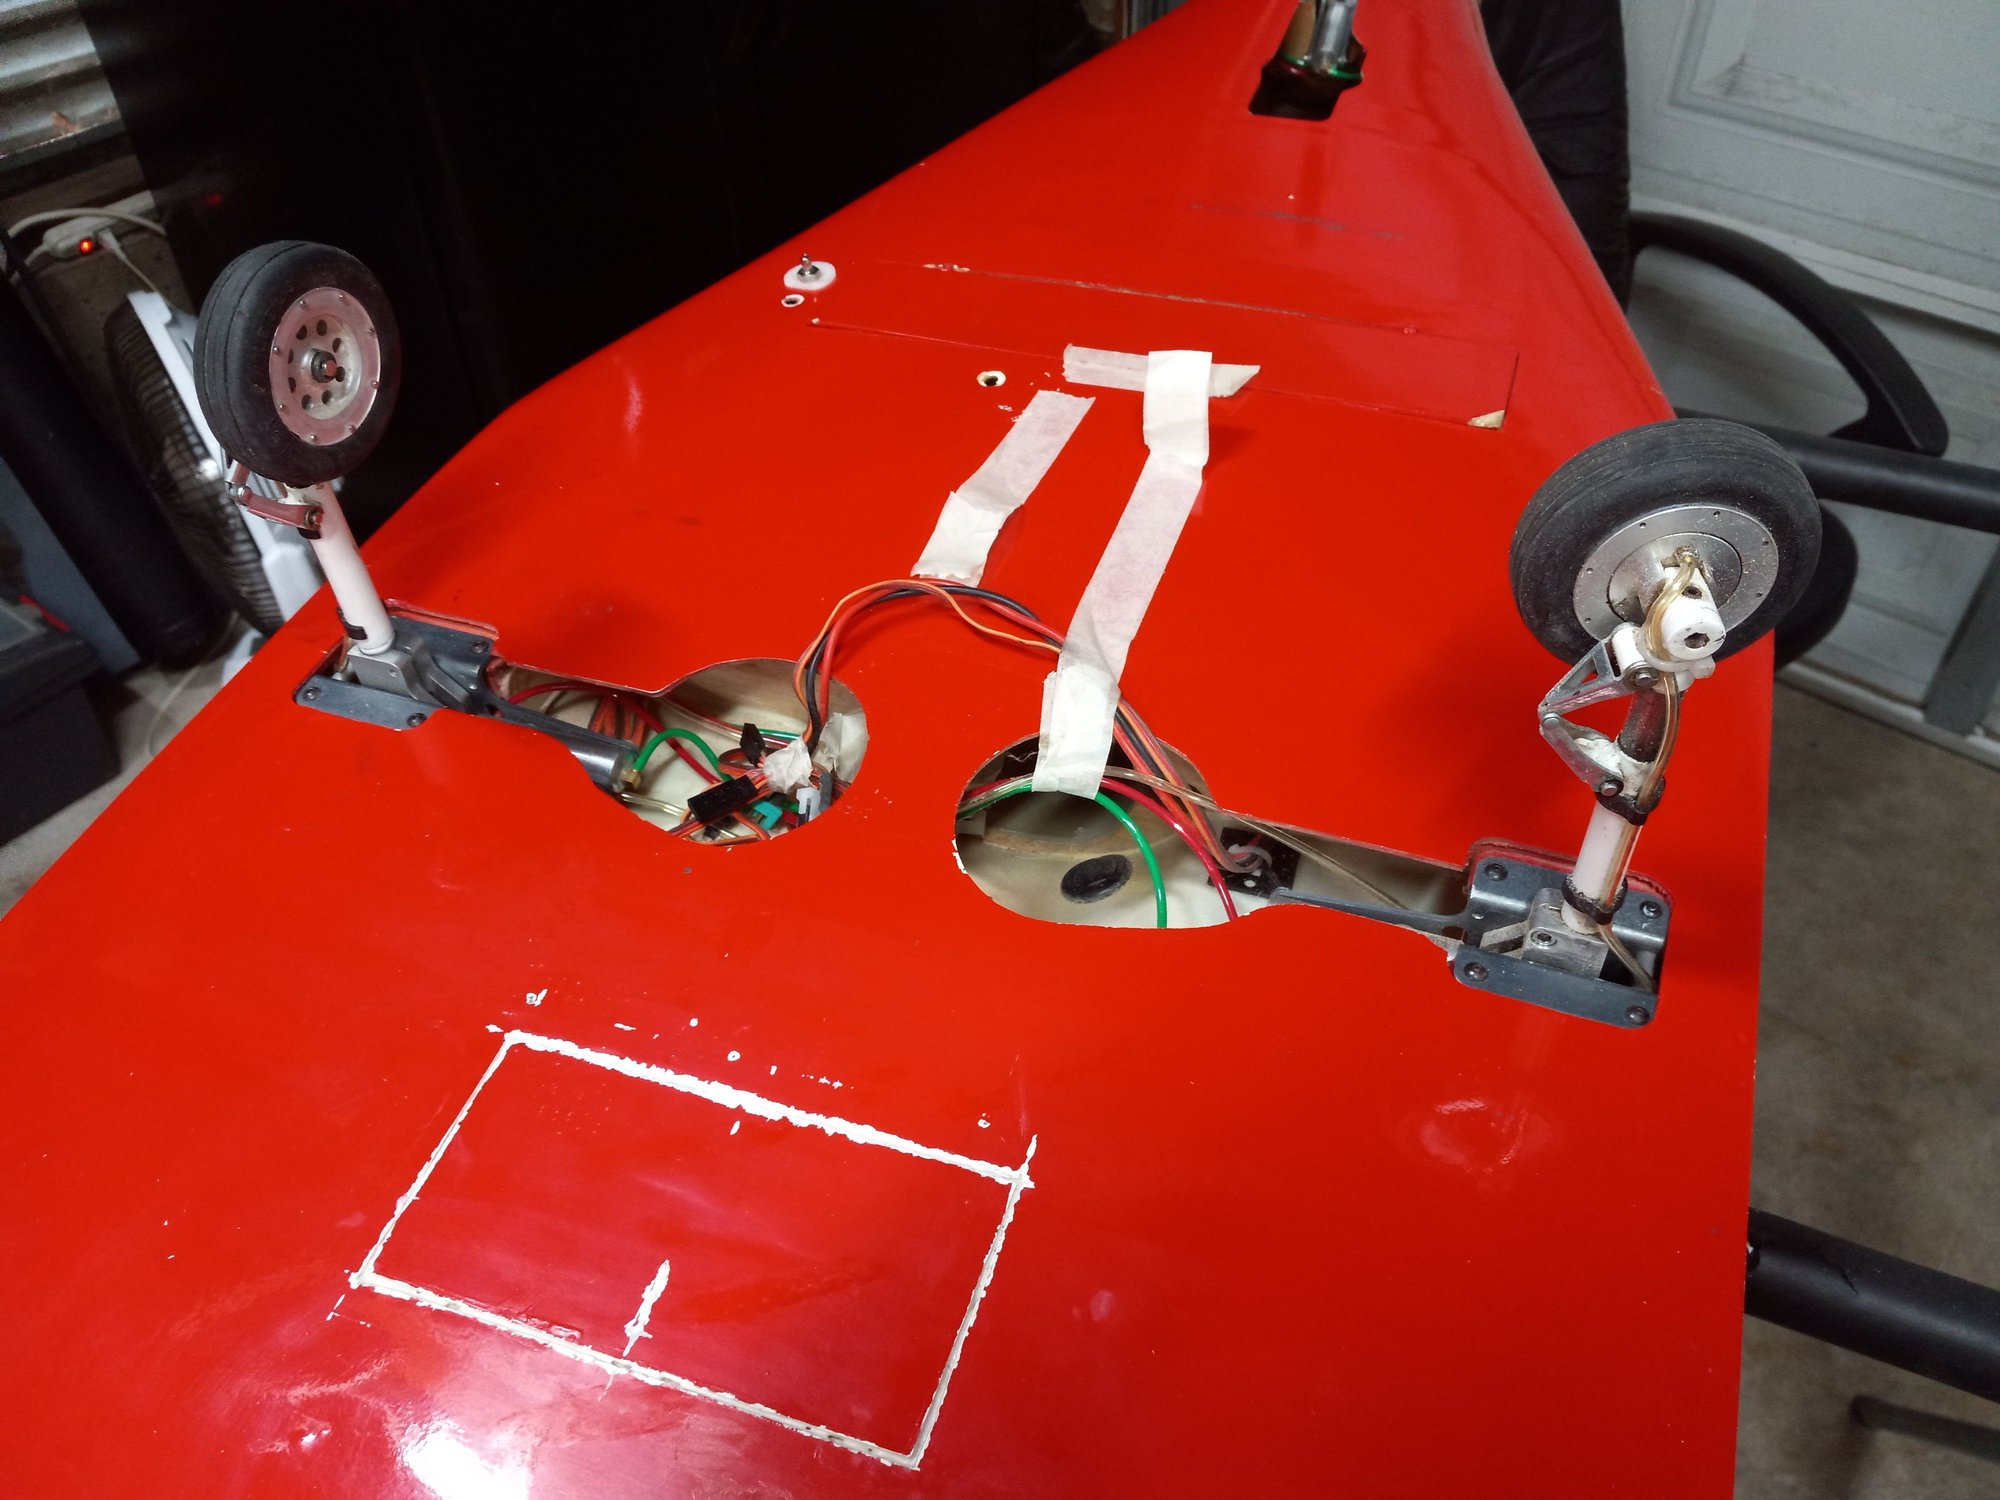
It's beginning to look organized in there, two new switches on the tray ( will go with the magnetic switch like on my other jets ) added two more lines for the second ailerons, this time all the accessories will be placed in the front,, not inside like before ( needs nose weight now )
May fly her the way it is right now ( one servo per wing ) and will add the second elevon servo at a later time, at least the servo leads are in place now.
Last edited by CARS II; 04-26-2022 at 06:46 PM.


 05-07-2022 | 10:47 AM
#18
Thank you Dan
I now fly at AMOS, it's an afternoon field.
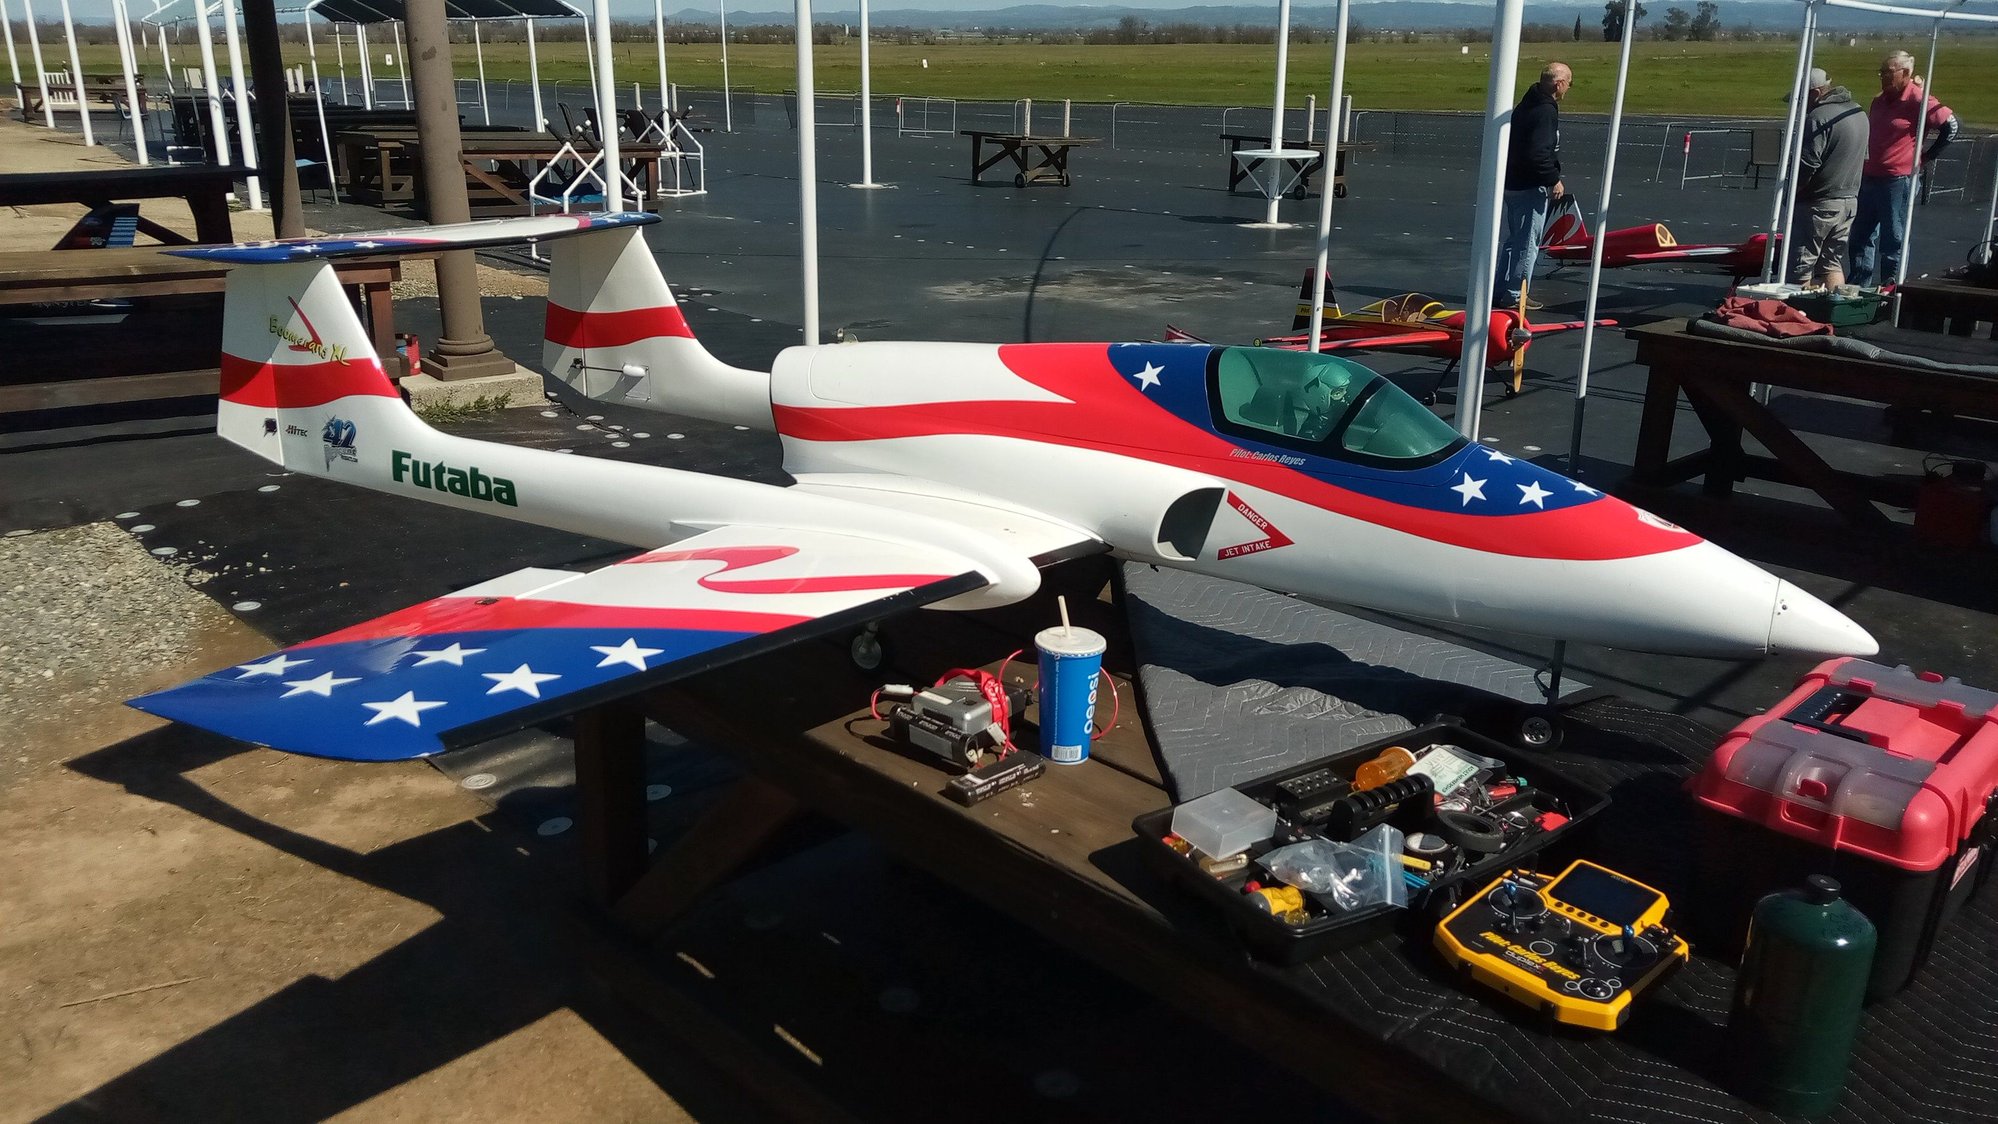
This engine came from Tam, he was checking it out to use with his about to be released F18s then but he decided to go with Jetcat, I gat the manual for it from Chris D. I suspect you sold your TJT3000 to him.
I've run this engine on my Boomerang XL for about 17 hrs, this Boomerang is the one you bought around 15 years ago, yeap! It's still flying but with a K140 now.

I now fly at AMOS, it's an afternoon field.
This engine came from Tam, he was checking it out to use with his about to be released F18s then but he decided to go with Jetcat, I gat the manual for it from Chris D. I suspect you sold your TJT3000 to him.
I've run this engine on my Boomerang XL for about 17 hrs, this Boomerang is the one you bought around 15 years ago, yeap! It's still flying but with a K140 now.
Last edited by CARS II; 05-07-2022 at 10:50 AM.
The following users liked this post:
Viper1GJ (05-11-2022)
05-12-2022 | 06:53 PM
#20
This Roo rebuild is near complete, is missing the UAT ( have no clue where it may be
 ) I got one on the way to be here next week, the batts are in the batt packets behind the CG, I will be making a couple of extentions, I'm going to use 1 LIFE and 1 LIPO, CG is slightly back from 95mm, with a full UAT it will come to balance right at 95mm, no lead added this time + with the remaining fuel after each flight, 1/4 to 20% of the tank, the CG will definitely be on target this time around, no need for the 1 1/2 lbs of lead in the rear of the fuse that I had to use before.
Last edited by CARS II; 05-12-2022 at 09:36 PM.
05-12-2022 | 09:31 PM
#21
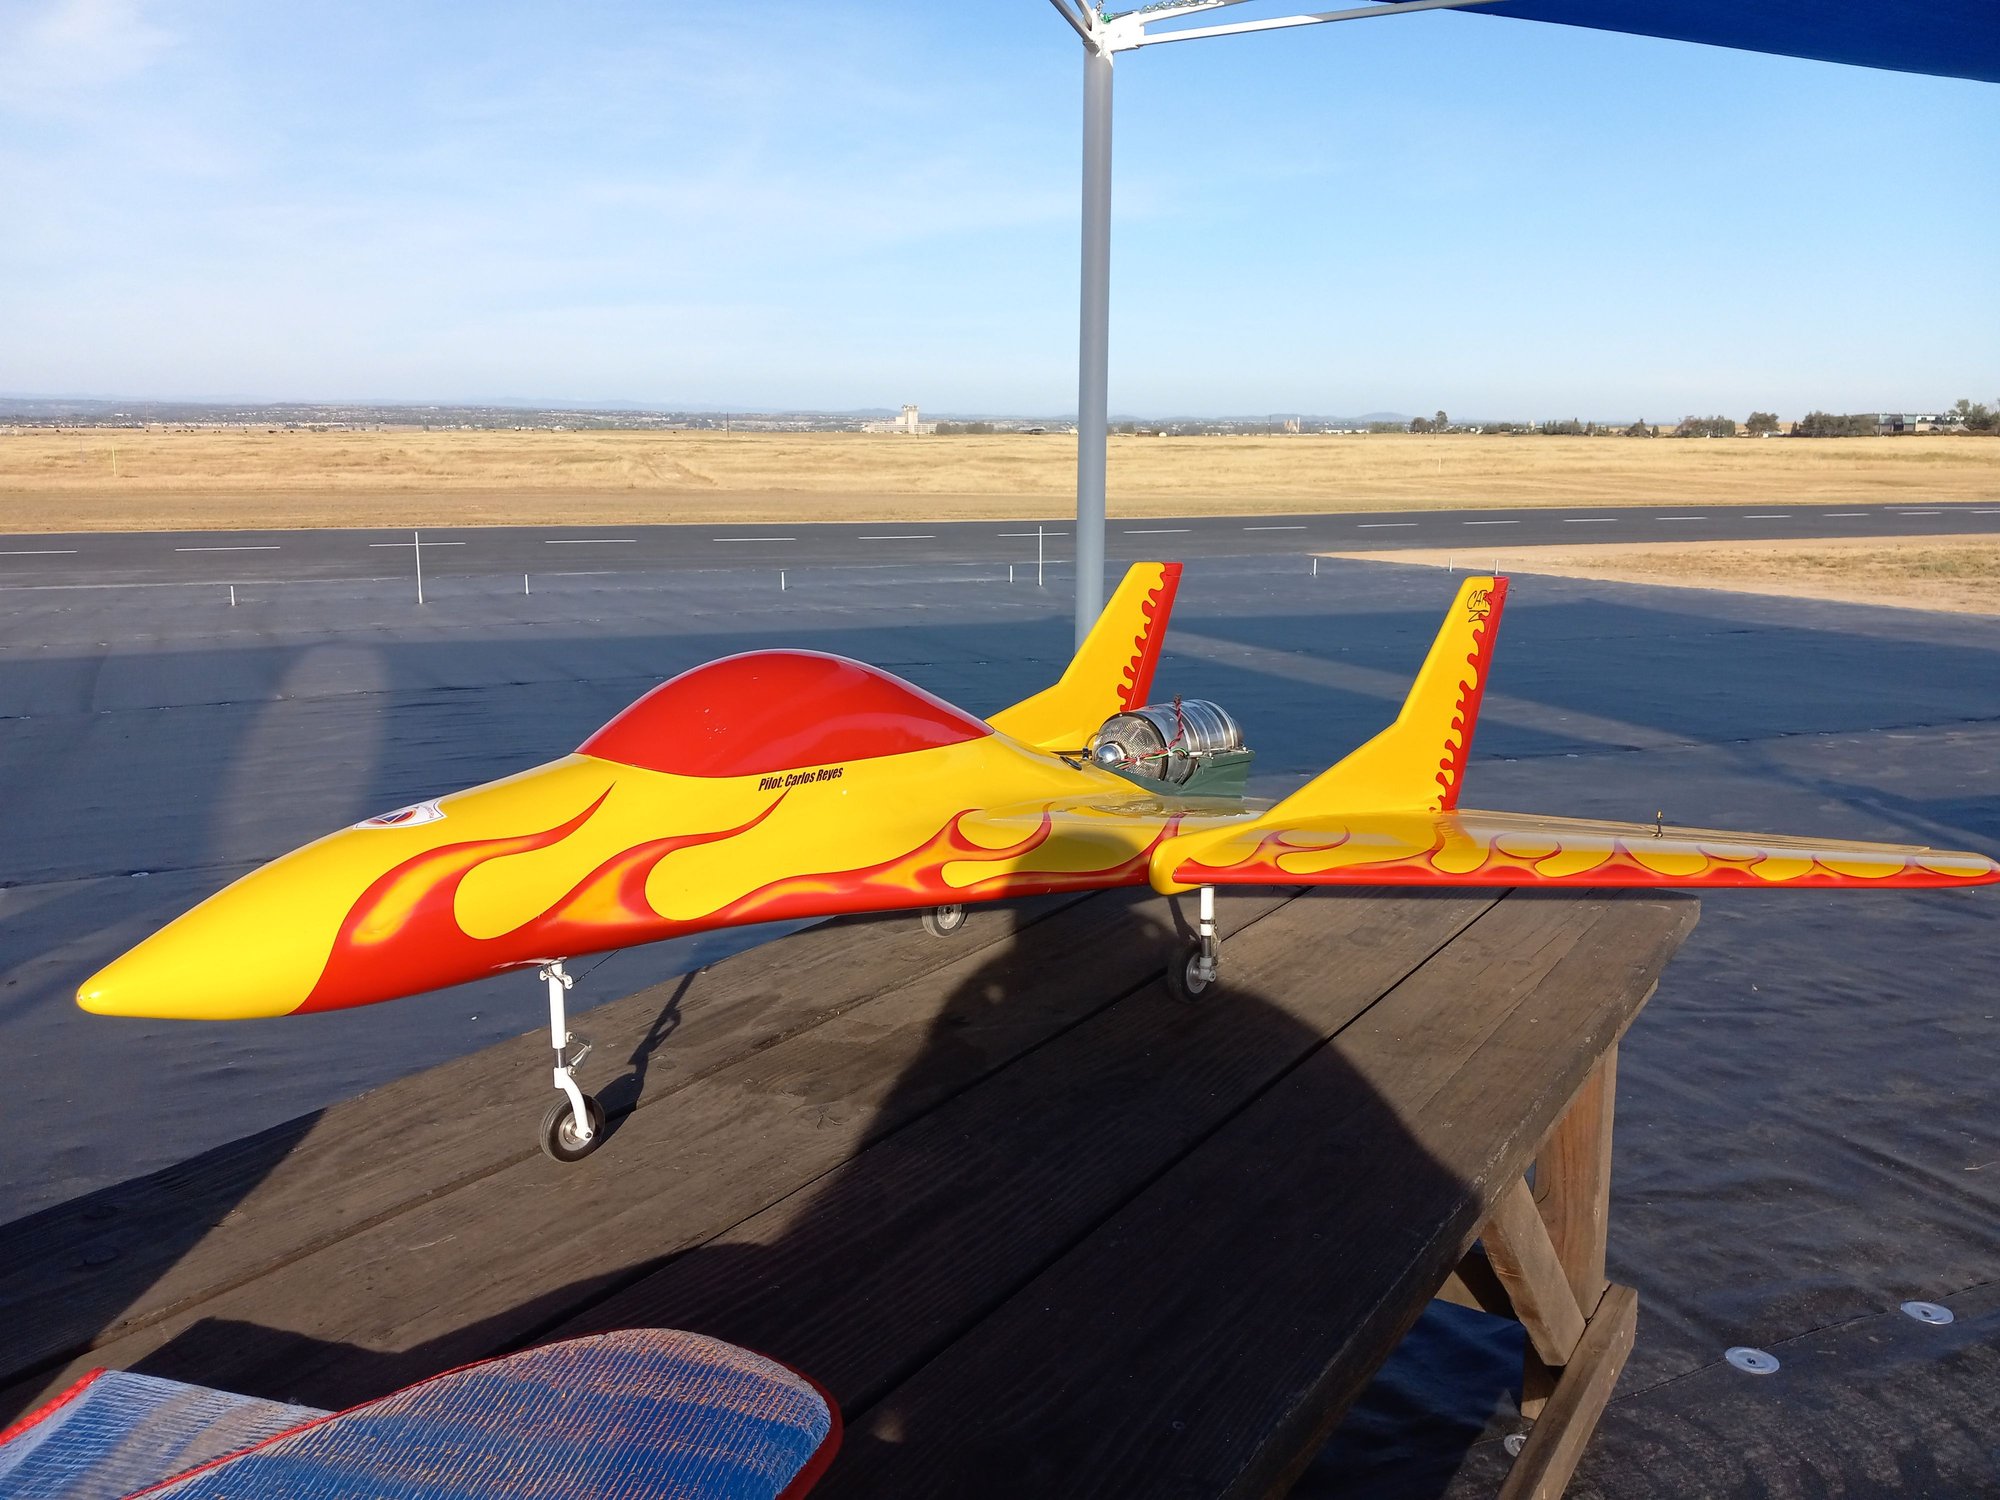
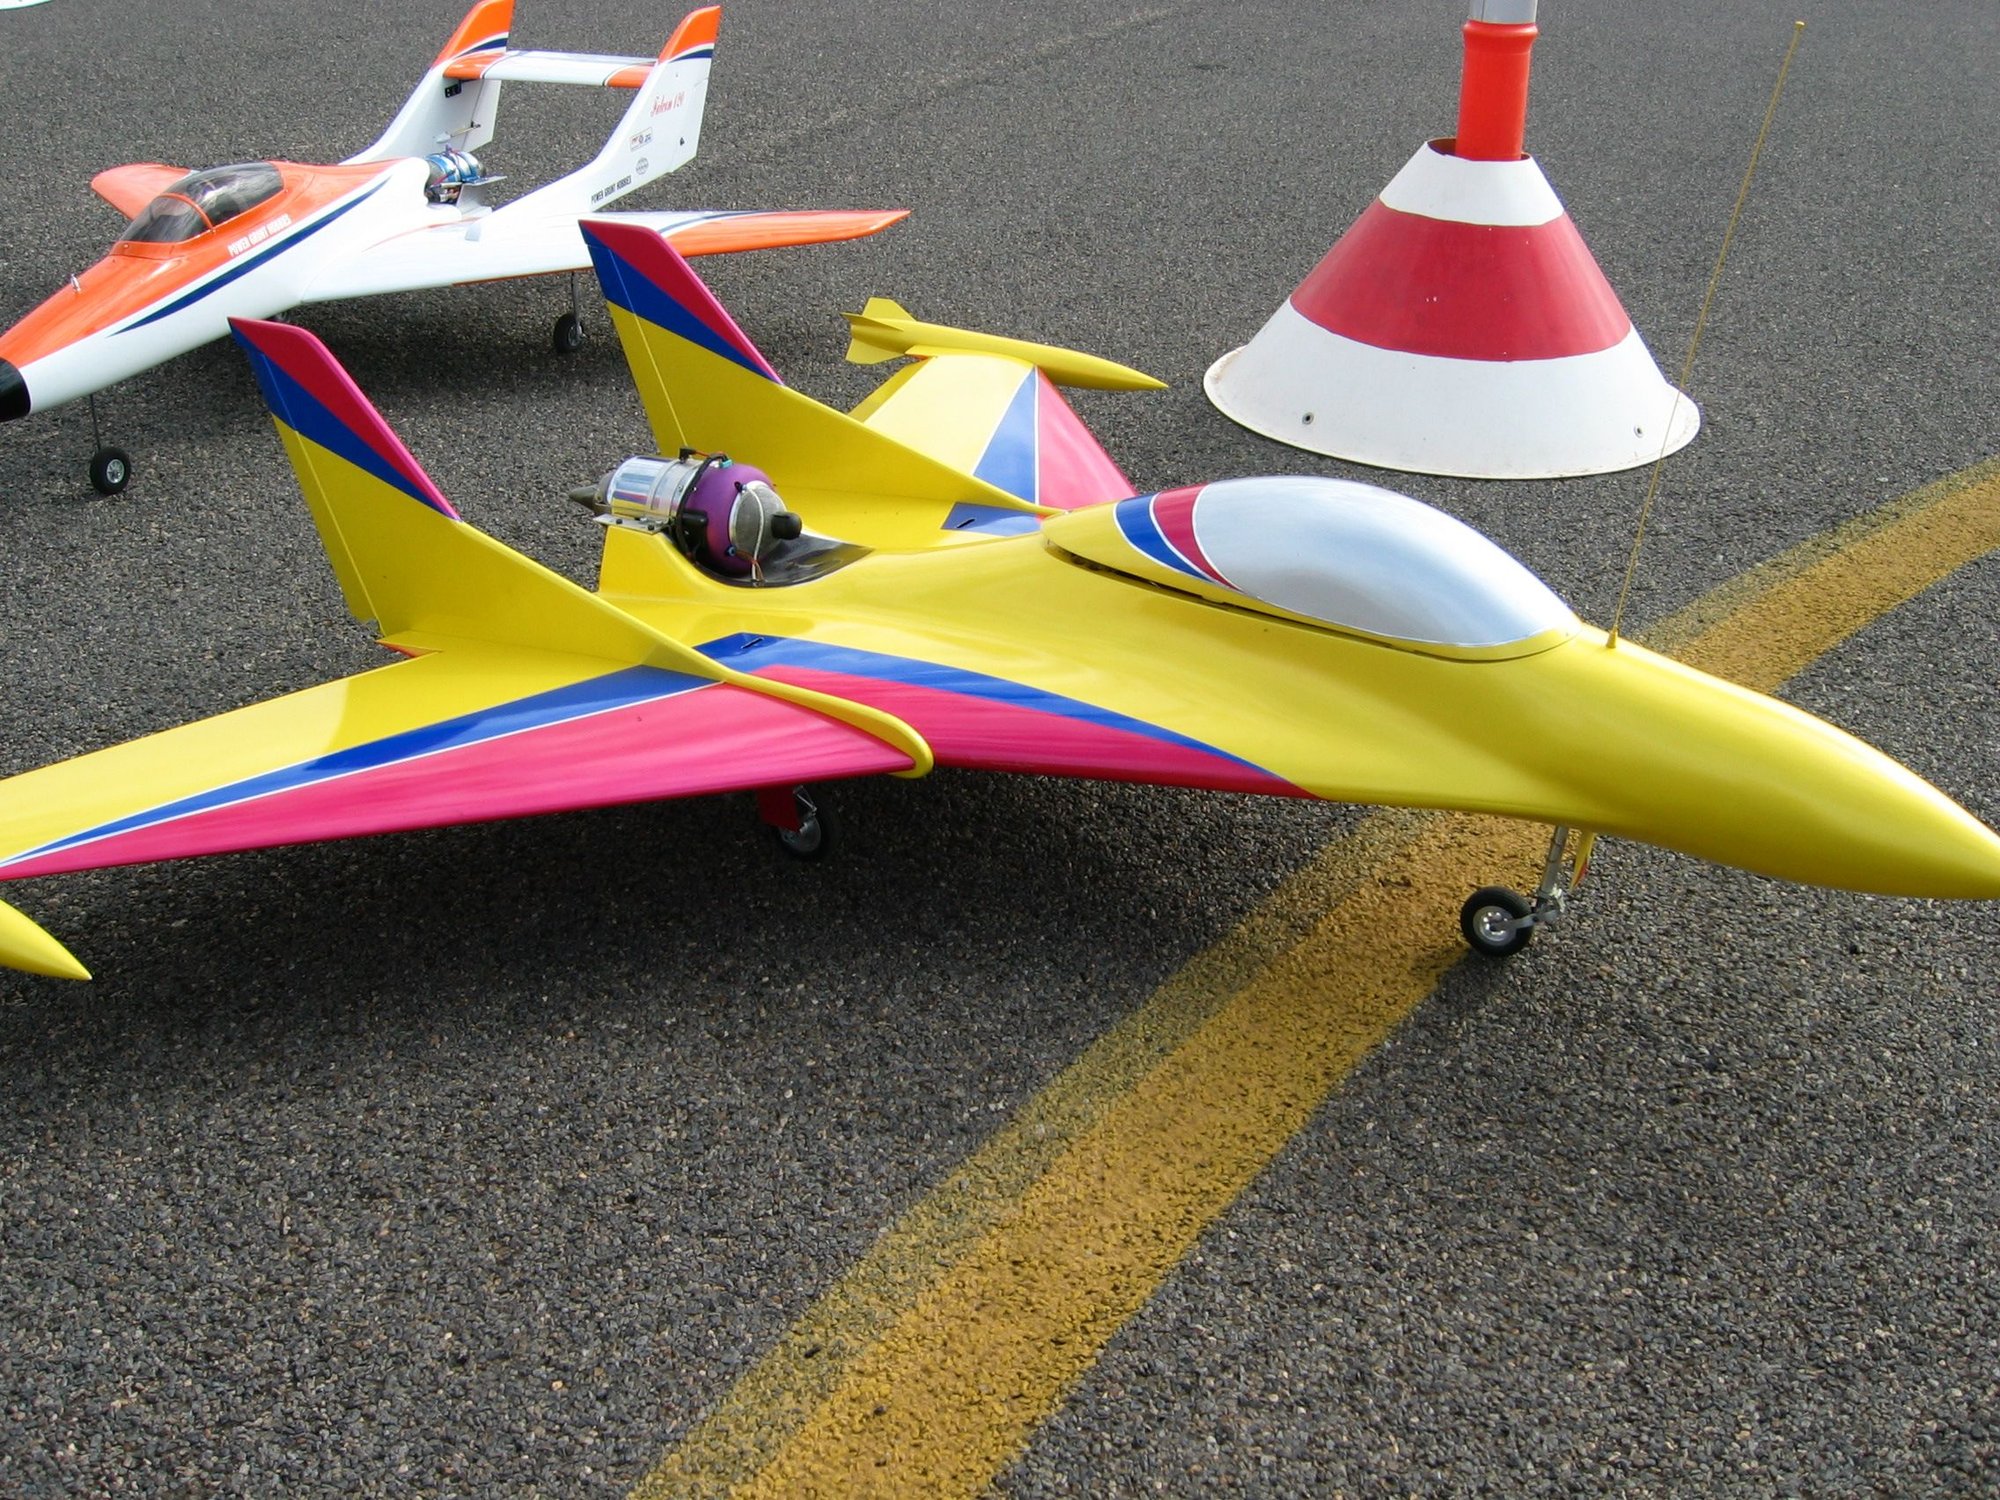
All done for this week
Tentative maiden day is next Tuesday, tested everything tonight, I still have to make two batt extensions ( for radio and engine ) the fuel tank developed a small crak during fuelling ( easy fix ) will fix that too.
Just run the engine after been stored for two years, it fired up like it had been running the day before.
Last edited by CARS II; 05-12-2022 at 09:37 PM.
05-16-2022 | 01:06 PM
#22
I'm already thinking about my next project, I will need help finding a carbon fiber tube to be used as a spar, or if anyone has a Boomerang XL rear spar tube that is not been used anymore.
63 Dia (16mm) & .078” thick (2mm) x 48” (1240 mm) long.
please let me know where I could get one this long.
Tks.
63 Dia (16mm) & .078” thick (2mm) x 48” (1240 mm) long.
please let me know where I could get one this long.
Tks.
The following users liked this post:
uncleTom (05-19-2022)
06-04-2022 | 10:34 PM
#24
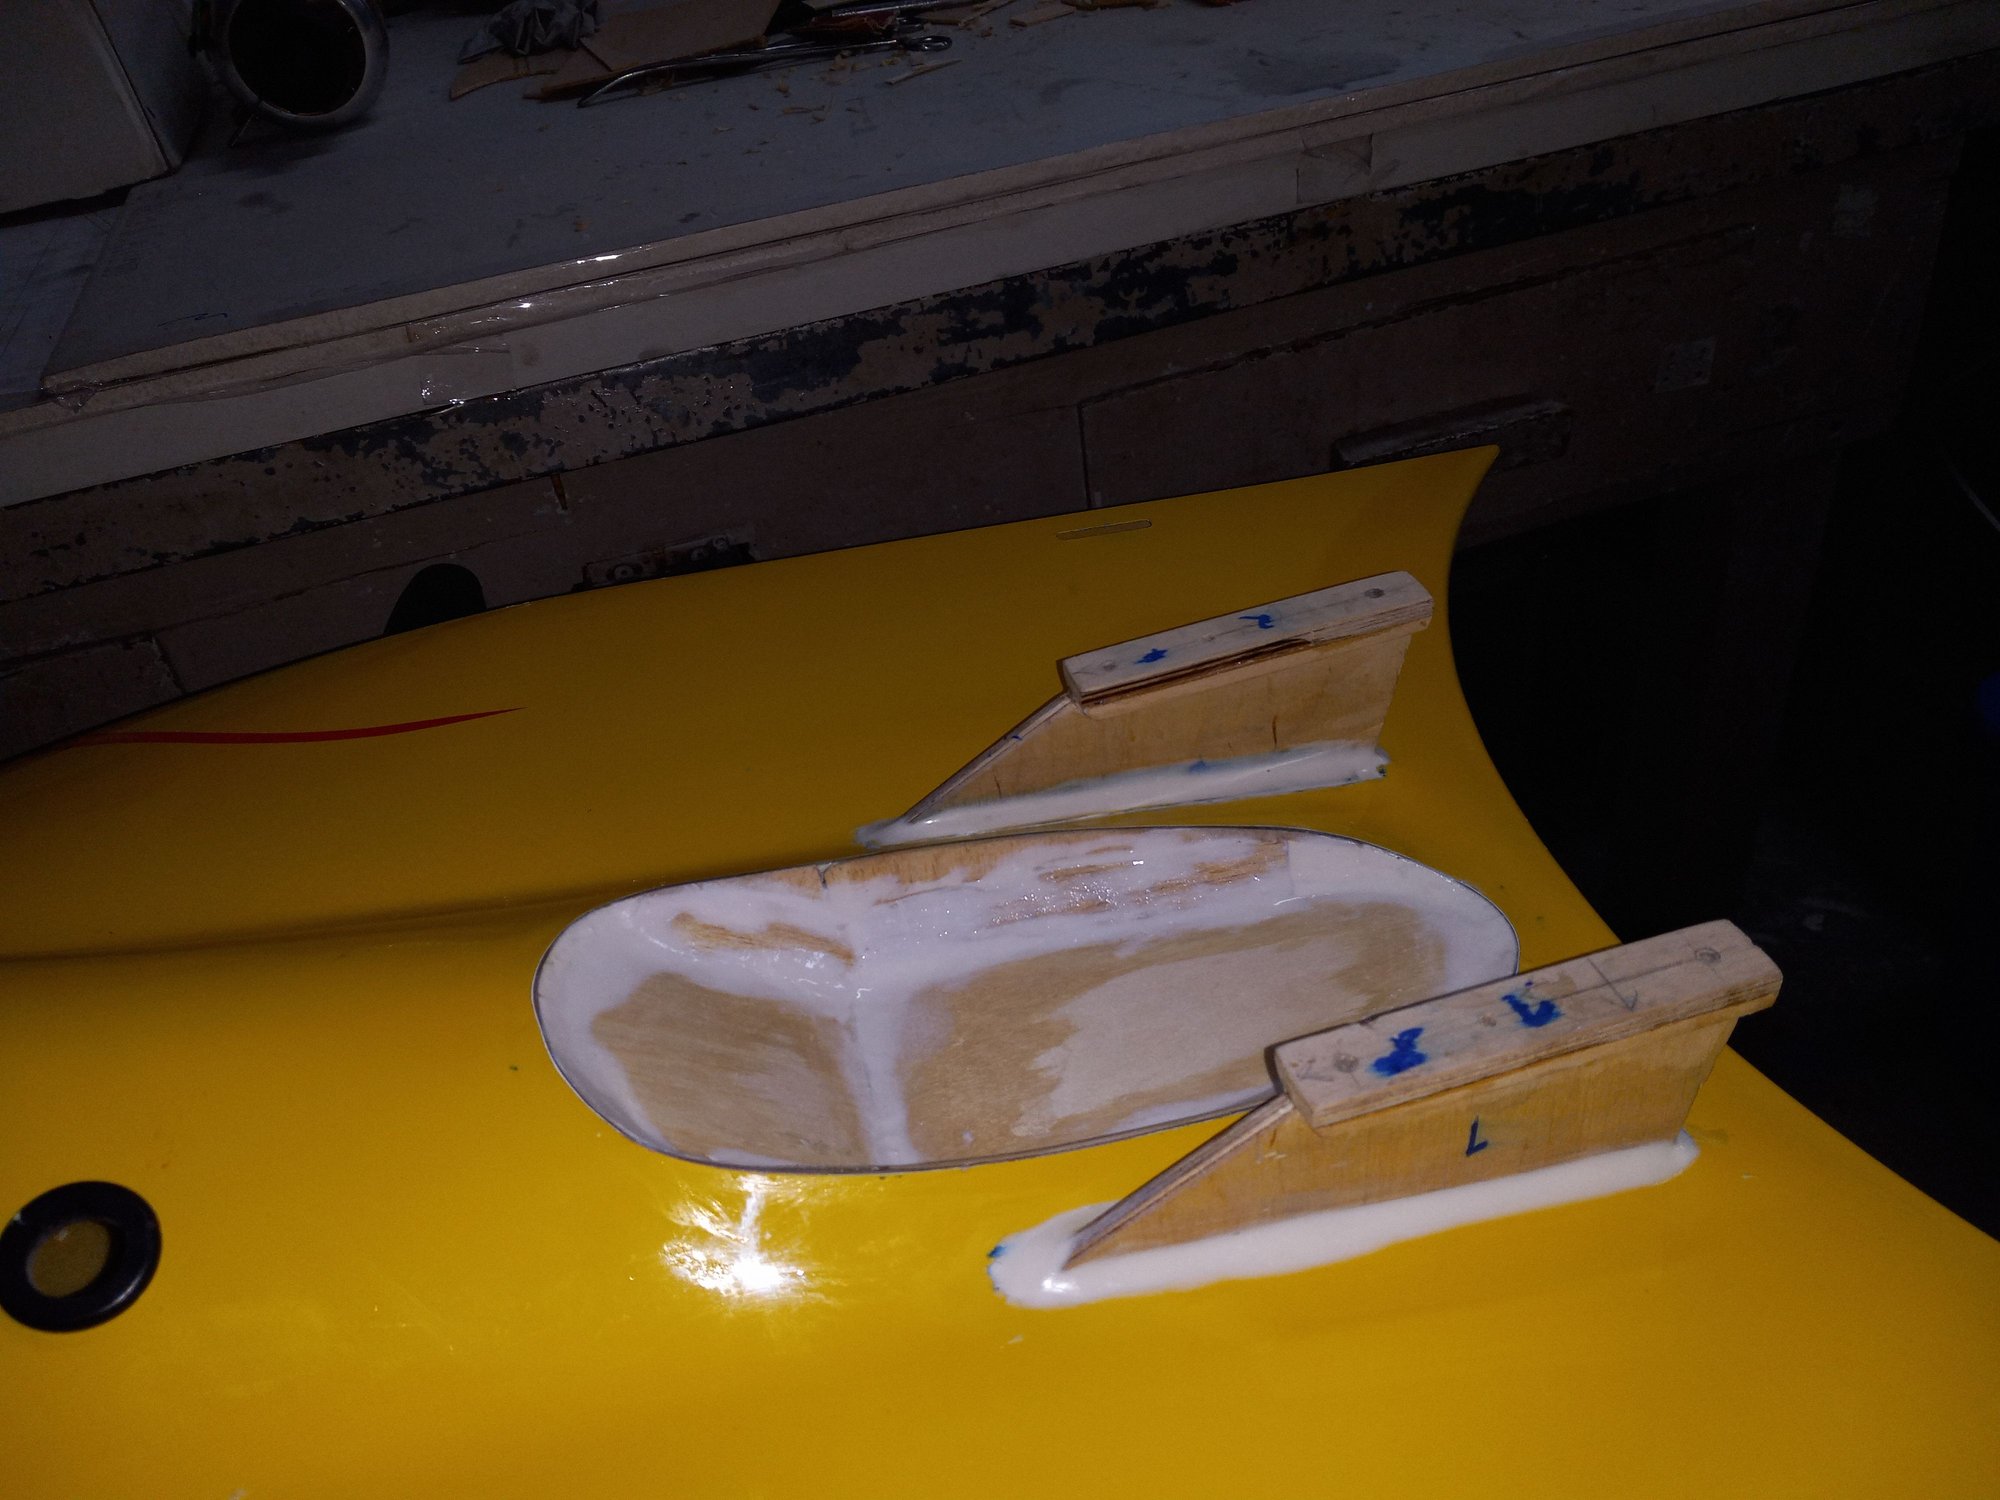
Since the winds have been very strong and unsettled for nearly two months around here, I took the opportunity to install two more Elevon servos that I was planning to do later, only thing left to do to the install is to cut the Elevons free from each other, both sets of servos are working in unison .
Can't think of anything else that has to be done but the re-maiden flight.

Can't think of anything else that has to be done but the re-maiden flight.
06-04-2022 | 11:50 PM
#25

that will make your roo fly great,
I done a similar improvement to my fiber classics kangaroo quite some years ago now and it changed the performance allot..
its better to land with and also has no pitch change from low throttle to full..
I have a Jetcat P-80 in mine
the attached pics were taken at our local Mangalore Jet geez must be about 10 years ago now but I still have it today and flies awesome

