


Bvm t-33 -reborn
 05-21-2022 | 03:22 PM
#1

Turbines at our field can only fly at certain times of the year. So with that being said, I wanted to pursue something electric. After considering a BVM kit, I quickly realized I already had a BVM kit built…Painted…Pretty much ready to rock and roll. It only needed some TLC, so here we are!
This thread is my journey of gutting, cleaning and reviving the T-33.
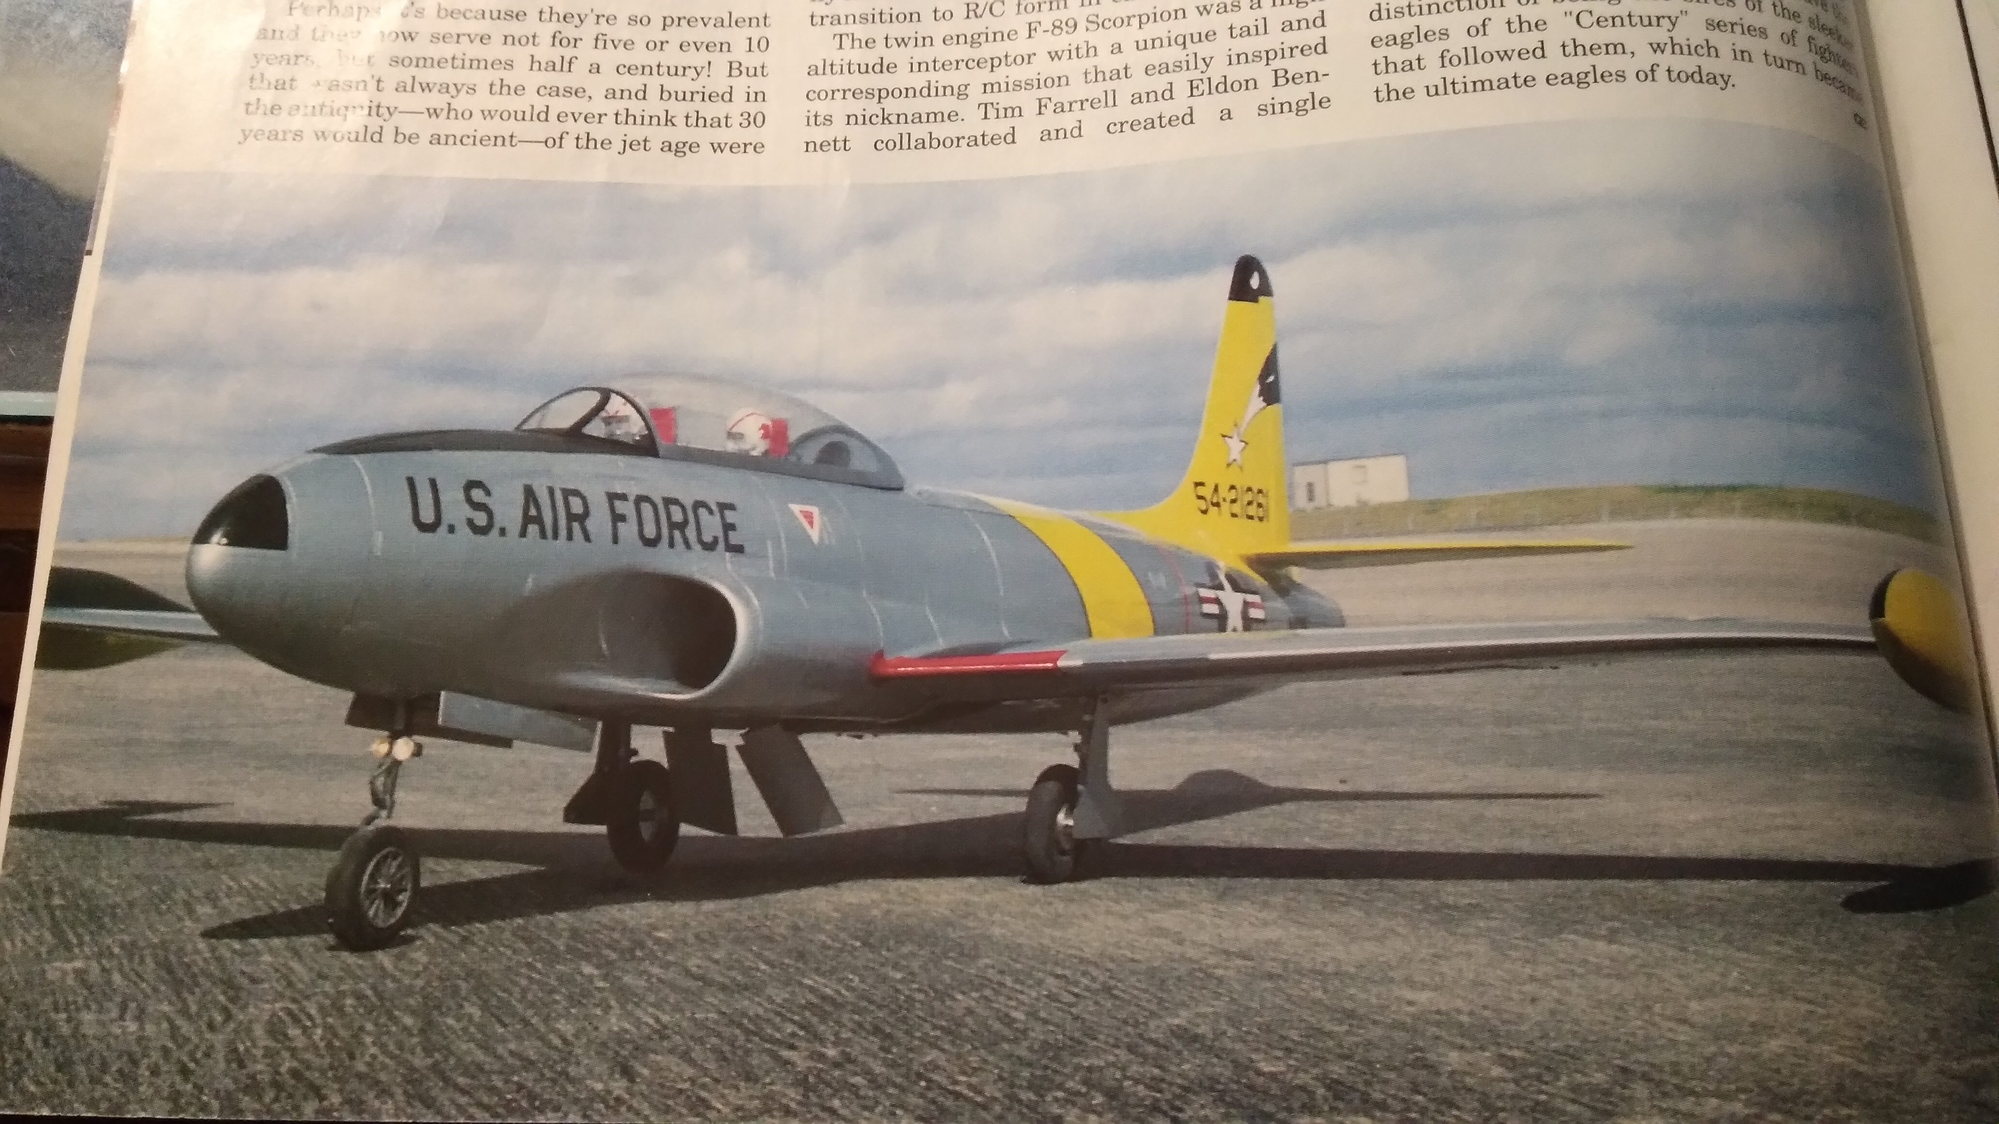
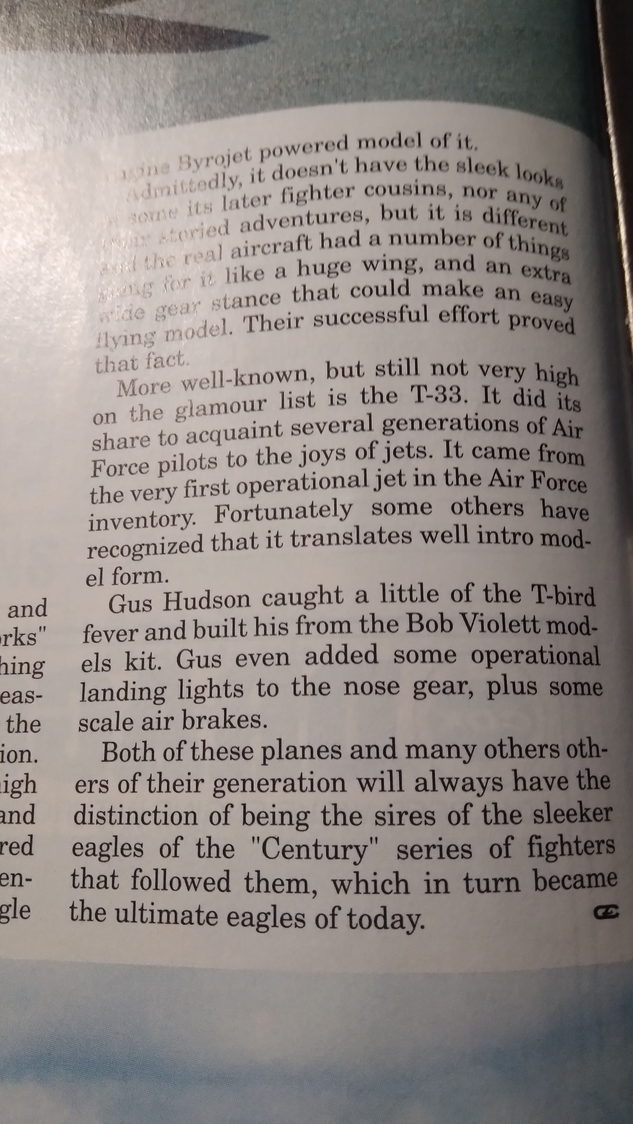
This was one of the earliest kits so it does have the issue with the leading edge. As some of the photos show, it’s been modded a little bit. This kit does NOT have the flap kit installed. (More on that later) This kit was built by Mr.Tom Dodgen and flown by my Grandfather, Gus Hudson. I pulled it out of storage and have determined that it’s time to fly again!
Follow me on this journey. I will try my best to take as many photos as possible and be as detailed as possible. This kit is older than me (not lying) so if there’s something in your brain that you think would be helpful, please, speak up! I would love to make this revival as successful as possible.
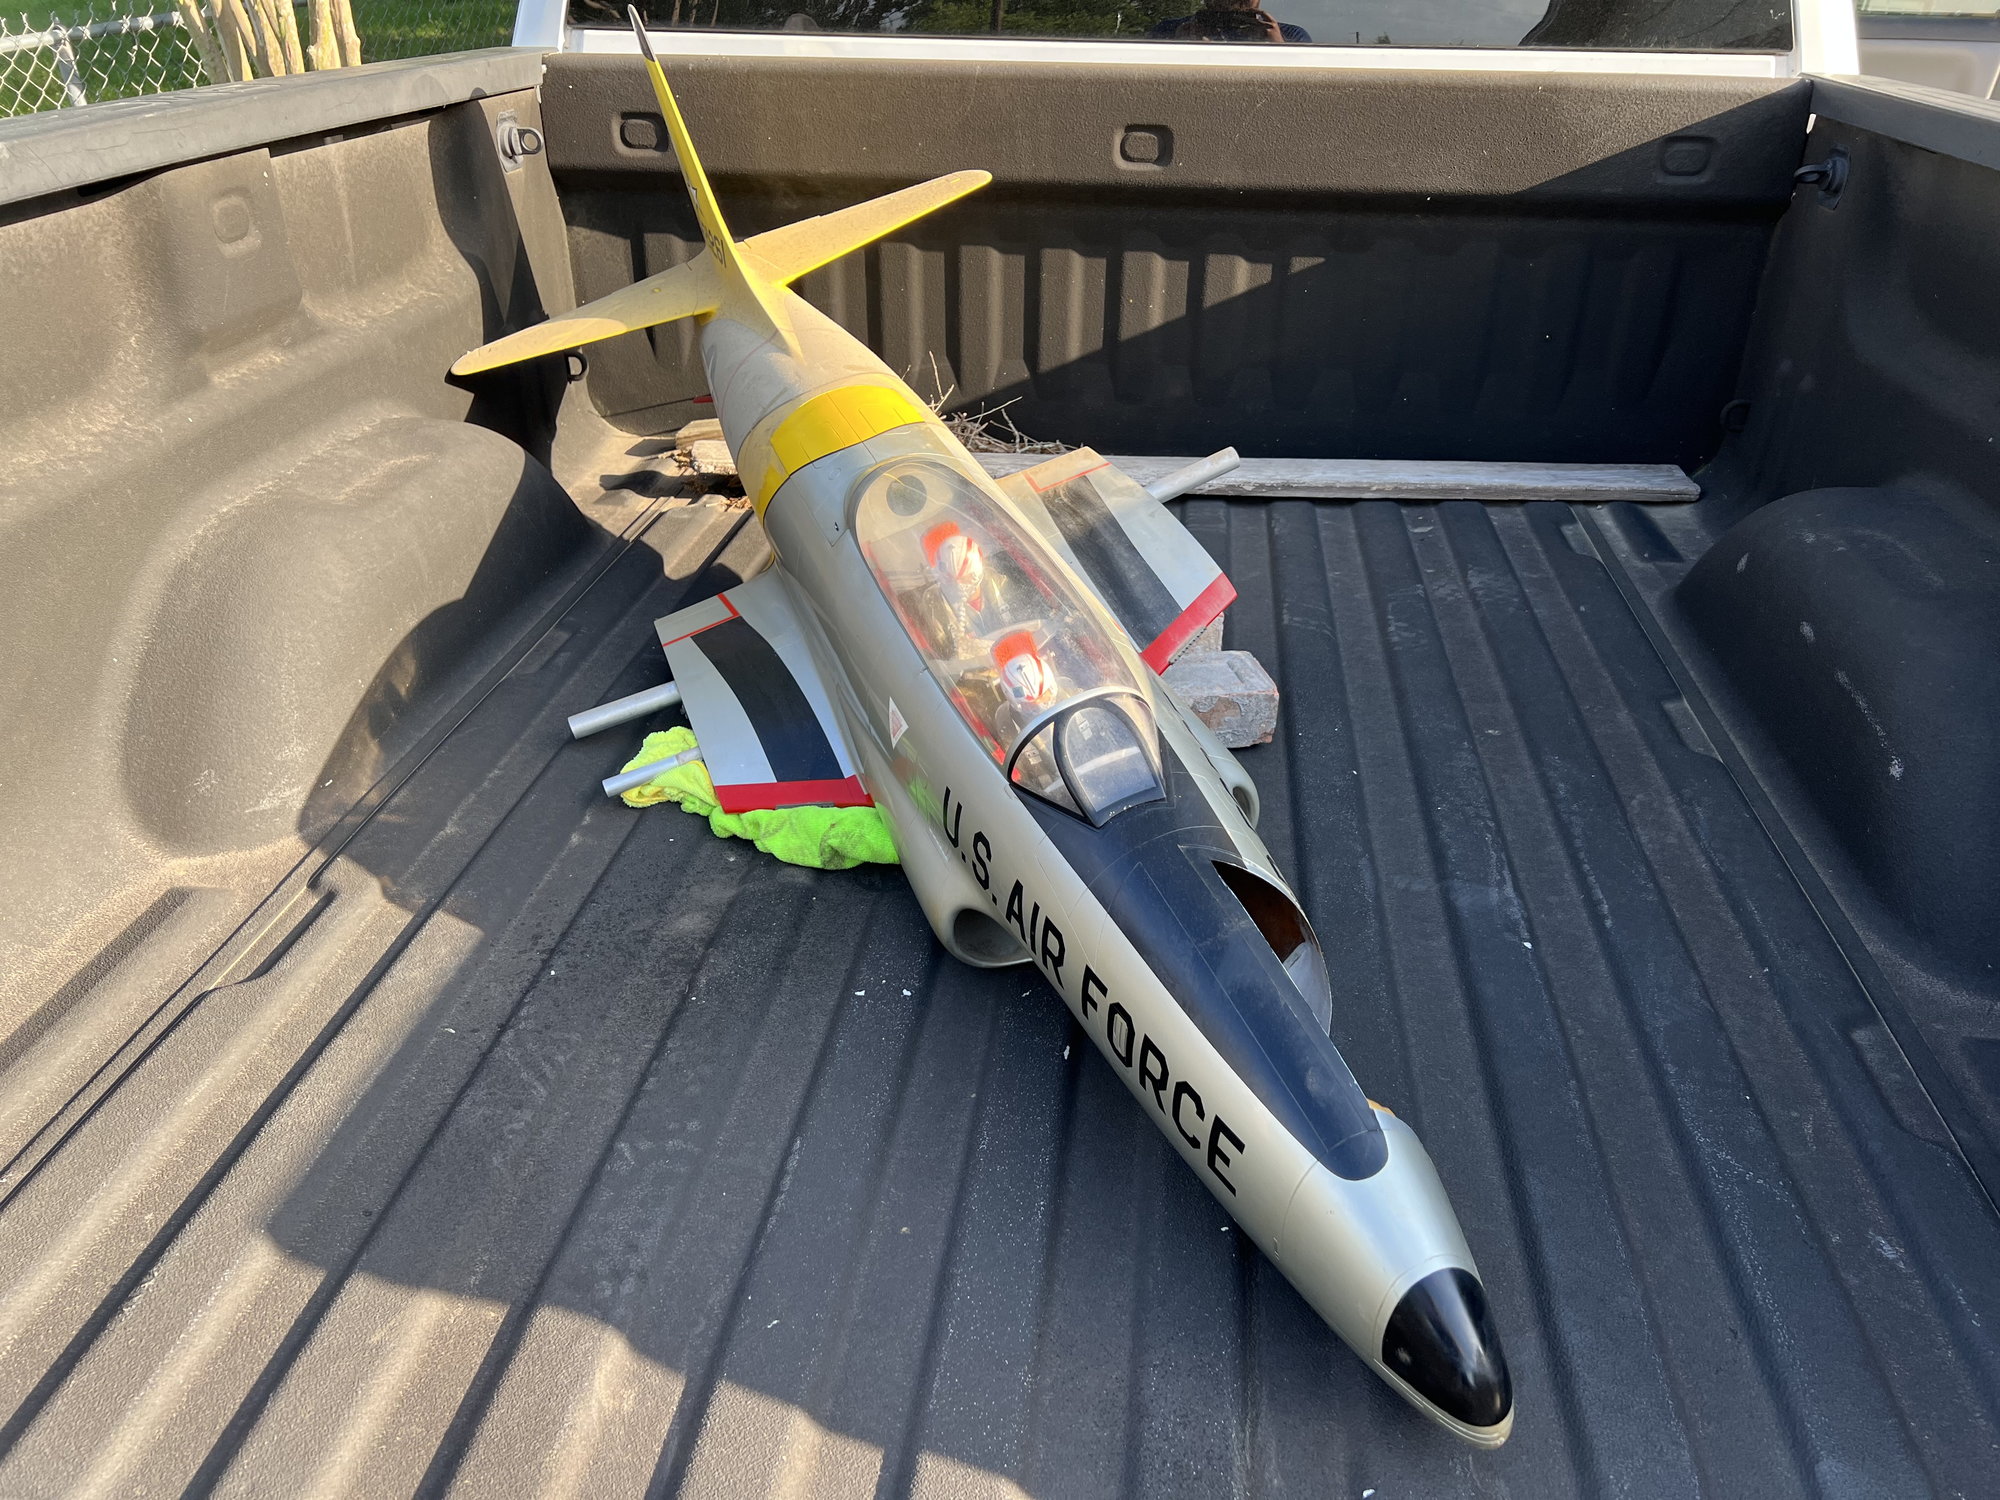
Time to bring her back to life!
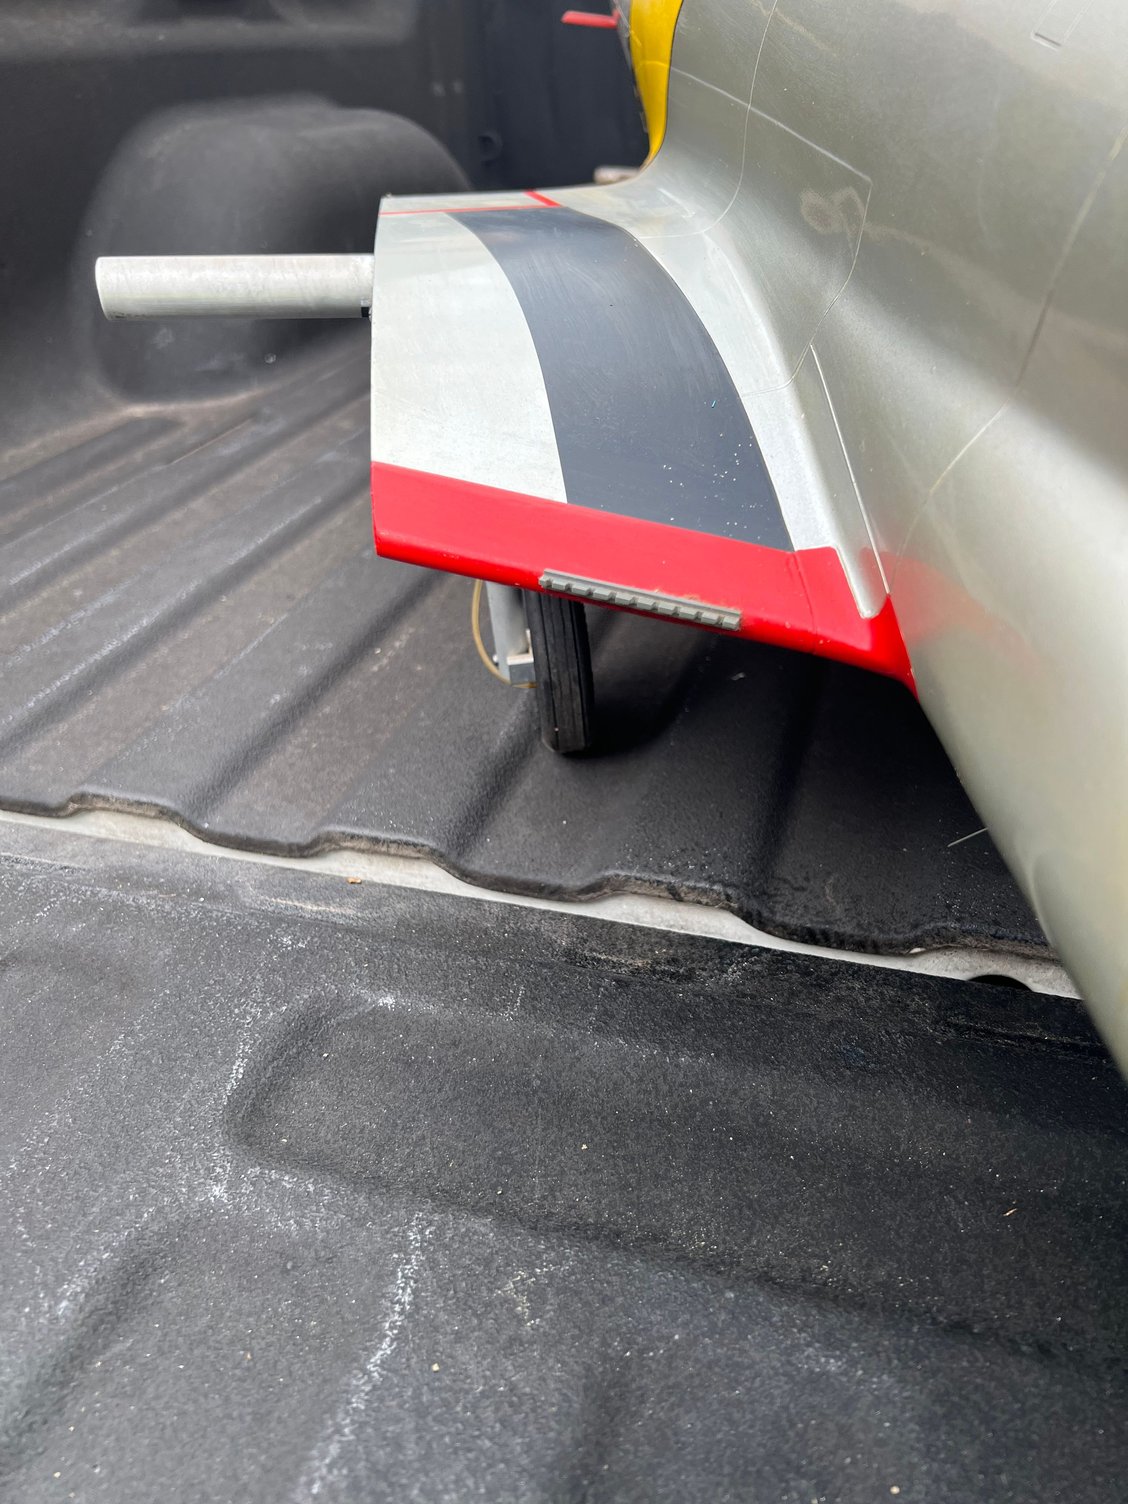
Mod 1
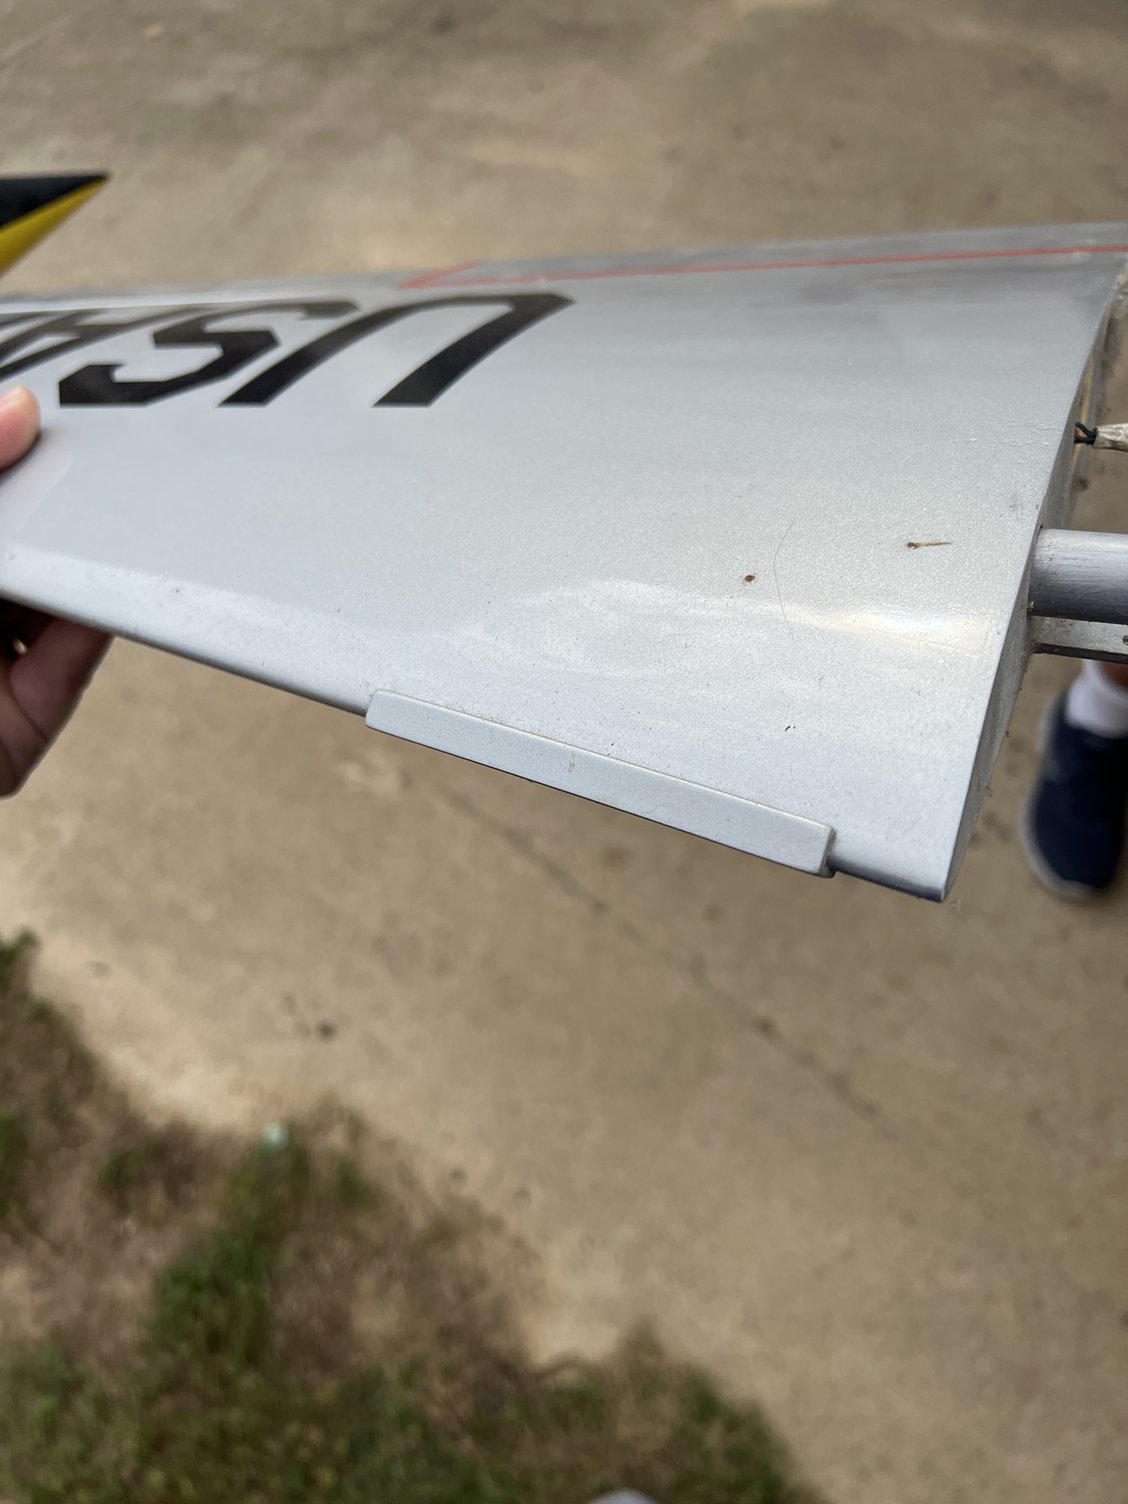
Mod 2
Little bit of dirt never hurt anyone.

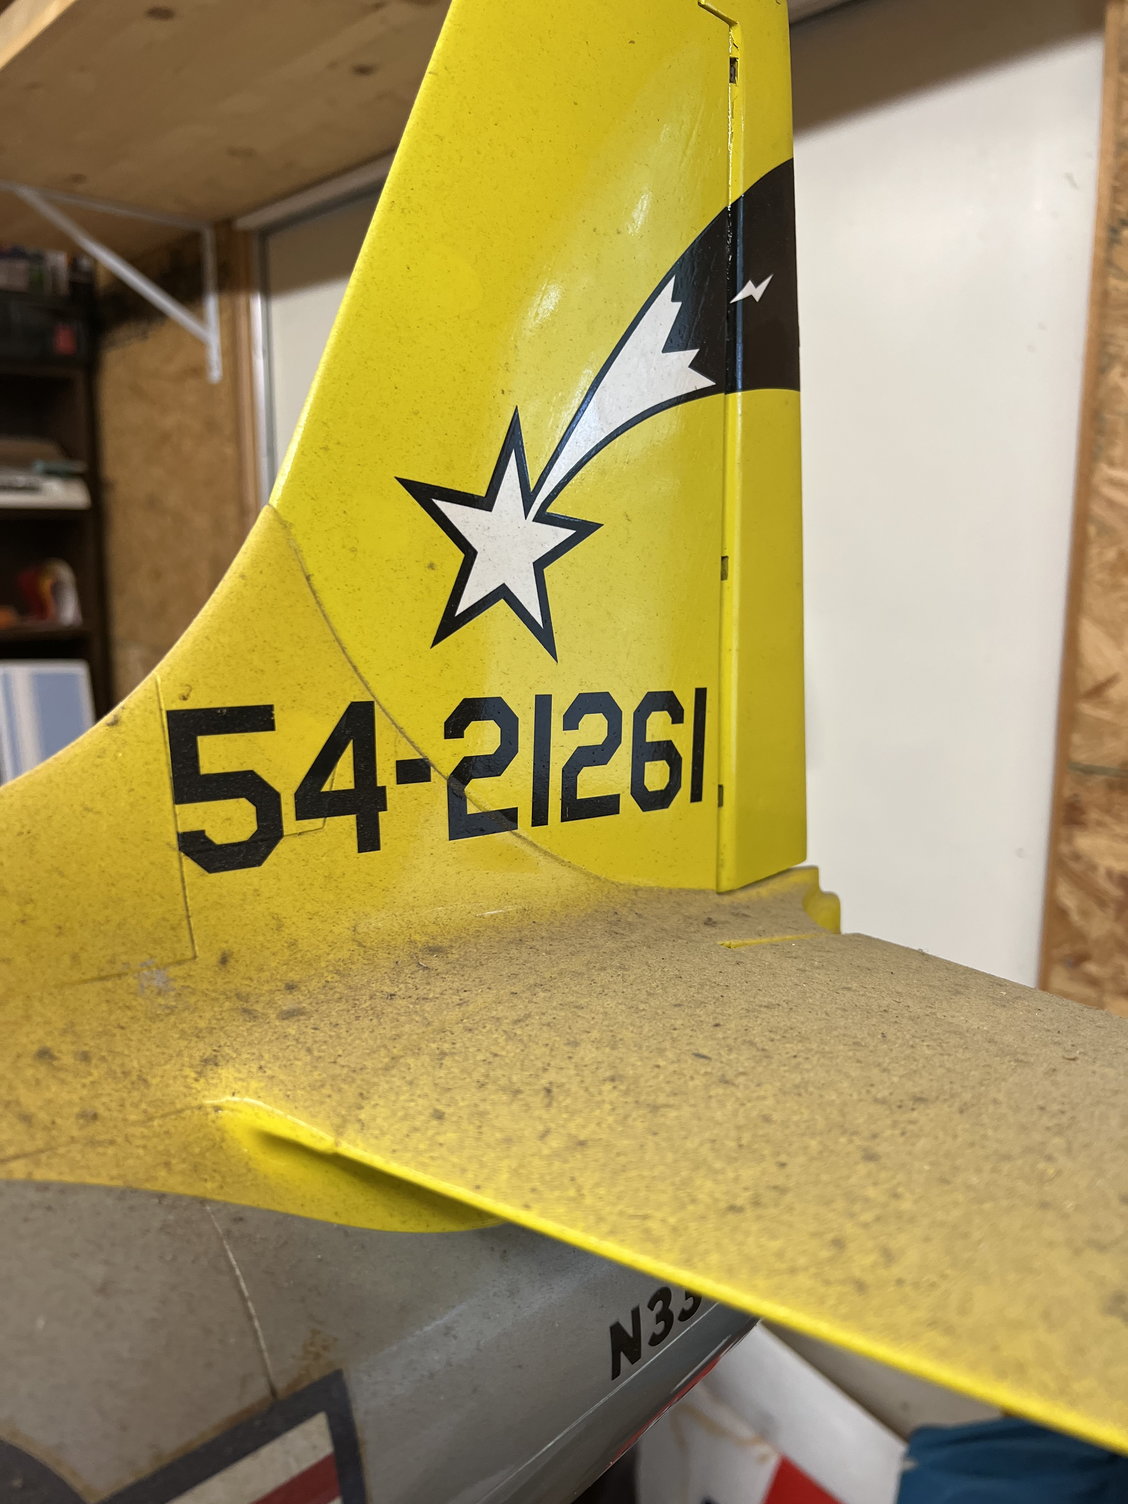
A little bit of a time machine here..
Still had compression!!!
This thread is my journey of gutting, cleaning and reviving the T-33.
This was one of the earliest kits so it does have the issue with the leading edge. As some of the photos show, it’s been modded a little bit. This kit does NOT have the flap kit installed. (More on that later) This kit was built by Mr.Tom Dodgen and flown by my Grandfather, Gus Hudson. I pulled it out of storage and have determined that it’s time to fly again!
Follow me on this journey. I will try my best to take as many photos as possible and be as detailed as possible. This kit is older than me (not lying) so if there’s something in your brain that you think would be helpful, please, speak up! I would love to make this revival as successful as possible.
Time to bring her back to life!
Mod 1
Mod 2
Little bit of dirt never hurt anyone.
A little bit of a time machine here..
Still had compression!!!

The following users liked this post:
RCAdam03 (05-21-2022)
05-21-2022 | 03:29 PM
#2
Plans:
New Gear doors via BVMs parts.
BVM EVF 12 Cell setup
TP Batteries
Spektrum Servos throughout
Spektrum Receiver
Spektrum Telemetry
Possibly lights??
One thing I’m considering, Flap Kit. Anyone have detailed photos of their installation? Seems like a very gruesome job and I’m currently debating it. I wouldn’t classify myself as an expert modeler, so I’m currently on the fence with it.
05-21-2022 | 03:58 PM
#3

It is very do-able, seems in reasonable condition. I still have a lot of BVM bits and pieces from that era. Let me know if you need something, I'll be happy to help.
Regards,
JanR
Regards,
JanR
05-21-2022 | 05:06 PM
#4
I seem to remember a video of this plane at the Superman Fan Fly when Tom Dodgen first finished it, beautiful plane. If you plan on selling the BVM glow fan system out of it let me know, i still fly those old ICDFs. Best of luck on your restoration!
05-21-2022 | 06:14 PM
#5

The following users liked this post:
RCAdam03 (05-22-2022)
05-21-2022 | 06:21 PM
#6
Gutting is complete. All internal servos, batteries, gyro, receiver, extensions, etc. Cleaned.
Being cautious with the paint, I took some warm distilled water and added just a drop of Dawn dish soap and sprayed the plane. Wiped it dry immediately with a micro fiber cloth. It cleaned up great. I’m going to go back, and spray some Ceramic coating spray. Can’t think of the name, but a fellow aviator uses it and it is AMAZING!
Being a full time student and full time employee, the only time I’m able to work on this thing is Friday/Saturday evenings. So until then, enjoy these few photos.
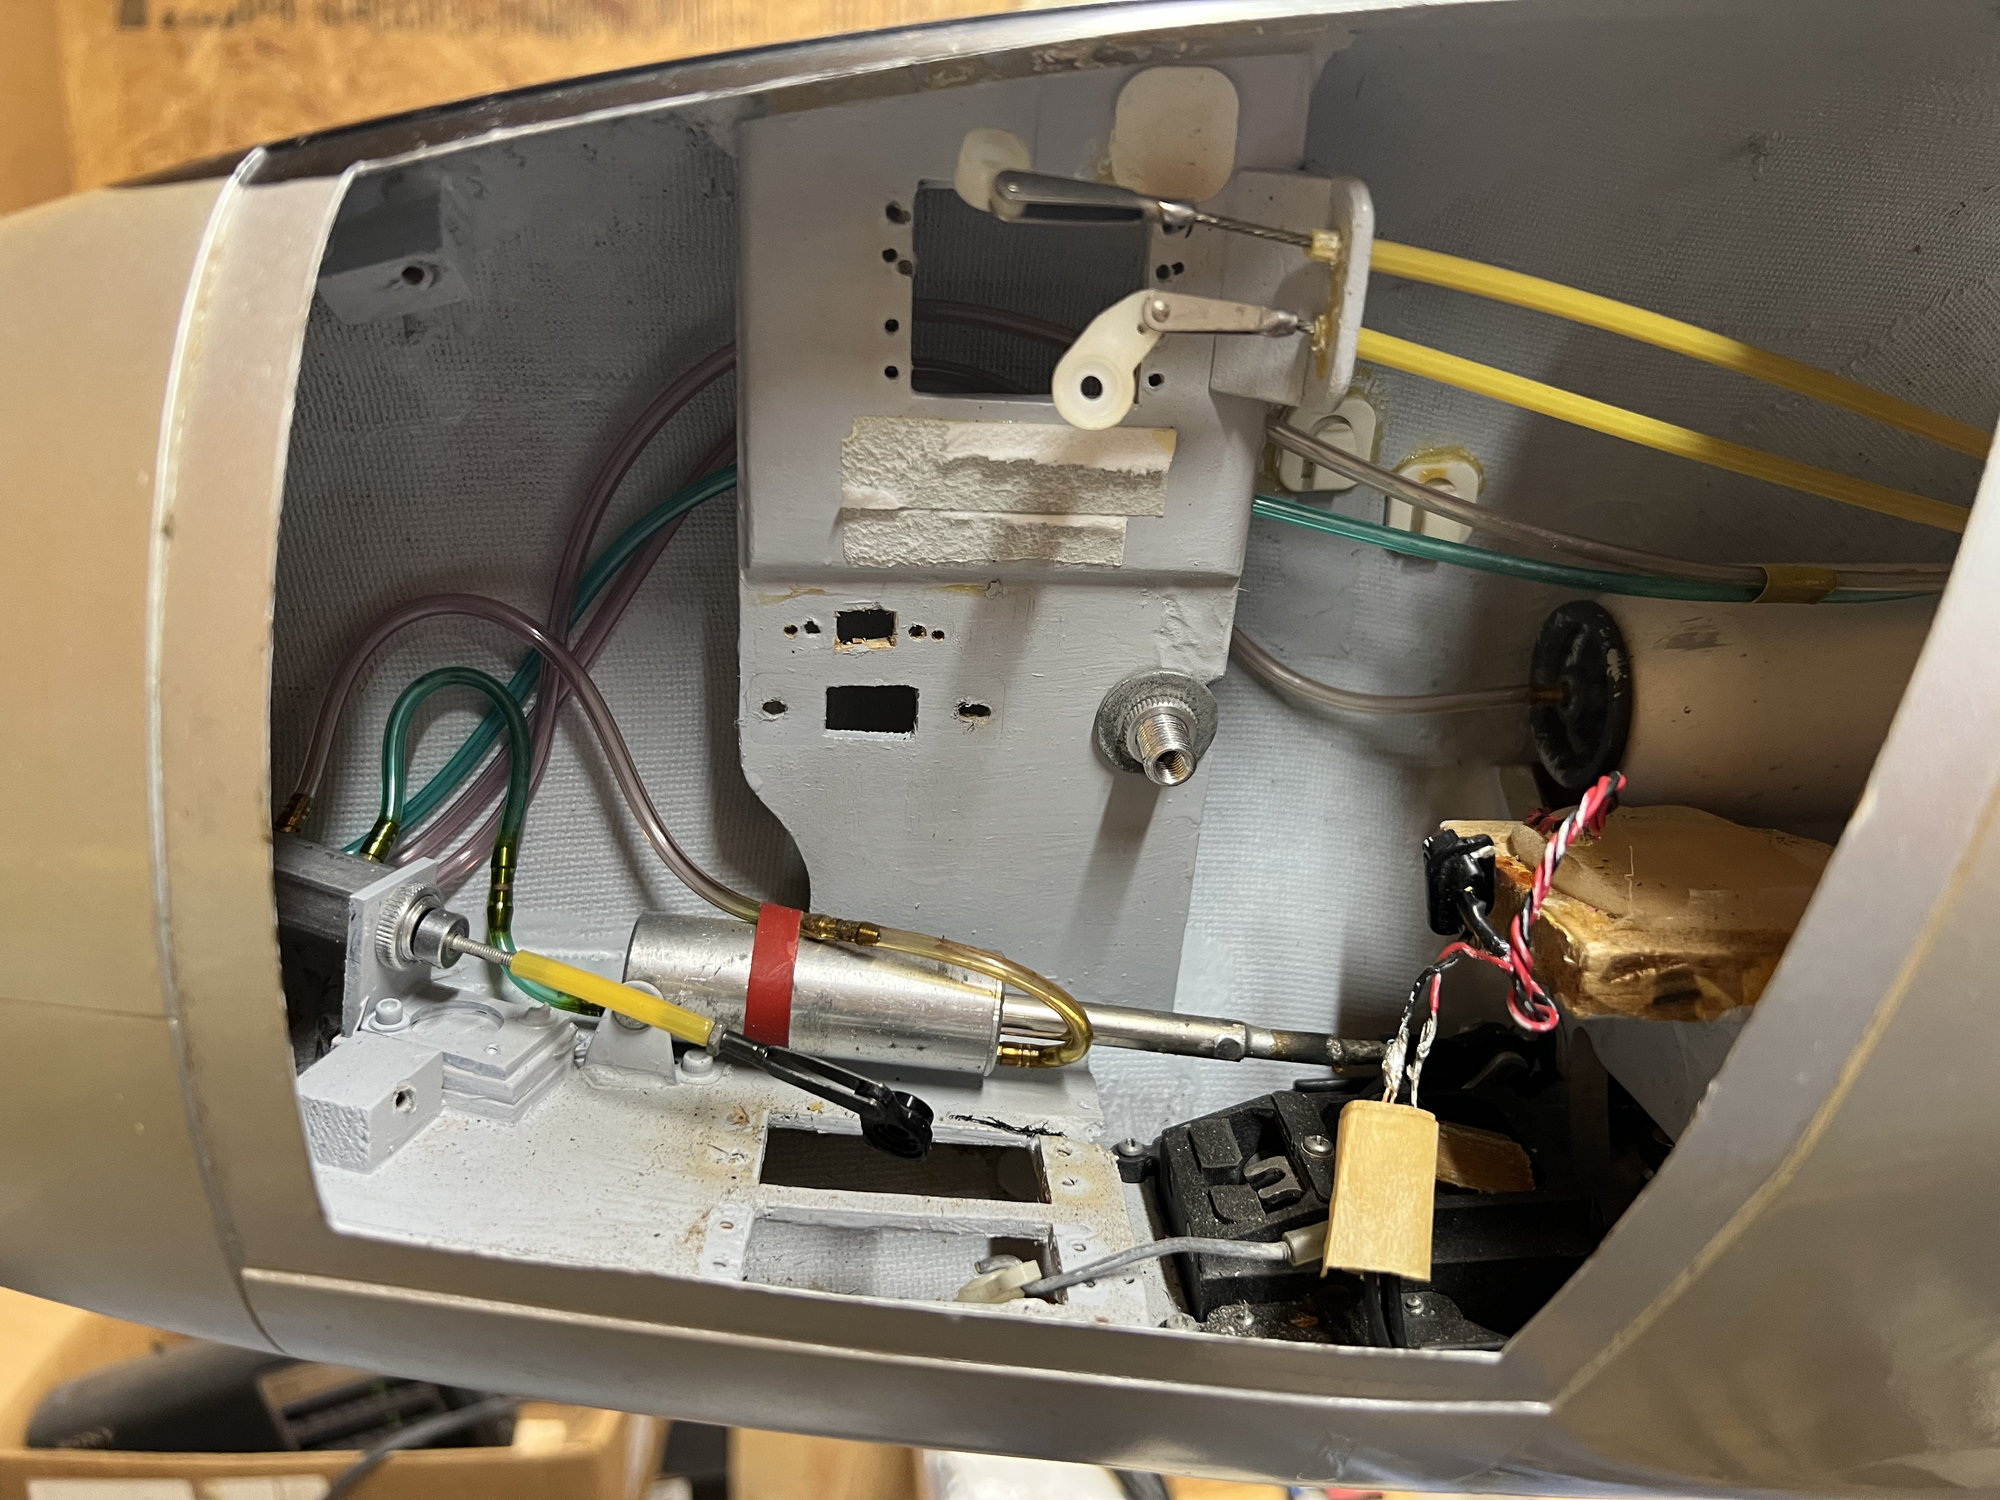
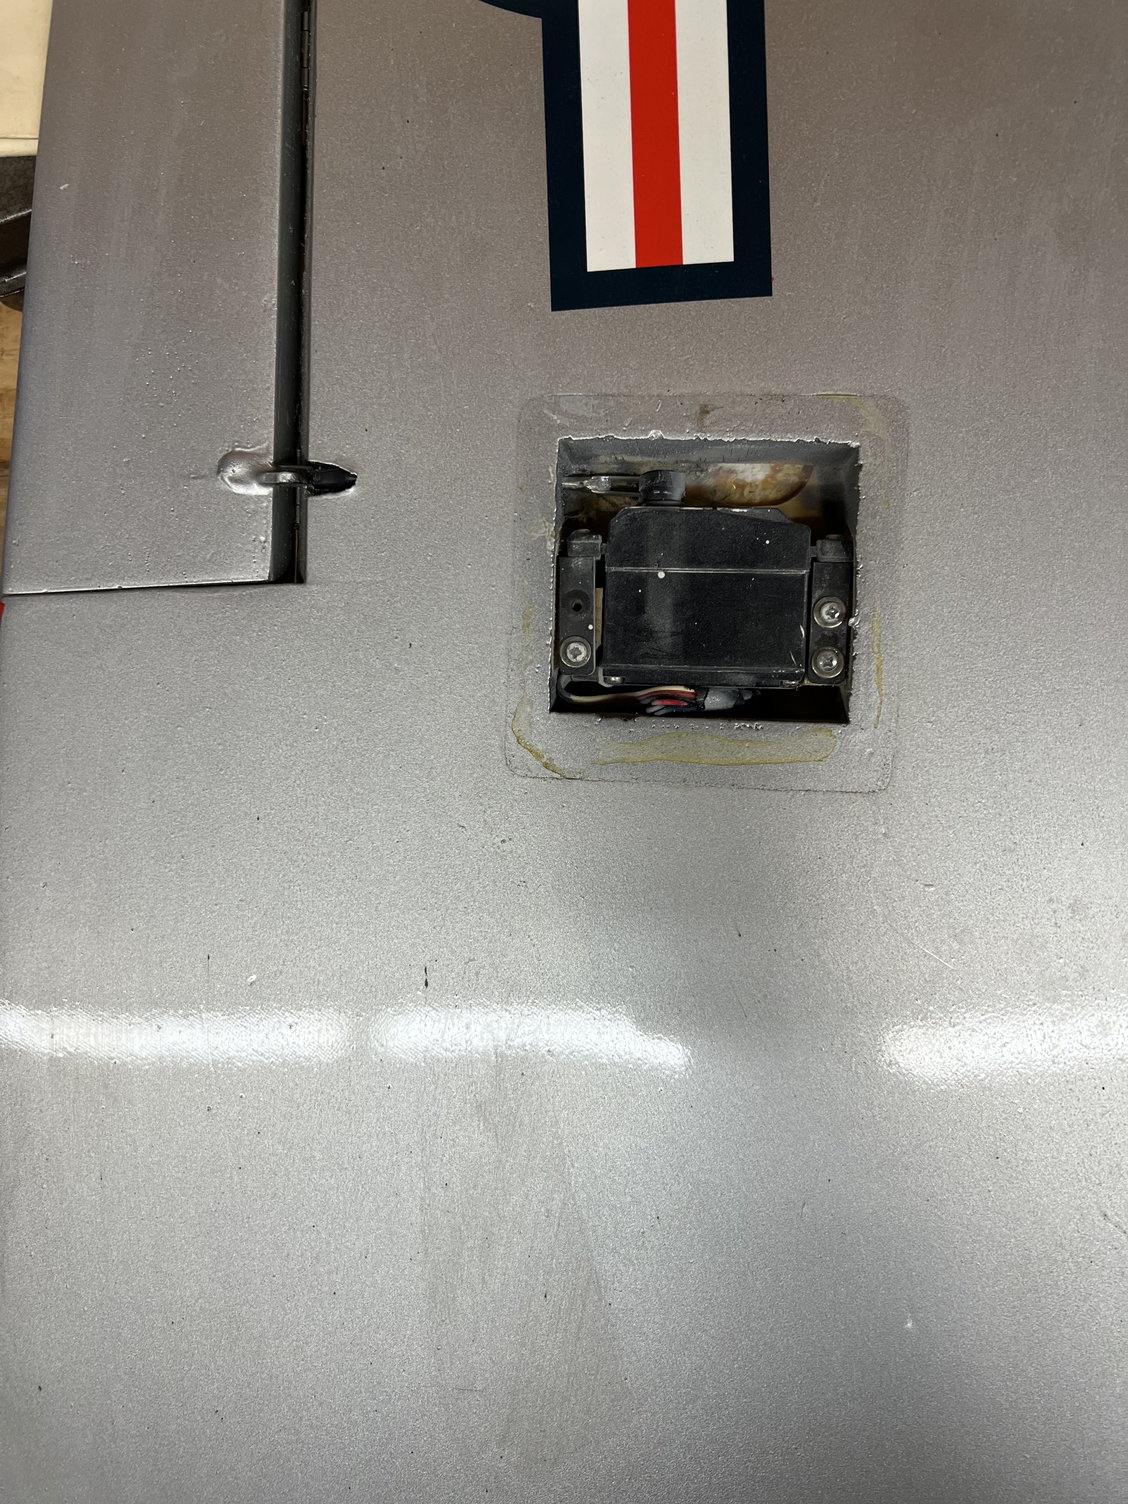
Throttle, mixture, nose steering and retract servo slots.
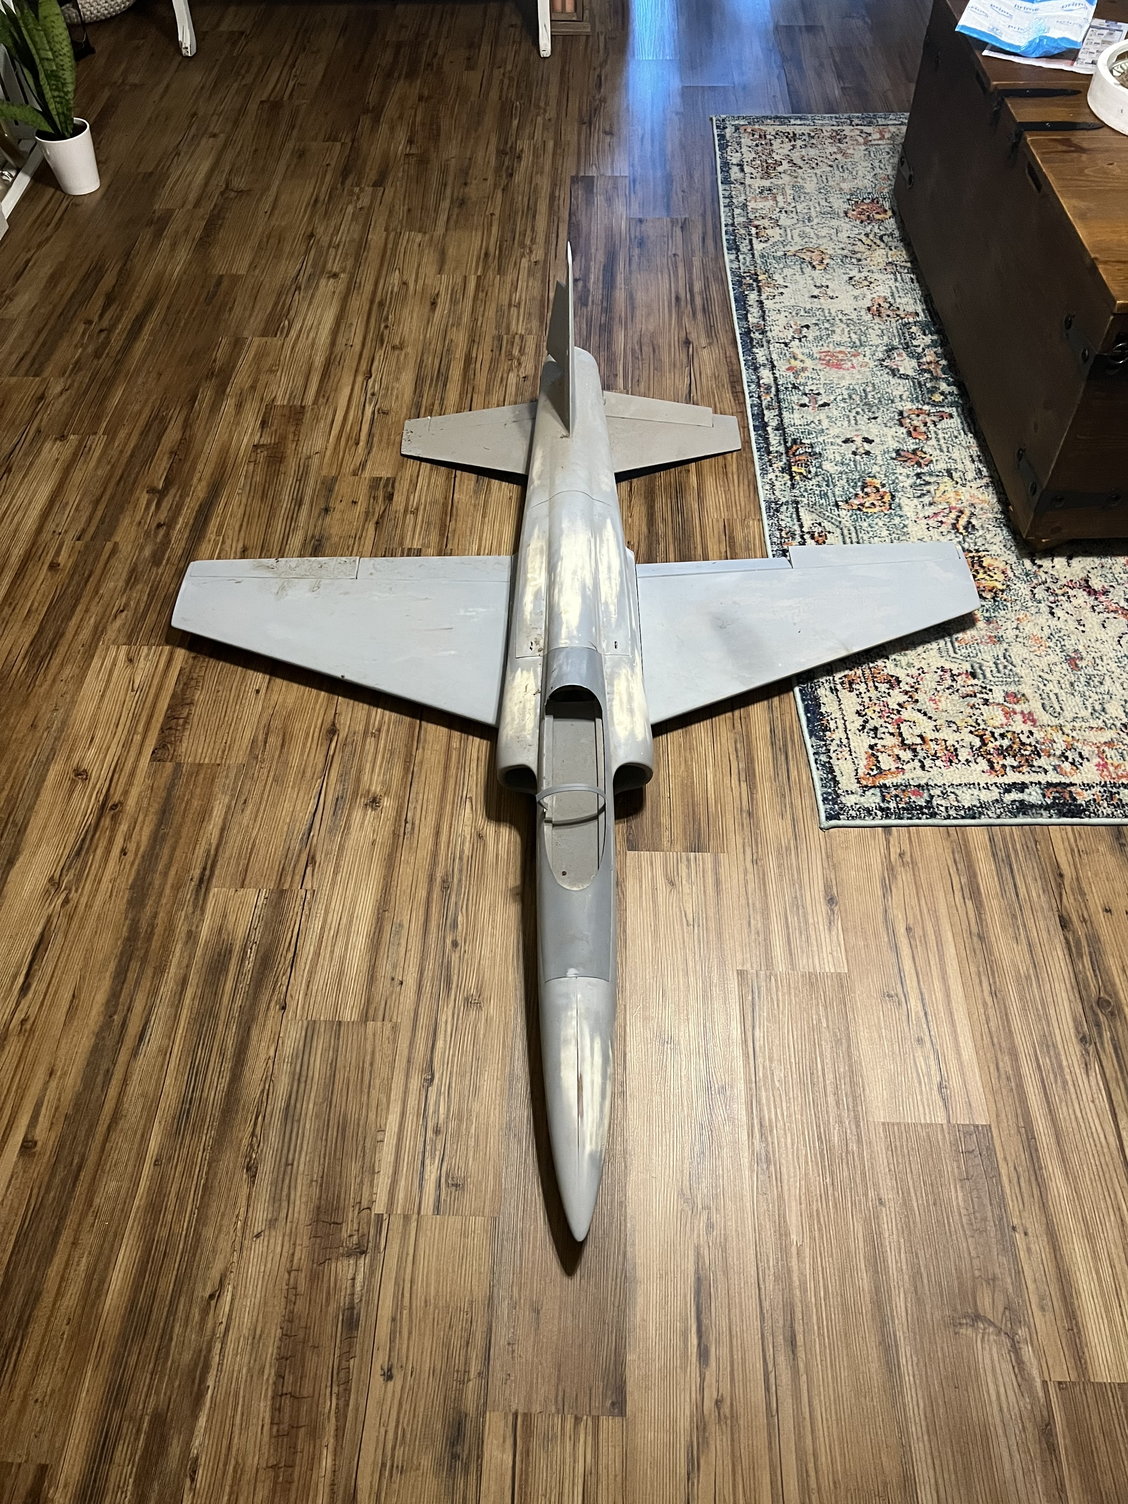
Looking a little empty!
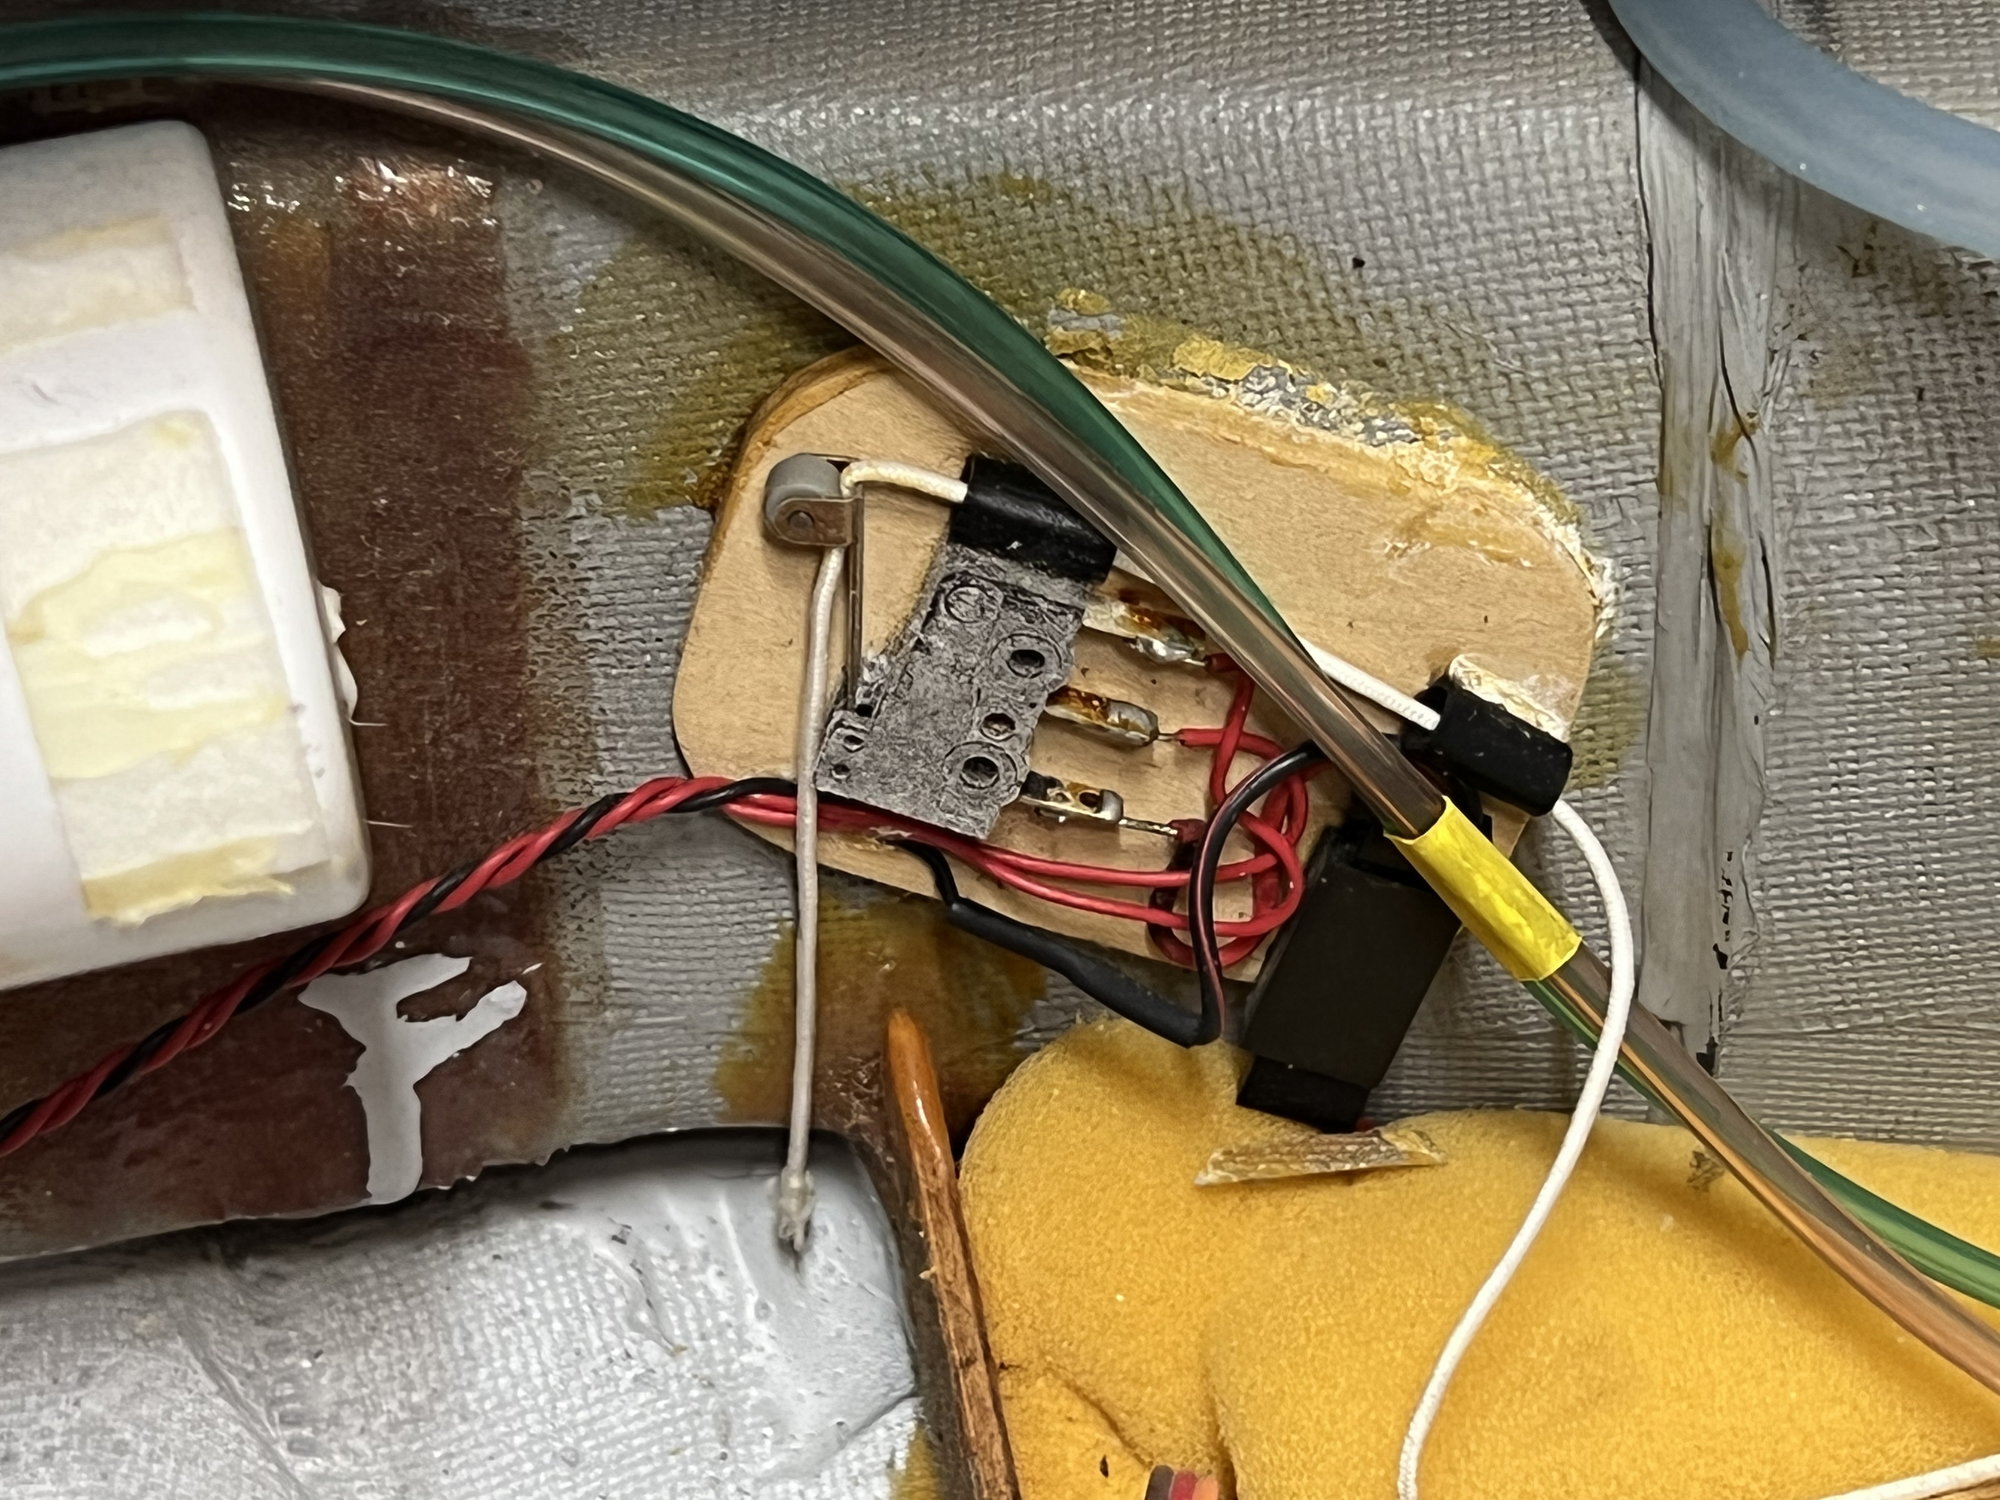
Ingenious design. Speed brakes deploy, a string is pulled, toggle switch engaged and nose landing lights are activated.
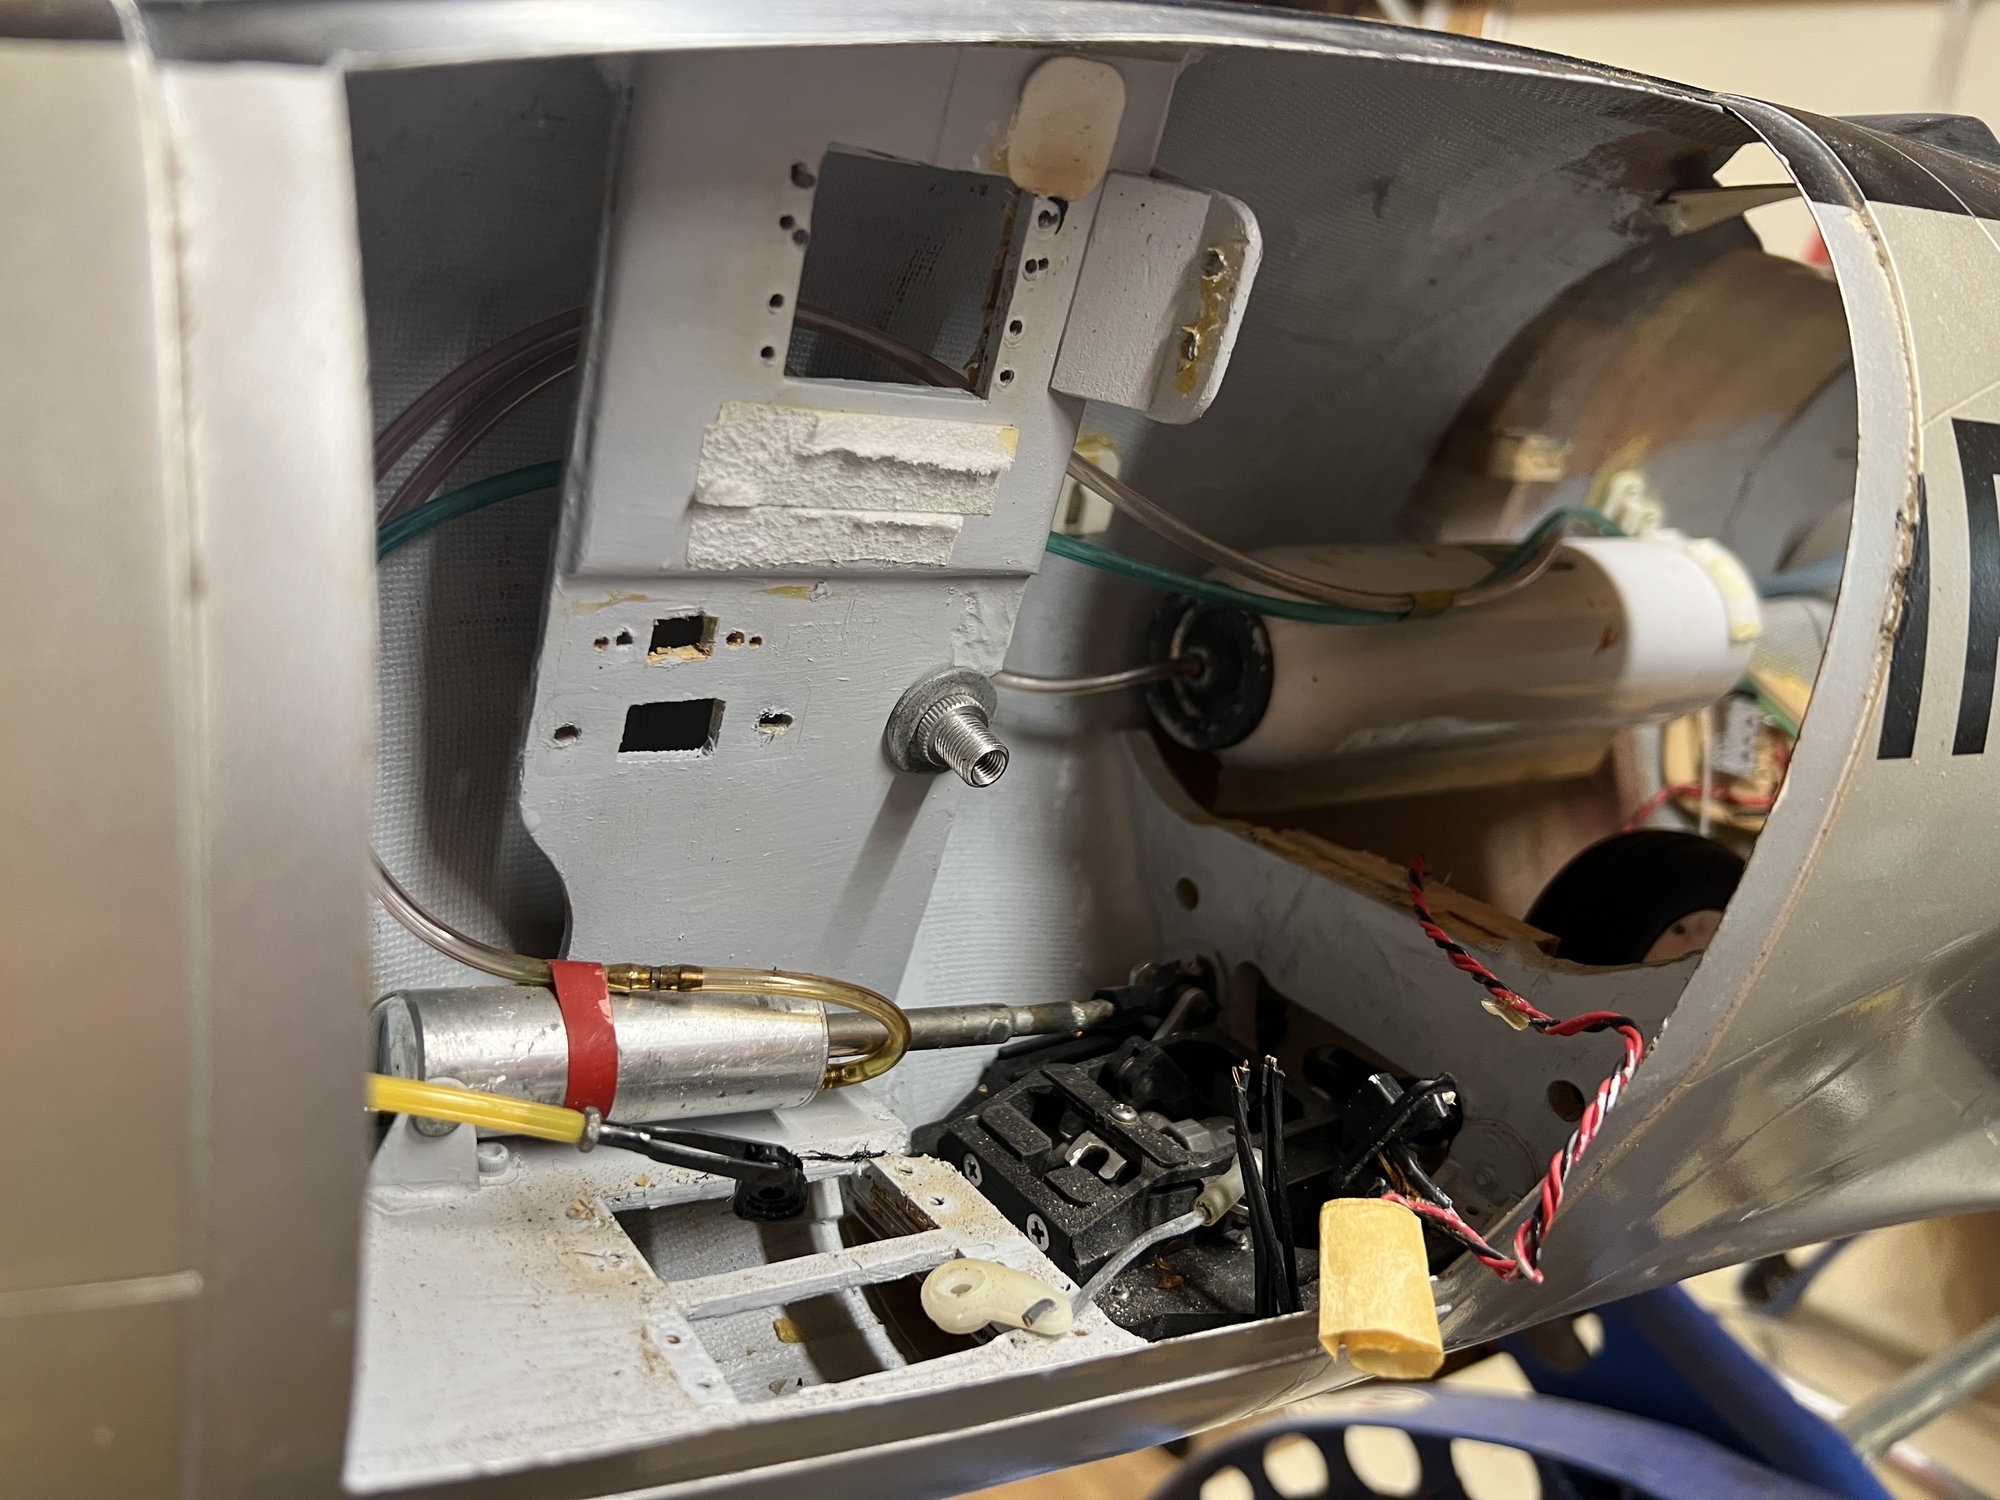
Looking pretty empty below deck.
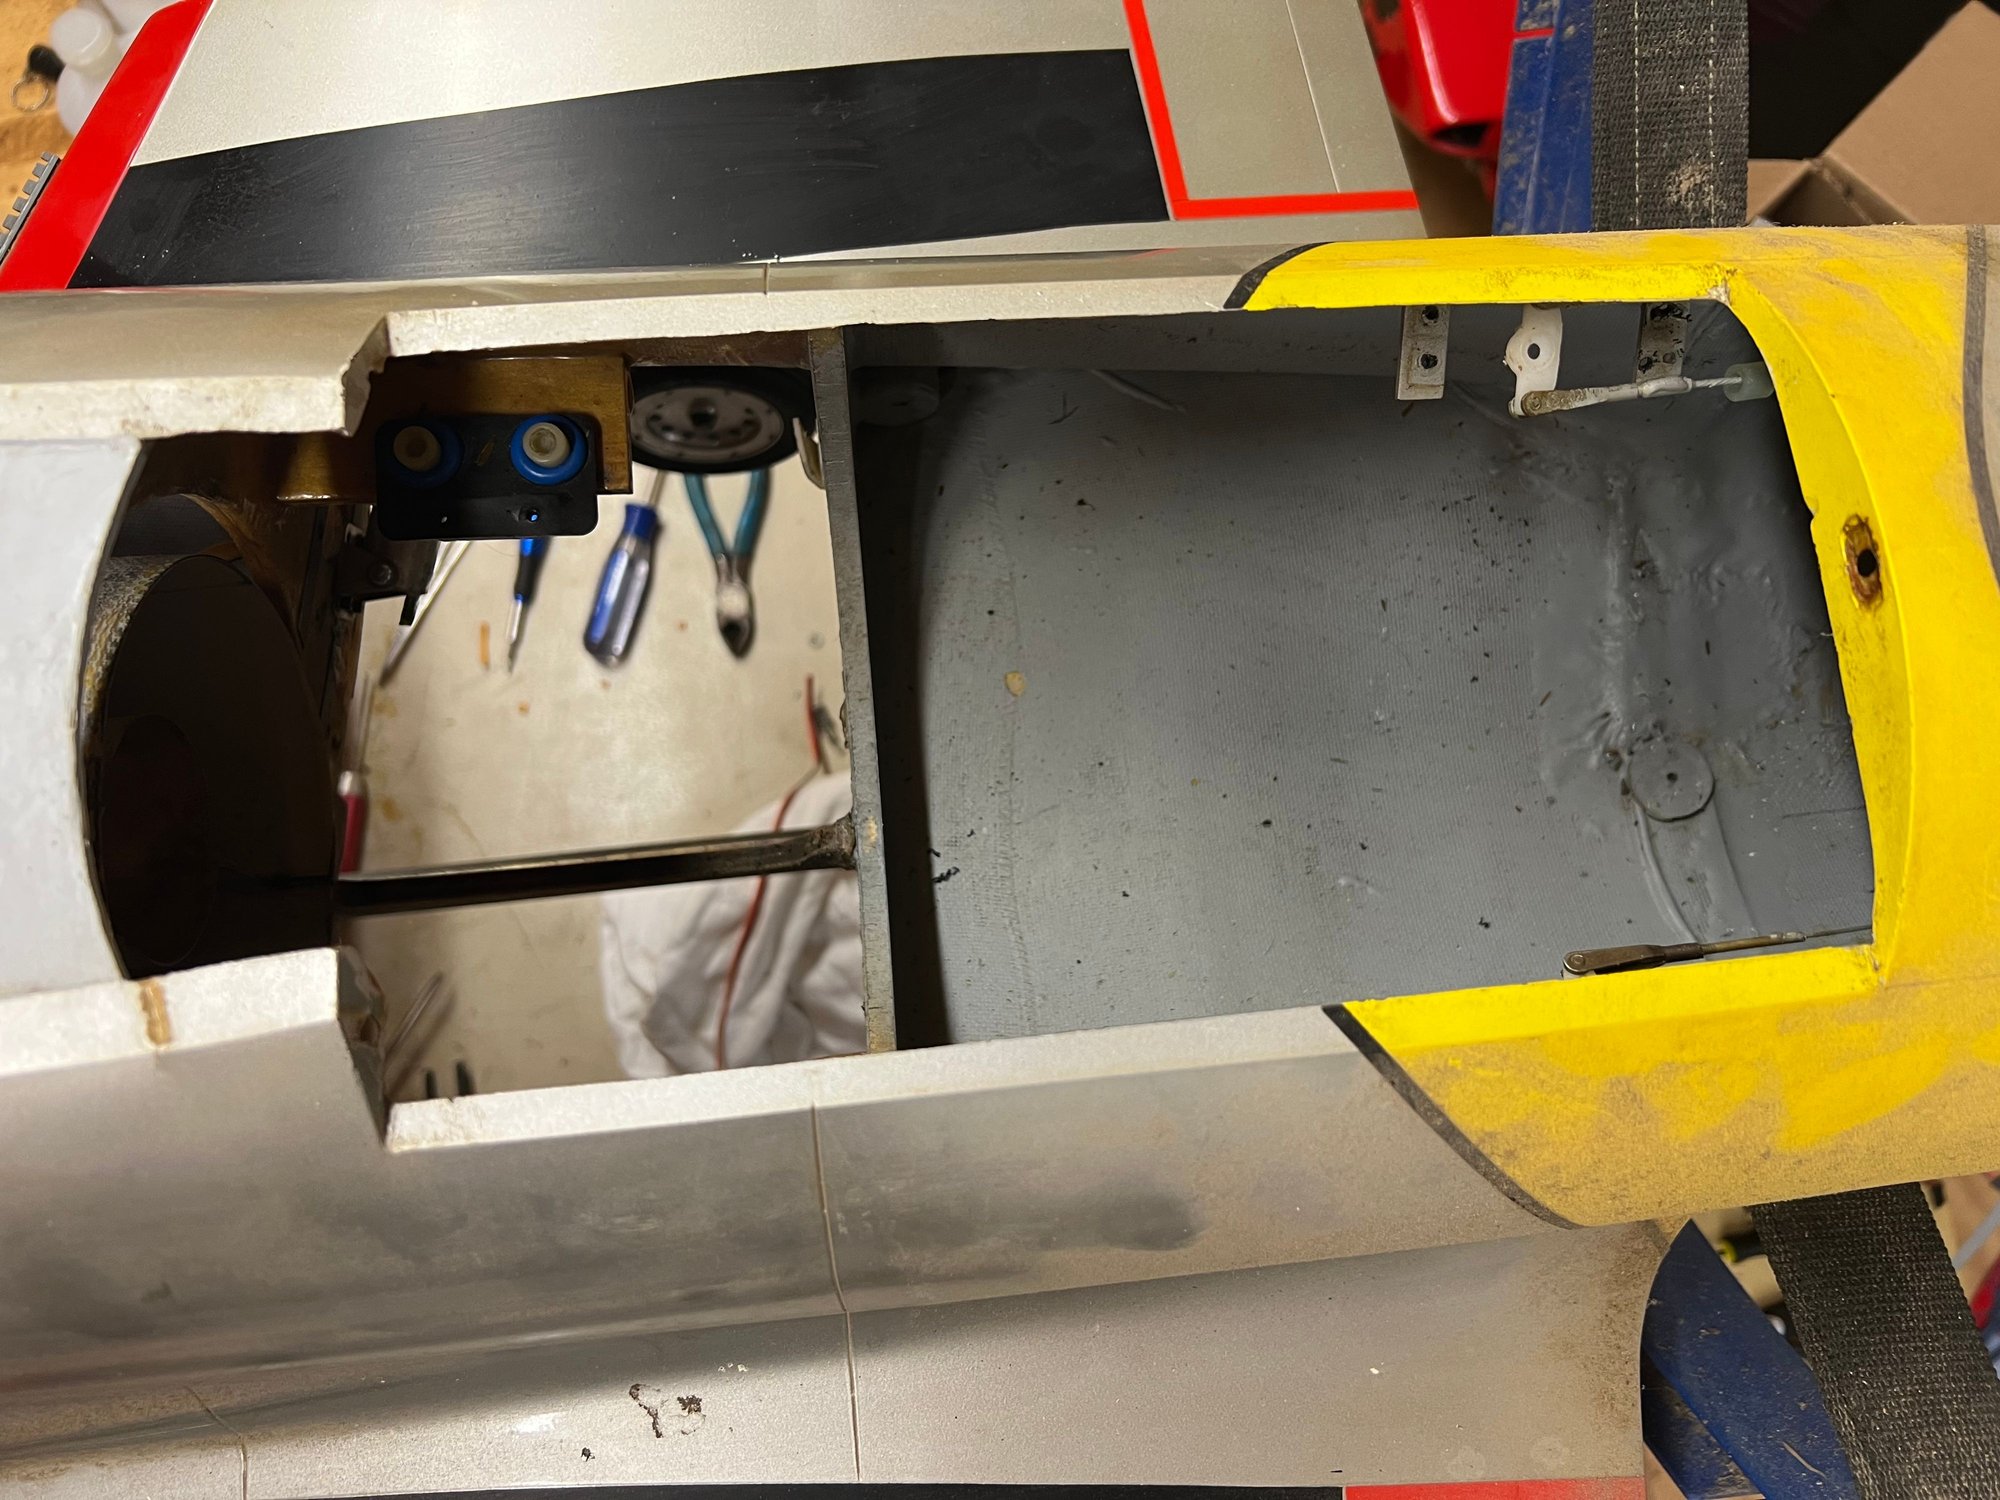
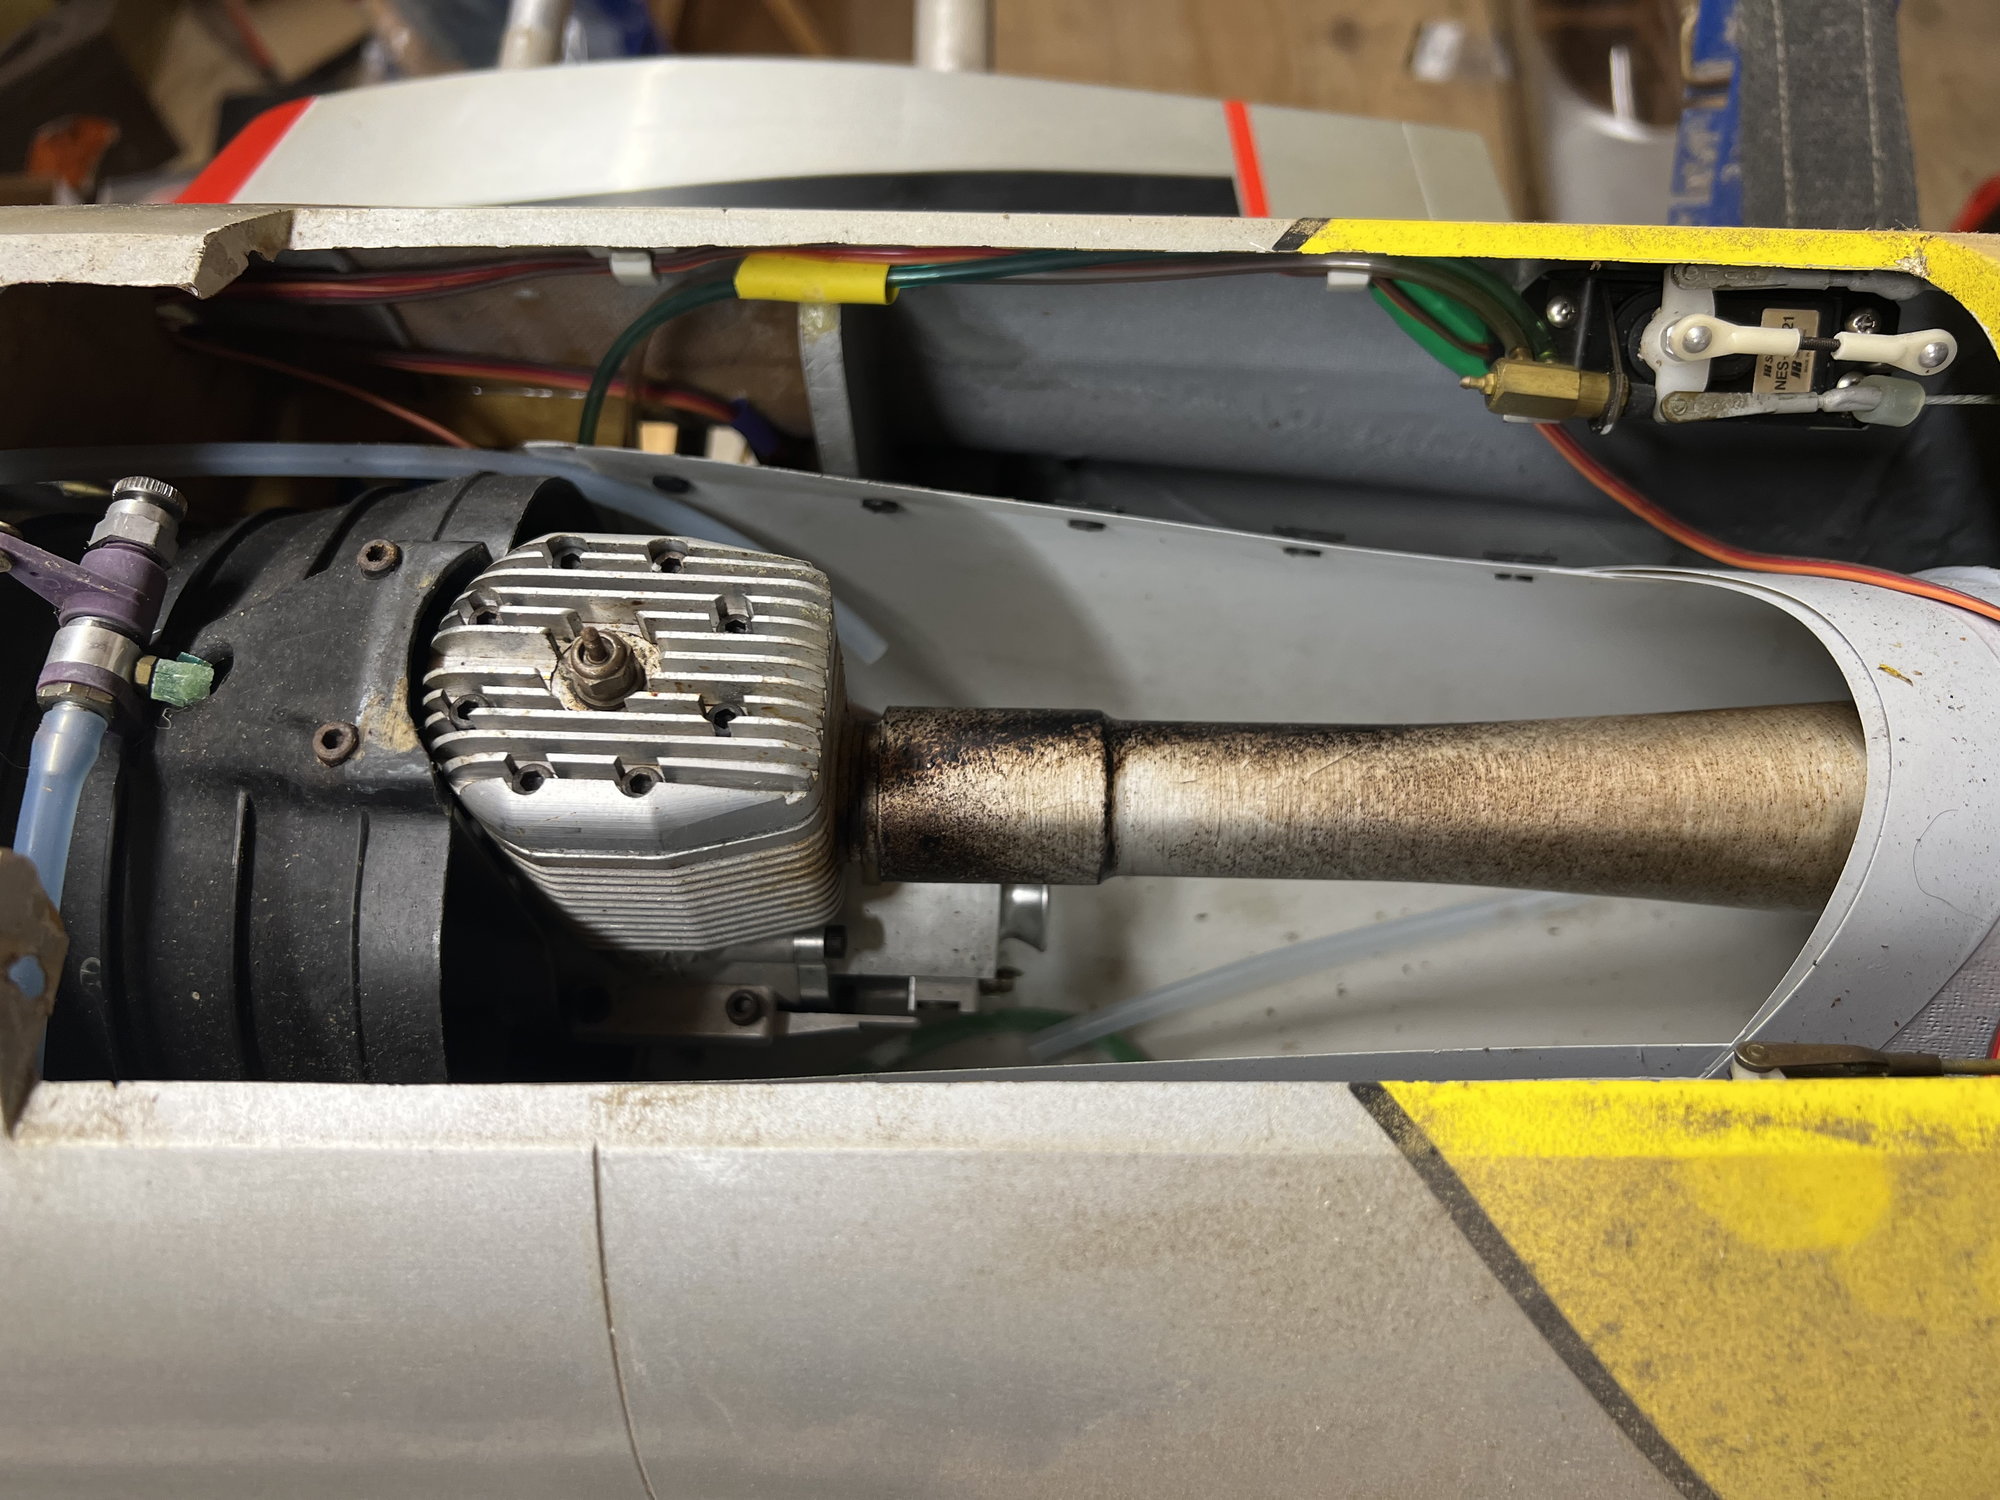
Fan and pipe removed.

Echoooooo!
I’m going to try and preserve the light mount and housing and replace them with LED’s. They look perfectly sized.
Being cautious with the paint, I took some warm distilled water and added just a drop of Dawn dish soap and sprayed the plane. Wiped it dry immediately with a micro fiber cloth. It cleaned up great. I’m going to go back, and spray some Ceramic coating spray. Can’t think of the name, but a fellow aviator uses it and it is AMAZING!
Being a full time student and full time employee, the only time I’m able to work on this thing is Friday/Saturday evenings. So until then, enjoy these few photos.
Throttle, mixture, nose steering and retract servo slots.
Looking a little empty!
Ingenious design. Speed brakes deploy, a string is pulled, toggle switch engaged and nose landing lights are activated.
Looking pretty empty below deck.
Fan and pipe removed.
Echoooooo!
I’m going to try and preserve the light mount and housing and replace them with LED’s. They look perfectly sized.
05-22-2022 | 04:16 AM
#8

My Feedback: (21)
Plans:
New Gear doors via BVMs parts.
BVM EVF 12 Cell setup
TP Batteries
Spektrum Servos throughout
Spektrum Receiver
Spektrum Telemetry
Possibly lights??
One thing I’m considering, Flap Kit. Anyone have detailed photos of their installation? Seems like a very gruesome job and I’m currently debating it. I wouldn’t classify myself as an expert modeler, so I’m currently on the fence with it.
New Gear doors via BVMs parts.
BVM EVF 12 Cell setup
TP Batteries
Spektrum Servos throughout
Spektrum Receiver
Spektrum Telemetry
Possibly lights??
One thing I’m considering, Flap Kit. Anyone have detailed photos of their installation? Seems like a very gruesome job and I’m currently debating it. I wouldn’t classify myself as an expert modeler, so I’m currently on the fence with it.

The following users liked this post:
grbaker (05-22-2022)
05-22-2022 | 06:41 AM
#10
Friends are always welcomed to come and stop by at the field!
05-22-2022 | 01:58 PM
#11
Senior Member
My Feedback: (85)
BVM T-33 wing root fix, is listed in this thread plus other good info
Help with a BVM T-33?
I don't know which kit you have, but you might want to check into it.
Clay
Help with a BVM T-33?
I don't know which kit you have, but you might want to check into it.
Clay


 05-22-2022 | 03:17 PM
#14
Thank you, sir.
Everyone: Thanks so much for the advice you guys are chiming in with. Hopefully in two weeks the servos will be here to begin the “stuffing.”
08-11-2022 | 04:28 PM
#16
Made a little bit of progress here and there..School and full scale flying have roped my attention for the past few weeks.
Also, I’ve been waiting on parts. I believe that after next week, all parts will be in.
In the meantime, here’s some photos..
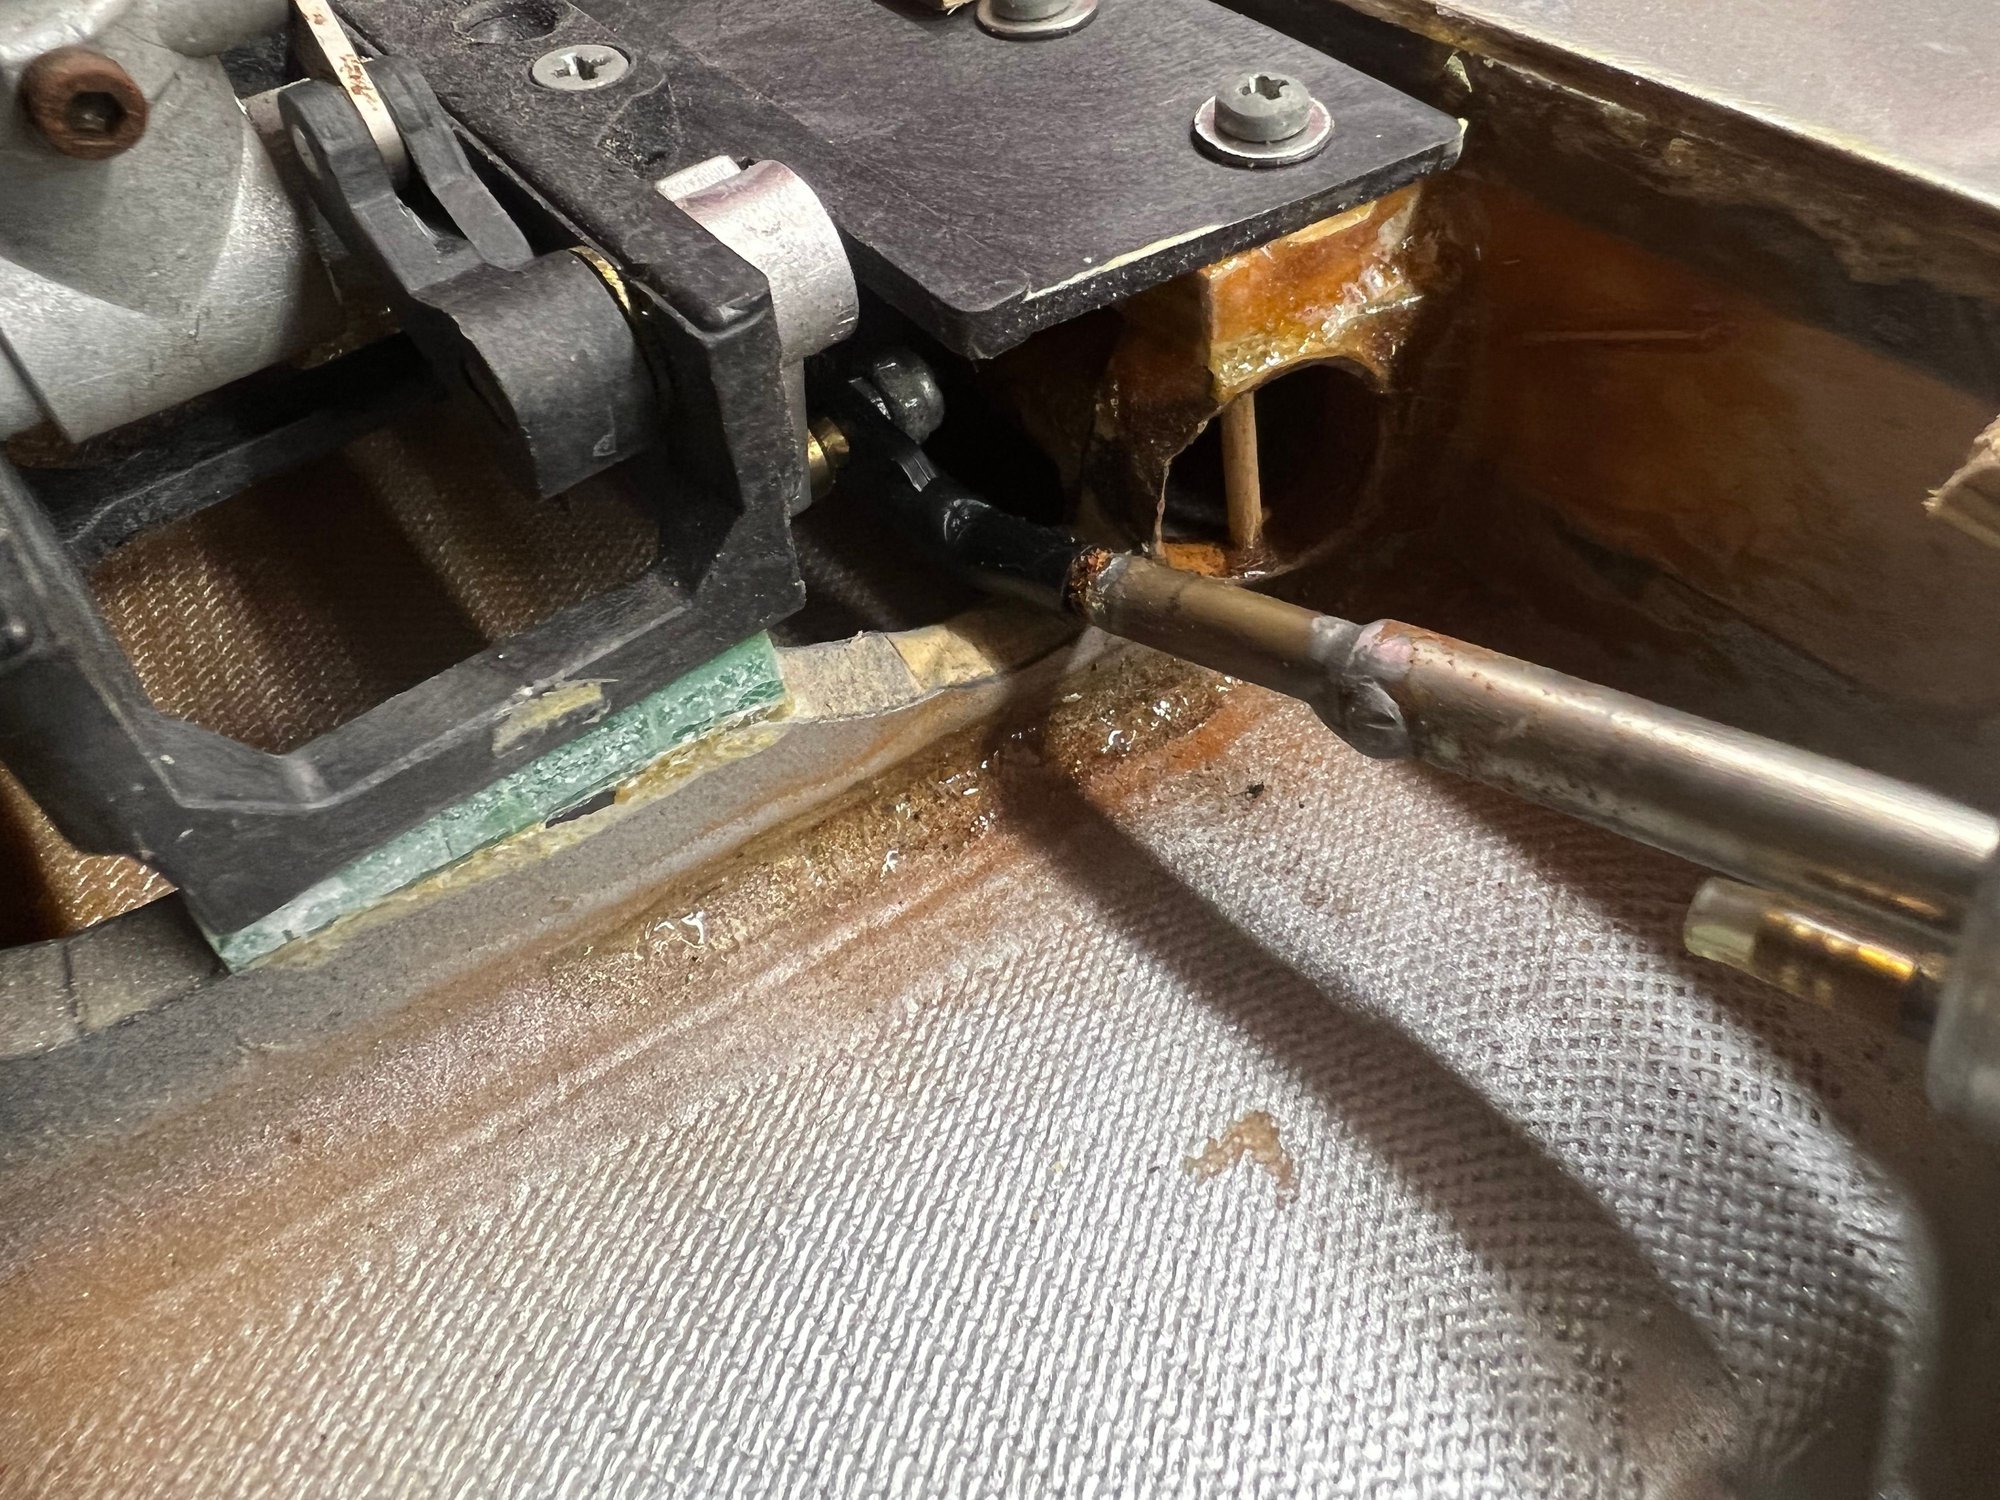
Inspecting the Geometry of the 4-40 connector, trying to decide how Tom did it..And pulled it off. Massive credit to all the builders out there!
Second look at it.
I determined that I could take a soldering blade, turn my heat to a low setting and make an impression on the Dubro link. This would allow me to bend it to its proper angle. It took about 3 tries until I was able to get it right.
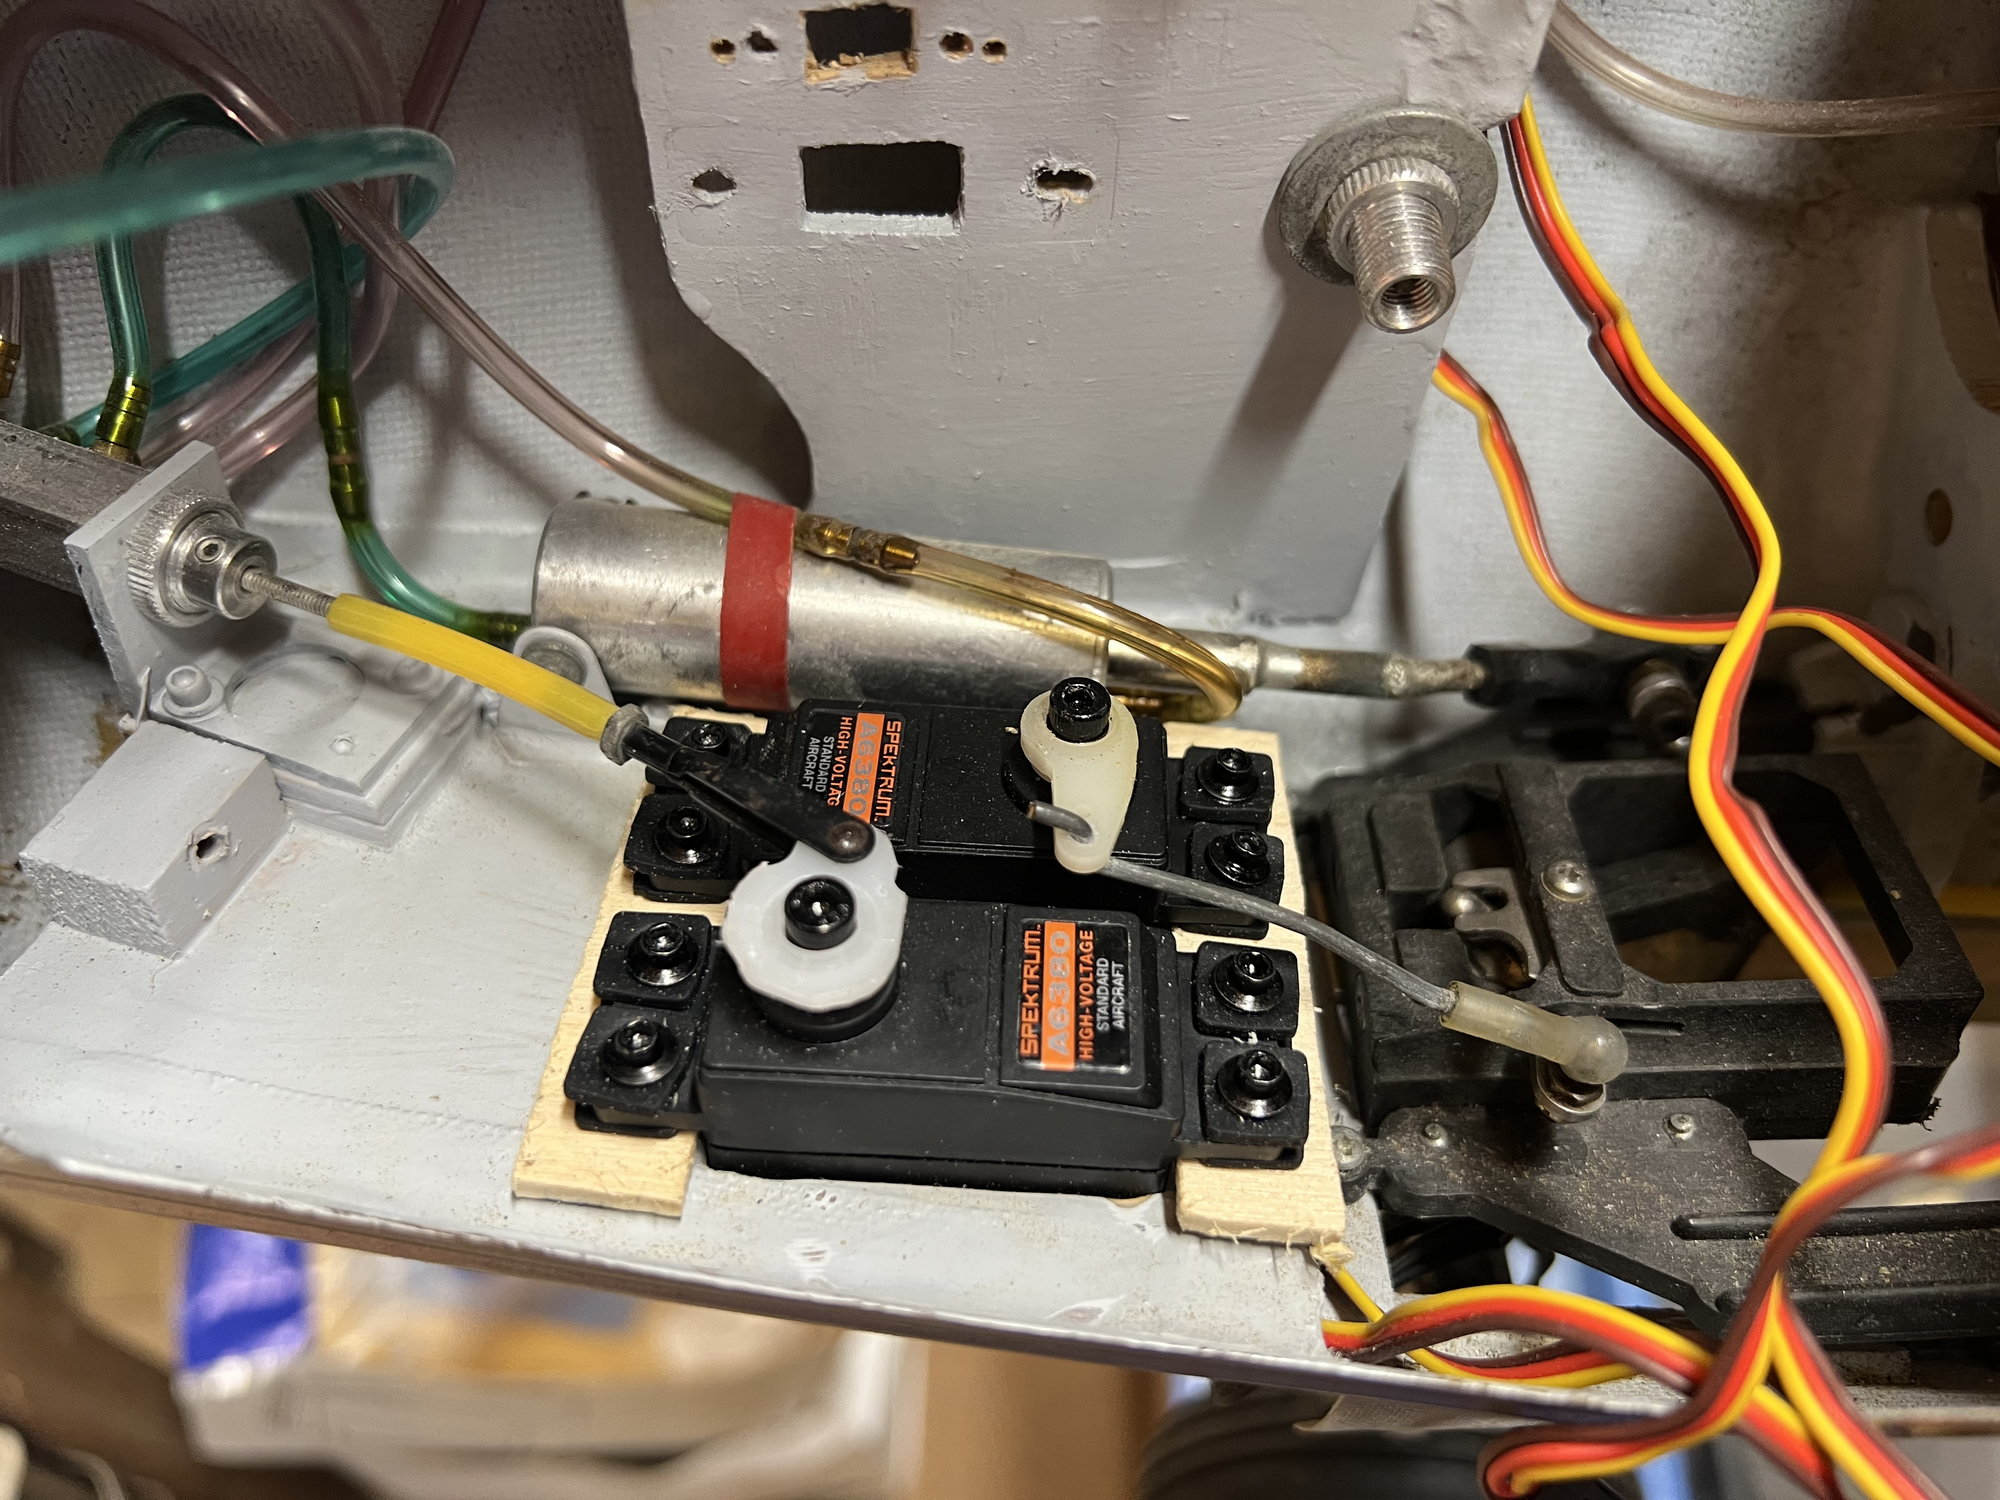
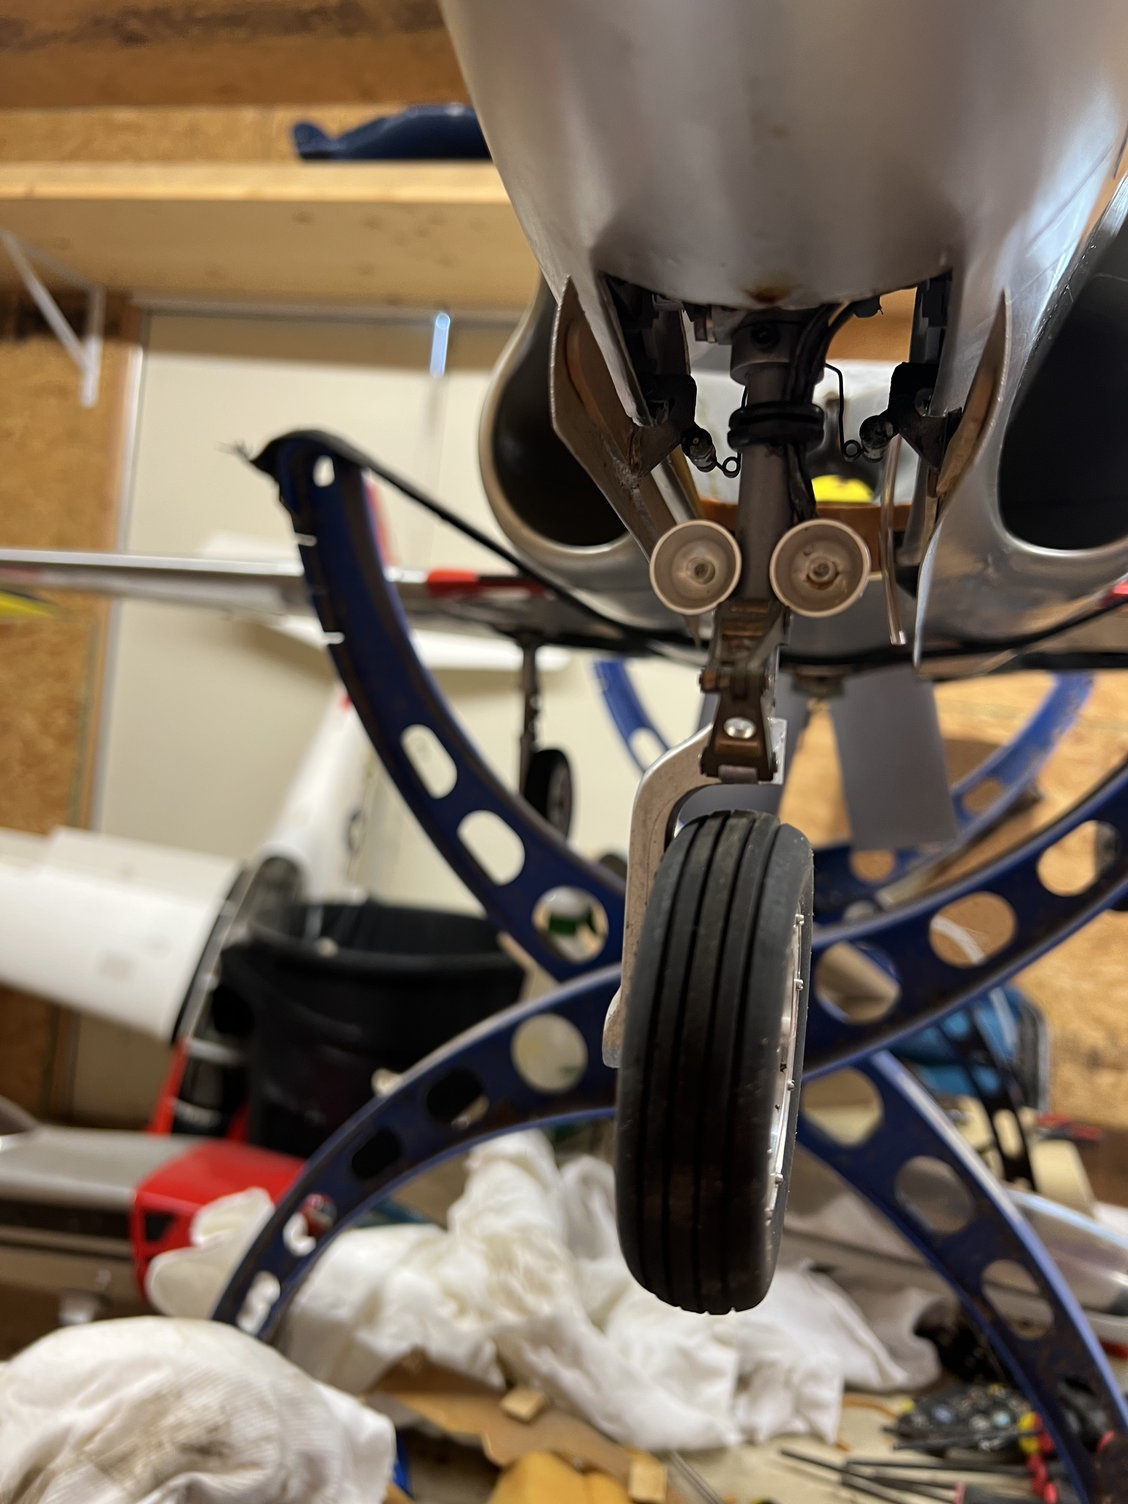
Gear Valve servo and nose steering servo mounted. The newer servos I bought were a tad too tall, so I took some thin ply and created a shim. Works like a charm. Gear valve still works A-Ok, so I decided to keep it.
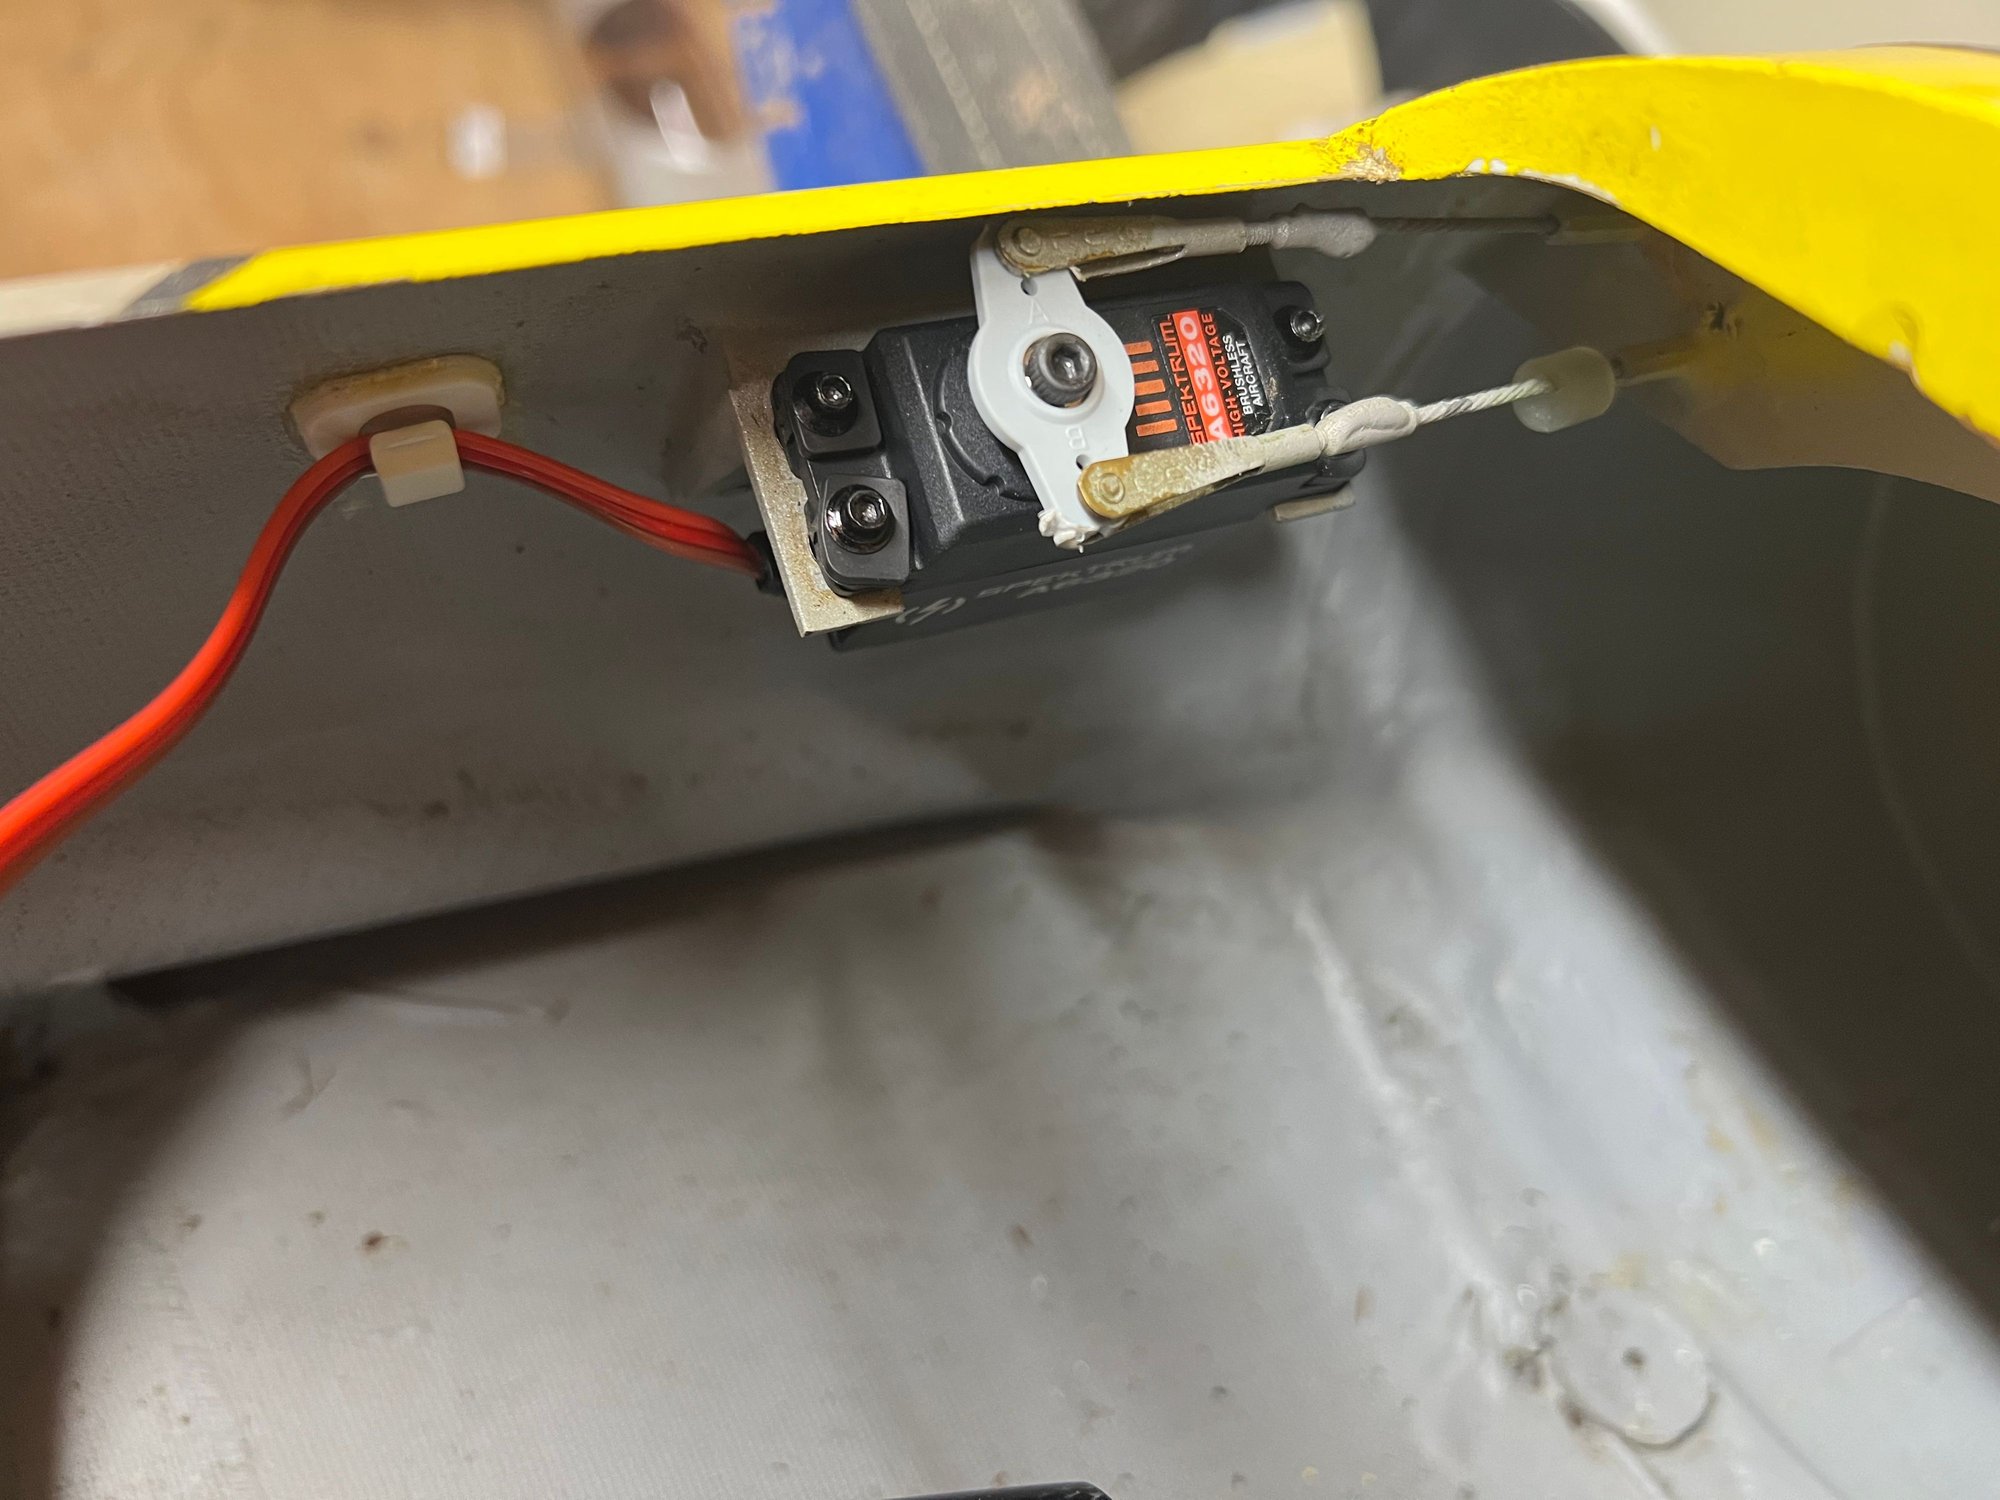
Tail servo 1
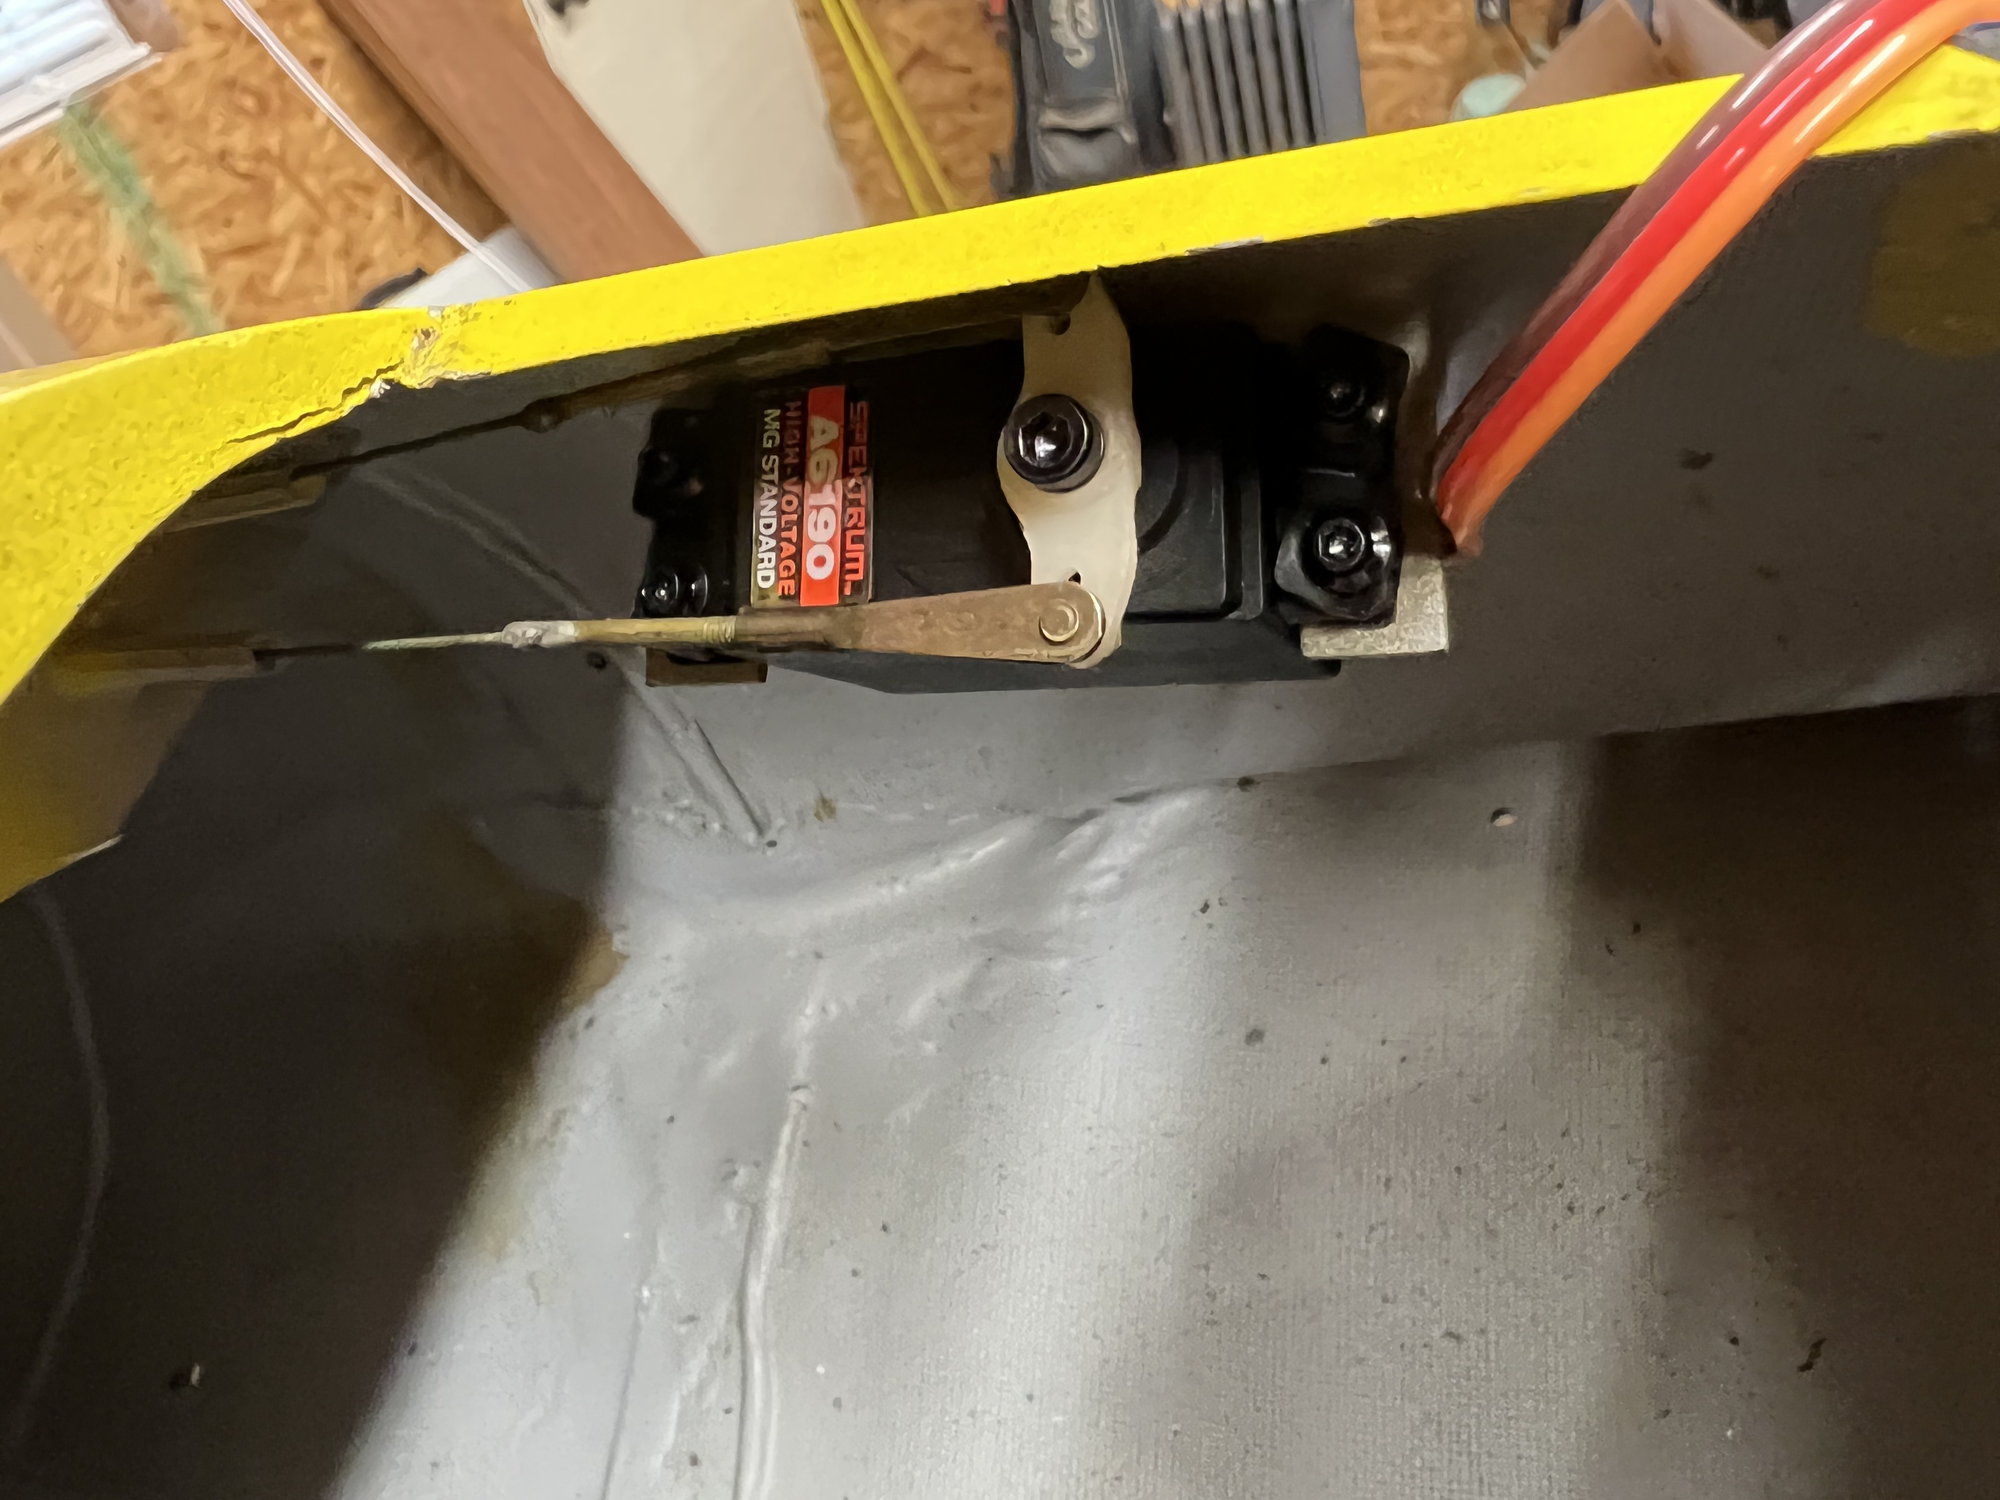
Tail servo 2.
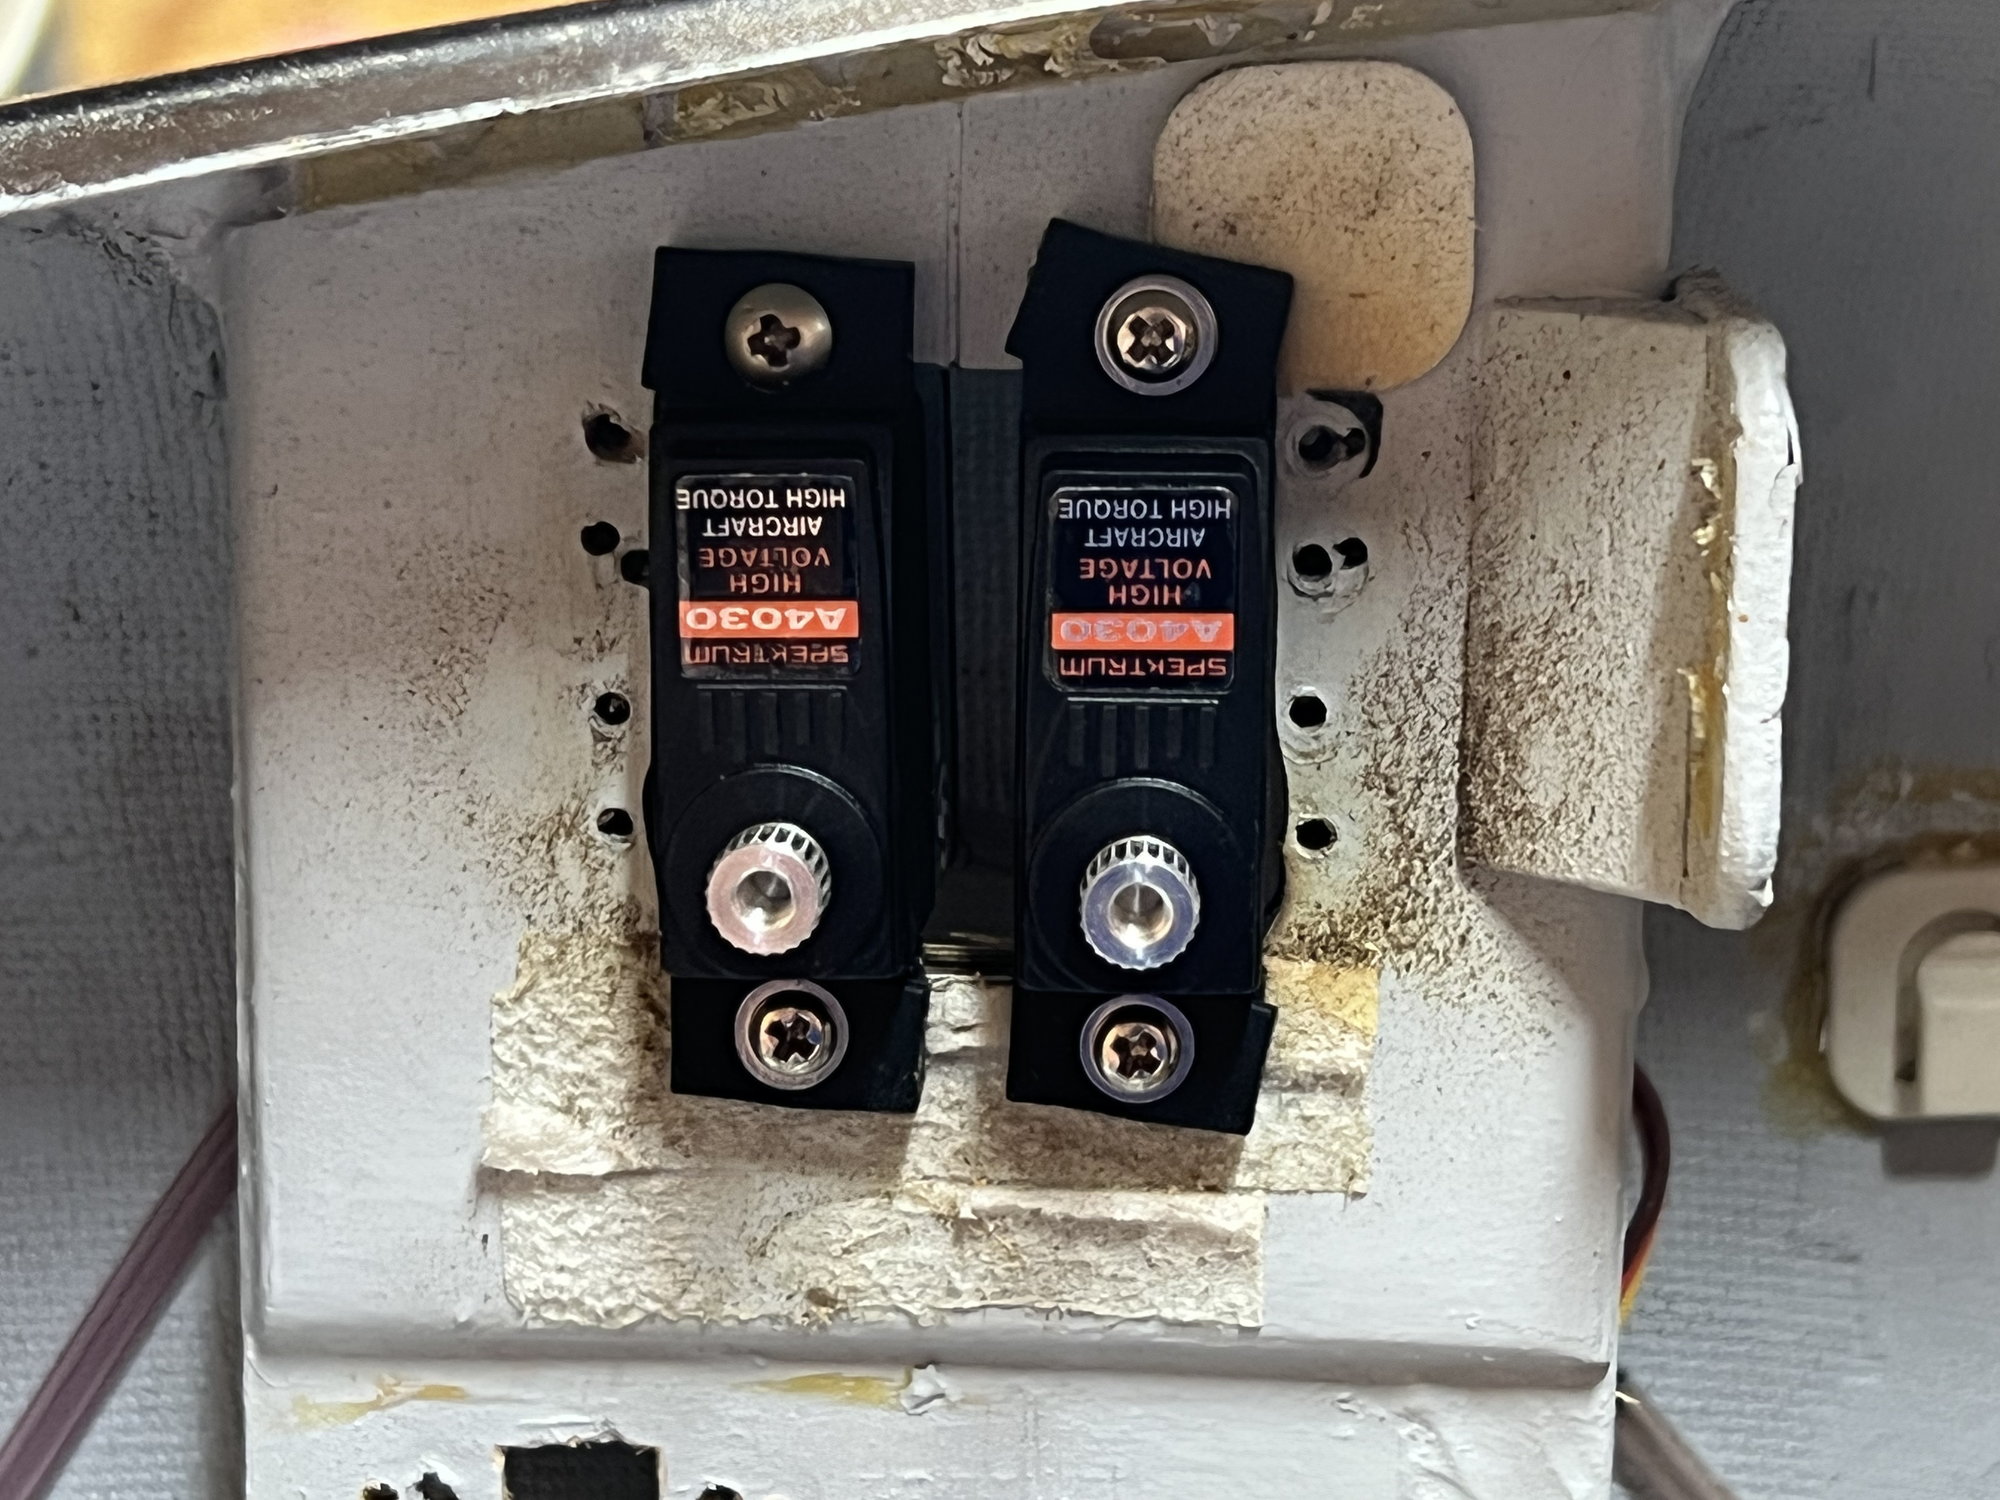
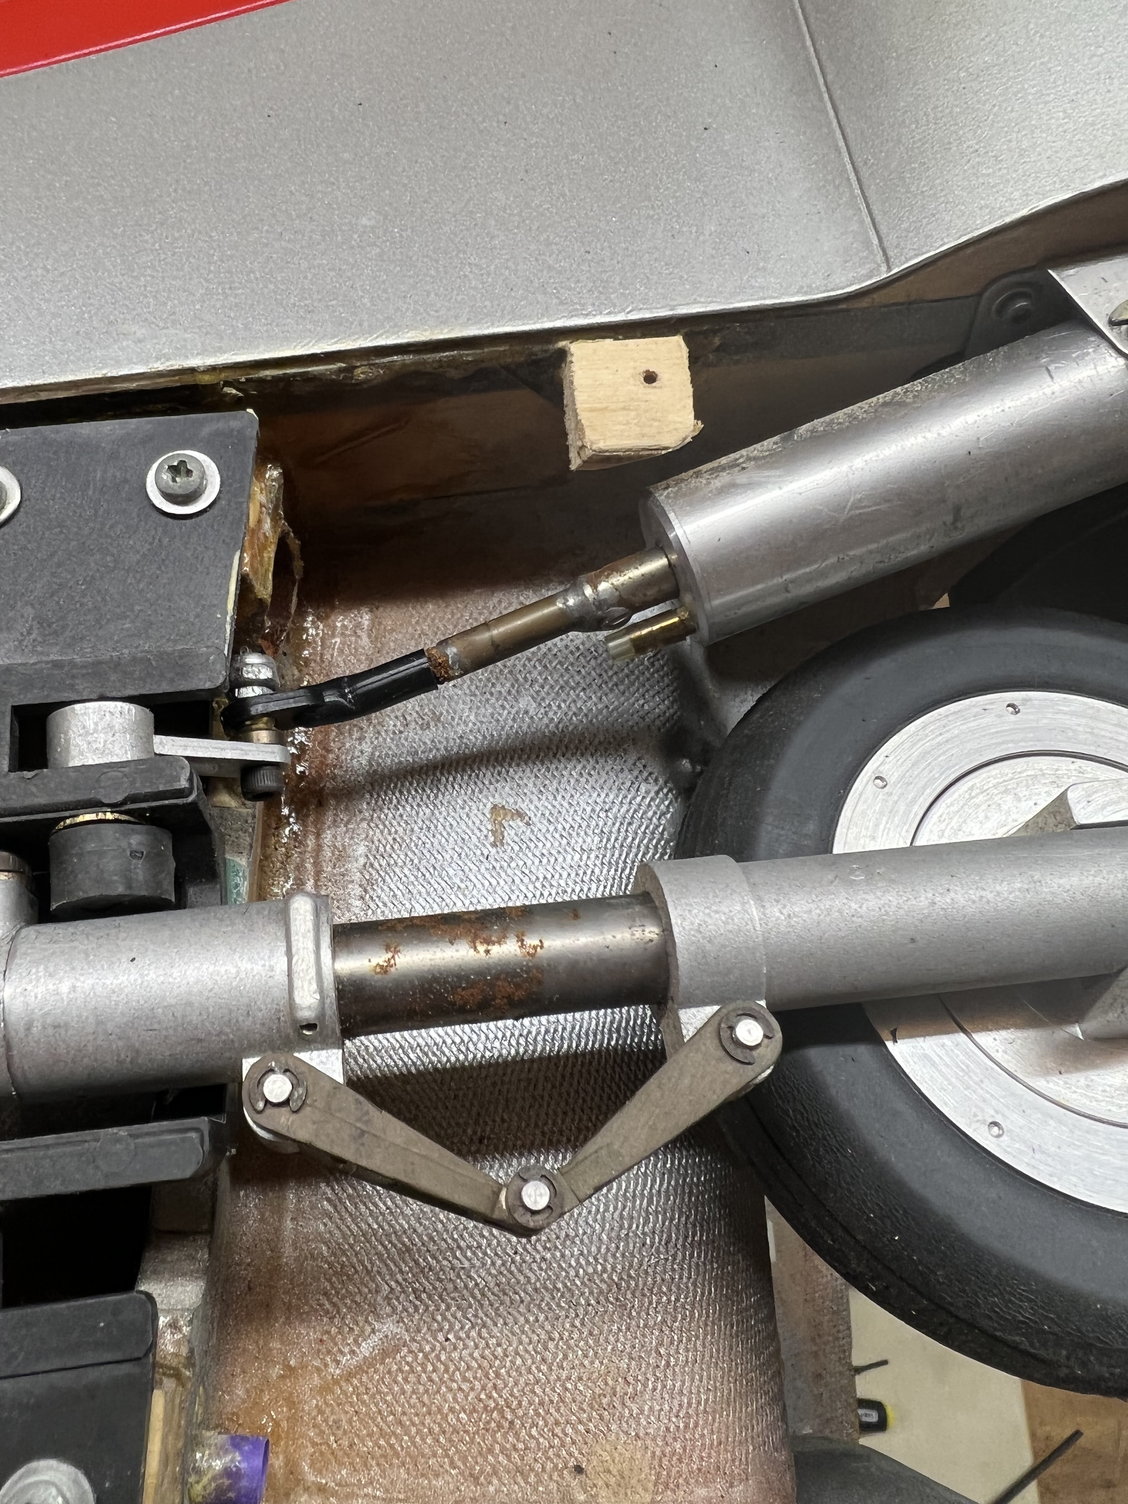
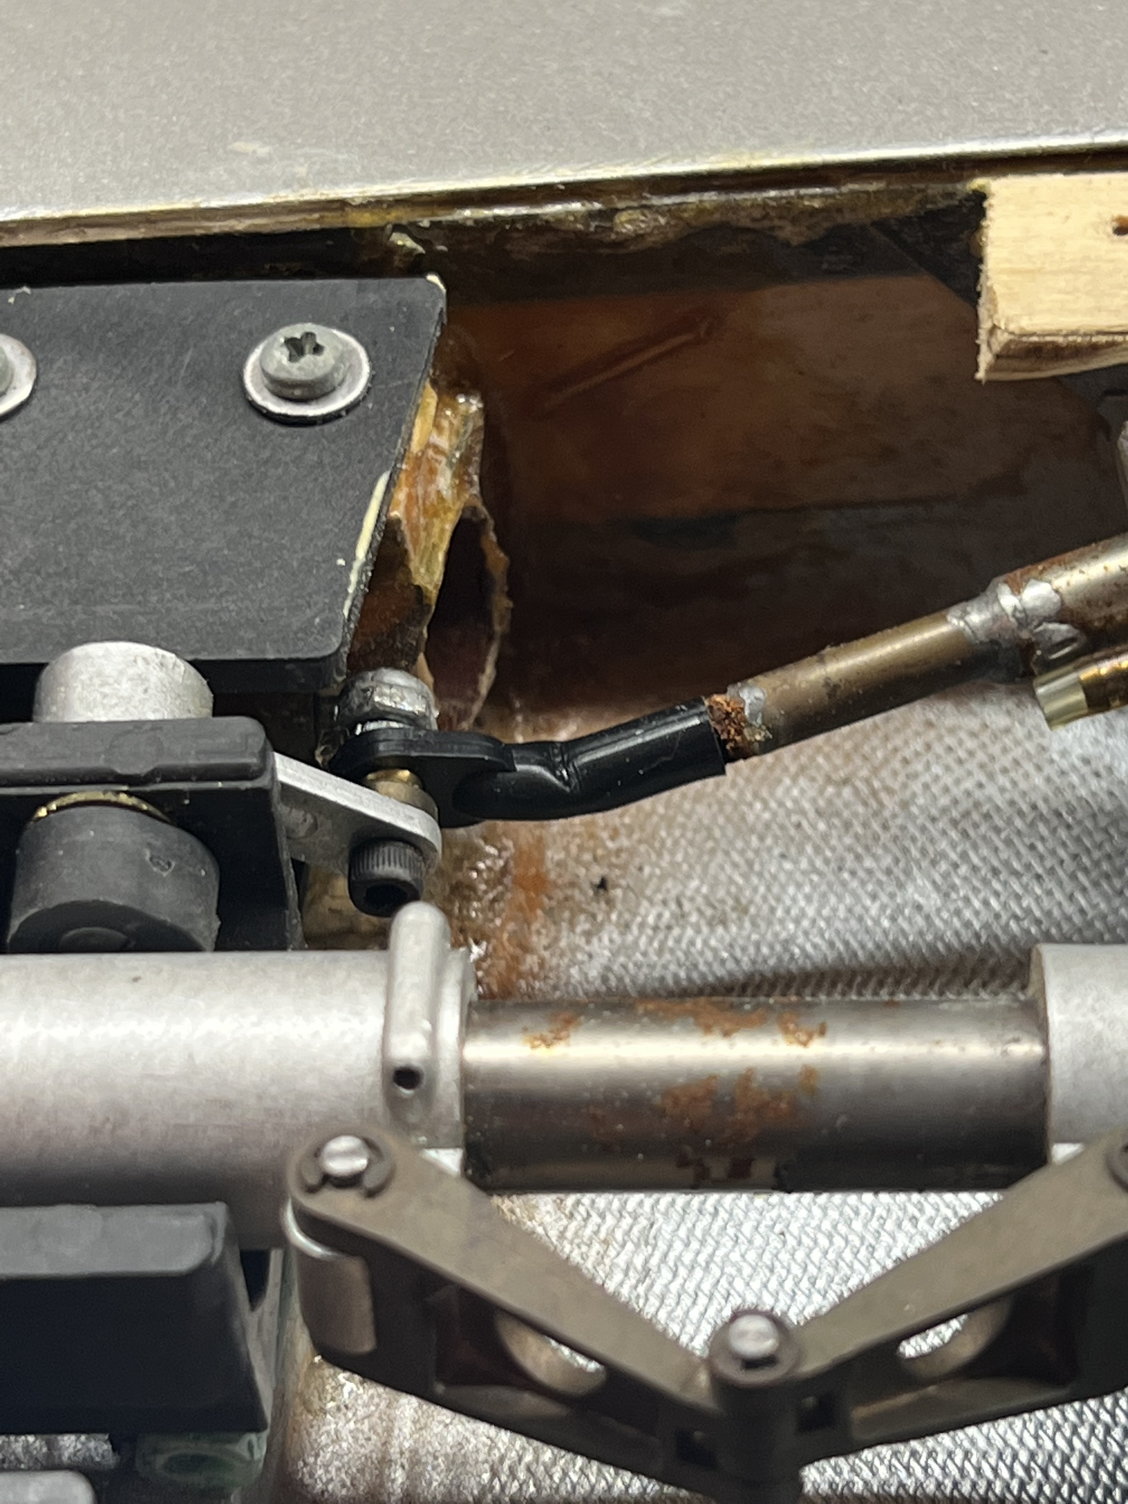
During the project, I had to decide on the brake valve and gear door valve servos.. Trying to be mindful of the CG, this seemed like an Ok place to pick.
It’s not a gold medal, but the geometry and servo are close. No binding whatsoever. I did have to do a little balancing, but honestly, it was more of my OCD wanting it to be perfect.
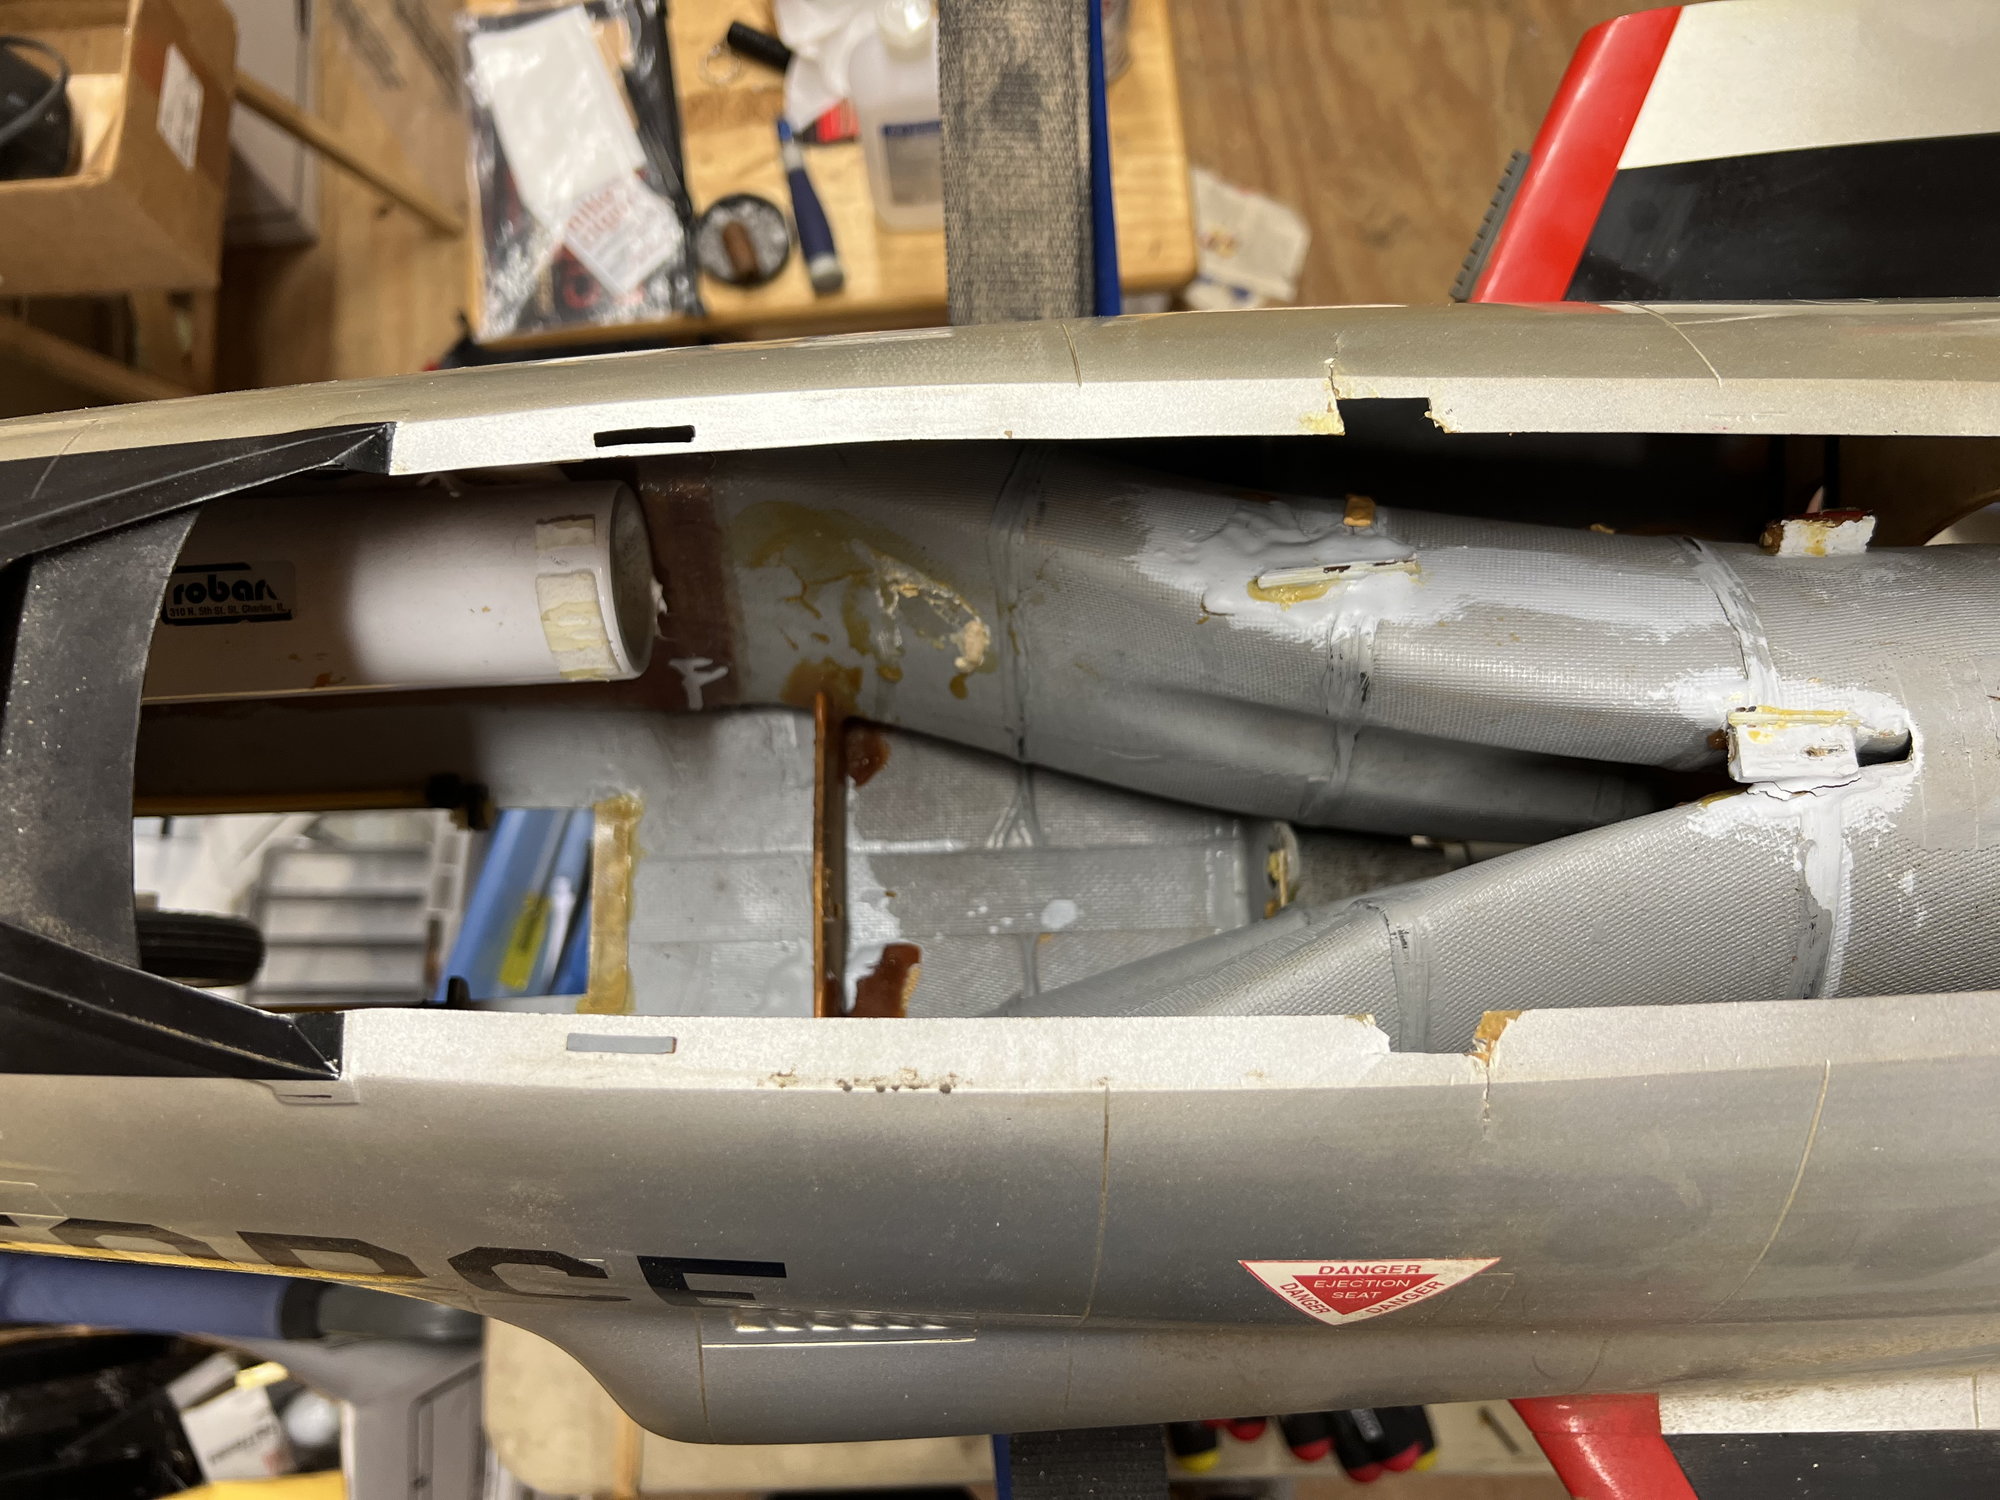
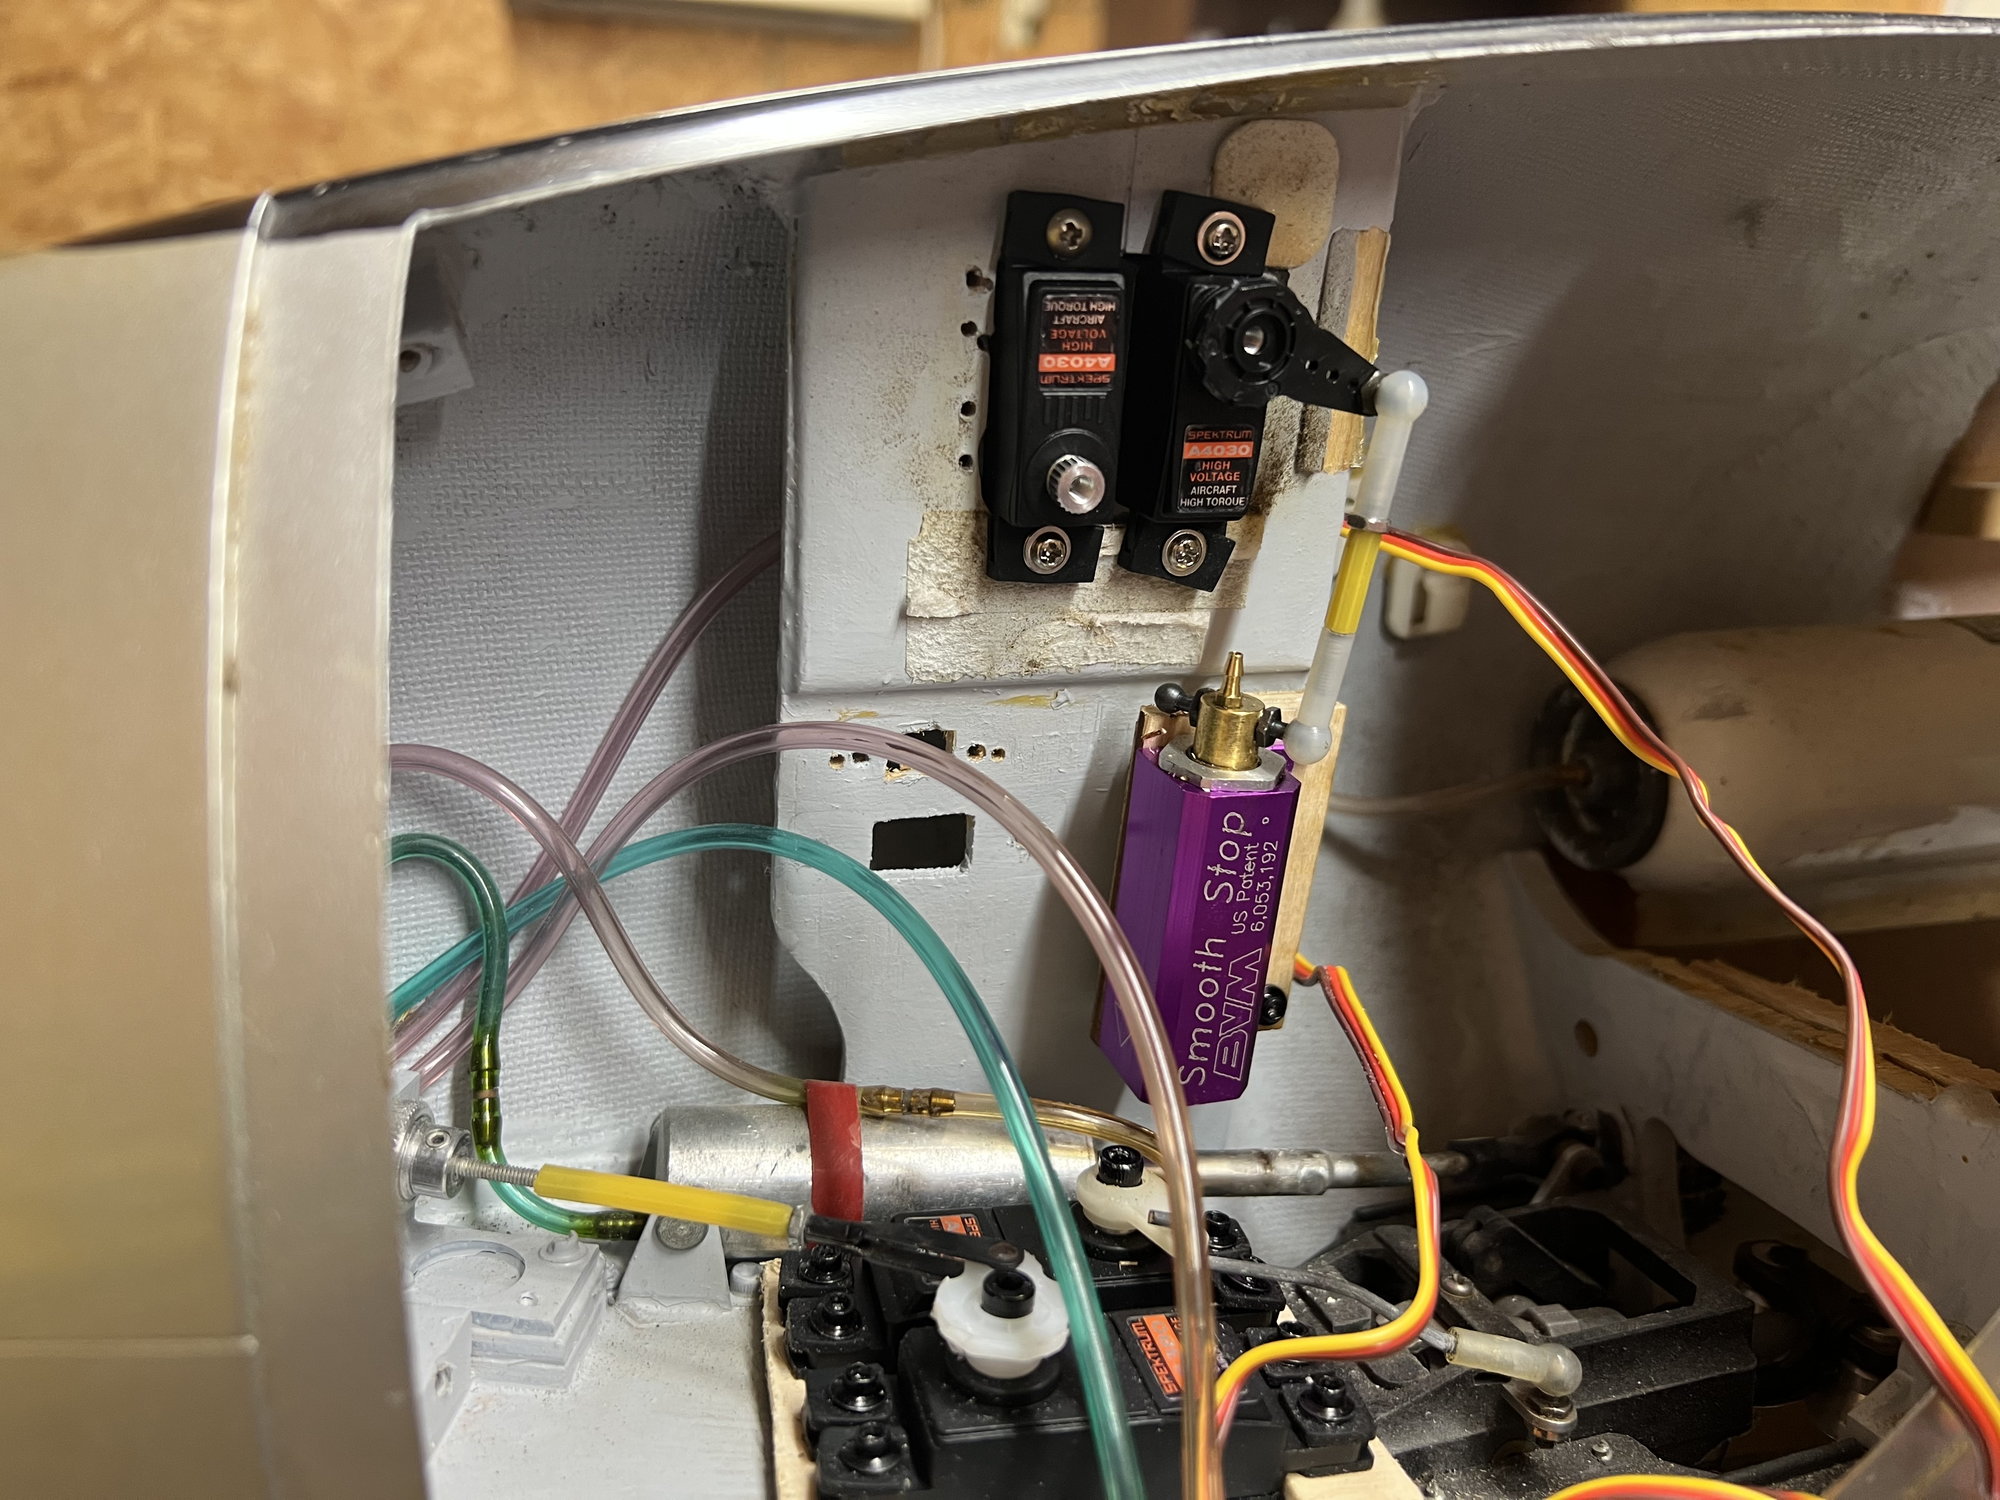
The beginning of the spaghetti. Since I’m going electric, I want to be as efficient as possible. Patiently waiting a set of full gear doors from Patty and the crew.
It’s TIGHT in there! This is the NON flap model.
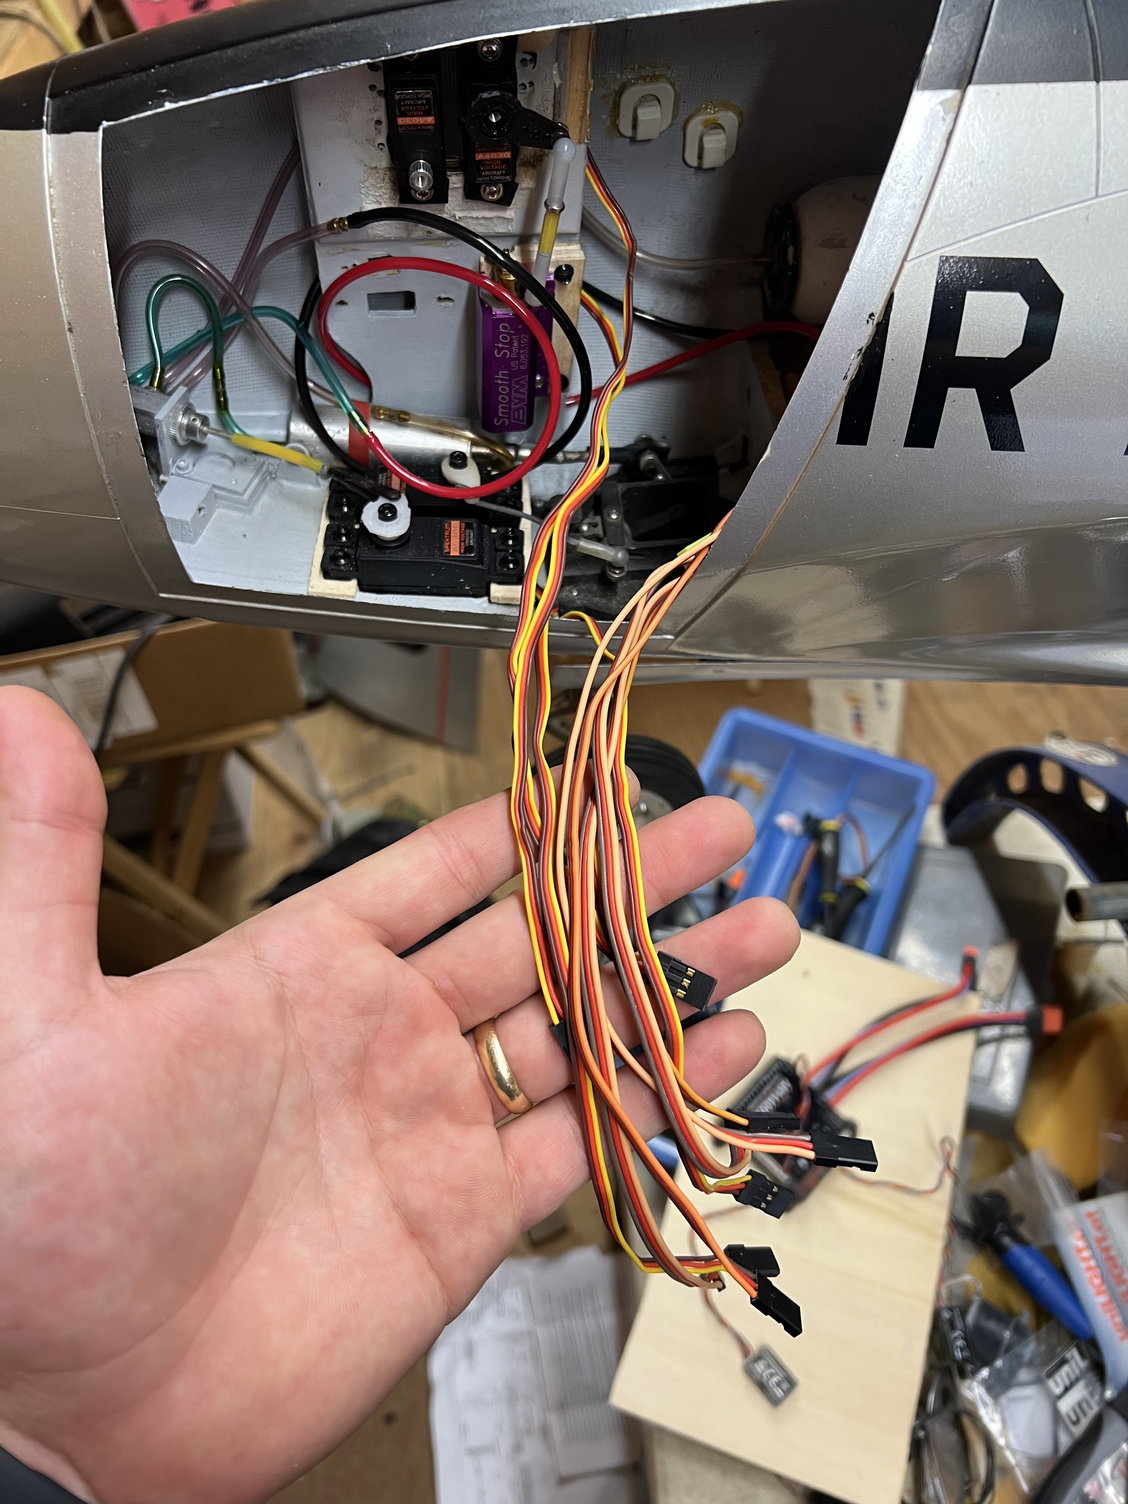
Ahh, fresh spaghetti. All servos are installed and ready to connect to the receiver!

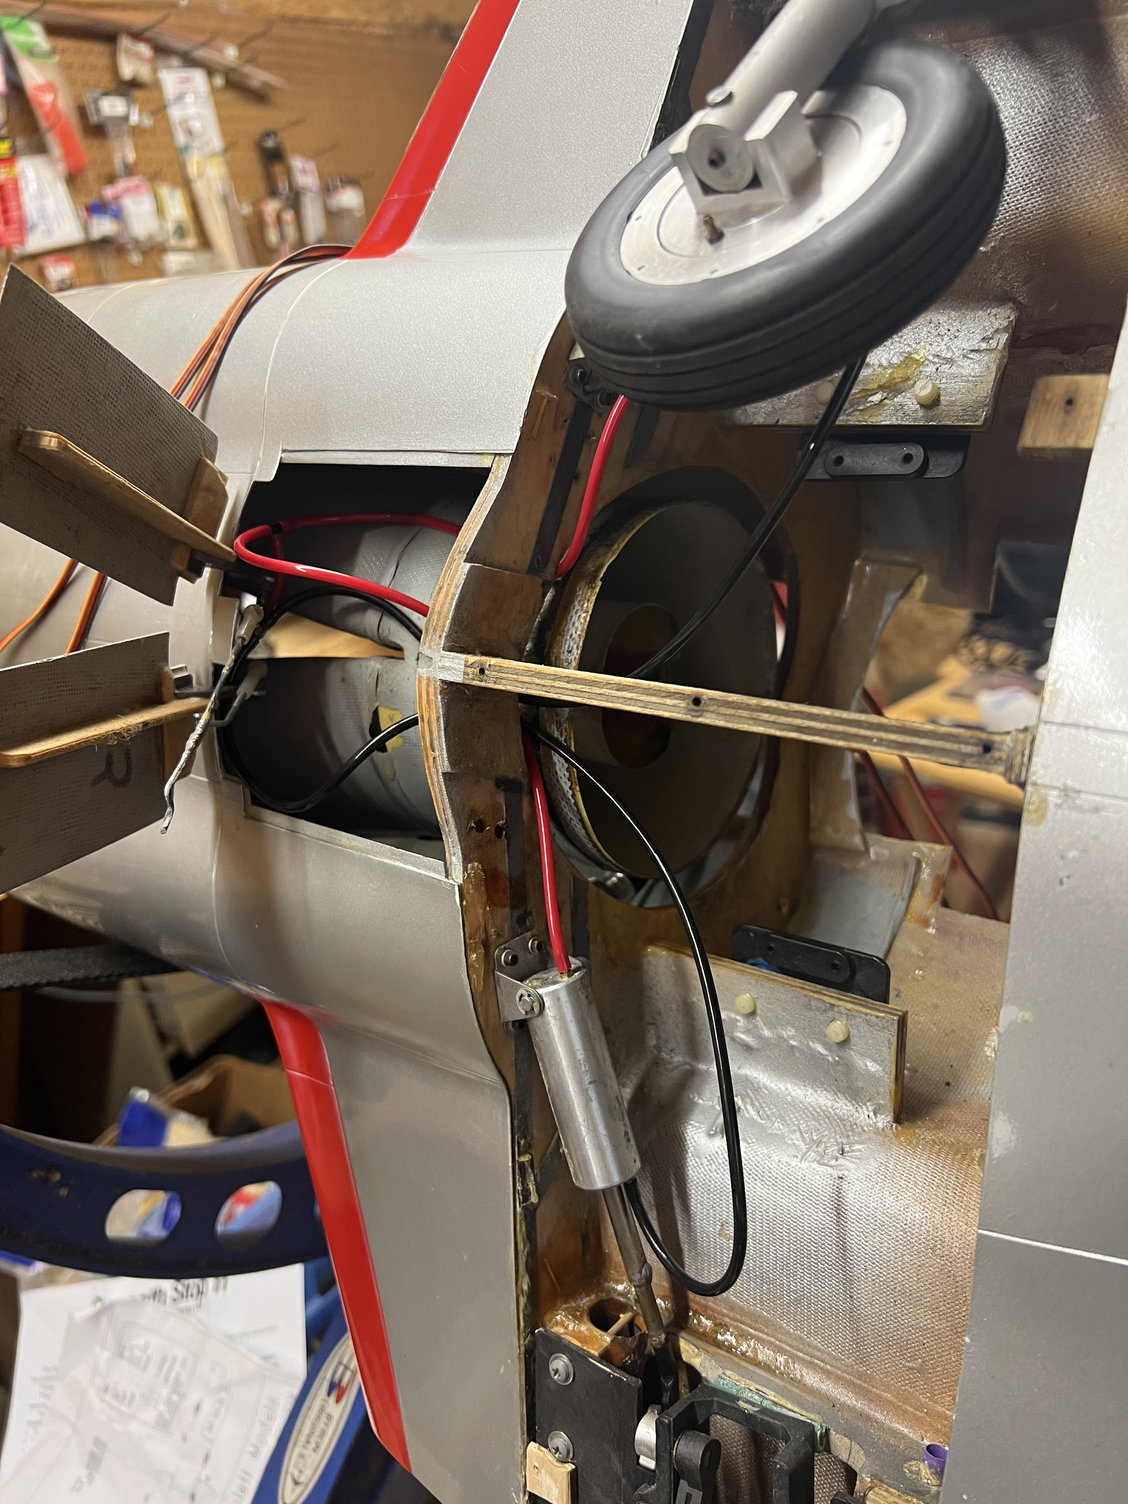
An older fan, but nonetheless still good! After seeing videos and articles with t33’s and 5012’s I determined I’d be safe.
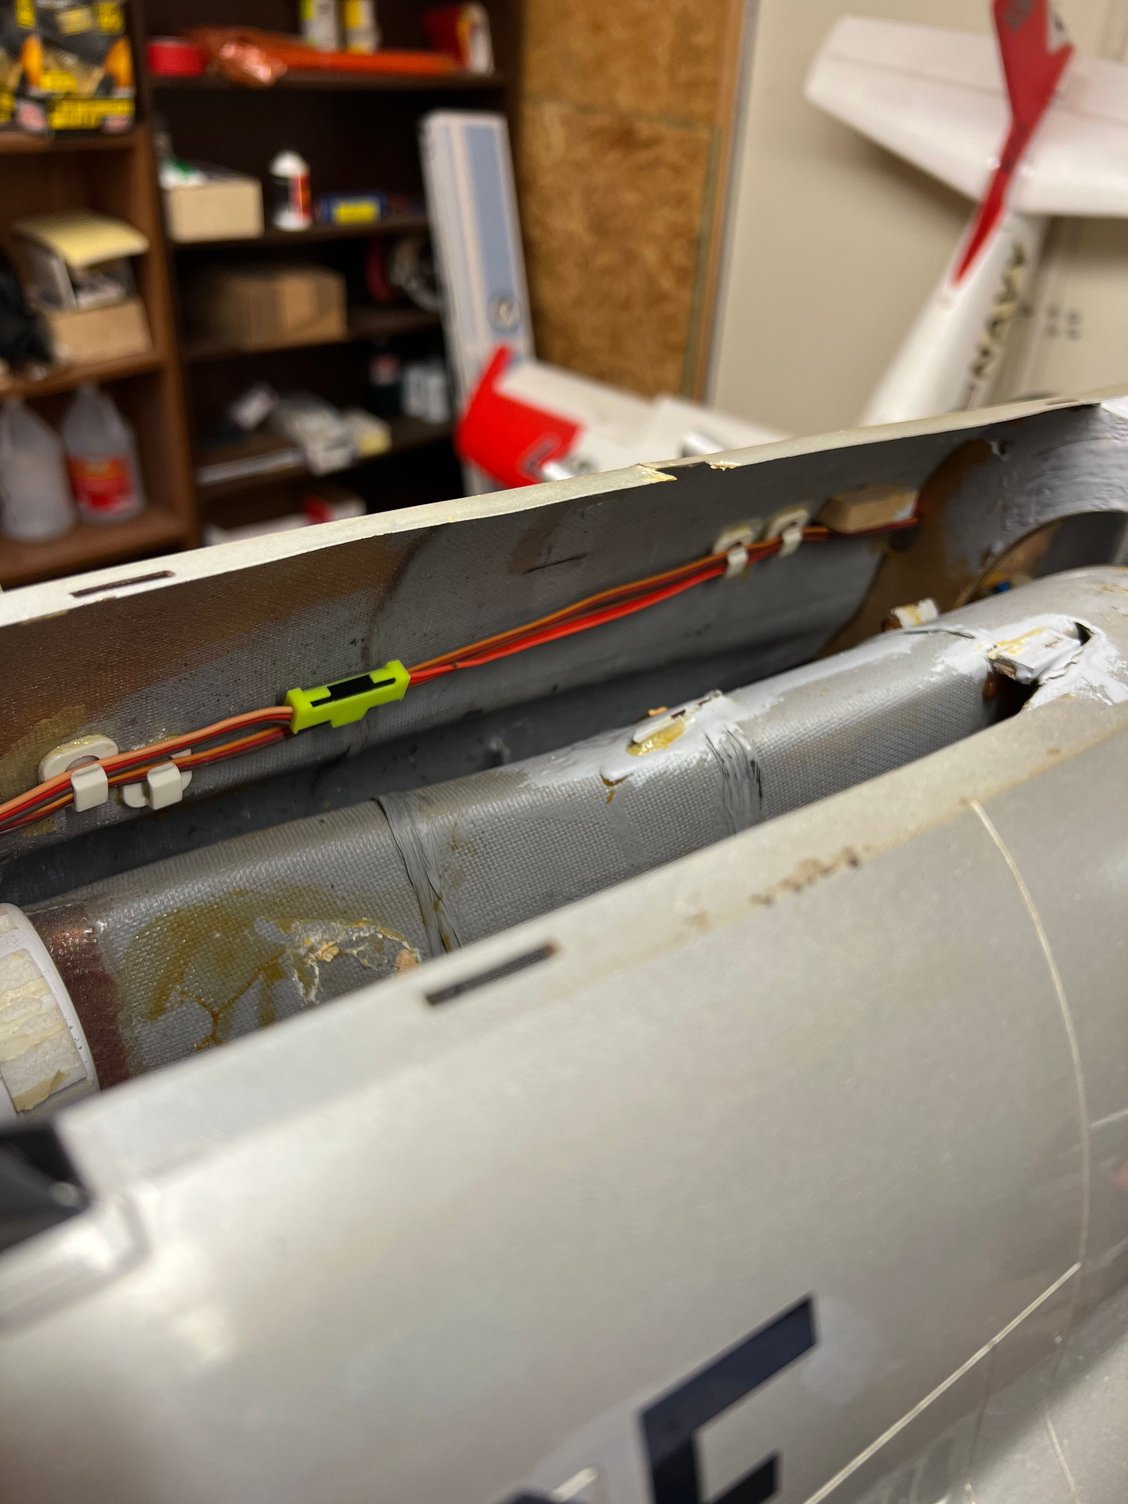
Following the path that Tom originally had laid.
Also, I’ve been waiting on parts. I believe that after next week, all parts will be in.
In the meantime, here’s some photos..
Inspecting the Geometry of the 4-40 connector, trying to decide how Tom did it..And pulled it off. Massive credit to all the builders out there!
Second look at it.
I determined that I could take a soldering blade, turn my heat to a low setting and make an impression on the Dubro link. This would allow me to bend it to its proper angle. It took about 3 tries until I was able to get it right.
Gear Valve servo and nose steering servo mounted. The newer servos I bought were a tad too tall, so I took some thin ply and created a shim. Works like a charm. Gear valve still works A-Ok, so I decided to keep it.
Tail servo 1
Tail servo 2.
During the project, I had to decide on the brake valve and gear door valve servos.. Trying to be mindful of the CG, this seemed like an Ok place to pick.
It’s not a gold medal, but the geometry and servo are close. No binding whatsoever. I did have to do a little balancing, but honestly, it was more of my OCD wanting it to be perfect.
The beginning of the spaghetti. Since I’m going electric, I want to be as efficient as possible. Patiently waiting a set of full gear doors from Patty and the crew.
It’s TIGHT in there! This is the NON flap model.
Ahh, fresh spaghetti. All servos are installed and ready to connect to the receiver!
An older fan, but nonetheless still good! After seeing videos and articles with t33’s and 5012’s I determined I’d be safe.
Following the path that Tom originally had laid.
08-11-2022 | 04:40 PM
#17
A few things to note..
This isn’t a Top Gun model, but it’s a model that’s dear to me. I’ll be happy to see it standing on its gear and taxiing around. I’ve truly enjoyed hanging out in the workshop and debating with grandad on what is possible and what’s a little bit out of reality. Usually he wins.
I’ve had to turn to my ‘modeling’ instincts for some scenarios. The updated manual is a little different build then what I’m dealing with. However, I’ve heavily relied on it to confirm my ideas and thoughts. Definitely worth purchasing.
I’ve cycled the gear and verified the brakes are A-Ok. I’m not too worried about anything in that area honestly. I will probably change out the o-ring for the brakes, but time will tell.
The Speed Brake is mounted and working perfectly.
At this time, I believe I’ll be able to use the original cockpit. Going on a twin 5 cell and sing 2 cell setup, I believe that again, the CG will work. Time will tell.
The only things that remain before I can stamp this complete:
- Main Gear doors/Belly Pan
- Nose gear doors. - Thinking of converting it to pneumatic instead of relying on a wire.
- Mounting the Receiver and tidying the servo leads.
- Mounting the gear door air switch.
- Install the thrust tube.
08-11-2022 | 04:53 PM
#18
Forgot to mention:
Thanks to Joey Tamez of JT’s Hobby Shop for helping me pick servos and getting them on order for me!
Thanks to Rob, Patty and Heather at BVM for answering my questions and not placing my phone on the black list. Ha! I’m truly happy I was able to get everything I needed to get this plane going. The goal is to finish it at the end of August, get a few flights on it and celebrate the 40th anniversary of the GSW Jet Rally. They knew this was my goal and have done everything they can to make sure it arrives in style.
In the meantime, I’m being haunted by an abandoned project. I’m bringing BVM DF’s back. But with a breath of fresh air.
Aggressor MK3
The following users liked this post:
grbaker (08-20-2022)
08-19-2022 | 11:11 AM
#21
08-29-2022 | 05:47 PM
#22
Well, after lots of stress, I'm finally one step closer. Between work and studying for my PPL checkride, I was able to get quite a bit accomplished. Made some mistakes, but in the end, everything was able to work out.
Public disclaimer:
Read Instructions.
Read Instructions.
Read more instructions.
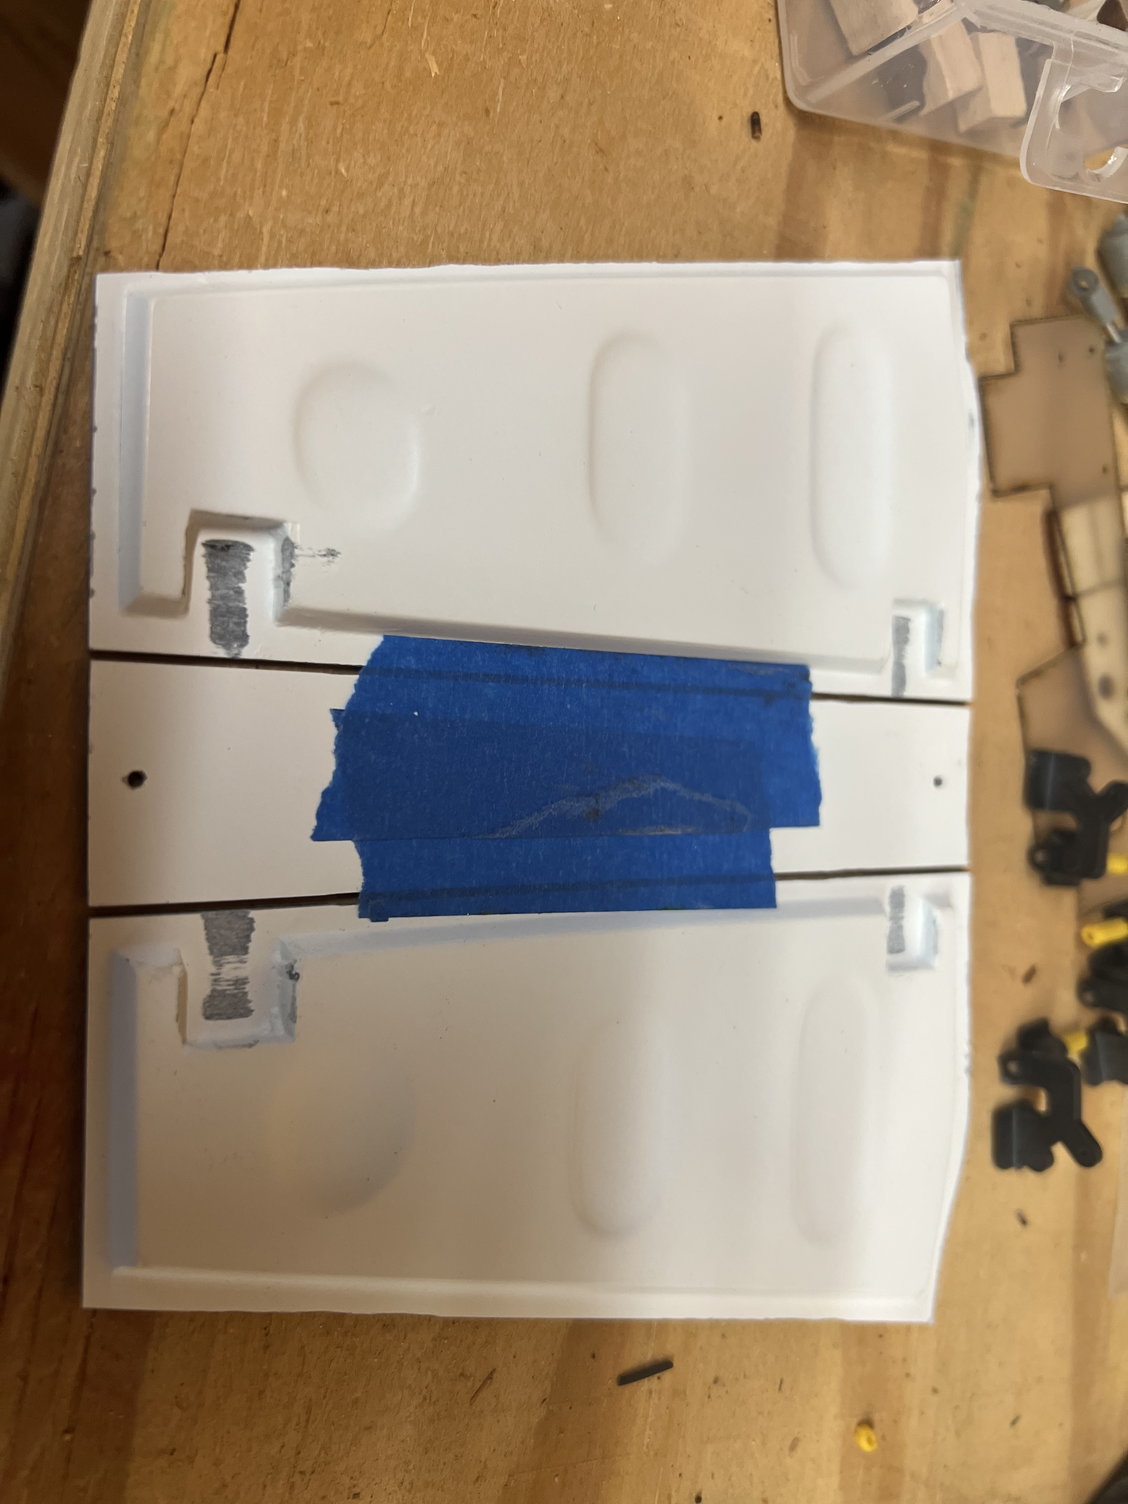
The gear doors finally came in and that was the first task. Since this is an all electric model, I knew the gear doors would probably increase efficiency, and every little bit helps at this point. After reading the instructions, and starting on the gear doors, I realized, I did NOT read the instructions.. I did, but I was in the incorrect part of the book. Ooops! Now, some people may think, why are you working on a model like this if you didn't even read the instructions. Well, sorry. I know next time. Painful lesson learned! Either way, we recovered, and that's all that matters.
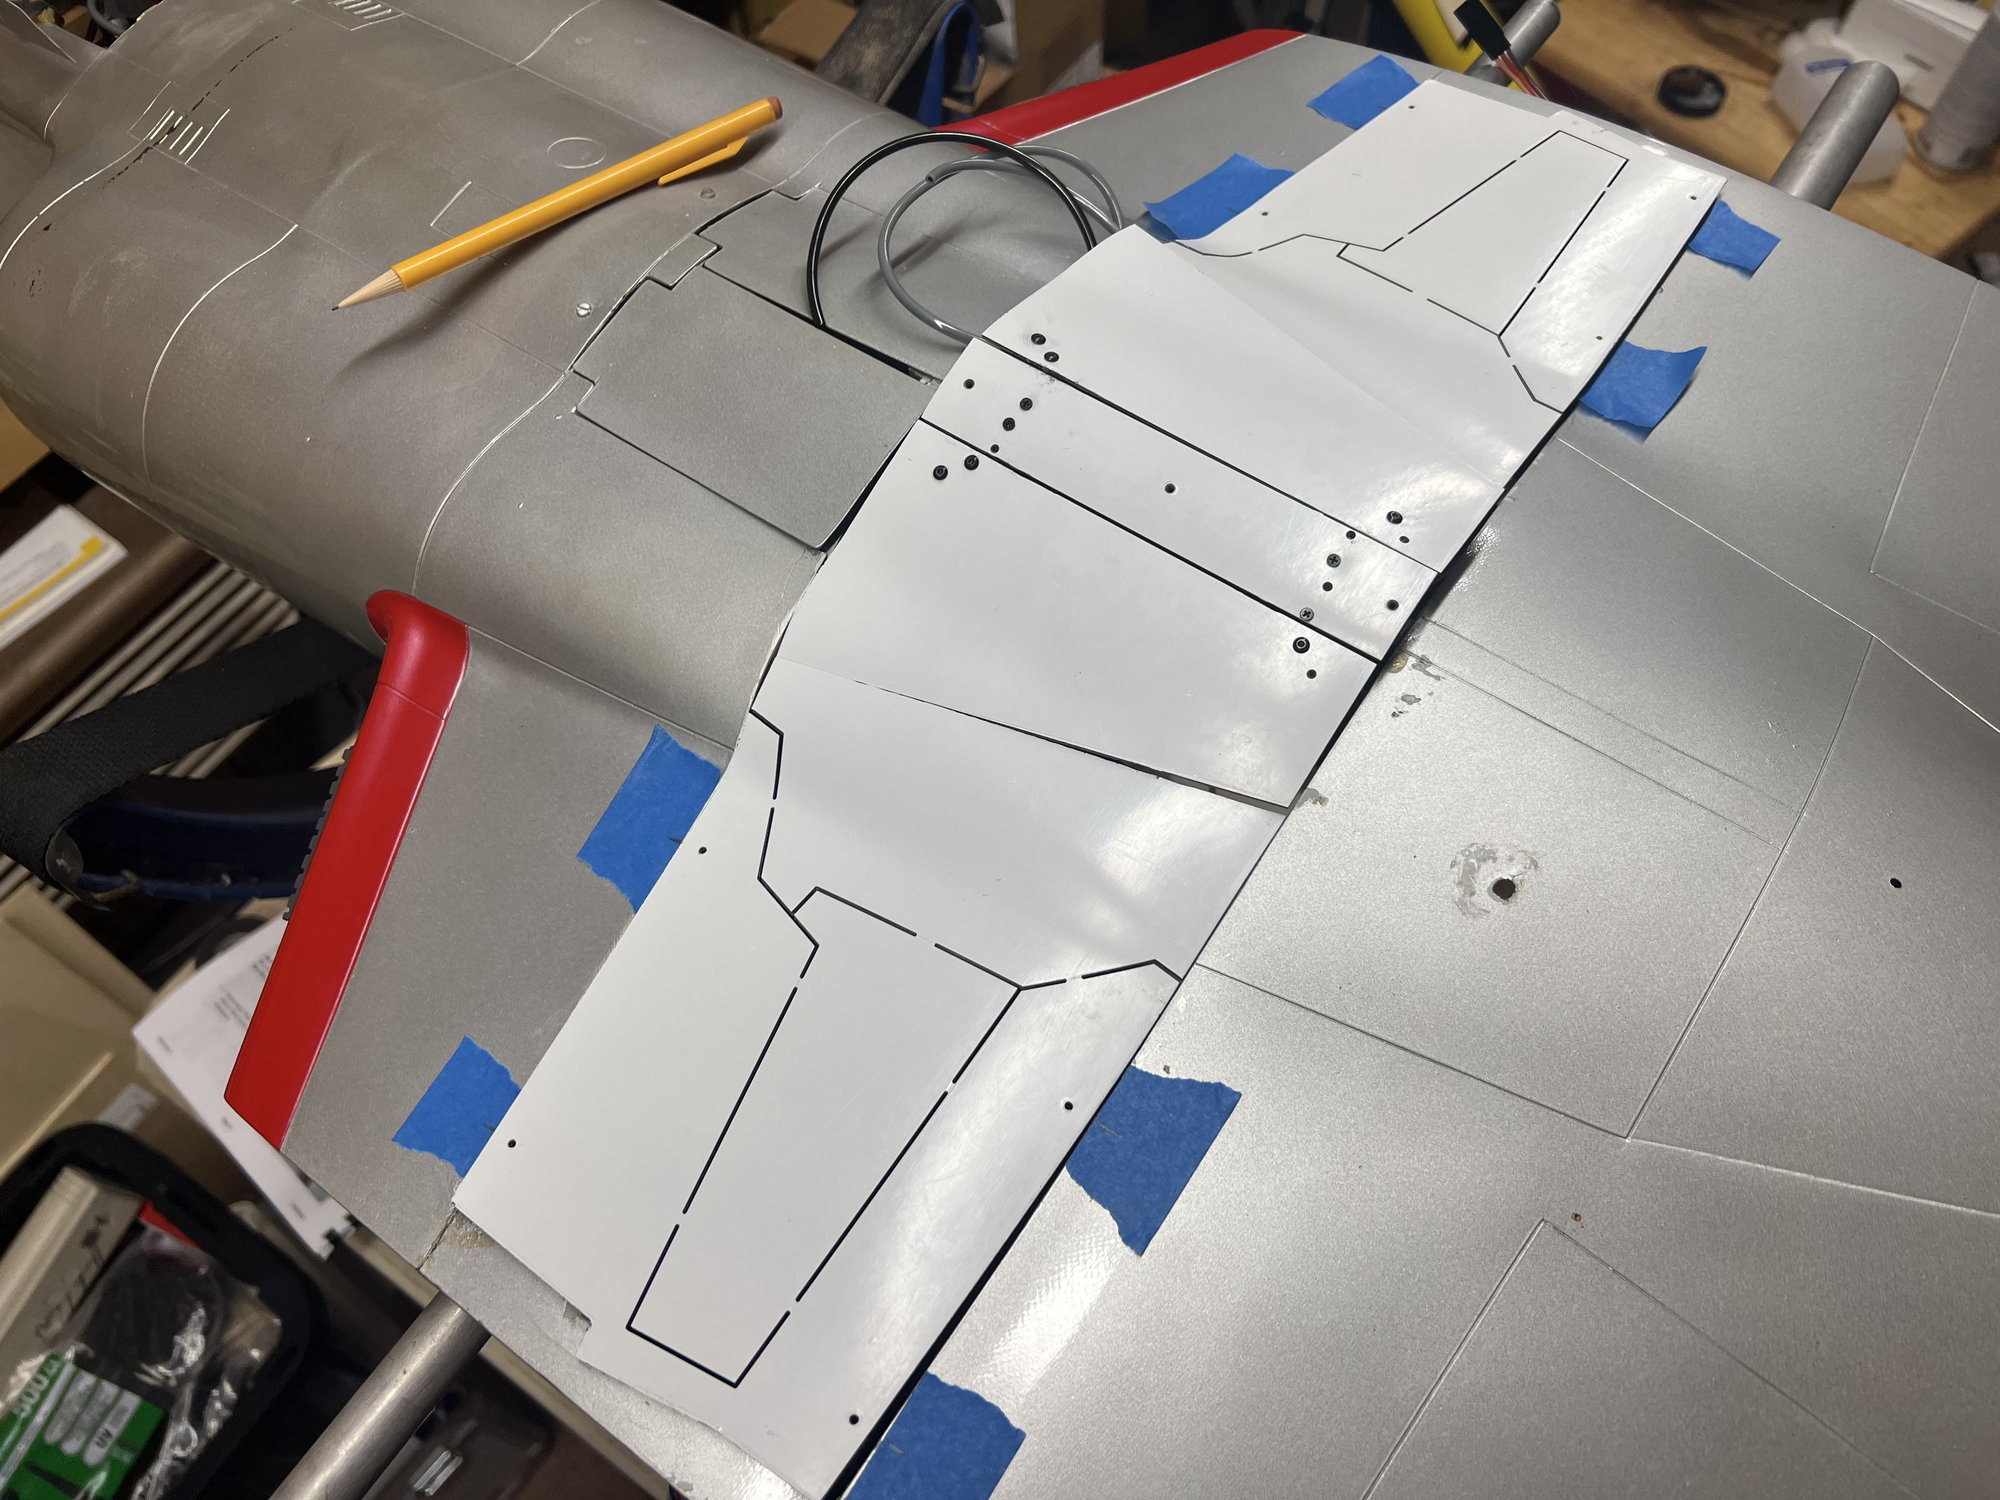
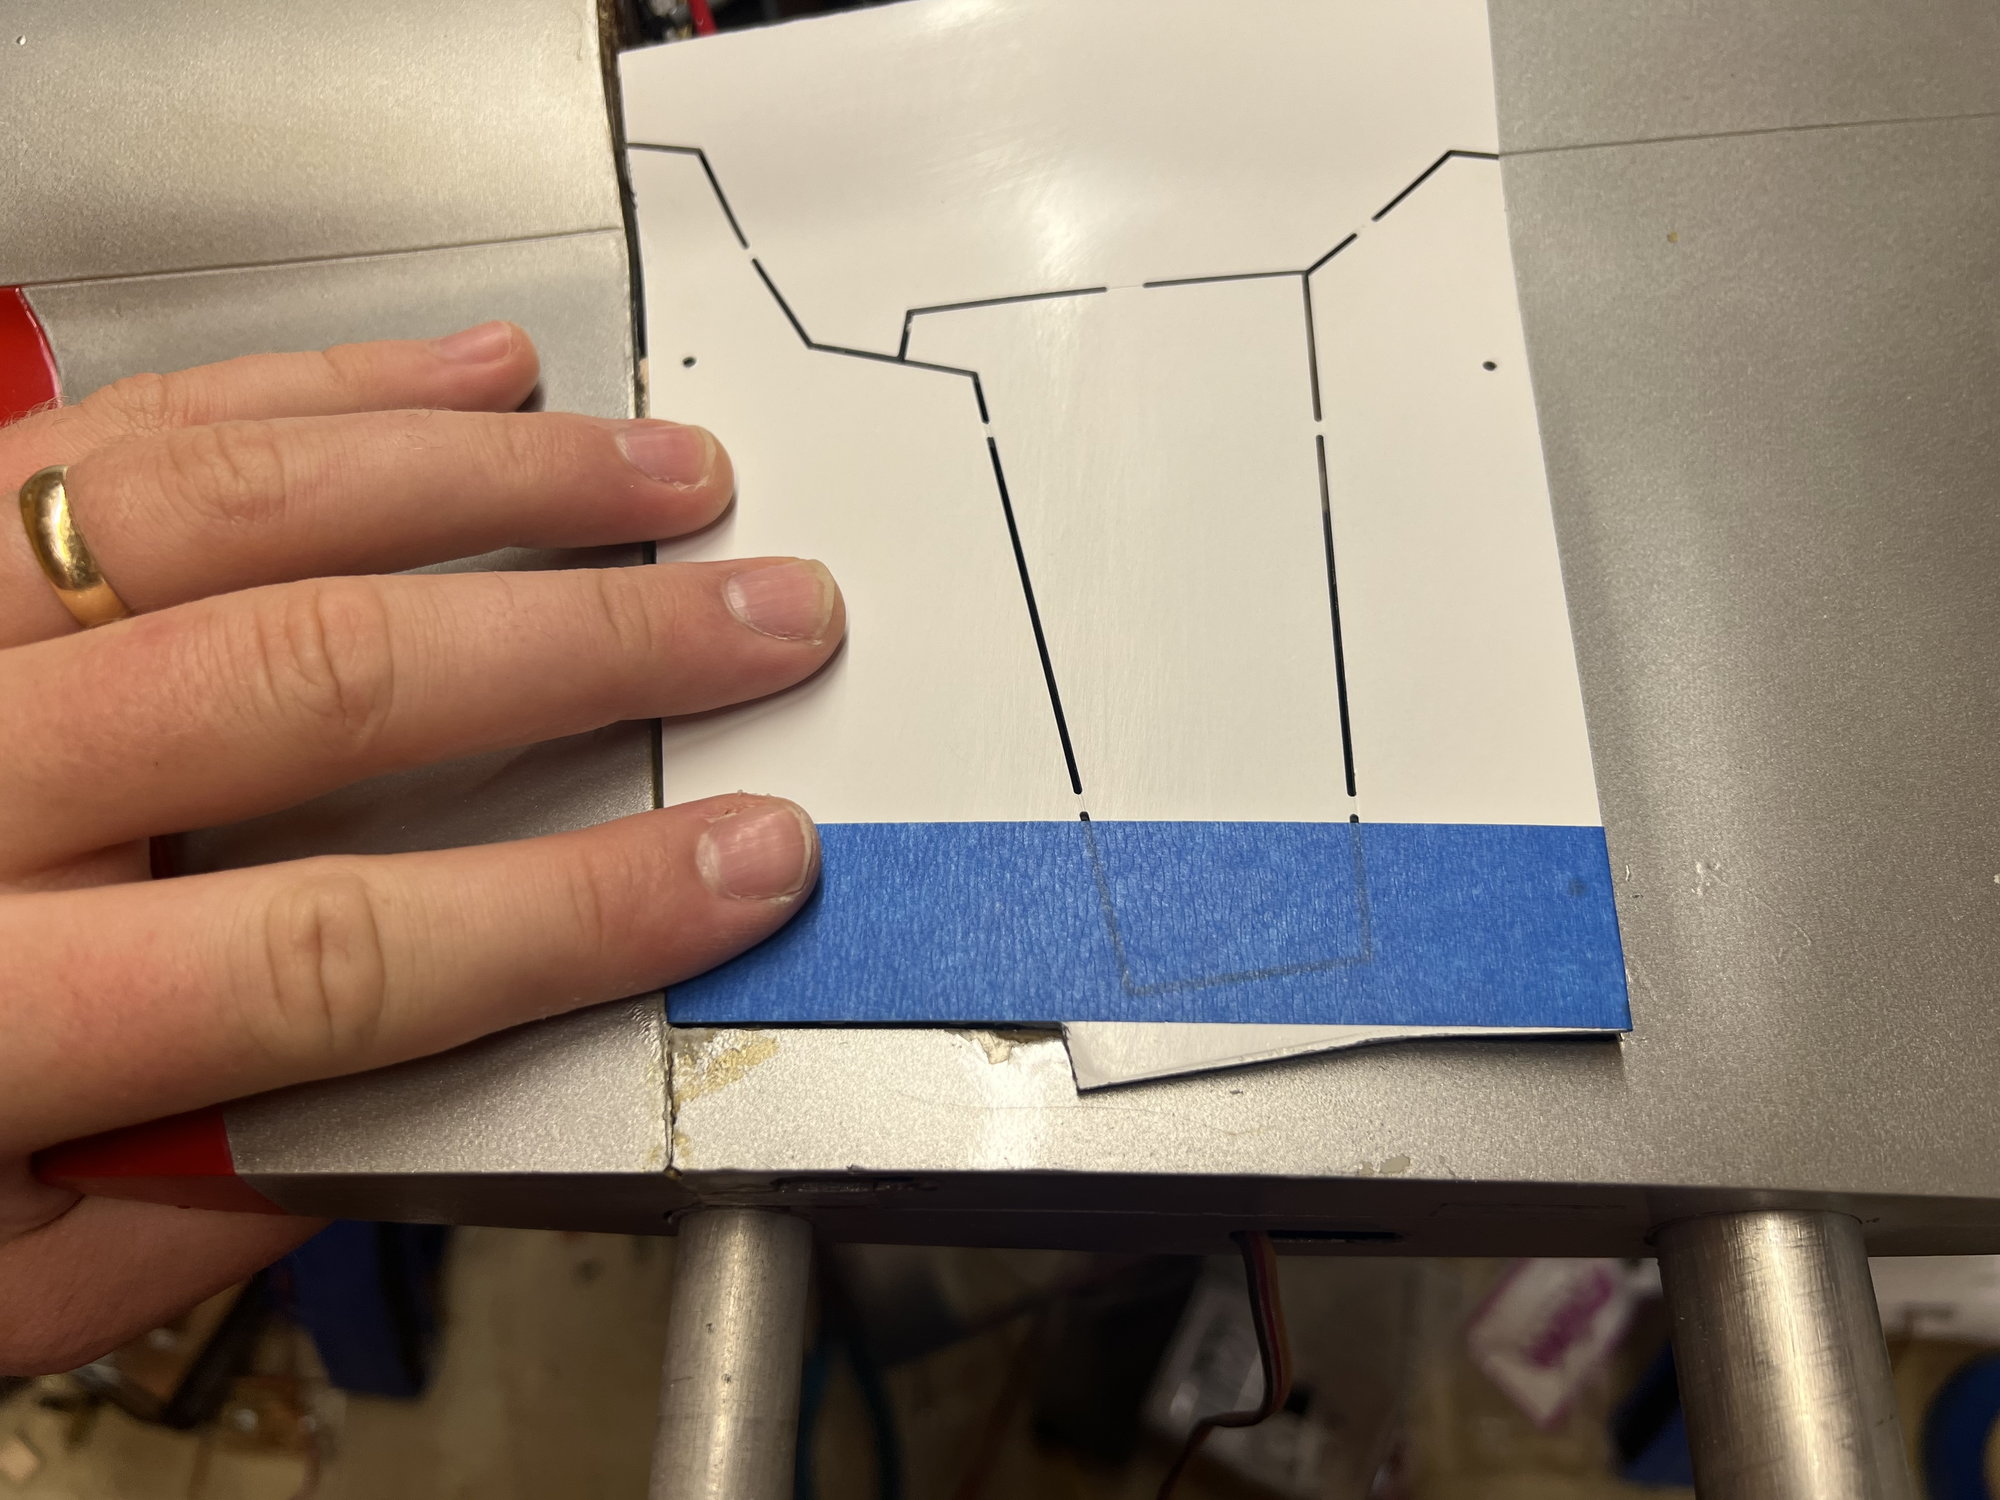
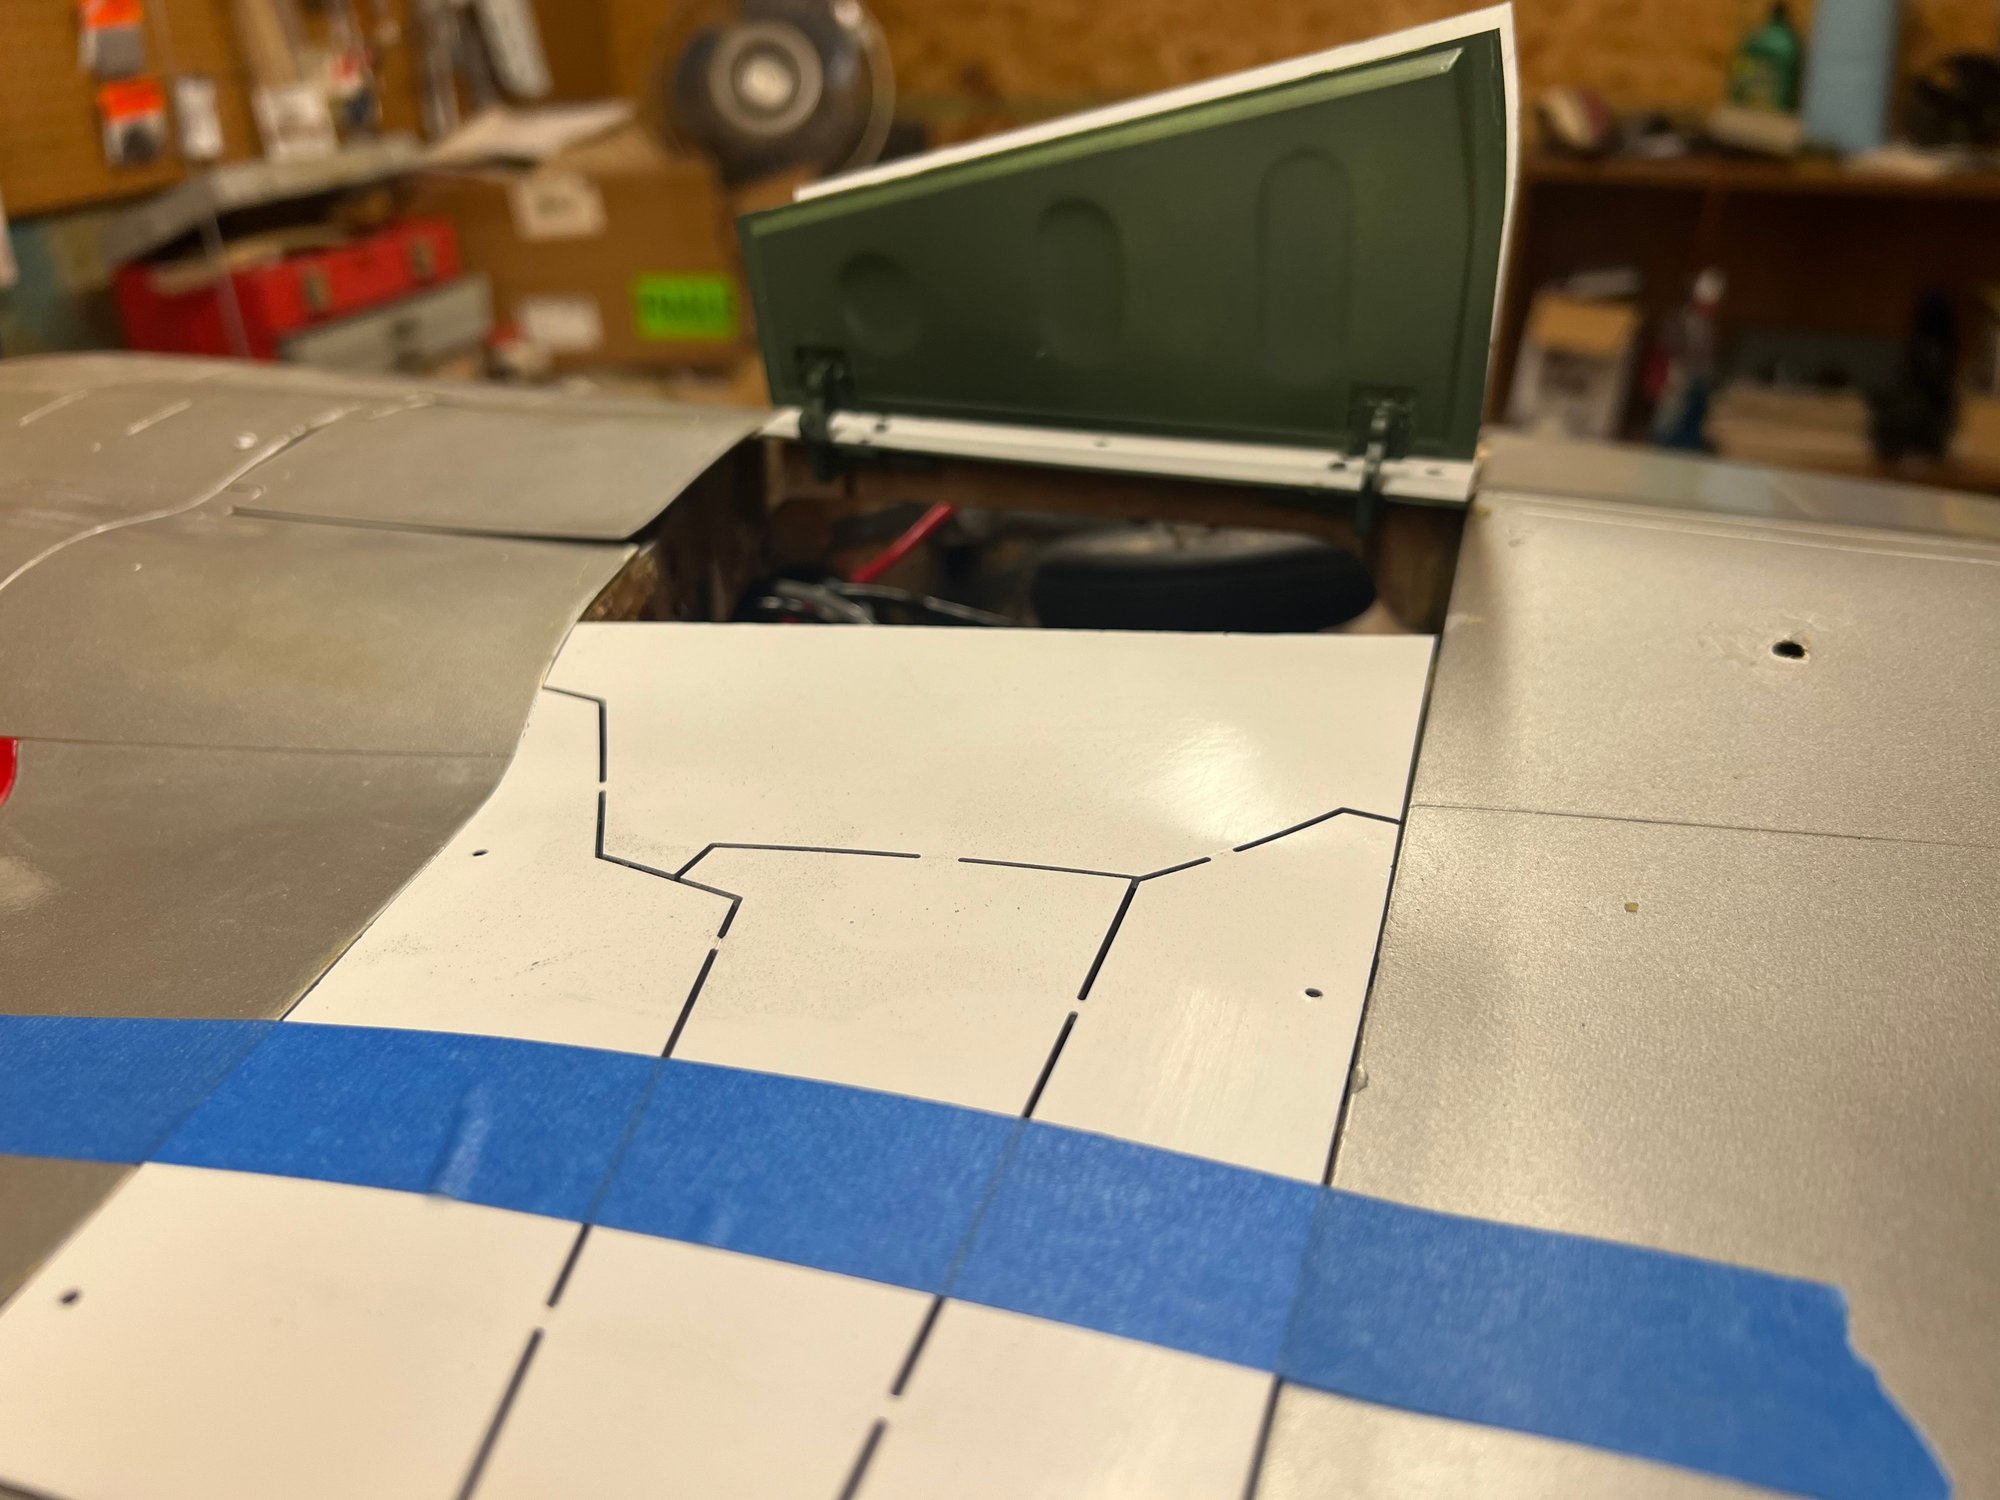
Gear Doors: Looks complicated, but if you read the instructions, you'll be golden. They'll practically build themselves. After making my first mistake, I was able to recover. Laid the center two gear doors on the fuse and they looked great. The center former for them to mount to took a little sanding, but it was a successful operation. I went ahead and laid the doors down on the belly, and marked where I would need to mount the wooden blocks. Crazy enough, they were PRECISELY were the old belly pan cover was. That was pretty awesome! I will totally admit, the center two doors kicked my butt, but I was determined! Next up was the upper strut doors and the covers. With this older model, the new doors have some excess material. This was trimmed off, and it looked great. After trimming, a light sanding, and I was ready for round two of doors. (I lied again. Didn't read the instructions.) I placed the ploy-ply and thin wood shim underneath the skin of the fuse, and marked my holes to drill. This poly-ply and wooden shim is used for mounting the strut door hinge to something stable. Next I went ahead and painted the doors using rattle can. A lot of people will knock me for this, but amazingly enough, the paint looked FANTASTIC! With the little resources I have, rattle can just economically made sense. If you told me the original model was sprayed with rattle, I'd totally believe you! The test fit of the doors looked FANTASTIC! I kept telling myself, "Even after all these mistakes, Uncle Bob can still harness his engineering and make my subpar skills look professional." There's nothing like a BVM kit.. After messing with the geometry on the strut doors for about 10 minutes, I was able to get them looking great! I did get a little confused on the wire that holds the door to the strut, but after seeing a photo of a proper setup, it clicked and fell right into place.. Hey, look, instructions! It's now I realize, either read instructions or stop going. So... I finally did what all proper modellers do, and read the instructions. (It was all bliss afterwards.) I have not gotten to the lower gear doors as I'm waiting on some strips of brass to come in. Once that comes in, I'll be able to finalize the doors.
Battery Shelf: Former 4 of the old kit was in the way of where the battery shelf should be. After a little cutting on the former, I was able to create a battery shelf out of thin ply and install it in the model. I did go back and apply some carbon fiber cloth to make sure the fuse was still structurally sound. On the plans, it looked like the shelf was right at the mounting location for the fan. After cutting out some very thin ply, creating some formers to reinforce the tray, I mounted the trays, applied aeropoxy and boom. It worked fantastic! I'll apply velcro later to hold the batteries in place. I referenced the plans multiple times to make sure that where I planned on putting the trays, was the correct place.
Motor and thrust tube: After mounting the motor, it was time for the thrust tube. I followed the instructions carefully, and it was a cake walk. I used some blue masking tape to hold the thrust tube together, installed it in the plane, trimmed excess, and finally got ready to install it permanently. I didn't get any tape with the thrust tube, so I spent about 5 minutes at Lowes trying to find some tape I thought would be suitable. There's some Scotch packing tape that advertises it'll stick to, "any cardboard guaranteed" and dang, it was good stuff! As soon as it touched the plastic, it was stuck. This made me feel very confident I made the right choice. Carefully applying a piece of tape next to every masking tape, allowed me to "permanently" set the thrust tube diameter. I saw in the instructions where it said use a broom handle to apply the tape to the thrust tube so it would still hold its curvature, and this proved, of course, to be an excellent move. After getting it taped up per the book, and installed, it looked great! Not a single gap anywhere between the motor and the thrust tube.
Luckily I am able to still use the existing cockpit with the battery setup I'm running. (Twin 5 cells with single 2 cell) So I'm not too worried about anything else as far as building goes. After I get all the wiring finalize, I will verify the CG and determine the final resting place for the 2 cell battery. I will use some thin ply to either create a battery pocket, or battery tray. Either way, battery removal for it will be easy. I firmly believe the model will CG out pretty close to what the plans call for. I have decided to hold off on lights at the moment as I'm running out of time. My plan is to have this plane ready before the 40th anniversary of the GSW event, and so far, it's looking good. I'm just trying not to add too much to my plate..
What's left:
Public disclaimer:
Read Instructions.
Read Instructions.
Read more instructions.
The gear doors finally came in and that was the first task. Since this is an all electric model, I knew the gear doors would probably increase efficiency, and every little bit helps at this point. After reading the instructions, and starting on the gear doors, I realized, I did NOT read the instructions.. I did, but I was in the incorrect part of the book. Ooops! Now, some people may think, why are you working on a model like this if you didn't even read the instructions. Well, sorry. I know next time. Painful lesson learned! Either way, we recovered, and that's all that matters.
Gear Doors: Looks complicated, but if you read the instructions, you'll be golden. They'll practically build themselves. After making my first mistake, I was able to recover. Laid the center two gear doors on the fuse and they looked great. The center former for them to mount to took a little sanding, but it was a successful operation. I went ahead and laid the doors down on the belly, and marked where I would need to mount the wooden blocks. Crazy enough, they were PRECISELY were the old belly pan cover was. That was pretty awesome! I will totally admit, the center two doors kicked my butt, but I was determined! Next up was the upper strut doors and the covers. With this older model, the new doors have some excess material. This was trimmed off, and it looked great. After trimming, a light sanding, and I was ready for round two of doors. (I lied again. Didn't read the instructions.) I placed the ploy-ply and thin wood shim underneath the skin of the fuse, and marked my holes to drill. This poly-ply and wooden shim is used for mounting the strut door hinge to something stable. Next I went ahead and painted the doors using rattle can. A lot of people will knock me for this, but amazingly enough, the paint looked FANTASTIC! With the little resources I have, rattle can just economically made sense. If you told me the original model was sprayed with rattle, I'd totally believe you! The test fit of the doors looked FANTASTIC! I kept telling myself, "Even after all these mistakes, Uncle Bob can still harness his engineering and make my subpar skills look professional." There's nothing like a BVM kit.. After messing with the geometry on the strut doors for about 10 minutes, I was able to get them looking great! I did get a little confused on the wire that holds the door to the strut, but after seeing a photo of a proper setup, it clicked and fell right into place.. Hey, look, instructions! It's now I realize, either read instructions or stop going. So... I finally did what all proper modellers do, and read the instructions. (It was all bliss afterwards.) I have not gotten to the lower gear doors as I'm waiting on some strips of brass to come in. Once that comes in, I'll be able to finalize the doors.
Battery Shelf: Former 4 of the old kit was in the way of where the battery shelf should be. After a little cutting on the former, I was able to create a battery shelf out of thin ply and install it in the model. I did go back and apply some carbon fiber cloth to make sure the fuse was still structurally sound. On the plans, it looked like the shelf was right at the mounting location for the fan. After cutting out some very thin ply, creating some formers to reinforce the tray, I mounted the trays, applied aeropoxy and boom. It worked fantastic! I'll apply velcro later to hold the batteries in place. I referenced the plans multiple times to make sure that where I planned on putting the trays, was the correct place.
Motor and thrust tube: After mounting the motor, it was time for the thrust tube. I followed the instructions carefully, and it was a cake walk. I used some blue masking tape to hold the thrust tube together, installed it in the plane, trimmed excess, and finally got ready to install it permanently. I didn't get any tape with the thrust tube, so I spent about 5 minutes at Lowes trying to find some tape I thought would be suitable. There's some Scotch packing tape that advertises it'll stick to, "any cardboard guaranteed" and dang, it was good stuff! As soon as it touched the plastic, it was stuck. This made me feel very confident I made the right choice. Carefully applying a piece of tape next to every masking tape, allowed me to "permanently" set the thrust tube diameter. I saw in the instructions where it said use a broom handle to apply the tape to the thrust tube so it would still hold its curvature, and this proved, of course, to be an excellent move. After getting it taped up per the book, and installed, it looked great! Not a single gap anywhere between the motor and the thrust tube.
Luckily I am able to still use the existing cockpit with the battery setup I'm running. (Twin 5 cells with single 2 cell) So I'm not too worried about anything else as far as building goes. After I get all the wiring finalize, I will verify the CG and determine the final resting place for the 2 cell battery. I will use some thin ply to either create a battery pocket, or battery tray. Either way, battery removal for it will be easy. I firmly believe the model will CG out pretty close to what the plans call for. I have decided to hold off on lights at the moment as I'm running out of time. My plan is to have this plane ready before the 40th anniversary of the GSW event, and so far, it's looking good. I'm just trying not to add too much to my plate..
What's left:
- Clean up the wiring. I don't plan on this taking forever, but I am a little bit of a freak when it comes to clean wiring installs. I think that's the old Low Voltage integrator in me.
- Verify the brakes work. If not, a new O-ring will be needed. Luckily I've got some.
- Re-attach the wing servo pocket cover.
- Mount the receiver.
- Range test and GO FLY!
08-29-2022 | 05:50 PM
#23
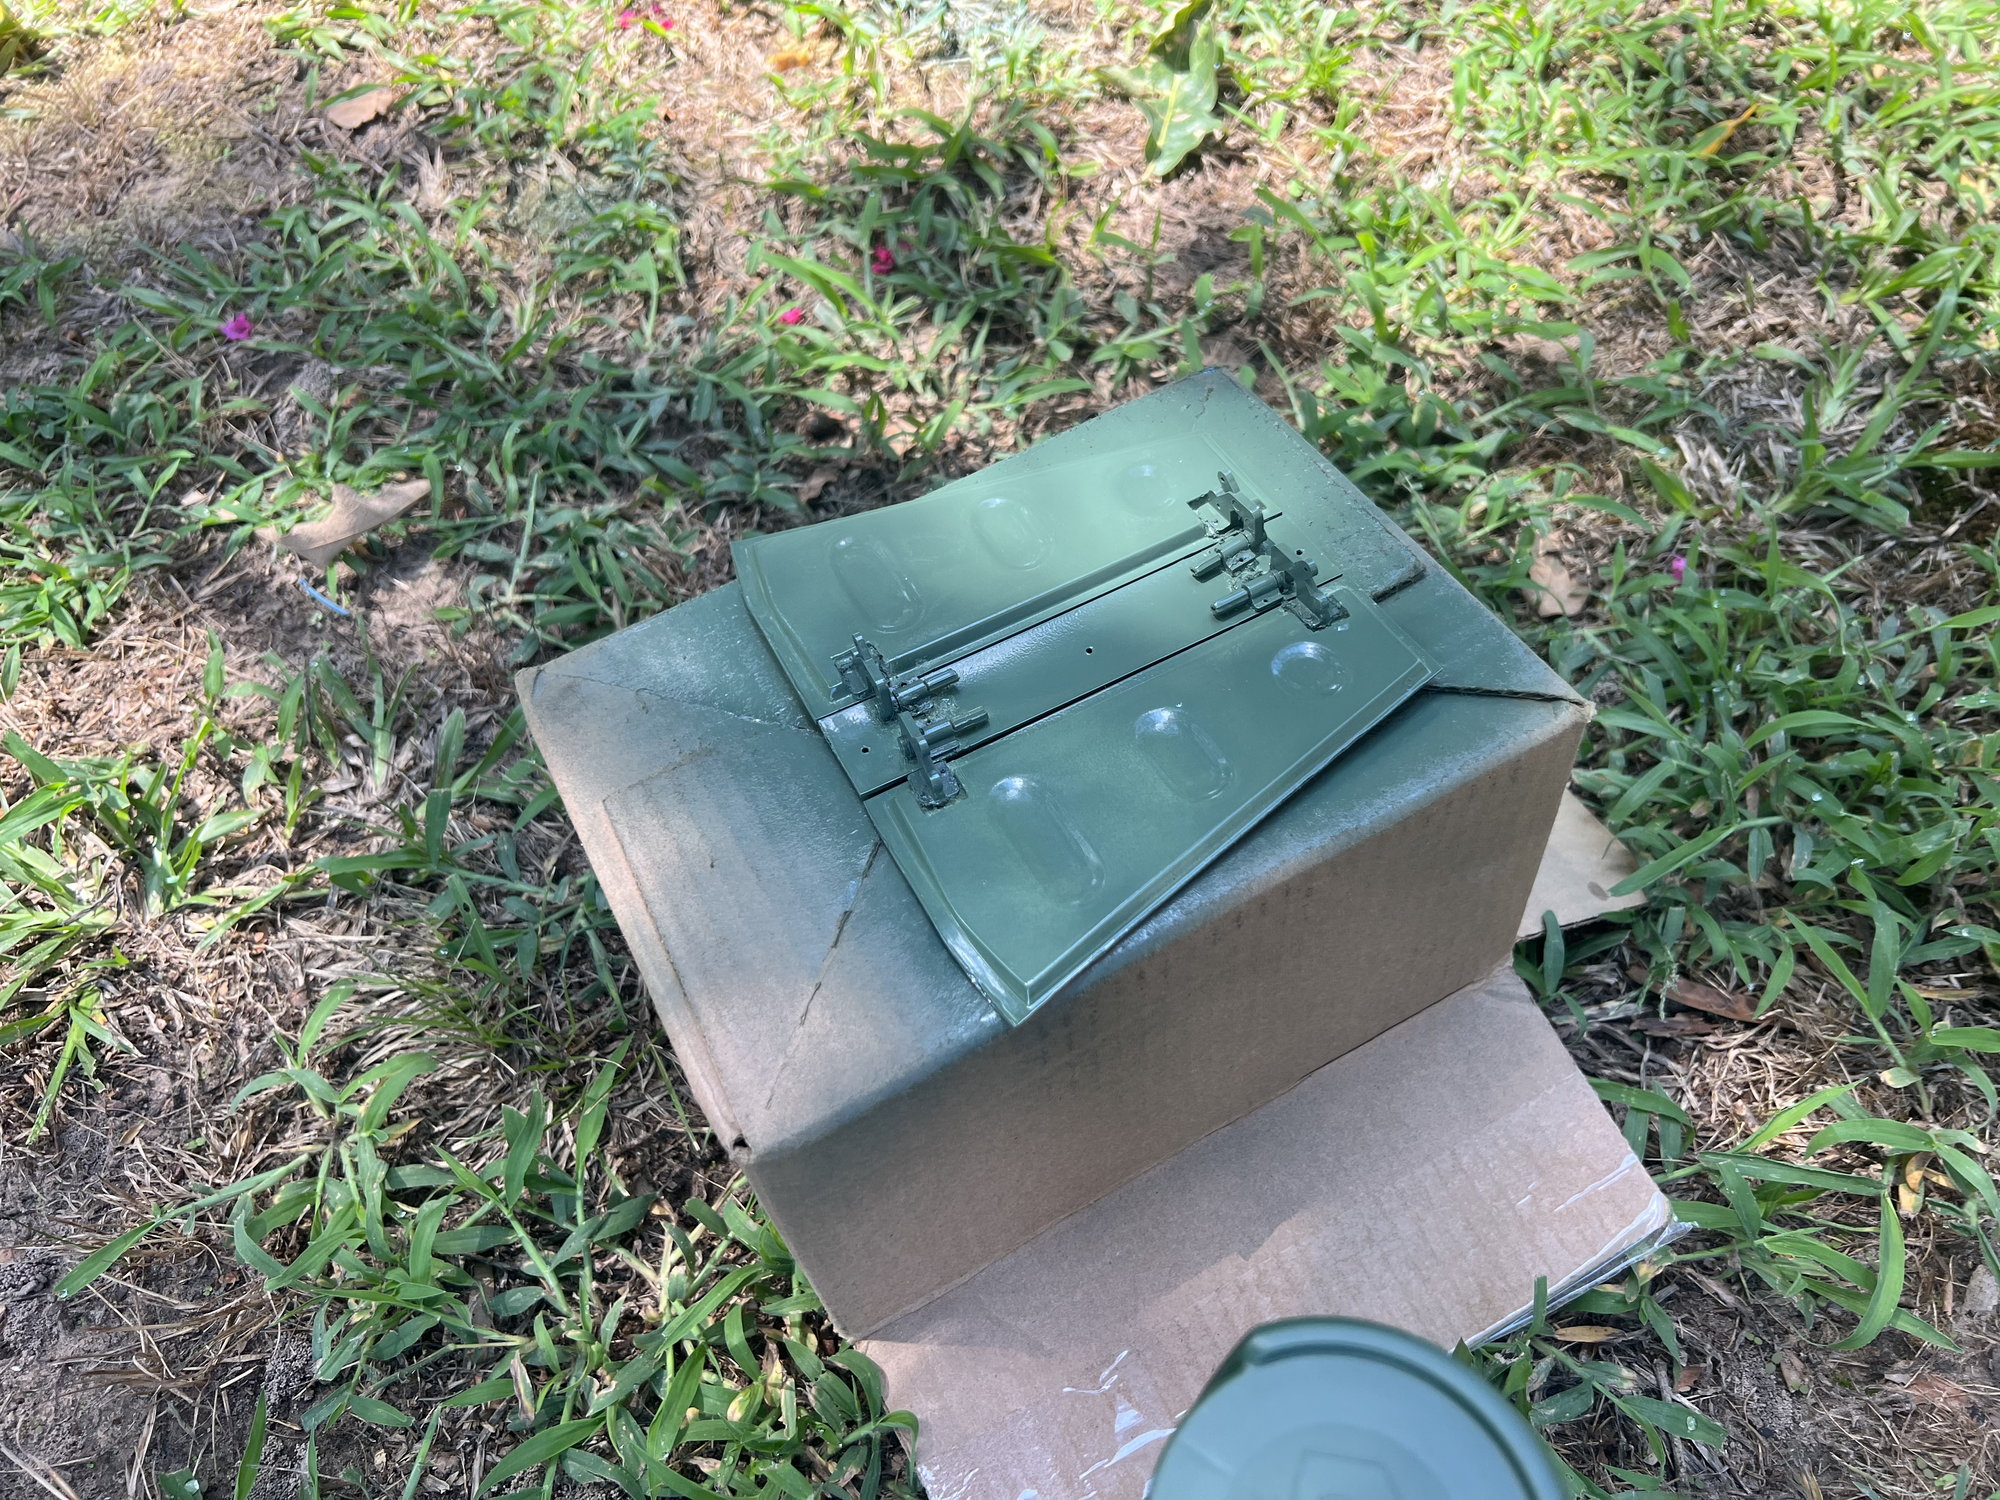
Pics inbound.
First mistake. Breaking these doors from the whole setup before mounting the hinges. I was able to restore them and hold them in place with Blue masking tape.
After completing the center section, I wanted to see what progress looked like. Man, I was excited! A little defeated with my mistakes, but I was excited!
Spray can, but it looks soooo good!
Notice the excess. This was trimmed back.

After trim.
I will admit, I got a little excited seeing the gear doors. 😁
First mistake. Breaking these doors from the whole setup before mounting the hinges. I was able to restore them and hold them in place with Blue masking tape.
After completing the center section, I wanted to see what progress looked like. Man, I was excited! A little defeated with my mistakes, but I was excited!
Spray can, but it looks soooo good!
Notice the excess. This was trimmed back.
After trim.
I will admit, I got a little excited seeing the gear doors. 😁
The following users liked this post:
RCAdam03 (08-30-2022)
The following users liked this post:
RCAdam03 (08-30-2022)
08-30-2022 | 07:36 AM
#25
The finished product looks great! No shame in having to make a correction or two, we've all done it and we'll do them again haha. Taking it back to the GSW Jet Meet will be a great tribute, I really hope to get out there next year, bucket list event. What do you guess the AUW difference will be with electric Viofan compared to the old GDF setup?

