


Pilot Matrix 1.8
 02-22-2025 | 04:54 PM
#1
Thread Starter

My Feedback: (1)
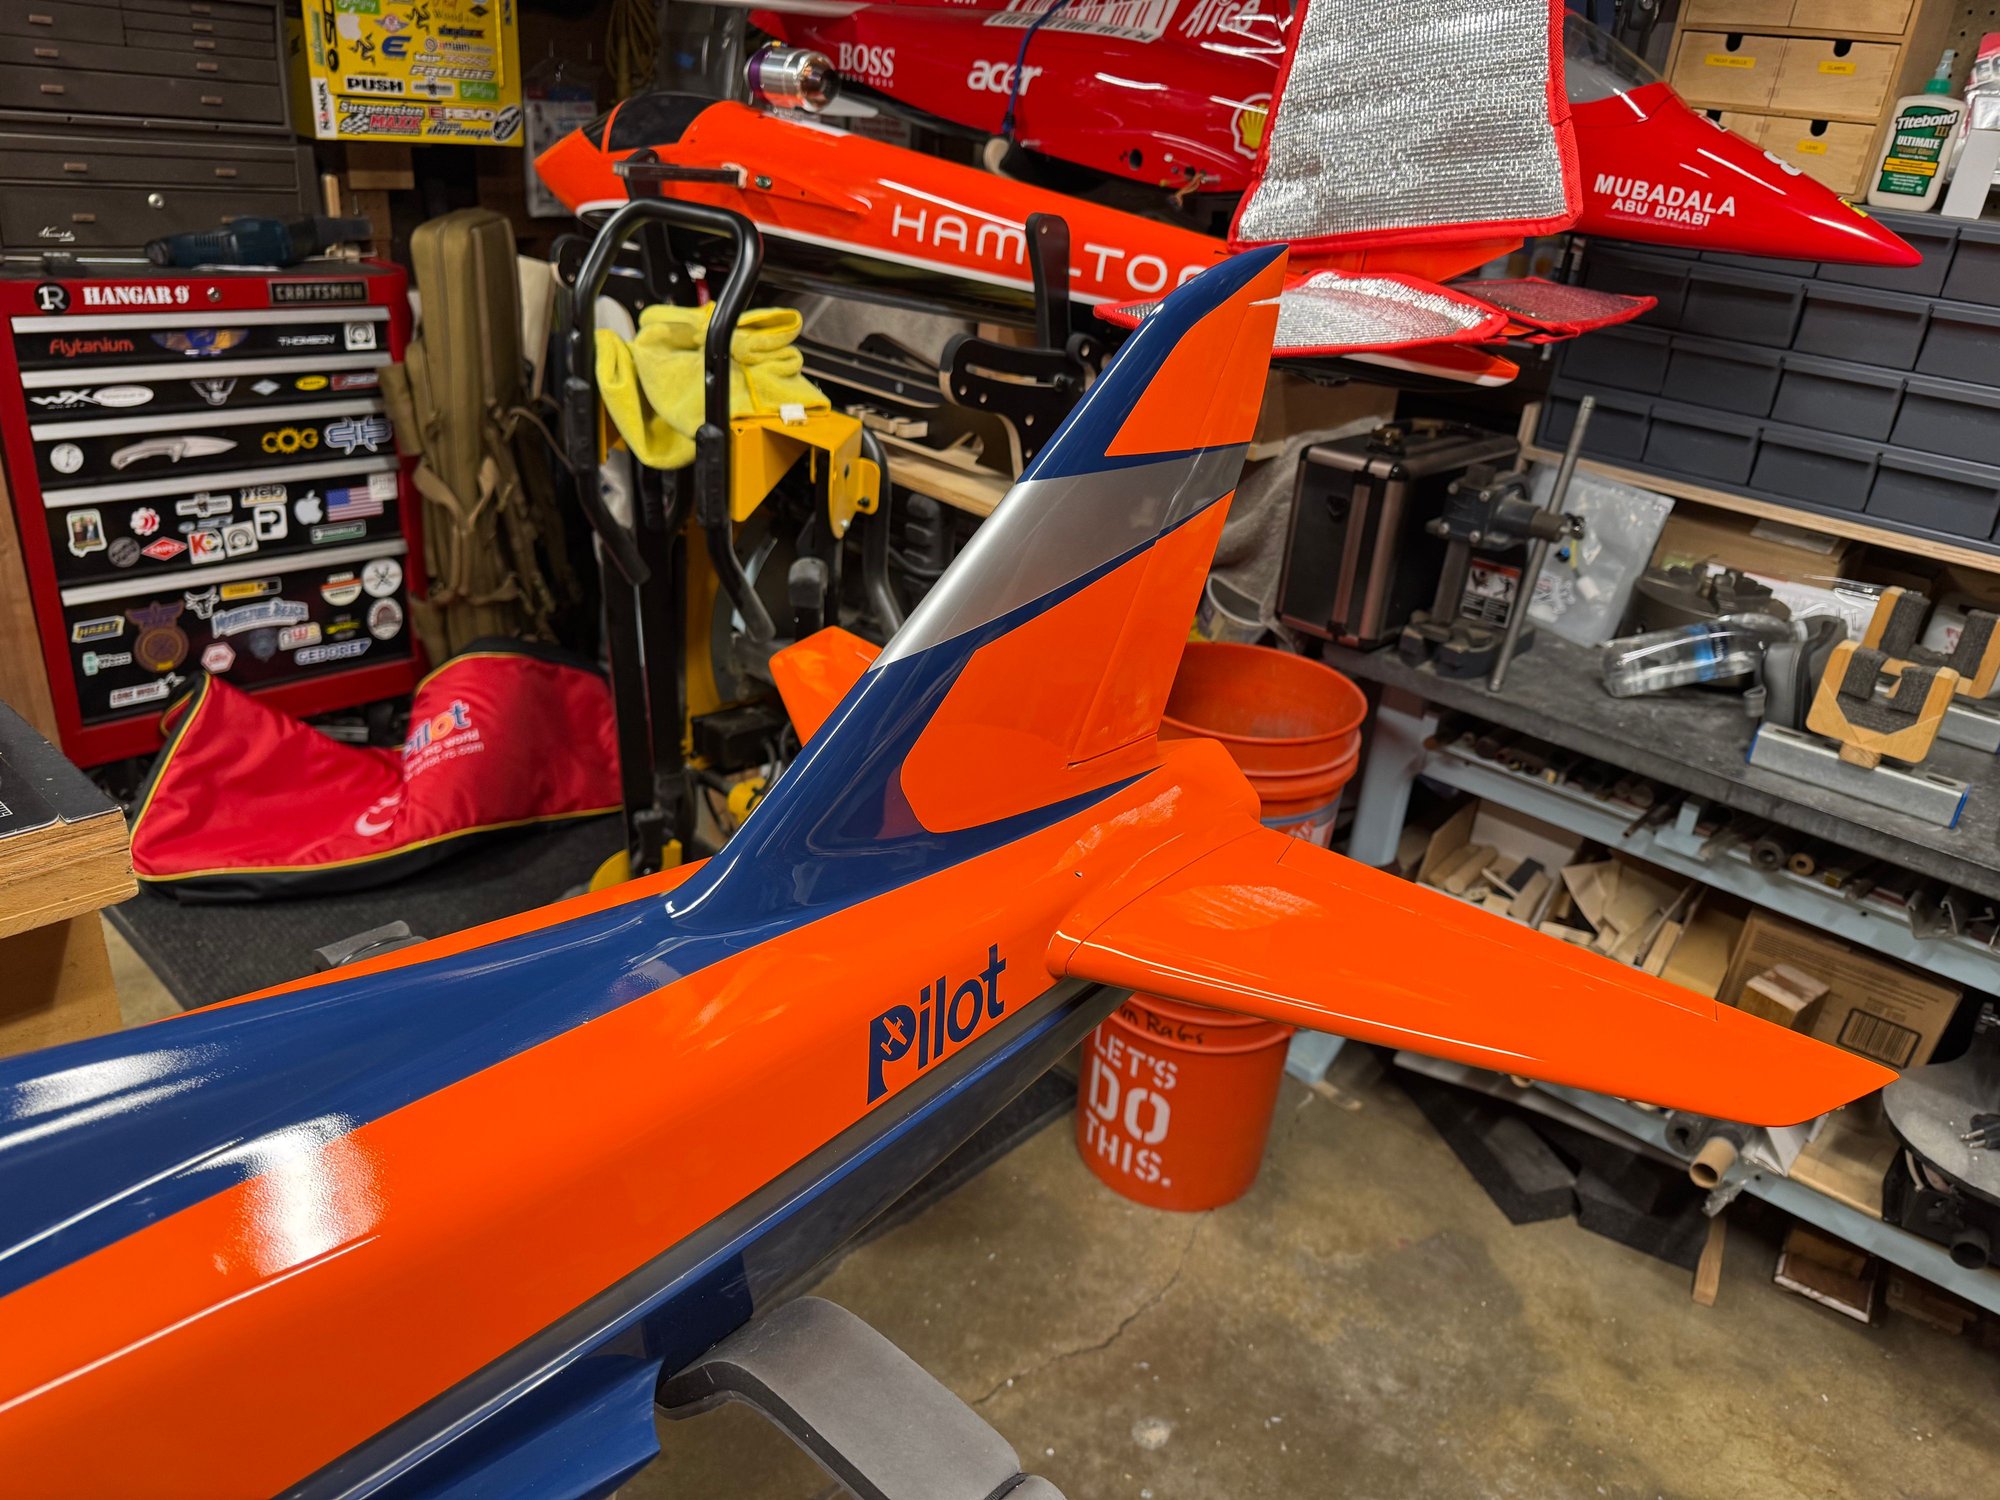
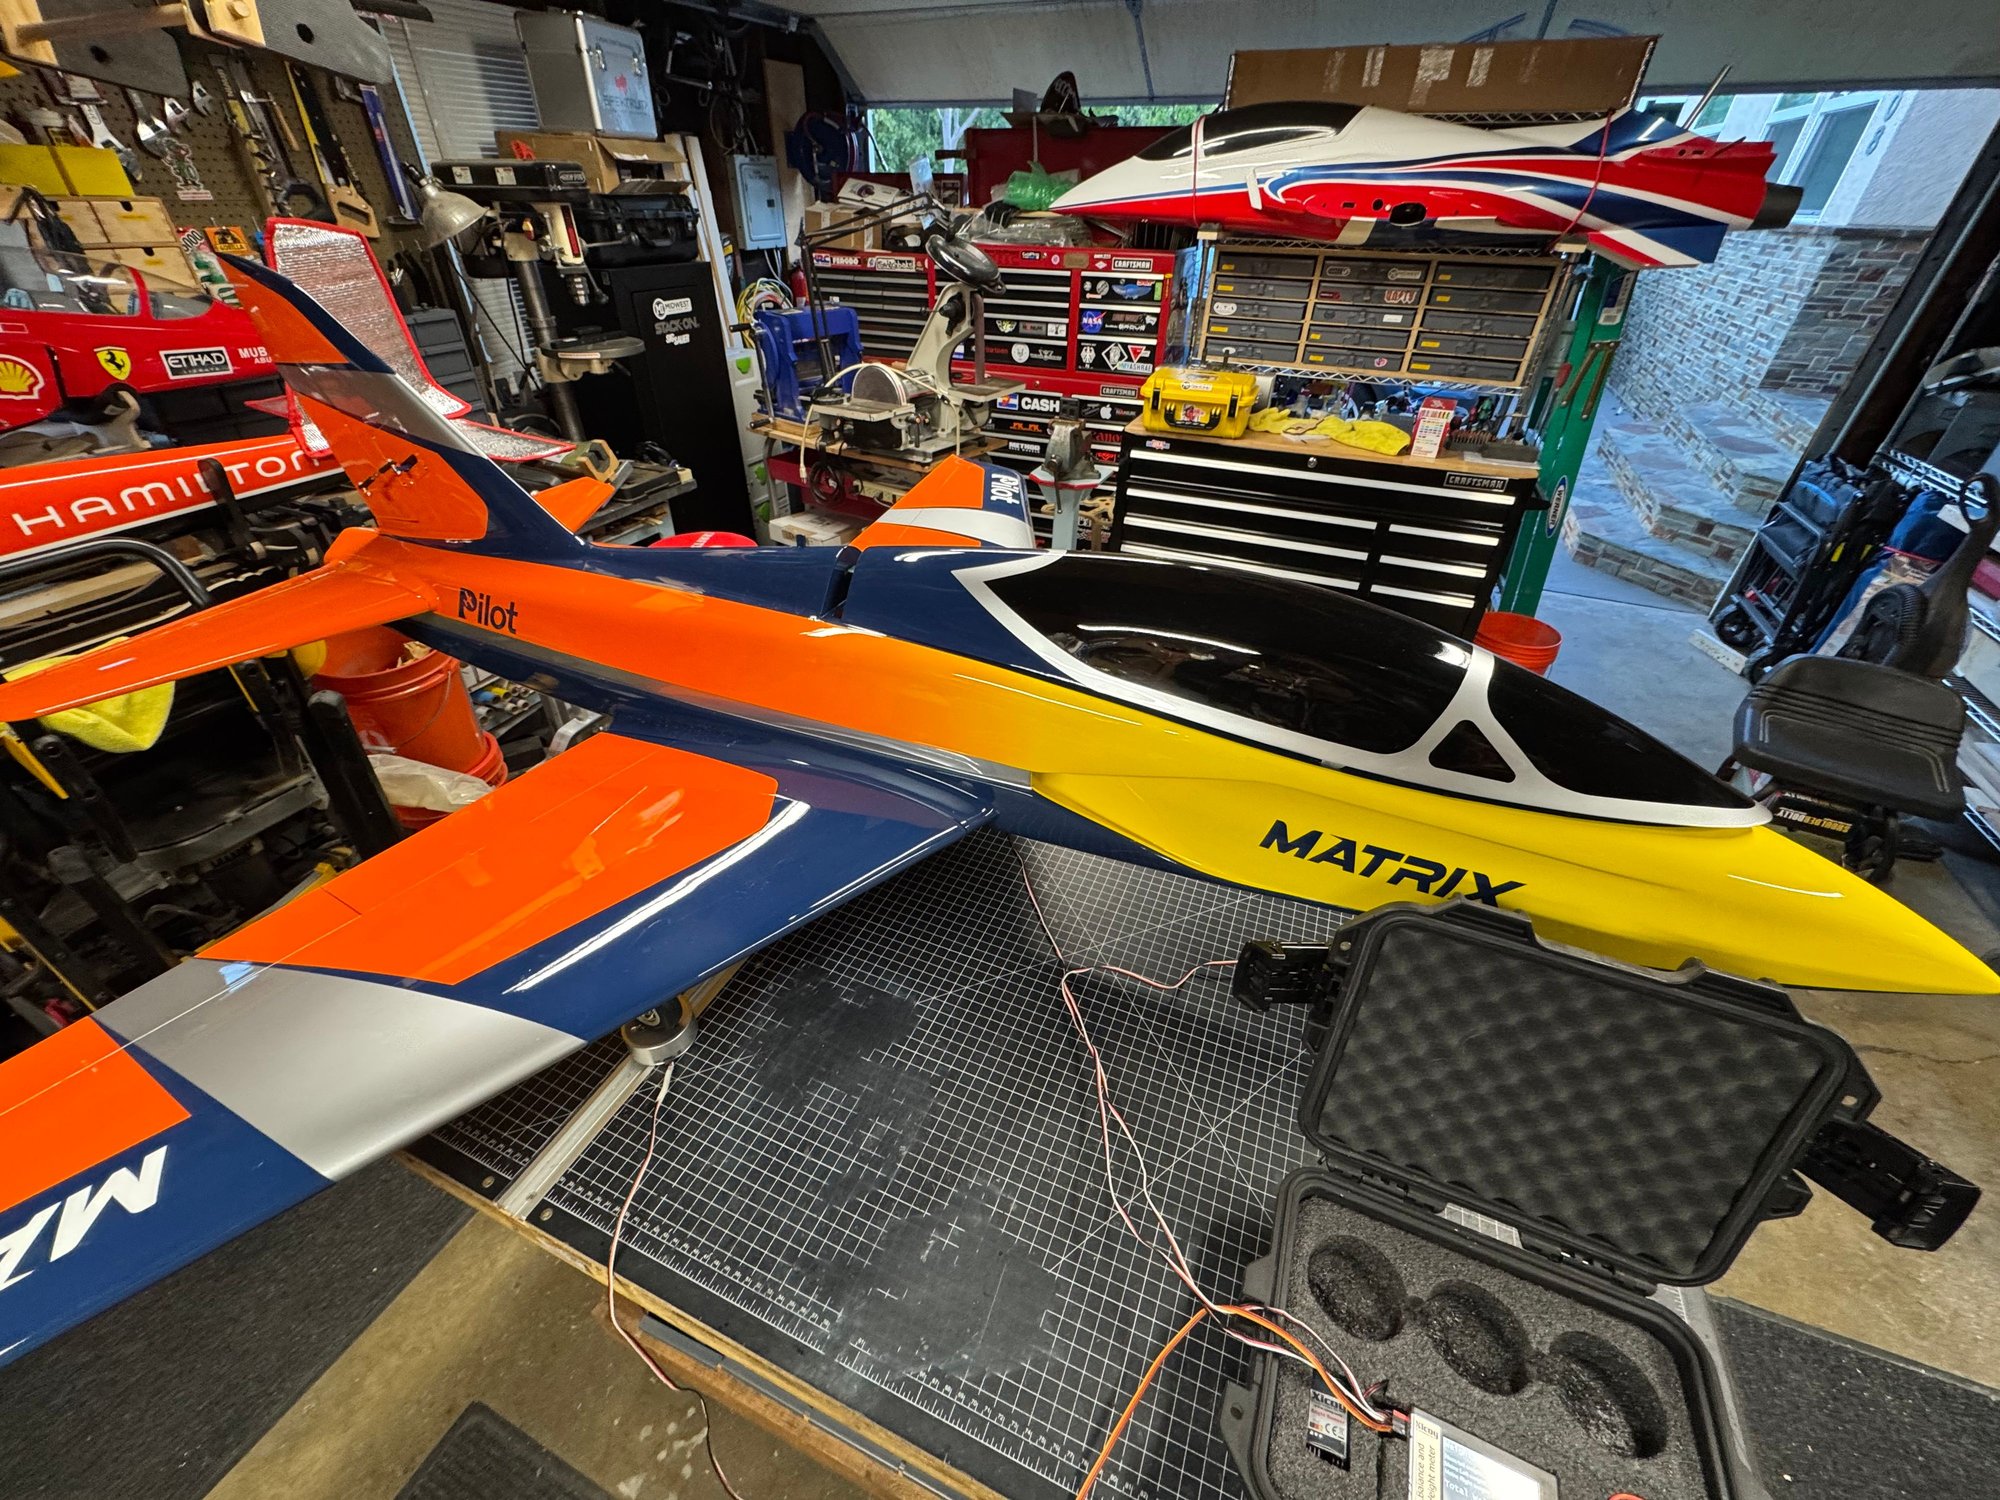
I received my 1.8m Matrix from Banana Hobby. I've been so impressed with the 2.2m version that I wanted to try the smaller version.
I ordered it turbine ready because I like the Pilot servos and this actually a good value.
So far, the build from the factory is very good. The servo arms are quality aluminum with turn buckles and ball end joints. The hardware is top notch.
The model came with a 2l fuel bag installed. Its a permanent installation. Removal will require cutting the carbon rods out. I would have liked to change the fuel tubing out. But accessing the bottom of the tank to do this may not be possible. I assume this is what the factory pilots use and will give it a go.
I have two pontential engines for this aircraft - a X60 and X120. The 60 is minimum power but reduces the weight by 500g or so. The 120 is greater than needed, but is close in weight to most 85's.
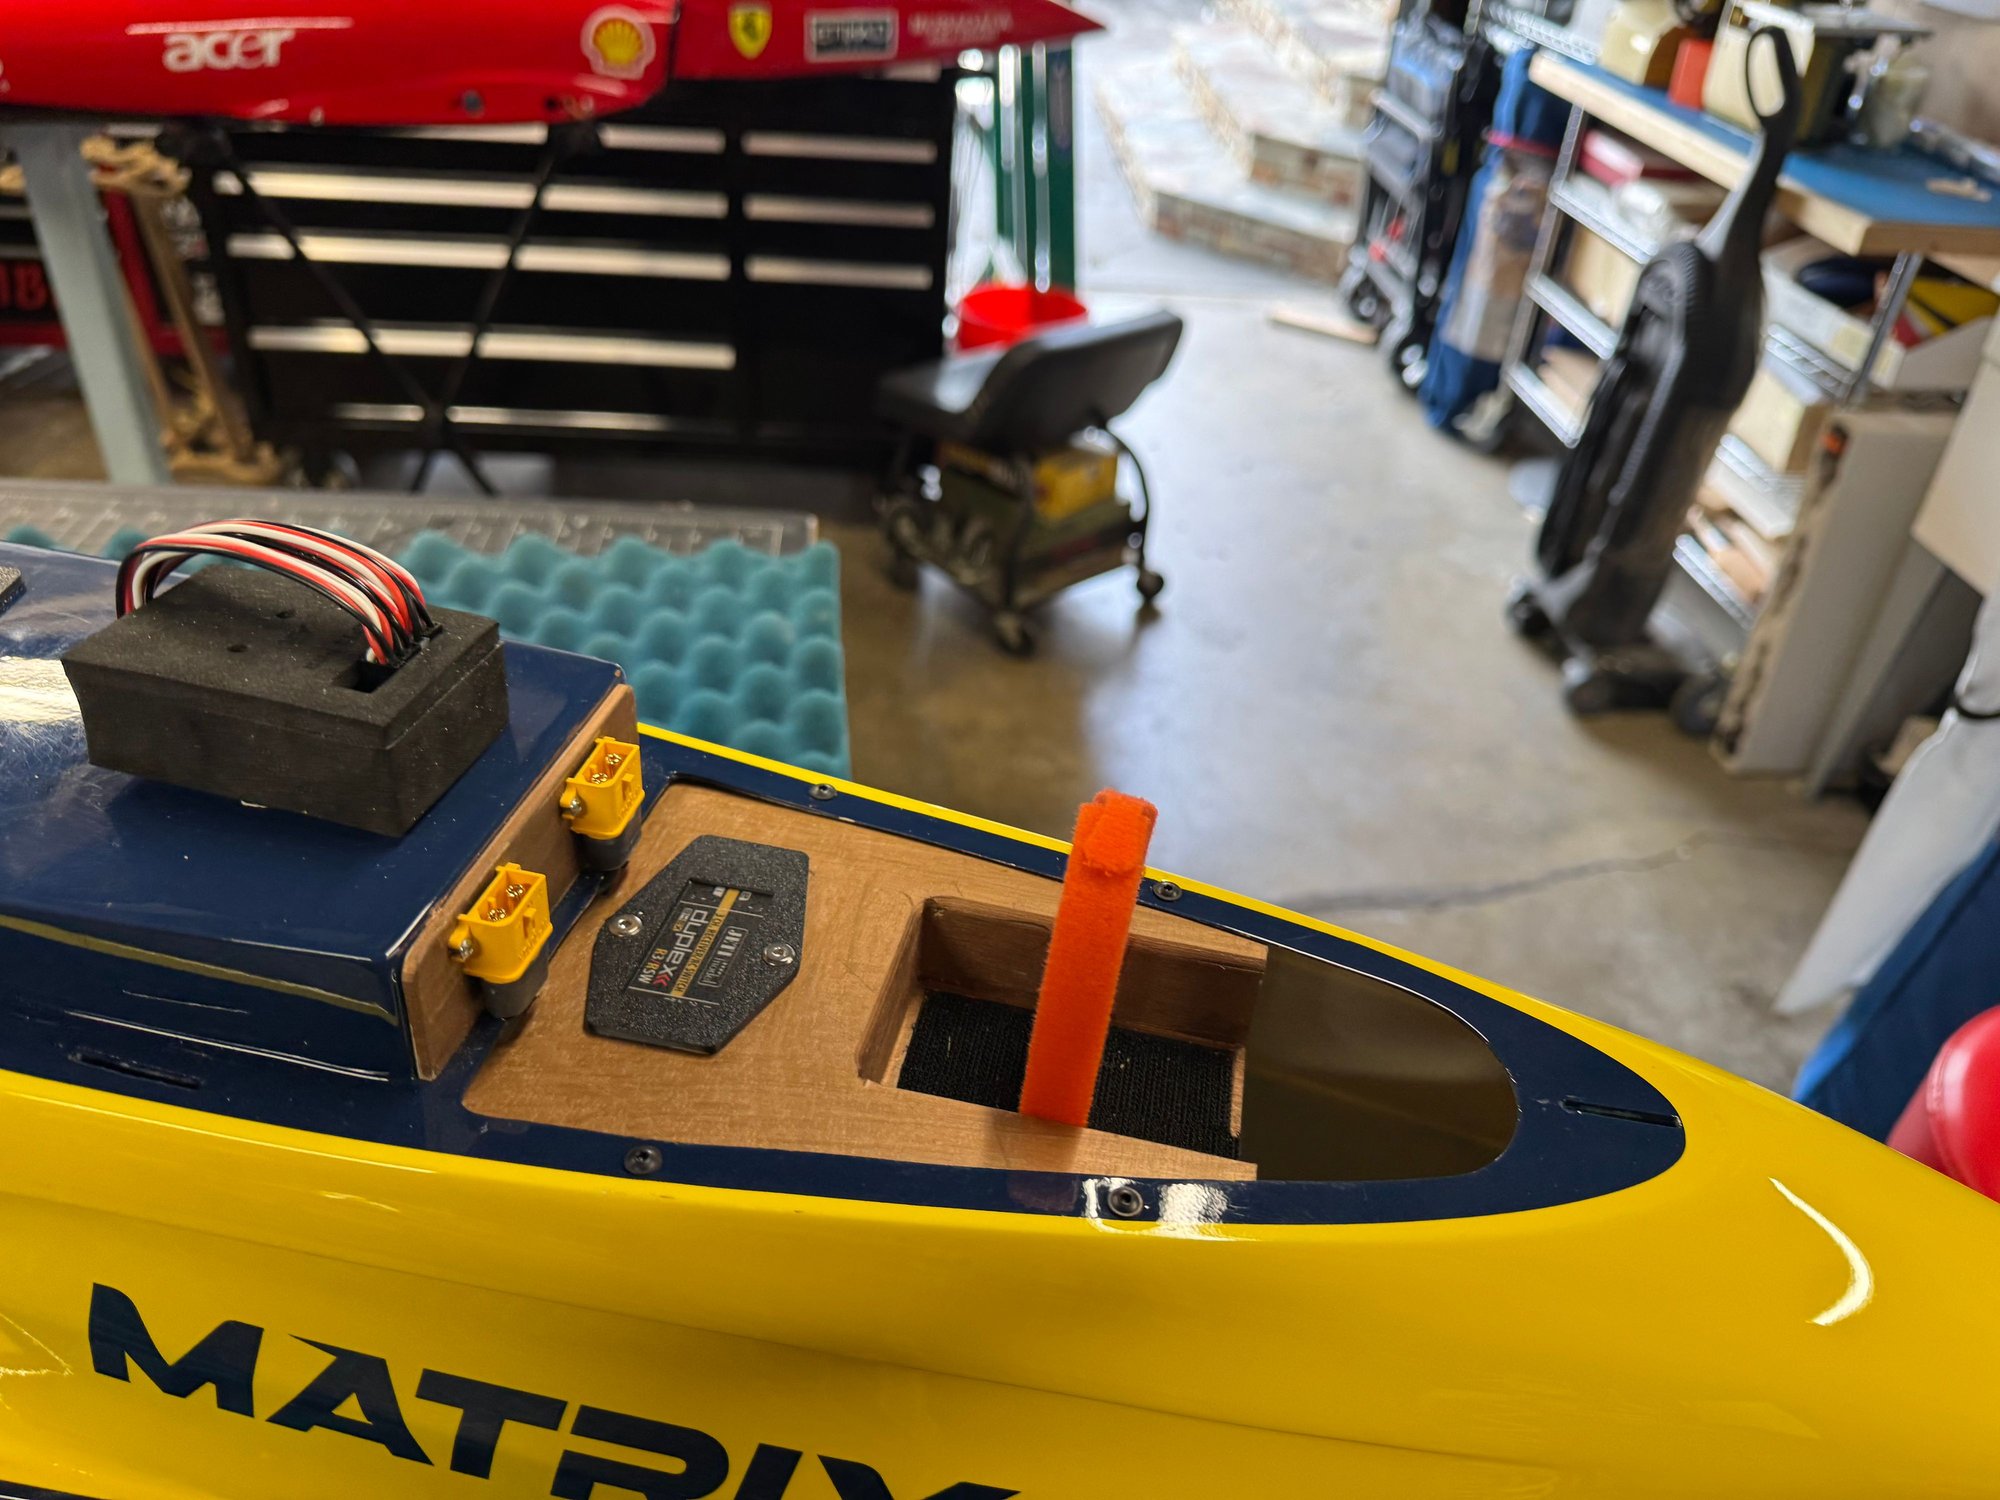
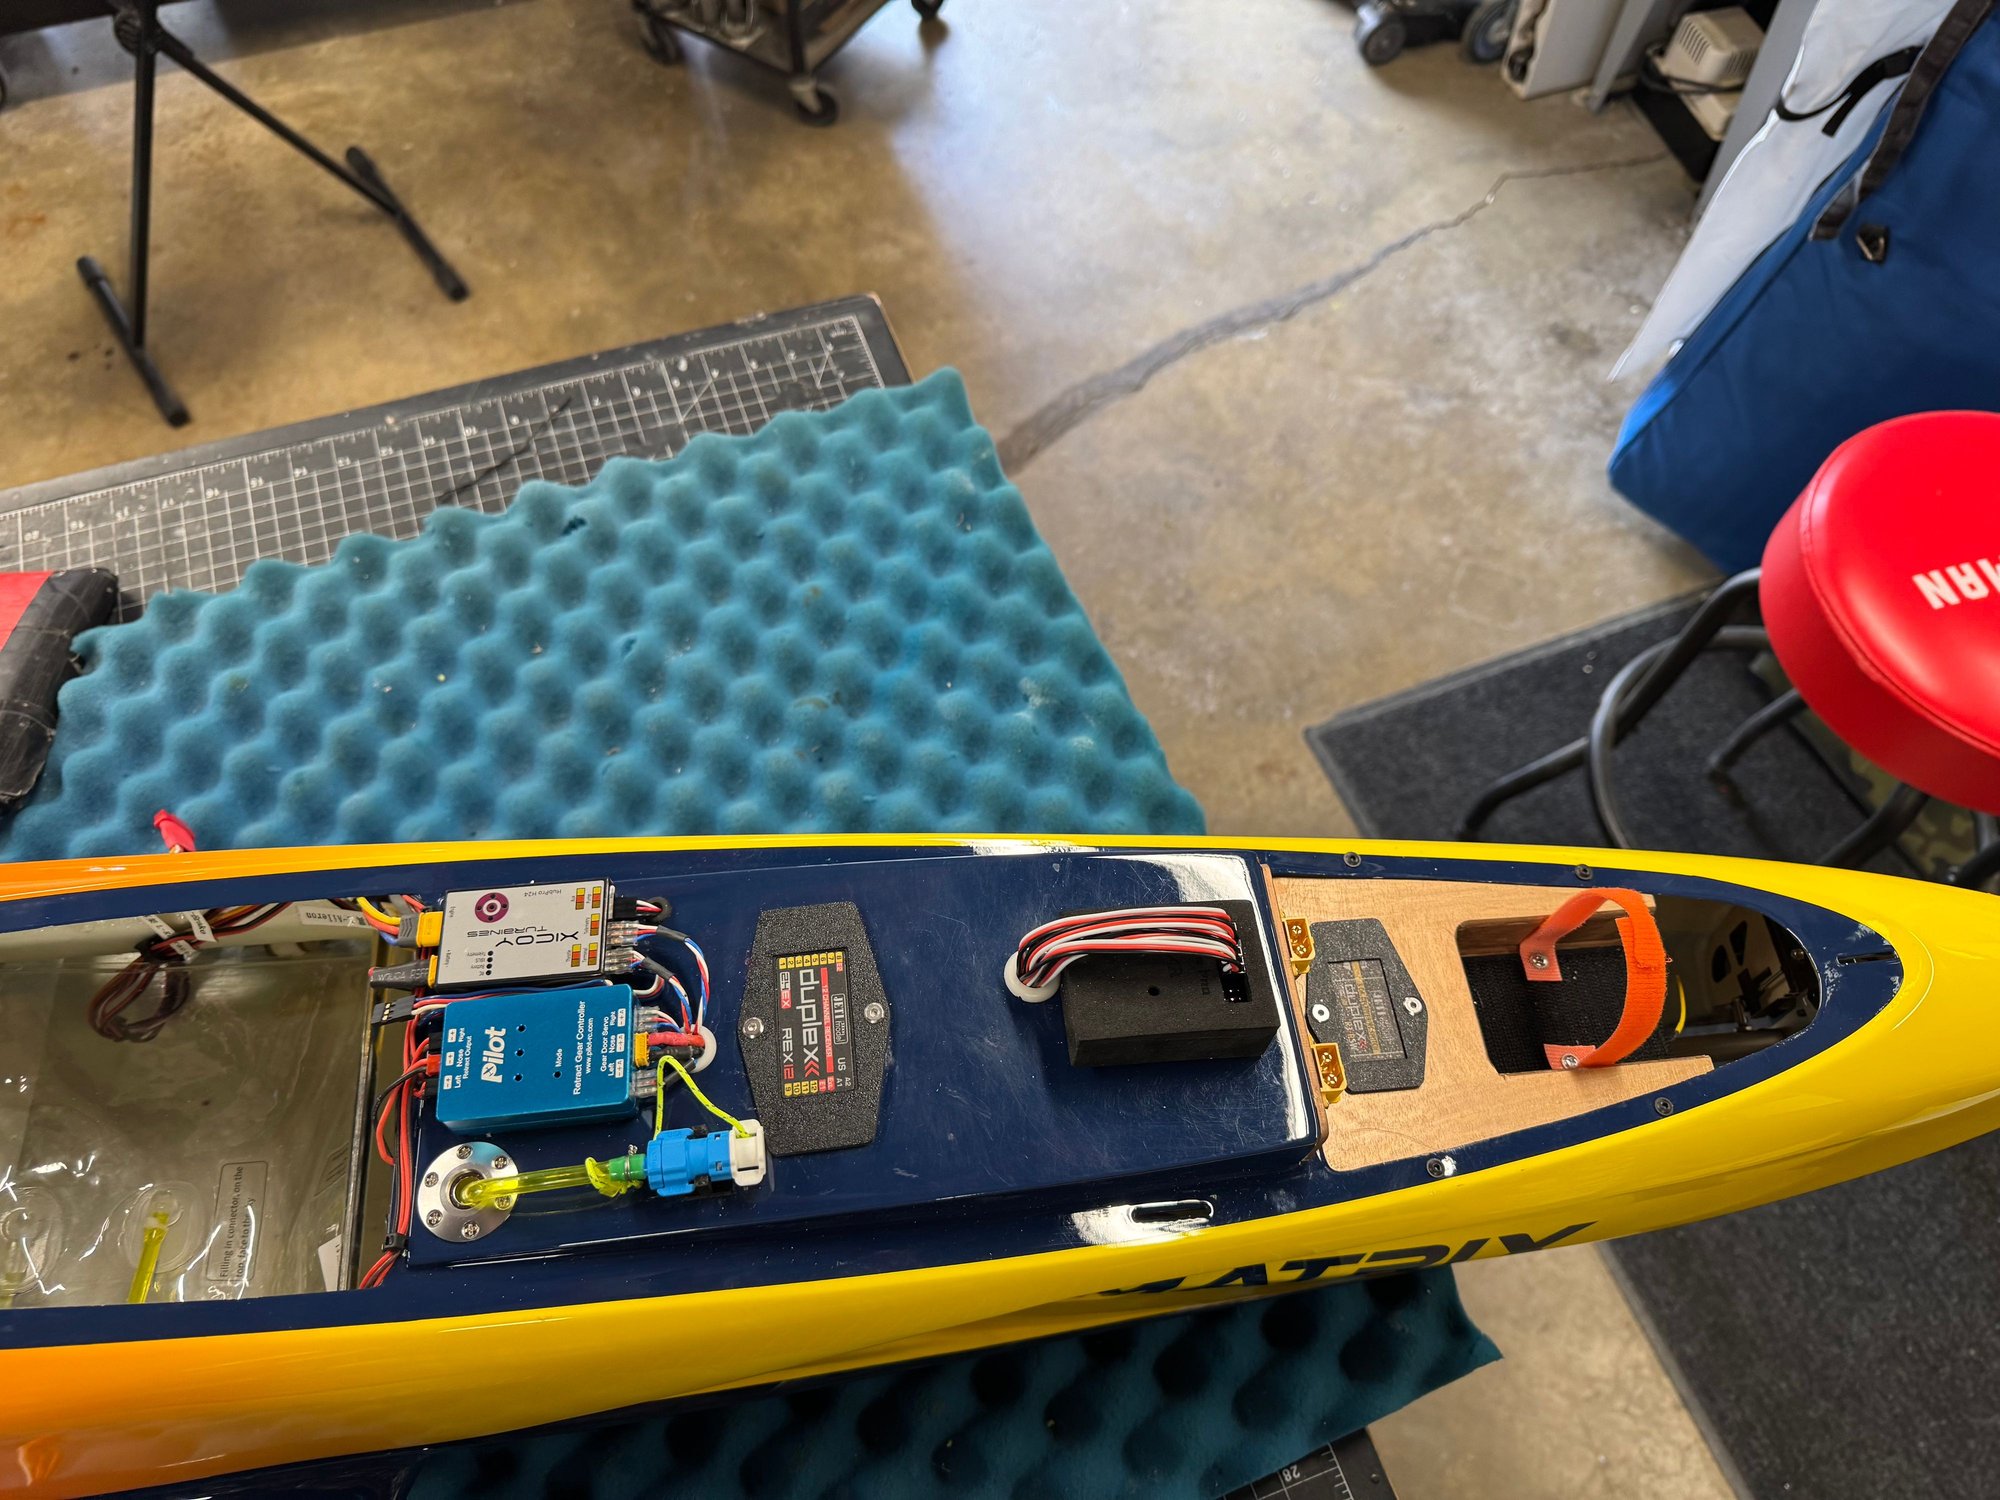
Assembly should be very quick as all I need to do is mount the equipment to the deck and plug it in.
One piece fuselage

Front tray is meant for batteries

Fuel bag is standard now.
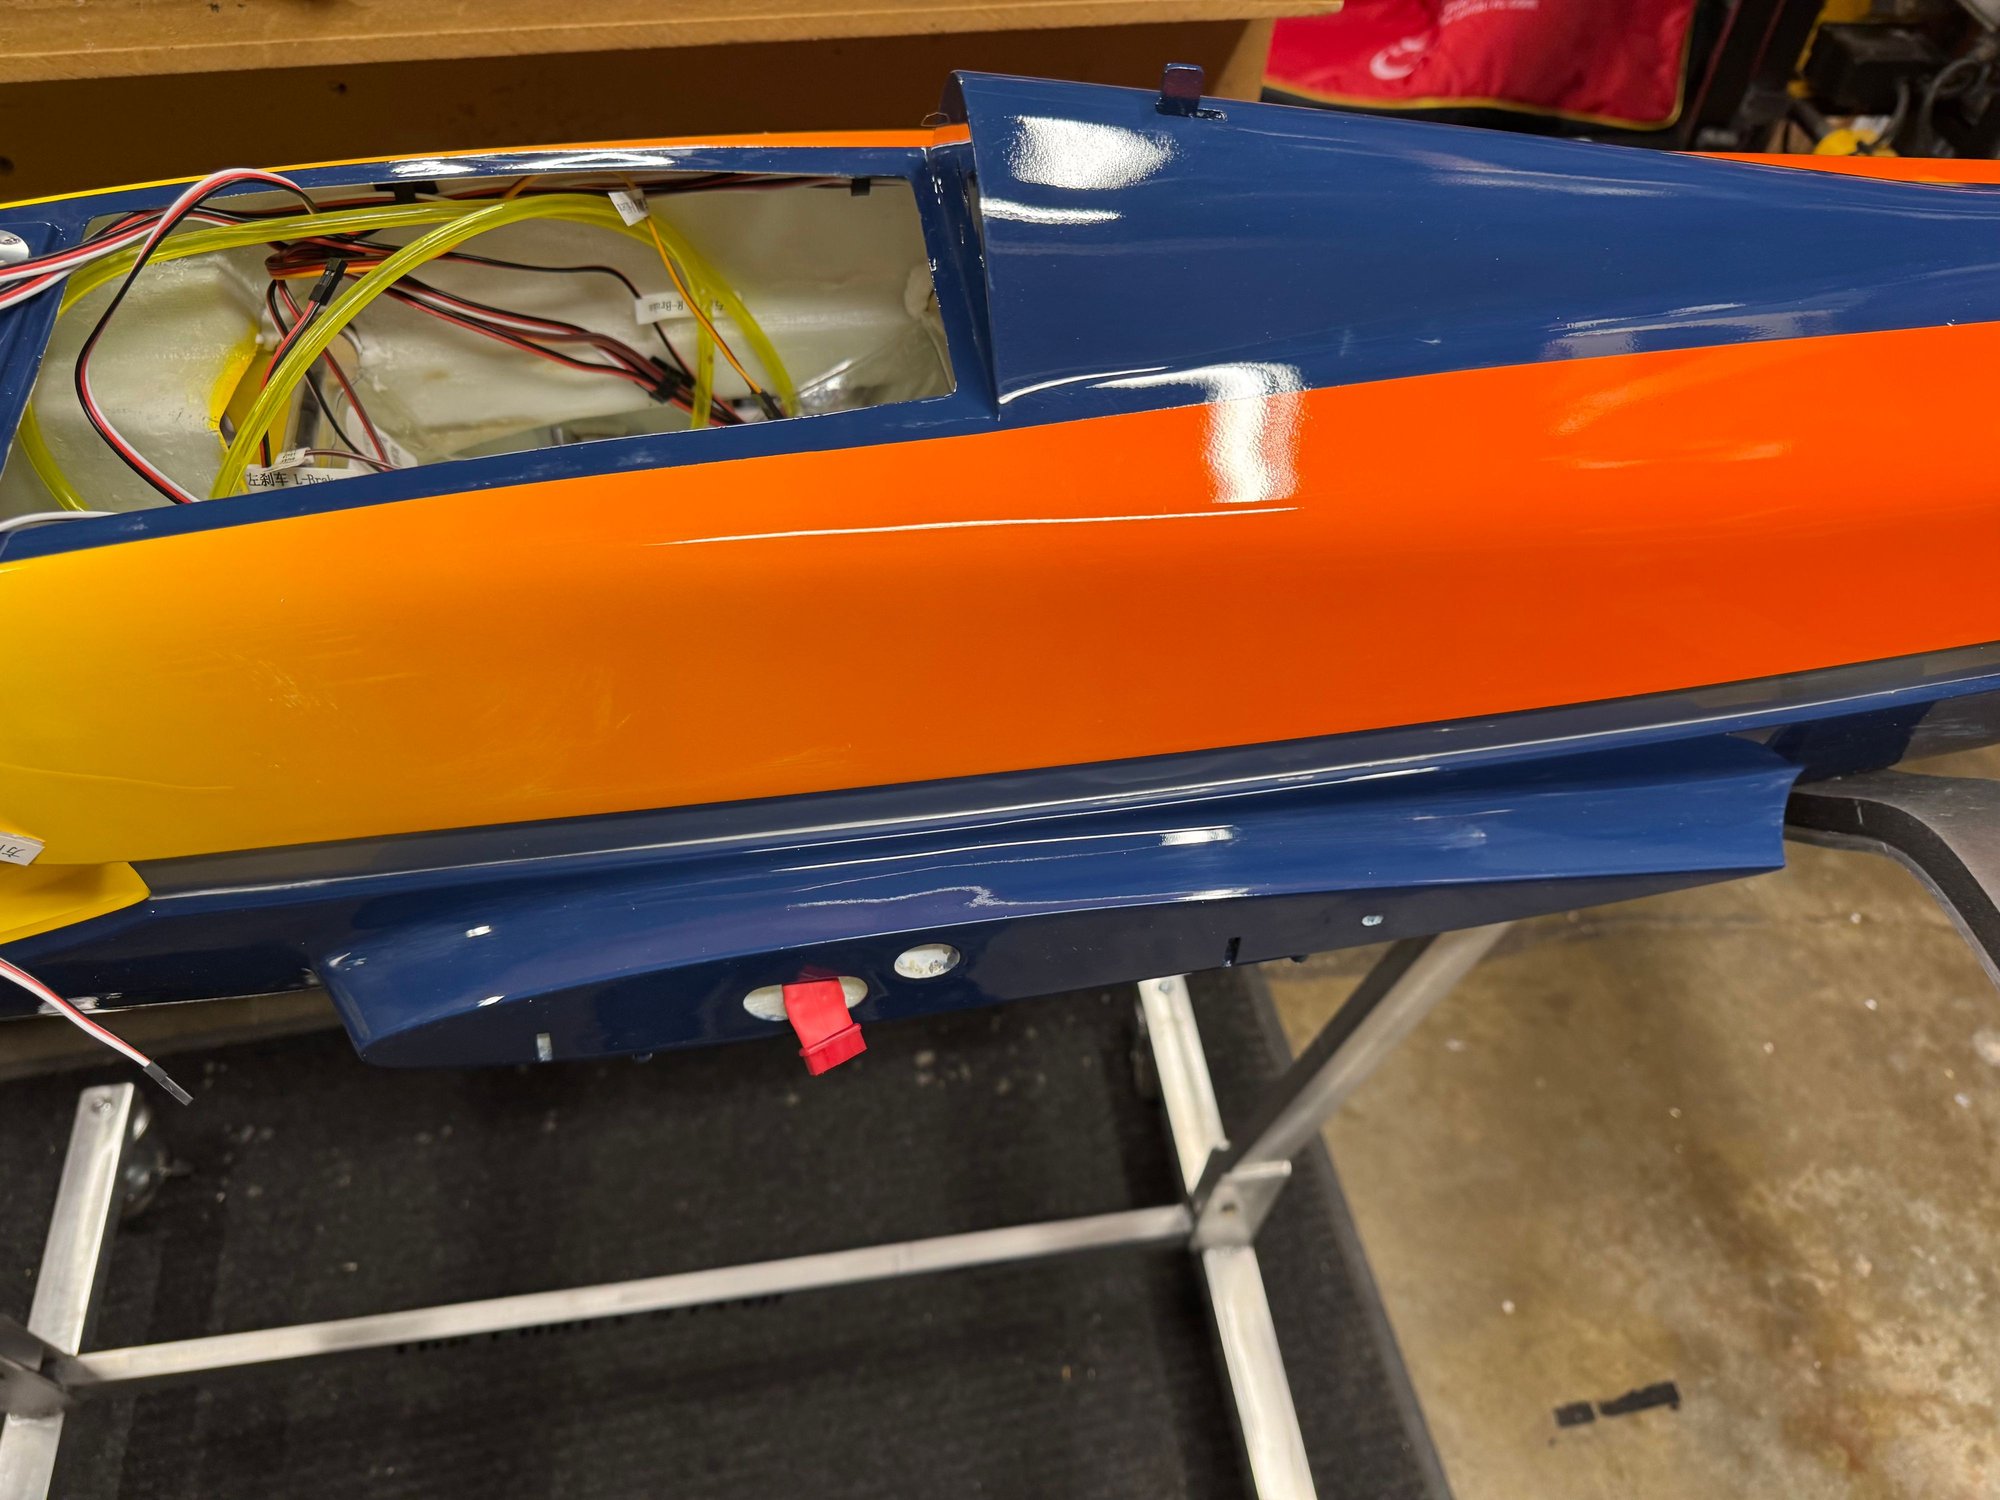
Wing mounting clips are on the bottom now.
I ordered it turbine ready because I like the Pilot servos and this actually a good value.
So far, the build from the factory is very good. The servo arms are quality aluminum with turn buckles and ball end joints. The hardware is top notch.
The model came with a 2l fuel bag installed. Its a permanent installation. Removal will require cutting the carbon rods out. I would have liked to change the fuel tubing out. But accessing the bottom of the tank to do this may not be possible. I assume this is what the factory pilots use and will give it a go.
I have two pontential engines for this aircraft - a X60 and X120. The 60 is minimum power but reduces the weight by 500g or so. The 120 is greater than needed, but is close in weight to most 85's.
Assembly should be very quick as all I need to do is mount the equipment to the deck and plug it in.
One piece fuselage
Front tray is meant for batteries
Fuel bag is standard now.
Wing mounting clips are on the bottom now.


The following users liked this post:
AEROSHELDON (02-23-2025)
02-24-2025 | 05:08 PM
#6
Thread Starter
My Feedback: (1)
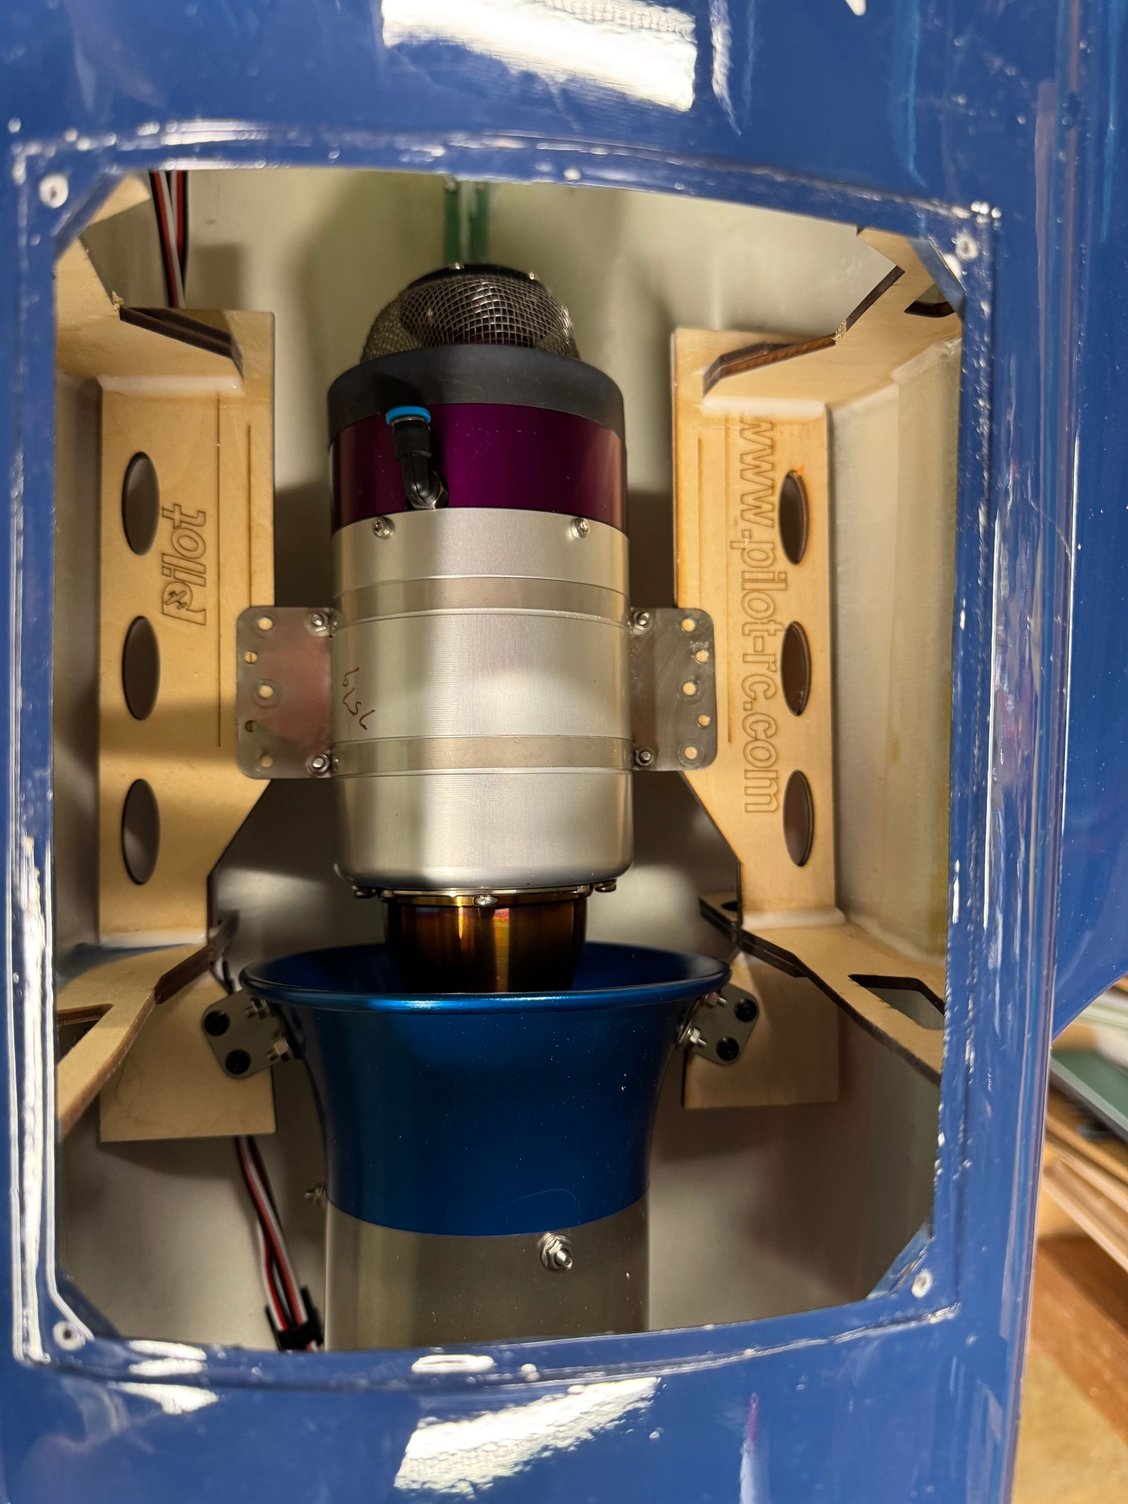
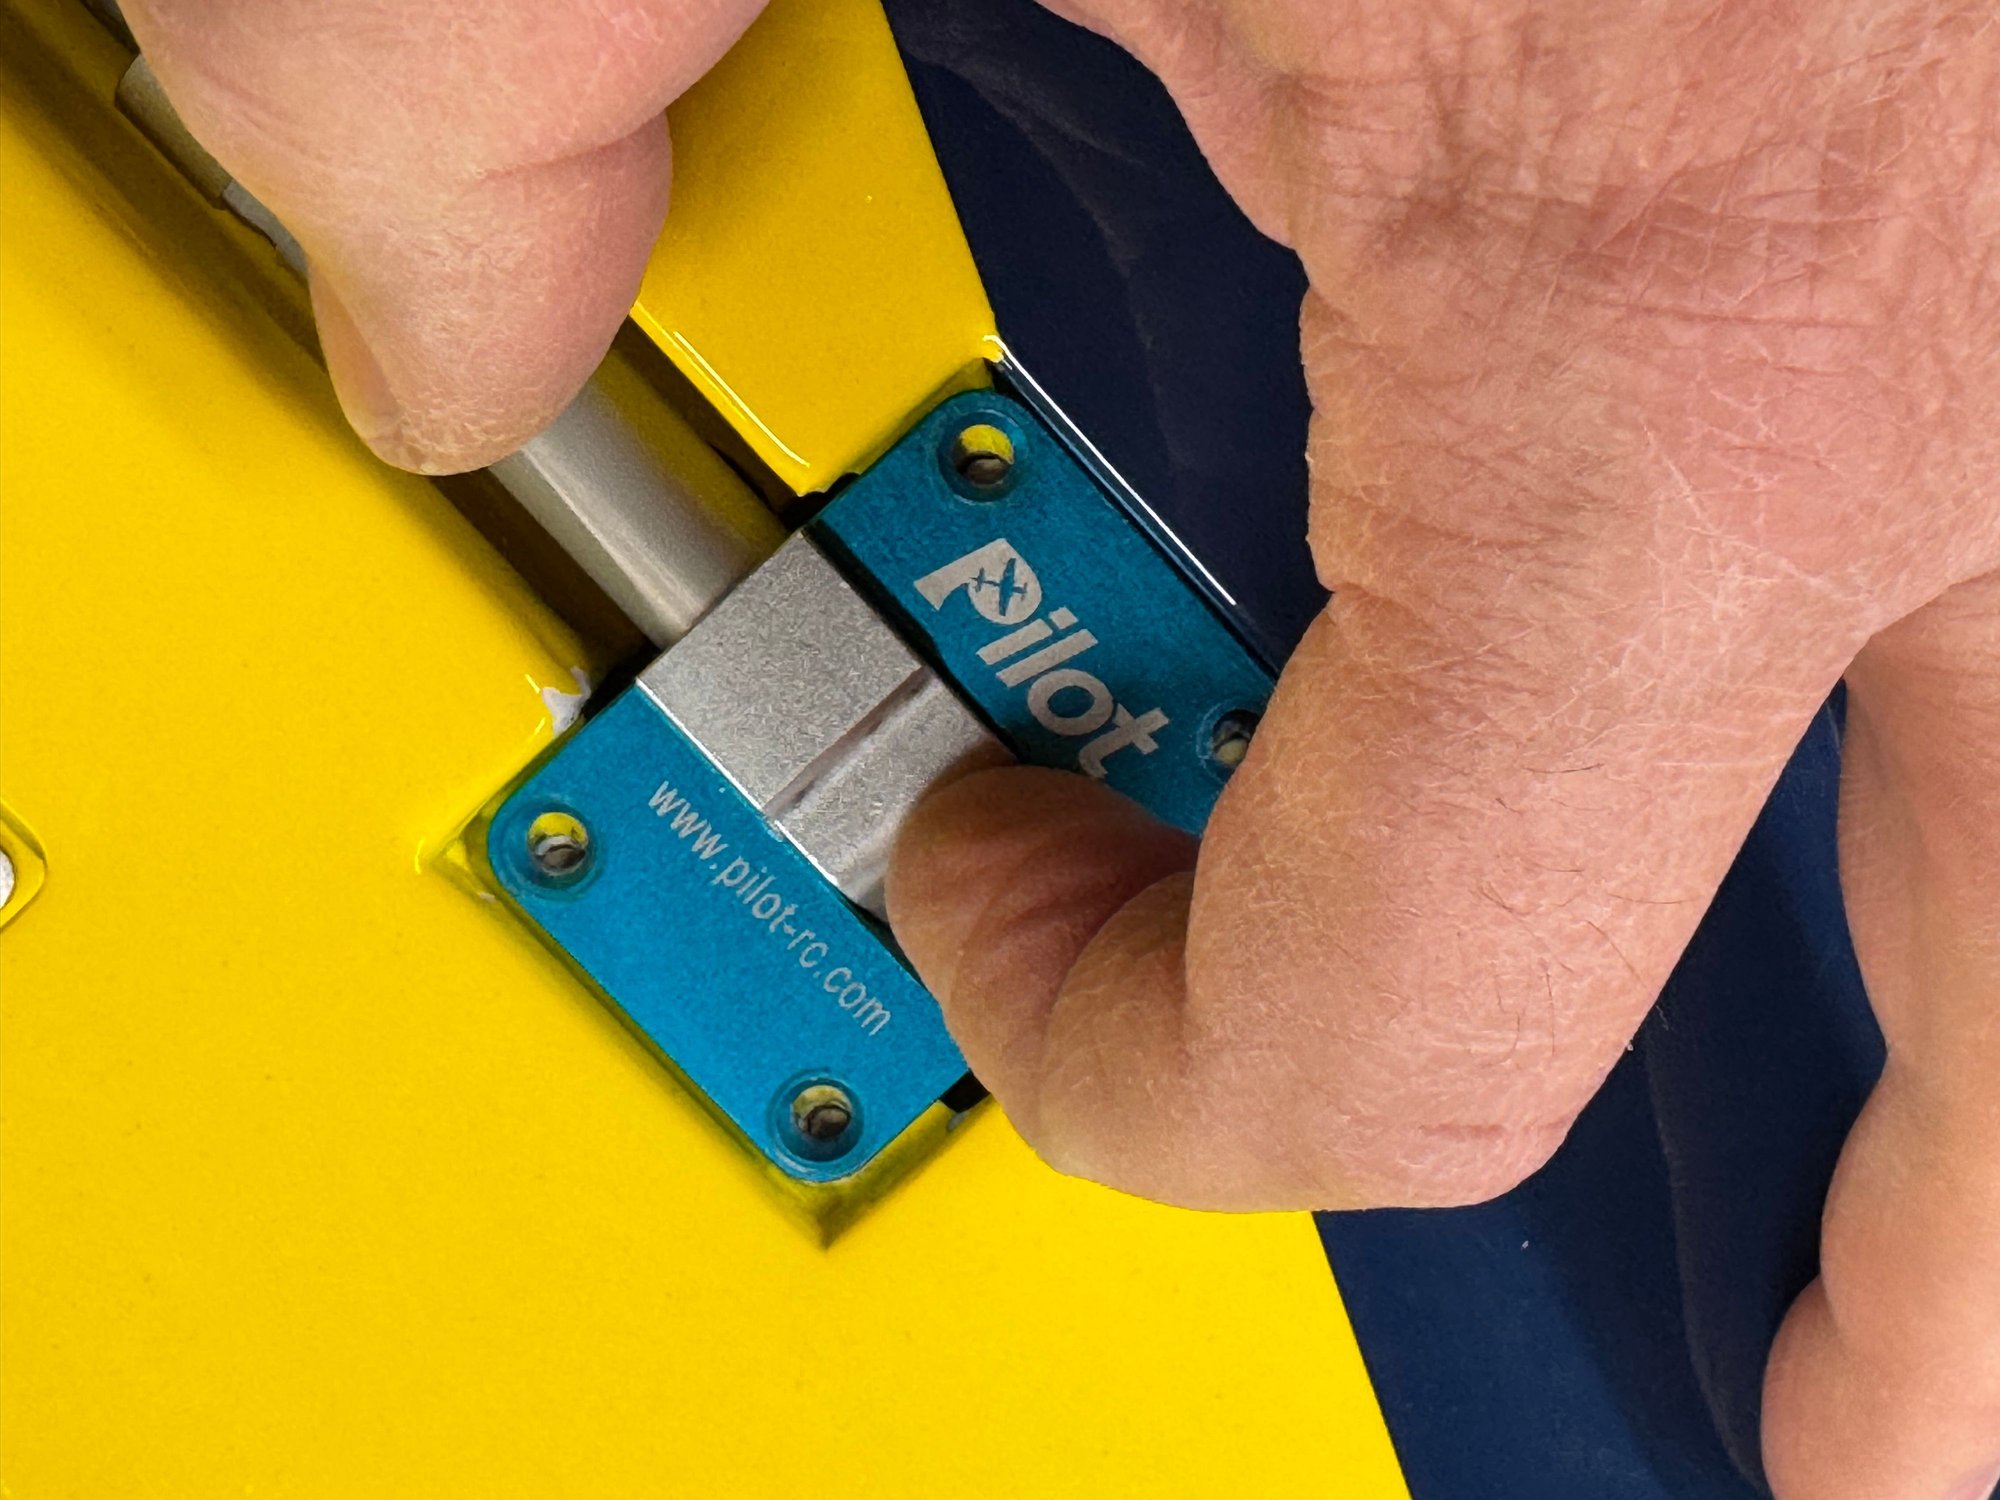
Pilot puts alignment marks for the turbine install on the mounting plates. That saves a bunch of time.
Oddly, the engine hatch is not centered on the bottom of fuselage. It favors the right side and is offset about 1/2". I cannot see a reason for it. They must have just eyeballed the mold.
 04-06-2025 | 02:18 PM
#8
Thread Starter
My Feedback: (1)
The 1st flight was completed. This informaiton may be useful to others wanting this airplane.
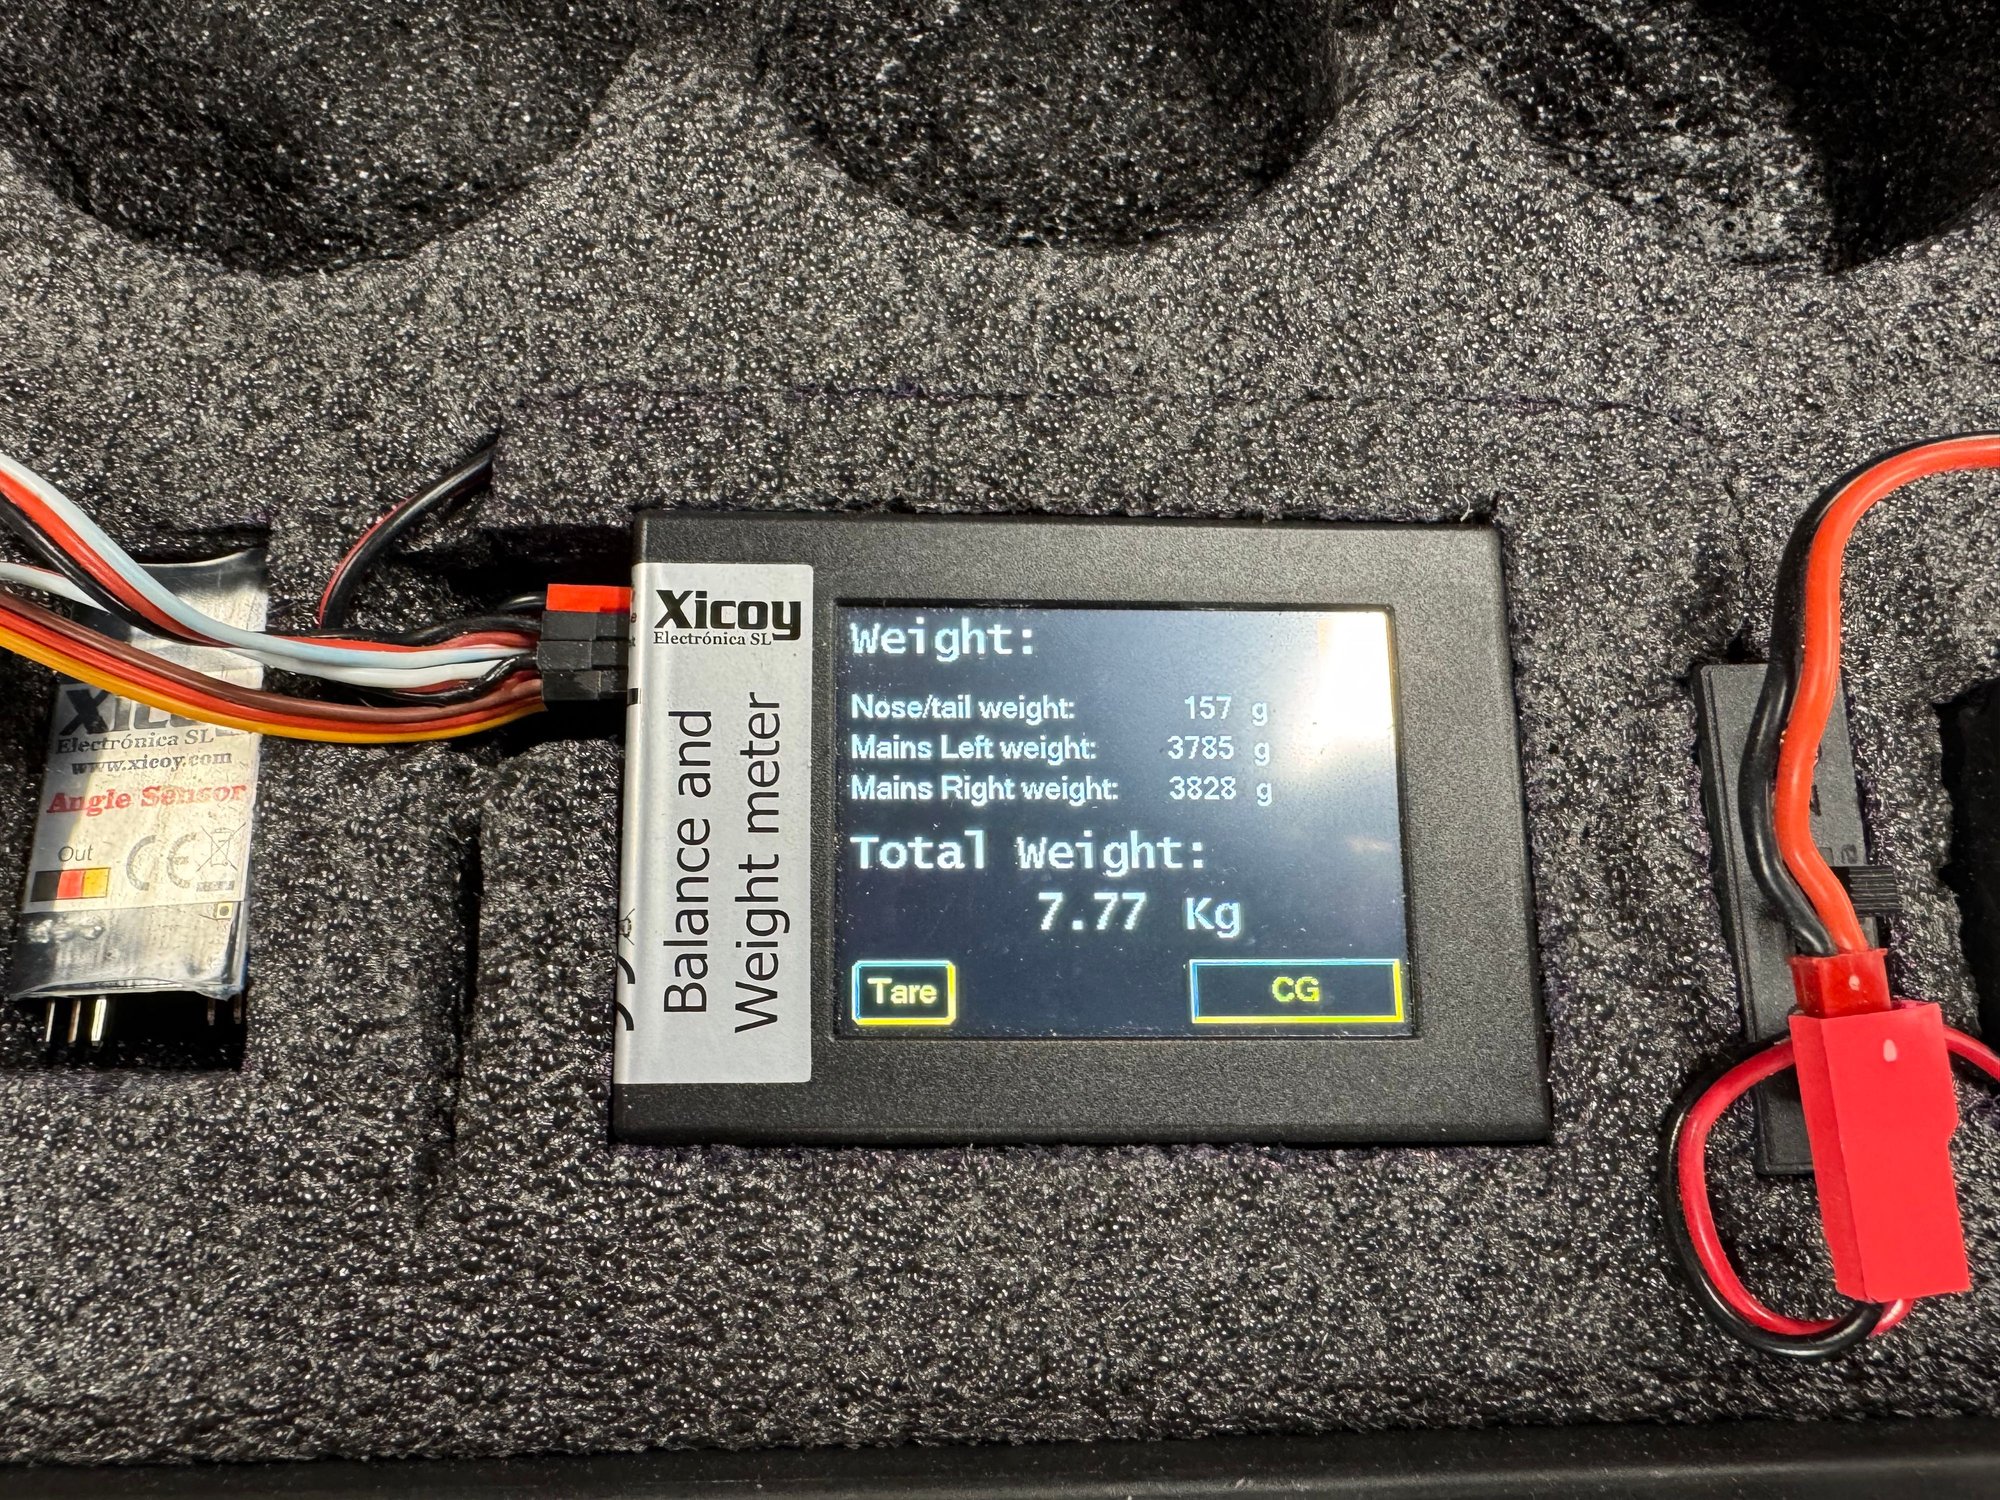
The recommended CG is 15mm in front of the main gear axles, I started a little nose heavy and set it at 26mm. With a fuel load of full the CG was 46mm in front of the axles.
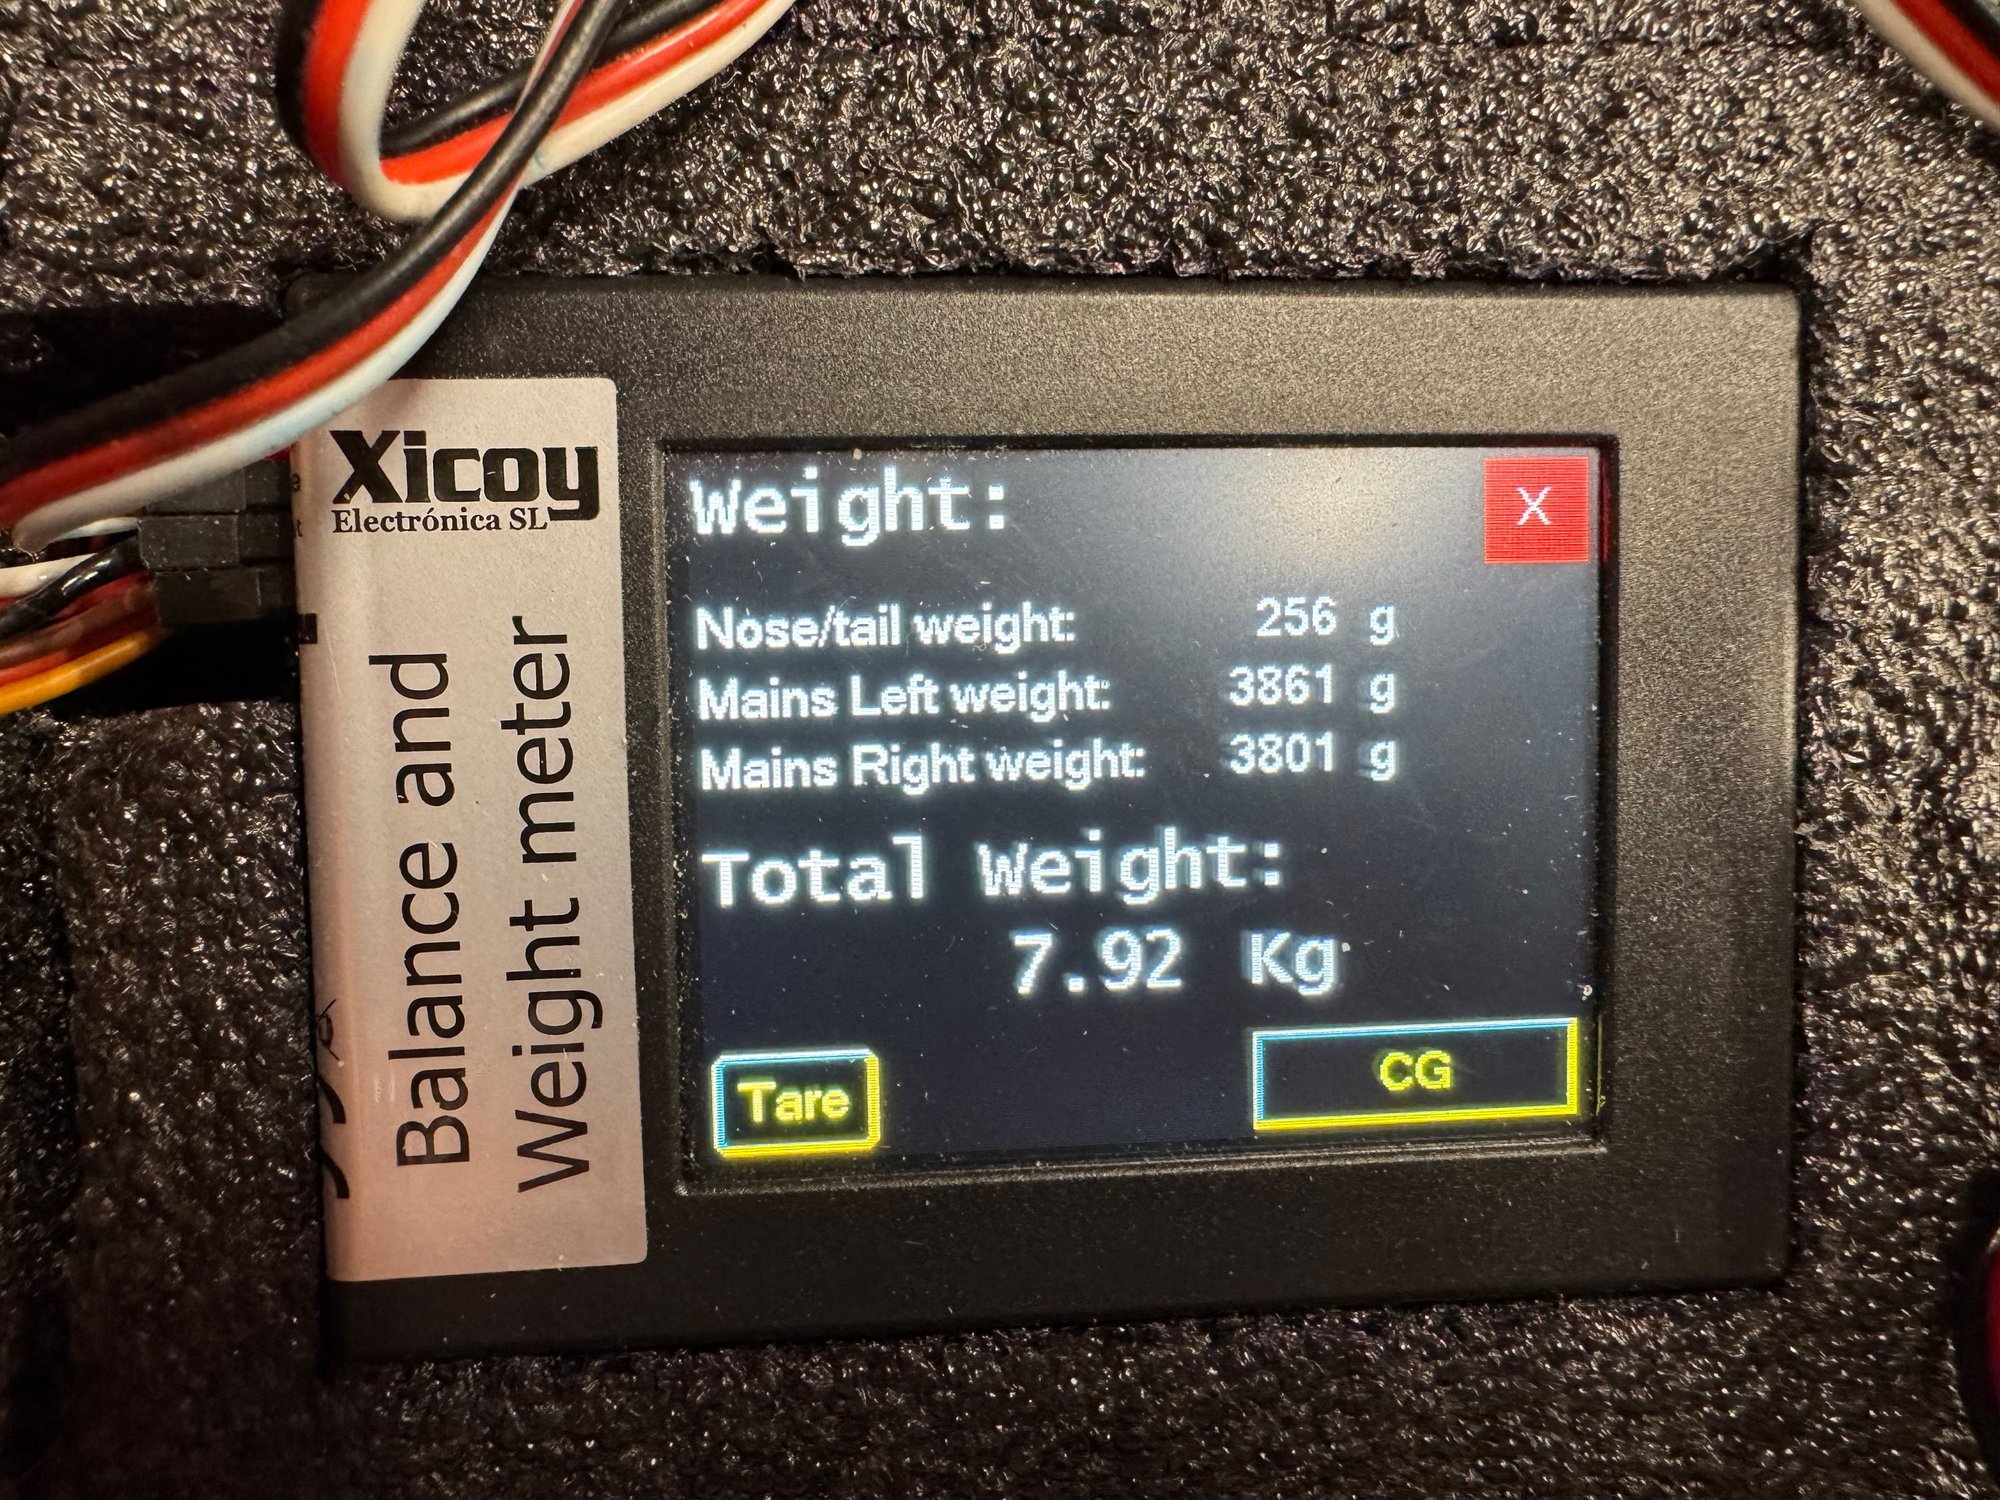
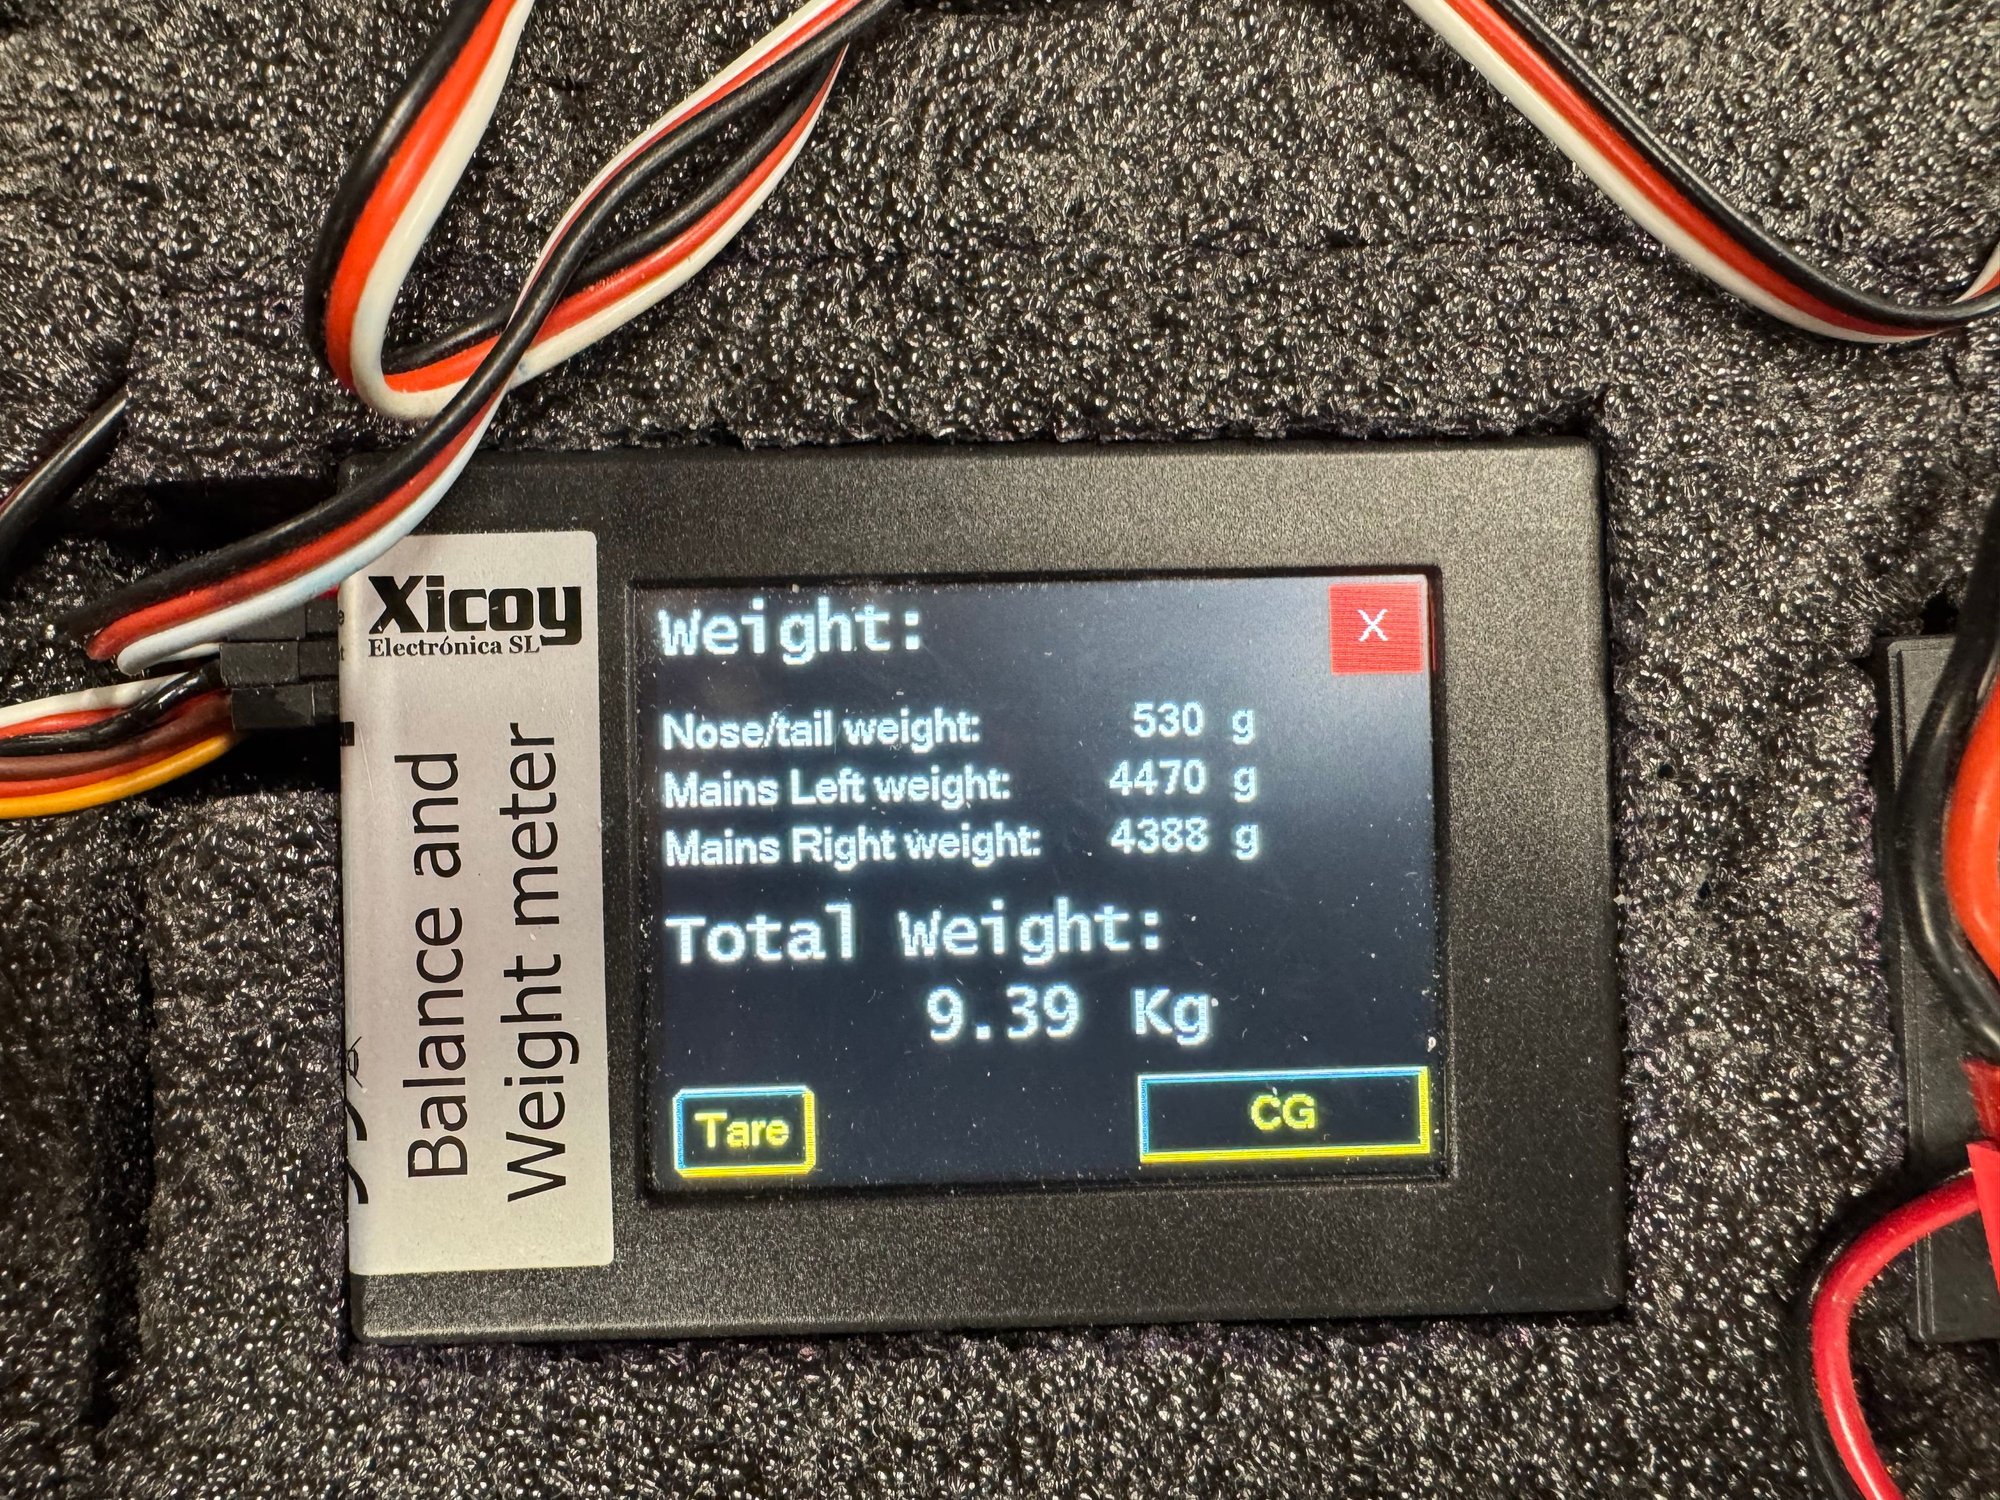
Empty weight was 7.92 kg and full of fuel 9.39 kg.
Handling throughout the flight was fine. The ailerons and elevator were not sensitive. I started with 15-degree movement on each of these surfaces and will increase the roll rate for sure. I'll add 5 more degrees.
The biggest surprise is how much down trim is needed with full flaps, at least 5mm, maybe more. This is at variance with its bigger brother, which needed very little down trim with flaps.
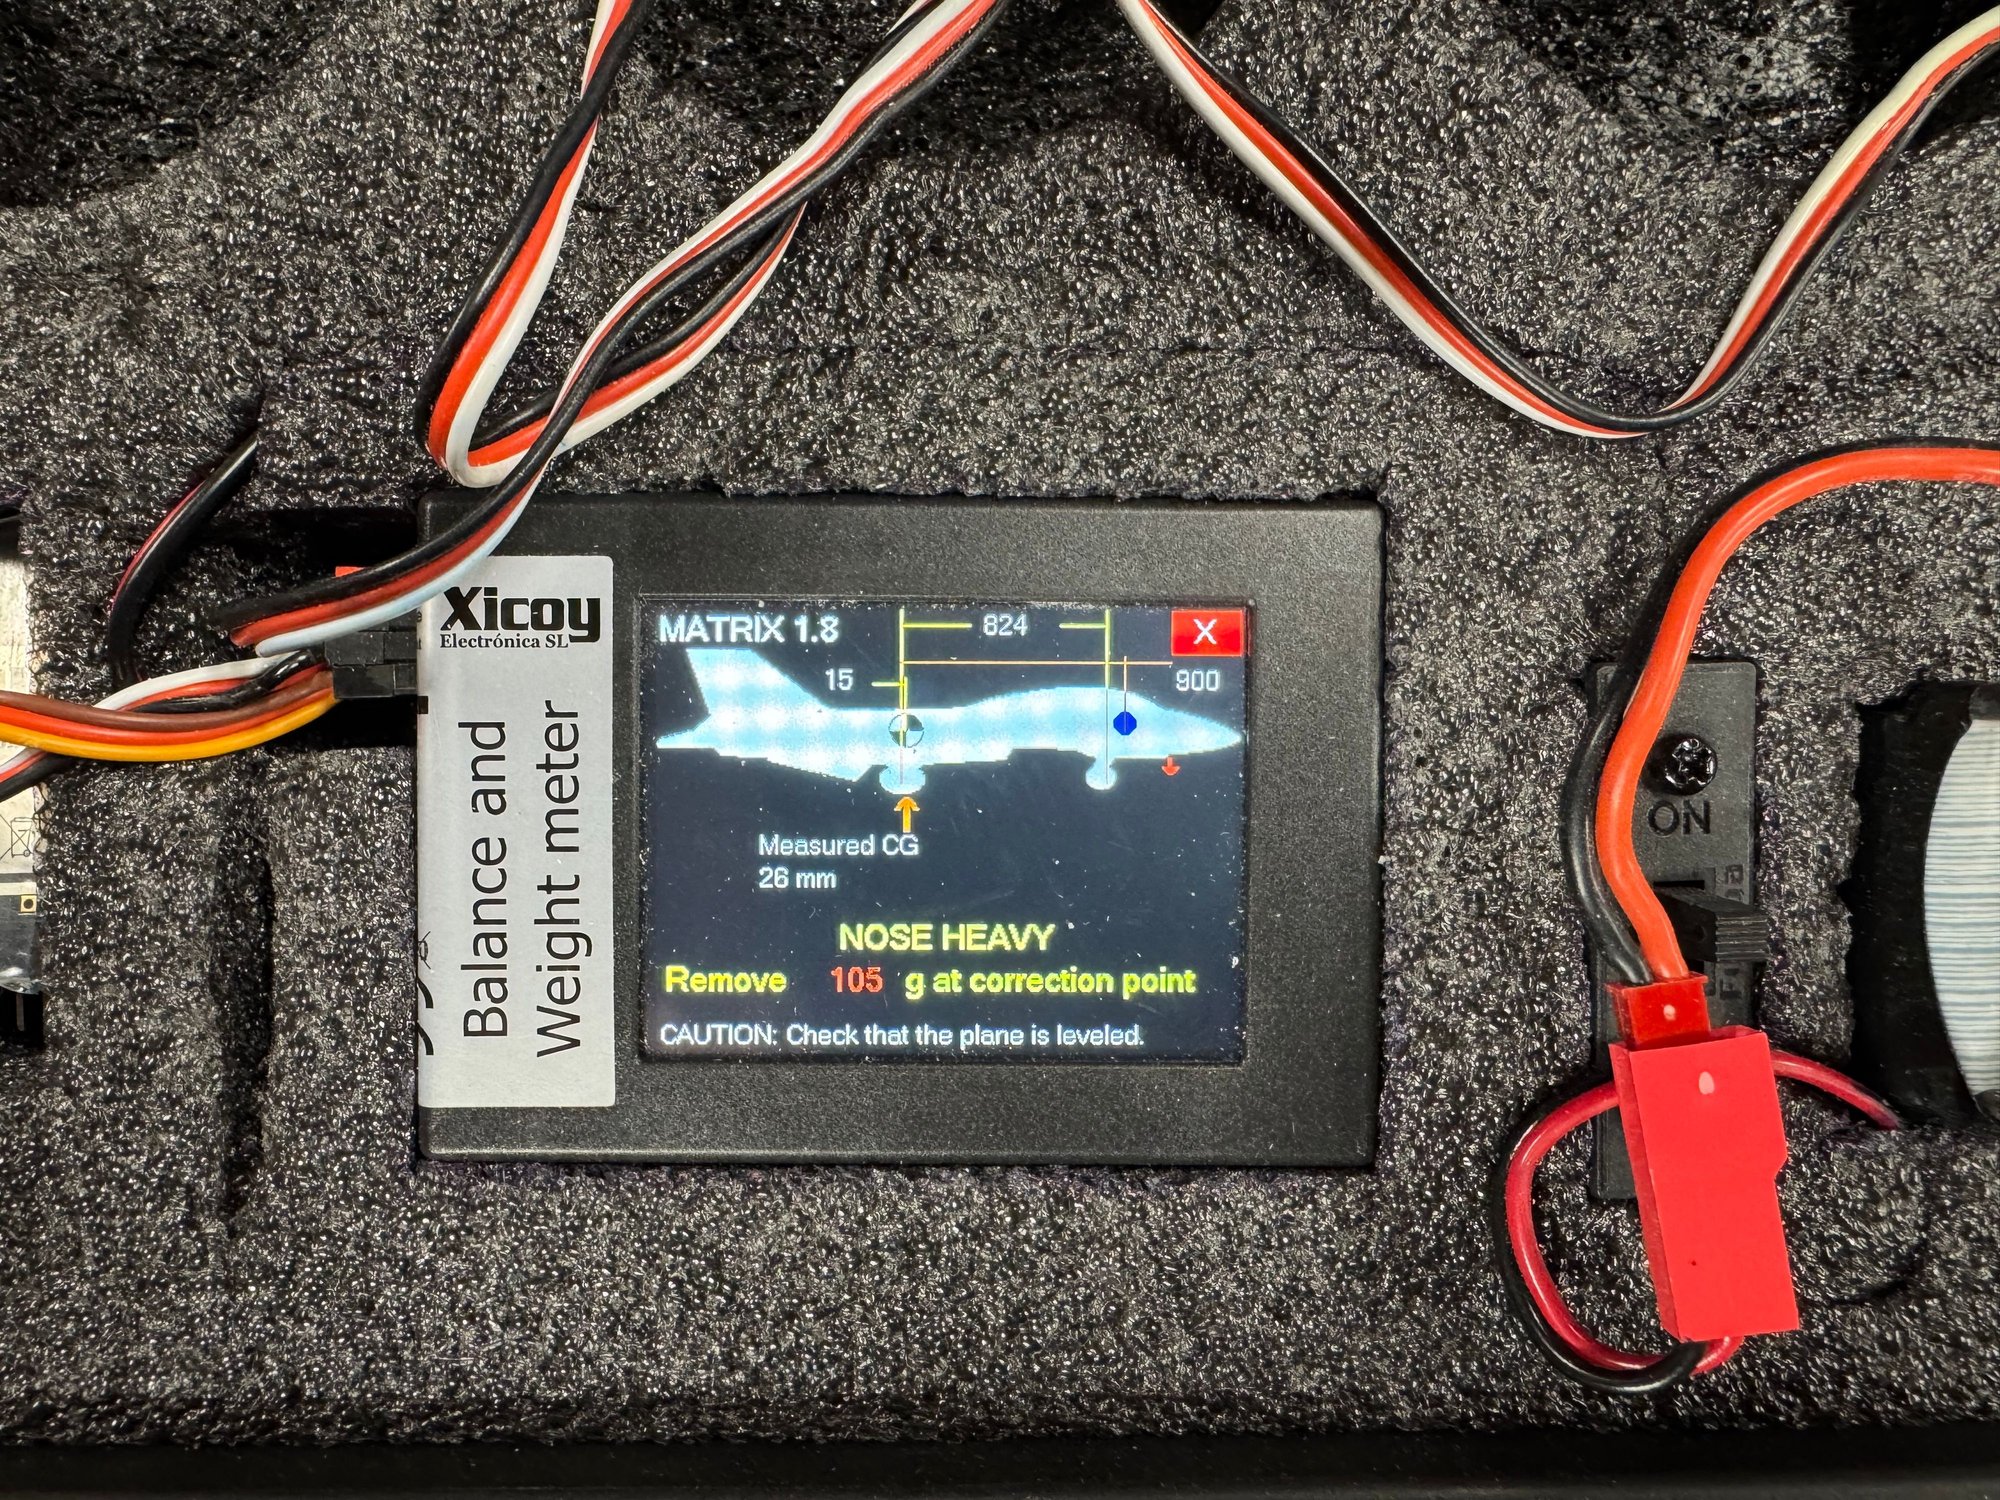
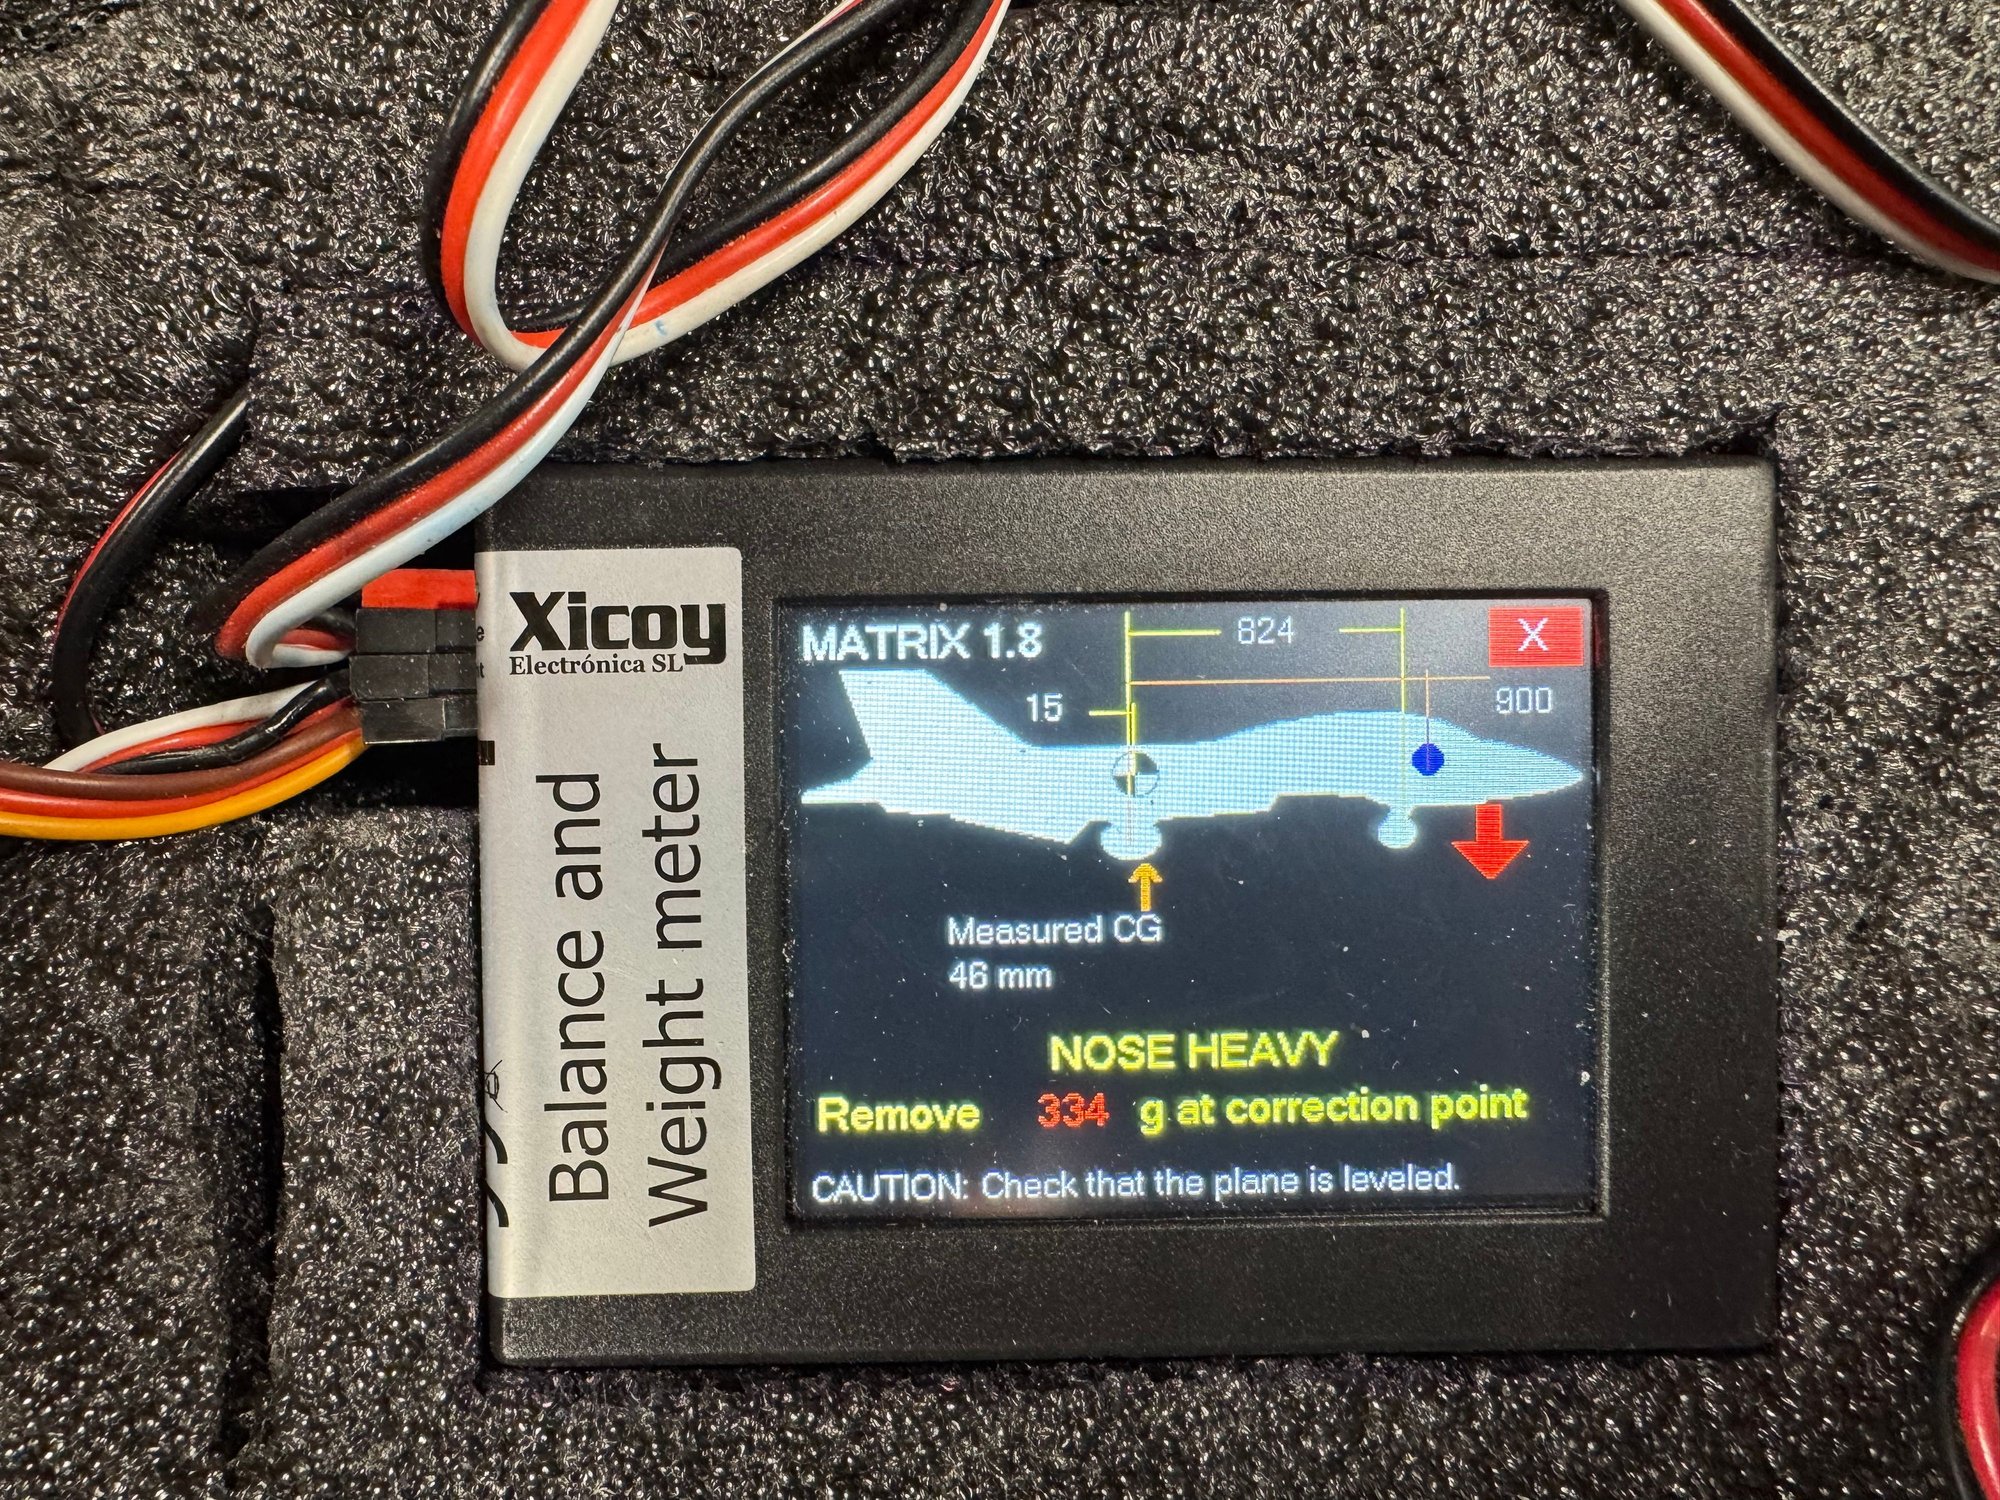
The recommended CG is 15mm in front of the main gear axles, I started a little nose heavy and set it at 26mm. With a fuel load of full the CG was 46mm in front of the axles.
Empty weight was 7.92 kg and full of fuel 9.39 kg.
Handling throughout the flight was fine. The ailerons and elevator were not sensitive. I started with 15-degree movement on each of these surfaces and will increase the roll rate for sure. I'll add 5 more degrees.
The biggest surprise is how much down trim is needed with full flaps, at least 5mm, maybe more. This is at variance with its bigger brother, which needed very little down trim with flaps.
04-06-2025 | 02:23 PM
#9
Thread Starter
My Feedback: (1)
I had two mechanical issues. One was the left wheel was hitting the wheel well on retract. I didn't notice this when I was building the airplane, it was factory assembled. And they messed up the polarity somewhere because the retract has to be plugged in opposite to coordinate with the other two gears.
I plugged the screw holes with 1/8" dowel pins and redrilled the mounting screws. Now the gear is in right.
The other issues is the clamps for the stabs do not tighten enough. Fully torqued I can still pull the stabs away from the fuselage. Not sure how to fix this, but tape works.
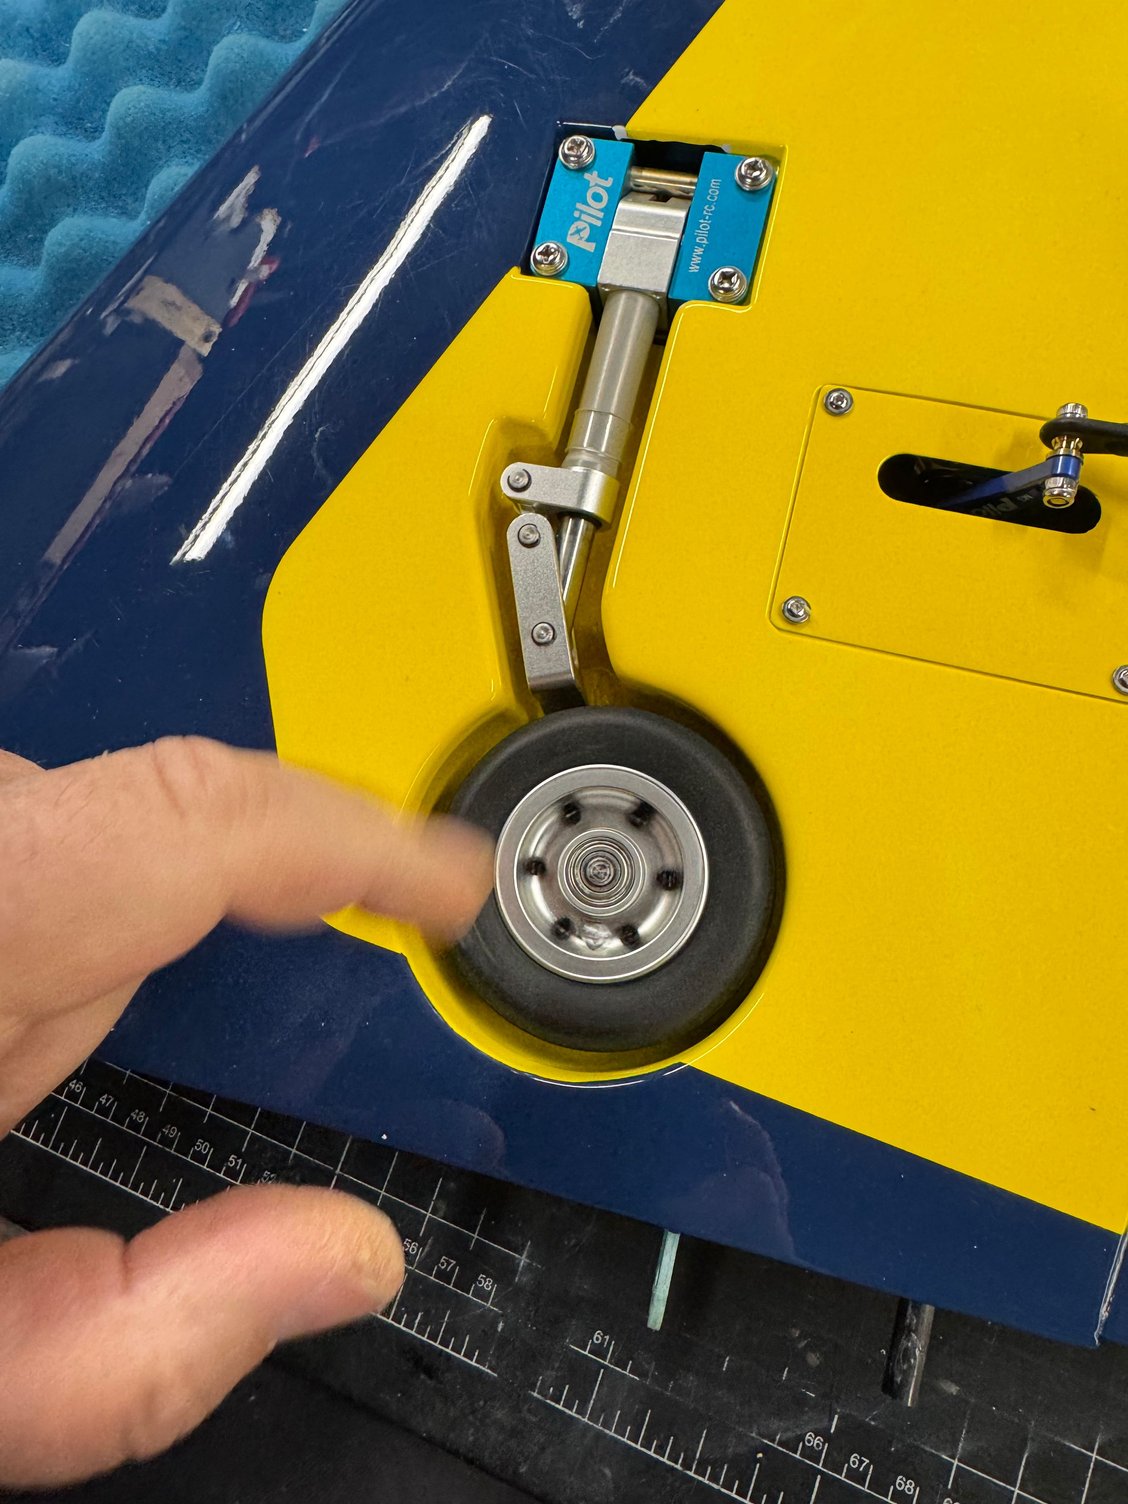
I plugged the screw holes with 1/8" dowel pins and redrilled the mounting screws. Now the gear is in right.
The other issues is the clamps for the stabs do not tighten enough. Fully torqued I can still pull the stabs away from the fuselage. Not sure how to fix this, but tape works.
 04-13-2025 | 06:34 AM
#11
Thread Starter
My Feedback: (1)
The airplane turned a sharp right on my first takeoff. I was able to yank in the air before I ran off the runway. It was a rough runway and I thought a wheel must have hit a hole in the runway.
The next take off on a smooth runway the same thing happened, but this time it was when I was correcting the airplane to try and stay on centerline.
So, I figured the steering was too sensitive. I reduced it.
Third flight, same thing, it vastly over corrected and went sideways. This is weird.
Looking at the airplane, which at this point had so little steering that it needed a football field to make a U-turn, I noticed how much rudder travel there was. I figured that the rudder was super effective, even at lower speeds and reduced the travel to about 20-degrees.
4th take off, I eased in to the throttle and the airplane held centerline and finally did a normal take off.
Lesson here: the rudder geometry allows for too much throw, Pilot made it like a 3D airplane.
06-22-2025 | 08:27 PM
#12
Quick question for any one that has built the matrix. Have you mounted the turbine with screws or bolts? Would like to put bolts in but it's a tight fit to get to the nuts
06-25-2025 | 09:34 AM
#15
Thanks that's useful. Has anyone had any issues with heat at the rear of the thrust tube. Its really close to the bottom of the fuse. Did you use heat paint or something similar?
08-02-2025 | 10:46 PM
#16
Hi guys.
I went through the info here. i am considering this for a K86 which i have sitting on the shelf.
I am wondering how will be the vertical performance with a 85N engine?
Goal is i need an aerobatic jet with decent speed.
For the fast fun i have a UF.
N
I went through the info here. i am considering this for a K86 which i have sitting on the shelf.
I am wondering how will be the vertical performance with a 85N engine?
Goal is i need an aerobatic jet with decent speed.
For the fast fun i have a UF.
N


