


Building the Mick Reeves Hawker Hunter


 11-10-2019, 04:31 PM
#328
So I arranged a trade for a Hunter cockpit for the Ripmax Hunter - the same scale as the Mick Reeves Hunter.
As I thought might be the case, the Ripmax Hunter cockpit is wrong. For a 1/6 scale Hunter, the pilot figure should be around 11" tall. A pilot figure of around that size is shown on Mick's plans for the Hunter.
I have a 10.5" tall RAF jet pilot figure. He doesn't even come close to fitting in the cockpit - as you can see. I will use the parts from the ARF cockpit to build one that is suitable for the scale of the Hunter and my pilot figure...
Bob
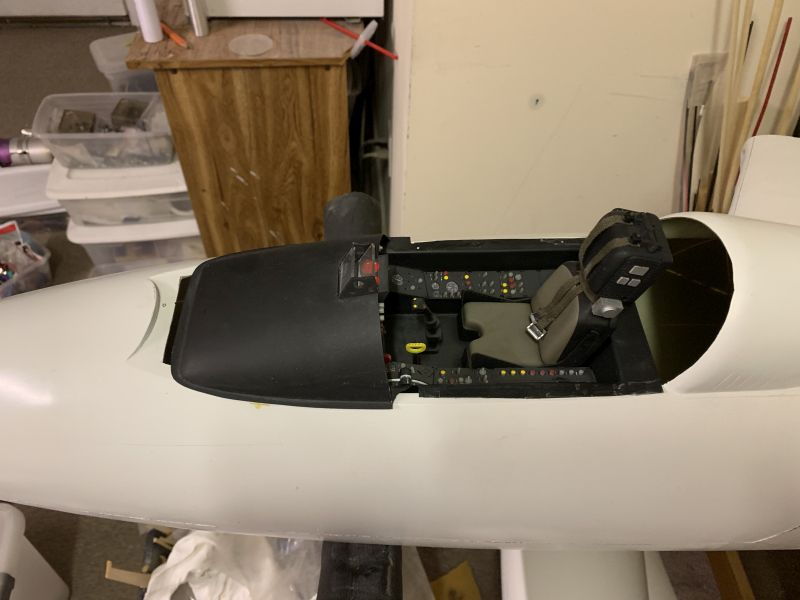
01-01-2020, 04:19 PM
#329
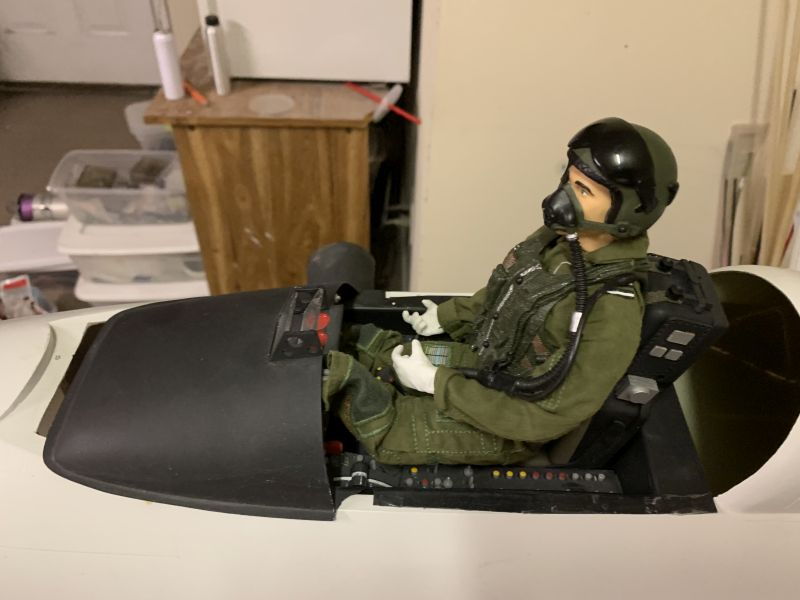
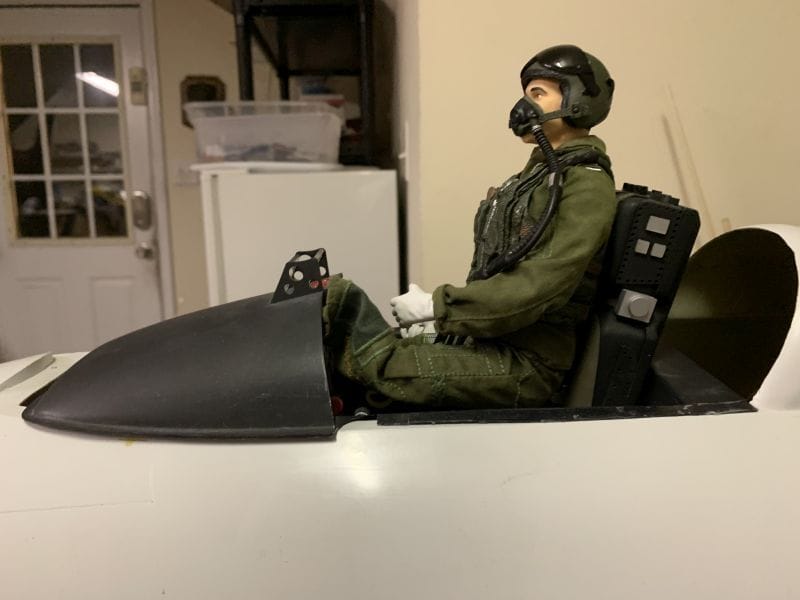
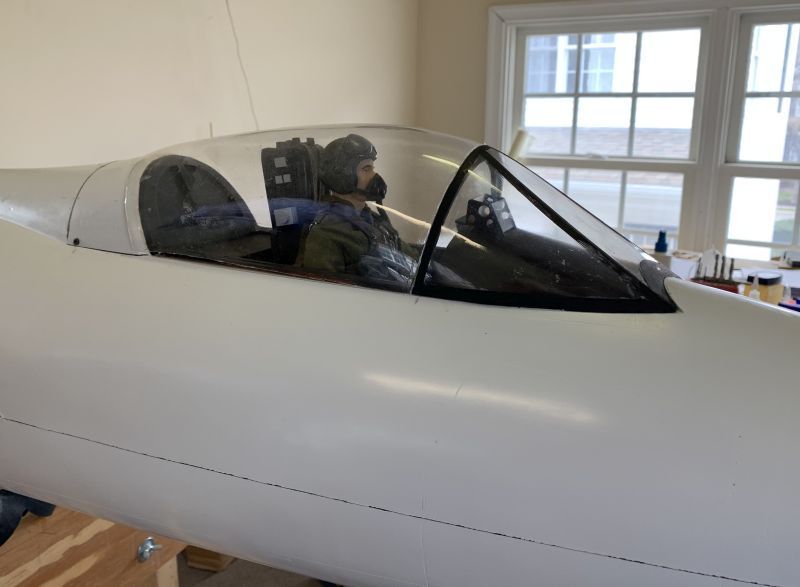
Making some progress on the Hunter ove the holidays. Here's what I did with the cockpit. I extended it down into the fuselage and resized the seat for the proper size pilot. You can see he fits fine now.

I still haven't quite figured out how to do the sliding rails yet, but I have a bunch of K&S metal shapes coming to figure it out. The sliding rails likely won't be that tricky, but figuring out how to actuate it and still make the cockpit easily removable is going to be a trick.
I still haven't quite figured out how to do the sliding rails yet, but I have a bunch of K&S metal shapes coming to figure it out. The sliding rails likely won't be that tricky, but figuring out how to actuate it and still make the cockpit easily removable is going to be a trick.
01-01-2020, 04:22 PM
#330
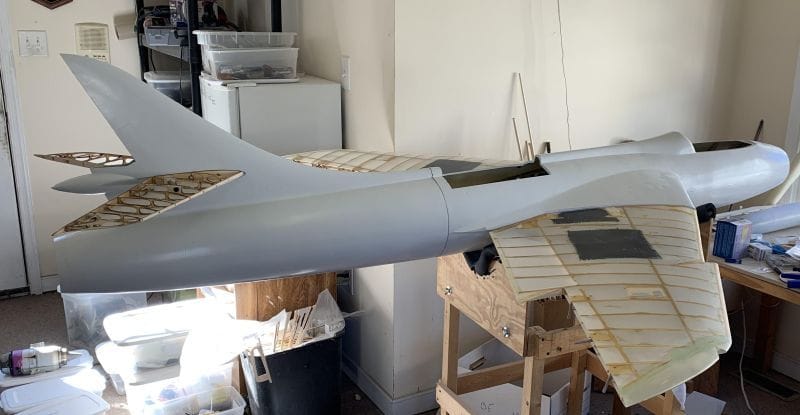
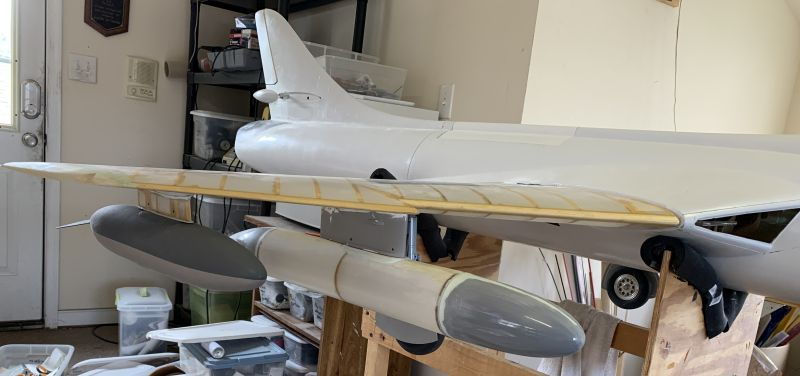
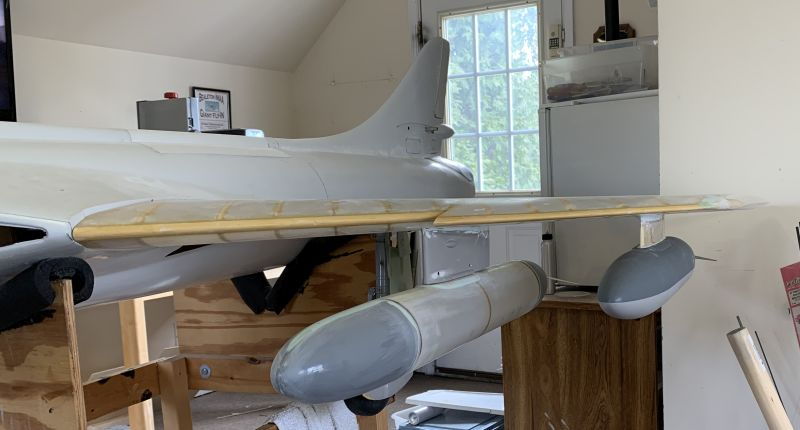
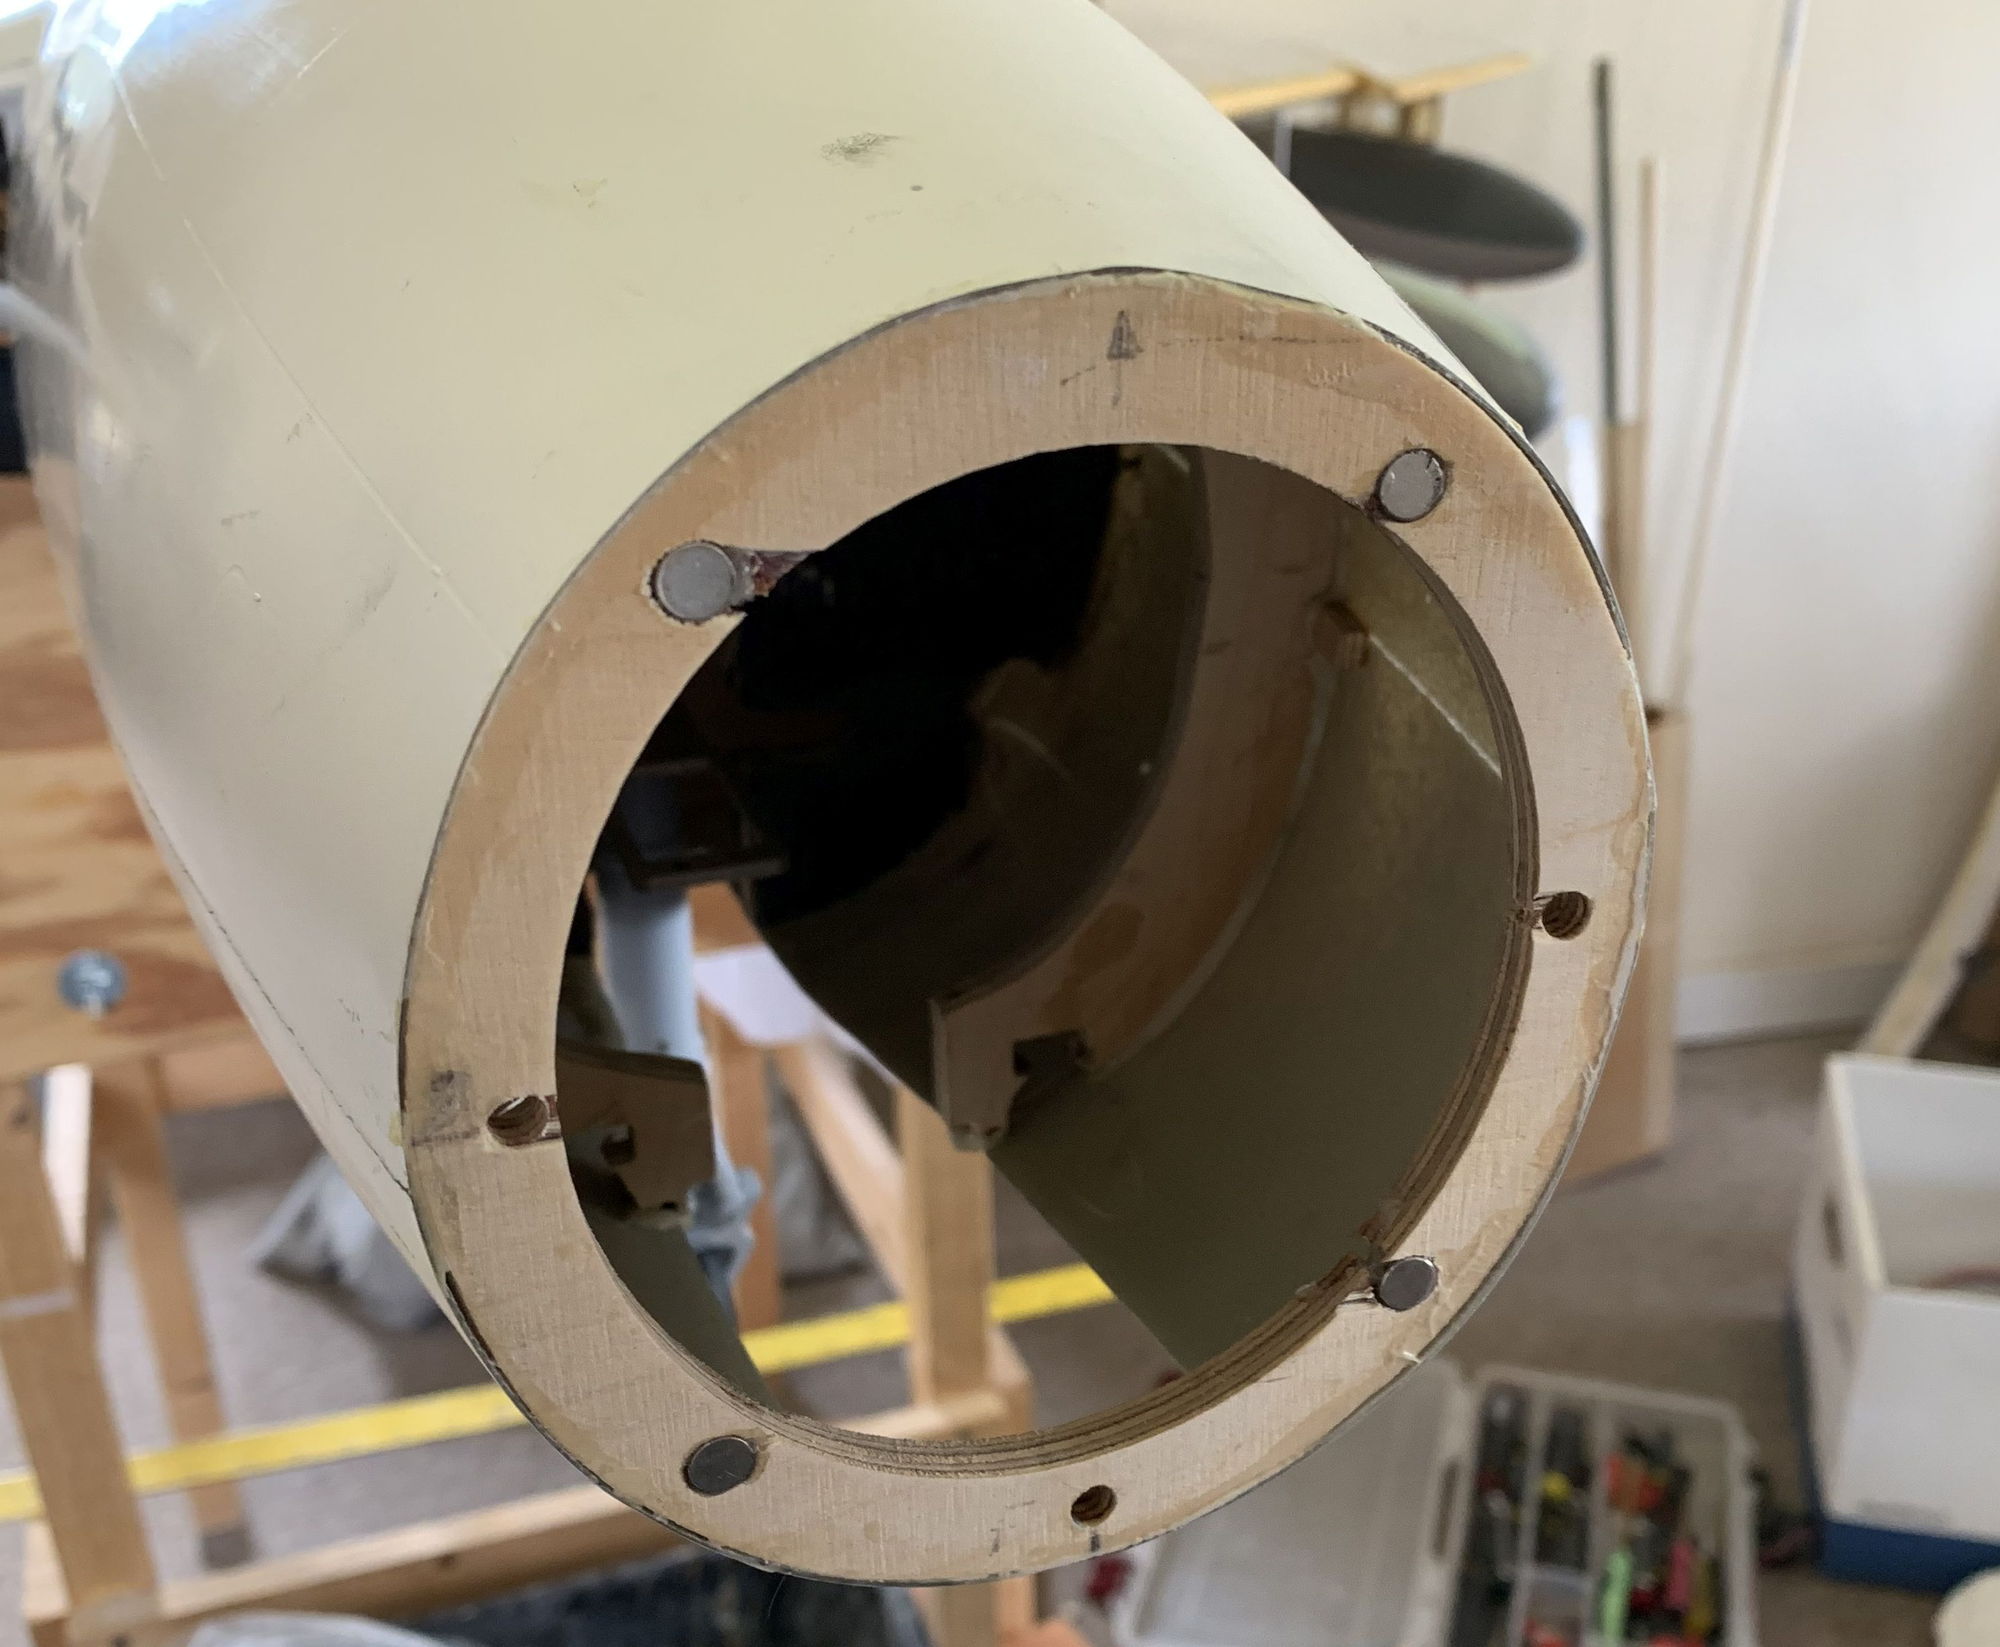
I built a set of large tanks from the tank kit that Mick offers, and I've got a set of small tanks that came from the Ripmax ARF. The Hunter I'm doing often flew with four tanks, so that's what I'm doing. The pylons and tanks took some work to get mounted correctly, but I think that the overall effect will be worth the effort.


 01-01-2020, 04:29 PM
#333
Finally, I finished the tail surfaces. I did the horizontal stab and elevators as per the plans.
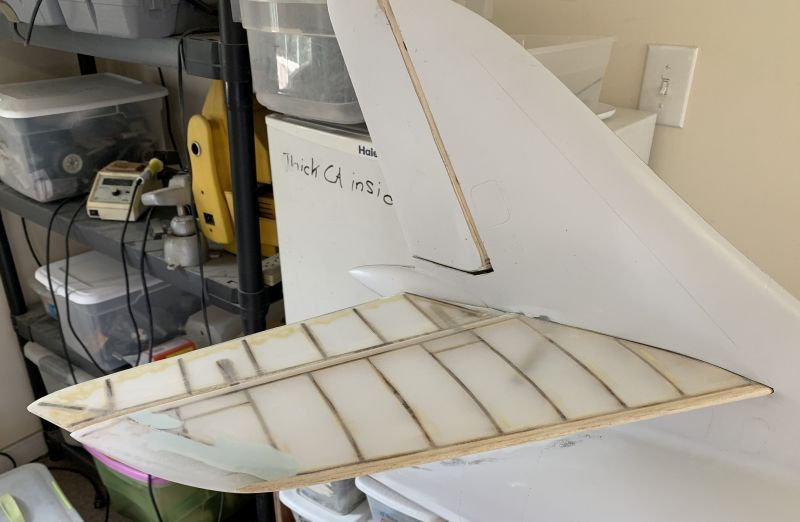
I modified the rudder somewhat as I didn't like just having one hinge on the rudder and using a plastic horn to secure the bottom of the rudder to the ruder servo. Instead I used two hinges, and used a metal arm on the servo that keys into a slot on the bottom of the rudder to actuate it. Its a much more positive system as the stock setup. I need to dress up the bottom of the rudder a bit to better hide the servo and servo arm.
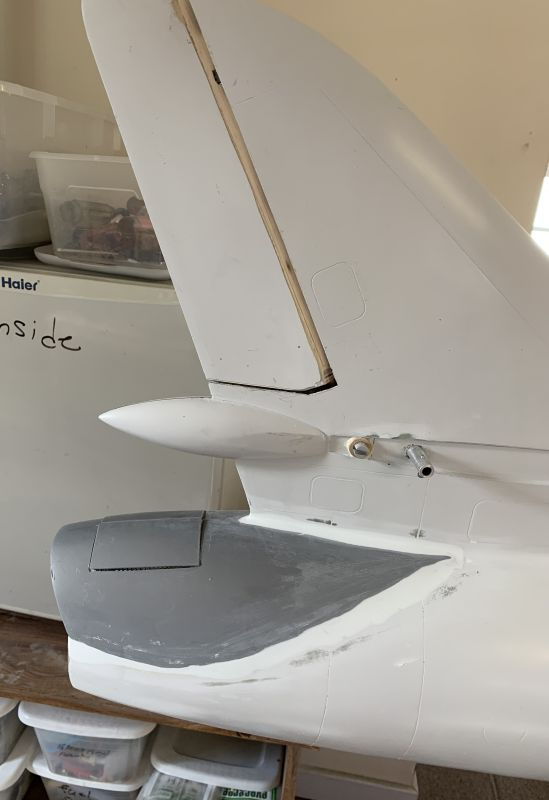
I modified the rudder somewhat as I didn't like just having one hinge on the rudder and using a plastic horn to secure the bottom of the rudder to the ruder servo. Instead I used two hinges, and used a metal arm on the servo that keys into a slot on the bottom of the rudder to actuate it. Its a much more positive system as the stock setup. I need to dress up the bottom of the rudder a bit to better hide the servo and servo arm.
01-02-2020, 04:20 PM
#335
Thanks for the advice. After I got the wings finally mounted and adjusted, I did just stand it on the gear and realized that the nose gear position I had setup was too short. I added 1/4 inch blocks between the nose gear mounts and the gear itself. I now have about 1 degree of positive incidence when its standing on the gear - unloaded. I'd assume that will increase to 2 degrees or more when the main gear compress with increased all-up weight.
I can actually adjust it either way by a degree or two by adding more blocks or removing the blocks...
Bob
01-02-2020, 10:31 PM
#336

Bob
Ok, if you look at a full scale Hunter it appears to sit positively on the ground. Also from the MR Hunters I have test flown they like to be a little nose heavy...so don’t got light or on the mark!
Dave
Ok, if you look at a full scale Hunter it appears to sit positively on the ground. Also from the MR Hunters I have test flown they like to be a little nose heavy...so don’t got light or on the mark!
Dave
01-03-2020, 06:51 AM
#337

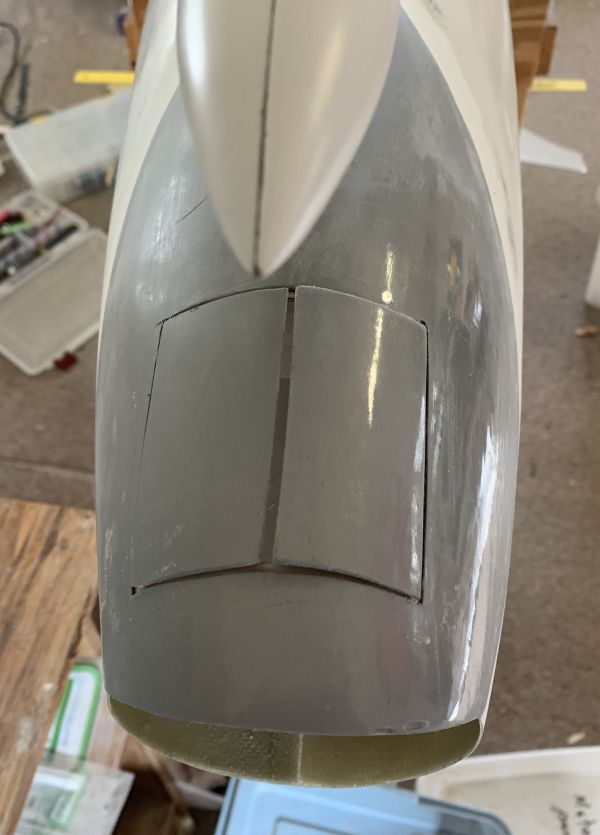
I'm also going to add a drag chute. I've installed the drag chute fairing from the kit and cut and hinged the doors on it. I'm not quite sure how I'm going to open the doors and deploy the chute, but I have a few ideas.
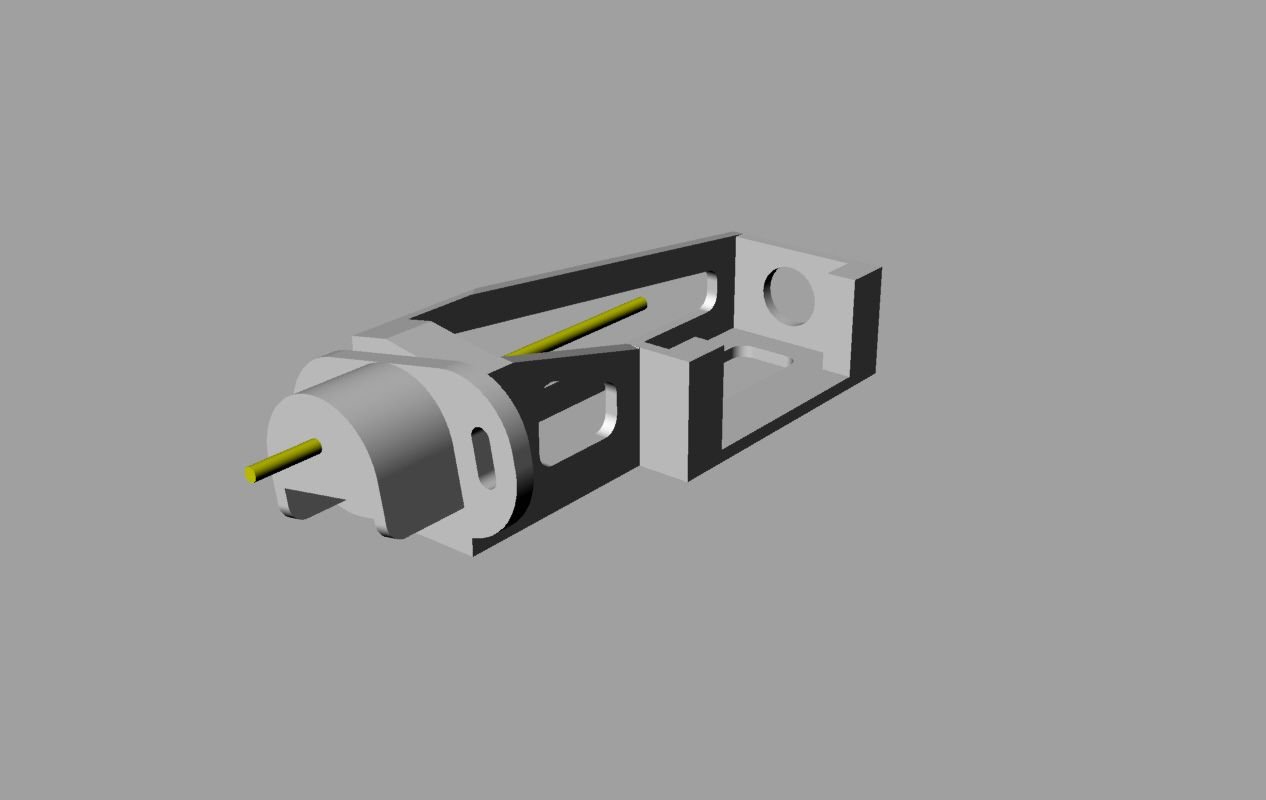
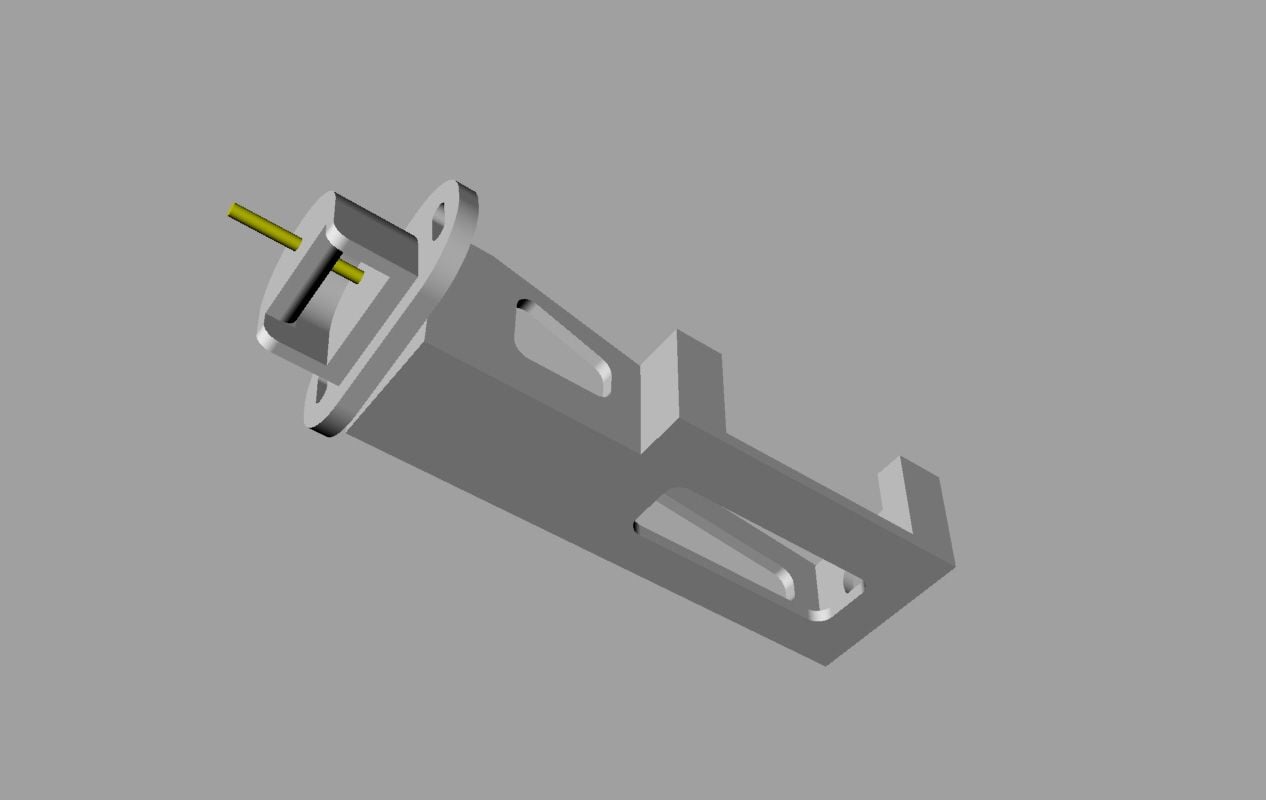
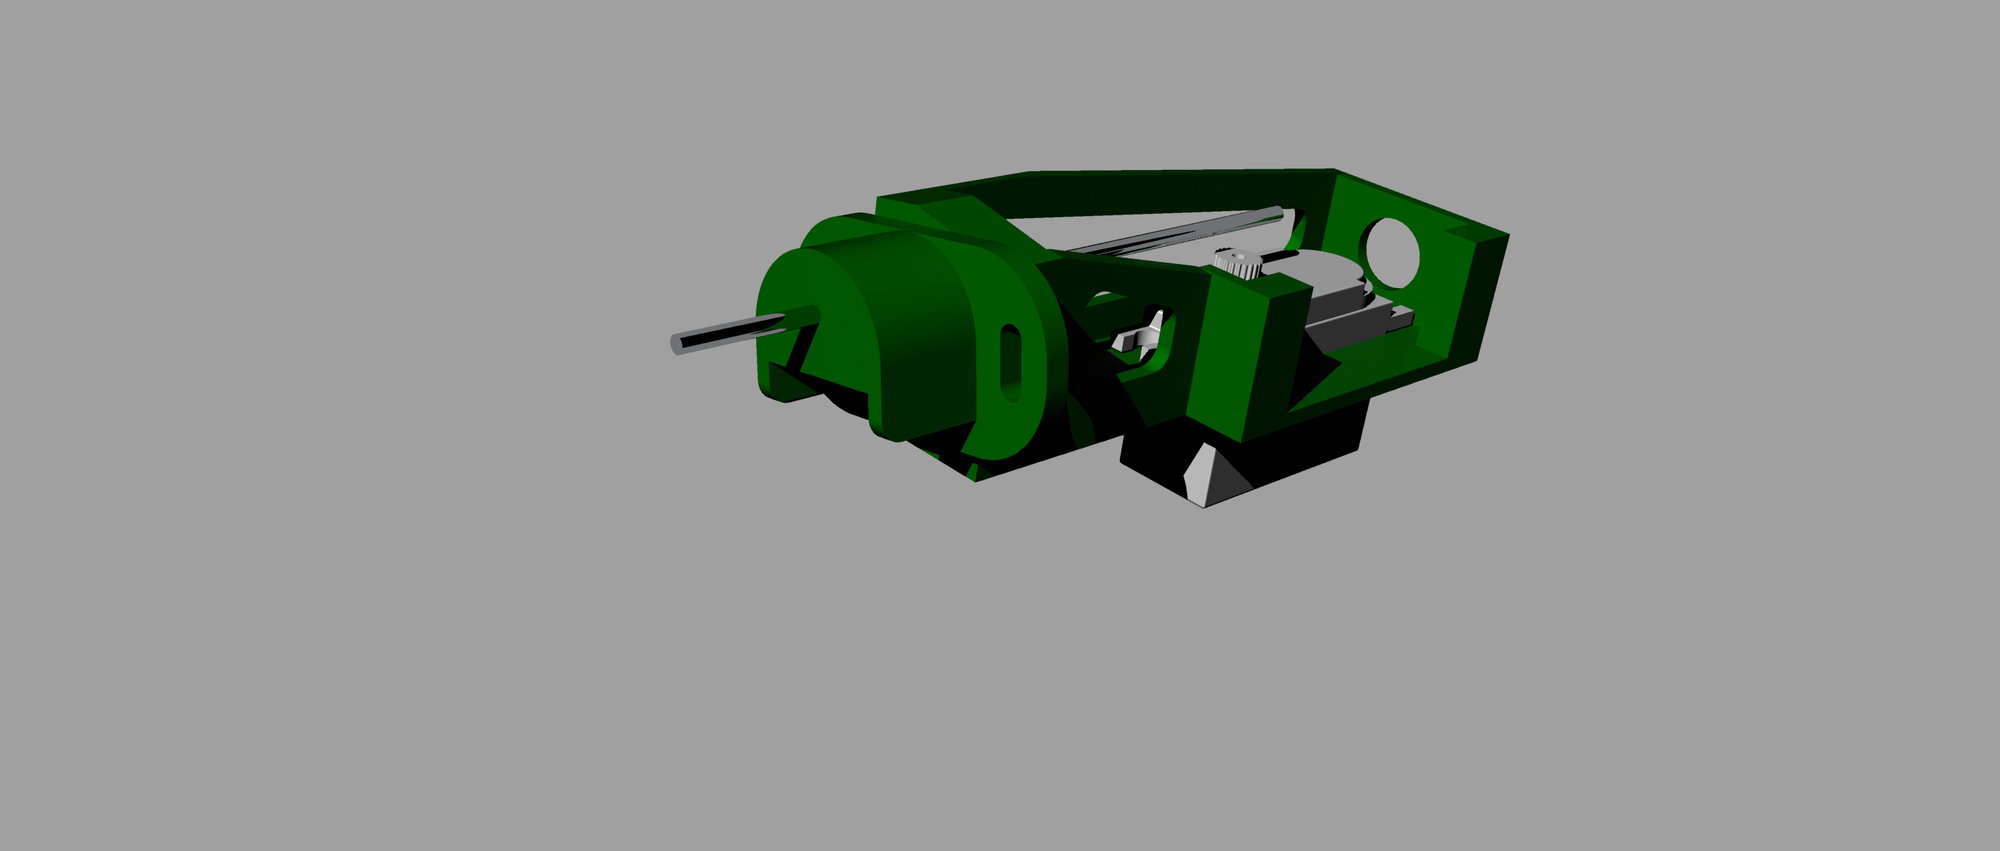
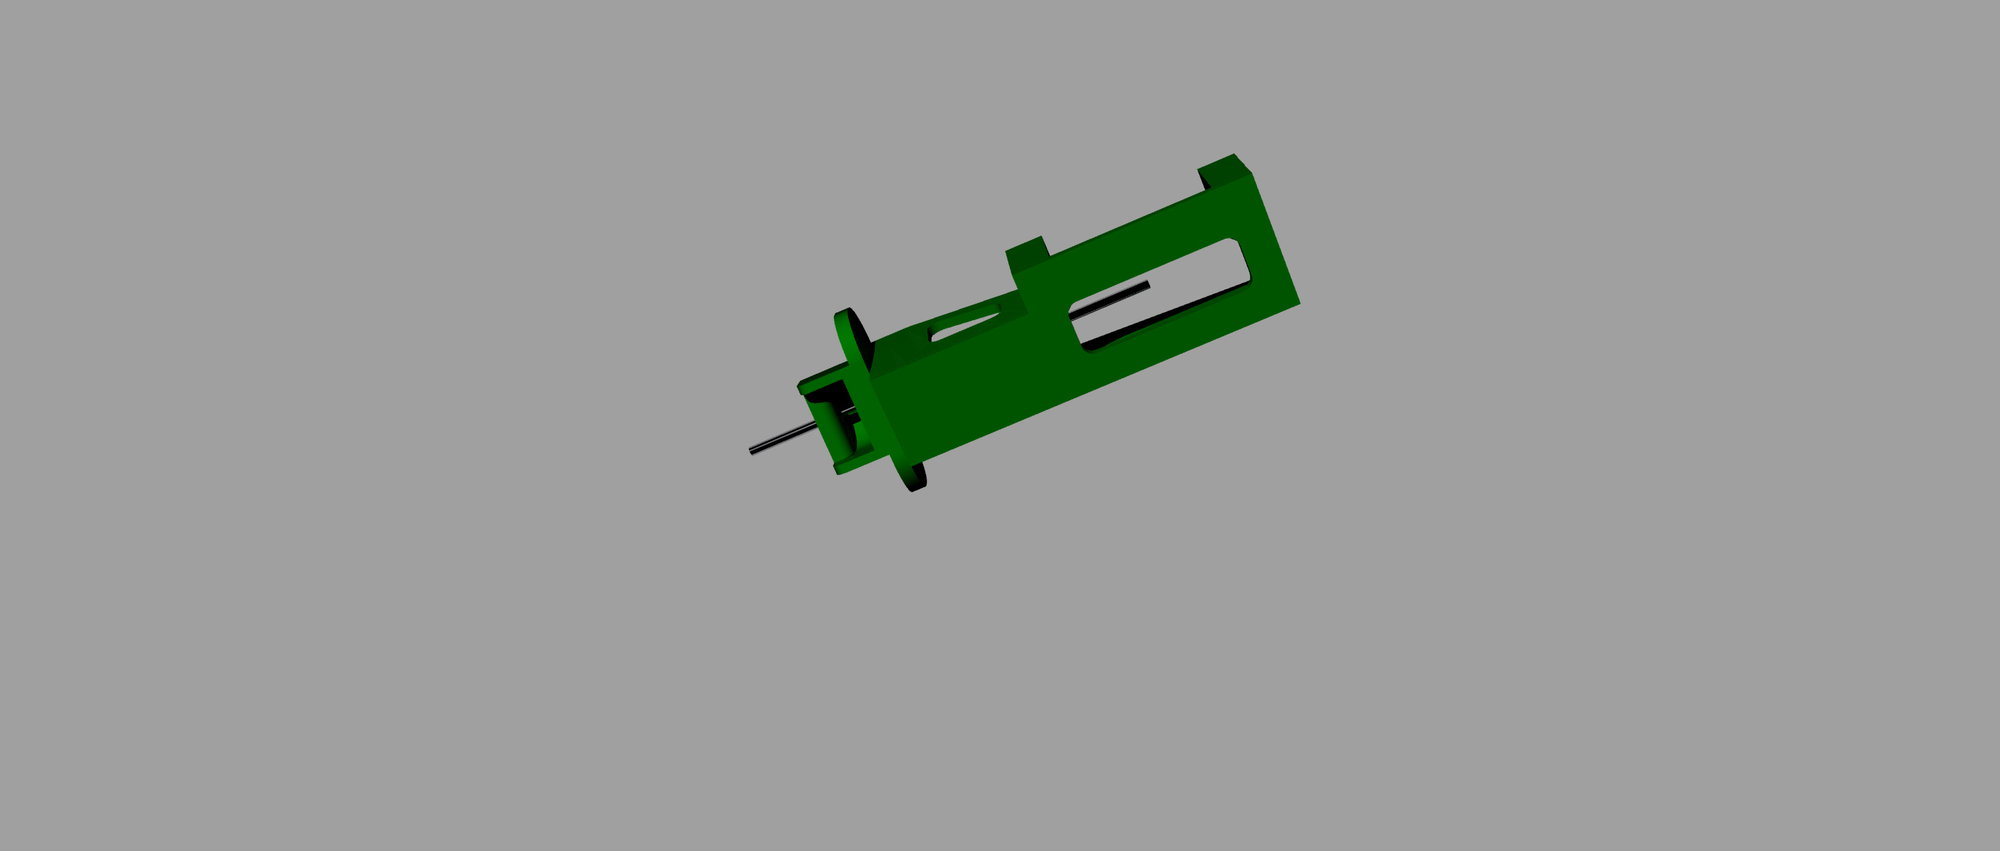
Here's some images from my scratch build chute release system for my DerJet Hunter. One servo does all functions, door release and then chute jettison, using a 3 position switch.
The doors are spring loaded to open, and are held closed by the pin, which also serves to retain the chute. One door overlaps the other and a hook on the top door engages the pin and holds them closed.
The chute needs some help getting out into the airflow, so I use a sort of 'trampoline', attached to the doors that lifts the chute up as the doors open. After some trial and error it now works well.
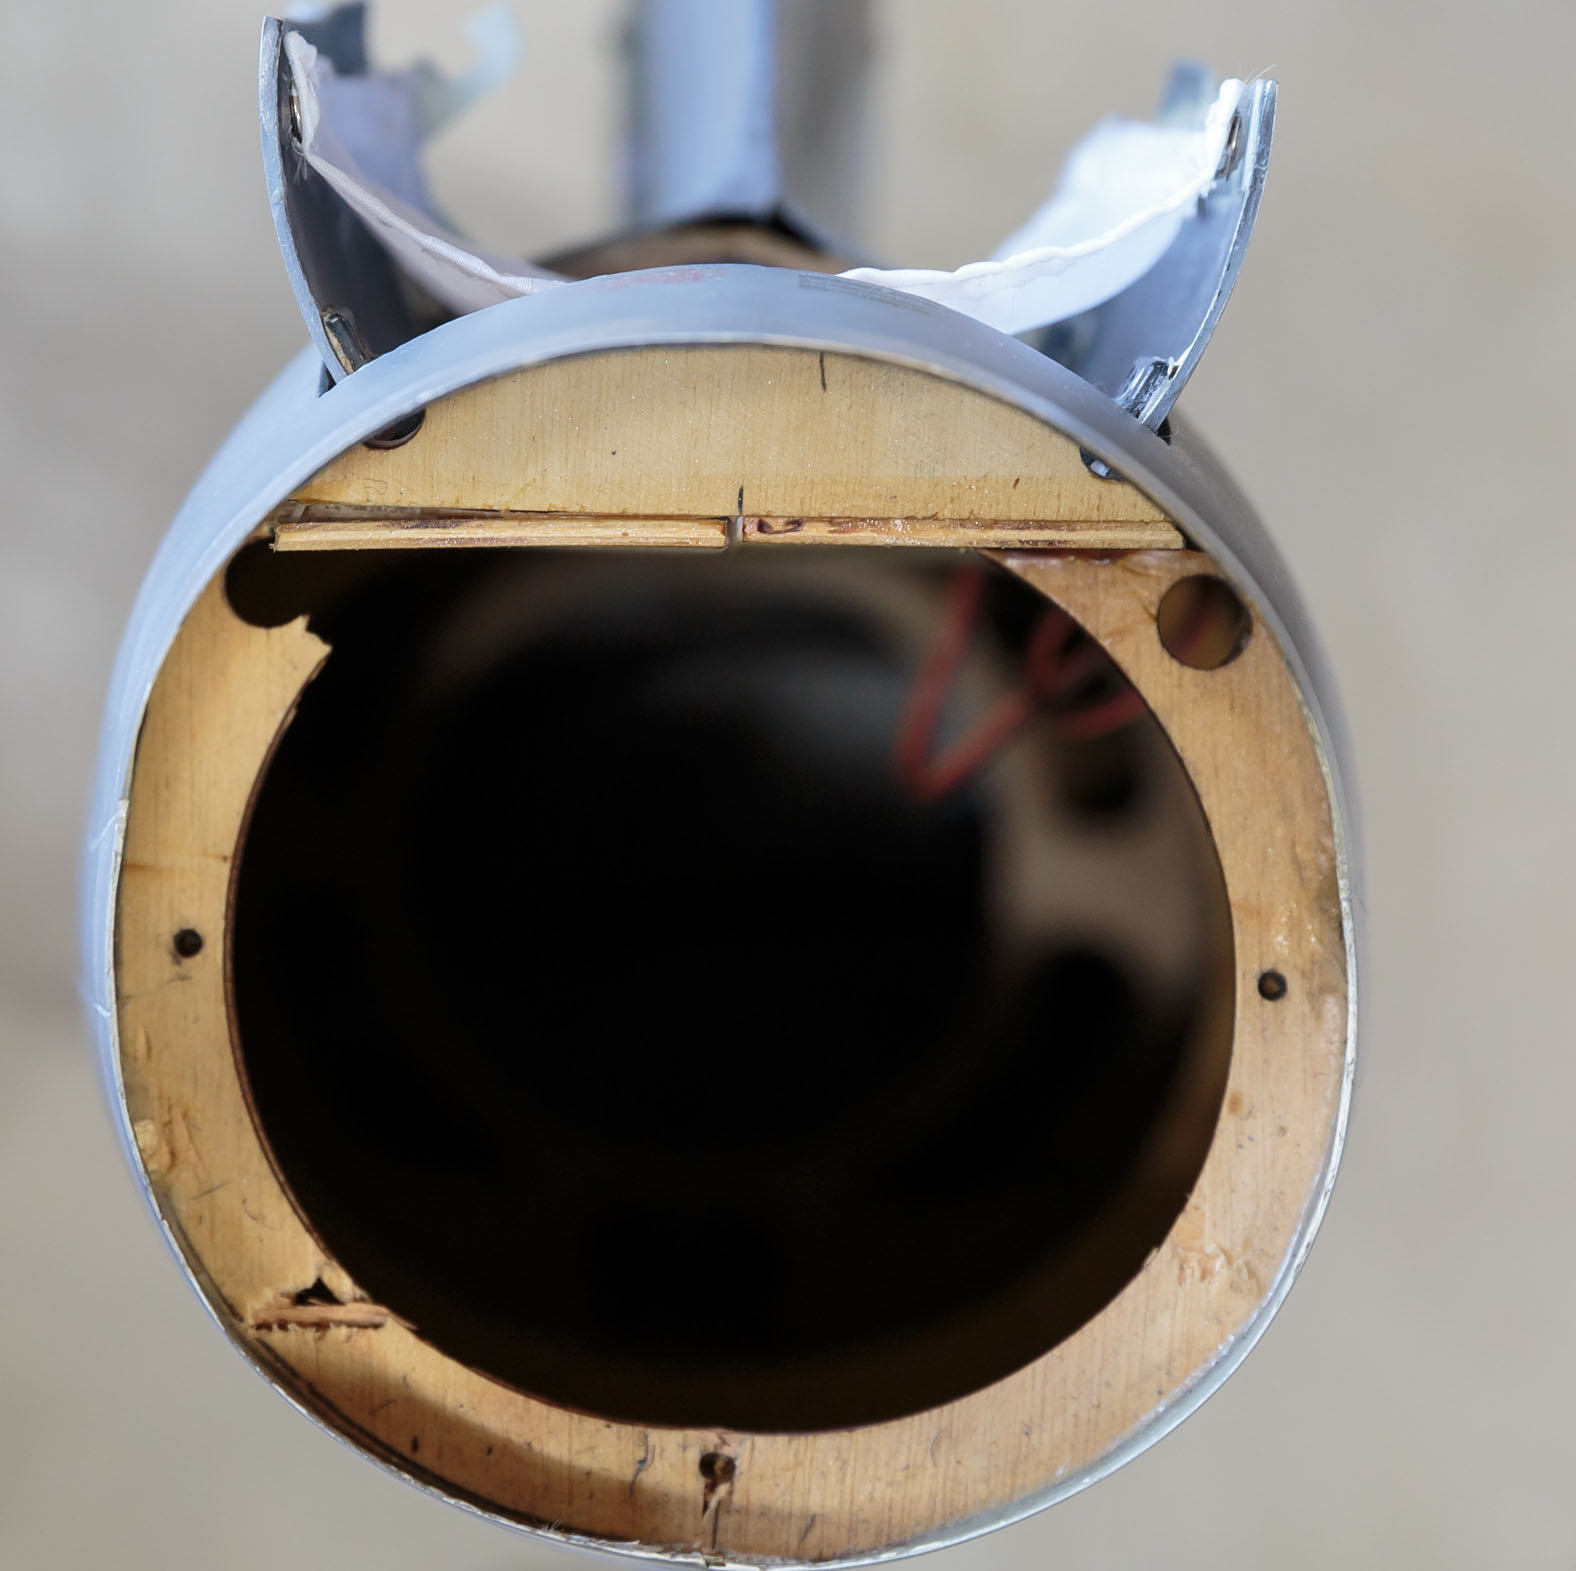
A motivational shot for you - make the chute work, it is well worth it!

Paul
01-03-2020, 01:49 PM
#338
Bob,
Here's some images from my scratch build chute release system for my DerJet Hunter. One servo does all functions, door release and then chute jettison, using a 3 position switch.
The doors are spring loaded to open, and are held closed by the pin, which also serves to retain the chute. One door overlaps the other and a hook on the top door engages the pin and holds them closed.
The chute needs some help getting out into the airflow, so I use a sort of 'trampoline', attached to the doors that lifts the chute up as the doors open. After some trial and error it now works well.
.
A motivational shot for you - make the chute work, it is well worth it!
Paul
That is AWESOME man, thanks very much for the information and inspiration!

Bob
