


Eindeckers anyone

 04-13-2007 | 03:17 AM
#27

And that's a very good historical source being as it is a Fokker factory photo. I didn't have a photo of the aircraft I was modeling so I just went with the style of cross that was in the drawings I had. Obviously there's a good deal of complexity in this "what type of cross and when" issue. But I continue to believe that the sort of cross most commonly seen on eindecker models (as typified by the models on the anglefire link) is just plain fantasy - a sort of myth that has worked it's way so deeply into the modeling community that it may never be dislodged.
04-13-2007 | 03:19 AM
#28
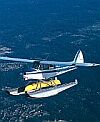
BTW, I think that photo does a good job of showing how really "spindley" the EIII was. Too often our models (including mine) end up looking too substantial.
04-13-2007 | 03:26 AM
#29
Member
Joined: Apr 2007
Posts: 37
Likes: 0
Received 0 Likes
on
0 Posts
From: Brisbane, AUSTRALIA
Here are some more images you might find useful. NOTE the thin cross on the wing of the second image.
The best case of "a sort of myth that has worked it's way so deeply into the modeling community that it may never be dislodged" I've ever seen is the EIII with the red fuselage band on the BUSA box. In actual historical fact the band on that particular example is Barvarian blue.
The best case of "a sort of myth that has worked it's way so deeply into the modeling community that it may never be dislodged" I've ever seen is the EIII with the red fuselage band on the BUSA box. In actual historical fact the band on that particular example is Barvarian blue.
04-13-2007 | 03:47 AM
#30


Joined: Jul 2005
Posts: 870
Likes: 0
Received 0 Likes
on
0 Posts
From: Bairnsdale, AUSTRALIA
As I've said elsewhere - it probably depends on whether Hans or Helmut was on cross-painting duties that day too....ditto the metalwork's "squiggles". Thanks for the info everyone - Don, I've only seen your (and my) subject aircraft with the style crosses you used, so I will do likewise. Thanks for the graphic. I'll probably spray the white and hand paint the black, including rego' numbers etc.
Sorry for hijacking the thread btw!
Cheers,
Cam
Sorry for hijacking the thread btw!
Cheers,
Cam
04-13-2007 | 04:01 AM
#31
I think I mostly just wanted to use the funky early style cross!  And you're all right about there being lots of variations (thanks to Hans and Helmut). Thanks for posting those photos.
I almost thought of doing the "Bavarian (BWM) blue" striped version myself. I thought it would be fun to buck tradition.
And you're all right about there being lots of variations (thanks to Hans and Helmut). Thanks for posting those photos.I almost thought of doing the "Bavarian (BWM) blue" striped version myself. I thought it would be fun to buck tradition.
04-14-2007 | 05:39 AM
#33
Senior Member
Joined: Dec 2001
Posts: 525
Likes: 0
Received 0 Likes
on
0 Posts
From: Queensland, AUSTRALIA
I based this one on an old Carstens plan. Span was around 85". Conventional stick balsa construction and covered with Sig Koverall. Paint job was basically acrylic housepaint applied with a 2" brush. Aluminium was ex a cheap spraycan. I brushed sanding sealer over the Koverall at the 'aluminum' areas and that effectively filled the fabric weave.
Power was a tired old 25cc Homelite conversion with the small carb and it was a very good match. The model flew like a trainer and could manage a loop and a roll from a shallow dive.
That`s a Ziroli Dr-1 in the background.
Alan W
Power was a tired old 25cc Homelite conversion with the small carb and it was a very good match. The model flew like a trainer and could manage a loop and a roll from a shallow dive.
That`s a Ziroli Dr-1 in the background.
Alan W
 04-14-2007 | 09:54 AM
#35
Senior Member
My Feedback: (1)
Joined: Sep 2002
Posts: 897
Likes: 0
Received 0 Likes
on
0 Posts
From: Mt Airy, MD
Thought I'd add a picture of my SR batteries eindecker. G26 and spektrum DX7 (back ordered) [ ] maiden this spring if spring ever gets here.
] maiden this spring if spring ever gets here.
04-14-2007 | 01:11 PM
#36
Senior Member
Joined: May 2003
Posts: 358
Likes: 0
Received 0 Likes
on
0 Posts
From: pelham, NH
Hi everone. Let me chime in with my 2 cents. My biggest issue with the BUSA lit is the outline of the cowl. Most of the rest of the kit a a glance seems semi scale. Fixing the cowl would requre a lot of work. but Abu is more qualified to speak about that than I am. One thing I have learned, is that it very often takes more effort to redesign someone else's work than to design and build from scratch.
Now, after having said all that. BREGUET I am really intruiged by your wing warping!! I have toyed with the idea for wing warping on my SR eindecker. Can you give me any other info? I know it will require a redesign of the undercarriage as well as the wings. I don't want to sabotage this thread so perhaps you could contact me by e-mail.I have the Proctor plans for a scratch build but I wanted to use a gas engine and ther would be no room for a dummy engine without redesigning. This alternative seems to be a lot less effort.
Here are some shots of it.
04-15-2007 | 11:39 AM
#37

Thread Starter
Senior Member
My Feedback: (7)
Joined: Oct 2004
Posts: 130
Likes: 0
Received 0 Likes
on
0 Posts
From: Agoura Hills,
CA
ORIGINAL: feep
Hi everone. Let me chime in with my 2 cents. My biggest issue with the BUSA lit is the outline of the cowl. Most of the rest of the kit a a glance seems semi scale. Fixing the cowl would requre a lot of work. but Abu is more qualified to speak about that than I am. One thing I have learned, is that it very often takes more effort to redesign someone else's work than to design and build from scratch.
Now, after having said all that. BREGUET I am really intruiged by your wing warping!! I have toyed with the idea for wing warping on my SR eindecker. Can you give me any other info? I know it will require a redesign of the undercarriage as well as the wings. I don't want to sabotage this thread so perhaps you could contact me by e-mail.I have the Proctor plans for a scratch build but I wanted to use a gas engine and ther would be no room for a dummy engine without redesigning. This alternative seems to be a lot less effort.
Here are some shots of it.
04-18-2007 | 06:29 PM
#38
Junior Member
Joined: Apr 2007
Posts: 2
Likes: 0
Received 0 Likes
on
0 Posts
From: Dublin, IRELAND
Hello all.
This is my first posting here. I am also quite new to RC Aircraft so be gentle with me. I am currently learning to fly a trainer and have decided to buy an Eindecker 40 as a project to build. My question is this. I have noticed in the literature/specs of the BALSA Eindecker that it uses 5 servos. The trainer I am learning on has 4. I am assuming the extra servo on the Eindecker is used on the ailerons? If this is the case, does the RC transmitter function the same way as with 4 servos? Or does each aileron have a separate controller on the transmitter? I hope this makes sense to you all, any help would be appreciated.
By the way, that wing-warping movie is pretty cool.
04-18-2007 | 07:08 PM
#39
Joined: Jul 2005
Posts: 870
Likes: 0
Received 0 Likes
on
0 Posts
From: Bairnsdale, AUSTRALIA
I'm sure the fifth servo would be aileron - i.e. one in each wing. Simplest setup is just use a y-lead out of the one aileron channel in the receiver, OR alot of modern computer radios alow you to use 2 different outputs in the receiver.
Using 2 outputs can allow more ease of individual trimming of the ailerons, plus get differential (mote up than down aileron movement) more easily via a transmitter function.
If you set it all up ok, a Y-lead is still fine though, and simple.
Cheers,
Cam
Using 2 outputs can allow more ease of individual trimming of the ailerons, plus get differential (mote up than down aileron movement) more easily via a transmitter function.
If you set it all up ok, a Y-lead is still fine though, and simple.
Cheers,
Cam
05-11-2007 | 08:38 PM
#41
Member
Joined: Apr 2007
Posts: 37
Likes: 0
Received 0 Likes
on
0 Posts
From: Brisbane, AUSTRALIA
Sorry I've been away from this for a while. Some of it spent out flying my EIII . Just tell me what you'd like to know about the warping and I'll try and fill you in.
. Just tell me what you'd like to know about the warping and I'll try and fill you in.
05-16-2007 | 05:46 AM
#42
Joined: Jul 2005
Posts: 870
Likes: 0
Received 0 Likes
on
0 Posts
From: Bairnsdale, AUSTRALIA
Just a quick update on the SR Eindecker project - did a quick assembly in the garage while I had all the "bits" together building a transport stand. Still a few little details not installed in the pics - namely the steps, fuel cap and compass (in wing). These will all be done shortly, then install the radio and commmit aviation
I still think there's room for a dummy engine in there, but will wait till after test flying before getting too carried away.
BTW I ended up using Don's (Abu's!) cross dimensions as they best matched my other artist's impressions of this scheme.
Cheers,
Cam
I still think there's room for a dummy engine in there, but will wait till after test flying before getting too carried away.
BTW I ended up using Don's (Abu's!) cross dimensions as they best matched my other artist's impressions of this scheme.
Cheers,
Cam
05-16-2007 | 07:34 AM
#43
Member
Joined: Apr 2007
Posts: 37
Likes: 0
Received 0 Likes
on
0 Posts
From: Brisbane, AUSTRALIA
Congratulations, lovely work. Mind you the diagonal stripe on this particular machne should be Prussian Blue (Bloody purists!). Seriously though it is a real credit to you and looks great.
05-16-2007 | 07:56 AM
#44
Cam, that looks great! [sm=thumbup.gif][sm=thumbup.gif][sm=thumbup.gif] Your eindecker really has a lot of character and that's the hardest thing to get on any model.
I think you're mistaking this color scheme for the one commonly (mis)modeled with the "red" stripe that should be BAVARIAN blue (as in "BWM blue" -- which is a light blue). I'm pretty sure that the strip in the scheme Cam (and I) did was black, like the rudder.
But I'm certainly willing to allow someone to try to convince me otherwise!
ORIGINAL: Breguet
Mind you the diagonal stripe on this particular machne should be Prussian Blue (Bloody purists!).
Mind you the diagonal stripe on this particular machne should be Prussian Blue (Bloody purists!).
But I'm certainly willing to allow someone to try to convince me otherwise!
05-16-2007 | 08:18 AM
#46


ORIGINAL: abufletcher
Camdyson, here's the version of the early Patee cross I ended up using. It seemed the best match for the documentation I had. I've seen photos of the EIII with the "later style" German cross -- but I think these were the ones operated by naval units. The thin arm and thin "foot" ones that are used on a lot of model eindeckers, for example the BUSA kit decals, don't look like anything I've ever seen in any period photo.
I printed this out on thick photo paper, then transfered it to thin cardboard, traced it onto the white background in pencil and then handpainted the crosses. From what I understand the most authentic way of doing it would be to paint the cross and then fill in the area around it with white.
Here's a verbal discription of how to draw one version of the Patee' cross. My complements on getting the name correct!
http://www.wwi-models.org/misc/mhae_cross/index.html
Variation on this I've seen the "B" (.4 H) dimention also called out as 1/2 H
T
05-16-2007 | 04:13 PM
#48
Member
Joined: Apr 2007
Posts: 37
Likes: 0
Received 0 Likes
on
0 Posts
From: Brisbane, AUSTRALIA
ORIGINAL: abufletcher
I think you're mistaking this color scheme for the one commonly (mis)modeled with the "red" stripe that should be BAVARIAN blue (as in "BWM blue" -- which is a light blue). I'm pretty sure that the strip in the scheme Cam (and I) did was black, like the rudder.
But I'm certainly willing to allow someone to try to convince me otherwise!
]Cheers
PS None of this takes away from thr great model Cam has turned out!
05-16-2007 | 07:15 PM
#49
Joined: Jul 2005
Posts: 870
Likes: 0
Received 0 Likes
on
0 Posts
From: Bairnsdale, AUSTRALIA
ORIGINAL: abufletcher
BTW, Cam, I'd like to hear more about how you did the weathering. I particularly like the "water stains" on the fabric.
BTW, Cam, I'd like to hear more about how you did the weathering. I particularly like the "water stains" on the fabric.
After painting on the crosses, lettering etc by hand (in Humbrol enamels) I did several different layers of "washes" with very thinned (with Turpentine)Humbrols - for the "water stains" I just put the part right way up and let gravity do the rest, LE up for the wings and tailplanes. Like painting with watercolours if you've ever tried that. There's alot of streaking under the fus which I didn't show in those pics - trust me, it's grubby
Following the washes, I dry-brushed layers of grey/brown etc. in the "heavy traffic" areas, again with Humbrol enamels. Normally I'd use pastels, but the brushed-on clear I chose prevented this. Finally when I was happy, the whole lot got a coat of water-based polyurethane clear, brushed on.
Only snag in all that lot, was the thinned "washes" would dissolve any large areas of underlying enamel, eg the crosses, so had to be used sparingly in those areas. Overall it all went o.k. I think.
Bear in mind this is a tarted-up sport model, not master-scale. I just wanted it to capture the "look" of a WWI fighter, rather than have it look like a toy. Hopefully it will get alot of flying hours on it.
Cheers,
Cam
05-16-2007 | 07:54 PM
#50
ORIGINAL: Breguet
I don't know about convincing or otherwise......these things are so dash confusing. My confusion comes from the 358 werk #. I've always been led to believe that this properly belongs to 105/15 NOT 103/15. (Though I know it shows it on 103 in the squadron signal publication, though that also shows the red striped 105). I know that you visit the aerodrome website (great for discussions like this) and as I recall (vaguely) Dan-san made some comment on this. []
I don't know about convincing or otherwise......these things are so dash confusing. My confusion comes from the 358 werk #. I've always been led to believe that this properly belongs to 105/15 NOT 103/15. (Though I know it shows it on 103 in the squadron signal publication, though that also shows the red striped 105). I know that you visit the aerodrome website (great for discussions like this) and as I recall (vaguely) Dan-san made some comment on this. [
]
And you're right that whatever info I do have comes from Aerodrome -- and specifically the wisdom on Dan-san. He's the one who pointed out that the "red stripe" on 99% of the models eindeckers you're ever likely to see at the field (which are intended to represent Ernst Udet's EIII) should actually be blue -- in particular the light Bavarian blue of Udet's home state.Some time ago I did some experiments in Photoshop to simulate the effects of the blue-sensitive orthographic film used and the key thing is that only a blue would have come out looking lighter (in B/W) than the nearby black cross, which is exactly what can be seen in period photos. A red strip would have been rendered virtually black -- and this is what I got in my Photoshop experiments.
Oh, the joys of arguing unproveable minutae!

