


My Jagdtiger build.
 01-12-2011, 11:01 AM
#1
Senior Member
Thread Starter

Join Date: Sep 2009
Location: Hegra, NORWAY
Posts: 167
Likes: 0
Received 0 Likes
on
0 Posts
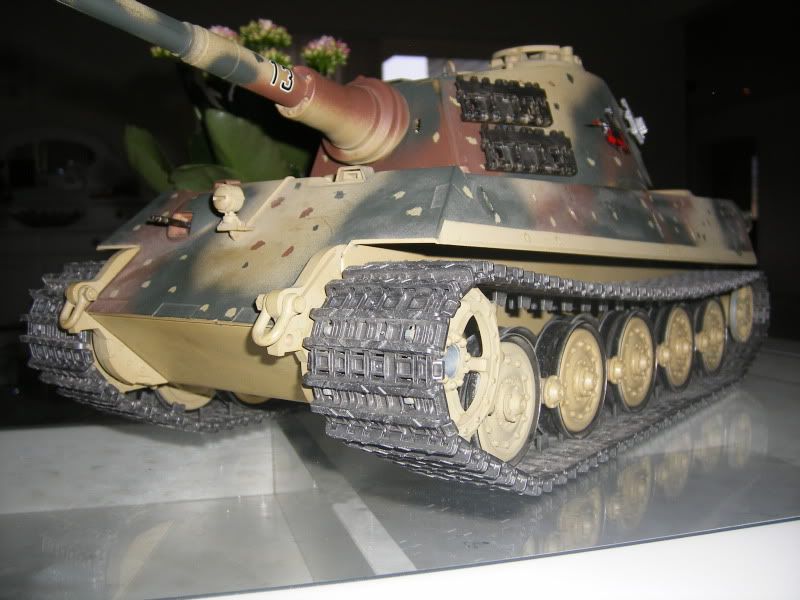
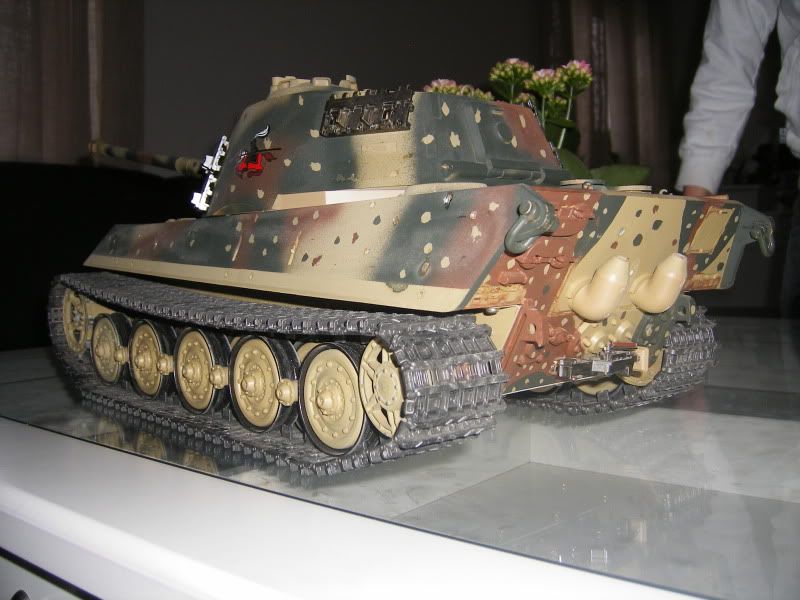
Finally I've started on my next project. It's based on the KT with 540 motor and clutch system. This was replaced before I recieved it with brand new twinmotor trannys.
I was thinking of the Wecohe kit in the beggining, but I think it's to costy for a "low" budget build. Still I had to buy some parts from them as the chalotte, mantlet, gun barrel and minor parts.
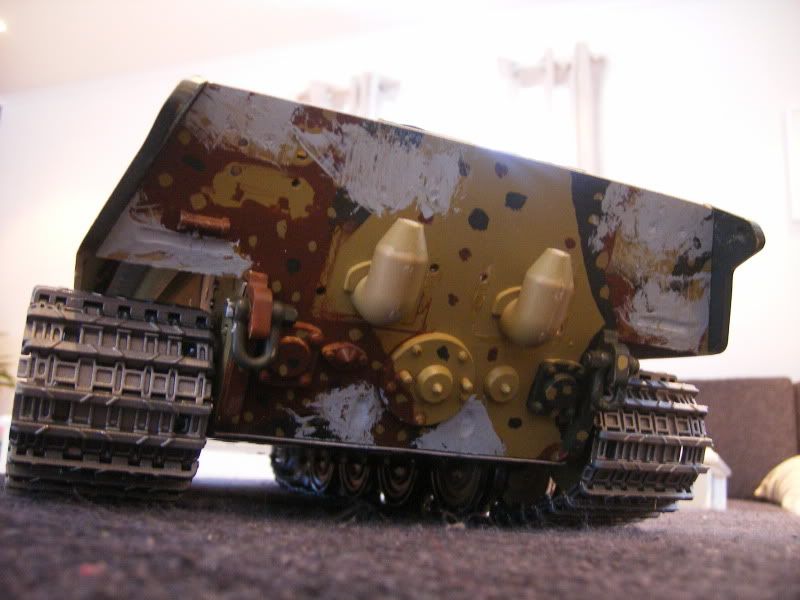
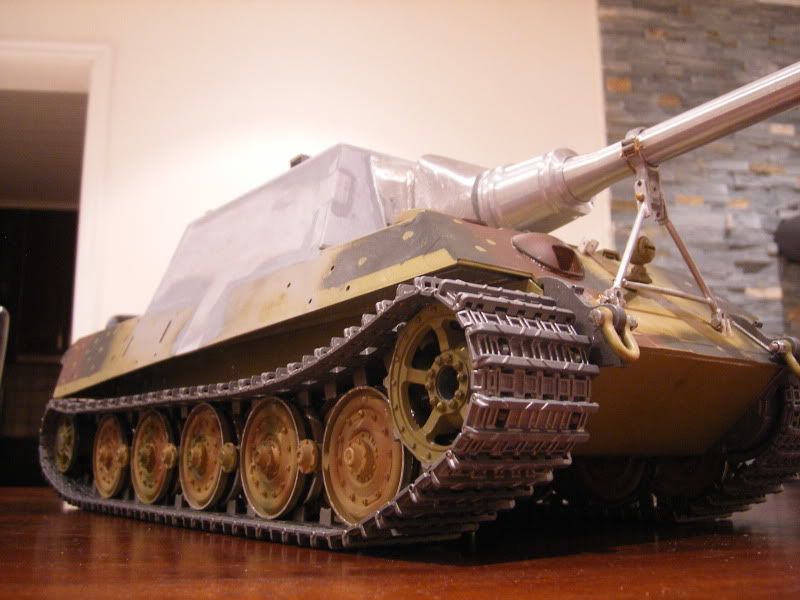
And I know: the front deck sist too high, but I chose to let it be.
As I recieved it. It had all te fenders mounted.
Some Impact parts.
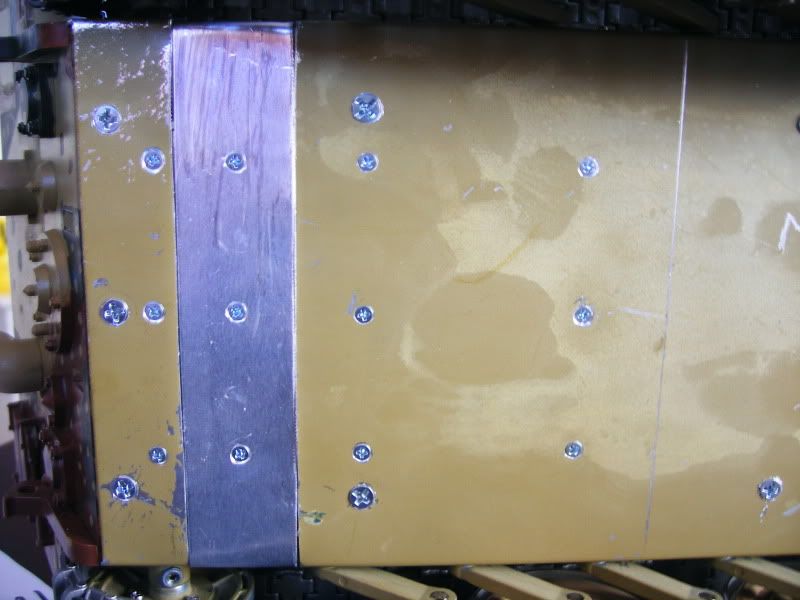
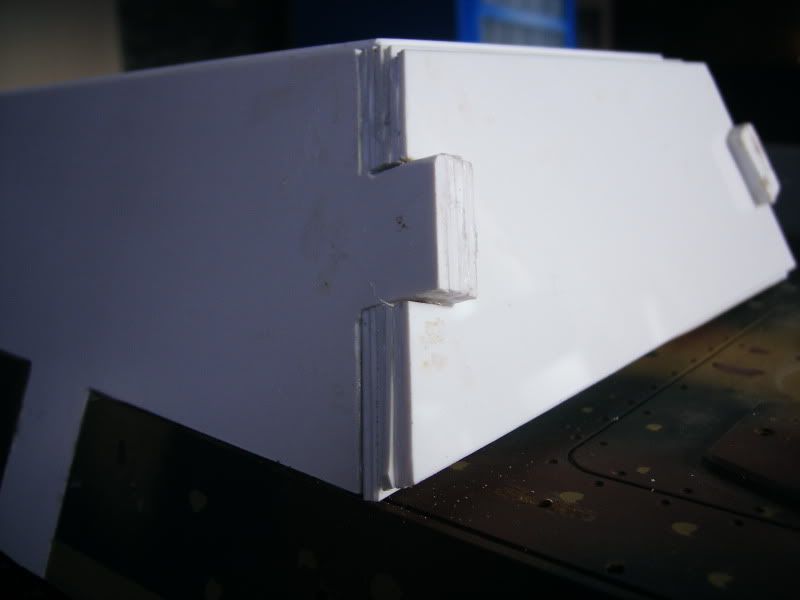
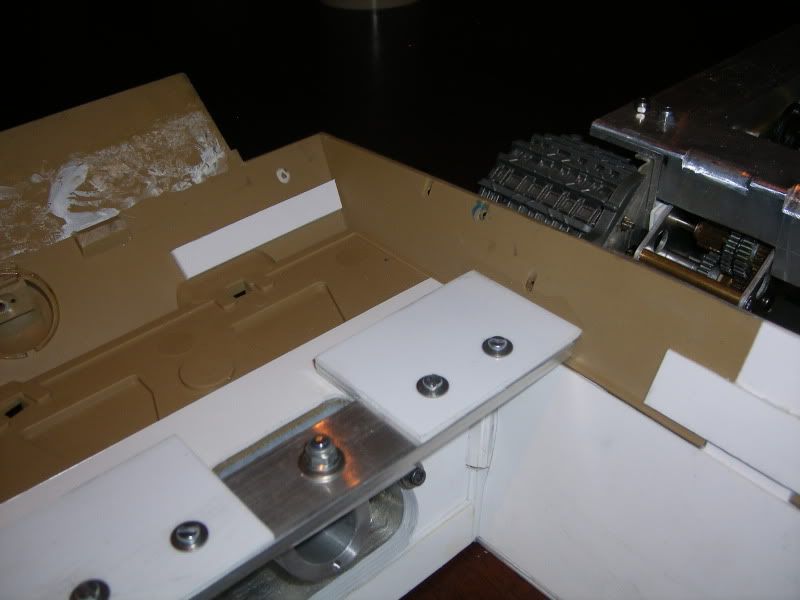
Extension of the hull.
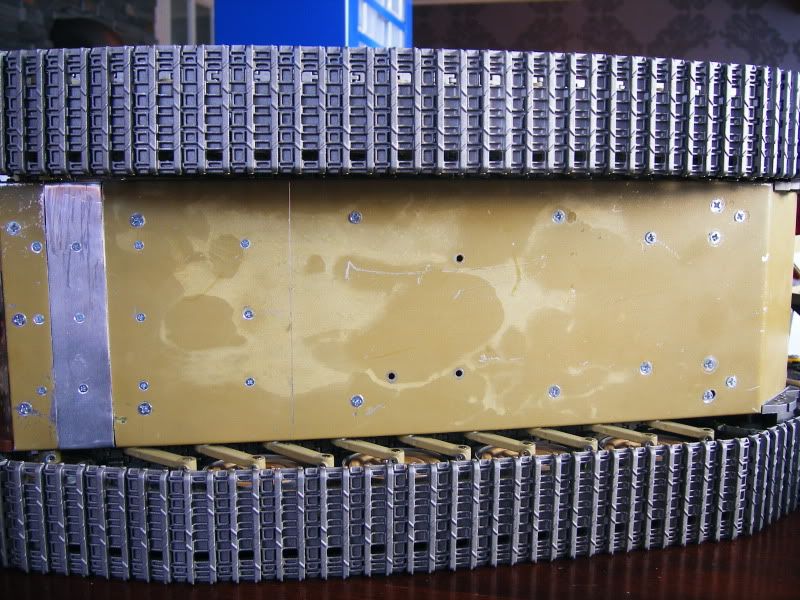
Reinforced on the inside with aluminium plate and countersunk screws.
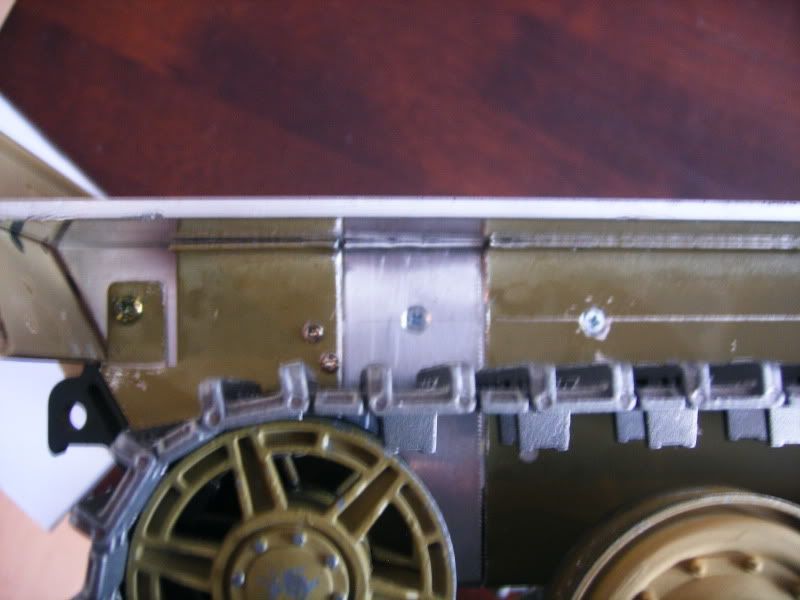
This had no inner fenders mounted, so I made some of 30x30x3mm angle alloy.
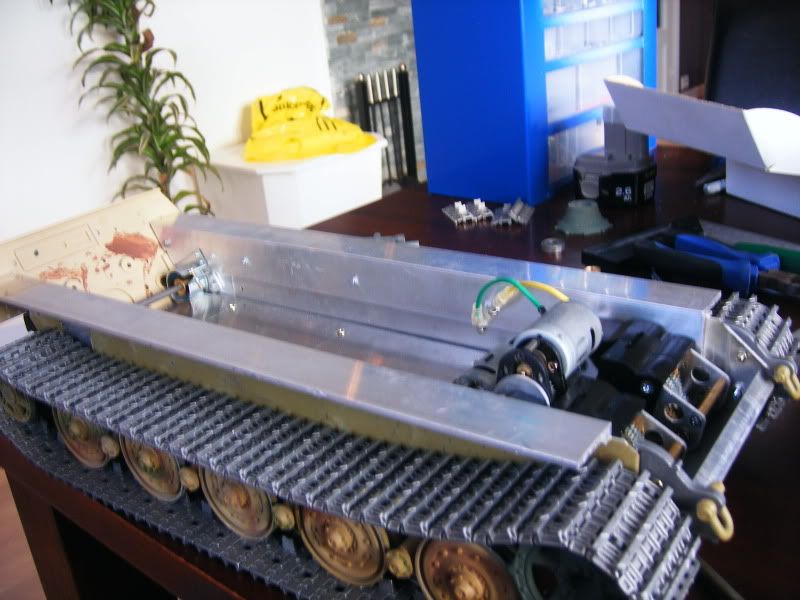
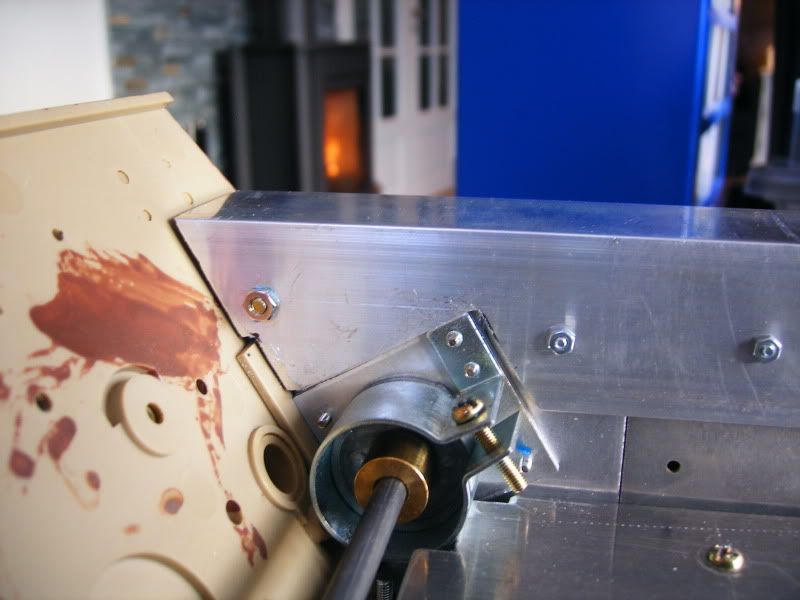
Plate for mounting all electronics made from 4mm alloy.
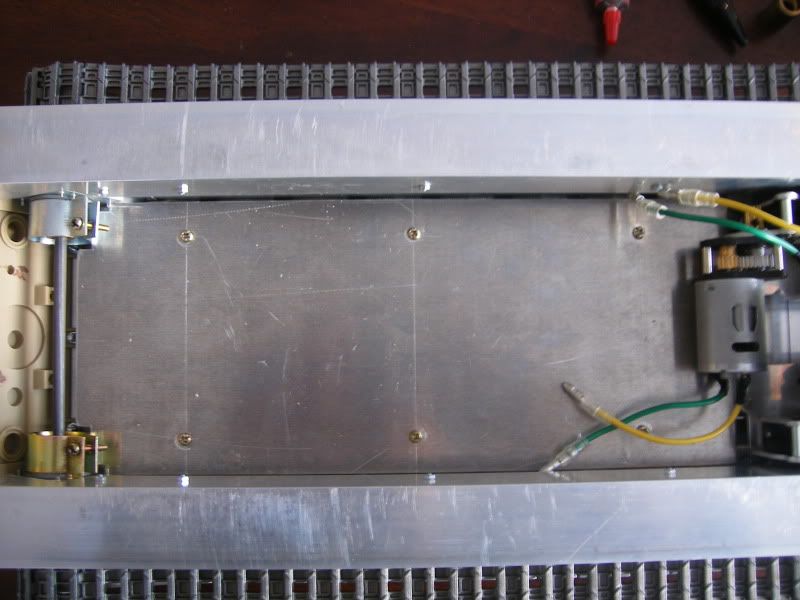
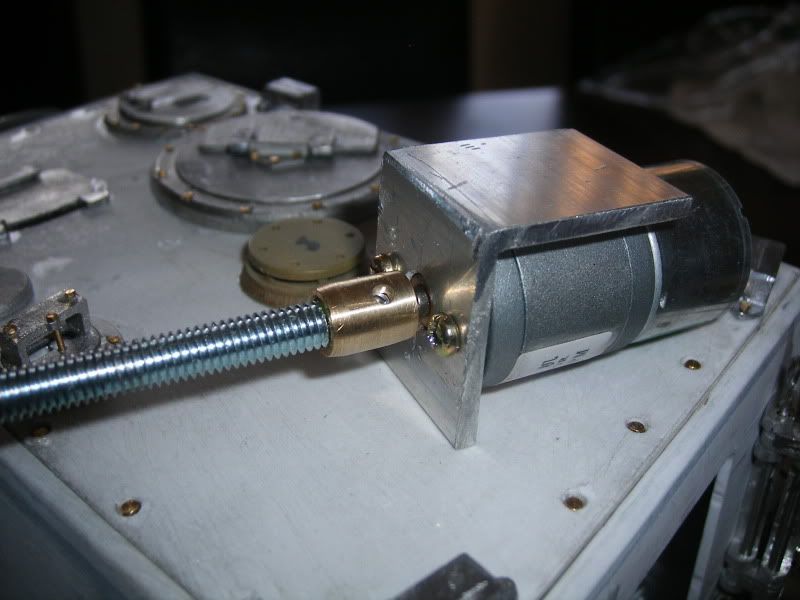
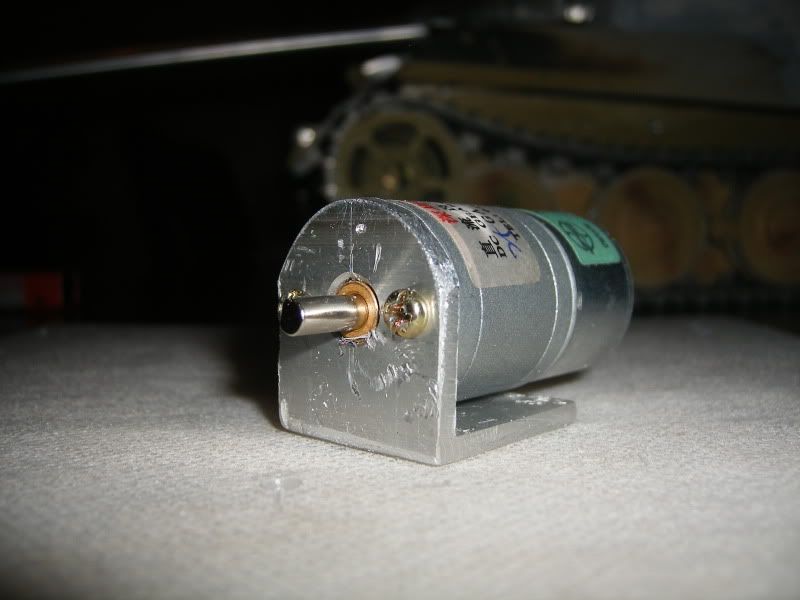
GRU bought on ebay. Had to grind down the output shaft from 4 to 2,3mm.
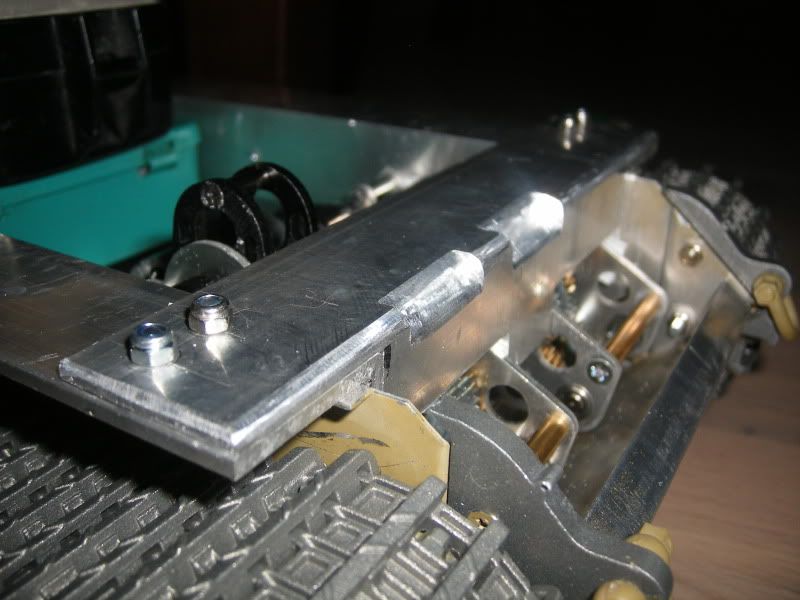
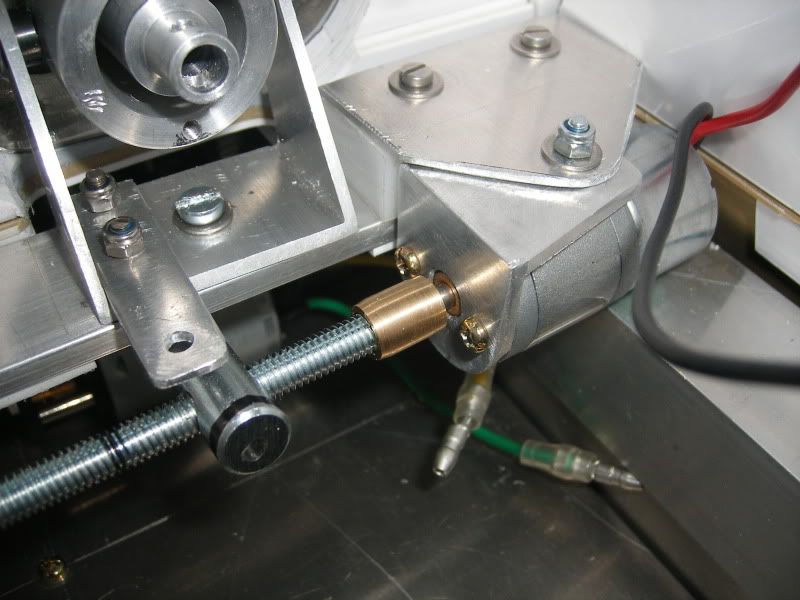
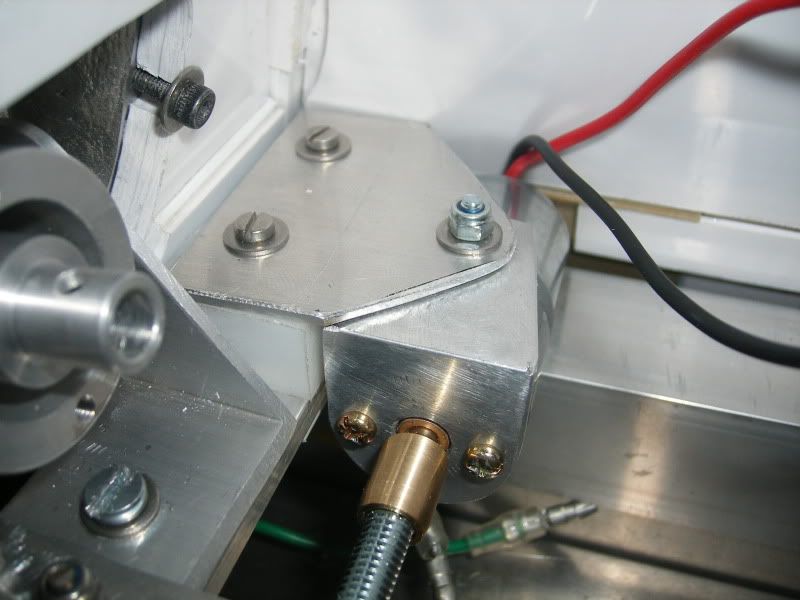
Gearbox strutbrace. No wobble anymore!

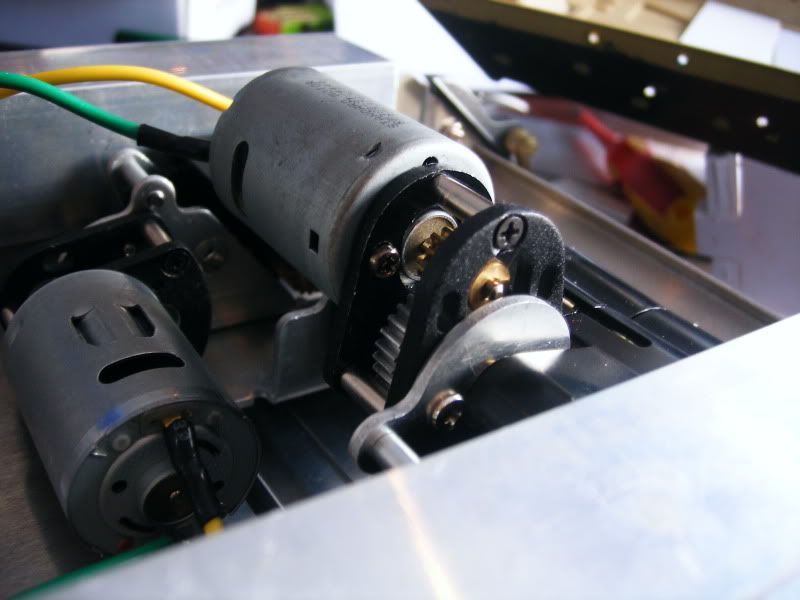
Had to make room for the MG and lightmount as they are sticking out on the innside.
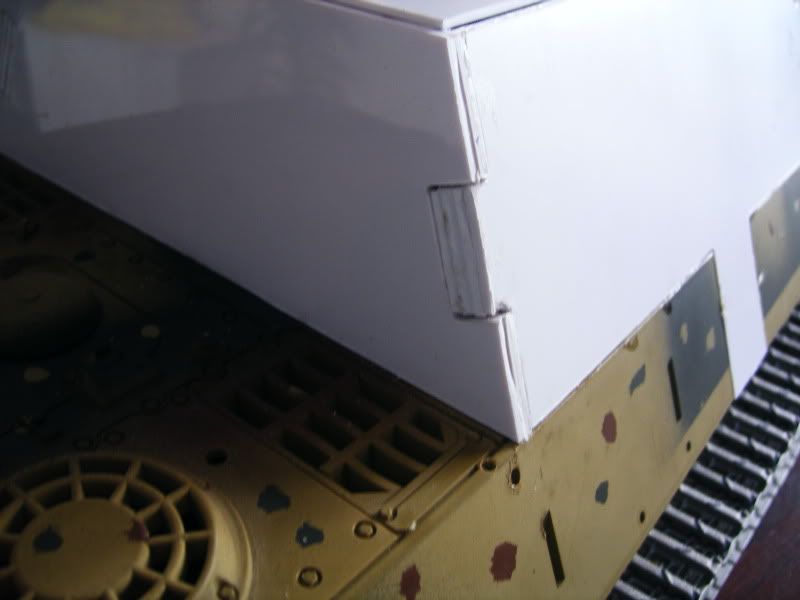
Superstructure
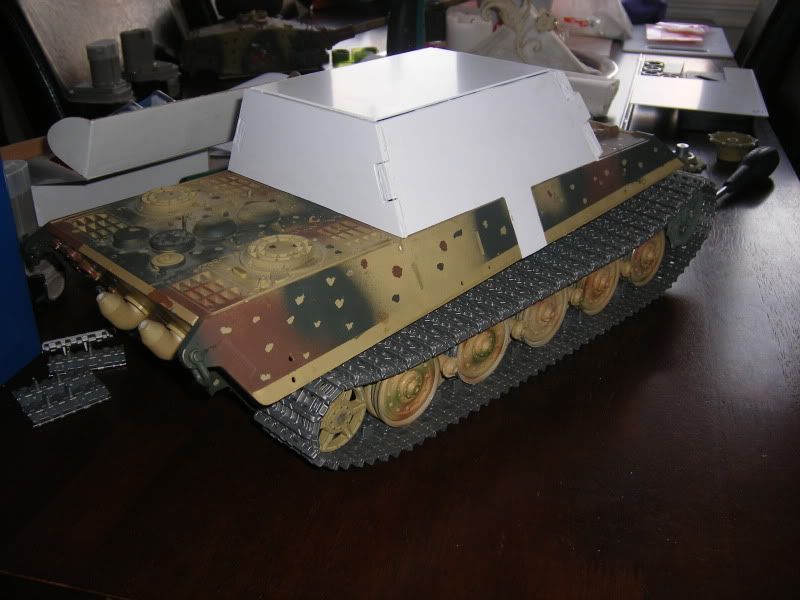
Frontplate. Not quite finnished yet.
Drilled holes for the mounting bolts.
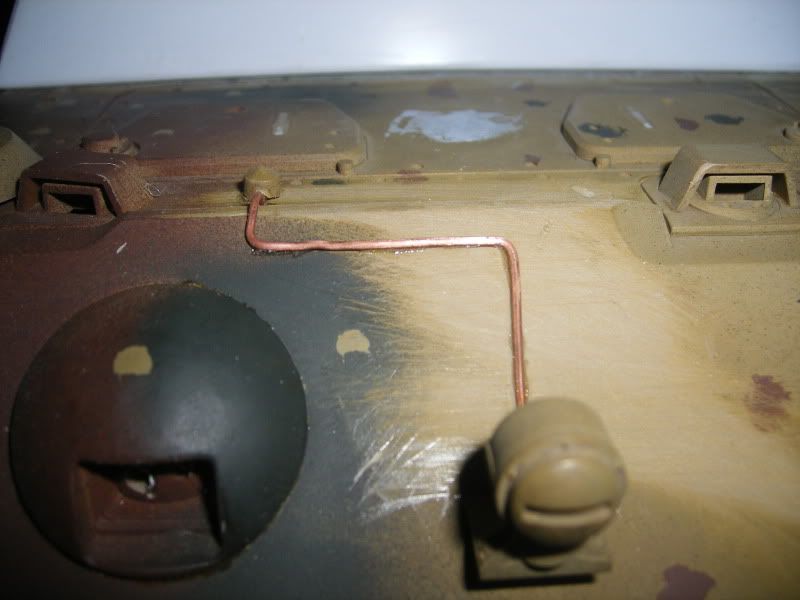
Re-routed the cable for the light.
Moved vent hat.
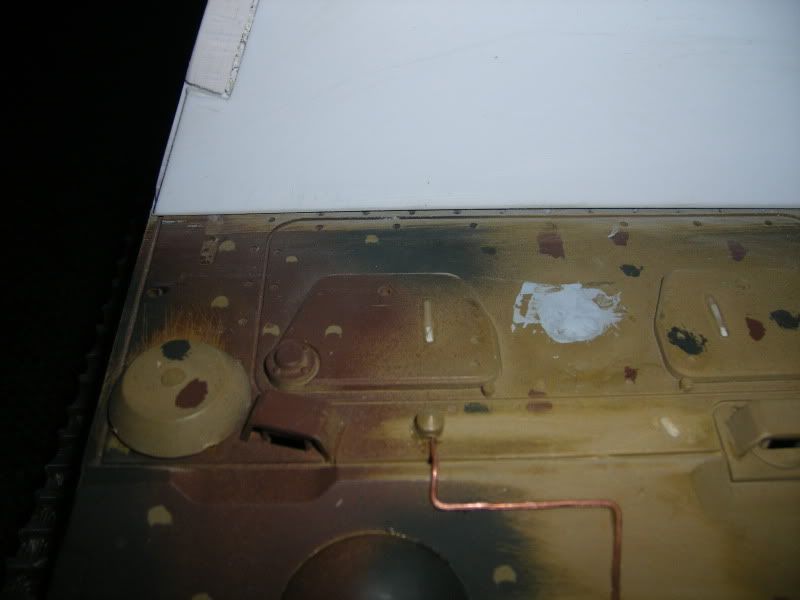
Filled the holes for the jack and jackblock. As the last ones didn't have that.
I was thinking of the Wecohe kit in the beggining, but I think it's to costy for a "low" budget build. Still I had to buy some parts from them as the chalotte, mantlet, gun barrel and minor parts.
And I know: the front deck sist too high, but I chose to let it be.
As I recieved it. It had all te fenders mounted.
Some Impact parts.
Extension of the hull.
Reinforced on the inside with aluminium plate and countersunk screws.
This had no inner fenders mounted, so I made some of 30x30x3mm angle alloy.
Plate for mounting all electronics made from 4mm alloy.
GRU bought on ebay. Had to grind down the output shaft from 4 to 2,3mm.
Gearbox strutbrace. No wobble anymore!
Had to make room for the MG and lightmount as they are sticking out on the innside.
Superstructure
Frontplate. Not quite finnished yet.
Drilled holes for the mounting bolts.
Re-routed the cable for the light.
Moved vent hat.
Filled the holes for the jack and jackblock. As the last ones didn't have that.
 04-15-2011, 02:45 AM
#2
Senior Member
Thread Starter
Join Date: Sep 2009
Location: Hegra, NORWAY
Posts: 167
Likes: 0
Received 0 Likes
on
0 Posts
Made some progress om my JT for the last two weeks.
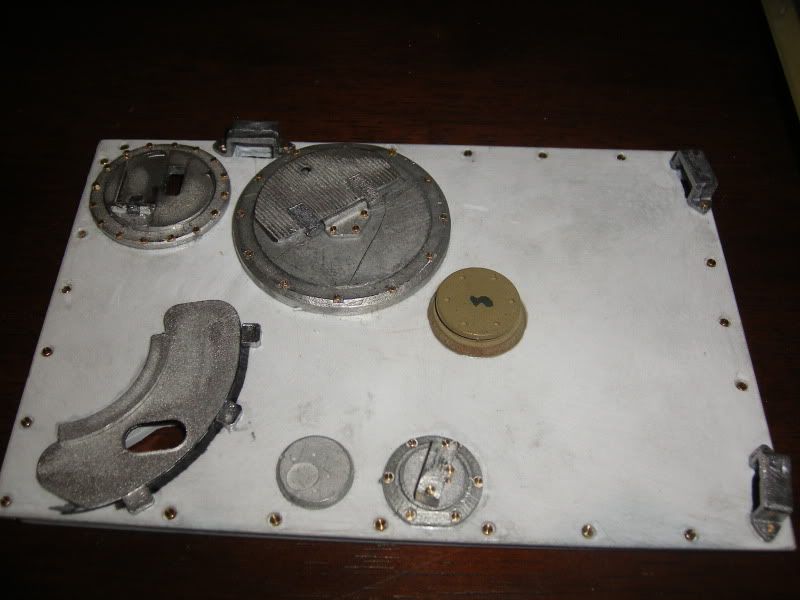
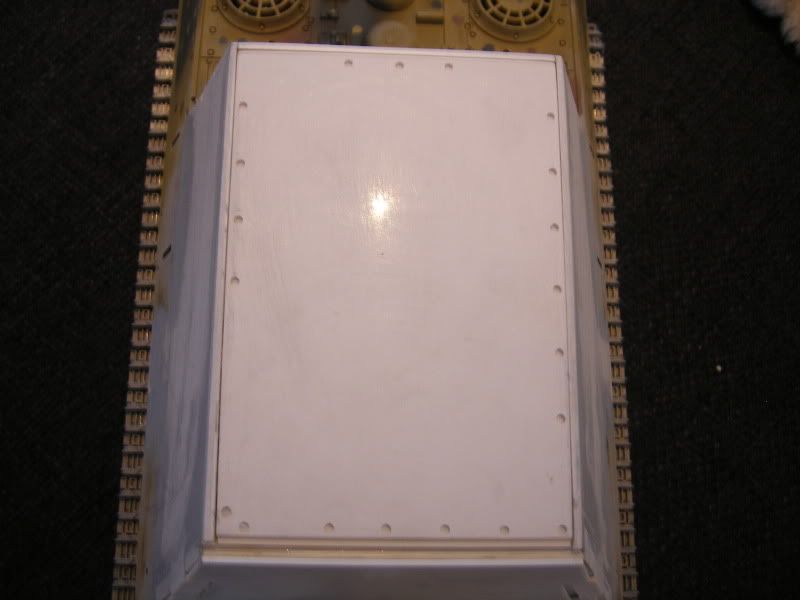
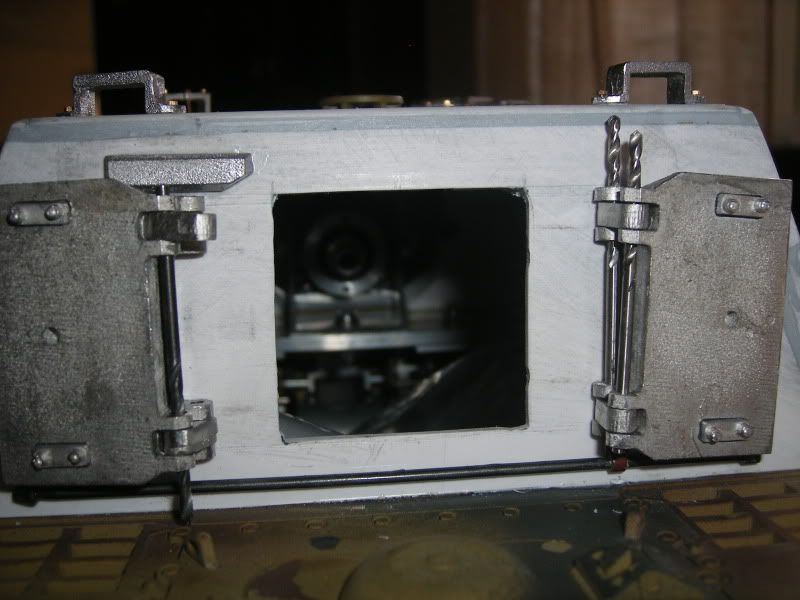
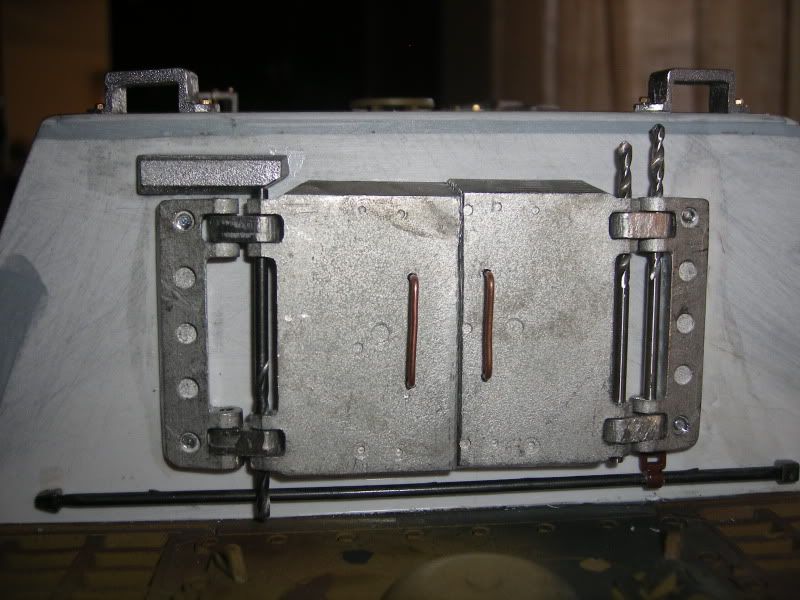
Rear doors. Where can I find 2mm bolts with a flat head? It wasn't supplied in the screw set.... I also have to buy the potoetch set for the JT.
Rear doors. Where can I find 2mm bolts with a flat head? It wasn't supplied in the screw set.... I also have to buy the potoetch set for the JT.
04-15-2011, 03:33 AM
#3
Senior Member

Join Date: Nov 2006
Location: Grande Prairie,
AB, CANADA
Posts: 8,976
Likes: 0
Received 4 Likes
on
4 Posts
I don't know how I missed this the first time around.
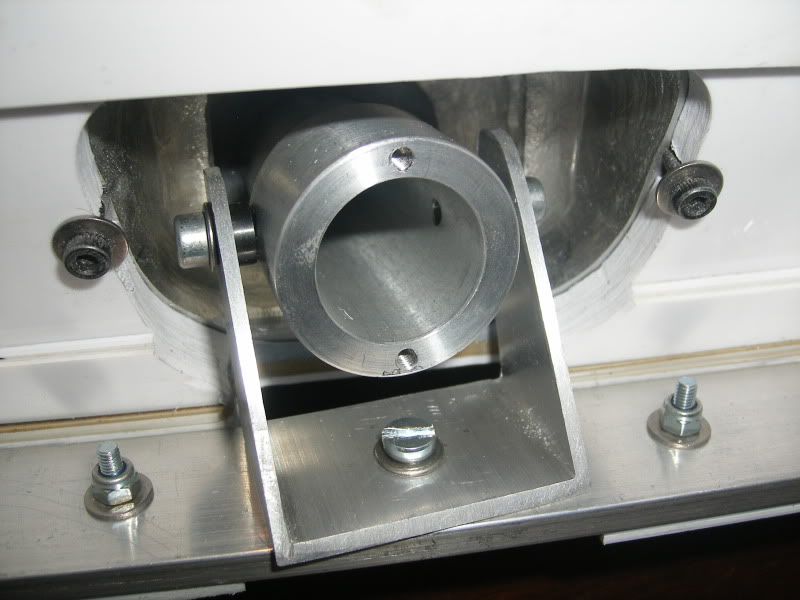
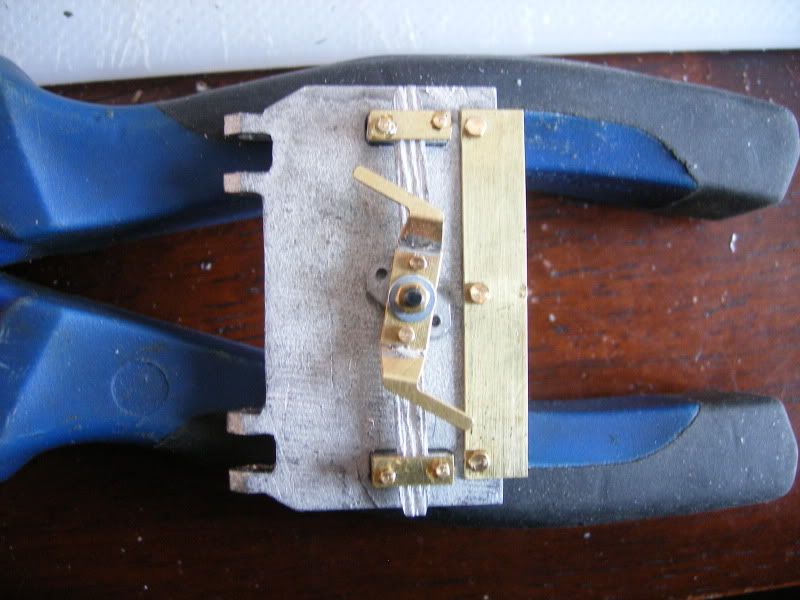
Very nice work, and I absolutely love the BBL traverse idea you have come up with. I will be borrowing that idea
Very nice work, and I absolutely love the BBL traverse idea you have come up with. I will be borrowing that idea

 04-15-2011, 07:09 PM
#8
Senior Member
Your JT looks real heavy duty. I will strongly recommend that you do something about the wimpy stock idlers in the back. Daryl turner makes some great parts as do others. I make my own for my JTs by flipping the clamping brackets left to right (and R to L). I then add a tension spring to the empty screw holes for the hull and attach them to the hull floor or torsion springs. You will need more than the stock springs can offer for that BEAST. Will it get and IR system, elevation and recoil?
Bob
Bob
04-15-2011, 07:52 PM
#9
Senior Member
Join Date: Feb 2011
Location: SPANAWAY, WA
Posts: 266
Likes: 0
Received 0 Likes
on
0 Posts
Is that one of those Tamyia recoil upgrades I see, I have one and could not get it to work, I know I'm doing something wrong but cant figure it out. If you get yours to work let me know what I'm doing wrong. Your buid is realy nice.
Mergen
Mergen
 04-15-2011, 09:08 PM
#11

ORIGINAL: YHR
I don't know how I missed this the first time around.
Very nice work, and I absolutely love the BBL traverse idea you have come up with. I will be borrowing that idea
I don't know how I missed this the first time around.
Very nice work, and I absolutely love the BBL traverse idea you have come up with. I will be borrowing that idea
I will borrow it too. Thanks for sharing.
04-16-2011, 12:39 AM
#12
Senior Member
Thread Starter
Join Date: Sep 2009
Location: Hegra, NORWAY
Posts: 167
Likes: 0
Received 0 Likes
on
0 Posts
ORIGINAL: thecommander
Your JT looks real heavy duty. I will strongly recommend that you do something about the wimpy stock idlers in the back. Daryl turner makes some great parts as do others. I make my own for my JTs by flipping the clamping brackets left to right (and R to L). I then add a tension spring to the empty screw holes for the hull and attach them to the hull floor or torsion springs. You will need more than the stock springs can offer for that BEAST. Will it get and IR system, elevation and recoil?
Bob
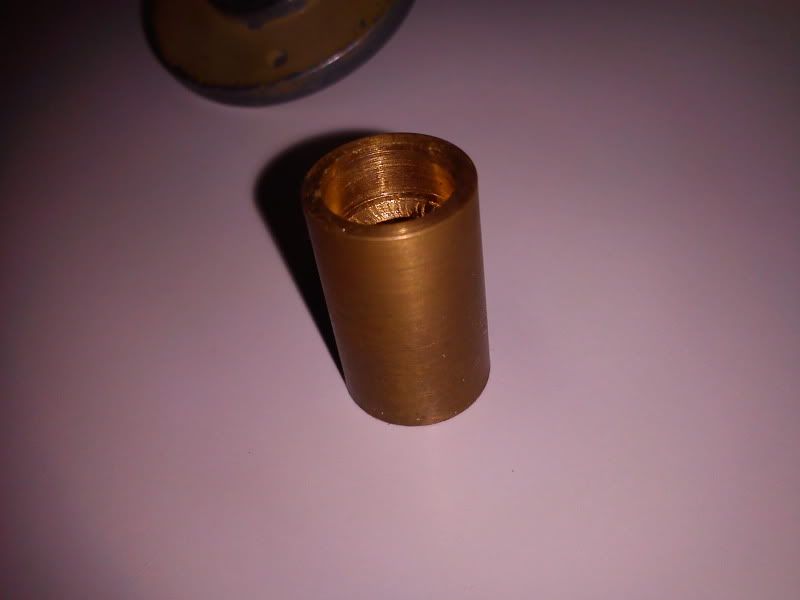
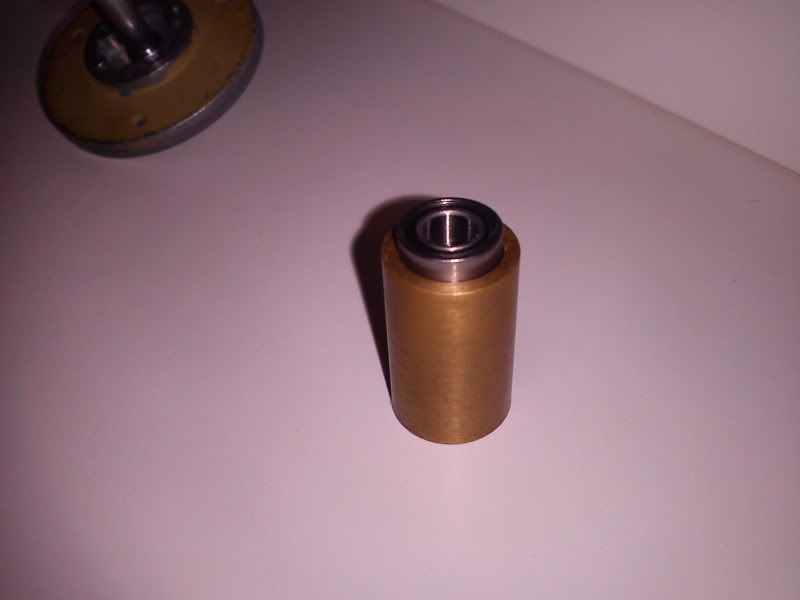
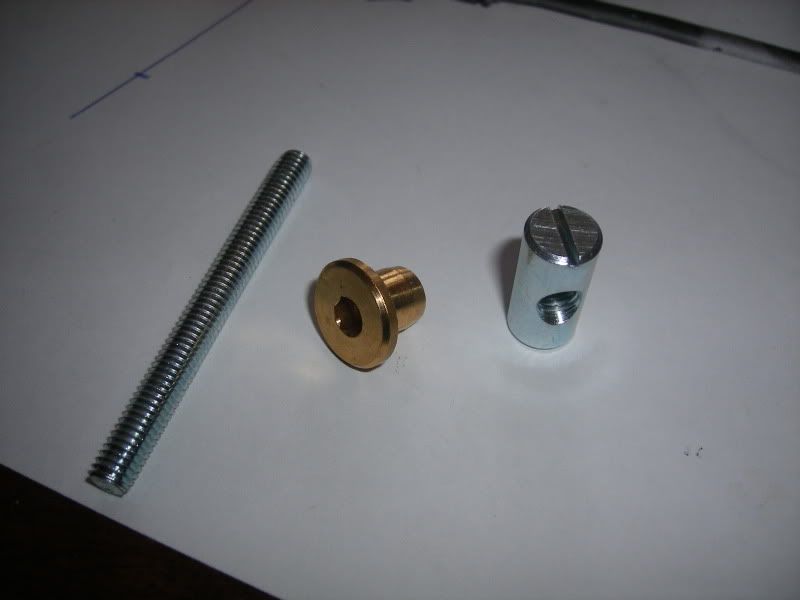
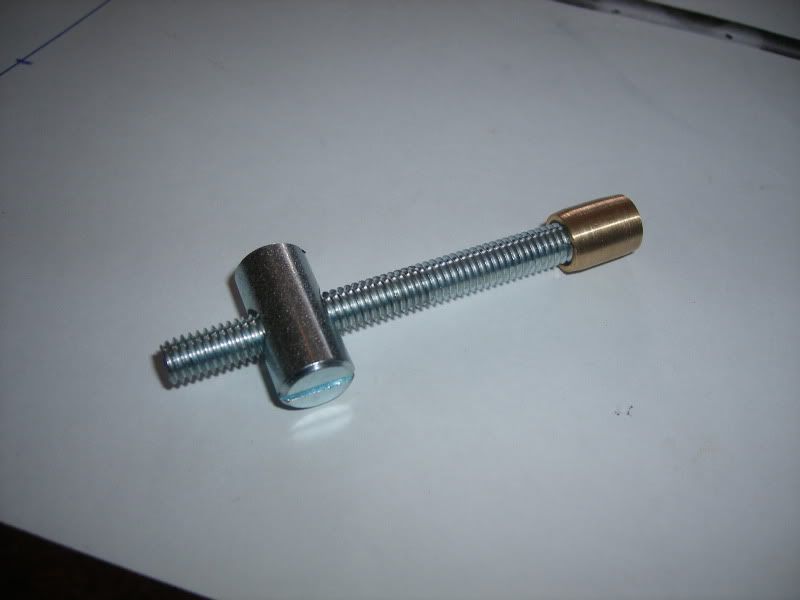
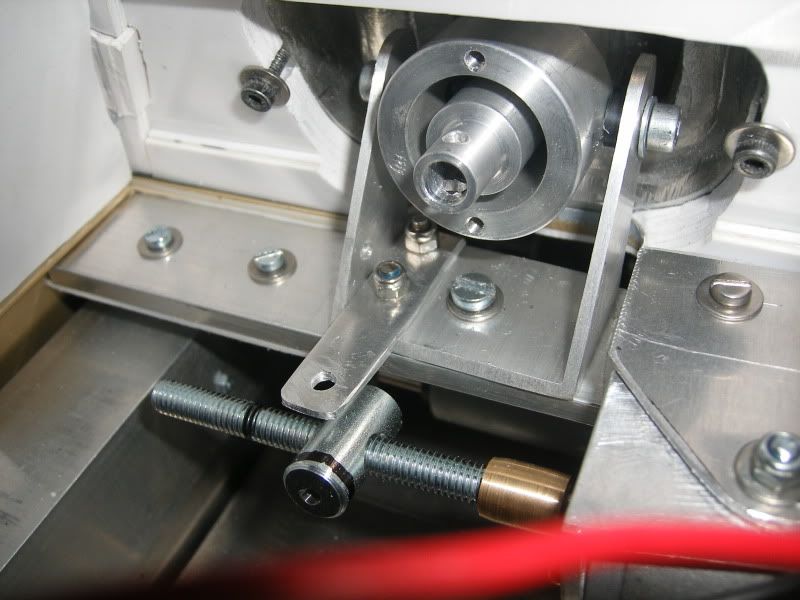
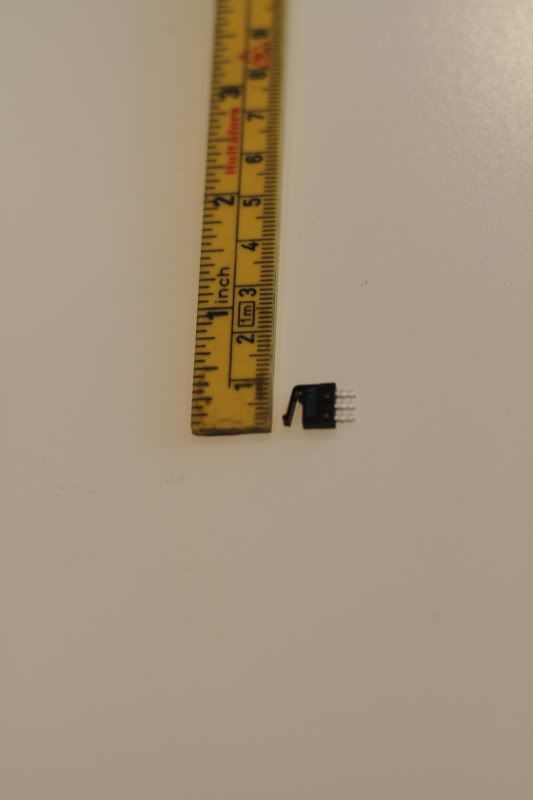
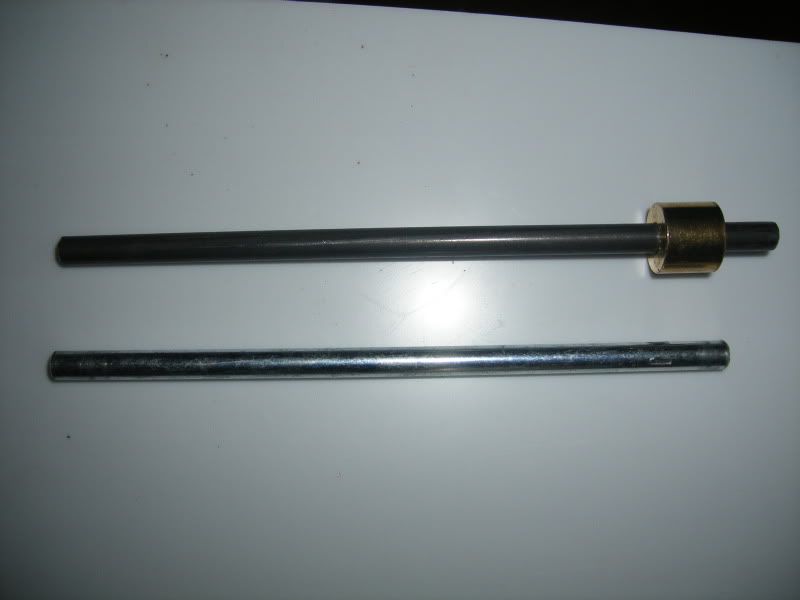
Also the shaft running from idlerarm to idlerarm is swapped out with a longer more tight fit shaft running all the length, that really helped preventing the sagging idlerarms. It's made from 5mm piano bar/wire from my local hobby shop. I used a hammer and a solid foundation to remove and fit the brass collar on the new shaft. The other one is secured with a set screw.
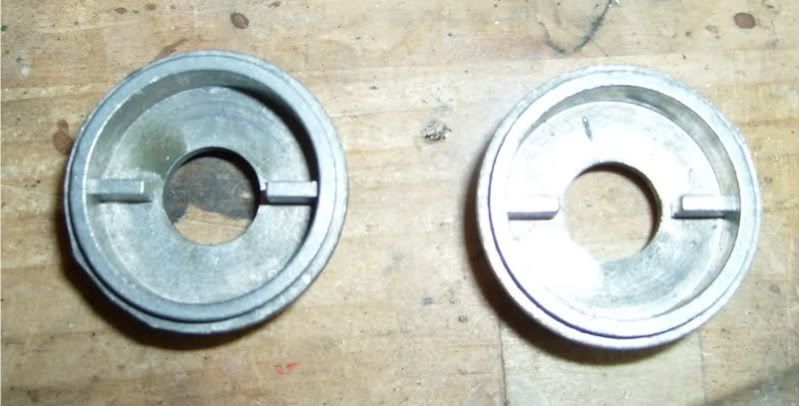
The springs in the tensioner drums is removed and filled with liquid metal. (Phot's borrowed from the German rc-panzerketten forum as I forgot to take pictures)

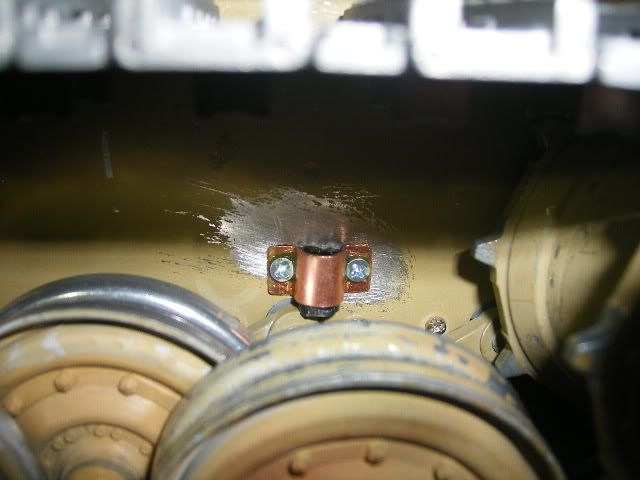
I also will drill a hole through the clamps and into the drums, tap to M3 and put in a screw to secure it all. To make it adjustable you can make a slot in the claps. I've done this mod on my 8kg KT and it have never failed, not even under heavy snow conditions. I think this baby will be at least 10kg when finnished. Easy mod and at a low cost.
Yes the plan it to fit it with recoil, flash an IR system when time and money alow it. (Hopefully next month or so)
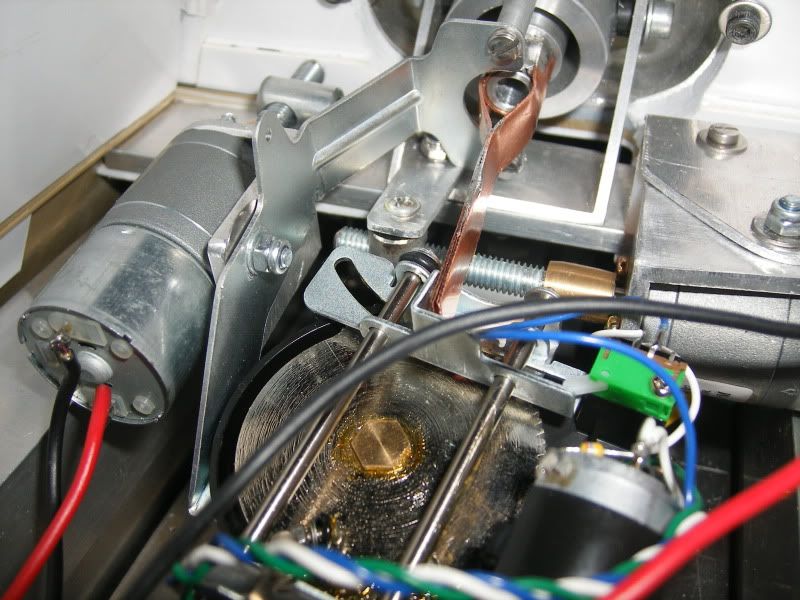
The elevation unit will be like the traverse, but I need the tamiya recoilbracket to fit it. The idea is borrowed from the Wecohe JT traverse kit, but mine is much stronger with bigger motors etc.

I also made bumpstops on the first and last pair of roadwheels like the original.
It will also get the Asiatam metal roadwheels like my KT, I simply love those wheels! They just need small rework to take 2 ballbearings in each wheel.
10-16-2012, 05:23 AM
#13
Senior Member
Thread Starter
Join Date: Sep 2009
Location: Hegra, NORWAY
Posts: 167
Likes: 0
Received 0 Likes
on
0 Posts
Woooow! Long time since last post. Not that much done really, and far from complete.
New interior. Speaker with a big S. Yes its loud!
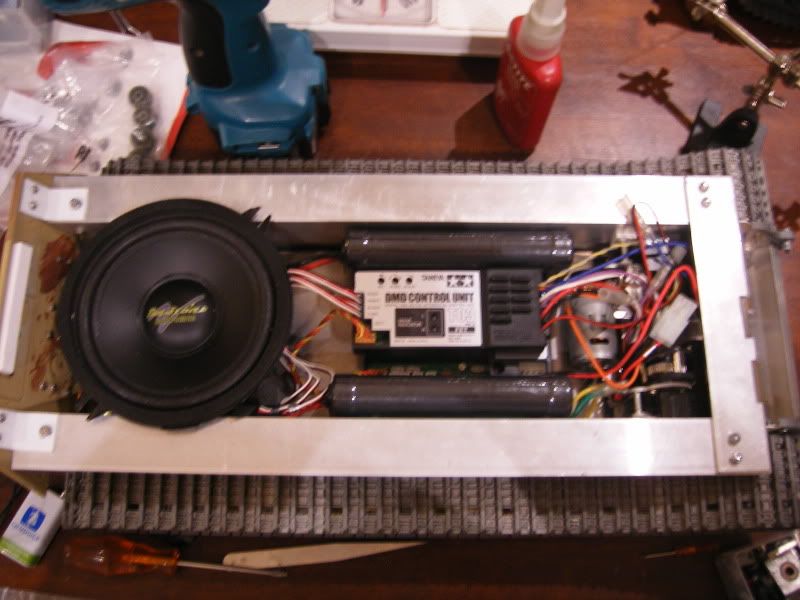
Functionable rear door.
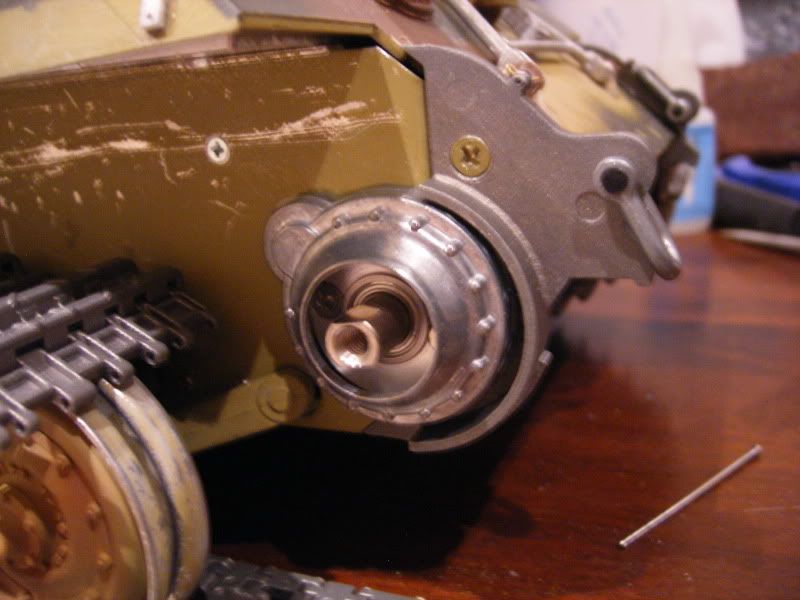
Asiatam tiger 1 hub with support bearing and retainer from Rctank.de
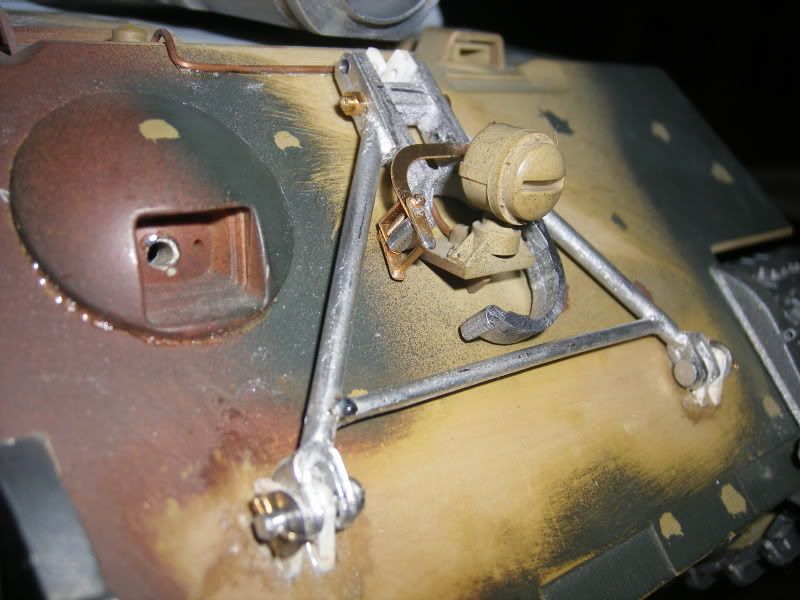
Periscopes.
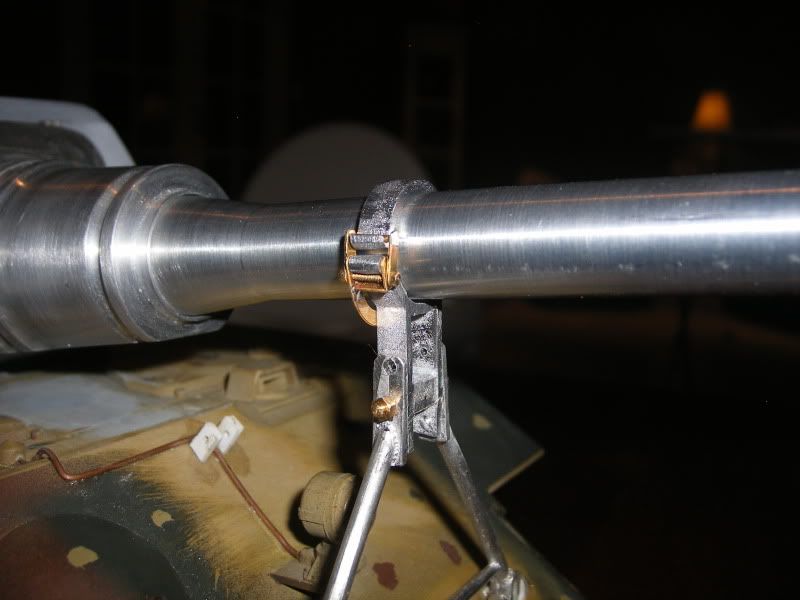
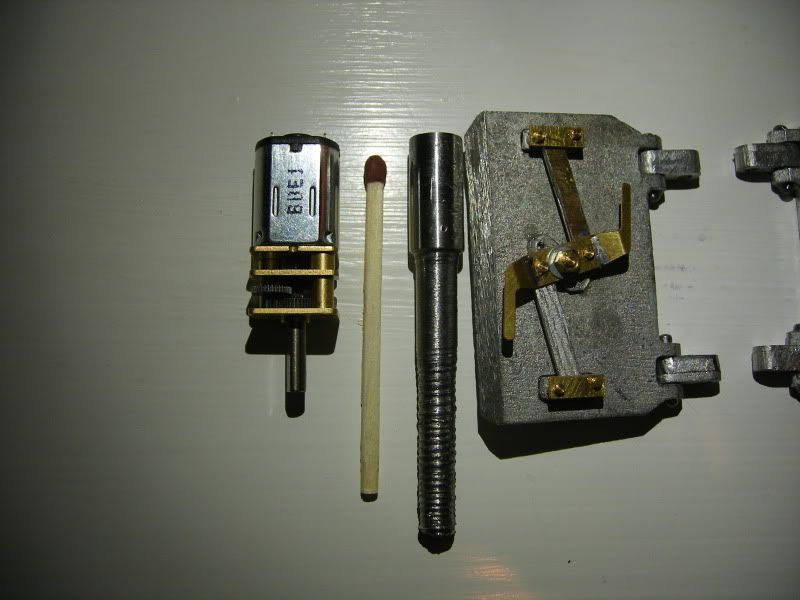
New elevation and traverse motors, old were a bit to big and limited the barrel movement. The screw is destroyed due to faulty tools.
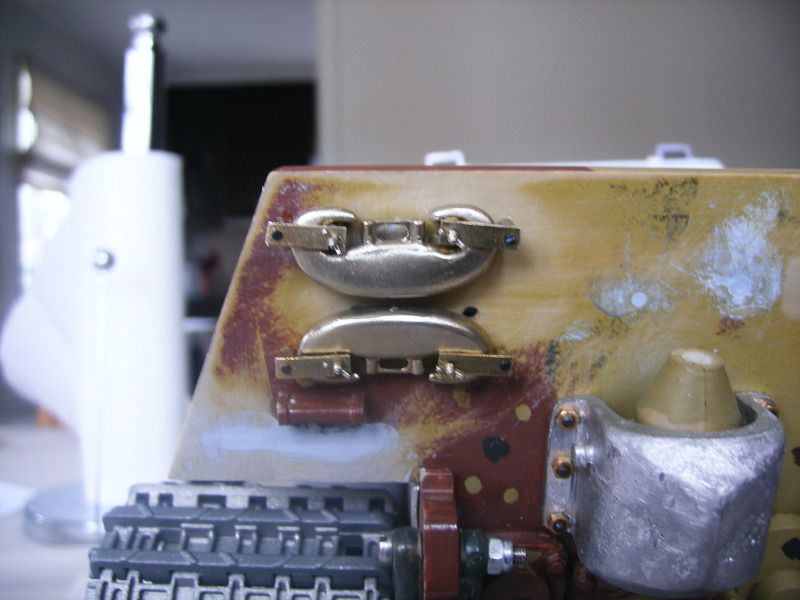
New C hooks and in correct position. Everything is working.
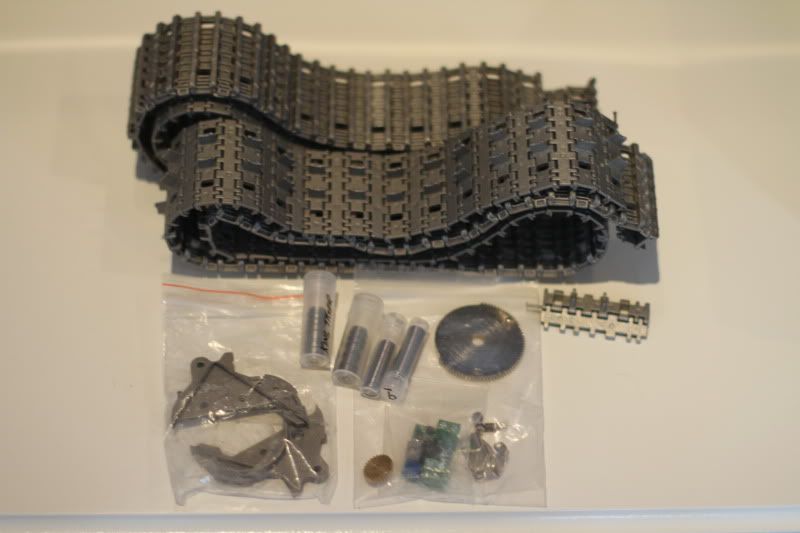
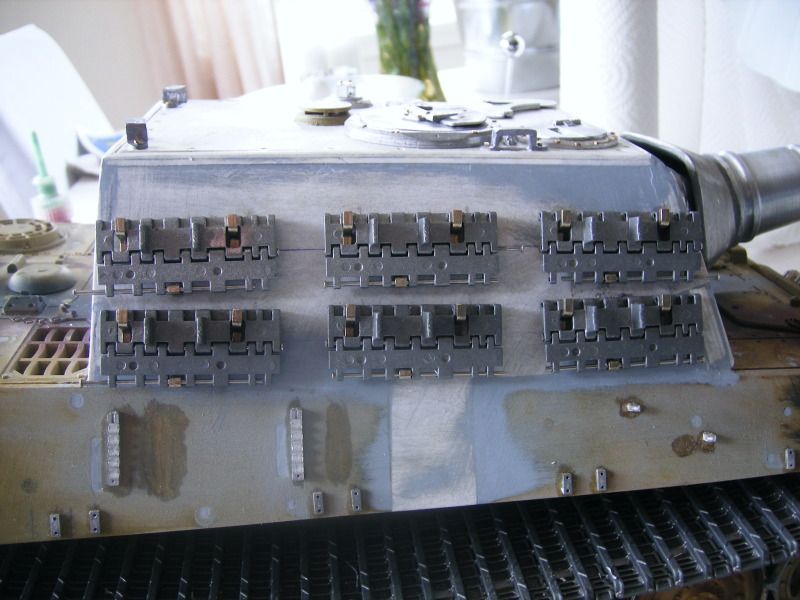
Double sets of trackhangers from ETO. Wechoe was crap and was missing lots of parts.
Almost ready for some Mr. surfacer 500 and filler. Need to modify and put on the metalwheels from Asiatam first.

Did a short test run with a curious kid present
[youtube]http://www.youtube.com/watch?v=zEHw7fr-jrc&feature=g-upl[/youtube]
[youtube]http://www.youtube.com/watch?v=TURd4OfxdHA&feature=g-upl[/youtube]
New interior. Speaker with a big S. Yes its loud!
Functionable rear door.
Asiatam tiger 1 hub with support bearing and retainer from Rctank.de
Periscopes.
New elevation and traverse motors, old were a bit to big and limited the barrel movement. The screw is destroyed due to faulty tools.
New C hooks and in correct position. Everything is working.
Double sets of trackhangers from ETO. Wechoe was crap and was missing lots of parts.
Almost ready for some Mr. surfacer 500 and filler. Need to modify and put on the metalwheels from Asiatam first.
Did a short test run with a curious kid present
[youtube]http://www.youtube.com/watch?v=zEHw7fr-jrc&feature=g-upl[/youtube]
[youtube]http://www.youtube.com/watch?v=TURd4OfxdHA&feature=g-upl[/youtube]
10-16-2012, 06:01 AM
#14
Beautiful, monster of a tank!  I want one too!
The only thing I would change is the gearbox noise.
I hope the kid didn't get any splinters!
~ Jeff
I want one too! The only thing I would change is the gearbox noise.
I hope the kid didn't get any splinters!
~ Jeff
 10-16-2012, 08:07 AM
#18
Senior Member
Thread Starter
Join Date: Sep 2009
Location: Hegra, NORWAY
Posts: 167
Likes: 0
Received 0 Likes
on
0 Posts
ORIGINAL: Panther F
Beautiful, monster of a tank! I want one too!
The only thing I would change is the gearbox noise.
I hope the kid didn't get any splinters!
~ Jeff
Beautiful, monster of a tank!
I want one too! The only thing I would change is the gearbox noise.
I hope the kid didn't get any splinters!
~ Jeff
Thanks! Actually the gearboxes are Tamiyas with 3:1 gear reduction. Impact is by far more noisy. It allready had new gearboxes when I bought it so this is what I got to play with for now.
10-16-2012, 08:10 AM
#19
Senior Member
Thread Starter
Join Date: Sep 2009
Location: Hegra, NORWAY
Posts: 167
Likes: 0
Received 0 Likes
on
0 Posts
ORIGINAL: mustclime
looks great, I love the gun rc stuff...
looks great, I love the gun rc stuff...

Maybe I will lower the front deck to get the correct proportions. I'm leaning more and more towards that.
10-16-2012, 08:14 AM
#20
Senior Member
Thread Starter
Join Date: Sep 2009
Location: Hegra, NORWAY
Posts: 167
Likes: 0
Received 0 Likes
on
0 Posts
ORIGINAL: karel47
nice conversion well done quality build
nice conversion well done quality build
The plan was a budget build, but it didn't turn out that way...
10-16-2012, 08:33 AM
#21


Join Date: Oct 2009
Location: ninove - outeroost vlaanderen, BELGIUM
Posts: 2,610
Likes: 0
Received 0 Likes
on
0 Posts
yes they all do in the end , conversions are growing ... needing money every time but in the end the result is pure ... personaly upgrading and so
10-16-2012, 08:47 AM
#22
ORIGINAL: GeirMagne
Thanks! I see you edited the message before I got around and aswered it
Maybe I will lower the front deck to get the correct proportions. I'm leaning more and more towards that.
ORIGINAL: mustclime
looks great, I love the gun rc stuff...
looks great, I love the gun rc stuff...
Maybe I will lower the front deck to get the correct proportions. I'm leaning more and more towards that.
10-16-2012, 10:36 AM
#23
Join Date: Oct 2009
Location: ninove - outeroost vlaanderen, BELGIUM
Posts: 2,610
Likes: 0
Received 0 Likes
on
0 Posts
i did it also lowering the forecompartment i was notice it when the superstructure almost was finished was not awere of it
i lowered it 5mm
i lowered it 5mm
10-16-2012, 10:59 AM
#24
Great build. I have a spare Tiger II lower hull I would like to turn into a JagdTiger. Do you have any photos of the inside of the lower hull showing how you reinforced the added section you used to lengthen the lower hull? Did you lay a section of aluminum plate across the the section that was added and just tie them together with the counter sunk screws to the hull sides and bottom?
Thanks,
Rudy
Thanks,
Rudy
10-16-2012, 11:25 AM
#25
Senior Member
Thread Starter
Join Date: Sep 2009
Location: Hegra, NORWAY
Posts: 167
Likes: 0
Received 0 Likes
on
0 Posts
I'm sorry I don't have a picture of the bare inside. But thats exactly how I did it. And since this is a old version it was missing the inner mud guards, which I made new longer ones out of 3mm thick 30x30mm angle alloy shown in the top of this thread.