Go Back  RCU Forums > RC Cars, Buggies, Trucks, Tanks and more > RC Tanks
Taigen tiger (early version) >

Taigen tiger (early version)

Community
Search
Notices
RC Tanks Discuss all aspects of rc tank building and driving here!

Taigen tiger (early version)

Thread Tools
 
Search this Thread
 
Old 10-24-2013, 03:33 AM
  #26  
Senior Member
 
Join Date: Apr 2012
Location: DOUGLASVILLE, GA
Posts: 194
Likes: 0
Received 1 Like on 1 Post
Default

That paint job looks fantastic! Good work!
Old 10-24-2013, 05:42 AM
  #27  
 
Join Date: Dec 2007
Location: Okinawa, JAPAN
Posts: 2,900
Likes: 0
Received 5 Likes on 5 Posts
Default

looks awesome...I like the extra little details, particularly the tow cables. Is that red oxide a primer?
Old 10-24-2013, 07:32 PM
  #28  
Member
 
Join Date: Mar 2013
Location: Conneaut, OH
Posts: 65
Likes: 0
Received 0 Likes on 0 Posts
Default

Great work! I really like the tri color and all the details.
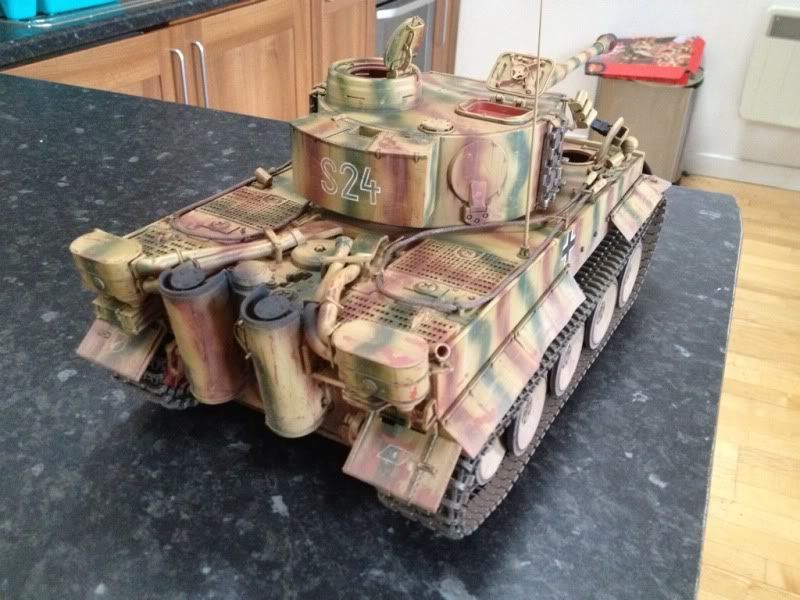
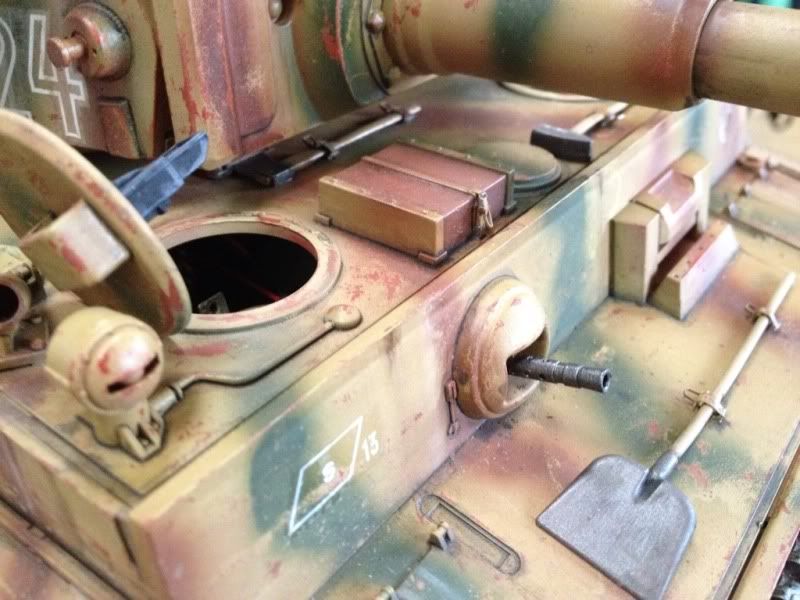
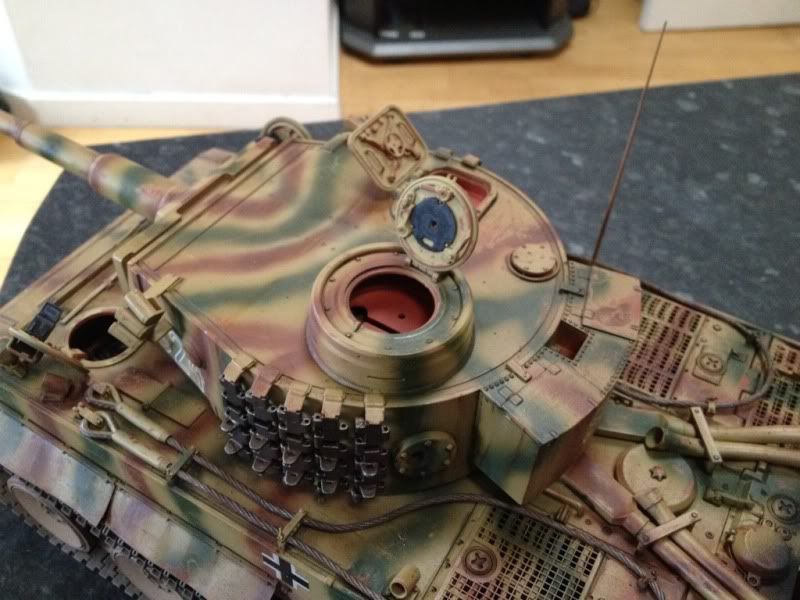
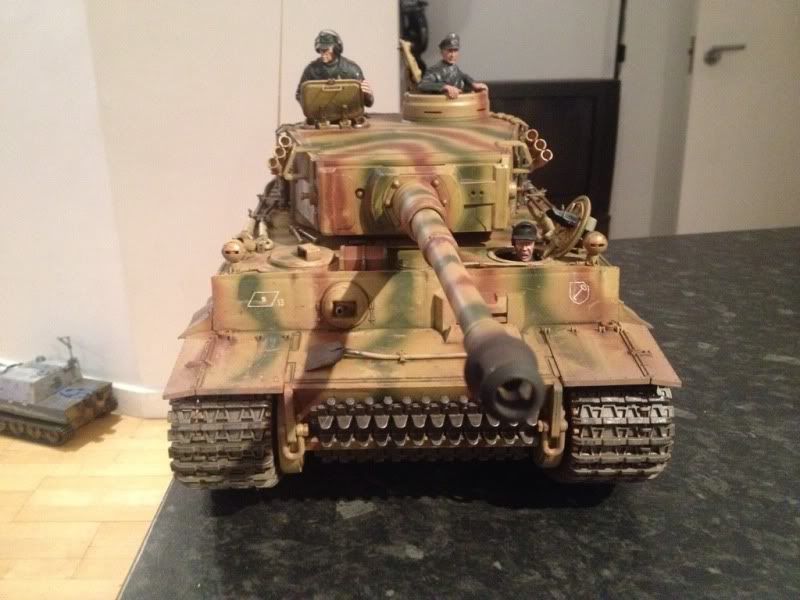
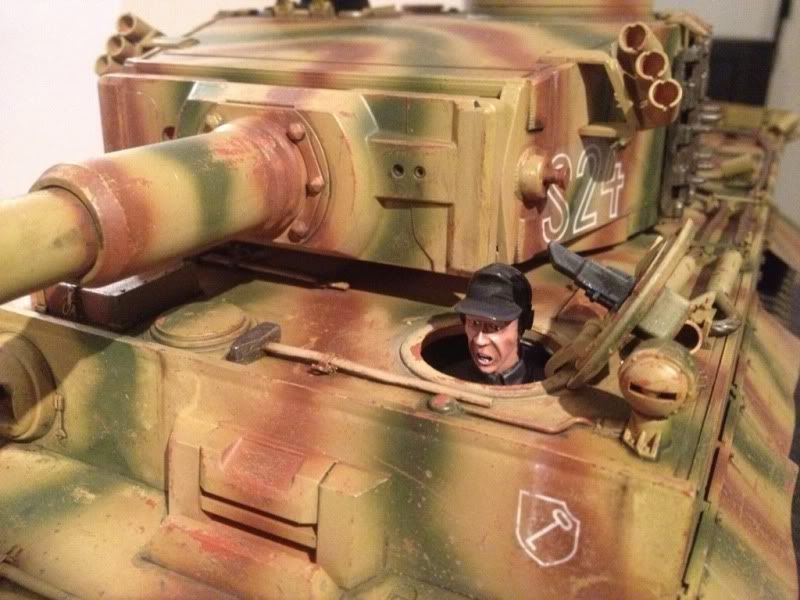
A few questions on the model itself. What are the canisters and hoses on the back and rear deck? Are they only on the early model tiger? Also, I'm assuming that's the actual location for the antenna? Was there actually one on the back? I'm currently working on a late model tiger and trying to learn the difference between the two as I go but the pictures are so varied.
Thanks,
Terry
Old 10-25-2013, 08:31 AM
  #29  
 
Green Amphibian's Avatar
 
Join Date: Jan 2009
Location: King, NC
Posts: 1,567
Likes: 0
Received 0 Likes on 0 Posts
Default

The canisters and hoses were for the fifel air filters. The radio antenna was located on the starboard side just a little back from center of the turret.

Herman
Old 10-25-2013, 11:03 AM
  #30  
Member
 
Join Date: Mar 2013
Location: Conneaut, OH
Posts: 65
Likes: 0
Received 0 Likes on 0 Posts
Default

Were the canisters used on the late model?
Old 10-25-2013, 07:29 PM
  #31  
 
Green Amphibian's Avatar
 
Join Date: Jan 2009
Location: King, NC
Posts: 1,567
Likes: 0
Received 0 Likes on 0 Posts
Default

No, and the hoses were eliminated also. The air intake was a bit different too.

Herman
Old 10-26-2013, 01:32 AM
  #32  
Thread Starter
 
Join Date: Mar 2010
Location: , UNITED KINGDOM
Posts: 2,384
Received 23 Likes on 14 Posts
Default

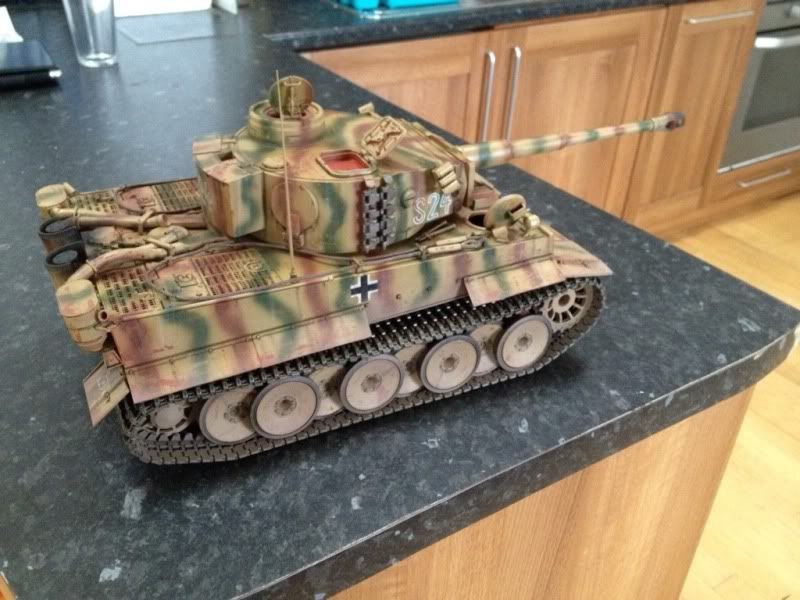
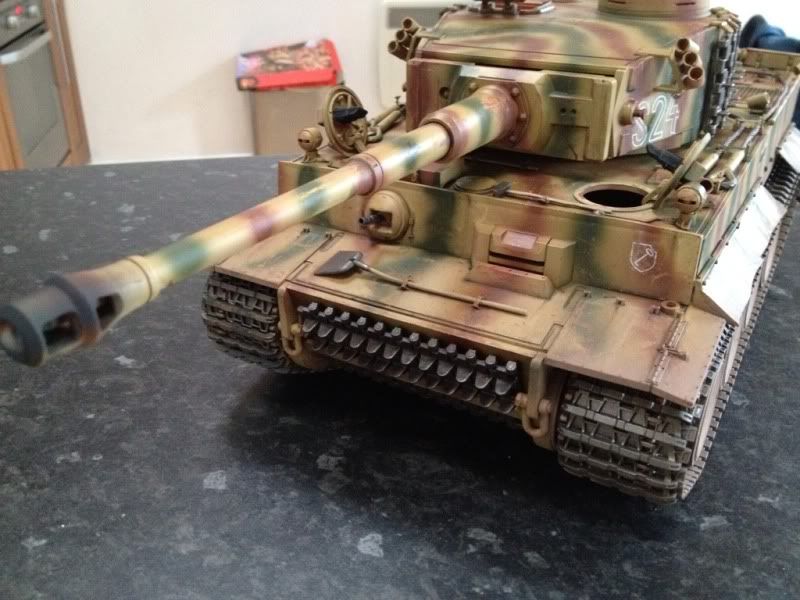
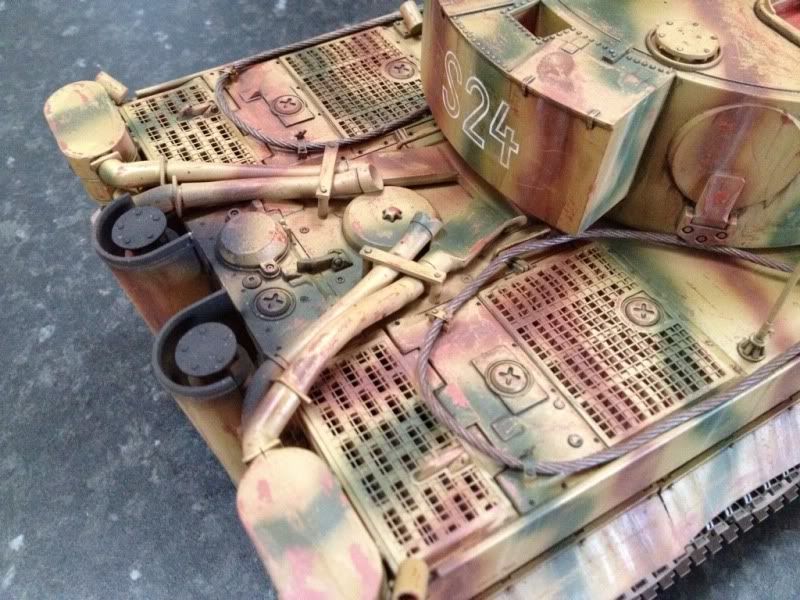
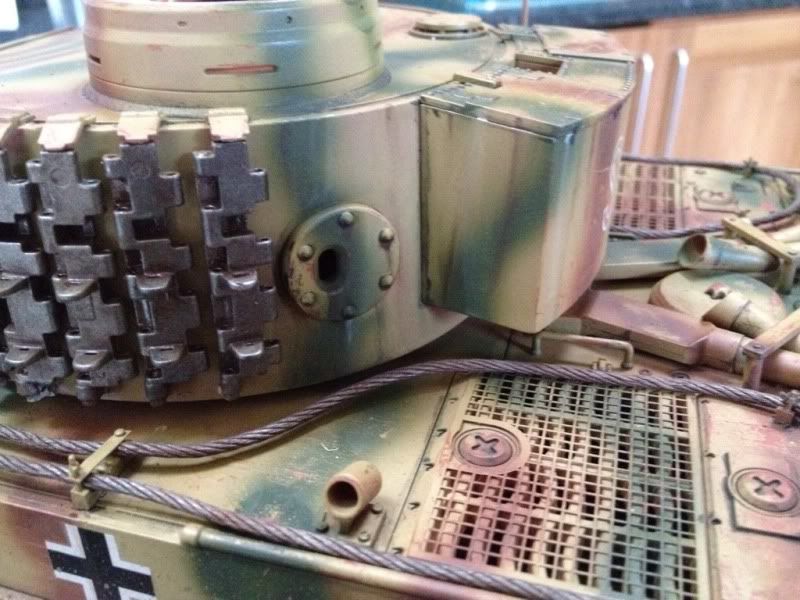
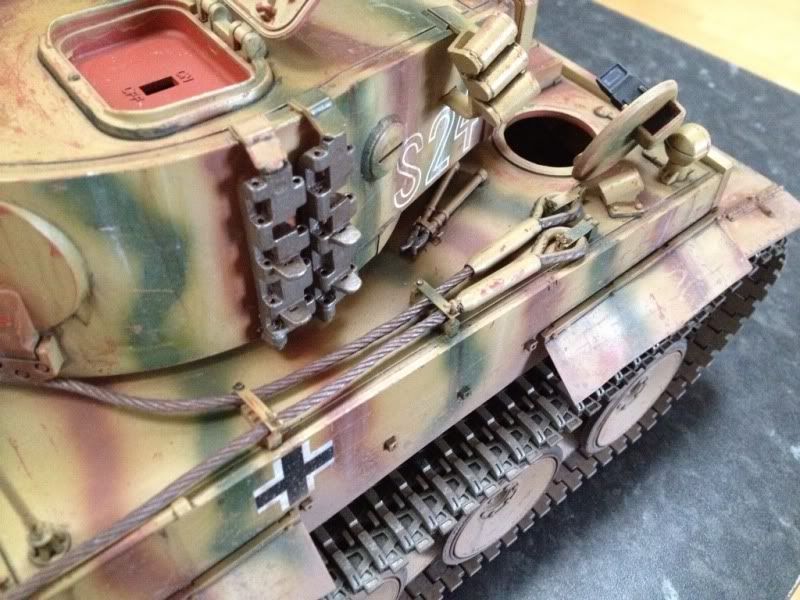
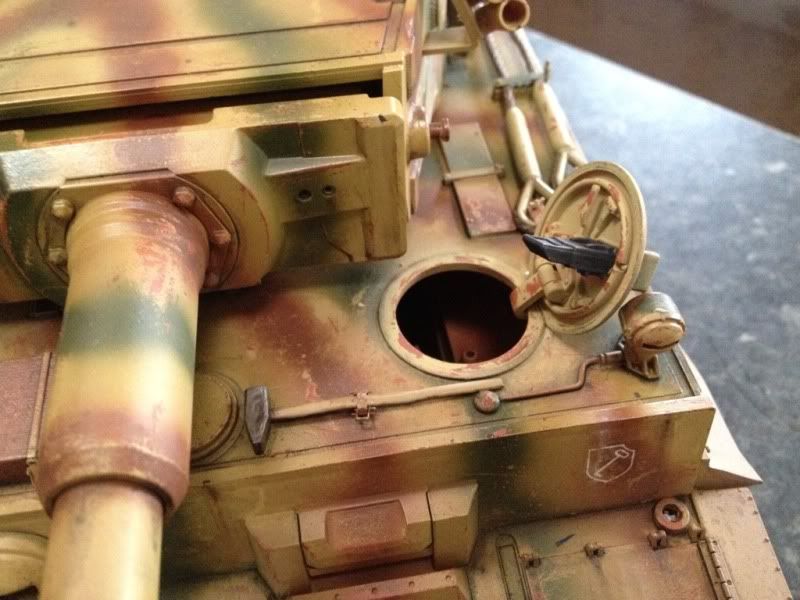
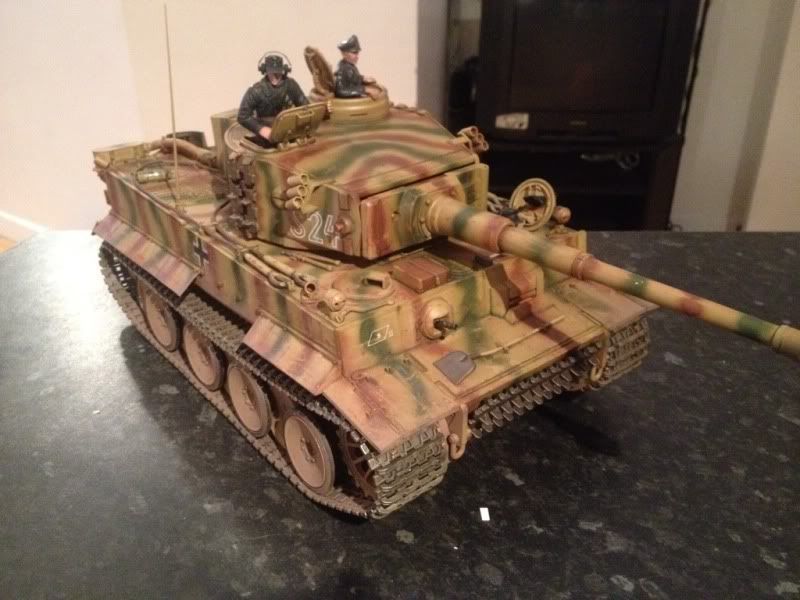
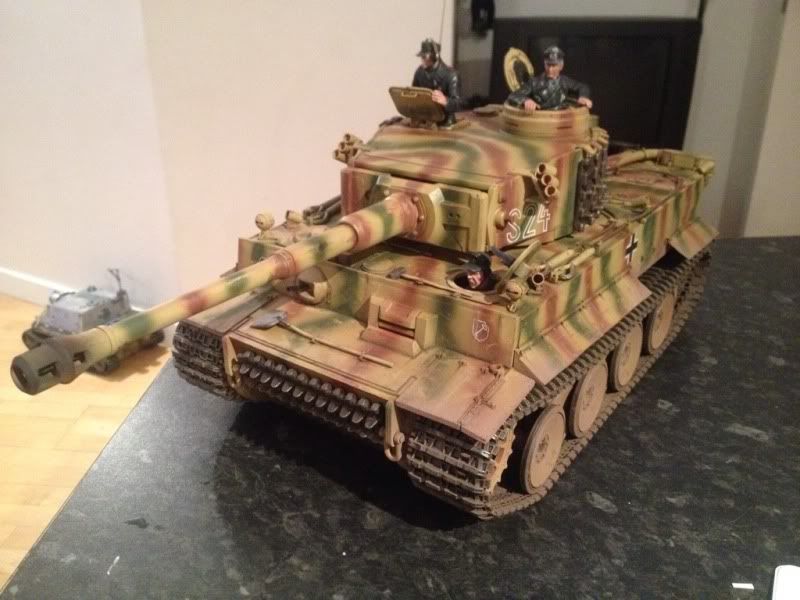
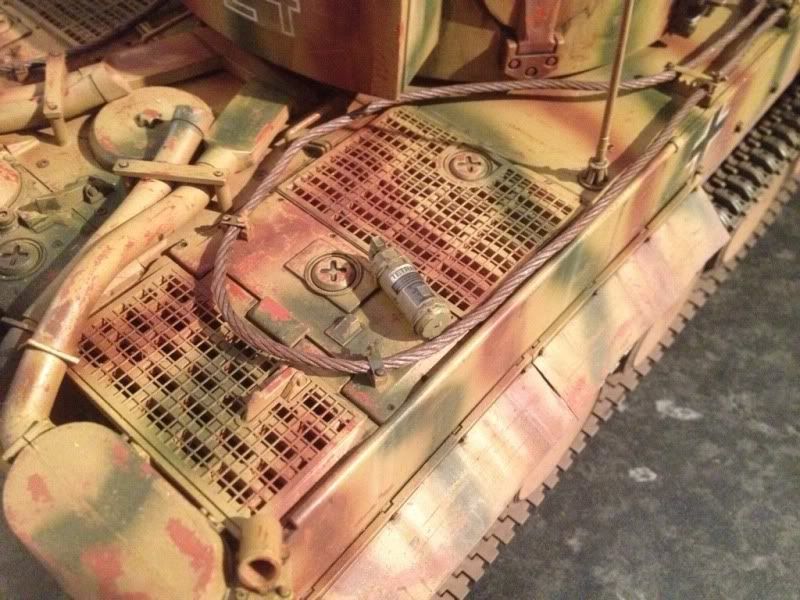
Well the end is almost in site, paint job is pretty much finished; just the barrel cleaning rods and the sprocket hub caps to do. Since the last update i've completed the pin washes and applied streaking grime, some rain marks and very light rust marks on the sheet steel parts (skirts and exhaust covers). I've also dirtied the exhausts and the muzzle barrel. To finish I've very lightly oversprayed flat earth and added some earth effects on the running gear, the fenders and mud guards.


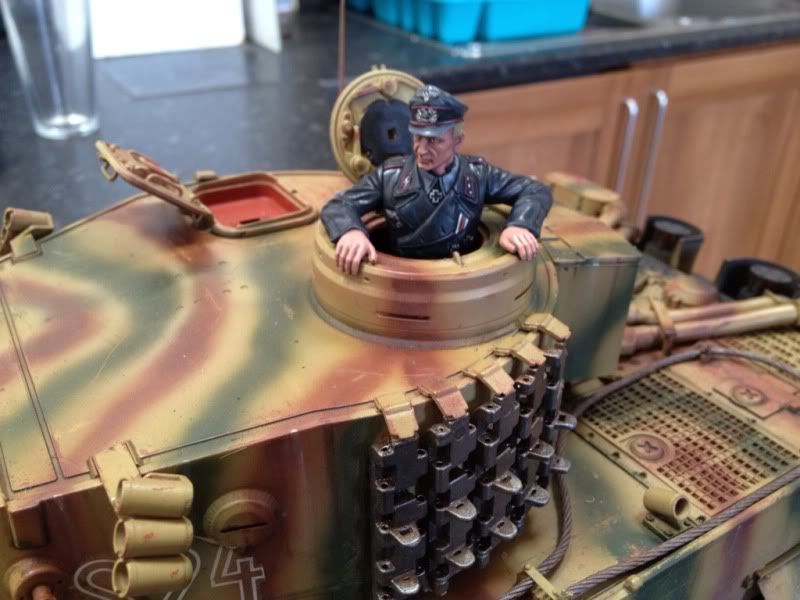
Next update will be in the display cabinet with a full crew (hopefully).


Old 10-26-2013, 03:17 PM
  #33  
Member
 
9nene's Avatar
 
Join Date: Nov 2005
Location: , FRANCE
Posts: 64
Likes: 0
Received 0 Likes on 0 Posts
Default

really beautiful good job
Old 10-27-2013, 07:27 AM
  #34  
 
Join Date: Jul 2013
Location: sayreville, NJ
Posts: 378
Likes: 0
Received 0 Likes on 0 Posts
Default

Yea, that is gorgeous !! I absolutely love the paint.
Old 10-27-2013, 08:19 AM
  #35  
Senior Member
 
smittyrob's Avatar
 
Join Date: Jan 2008
Location: Abbotsford, BC, CANADA
Posts: 342
Likes: 0
Received 3 Likes on 3 Posts
Default

Really great job, wish I could get around to finishing some of mine.
Old 10-27-2013, 09:20 AM
  #36  
Thread Starter
 
Join Date: Mar 2010
Location: , UNITED KINGDOM
Posts: 2,384
Received 23 Likes on 14 Posts
Default

Cheers guys! It's been a long road but she's finally done!


Video to follow!
Old 10-31-2013, 09:28 AM
  #37  
Thread Starter
 
Join Date: Mar 2010
Location: , UNITED KINGDOM
Posts: 2,384
Received 23 Likes on 14 Posts
Default

Thanks guys! As promised heres a video and some outside pics.


[youtube]http://www.youtube.com/watch?v=ZnID_2j1h4M[/youtube]


Old 10-31-2013, 01:15 PM
  #38  
Senior Member
 
Join Date: Feb 2008
Location: hillsdale, NJ
Posts: 3,143
Likes: 0
Received 1 Like on 1 Post
Default

Every time I look at your tanks I am amazed by your detail. I am in awe. Fantastic...Cheers, Bob
Old 10-31-2013, 01:53 PM
  #39  
Thread Starter
 
Join Date: Mar 2010
Location: , UNITED KINGDOM
Posts: 2,384
Received 23 Likes on 14 Posts
Default

Bob thanks very much for the kind words!
Old 02-14-2014, 01:03 PM
  #40  
 
tinviper's Avatar
 
Join Date: Jan 2014
Posts: 46
Likes: 0
Received 1 Like on 1 Post
Default

I have the same tow cables and im wondering how there glued in as they seem to be about an inch too long. Other then that there perfect.
Old 02-14-2014, 02:36 PM
  #41  
Thread Starter
 
Join Date: Mar 2010
Location: , UNITED KINGDOM
Posts: 2,384
Received 23 Likes on 14 Posts
Default

Hey thanks very much! Basically I had to cut the down to fit. I snipped them at one end then drilled the cable out the tinned the cable down to size ad glued it back in place. Just be careful you don't cut too much off, ruined a cable like that!
Old 02-16-2014, 07:28 AM
  #42  
YHR
Senior Member
 
YHR's Avatar
 
Join Date: Nov 2006
Location: Grande Prairie, AB, CANADA
Posts: 8,976
Likes: 0
Received 4 Likes on 4 Posts
Default

Very Nice. Where did you get the snap latches from?
Old 02-16-2014, 08:07 AM
  #43  
Thread Starter
 
Join Date: Mar 2010
Location: , UNITED KINGDOM
Posts: 2,384
Received 23 Likes on 14 Posts
Default

Cheers dan! This thread being resurected makes me wish id never sold it (although I did pick up a full option tiger for a bit over a third of what I sold this for) What are snap latches?
Old 02-16-2014, 08:32 AM
  #44  
YHR
Senior Member
 
YHR's Avatar
 
Join Date: Nov 2006
Location: Grande Prairie, AB, CANADA
Posts: 8,976
Likes: 0
Received 4 Likes on 4 Posts
Default

They are used on the Battery box on this Tiger

Cheers
Old 02-18-2014, 09:00 AM
  #45  
 
Imex-Erik's Avatar
 
Join Date: Mar 2013
Location: Brooksville , FL
Posts: 3,216
Received 37 Likes on 33 Posts
Default

Looking great! I really like the paint!
Old 02-18-2014, 09:26 AM
  #46  
Thread Starter
 
Join Date: Mar 2010
Location: , UNITED KINGDOM
Posts: 2,384
Received 23 Likes on 14 Posts
Default

Hey dan they're from the aber German clasps and latches PE set all fully functiona. Cheers Erik!
Old 02-23-2014, 09:45 AM
  #47  
Member
 
Join Date: Mar 2013
Location: Conneaut, OH
Posts: 65
Likes: 0
Received 0 Likes on 0 Posts
Default

It looks great! Any chance you want to paint mine?
Old 02-23-2014, 11:02 AM
  #48  
Thread Starter
 
Join Date: Mar 2010
Location: , UNITED KINGDOM
Posts: 2,384
Received 23 Likes on 14 Posts
Default

The postage might be a bit expensive!
Old 02-23-2014, 01:48 PM
  #49  
Member
 
Join Date: Mar 2013
Location: Conneaut, OH
Posts: 65
Likes: 0
Received 0 Likes on 0 Posts
Default

By the looks of your work it may be worth it! Again, great job.

Terry
Old 02-24-2014, 09:03 AM
  #50  
Thread Starter
 
Join Date: Mar 2010
Location: , UNITED KINGDOM
Posts: 2,384
Received 23 Likes on 14 Posts
Default

Well terry I'm happy to undertake commission work shoot me a pm if you ever ddo want something painting

Posting Rules
You may not post new threads
You may not post replies
You may not post attachments
You may not edit your posts

BB code is On
Smilies are On
[IMG] code is On
HTML code is Off
Trackbacks are Off
Pingbacks are Off
Refbacks are On


Contact Us - Manage Preferences Archive - Advertising - Cookie Policy - Privacy Statement - Terms of Service

Copyright © 2024 MH Sub I, LLC dba Internet Brands. All rights reserved. Use of this site indicates your consent to the Terms of Use.