


Here I go again! (tamiya early tiger build)
 04-11-2014, 10:40 AM
#26

Thread Starter
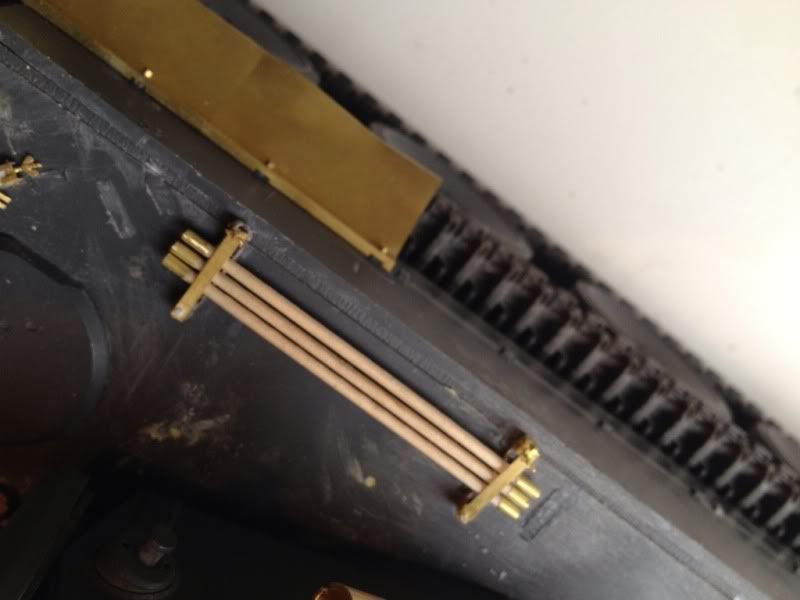
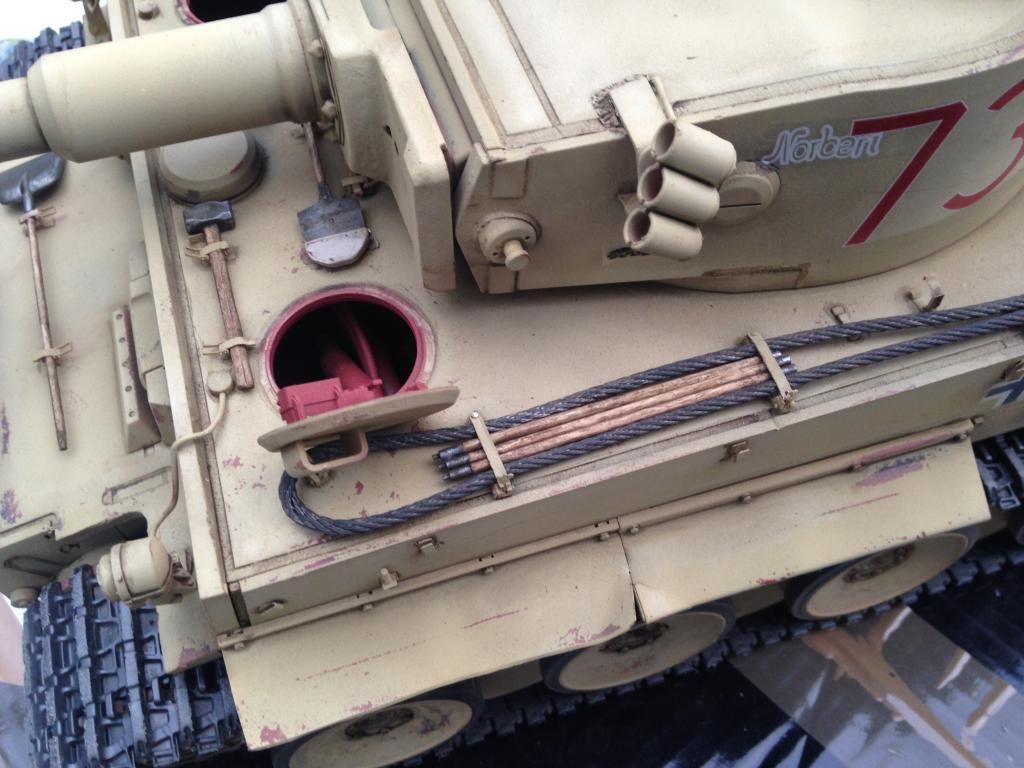
A tiny (literally) update for you folks, I've finished the clasps on the rear stowage bin and started on the barrel cleaning rods. The clasps took a good few hours but now I've got the hang of it I'm getting faster!
Cleaning rods:
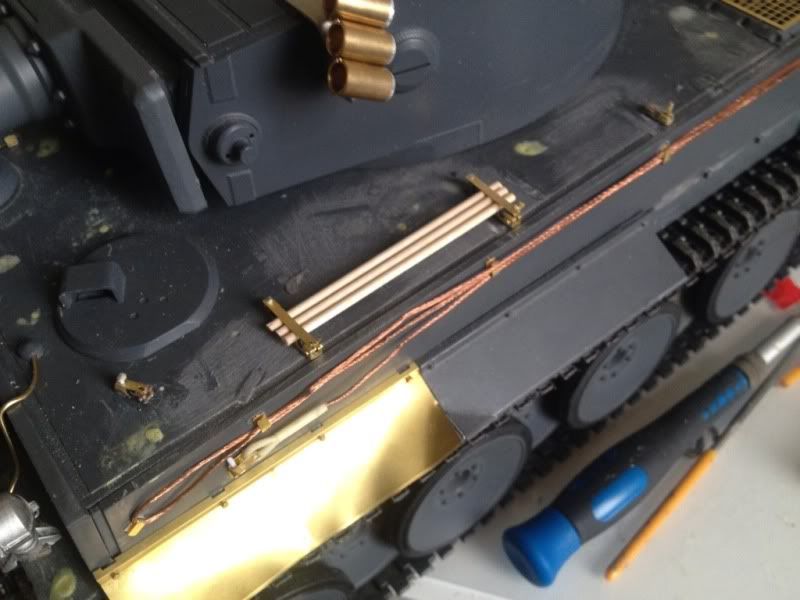
Clamps and clasps: ( yes that's a tiny padlock)

Cleaning rods:
Clamps and clasps: ( yes that's a tiny padlock)
 04-11-2014, 10:54 AM
#27
Looks good Tom!
You almost have me convinced to build my Tamiya TI.
Jeff
You almost have me convinced to build my Tamiya TI.
Jeff
04-11-2014, 11:06 AM
#28
Thread Starter
Cheers Jeff! I was never a fan of the early tiger and it was such a popular subject I avoided for a long time. However I've not seen anyone do a Tunisian tiger with the 501st field mods so it added some more interest for me! The challenge of the photo etch has kept me entertained, each bit is like a mini project. I've enjoyed this build so much I'm doing a later tiger next!
04-11-2014, 11:31 AM
#29
Yeah, I have the Tiger I one the Eastern Front and the Modelers Guide to the Tiger Tank (books) and I was doin' a little studying last night.
Still like my idea using the electronics for my Initial Turret Tiger B build better. (Porsche Turret King Tiger)
Jeff
Still like my idea using the electronics for my Initial Turret Tiger B build better.
(Porsche Turret King Tiger)Jeff
 04-11-2014, 12:59 PM
#33
Thread Starter
Bill, most of it it the voyger tiger photo etch, I've got the taigen PE debris screens, schumo headlights (on scratched bbrass mounts as per 501 pz field mods), schumo tapered aerial and antenna base. I'm also using the tamiya tiger k sprue hatches. I'm trying to get hold of some schumo tow cables but apparently they're discontinued :/

 04-13-2014, 09:35 AM
#35
Thread Starter
Got a fair bit done today, infact he end it almost nigh!
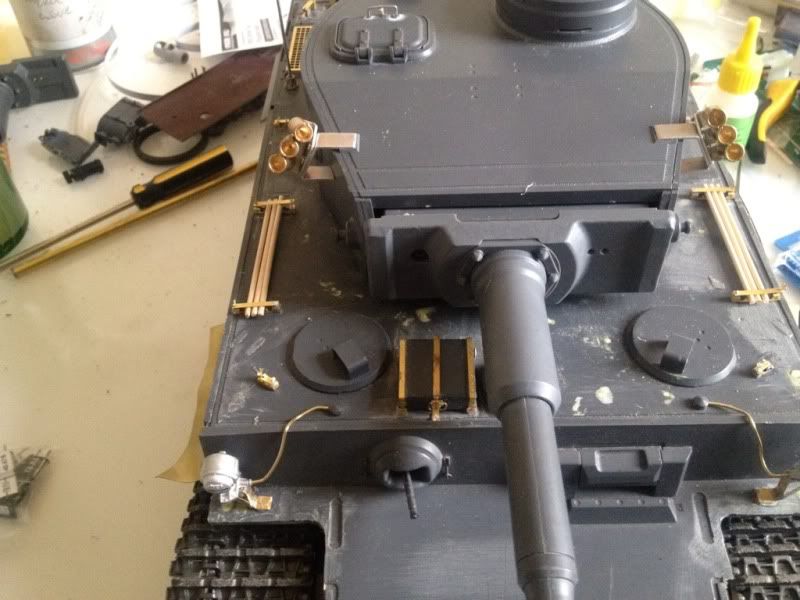
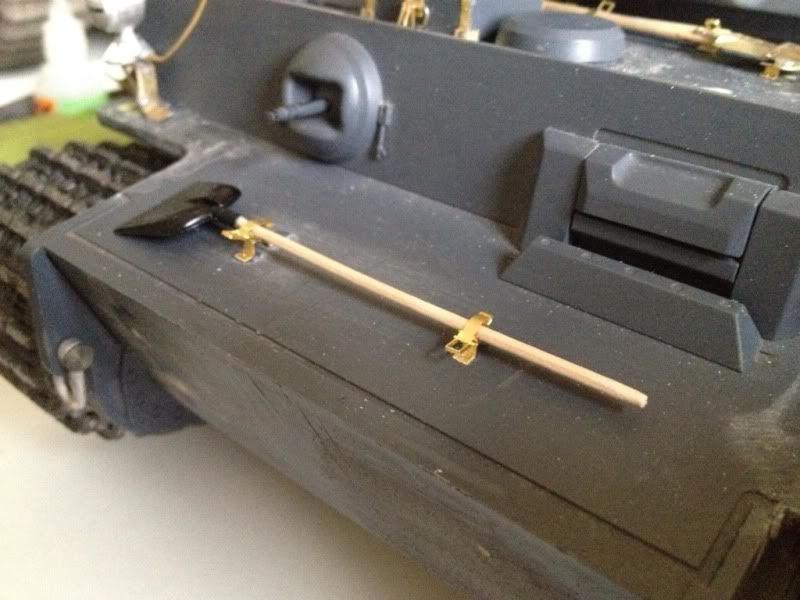
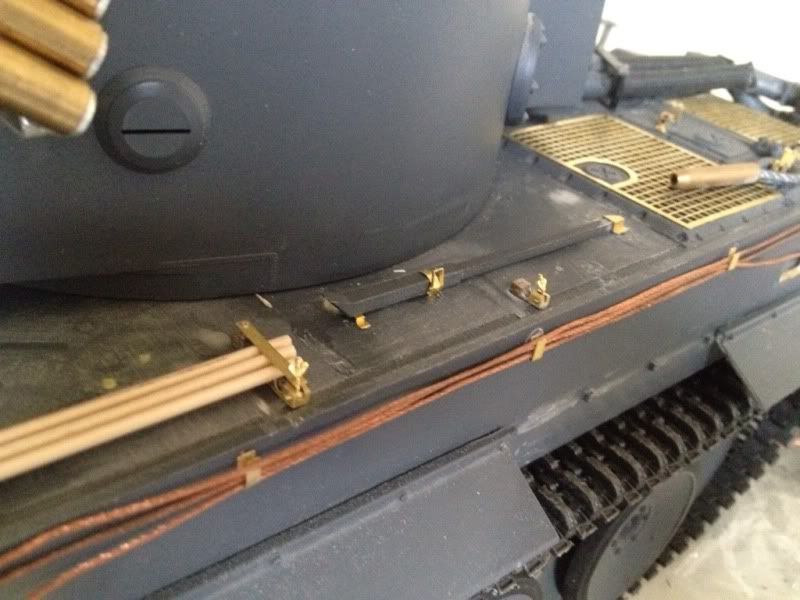
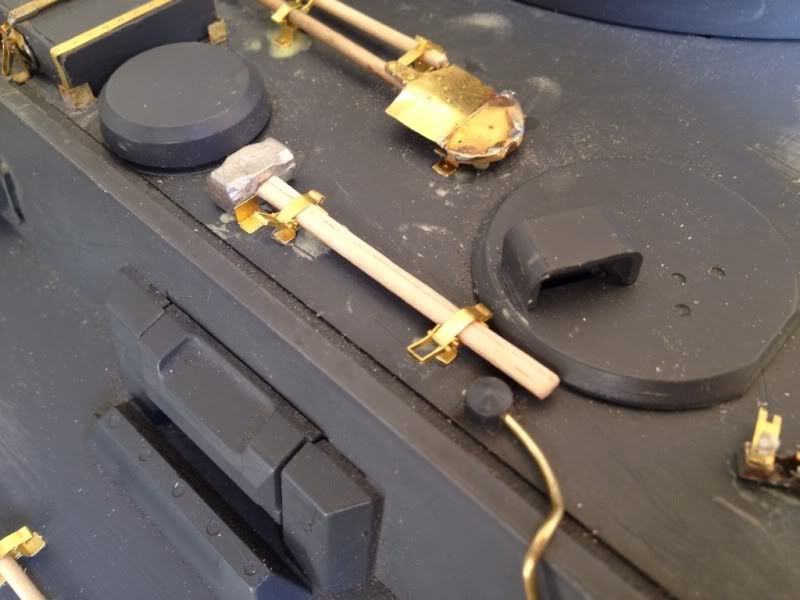
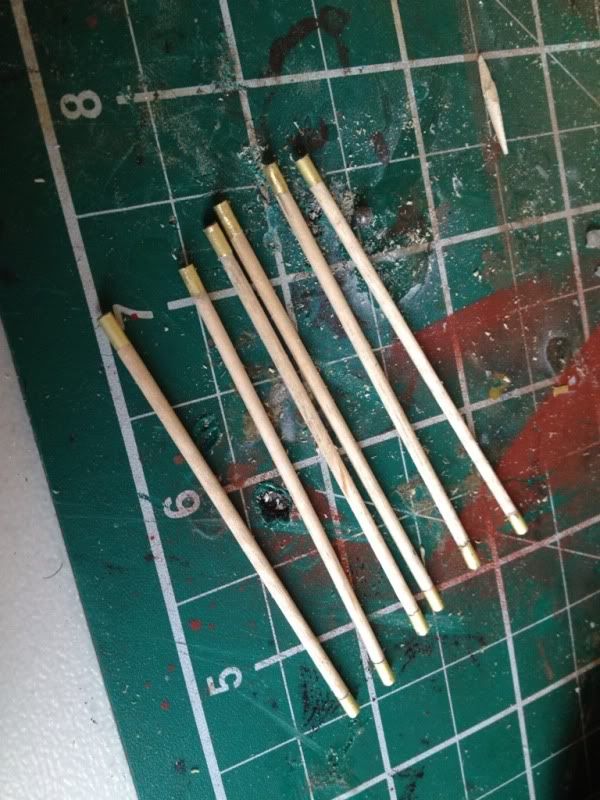
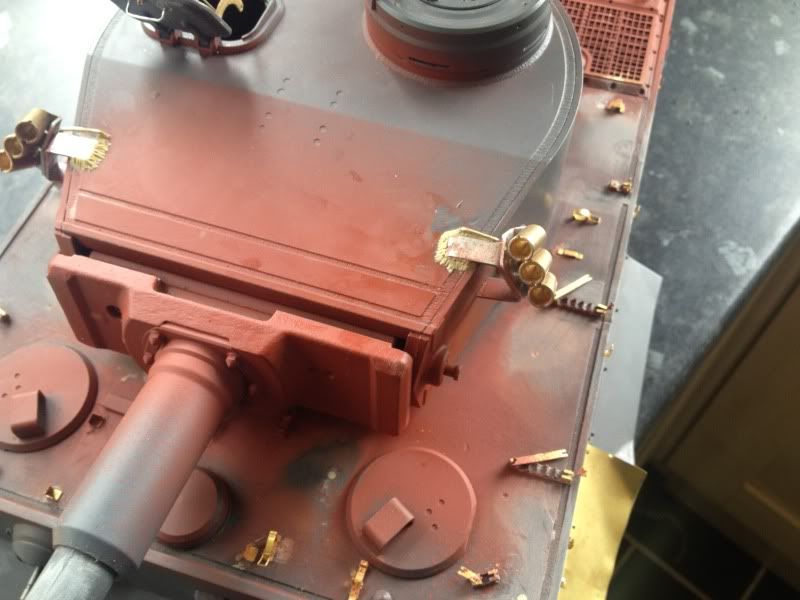
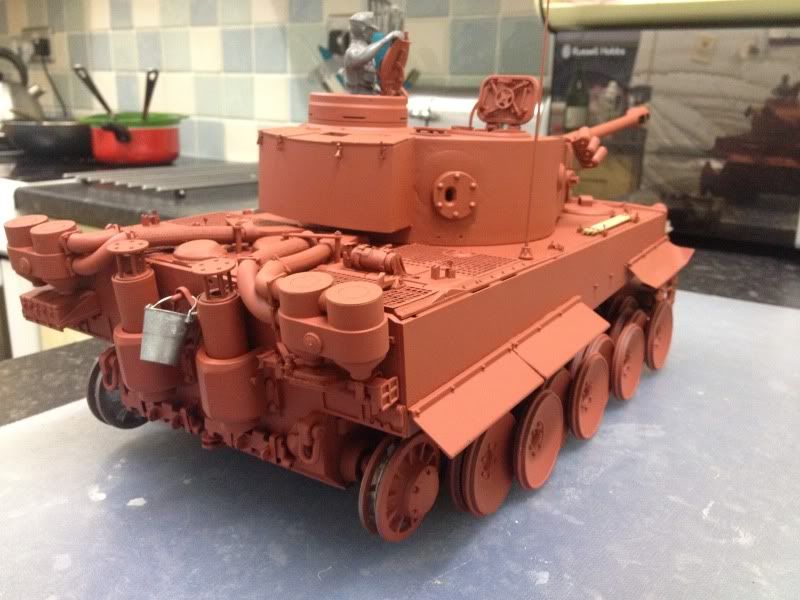
Done all the tools now aside from the bolt cutters (which I have mislaid :/) all have wooden handles. Where cocktail sticks were too thin ( the hammer and axe) I sanded two cocktail sticks slightly flat on one side then super glued together and shaped to my requirements.
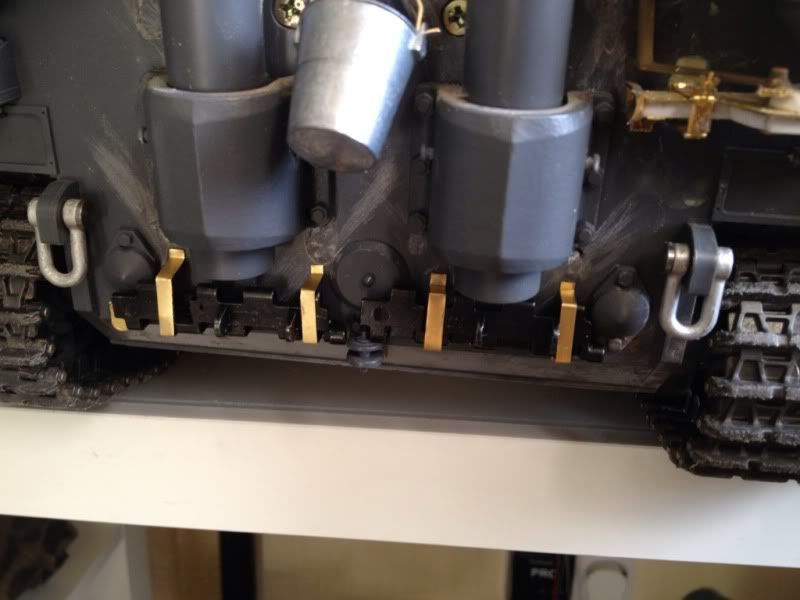
Other work has included repositioning the jack holders and adding some bits I missed first time. I've rebuilt the hooks for the engine access hatches and altered the mesh screens to fit them. I've rebuilt the bottom end of the fire extinguisher as I had the circular bit attached to the extinguisher. In reality it's just a rest. Finally I've added the spare links on the back of the tank.
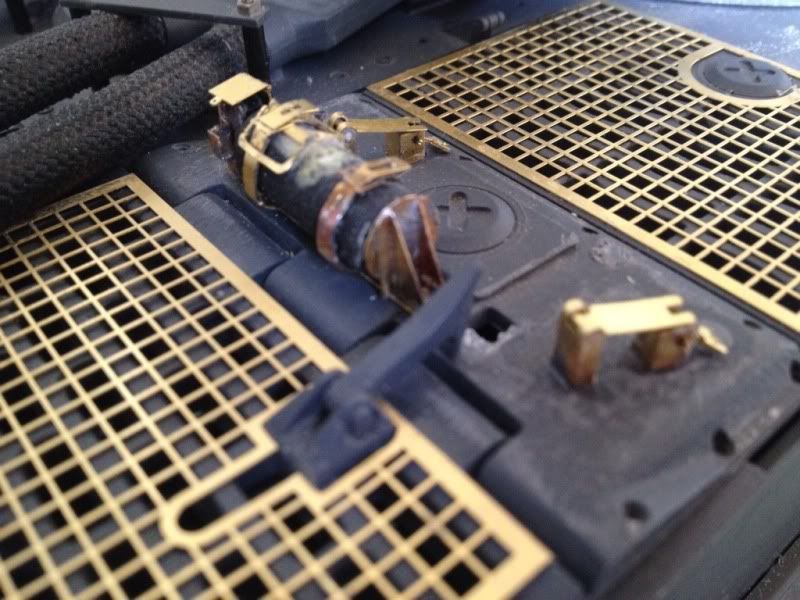
I need to finish the cleaning rods but unfortunately I bought the wrong sized brass tube so they will have to wait. Still they should look good when done!
Done all the tools now aside from the bolt cutters (which I have mislaid :/) all have wooden handles. Where cocktail sticks were too thin ( the hammer and axe) I sanded two cocktail sticks slightly flat on one side then super glued together and shaped to my requirements.
Other work has included repositioning the jack holders and adding some bits I missed first time. I've rebuilt the hooks for the engine access hatches and altered the mesh screens to fit them. I've rebuilt the bottom end of the fire extinguisher as I had the circular bit attached to the extinguisher. In reality it's just a rest. Finally I've added the spare links on the back of the tank.
I need to finish the cleaning rods but unfortunately I bought the wrong sized brass tube so they will have to wait. Still they should look good when done!
 04-18-2014, 01:52 AM
#38
Thread Starter
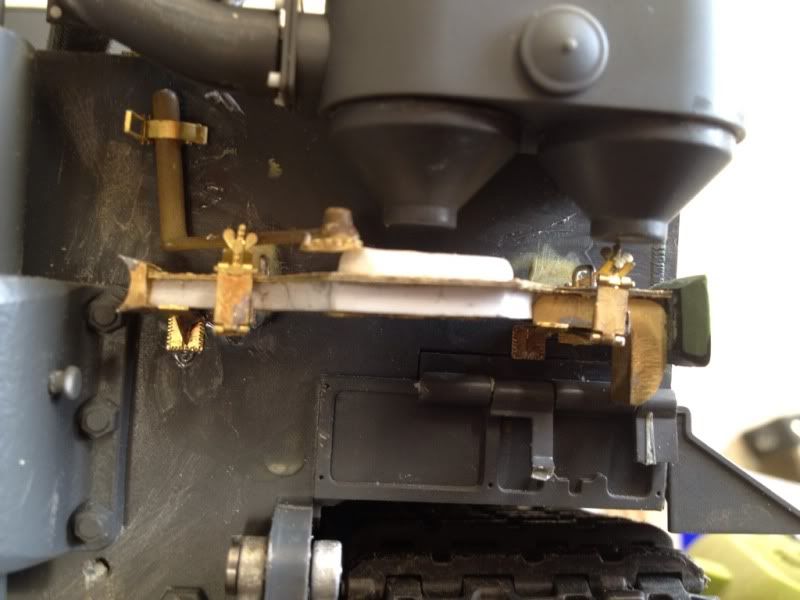
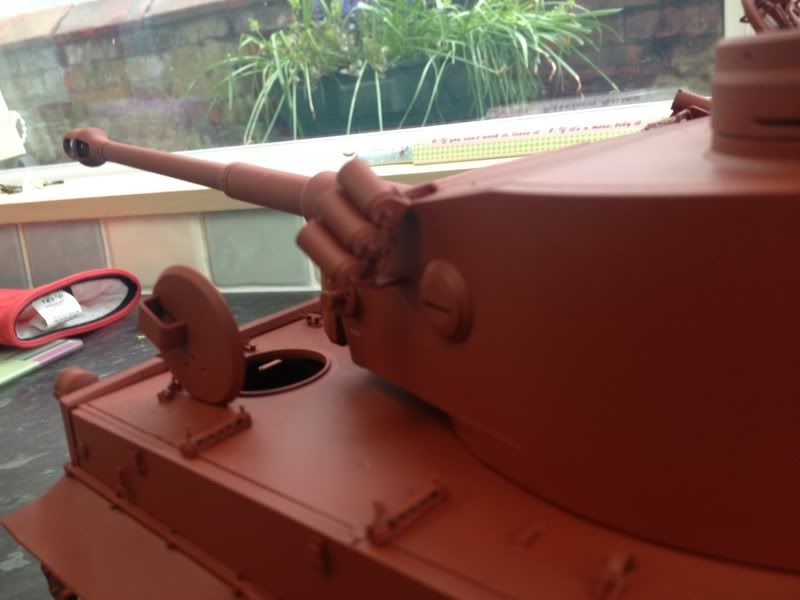
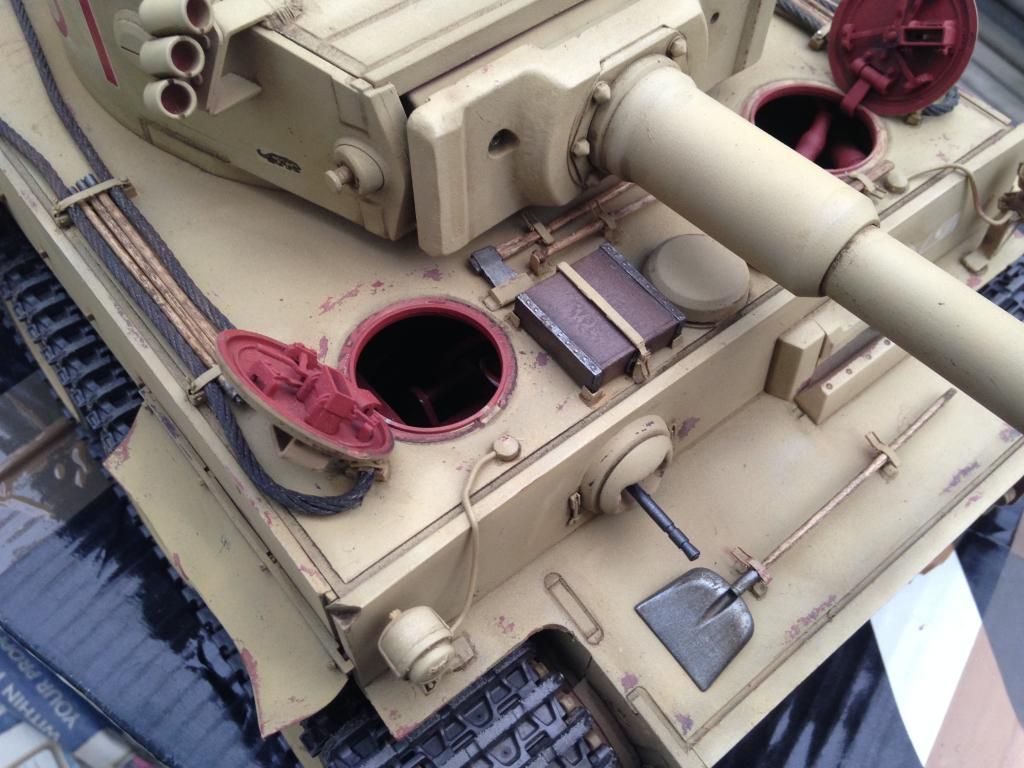
Managed to snatch an hour after work do make some more progress, started to added detal to the barrel cleaning rods. Using cocktail sticks for the wooden bits and 2mm brass tube for the end caps I think they're looking reasonable! I've got some 1mm threaded rod for the one end and will be able to drill holes in the other end so they will actually screw together!
I've also purchased the ak interactive DAK filter, wash and mud set so will be trying my hand at some realising weathering!
I've also purchased the ak interactive DAK filter, wash and mud set so will be trying my hand at some realising weathering!
05-08-2014, 08:30 AM
#39
Thread Starter
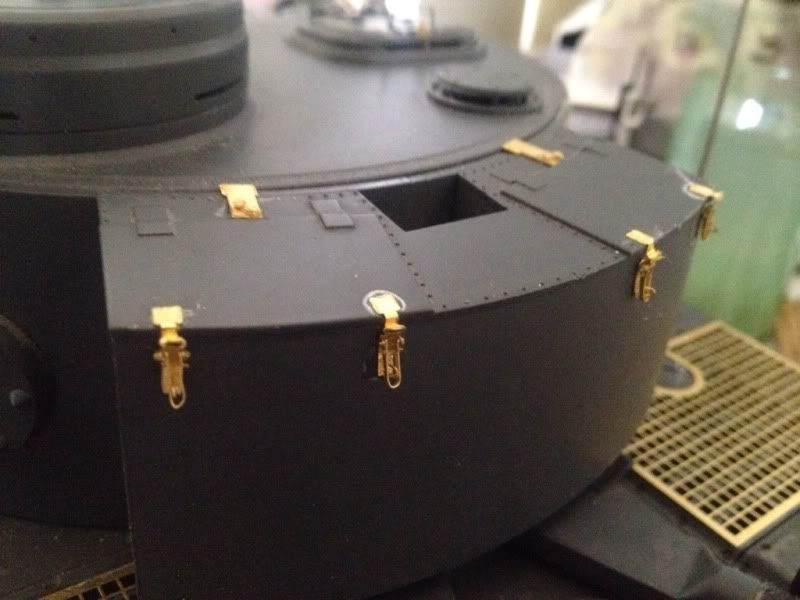
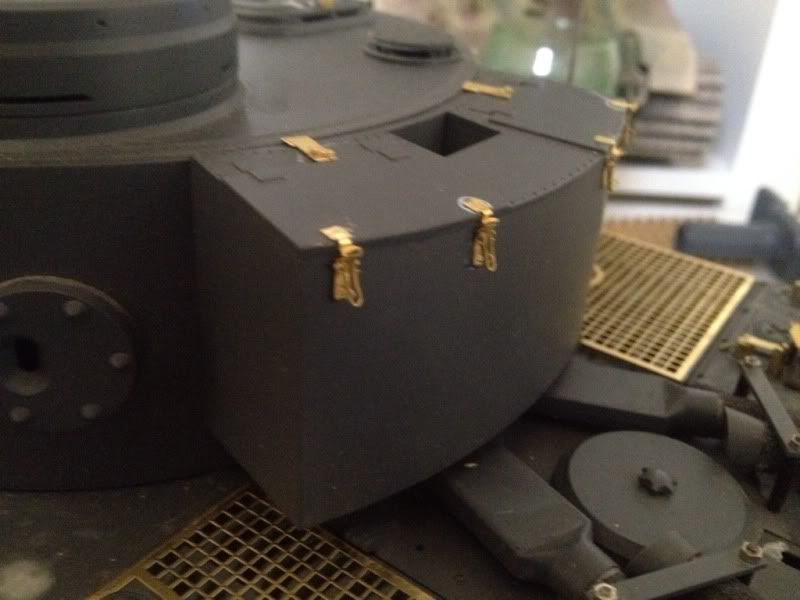
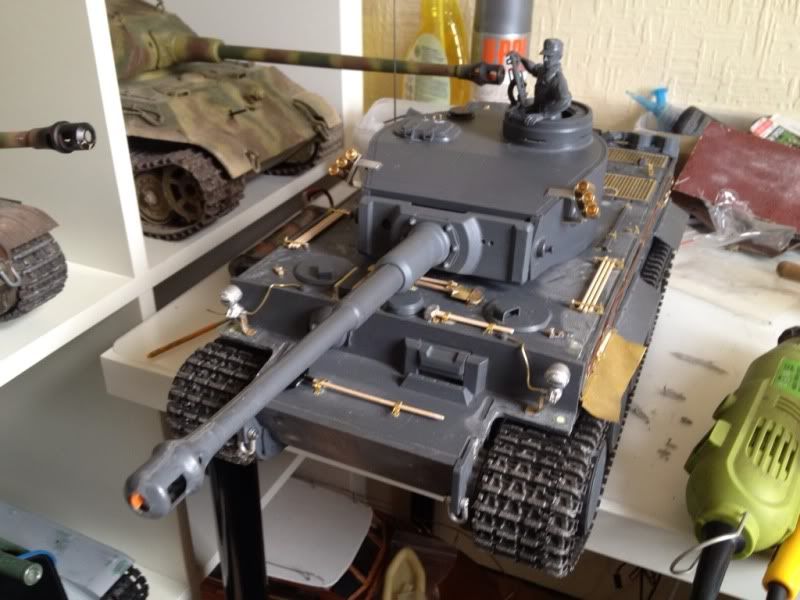
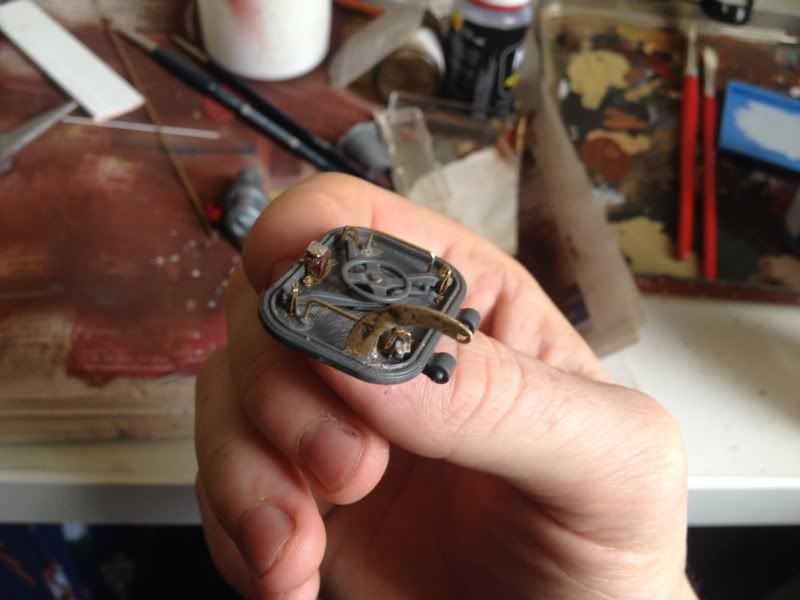
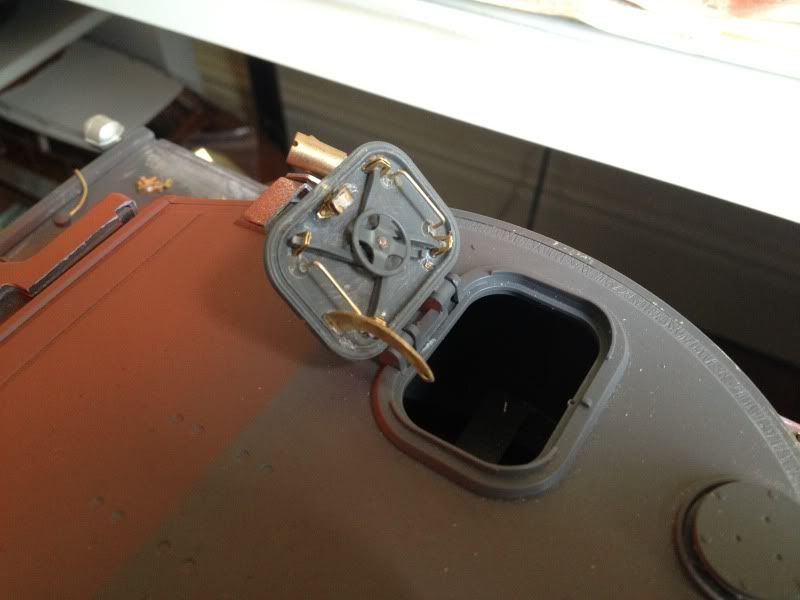
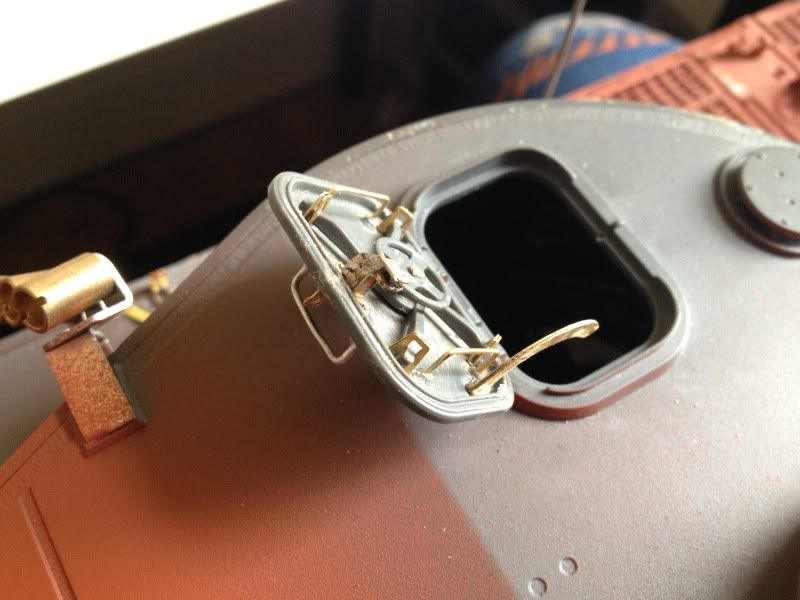
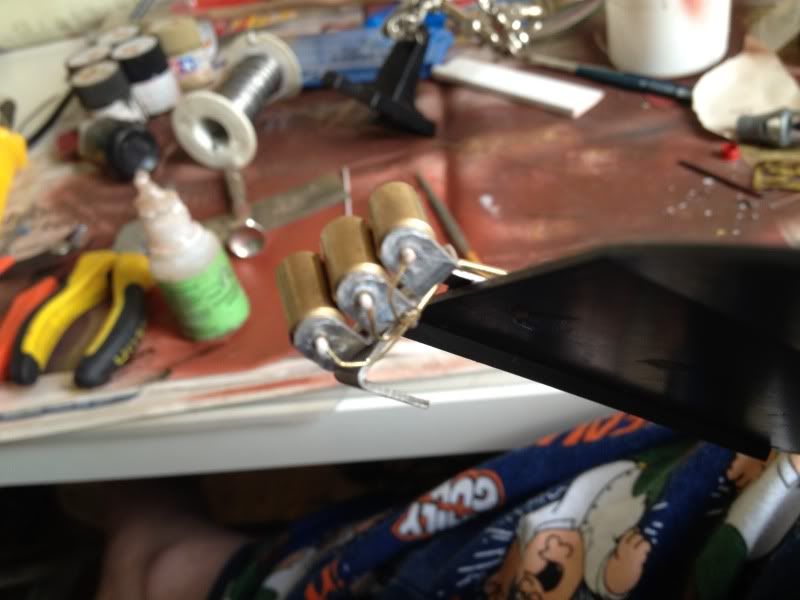
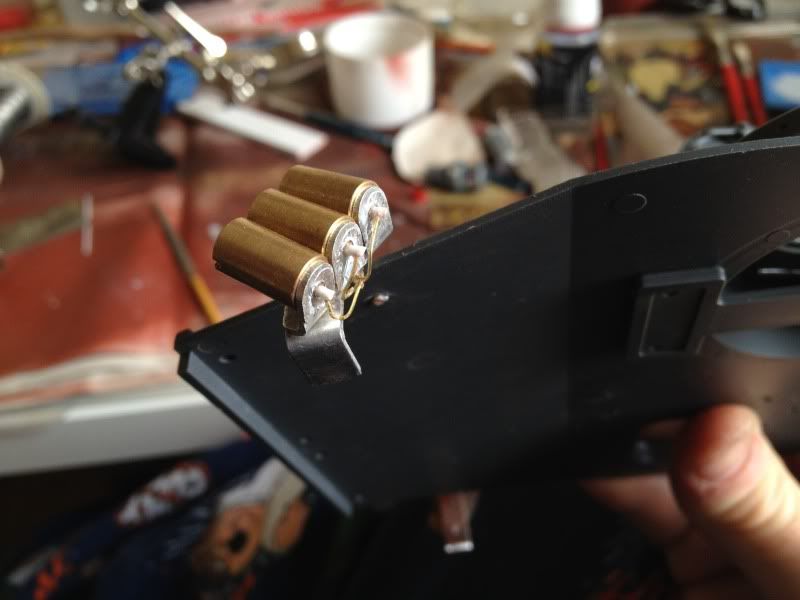
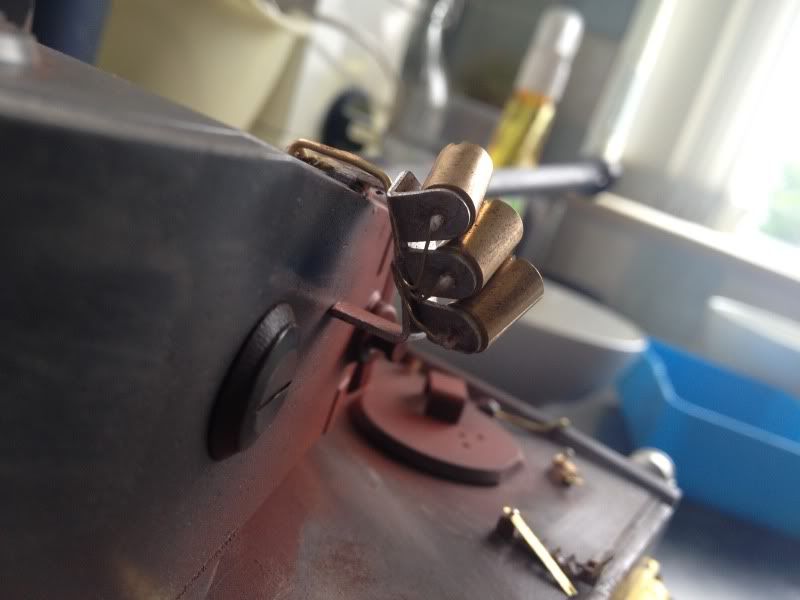
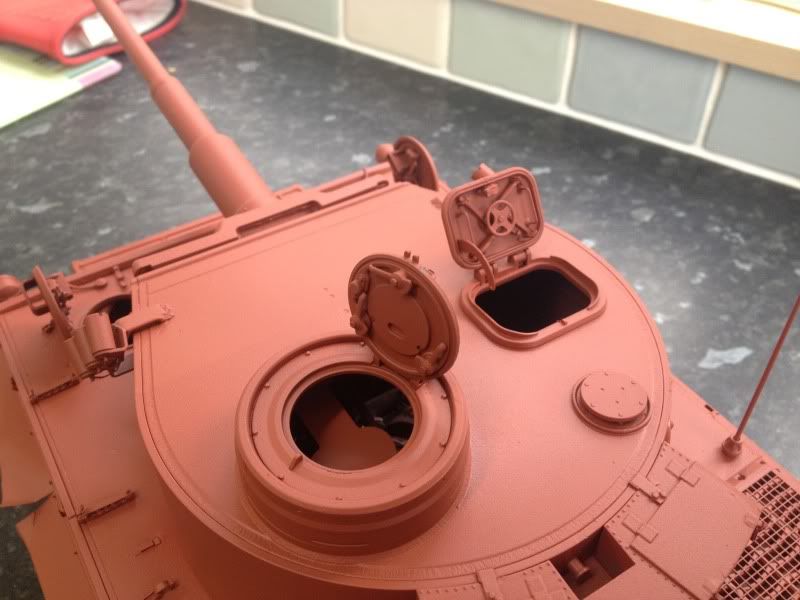
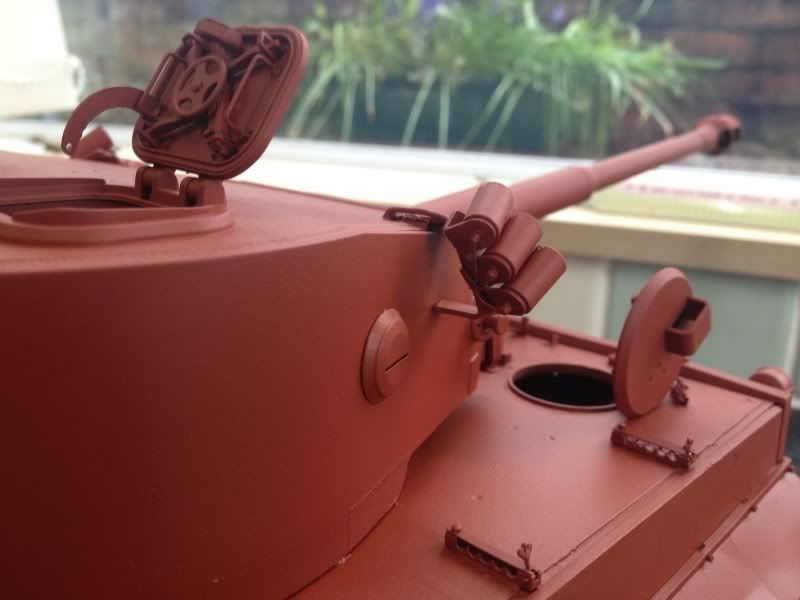
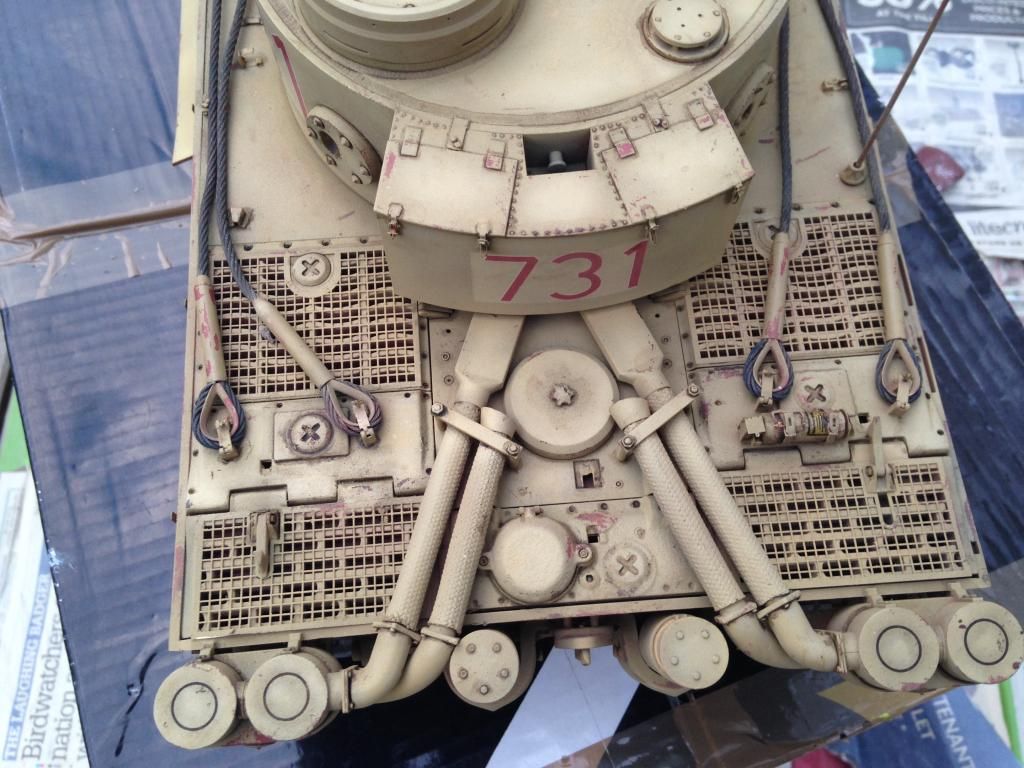
Having finally received an end of may date or the tunisian tiger aber bits to bit launched I decided to press on with the build. I've bought a couple of bits packages off ebay for bargain prices which i'm going to be putting to good use on this. The first was a photo etch set for the loaders hatch. Tricky to build but I think looks good! Next i decided to detail the smoke launchers as these where letting the rest of the tank down. I've used 0.5 mm brass wire and 1mm styrene rod to make something vaguely scale.
Hatch detail
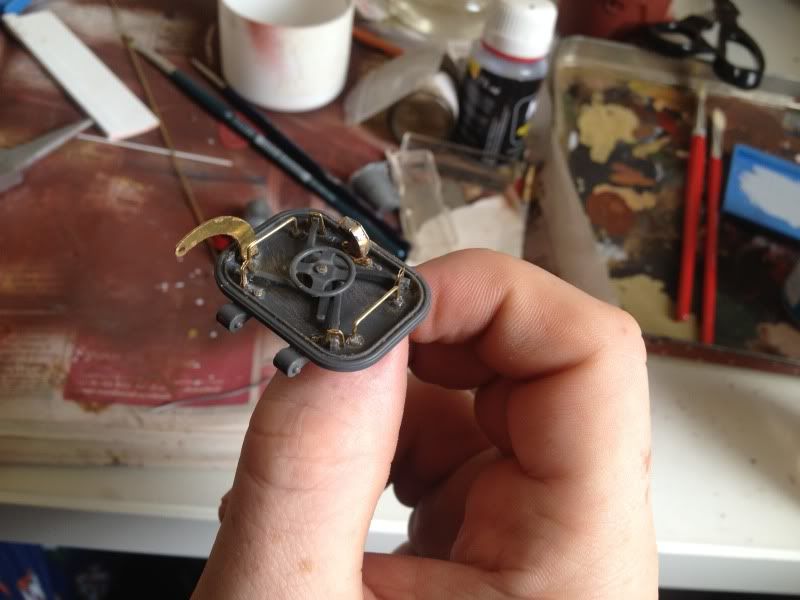
Smoke launchers:
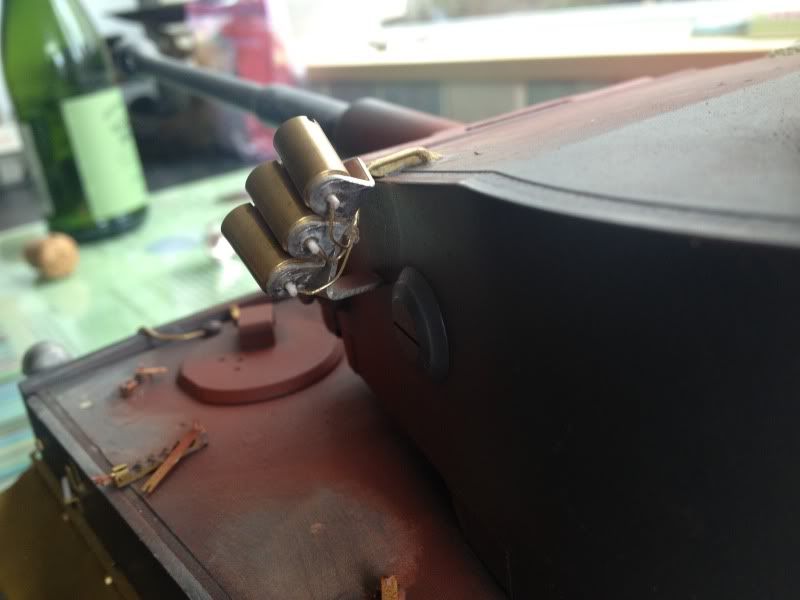
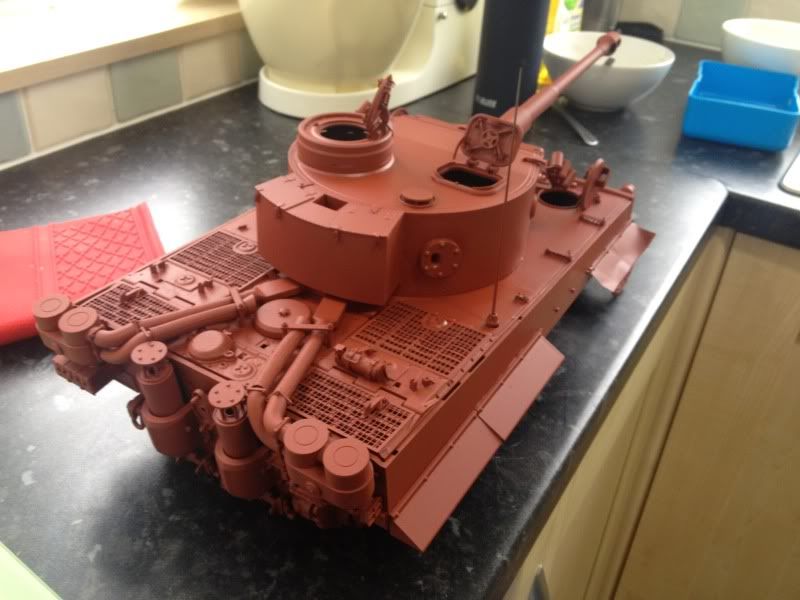
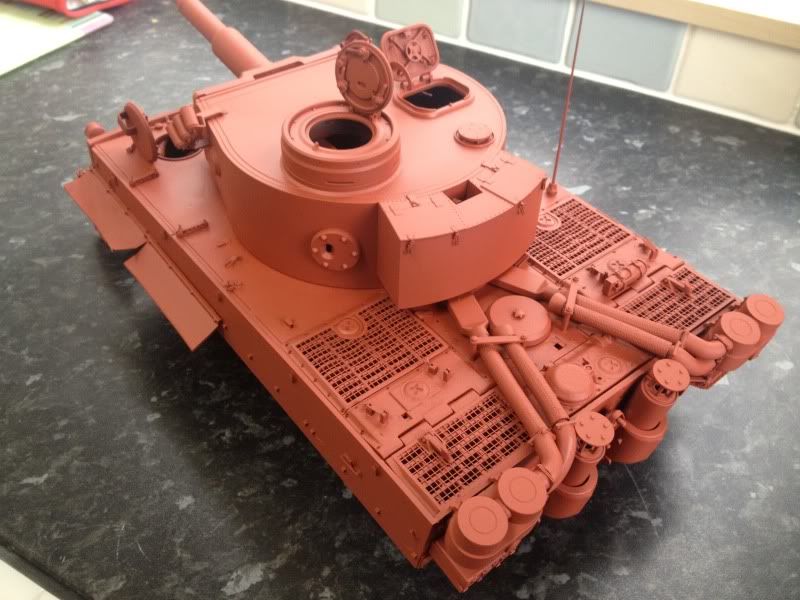
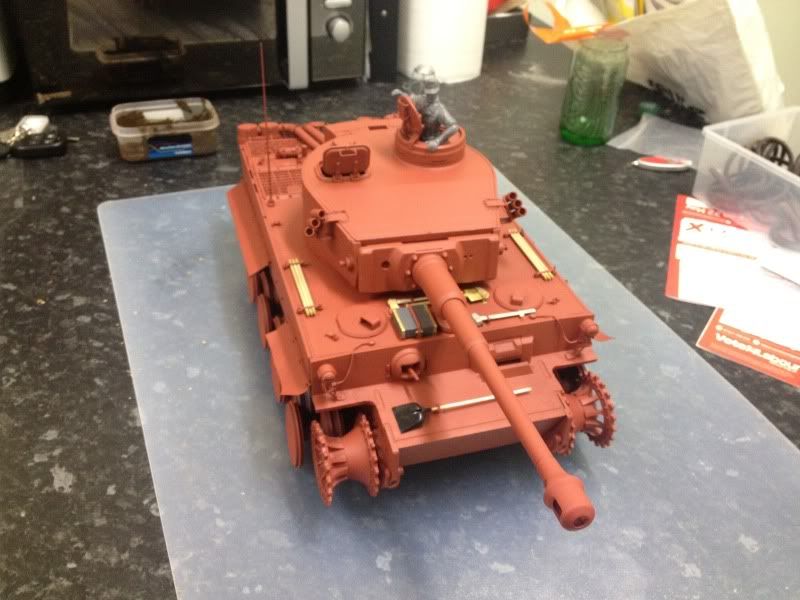
And some primer thrown on:
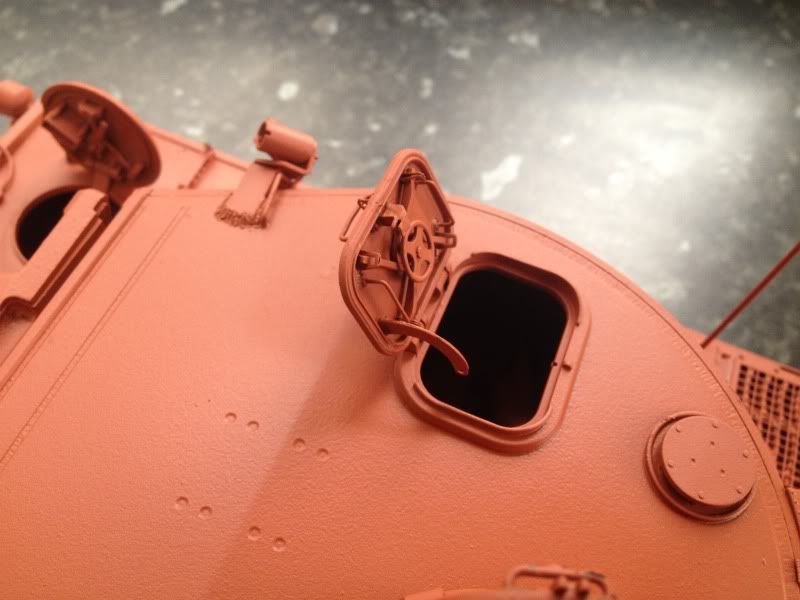
Hatch detail


Smoke launchers:


And some primer thrown on:


 05-08-2014, 08:46 AM
#40

My Feedback: (1)
Join Date: Jan 2012
Location: London, UNITED KINGDOM
Posts: 116
Likes: 0
Received 0 Likes
on
0 Posts
Lovely work. The details on the hatch really pop. And it looks magnificent in primer!
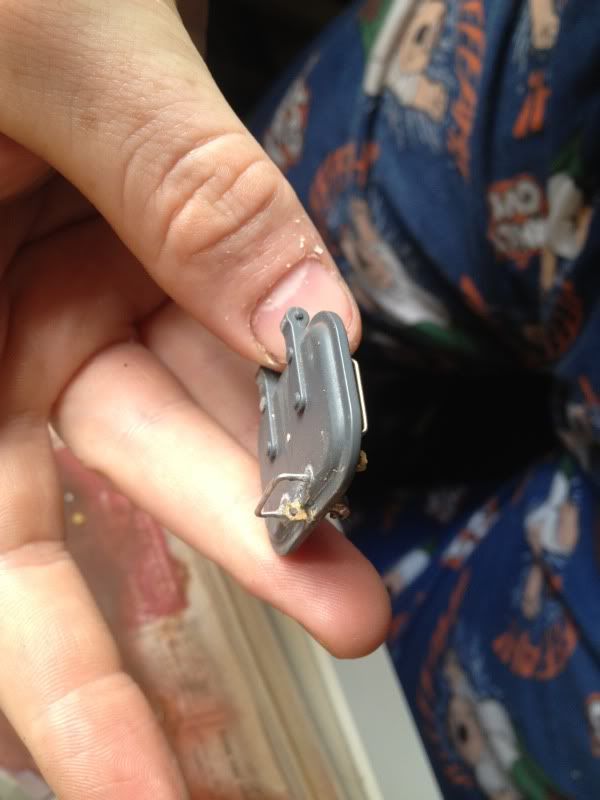
One tiny question... the rear left fender still has the triangular blanking plate on it... I thought the Initials did not have this and the fenders were "sealed" with the funky shaped complex rear mud-guards.
One tiny question... the rear left fender still has the triangular blanking plate on it... I thought the Initials did not have this and the fenders were "sealed" with the funky shaped complex rear mud-guards.
05-08-2014, 09:04 AM
#42
My Feedback: (1)
Join Date: Jan 2012
Location: London, UNITED KINGDOM
Posts: 116
Likes: 0
Received 0 Likes
on
0 Posts
I hate being a rivet counter, but you have spent so much effort getting it perfect it seemed a pity not to. It will be an easy tweak to make though.
Do check before you do it though... I am 99% sure of the fact but not 100%
This is a nice model to look at... http://hyperscale.com/features/2002/tigerigc_1.htm
Do check before you do it though... I am 99% sure of the fact but not 100%
This is a nice model to look at... http://hyperscale.com/features/2002/tigerigc_1.htm
Last edited by vonmarshall; 05-08-2014 at 09:07 AM.
05-08-2014, 11:30 AM
#43
Thread Starter
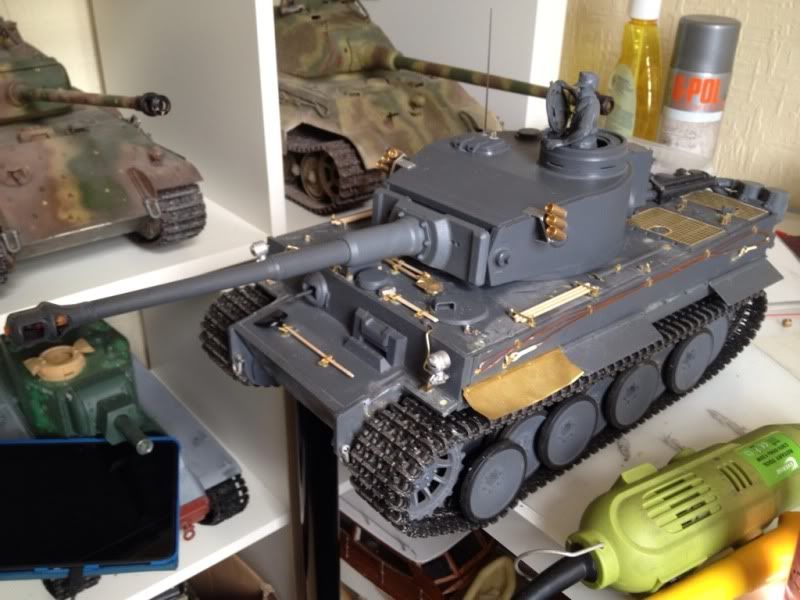
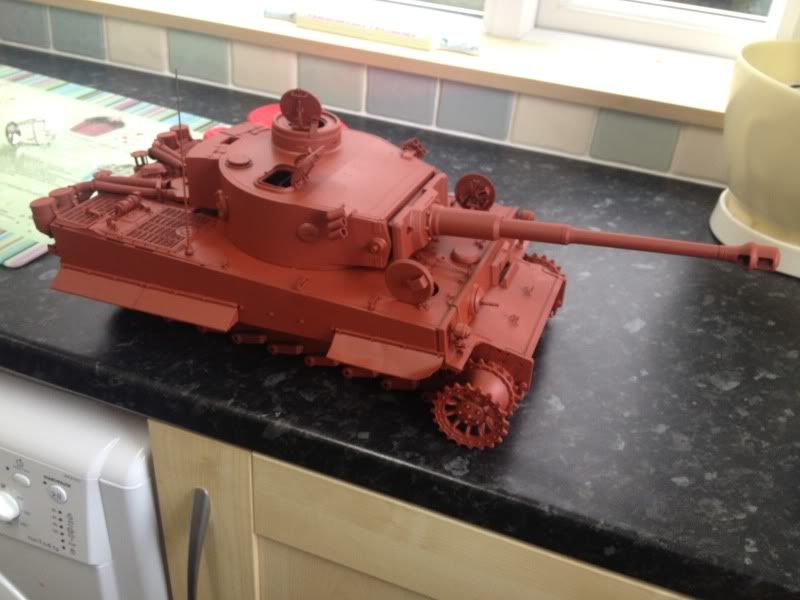
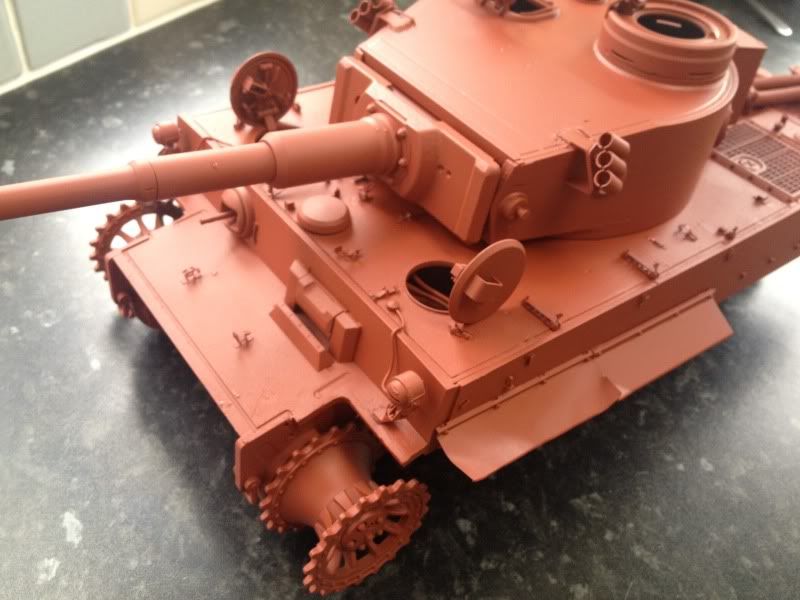
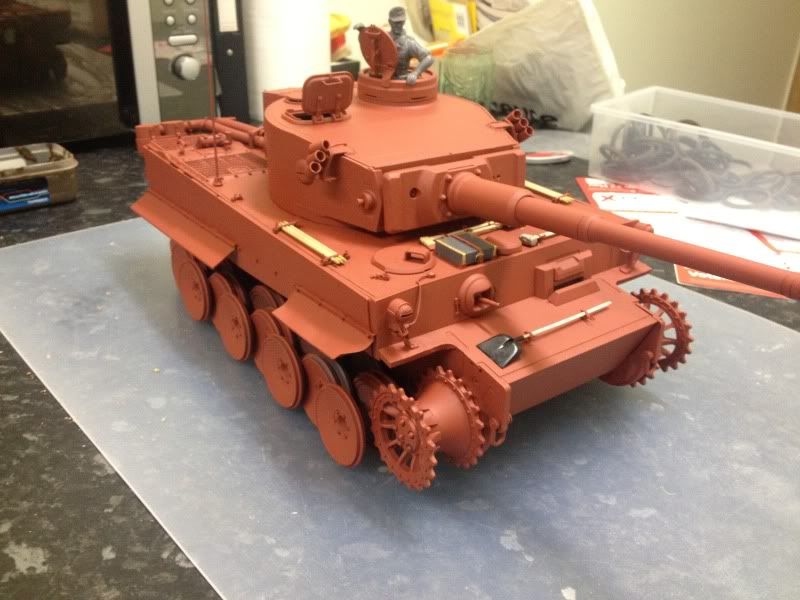
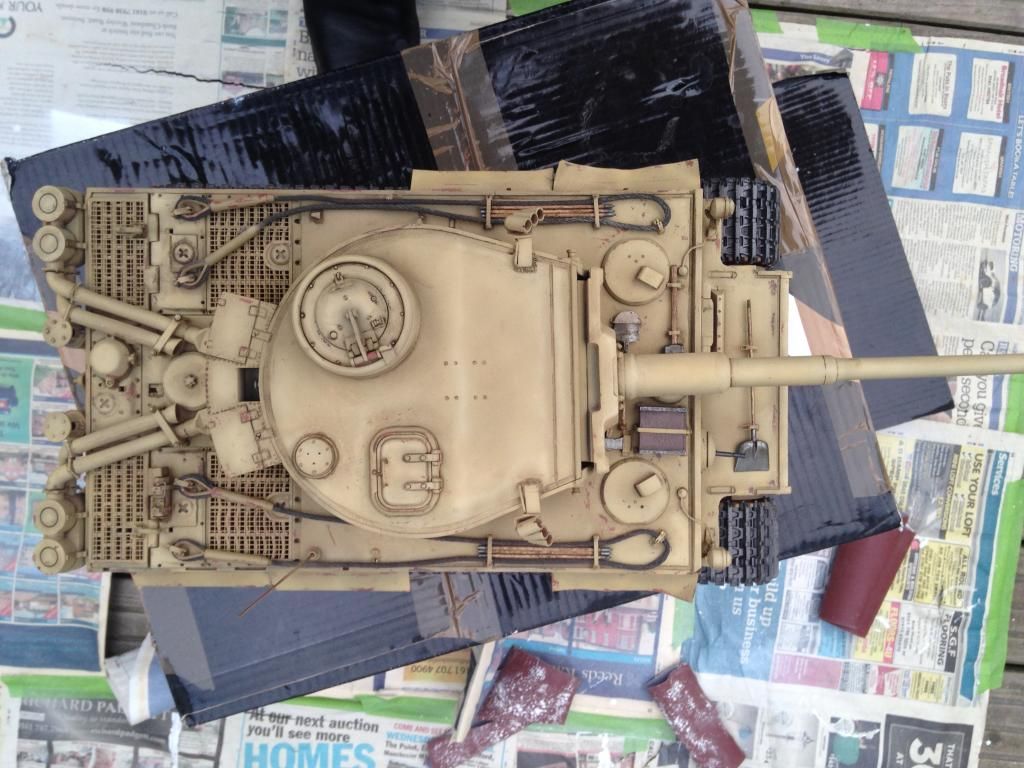
So an eagle eyed viewer (thanks Vonmarshal) pointed out the earler tigers don't have the triangular bits at the end of the guards. So these have been removed!
I put the wheels and tools back in to make sure all fits after paint.
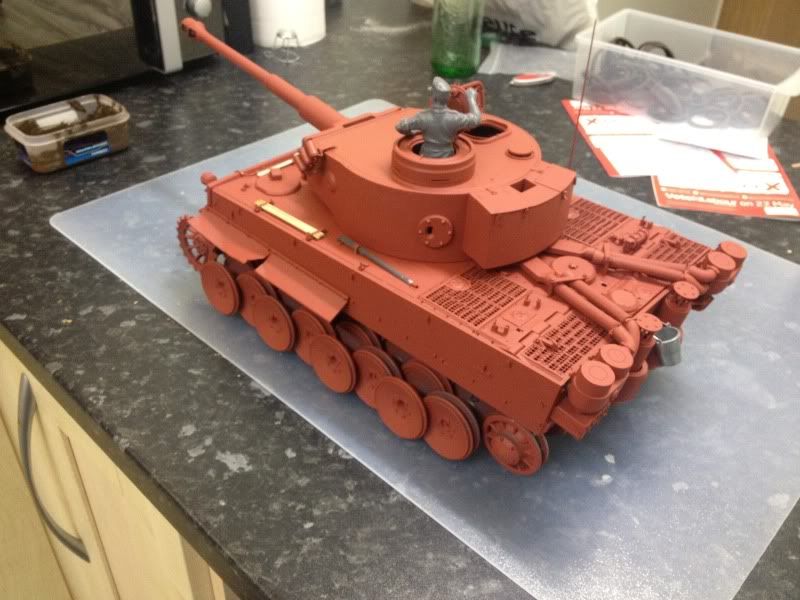
I put the wheels and tools back in to make sure all fits after paint.
05-08-2014, 12:49 PM
#44
My Feedback: (1)
Join Date: Jan 2012
Location: London, UNITED KINGDOM
Posts: 116
Likes: 0
Received 0 Likes
on
0 Posts
That is just amazing. Lovely work.
One thing I would love to see on it is a front and rear mudguard or two... they really make the Tunisian ones stand out. Are you sure you don't have the patience to wait for the Aber sets? This is by far and away the best Initial 1/16 I have seen (and I spend a lot of time looking at top notch RC tanks!).
One thing I would love to see on it is a front and rear mudguard or two... they really make the Tunisian ones stand out. Are you sure you don't have the patience to wait for the Aber sets? This is by far and away the best Initial 1/16 I have seen (and I spend a lot of time looking at top notch RC tanks!).
05-19-2014, 01:22 PM
#48
Thread Starter
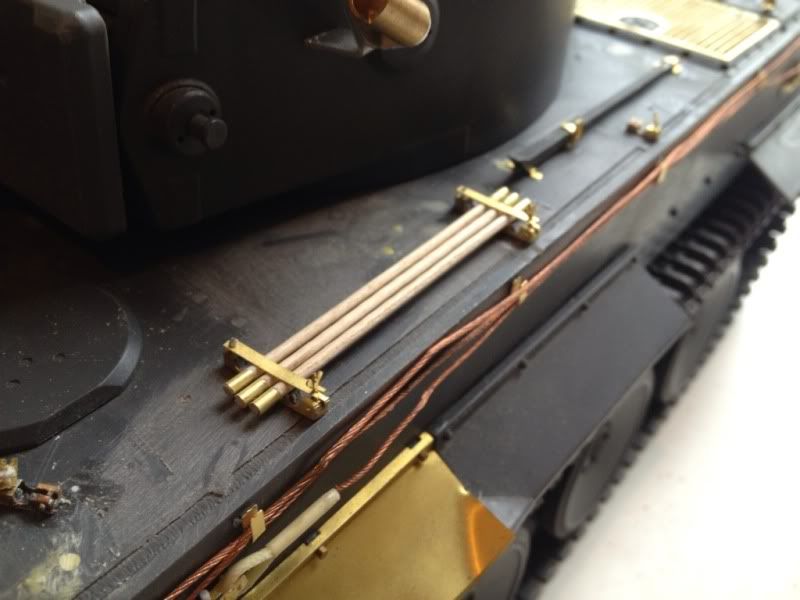
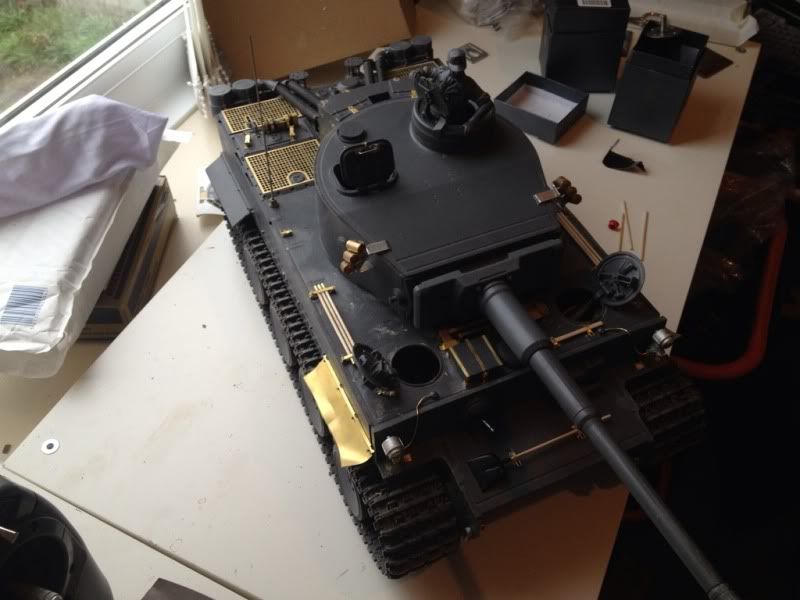
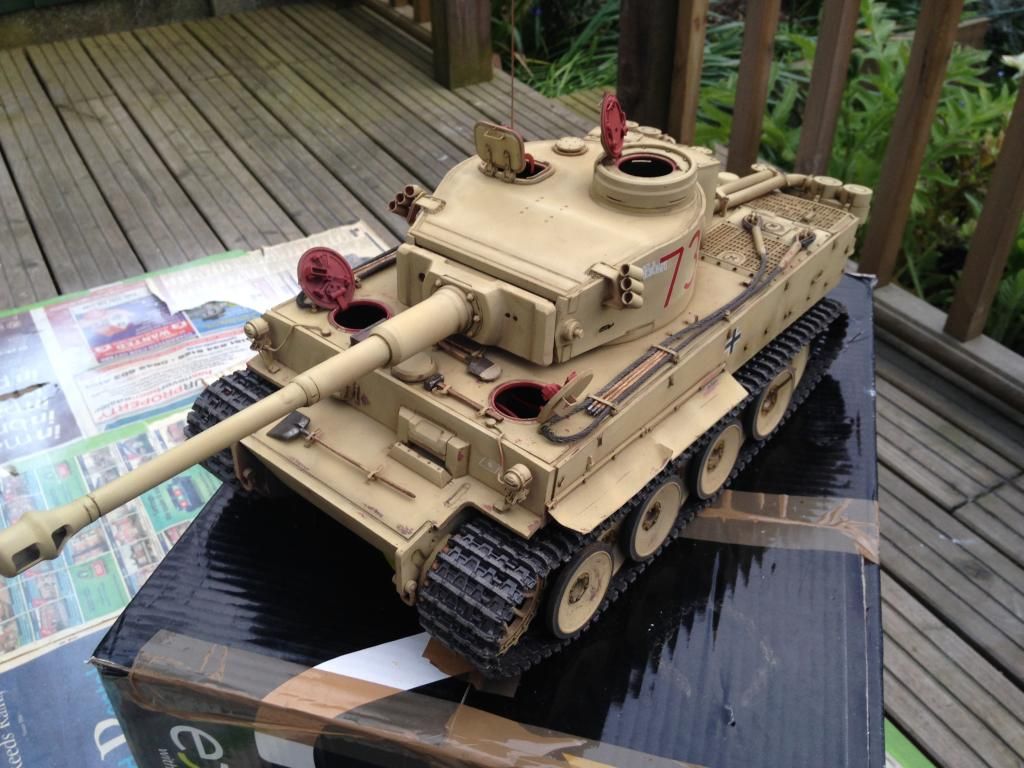
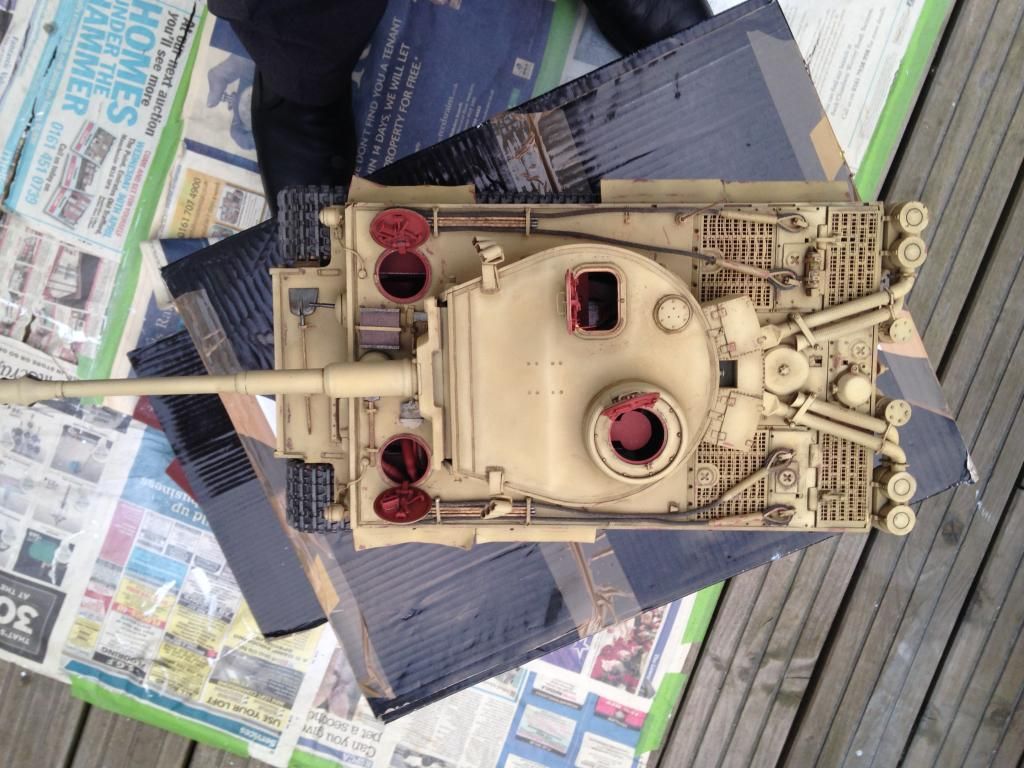
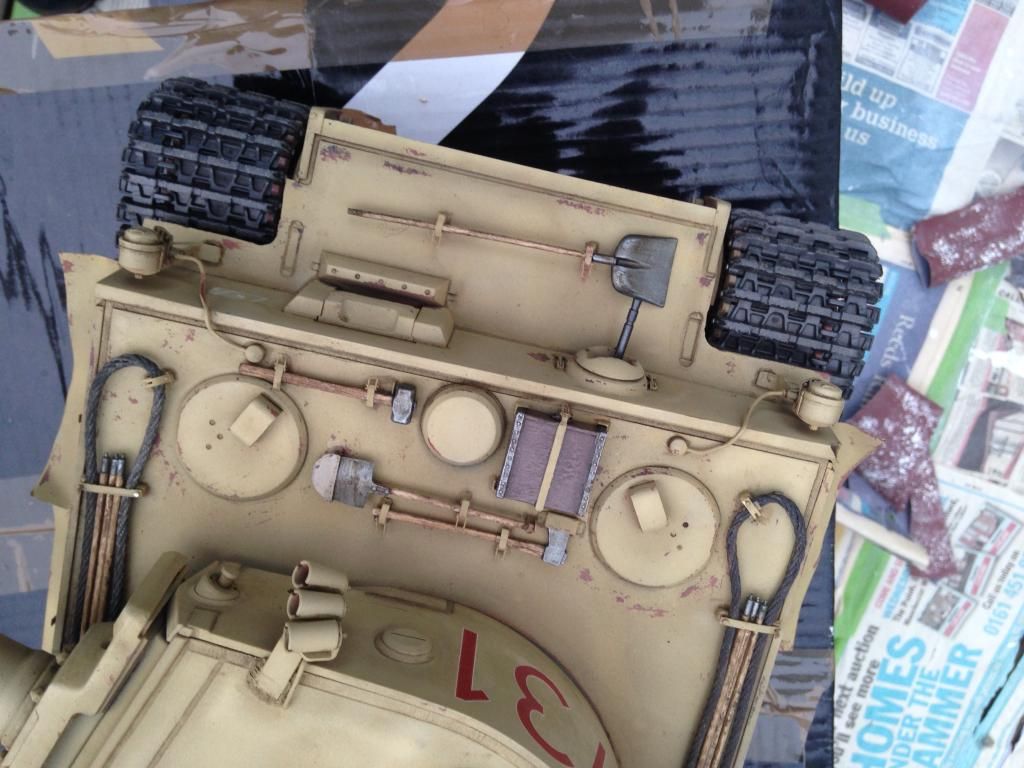
We'll folks you've had a preview, but I've made some more progress so here goes; finished the tools, added tow ropes, on this build I've secured all the clasps to make things more durable. The tow ropes where interesting. On the upside the treatment of the cable looked excellent, the downside is they don't fit together properly without some rework. In addition the cables weren't continuously stranded throughout so when they where bent strands splintered out. IMO the shumo ones were better; sadly now they've been discontinued. I have also added tracks to get her running for Sundays MAD meet. Now I'm aware the hatches should be painted ivory; this will be amended.
Here's some shots:
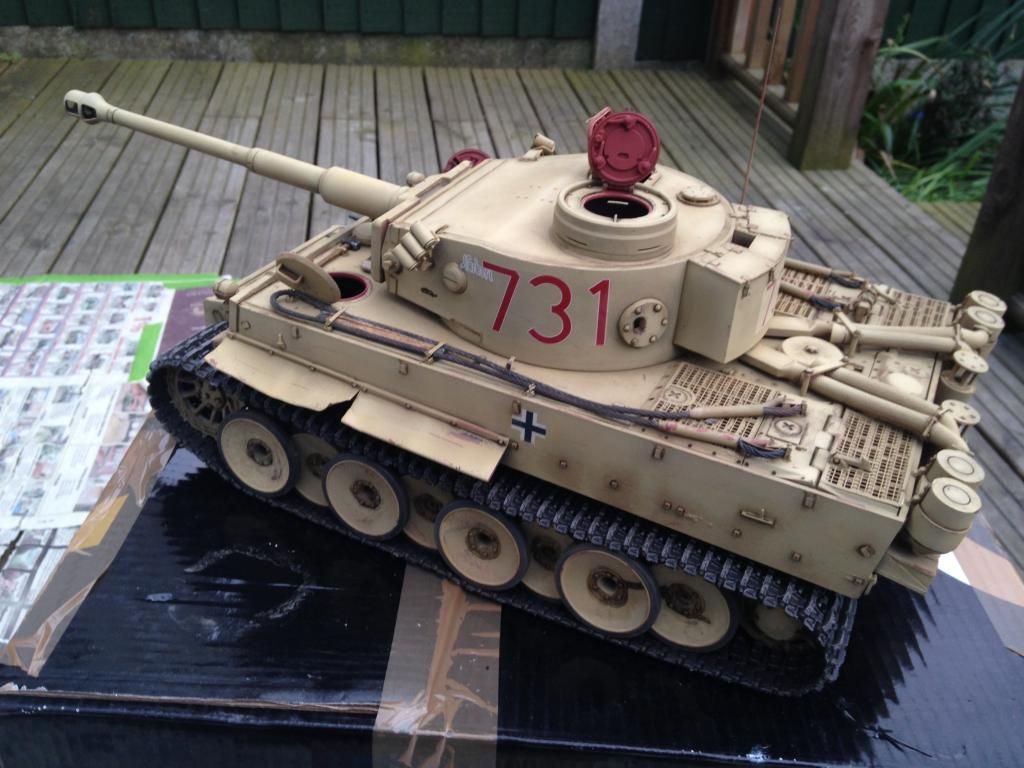
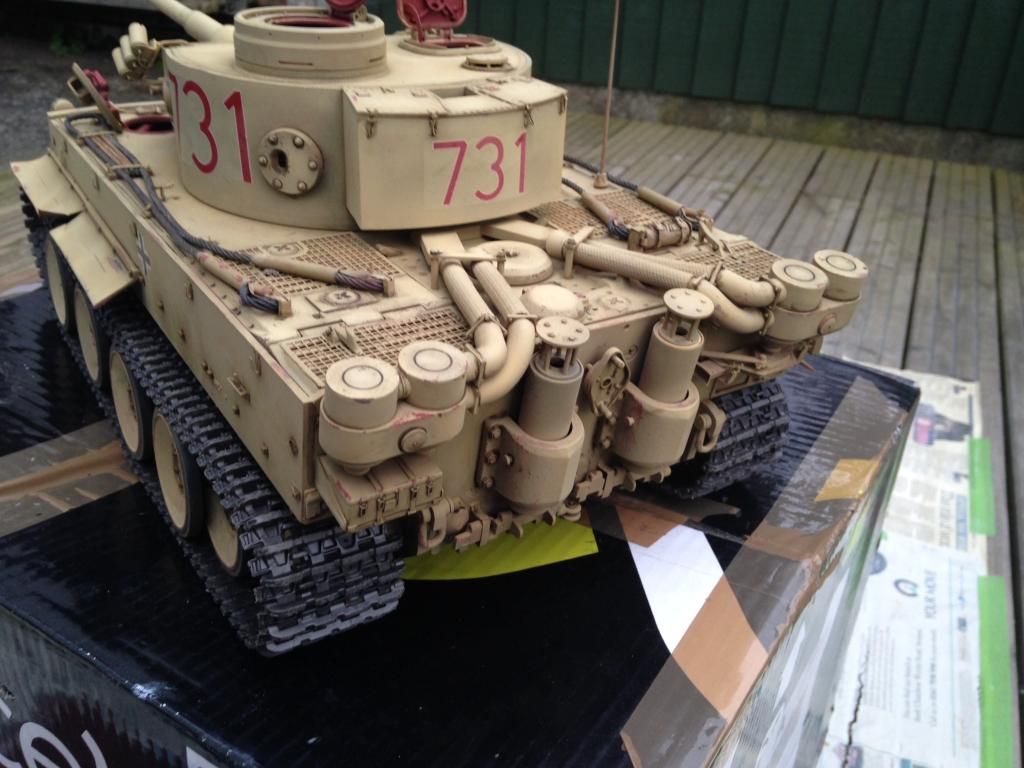

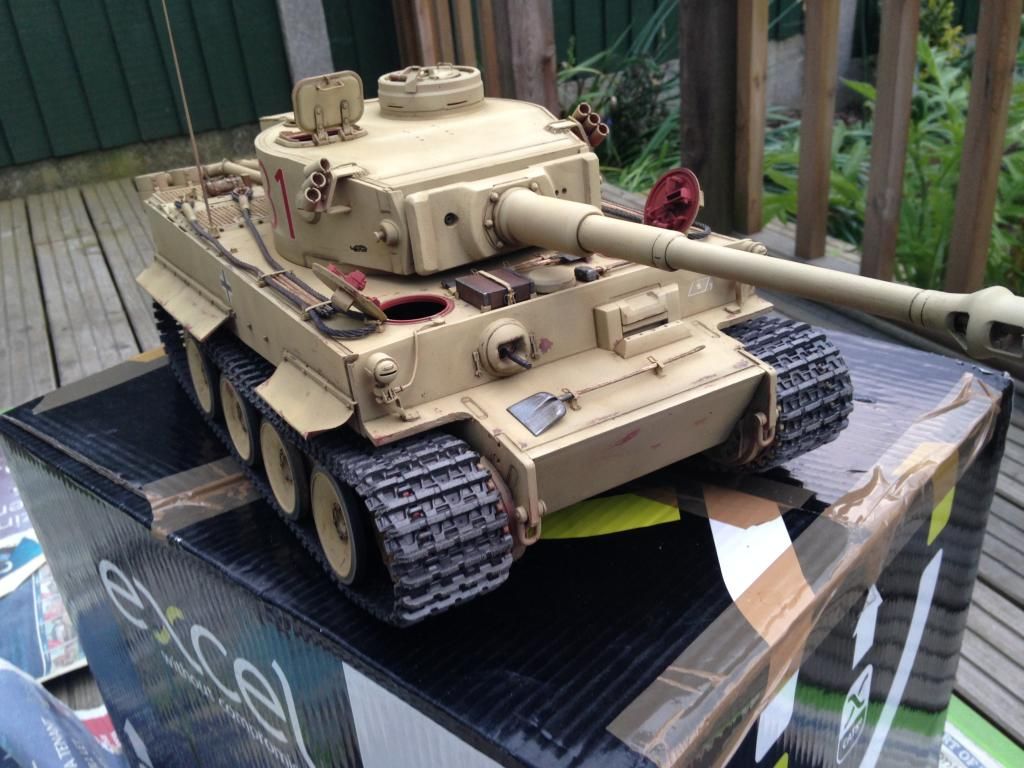
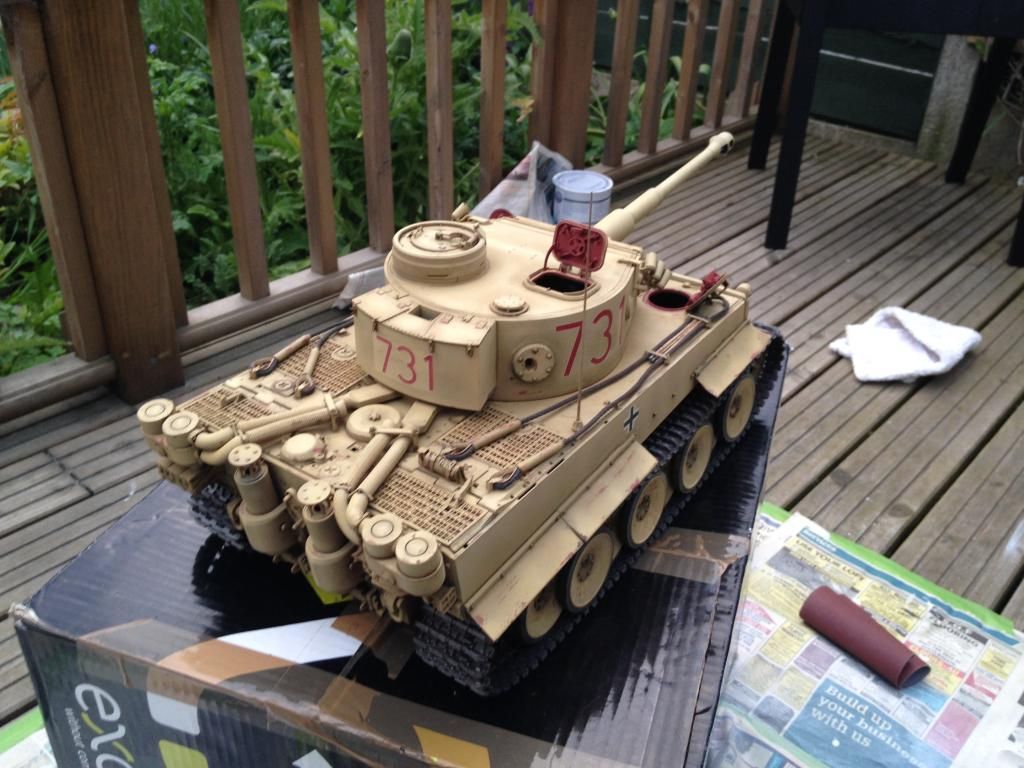
Still masses to do, I'm also after some closed pin metal tracks
Here's some shots:


Still masses to do, I'm also after some closed pin metal tracks
 05-20-2014, 04:13 AM
#50
Wow, another good looking tank!!!