


Build Thread : Type 3 Chi-Nu (Kai?)
 12-04-2013 | 05:29 AM
#1

Thread Starter

Hey guys. I've been mulling this one over in my head since forever ago, so I finally went and ordered a panzer III, and 2 days later, bam. Let the hacking, cutting, drilling and general gutting begin.
What I'm going for:

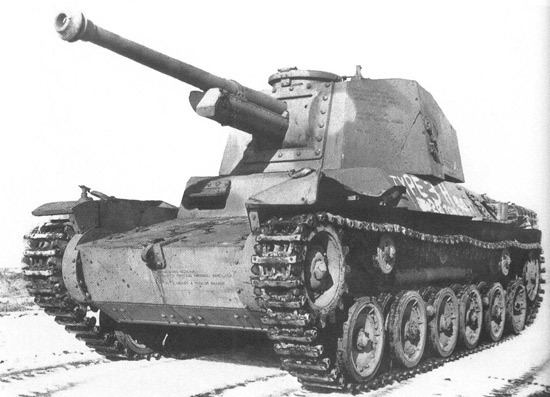

Main things involved with this build are:
Progress so far :


Comments tips and criticism welcome! :P
What I'm going for:
Main things involved with this build are:
- narrow the hull
- level the rear engine deck
- build a whole new turret
- modify hull and track guard angles & dimensions.
- lower the idler wheel
Progress so far :
Comments tips and criticism welcome! :P
Last edited by Strato50; 12-05-2013 at 03:31 AM.
 12-04-2013 | 07:02 AM
#2
Here's my comment........Tip #1........never ask for criticism !!!! LOL ...that can ruin your day !
I'm glad to see your choice of this tank as a project. We need more examples of "NOT the usual stuff". I have had this tank on my bucket list for years but never got around to it. I am impressed with your build. That Panzer III model seems to able to be used as a base for a lot of conversions. Thanks for the build thread. I have only seen two 1/16 scale Japanese tanks before, and your effort looks real good. Now ya got me thinking about maybe doing a Type 5 Chi-Ri.
Rex
12-04-2013 | 02:53 PM
#3

You may want to check out the DAK site. Ethan started one a couple years back then handed the project off to another member. I now have the tank (as a roller... and in need of a lot of repair!) but it's still in decent shape overall.
Here's the build thread as it was.
http://www.desertarmor.com/DAK_PROJE...nk_Chi-Nu.html
Dave
Here's the build thread as it was.
http://www.desertarmor.com/DAK_PROJE...nk_Chi-Nu.html
Dave
12-04-2013 | 10:21 PM
#4
Thread Starter
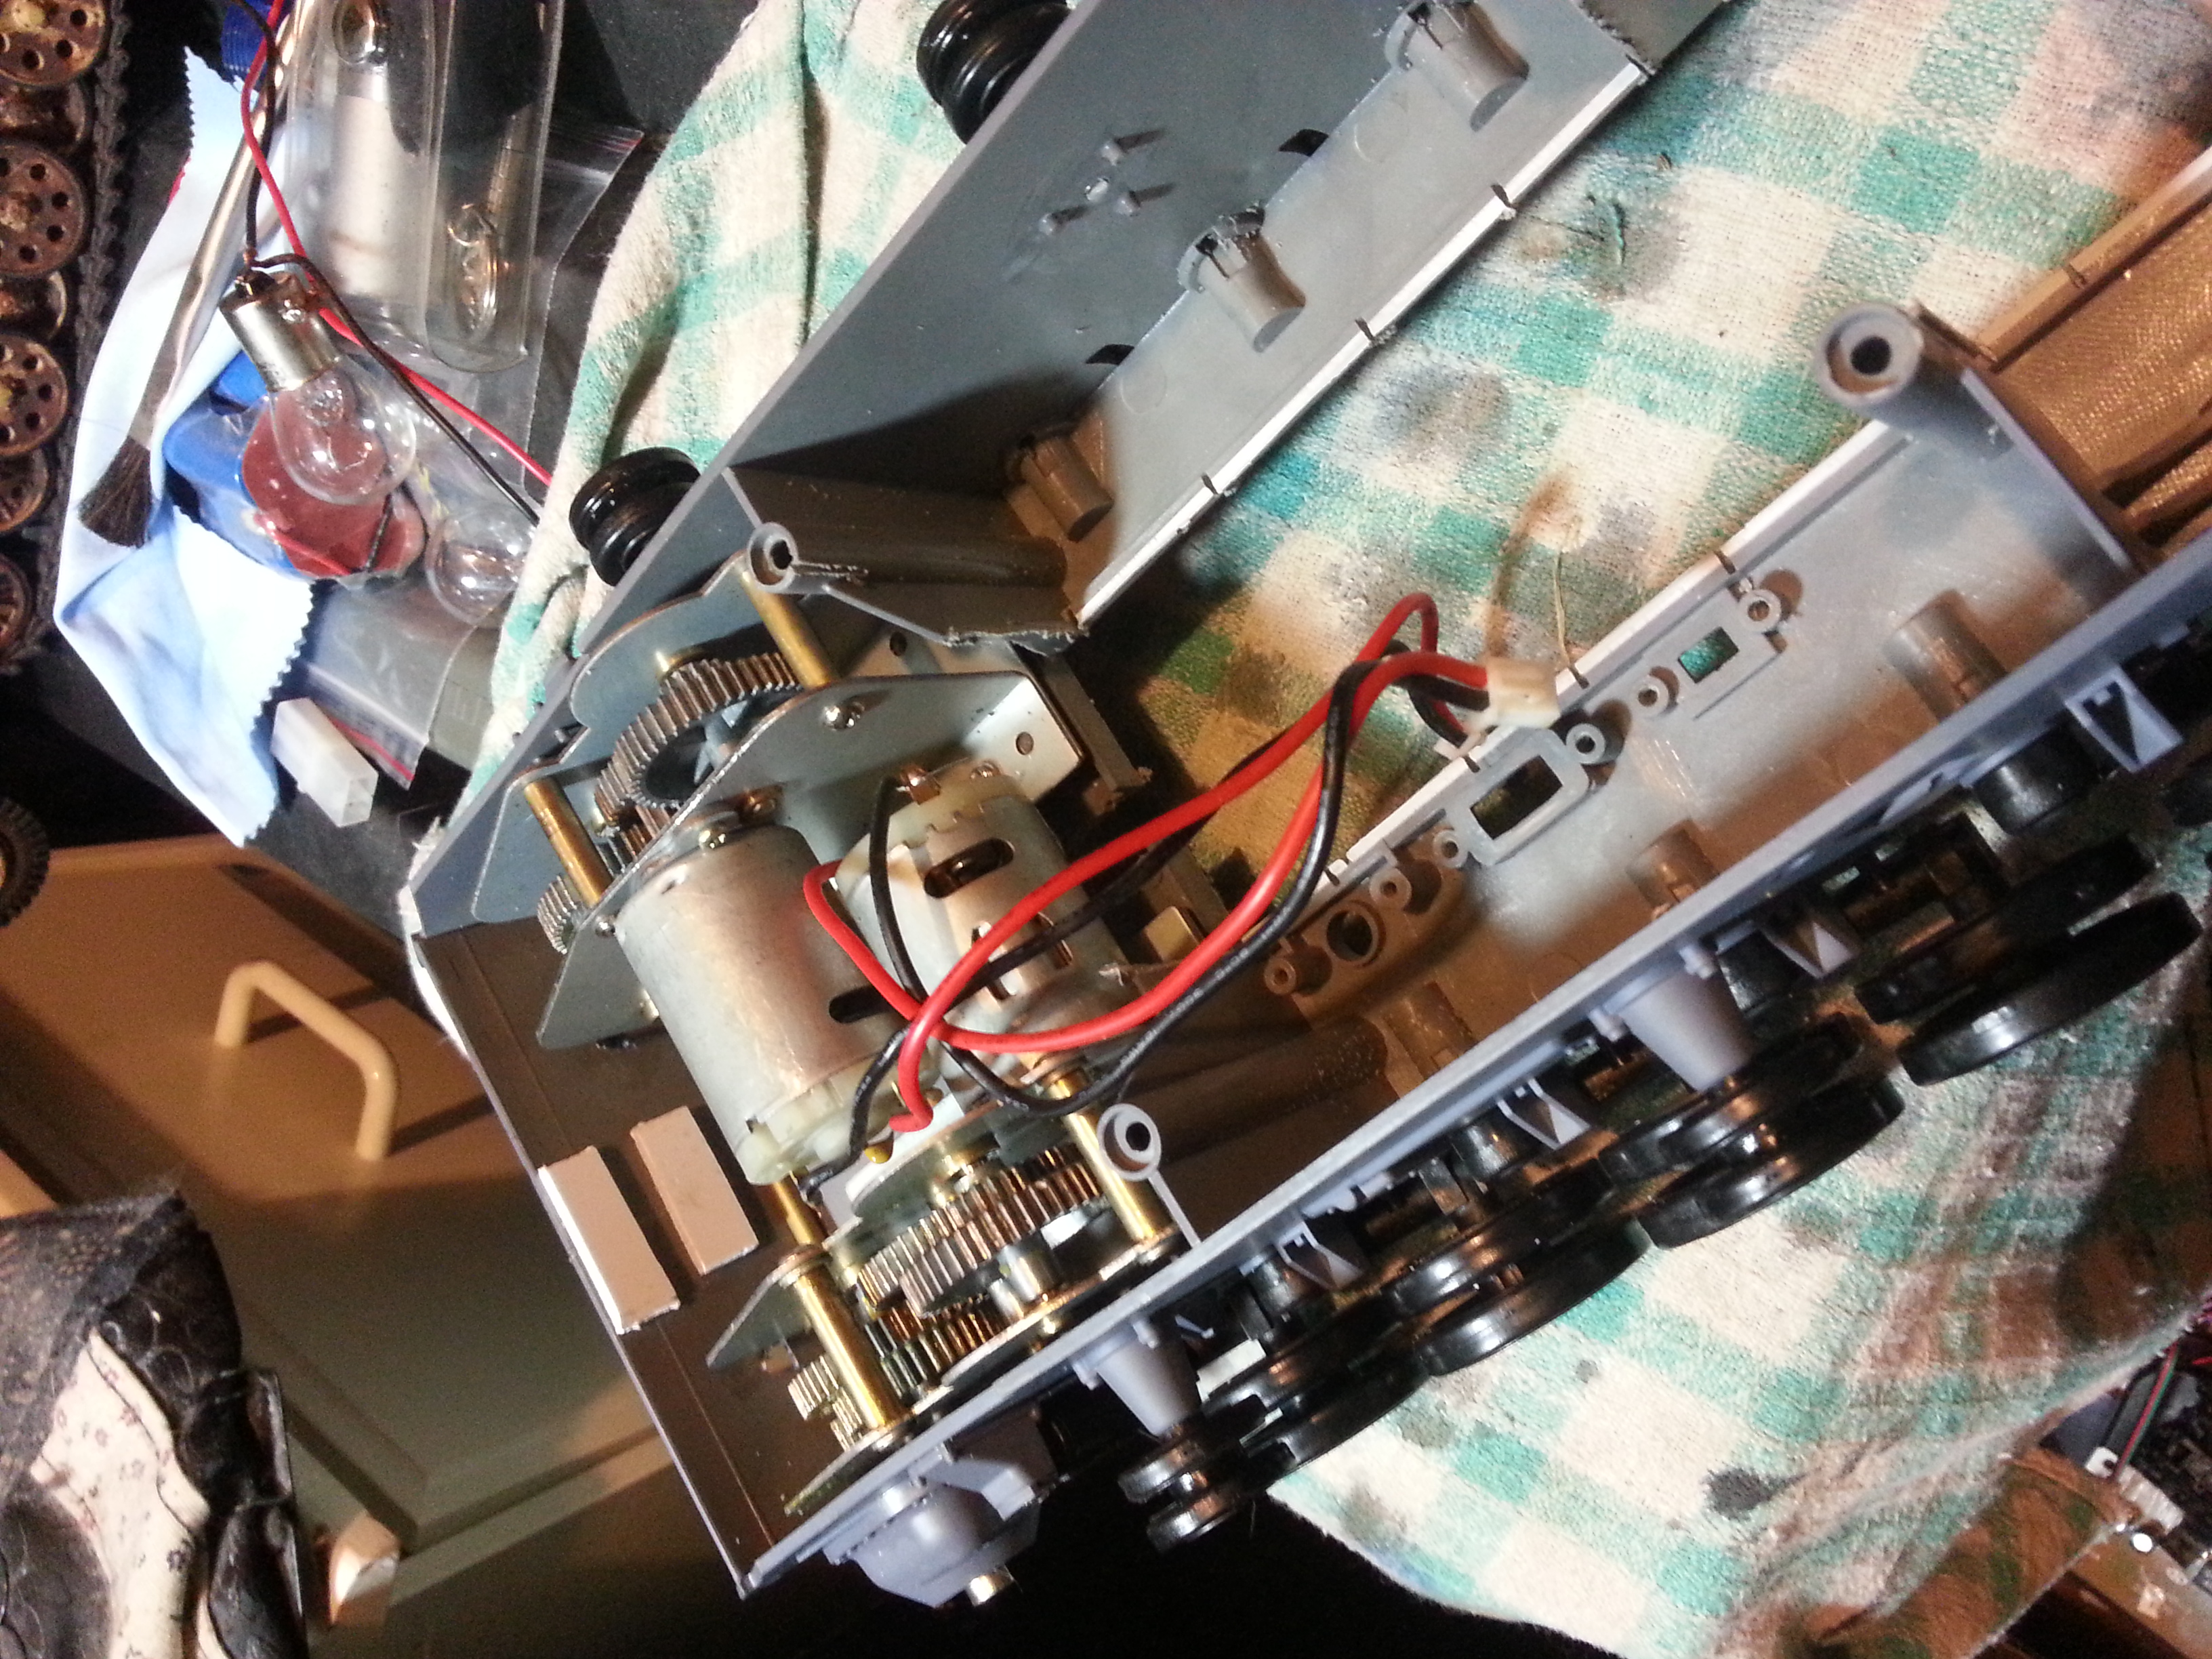
Well there were pictures earlier! I wonder where they went.... Dave that's a great resource I think I'll reference that a lot! I wasn't initially planning to relocate the gearboxes but it could happen...
I need some more styrene, you can tell I'm running low on material hehe, using scraps of tin sheet and clear plexiglass :P
I need some more styrene, you can tell I'm running low on material hehe, using scraps of tin sheet and clear plexiglass :P
12-05-2013 | 08:47 AM
#5
Well yours looks awesome so far. Cant wait to see the progress! Flipping the gearbox was quite clever in solving the bow plate angle and eliminating any bulge/protrusion from the motors. Of course this introduced a new problem of mounting/securing them LOL. Gotta love scratch building and kit bashing. Always keeps you on your toes!
Dave
Dave
 12-06-2013 | 12:10 AM
#7
Thread Starter
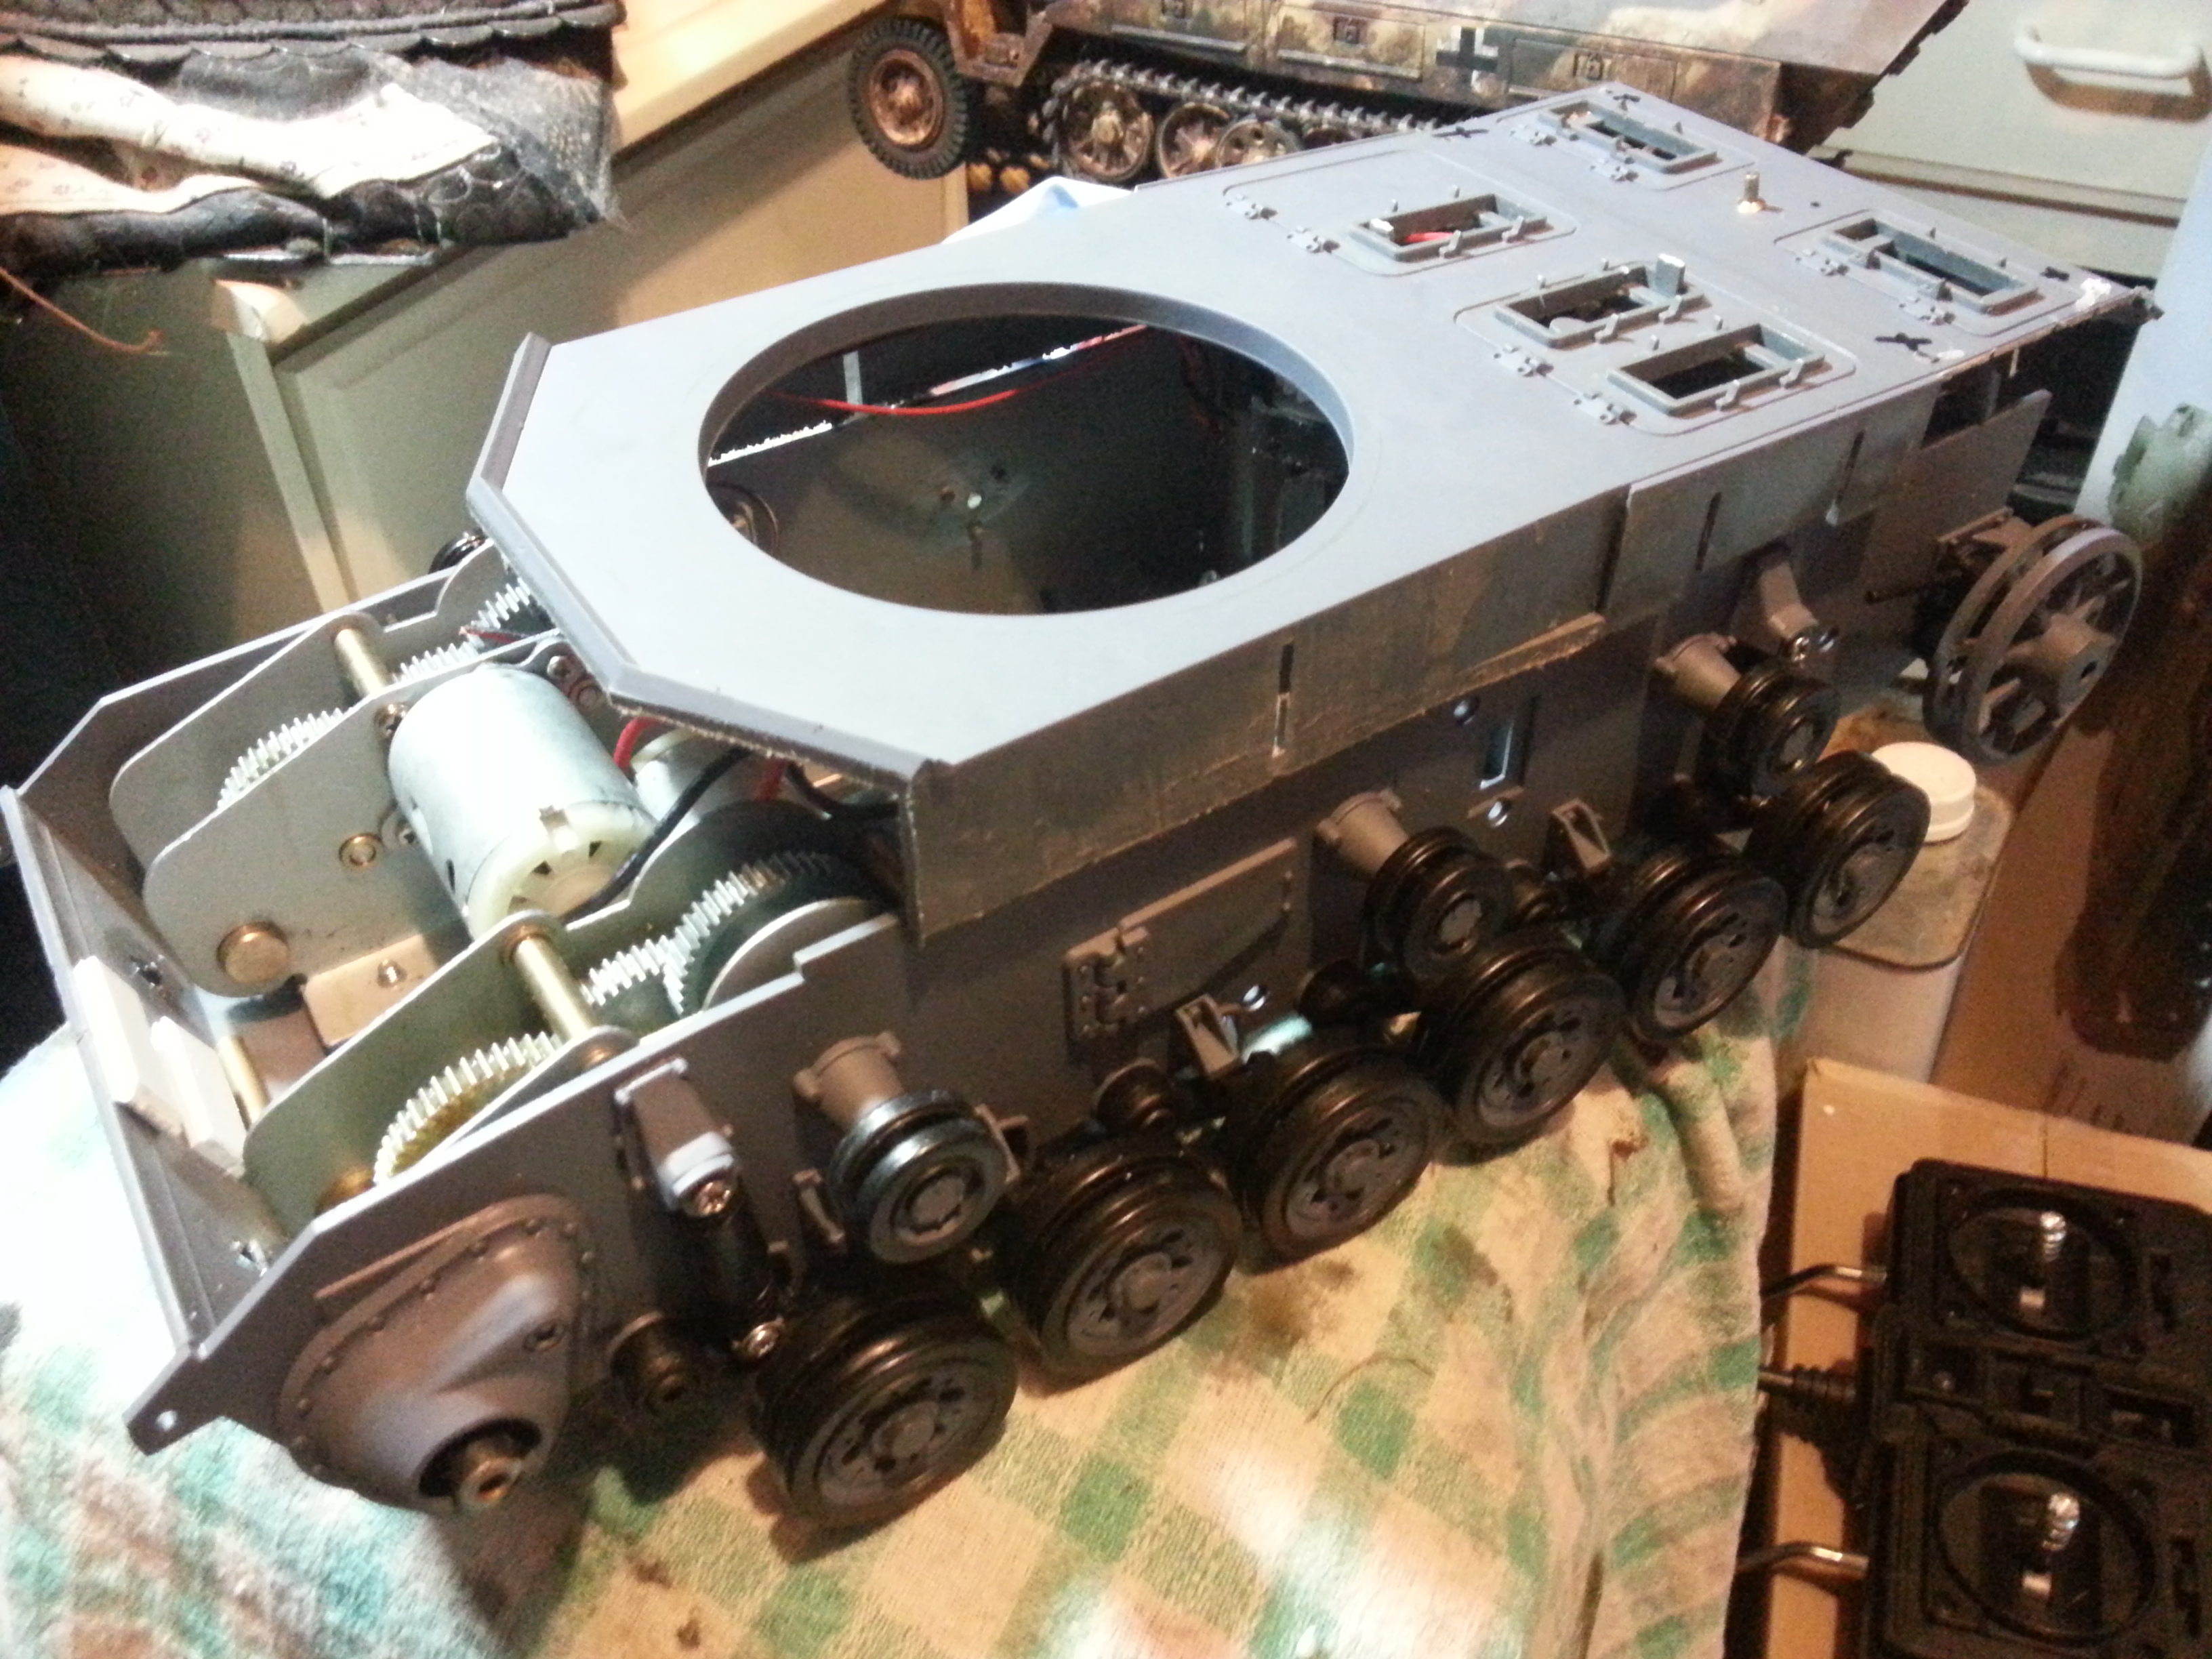
Thanks for the input guys! As things stand I don't yet need to invert the gearboxes. I'm doing a lot of the armor plate spacing and weld lines by eye, corresponding hull lines and angle changes by the approximate place the road wheels line up with them. Again it won't be perfect but it'll LOOK right... and 'more right' than most of the recent Tiger tanks used in movies 
I redid some of the upper hull plates and front end angles yesterday. Here's the result!
Next step is to finish off the squaring up of the rear end and clean up the gaps left between the upper and lower hulls. I need to pay a visit to Canadian Tire and the hobby shop for paint, styrene and some putty!
Last edited by Strato50; 12-06-2013 at 12:12 AM.
12-06-2013 | 09:12 AM
#8
Thread Starter
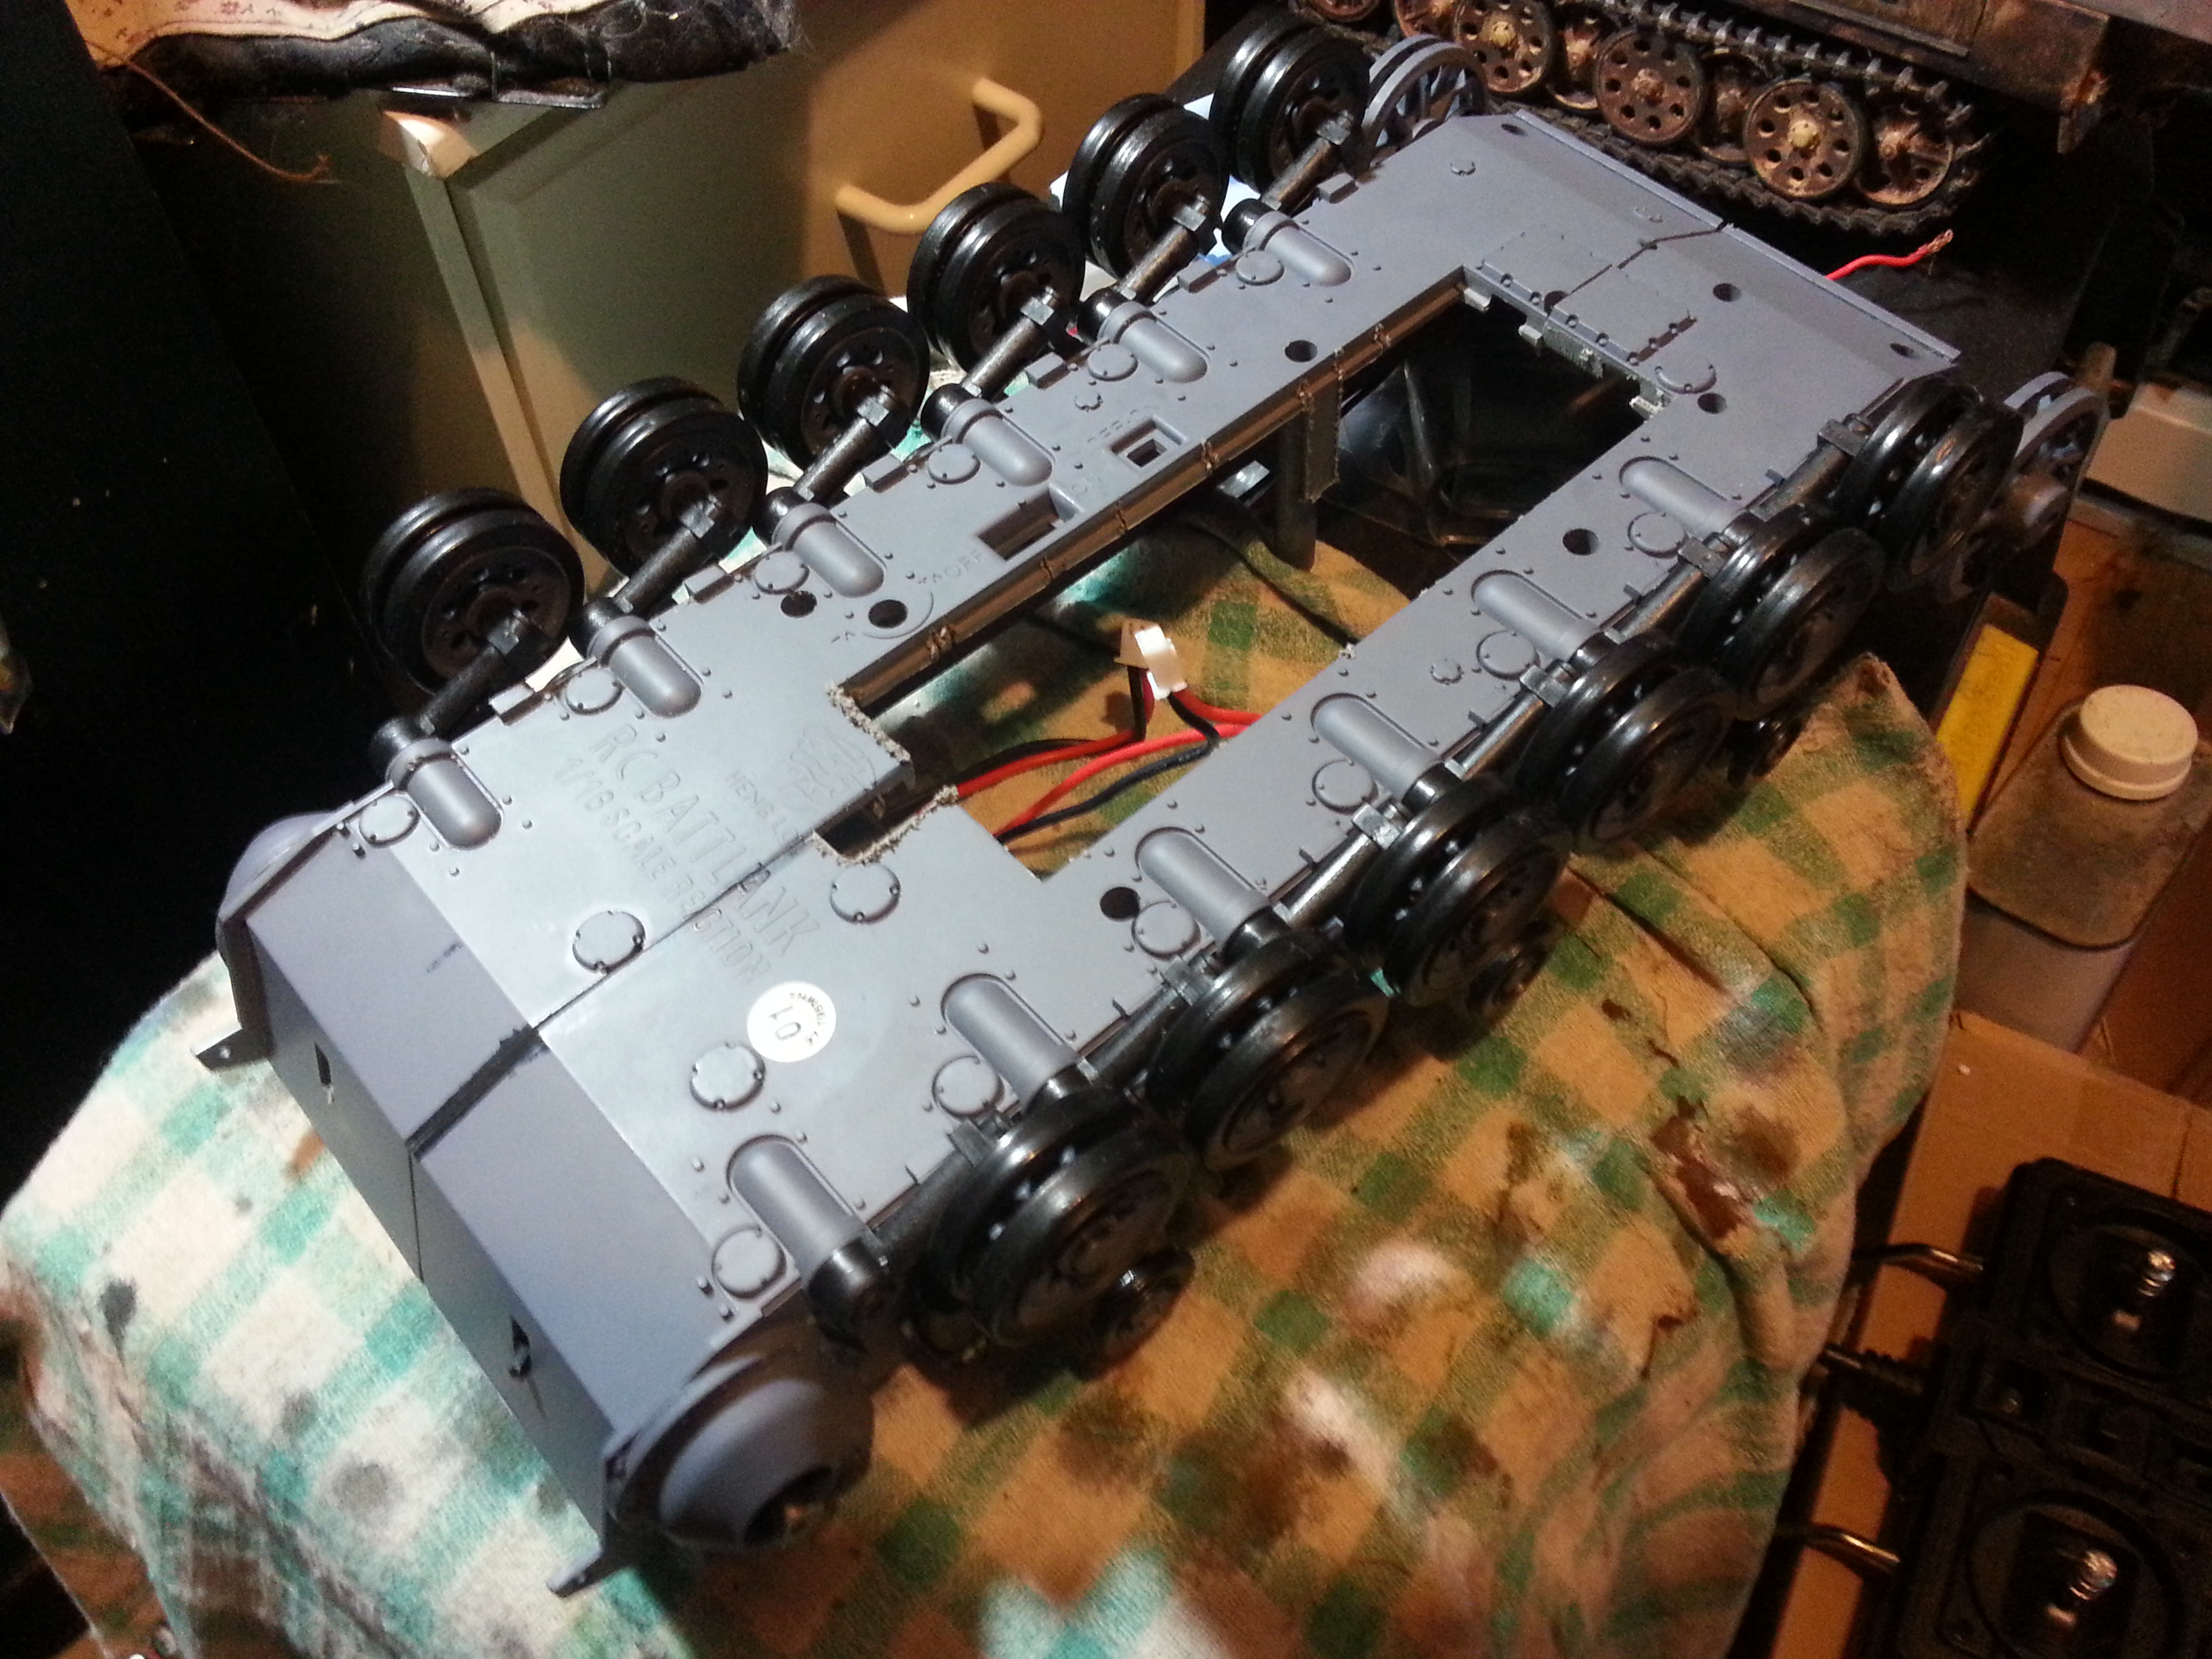
I picked up a 4x8 sheet of polystyrene for $19, yay plastic supply store...
Anyhoo I did some rear deck work, rear end and some minor bits with the styrene. I also picked up a tube of finishing filler to fill spaces and gaps that I don't want. I've never used a filler / putty before so I'm learning as I go. The stuff says it's sandable and paintable so with luck it'll be fine. It goes on pink and dries / hardens white!
Anyhoo I did some rear deck work, rear end and some minor bits with the styrene. I also picked up a tube of finishing filler to fill spaces and gaps that I don't want. I've never used a filler / putty before so I'm learning as I go. The stuff says it's sandable and paintable so with luck it'll be fine. It goes on pink and dries / hardens white!
 12-06-2013 | 11:35 AM
#10

Joined: Jul 2010
Posts: 248
Likes: 0
Received 0 Likes
on
0 Posts
From: Charlotte, , NC
Awesome work on a really different and challenging project. Can't wait tp see the finished tank. Indidentally, I coult use the
Pz turret if you have no further use for it. Be glad to pay for it.
Pz turret if you have no further use for it. Be glad to pay for it.
 12-07-2013 | 03:26 AM
#12
Thread Starter
Thanks again fellas.
Having more fun today with the new styrene. I'm used to working with a thicker material but since that has run out (lasted me MANY years) I'm now well stocked with this 1mm sheet and I really like working with it.
Did some fender work, basically adding sheets ontop of what was left of the original PnzIII fenders, which wasn't much after the band saw introduced itself...
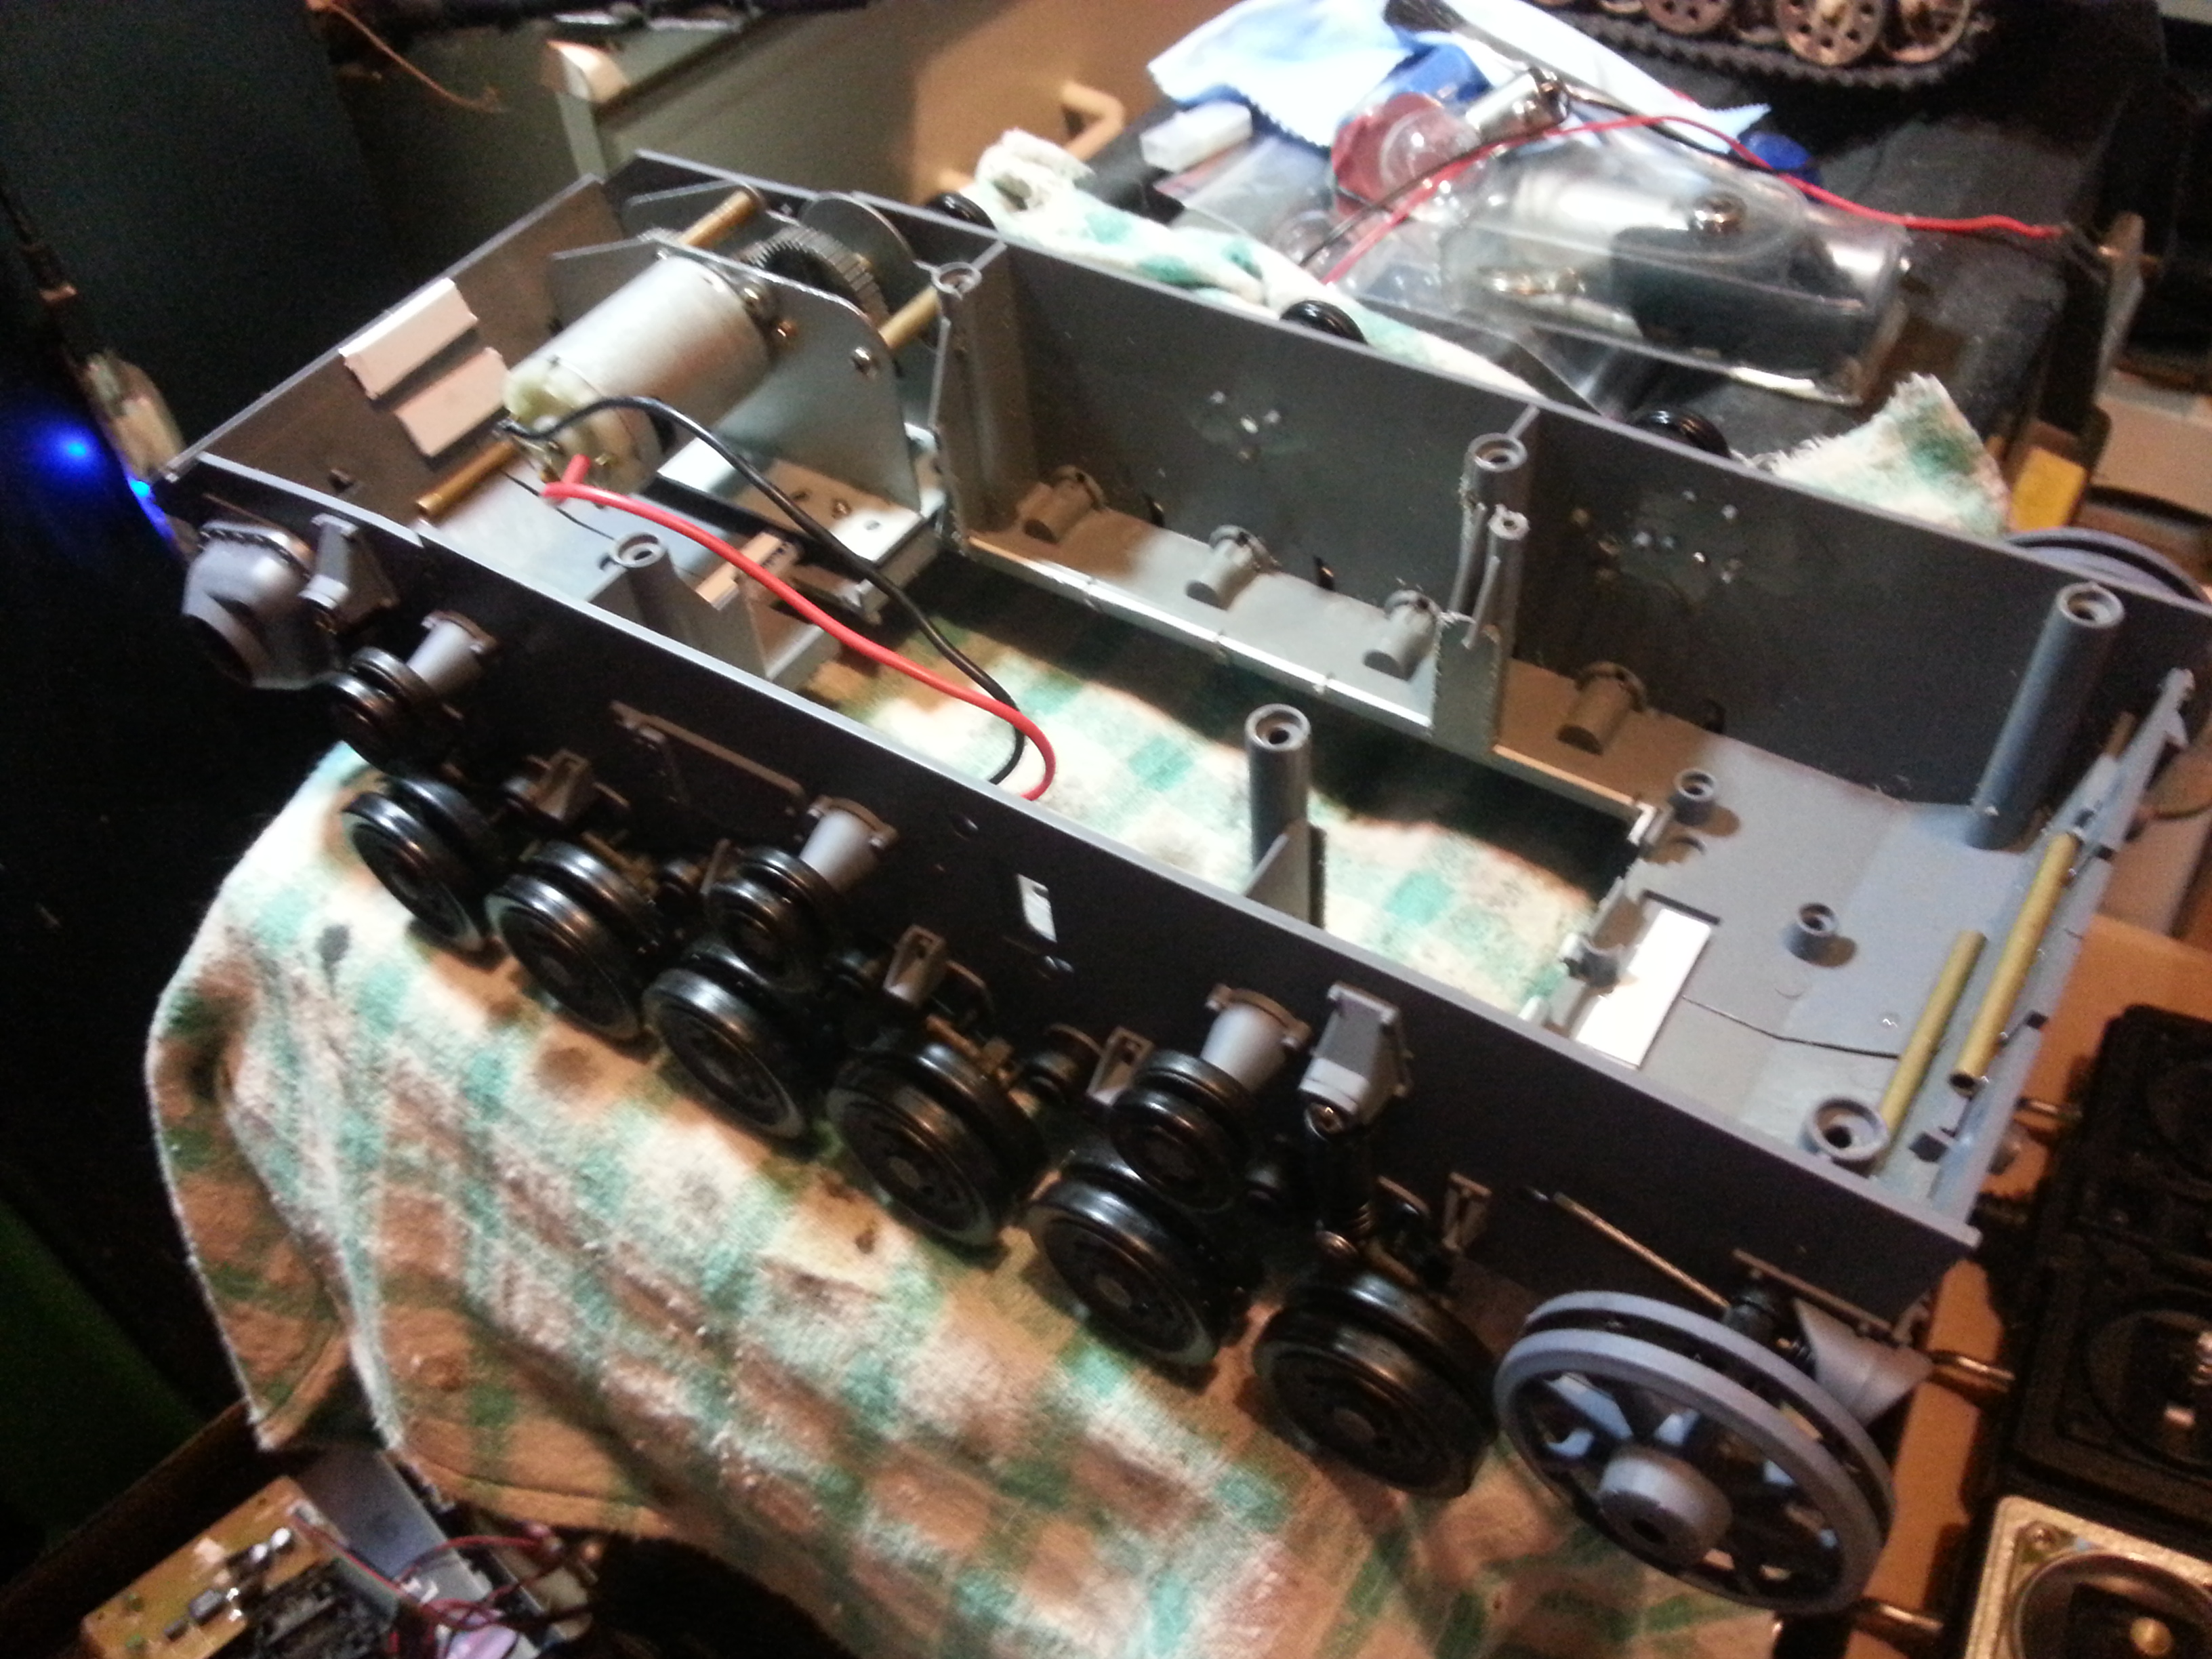
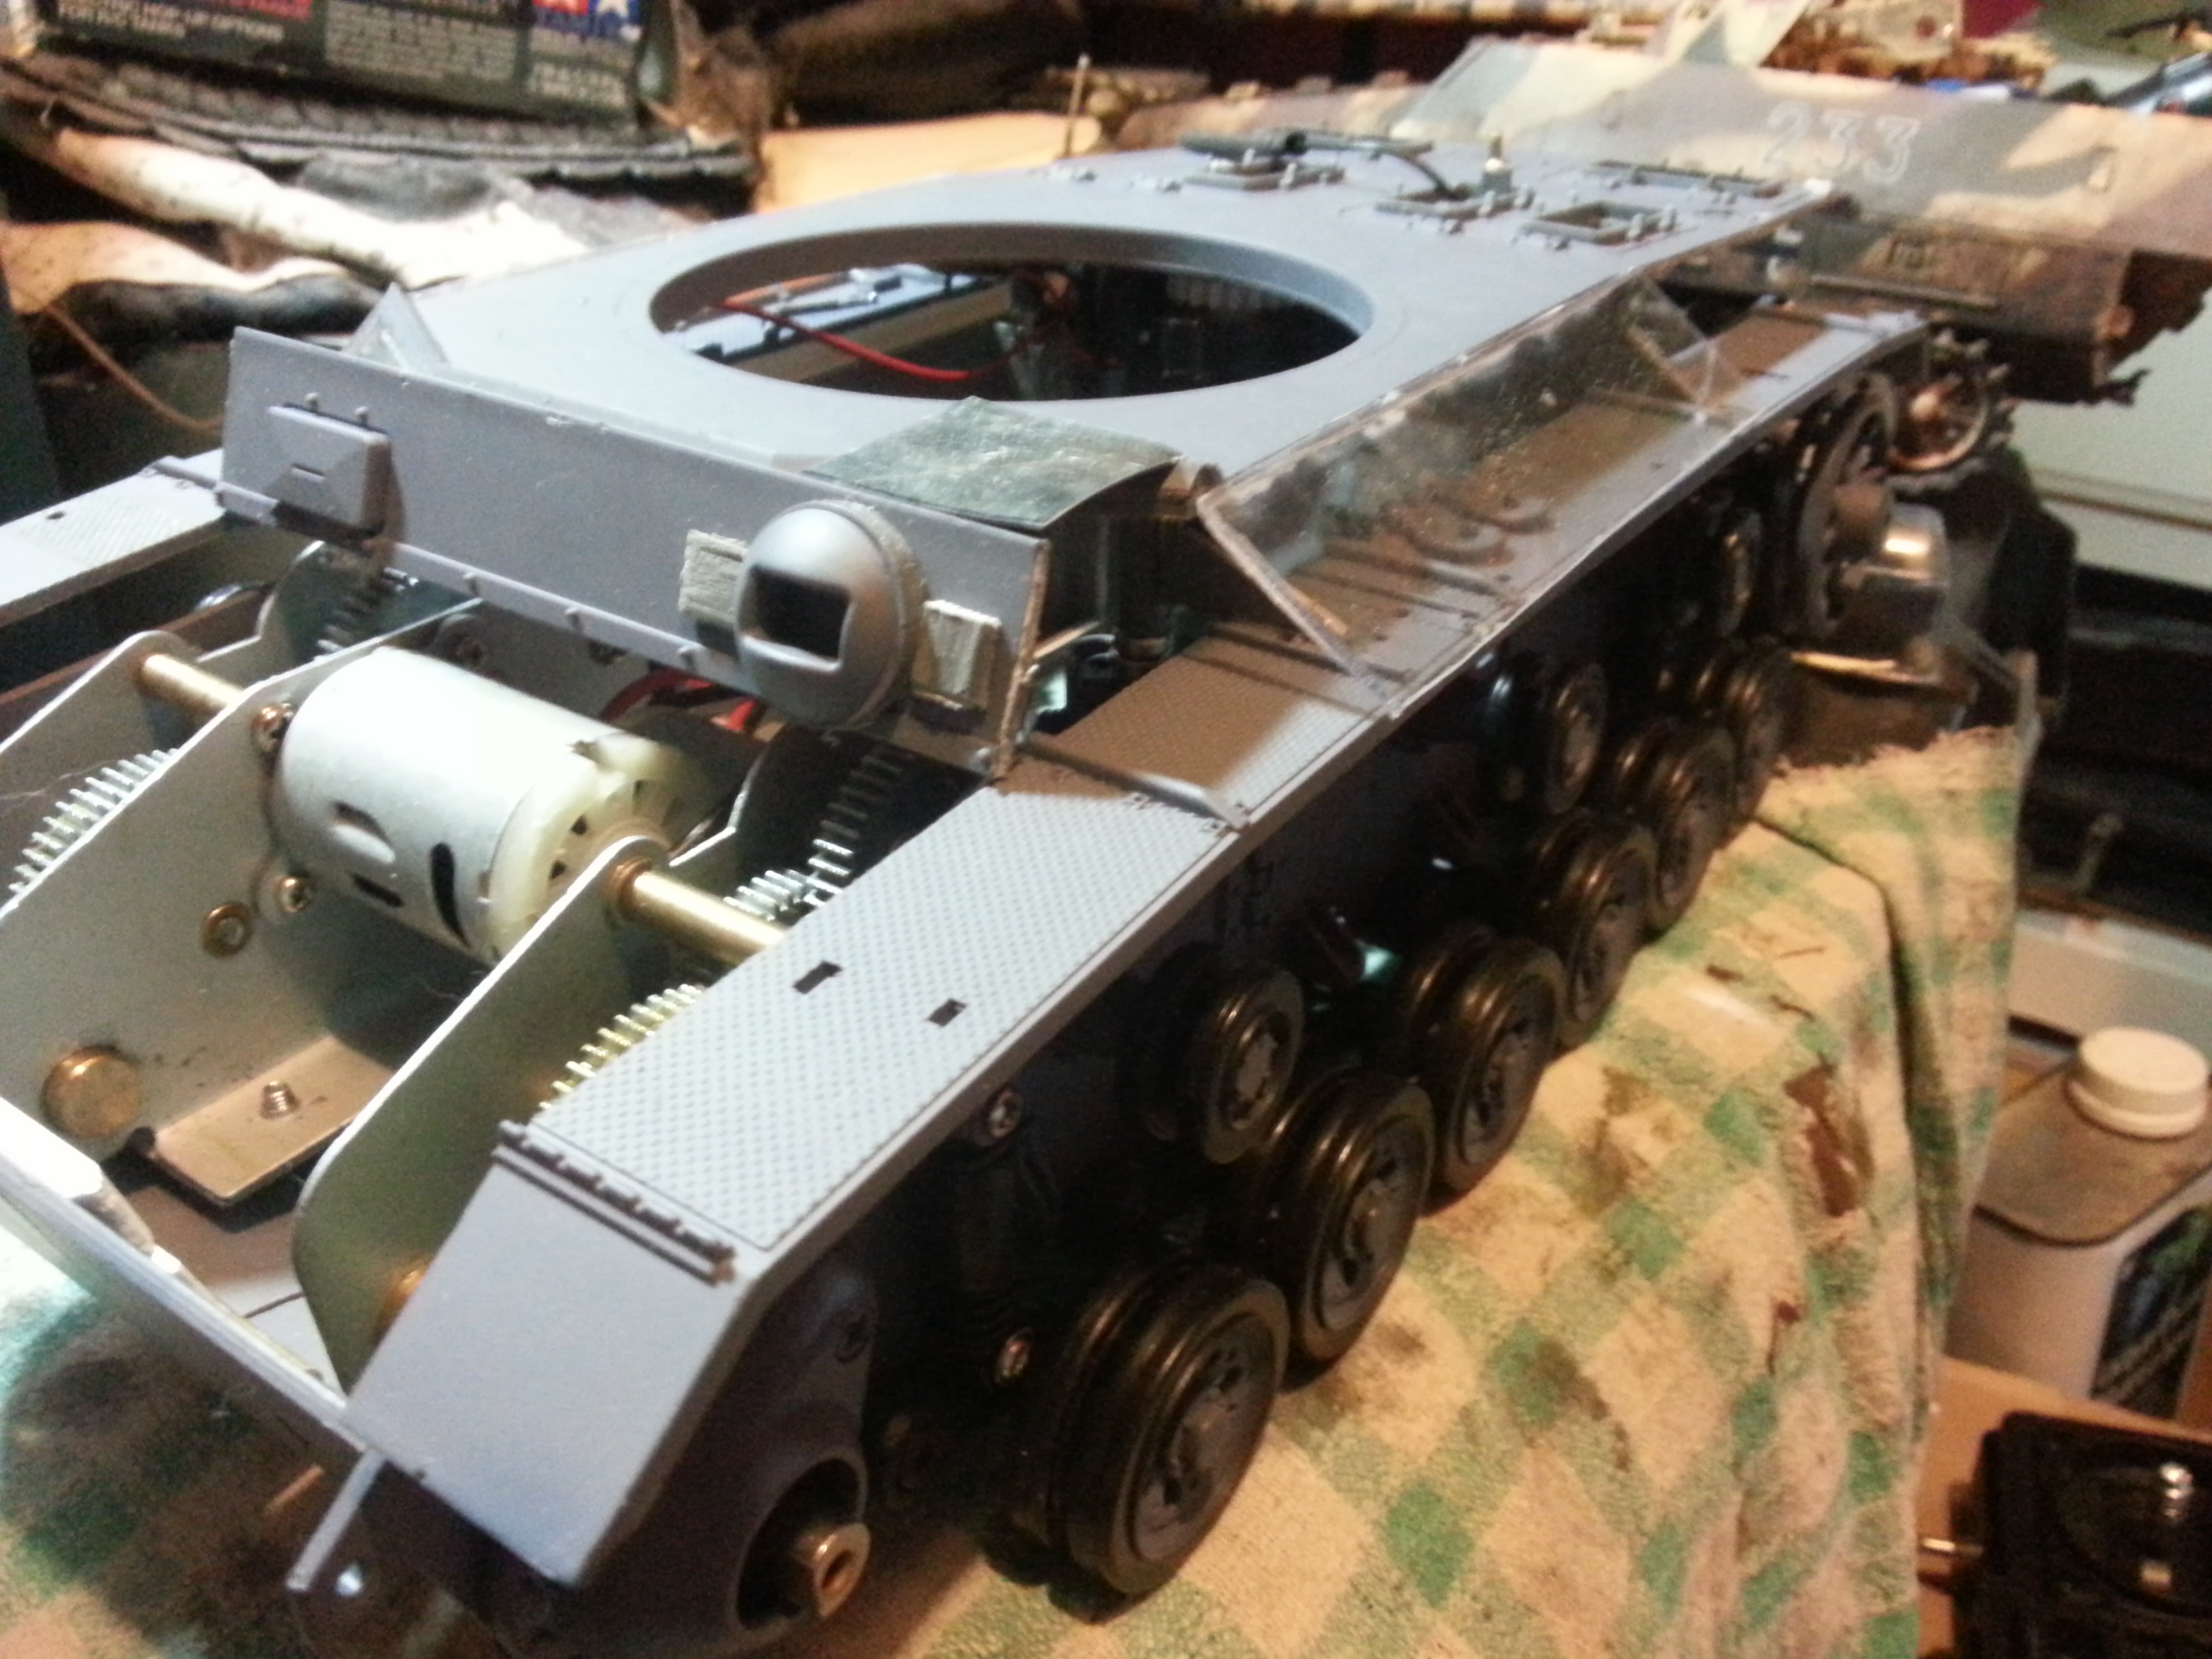
Cleaned up the lower hull cosmetically & removed the vertical spring coil suspension bits from the Panzer III and smoothed out their mounts. Now I seem to remember OTHER panzer 3's I've taken apart having BOTH the vertical spring and the coil spring under the suspension arm.. all 4 on this tank did not have the coil spring. Oh well, I had spares and in they went.
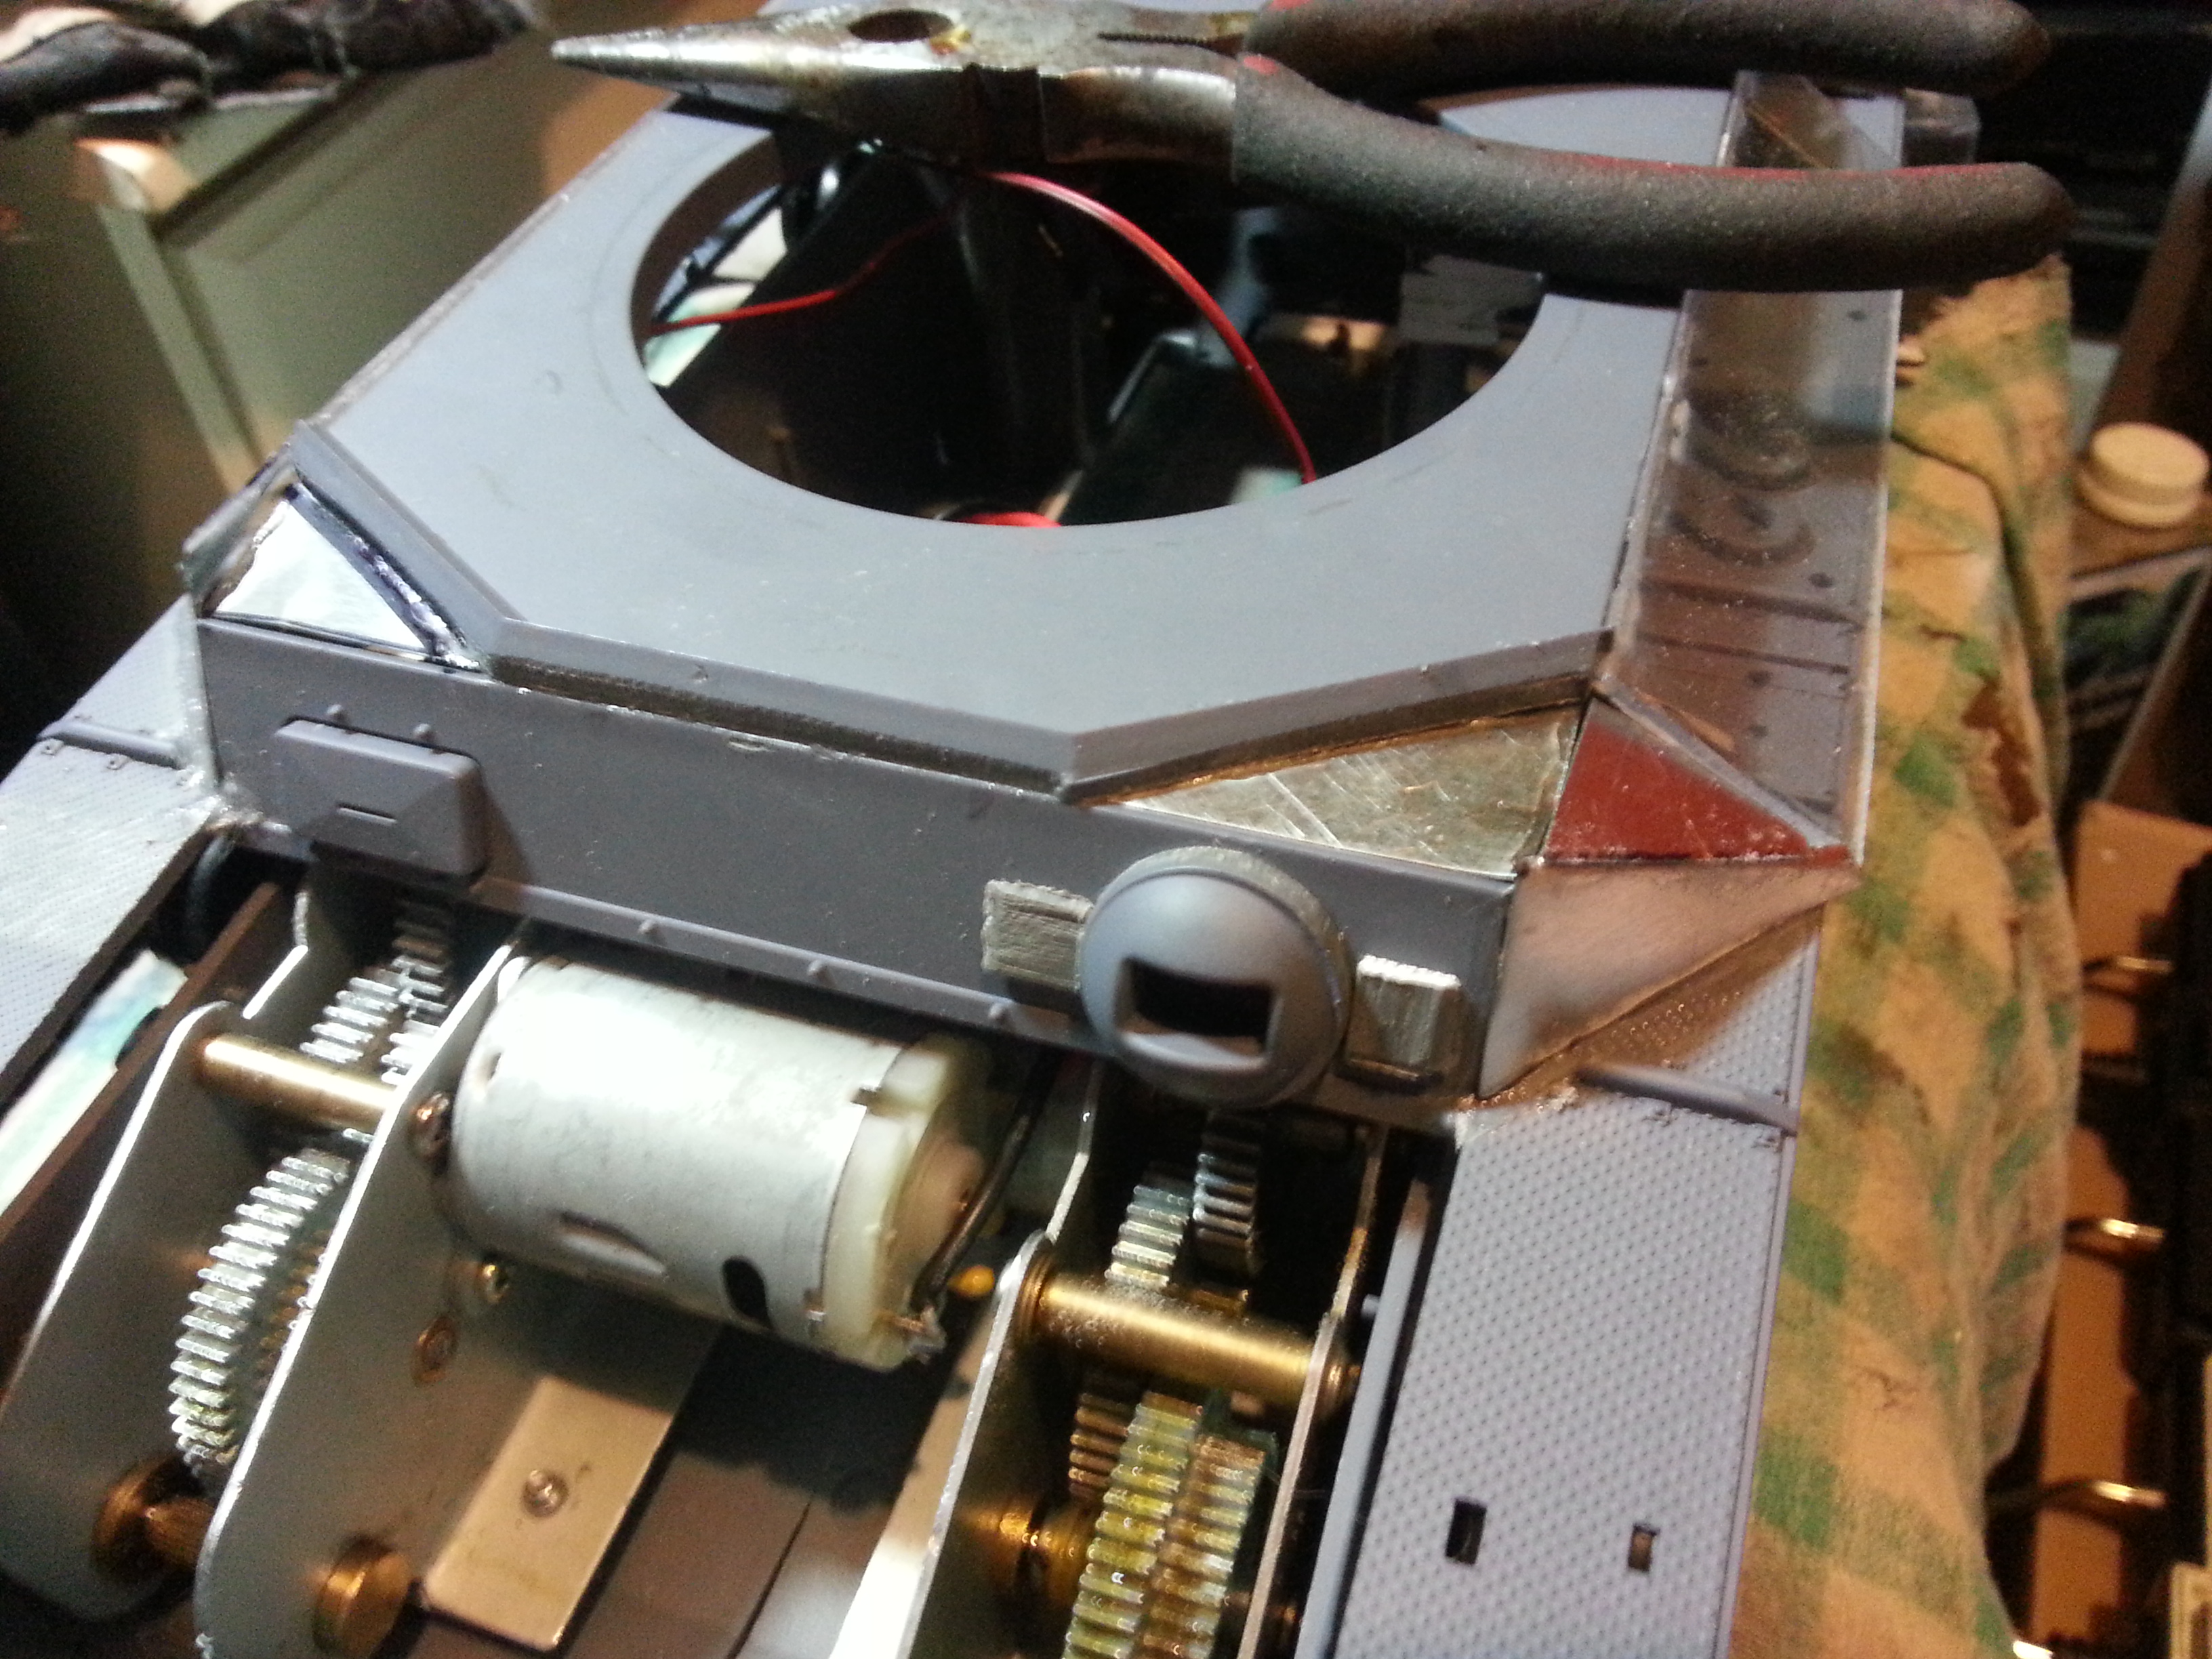
I also redid the front end of the tank with the thinner material as it gave a better look and more clearance to the gearboxes... granted I also took a dremel to the tops of the gearbox frame to make a bit more room!
The spackle filler is doing a good job so far! It sticks nicely to the plastic and is super easy to sand. If anything it's a big too brittle but I'm not using it in any structural capacity

Bob, if I carry on with this plan I'll be using most of the turret to build myself a new one.
Having more fun today with the new styrene. I'm used to working with a thicker material but since that has run out (lasted me MANY years) I'm now well stocked with this 1mm sheet and I really like working with it.
Did some fender work, basically adding sheets ontop of what was left of the original PnzIII fenders, which wasn't much after the band saw introduced itself...
Cleaned up the lower hull cosmetically & removed the vertical spring coil suspension bits from the Panzer III and smoothed out their mounts. Now I seem to remember OTHER panzer 3's I've taken apart having BOTH the vertical spring and the coil spring under the suspension arm.. all 4 on this tank did not have the coil spring. Oh well, I had spares and in they went.
I also redid the front end of the tank with the thinner material as it gave a better look and more clearance to the gearboxes... granted I also took a dremel to the tops of the gearbox frame to make a bit more room!
The spackle filler is doing a good job so far! It sticks nicely to the plastic and is super easy to sand. If anything it's a big too brittle but I'm not using it in any structural capacity
Bob, if I carry on with this plan I'll be using most of the turret to build myself a new one.
Last edited by Strato50; 12-07-2013 at 03:30 AM.
12-08-2013 | 06:28 PM
#13
Thread Starter
Quite a bit got done today!
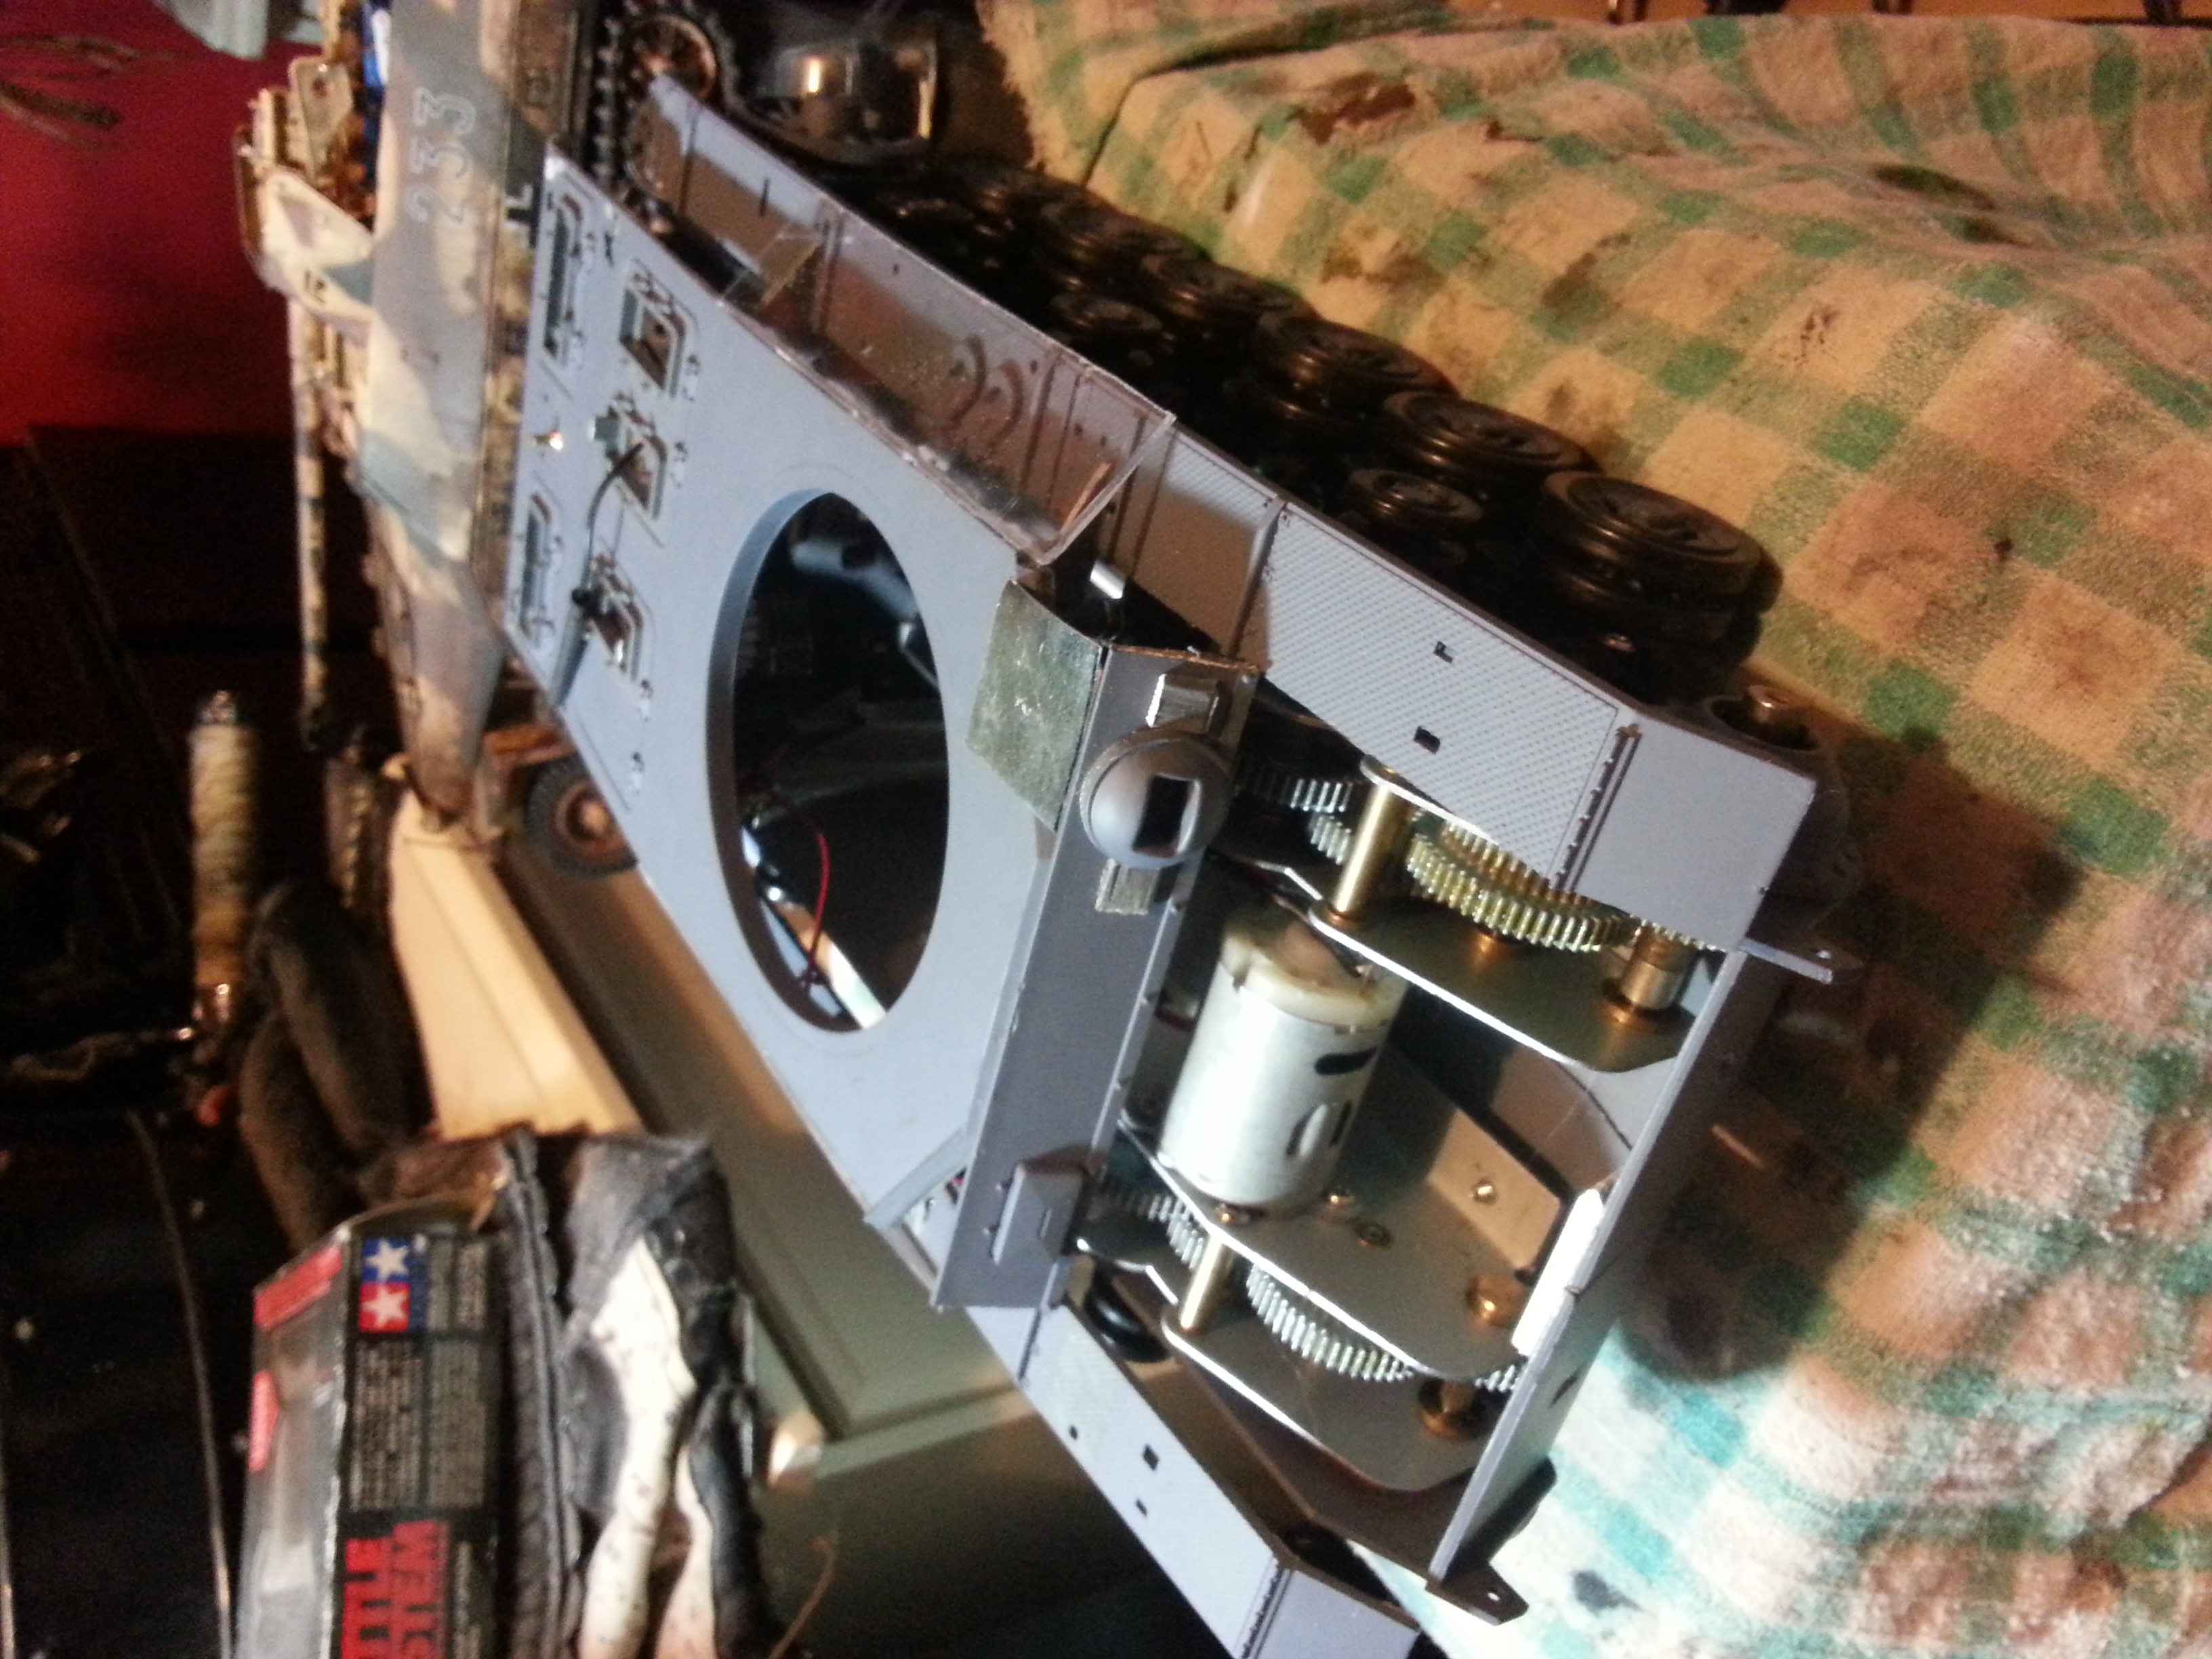
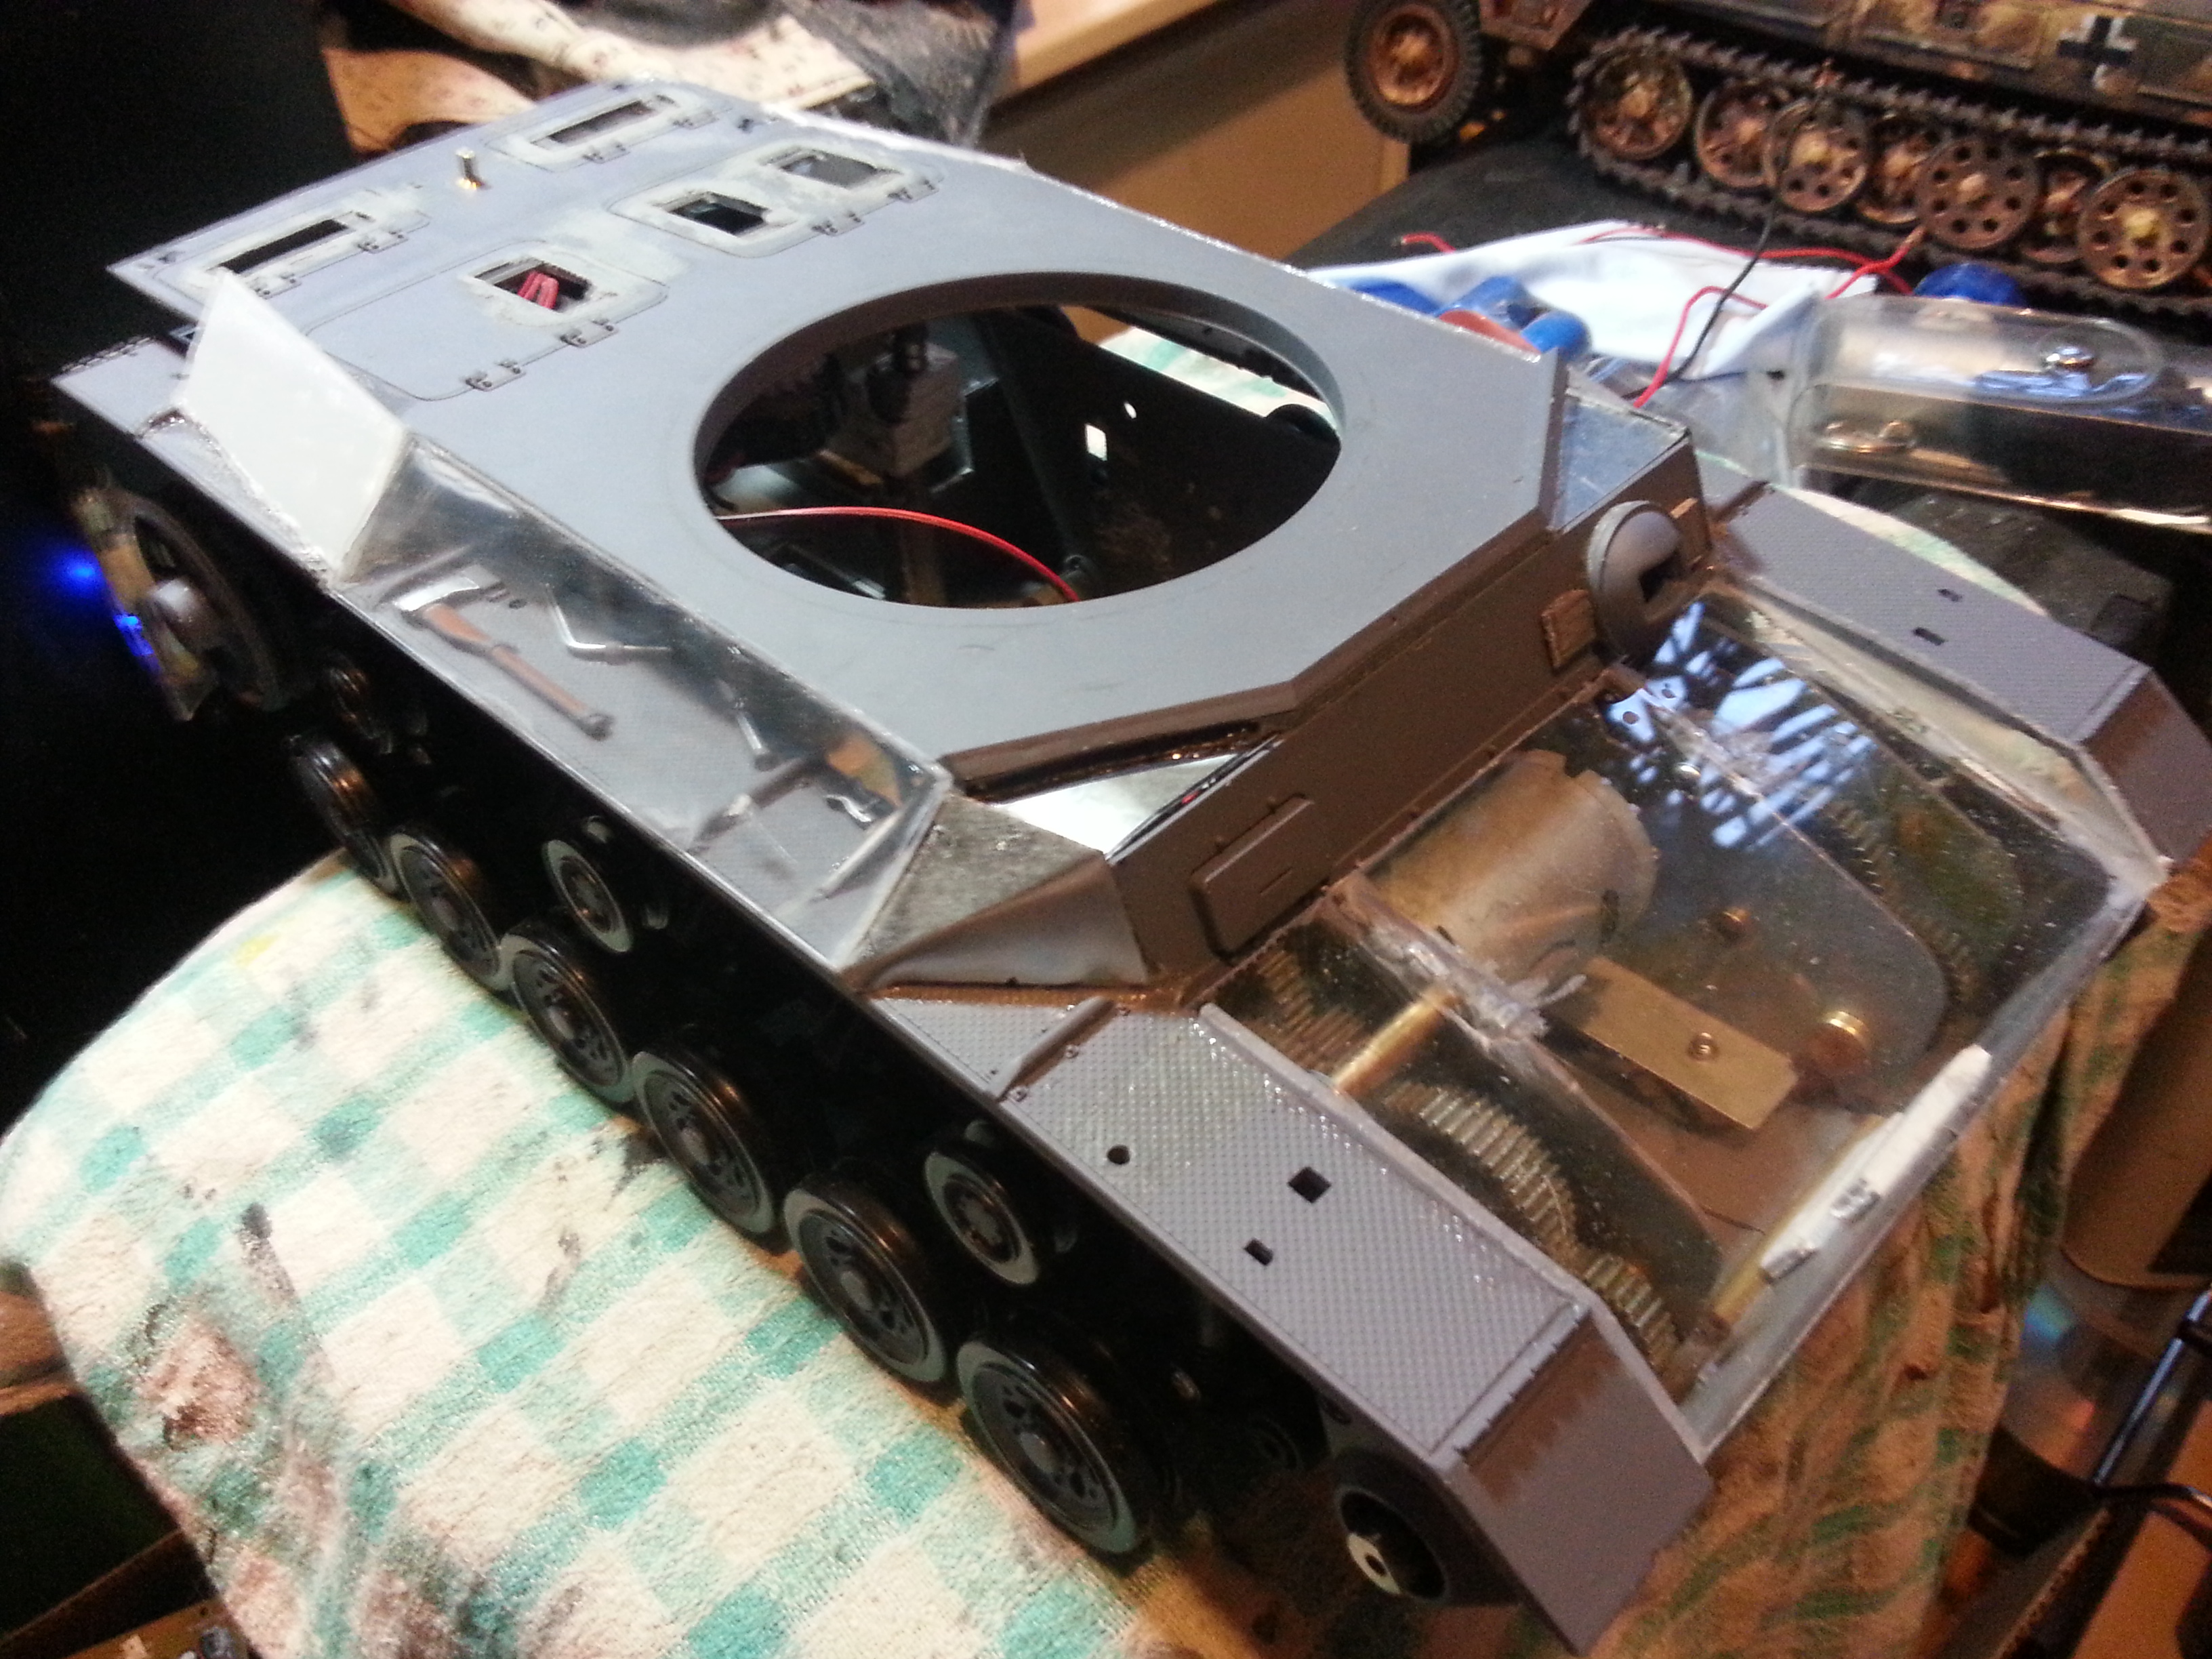
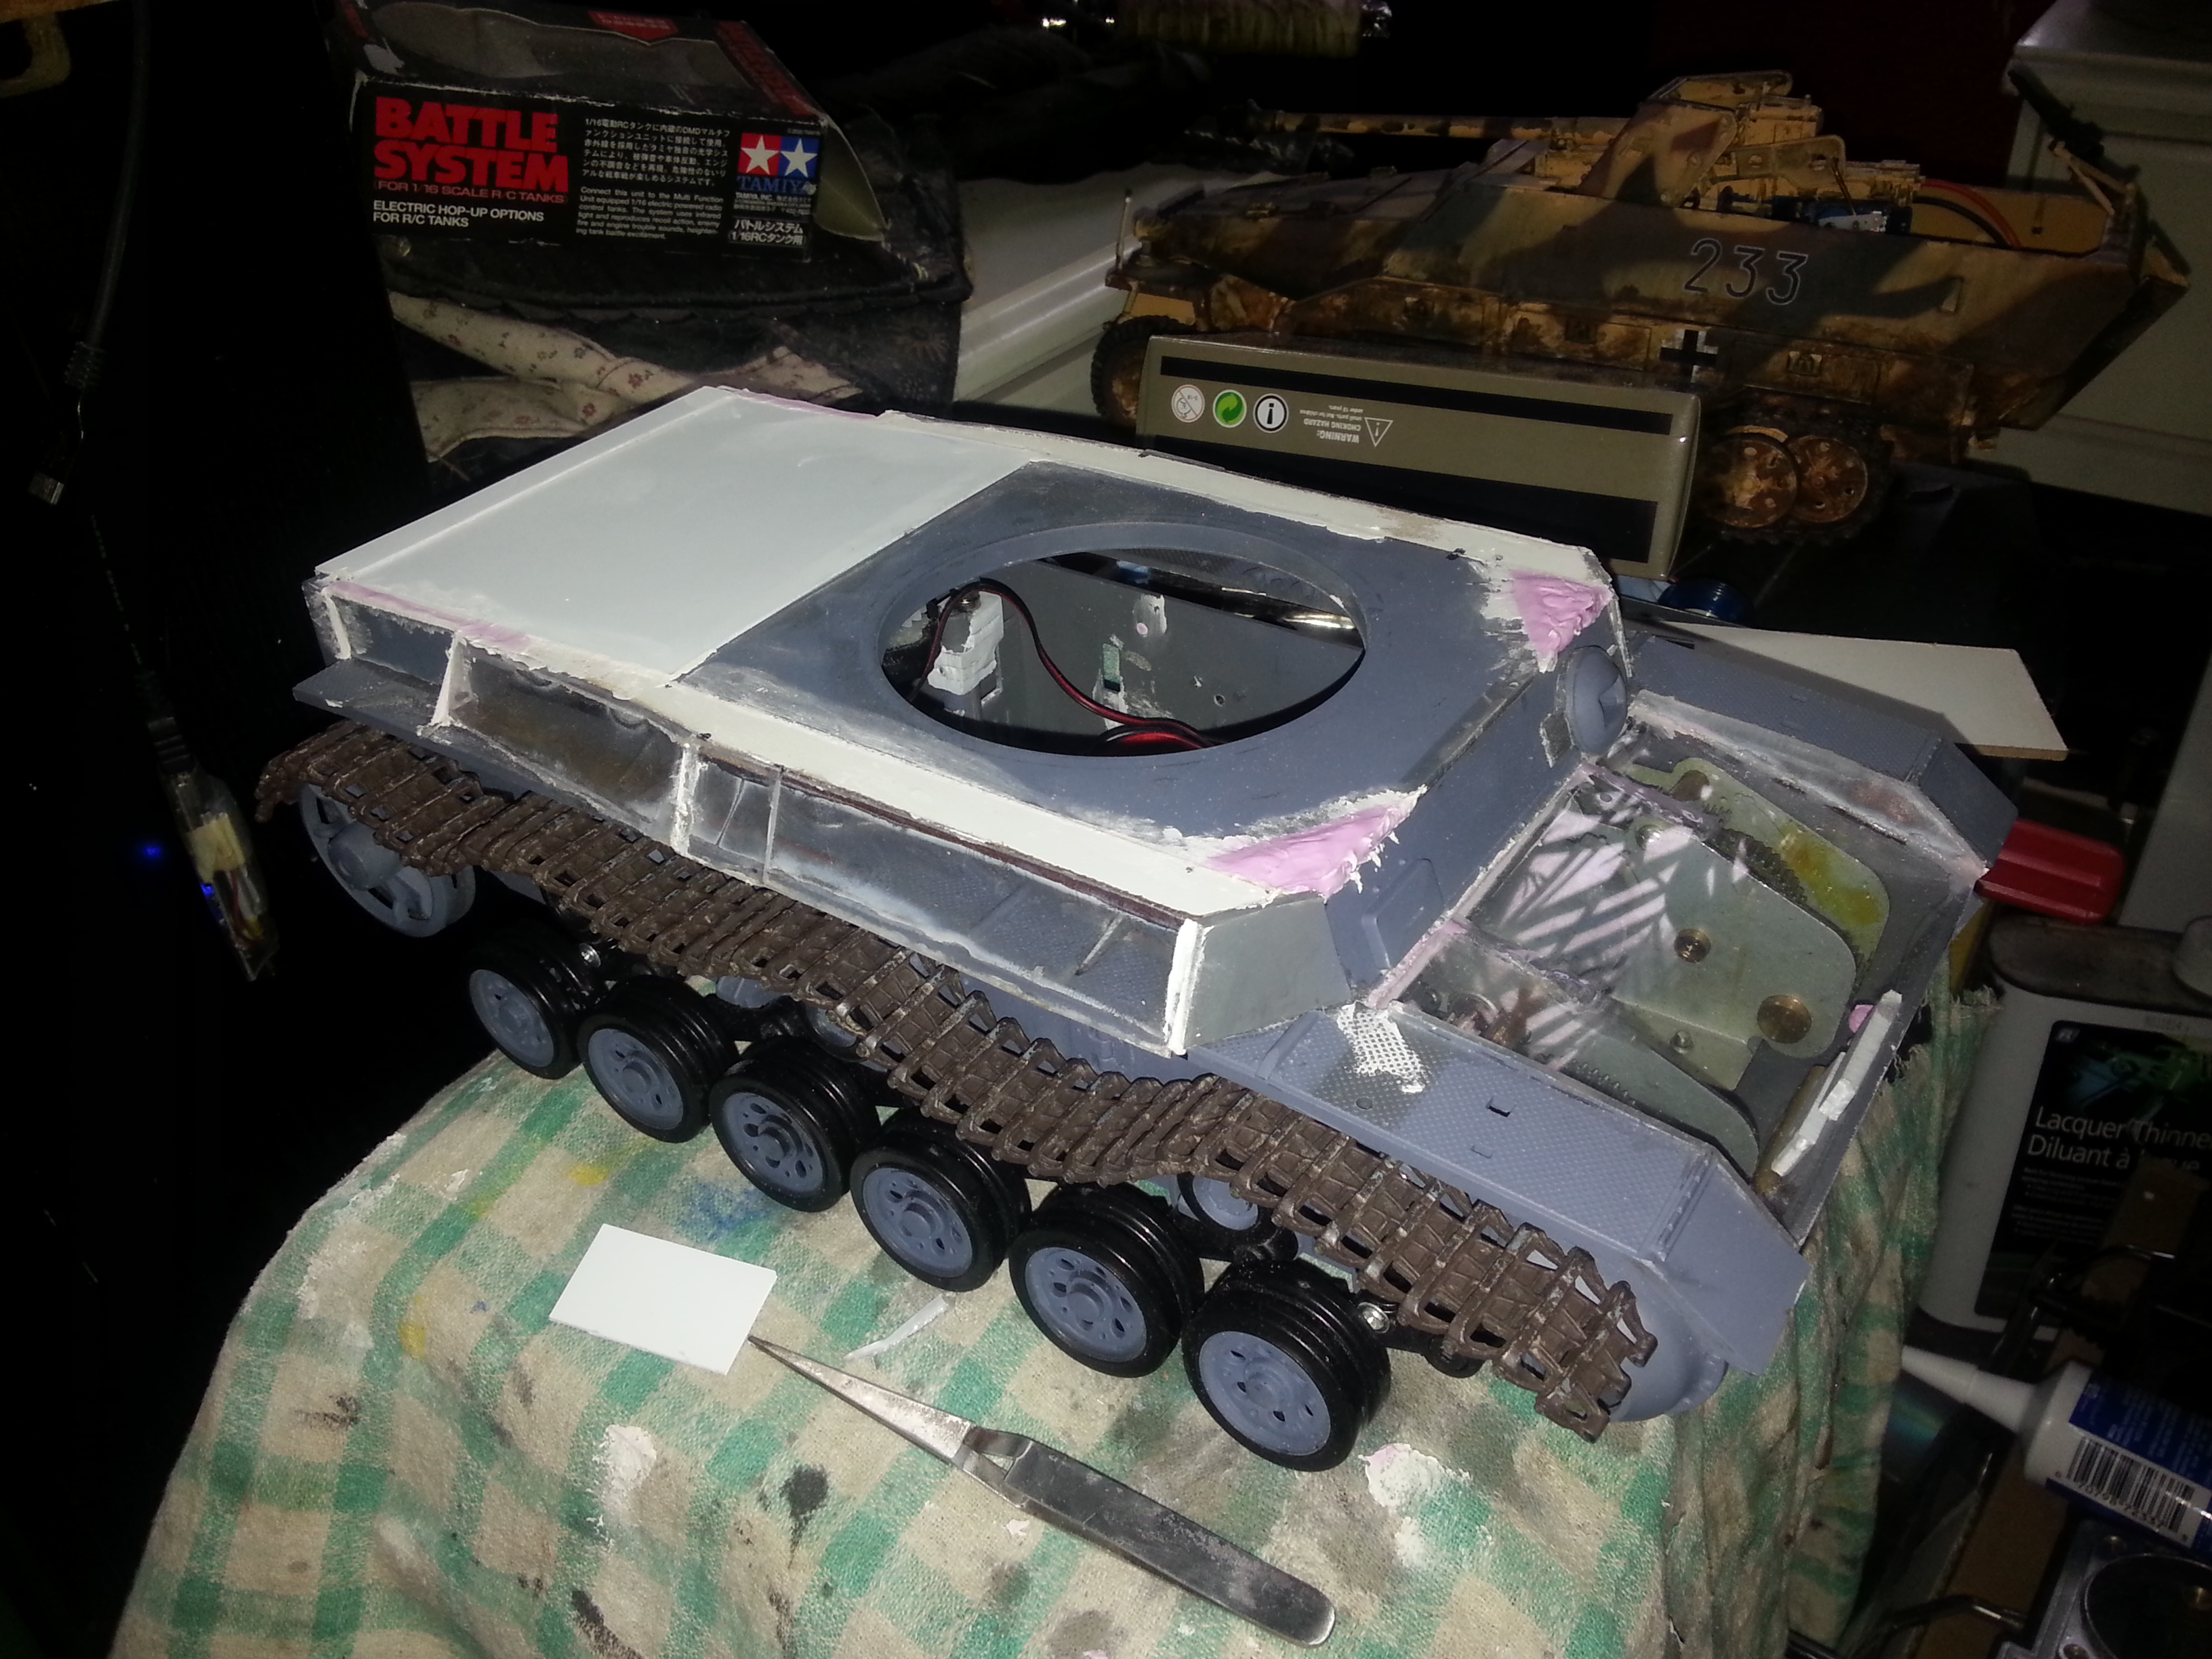
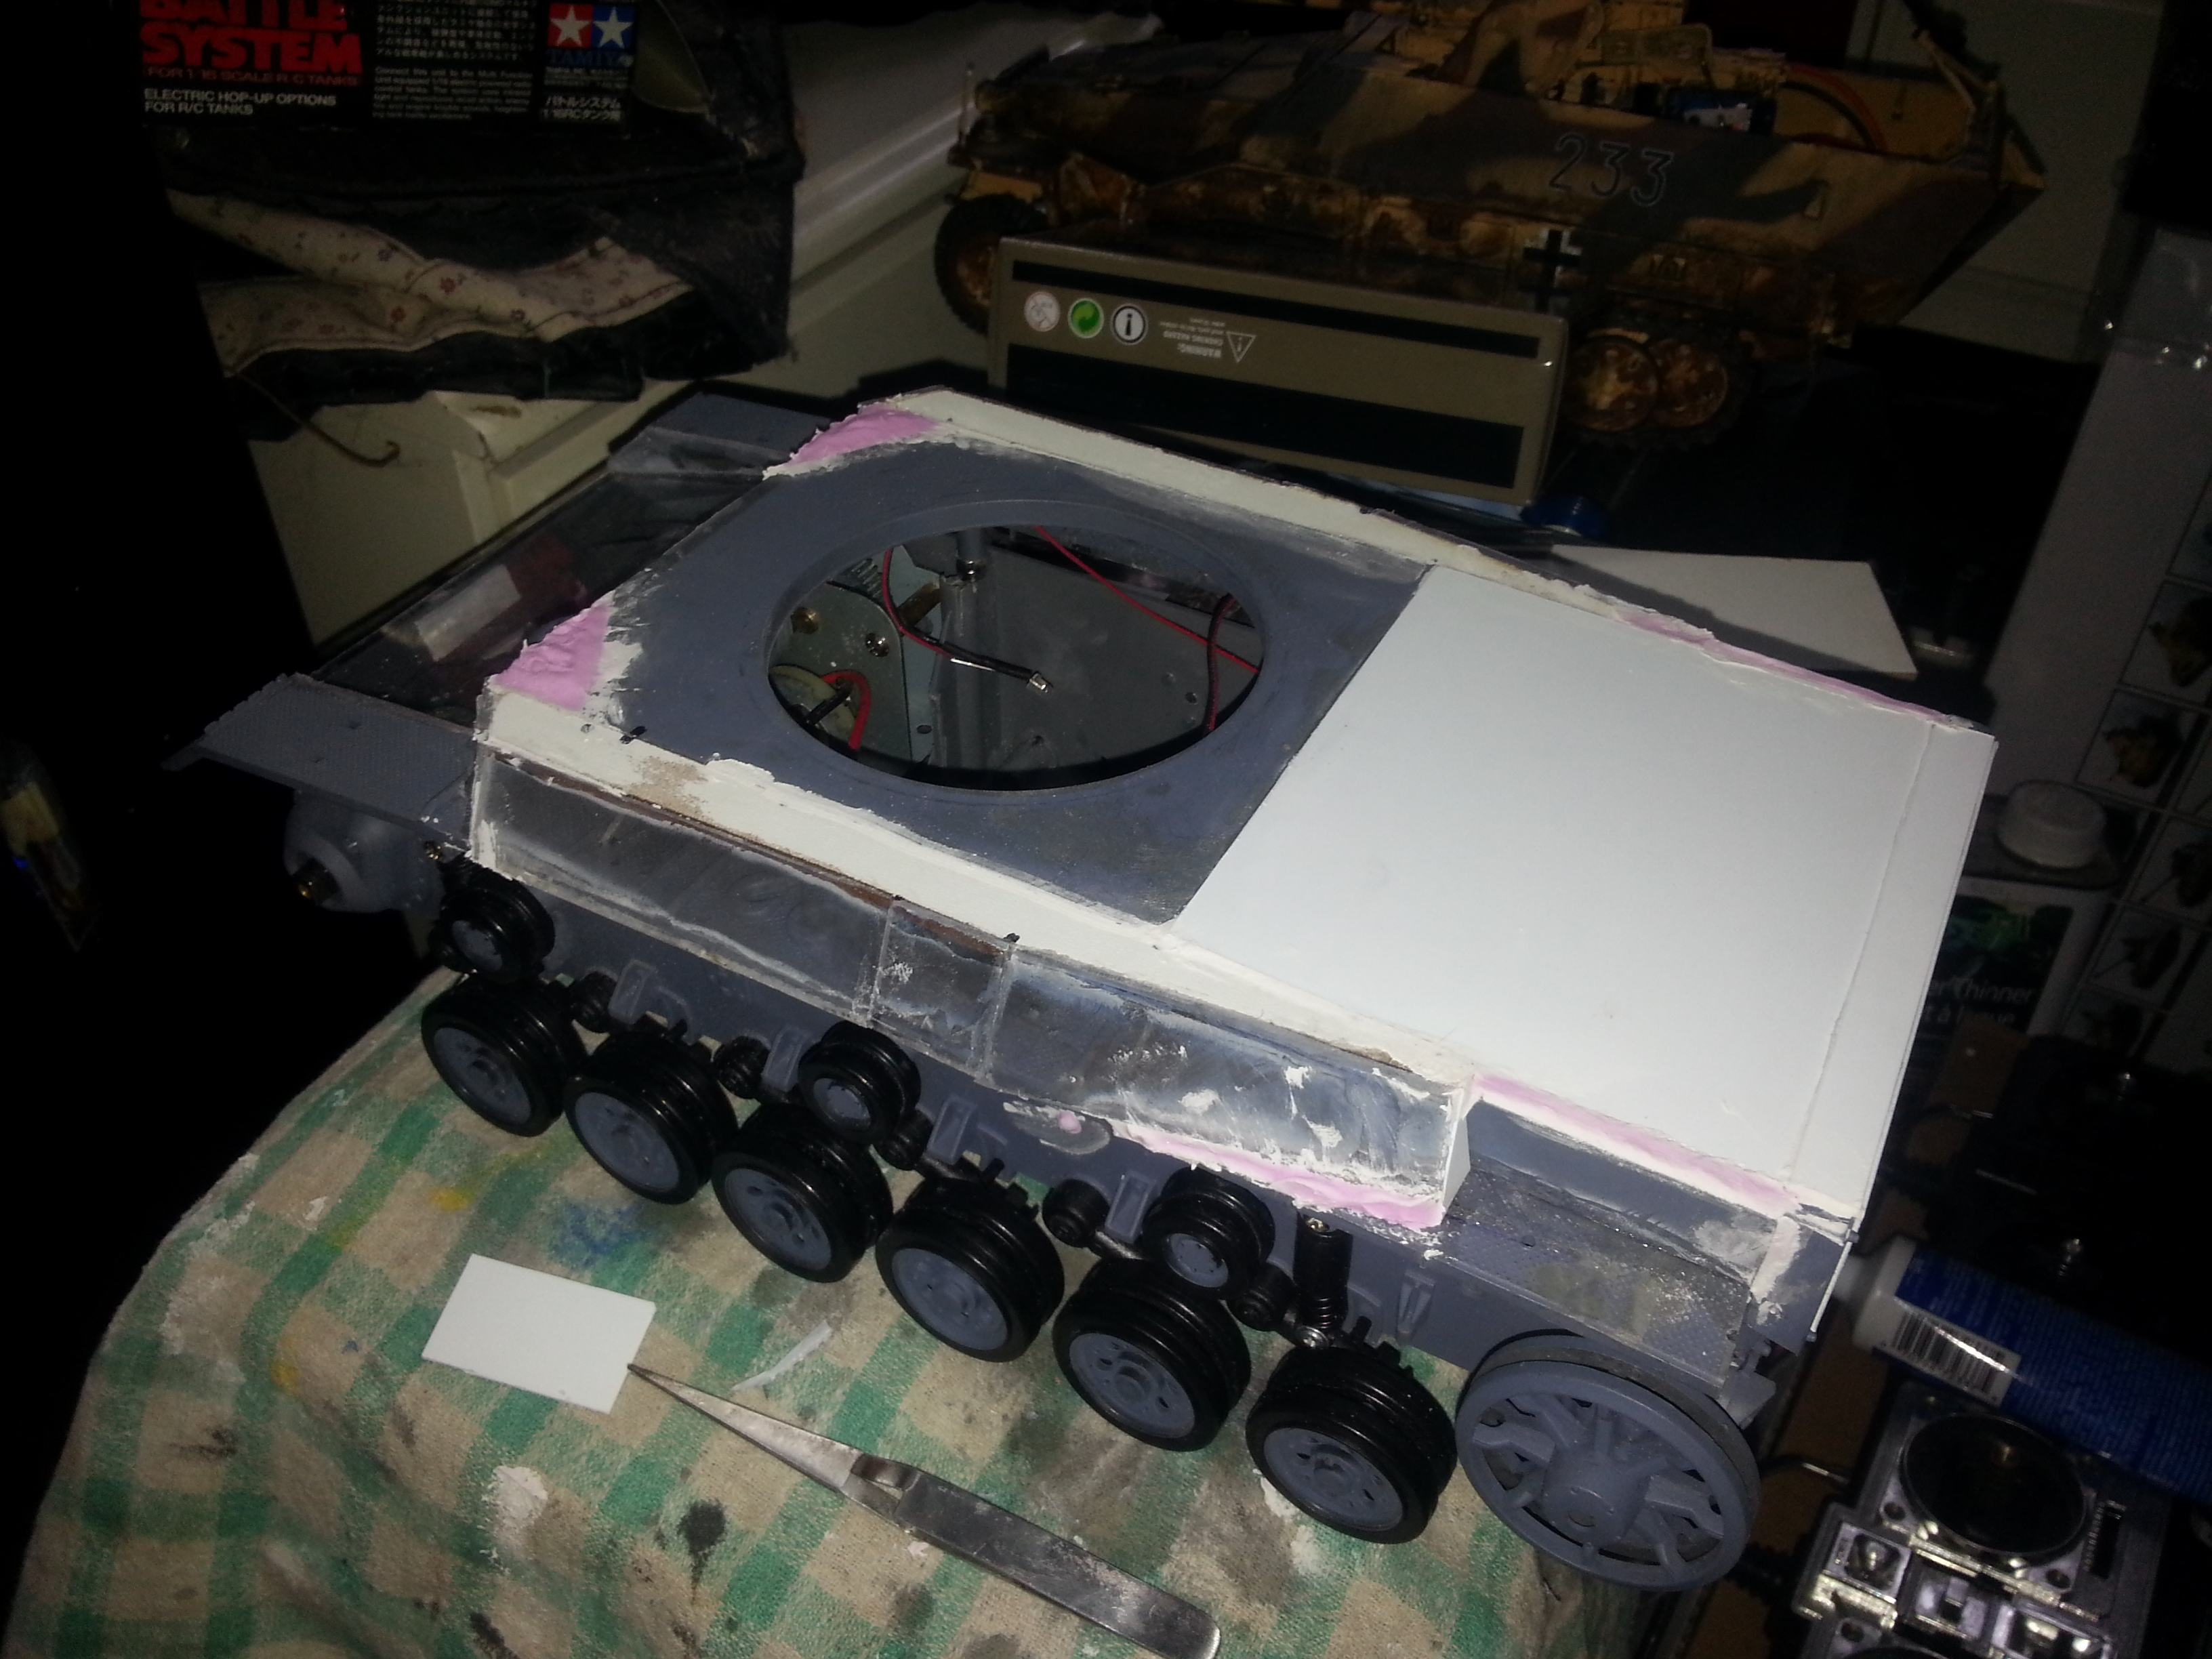
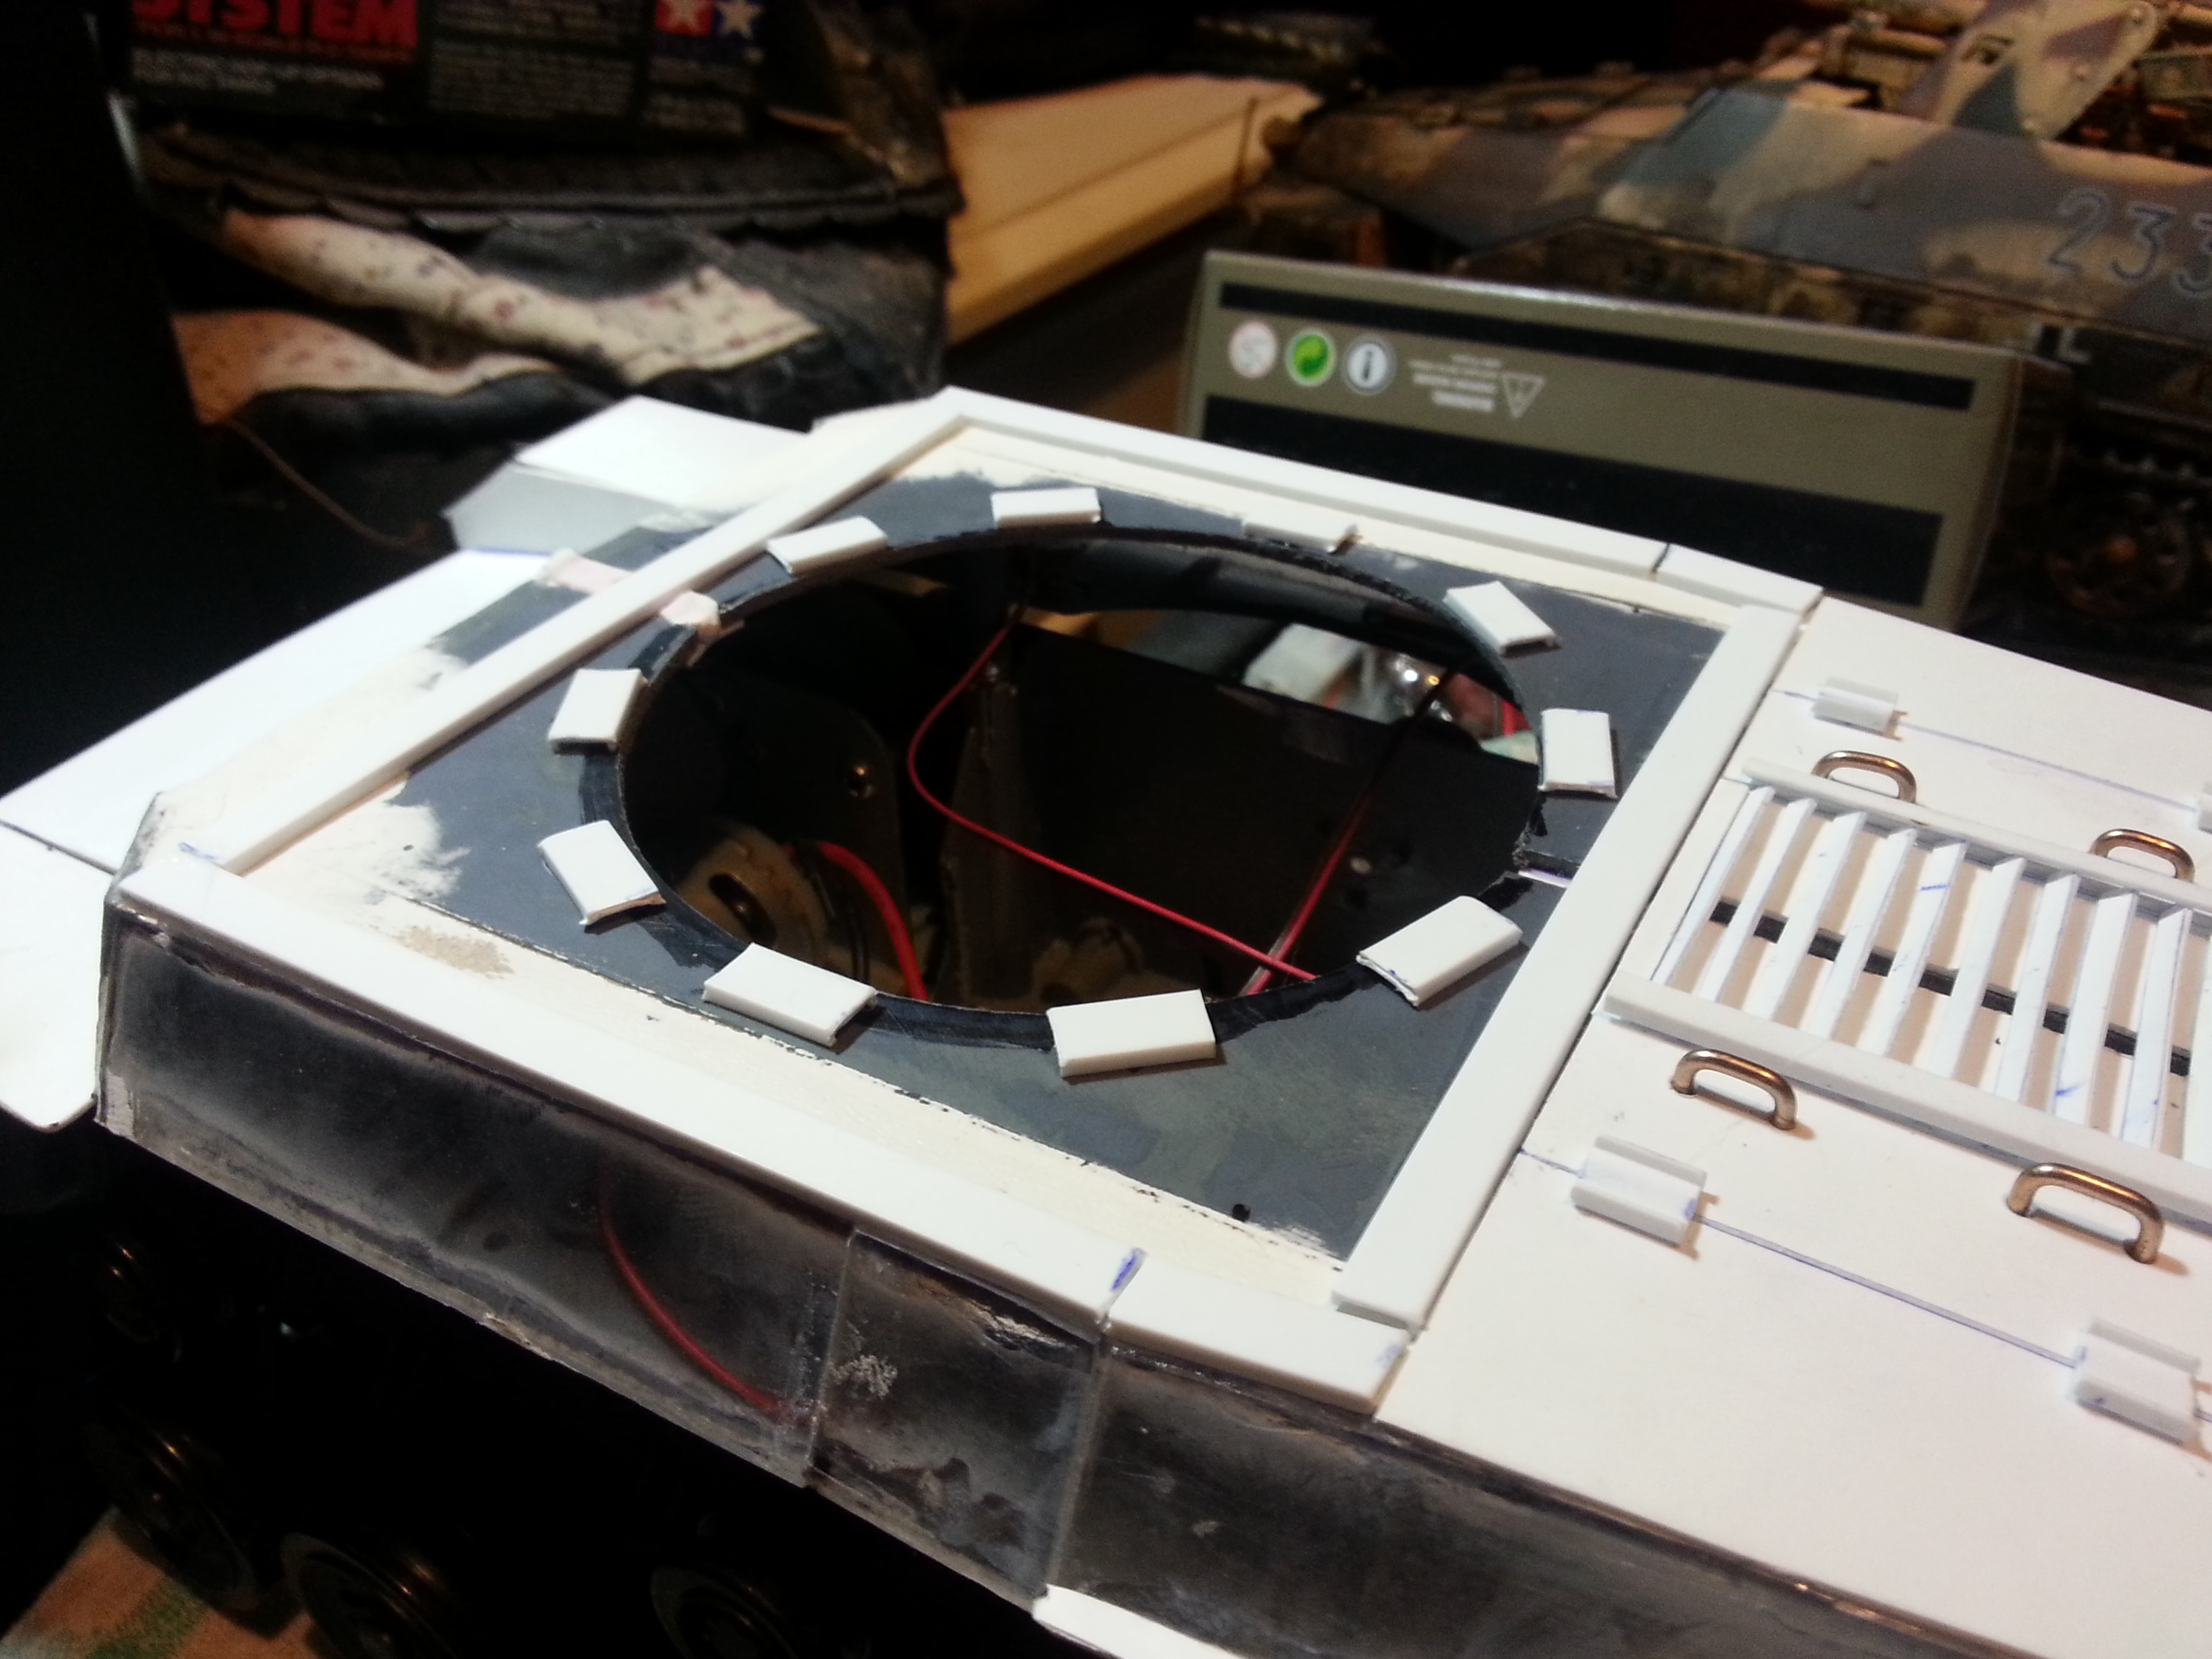
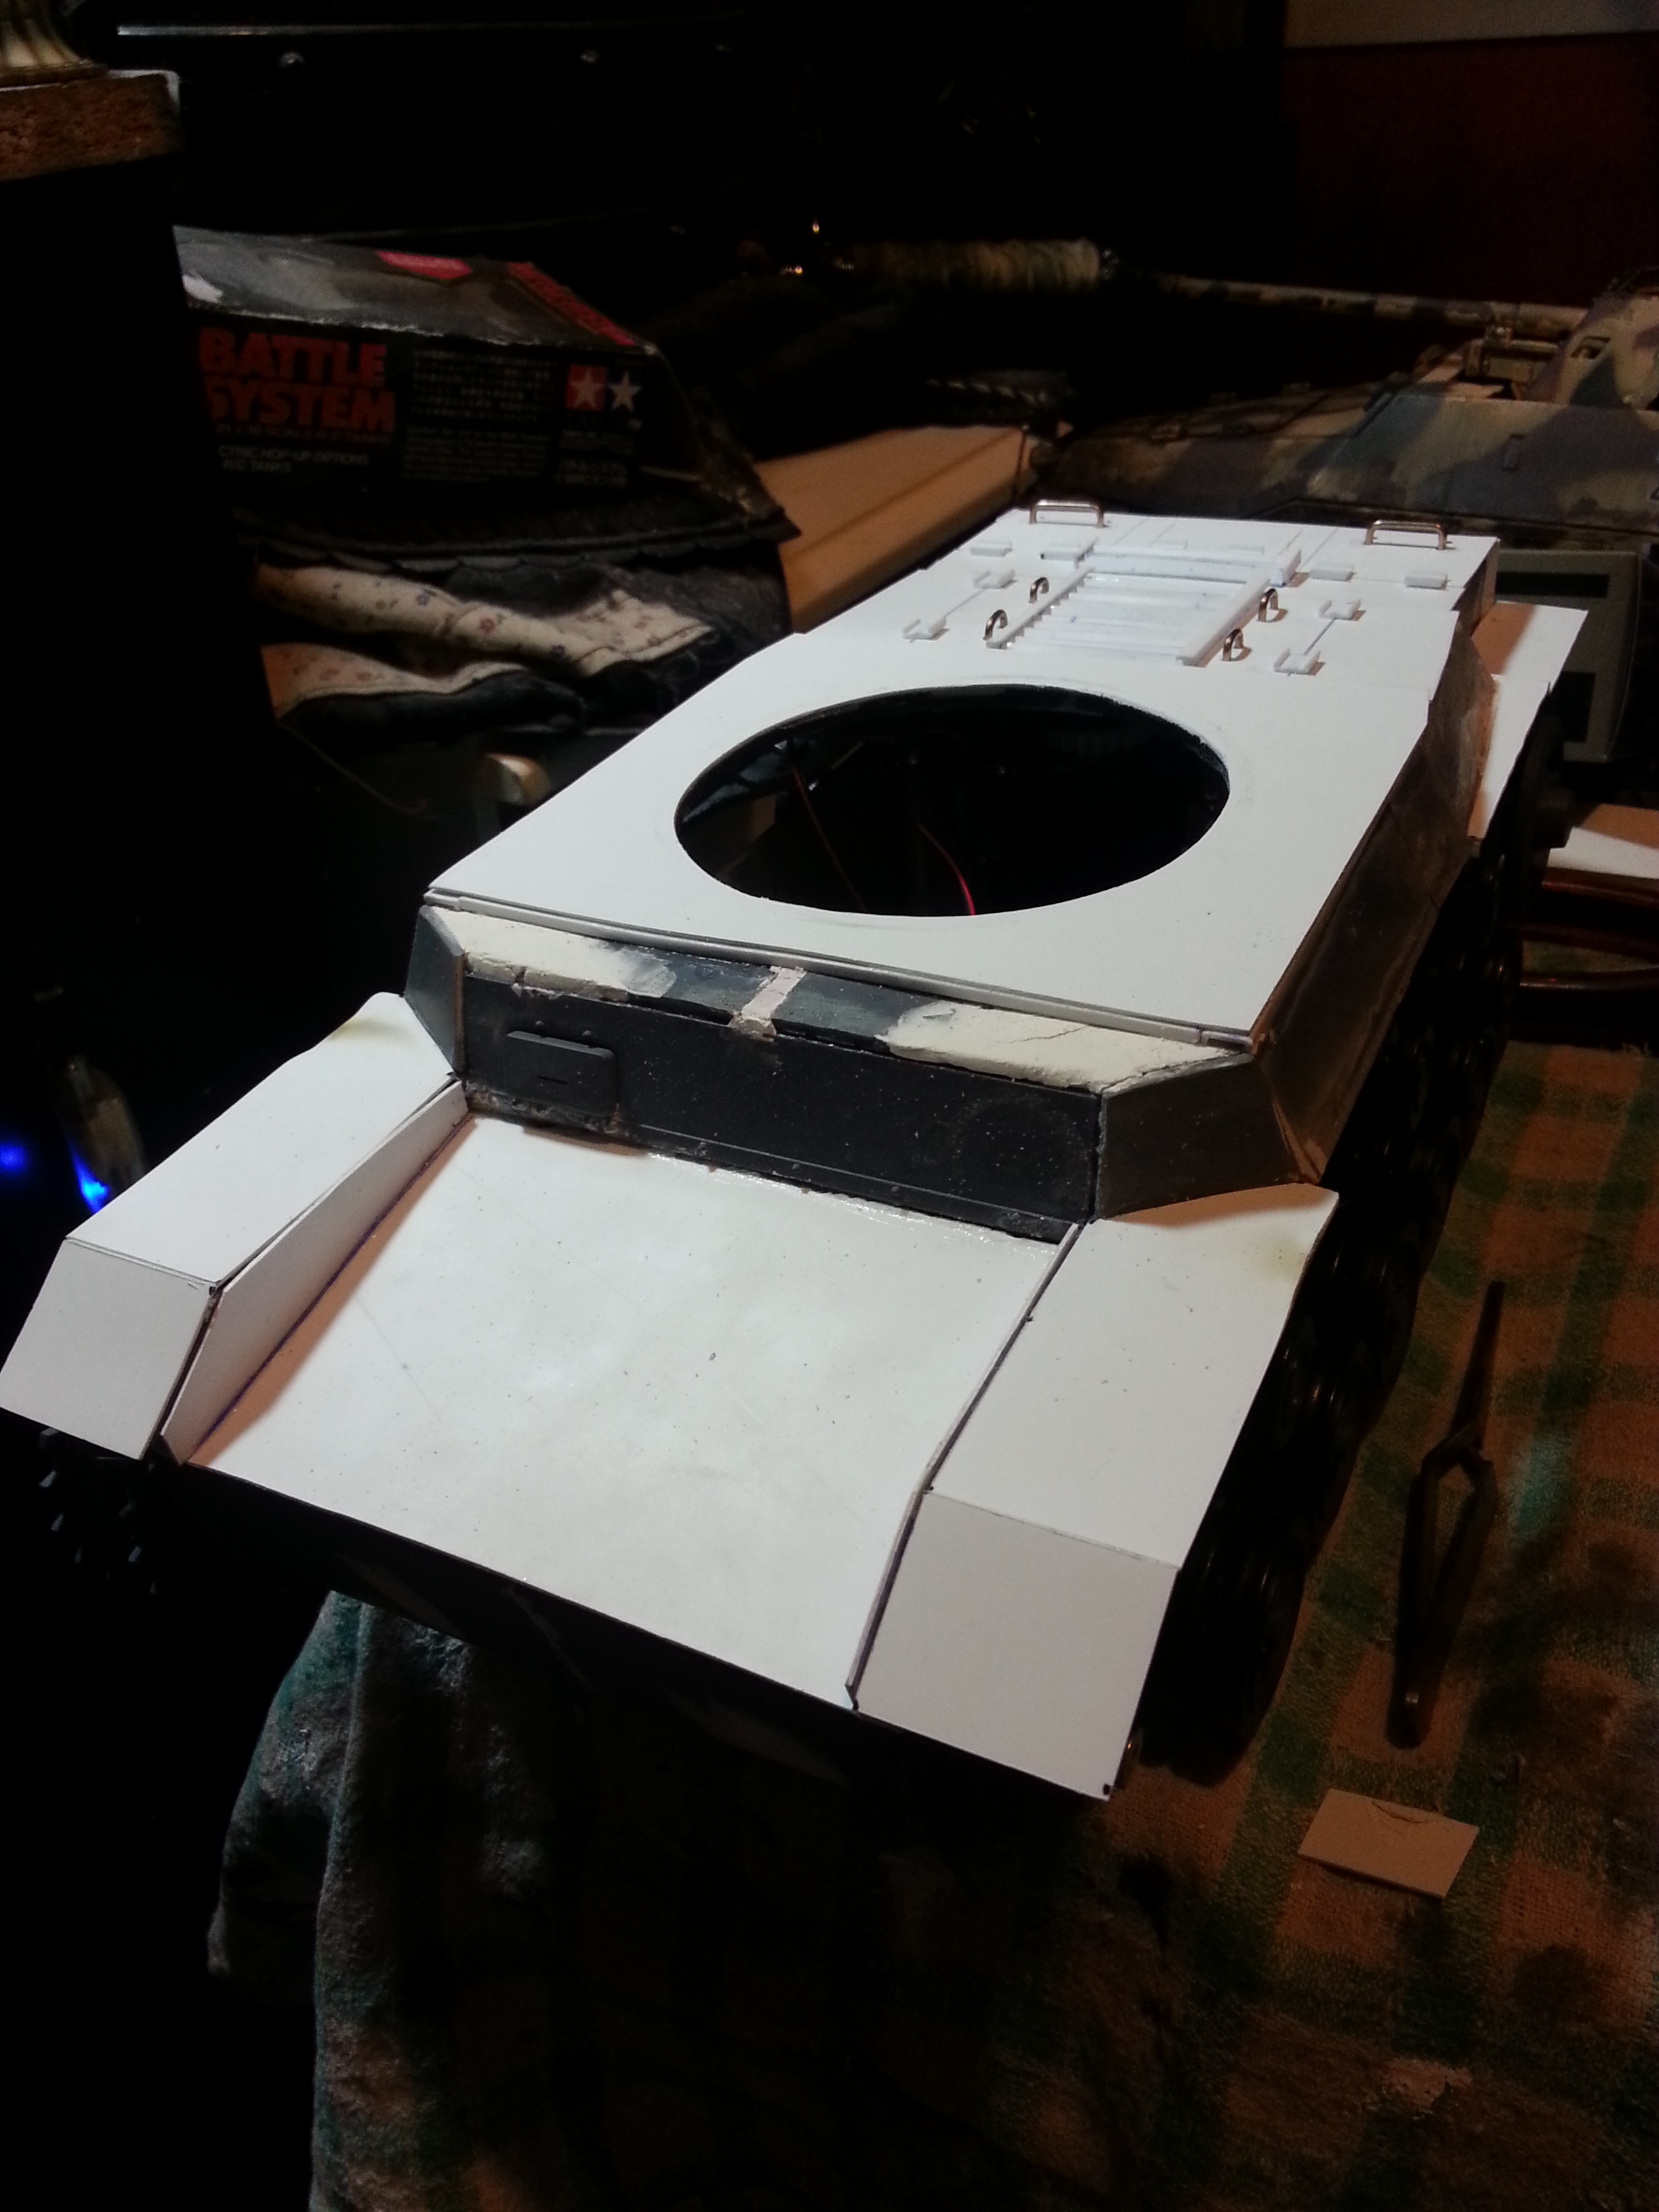
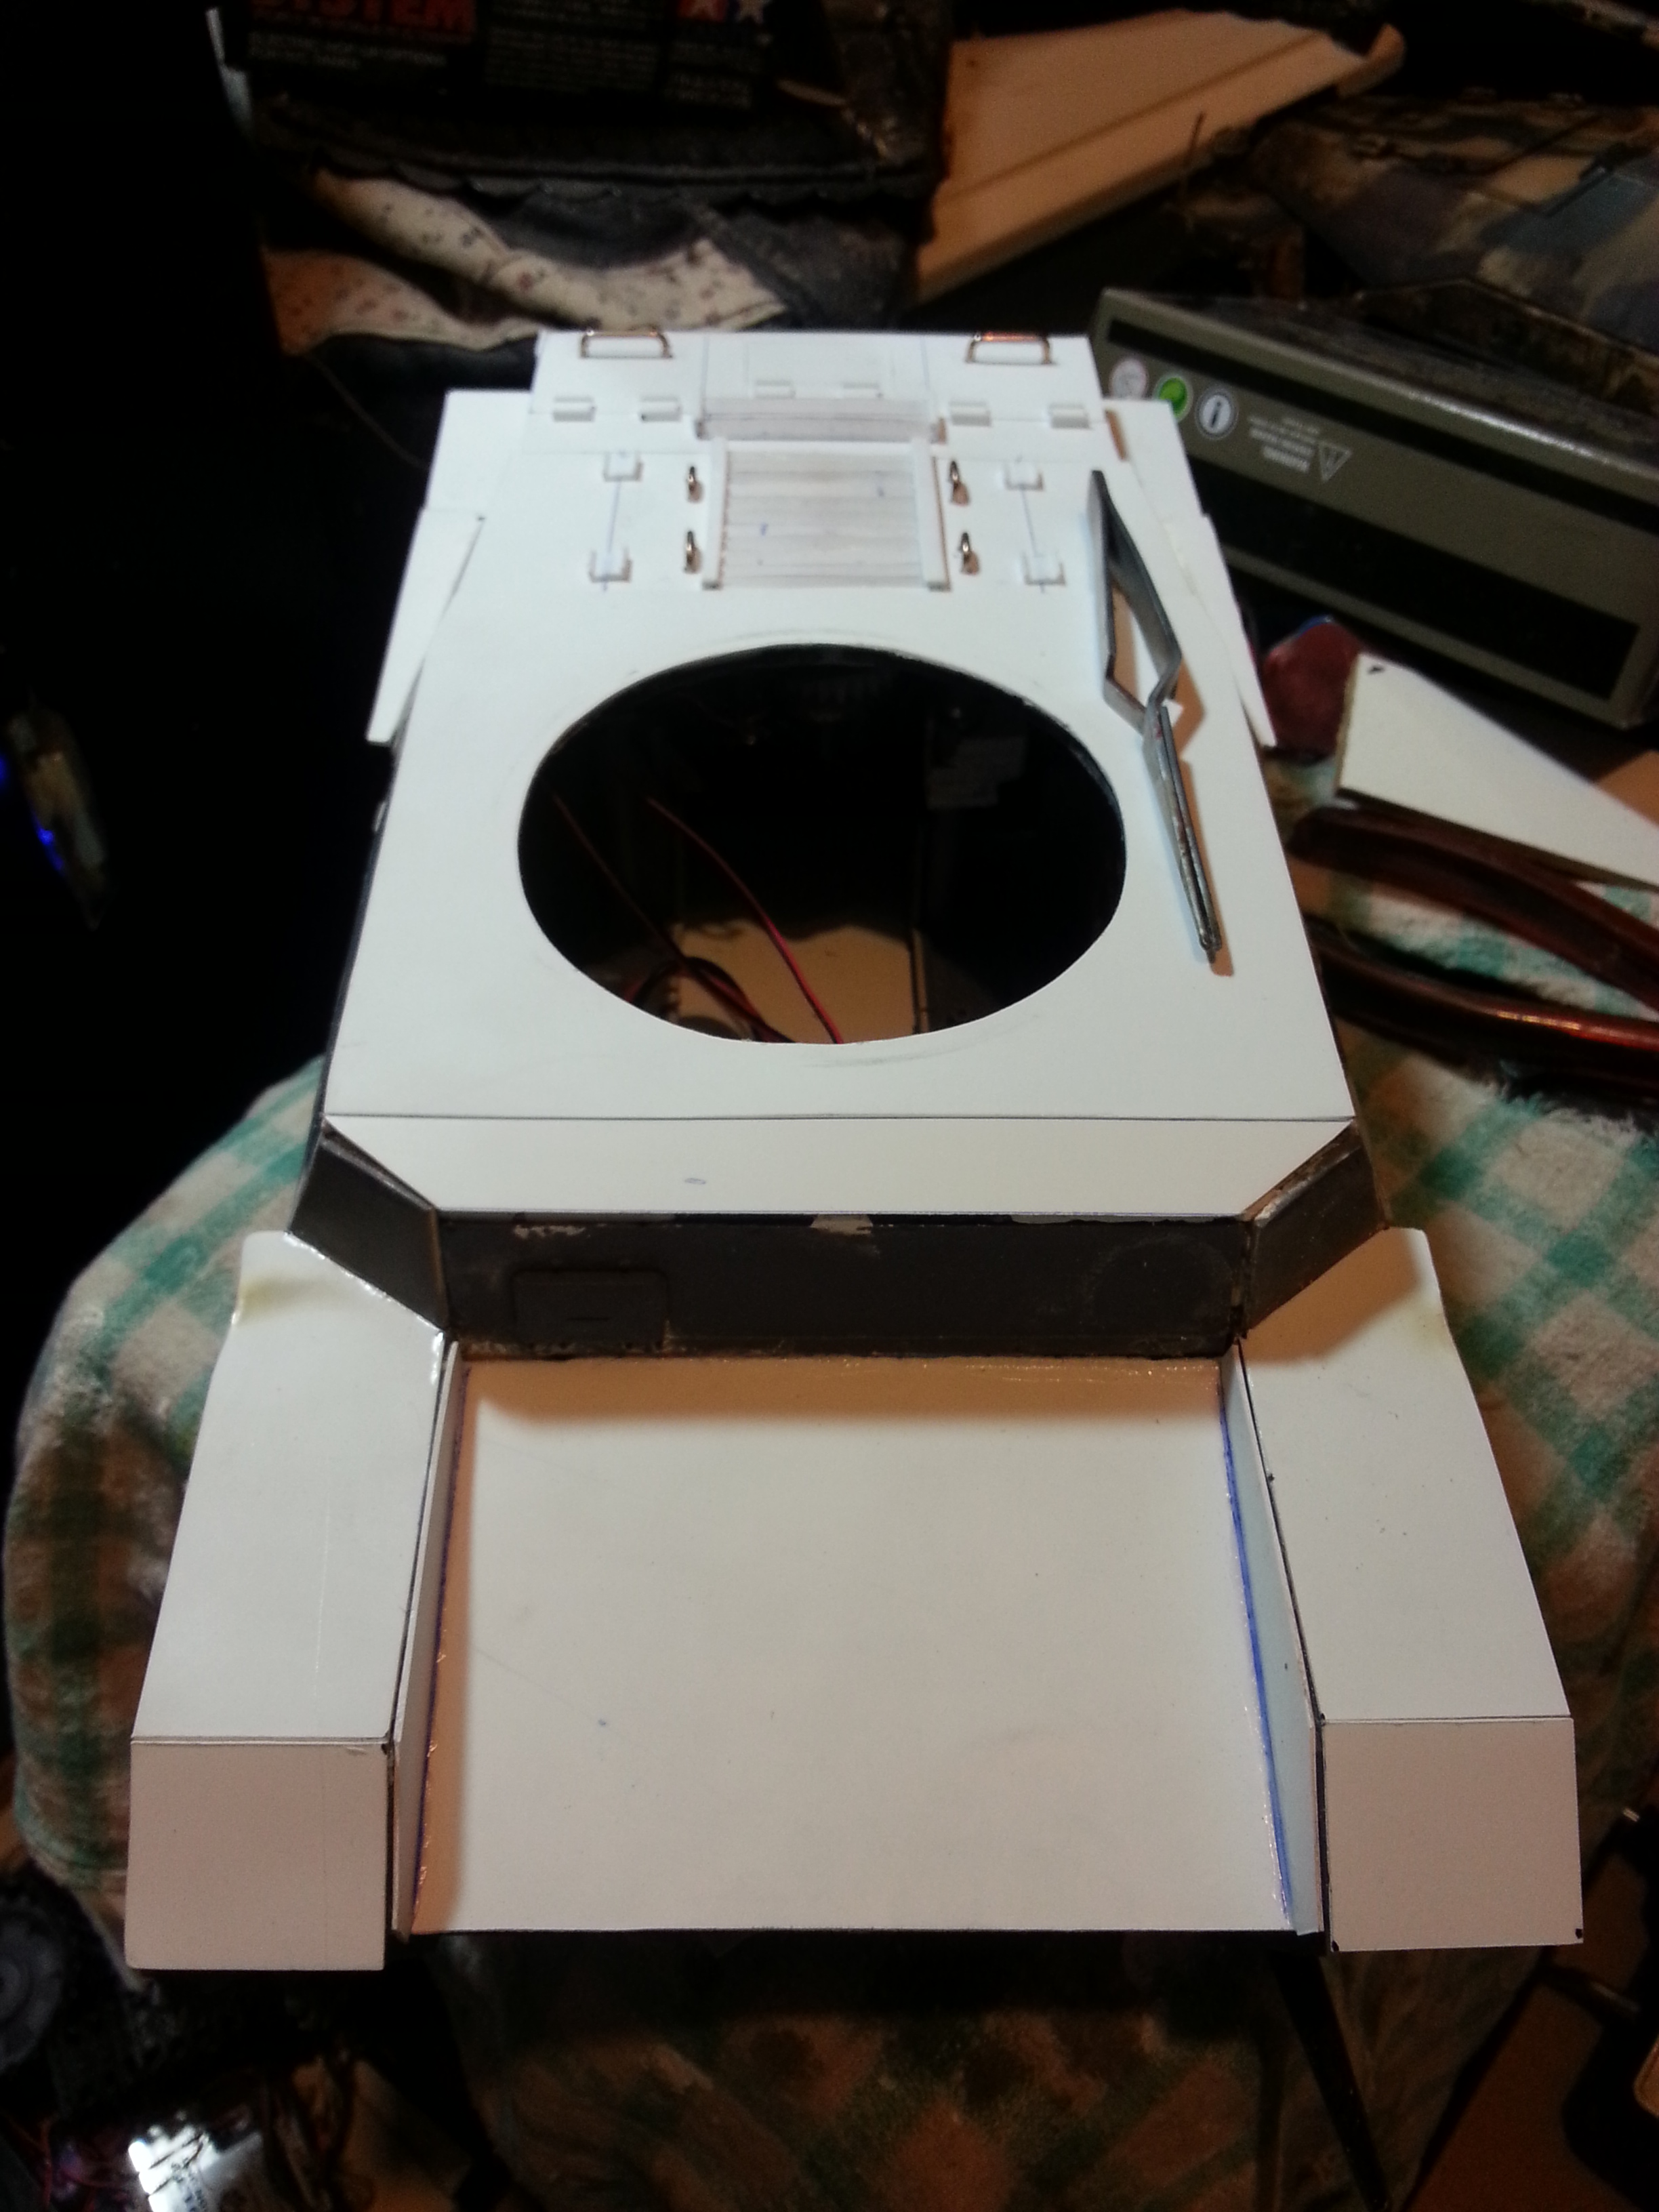
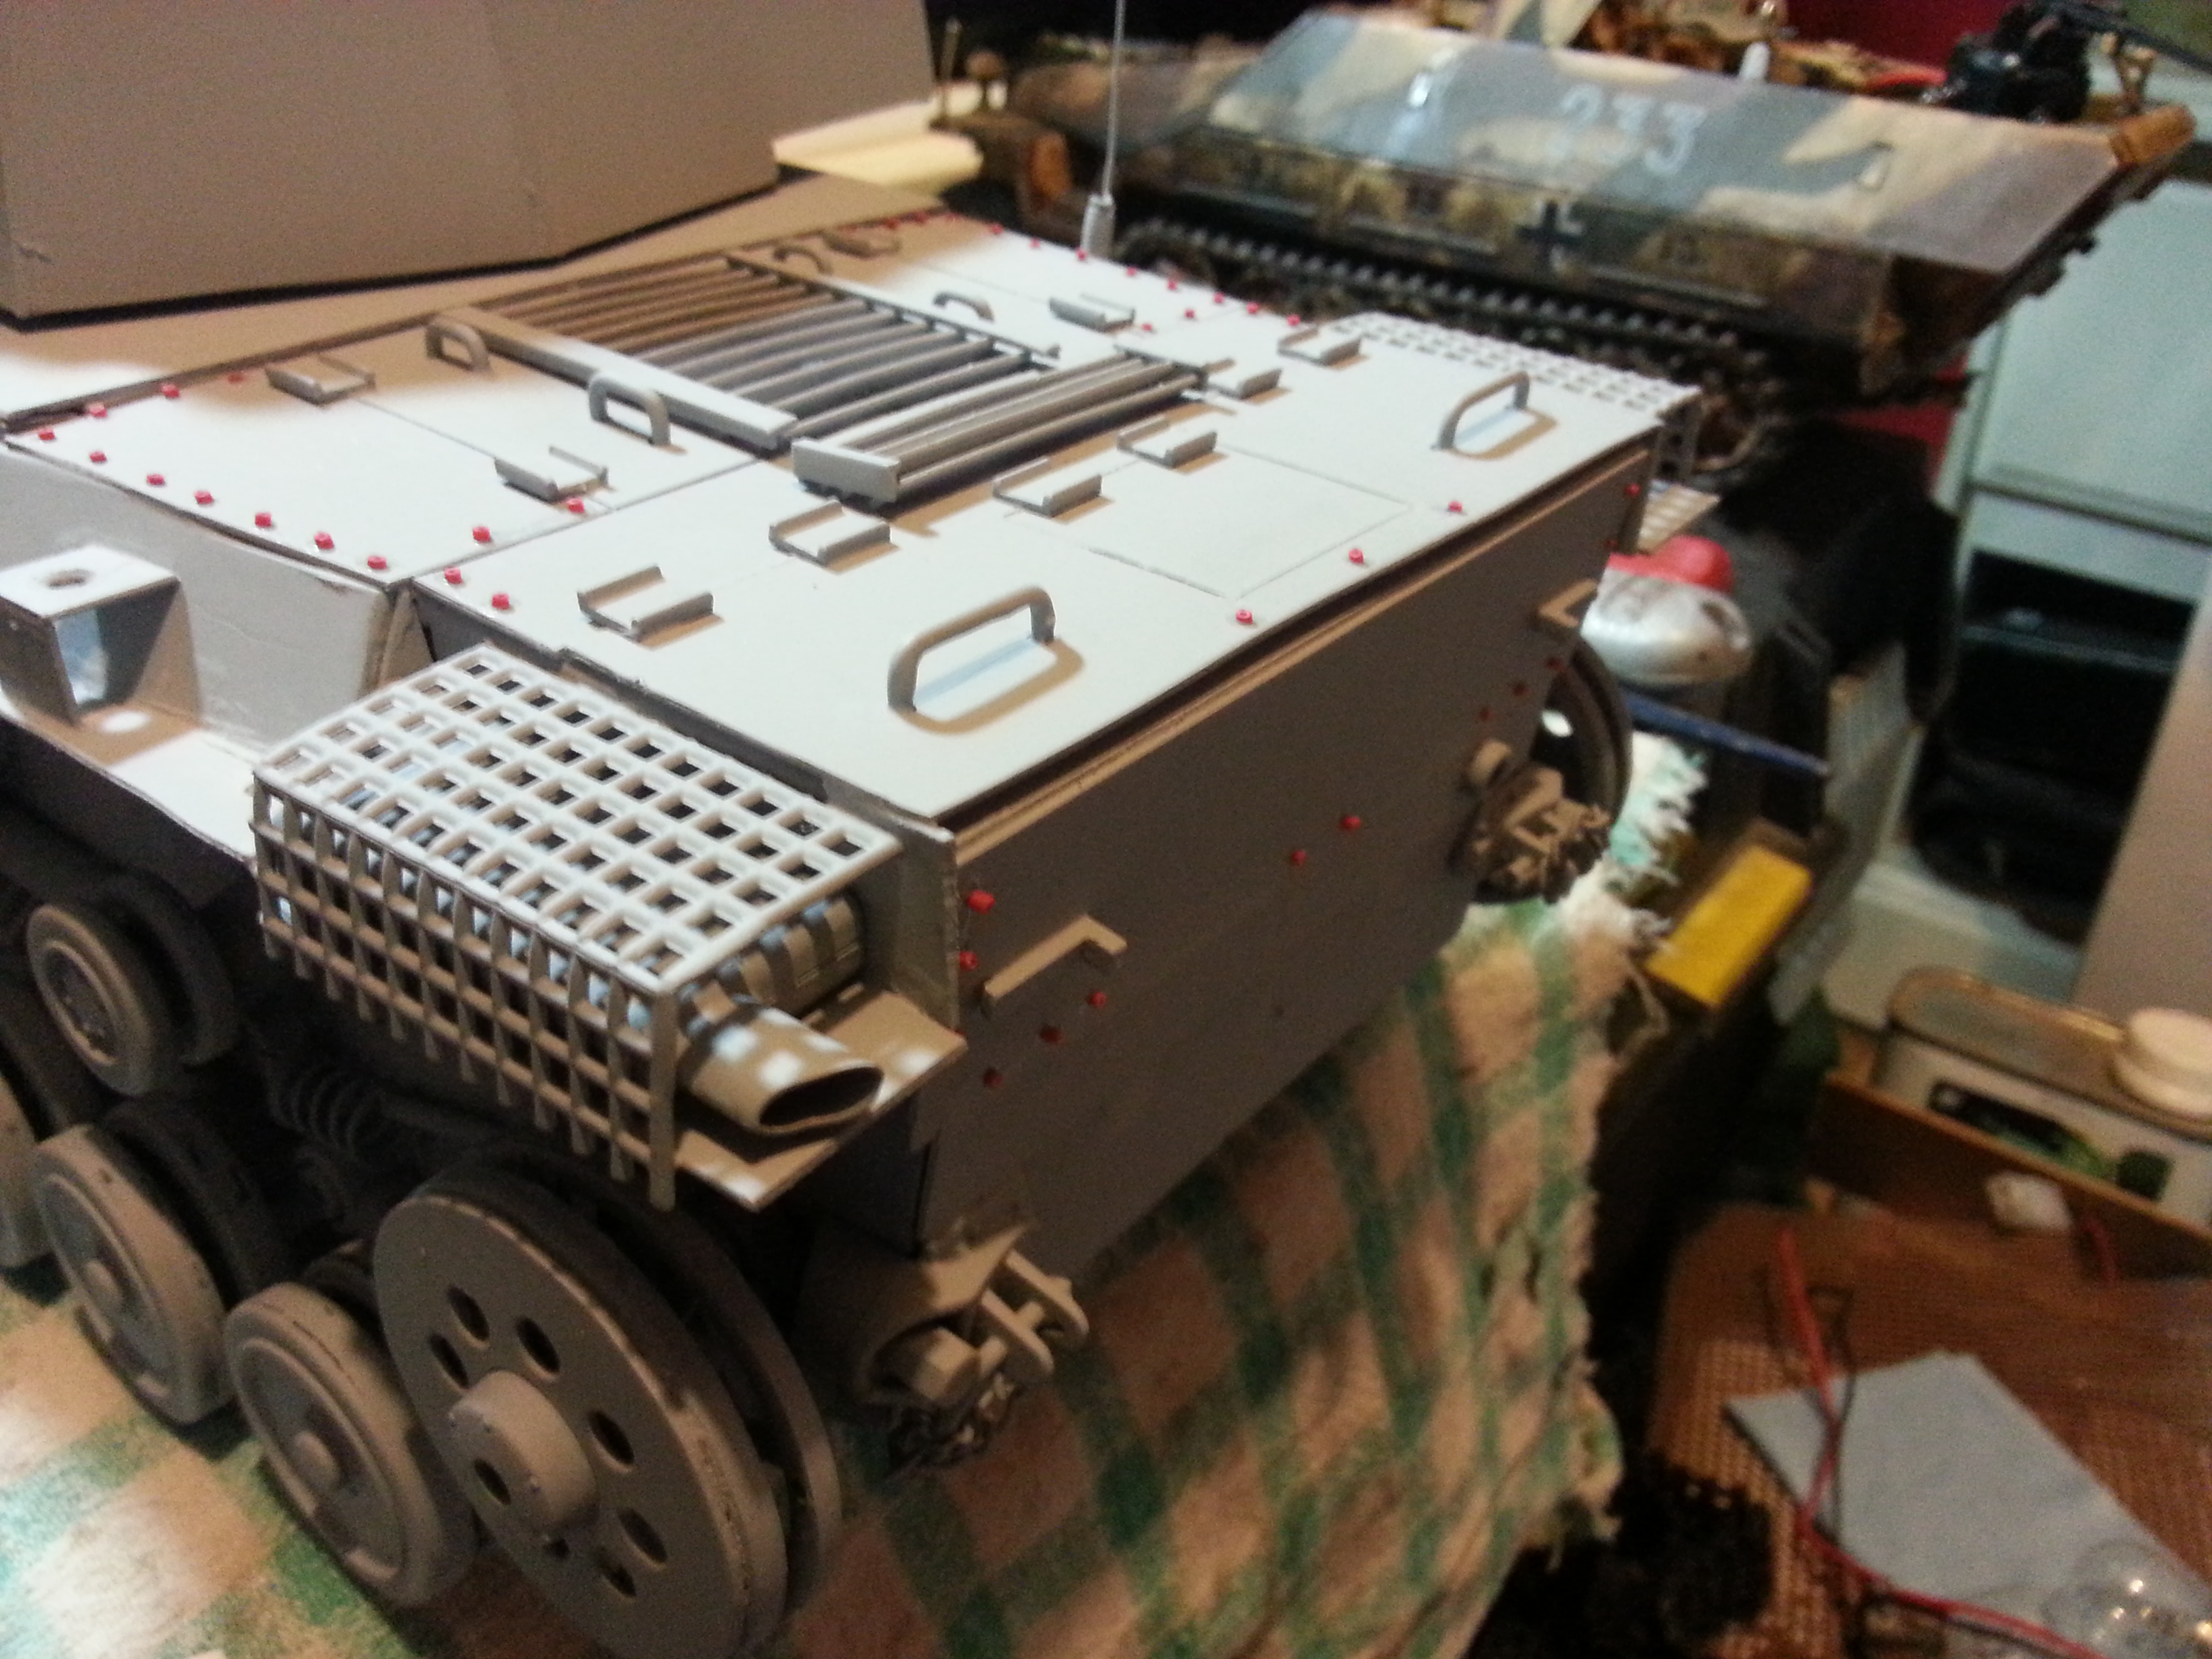
I bit the bullet and used the band-saw to cut the UPPER hull today down the middle... I finally decided I didn't like the wider look the way I originally had it. It went smoothly and sanding out a new turret opening wasn't as bad as I had anticipated. Yay sanding drum dremel attachment! It's back together as you can see. I just need to reinforce it a bit more.
I reworked (again) the rear end, making things line up better with the newly narrow upper hull. Lots of detail work getting started! You can probably also see new Asiatam PnzIII track tensioners, curtousy of a club member.
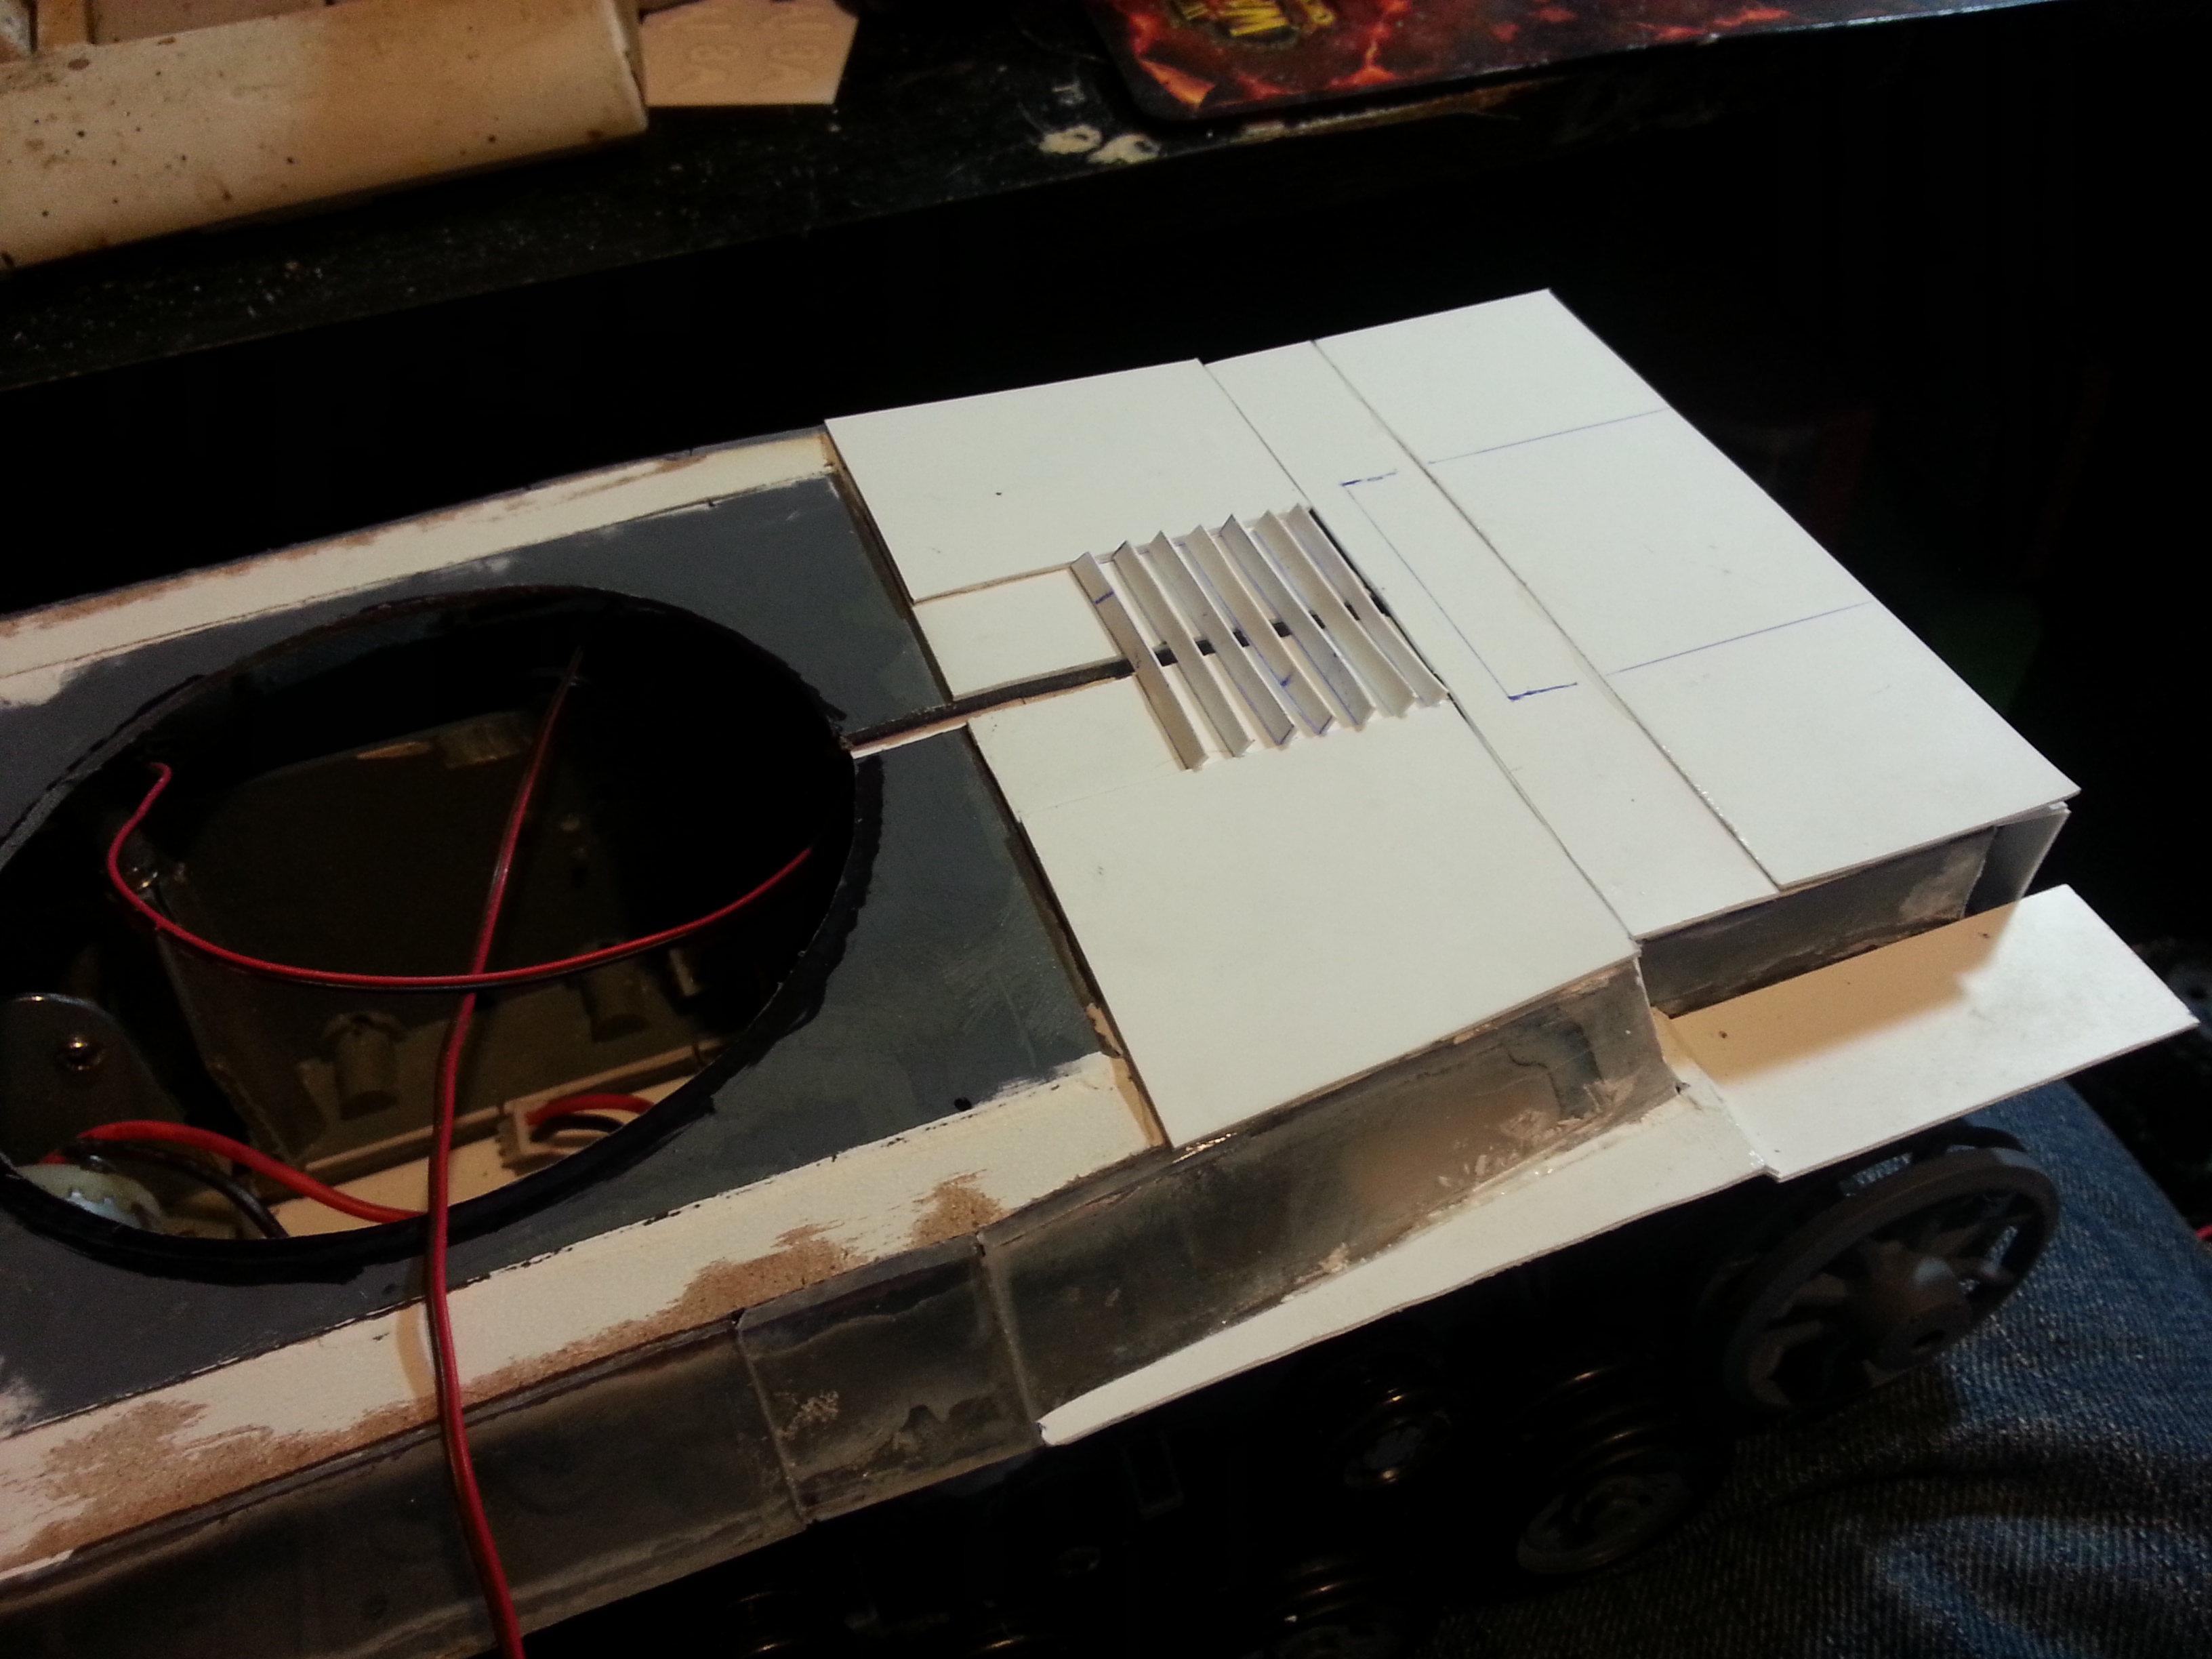
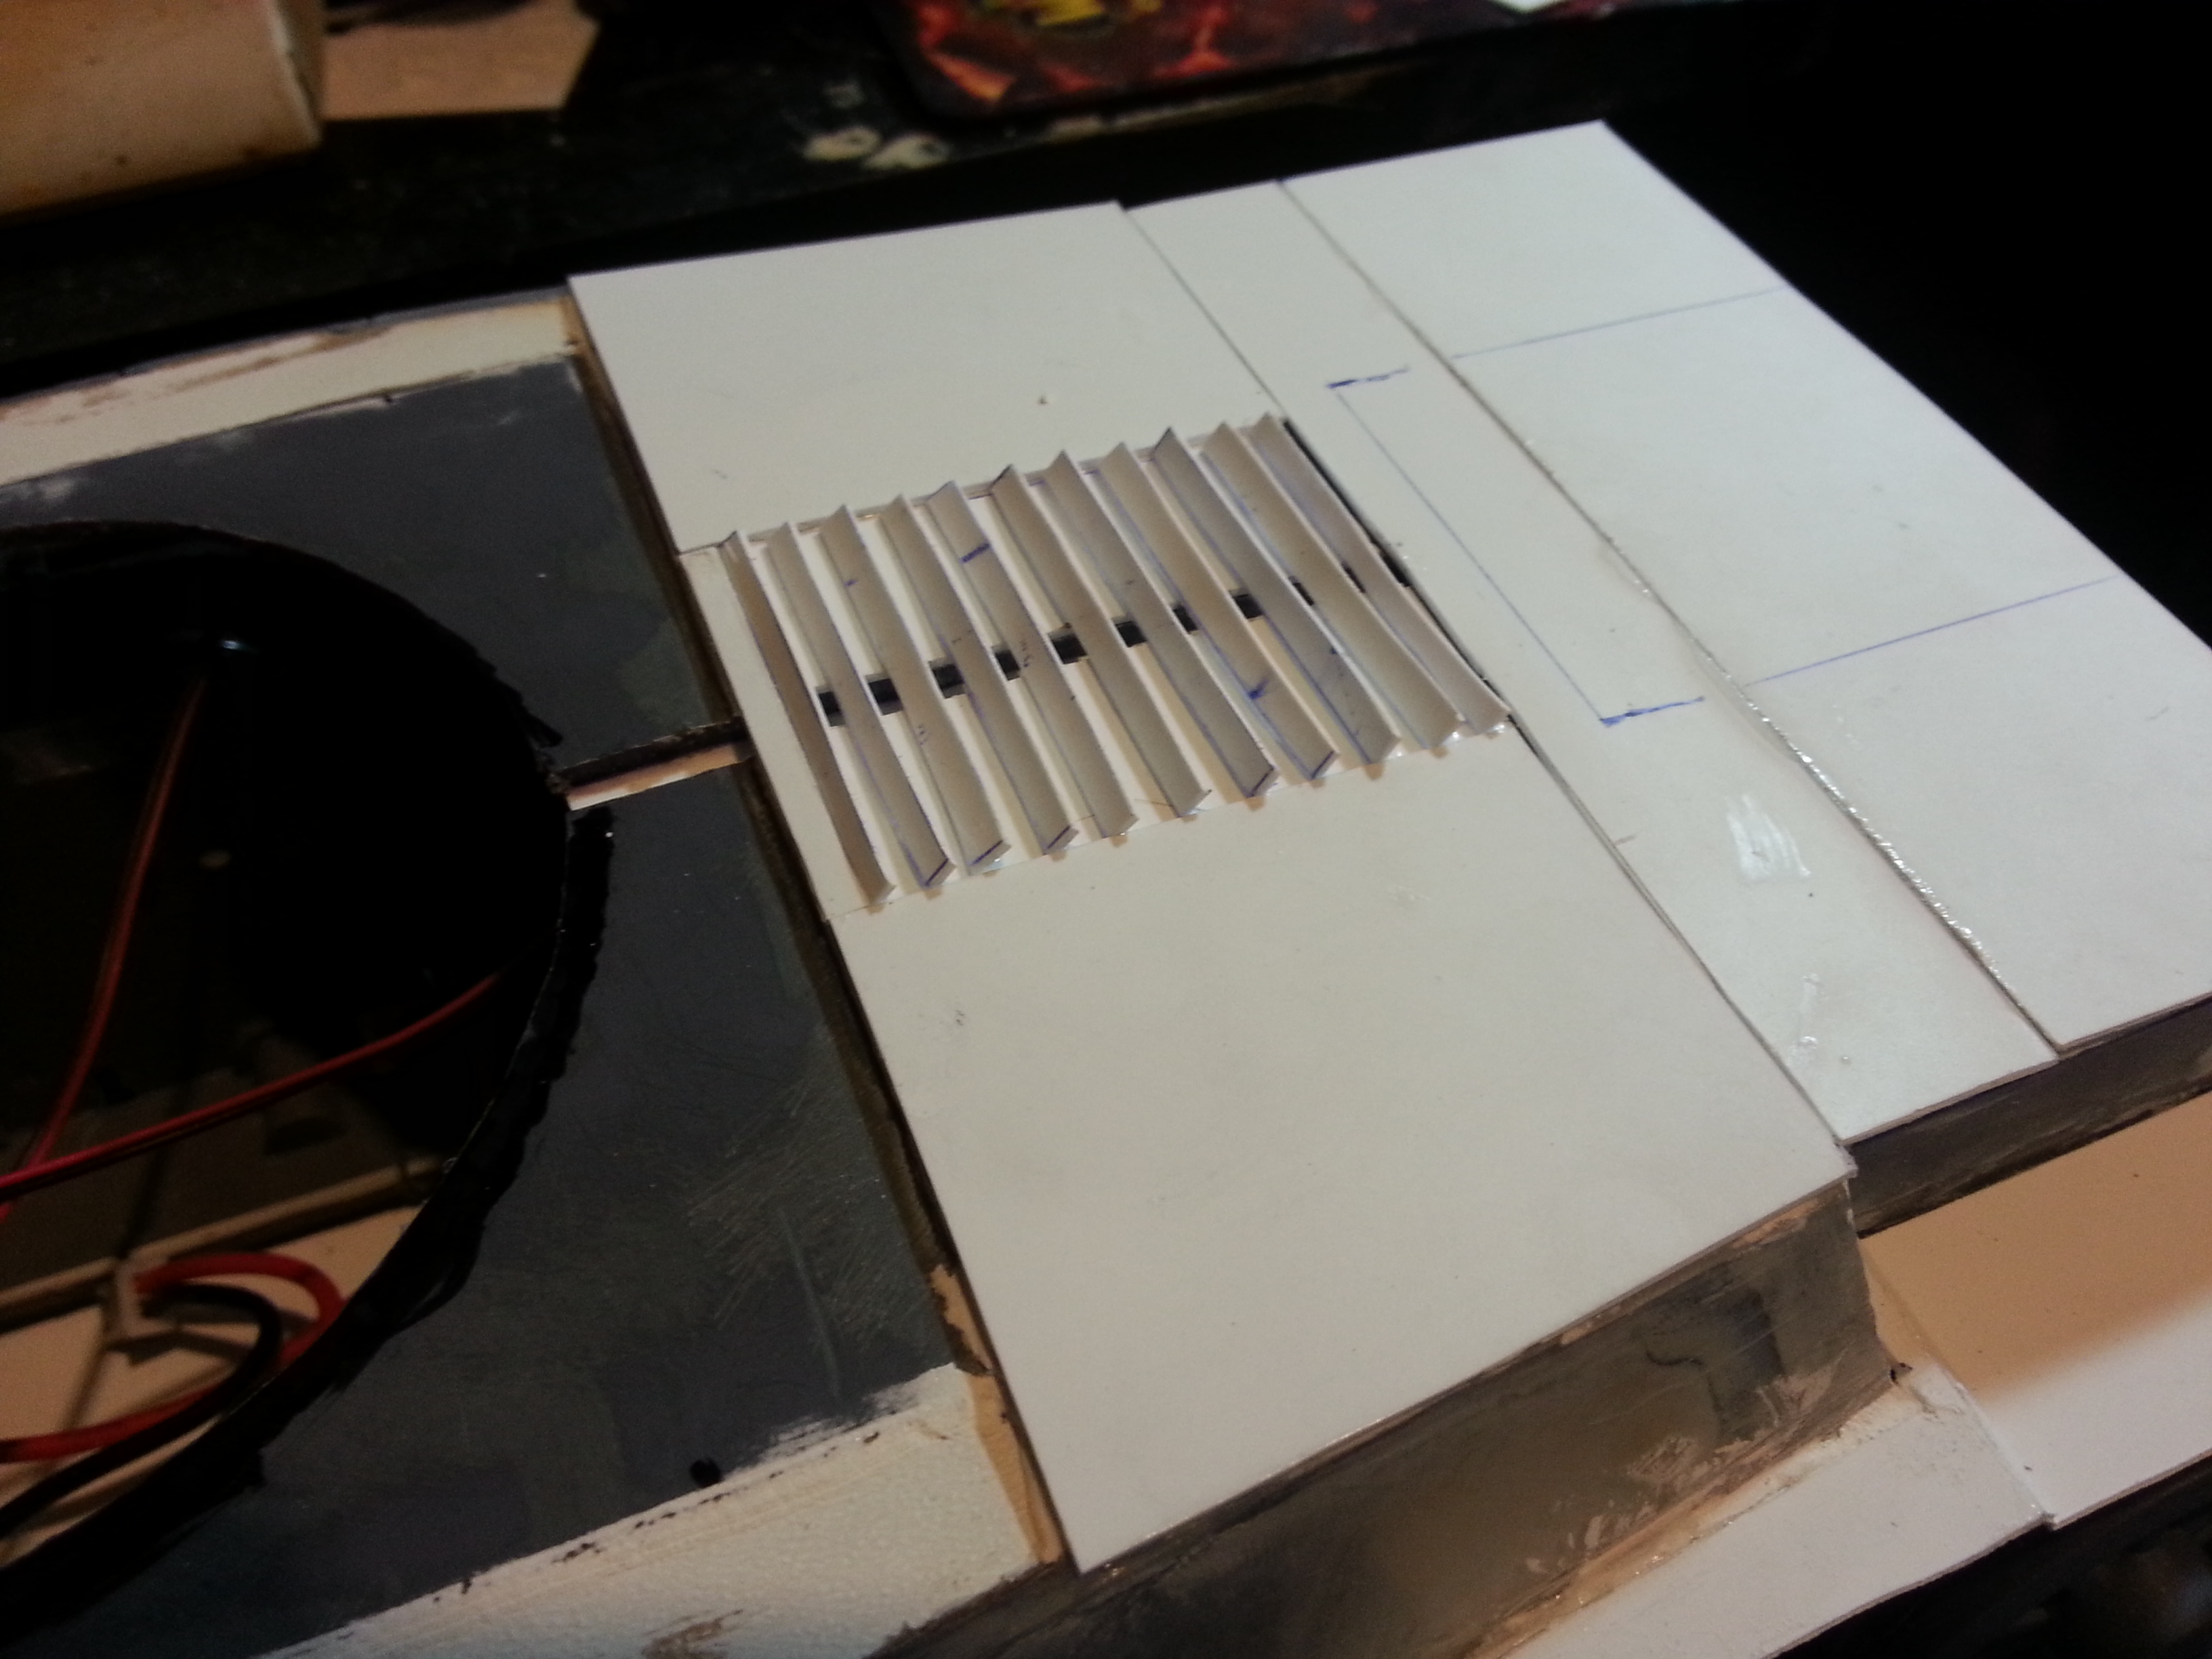
Cutting those engine vent slats reminded me of the track pads I cut for my Indiana Jones tank.... *shivers*... lucky this wasn't so bad!!
*Update*
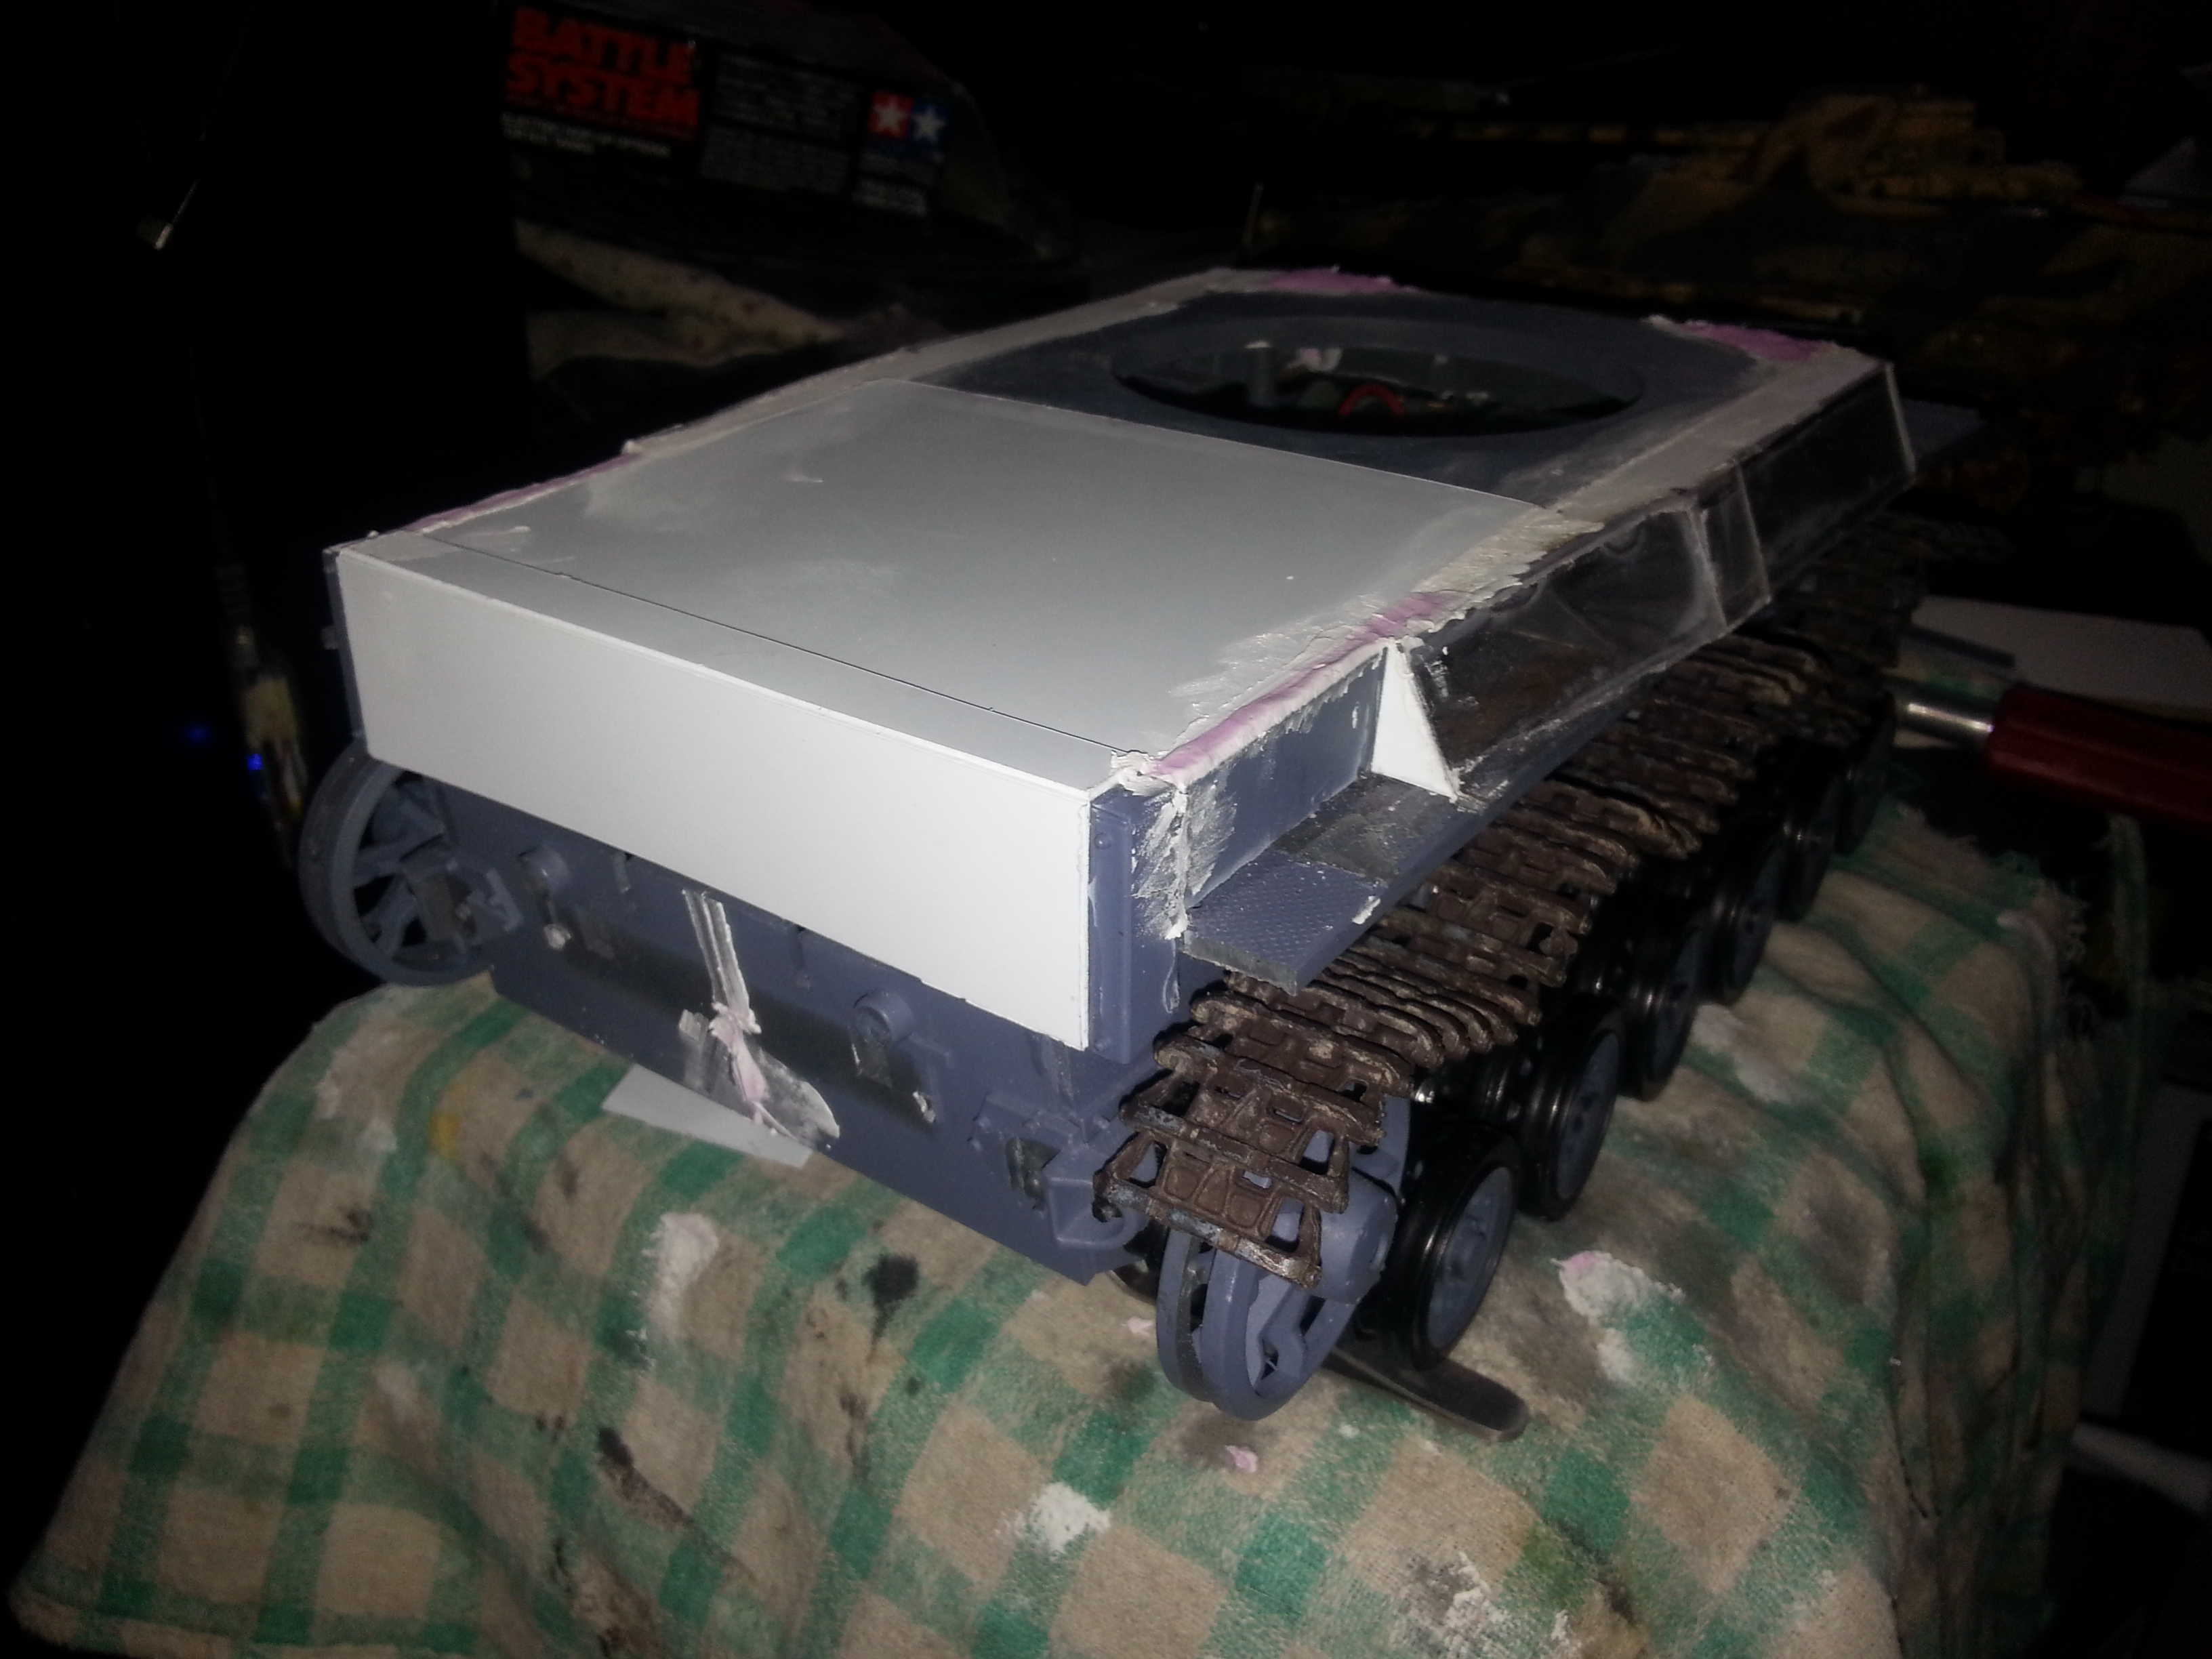
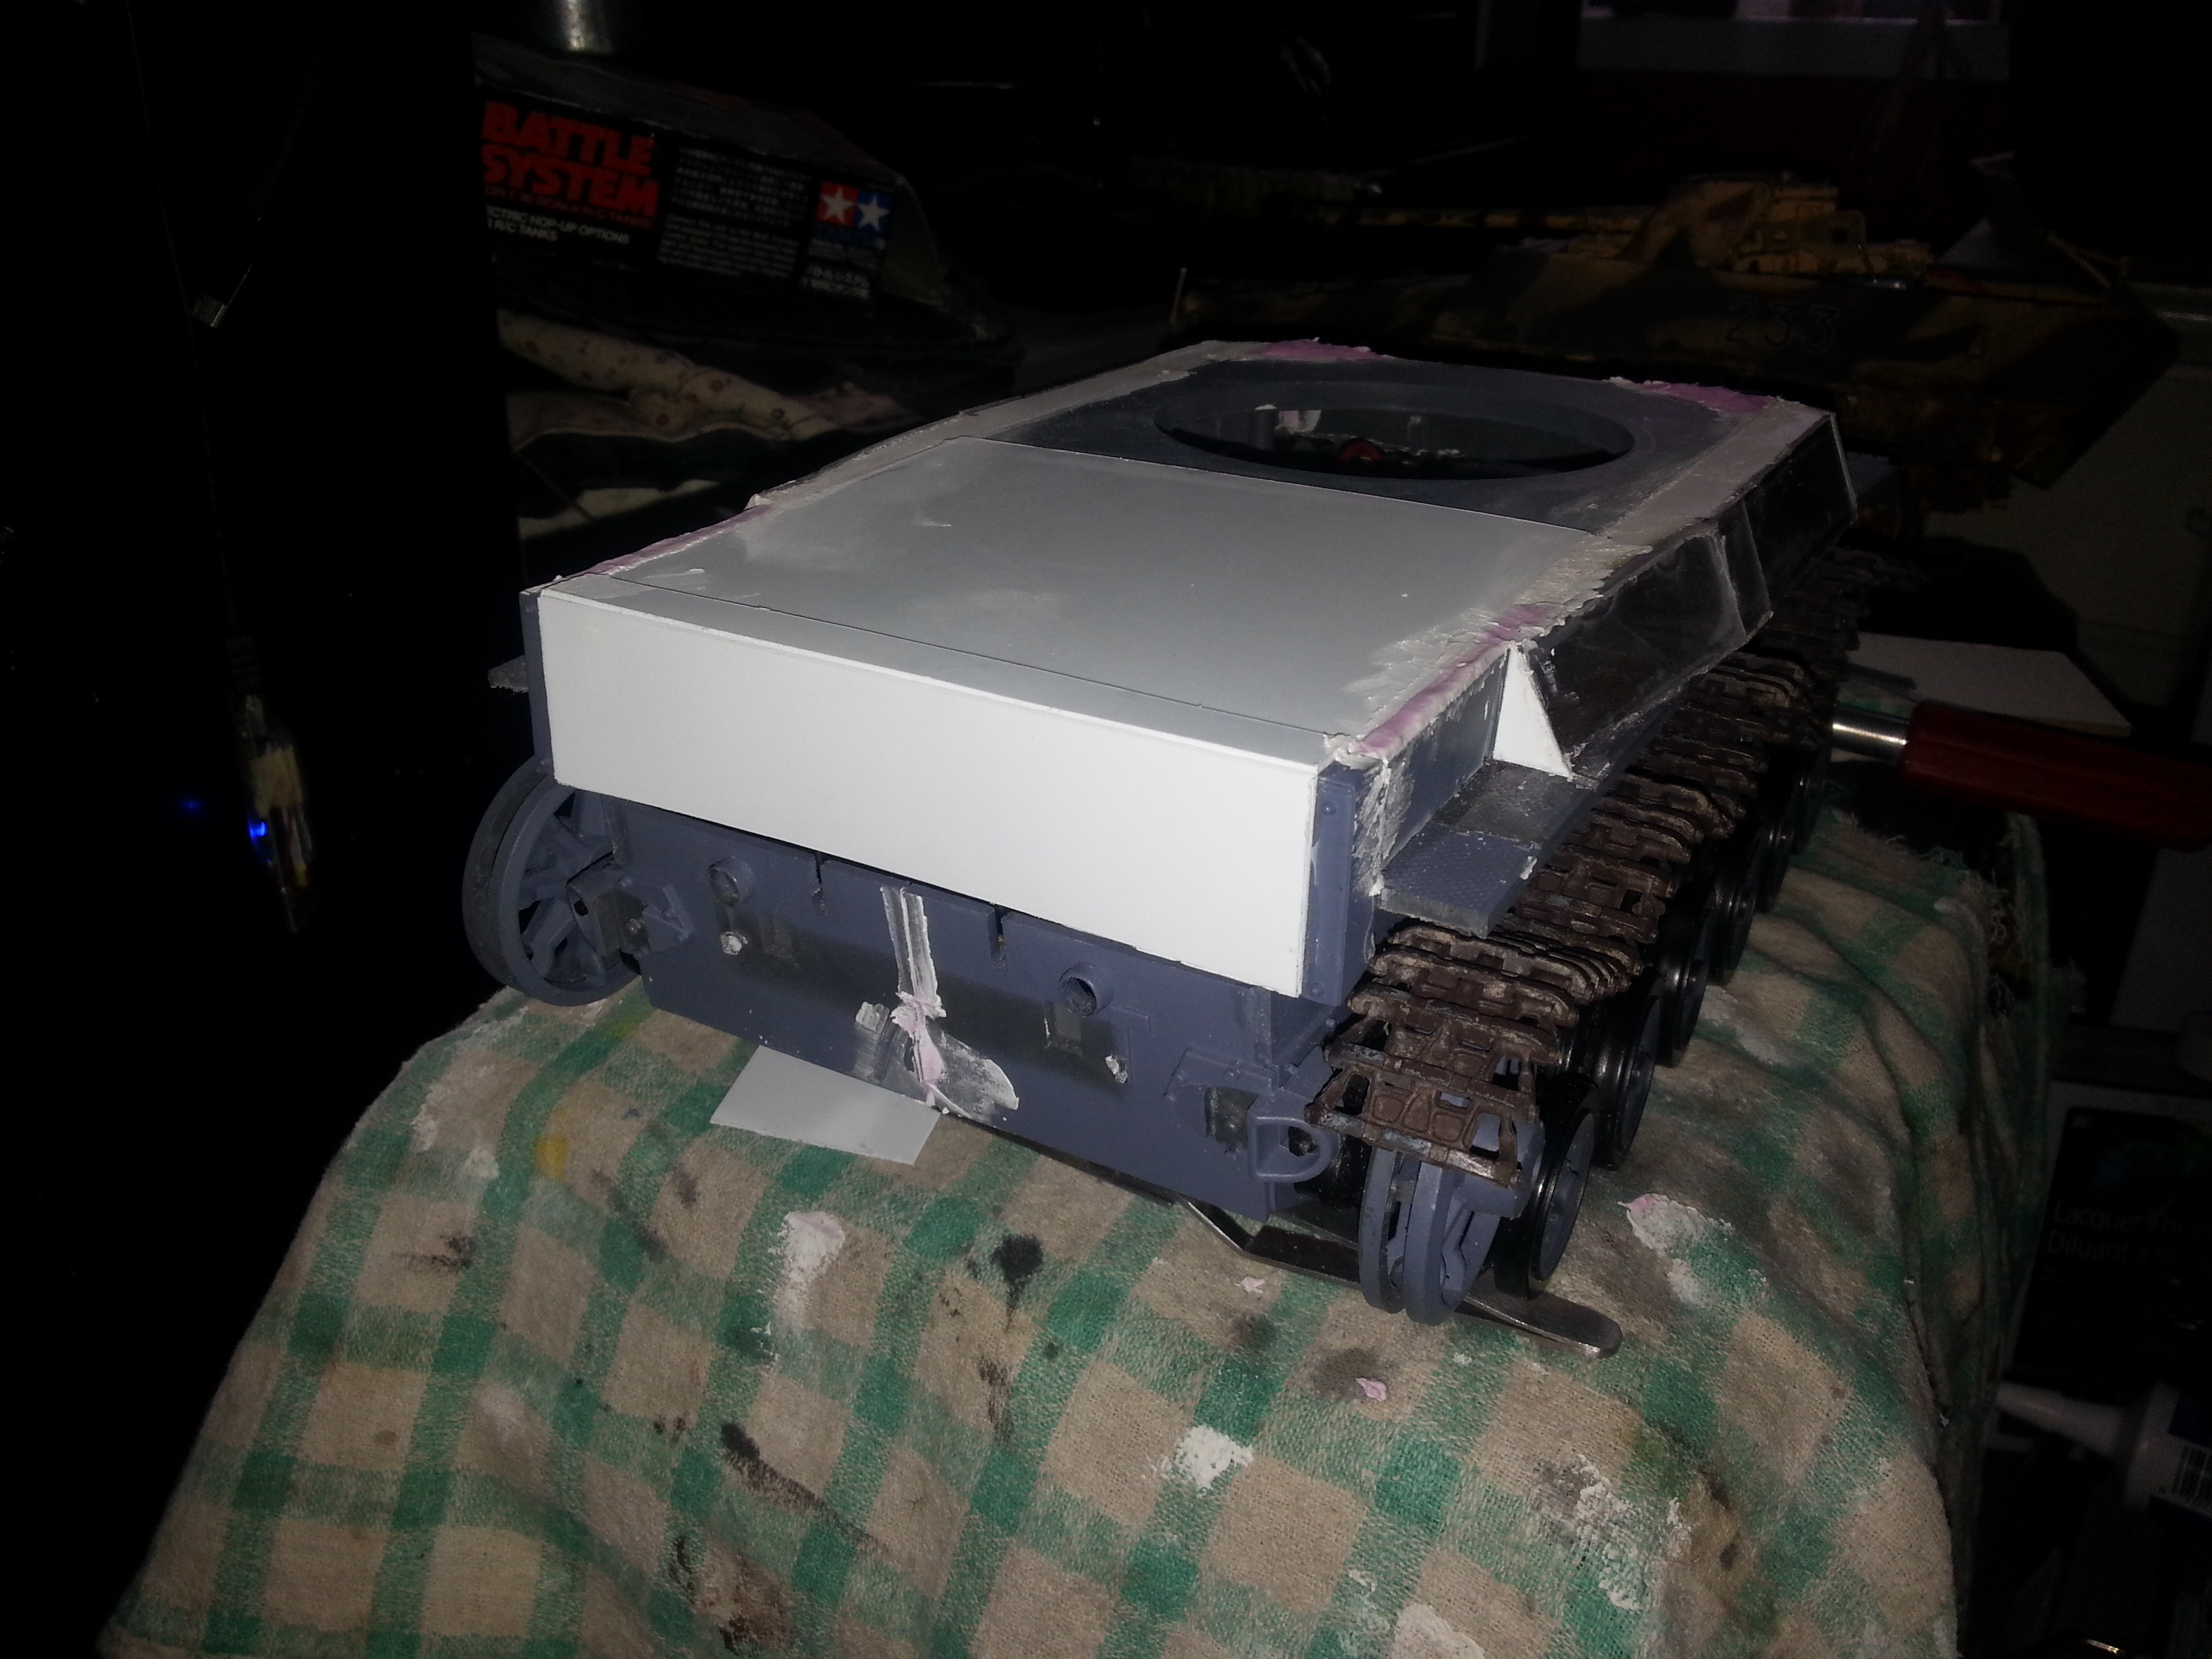
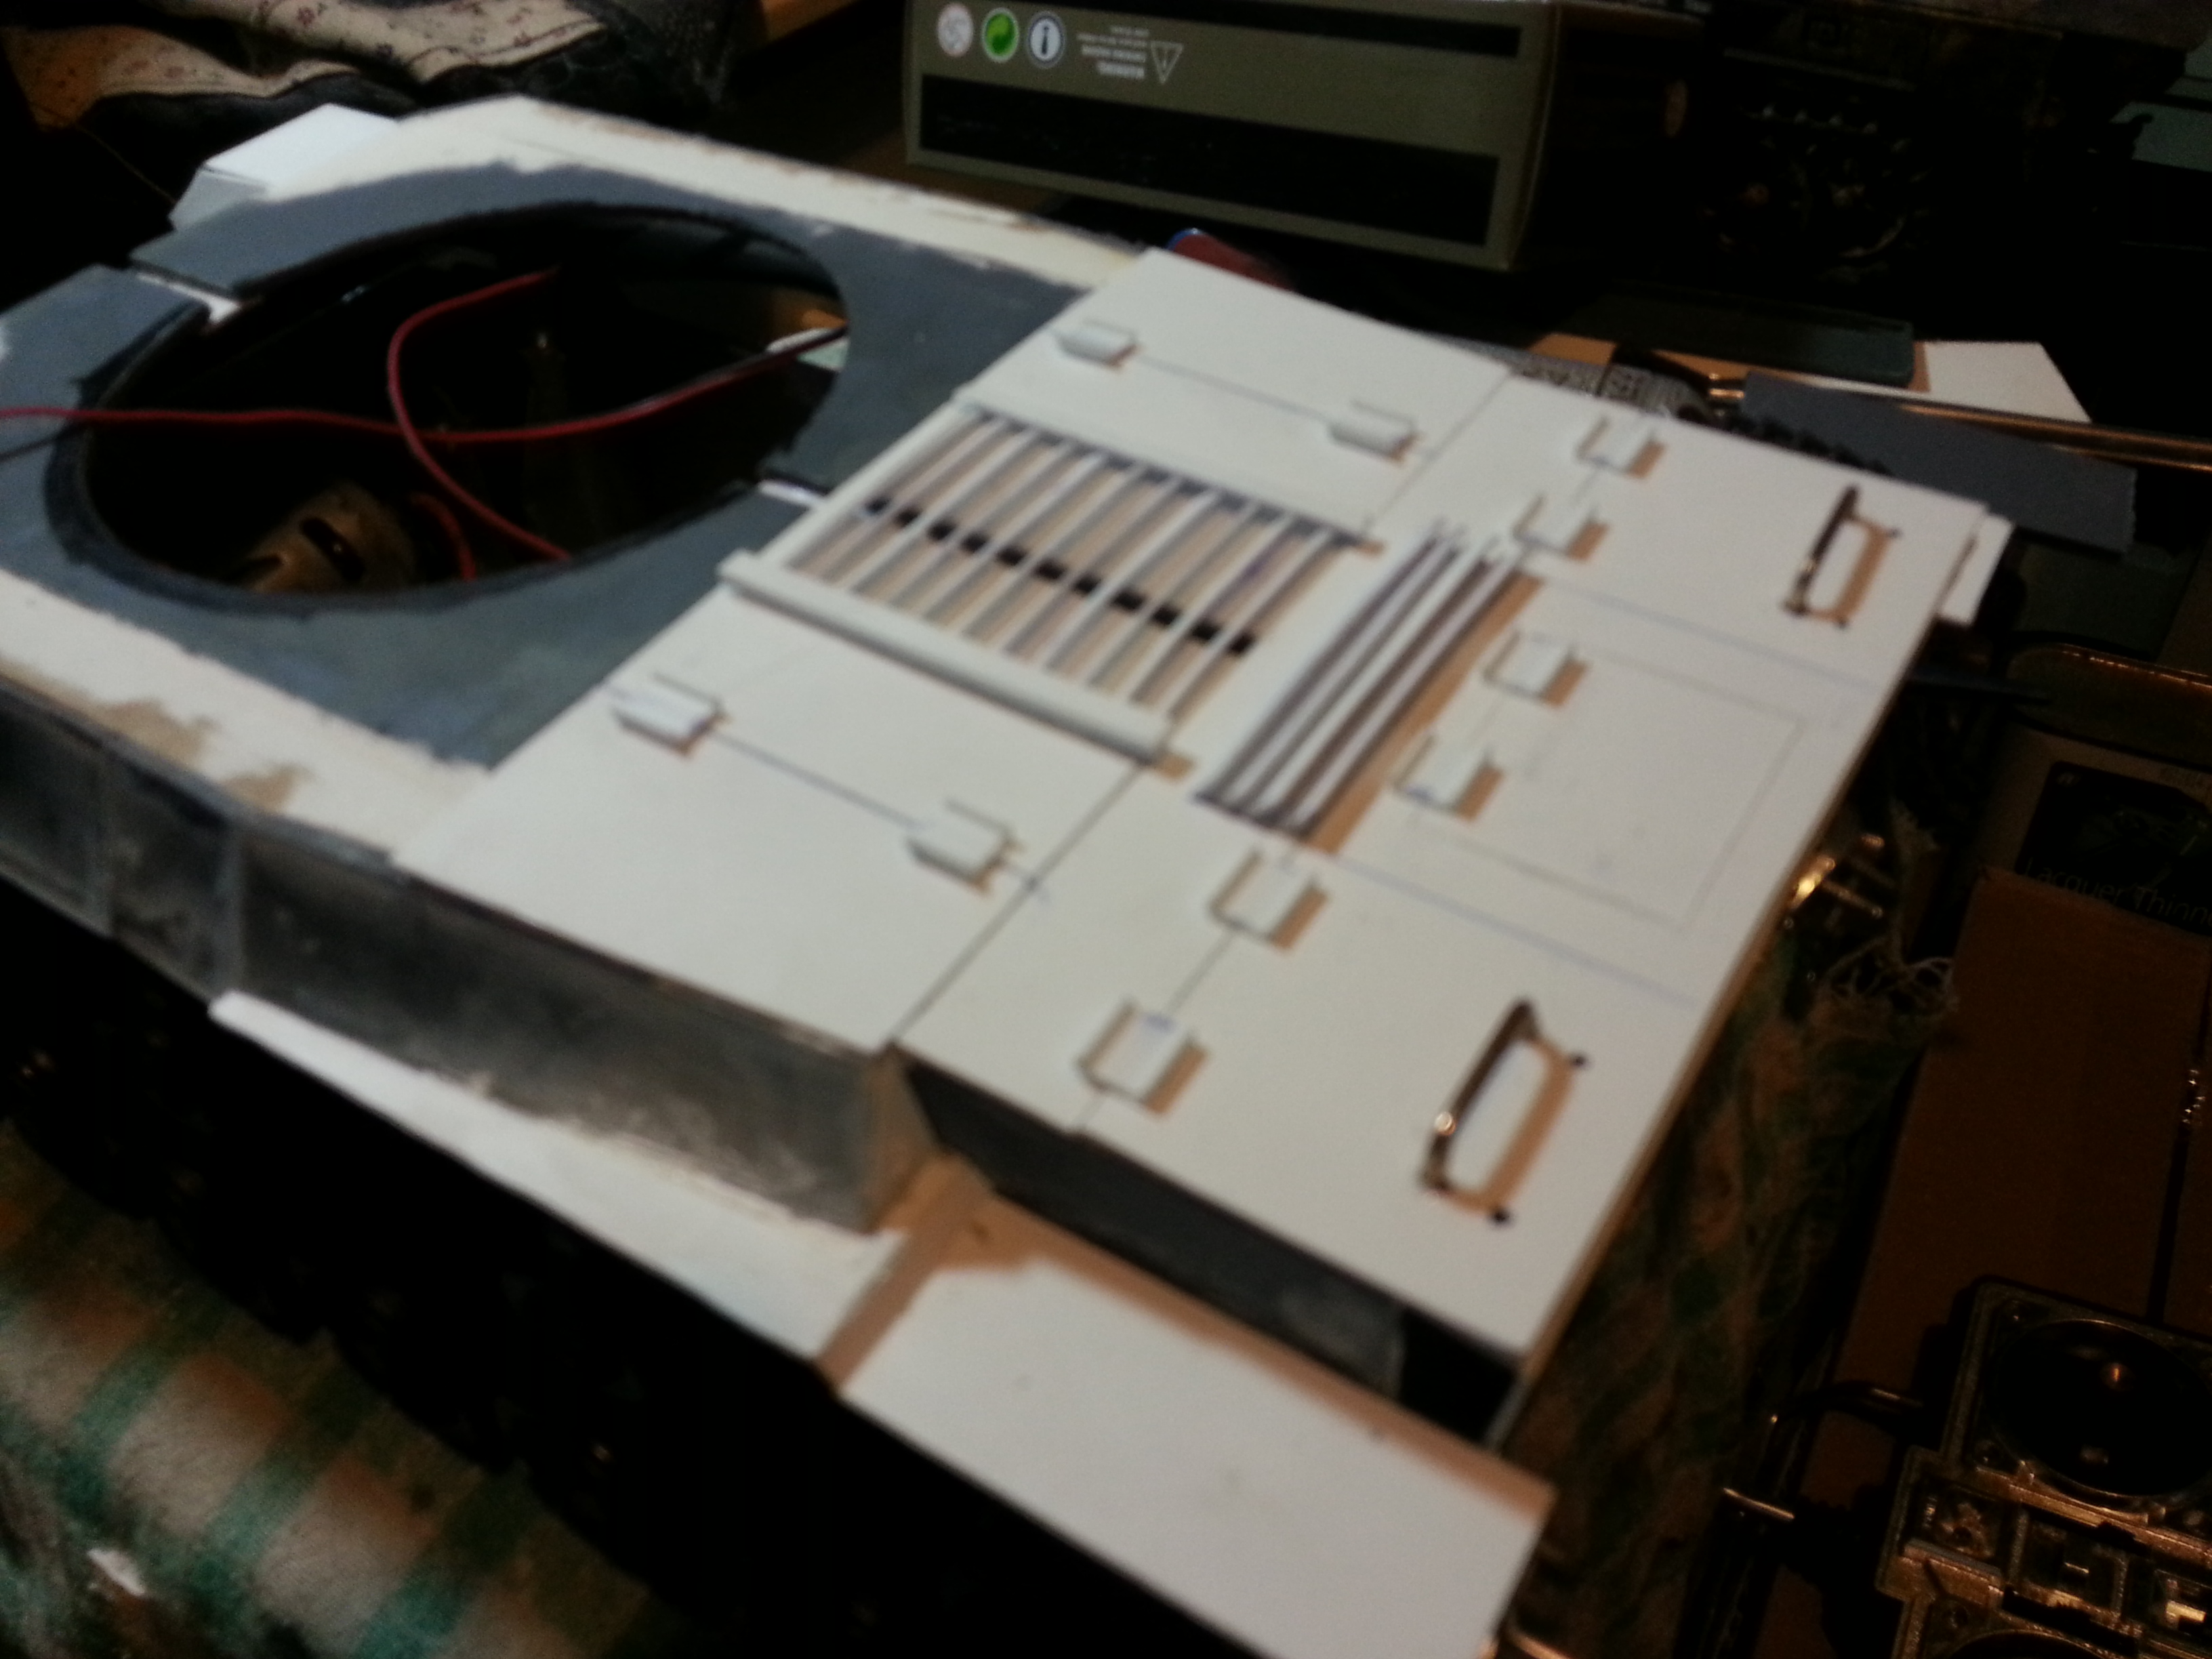
So it's been a busy weekend! I got a bit more done... solved a couple cosmetic and technical issues by raising the roof of the hull slightly. I used some leftover styrene C-channel as a base and more 1mm sheet on top. Now I can have the very slight angle infront of the turret & above the machine gun & drivers viewport
 Styrene C-channel around the outside of the hull ceiling & turret base
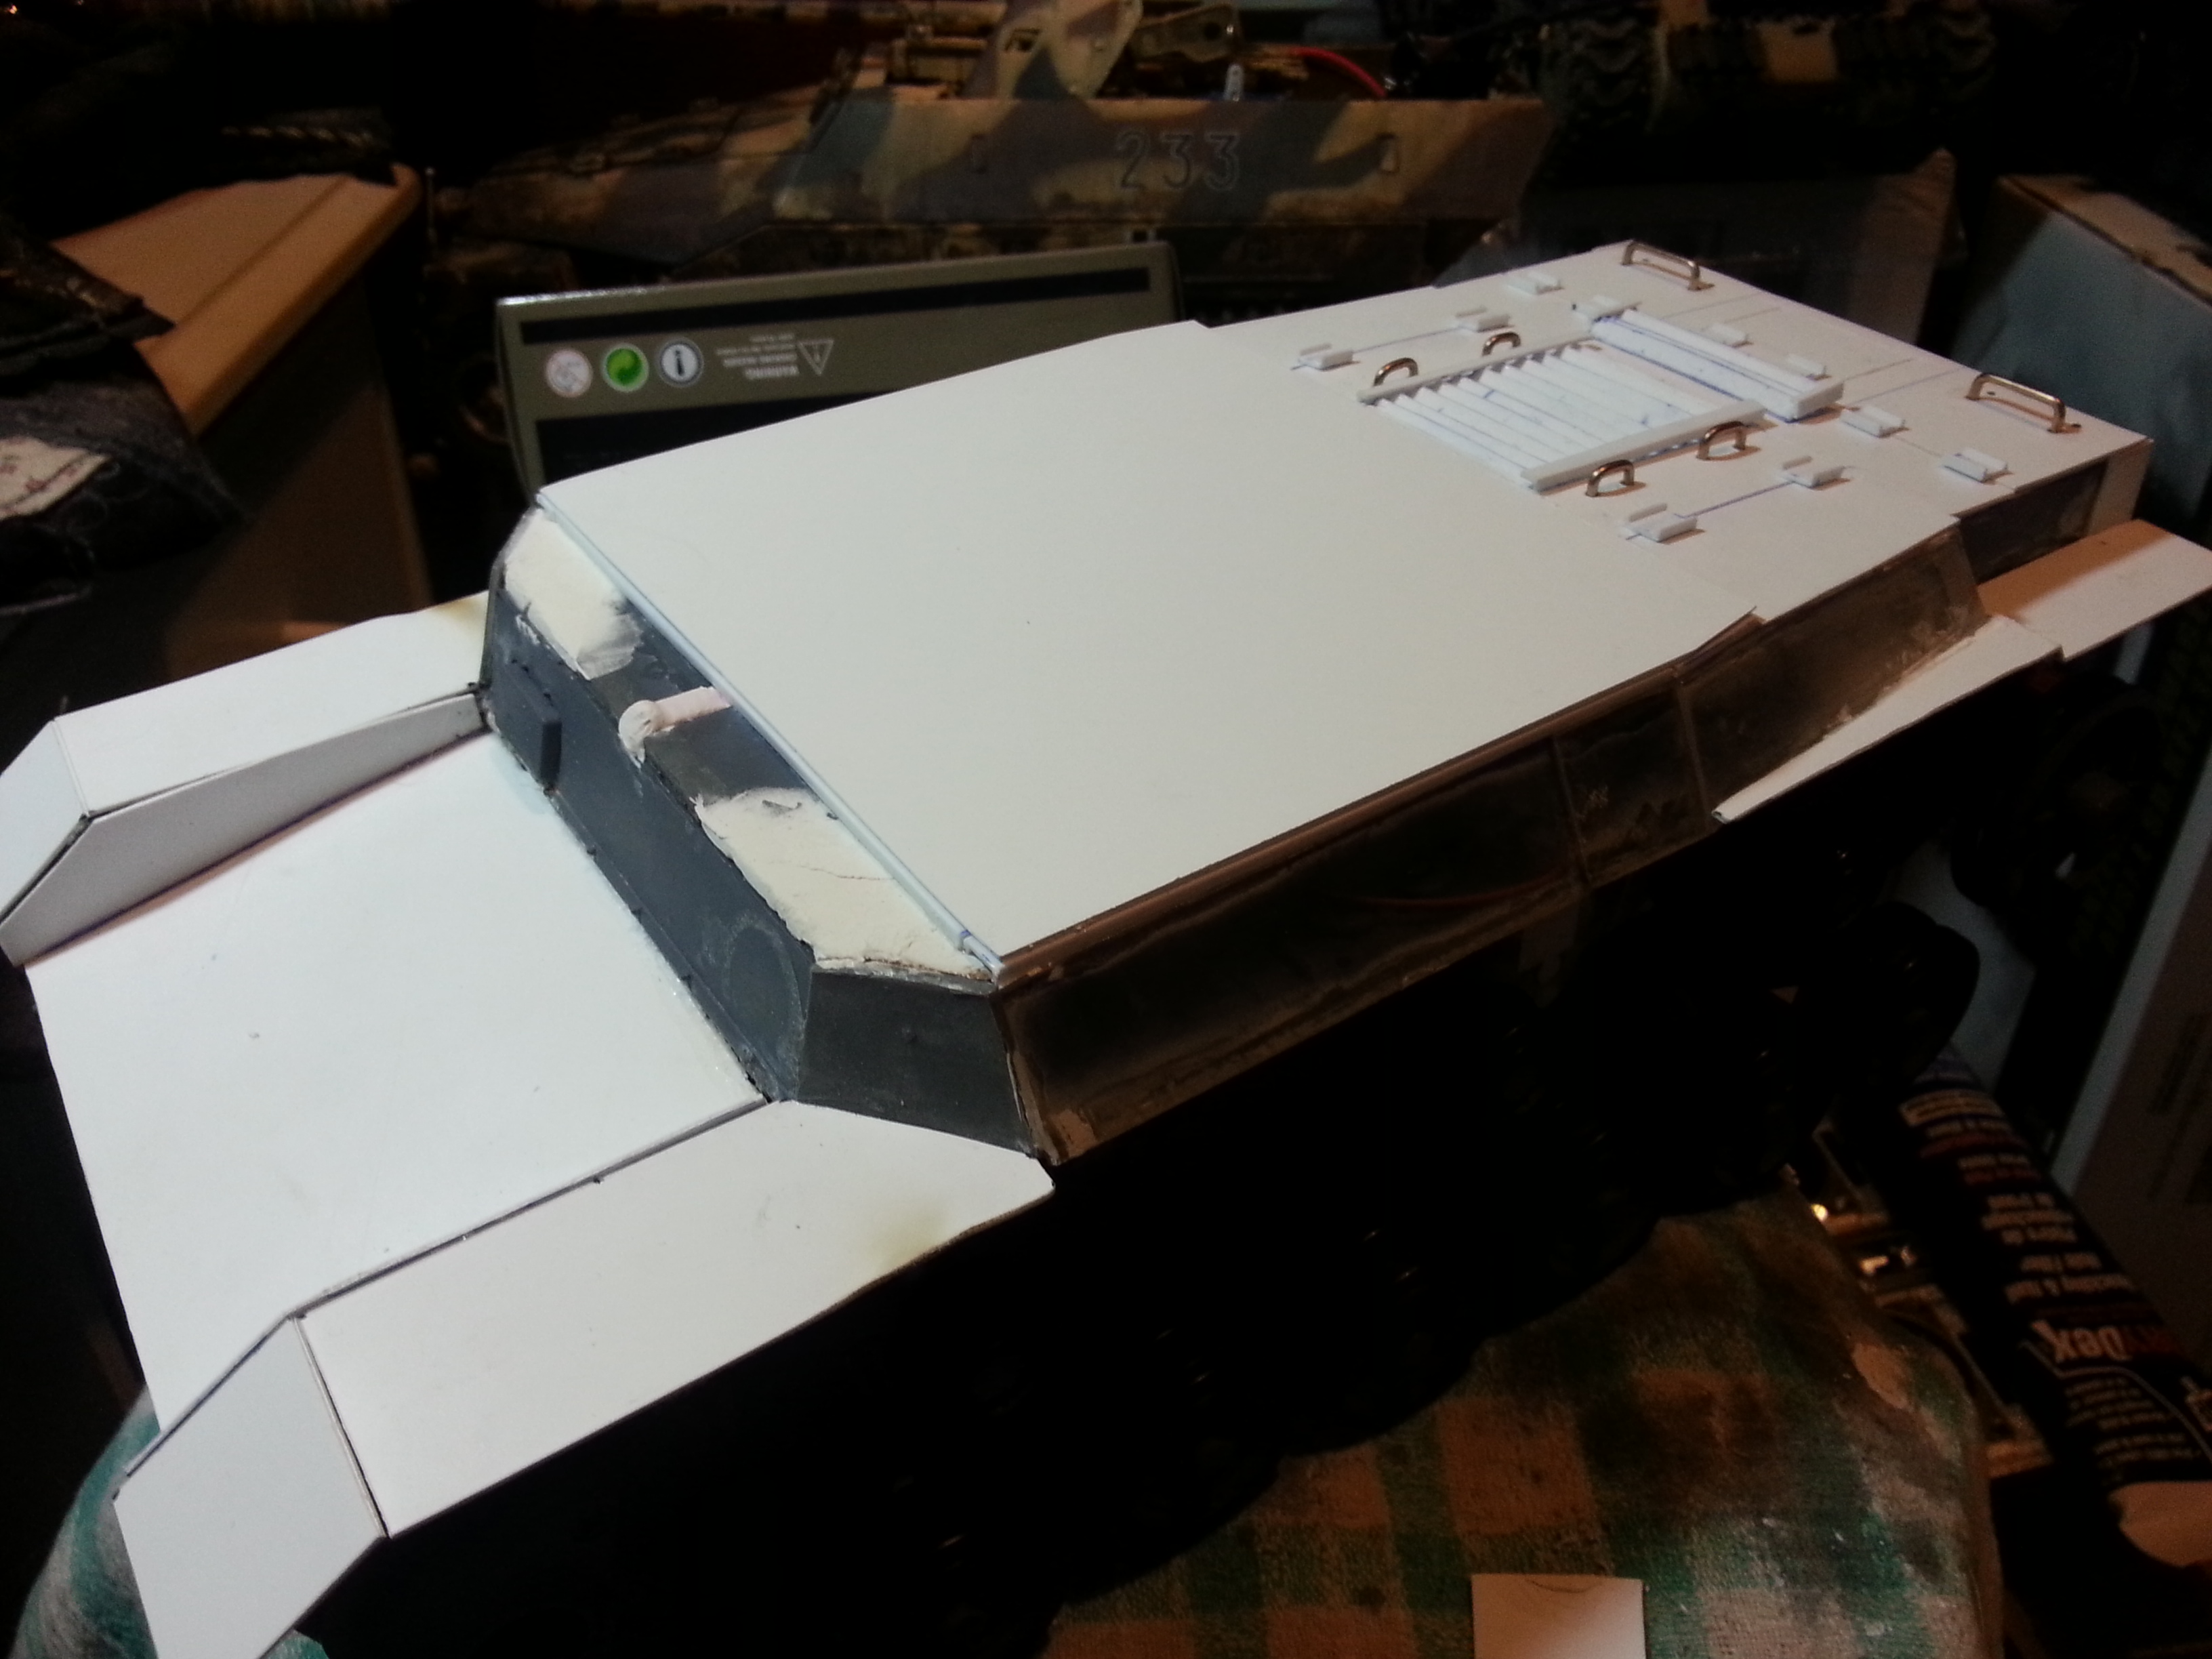 Styrene cut to shape and laid ontop
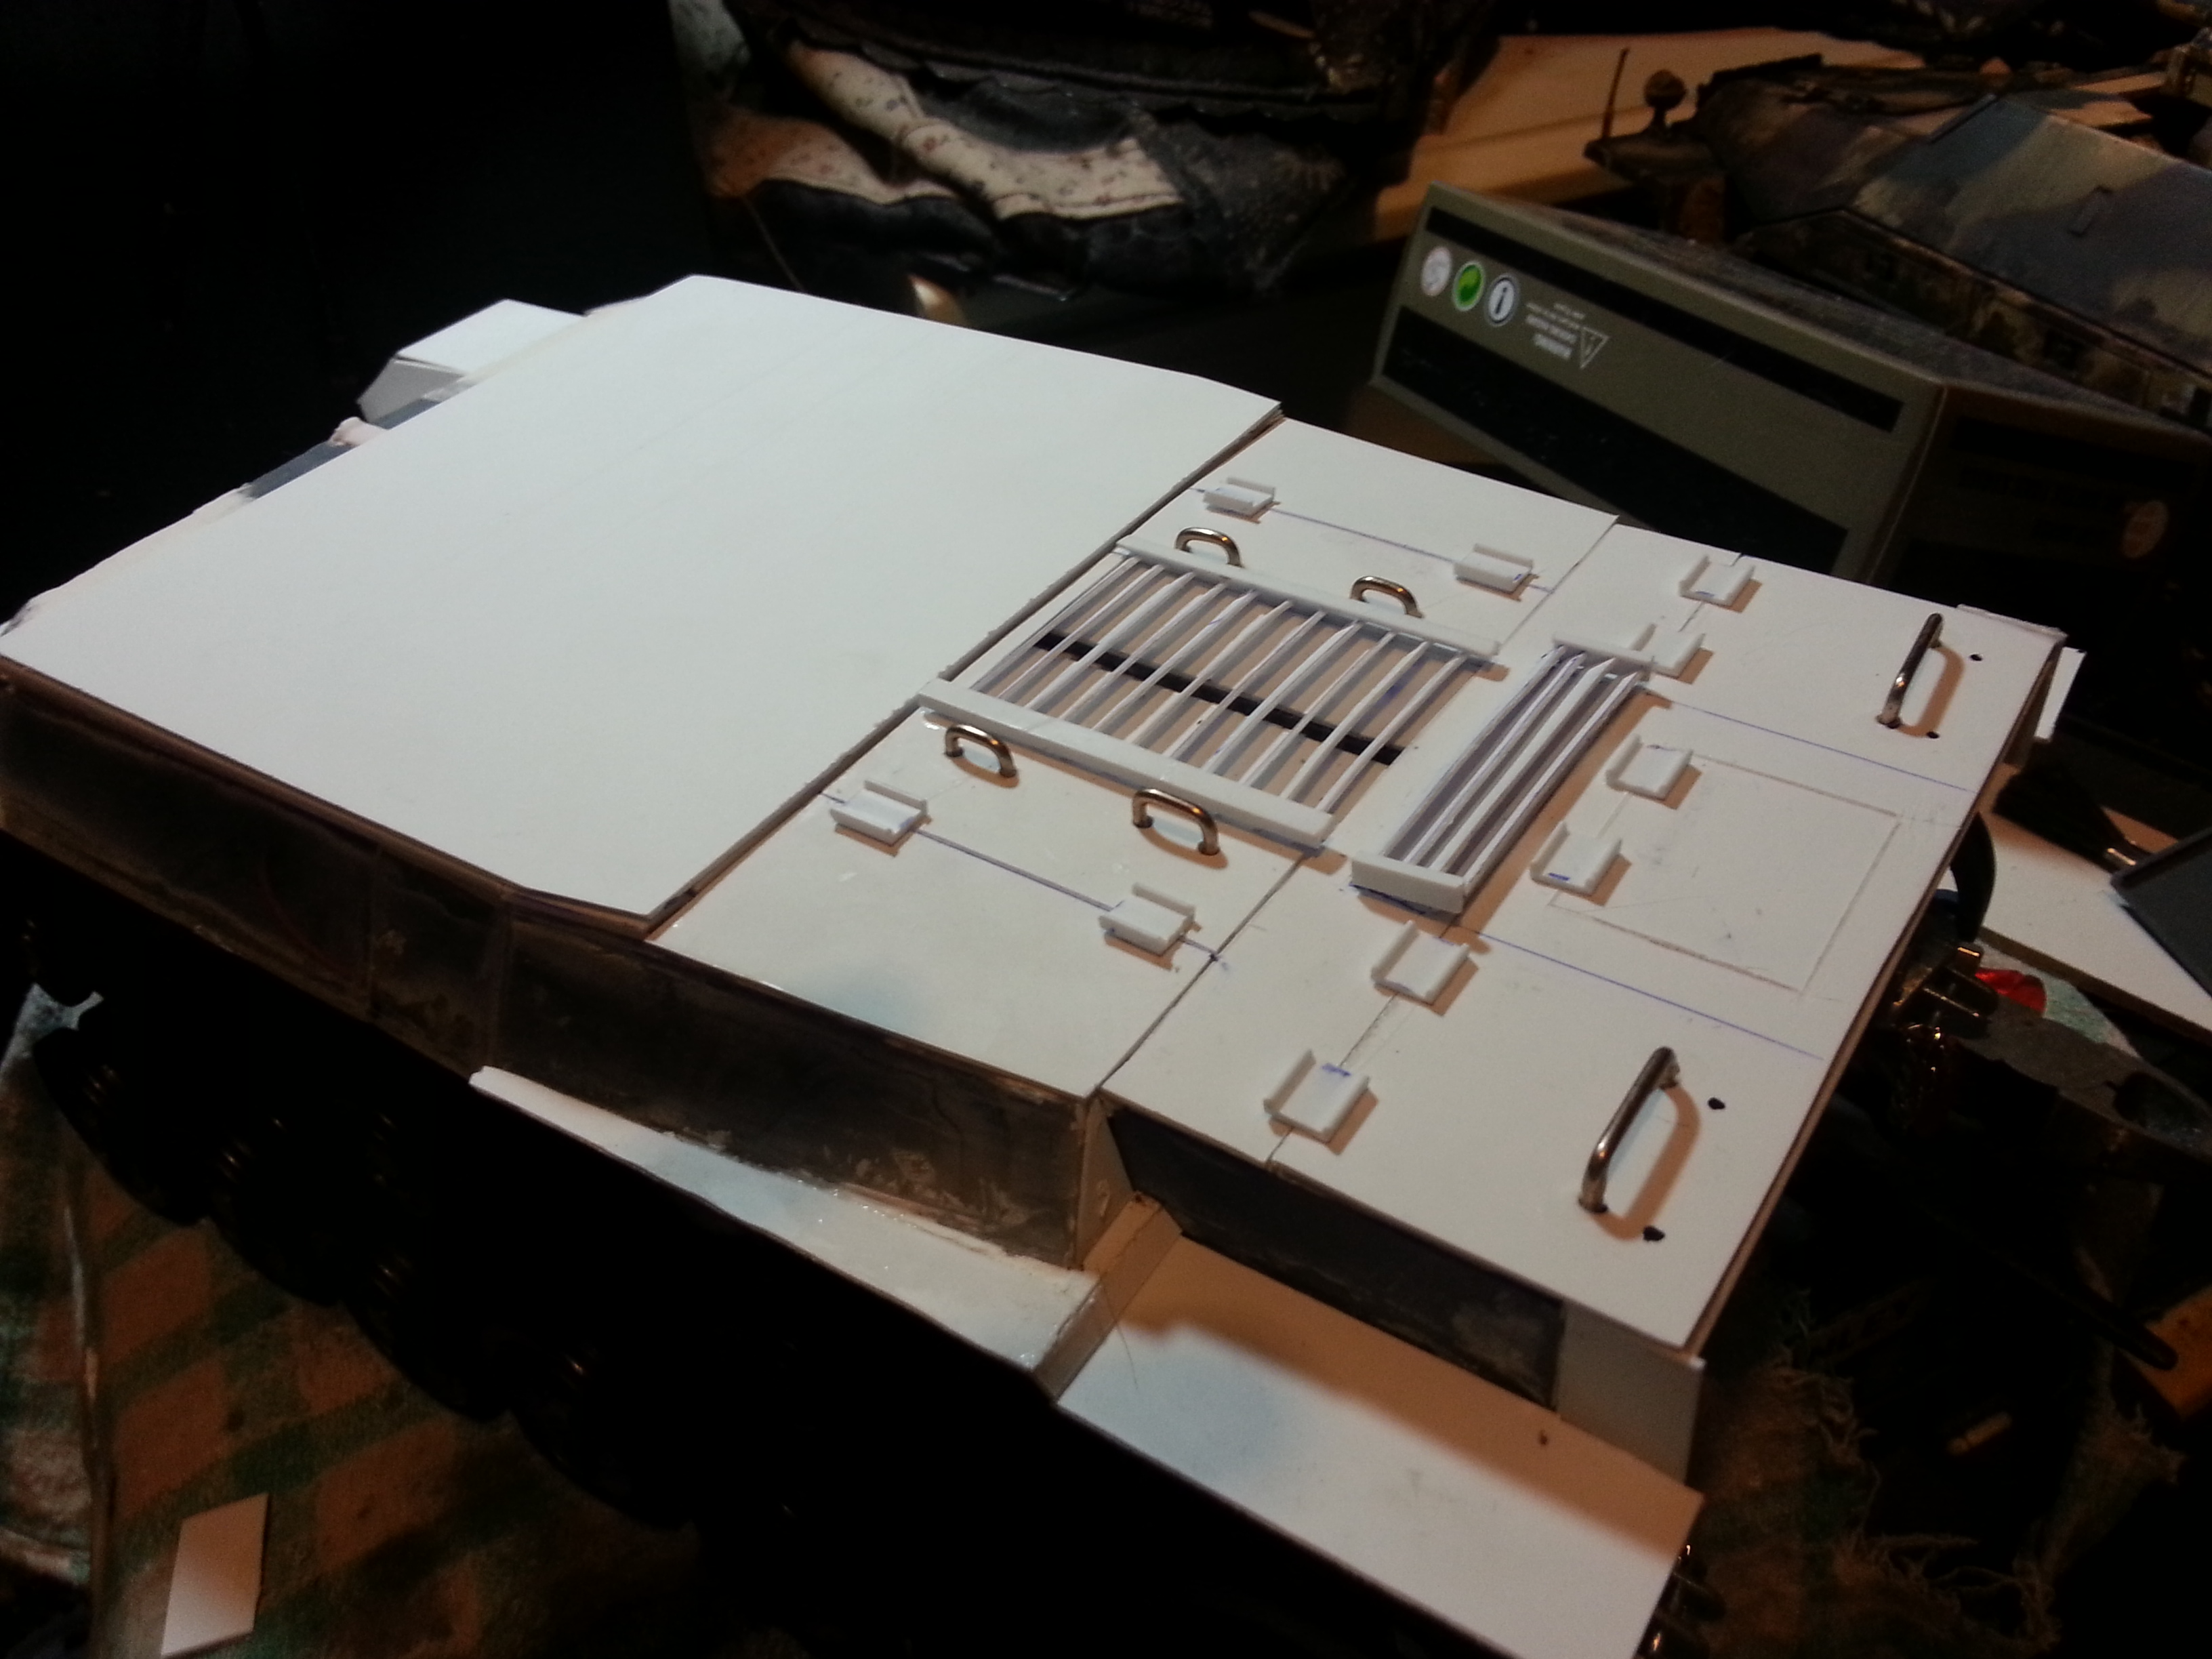 Engine deck detail :copper bar & styrene
 New angled plate matches the full scale tank now.
REALLY starting to love this build!!
I bit the bullet and used the band-saw to cut the UPPER hull today down the middle... I finally decided I didn't like the wider look the way I originally had it. It went smoothly and sanding out a new turret opening wasn't as bad as I had anticipated. Yay sanding drum dremel attachment! It's back together as you can see. I just need to reinforce it a bit more.
I reworked (again) the rear end, making things line up better with the newly narrow upper hull. Lots of detail work getting started! You can probably also see new Asiatam PnzIII track tensioners, curtousy of a club member.
Cutting those engine vent slats reminded me of the track pads I cut for my Indiana Jones tank.... *shivers*... lucky this wasn't so bad!!
*Update*
So it's been a busy weekend! I got a bit more done... solved a couple cosmetic and technical issues by raising the roof of the hull slightly. I used some leftover styrene C-channel as a base and more 1mm sheet on top. Now I can have the very slight angle infront of the turret & above the machine gun & drivers viewport
REALLY starting to love this build!!
Last edited by Strato50; 12-08-2013 at 10:34 PM.
12-10-2013 | 06:15 AM
#14
I love your build too. Thanks for the updates. Seeing someone else's work always gives me ideas on how to do my own projects cheaper/easier/better/faster. As a result of your project I started to research Japanese AFVs and found more of them than I knew existed. The problem is that most of them look like something only their mother could love and could be taken out with a .50 caliber Browning. The one that really tweeks my interest is the Type 2 Ka Mi amphibious tank with detachable floats. Hmmmmmmm 
Rex
Rex
12-10-2013 | 08:46 AM
#15
Thread Starter
Rex, your role in my tanking universe as the scratch-building Buddha is very present, and your words of encouragement are very much appreciated! (Don't worry I had to read that a few times myself.. . )
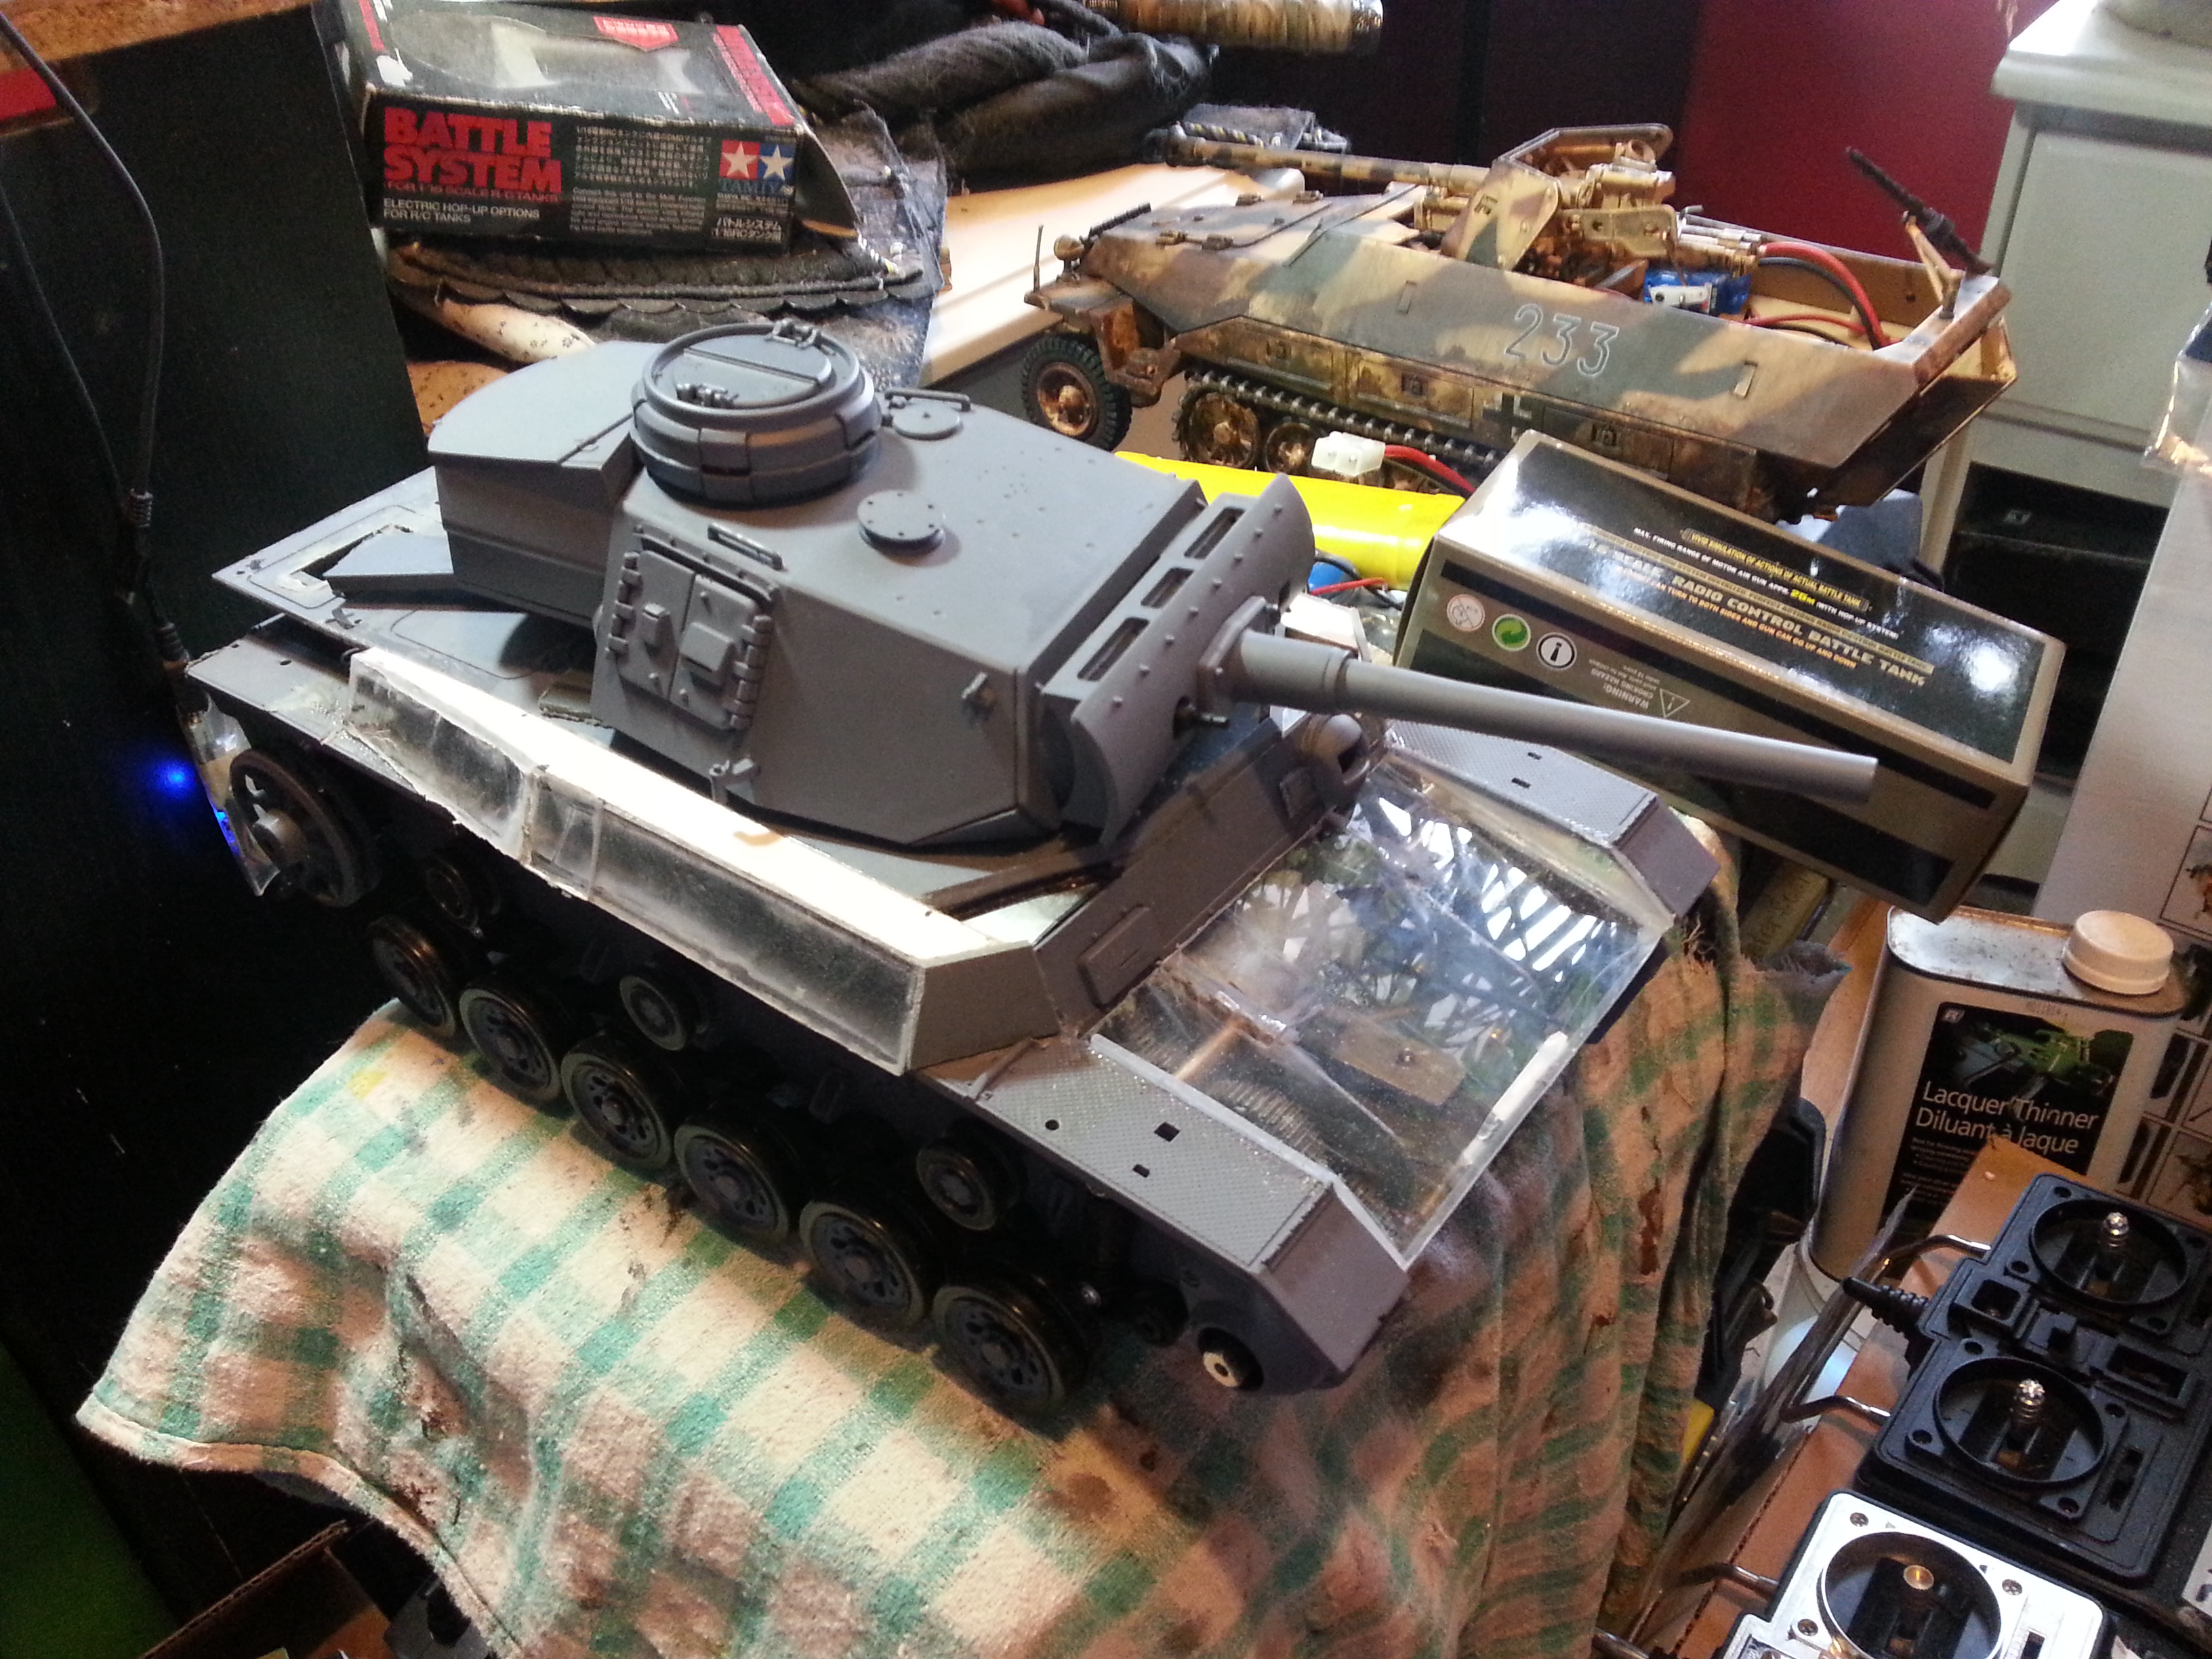
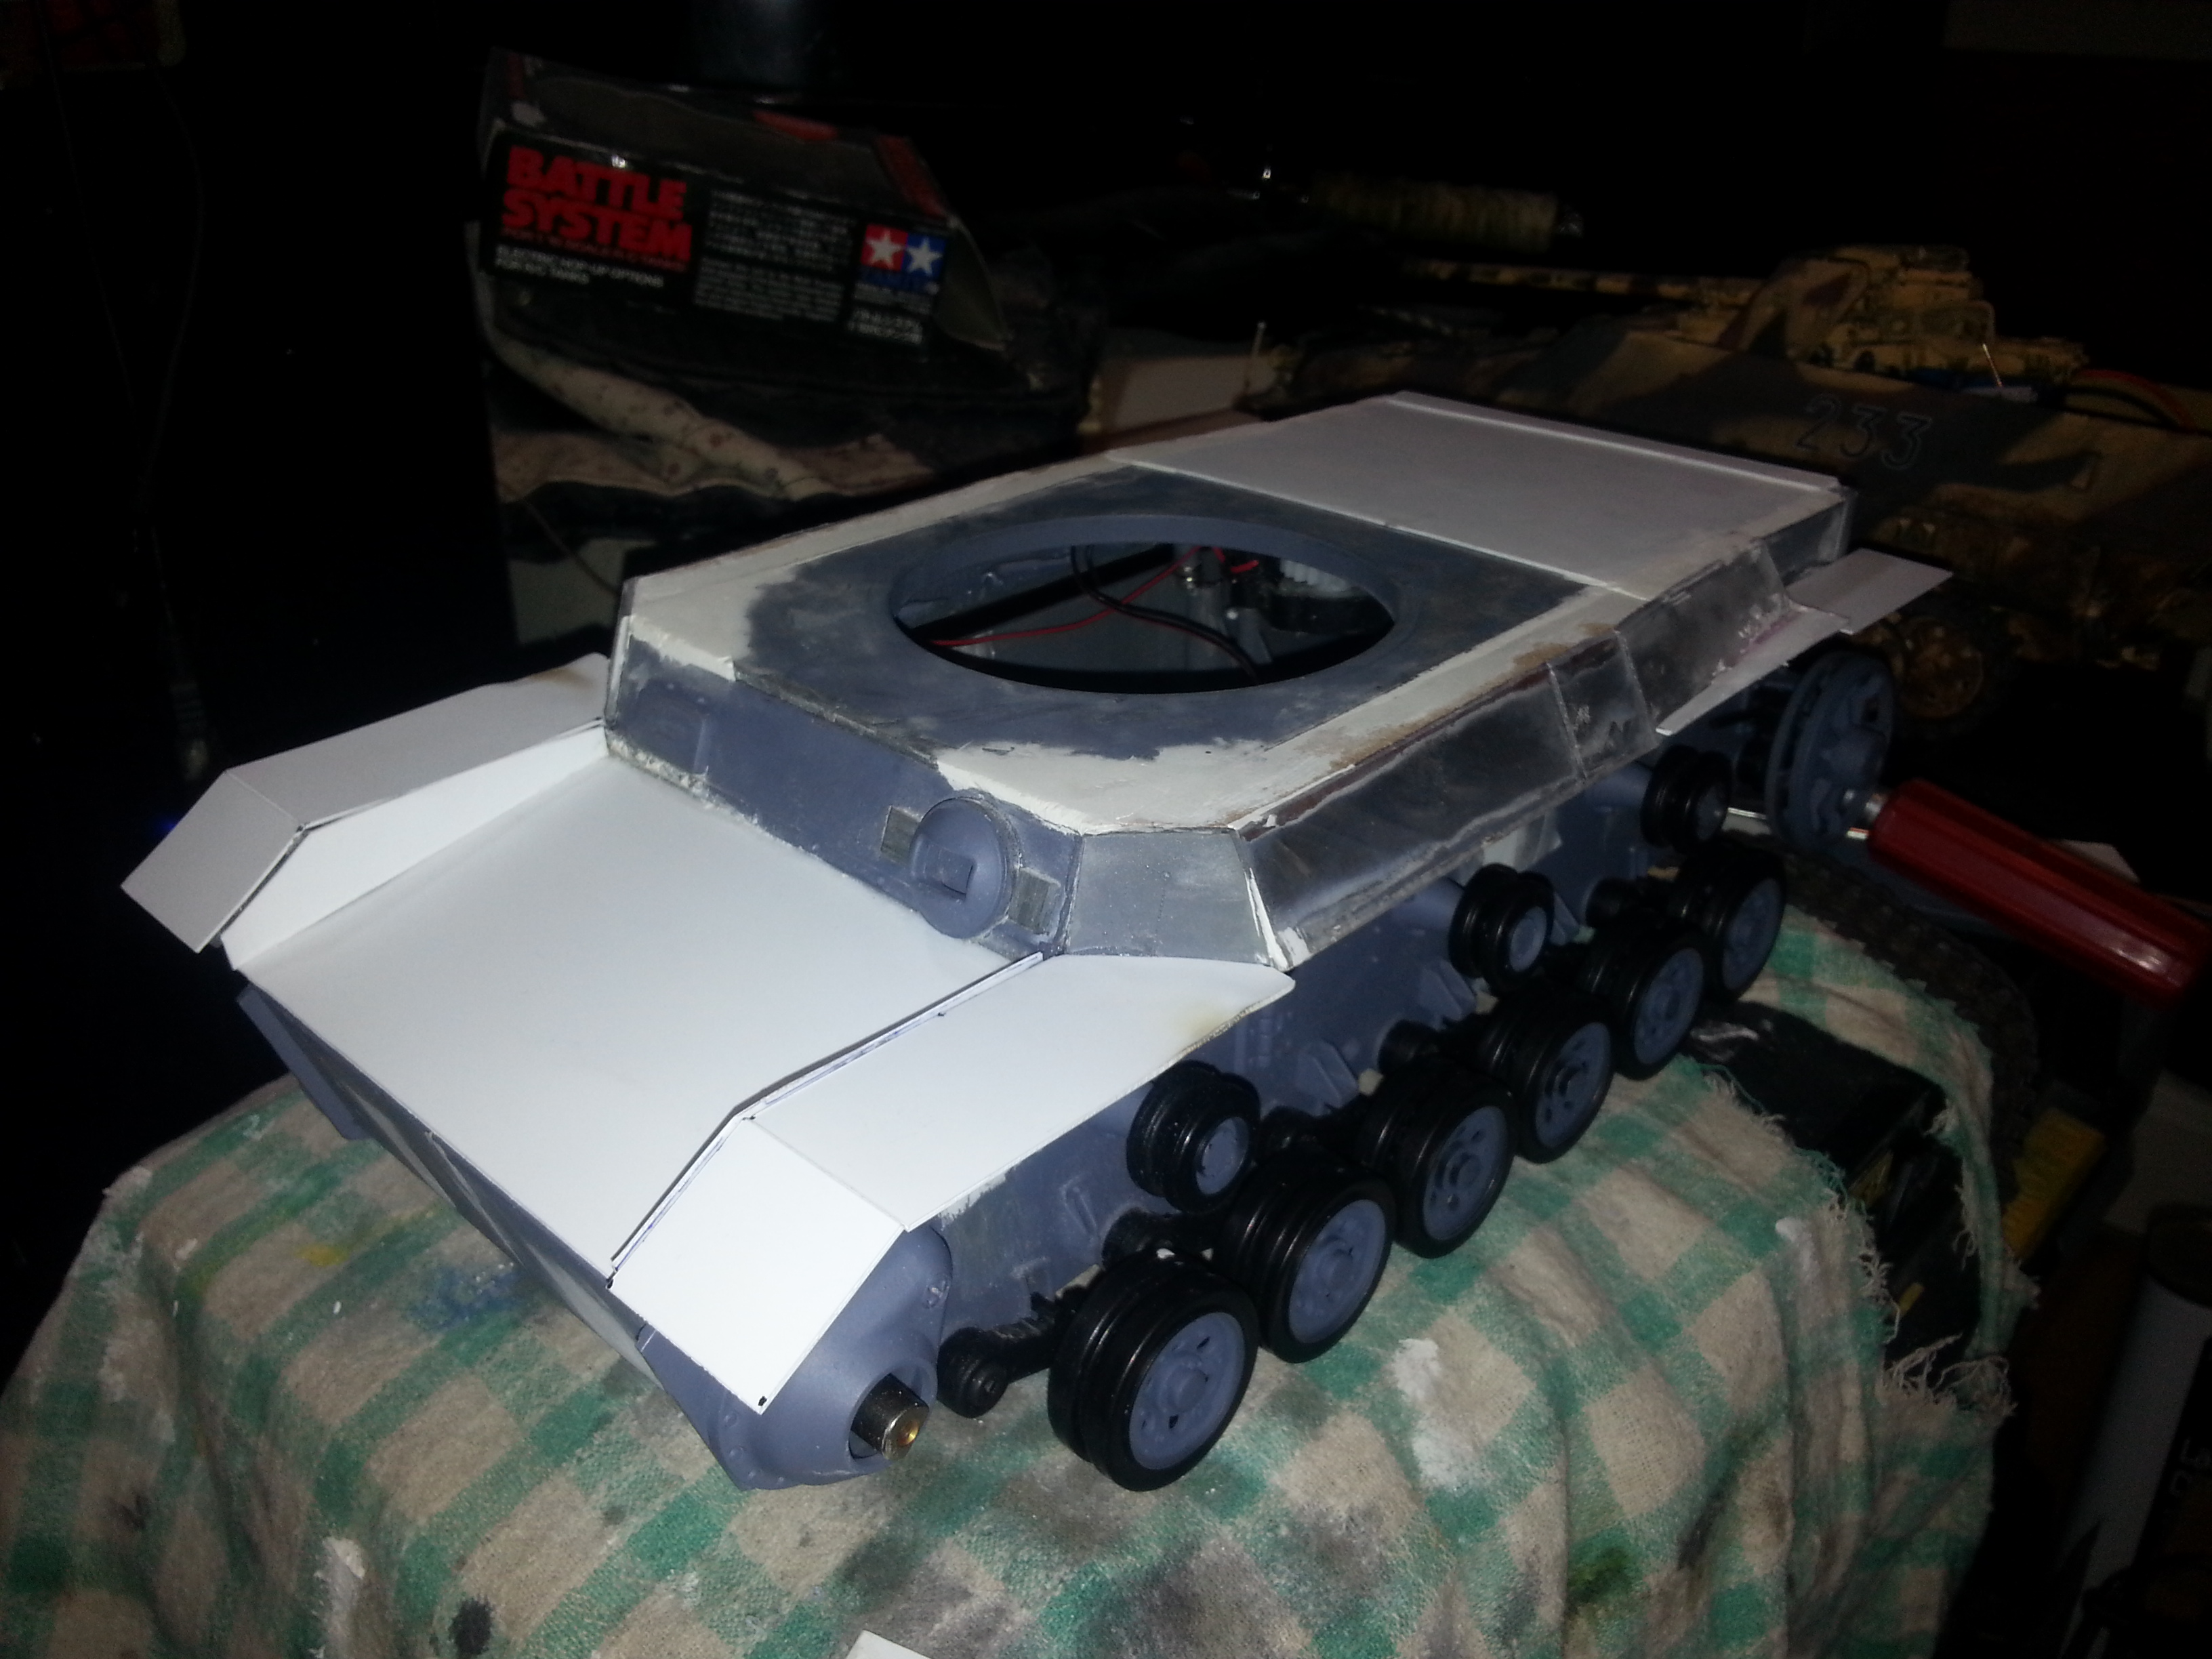
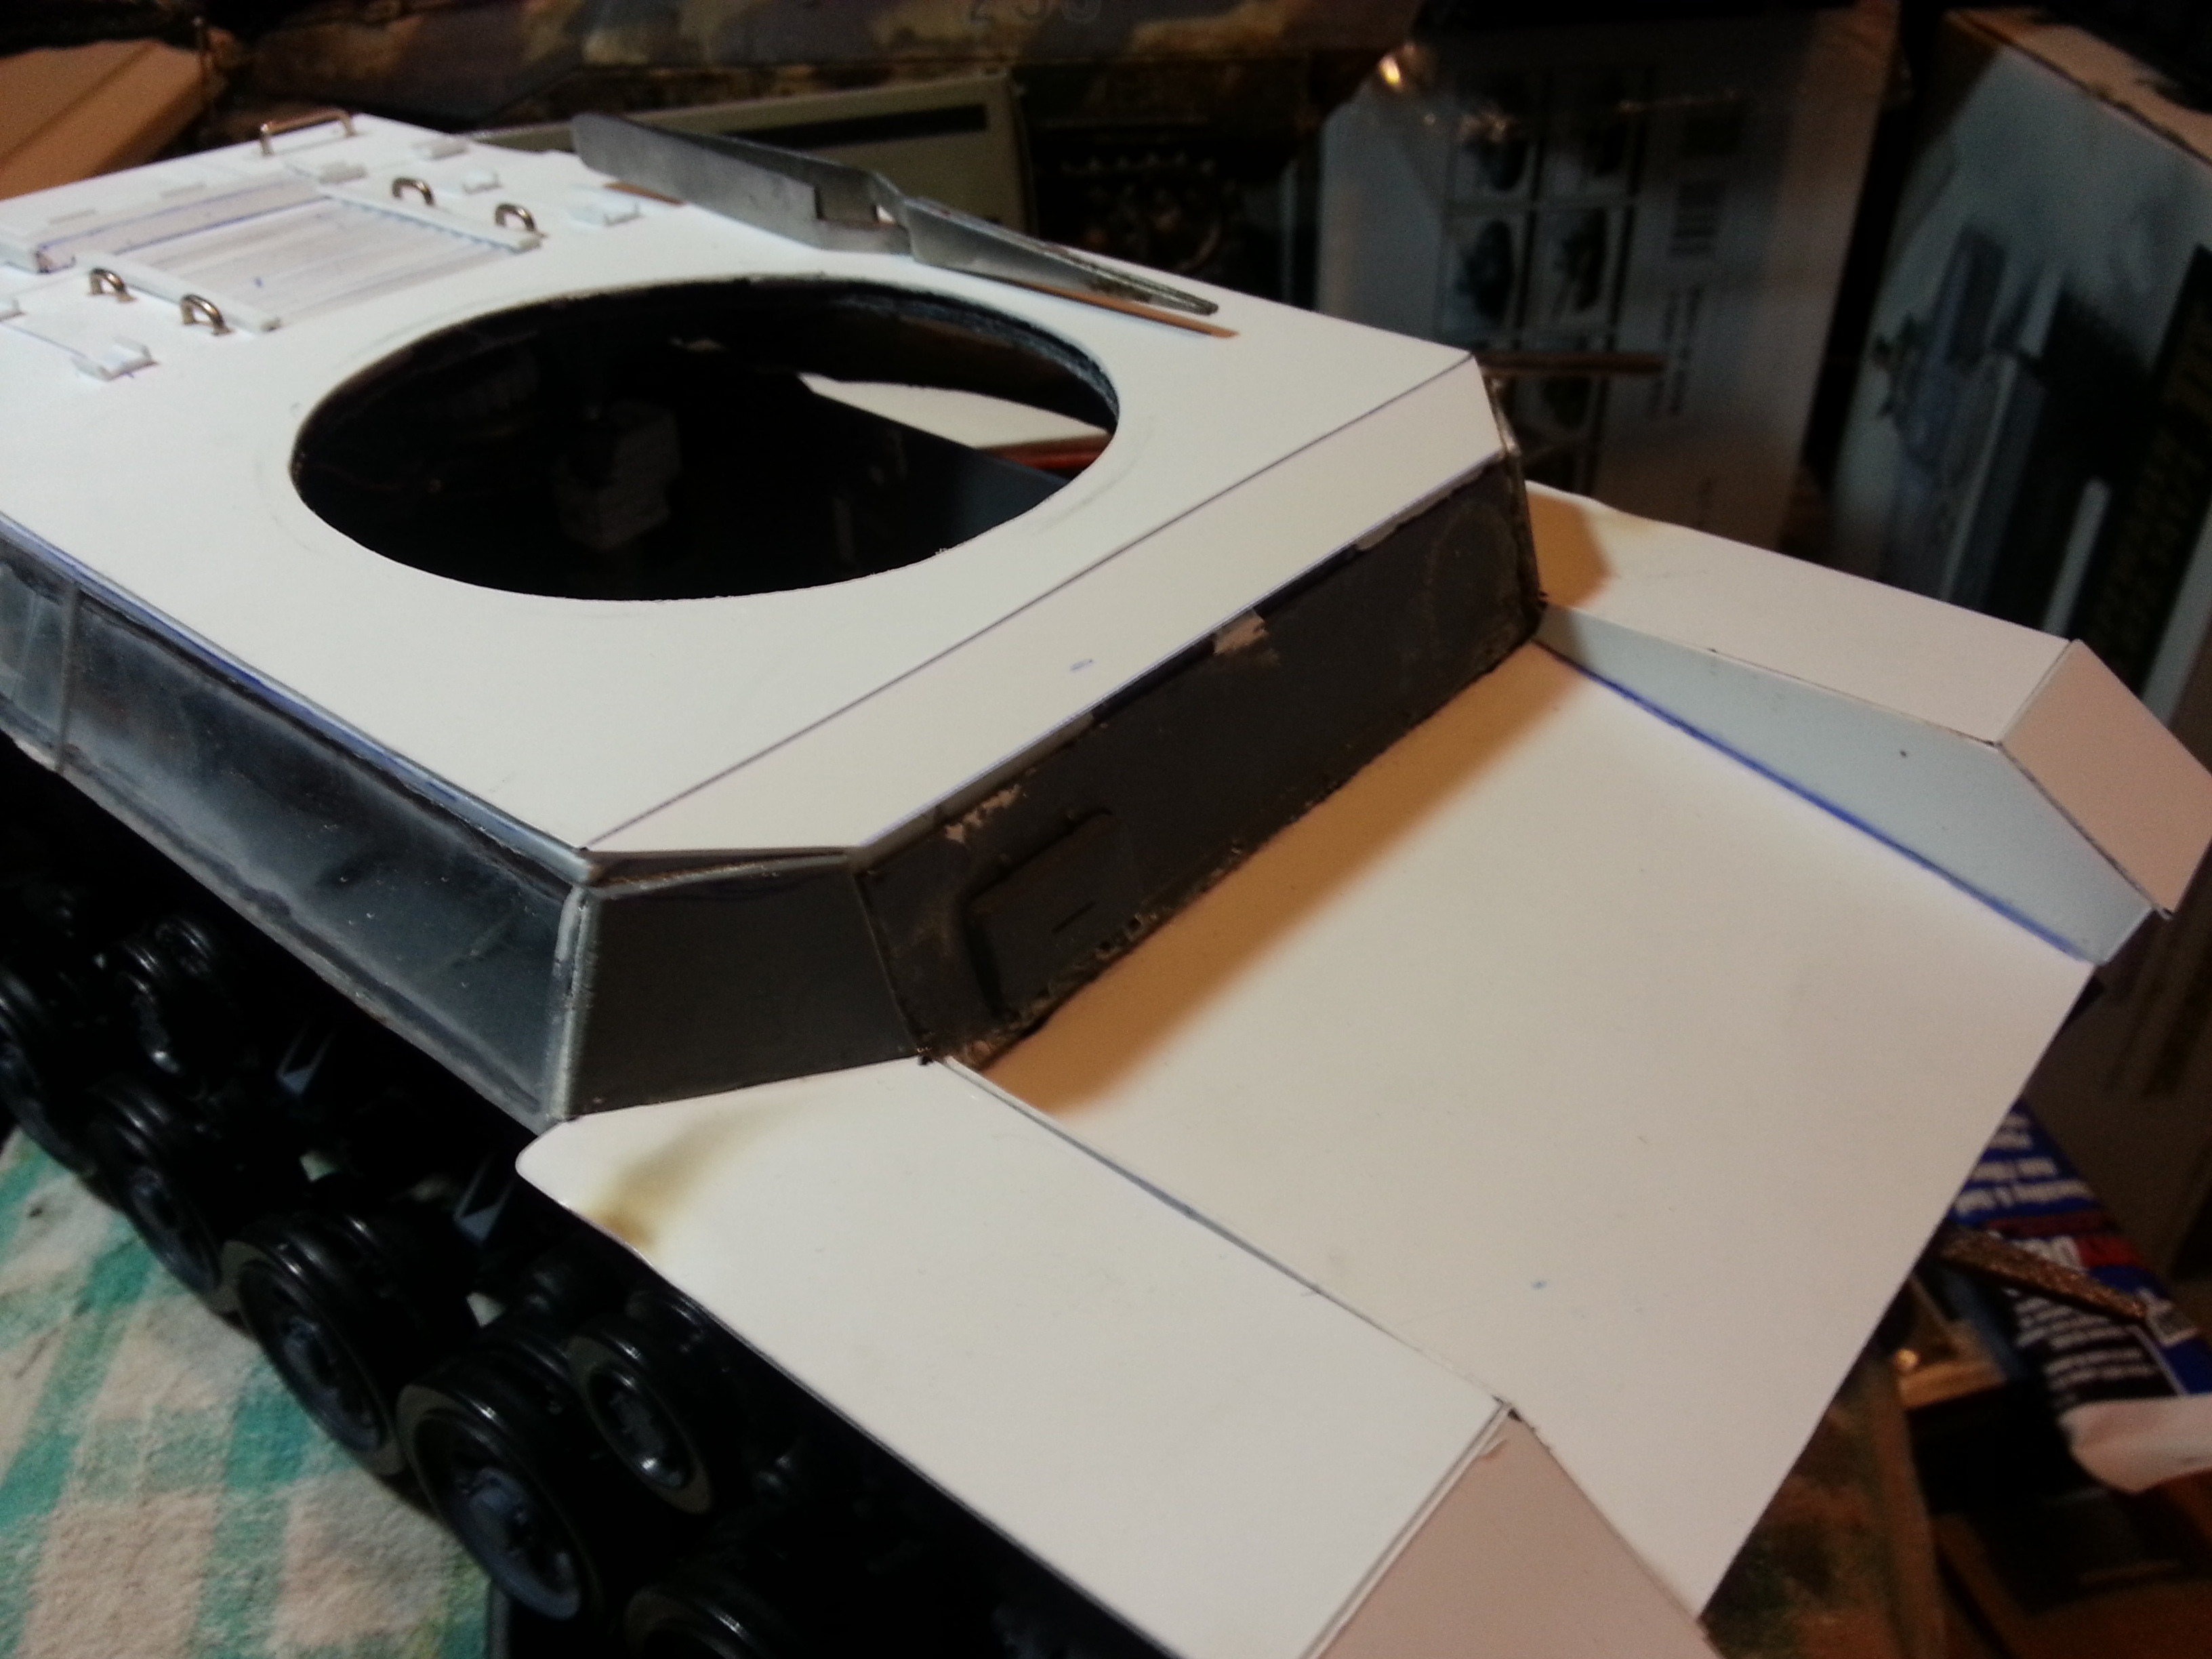
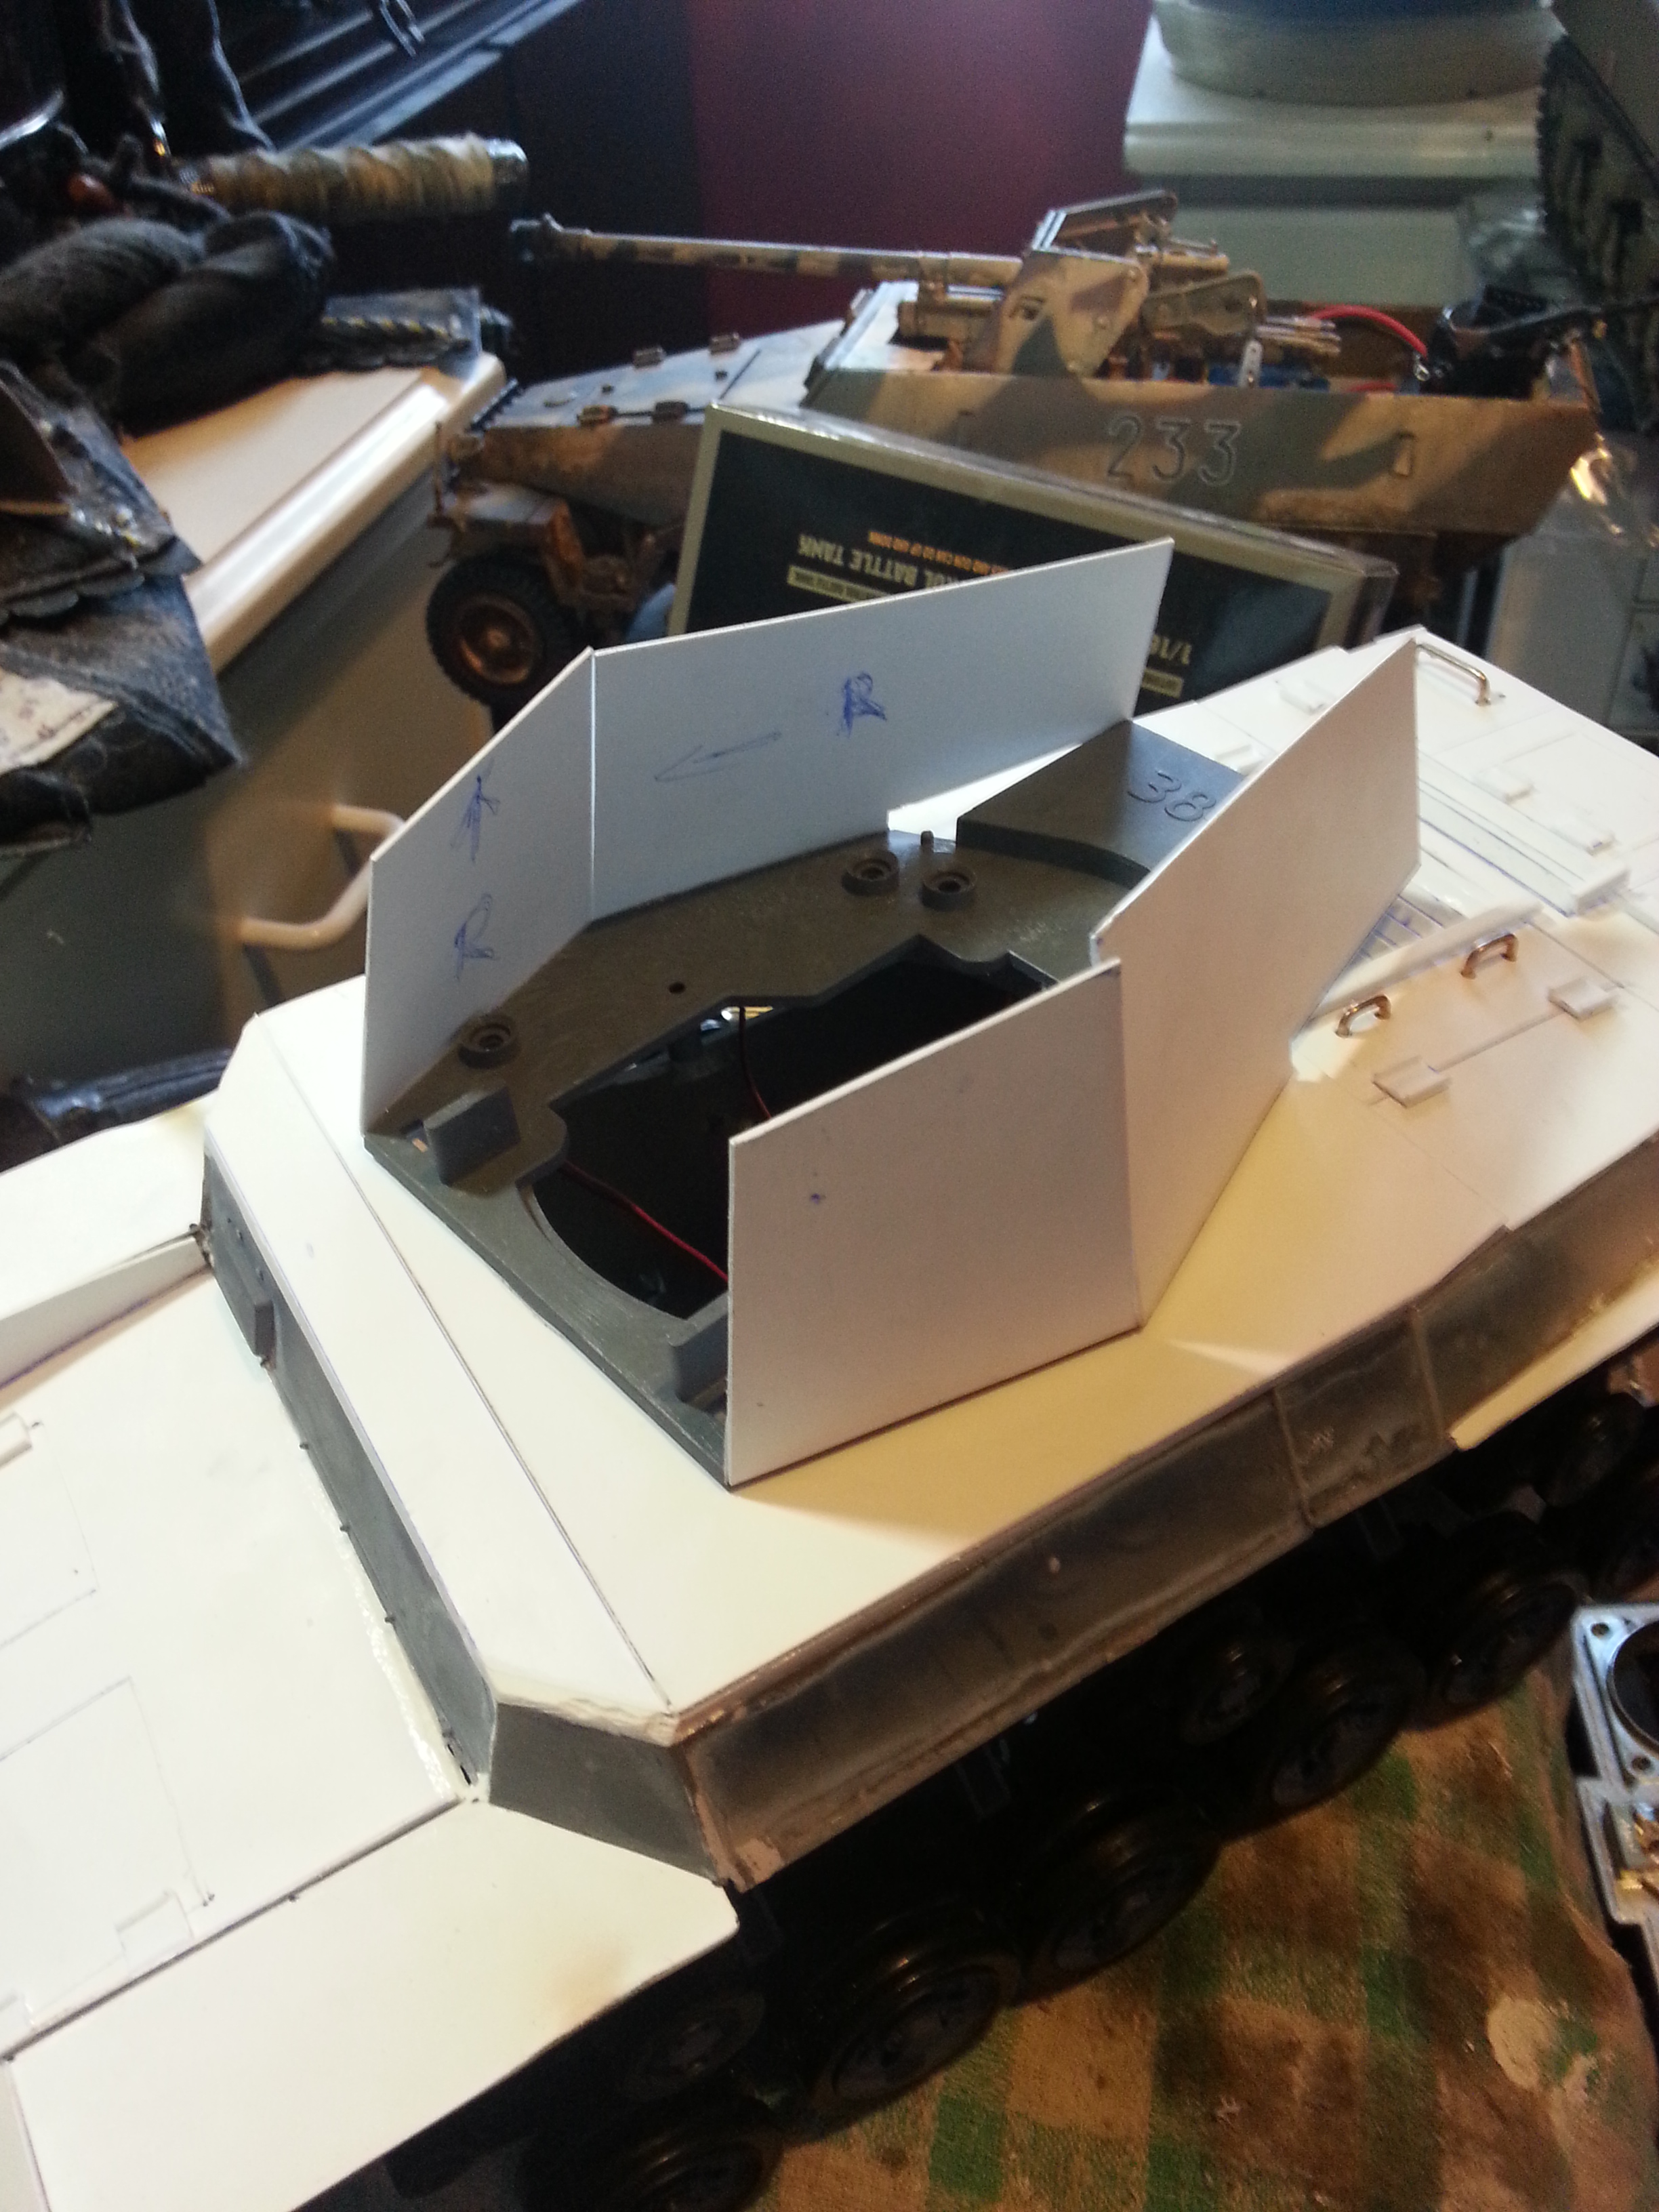
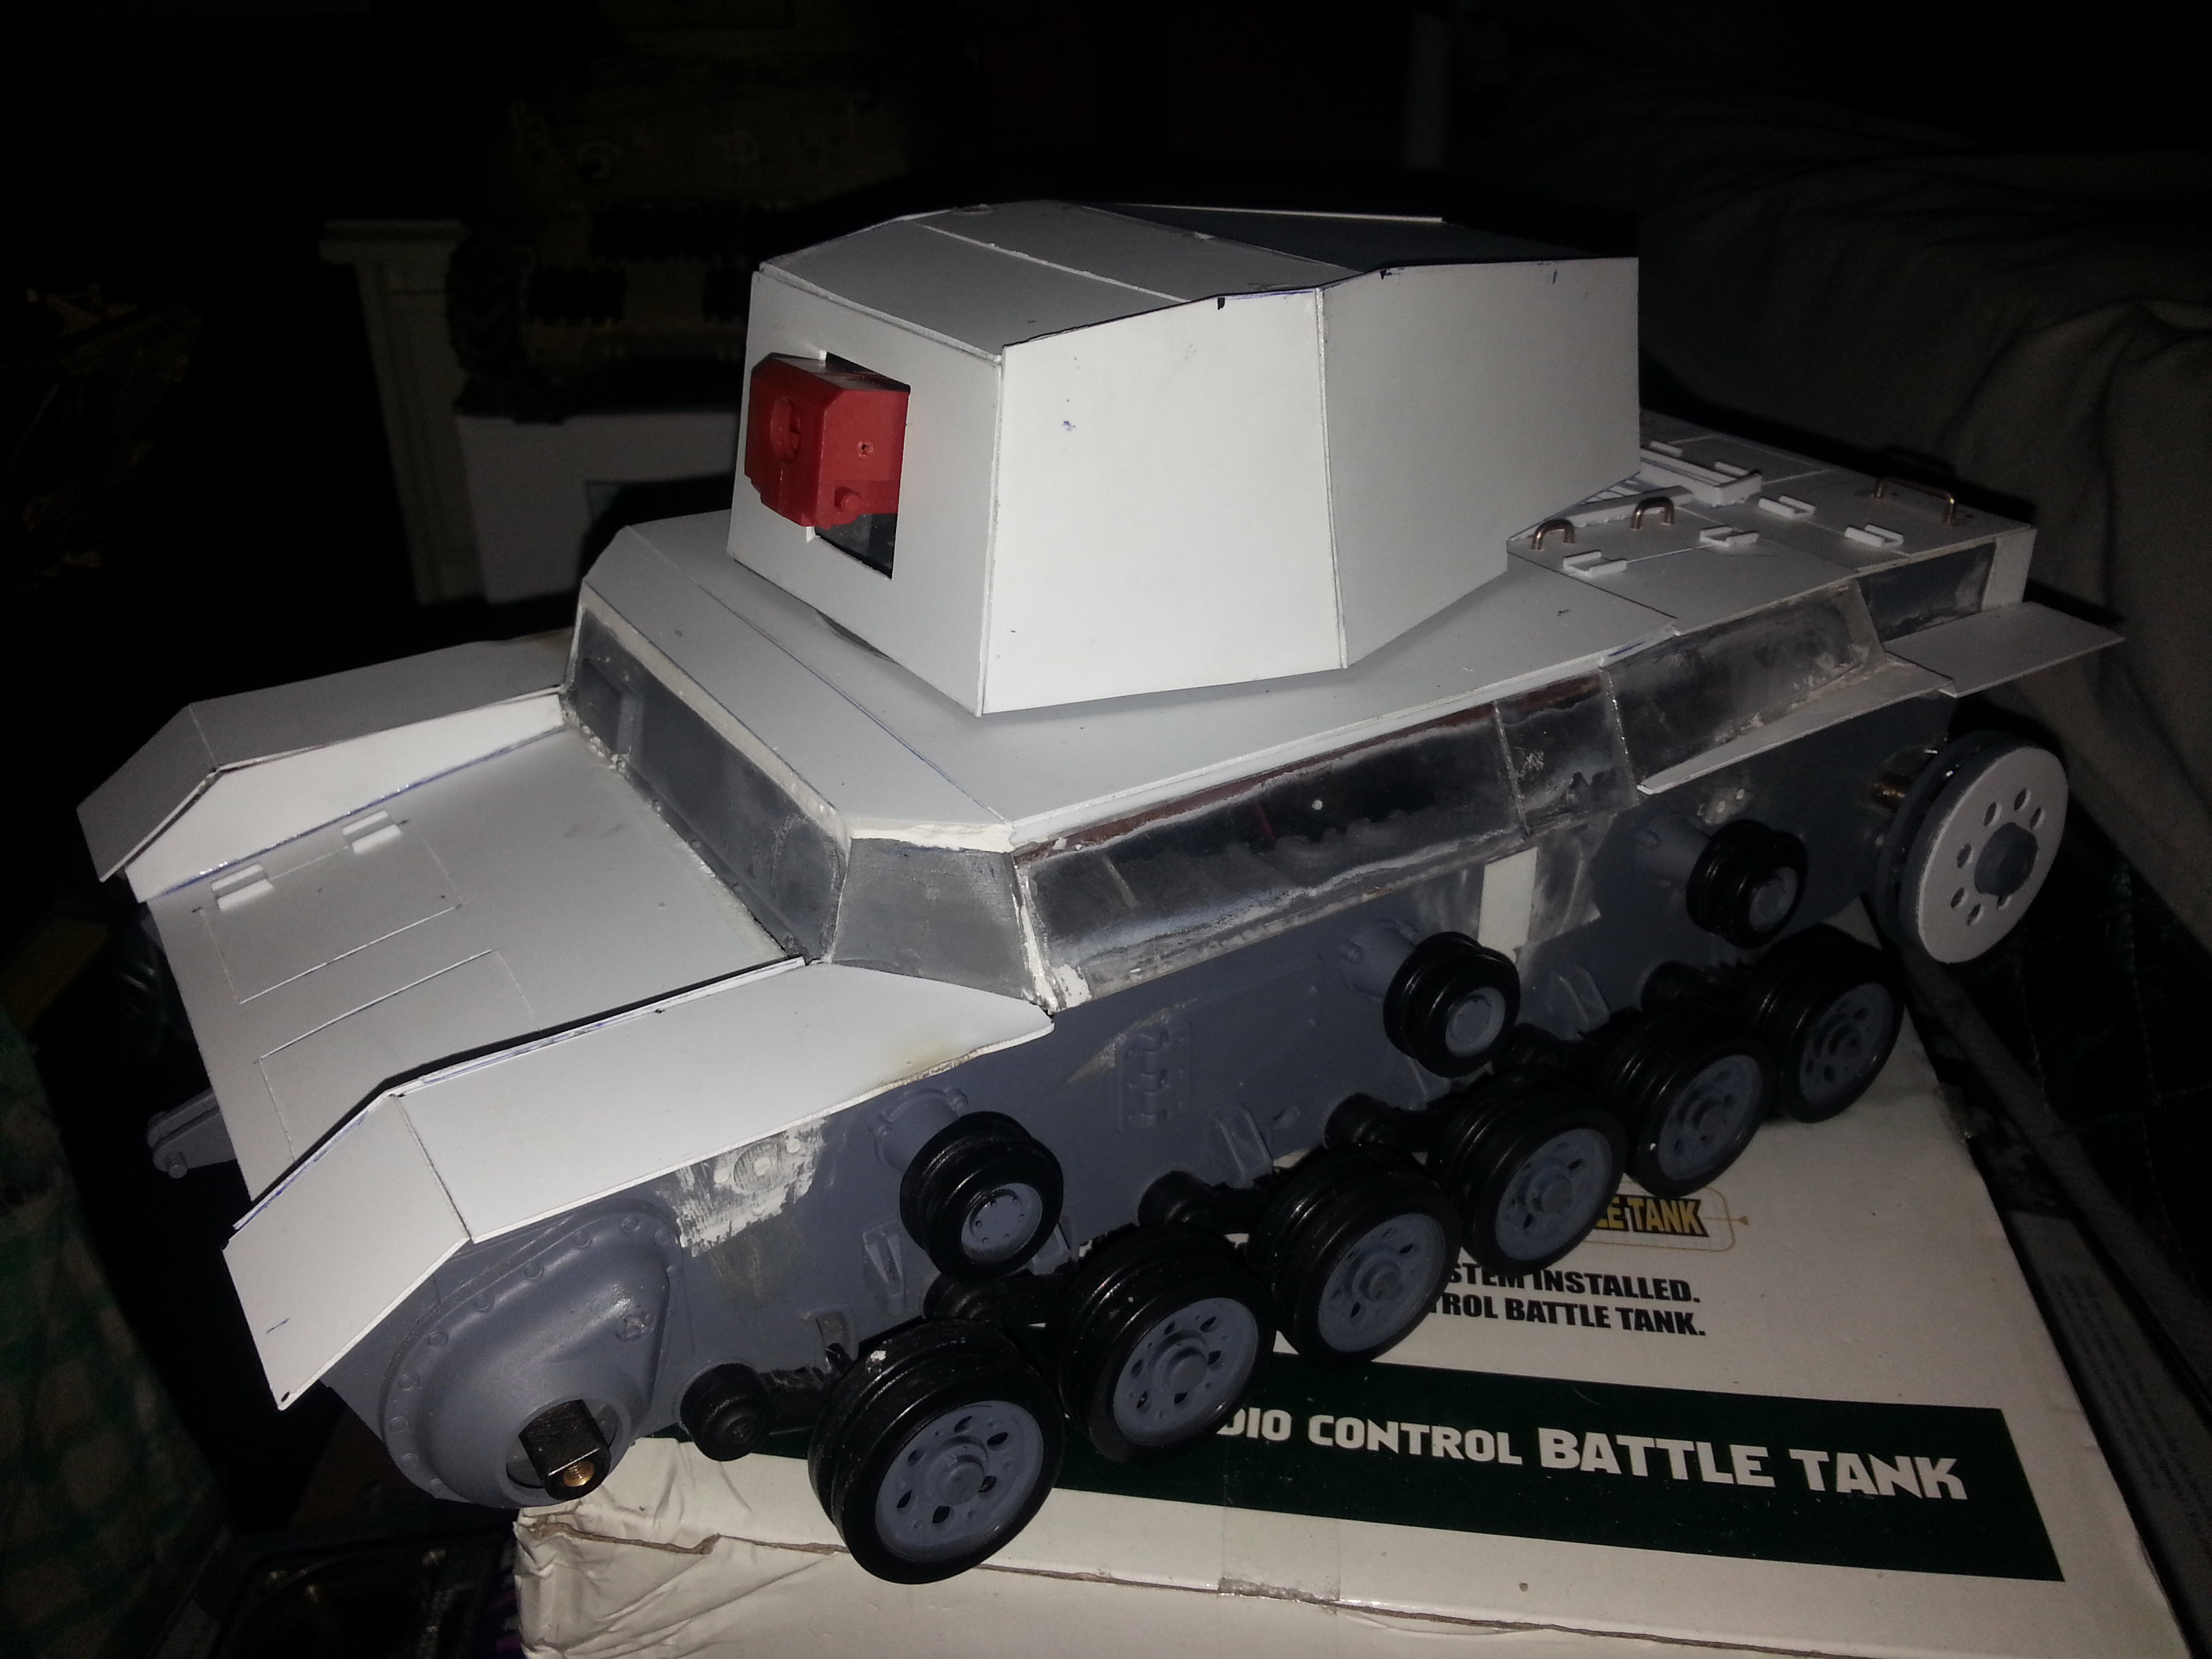
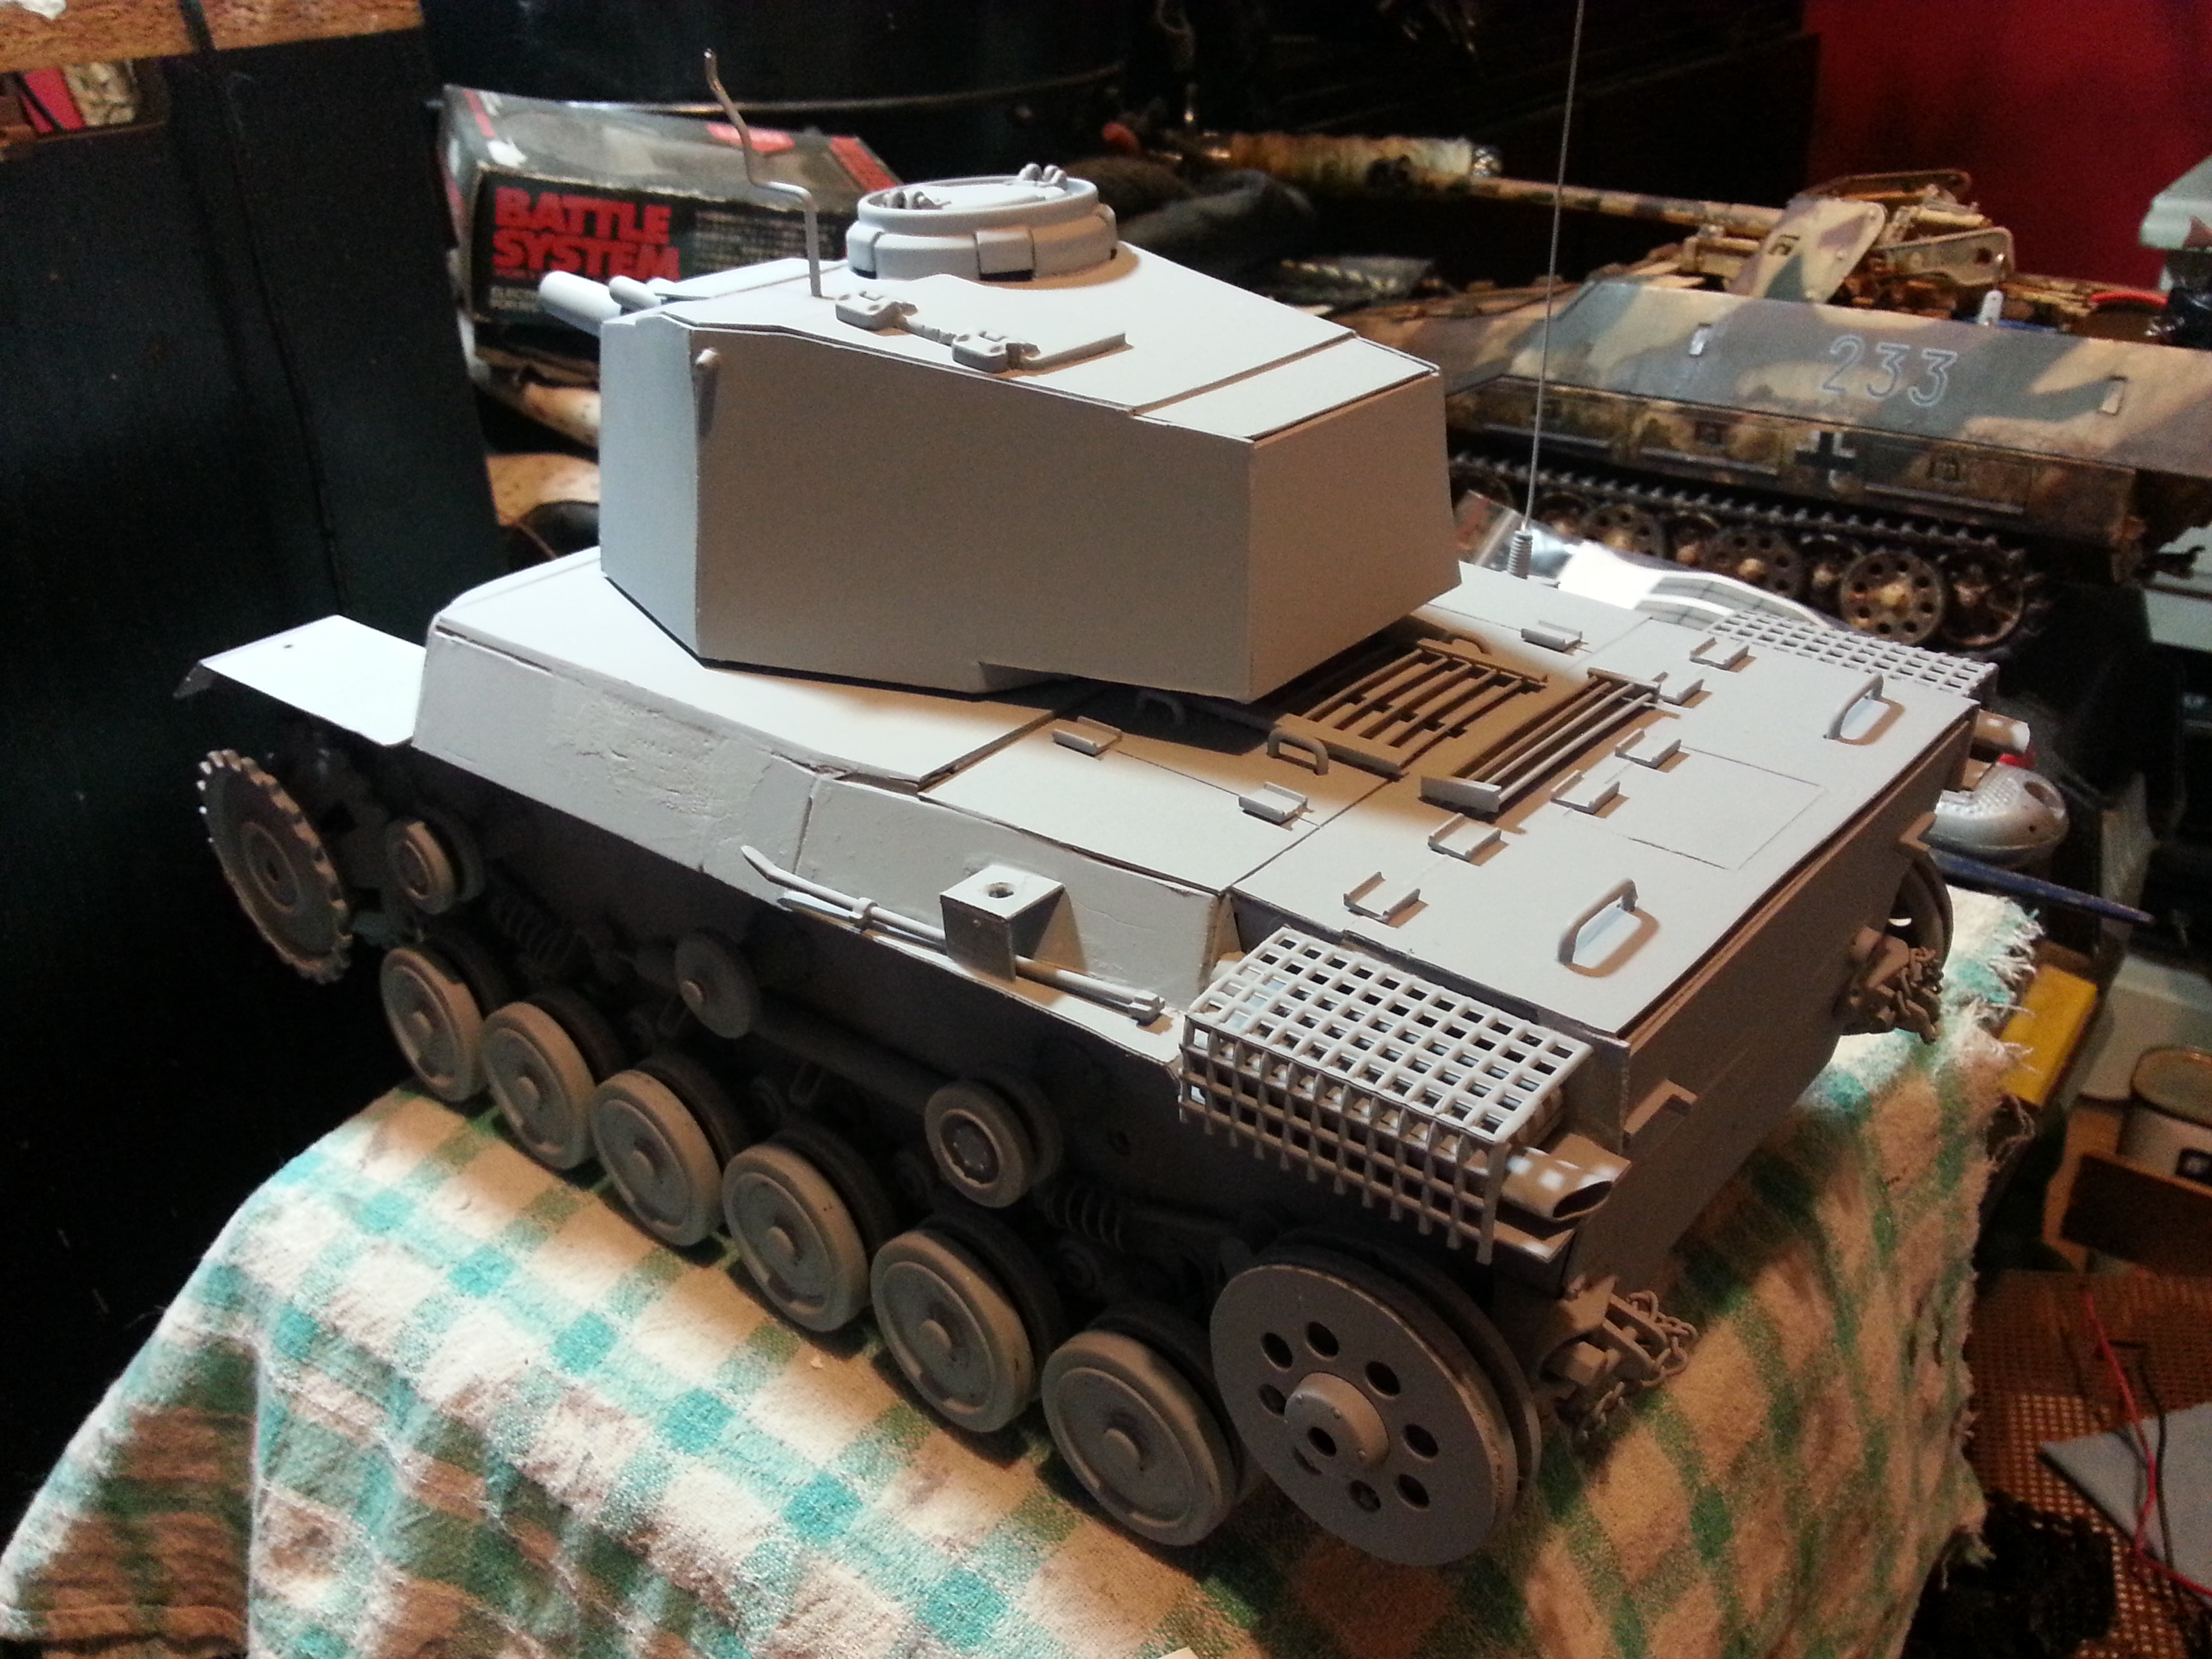
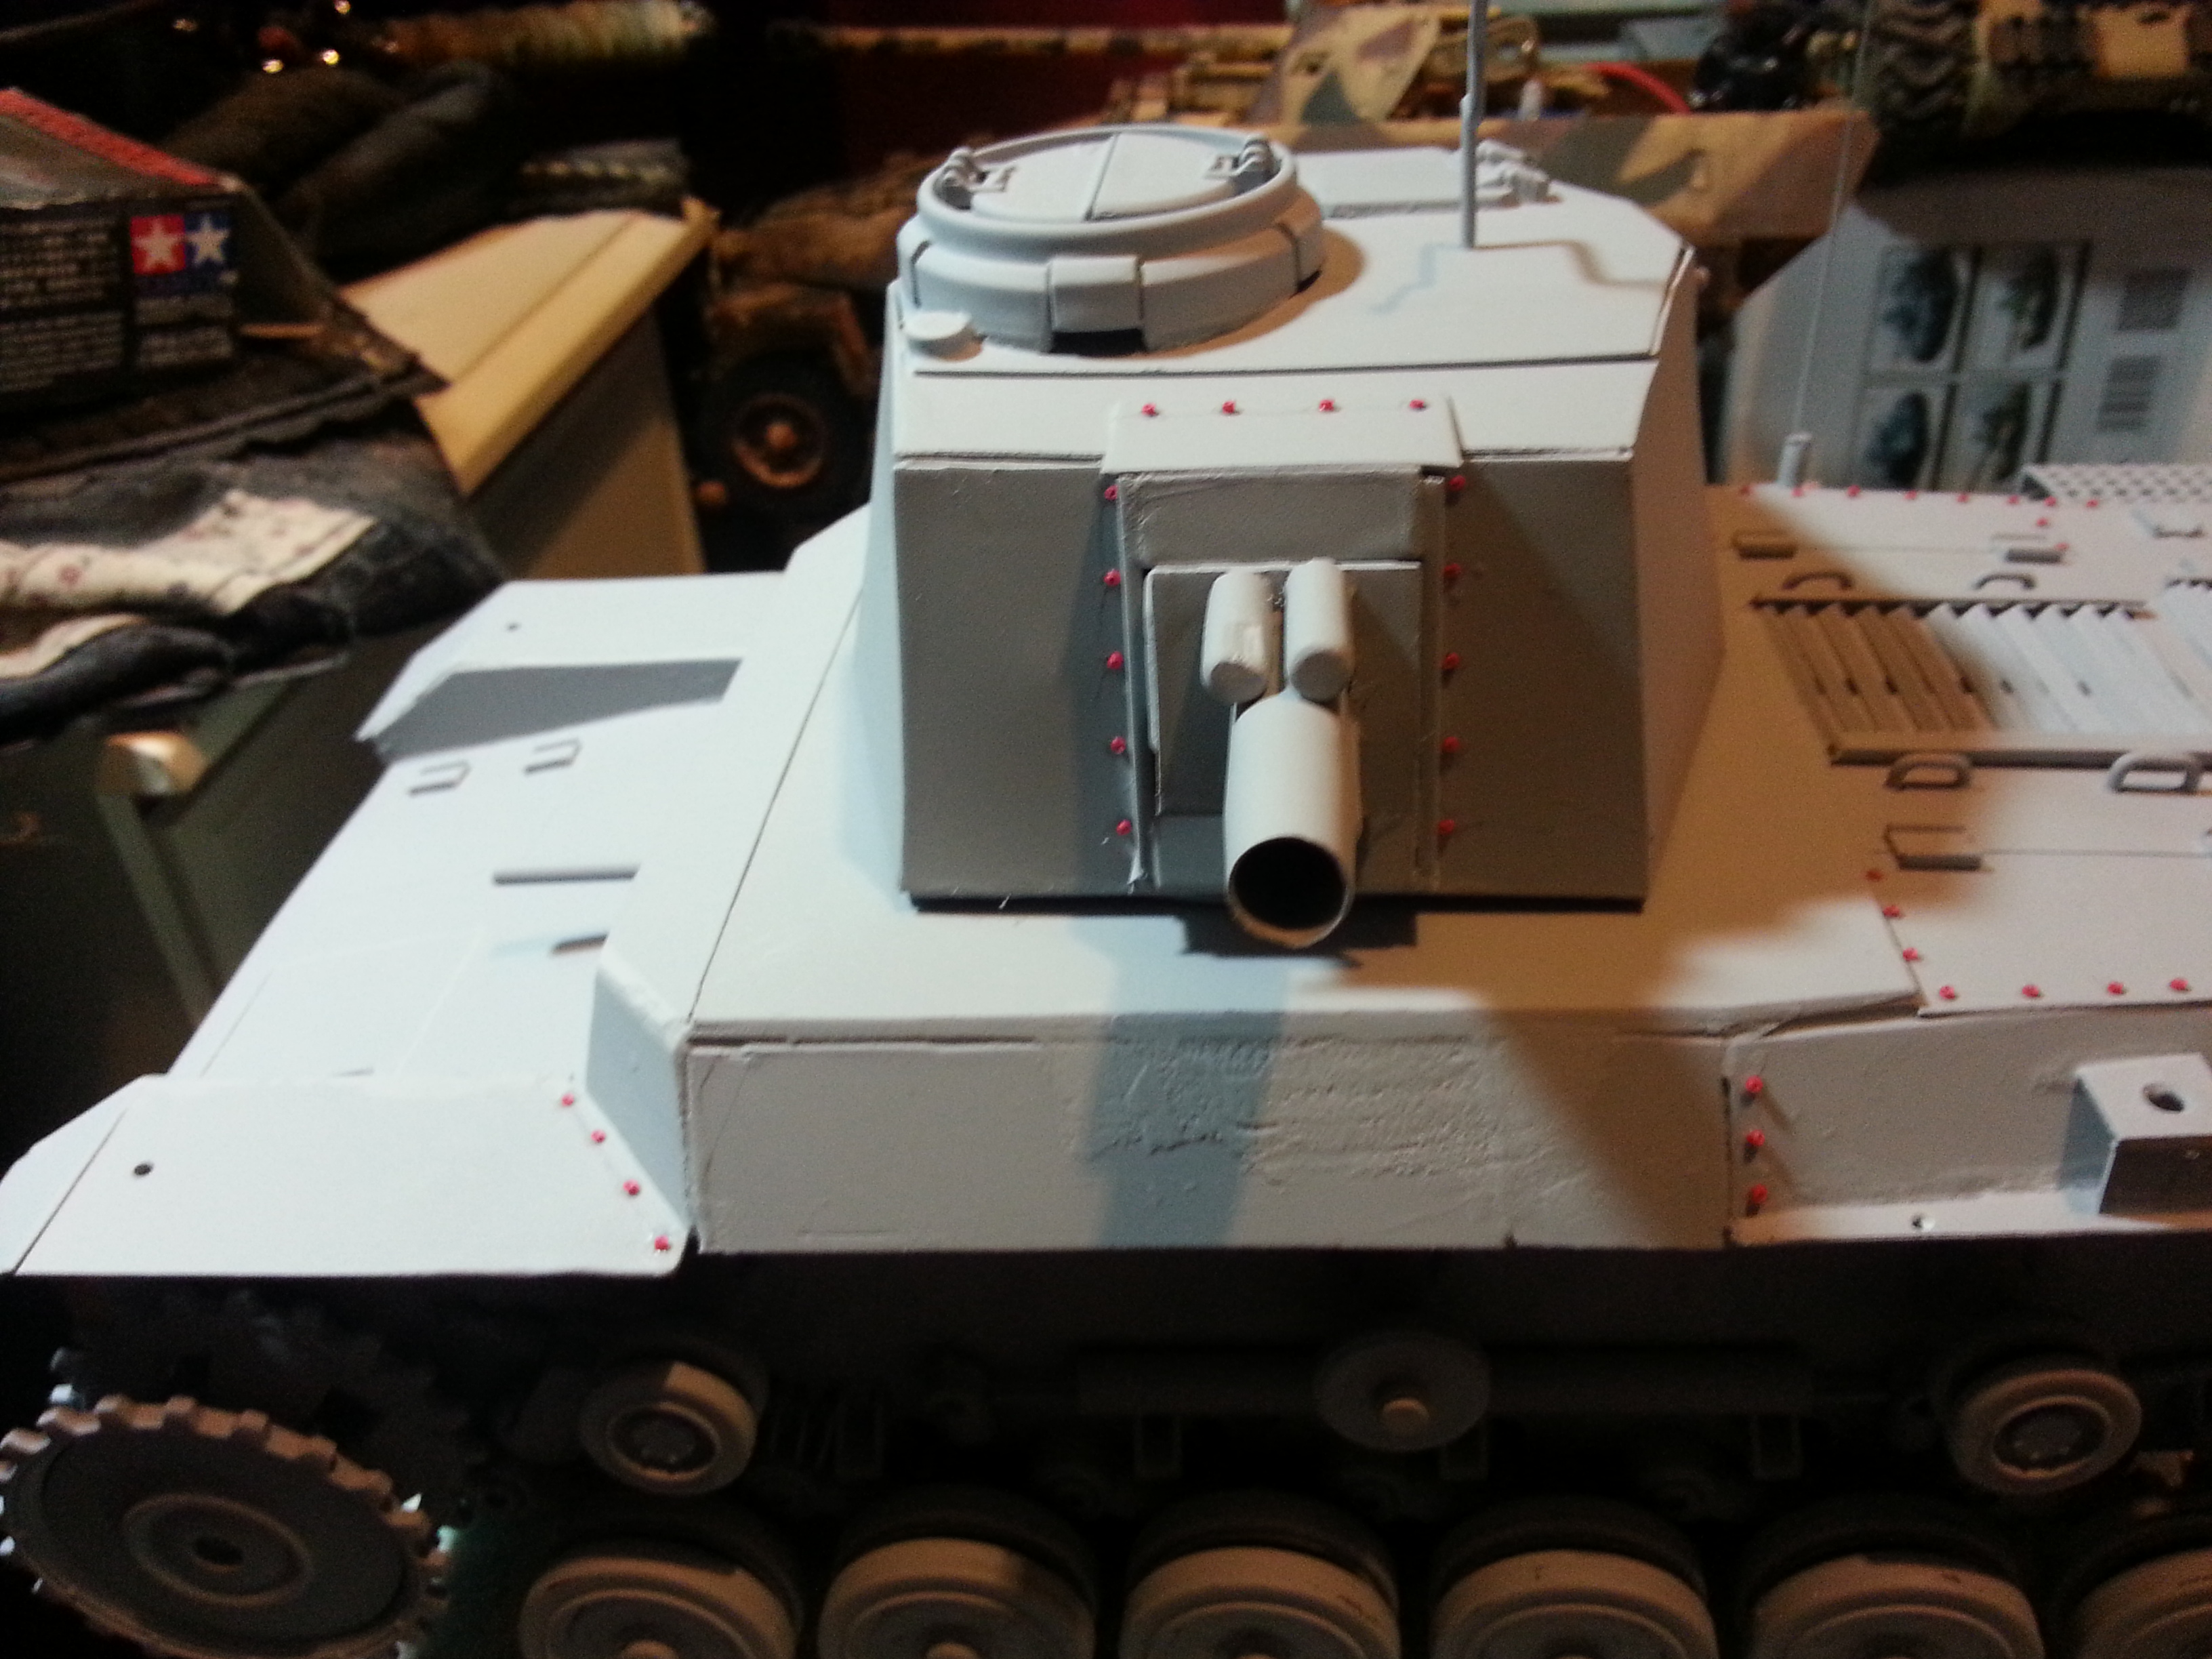
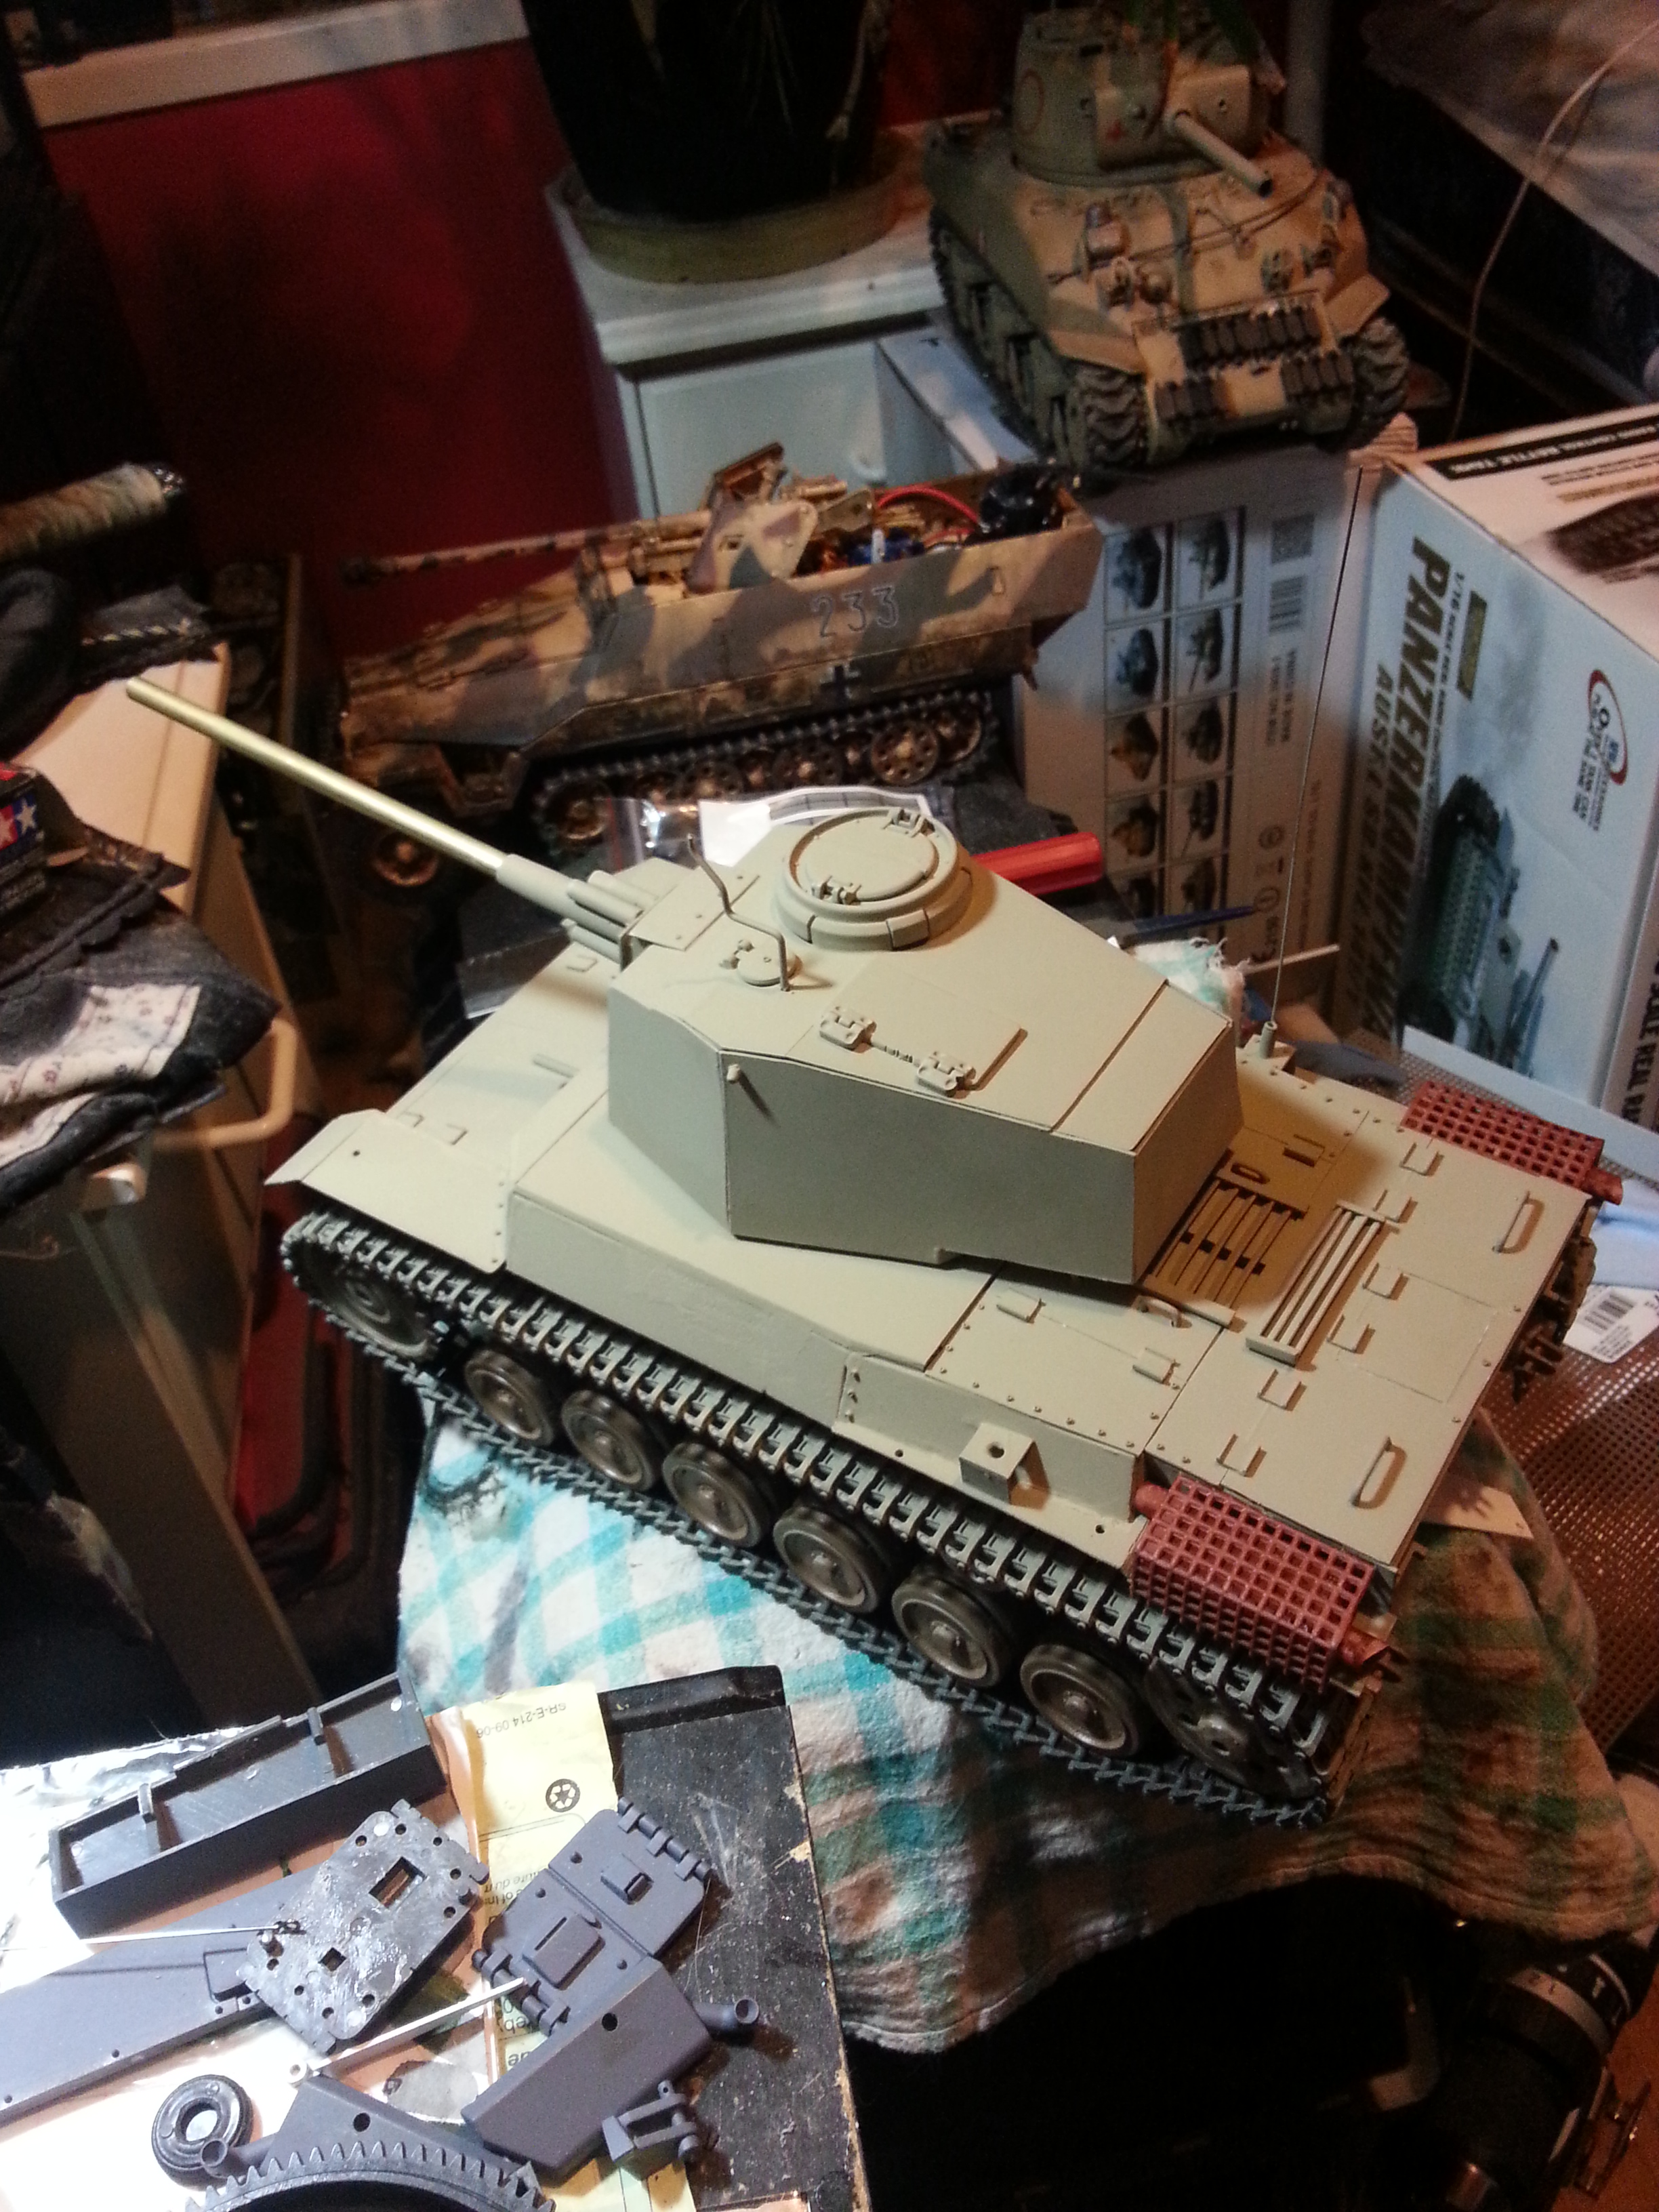
Anyhoo, good news everyone! I spent a couple hours this morning starting on the turret! My main goal was functionality, accessibility, strength and of course moderately good looks. I want to reuse as much as the original turret as possible internally for elevation and such and hopefully in these pictures you can see what I'm up to.
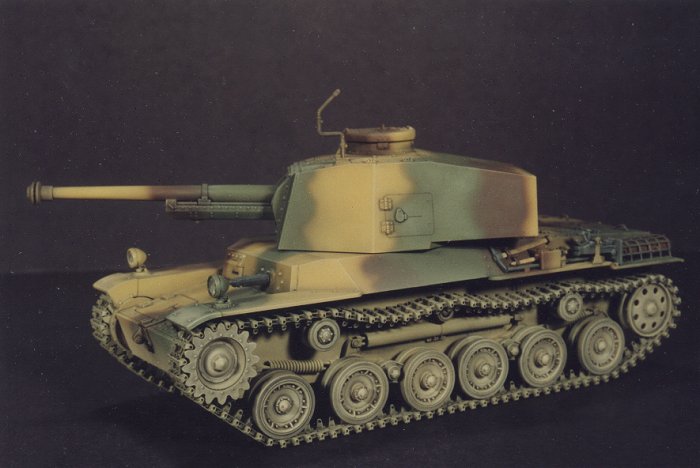
The turret exterior I measure and cut somewhat by eye and by what fit the original Panzer III turret base. I'm VERY sure the Japanese nearly copied the Pnz 3 when building this tank & turret, nearly everything lines up and has very similar angles.
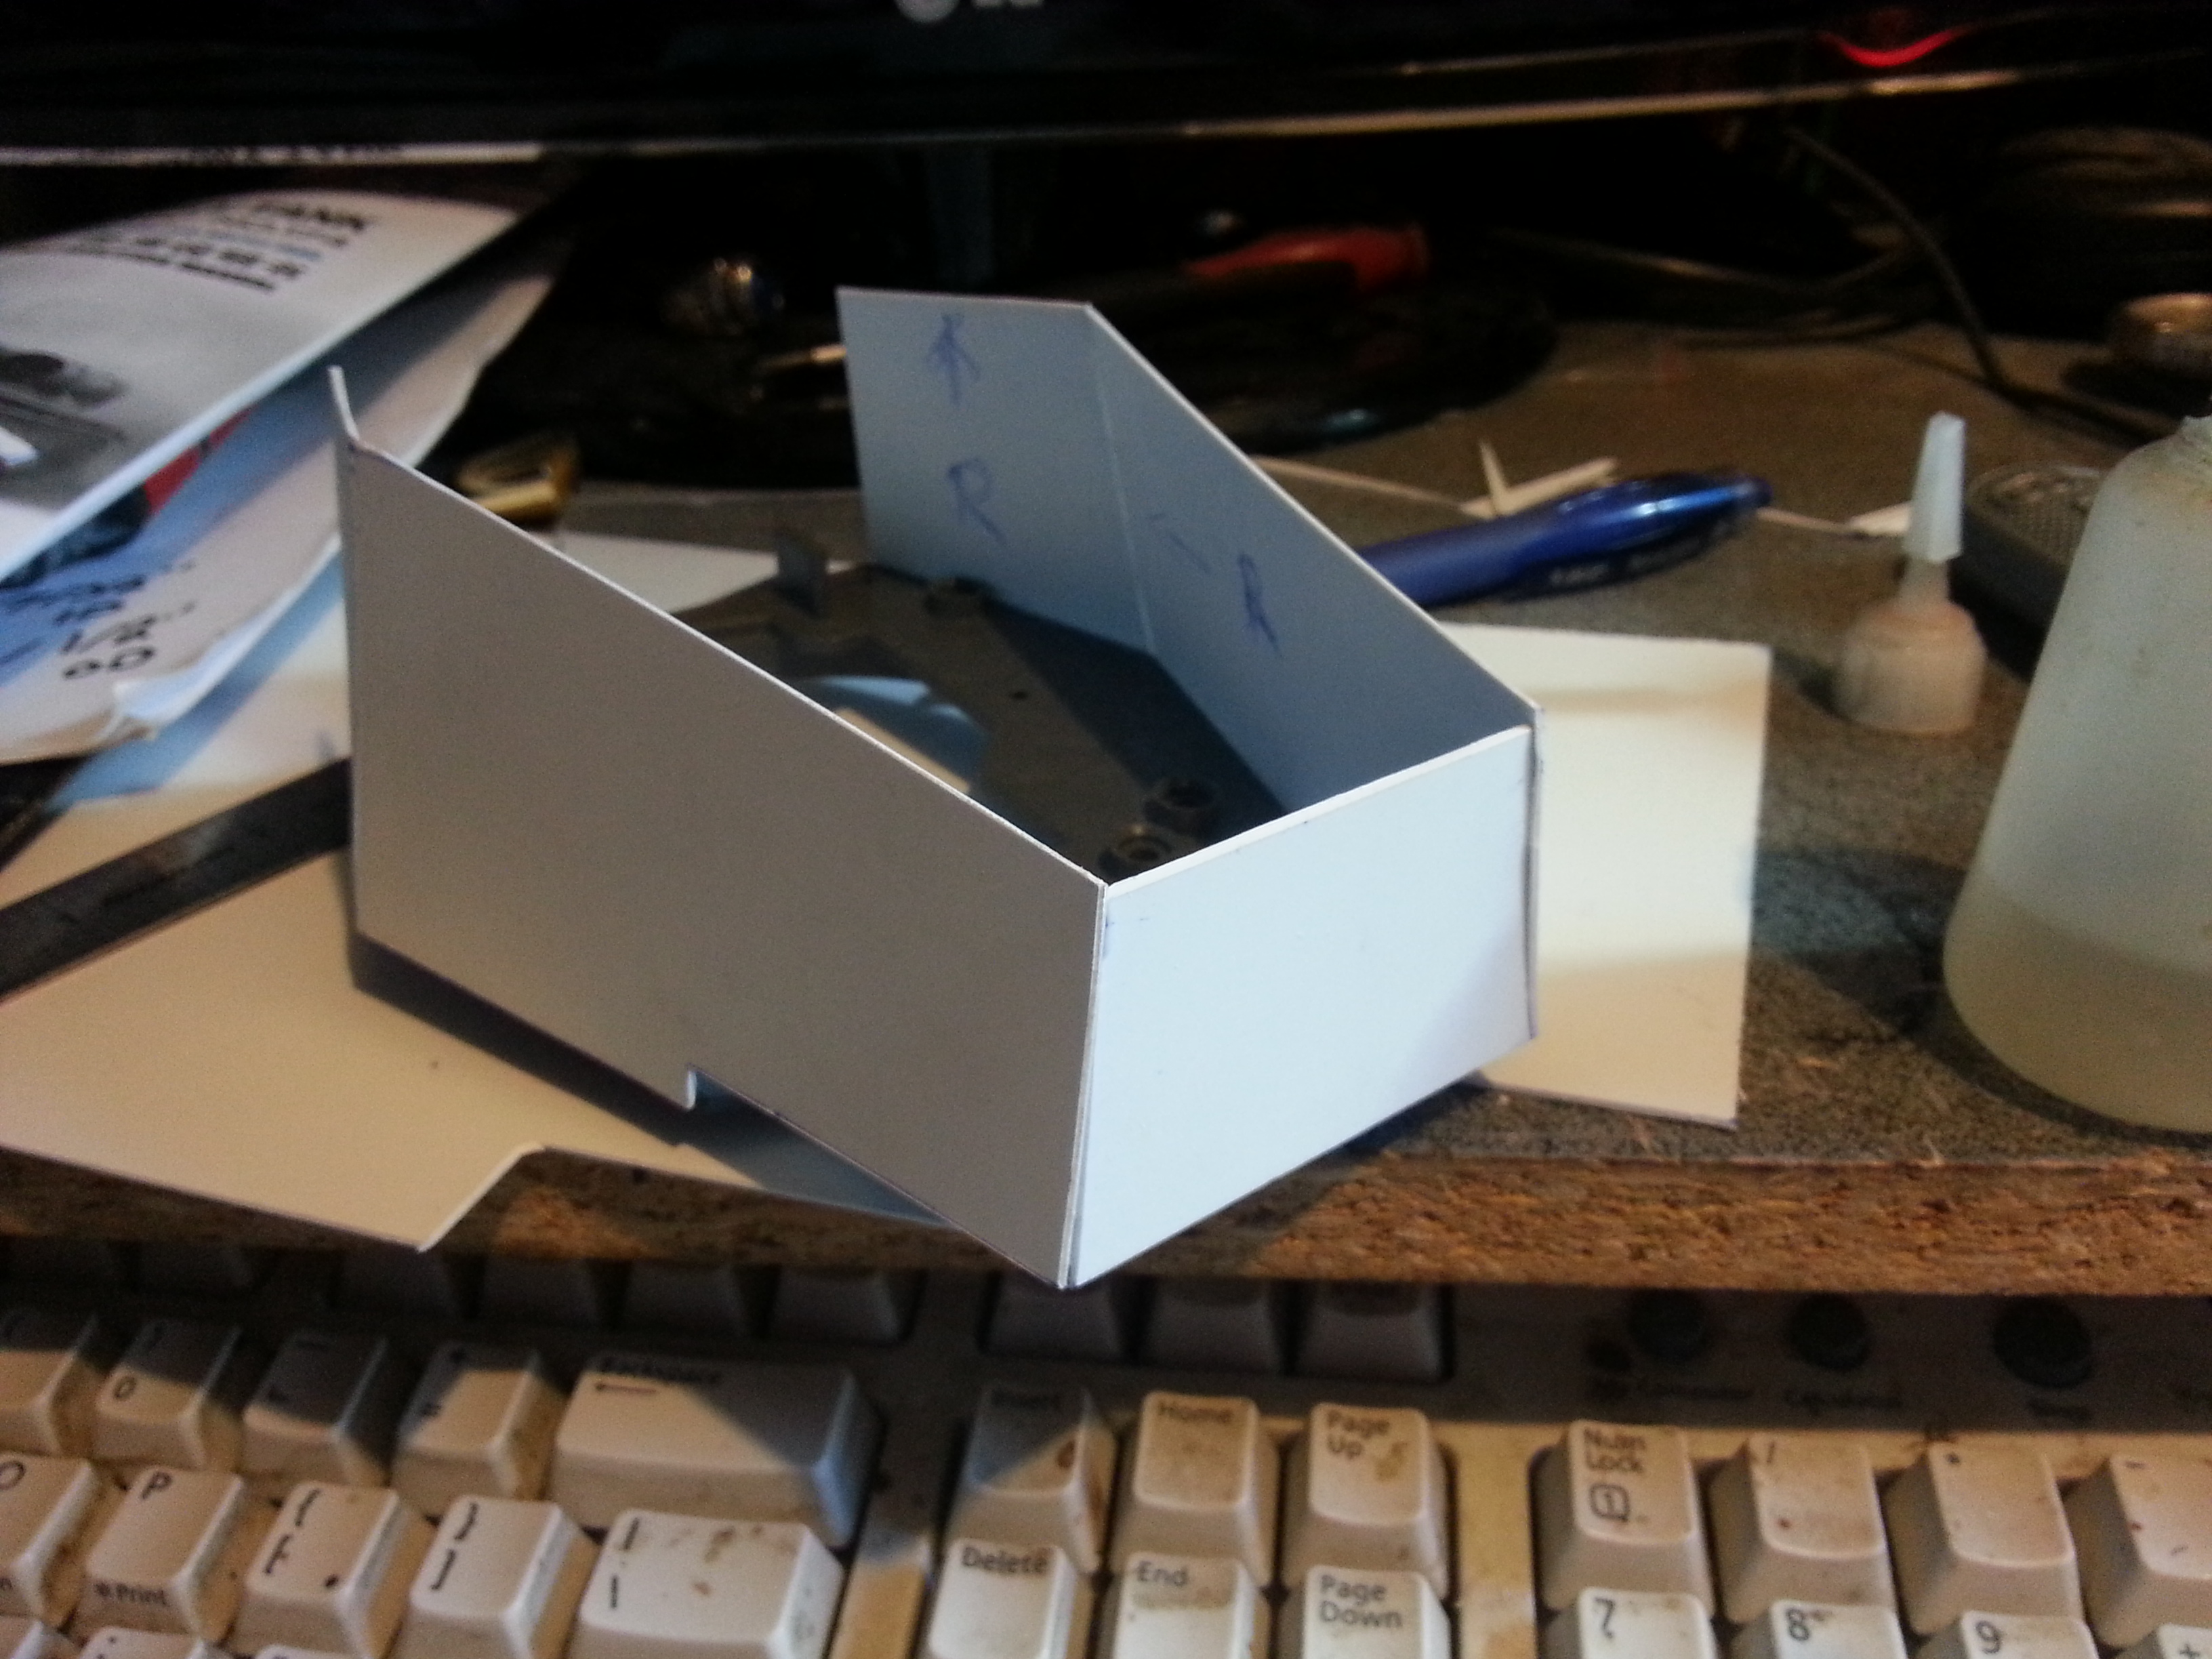
 You can see I only had to adjust the side angles slightly
 Lining up the angled plates. They almost went together naturally with minimum adjustment.
 Oh hey, it looks like a turret now!
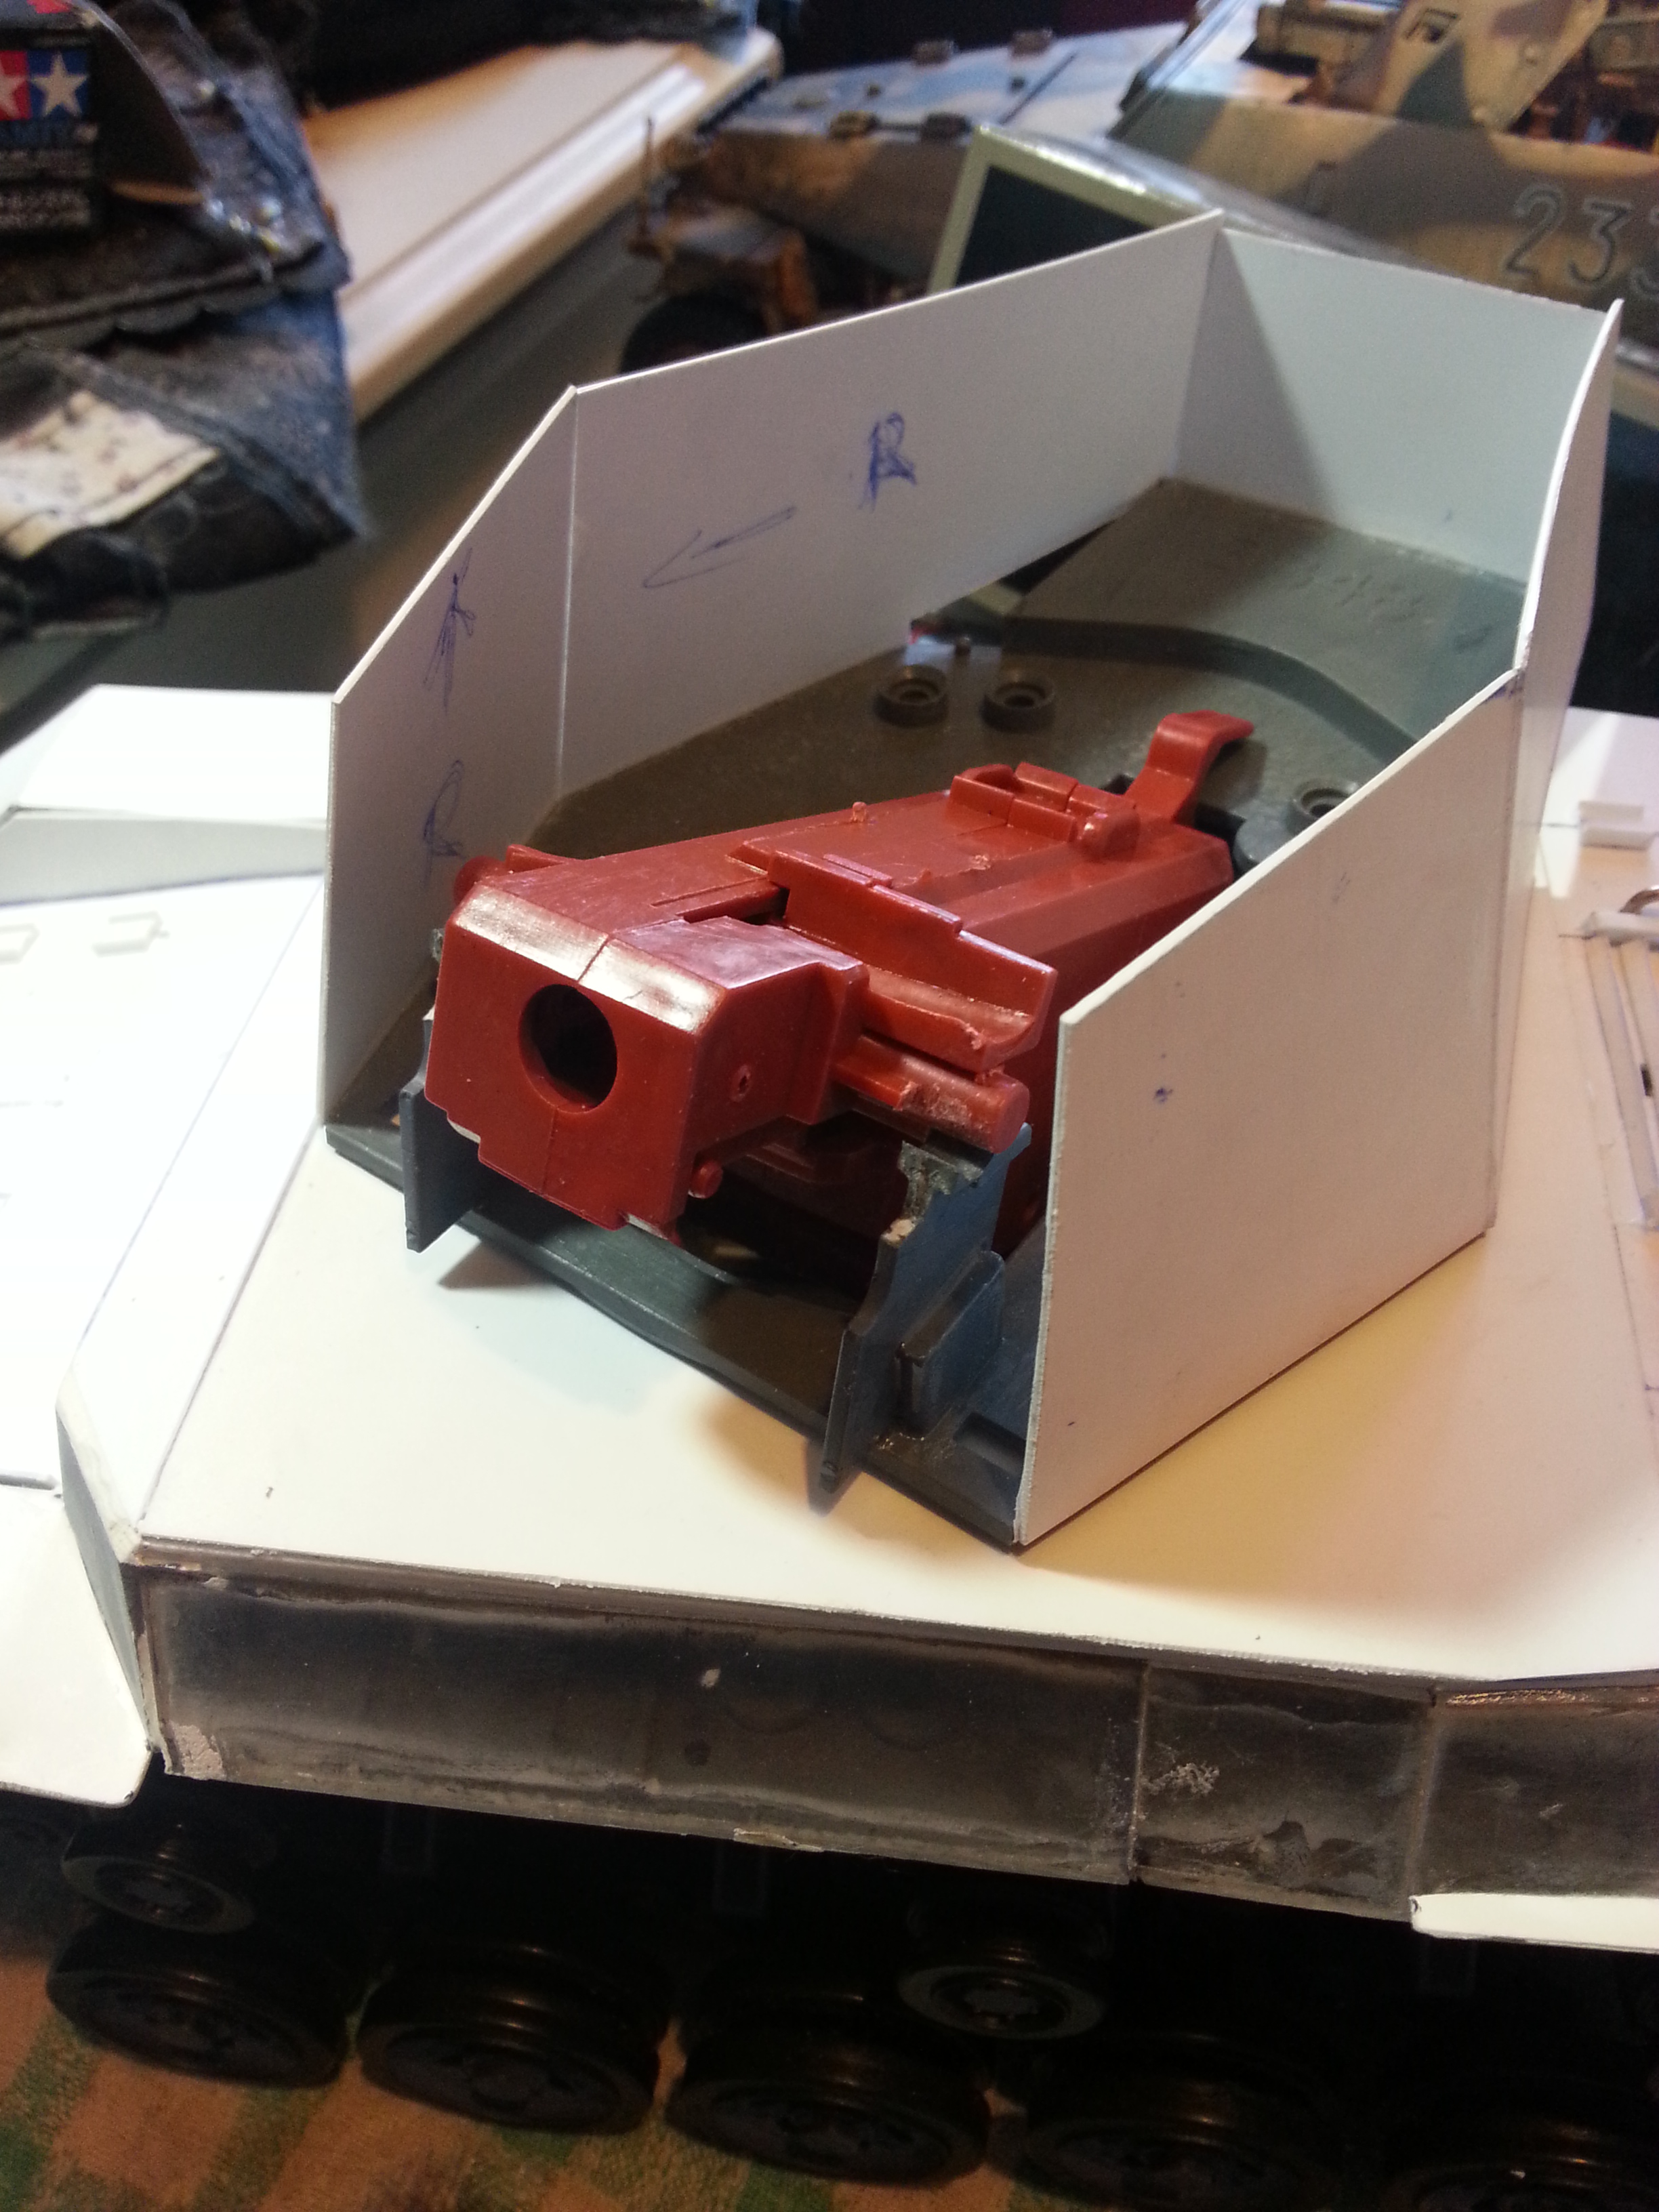

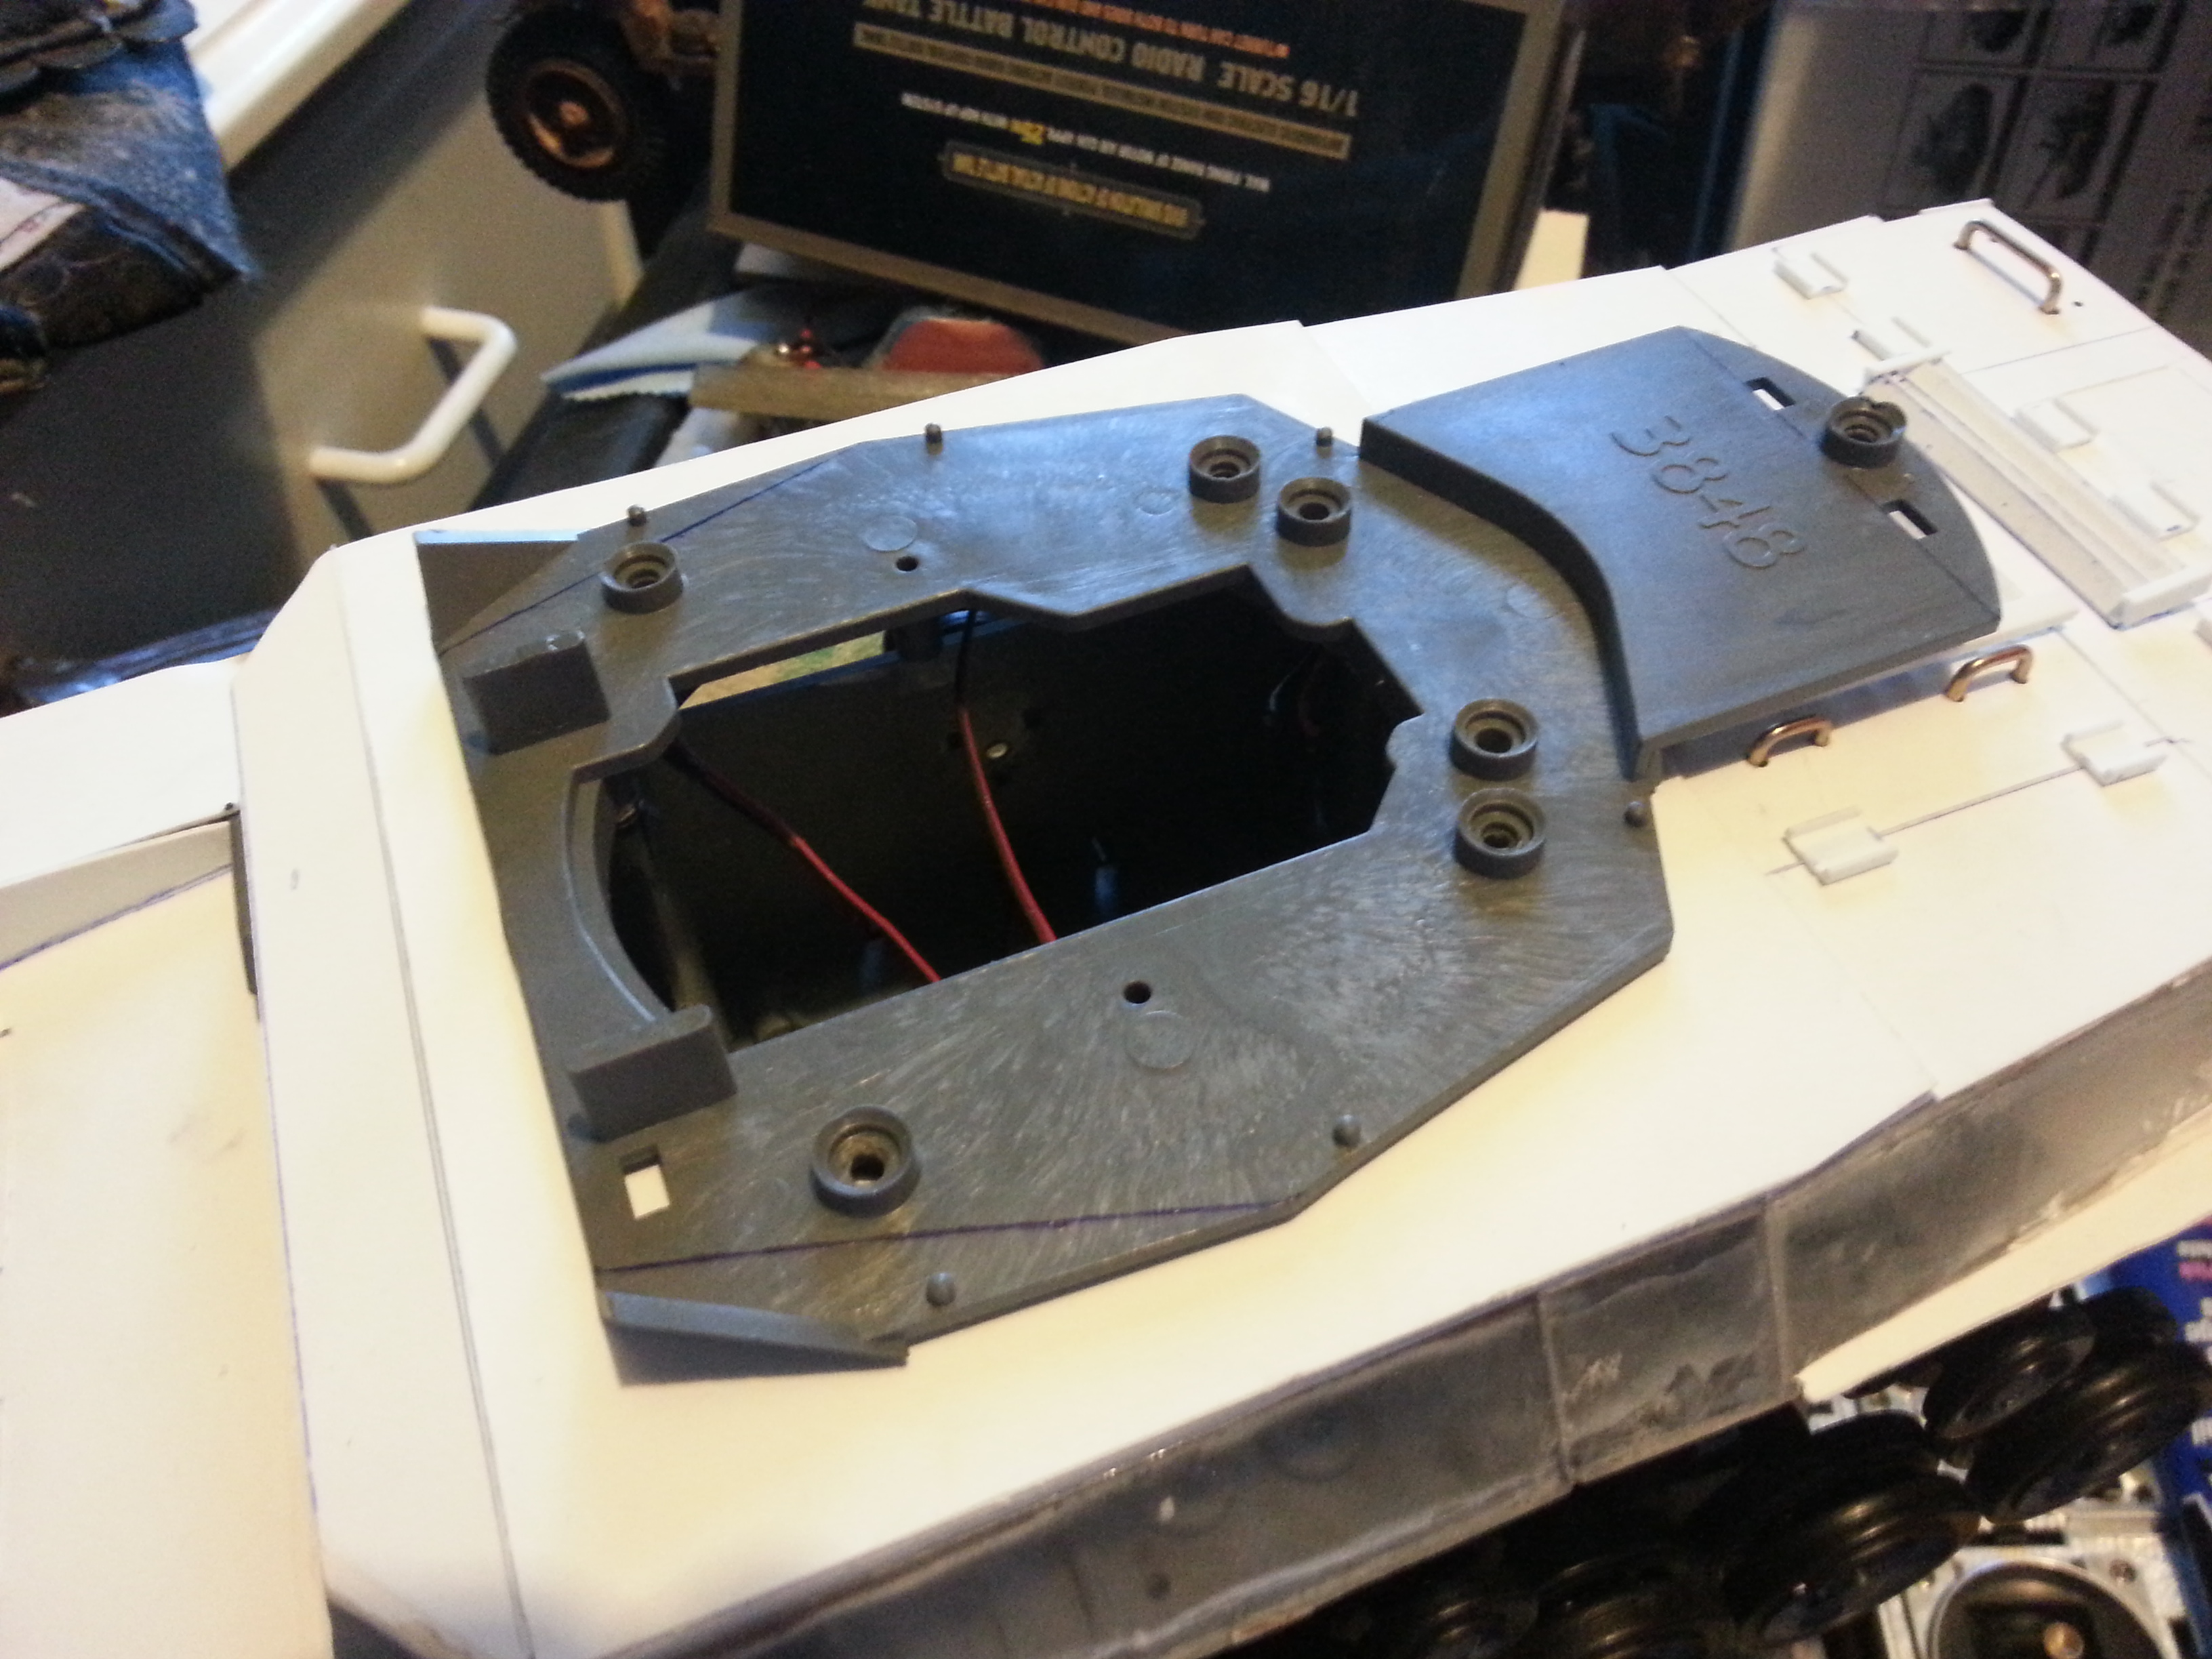
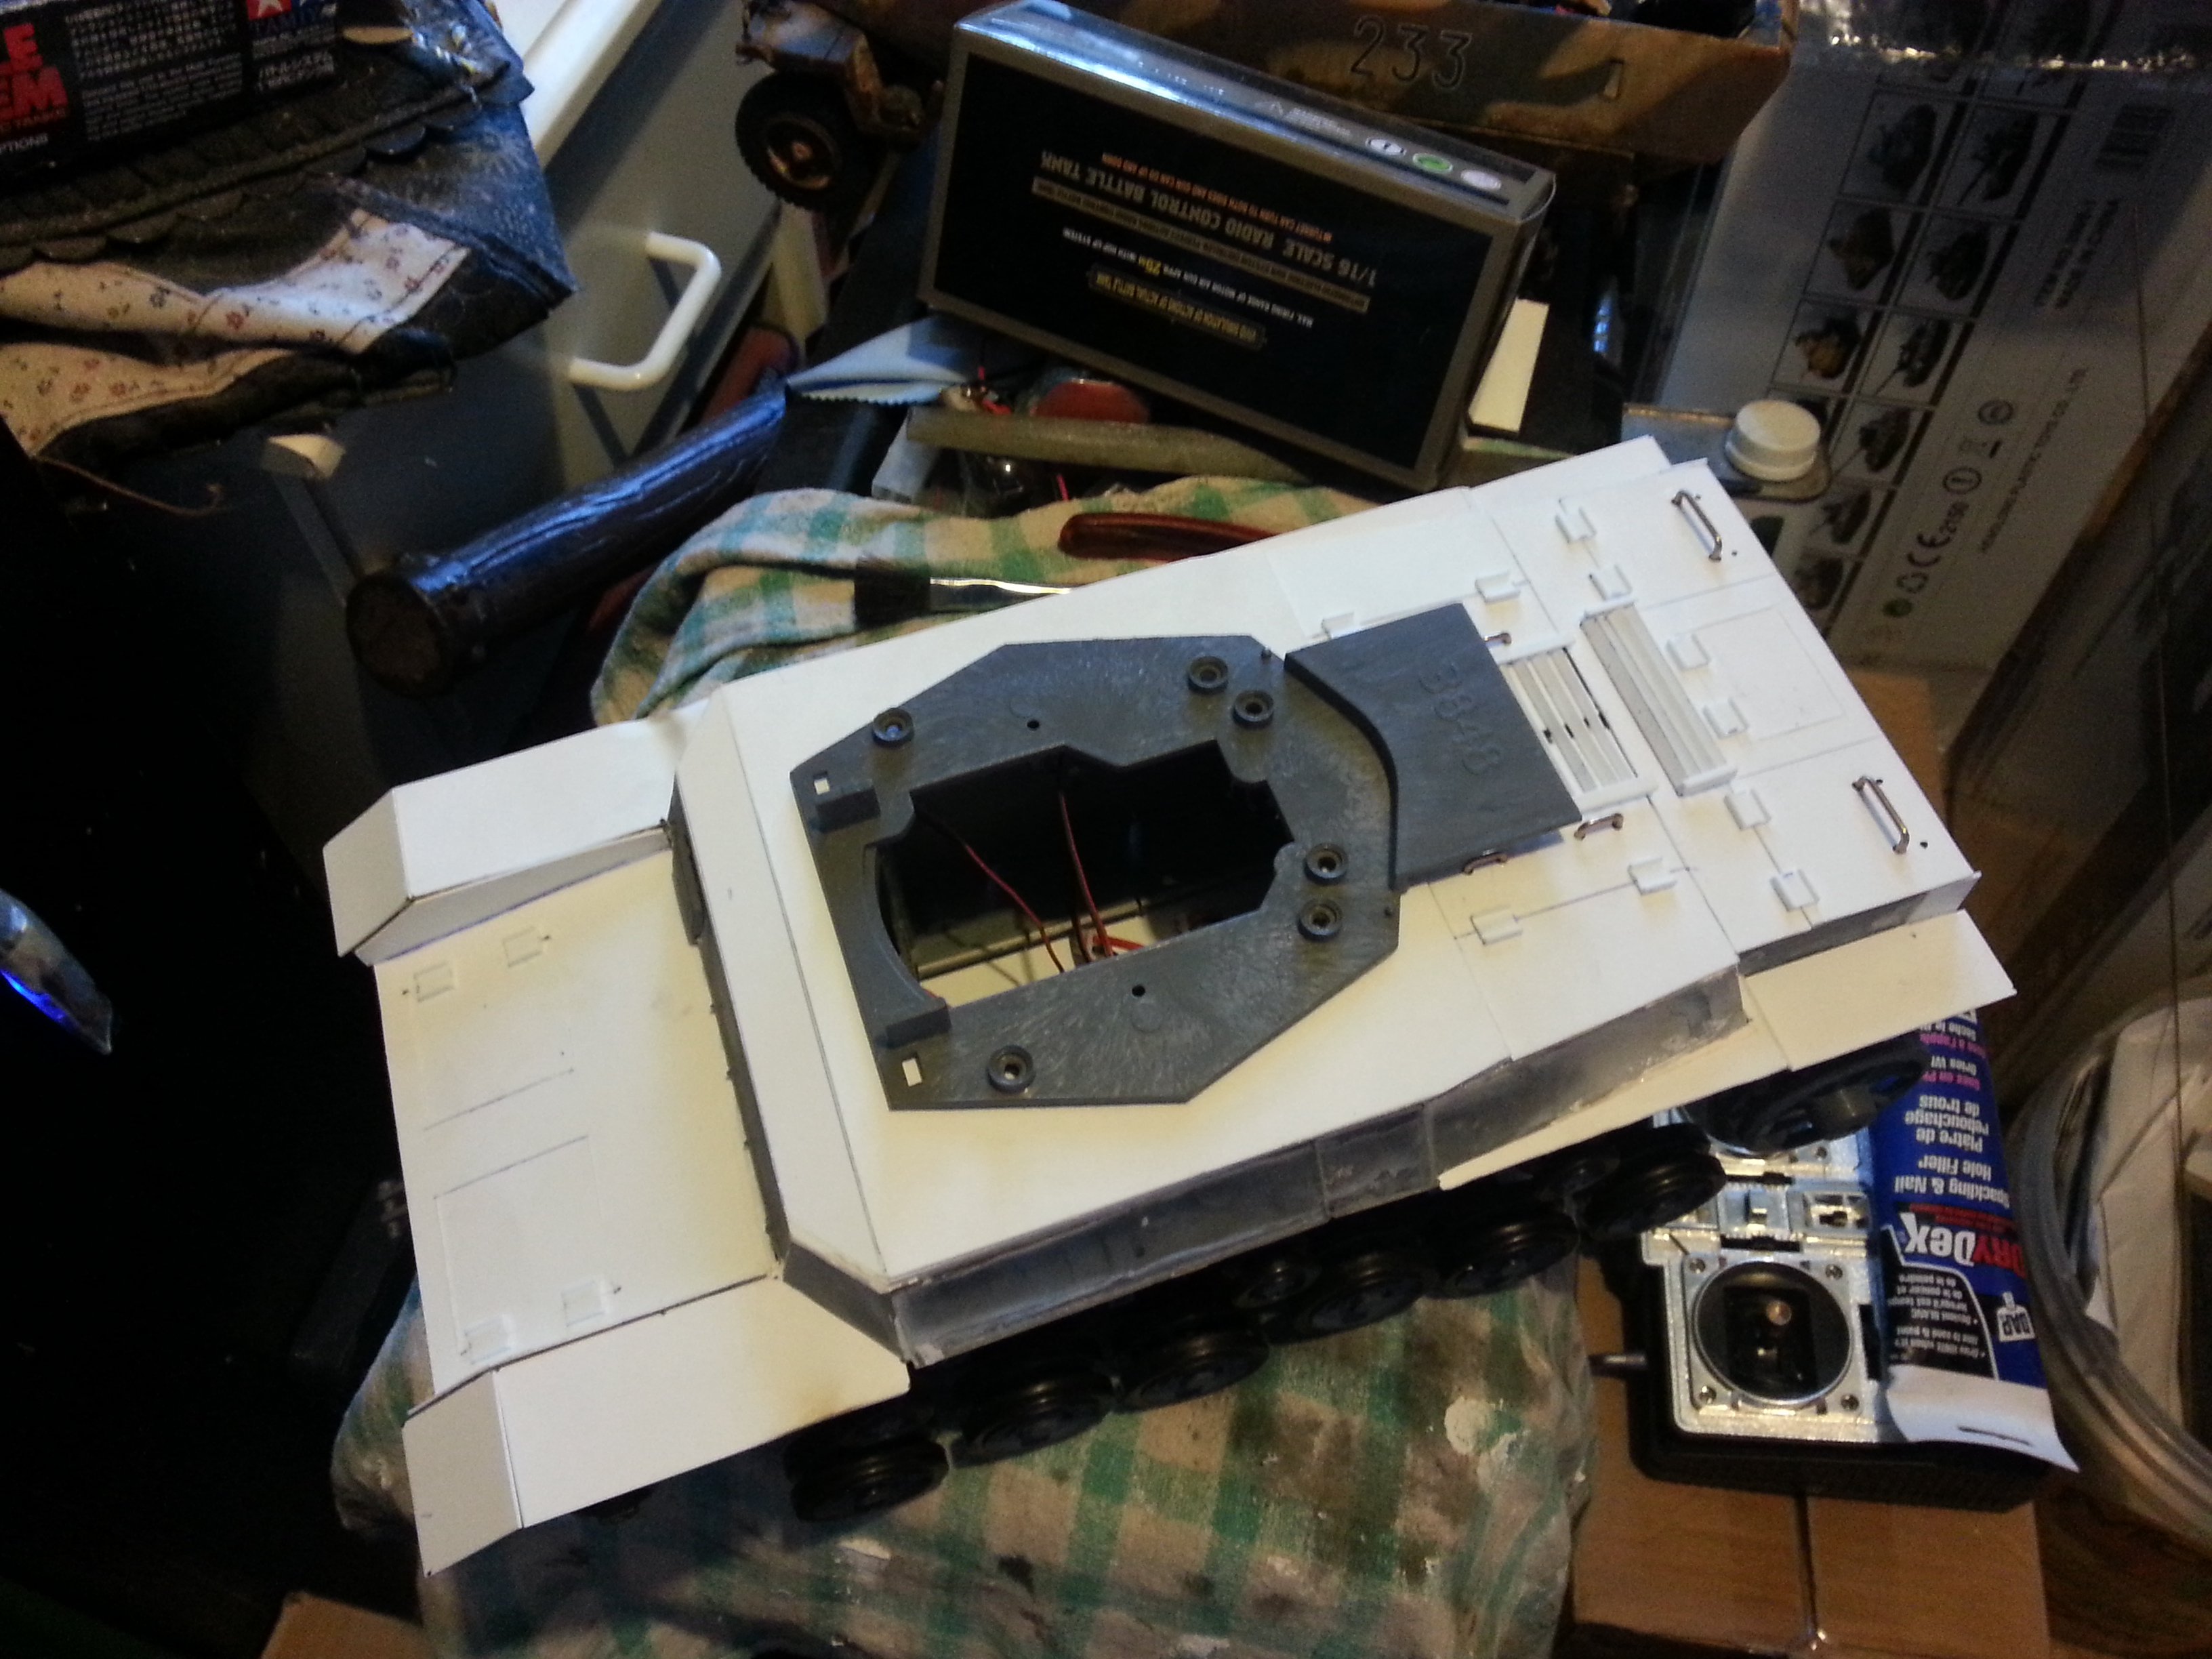
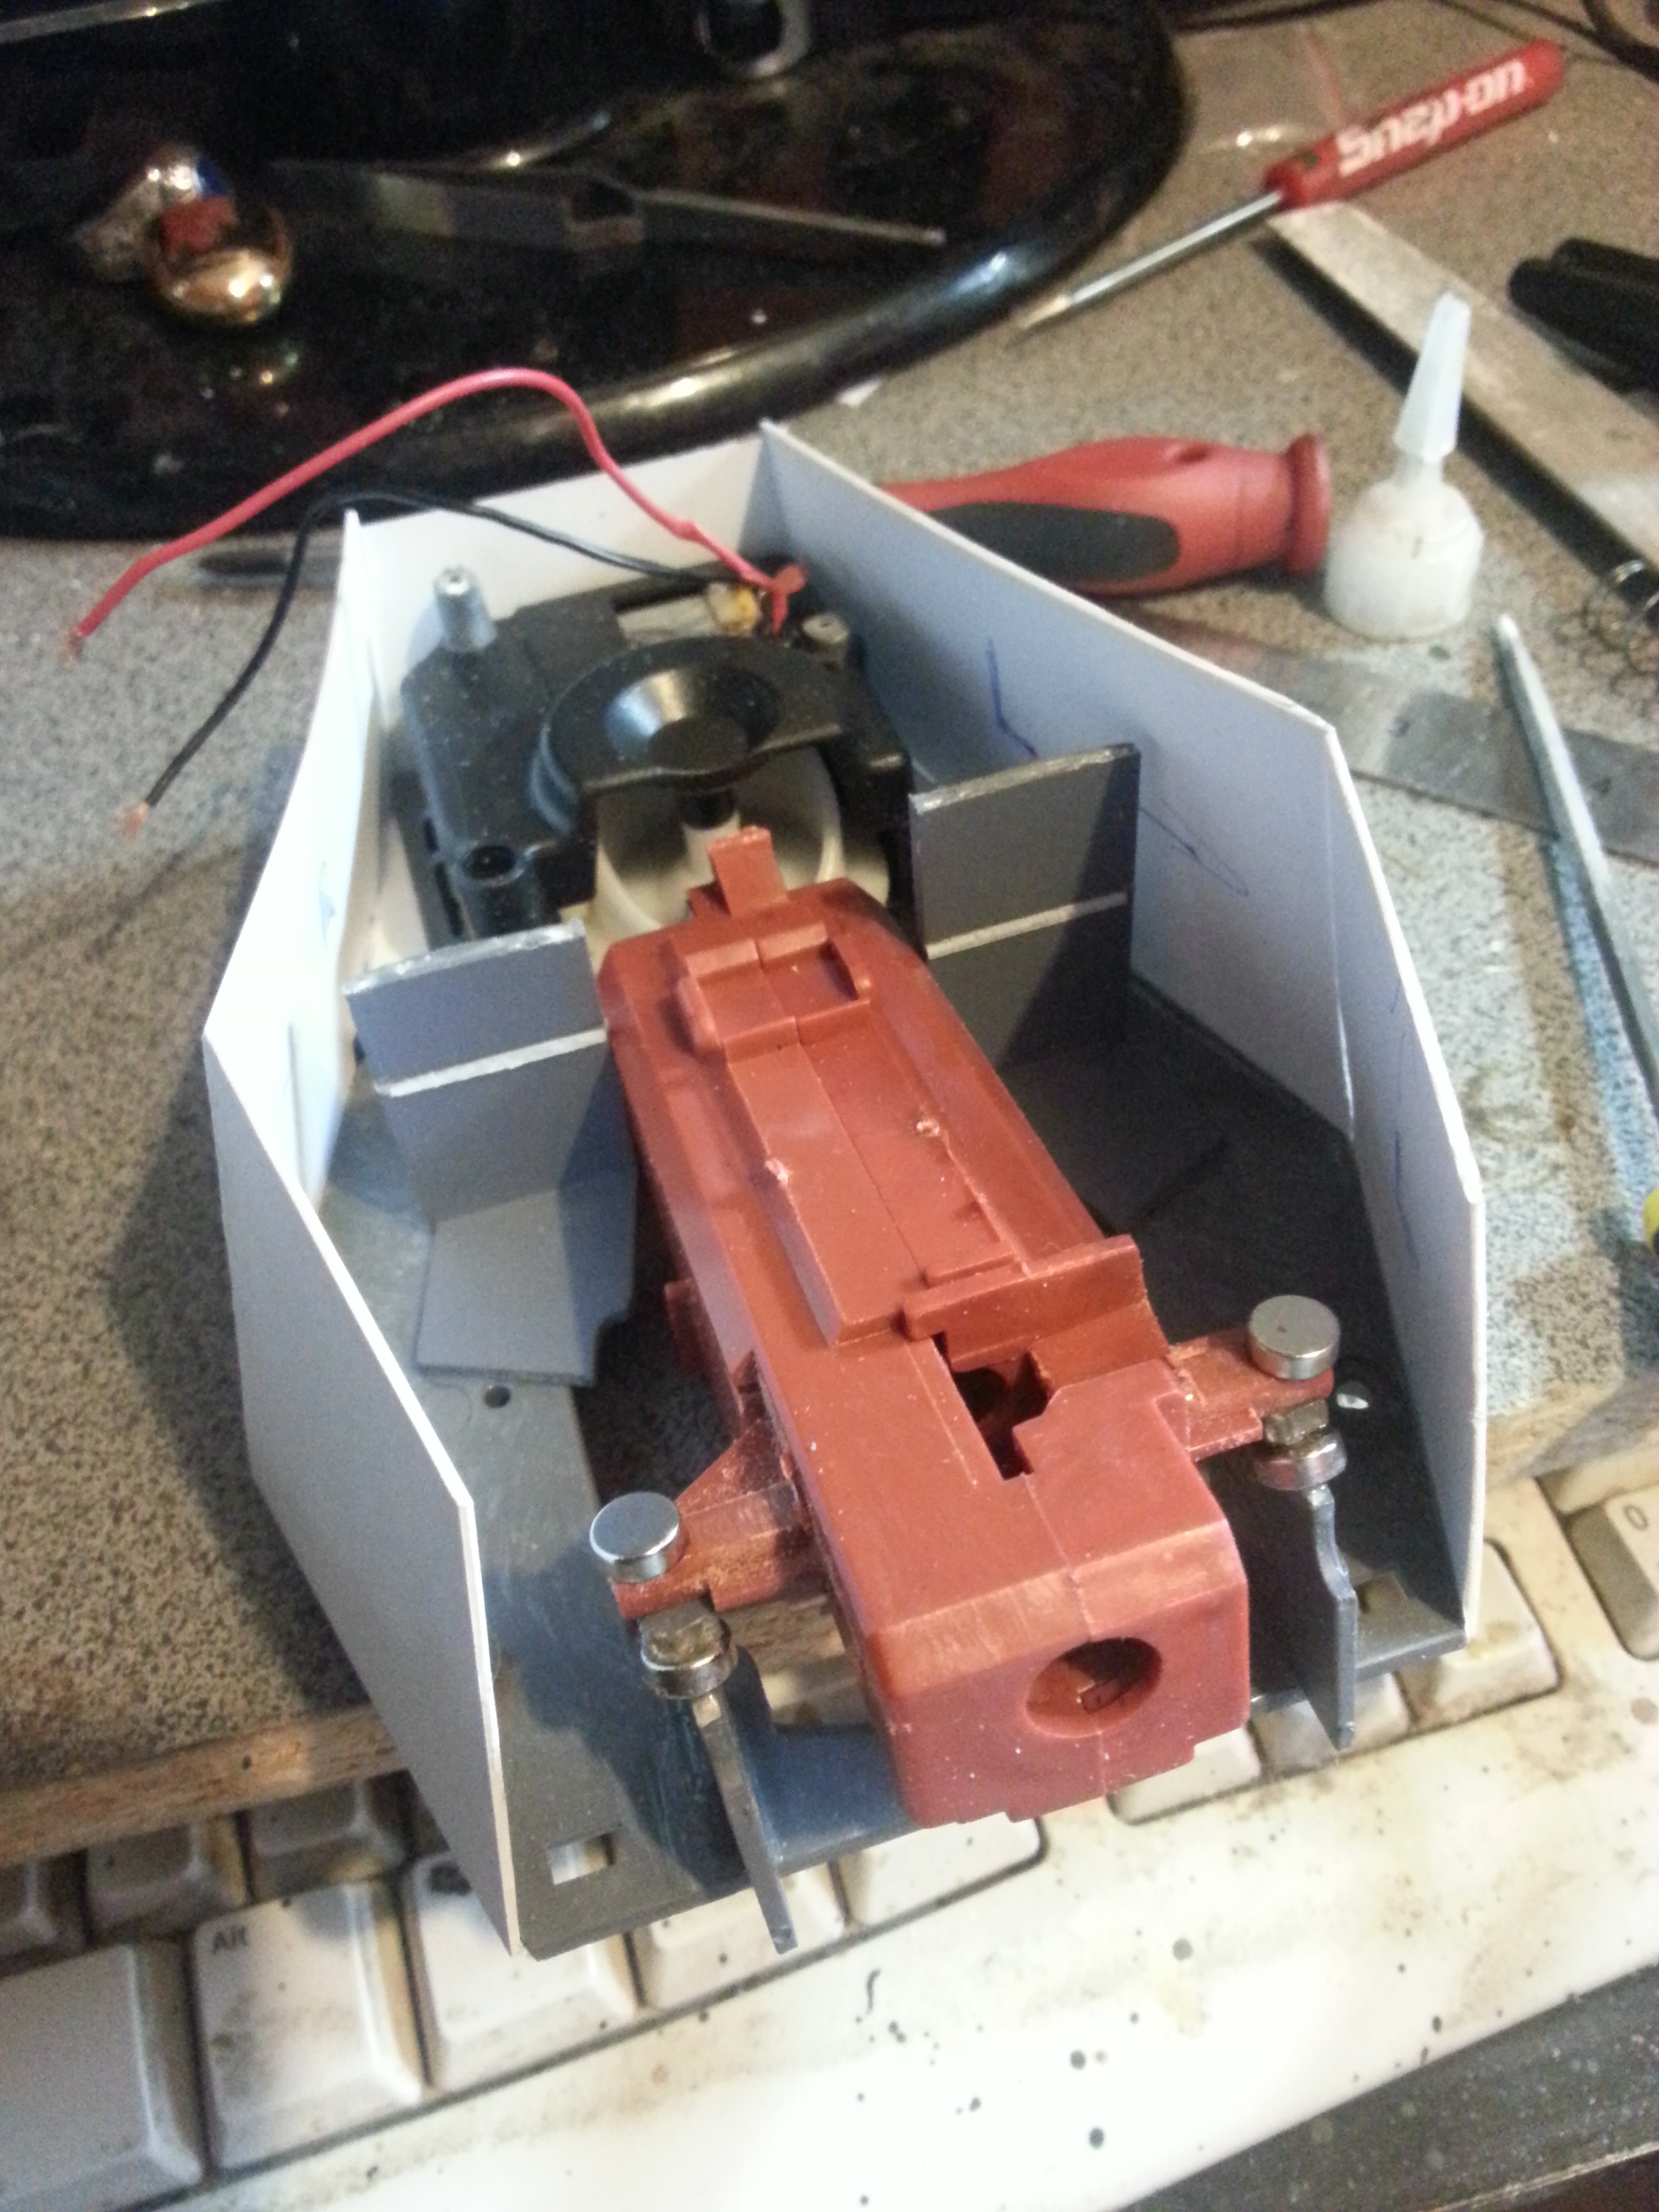
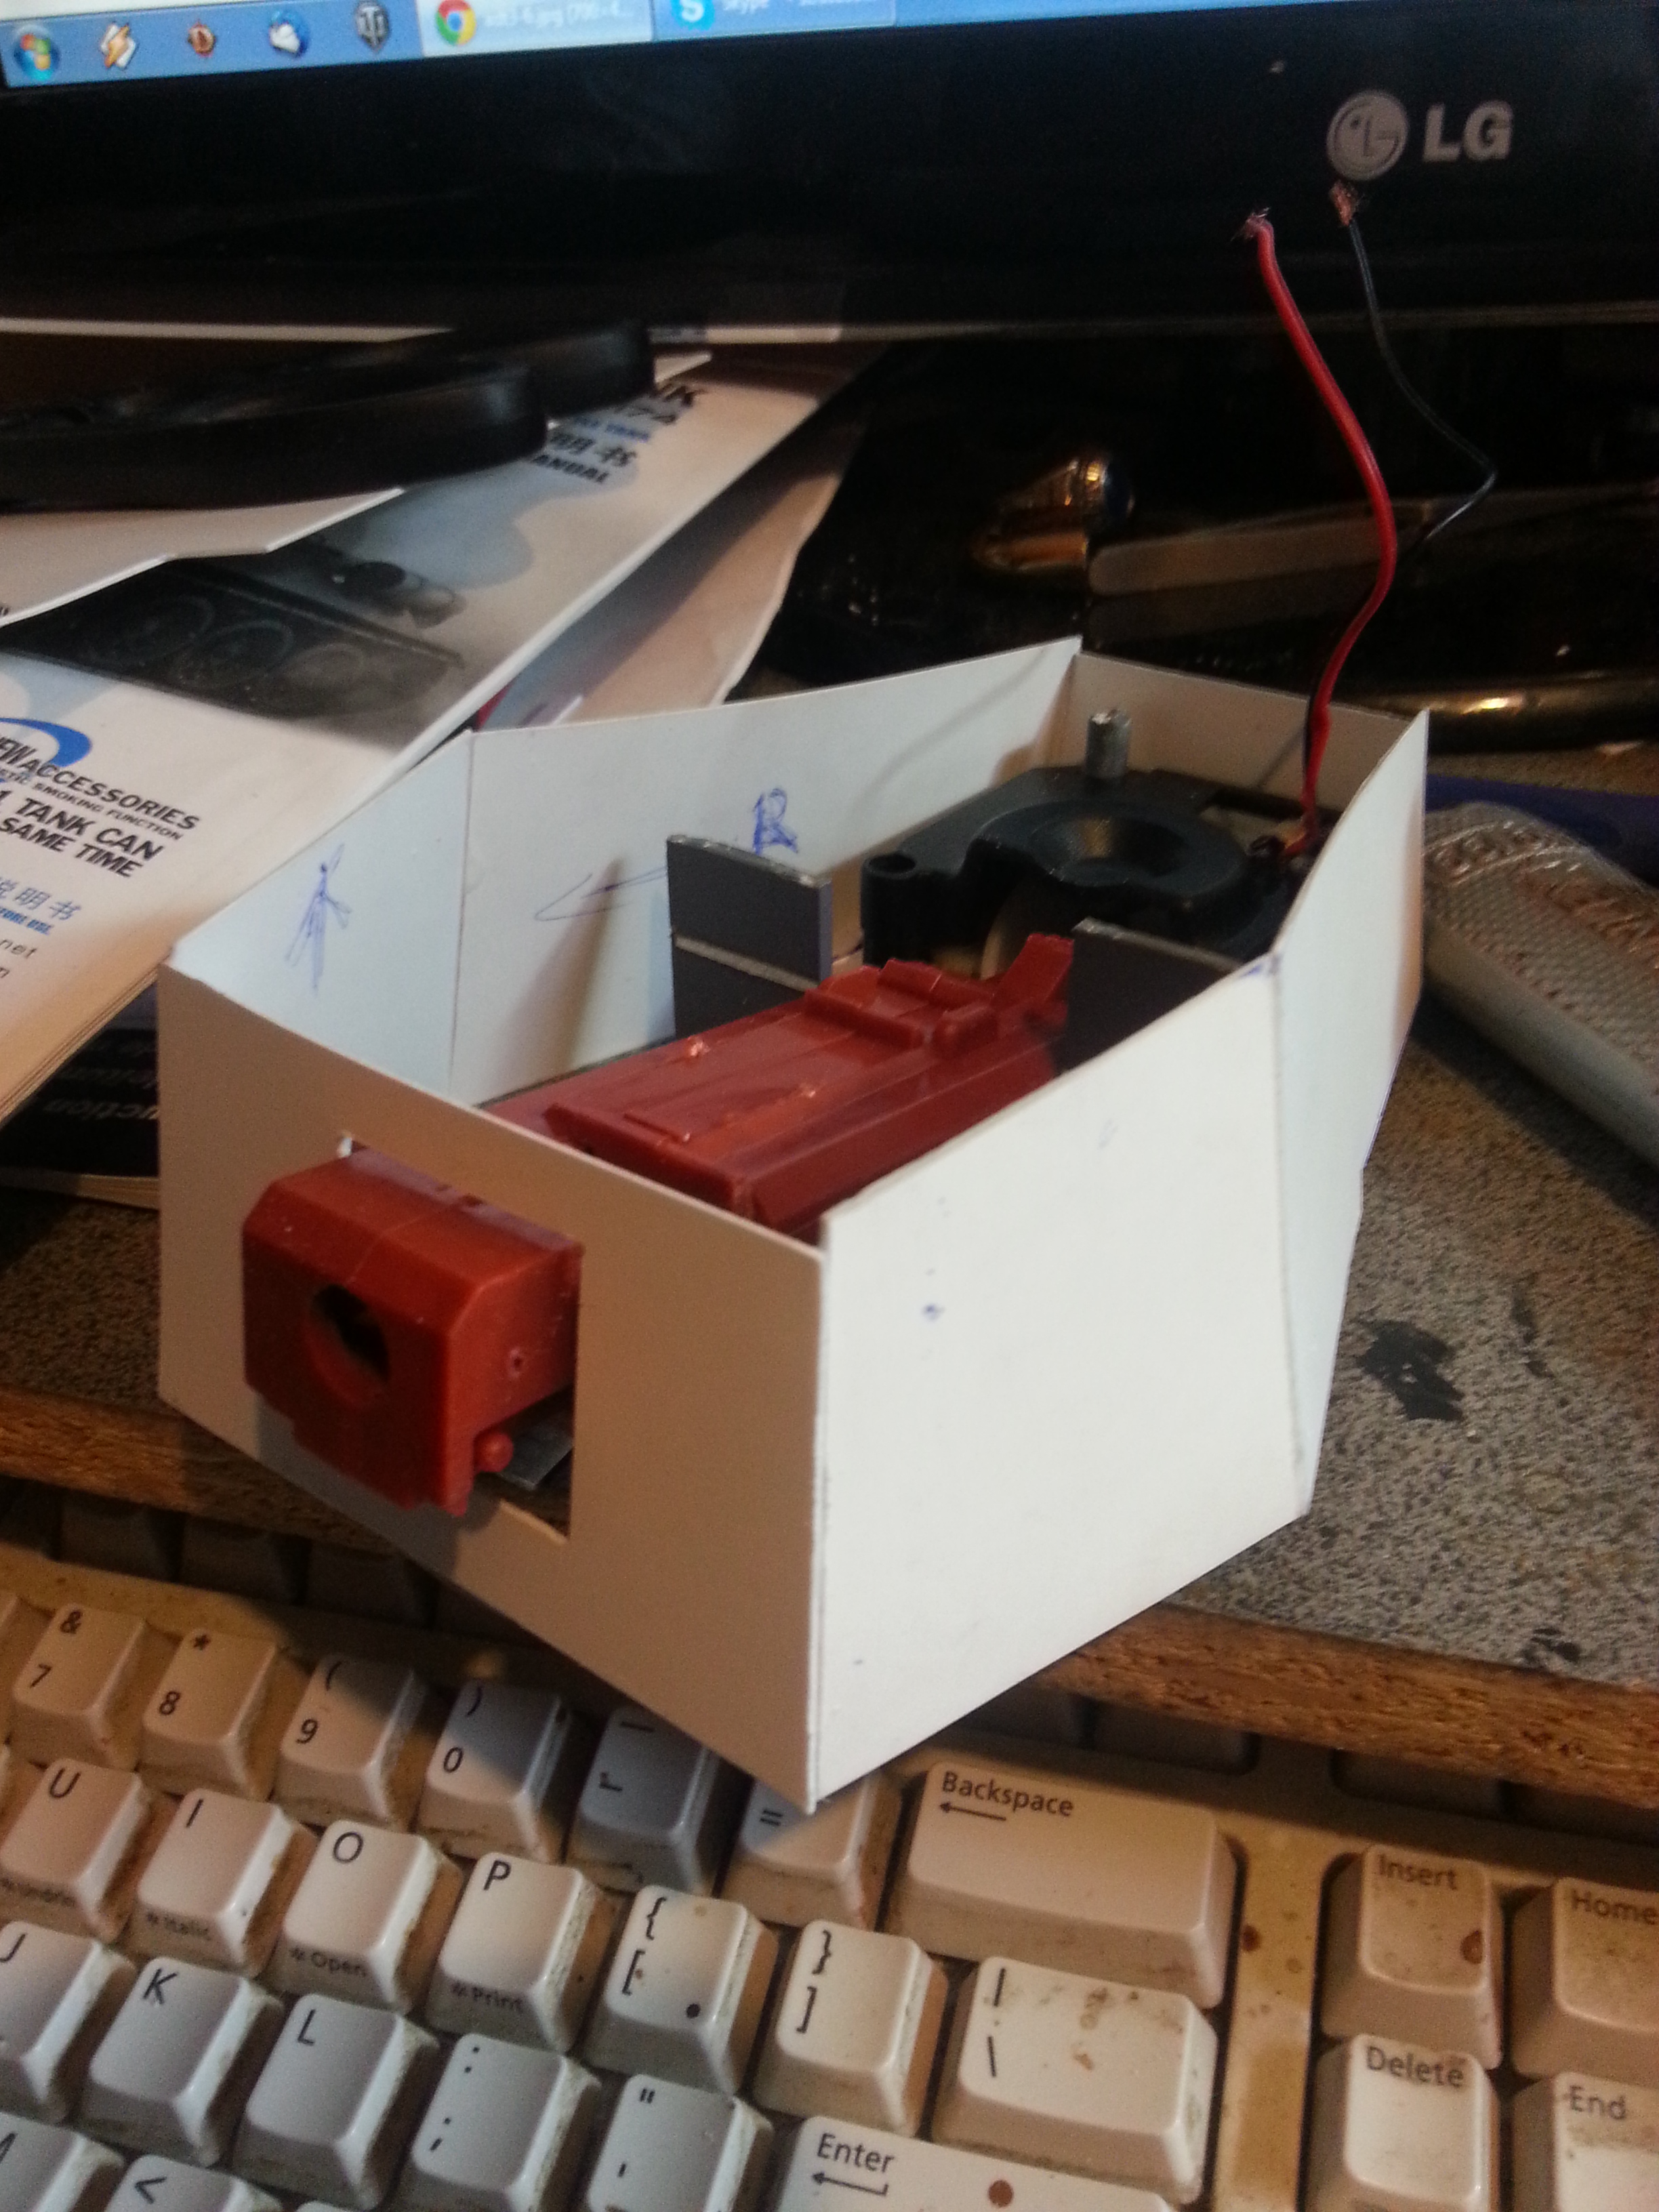
I gutted the airsoft mechanism and cut the bottom flush for hull clearance. I modified the gun mount and raised the entire thing about 1.5cm giving it the proper profile. I plan on having the gun mantlet mounted more or less directly to the front of the airsoft housing. The elevation unit will be mounted from the bottom, and most of the turret roof will be held down with magnets!
Off to bed now!
)Anyhoo, good news everyone! I spent a couple hours this morning starting on the turret! My main goal was functionality, accessibility, strength and of course moderately good looks. I want to reuse as much as the original turret as possible internally for elevation and such and hopefully in these pictures you can see what I'm up to.
The turret exterior I measure and cut somewhat by eye and by what fit the original Panzer III turret base. I'm VERY sure the Japanese nearly copied the Pnz 3 when building this tank & turret, nearly everything lines up and has very similar angles.
I gutted the airsoft mechanism and cut the bottom flush for hull clearance. I modified the gun mount and raised the entire thing about 1.5cm giving it the proper profile. I plan on having the gun mantlet mounted more or less directly to the front of the airsoft housing. The elevation unit will be mounted from the bottom, and most of the turret roof will be held down with magnets!
Off to bed now!
12-12-2013 | 12:47 AM
#16
Thread Starter
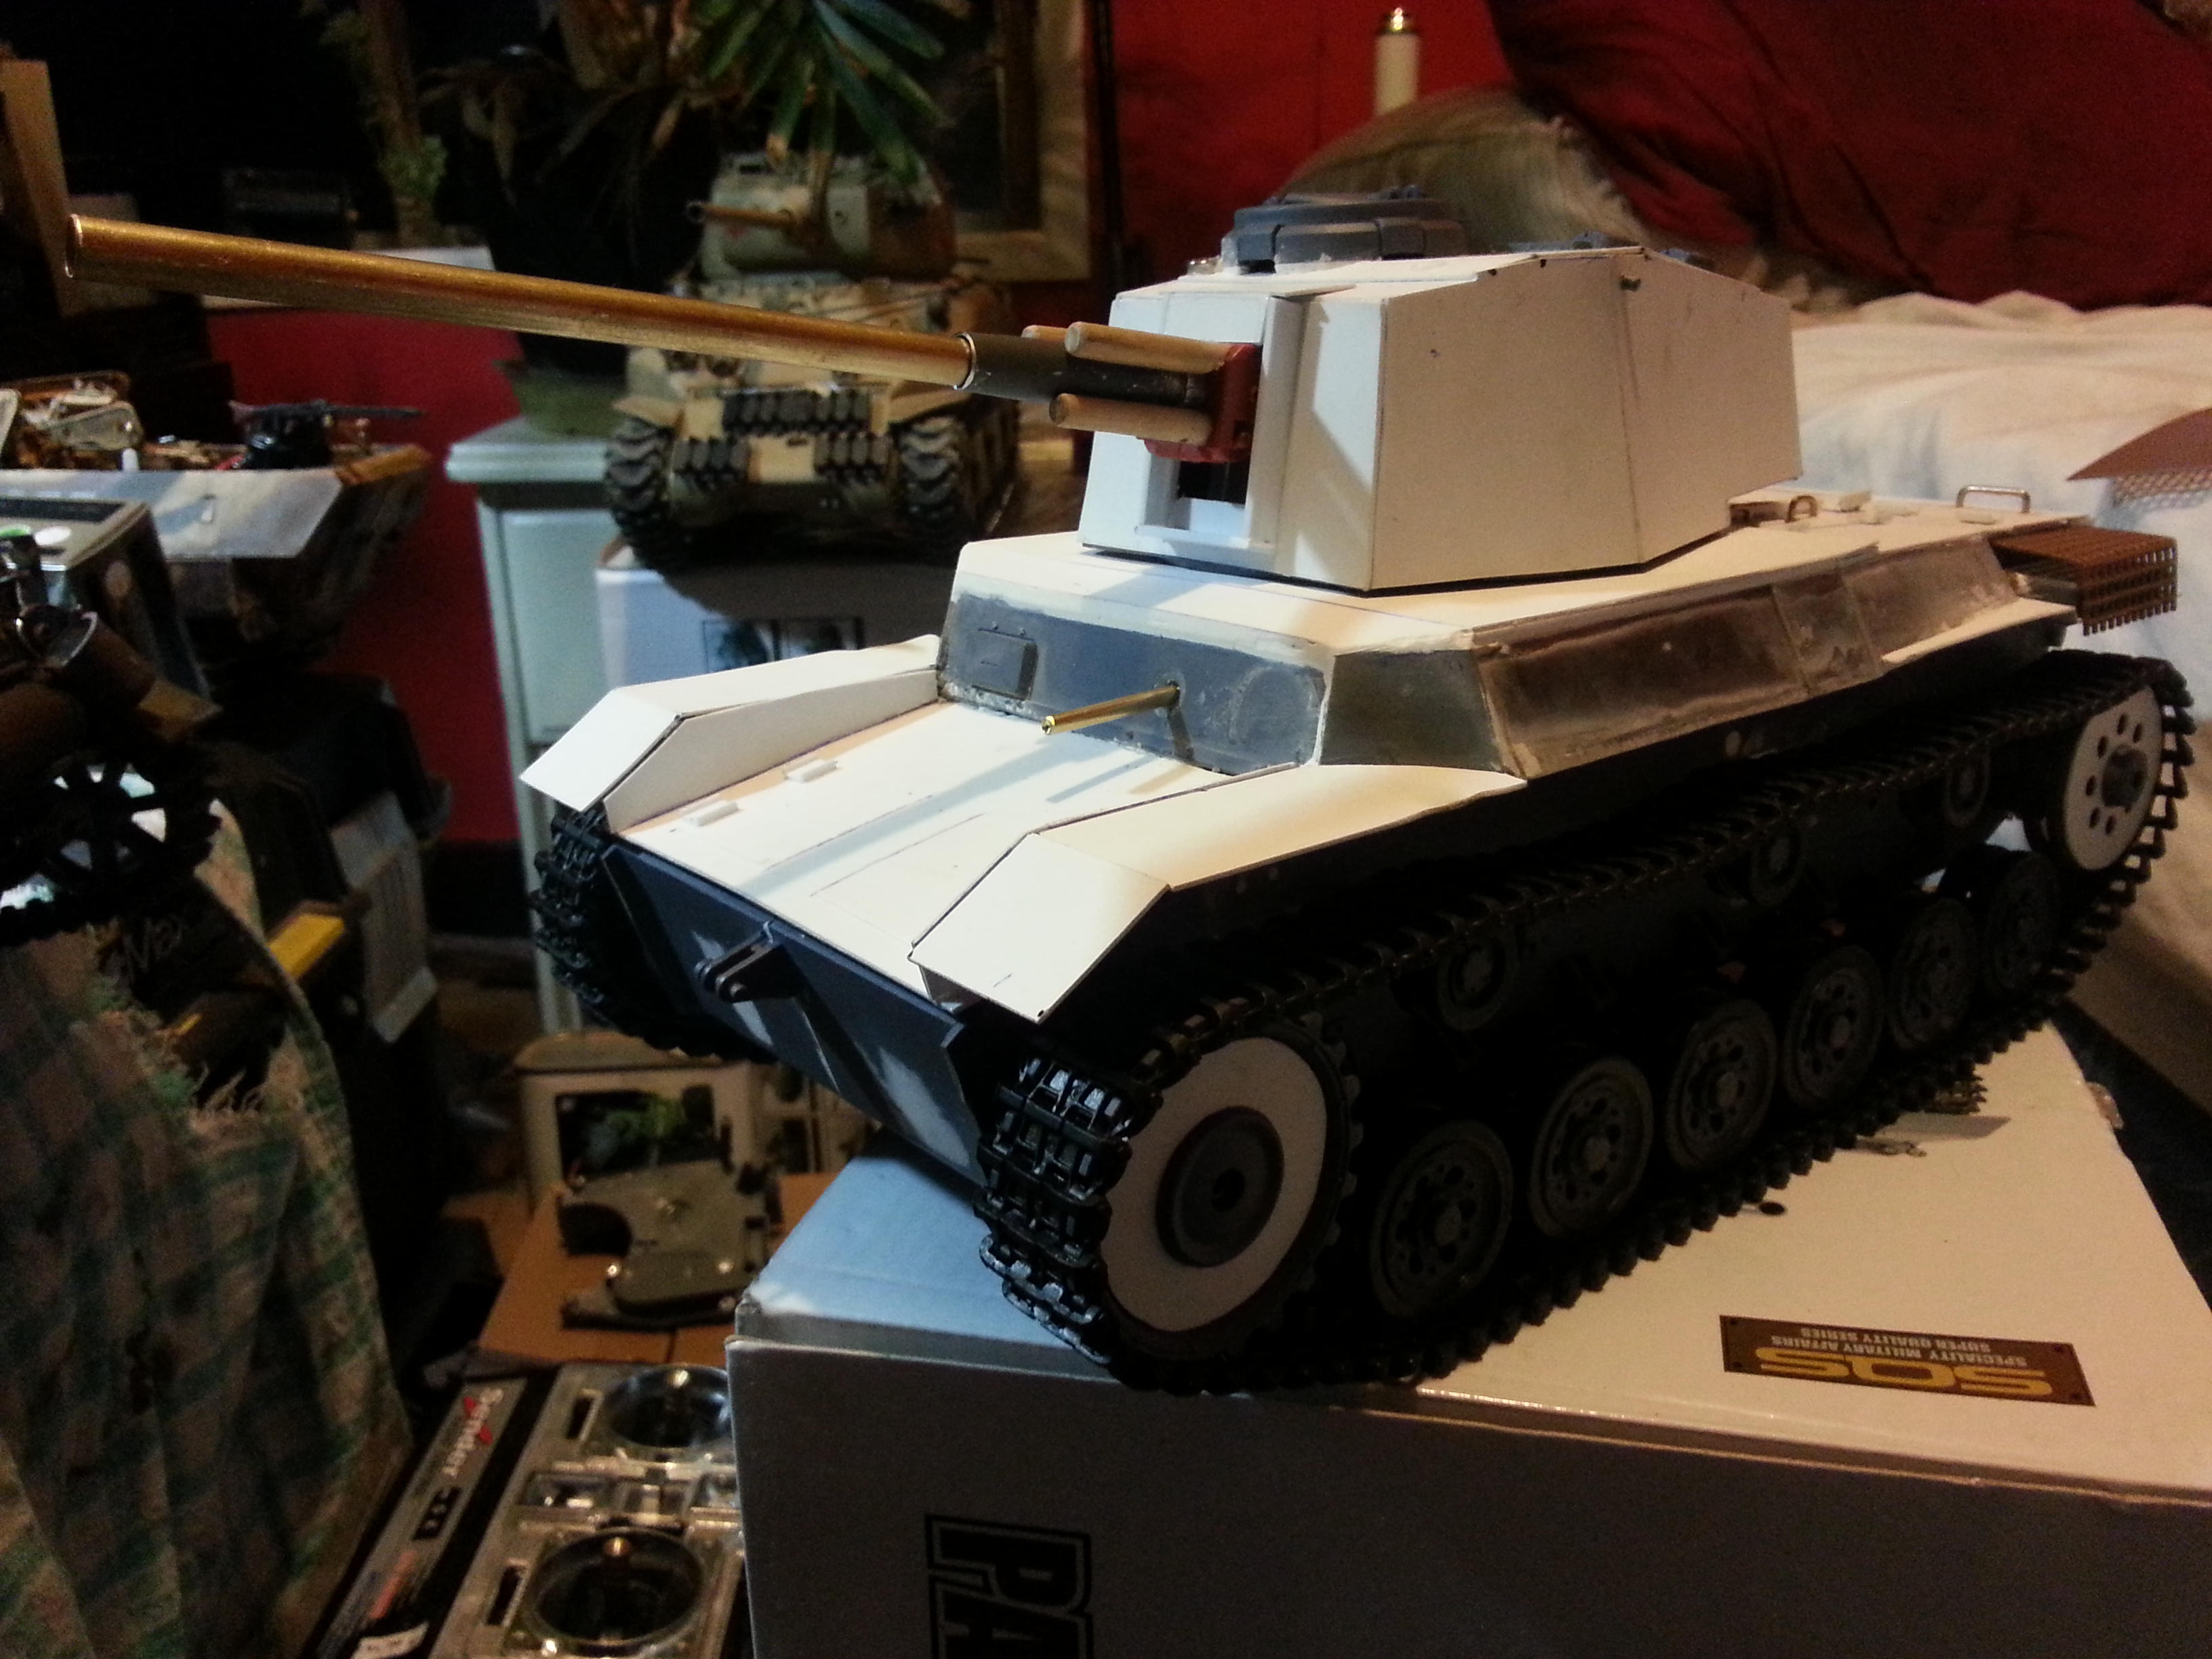
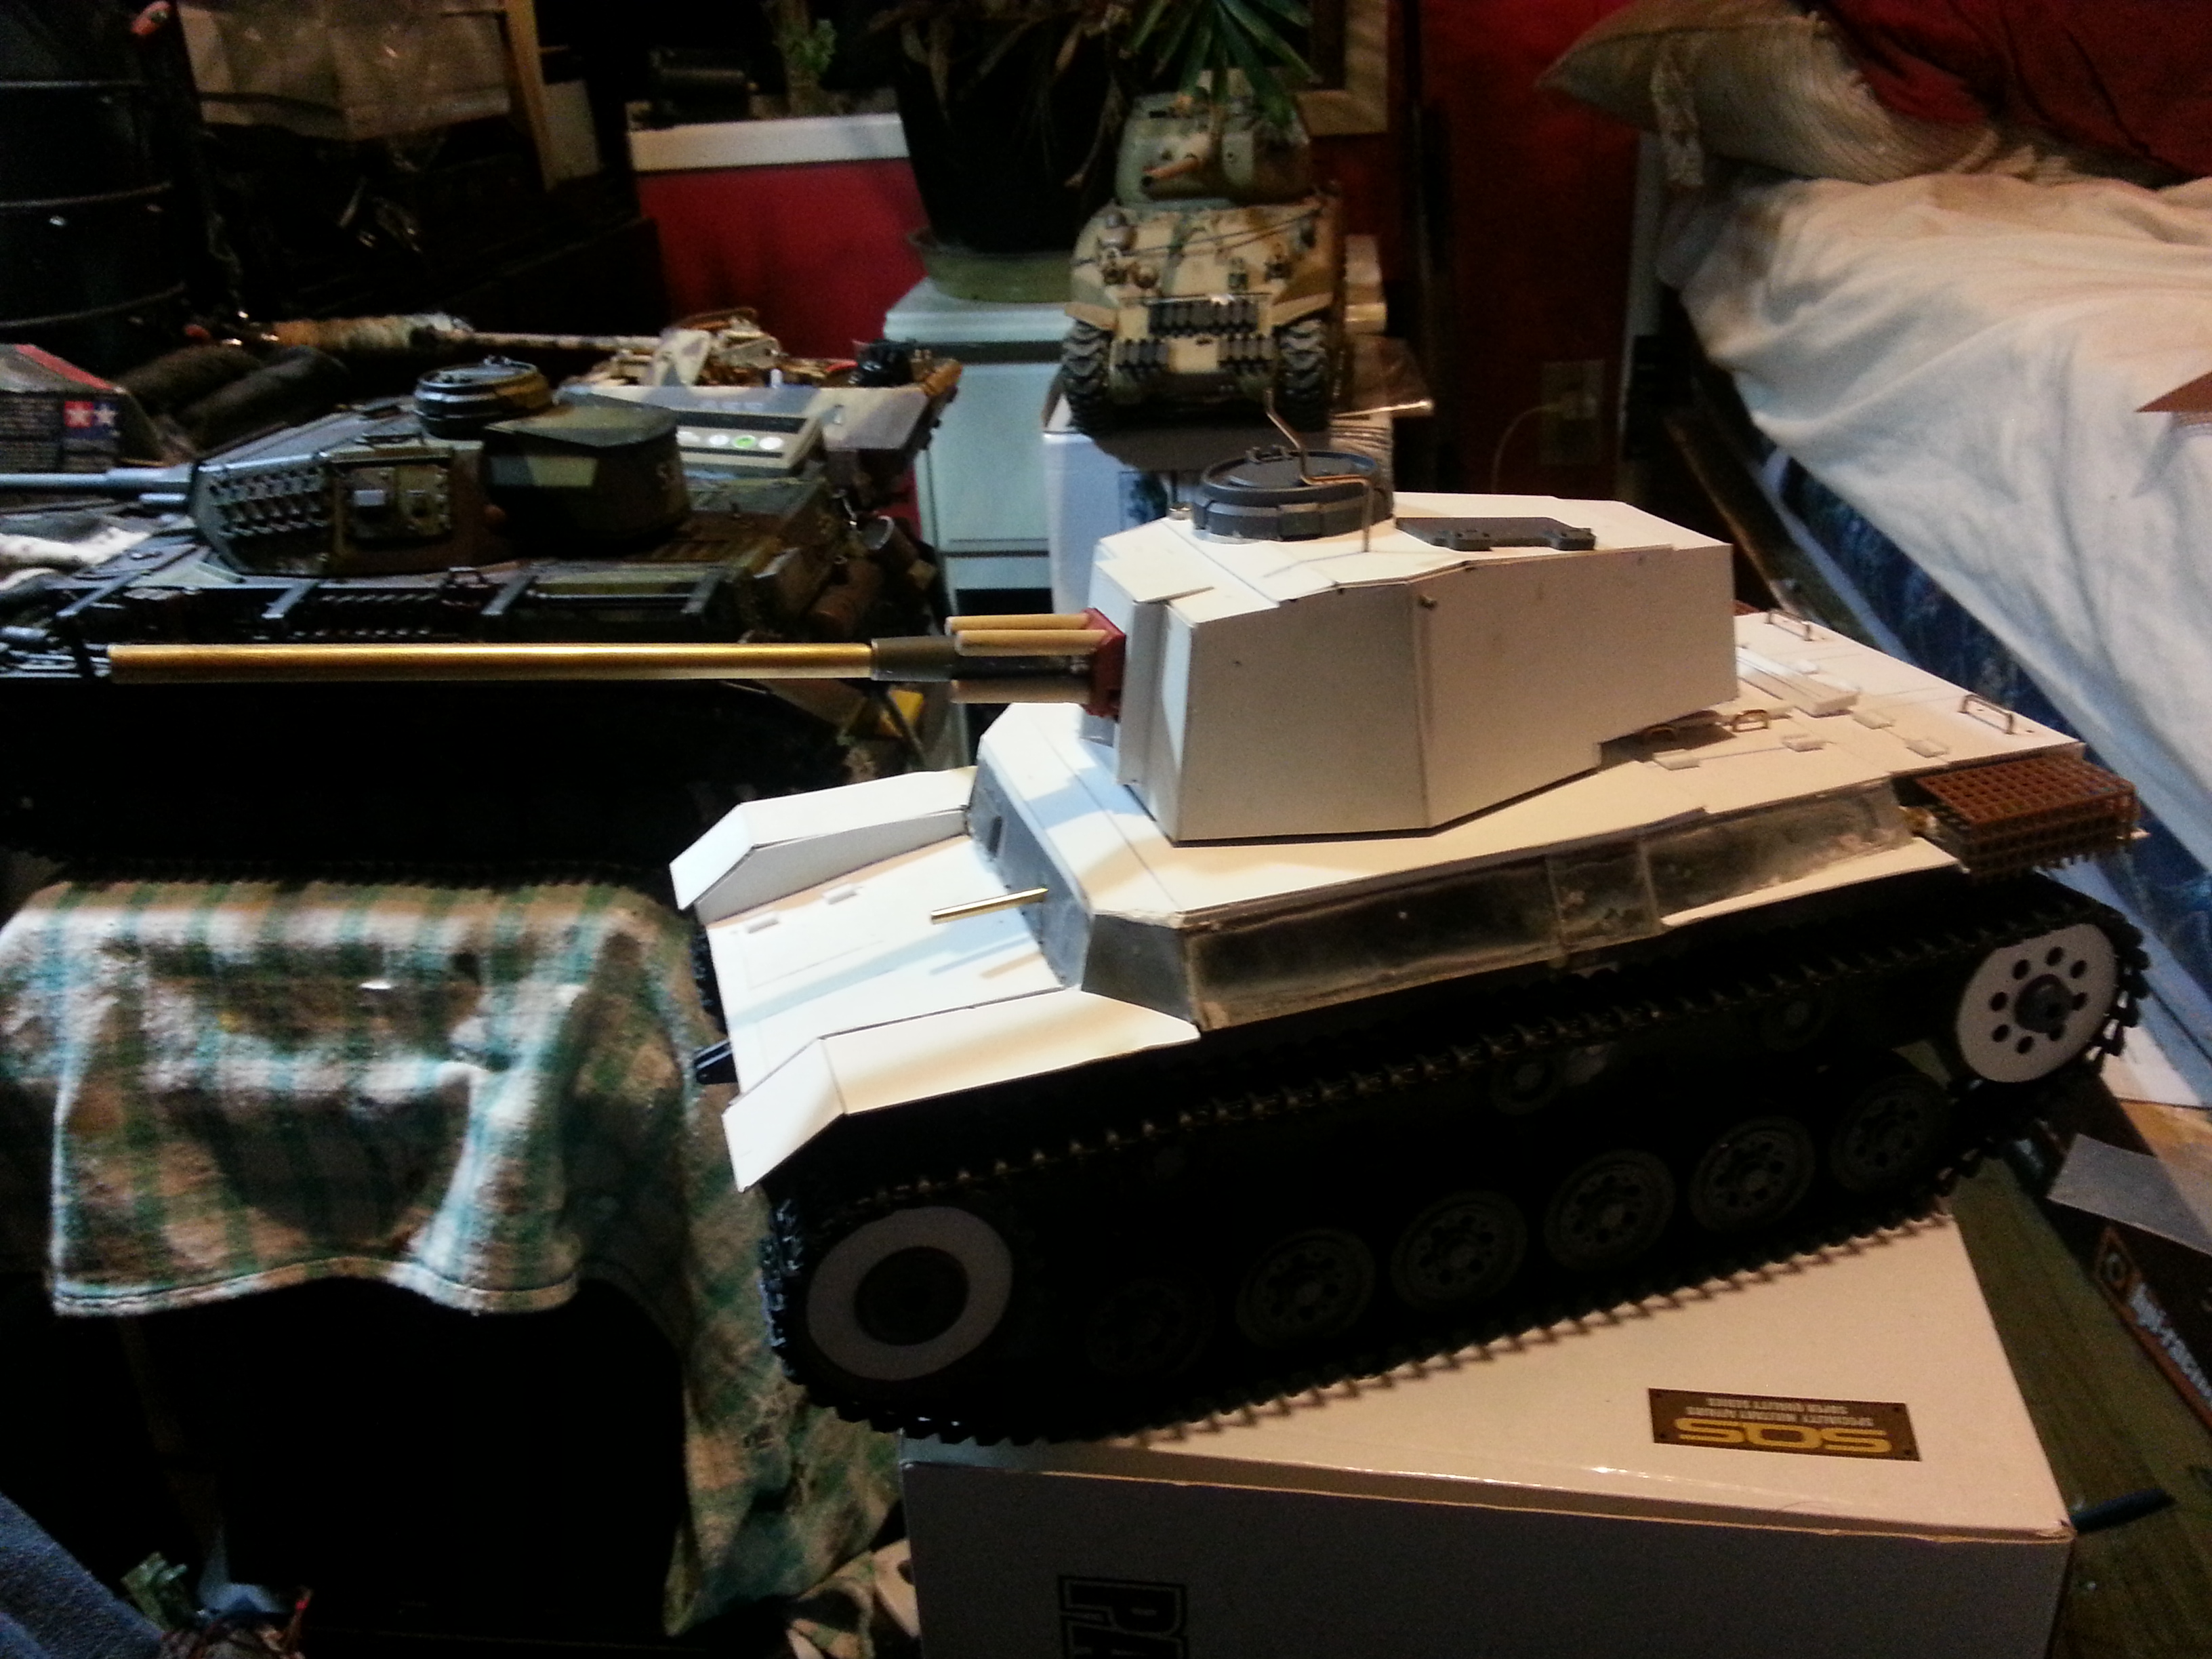
Earlier today I managed to squeeze some more work in
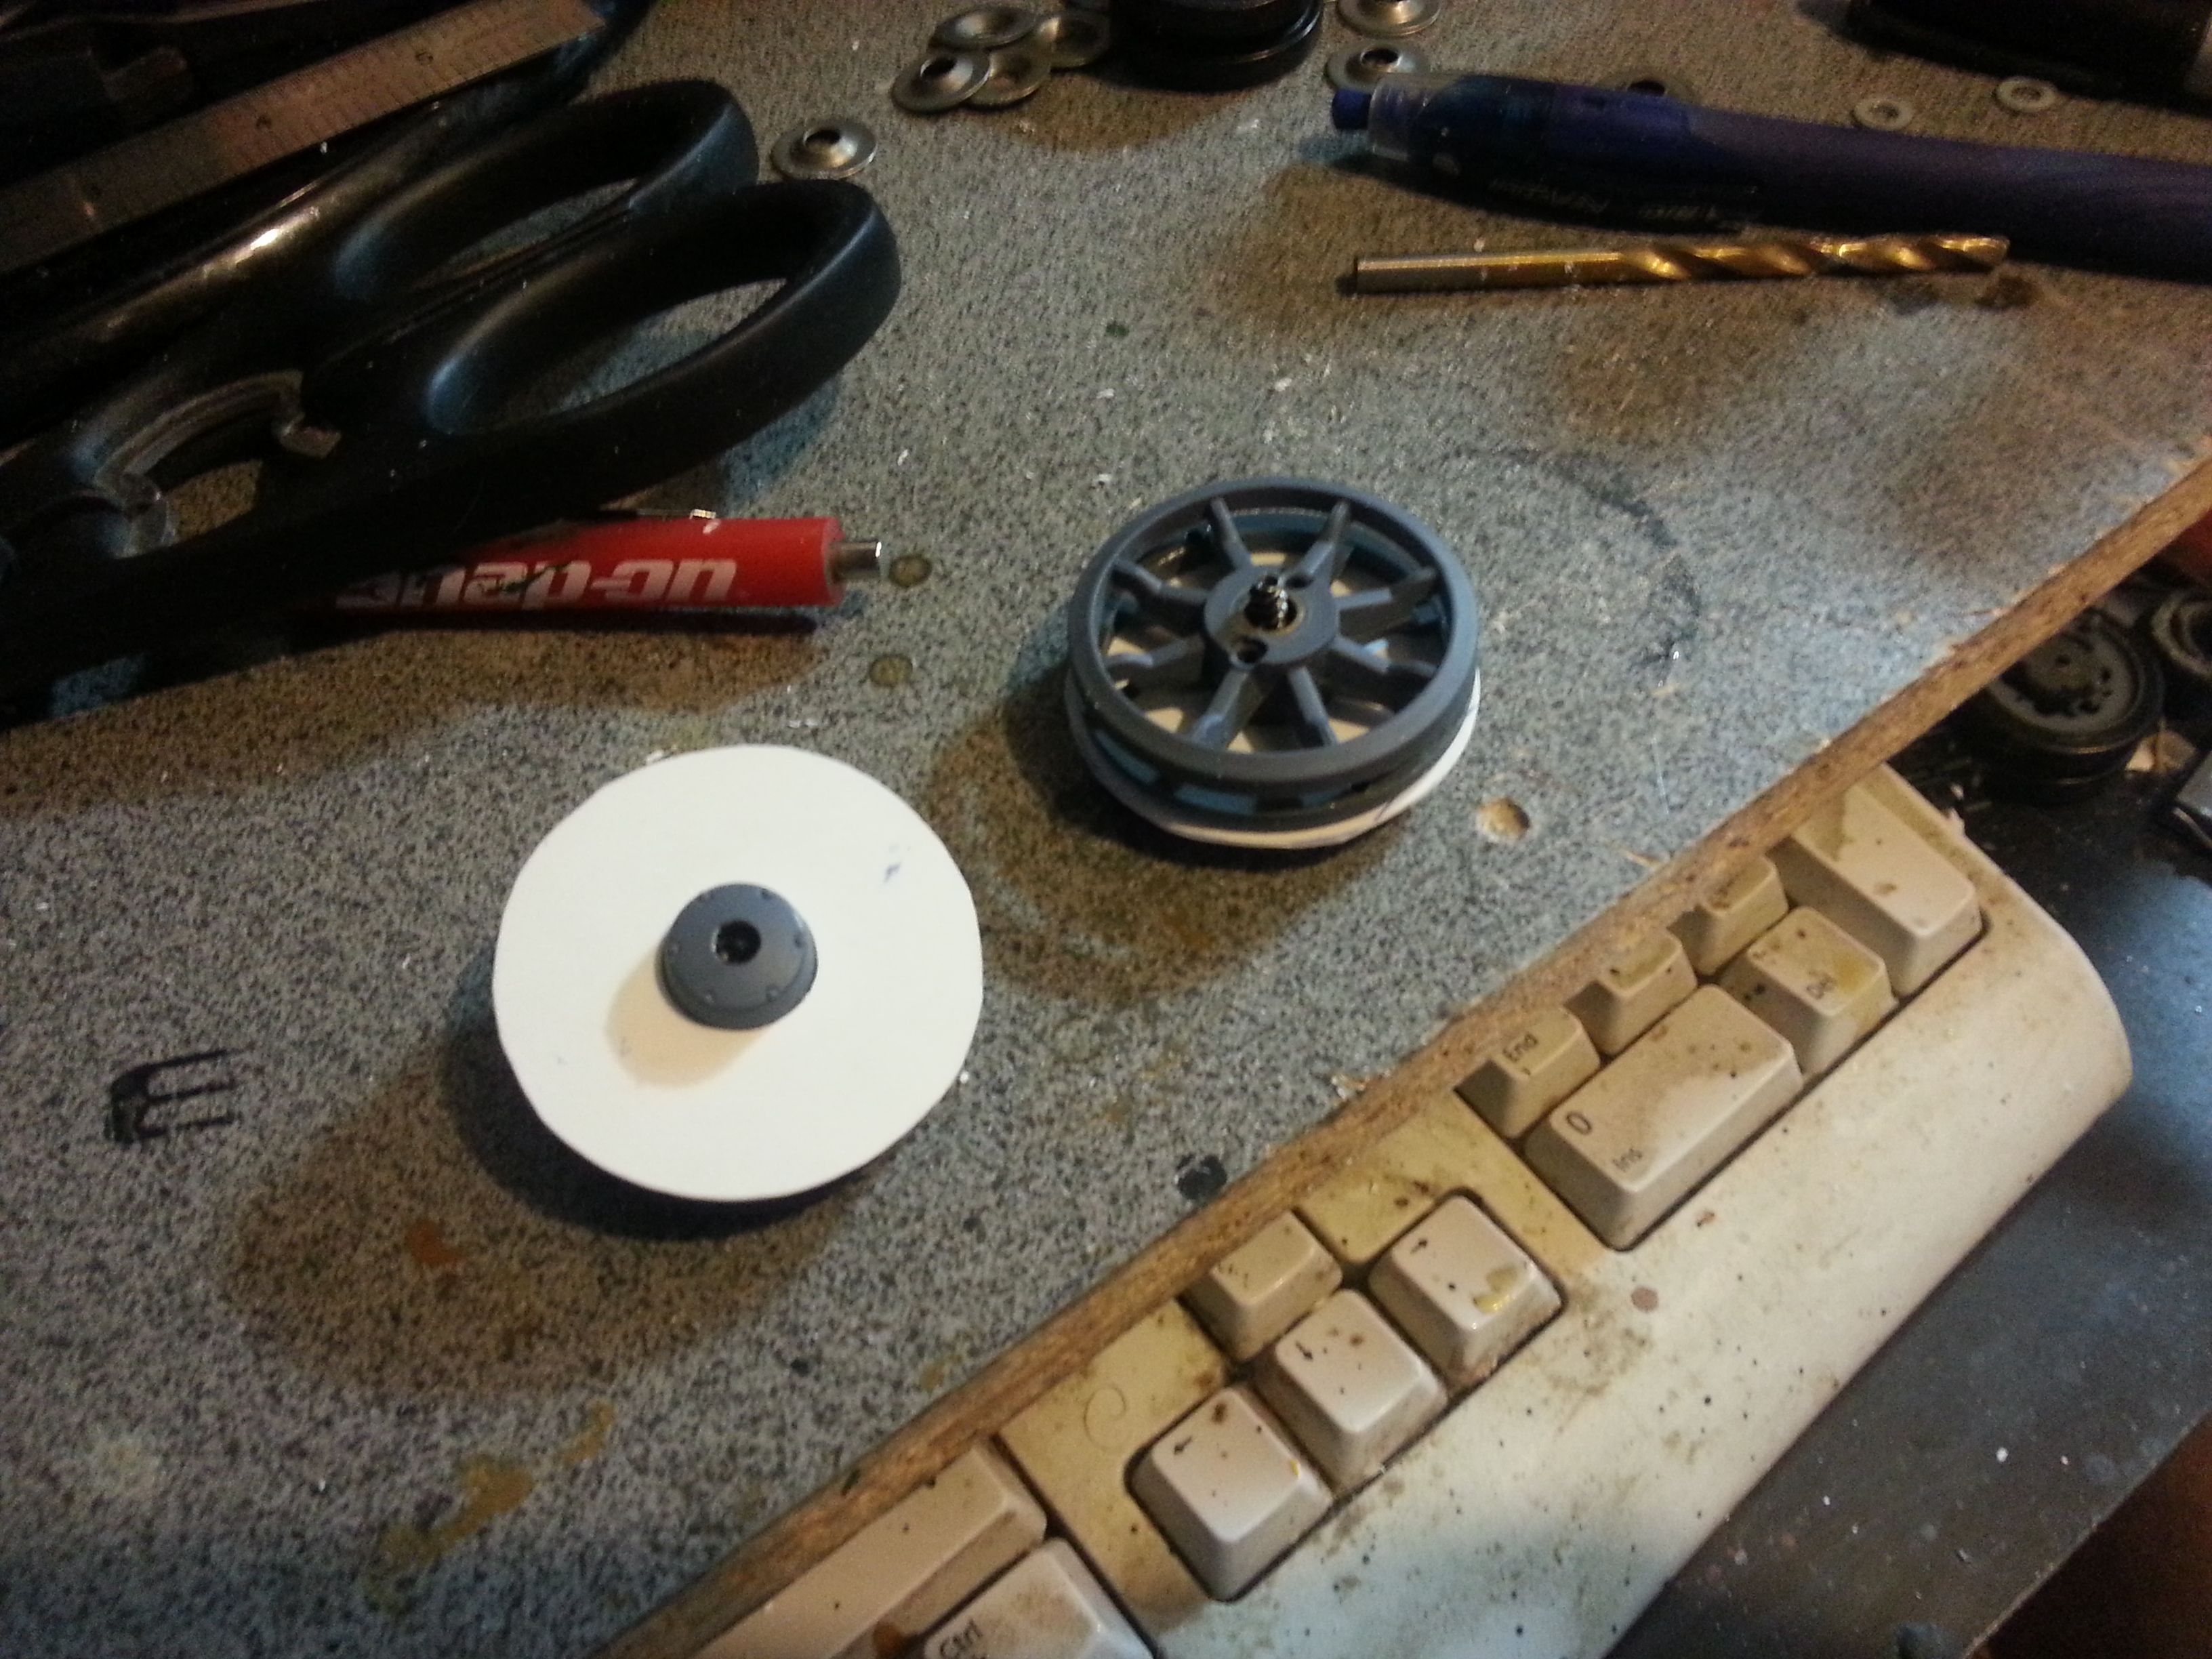
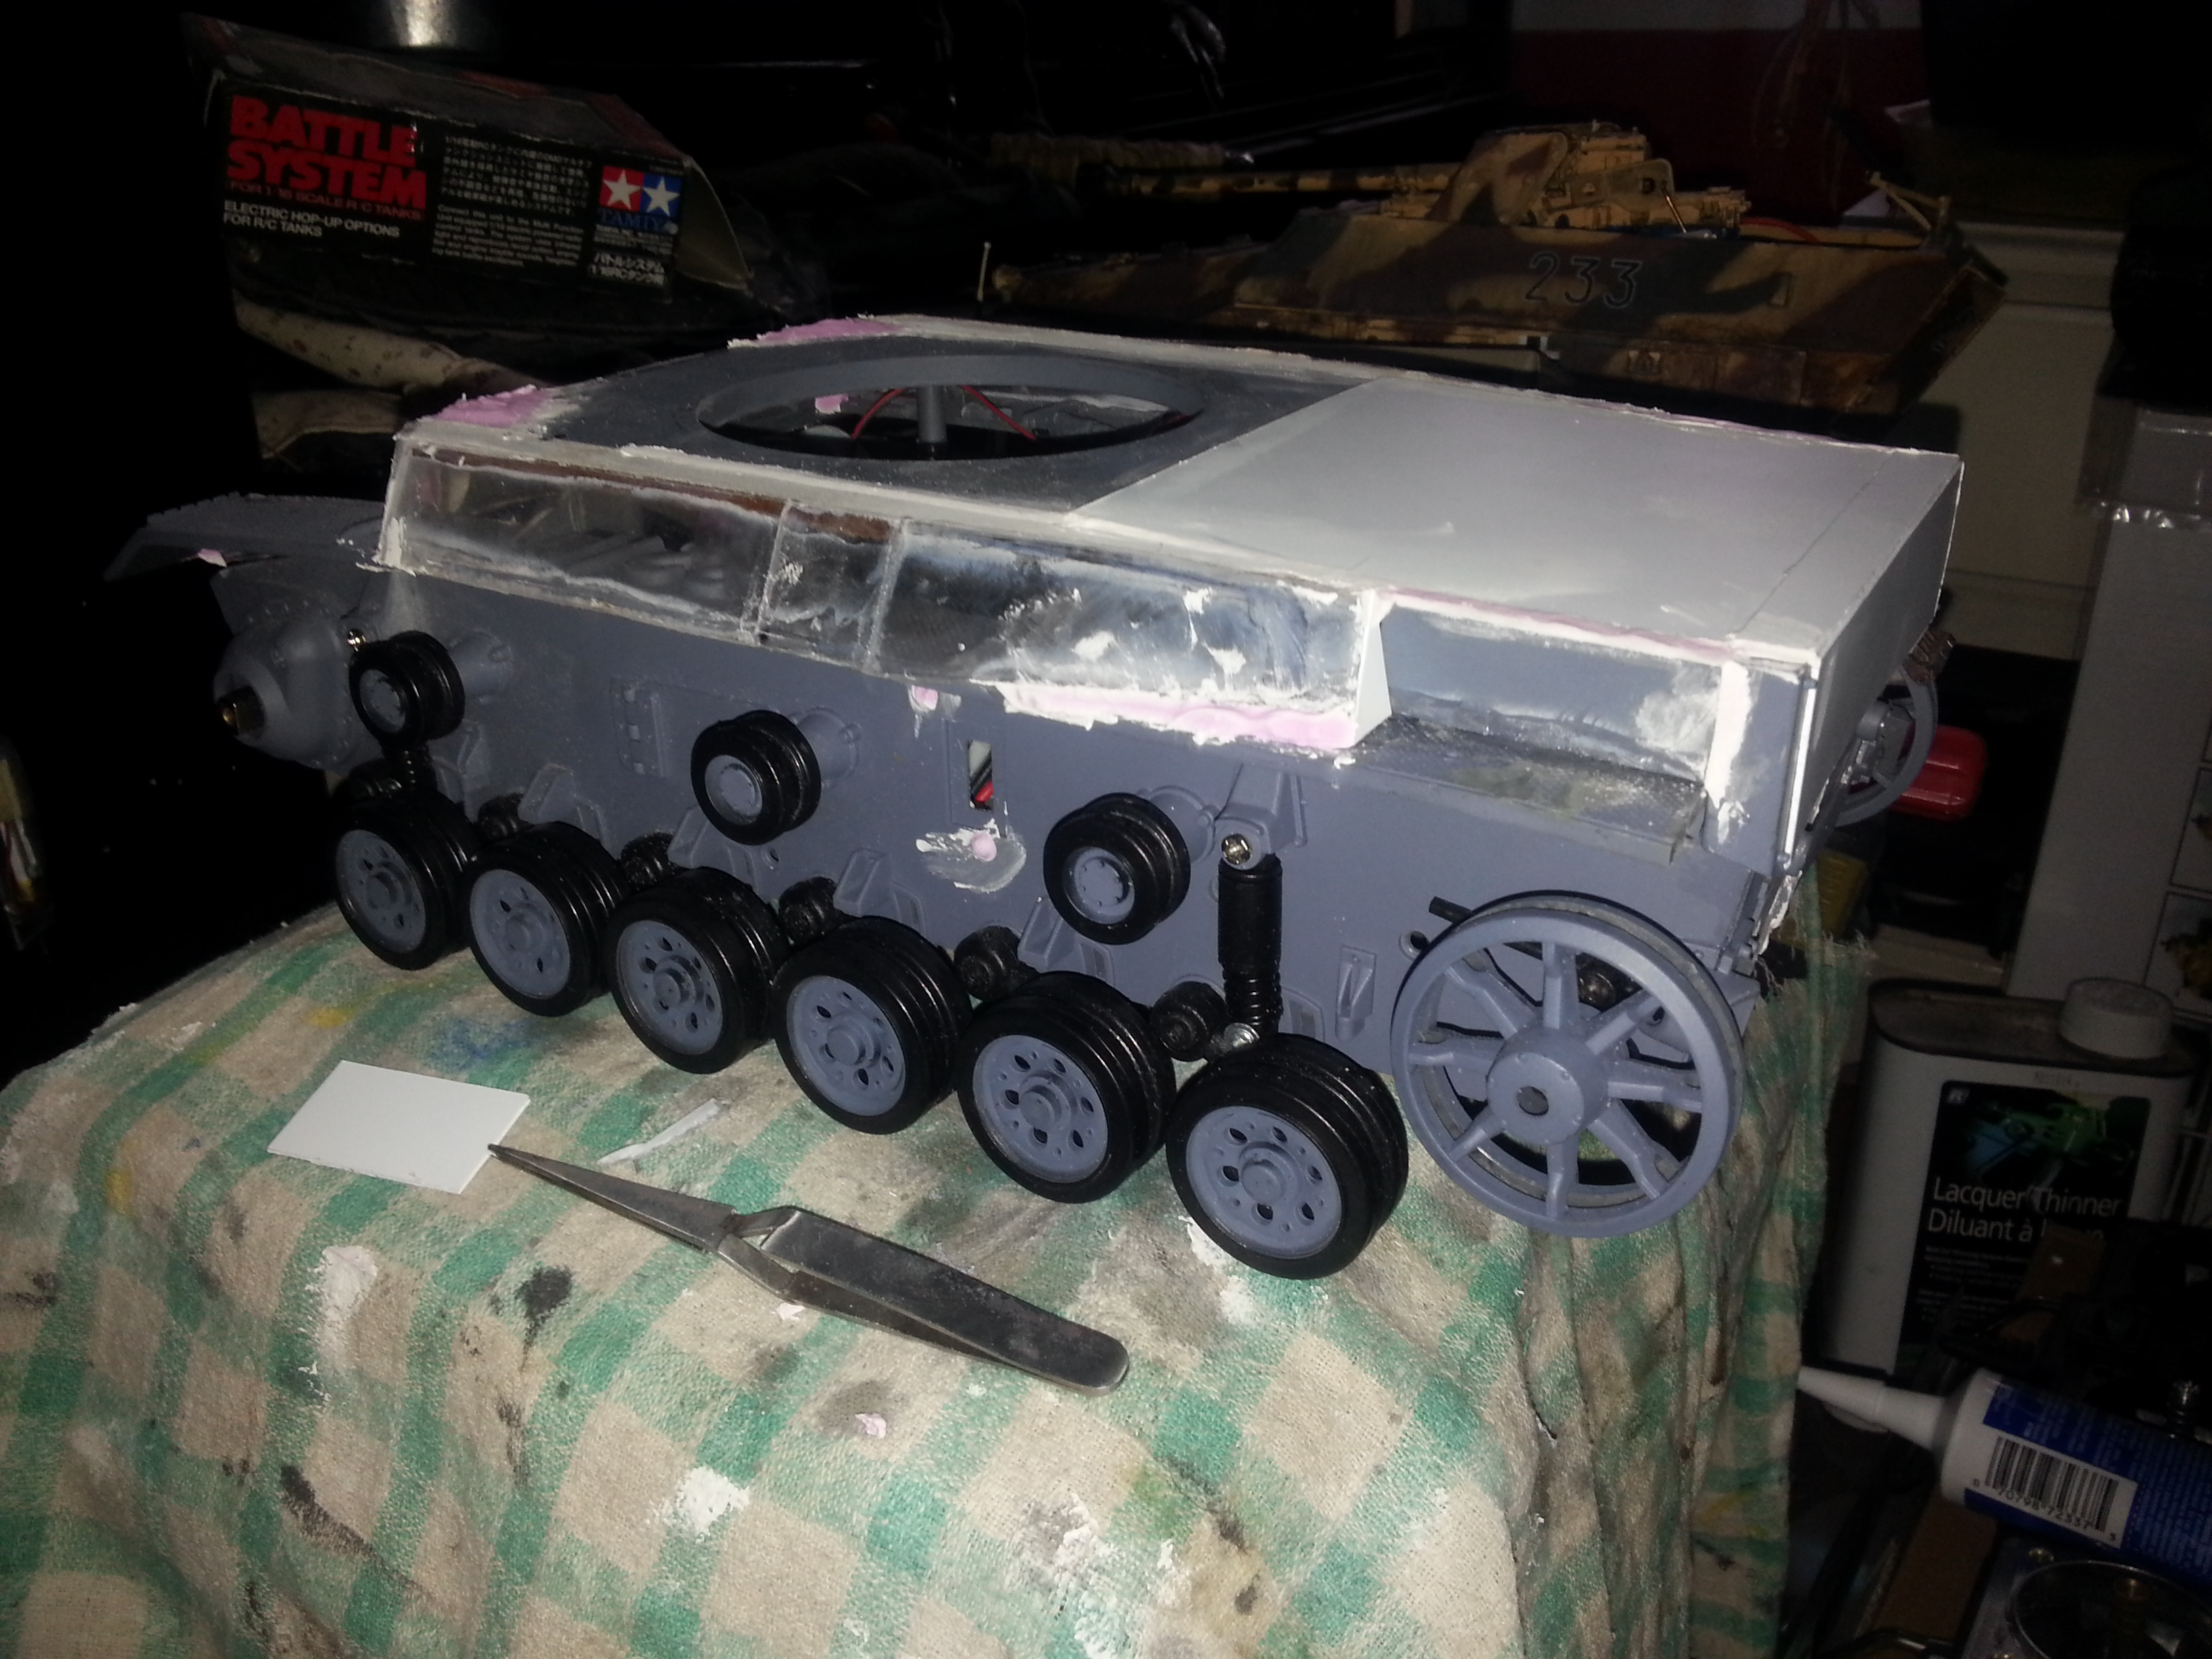
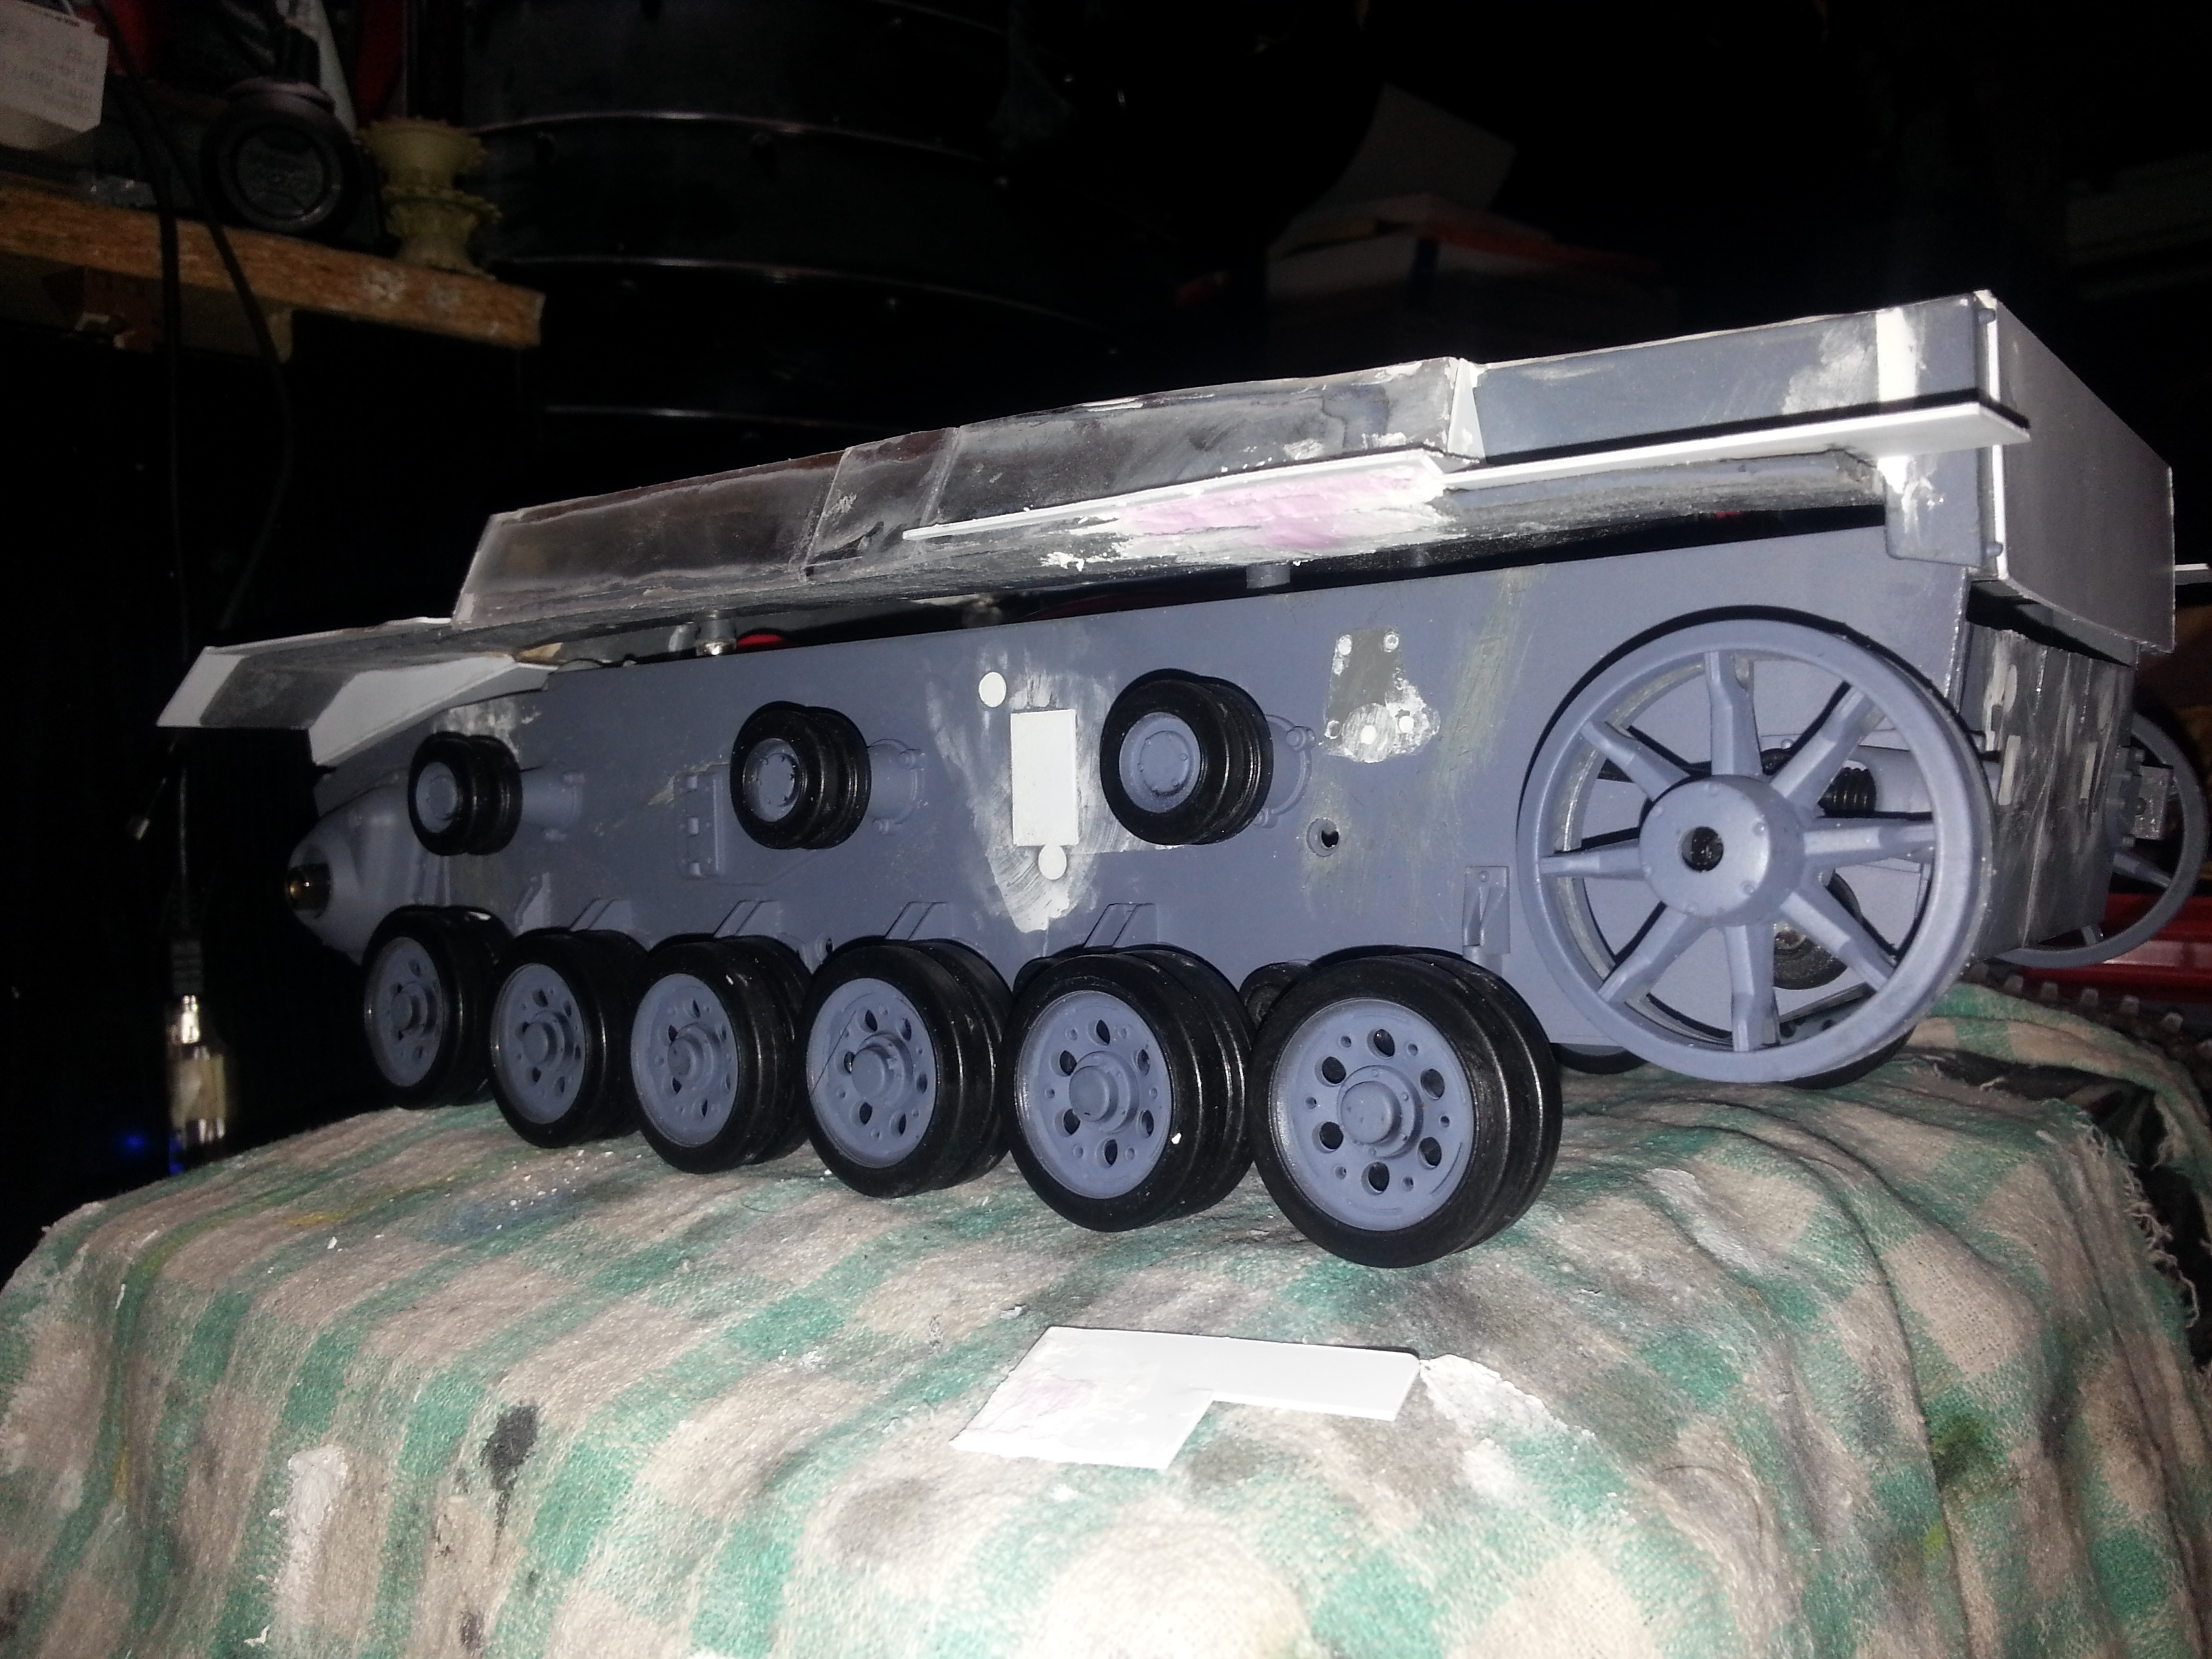
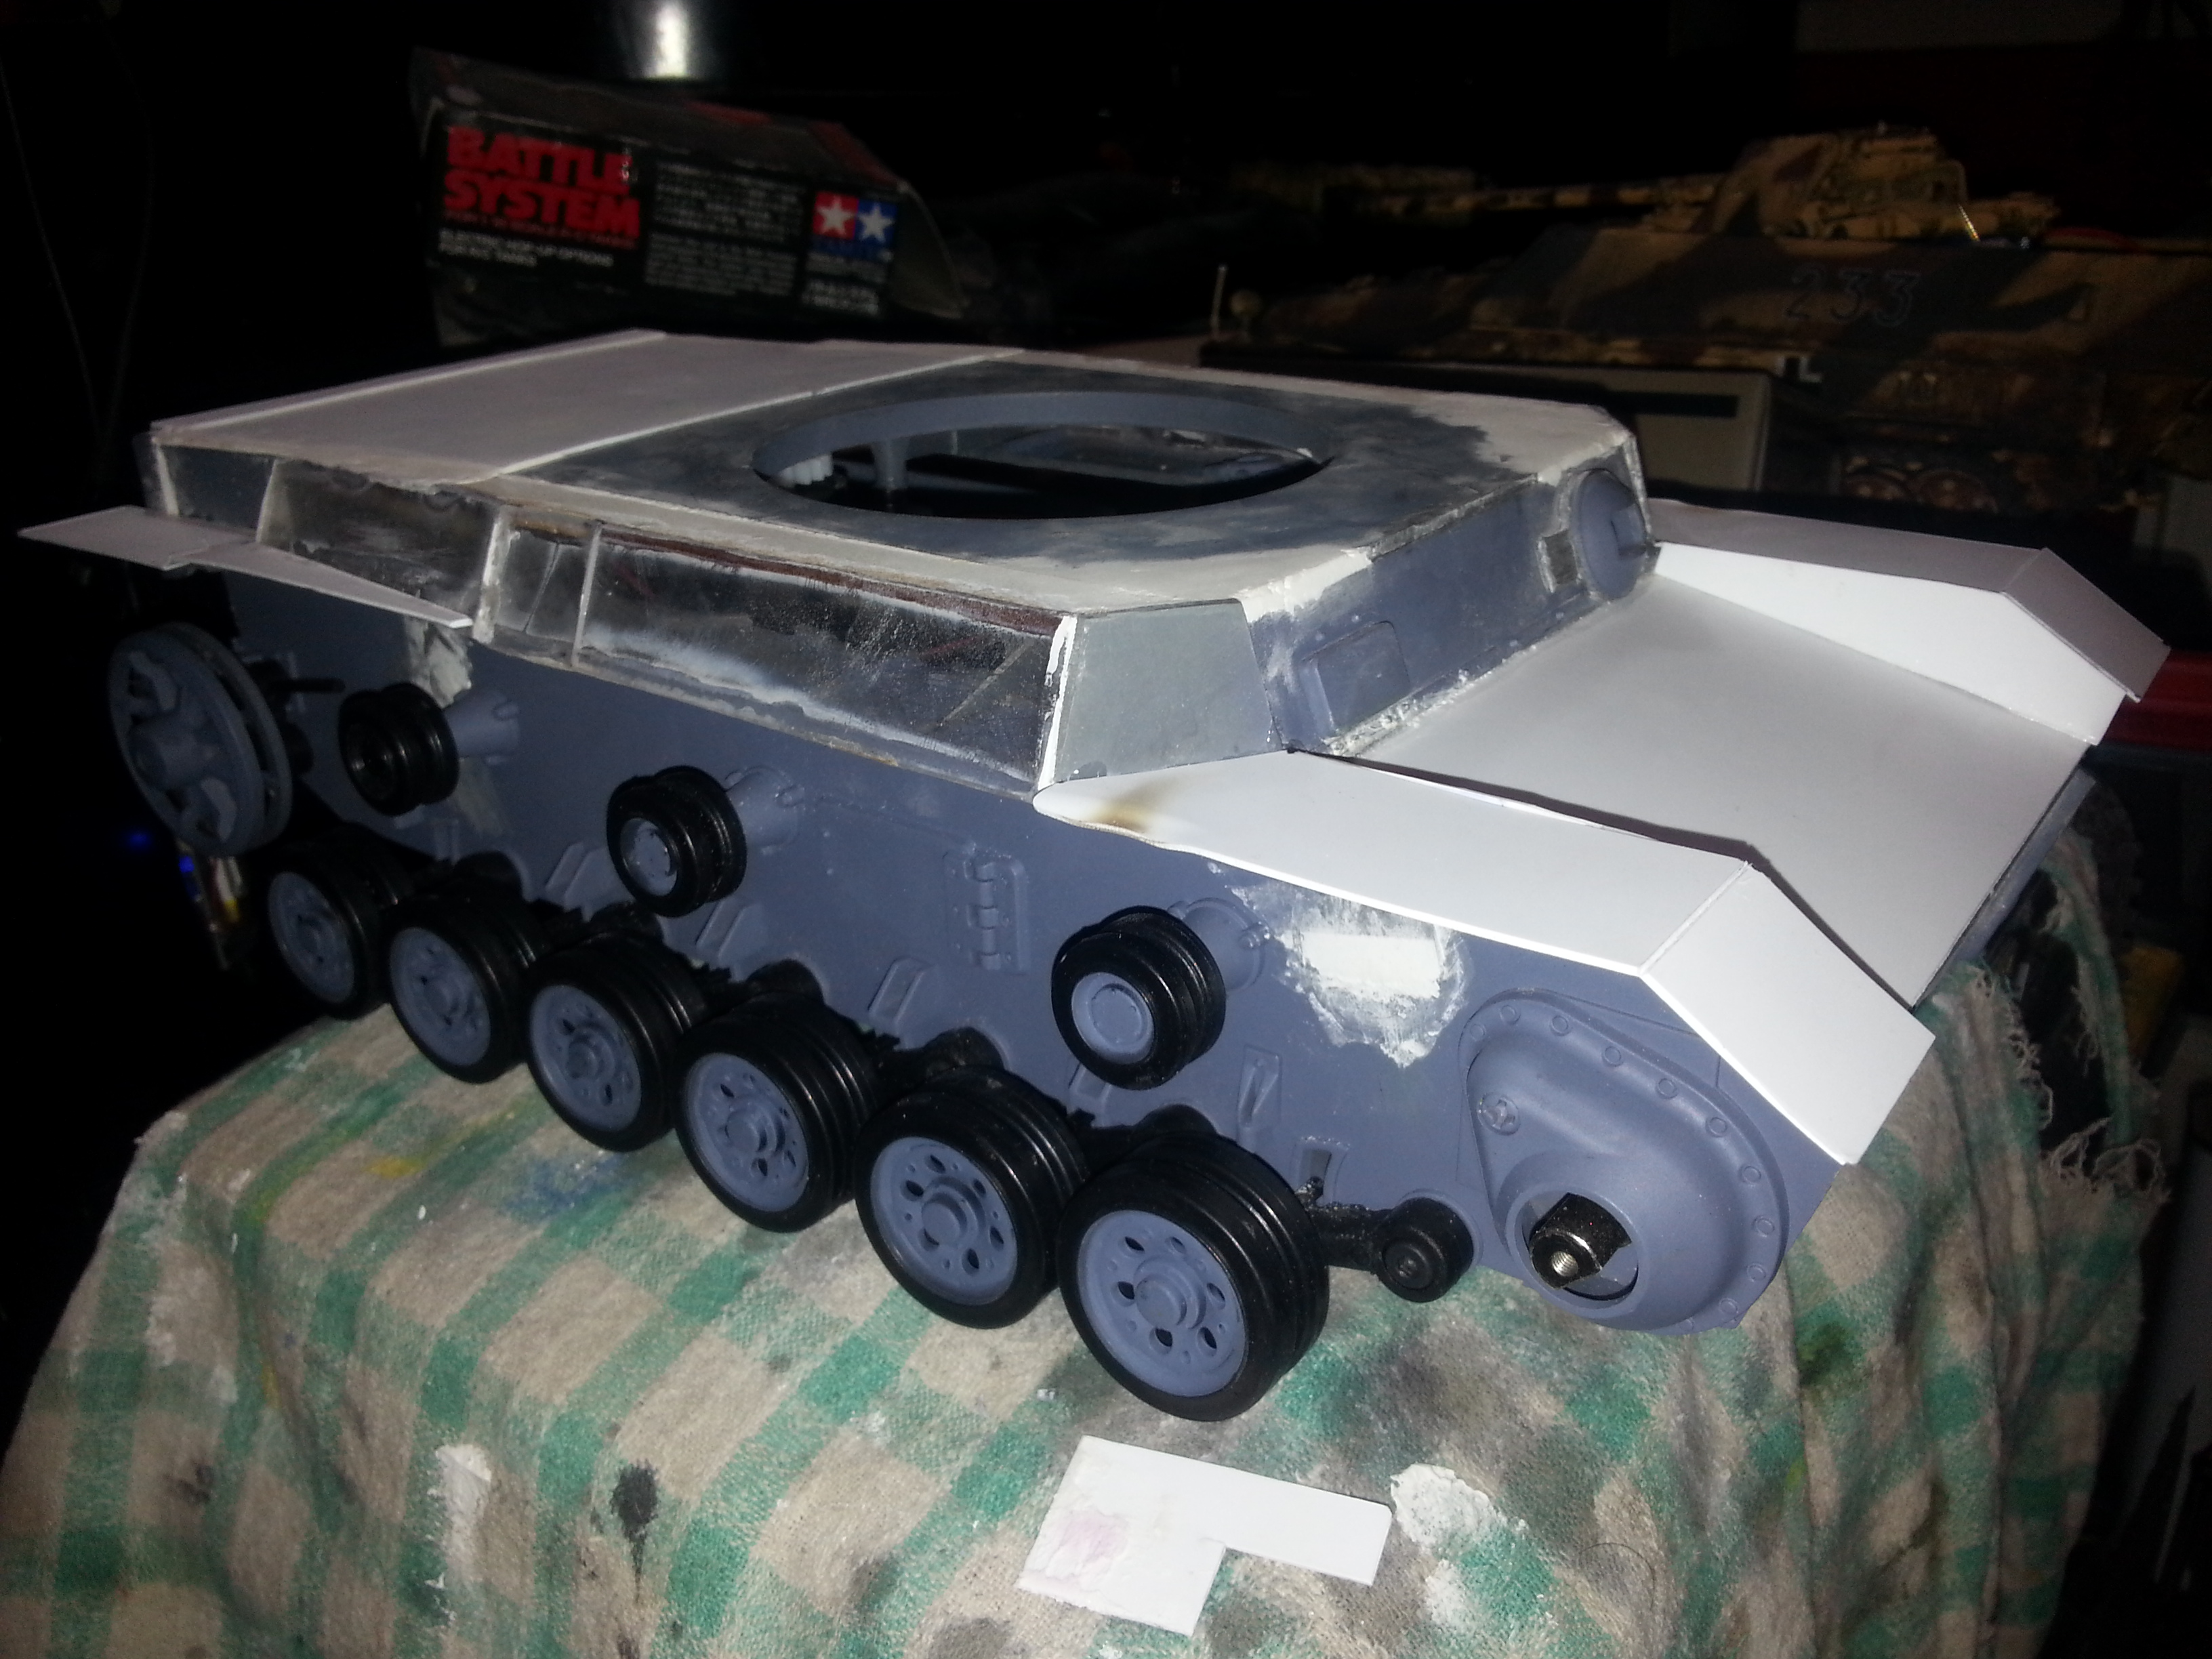
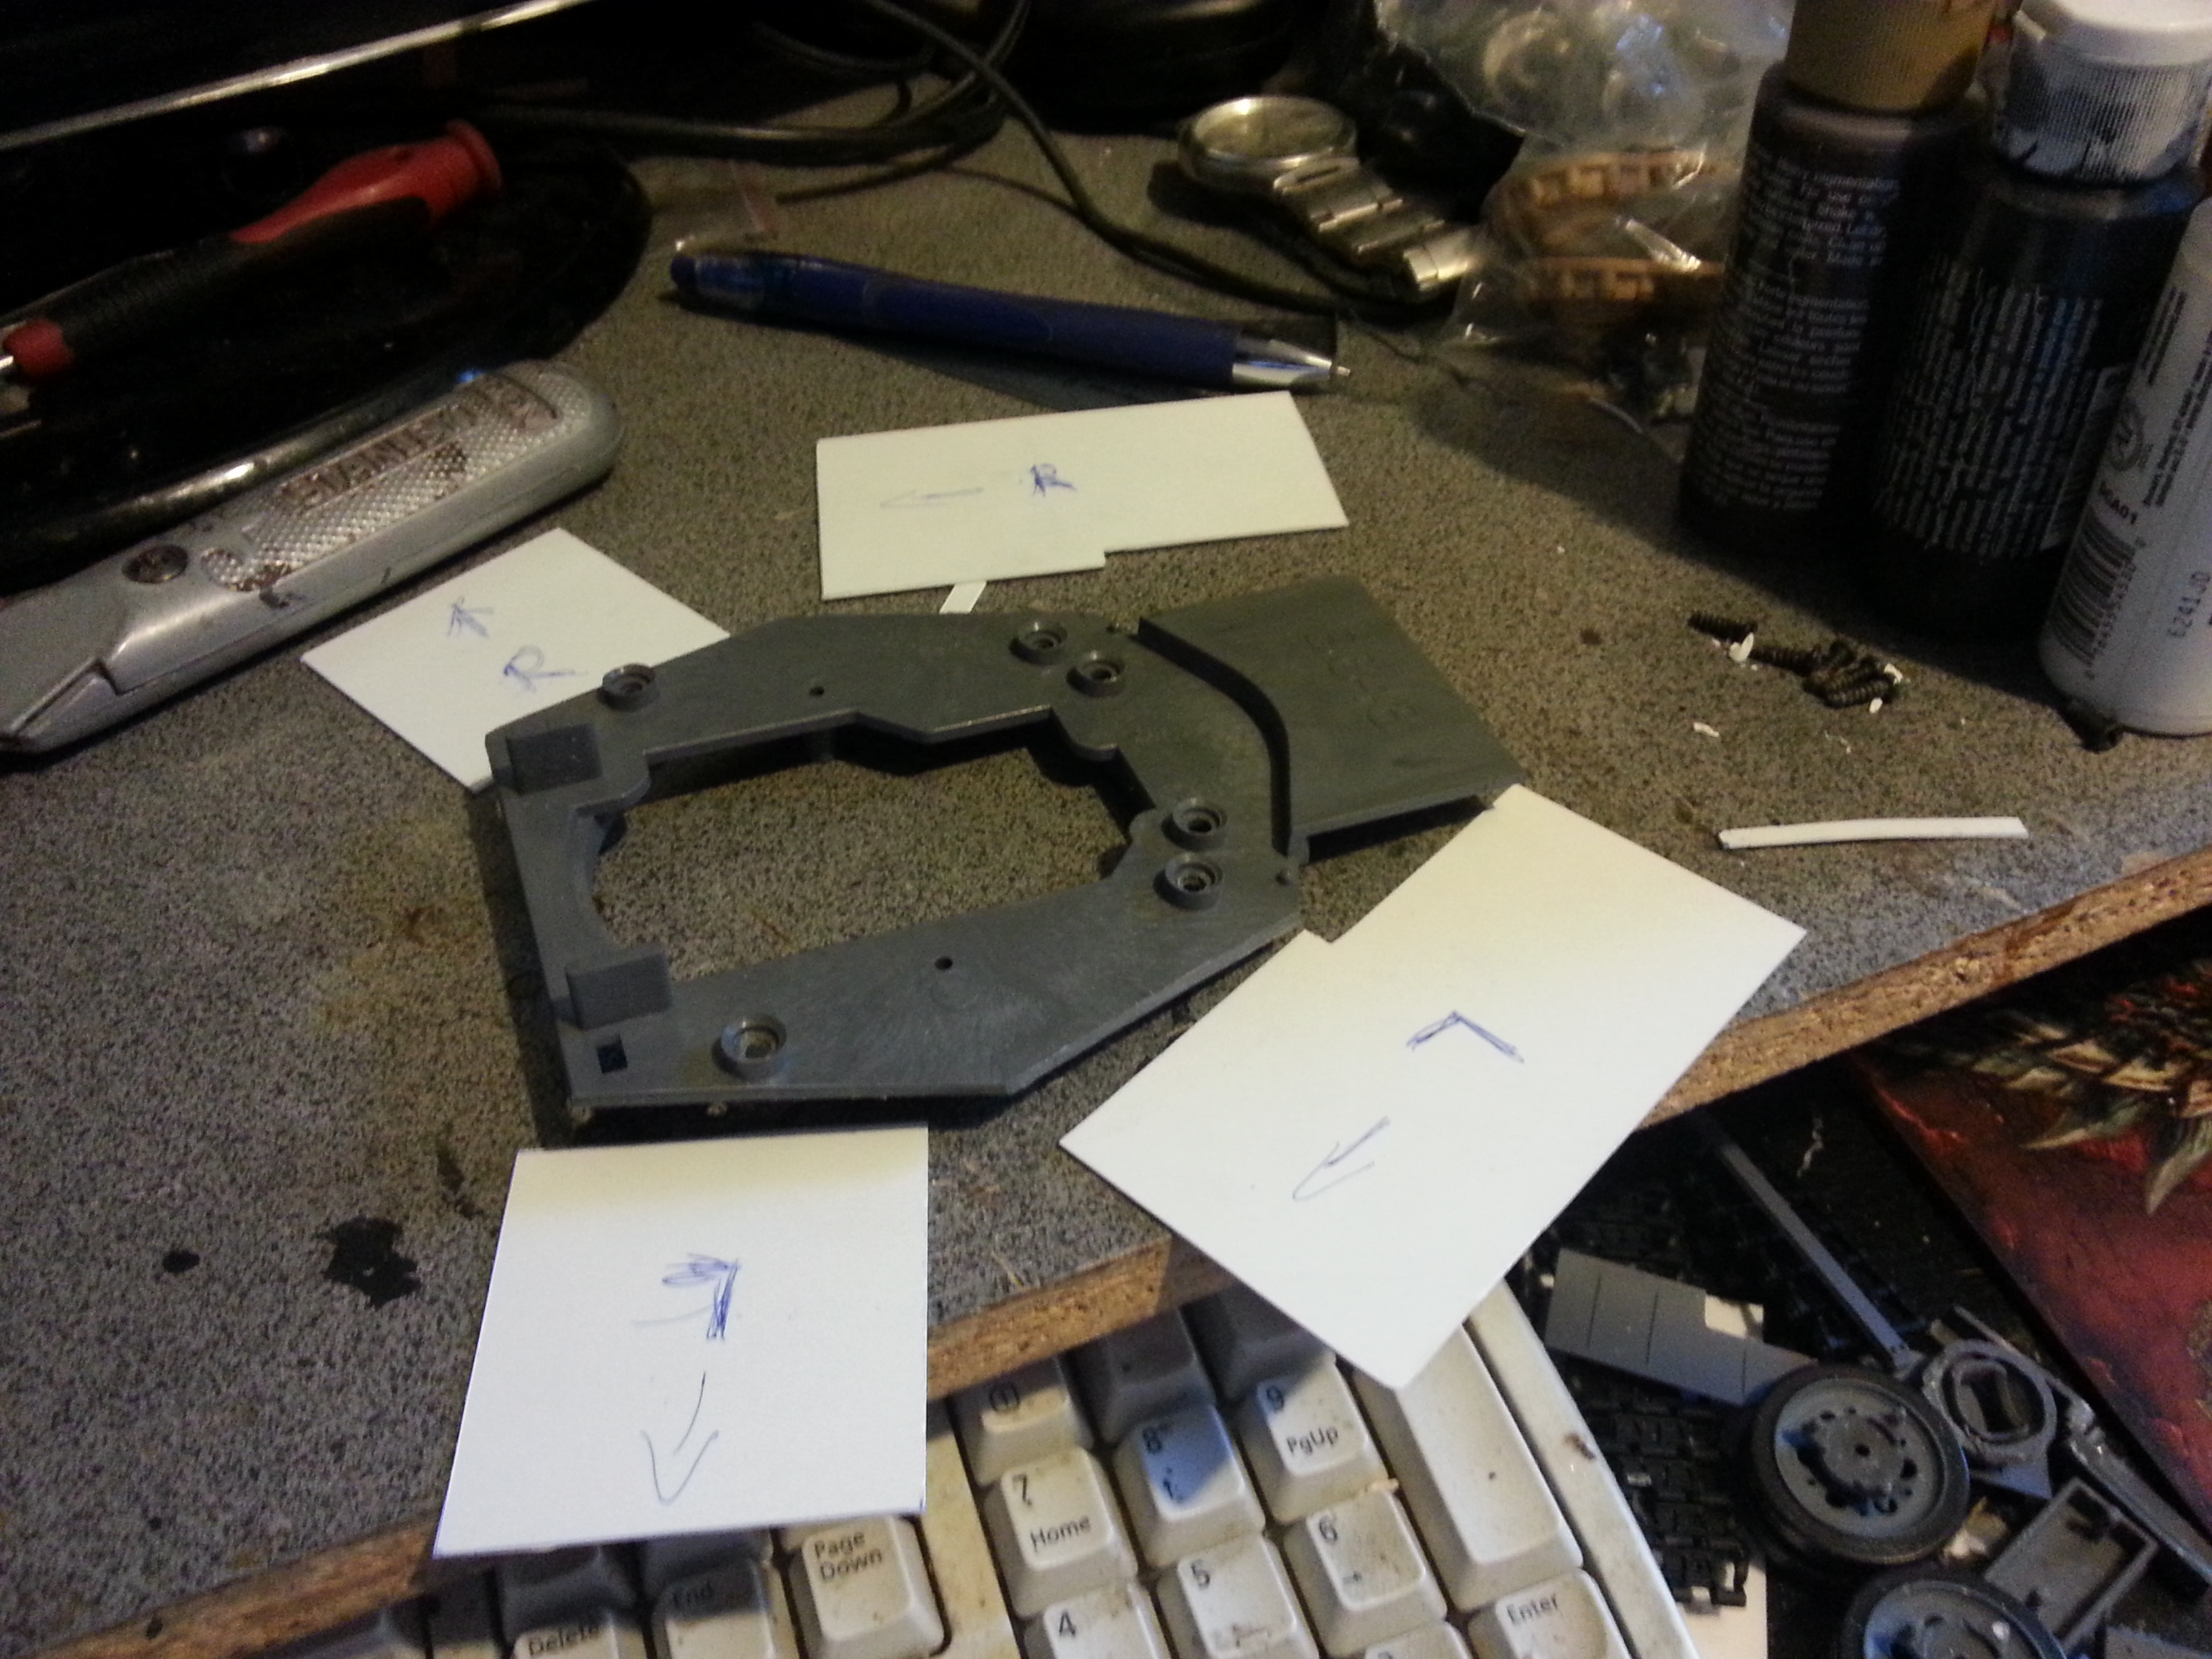
 Cut out, mounted and drilled out the correct idler wheel dish shape. Lots of time spend with a round file to get the inner and outer diameters right. The inside holes I messed up ONLY once trying to drill them before mounting the wheel... I ended up simply drilling between the PnzIII wheel posts on my drill press after gluing the plate & wheel together.
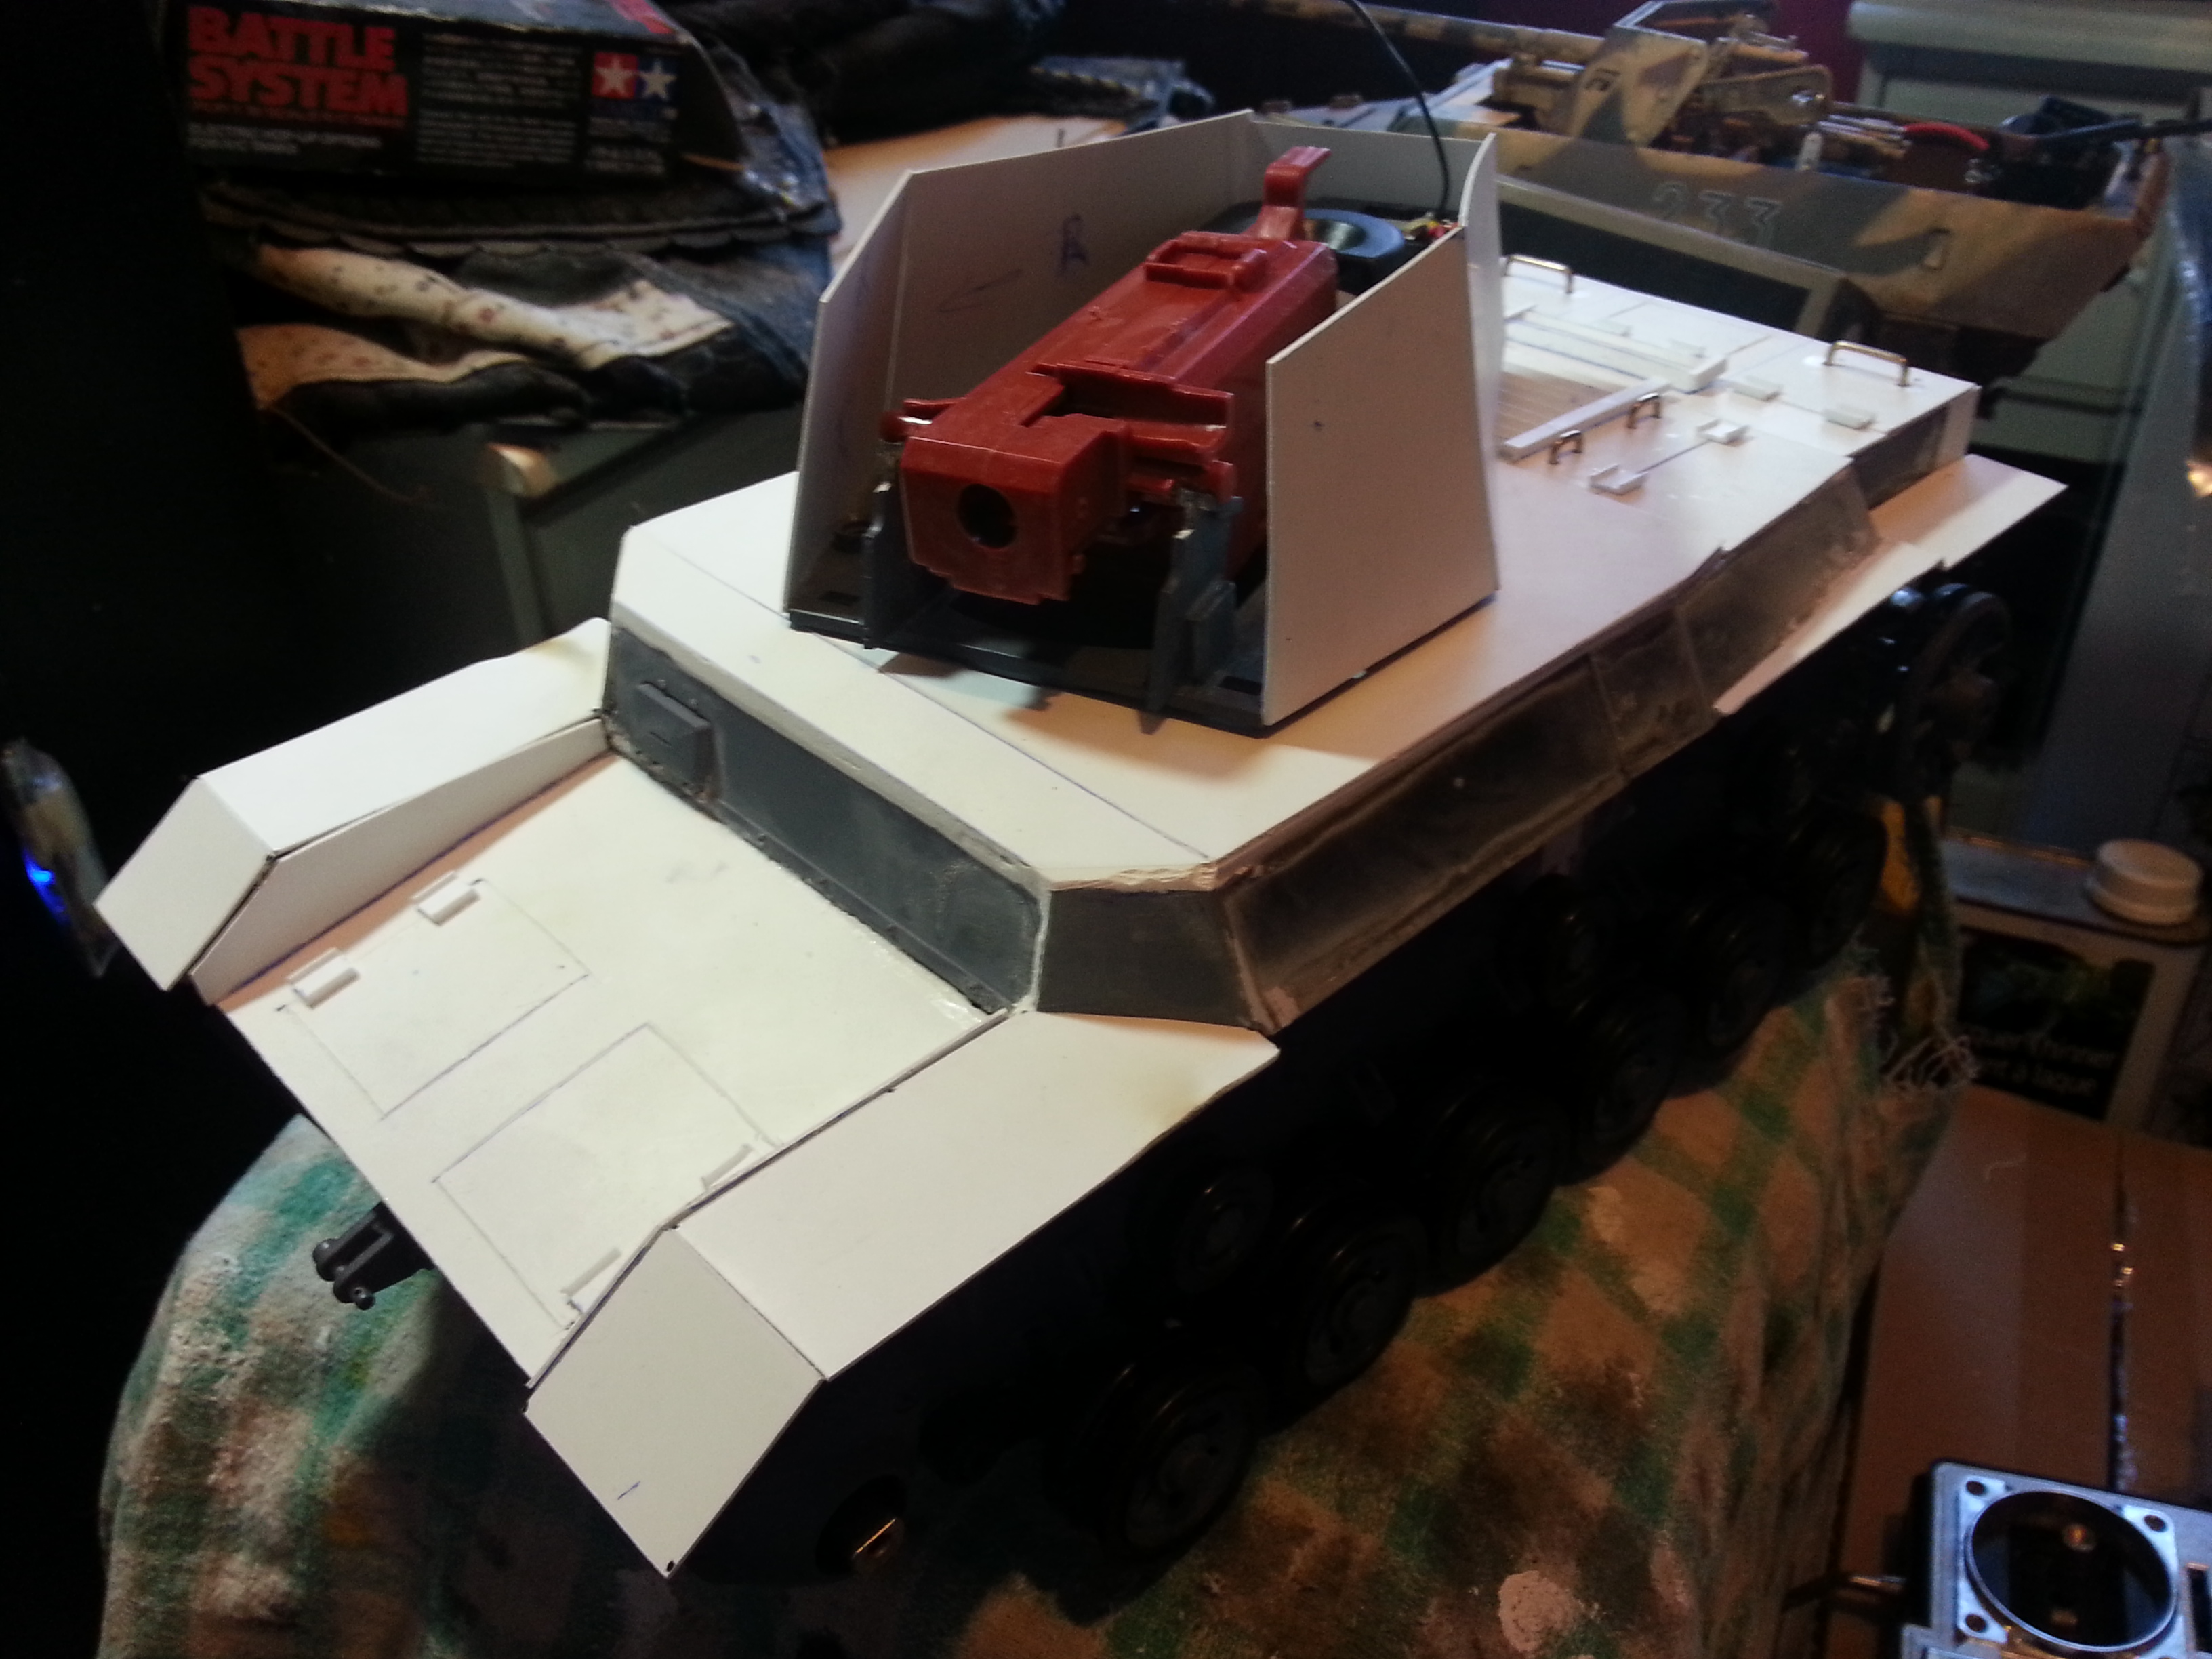
 The turret front and first roof plate are glued permanently. The rear and middle plate will be removable for access to the internals.
Next is mounting a gun & making the mantlet!
Next is mounting a gun & making the mantlet!
 12-12-2013 | 02:04 PM
#20
I agree with Skyhawk, you look like a man with a mission who knows what he is doing. I can really appreciate the time and planning you have put into this project.
Excellent model, or as they say in Japan ...... エクセレントモデル
Excellent model, or as they say in Japan ...... エクセレントモデル
12-13-2013 | 10:45 PM
#21
Thread Starter
SkyHawk, it just comes with practice and ingenuity. I just attack plastic with a hobby knife, ruler and a sharpie and tanks randomly appear... 
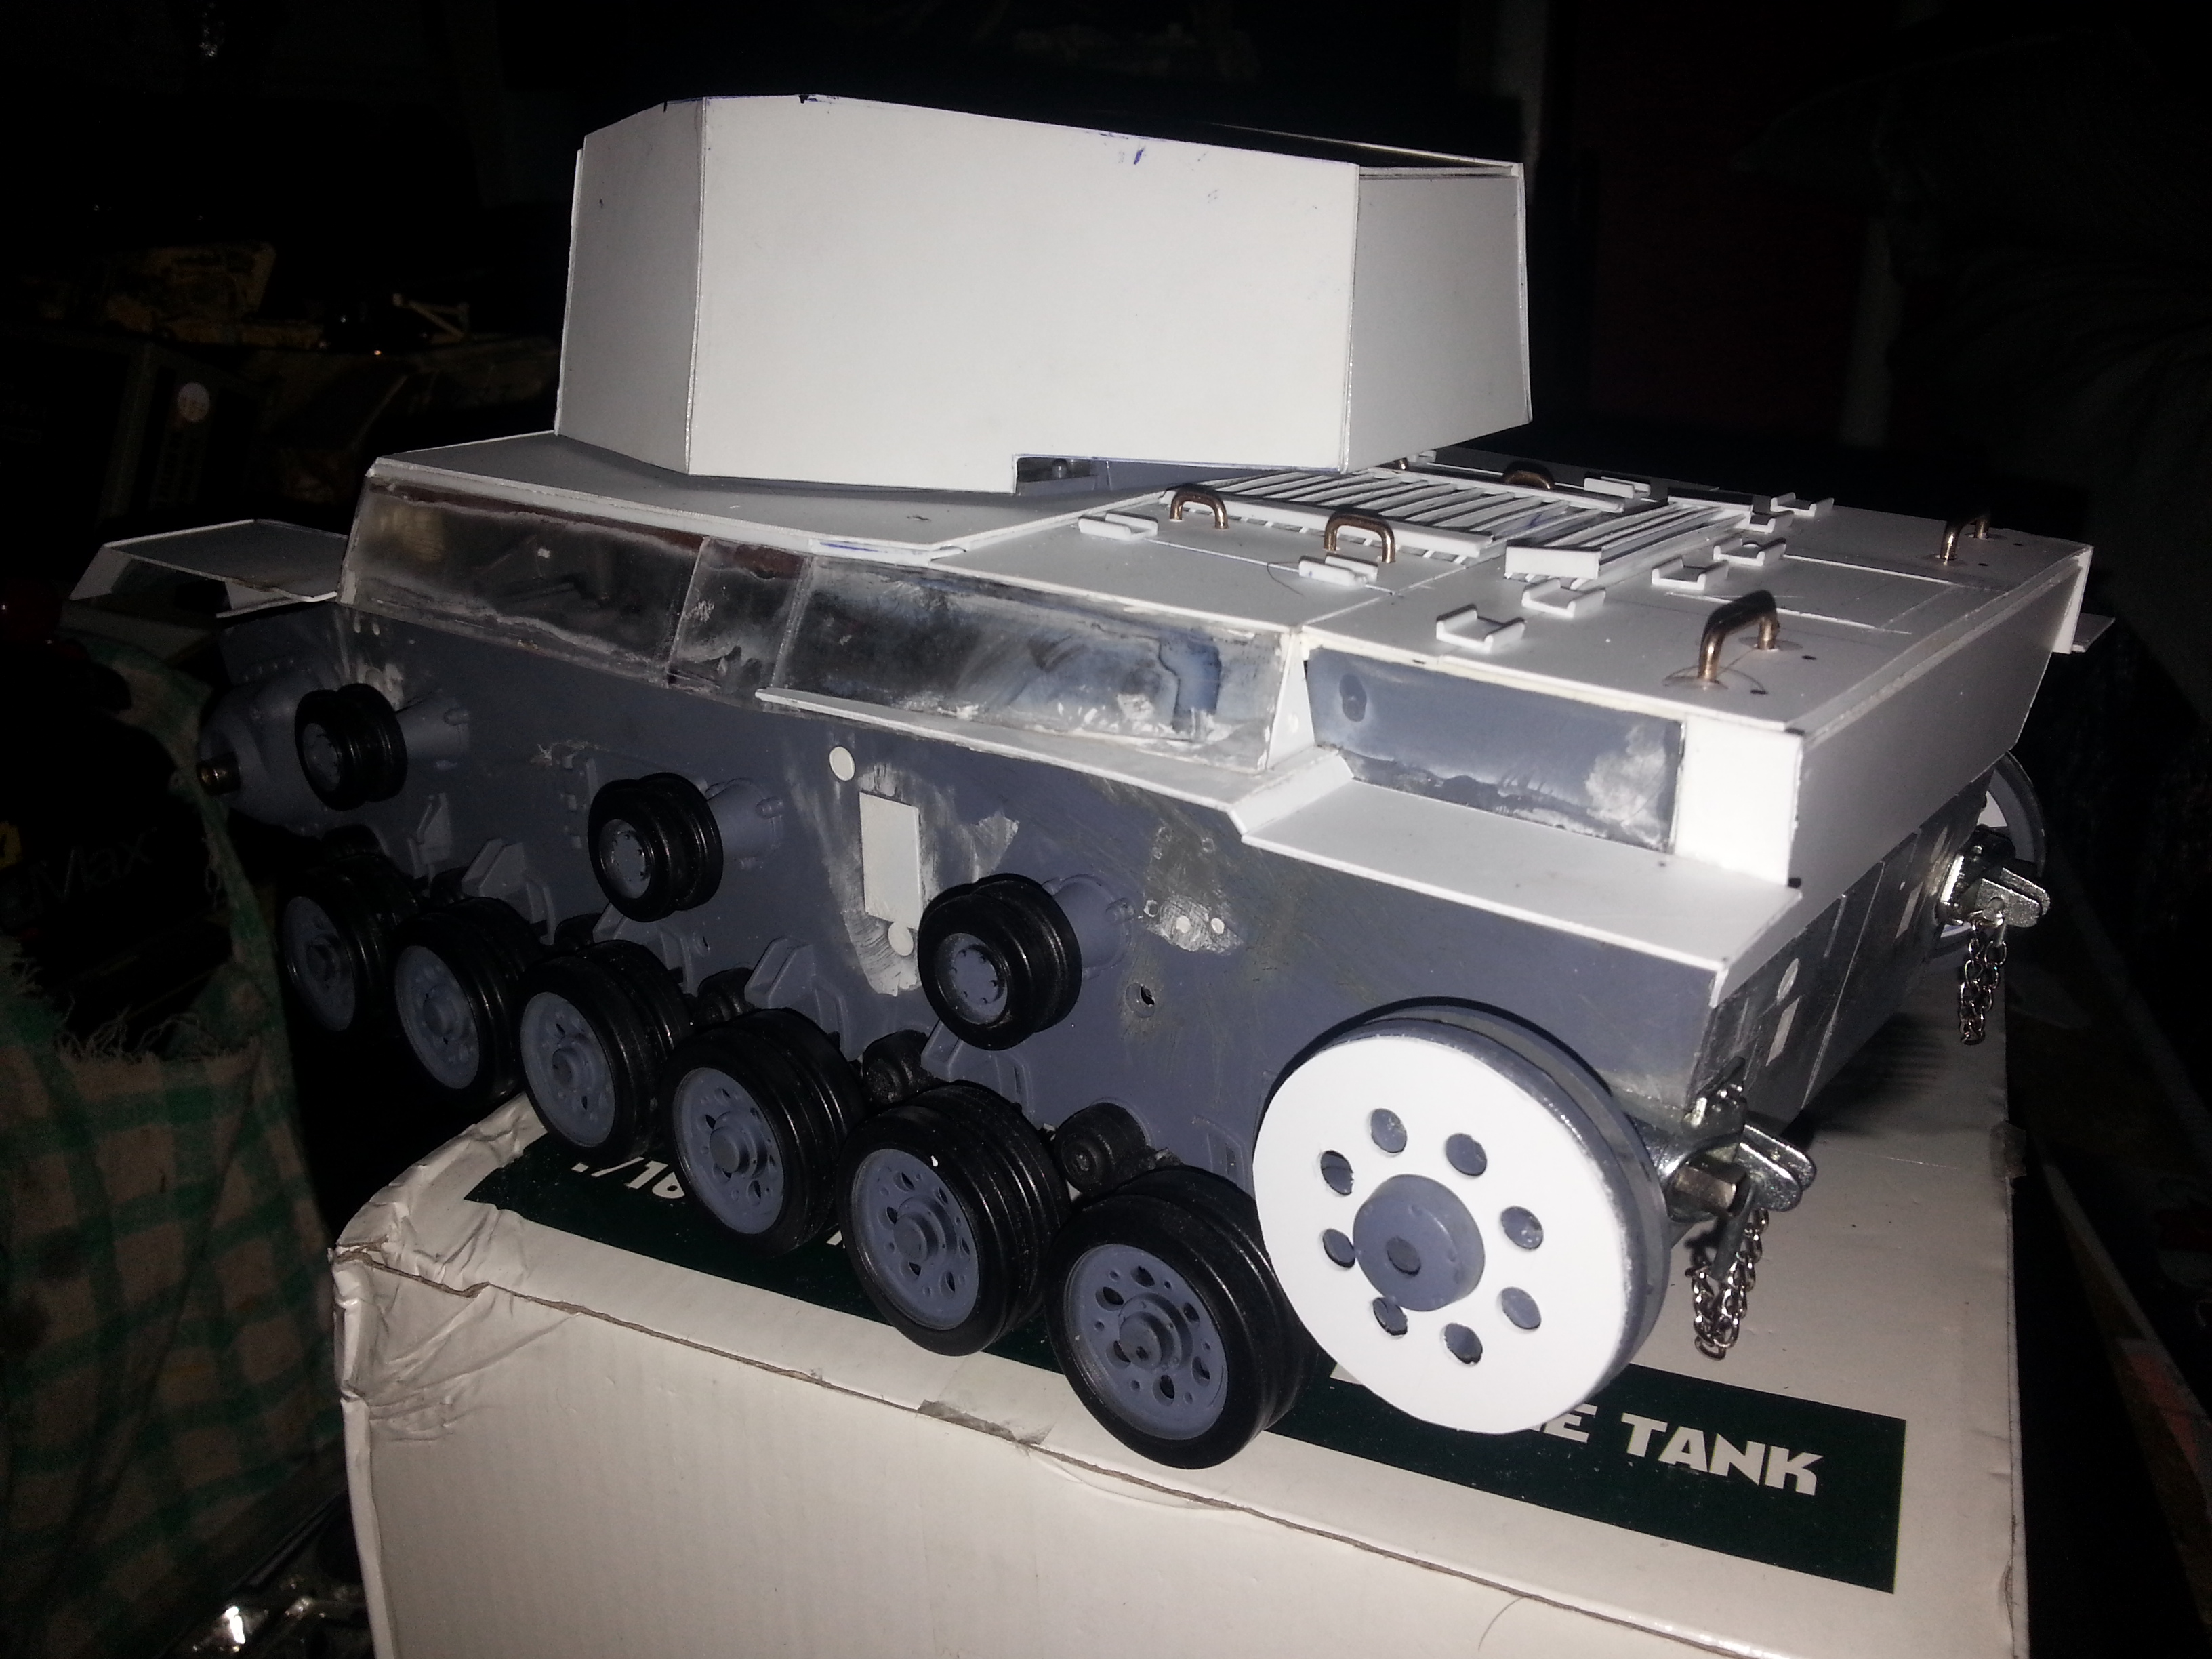
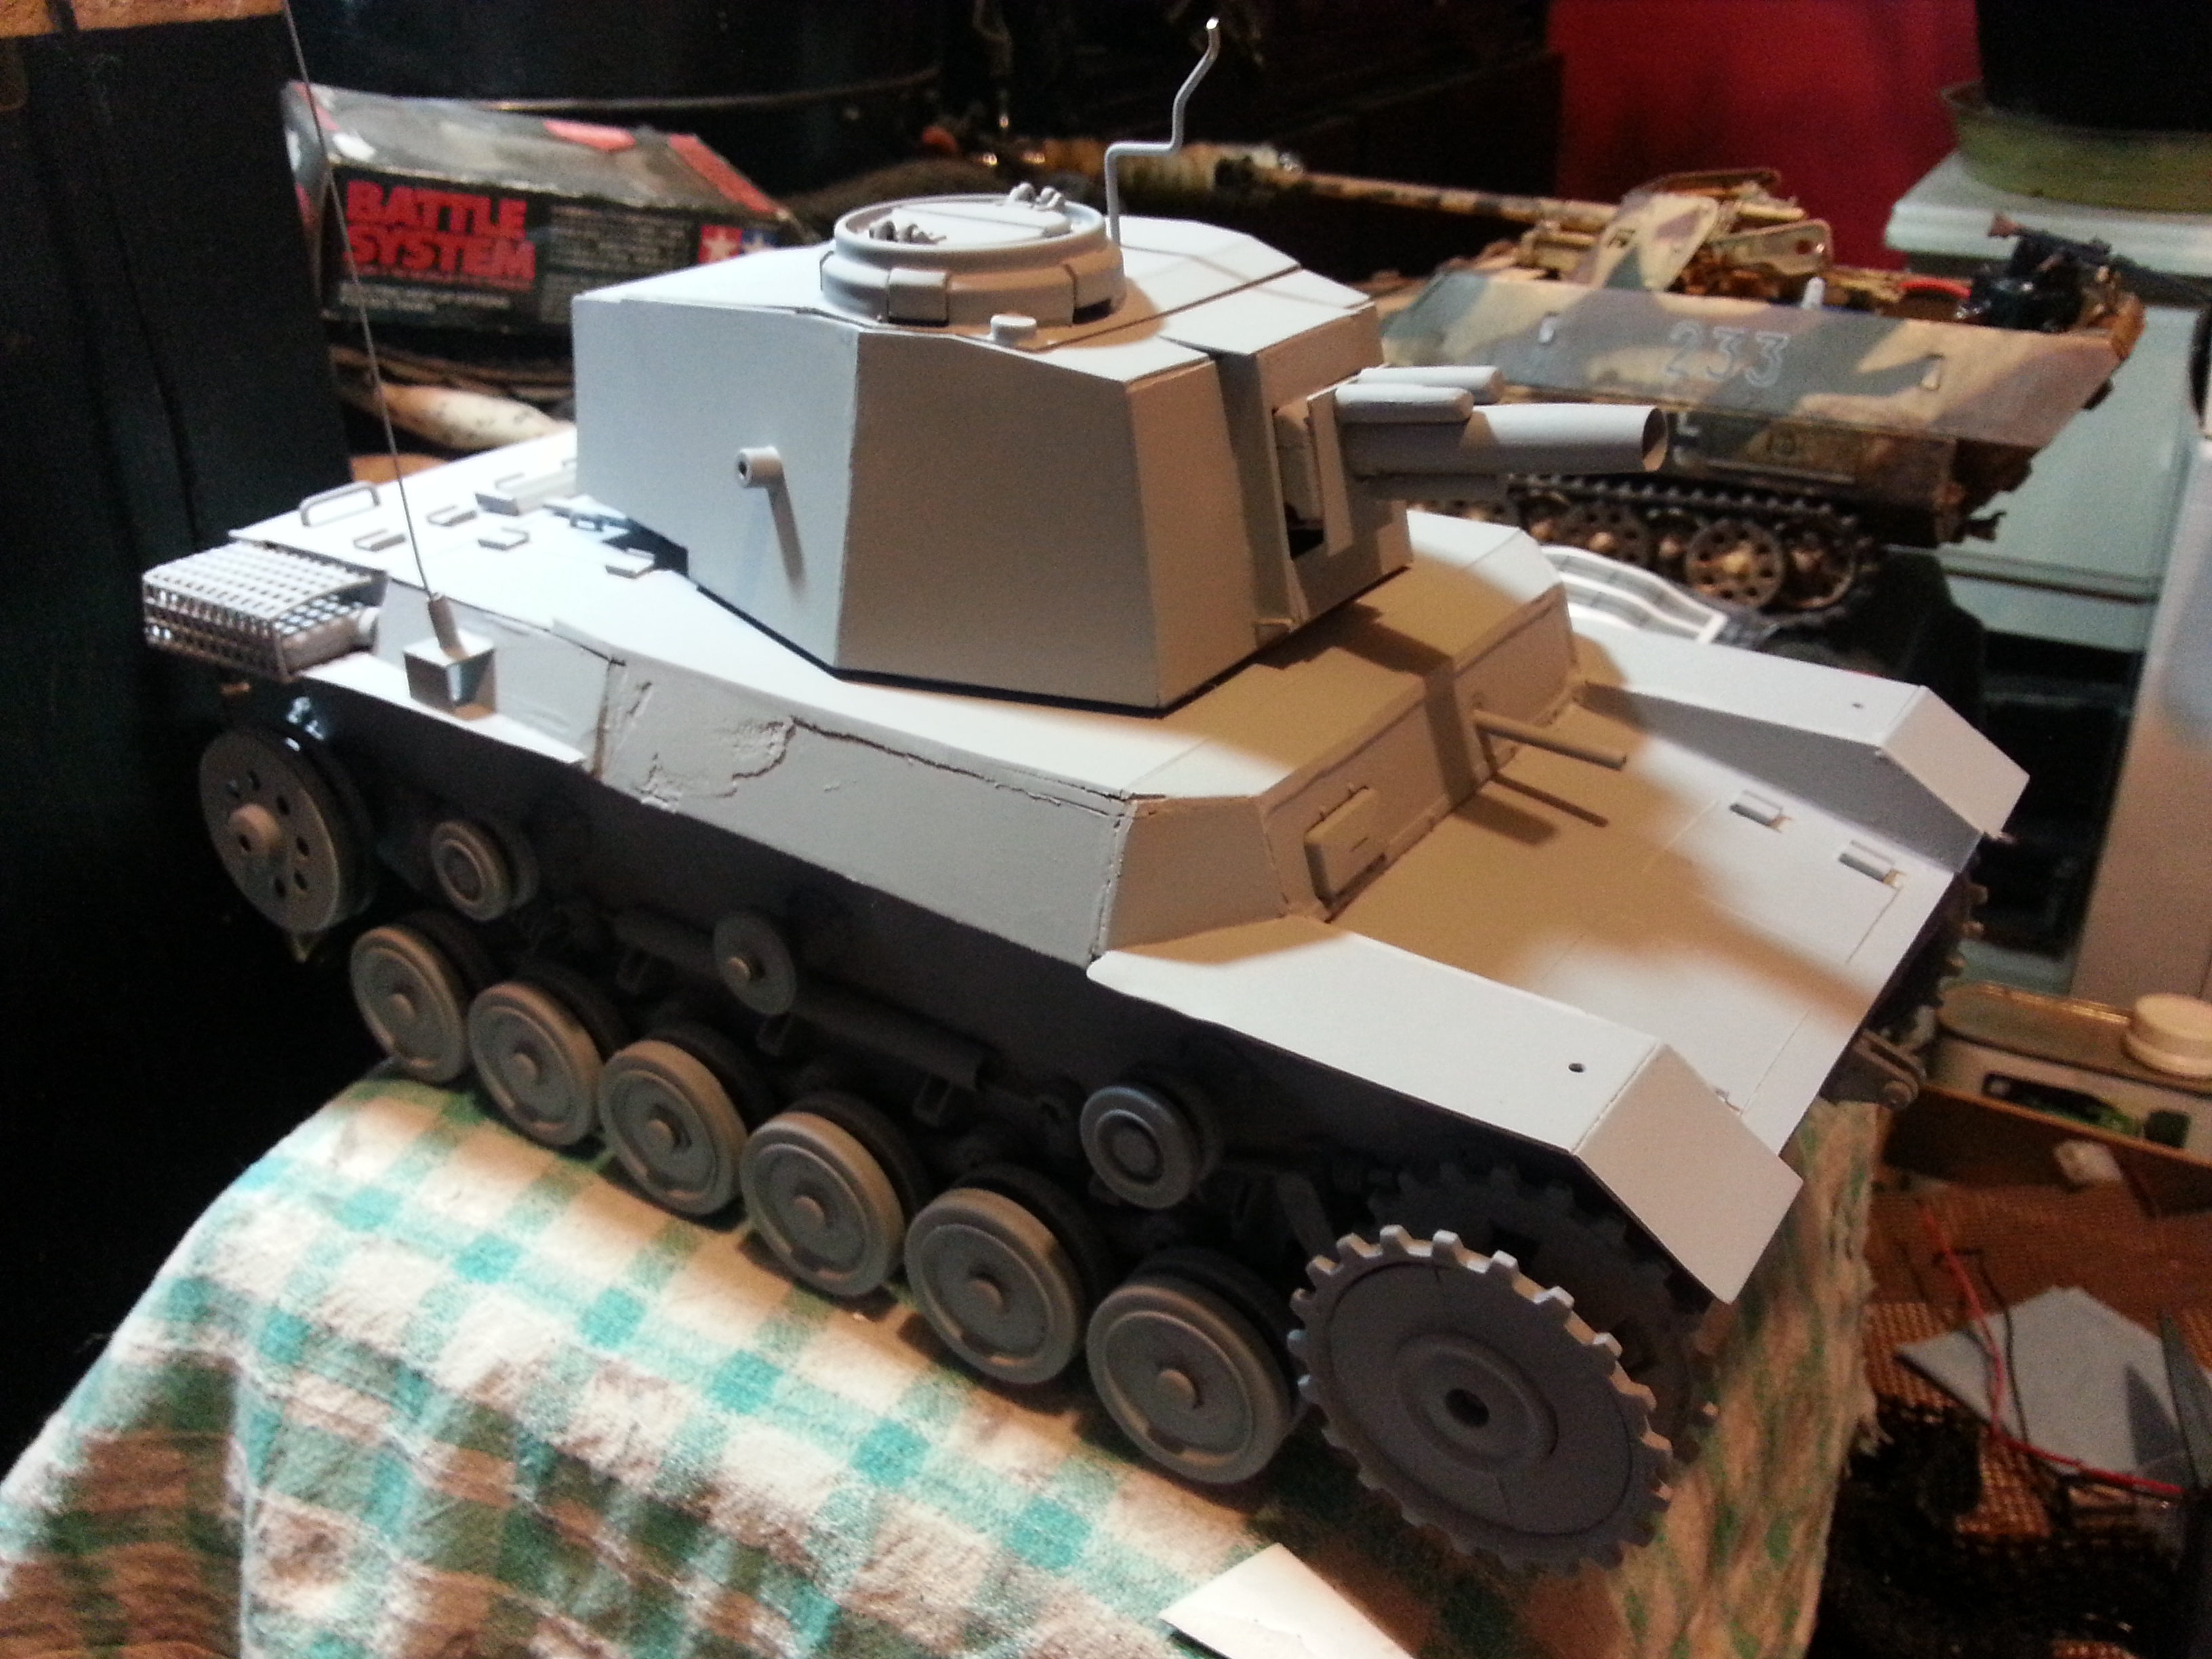
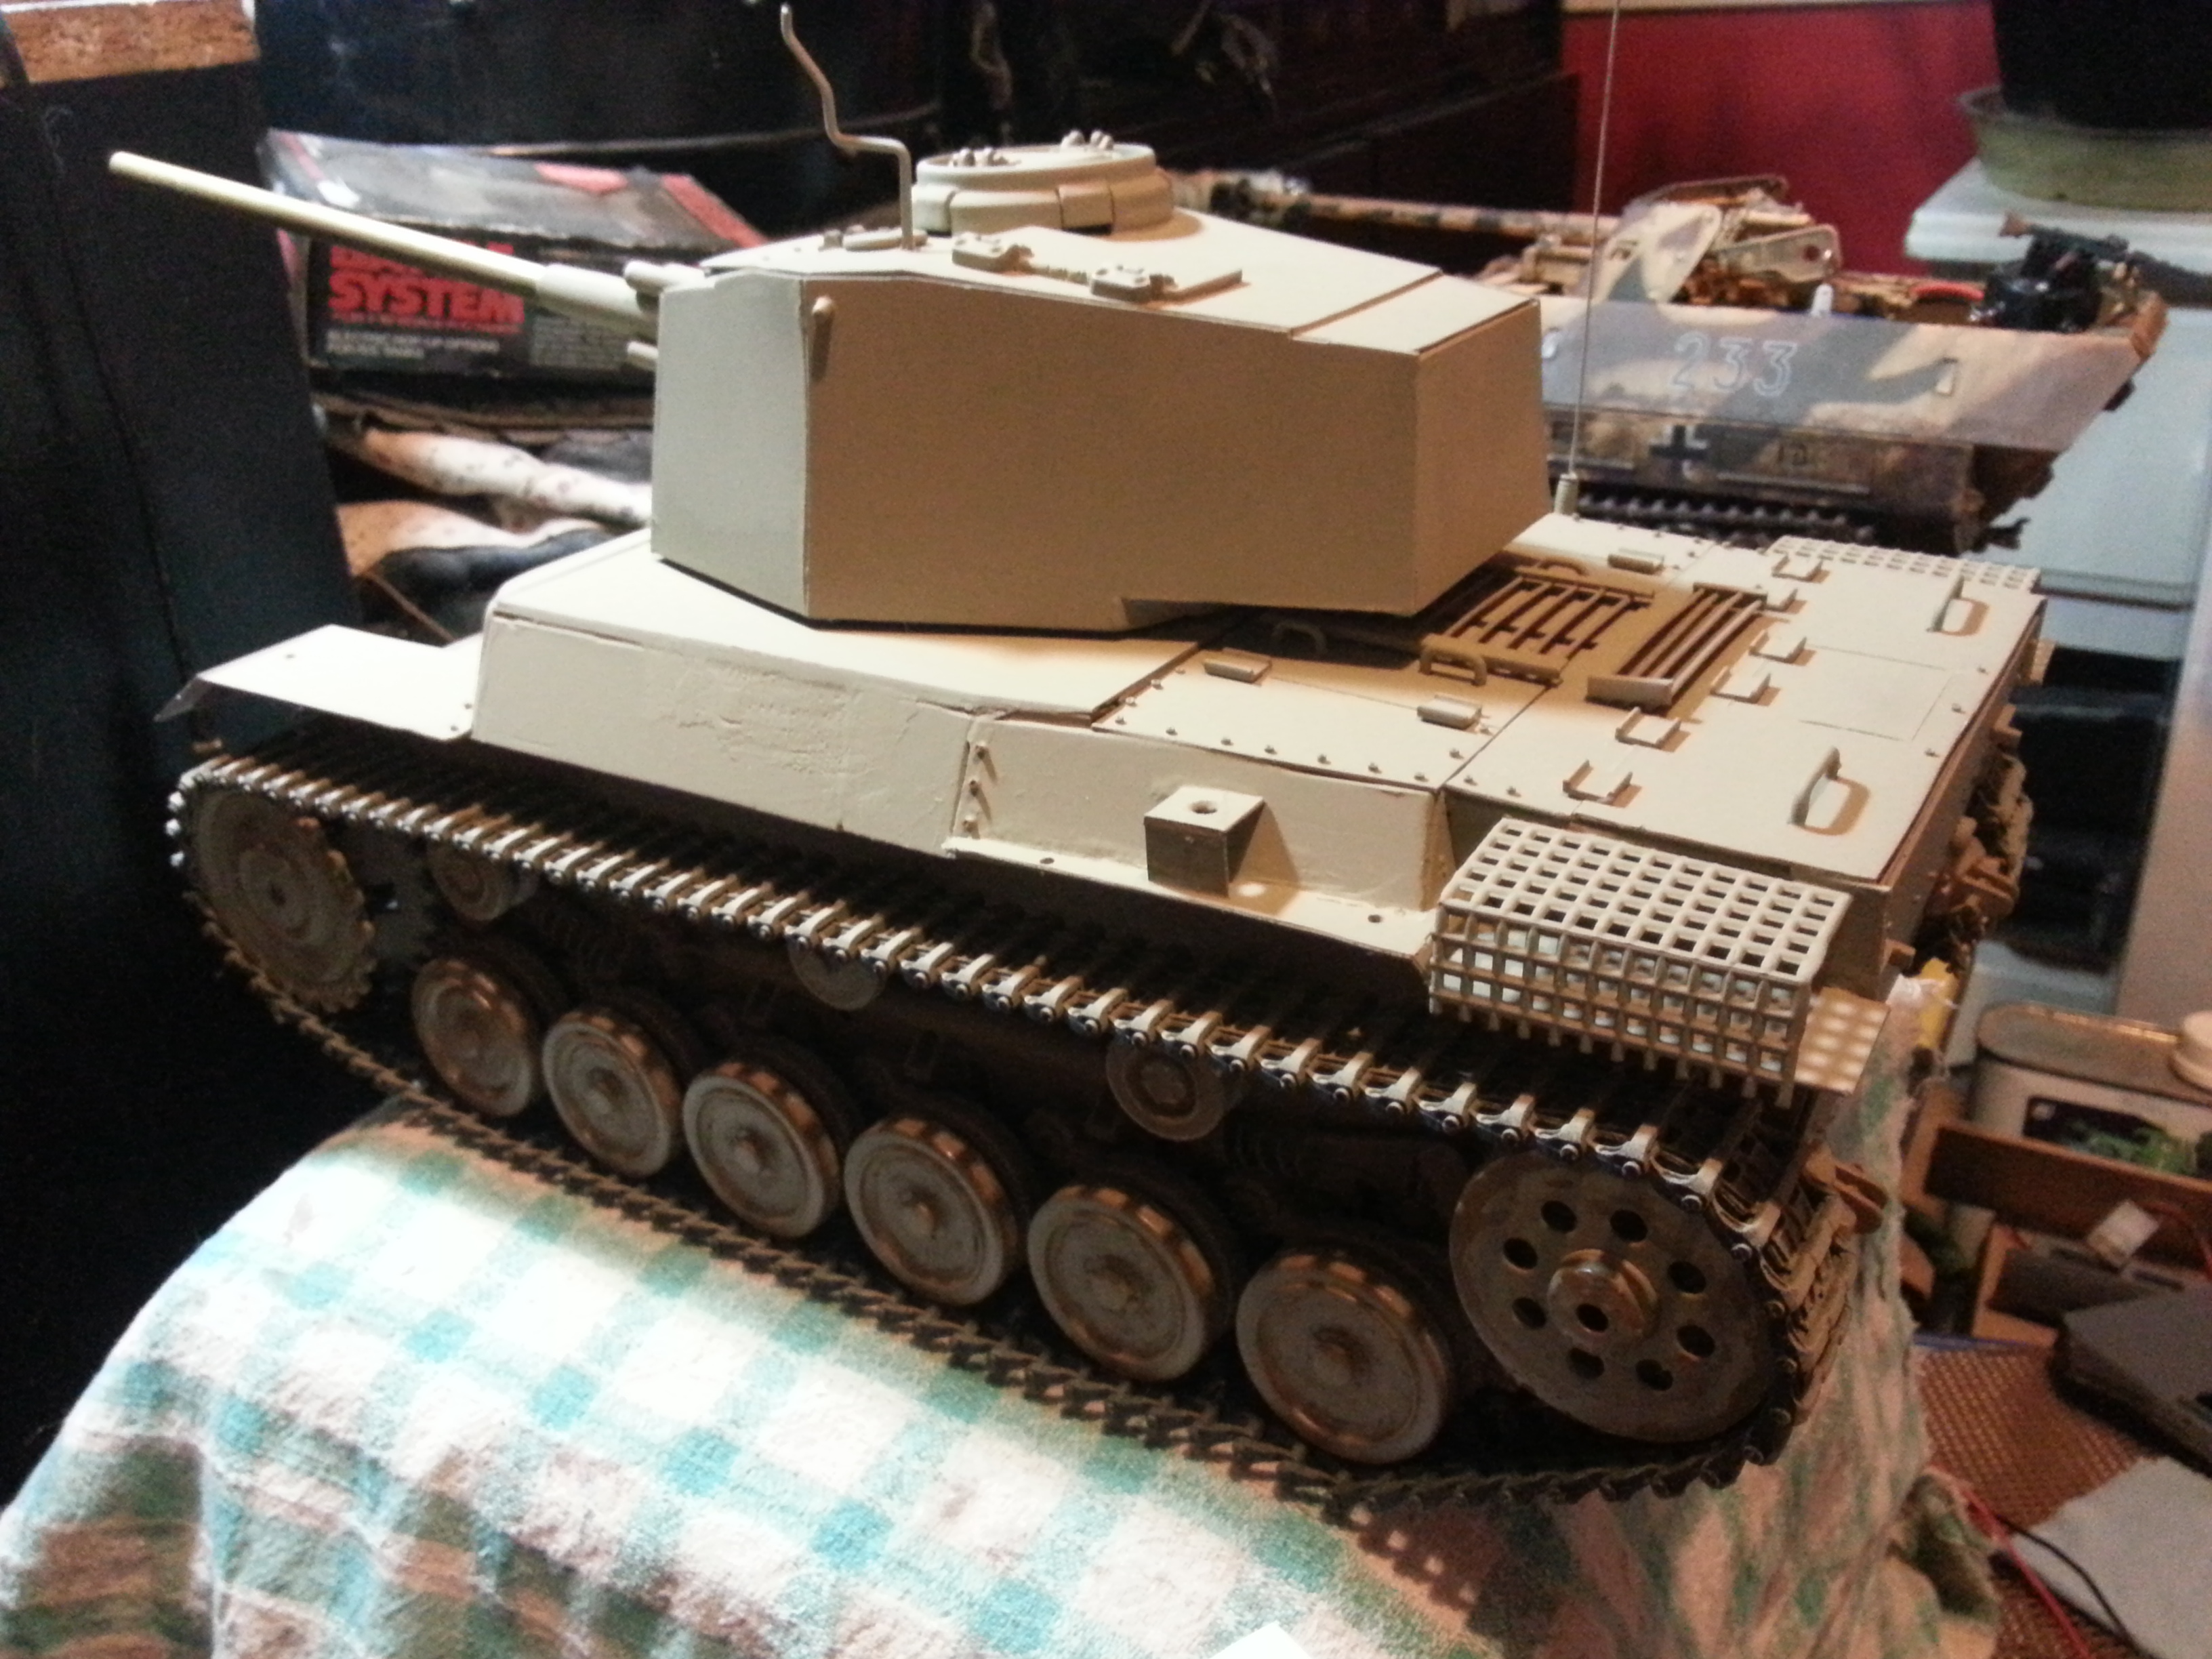
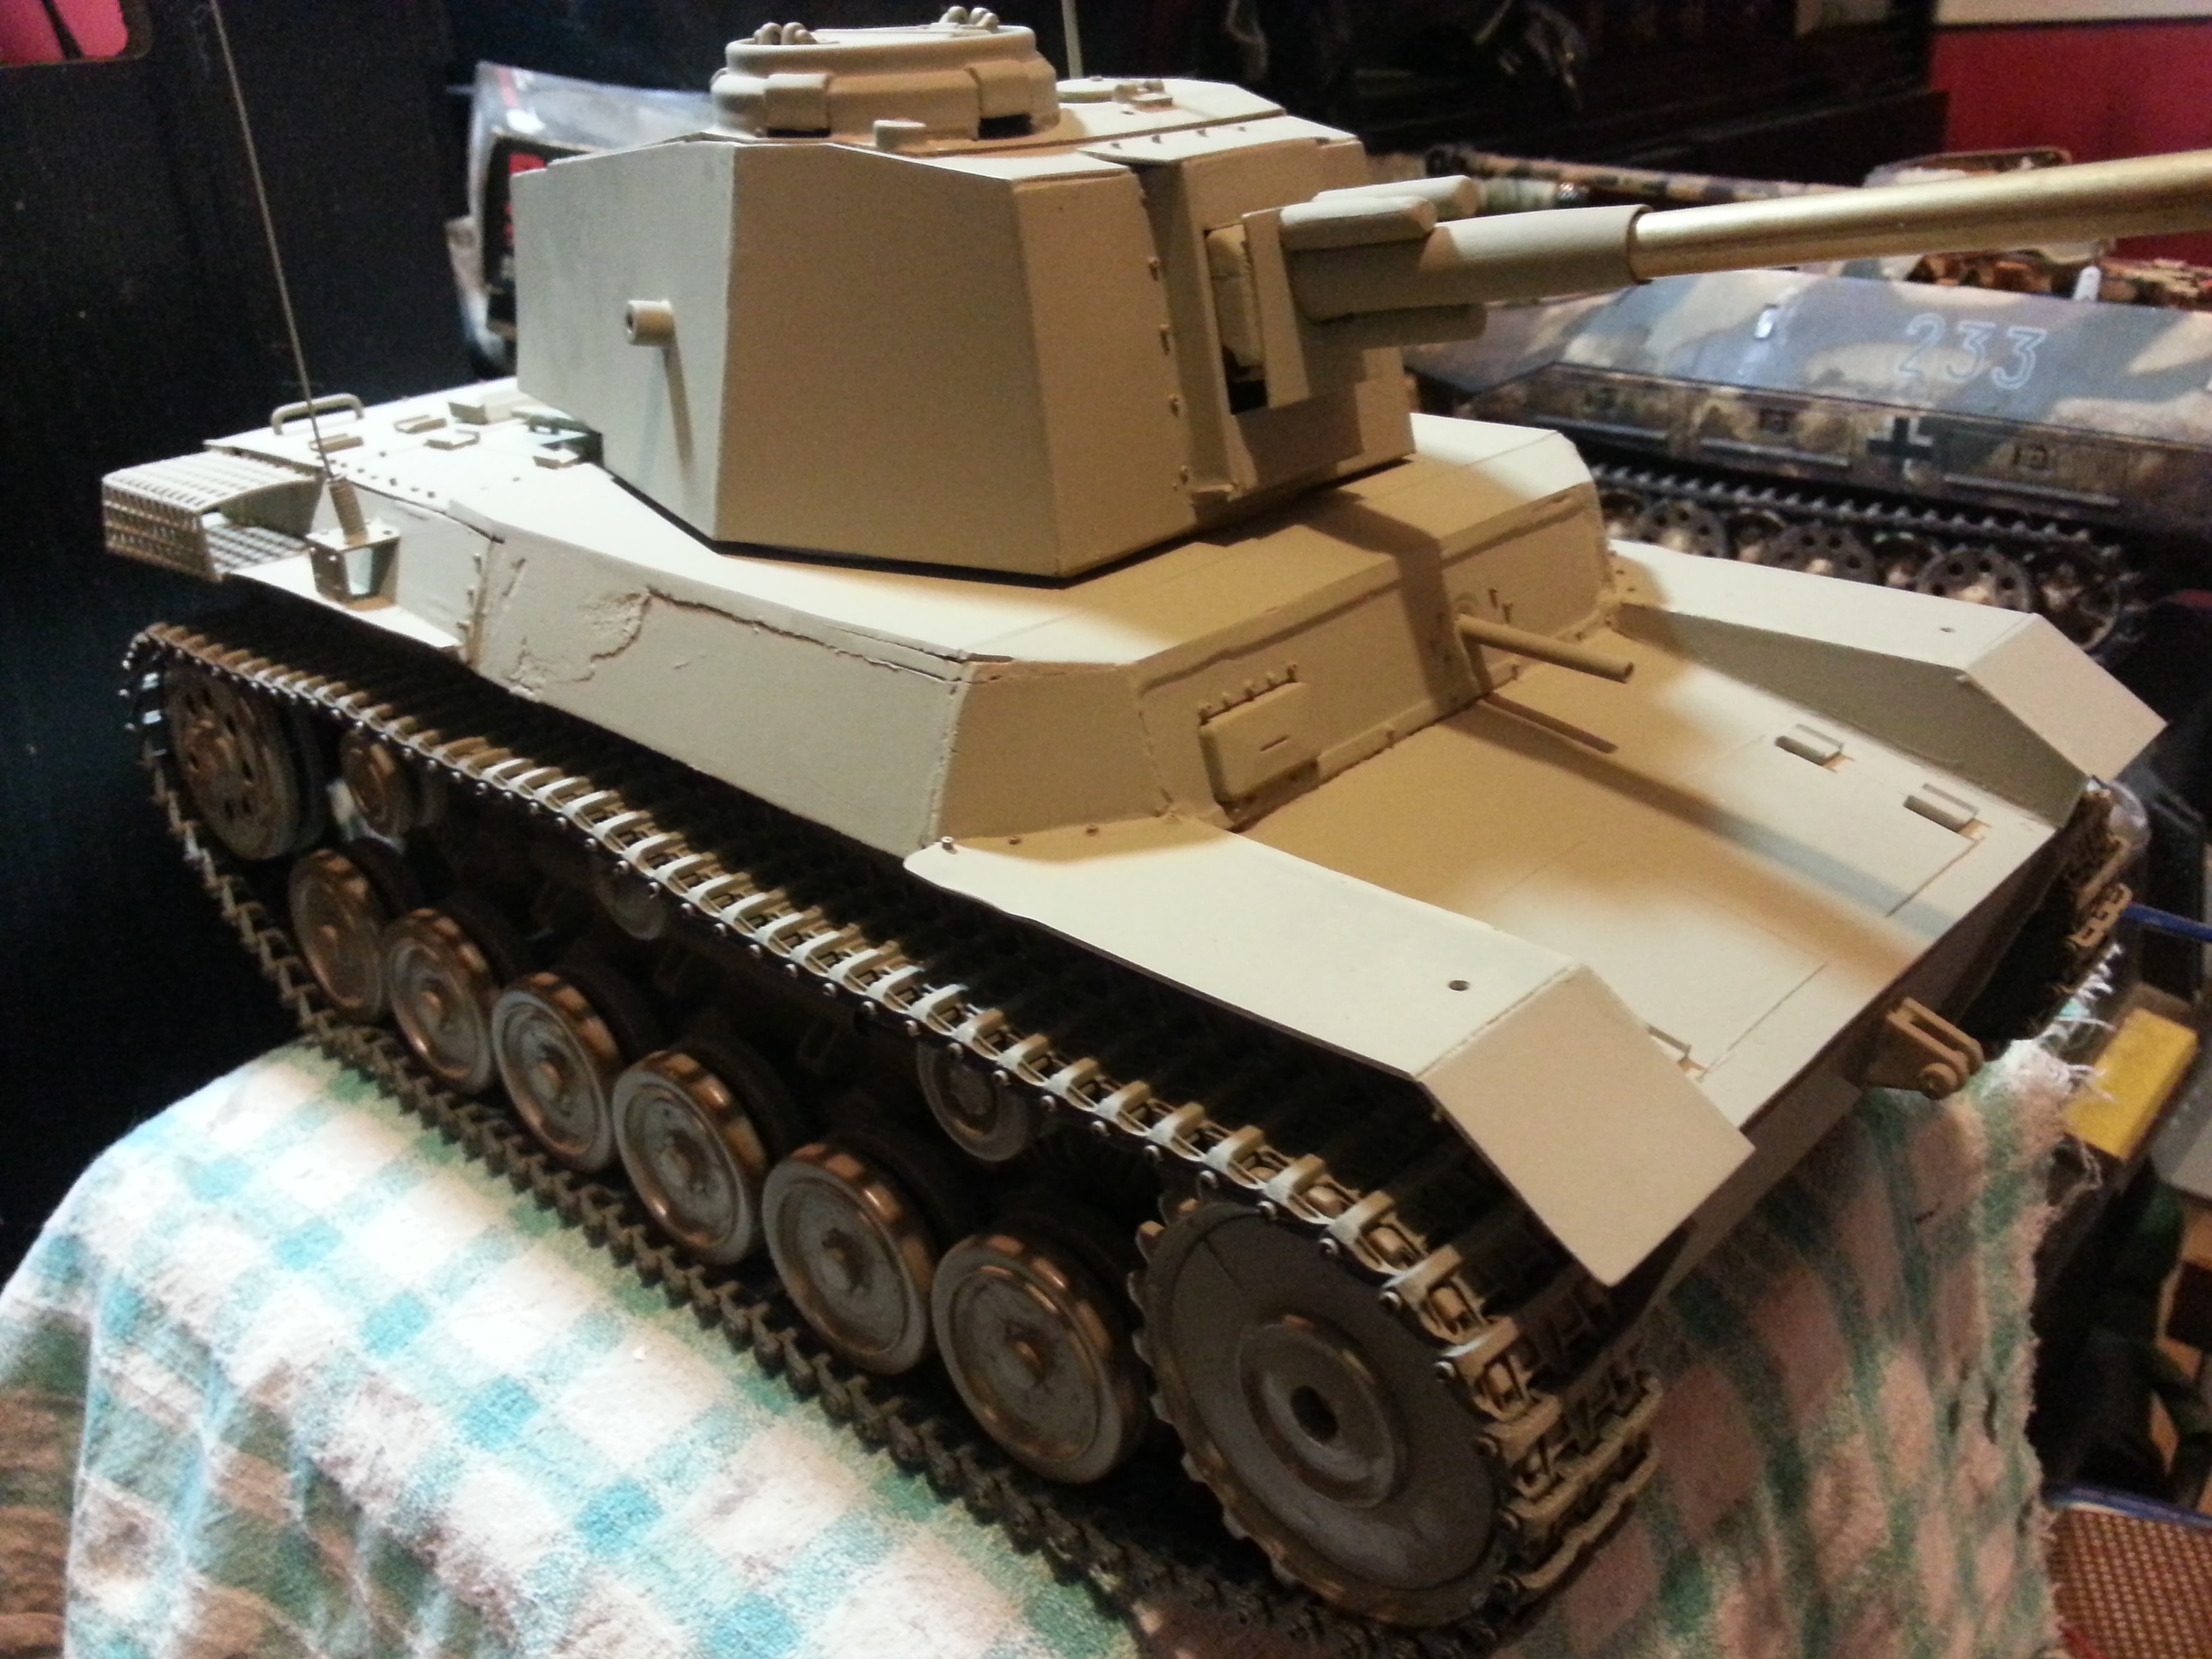
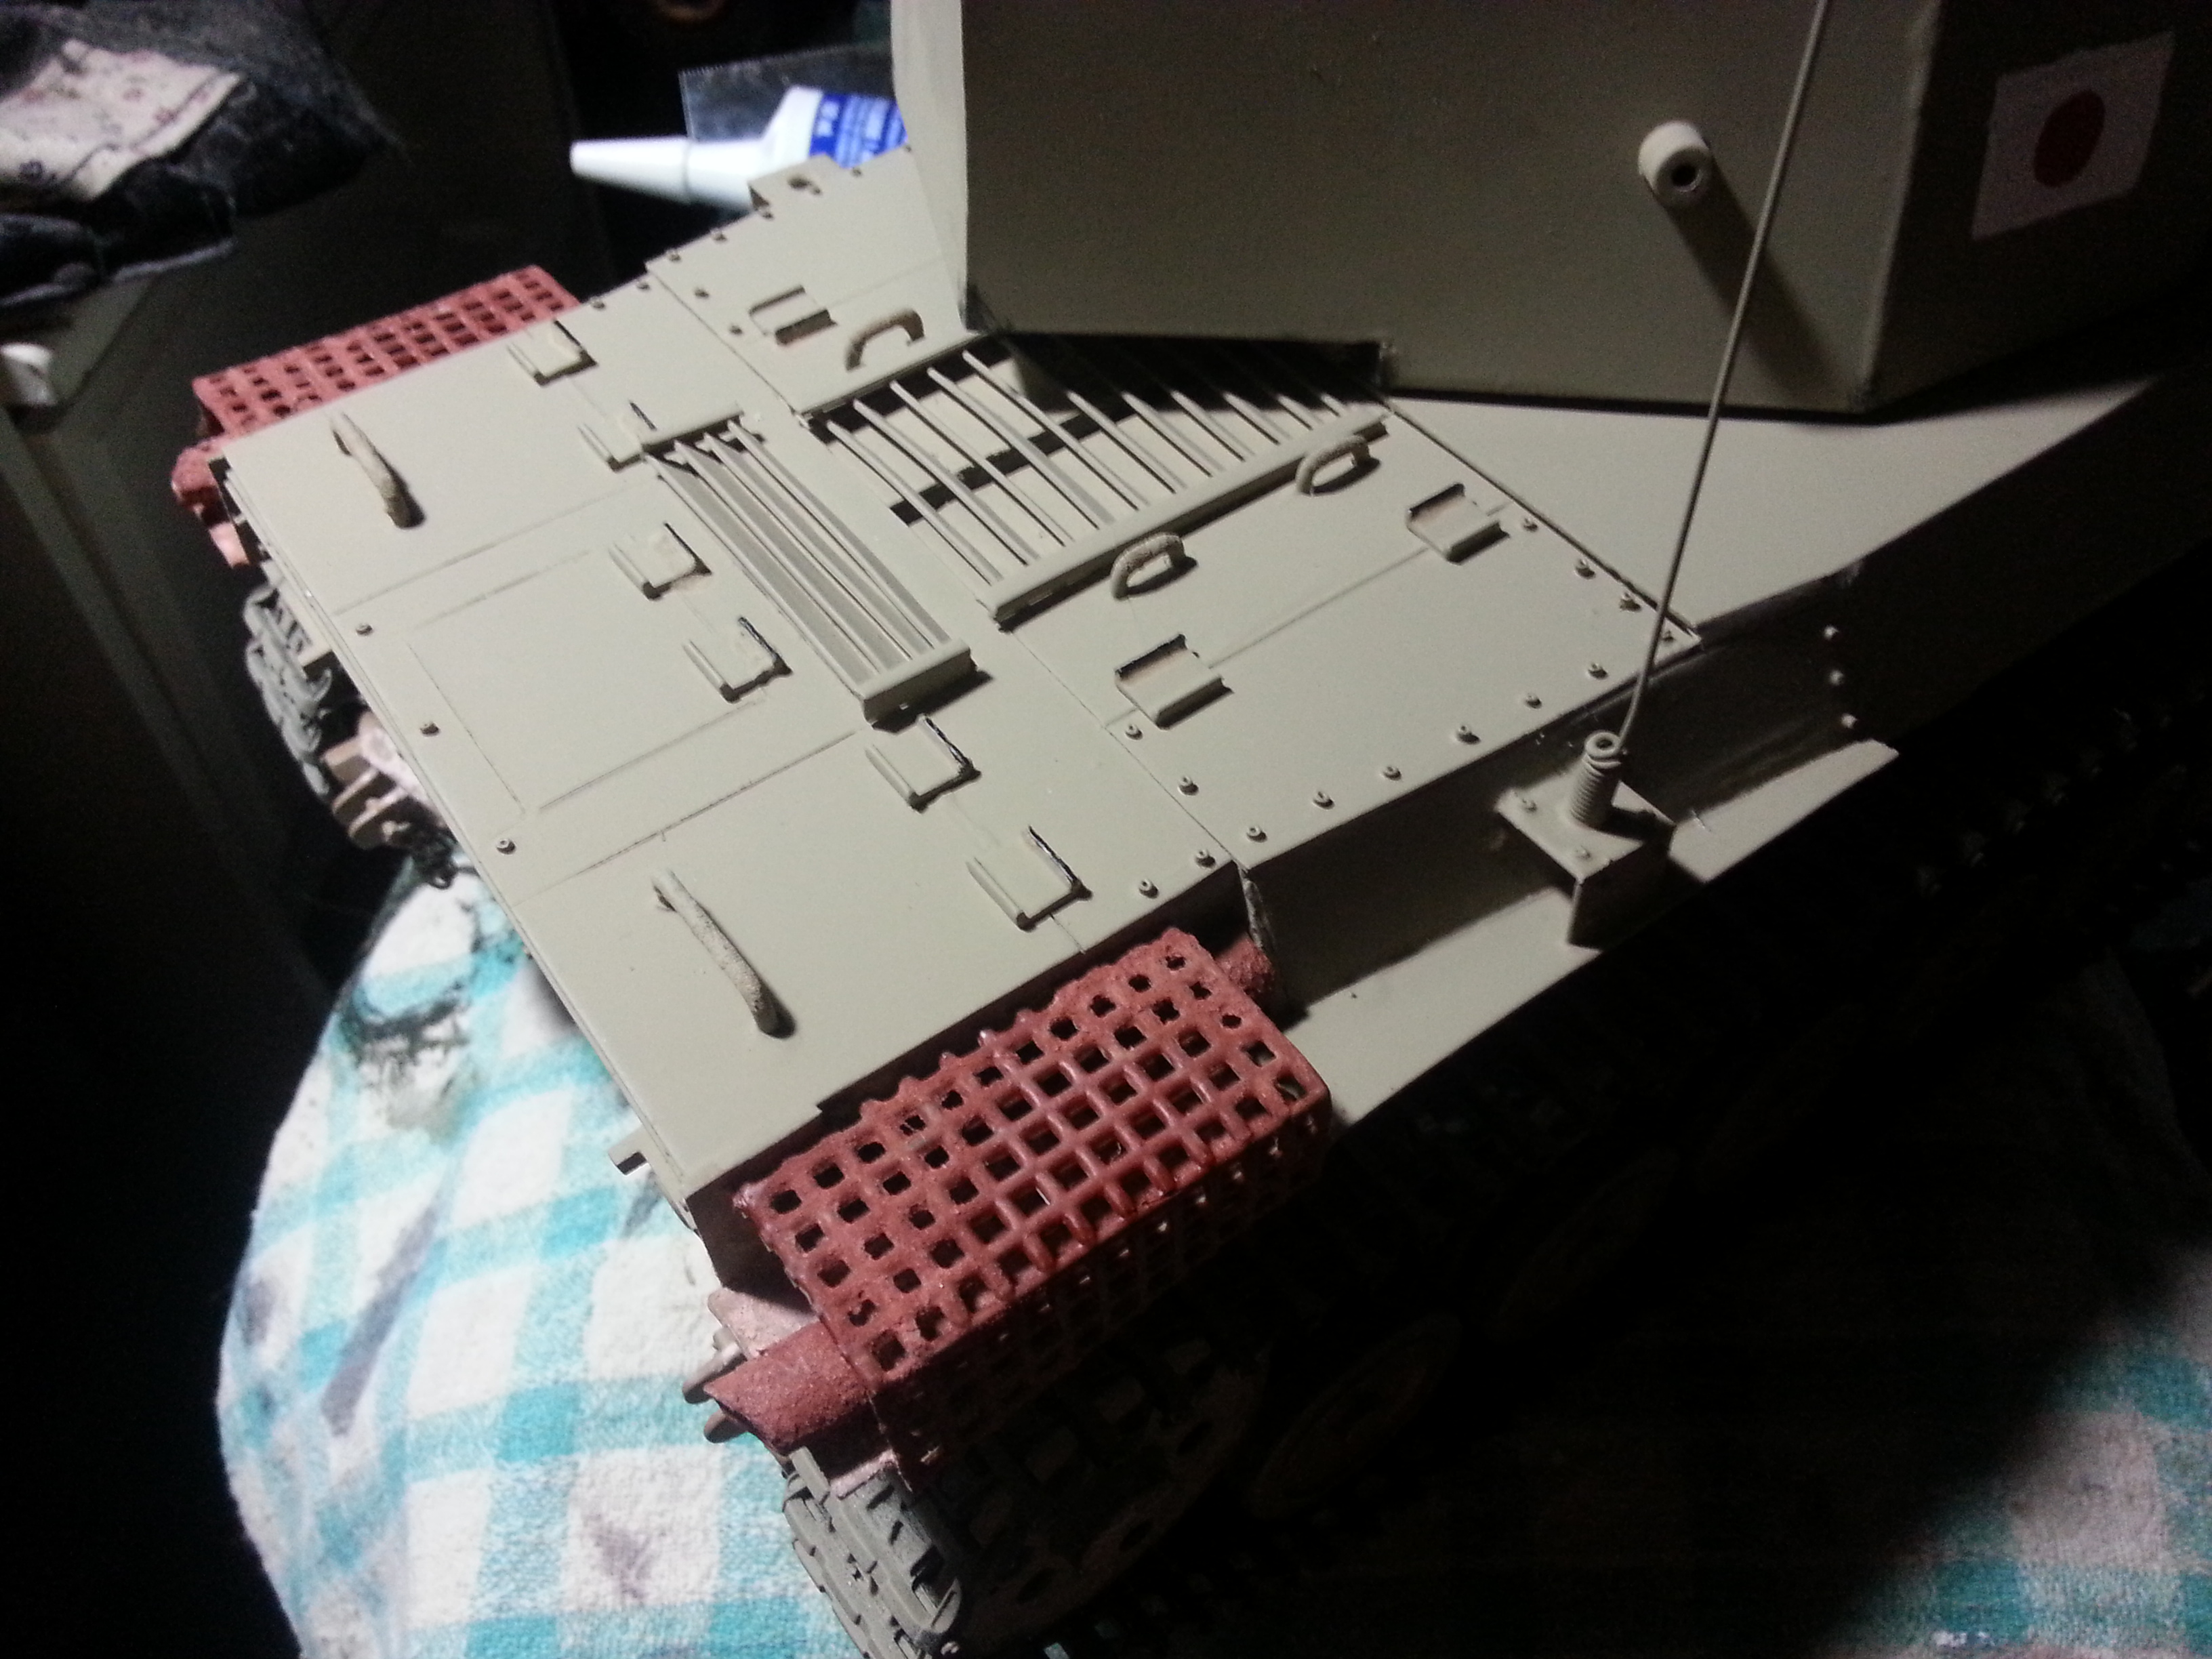
I did some more detail work around the turret. So far so good, not perfectly scale but she'll do! I need to seal up the gaps between the upper and lower hull still with some sheet and it'll be basically ready to start painting and working on electronics... this beast will be getting a Clark and be built for combat
Also note the exhaust cages... I bought a sheet of brown needlepoint plastic sheet for 99c and it's lasted me 2 builds..! Awesome for vents, grill covers and cages of all sorts.
Next on the to-do list are the faux-spring suspension that is typical of Japanese tanks.
Last edited by Strato50; 12-14-2013 at 03:33 AM.
12-23-2013 | 02:21 PM
#22
Thread Starter
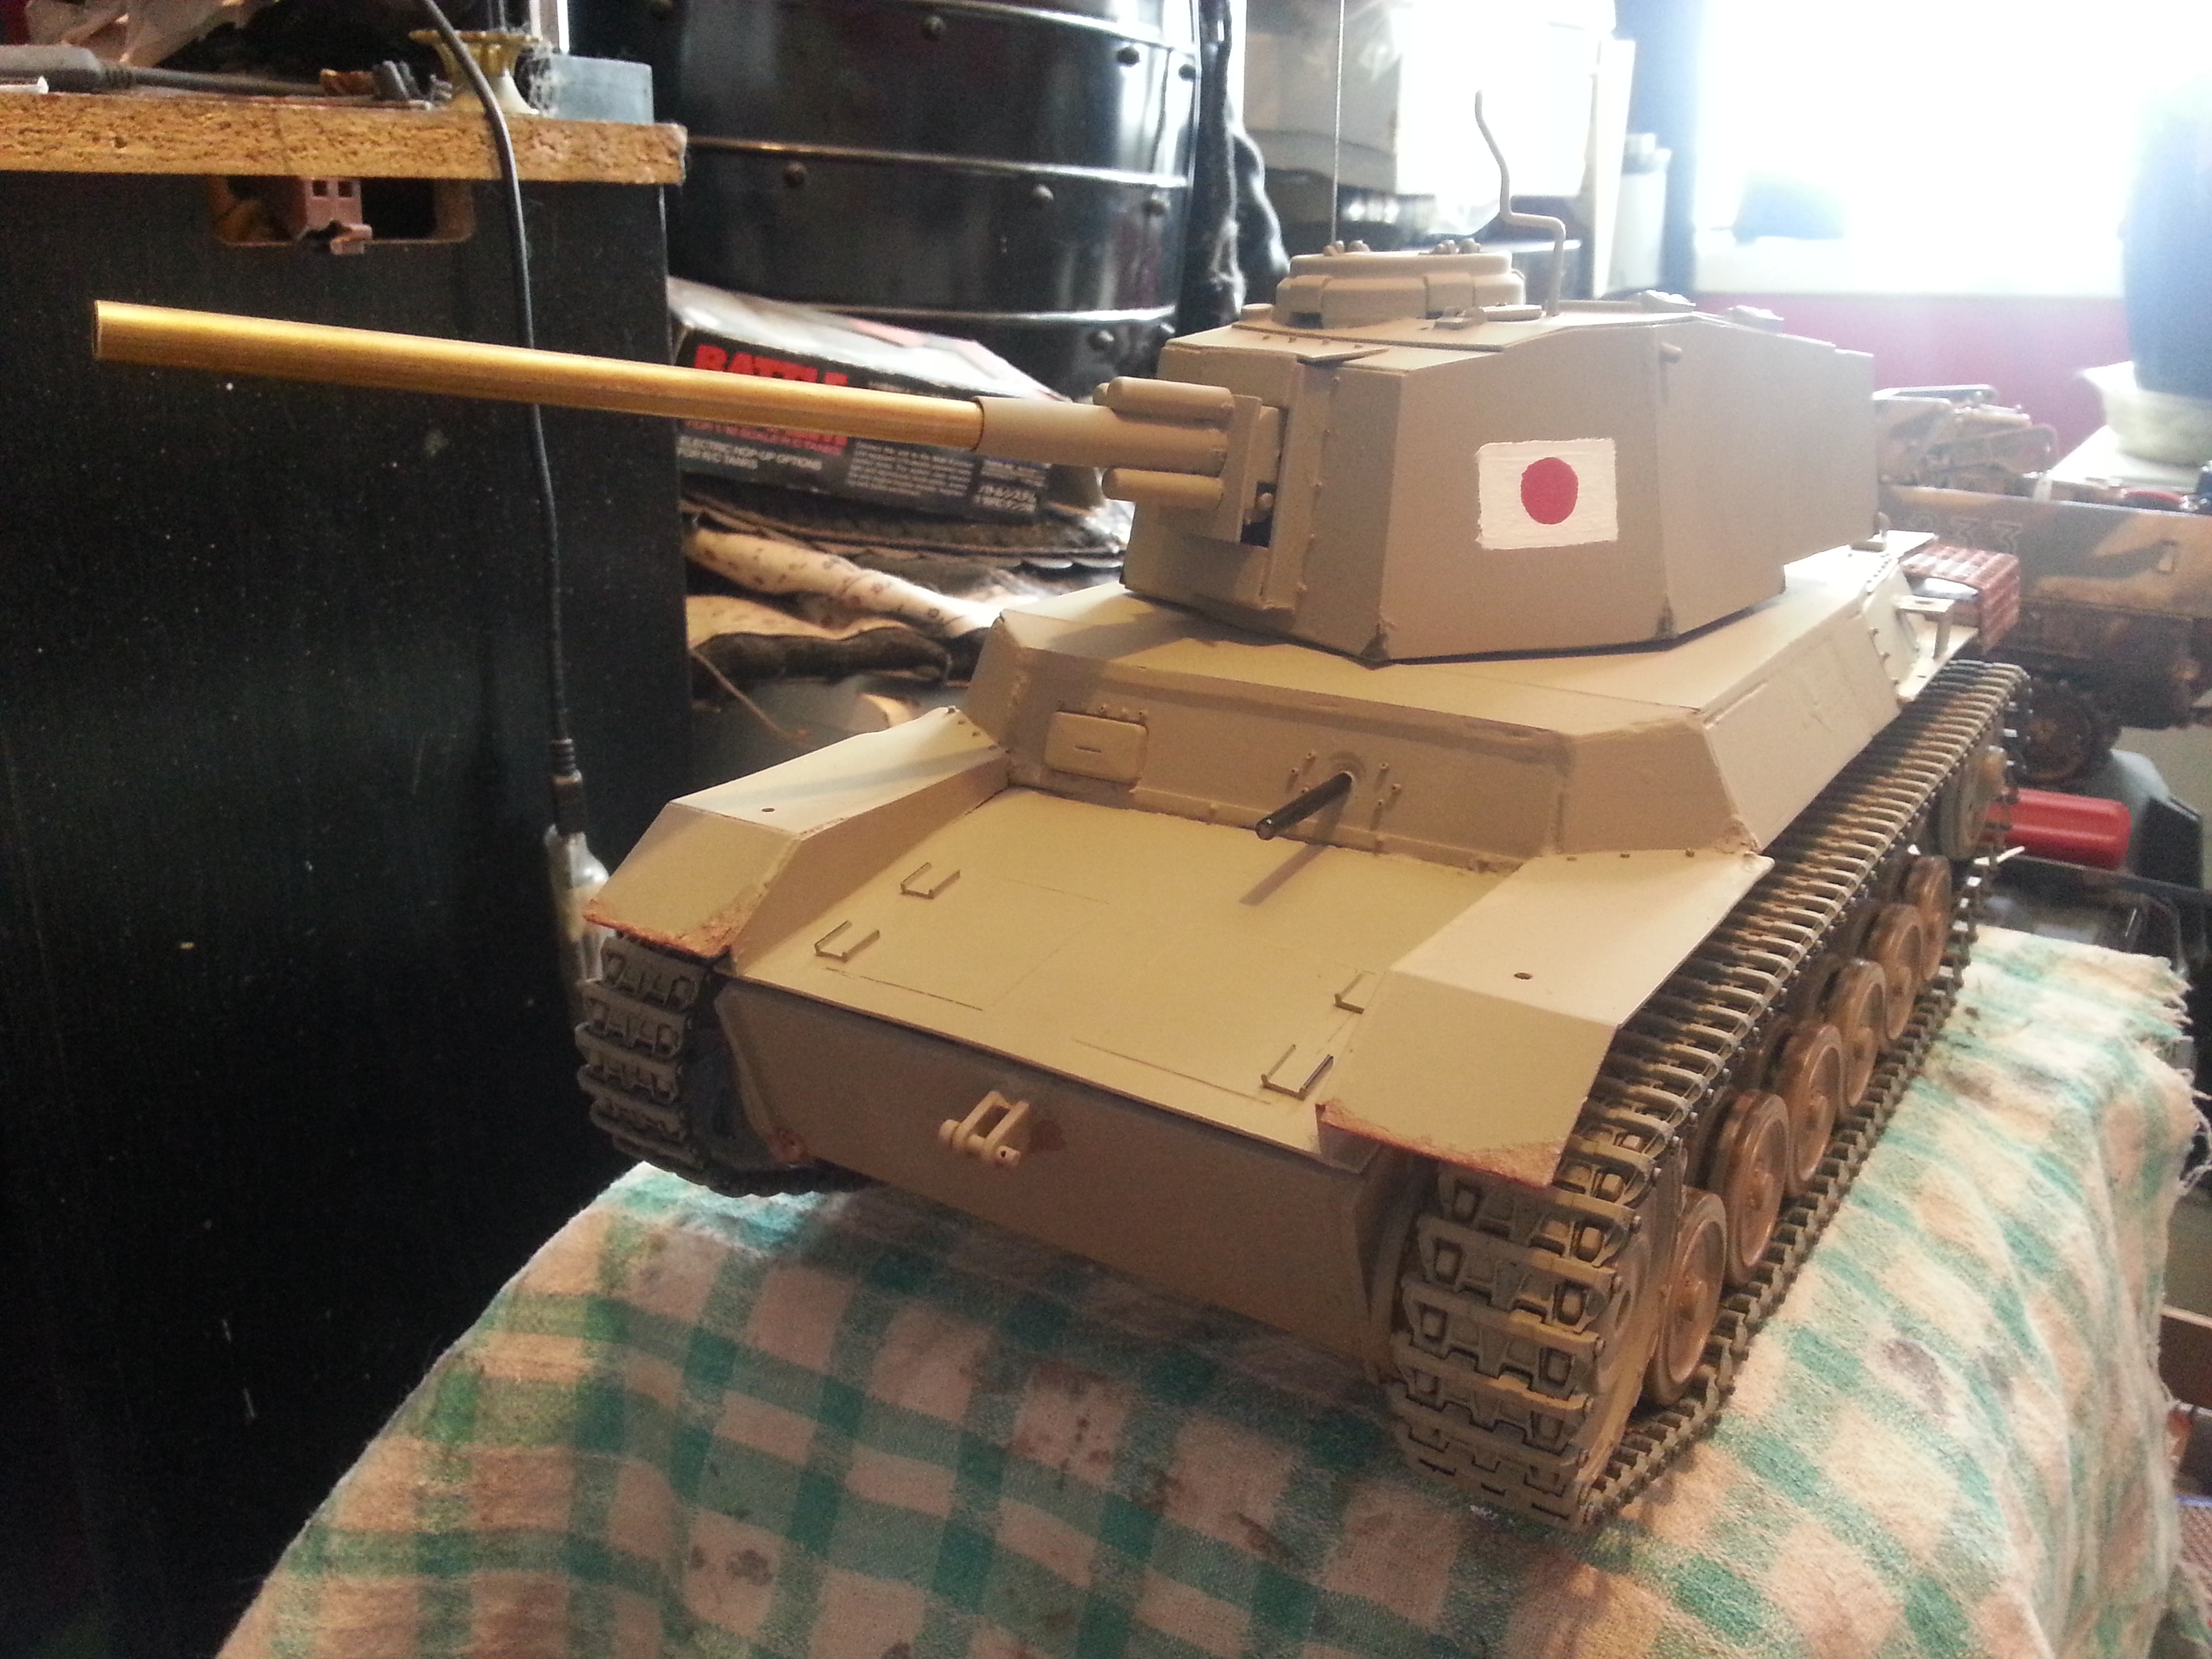
Did some filling, sanding, added a few detail bits. Primed, initial colour coat & some 'mud' splash. Bolts (yes a lot of the armor plate was BOLTED on) are made from cutting the insulation of a thin wire one at a time!
Last edited by Strato50; 12-23-2013 at 02:31 PM.
12-24-2013 | 07:16 AM
#23
Did some filling, sanding, added a few detail bits. Primed, initial colour coat & some 'mud' splash. Bolts (yes a lot of the armor plate was BOLTED on) are made from cutting the insulation of a thin wire one at a time!
~~~~~~~~
You must have a lot of patience !!!!! I know what you are dealing with and feel your pain. There are a lot of miniature bolt suppliers out there that I have used ..... the prices for a box of 50 or 100 are cheap. Also, rivets in all sizes and head shapes are out there too. I just use straight pins from a sewing materials store for rivets.
Here are a couple of places you might consider if it meets your needs. Your project looks good !!
http://www.microfasteners.com/home.php?cat=575
http://www.scalehardware.com/miniature-hex-bolts-c-1
12-24-2013 | 10:05 AM
#24
This build looks absolutely fantastic. I wish I had that much skill.
Could you tell me a bit more about how you mounted the turret? I am a bit confused. Did you use styrene to make a roof, or did you just cover over the old one with it? How is it secured?
Could you tell me a bit more about how you mounted the turret? I am a bit confused. Did you use styrene to make a roof, or did you just cover over the old one with it? How is it secured?
12-26-2013 | 10:11 PM
#25
Thread Starter
Thanks Rex & Mart. I'll browse the nuts & bolts and see if there's something that really sticks out for use in my builds!
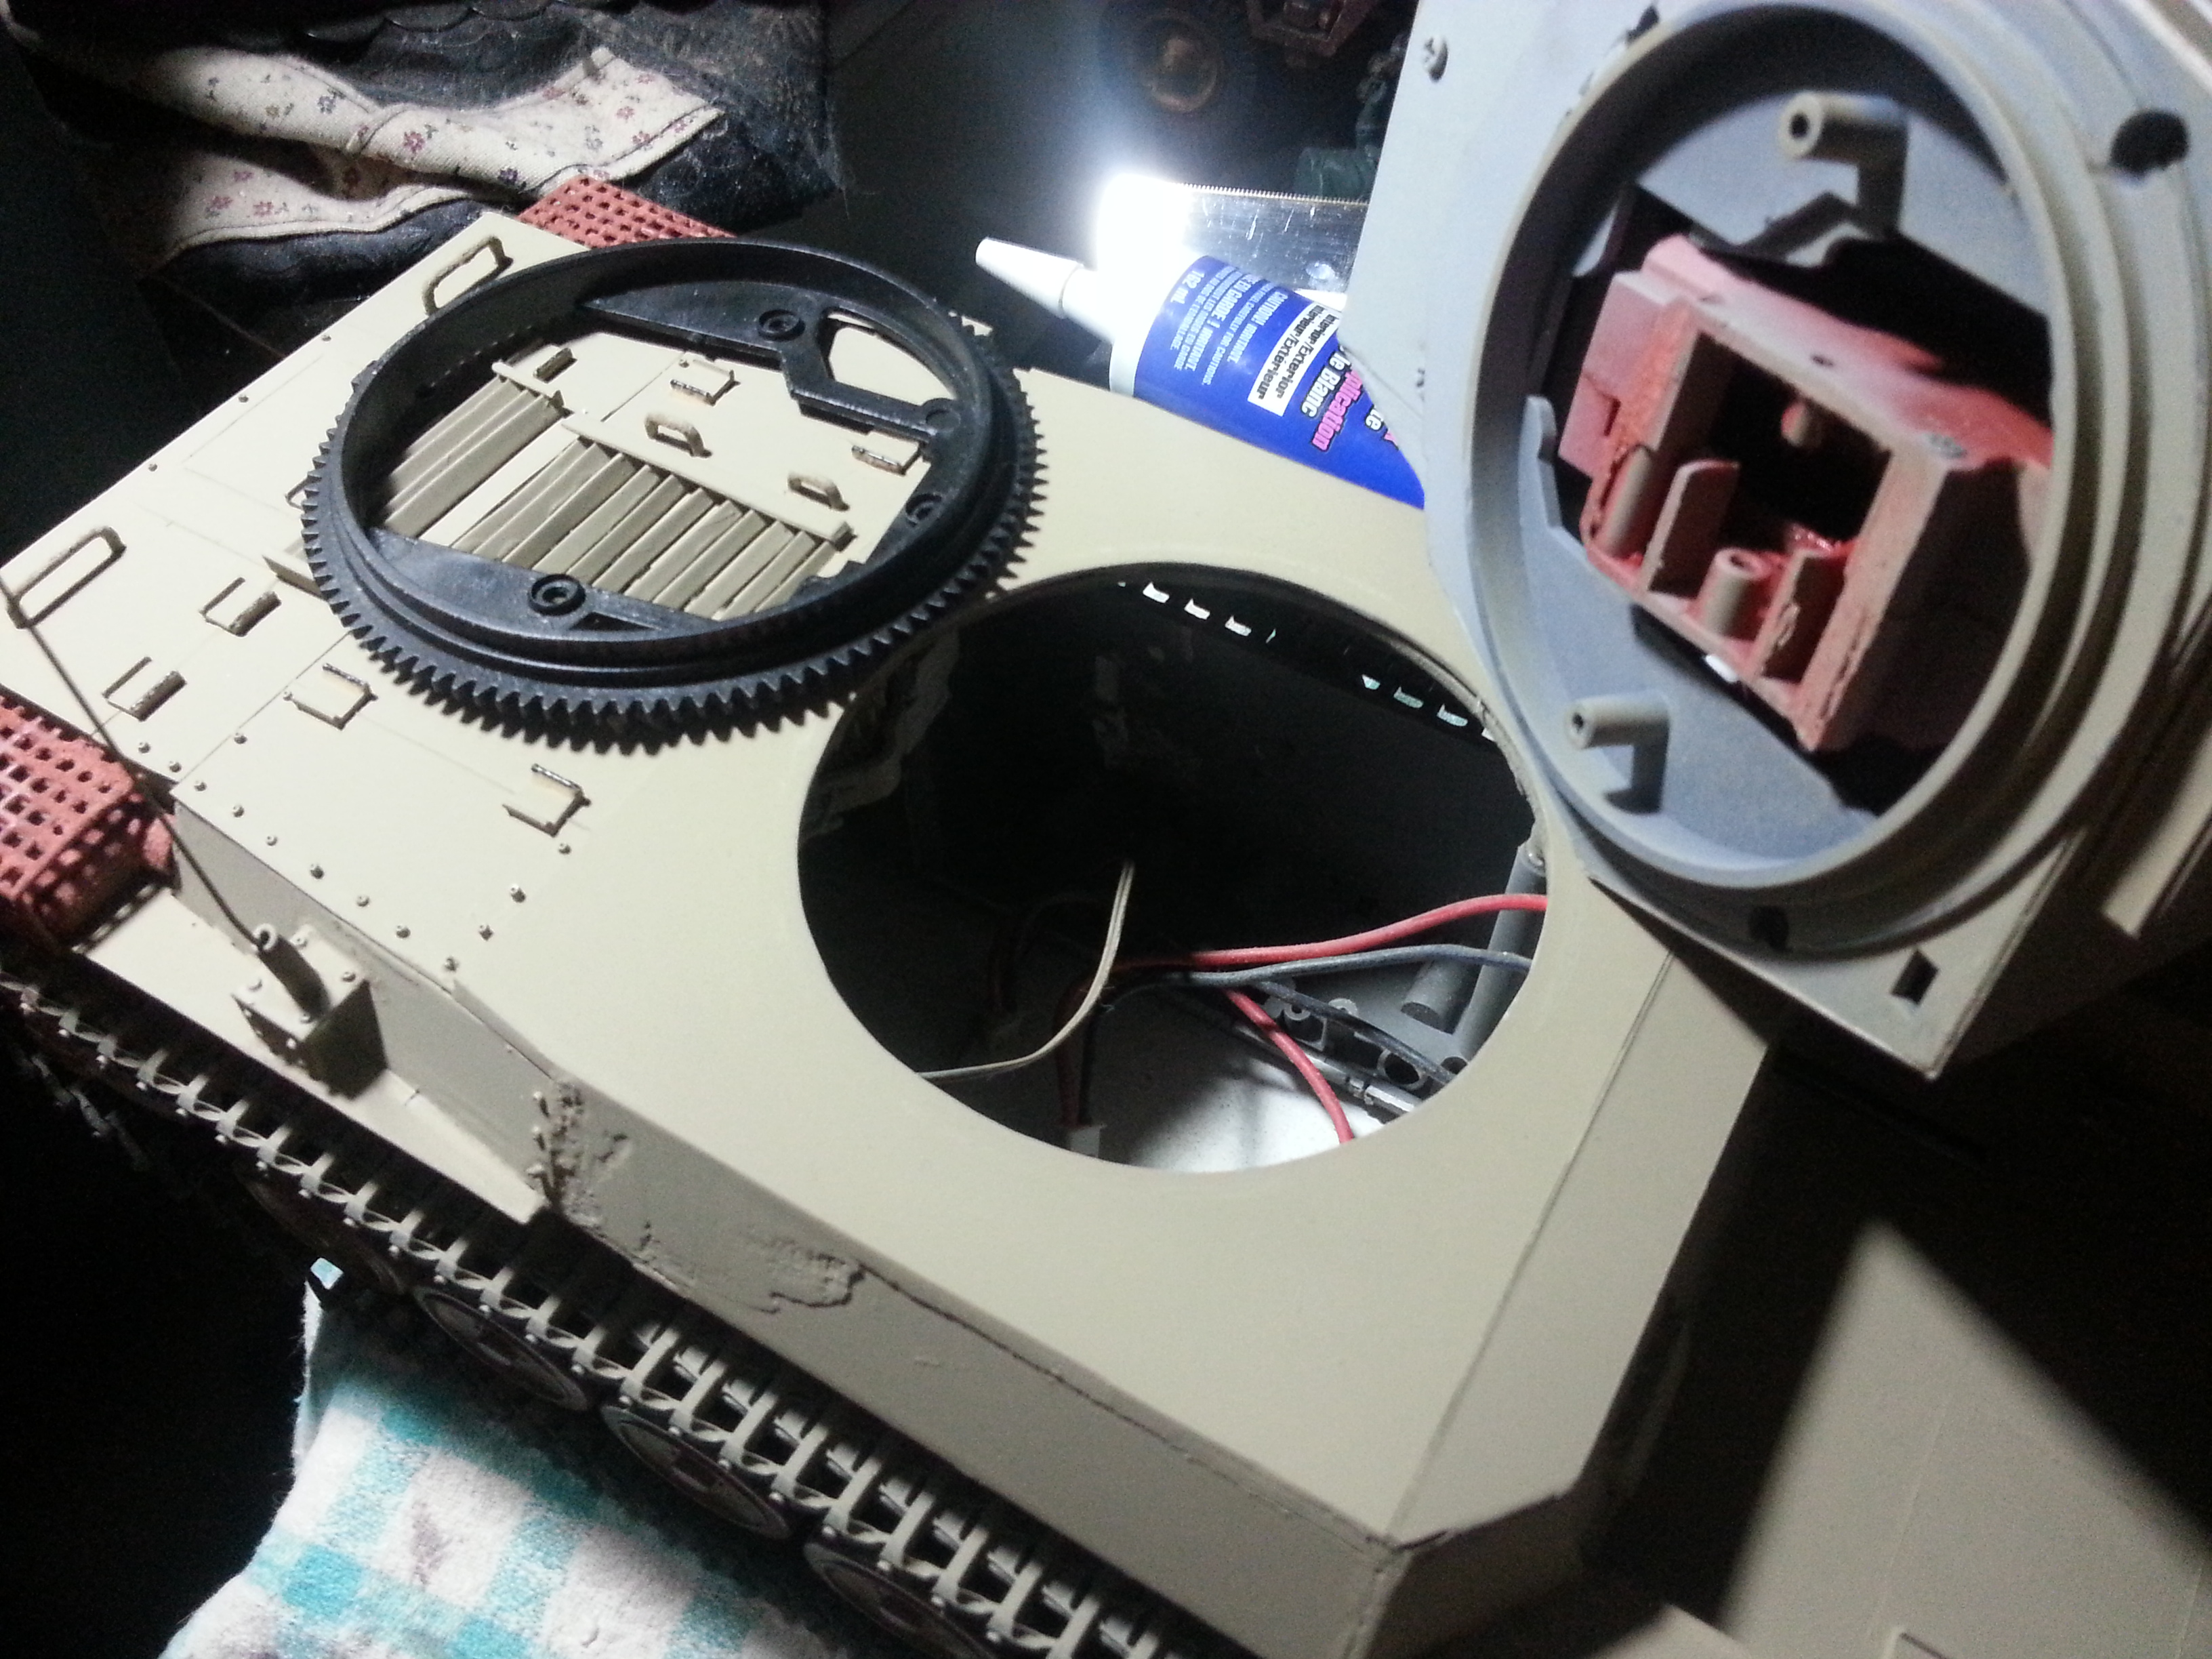
Mart I basically resurfaced the original roof of the tank. While cutting up the hull it left plenty of scars and a new and slightly taller profile wasn't a big problem. Now I have some minor turret rotation issues to work on because the turret ring gear is slightly higher than the rotation gearbox although they still mesh.
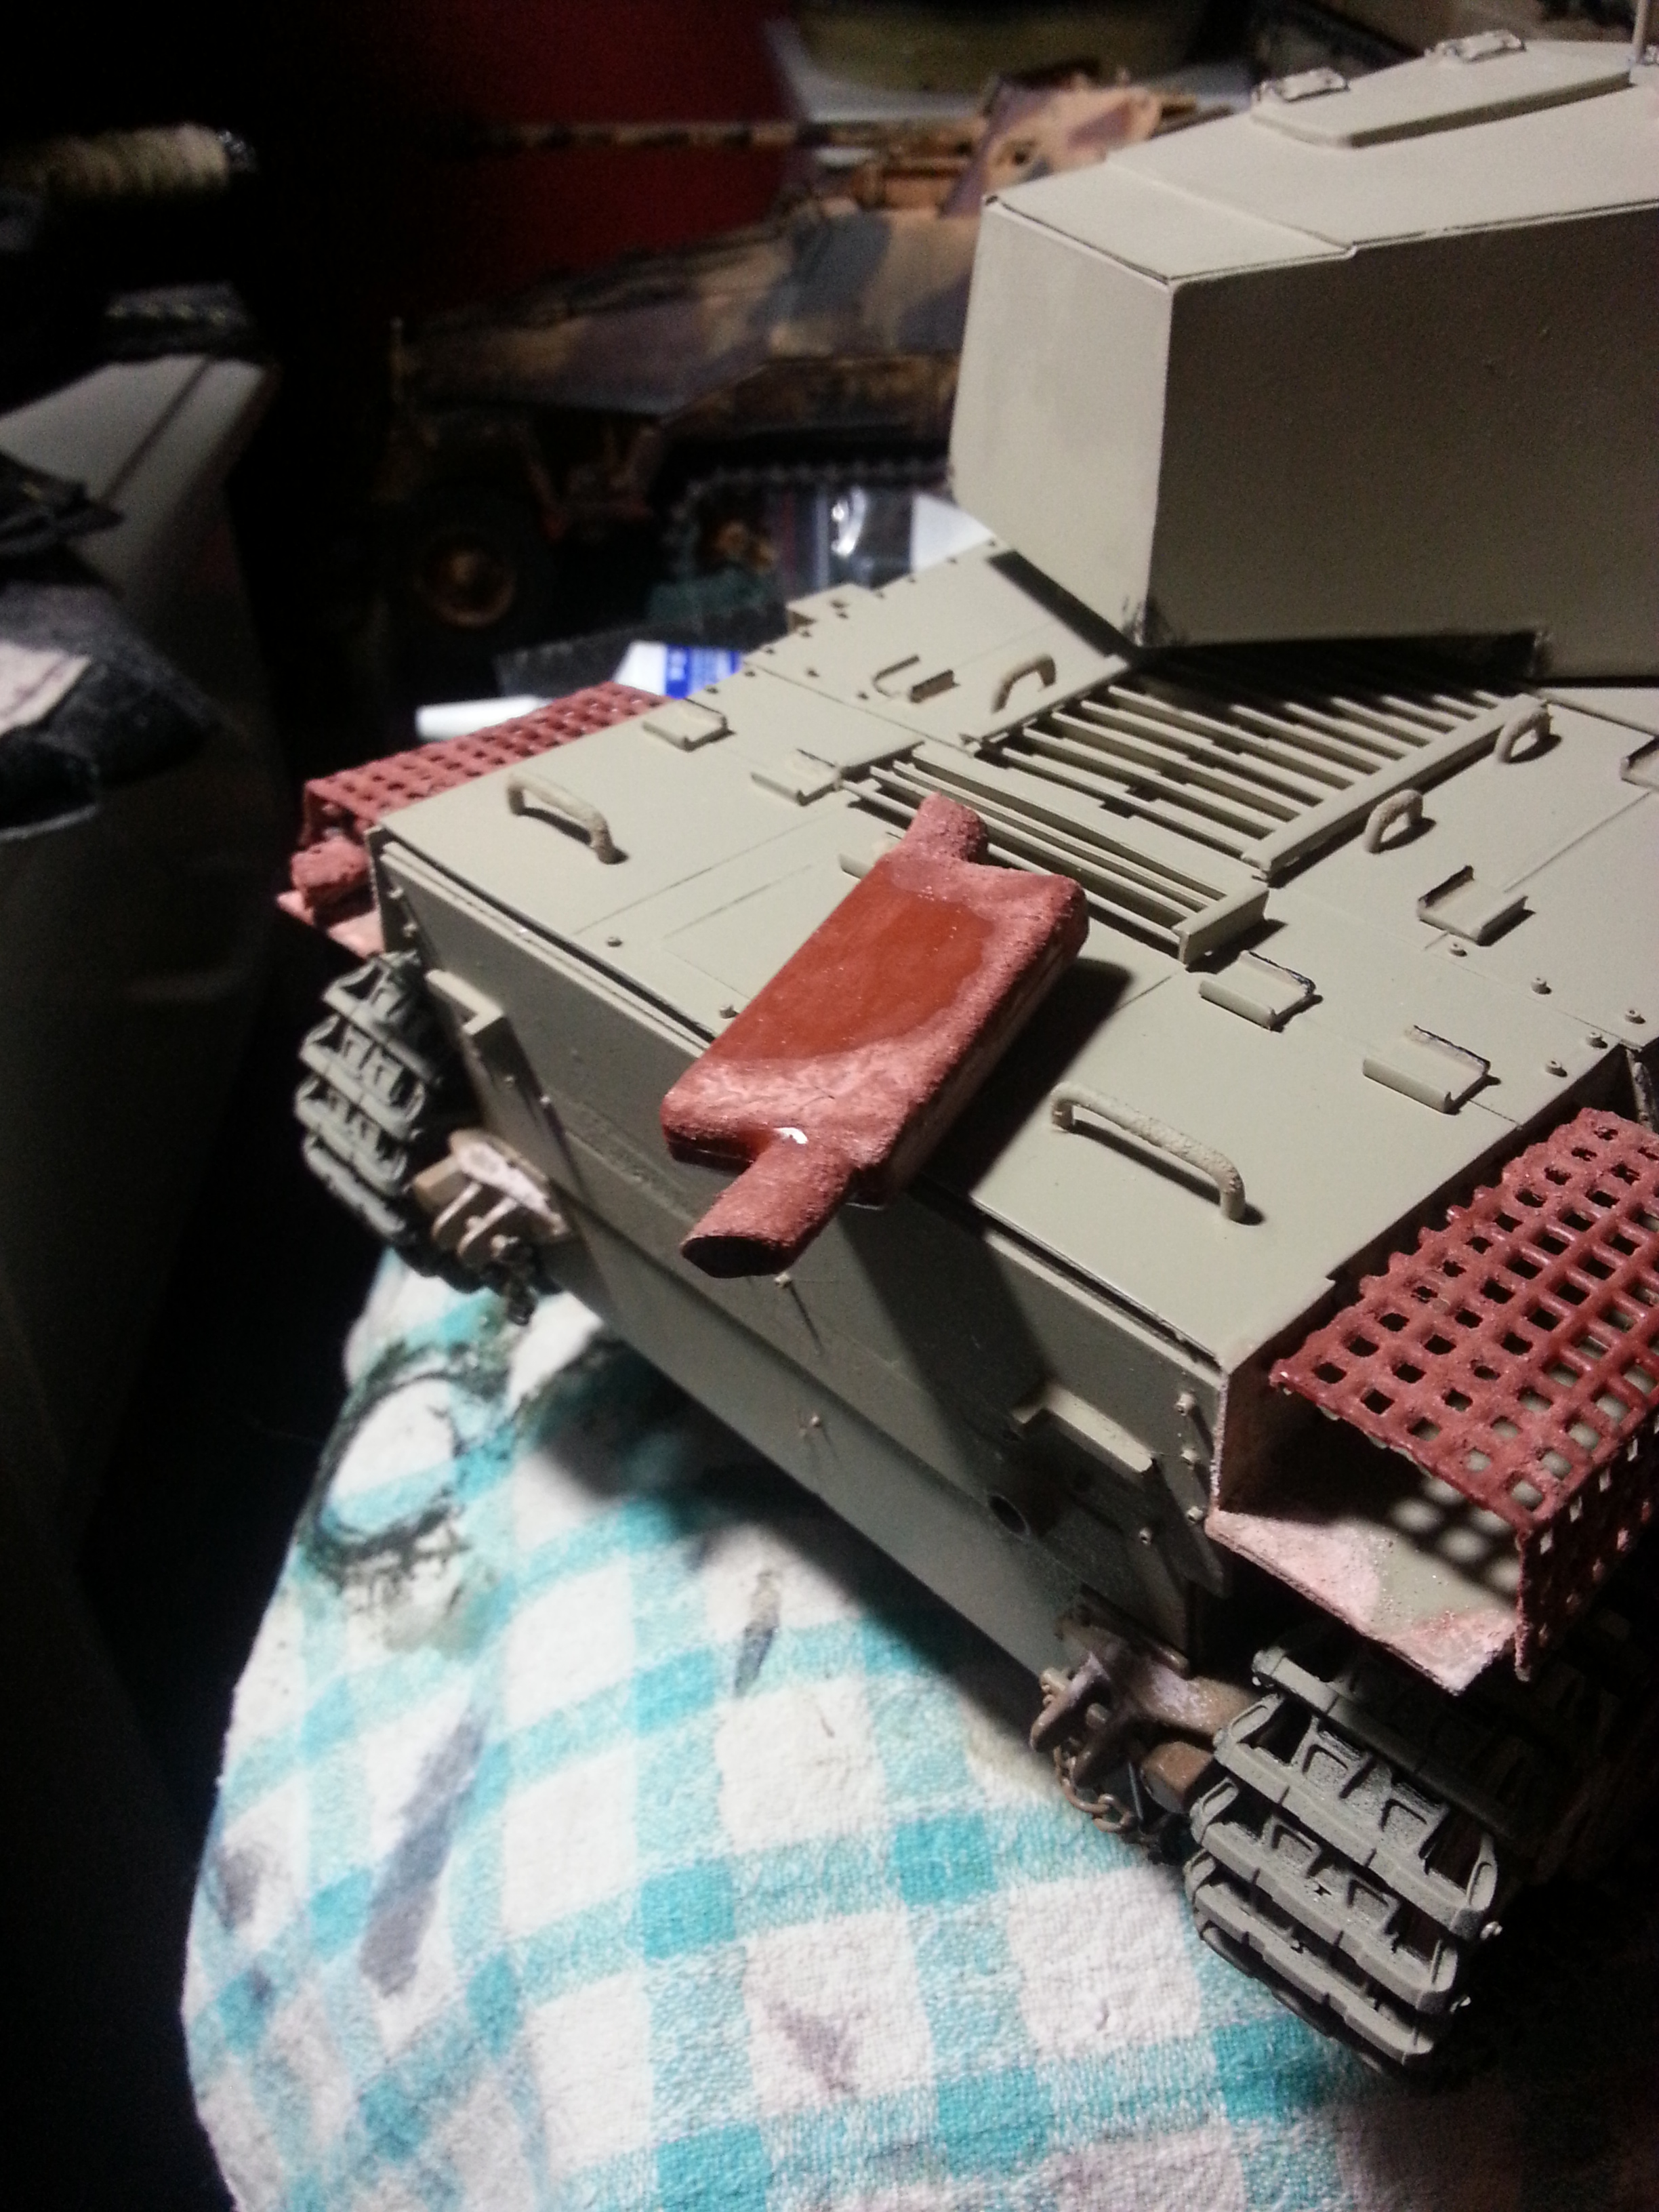
 Exhaust rust & detail. I experimented for the first time with paint and baking powder mixed... very good results.
Mart I basically resurfaced the original roof of the tank. While cutting up the hull it left plenty of scars and a new and slightly taller profile wasn't a big problem. Now I have some minor turret rotation issues to work on because the turret ring gear is slightly higher than the rotation gearbox although they still mesh.

