


DGS resin Firefly kit


 06-20-2016, 01:33 PM
#27
Looks great!!! Thanks
06-20-2016, 01:49 PM
#28
Here is some very short video of my friend Michael's running at our last battleday. This is the last I will hijack this thread! LOL!
https://www.youtube.com/watch?v=GjRPlzw_m-w
https://www.youtube.com/watch?v=qEoyvR7iN6k
https://www.youtube.com/watch?v=tCyADK1b4ZY
https://www.youtube.com/watch?v=tCyADK1b4ZY
https://www.youtube.com/watch?v=GjRPlzw_m-w
https://www.youtube.com/watch?v=qEoyvR7iN6k
https://www.youtube.com/watch?v=tCyADK1b4ZY
https://www.youtube.com/watch?v=tCyADK1b4ZY
06-22-2016, 03:35 PM
#29

Thread Starter
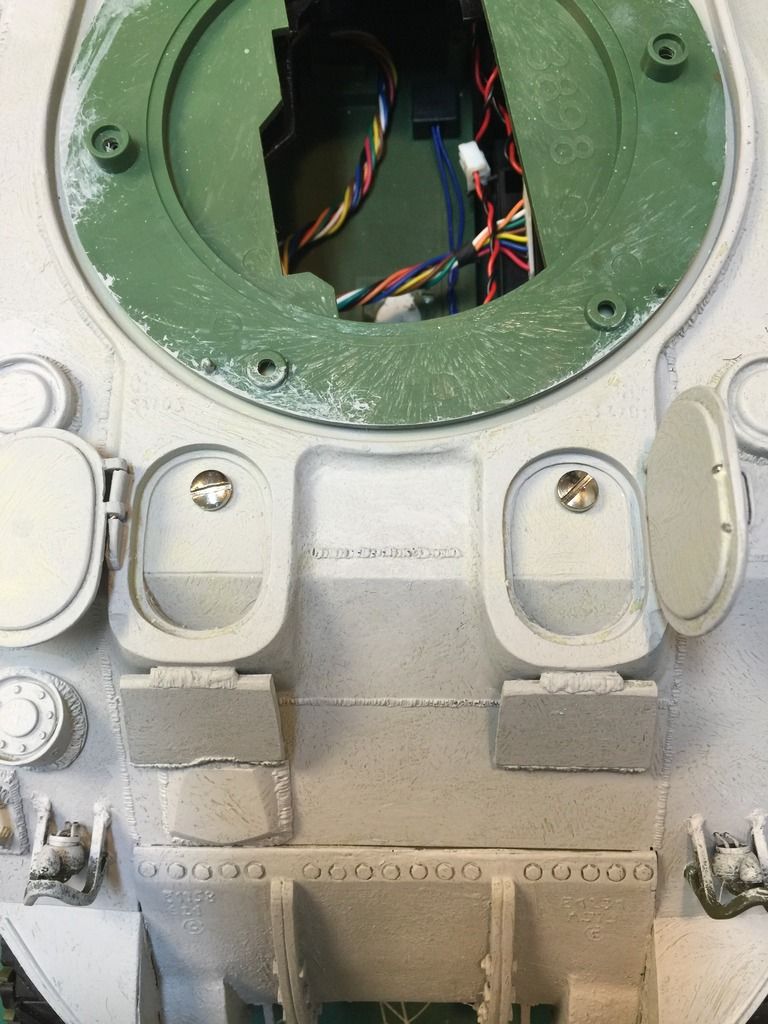
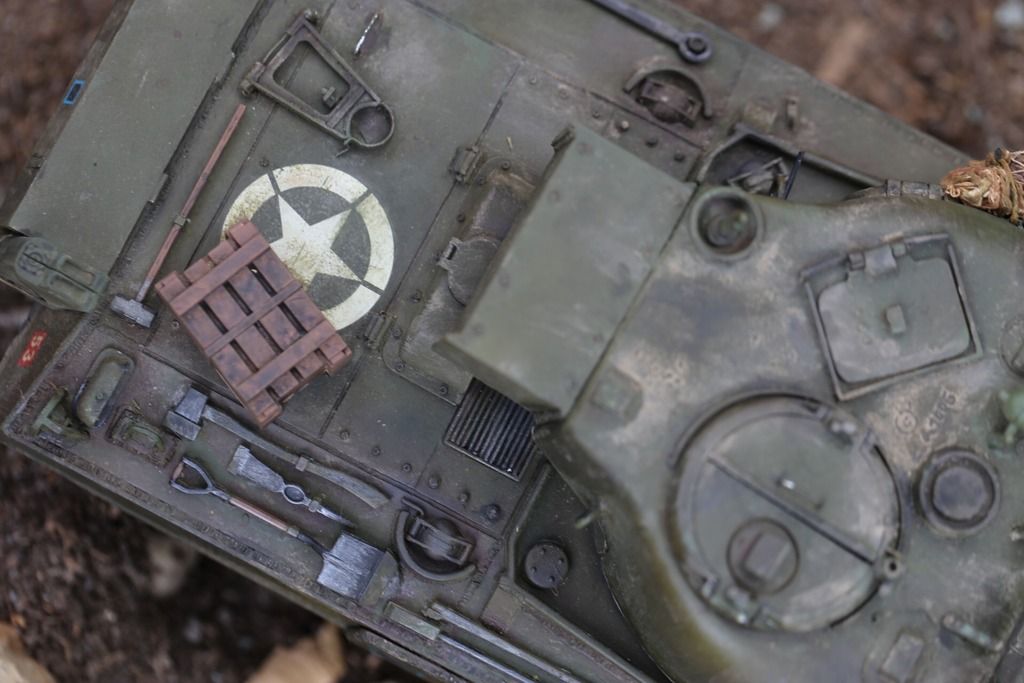
Almost ready for paint now. It has an aluminum strip across the lower hull and I added
Threaded holes so I can screw the top to the bottom and I added the turret cheek armor today and sealed up the turret,hooked up the lights, and it runs. A few small issues :{
First when I fire the machine gun my headlights flash, so I must have a wire crossed somewhere.
My turret elevation is wonky, the posts you screw the elevation motor into cracked and my attempt to fix it didn't hold. For now I will leave it but eventually it needs sorting. I ordered a metal barrel that should be here in a week or so. It pulls to the right when running and the trim only sorts it out a bit. But otherwise, it has been a lot of fun so far. A few photos
Threaded holes so I can screw the top to the bottom and I added the turret cheek armor today and sealed up the turret,hooked up the lights, and it runs. A few small issues :{
First when I fire the machine gun my headlights flash, so I must have a wire crossed somewhere.
My turret elevation is wonky, the posts you screw the elevation motor into cracked and my attempt to fix it didn't hold. For now I will leave it but eventually it needs sorting. I ordered a metal barrel that should be here in a week or so. It pulls to the right when running and the trim only sorts it out a bit. But otherwise, it has been a lot of fun
so far. A few photos


 06-22-2016, 04:29 PM
#31
My Feedback: (1)
Join Date: May 2009
Location: Pearl City, HI
Posts: 372
Likes: 0
Received 0 Likes
on
0 Posts
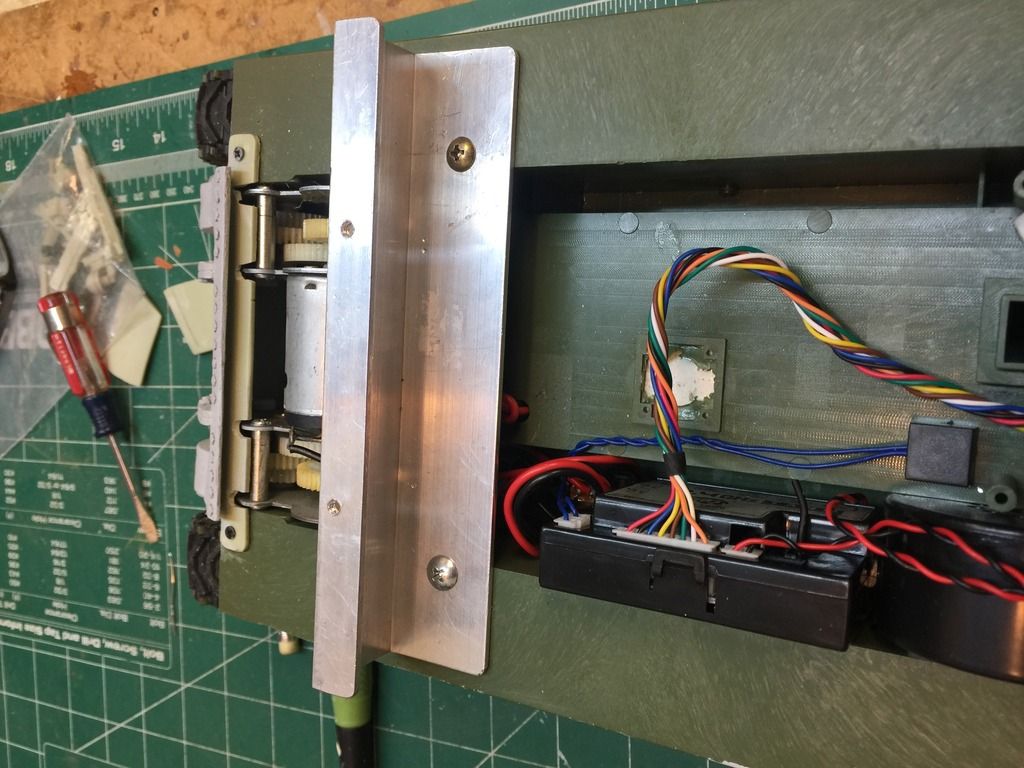
I also used screws through the hatch area to hold the upper hull onto the lower. The only things I did differently were to use two aluminum angles bolted together (allowed me to adjust the final position of where the screws would come down from the top), and to use flathead machine screws (which means you have to countersink the resin just a little). That was the only way I could get enough room for the hatches to close. -Mike
 06-22-2016, 09:38 PM
#32
Thread Starter
I also used screws through the hatch area to hold the upper hull onto the lower. The only things I did differently were to use two aluminum angles bolted together (allowed me to adjust the final position of where the screws would come down from the top), and to use flathead machine screws (which means you have to countersink the resin just a little). That was the only way I could get enough room for the hatches to close. -Mike
06-29-2016, 12:59 PM
#33
Thread Starter
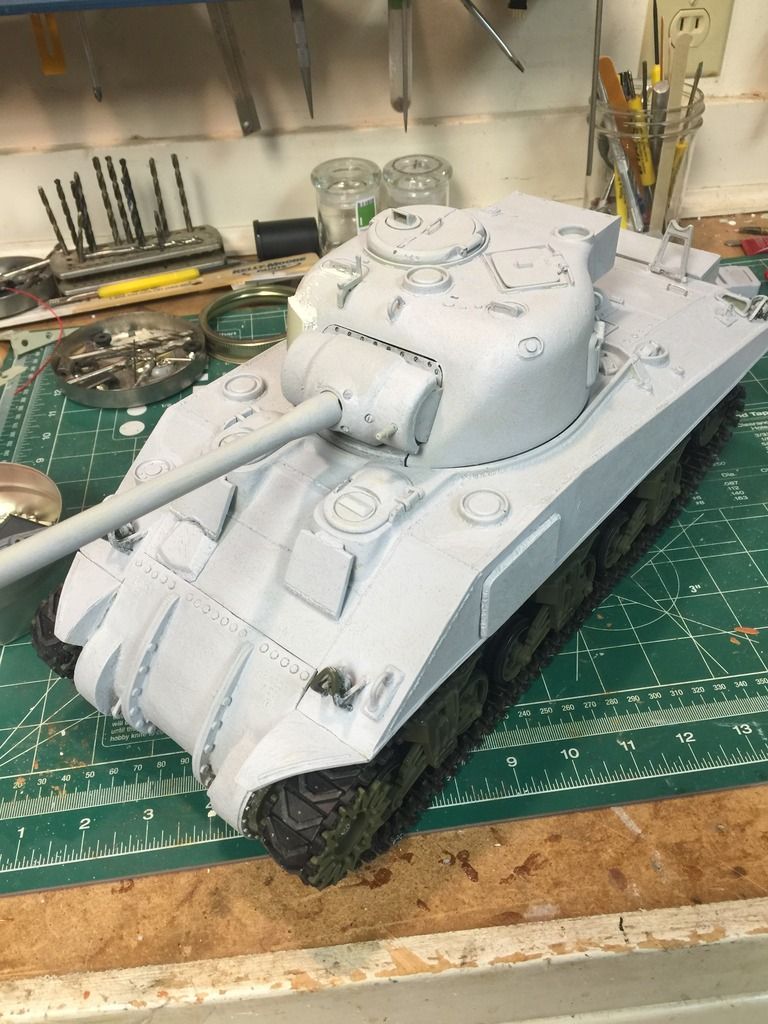
Finally some paint! It doesn't look half bad in the photo! But in real life it's splotchy and uneven, I am not very good at this airbrush business  using tamiya acrylic with tamiya acrylic thinner 50/50 seems to spray smoothly but I am terrible at controlling the spray blast !
This is just the dark green base coat.
using tamiya acrylic with tamiya acrylic thinner 50/50 seems to spray smoothly but I am terrible at controlling the spray blast !This is just the dark green base coat.
 06-29-2016, 04:24 PM
#35
Finally some paint! It doesn't look half bad in the photo! But in real life it's splotchy and uneven, I am not very good at this airbrush business using tamiya acrylic with tamiya acrylic thinner 50/50 seems to spray smoothly but I am terrible at controlling the spray blast !
This is just the dark green base coat.
using tamiya acrylic with tamiya acrylic thinner 50/50 seems to spray smoothly but I am terrible at controlling the spray blast !This is just the dark green base coat.
Looks good!

I need to put my Firefly together... someday.
Jeff
07-02-2016, 09:15 PM
#36
Thread Starter
I got a mato firefly barrel and it is too long for the standard Heng long set up? Is this because of the kit? It is a good bit longer than the kit barel and too thick at the part that goes into the mantlet. Been fighting with it for an hour. As far as I can tell it will need cutting back a bit with a lathe? Looks like I may have to scrap the idea of keeping the airsoft. It's starting to look like this kit is really for a Clark or like board and servo recoil. And fair enough most of you battle. Sadly no battles here in NorCal so I was just gonna keep it stock and save a board for another tank down the road. Hmmmmm decisions
Cheers
Mark
Cheers
Mark
07-25-2016, 02:20 PM
#37
Thread Starter
I am finally getting to the end of this build! I think :haha:
Weathering now and going very slow so I don't over do it!
Experimenting w Vallejo weathering kit for green armor. As well as Mig
Washes etc. just started w MiG pigments wow they are cool.
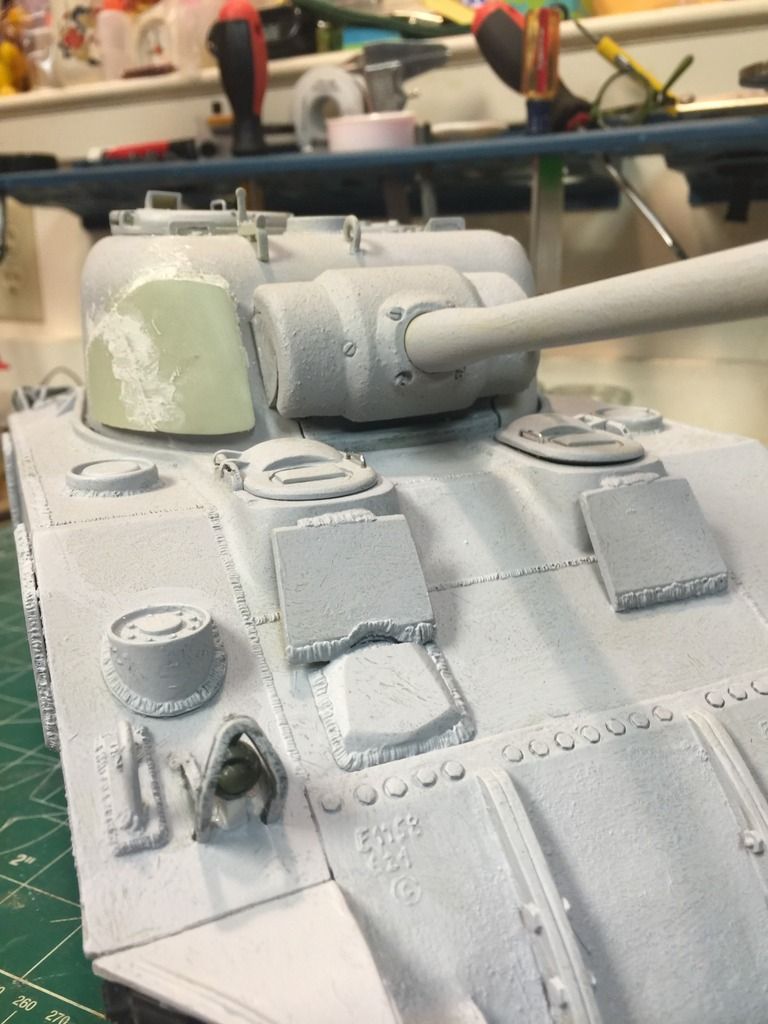
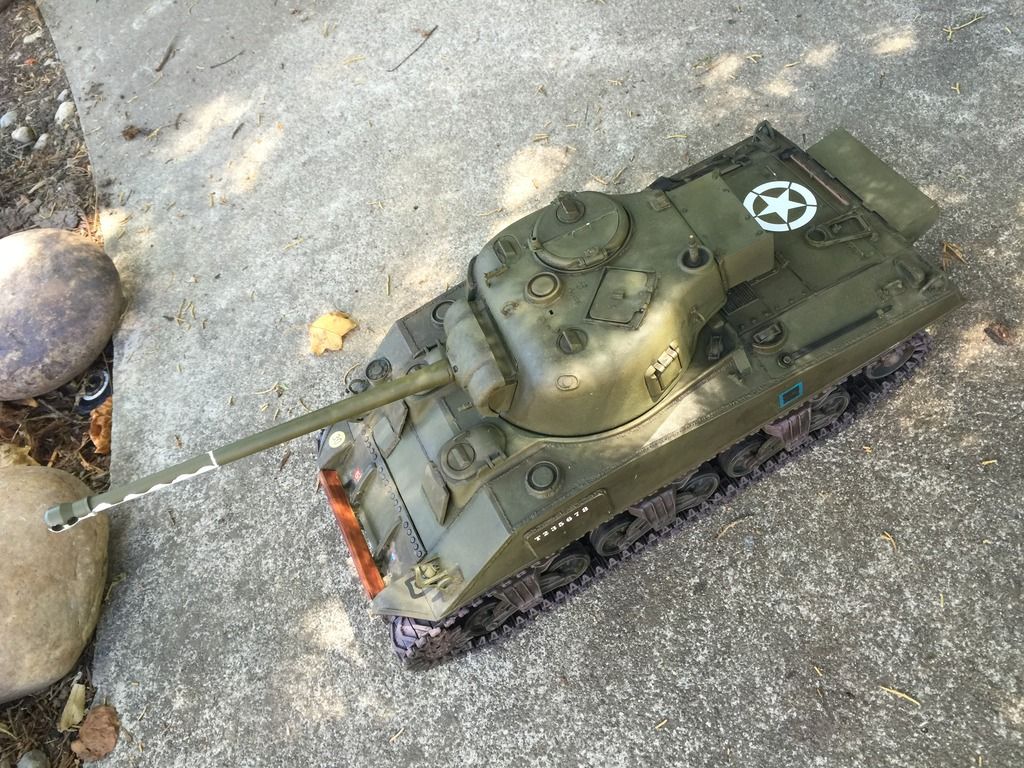
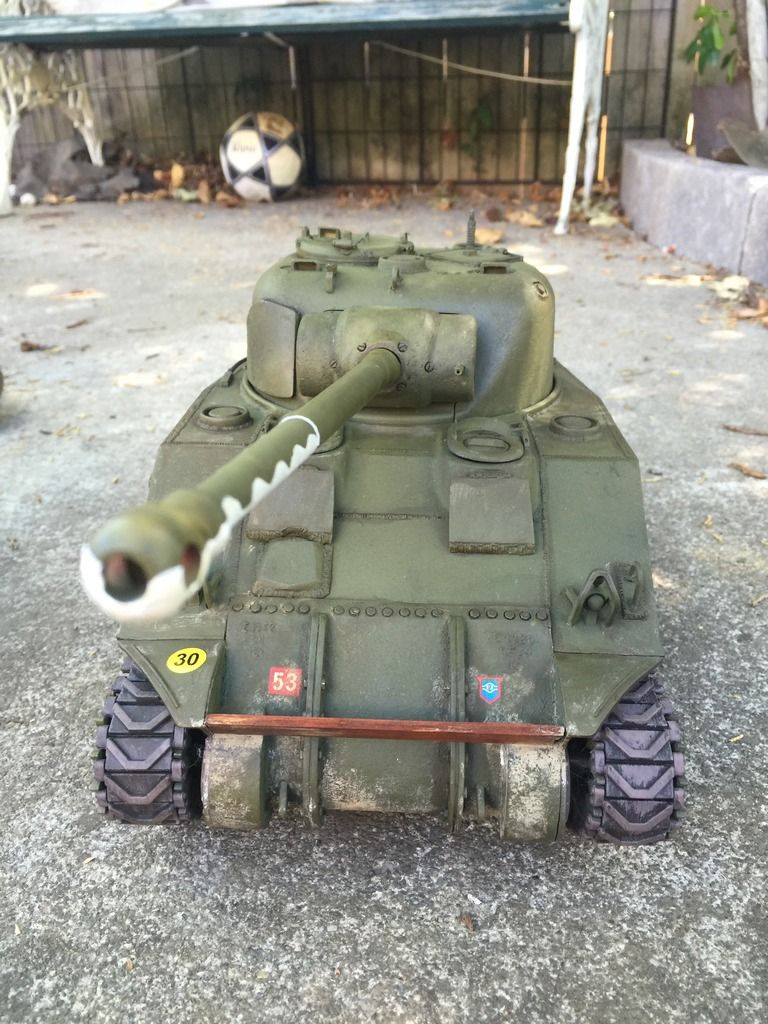
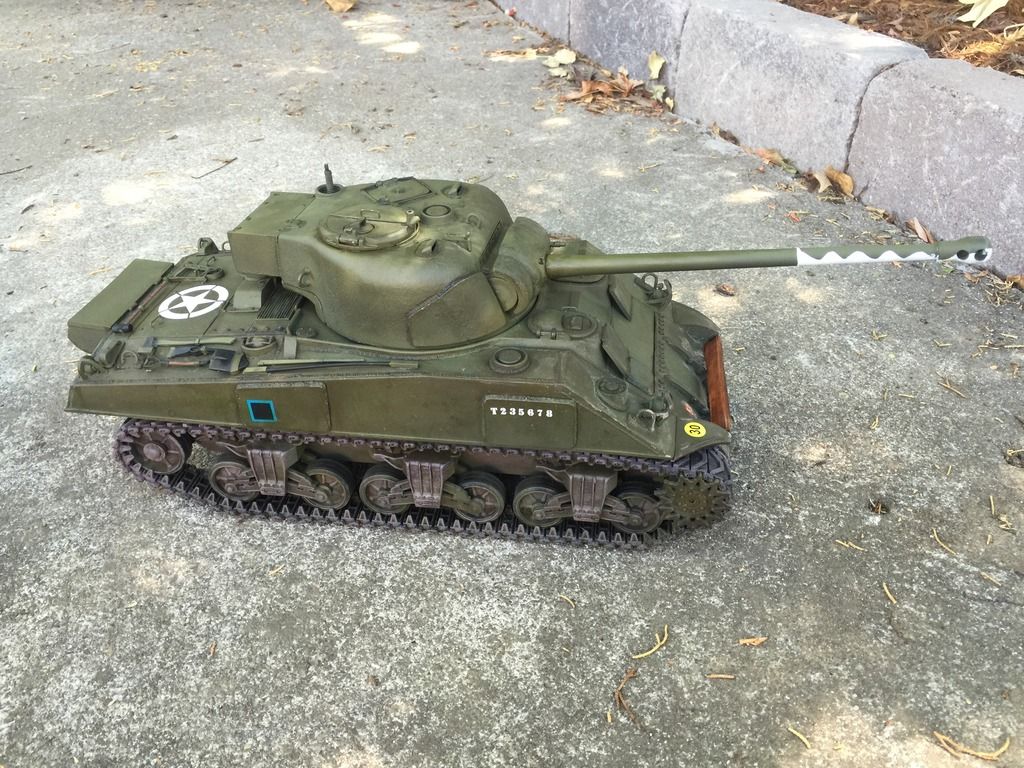
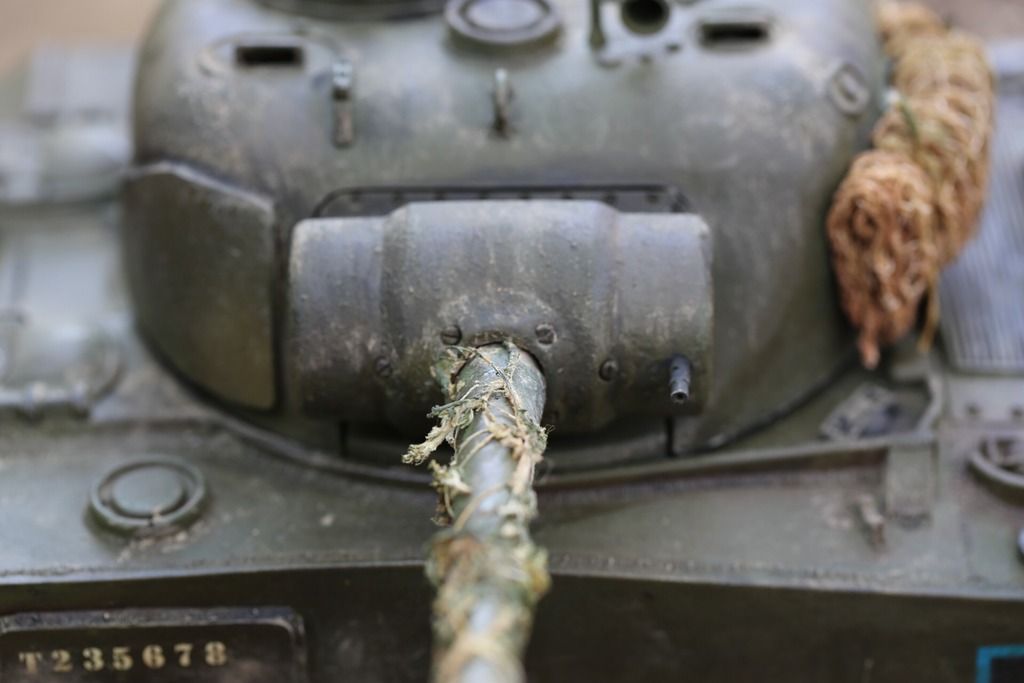
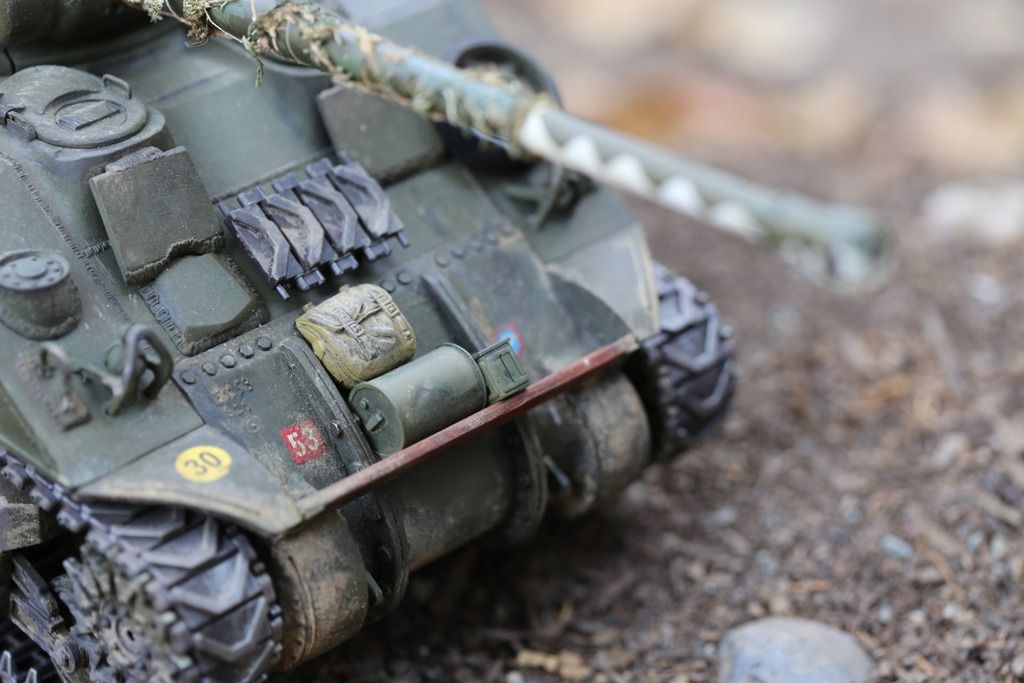
I painted the barrel today , does it look ok?
I based this off the Bastogne firefly that was preserved in Belgium. Although have taken a few
Liberties w numbers etc to make it mine
And advice or comments welcome
Cheers fellas :thumbup:
Weathering now and going very slow so I don't over do it!
Experimenting w Vallejo weathering kit for green armor. As well as Mig
Washes etc. just started w MiG pigments wow they are cool.
I painted the barrel today , does it look ok?
I based this off the Bastogne firefly that was preserved in Belgium. Although have taken a few
Liberties w numbers etc to make it mine
And advice or comments welcome
Cheers fellas :thumbup:


 07-29-2016, 05:11 AM
#39
Looks great Mark. Not over weathered, used but not abused yet!!!
08-21-2016, 02:34 PM
#40
Thread Starter
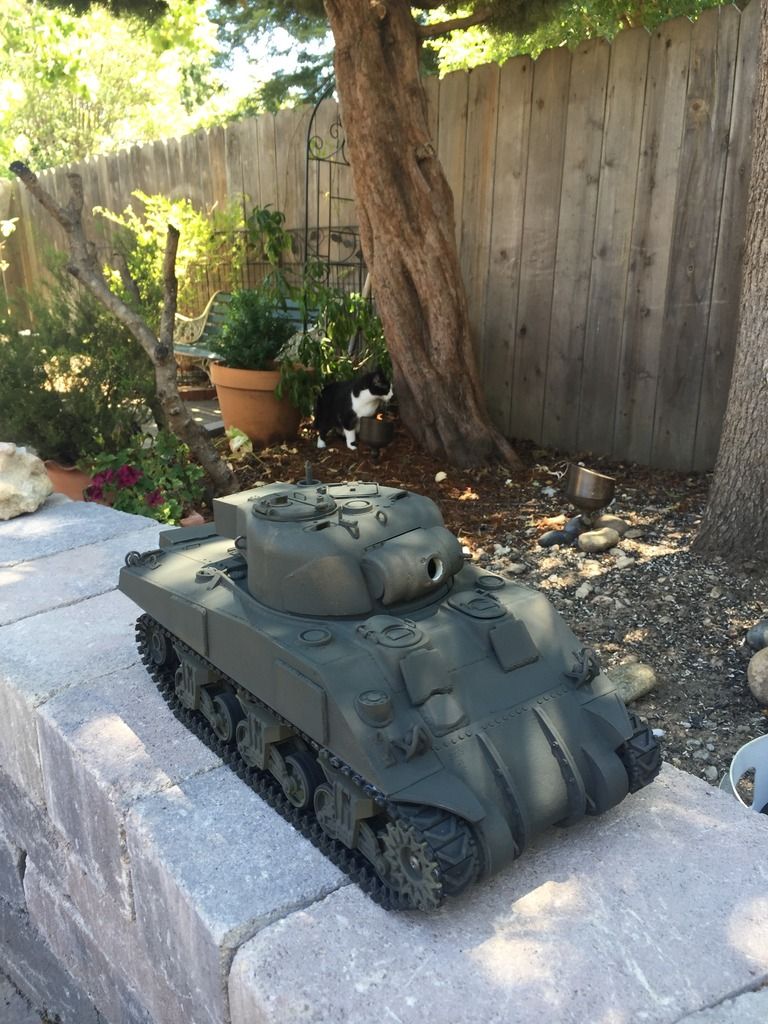
It's been a while I have almost finished weathering her and completing this
Tank (are they ever done ? )
Painted with tamiya as a base then a feeble attempt at colour modulation
It's ok, my big problem is I read all these books and it ends up driving me nuts.
What thinner for this paint and not for that acrylic/enamel etc
Had a few spots eat the original paint off , and would love the secret to washes, lol
Pigments were cool although easy to over do it. I thought the tank was over weathered and looked like poop, until I took it outside and it looked much better.
Anyway enough from me, took a few snaps in the back yard today. Comments and suggestions appreciated
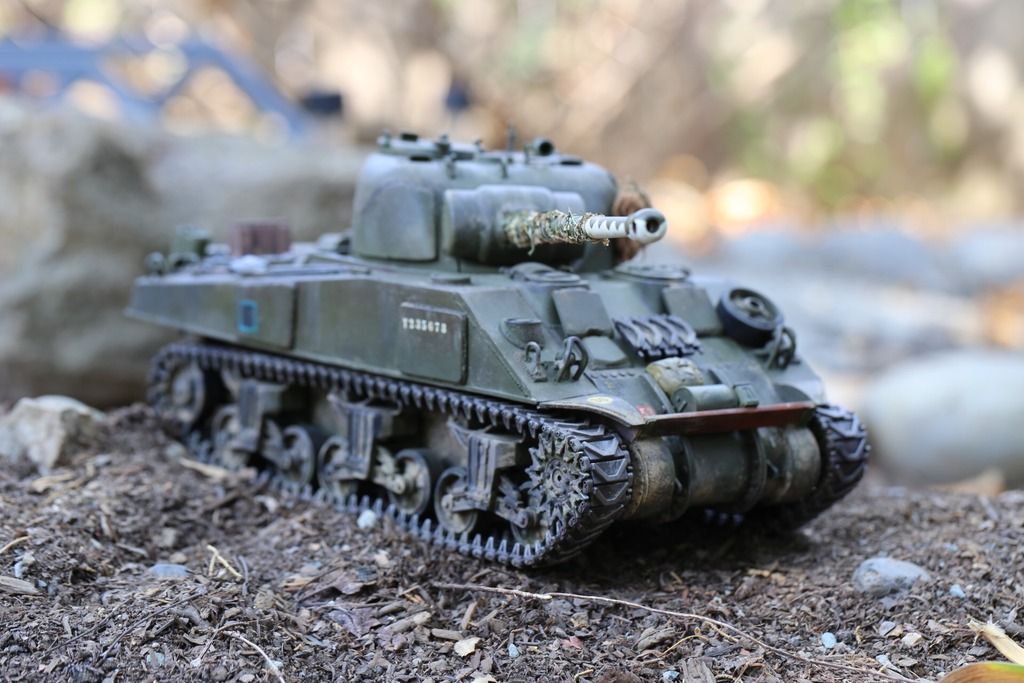
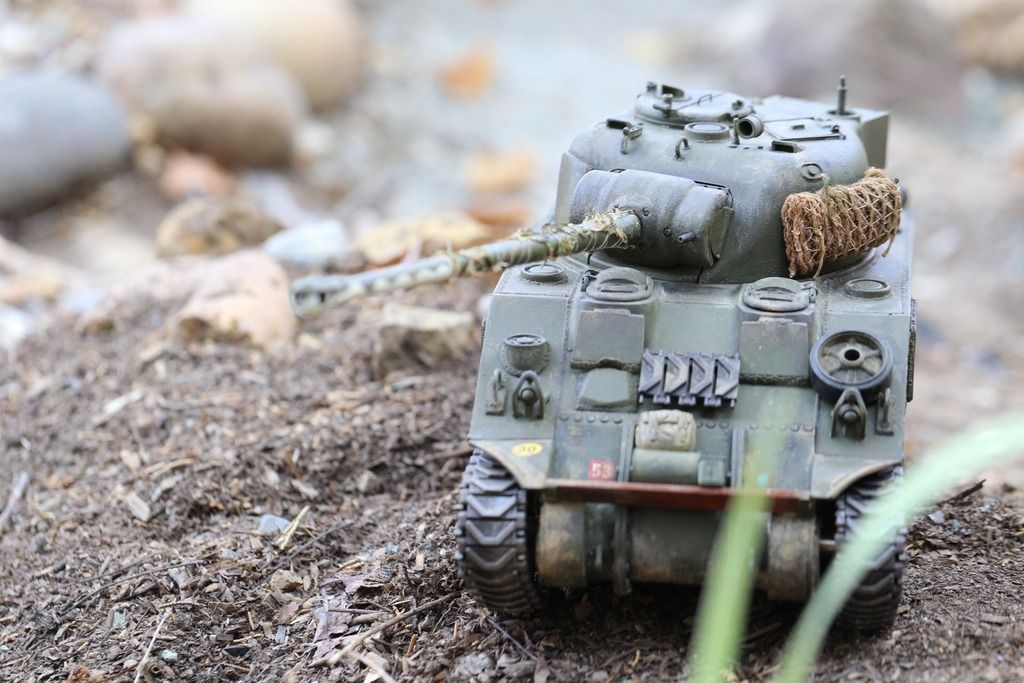
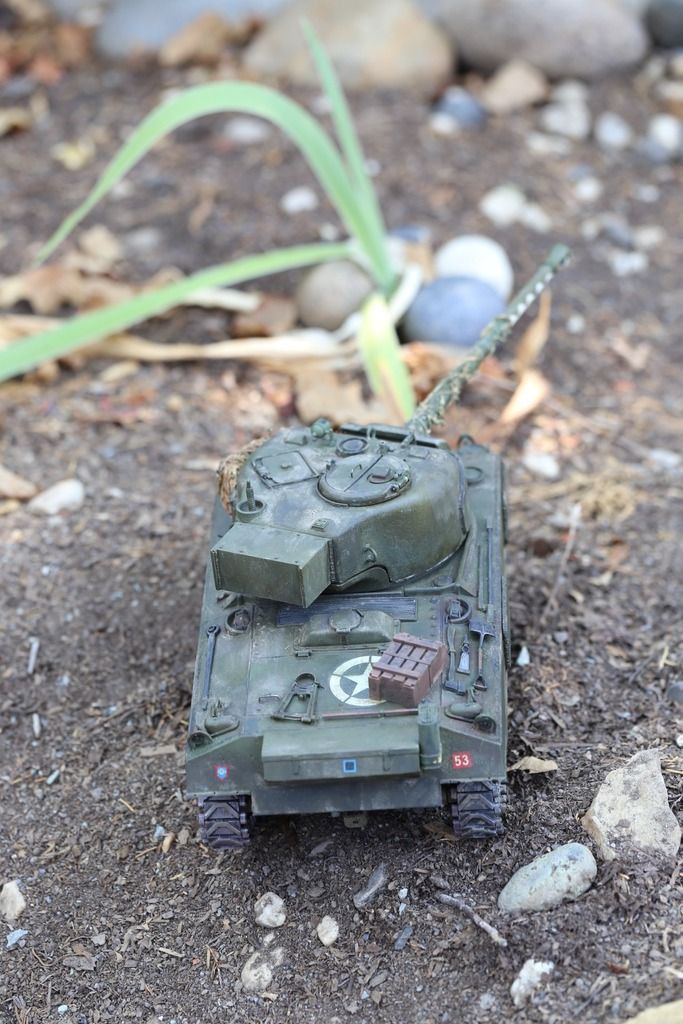
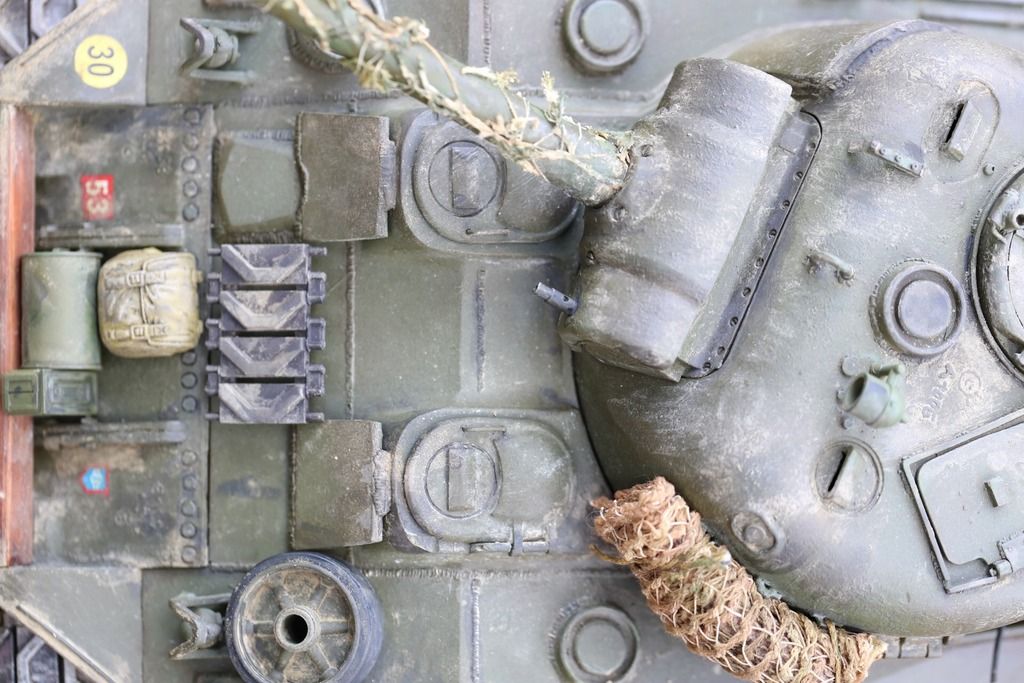
Cheers Mark
I have almost finished weathering her and completing this Tank (are they ever done
? )Painted with tamiya as a base then a feeble attempt at colour modulation
It's ok, my big problem is I read all these books and it ends up driving me nuts.
What thinner for this paint and not for that acrylic/enamel etc
Had a few spots eat the original paint off , and would love the secret to washes, lol
Pigments were cool although easy to over do it. I thought the tank was over weathered and looked like poop, until I took it outside and it looked much better.
Anyway enough from me, took a few snaps in the back yard today. Comments and suggestions appreciated


Cheers Mark


