


M32 Build

 12-22-2017 | 04:34 PM
#27

Thread Starter

Yeah, I have found Taigen to be oversize in scale appearance on the turrets etc. At least compared to Nick's work. Hi stuff looks so good, I hate to use anything else really. But I am willing to try just about any kit or parts out there that are Shermans. This project has really gone off the deep end in scratch building requirements. Most of it will be. Its fun in one respect but doing all the research to get it right is the pain. I obsess unitll I have it just right, or I will remove it and redo the work and I rather not do that. There aren't tons of photos of M32B3 available to answer questions I had abut angles and things and such and finally a guy from Facebook Sherman group dropped a load on me. Really helped.
04-21-2019 | 10:44 PM
#28
Thread Starter
Wow more than a year I haven't touched this model. It was time to do something.... So I made the front fairlead roller contraption. A hand full of days worth of work. Used Ludwigs top part and roller but the rest of his parts were all wrong so I made some templates up and made brass parts and soldered it all up. Not a fun project, lots of burnt fingers and hurt ego when doing this kinda work.
01-23-2021 | 08:50 AM
#29
Thread Starter
Dang, wow more than 4 years have passed since I started this one. I really need to get it finished..... Well Ive been hard at work on this monster for the last week. 3 day weekend solid, nothing else and every night. I made lots of bits and details that I havent really photoed yet but I also got it working too.
The following users liked this post:
Panther F (01-23-2021)
01-23-2021 | 10:26 AM
#30
Congrats! What a labor of love that is.
I know and can appreciate what goes into a build like this.
I know and can appreciate what goes into a build like this.
01-23-2021 | 09:05 PM
#31
Thread Starter
Wow been working all day power building. Got a bunch of tiny stuff done.
Its not really the work that takes so long, its going through 1200 pictures doing research on each little thing to get the details correct then make it up. Some trial and error also occurs.
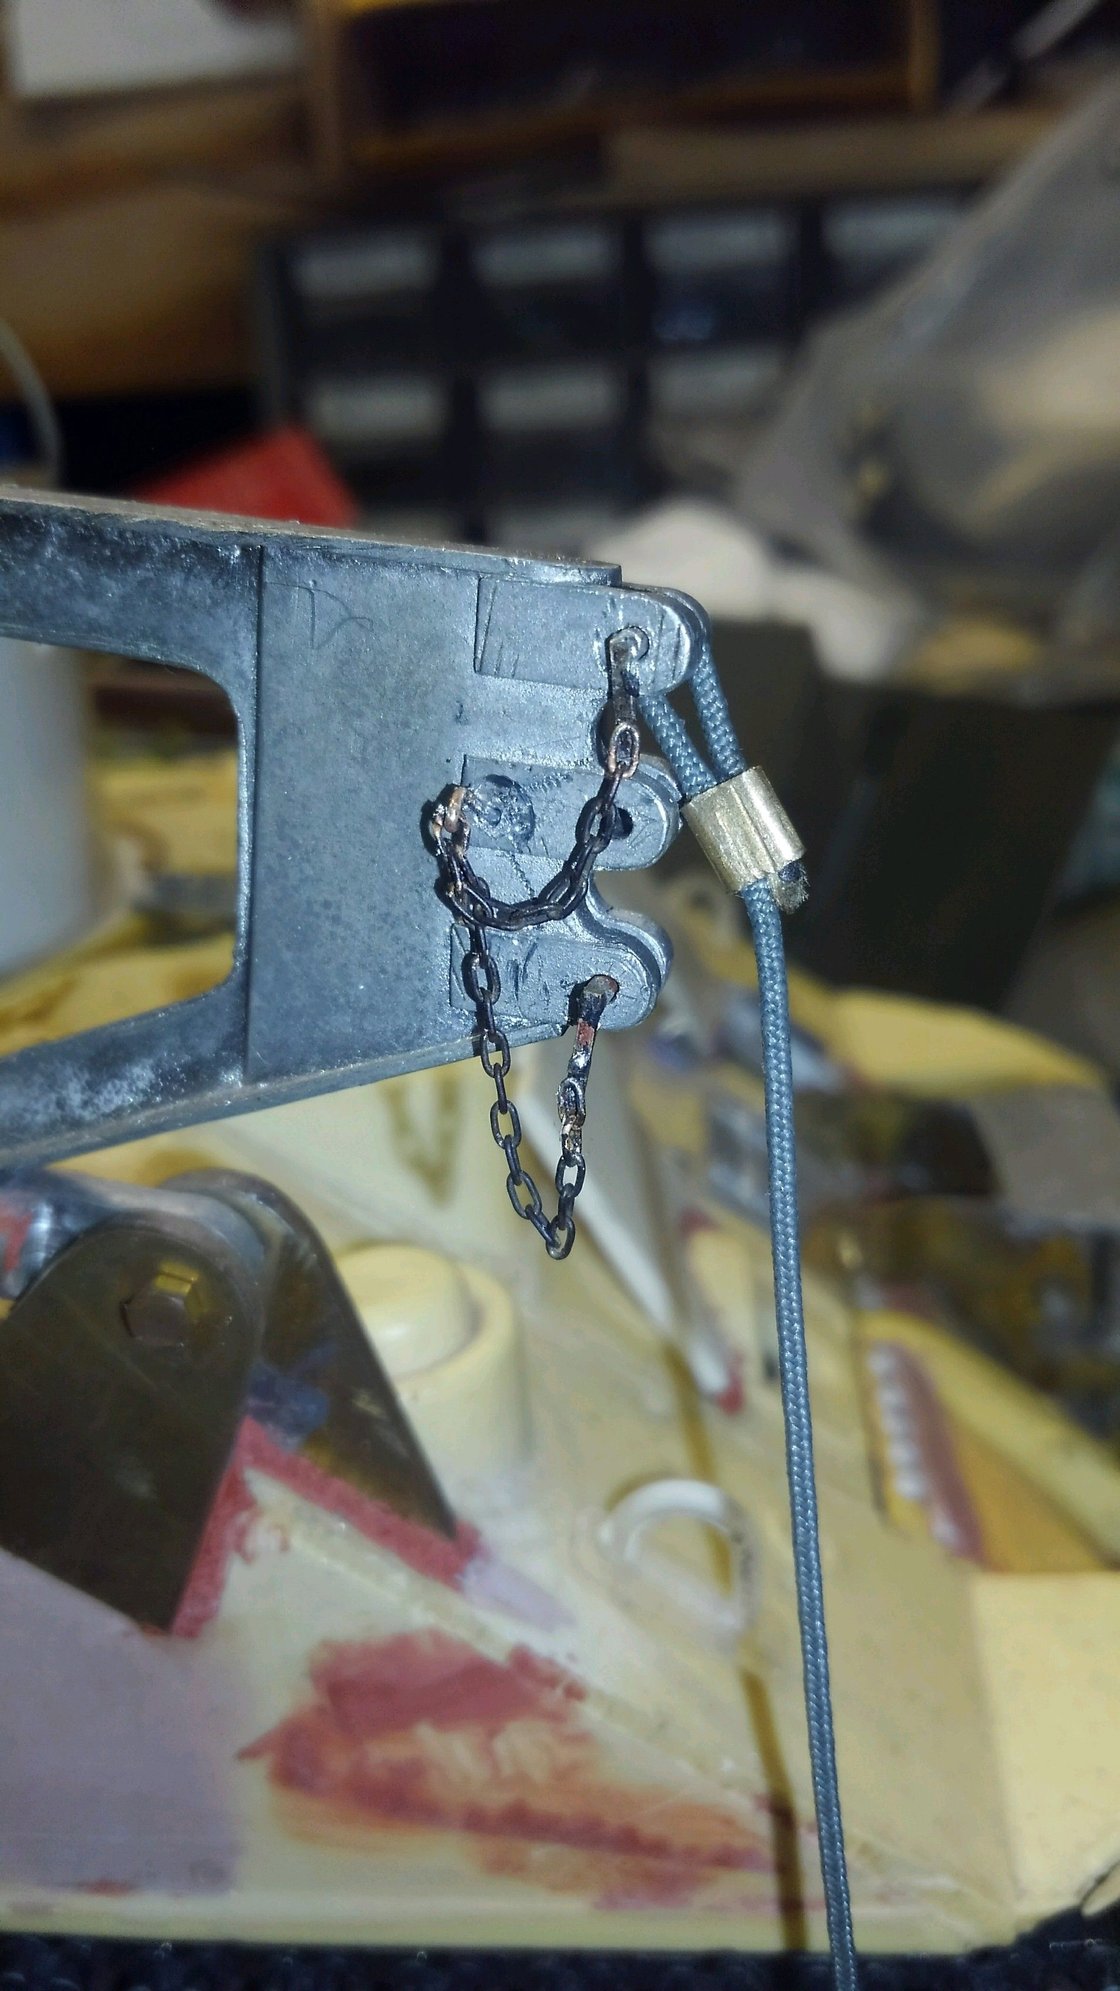
Im especially proud of my winching/lifting cable end. Ive got it just right as the real ones are with 4 wire crimps. The whole design of this model is intended to be able to winch a tank out or two a disabled tank, yes I know rc tanks wont roll because of the motors, I will set up a henglong sherman to be towed, Also will have a lift off turret! But thats eventually.....
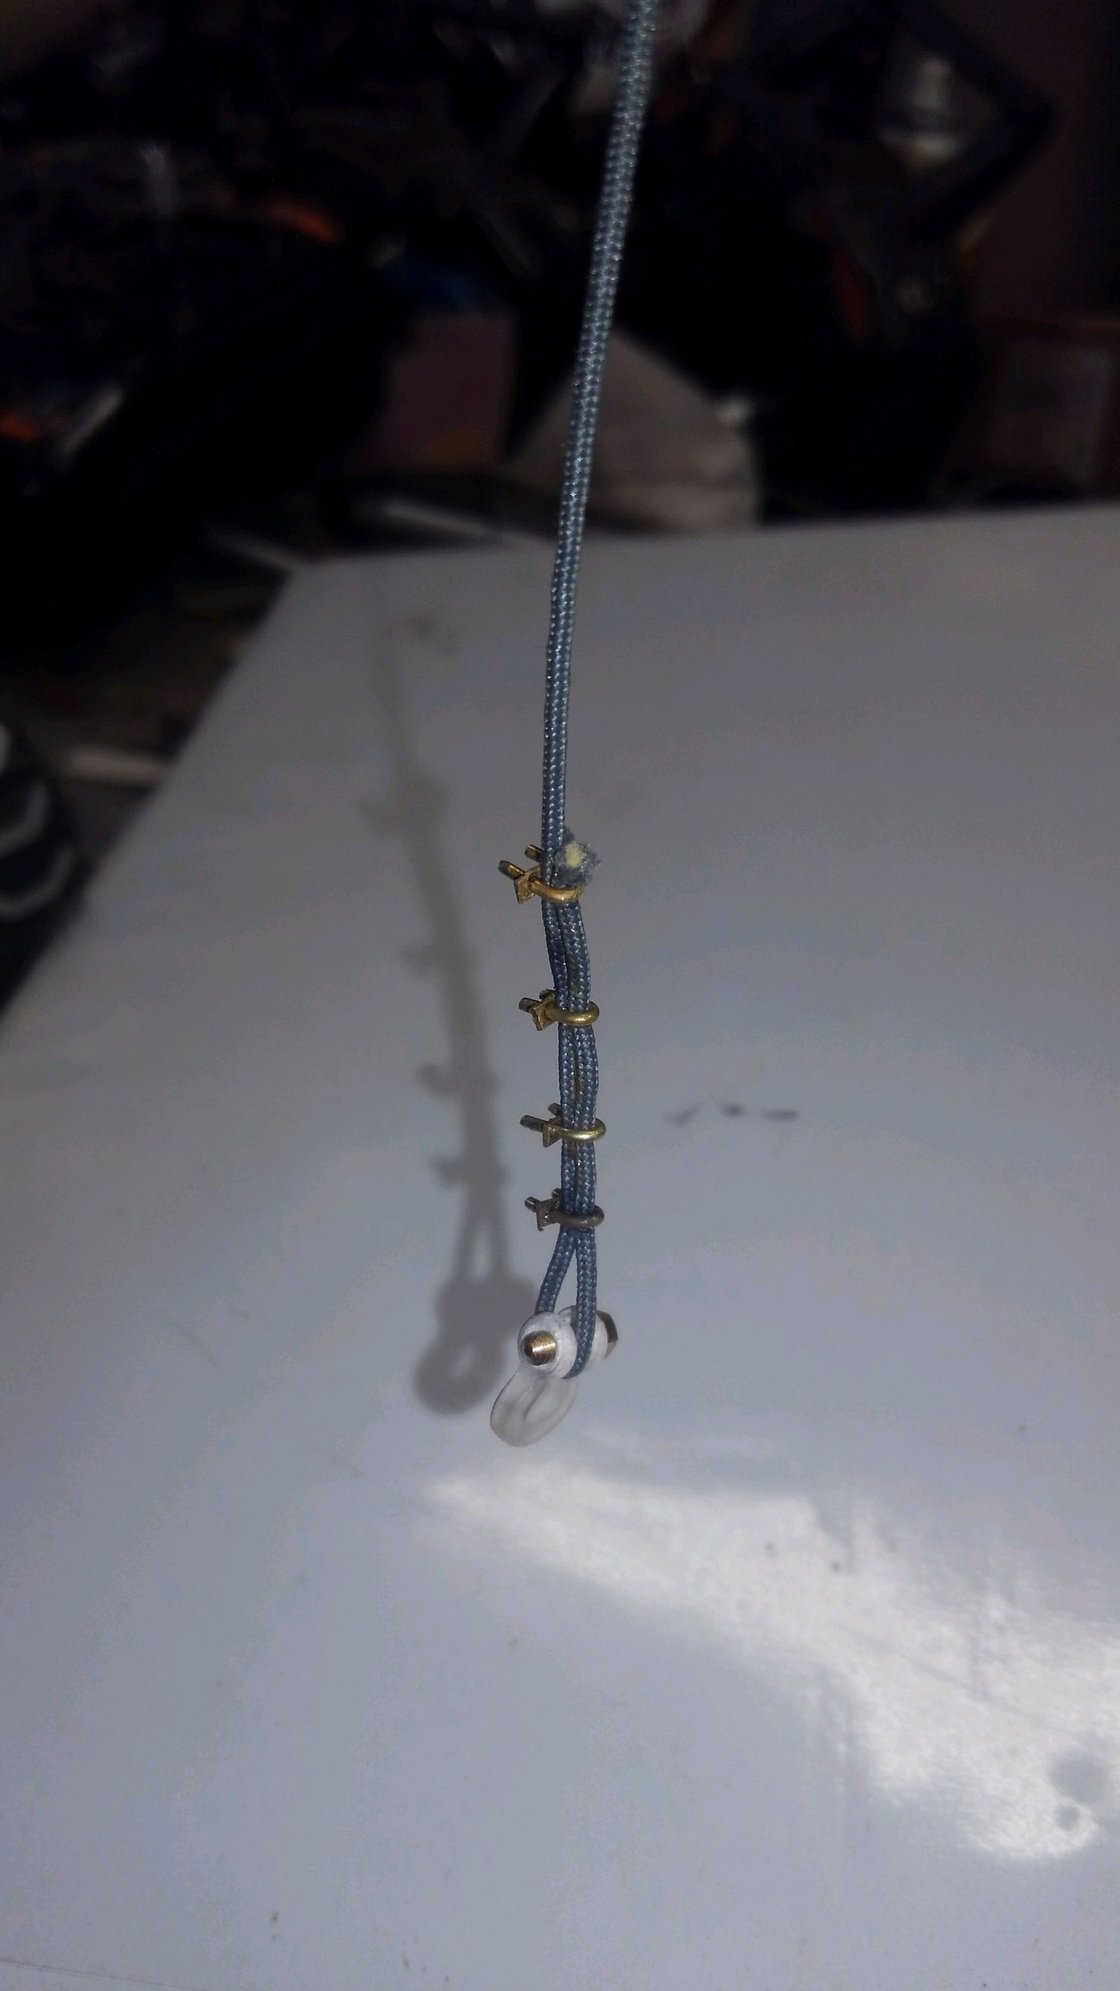
Its not really the work that takes so long, its going through 1200 pictures doing research on each little thing to get the details correct then make it up. Some trial and error also occurs.
Im especially proud of my winching/lifting cable end. Ive got it just right as the real ones are with 4 wire crimps. The whole design of this model is intended to be able to winch a tank out or two a disabled tank, yes I know rc tanks wont roll because of the motors, I will set up a henglong sherman to be towed, Also will have a lift off turret! But thats eventually.....
01-24-2021 | 07:31 AM
#32
Nice build and a video to show it works, love the workbench looks like organised chaos. Lots of tiny metalwork going on , have you one of these to save burnt fingers?

jewellers peg board for solder work.
jewellers peg board for solder work.
01-24-2021 | 08:20 AM
#33
Thread Starter
No I dont. I usually make up a quick jig for soldering parts up. I have a flat glassy tile that I use often, its 1/1 foot so it takes up some space on one workbench but its my true flat surface for assembling anything from wood model RR car kits, wood buildings or maing tank parts. And yeah, Ive got 4 workbenches and they all look like that sadly. I have a 1 car garage that is barely organized chaos. Those that I help set up or work on tanks are shocked at everything I cram in there, and then still shocked at what I am able to get done in my mess.
01-24-2021 | 12:54 PM
#34
My Feedback: (1)
Sounds like I might have competition for "Messiest Workroom in the World". 
Another fine job, Rich. This one truly is impressive. One of these days when I have lots of money I plan to see you about an E8. I know you don't often do custom builds, but I'm hoping you'll make an exception for your printer.
And where did you score that awesome cable? I assume the U-bolts are scratch built? That's gonna be an excellent detail on an excellent model.
01-24-2021 | 10:20 PM
#35
Thread Starter
I fianlly got the front door fabricated. Ive been dreading making this part since I started this project 4 years ago. I knew I wanted it to actually work but I wasnt sure my skills could do it 4 years ago so back then I was entertaining just using brass doll house hinges. Im glad I never made it till now as I was up to the challenge to make it 100 percent accurate.
Now, if your an M32 expert you will notice I did not put the bullet splash on the bottom of the side of the door. I just dont think it would line up well into the hull and I was also afraid that if I tried too much heat the hinges would all fall apart and entire days worth of work would be lost along with my sanity so I just left them off. I could glue on some styrene strips later if I really want that look.... maybe. Enjoy the pics. Ive spent all night just looking it over. I played with the door in my fingers for a while just marveling at my work, really this one was a masterpiece by itself.


Now, if your an M32 expert you will notice I did not put the bullet splash on the bottom of the side of the door. I just dont think it would line up well into the hull and I was also afraid that if I tried too much heat the hinges would all fall apart and entire days worth of work would be lost along with my sanity so I just left them off. I could glue on some styrene strips later if I really want that look.... maybe. Enjoy the pics. Ive spent all night just looking it over. I played with the door in my fingers for a while just marveling at my work, really this one was a masterpiece by itself.
01-25-2021 | 09:41 AM
#37
Thread Starter
I’m not sure how heavy it is, it’s got a few ingots of lead inside it so it’s considerable, probably 15 pounds maybe?
Well, I just remembered I have a refrigerant scale in my back pocket. It’s 13.6 pounds,
I did not have the tank anchored, however the M32 came with two welded steel ramps to put in front of each track that would dig into the ground and prevent the tank from sliding forward or tipping forward while winching or using the boom. Ludwig included them in the kit. I think they are seen in the video lifting the howitzer.
01-27-2021 | 04:56 PM
#38
Dang, wow more than 4 years have passed since I started this one. I really need to get it finished..... Well Ive been hard at work on this monster for the last week. 3 day weekend solid, nothing else and every night. I made lots of bits and details that I havent really photoed yet but I also got it working too.
https://www.youtube.com/watch?v=hMETEiktxYQ
https://www.youtube.com/watch?v=Y9Zpyj1gtq4
https://www.youtube.com/watch?v=hMETEiktxYQ
https://www.youtube.com/watch?v=Y9Zpyj1gtq4
01-27-2021 | 07:42 PM
#39
Thread Starter
Well thank you Maus. Im having alot of fun with this build. Im kind of going overboard on alot of stuff. It will probably become my best build yet. Since everything will work like the real thing did. One of the big draw backs I have hit is I keep having to rebuild parts from the kit I got that arent correct. I have found the rear of the turret isnt quite right, its too long, so when I take the turret off and get to that point... well Ille be chopping again.
 01-28-2021 | 04:30 PM
#41
Well thank you Maus. Im having alot of fun with this build. Im kind of going overboard on alot of stuff. It will probably become my best build yet. Since everything will work like the real thing did. One of the big draw backs I have hit is I keep having to rebuild parts from the kit I got that arent correct. I have found the rear of the turret isnt quite right, its too long, so when I take the turret off and get to that point... well Ille be chopping again.
01-29-2021 | 10:47 PM
#42
Thread Starter
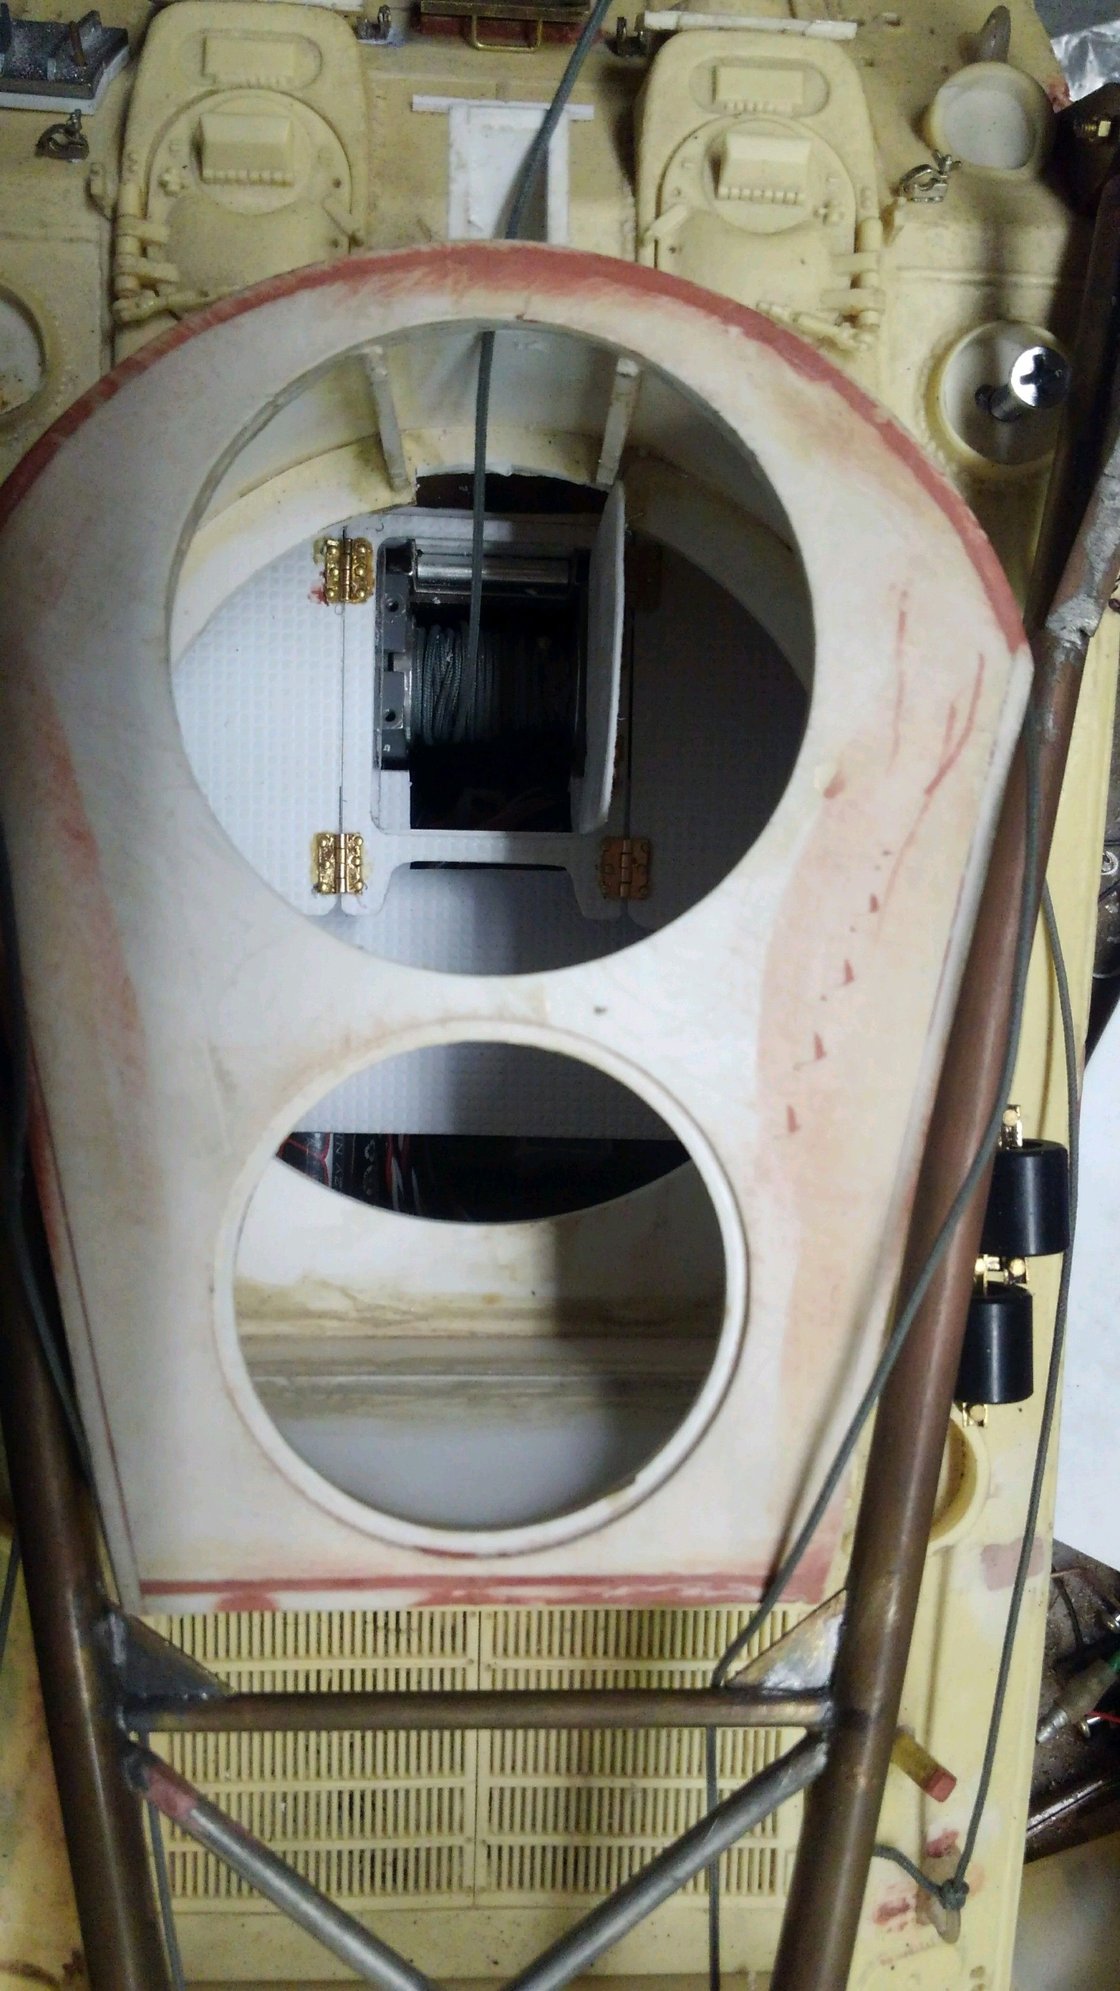
Well Ive gotten quite a bit more done though it wont seem like it. Planning takes hours of photo study, trial and error and fitting and refitting.
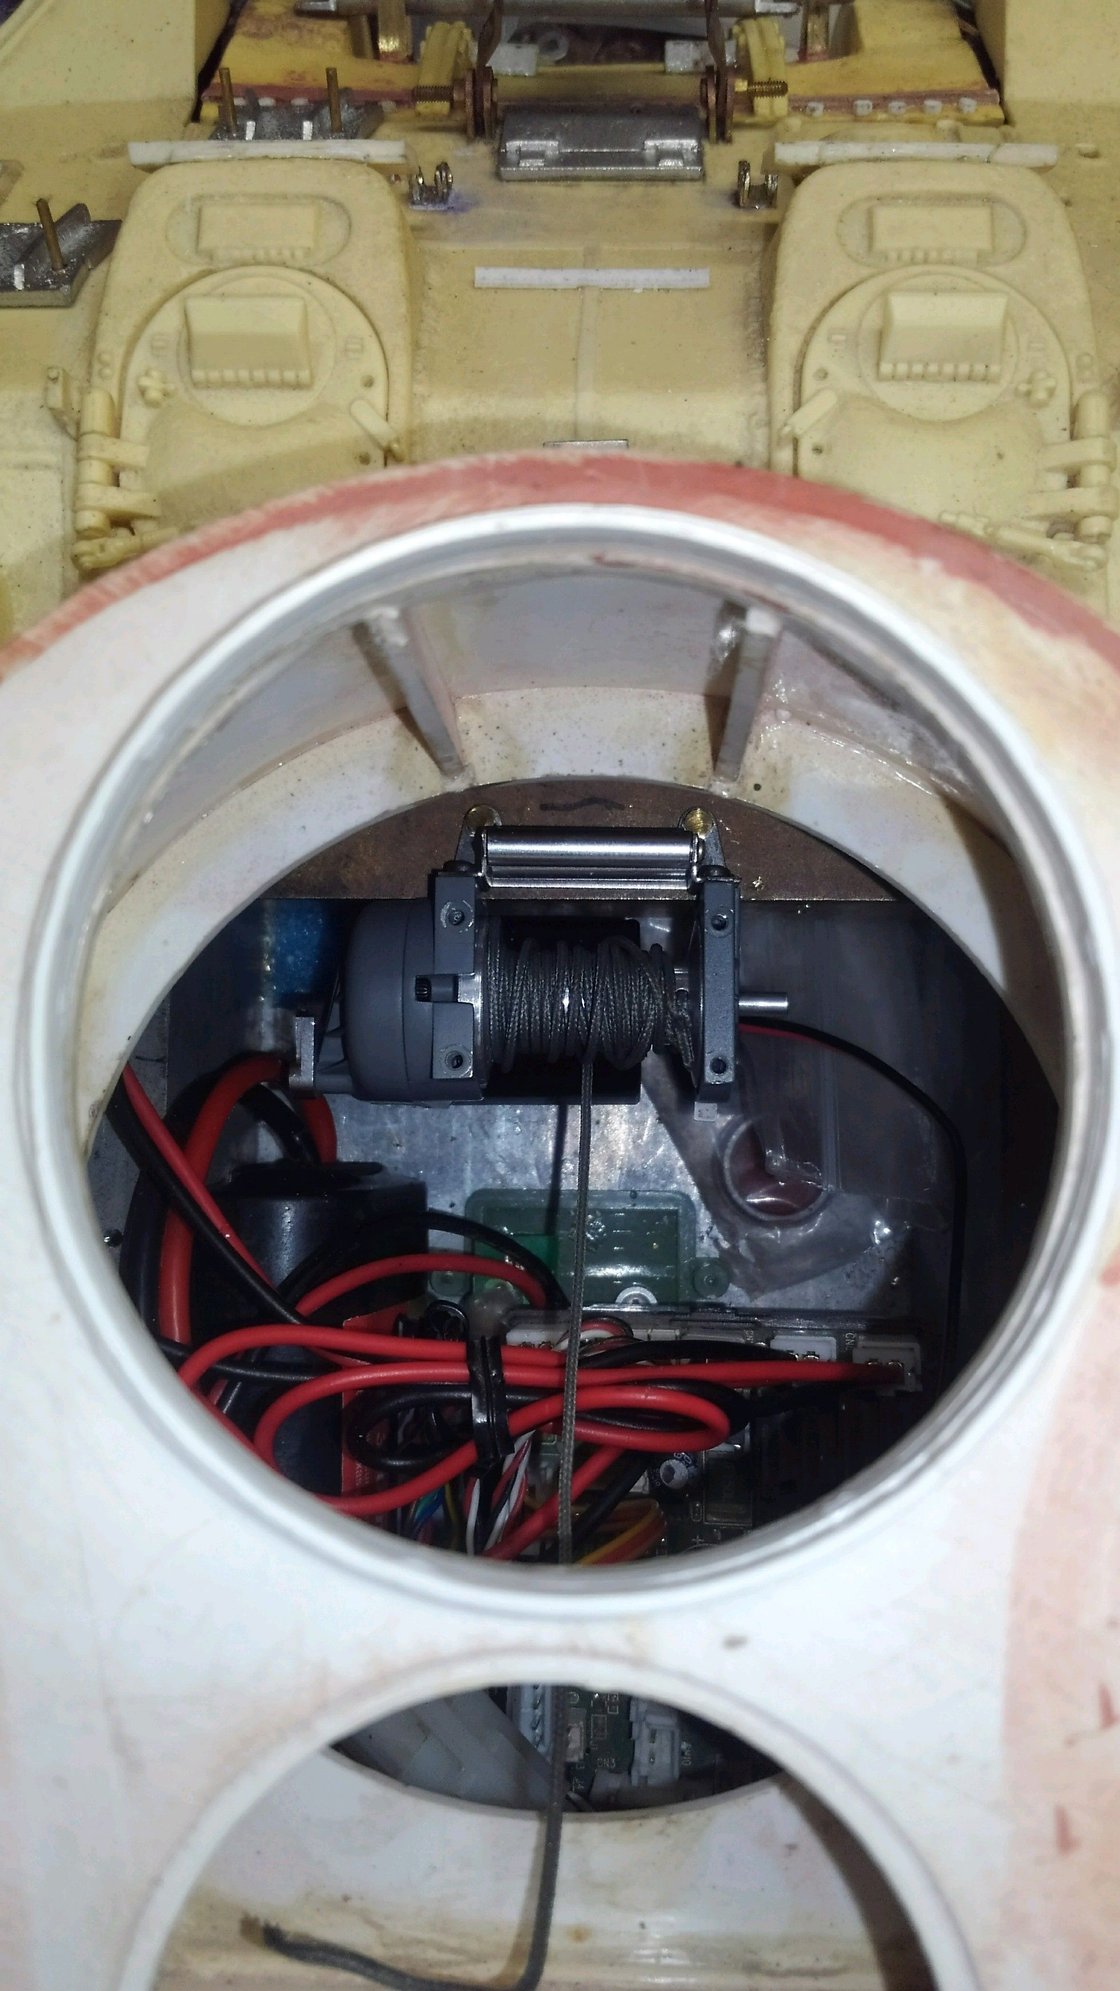
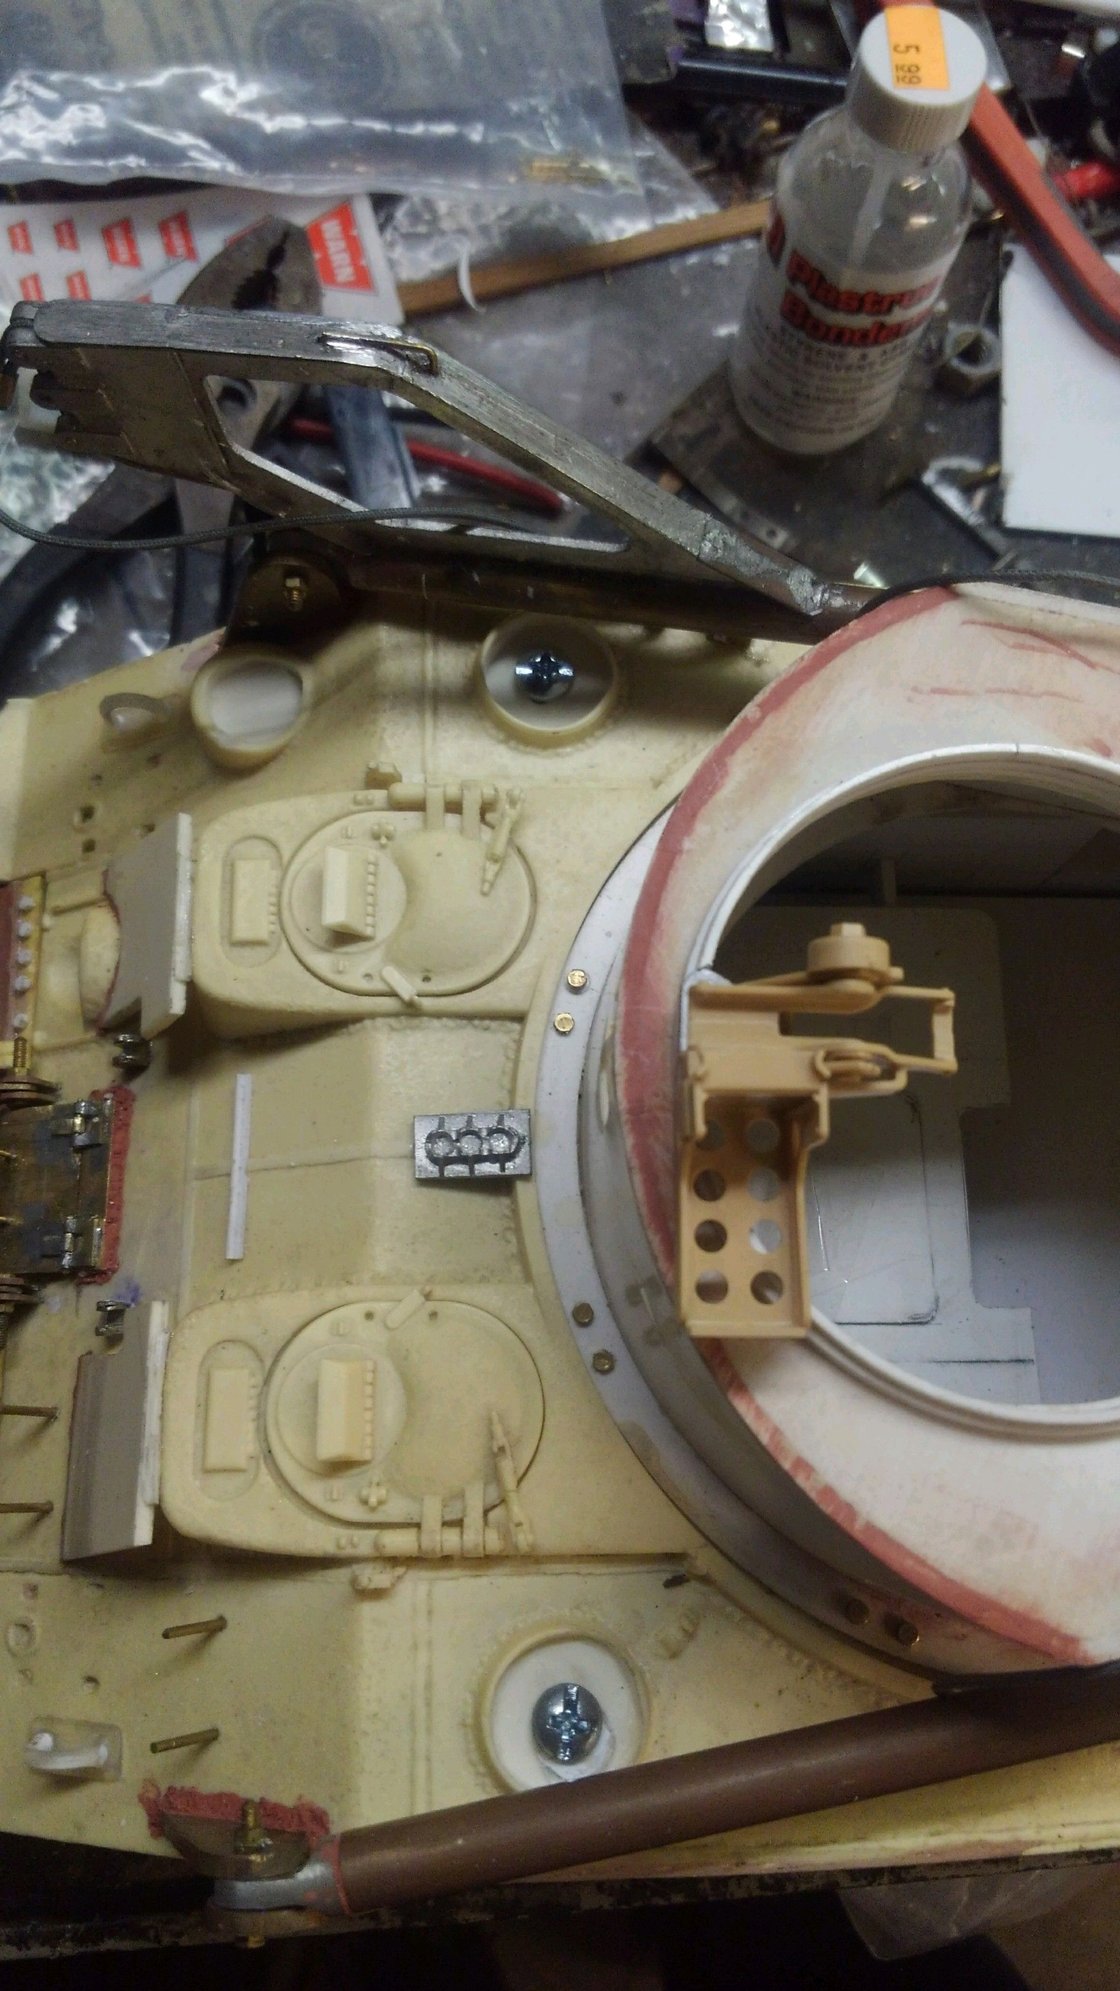
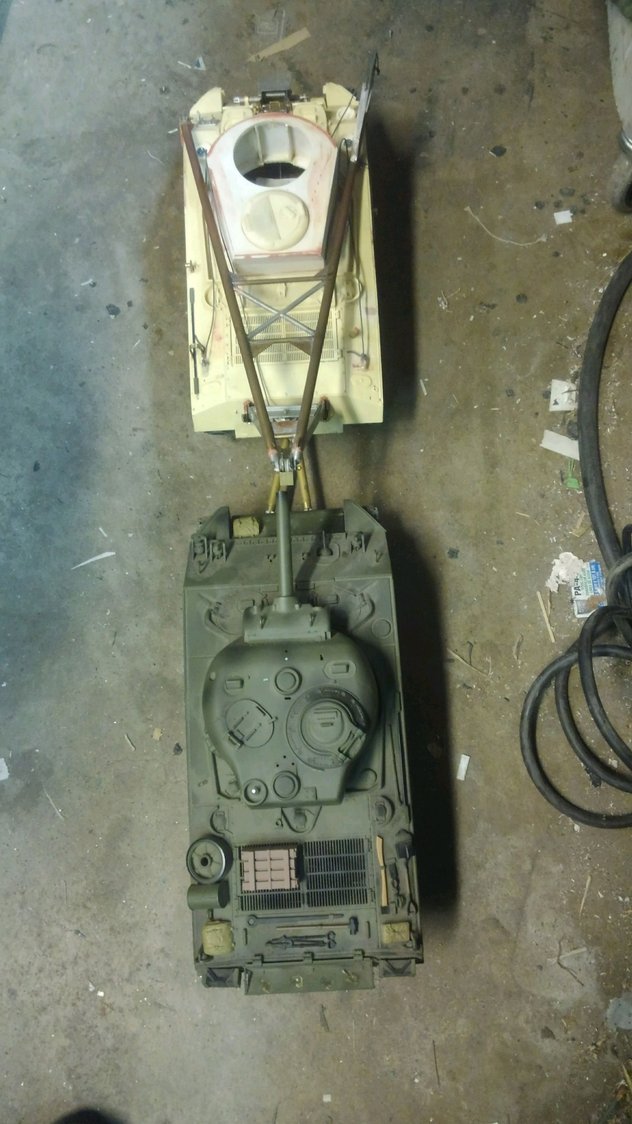
I have the interior of the hull (not the turret) mocked up. The tool boxes on the sides and bottom floor are completed as is the base for the MG platform. The bottom floor and the MG platform will eventually be diamond plate so just waiting for that to arrive some day. The current platform is the Template. It will all be hinged per the real thing, it has to be so I can access the cable and move it to the front exit or up to the top or out the rear with my long wire hook cable manipulator to use it as I need to. The cool realization when all my guestimation and hoping added up to the figure at the right height for the MG to be used and the floors all lined up about right with the top down photos I have. Its as close as I can get without measurements.
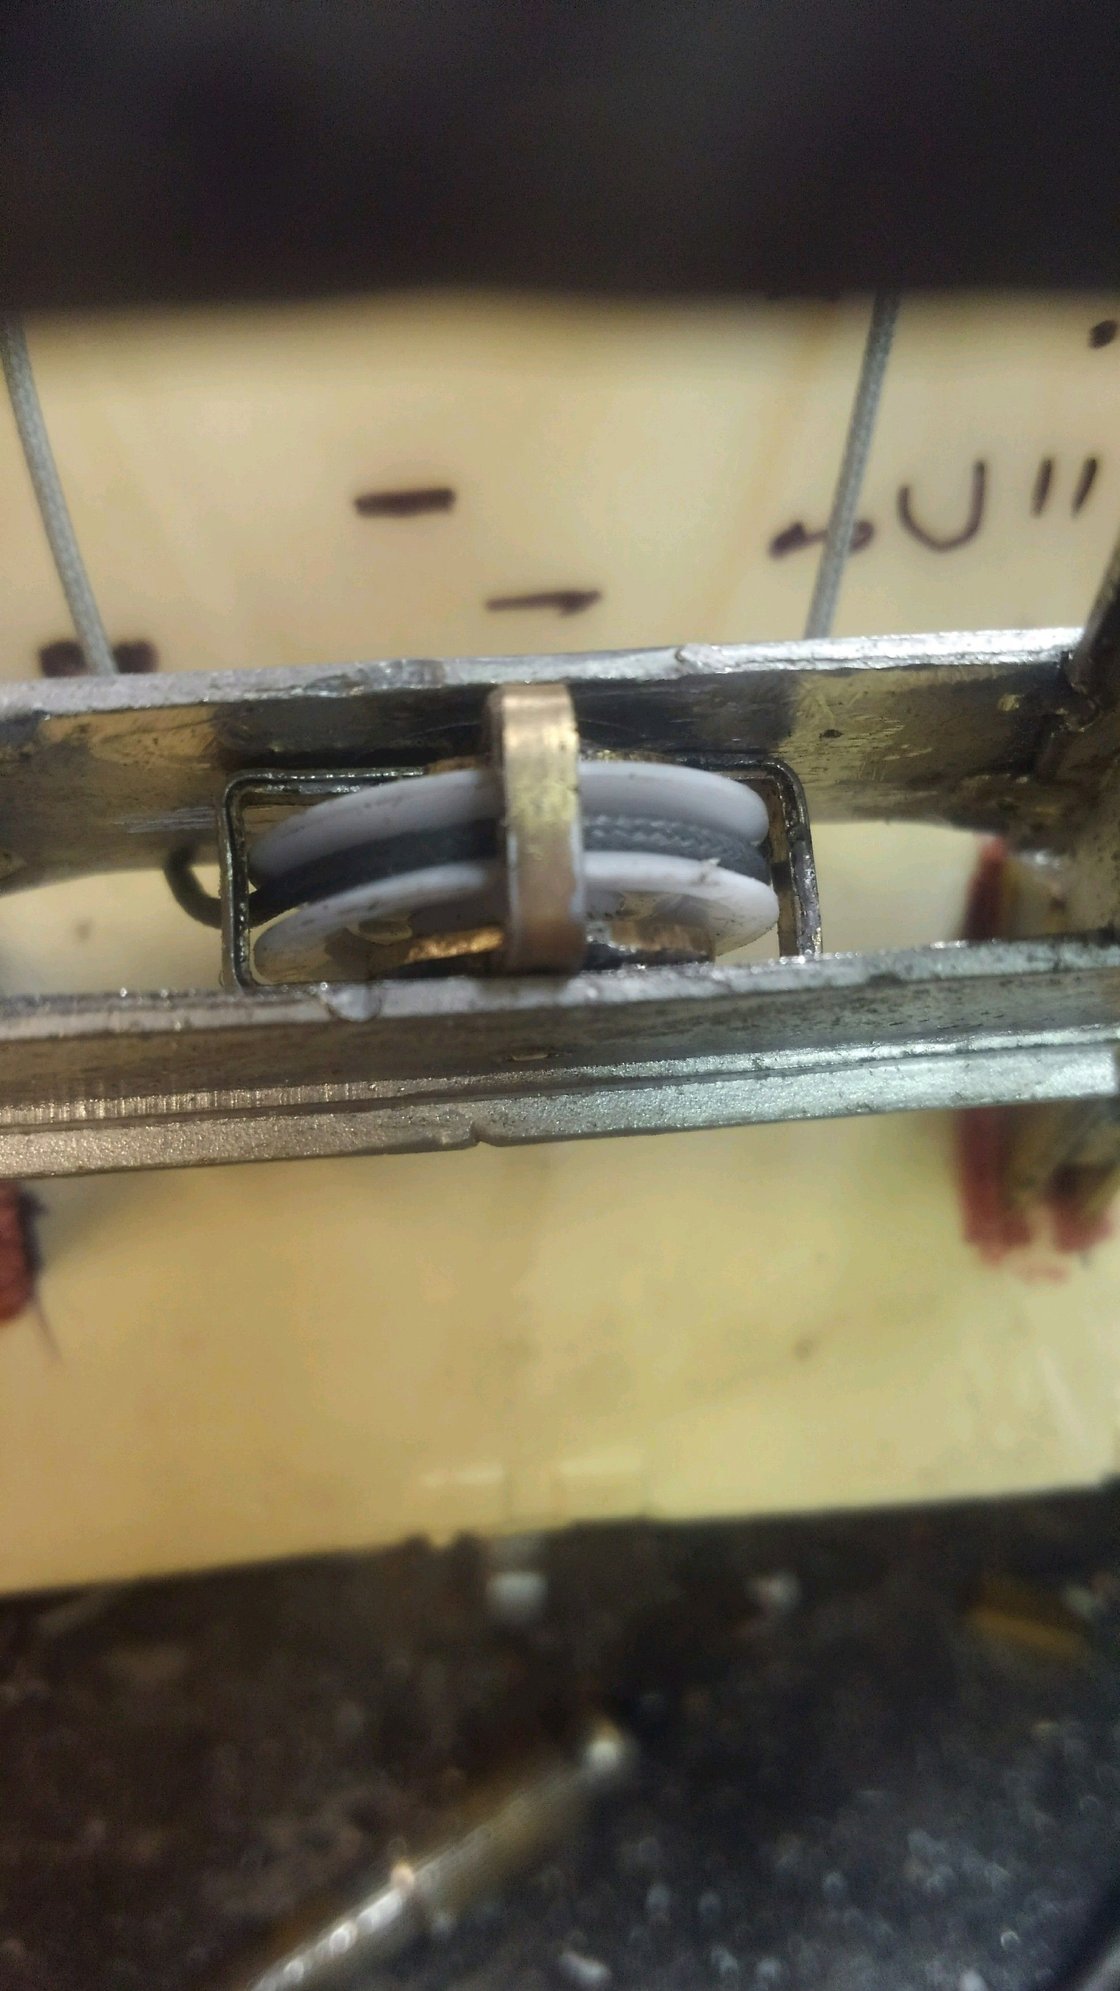
I also cut out the center of the A frame brace which was just a round cylinder the wire rope wrapped around and fabricated the pulley and keeper brackets. Early tanks had just the dowel to hold the cable but that changed quickly and a pulley was installed in all subsequent M32 conversions and older ones were upgraded to the pulley as fast as possible.
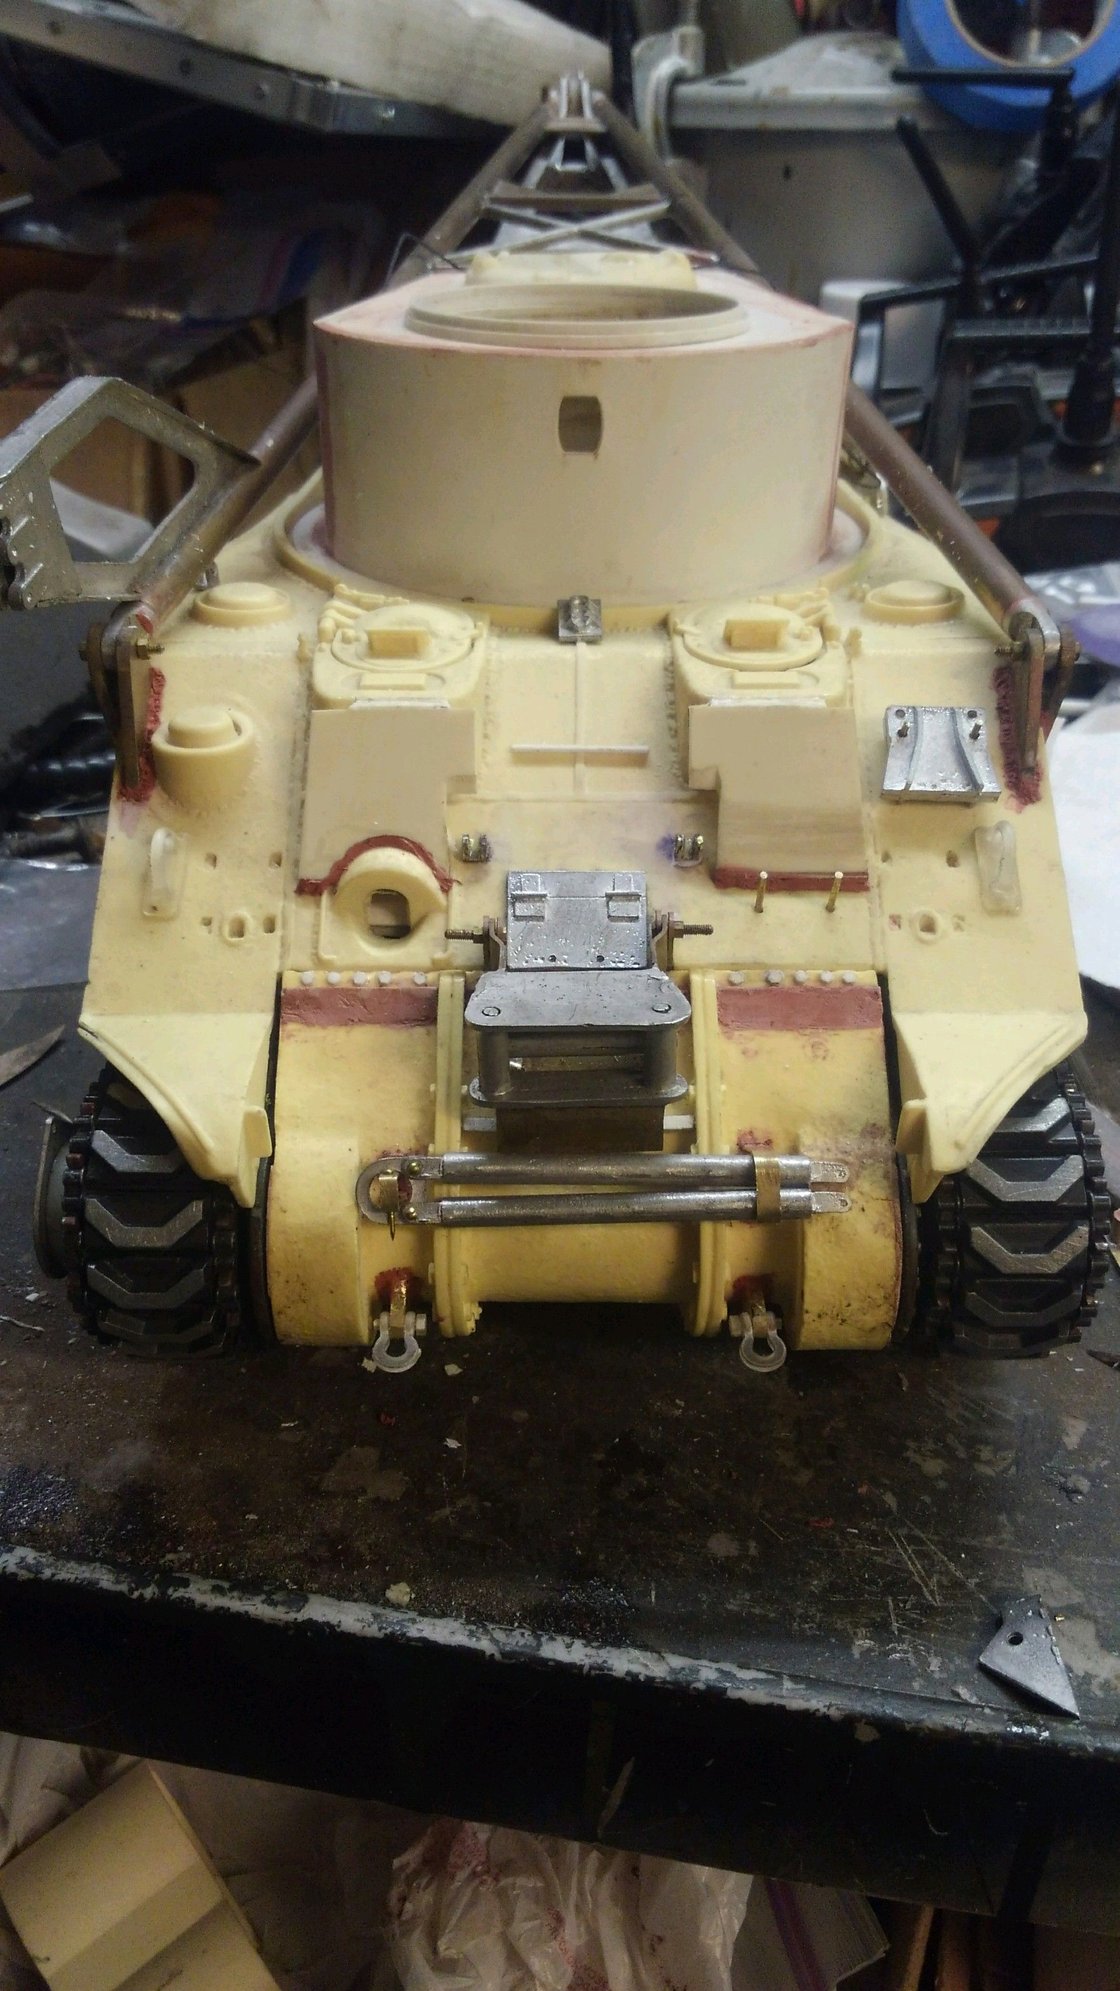
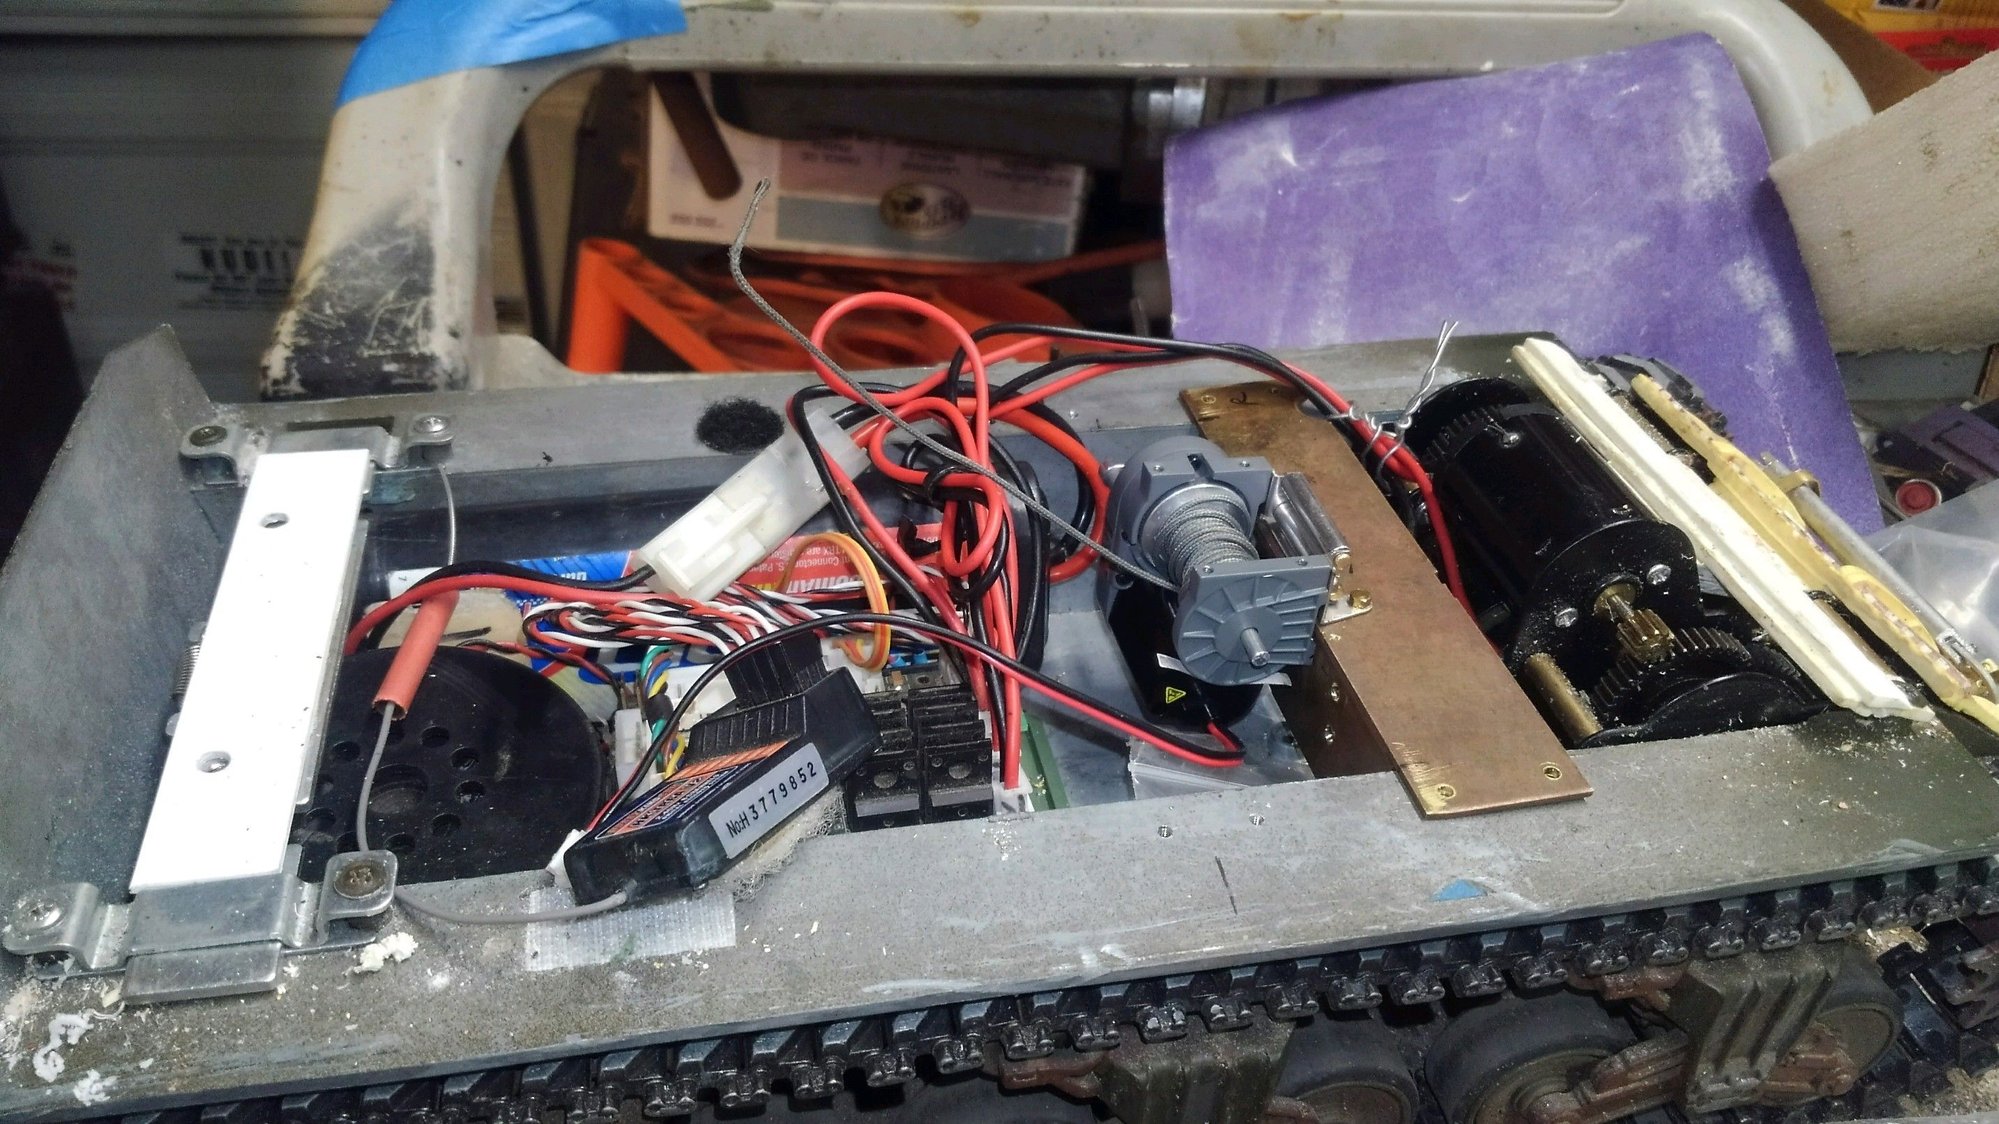
Oh I also completed the front anchoring system for the hull. The hull of the tank needs to be very firmly attached to the chassis for all the winching work so it has 4 screws now holding it down. Changing batteries will be a major PIA so I may just make a charging plug up, yet still, it all comes apart down to the hinged false floor to open up and get the battery out when I want to.
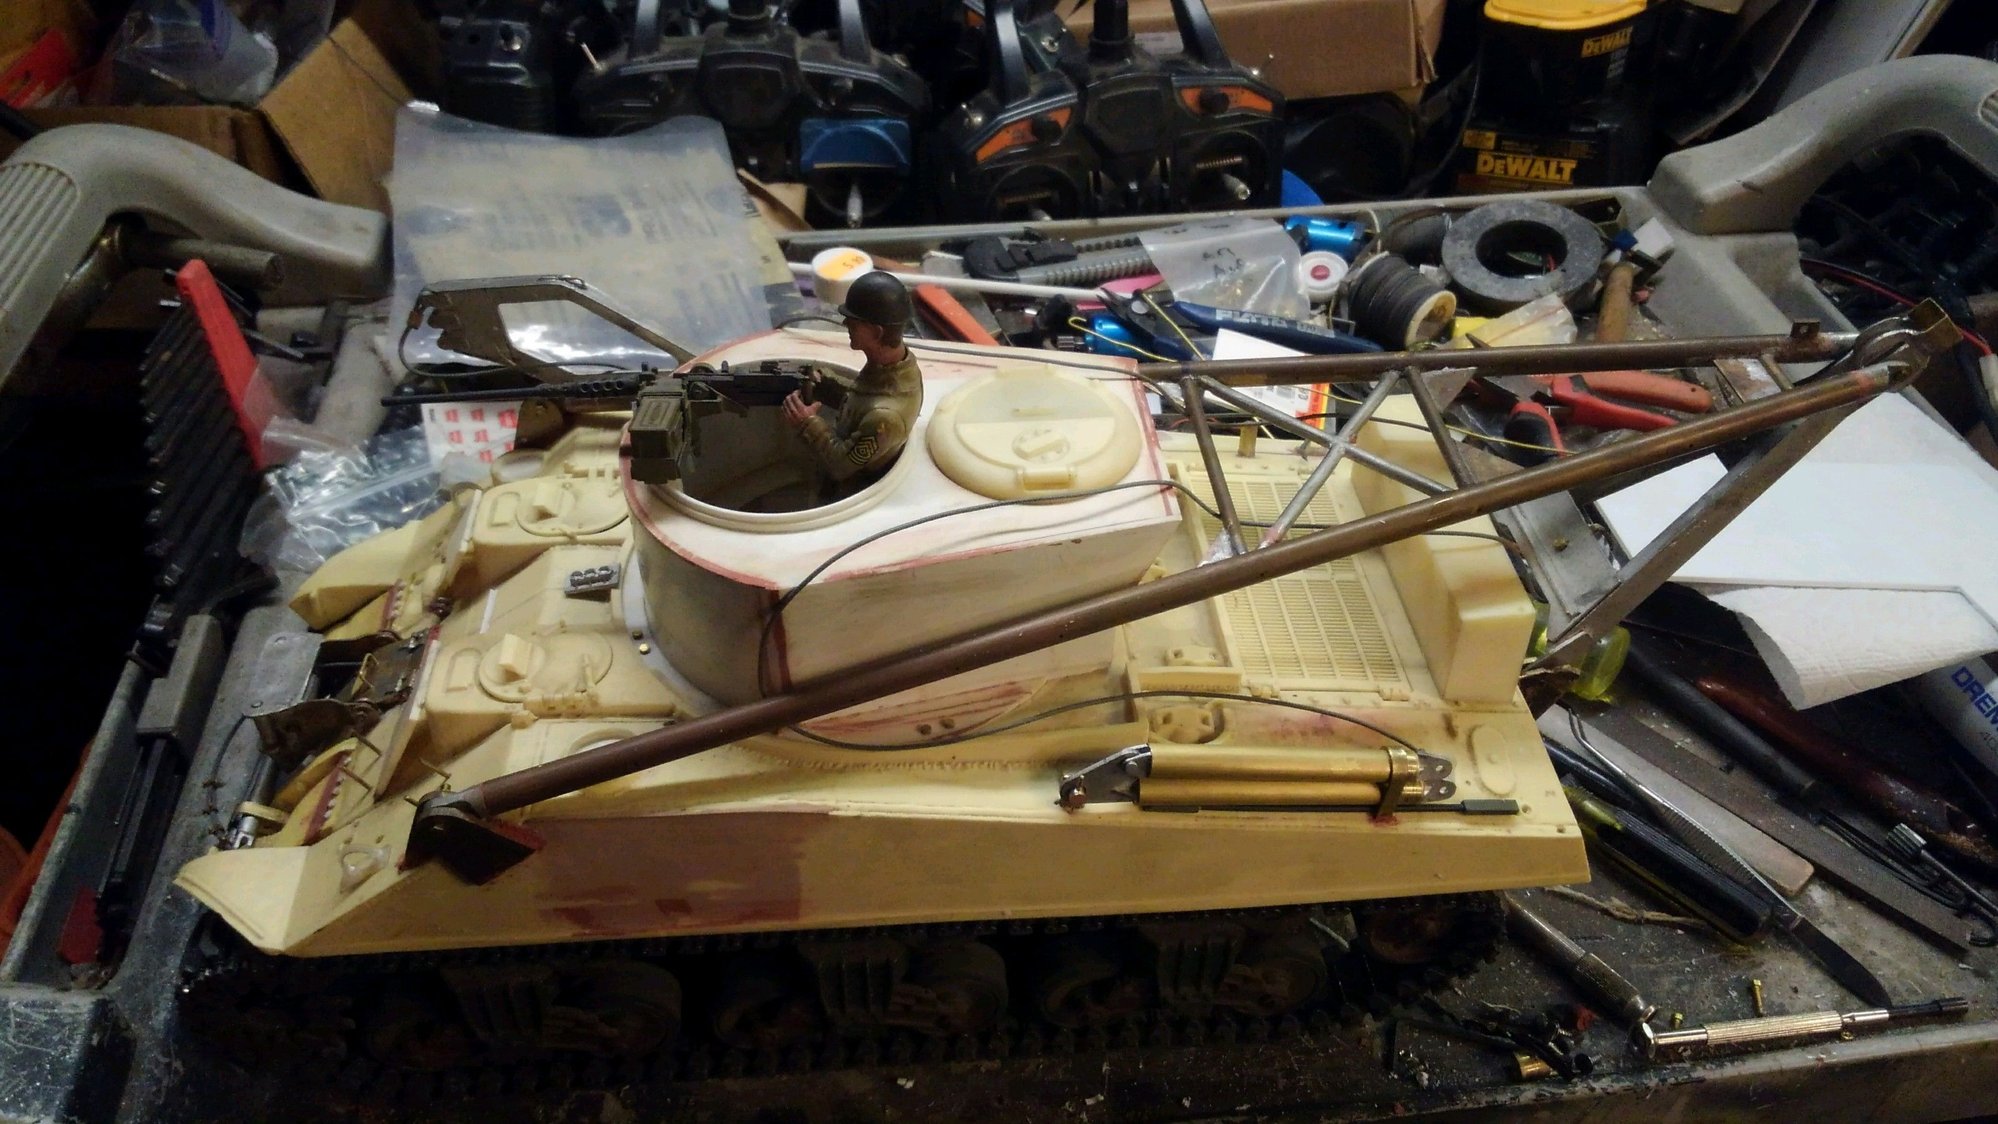
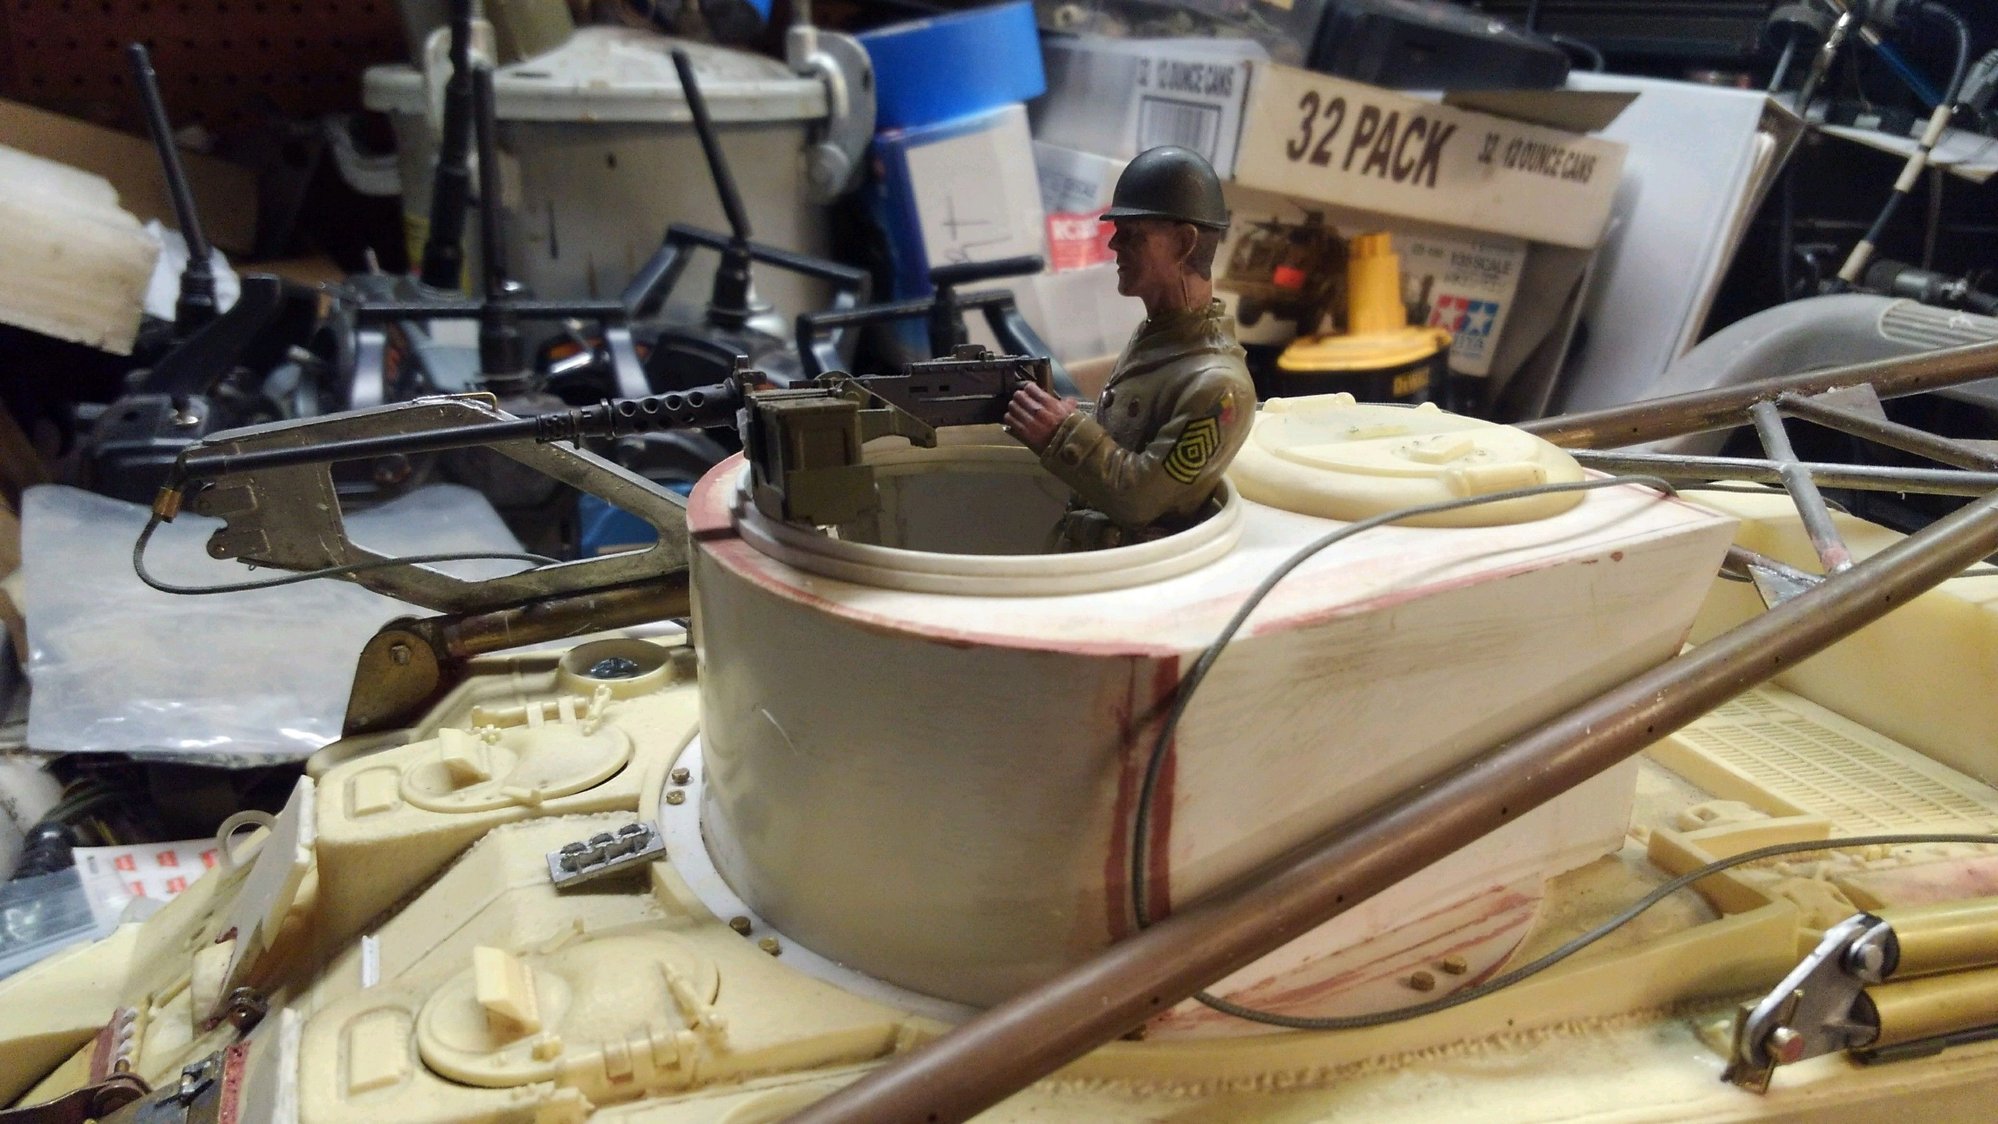
I have the interior of the hull (not the turret) mocked up. The tool boxes on the sides and bottom floor are completed as is the base for the MG platform. The bottom floor and the MG platform will eventually be diamond plate so just waiting for that to arrive some day. The current platform is the Template. It will all be hinged per the real thing, it has to be so I can access the cable and move it to the front exit or up to the top or out the rear with my long wire hook cable manipulator to use it as I need to. The cool realization when all my guestimation and hoping added up to the figure at the right height for the MG to be used and the floors all lined up about right with the top down photos I have. Its as close as I can get without measurements.
I also cut out the center of the A frame brace which was just a round cylinder the wire rope wrapped around and fabricated the pulley and keeper brackets. Early tanks had just the dowel to hold the cable but that changed quickly and a pulley was installed in all subsequent M32 conversions and older ones were upgraded to the pulley as fast as possible.
Oh I also completed the front anchoring system for the hull. The hull of the tank needs to be very firmly attached to the chassis for all the winching work so it has 4 screws now holding it down. Changing batteries will be a major PIA so I may just make a charging plug up, yet still, it all comes apart down to the hinged false floor to open up and get the battery out when I want to.
02-02-2021 | 02:52 PM
#43
Wow, this build rocks!!! Keep the photos coming!!!
02-02-2021 | 10:38 PM
#44
Thread Starter
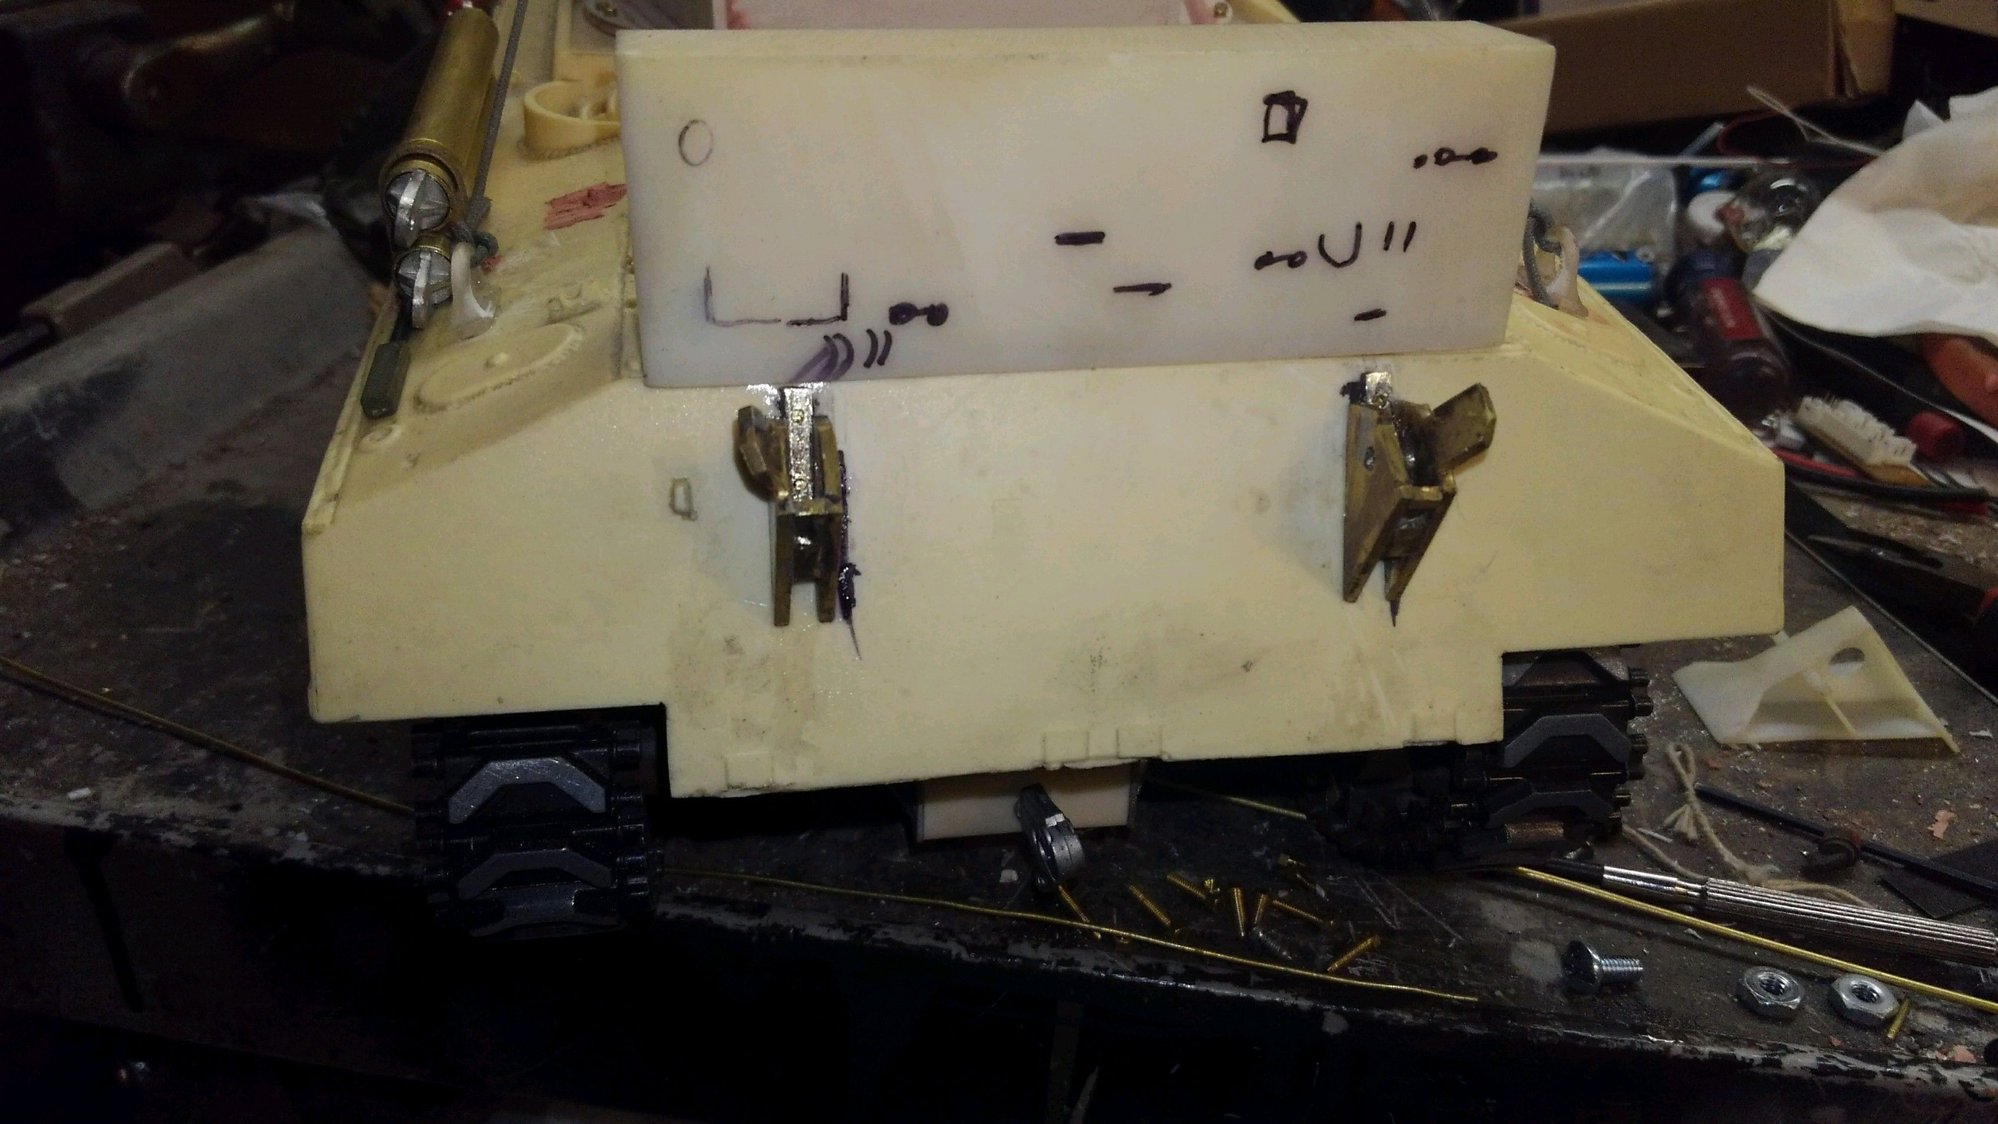
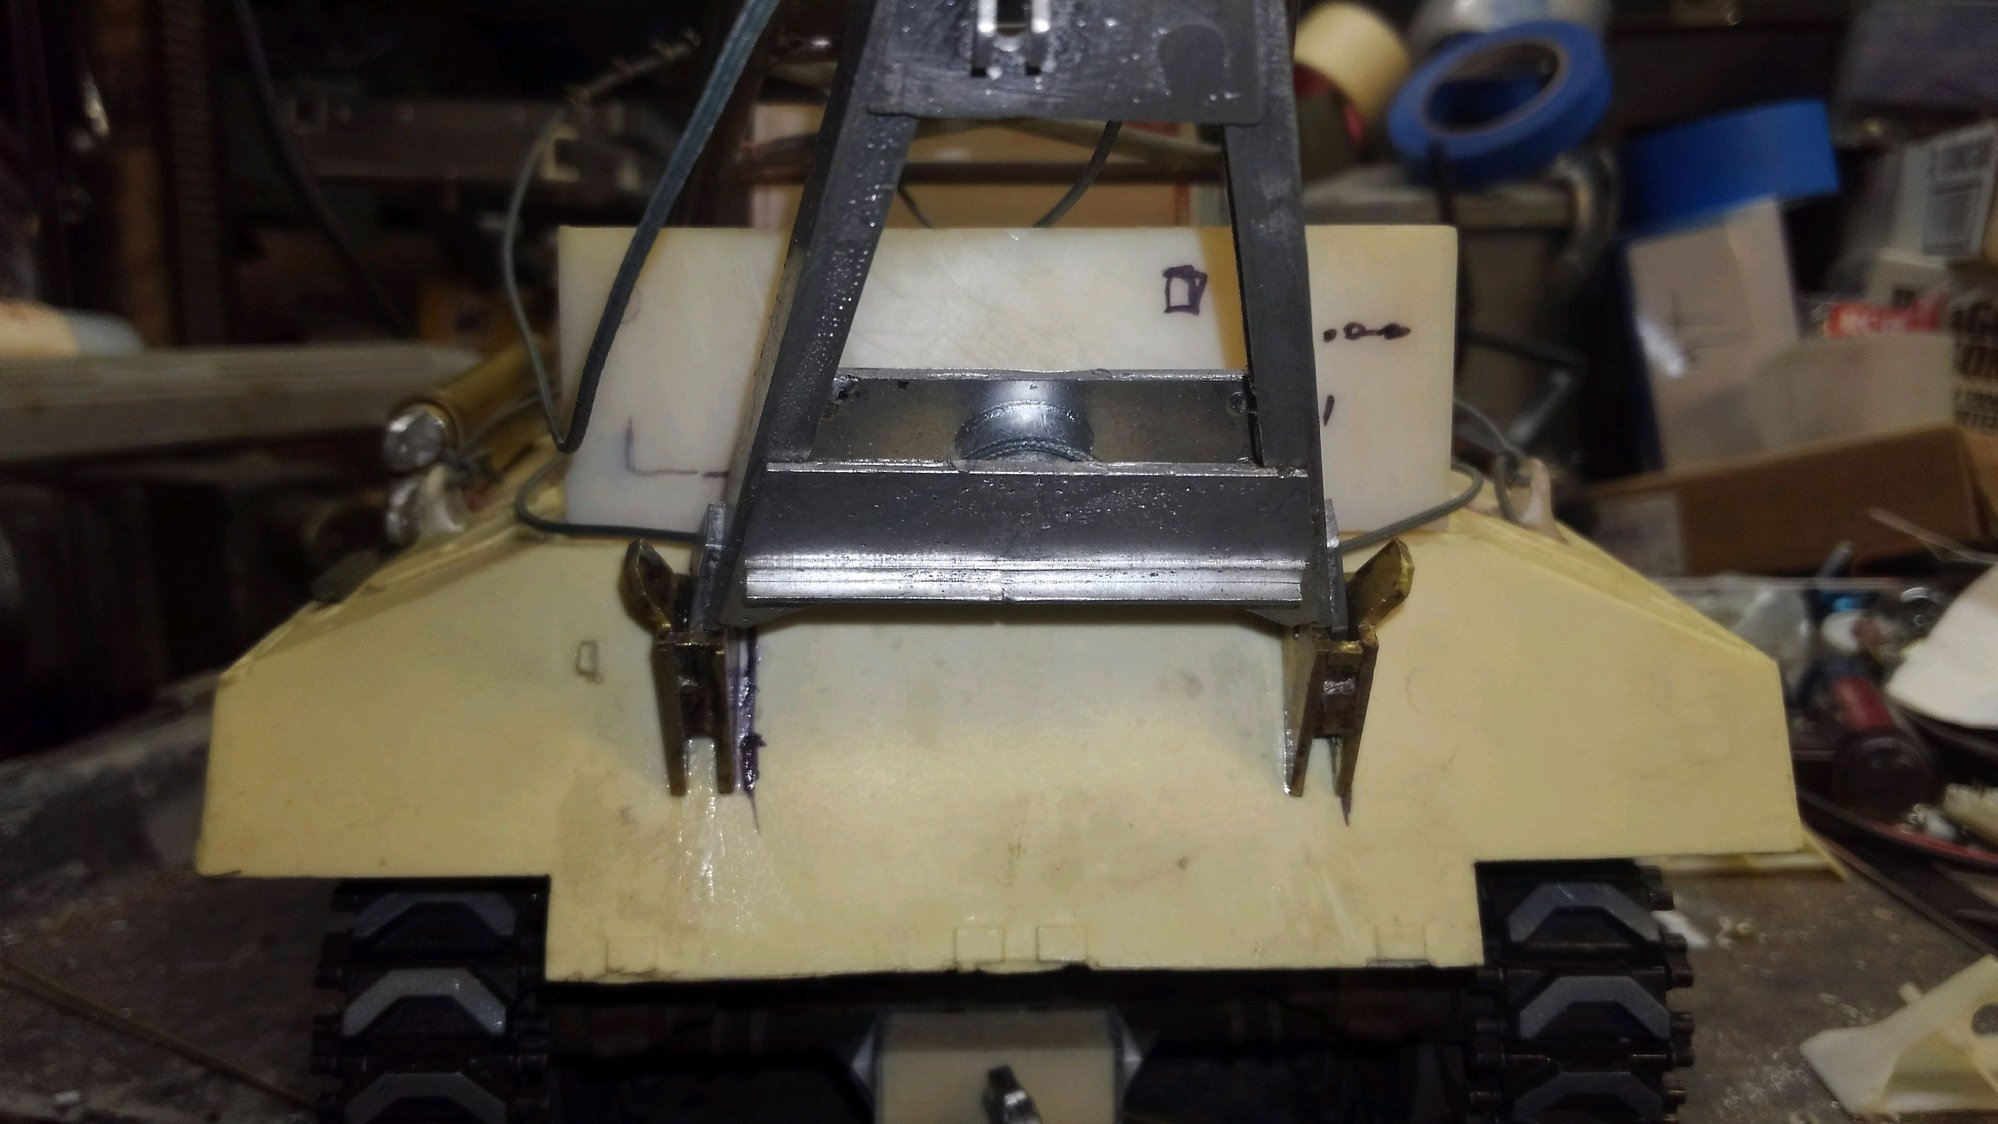
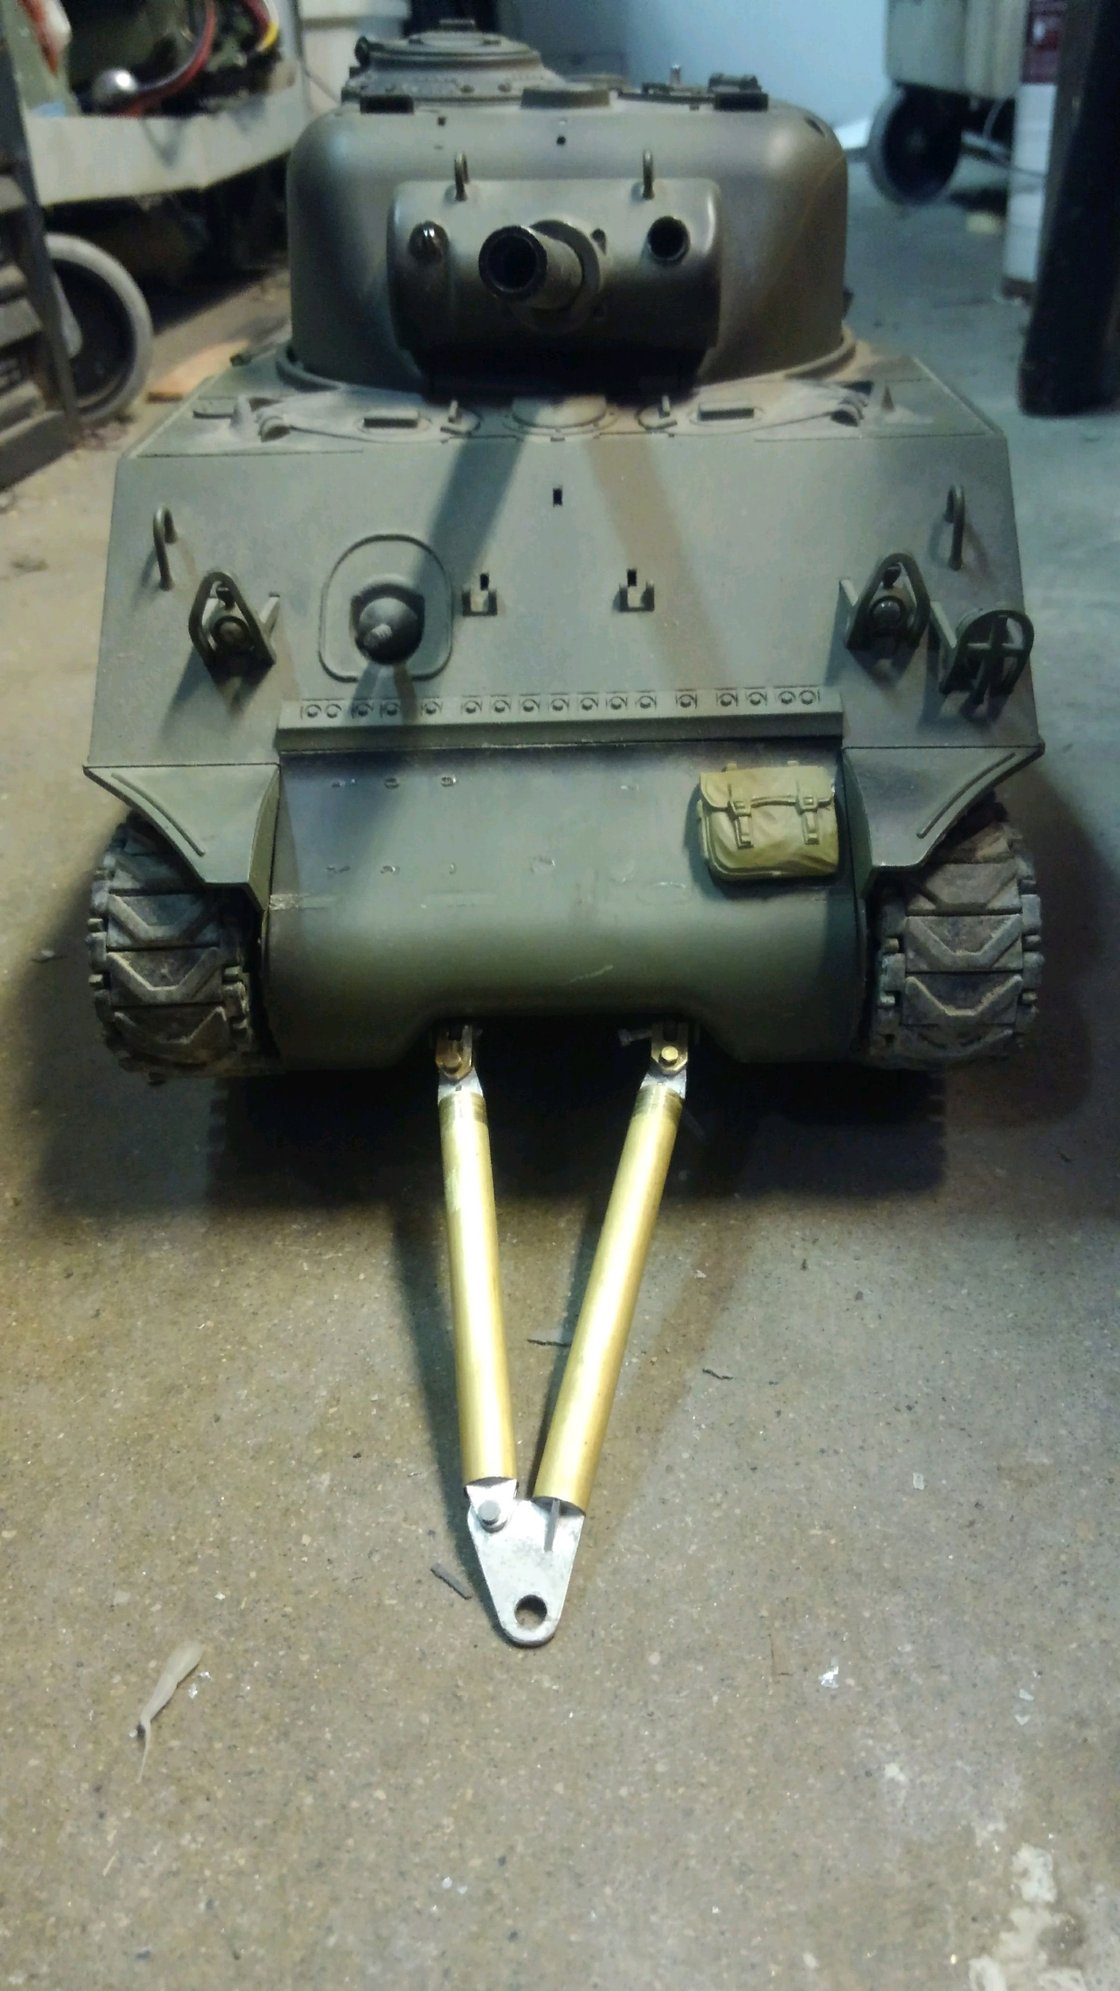
I did some more work on the tow bar tonight and fabricated the towing cleats that actually connect the tow bar to the tow lugs on the sherman front. Fun project. They need some refinement but anh, here they are.


The following users liked this post:
ksoc (02-06-2021)
 02-05-2021 | 08:13 AM
#46
This just gets better and better!!! Looks great Rich, again your attention to detail is really paying off!!!
02-10-2021 | 12:55 PM
#47
Thread Starter
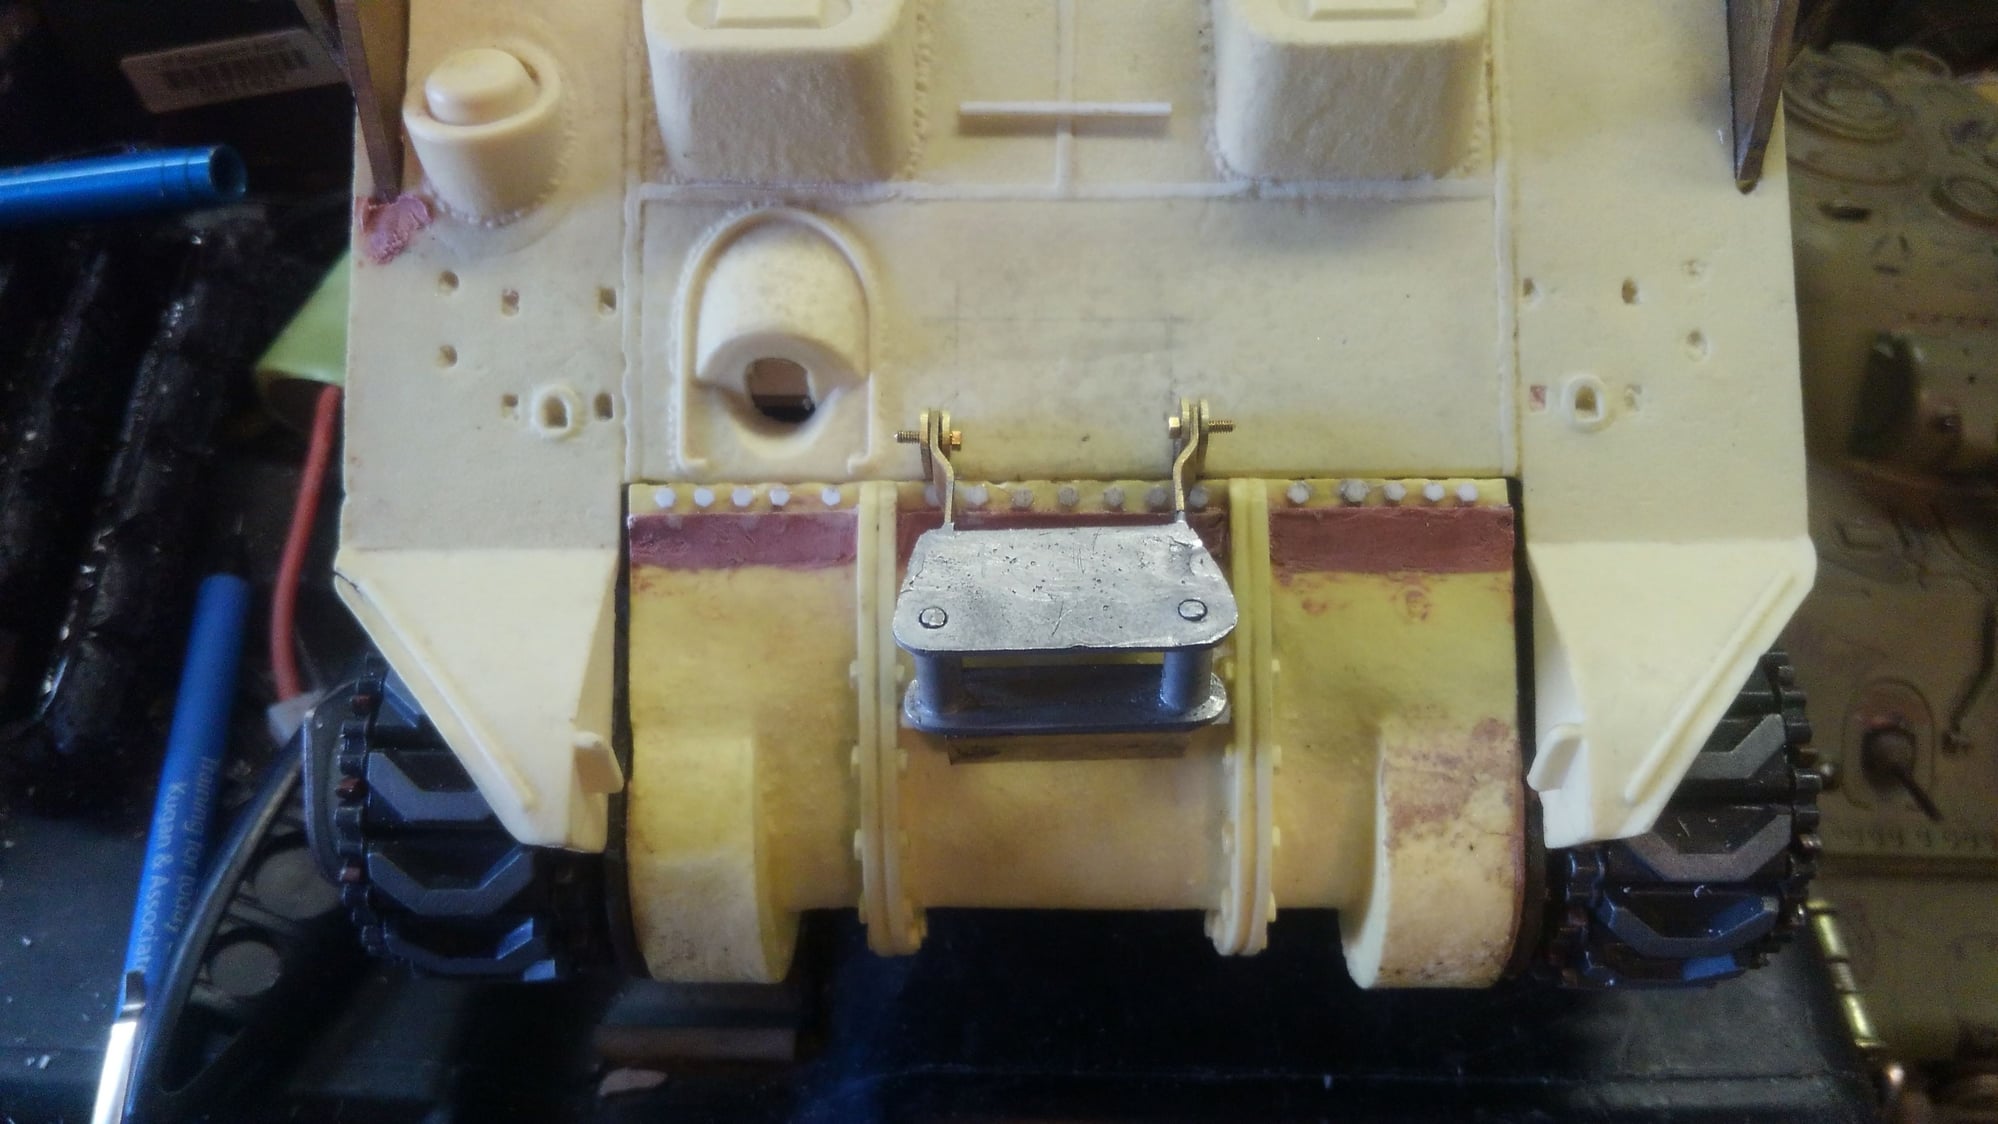
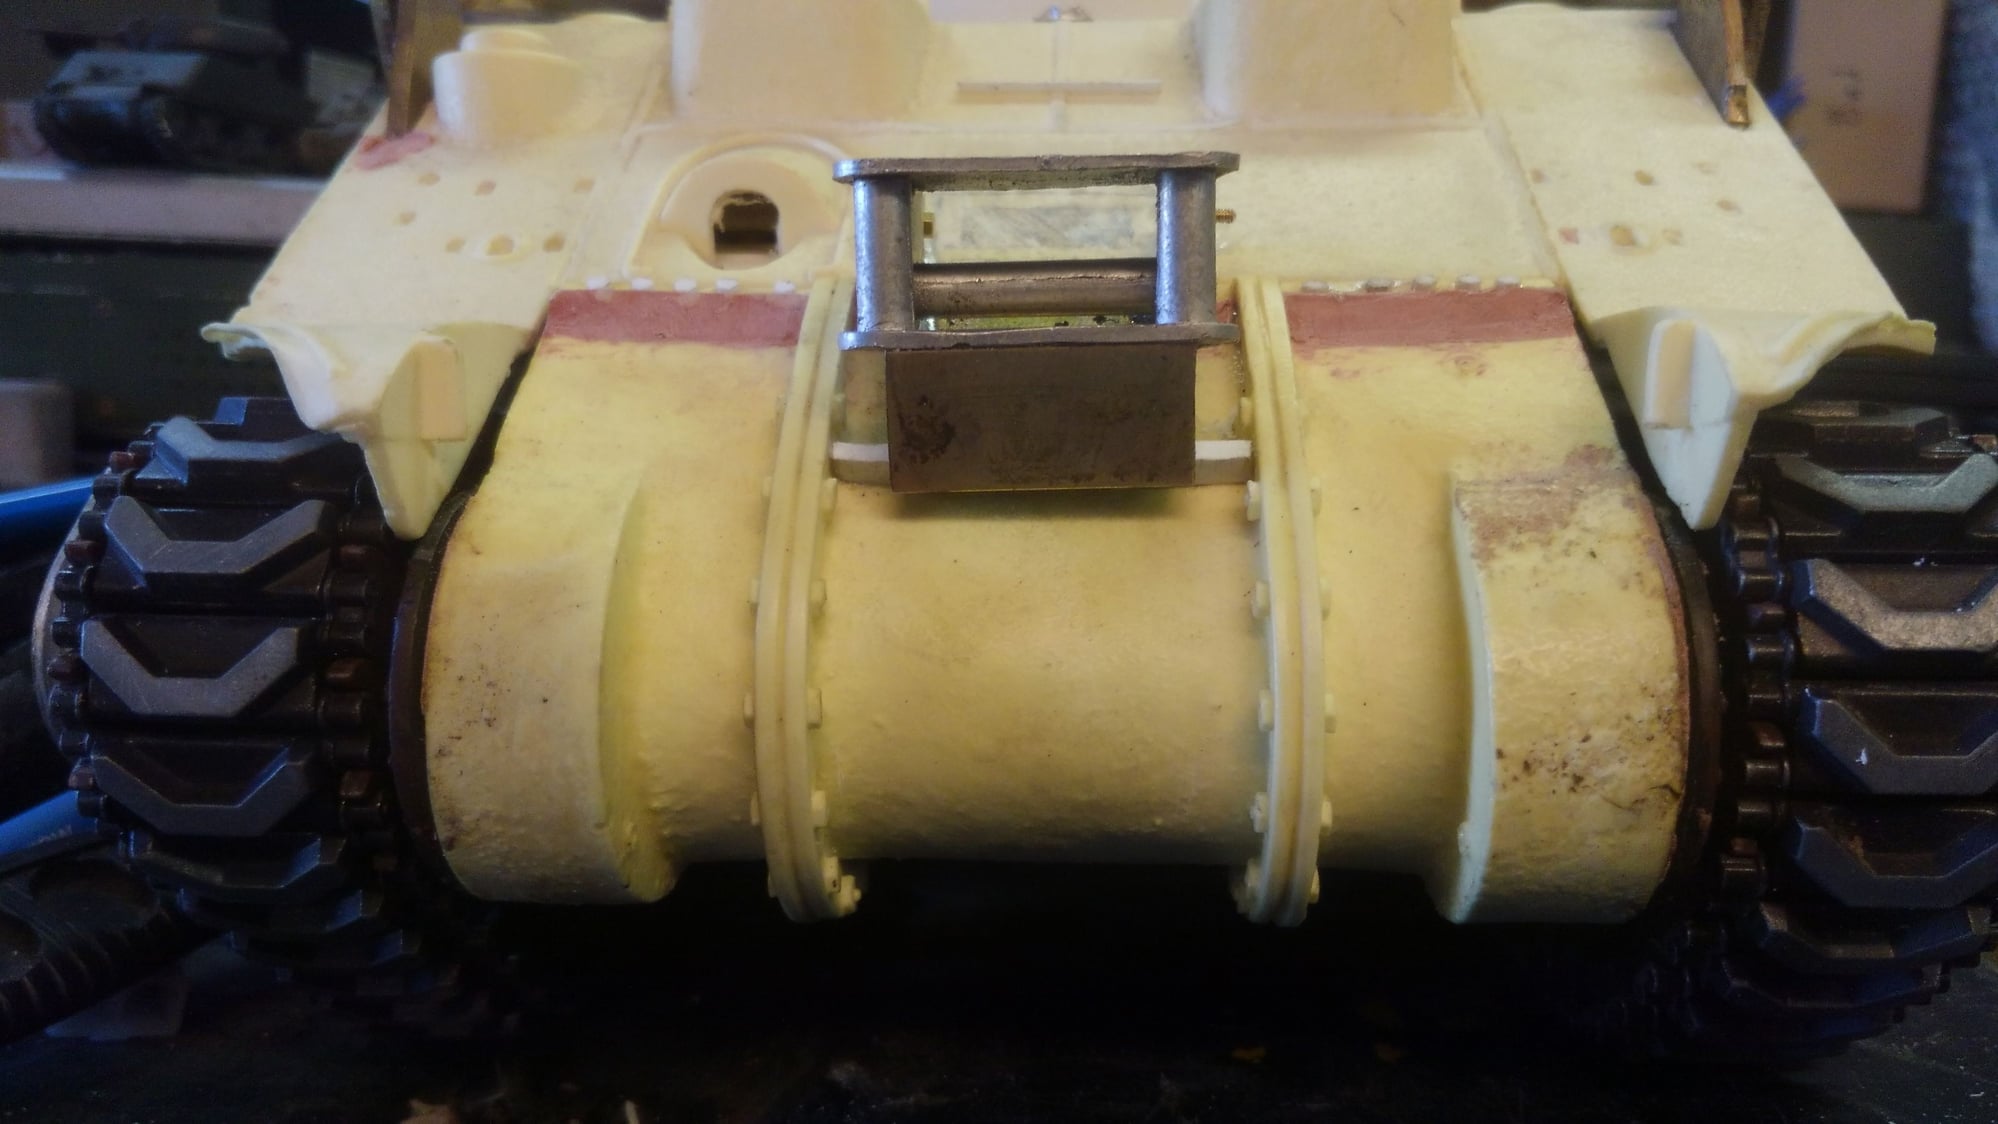
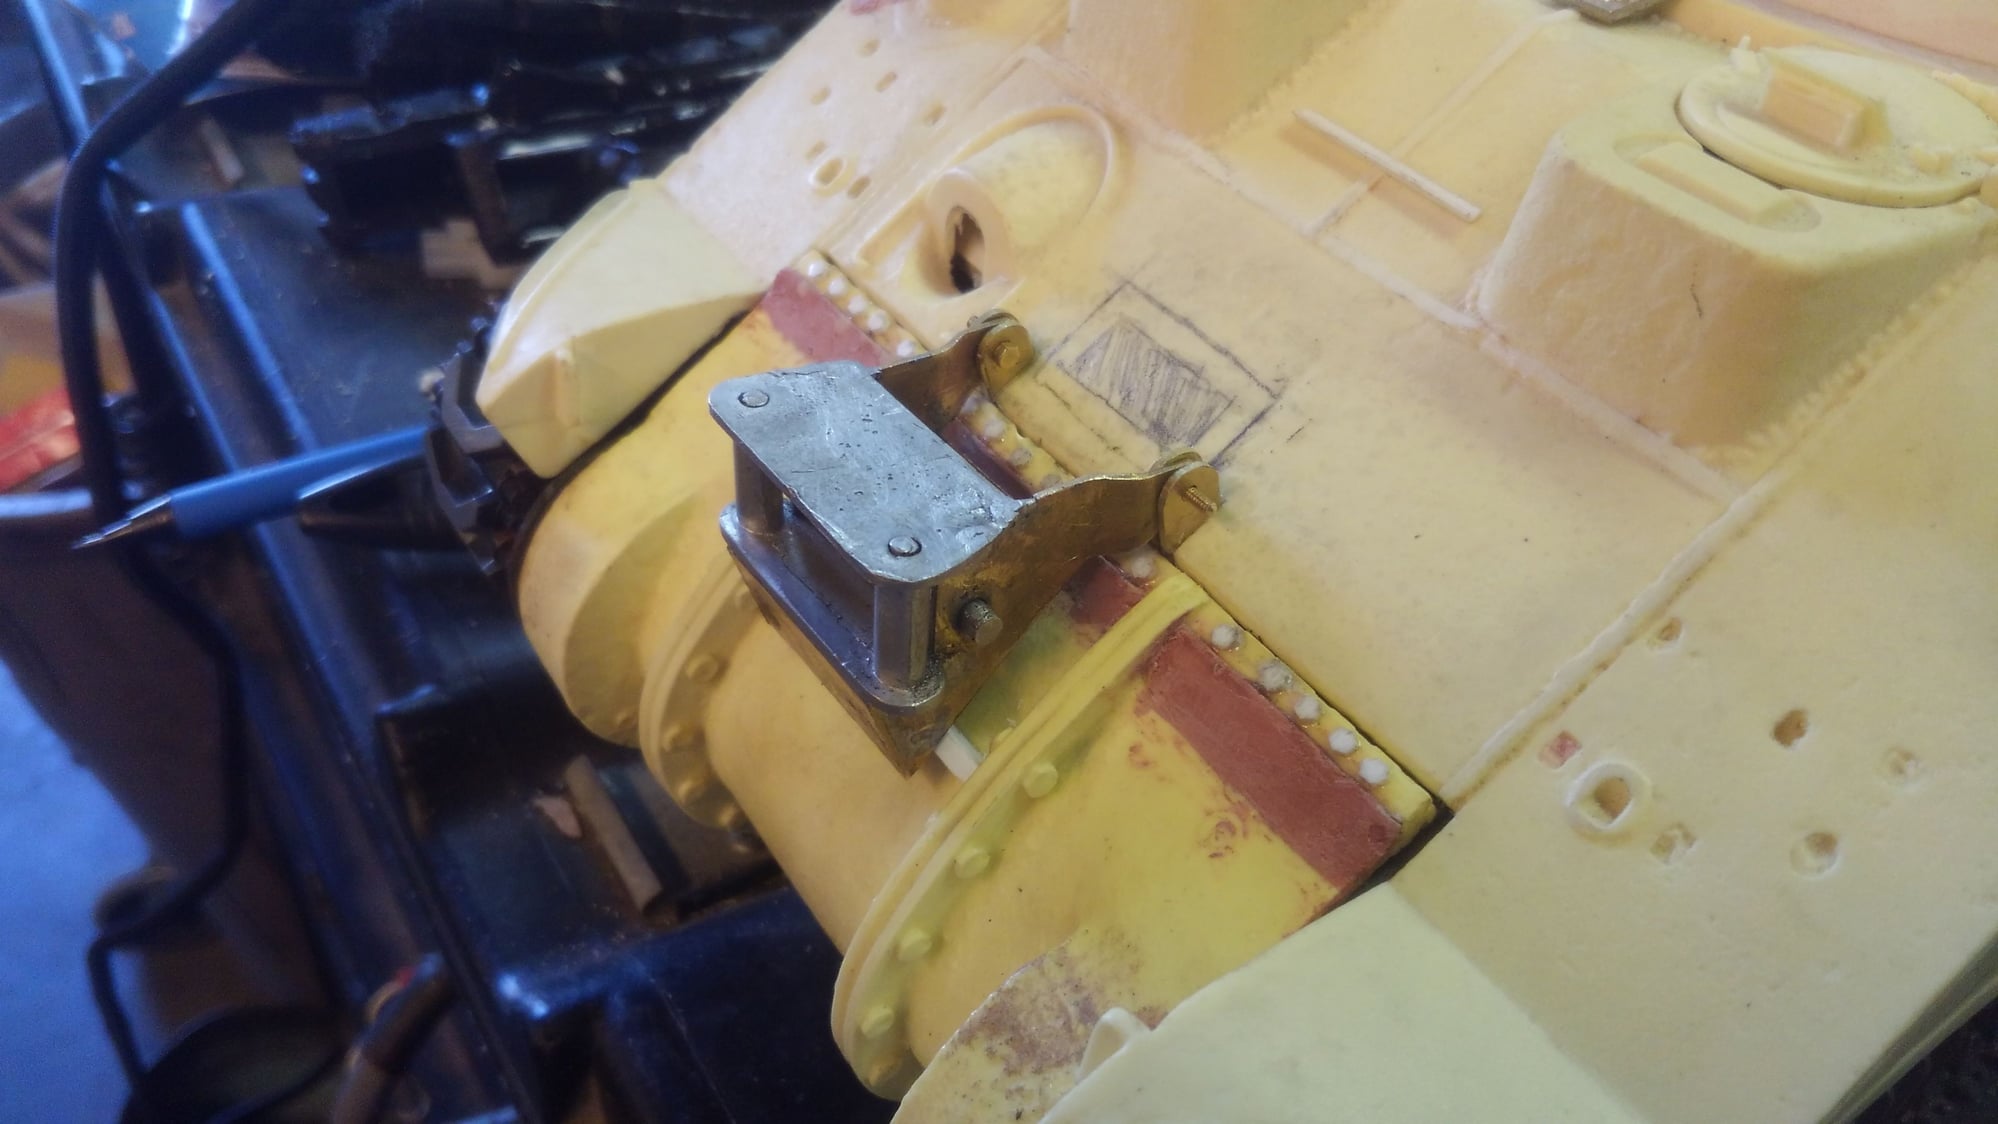
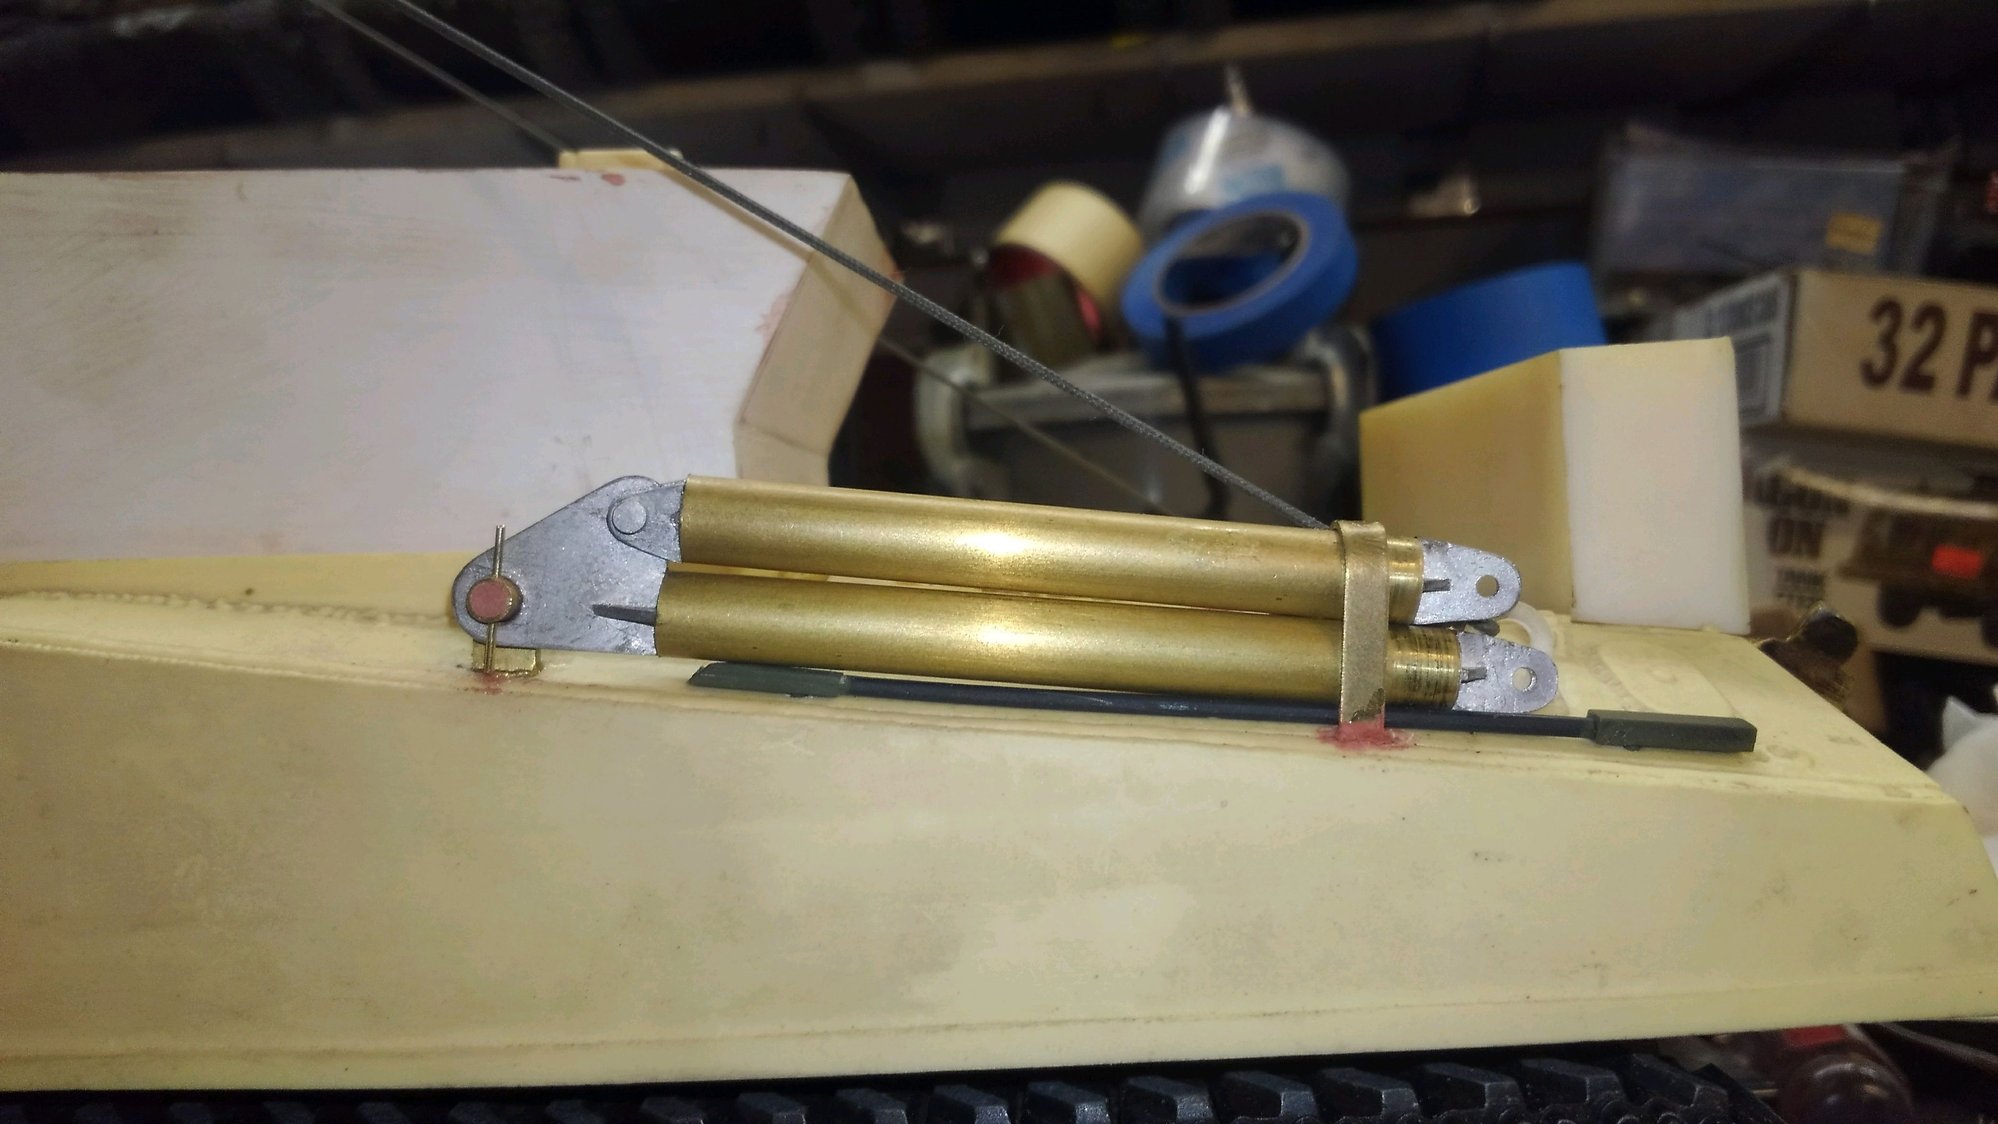
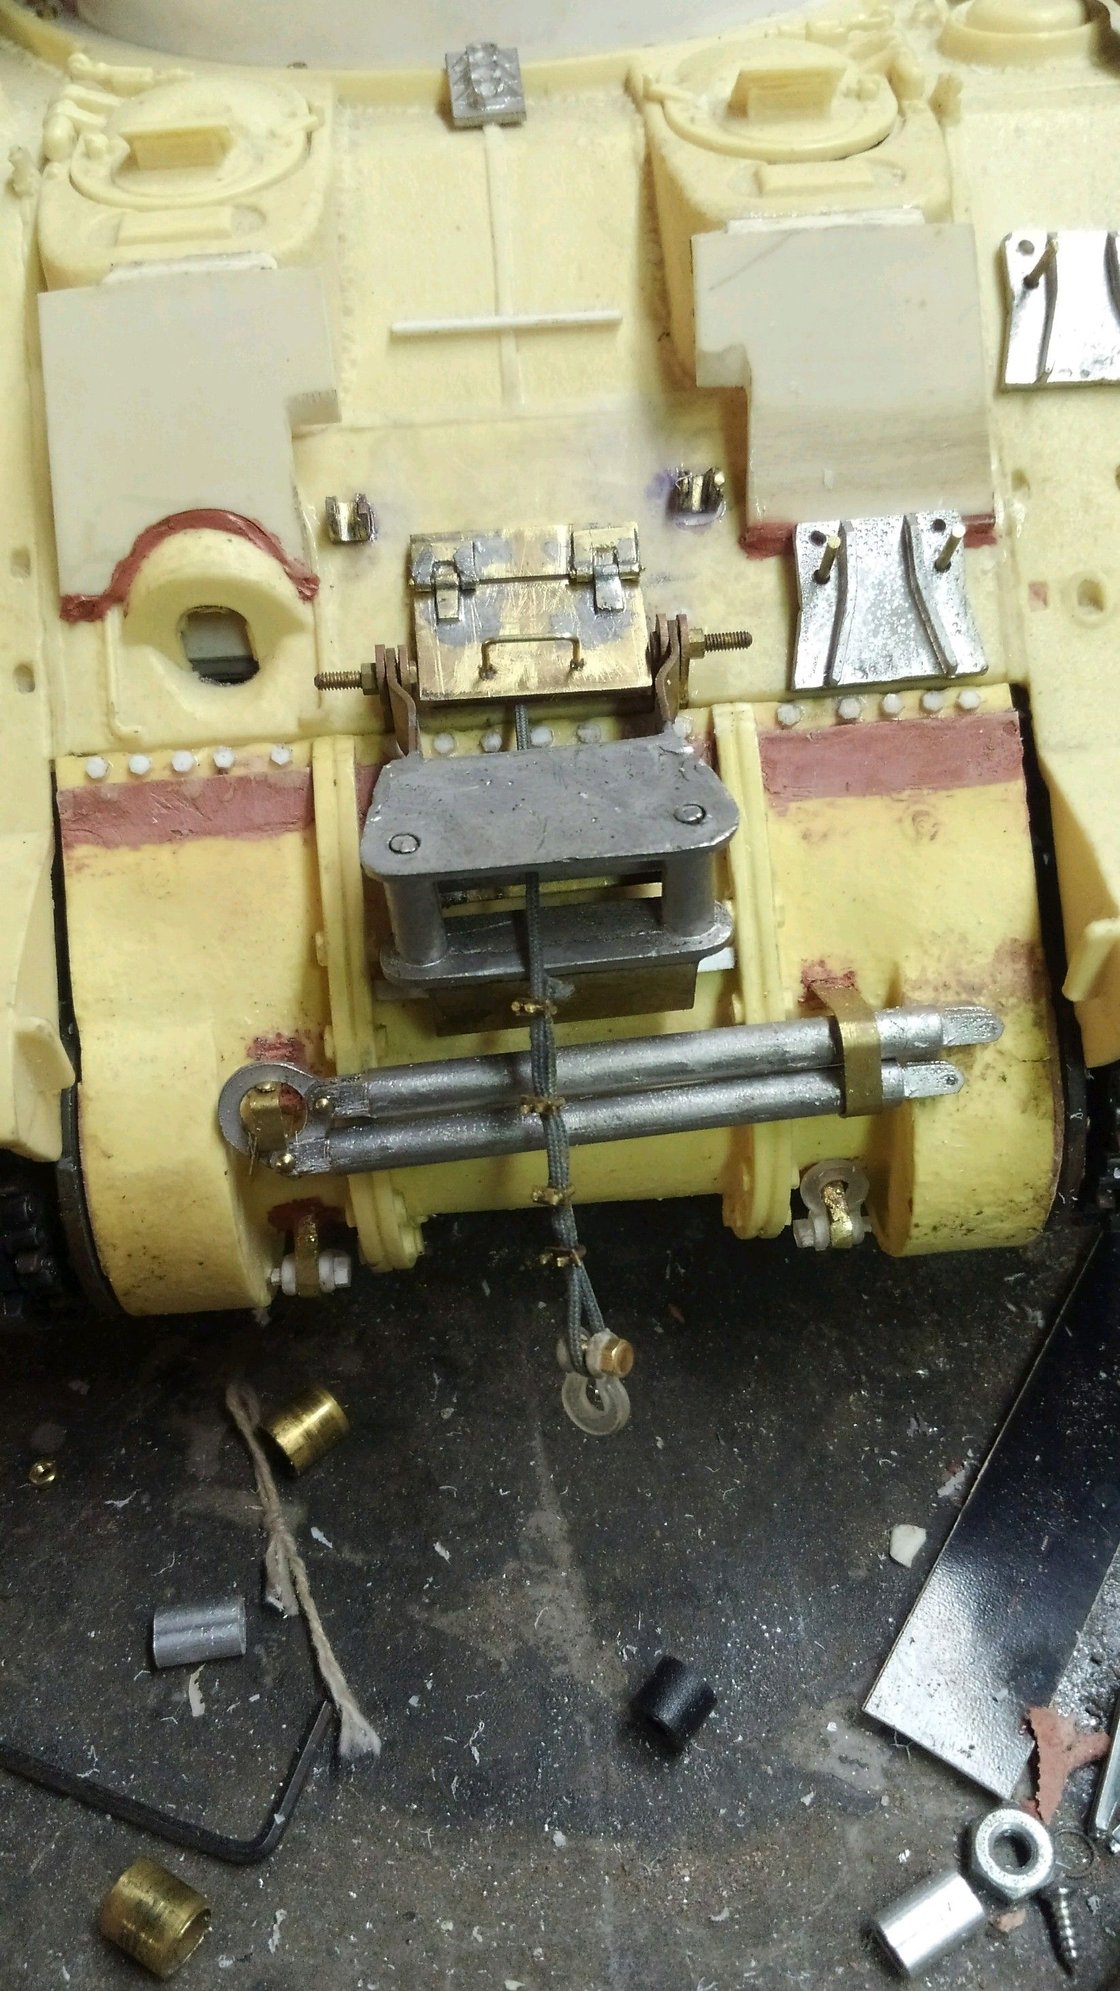
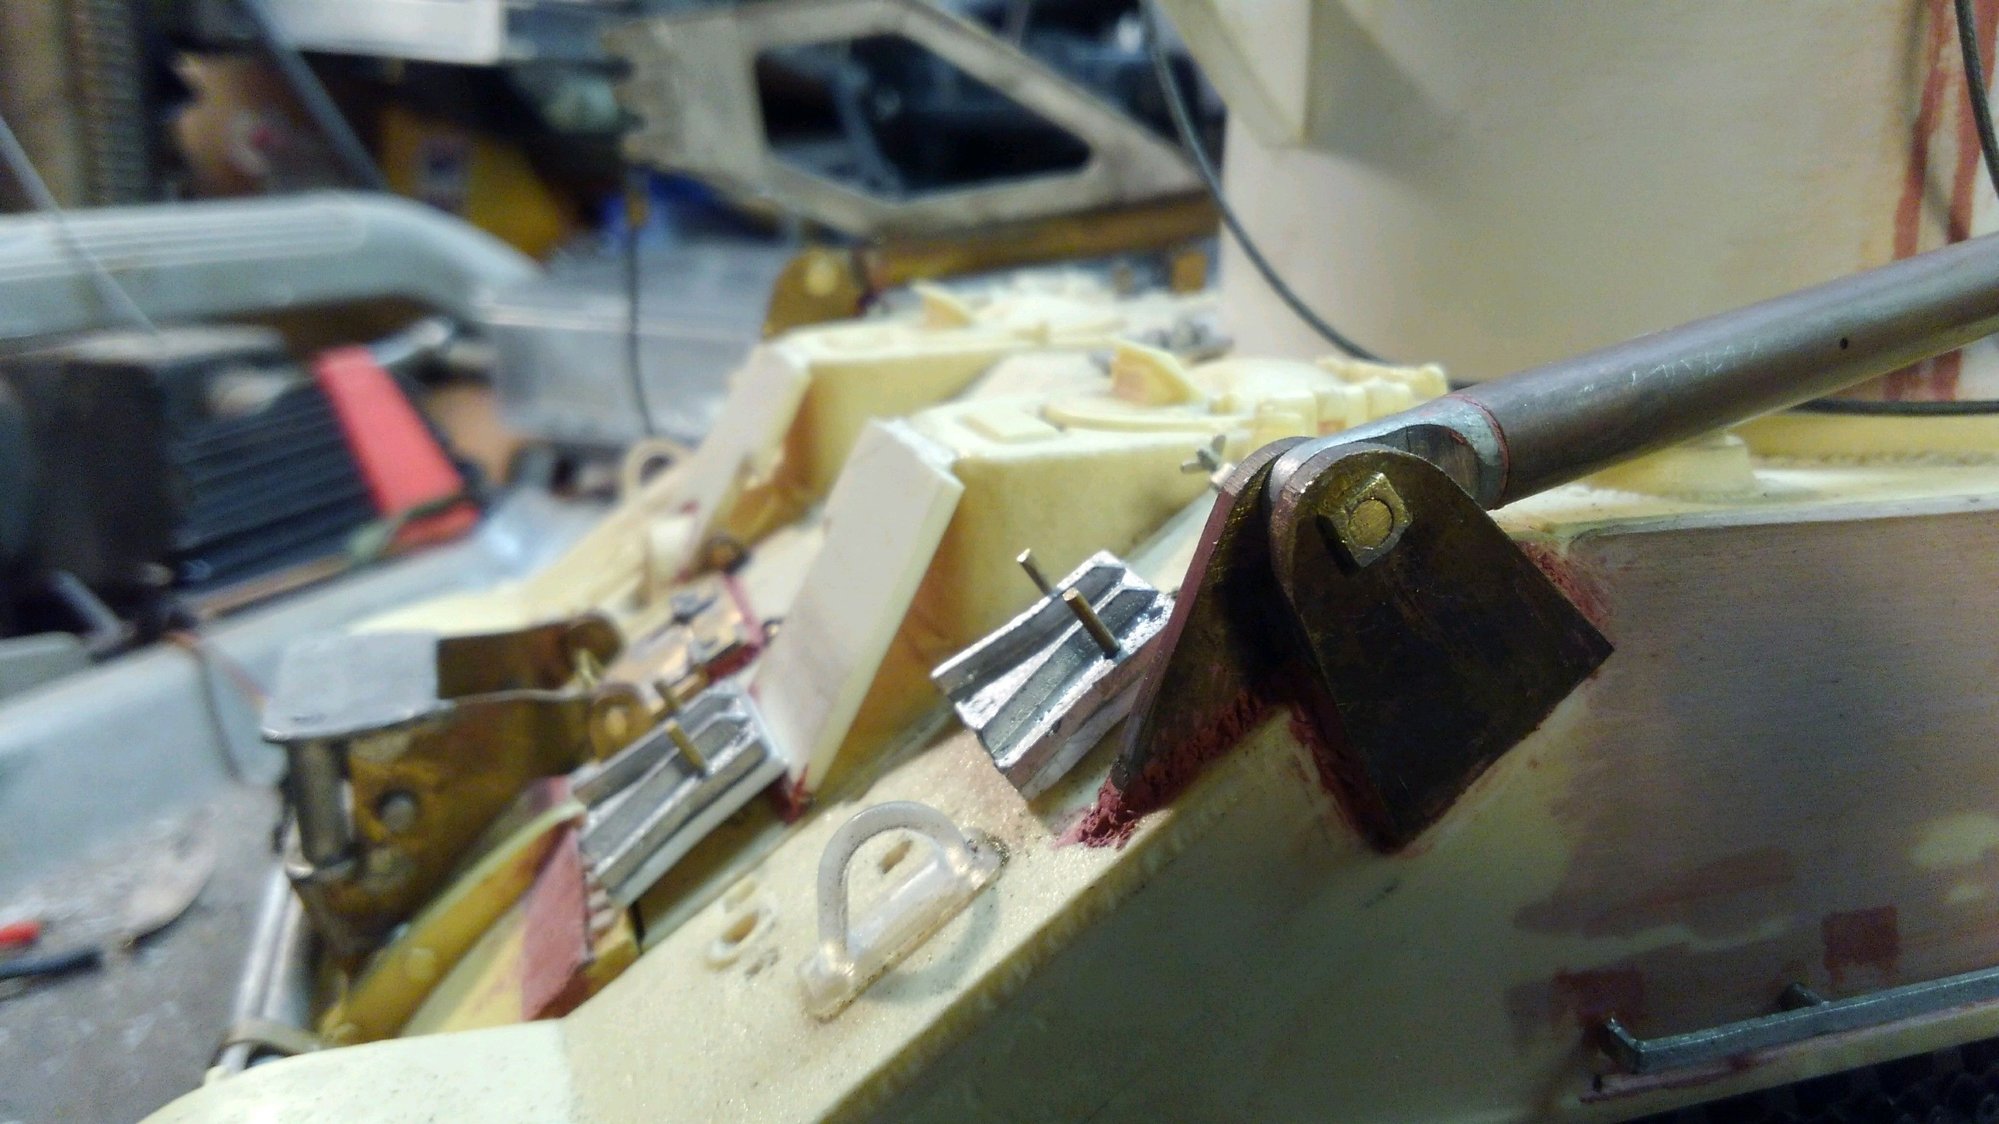
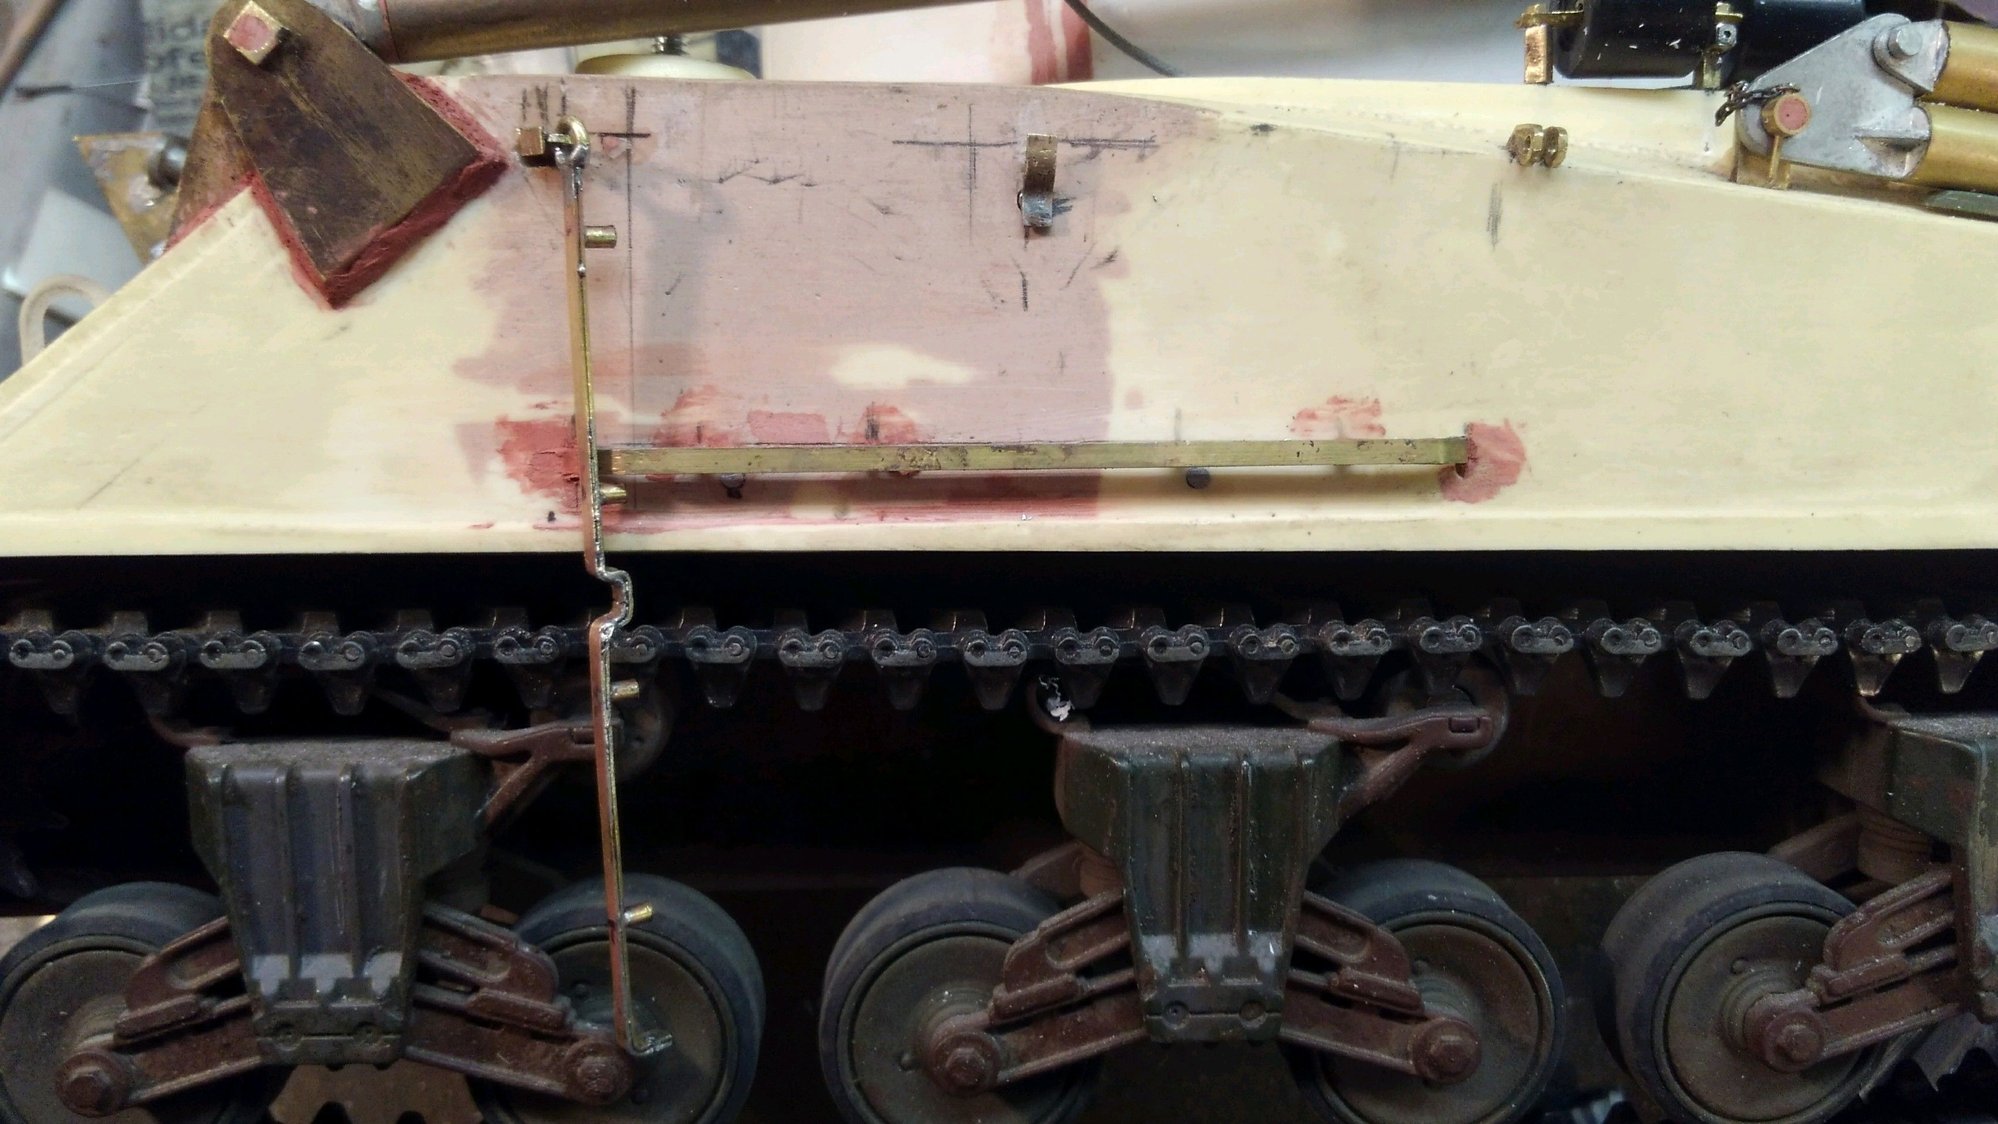
I completed the return roller stowage brackets on each side and have the rollers bolted in place on their brackets.
Also finally dealt with the A frame boom retainer pins. They have a folding tab at the end that drops down when they are inserted to retain them, as well as a bar under the square head of the pin to stop from vibration rotation. I soldered the bar on after I took the photos so it�s noticeably not here but it�s done.


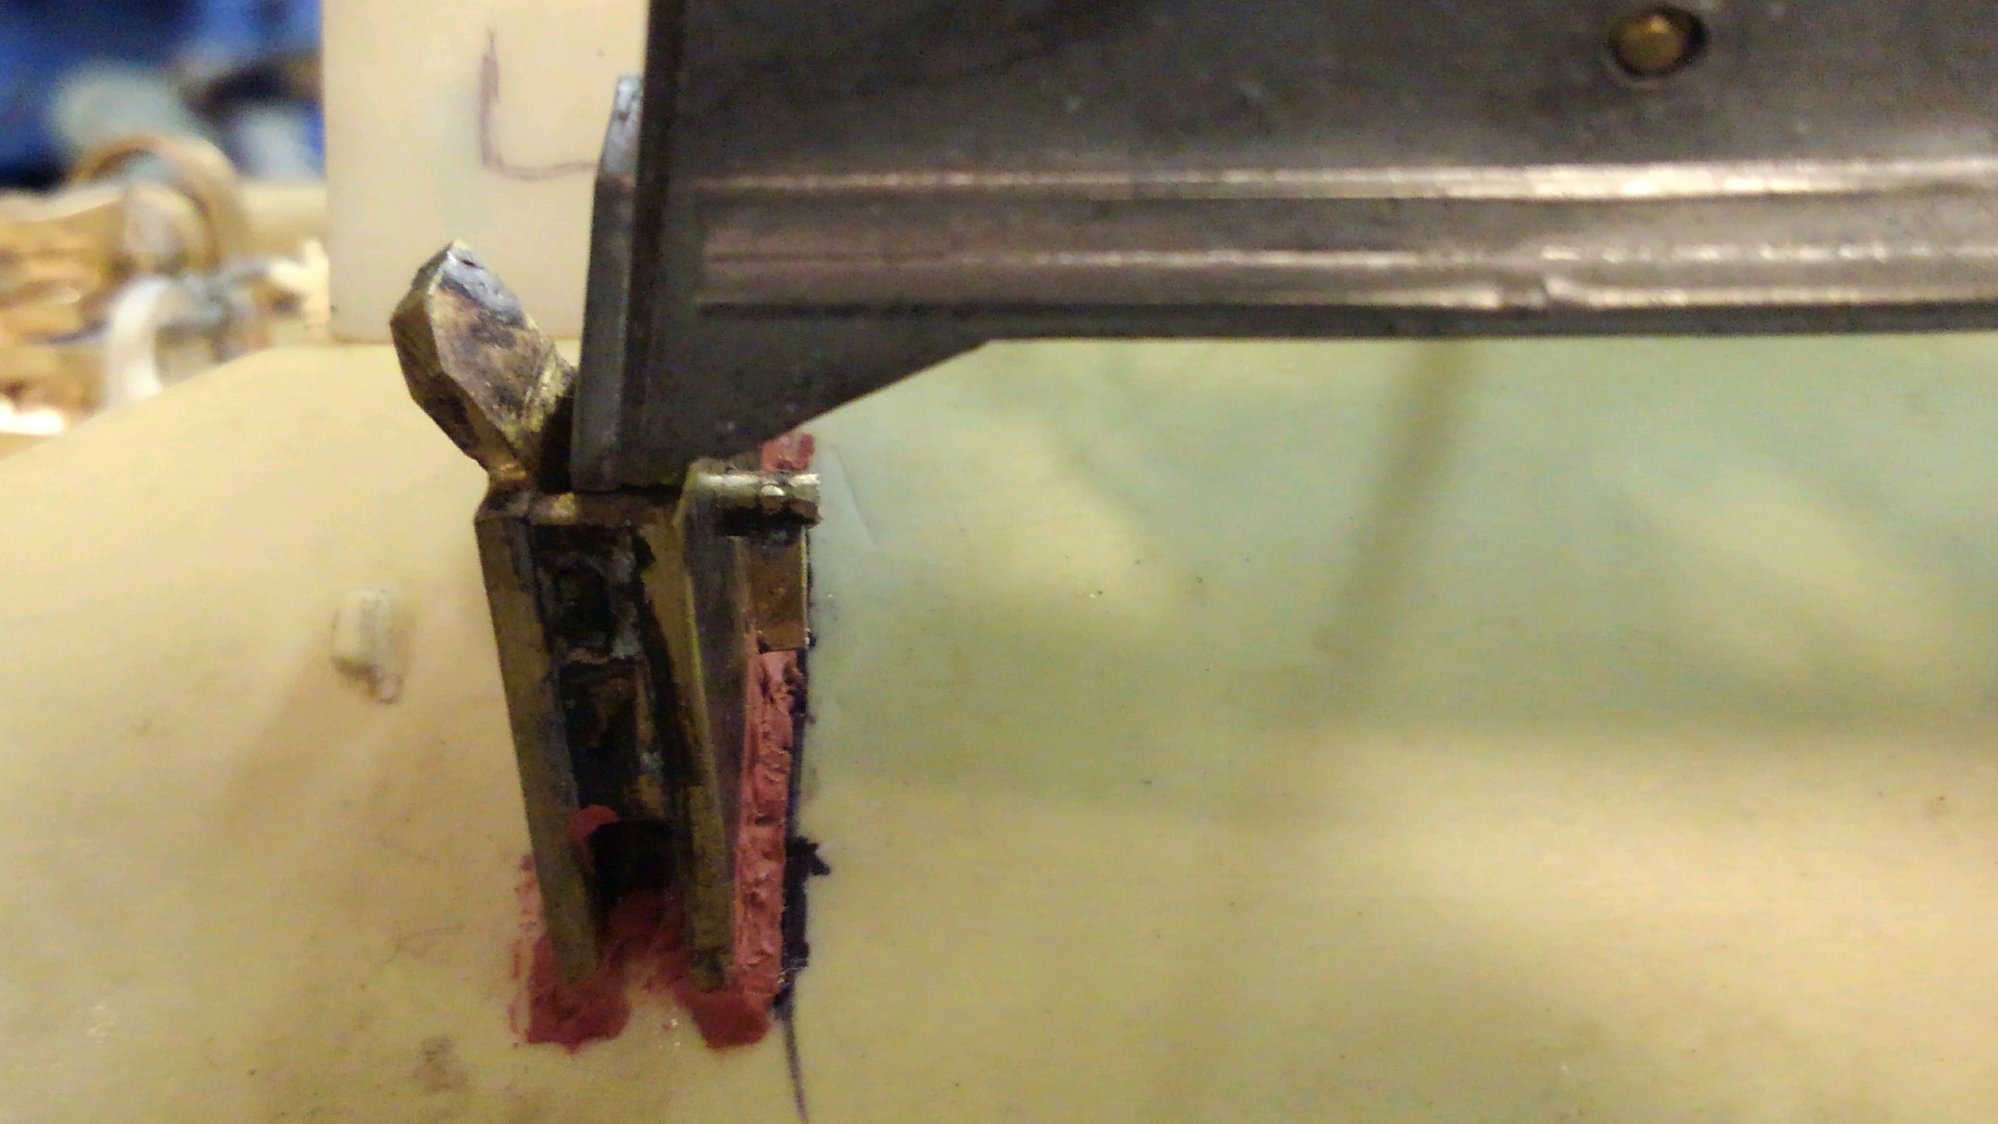
Also finally dealt with the A frame boom retainer pins. They have a folding tab at the end that drops down when they are inserted to retain them, as well as a bar under the square head of the pin to stop from vibration rotation. I soldered the bar on after I took the photos so it�s noticeably not here but it�s done.
02-12-2021 | 11:32 PM
#48
Thread Starter
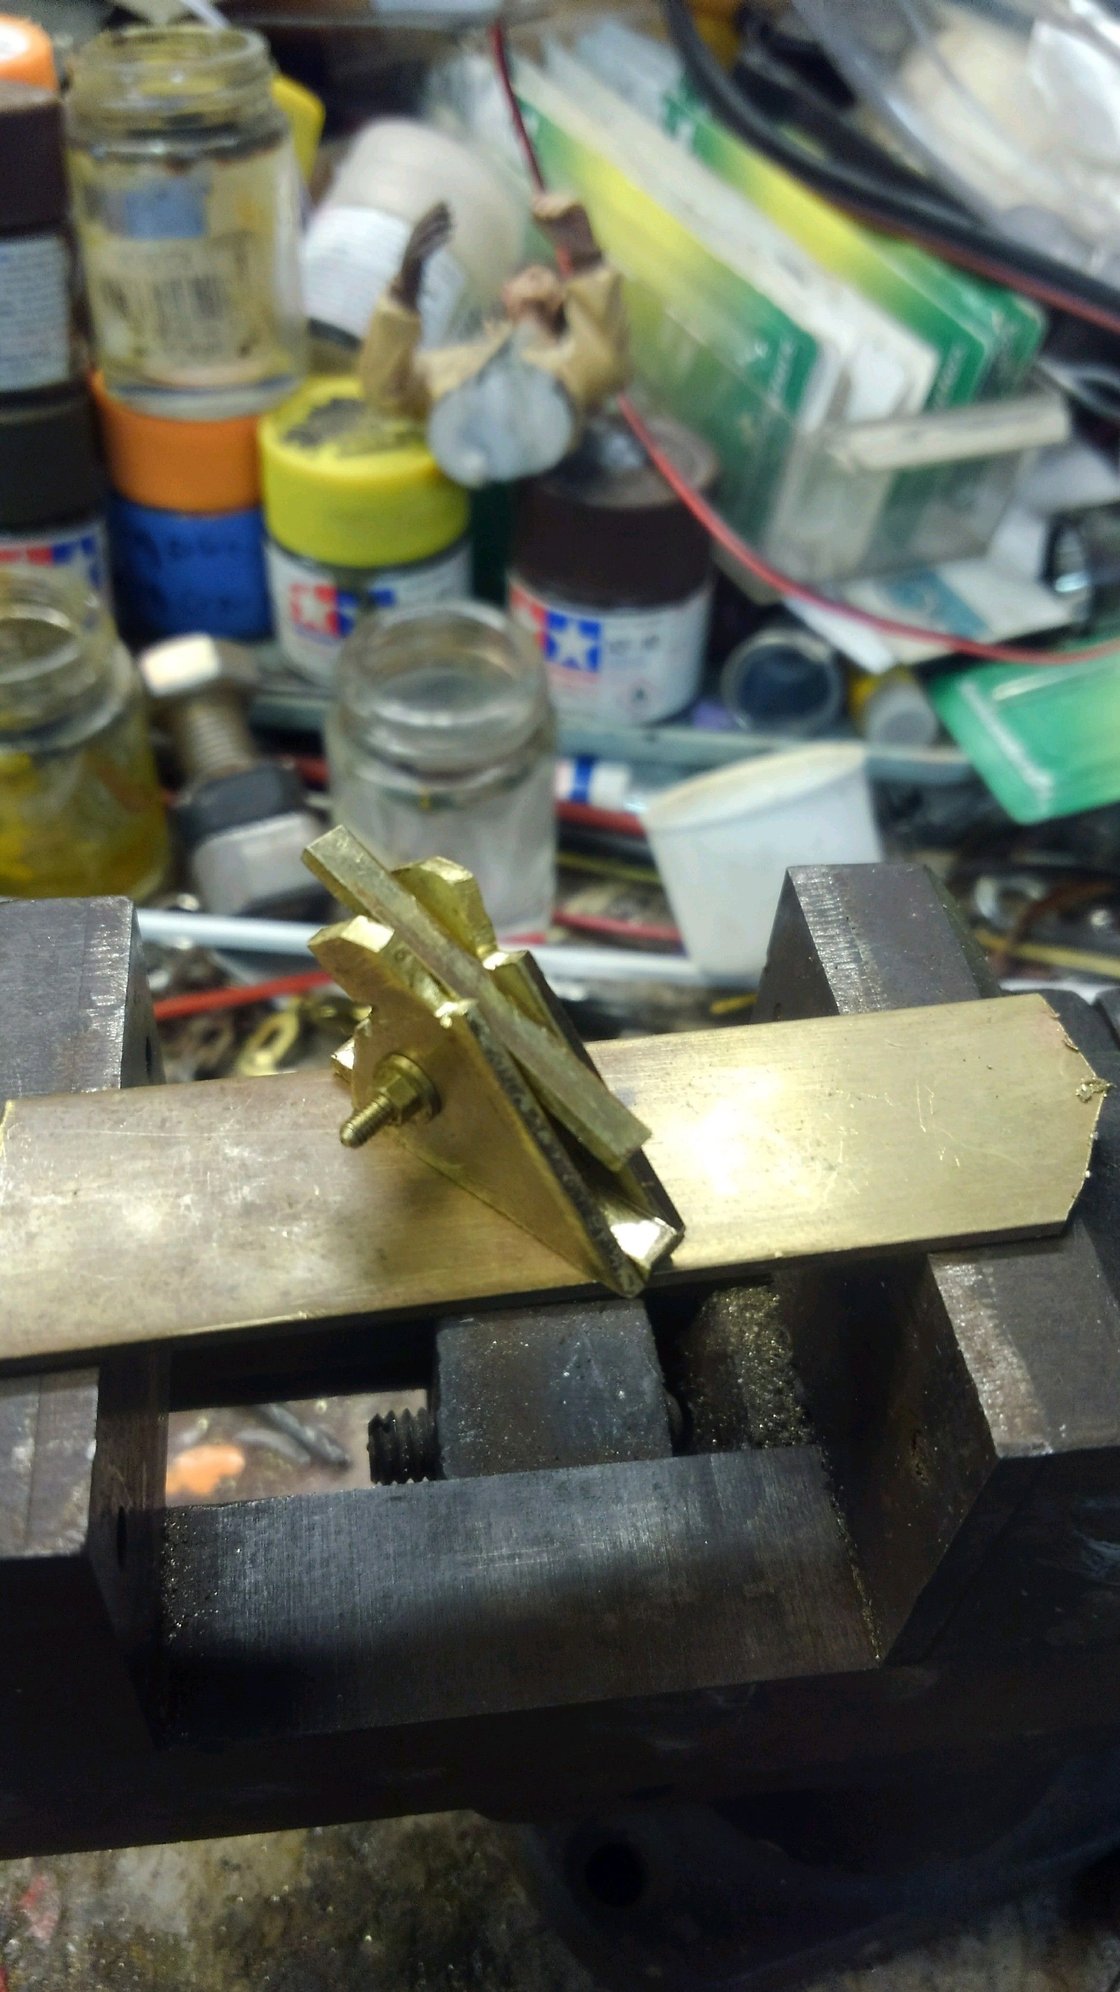
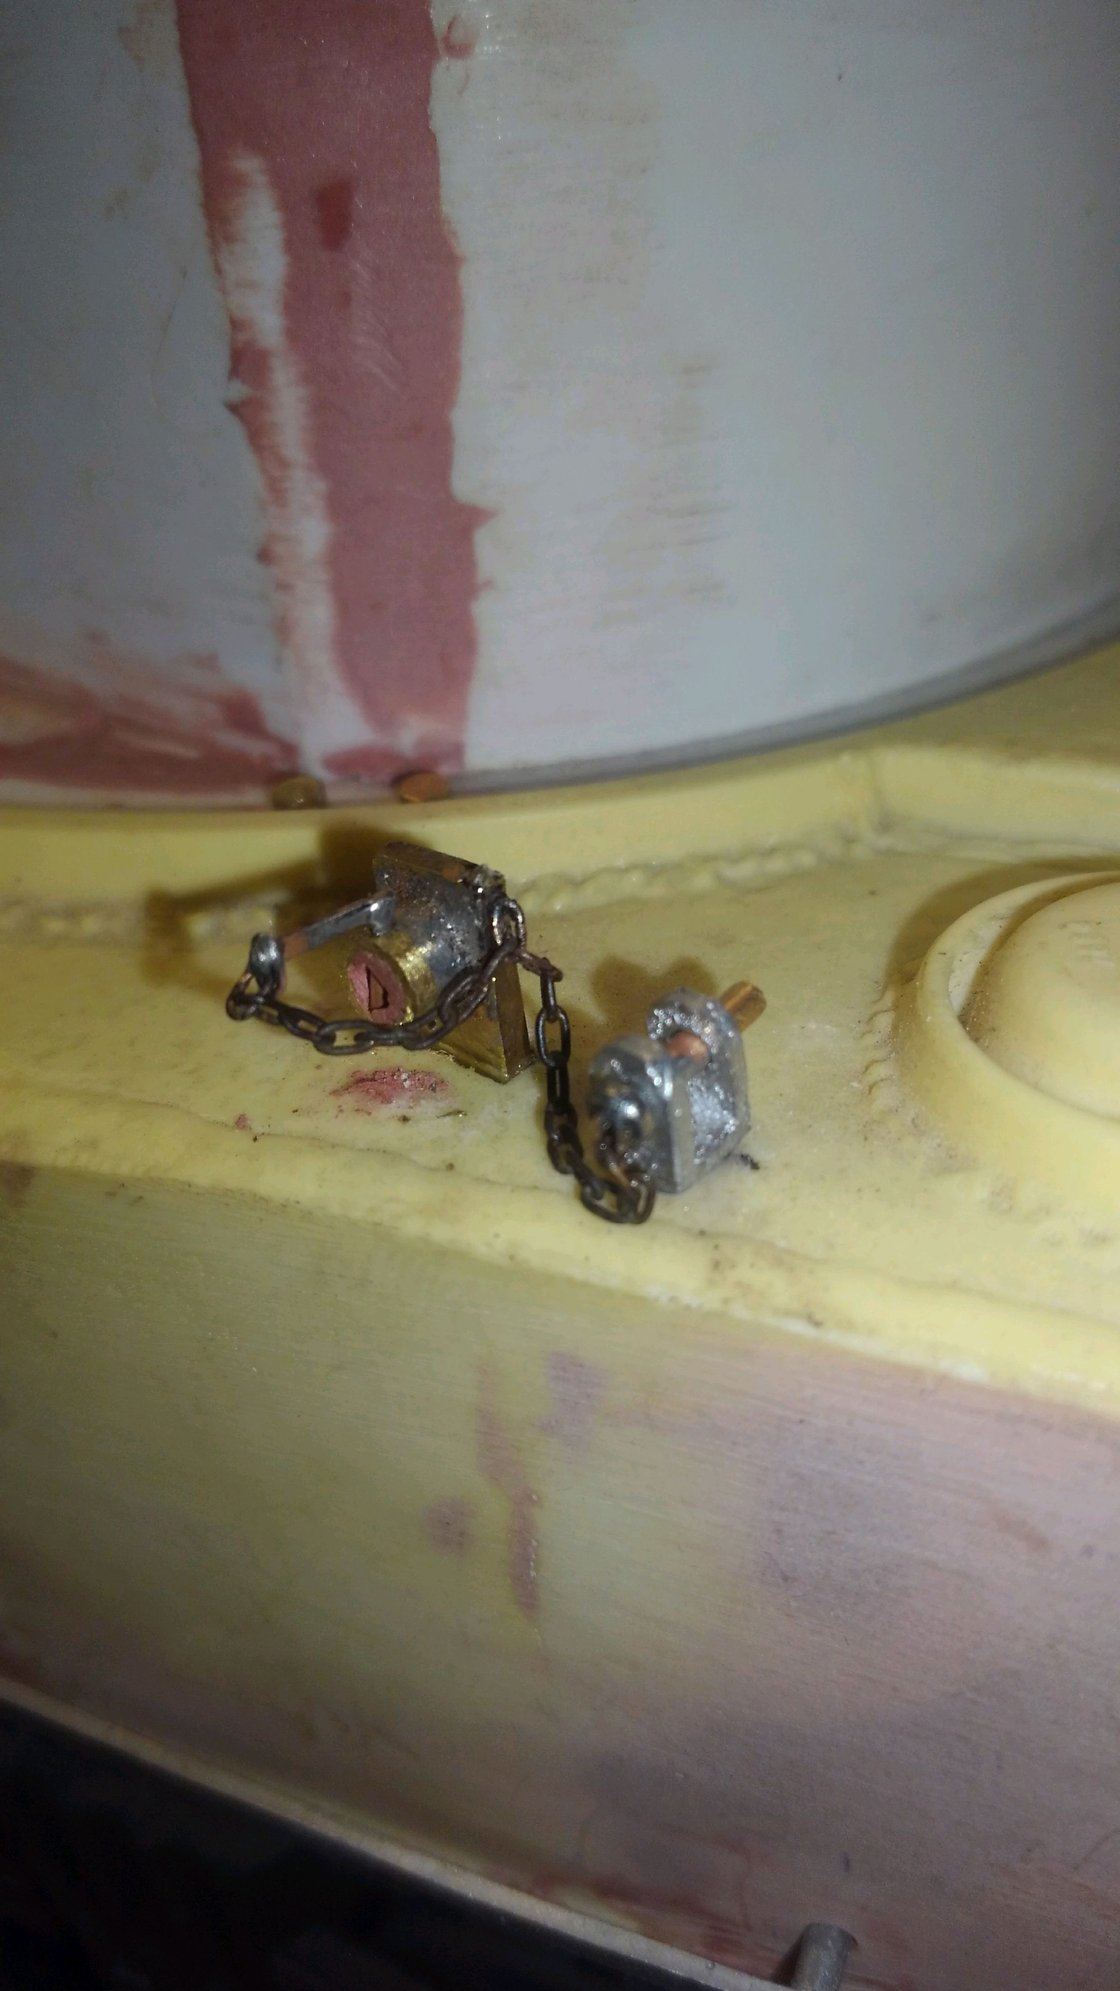
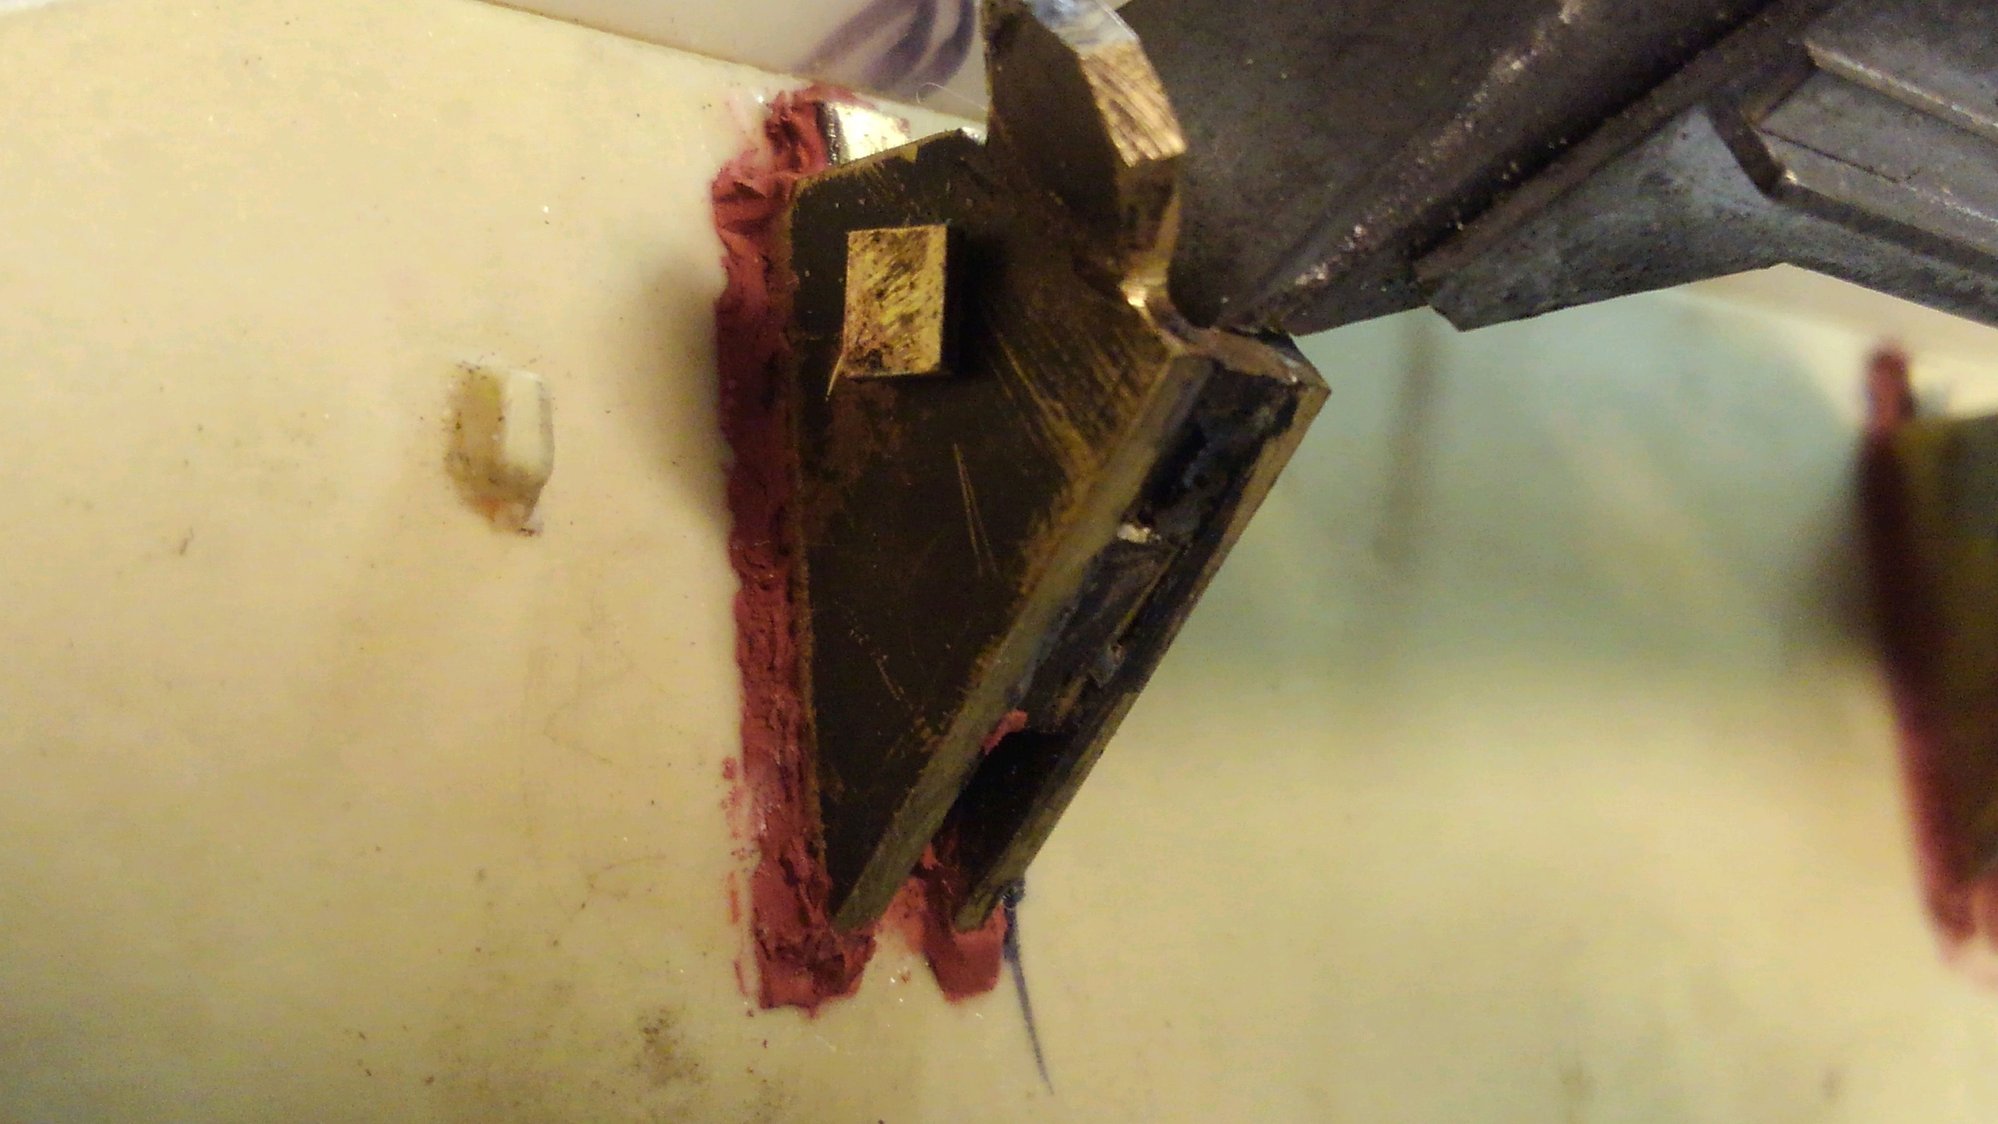
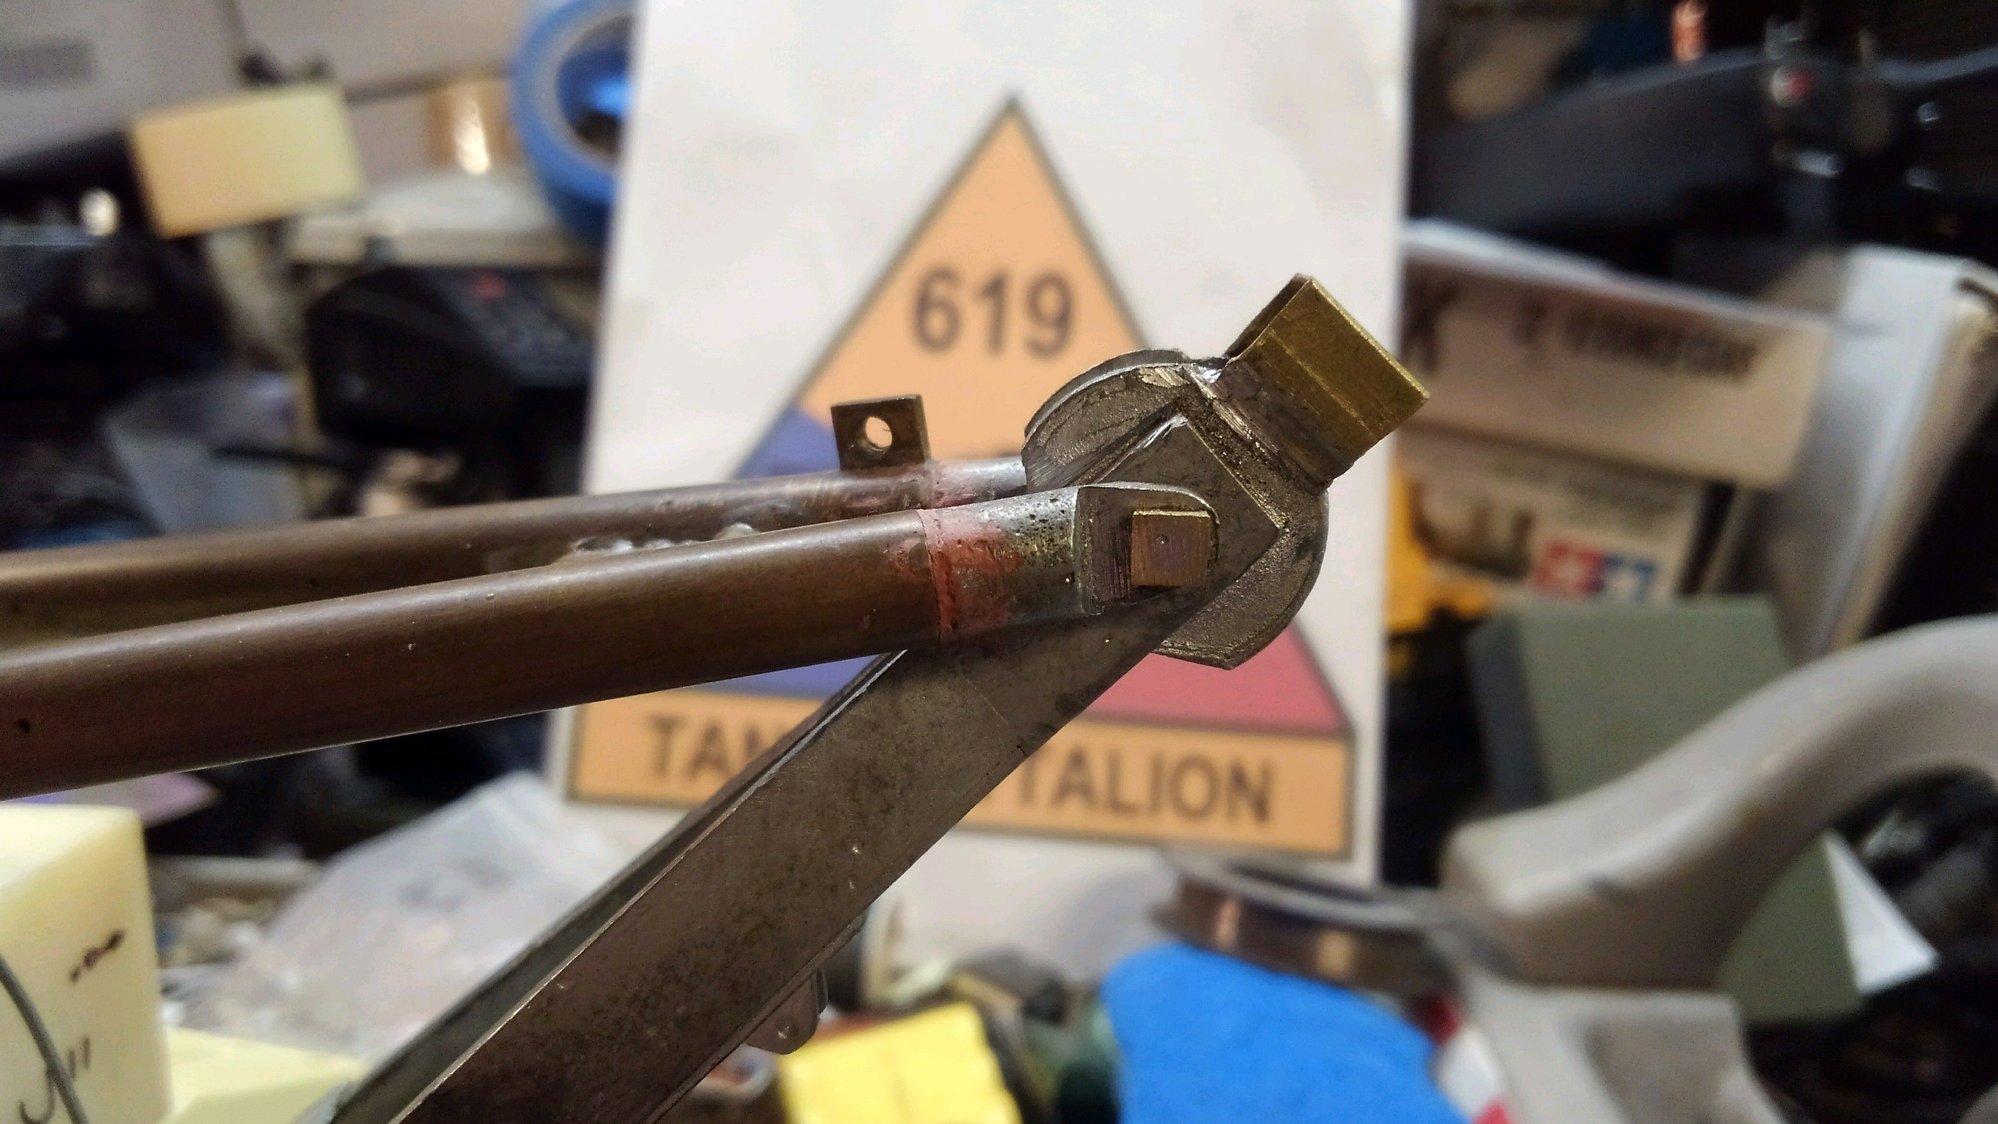
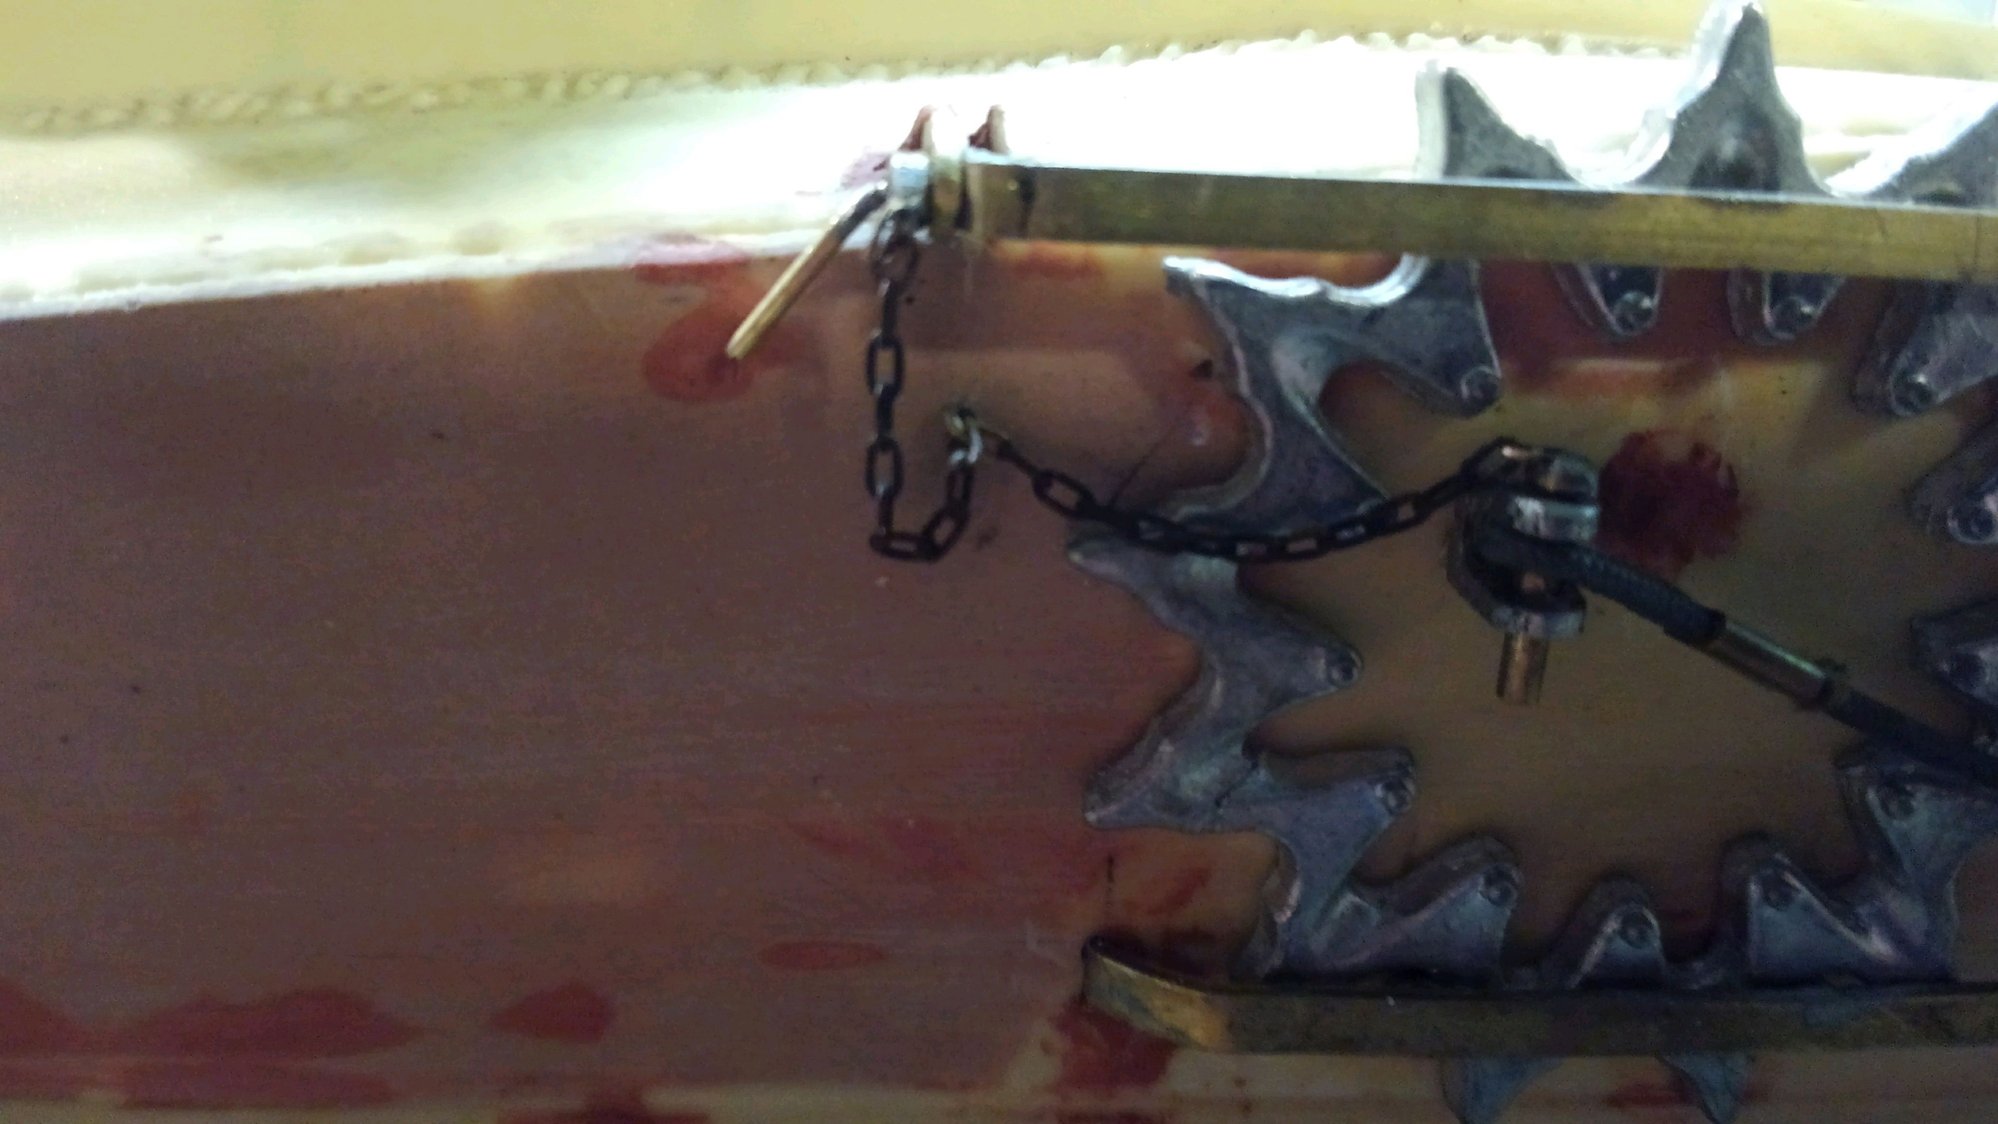
I got a lot accomplished tonight. It doesnt look like much but over the last two days I converted the large bolts, 2-56 to square head bolts by turning down the hex head and inserting it into brass plate and soldering. Also made the corresponding nuts much larger to be in visual accuaracy with the prototype. I drilled out larger brass nuts and then turned down the 2-56 nut and soldered them inside. This took hours to do and was not fast.
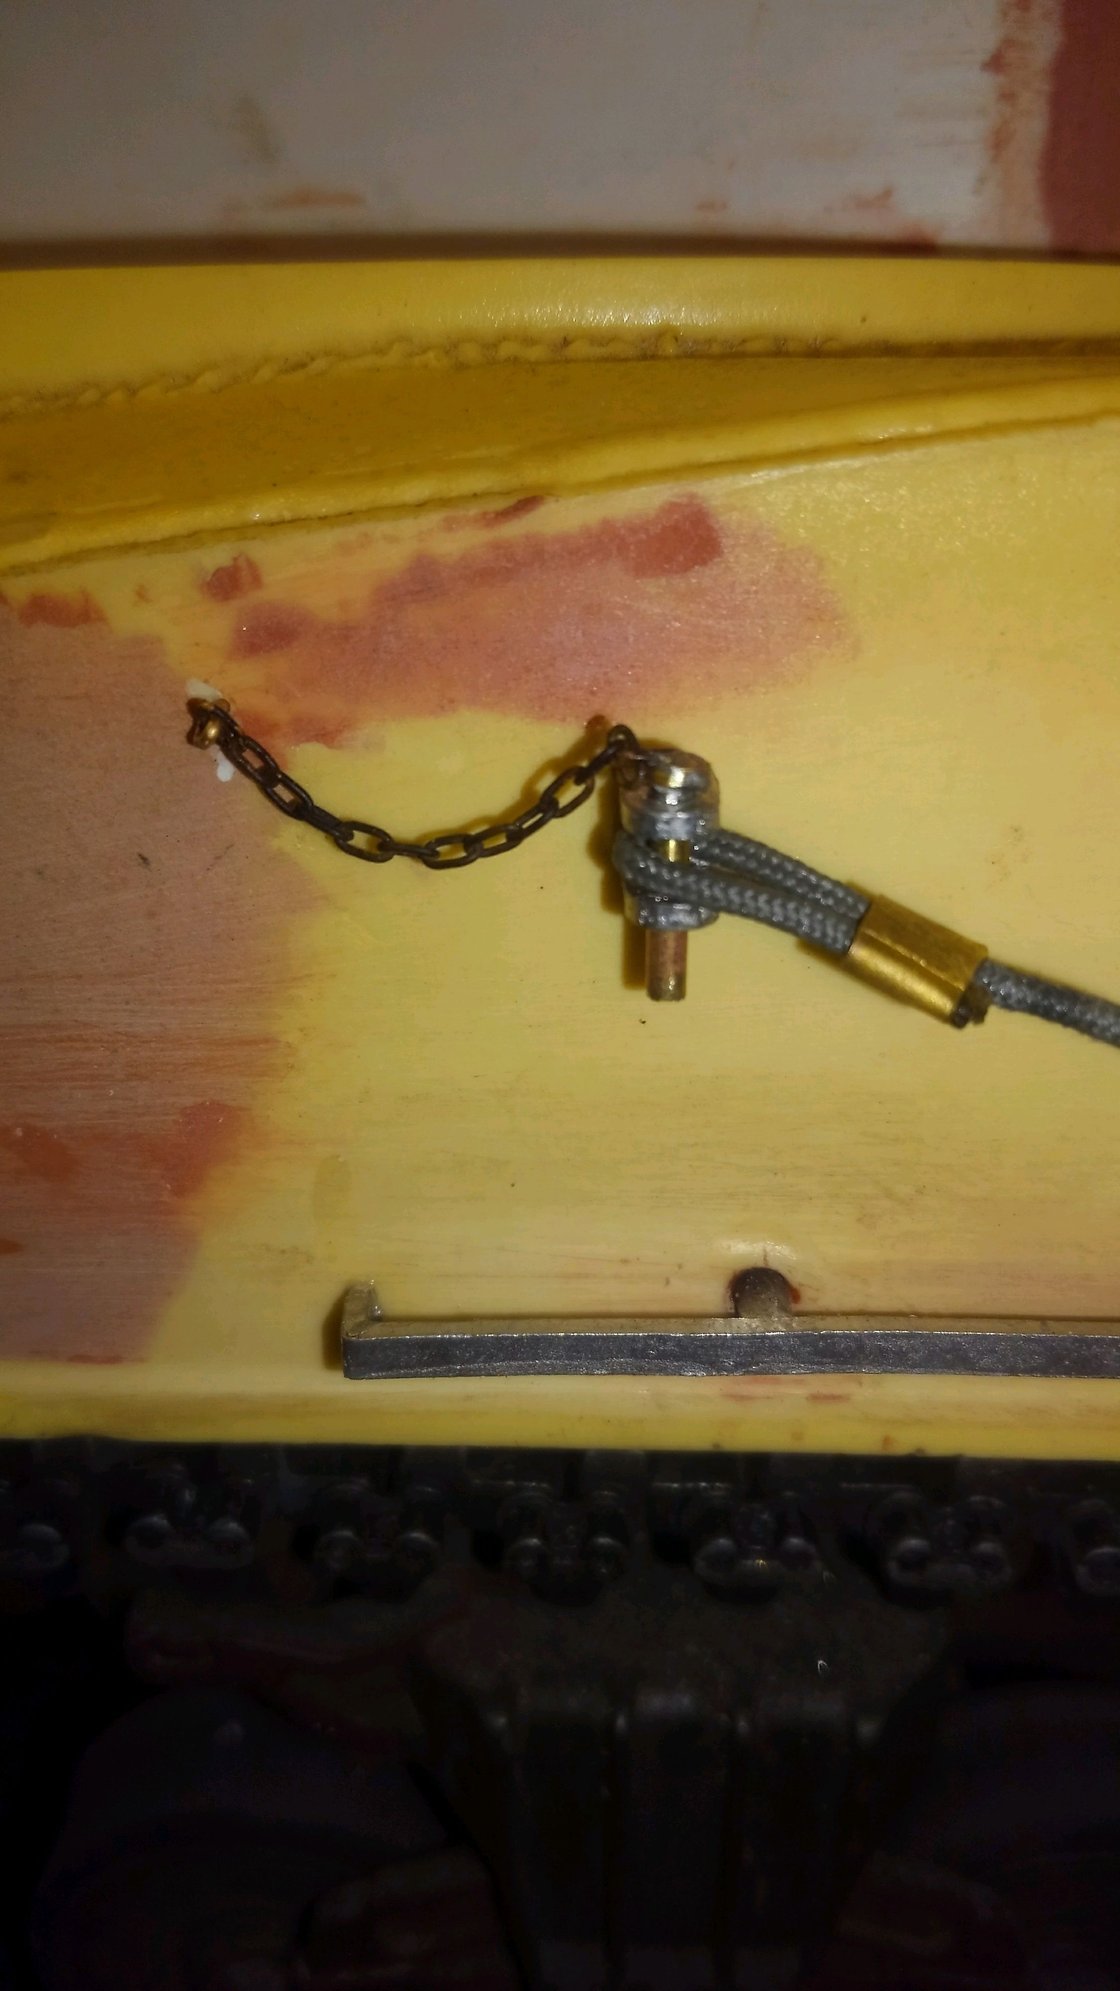
Then I wanted to get to where my rear boom A frame retaining pins would not get lost, I am tired of taking them in and out already. So I got the photos out and made up the retainer chains and soldered them in. After they fell apart a few times and I lost a part and had to remake it I figured out a technique to get the chains soldered on without the pins falling off the other side. Again, hours of work for two tiny dumb little chains. But they keep the pins from getting lost now.
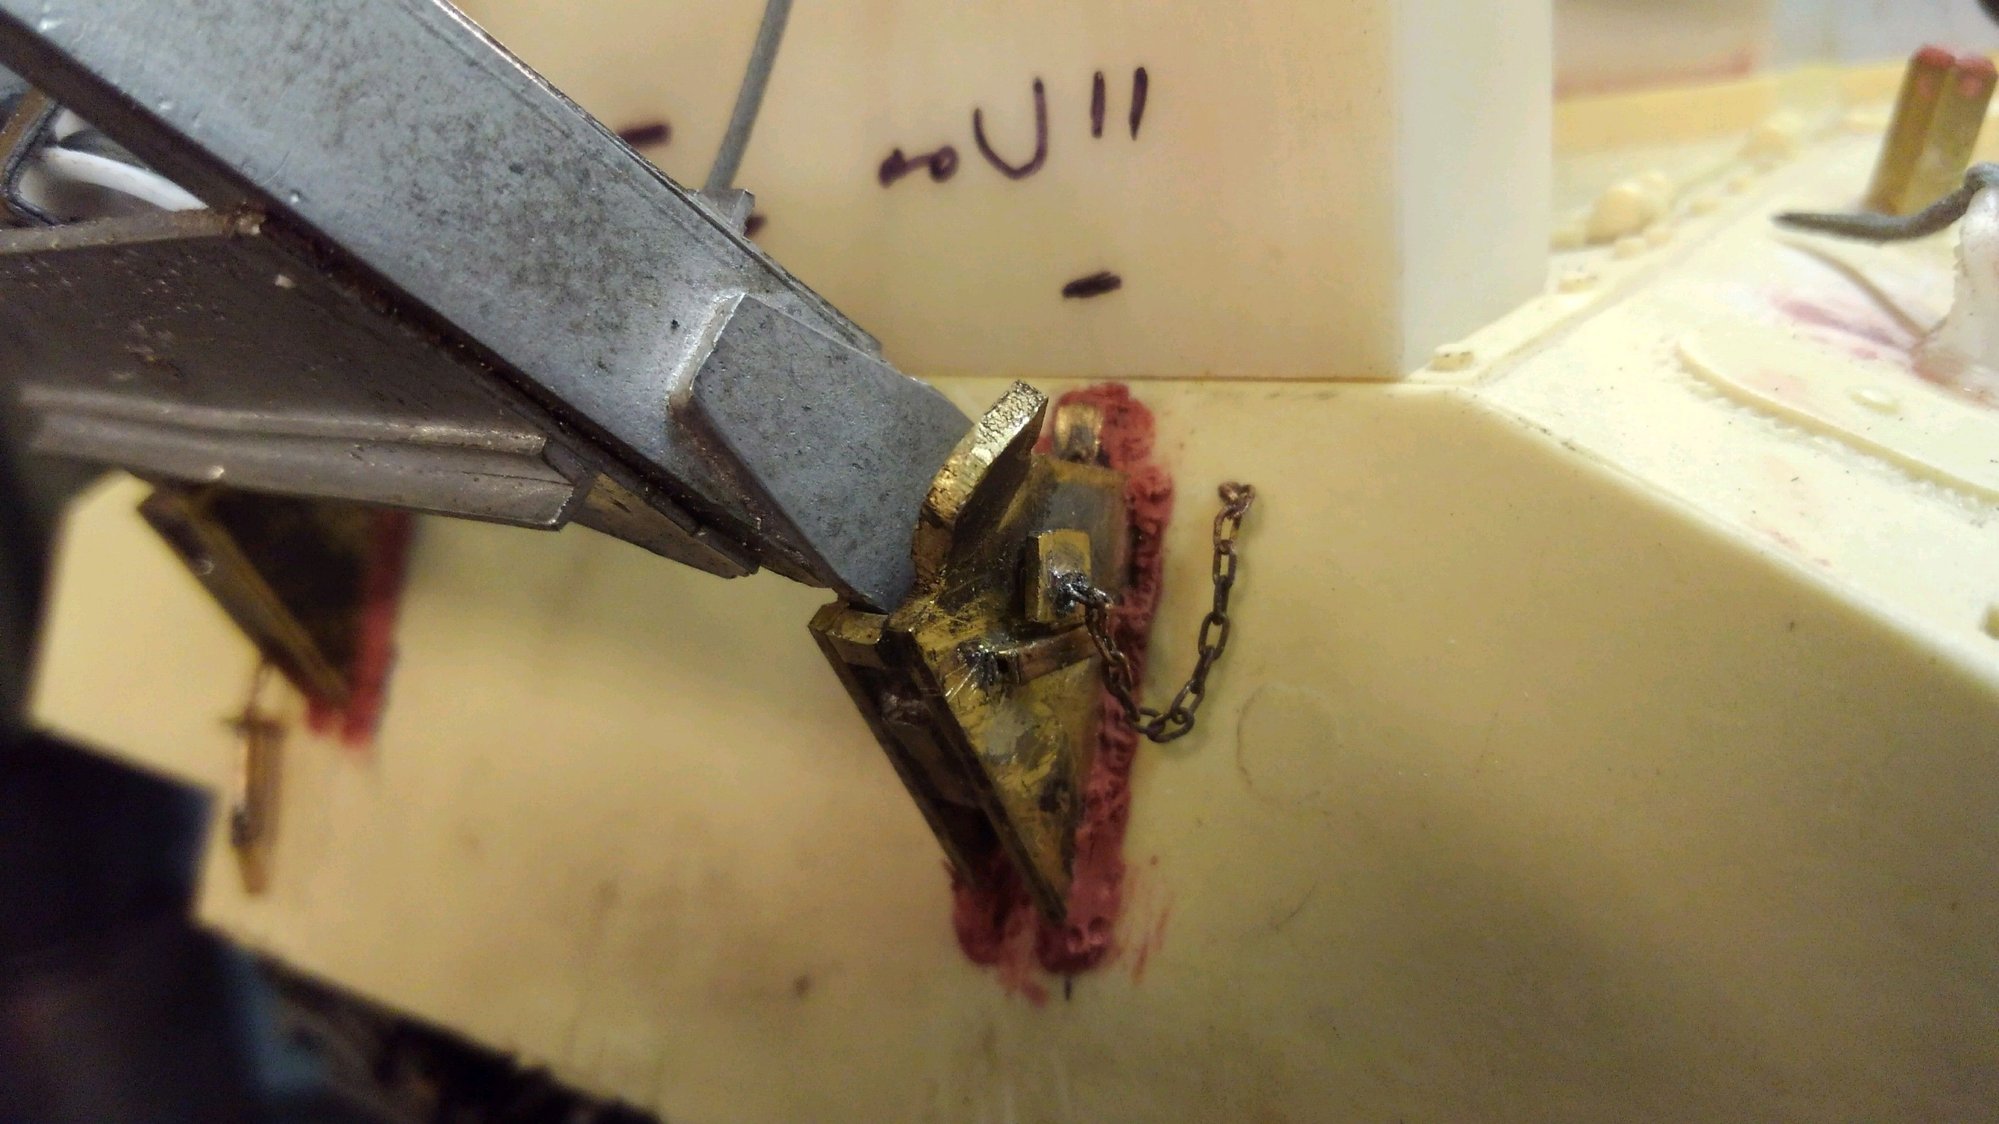
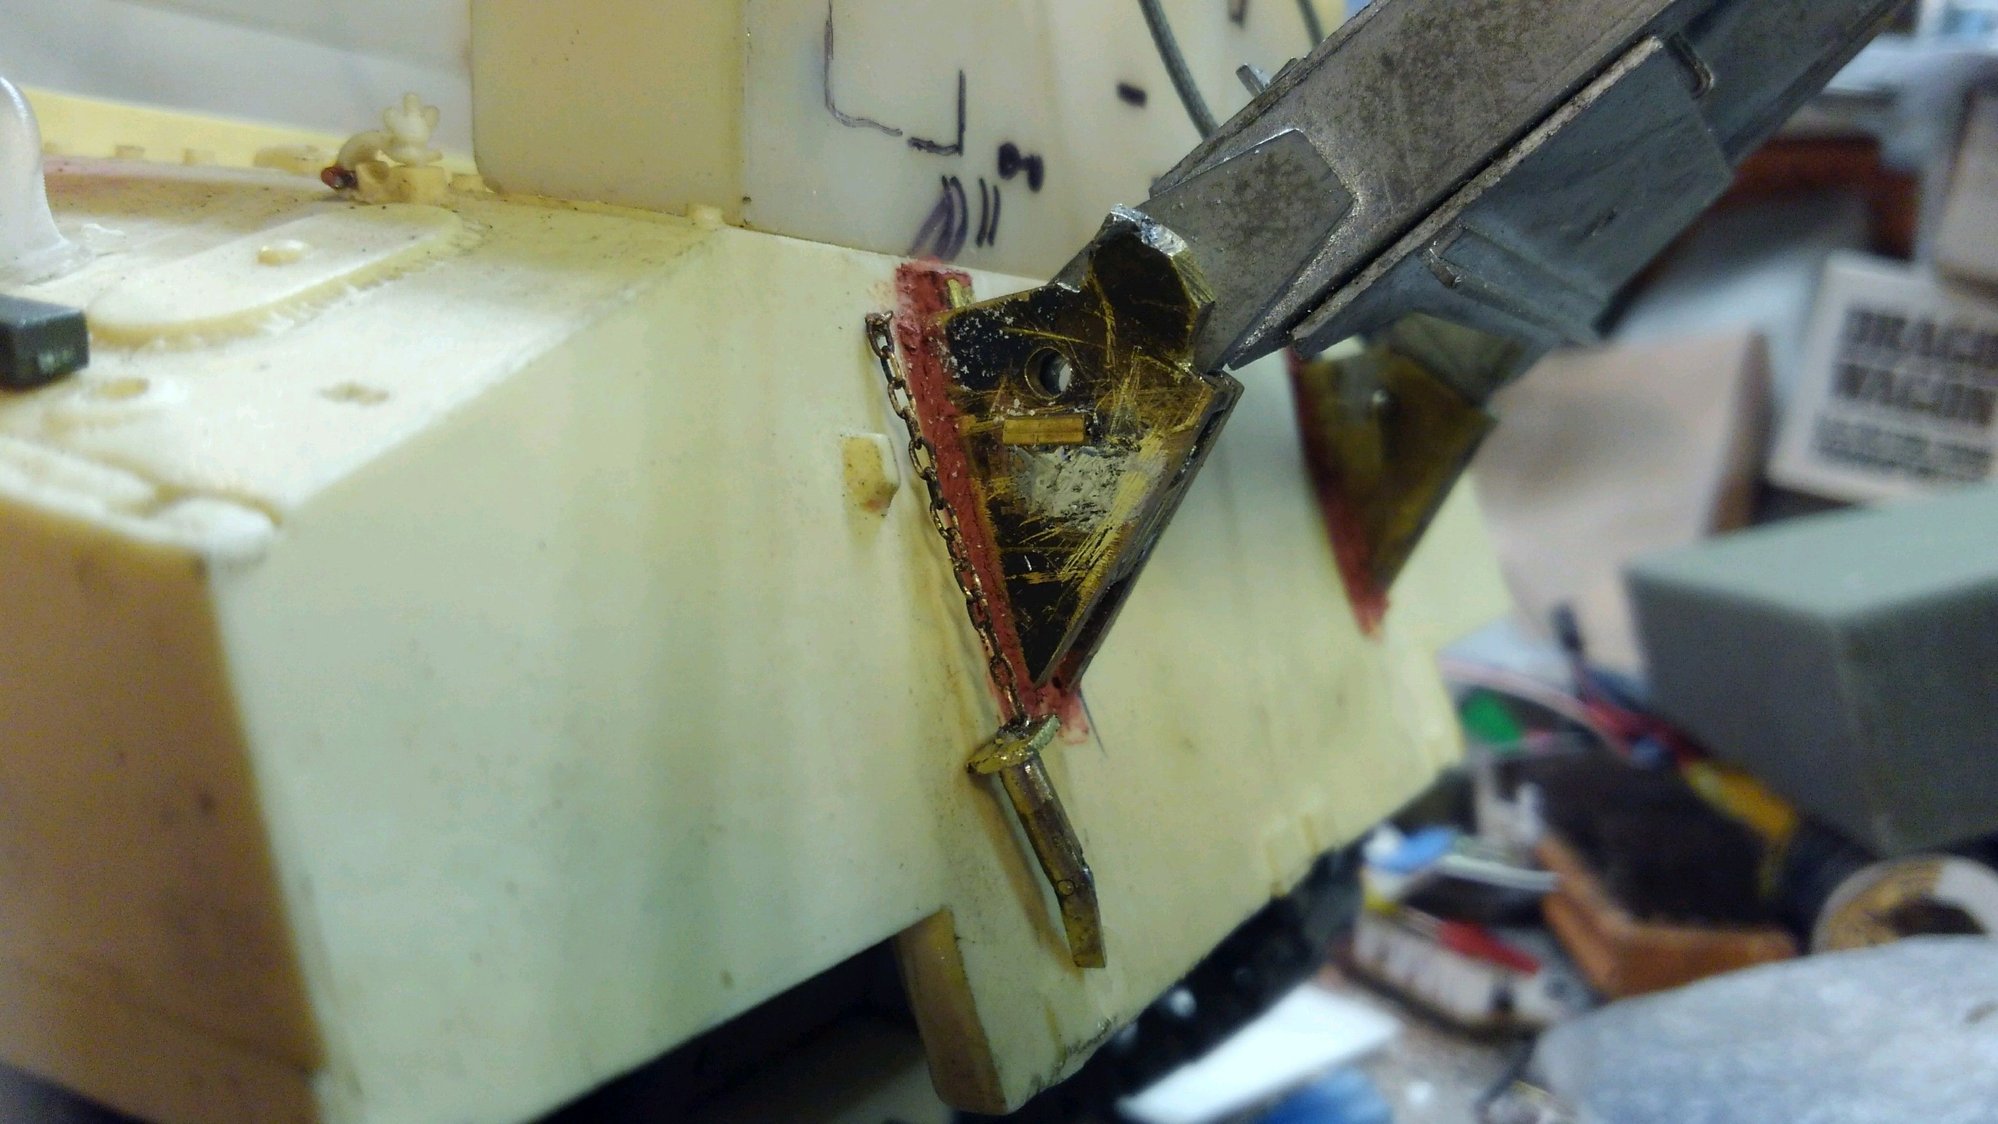

Then I wanted to get to where my rear boom A frame retaining pins would not get lost, I am tired of taking them in and out already. So I got the photos out and made up the retainer chains and soldered them in. After they fell apart a few times and I lost a part and had to remake it I figured out a technique to get the chains soldered on without the pins falling off the other side. Again, hours of work for two tiny dumb little chains. But they keep the pins from getting lost now.
02-15-2021 | 09:33 PM
#49
Thread Starter
Well, 3 plus days of work and here I am, one side done. I didnt like the soft metal strips that came with the kit so I did what the mad scientist usually does, rebuild it all perfectly out of brass. This particular project drove me crazy. So much planning and replanning and planning ahead.
Now to do the other side.....
Now to do the other side.....
02-19-2021 | 09:59 PM
#50
Thread Starter
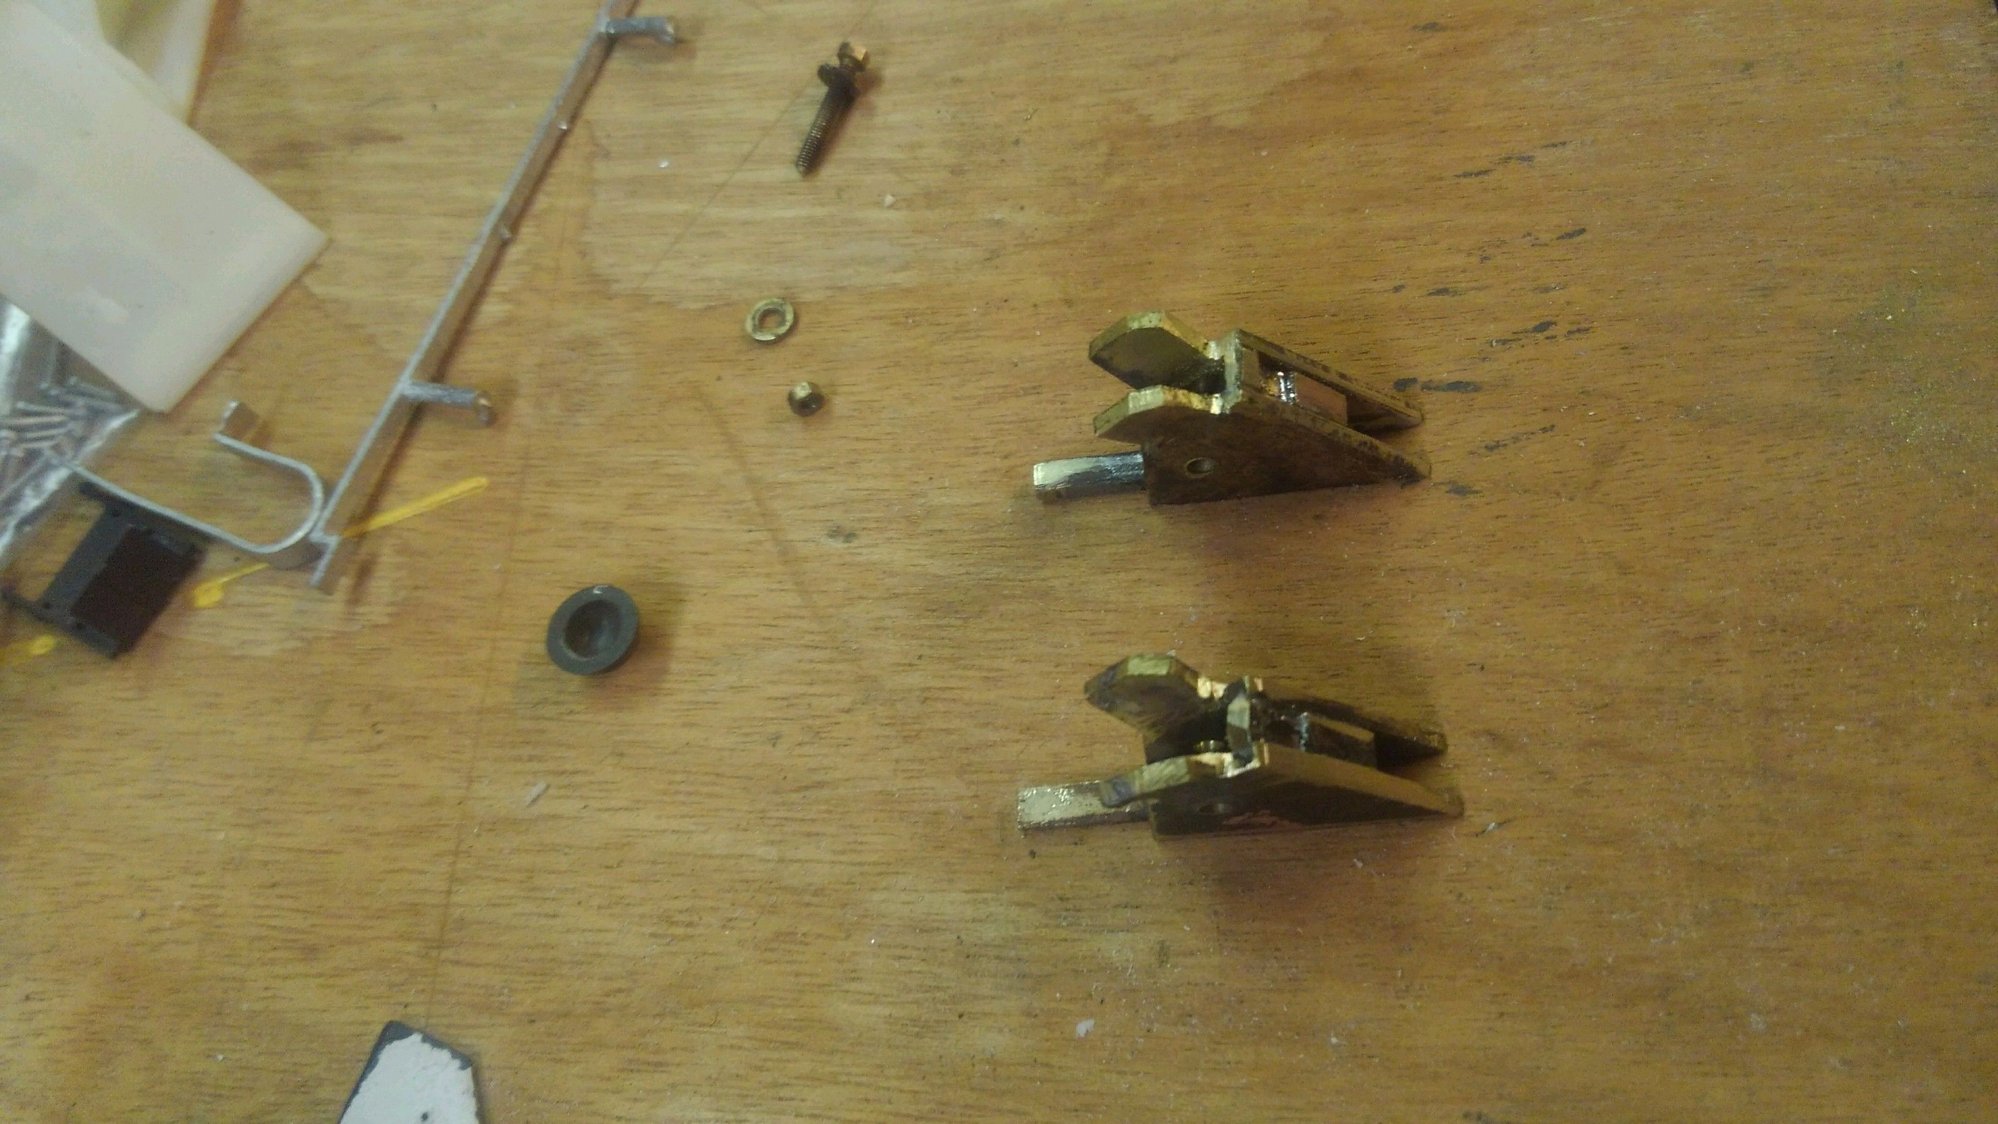
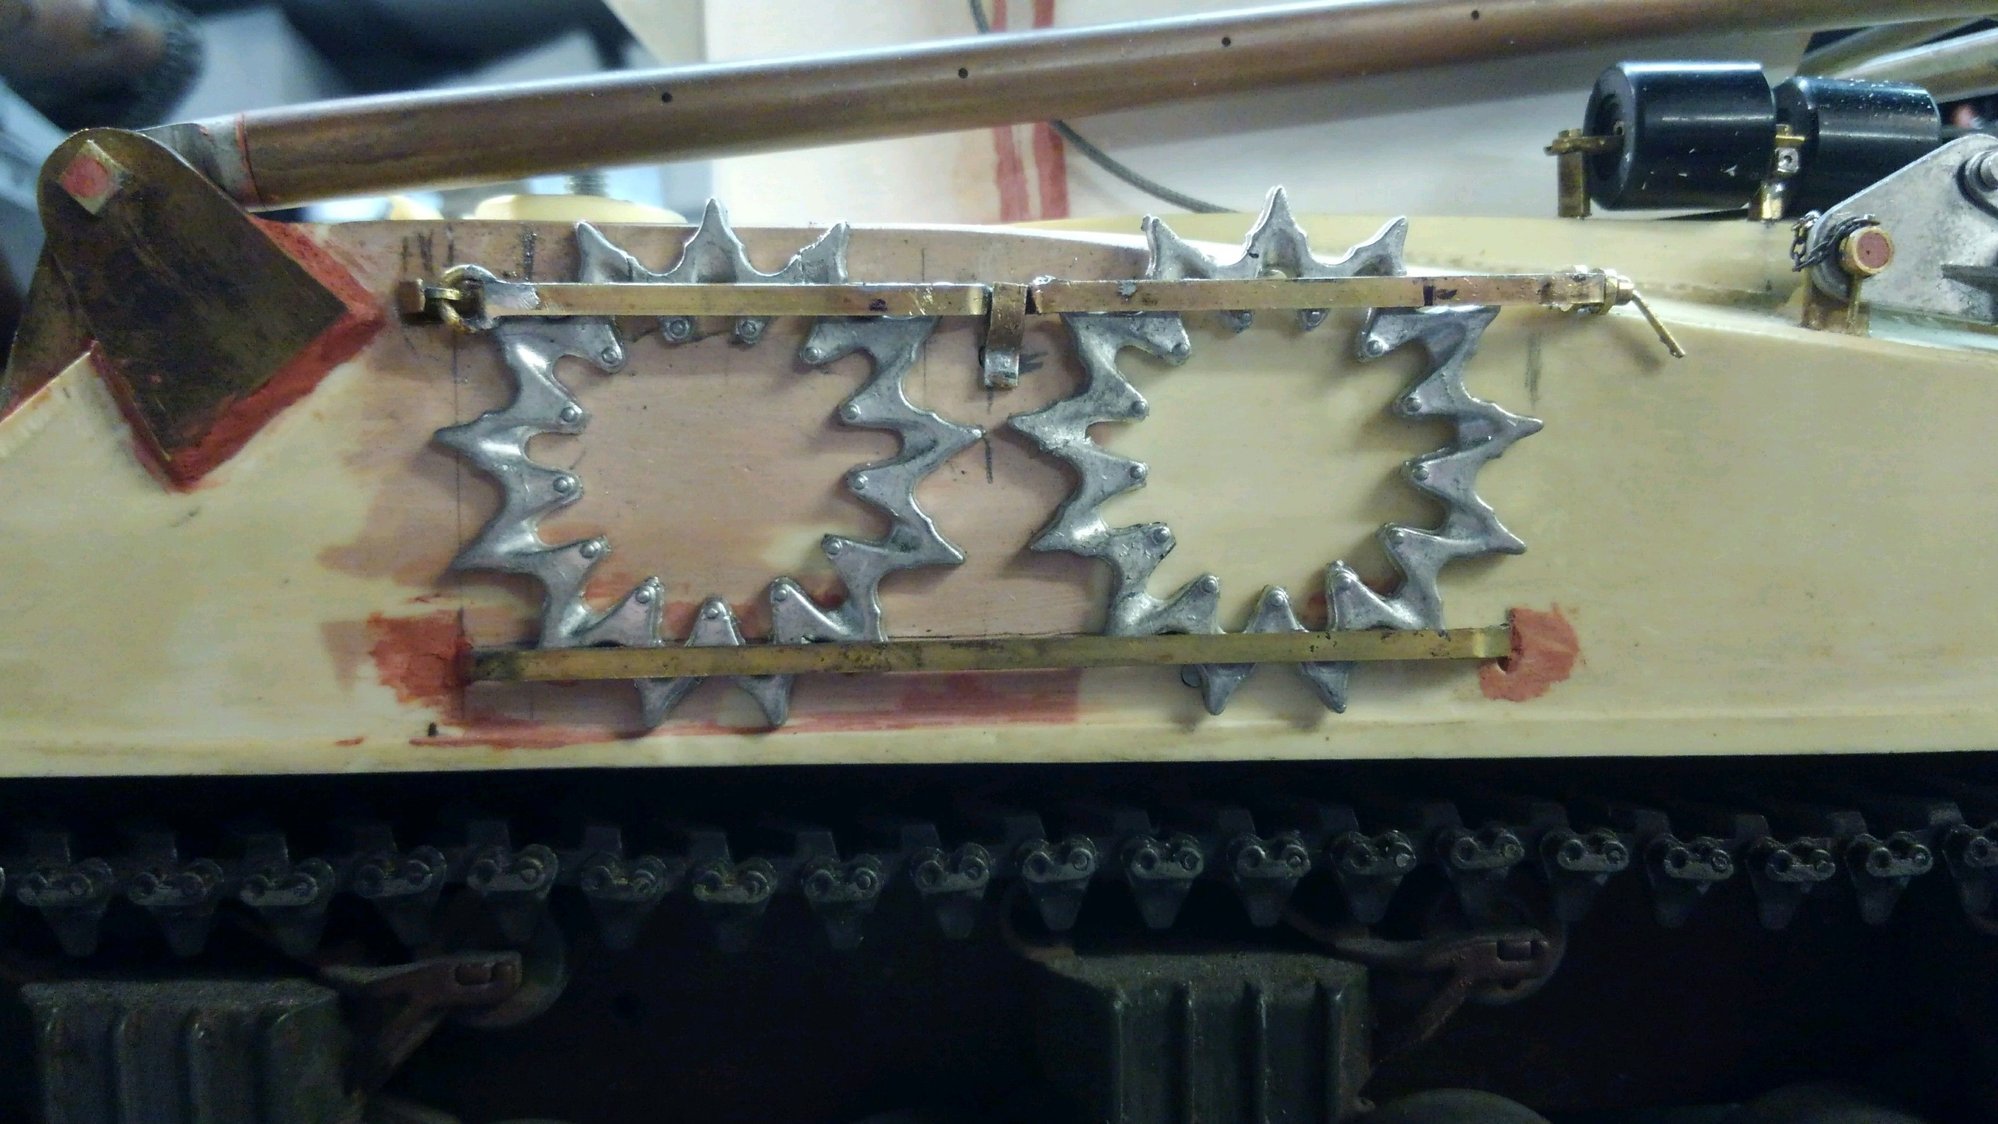
I have finally finished the sprocket brackets on the sides of the hull. This has been another very challenging project for me. Soldering it all out of brass is very difficult and stuff falls apart alot while your soldering other parts. Im mostly happy with how it all came out. I made some mistakes but I think no one but me will ever notice. Hats off to you if you do.
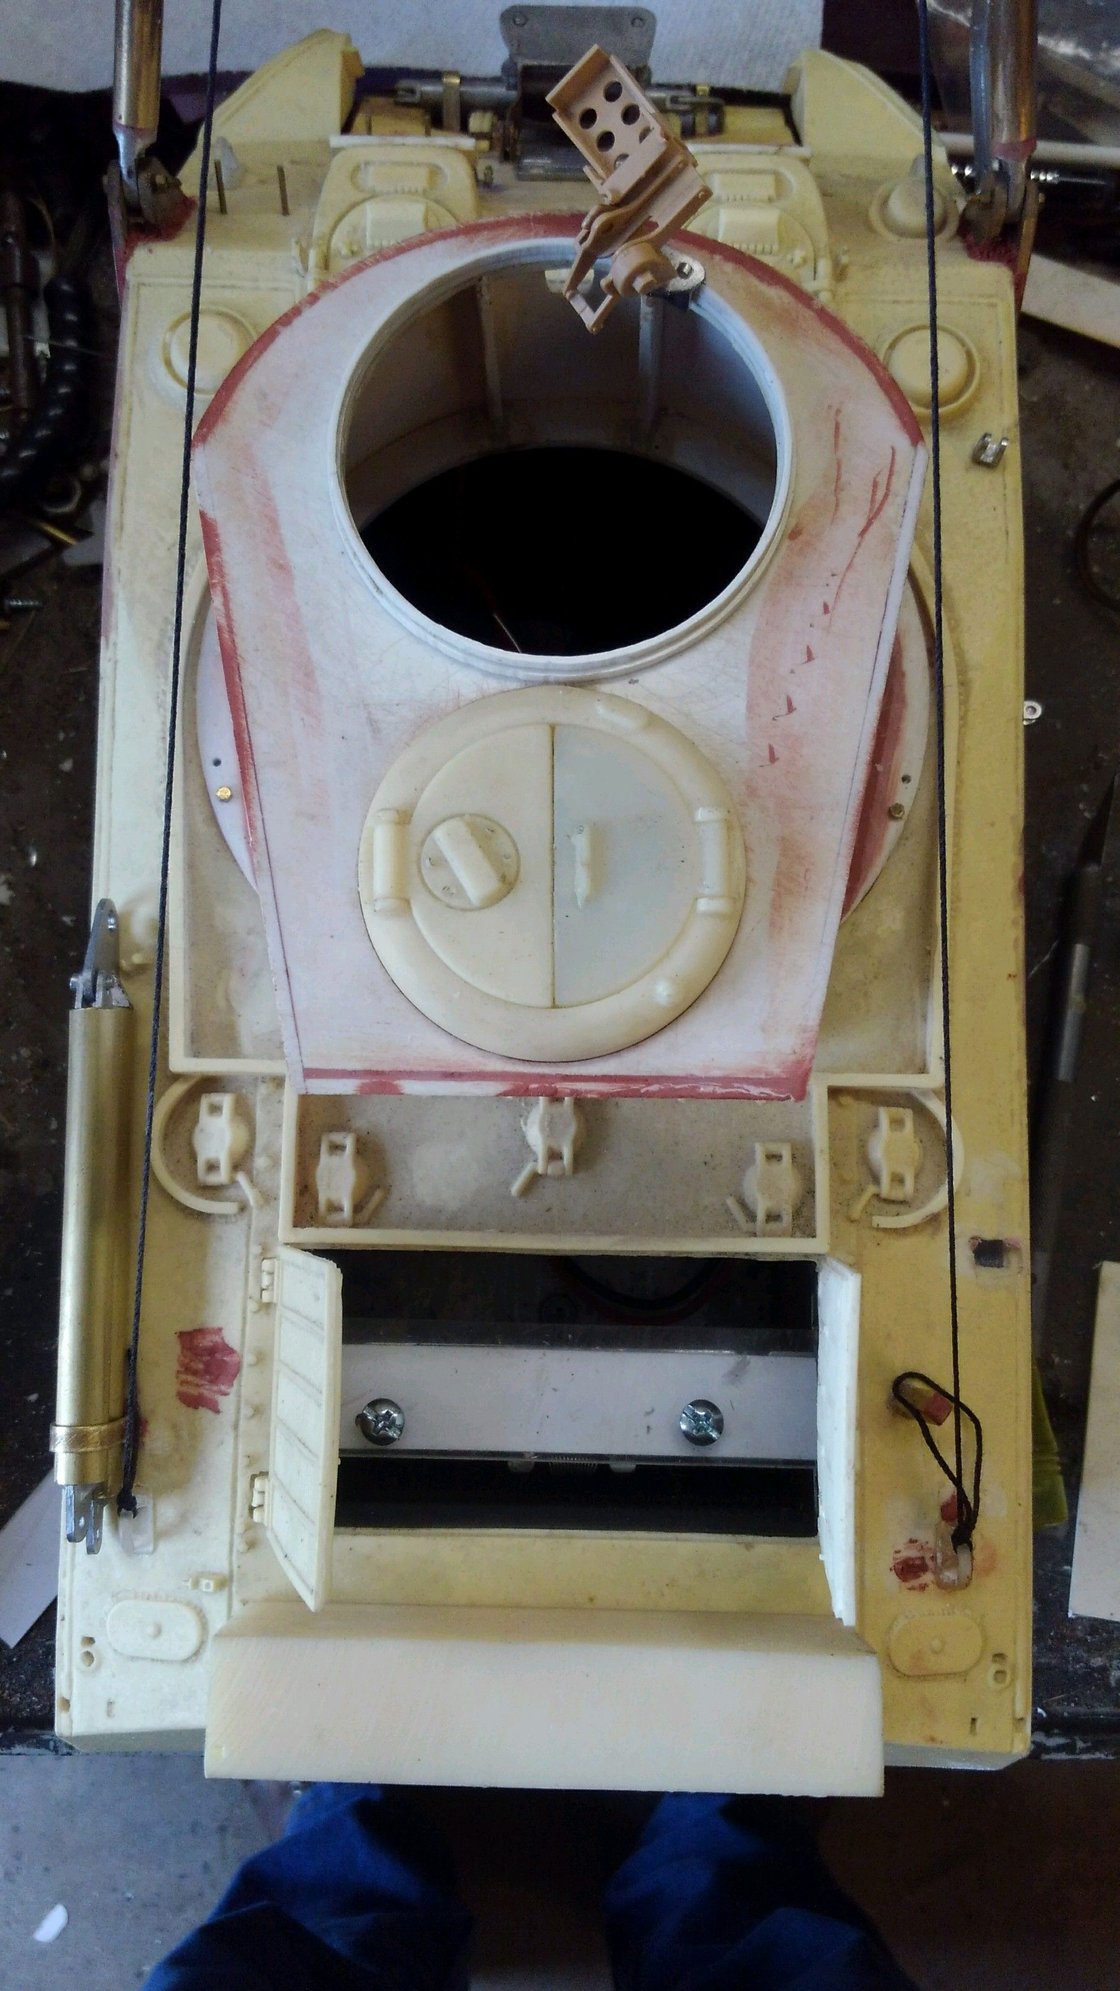
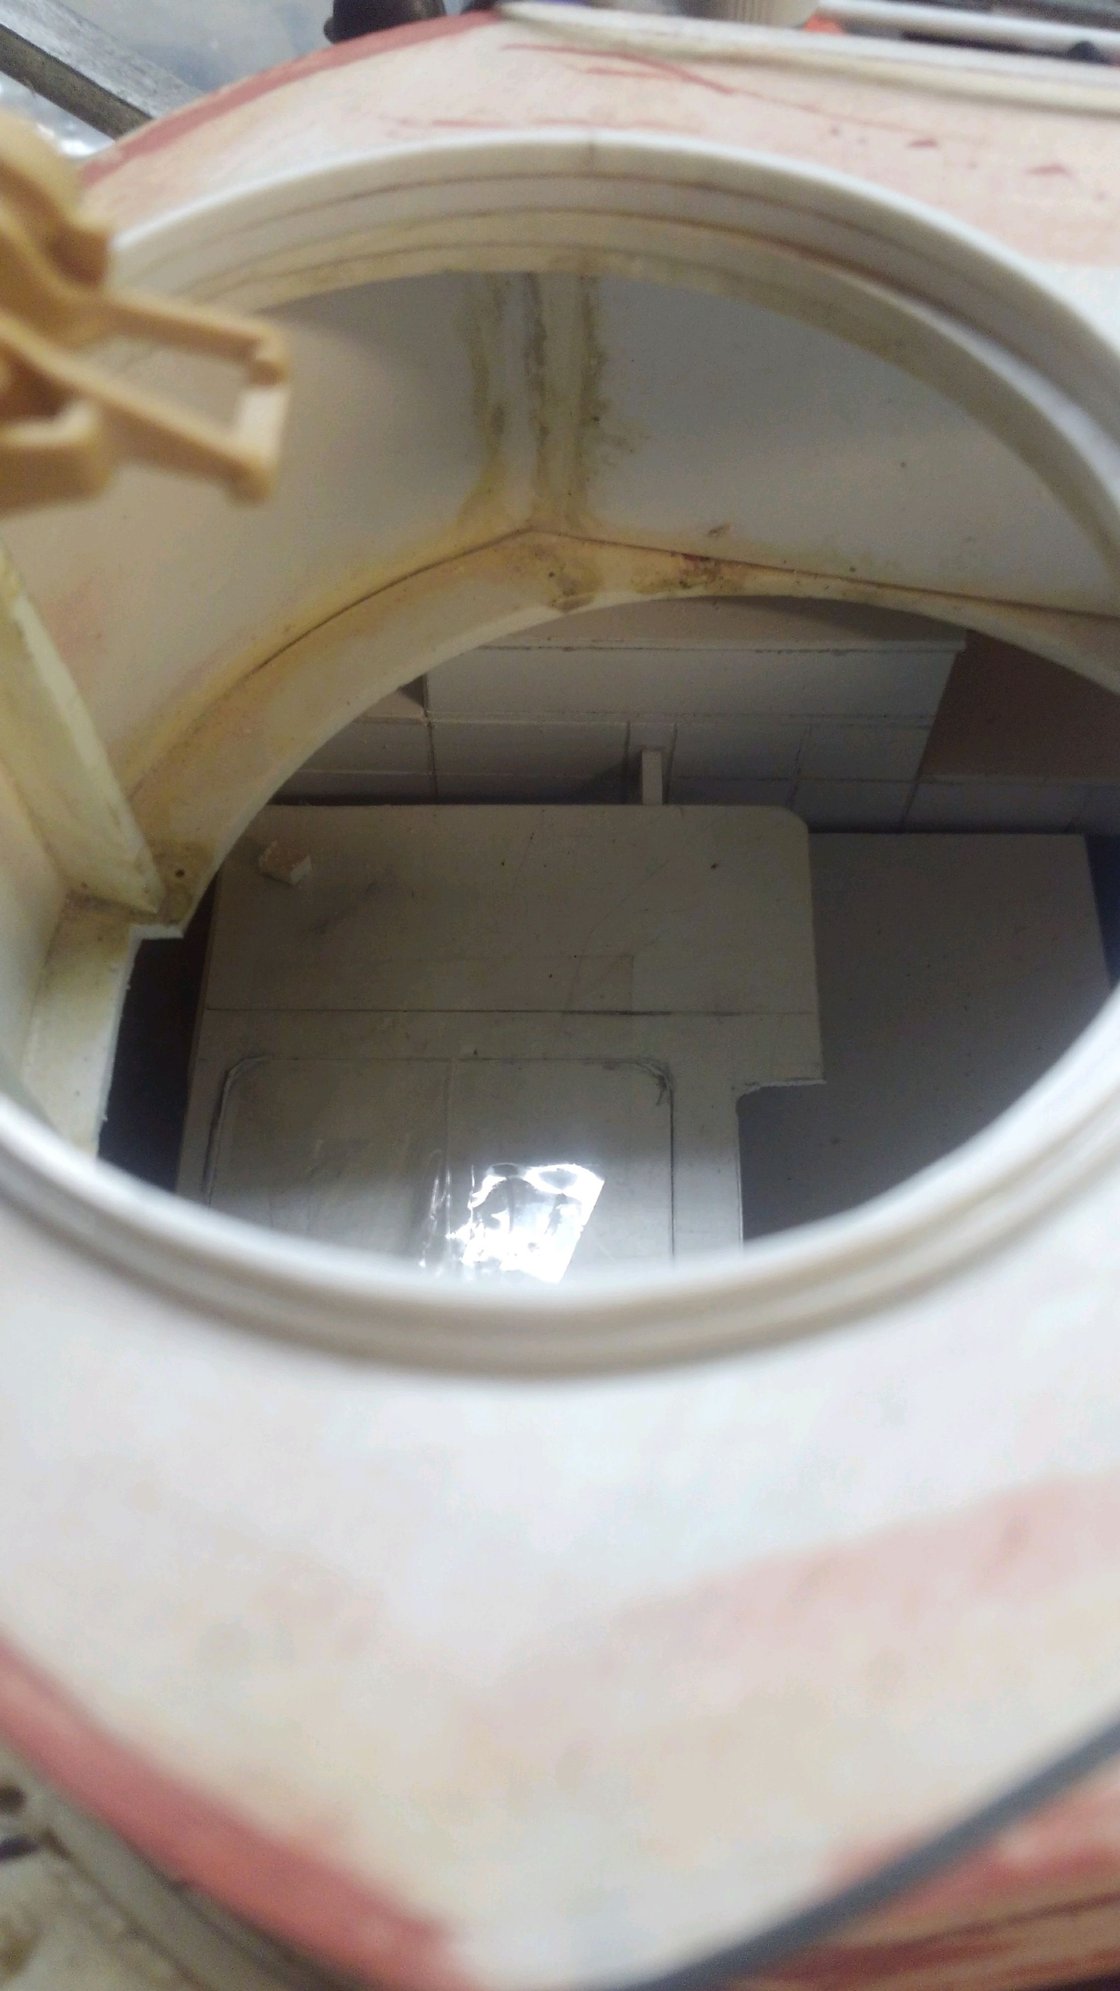
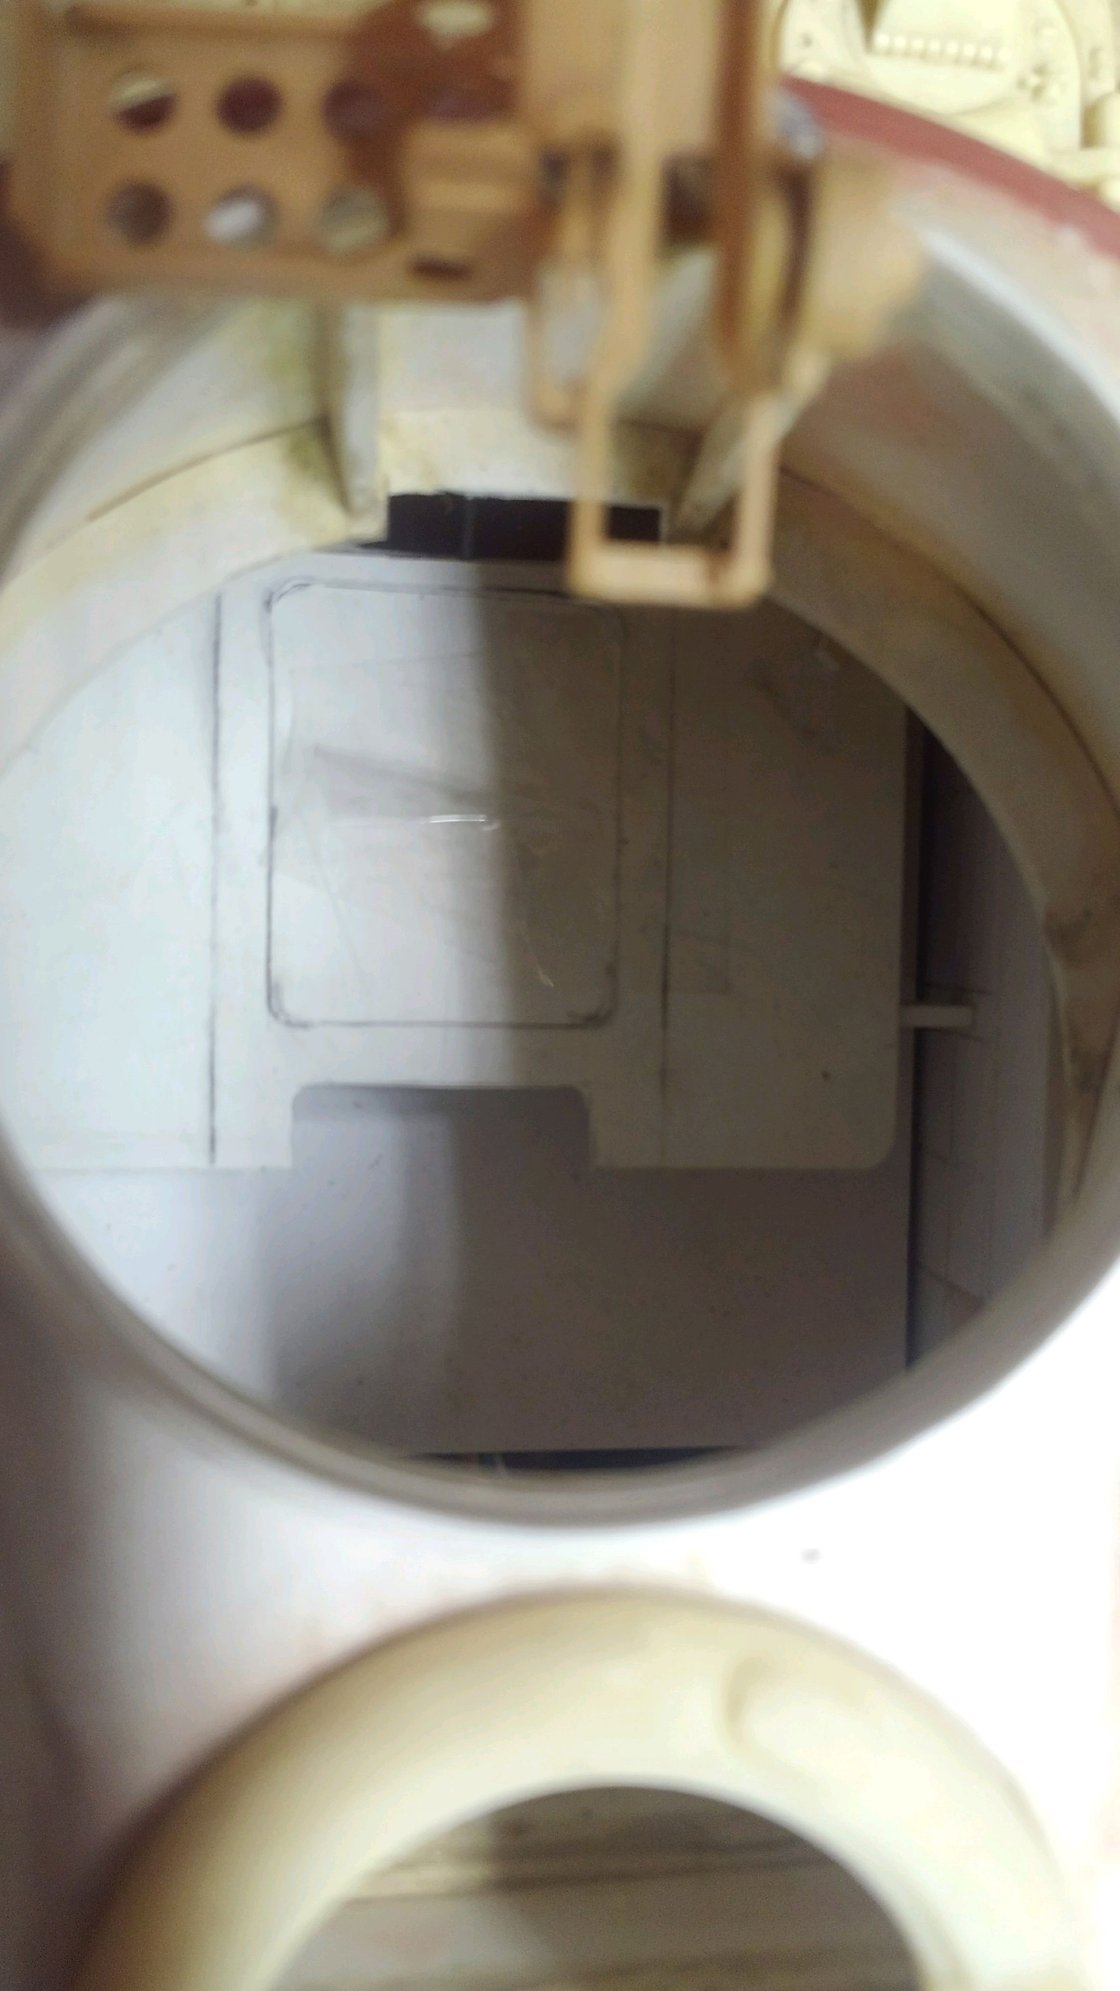
Also a sneak peak at the inside progress as well.

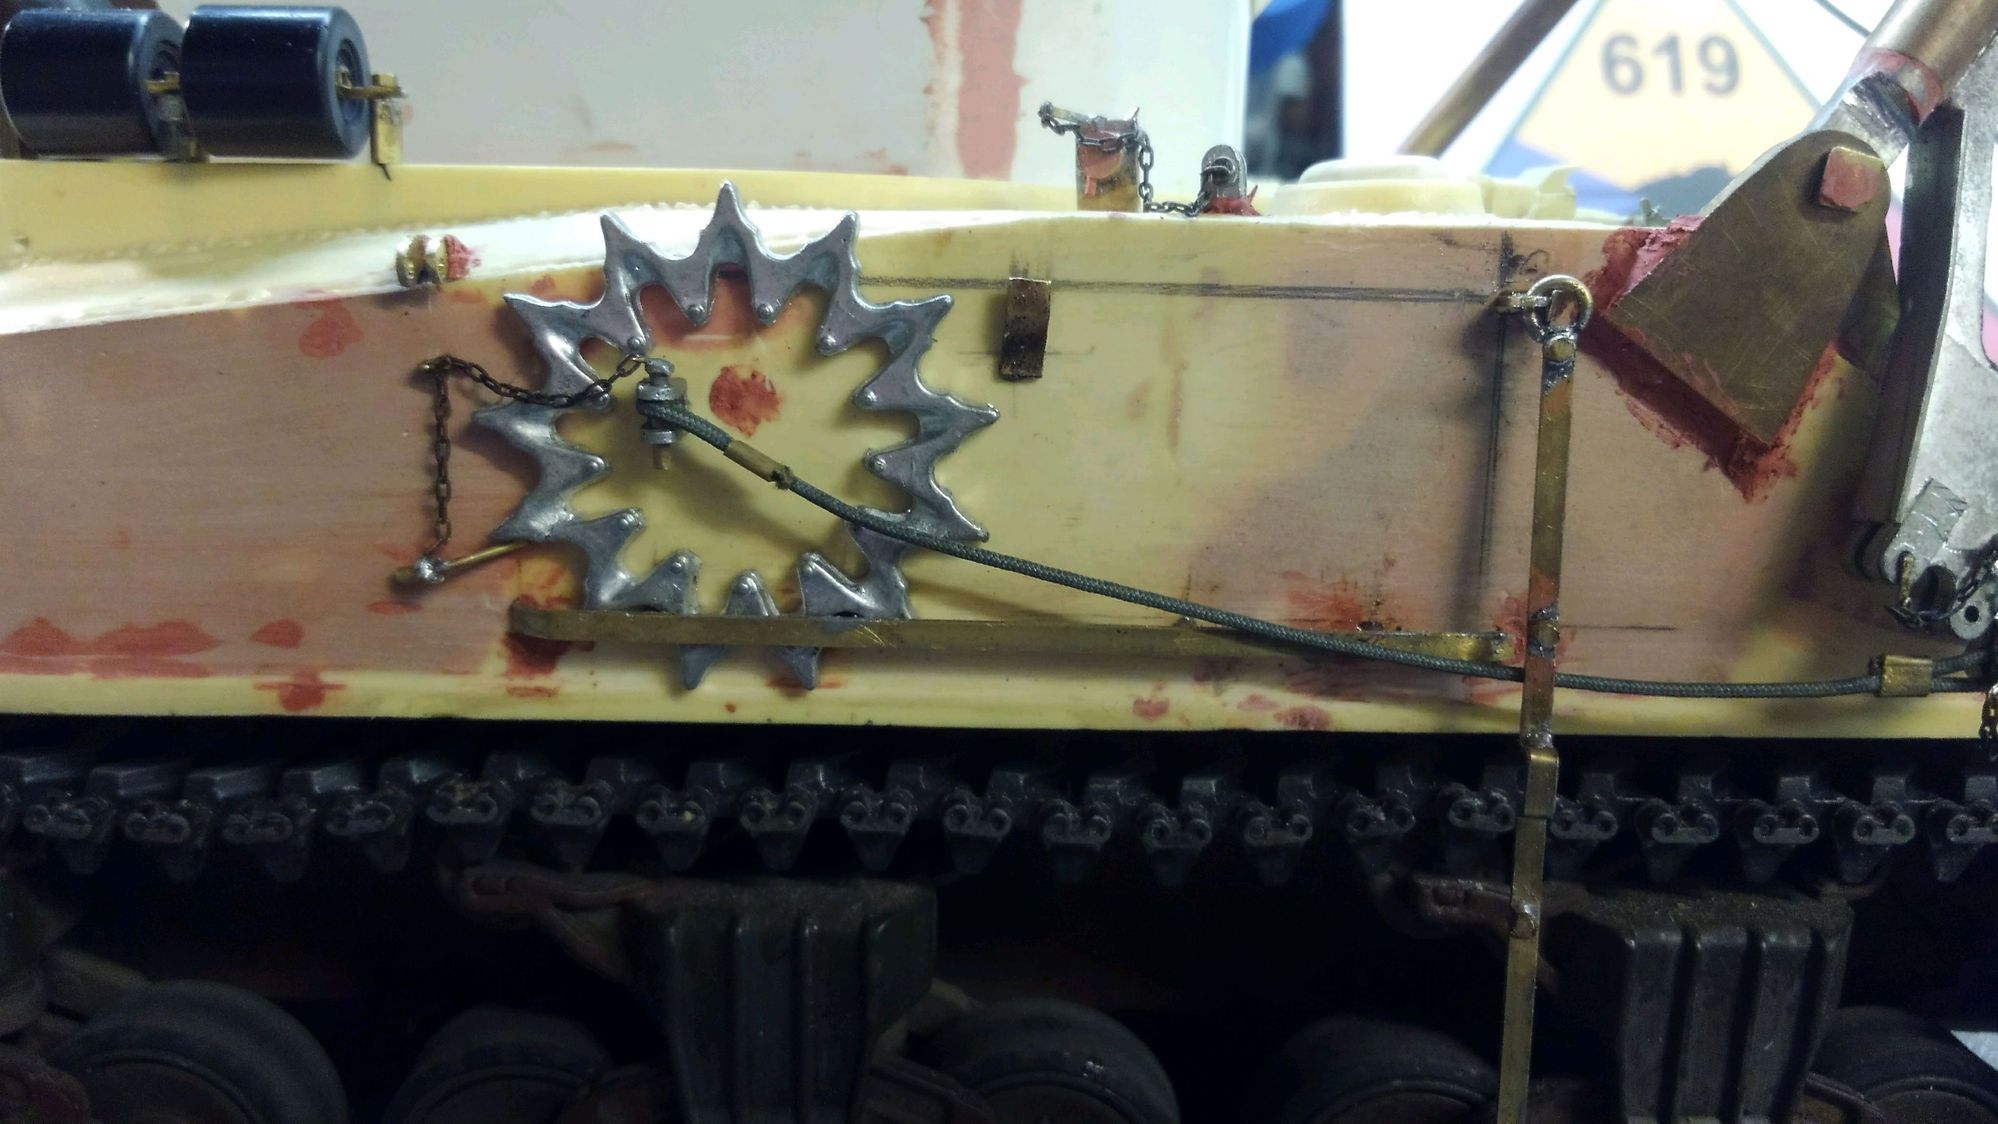
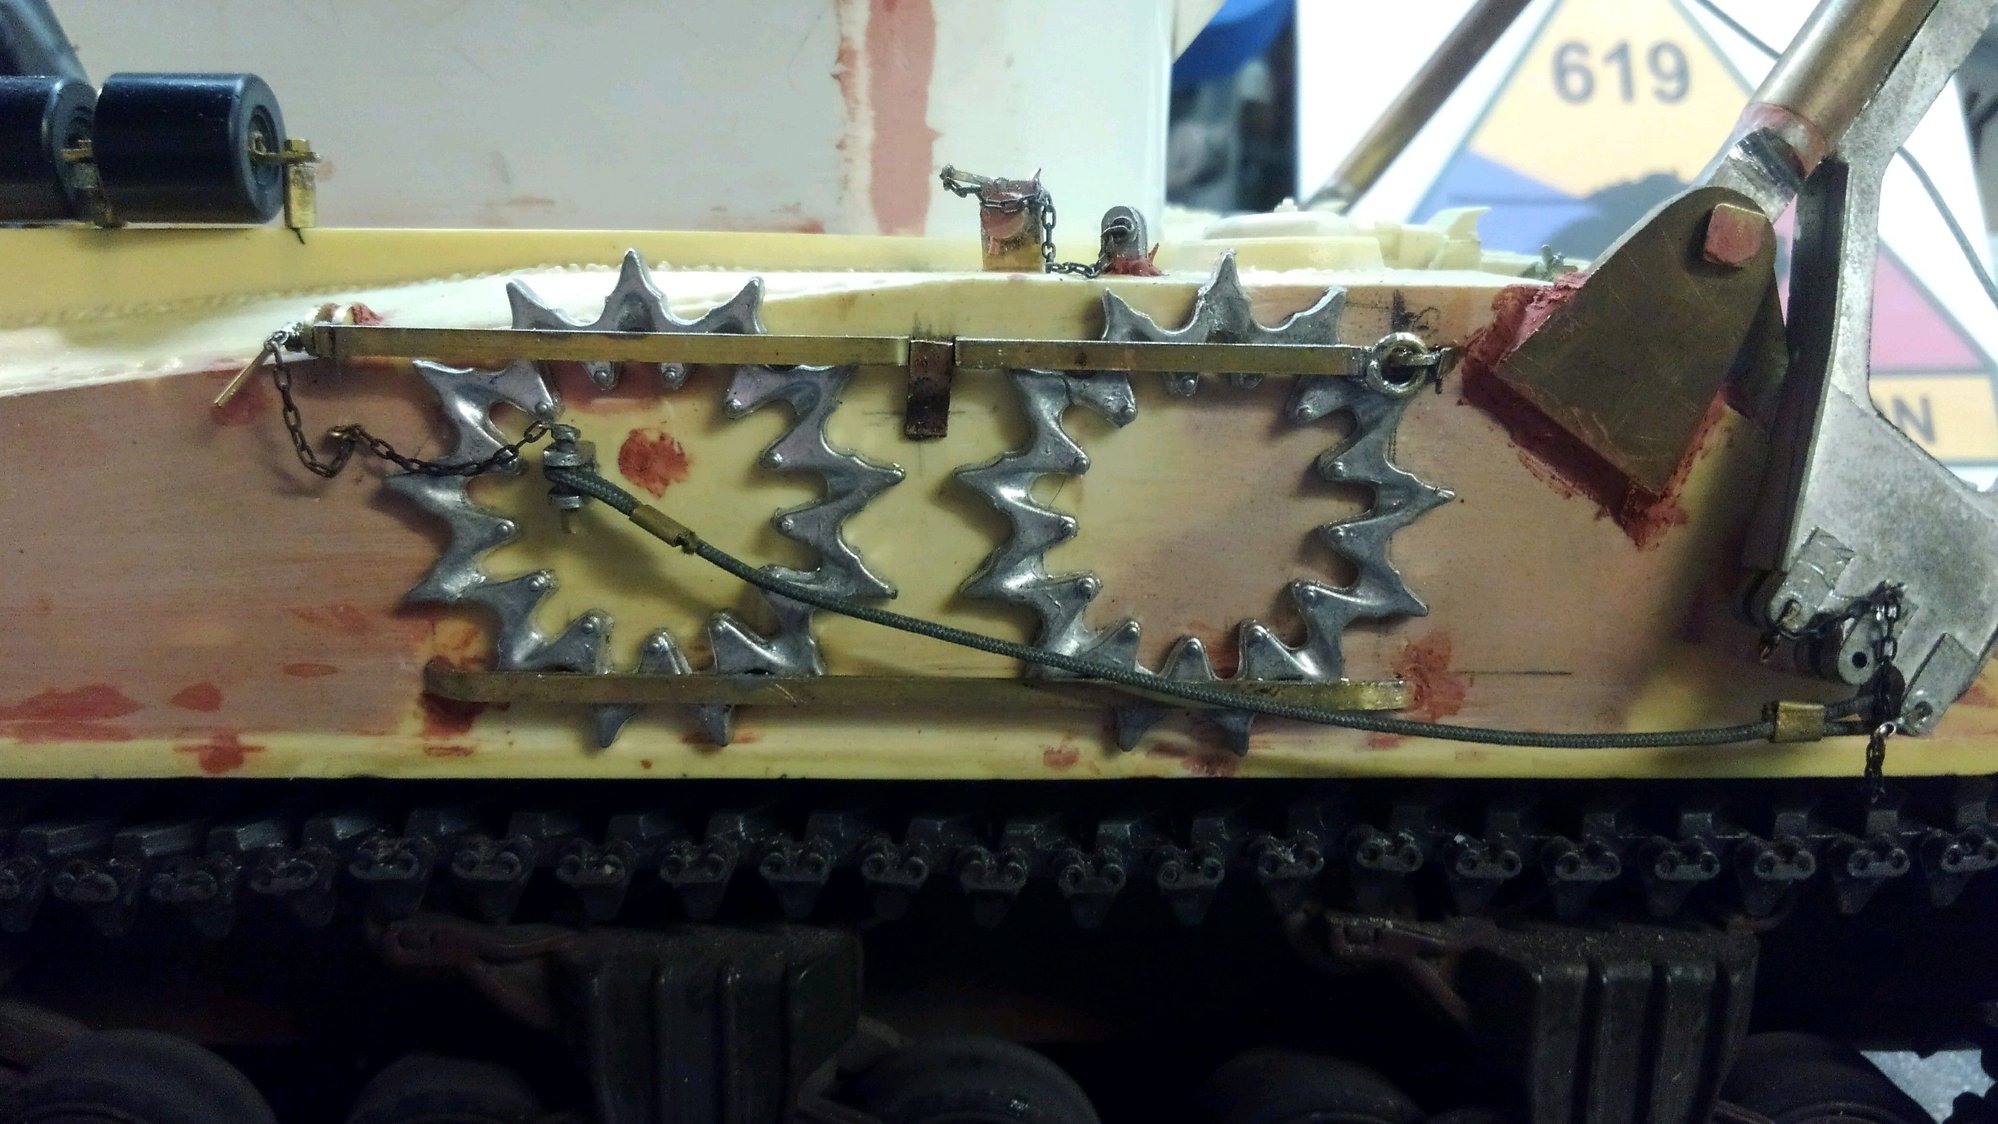
Also a sneak peak at the inside progress as well.
The following users liked this post:
Panther F (02-20-2021)

