


Taigen KV-1E
 09-08-2022 | 02:34 AM
#1
Thread Starter

My Feedback: (1)
I was just complaining I had zero tank time with school and all so I took a night off from school to finish the last bits on a tank I've been working on for a few months when I've had the time.
This KV-1E was cobbled together from other builds and piece mail parts. The turret came from the first KV-1E I bought that got converted into the SU-152.
It's using the newer Taigen/Torro KV-1 lower. I custom fit a set of the Heng Long all enclosed CNC machined 1/56 ratio (slow) gearboxes to the Taigen hull. It also got a metal turret ring and metal turret drive motor. Installed a FRS7S Visaton speaker in an off the shelf plastic box and printed a speaker grill from ABS for it. It's being controlled by a Clark TK-50SP board and Flysky FS-I6S radio/FS-iA6B receiver.


I added the turret ring guards, reoriented the saw so it pointed the right direction, added the antenna, added the lifting rings, replaced the engine deck vent mesh with real mesh guards, added weld lines, and added a brass gun cleaning kit to the fender.


Added some weld lines around the towing eyes and some mesh to the engine vent.

That turret was gutted and the innards were replaced with a Clark 3D printed recoil and elevation specifically made for the KV-1 (from DAK RC). IR LED was installed in the front of the turret along with a Taigen high intensity flash unit. Turret is held on with magnets. You can also see I decided to add some more texture to the flat plates not seen in the rest of the photos.

Turret got some weld lines as well, some light Mr. Surfacer texture, added a 3D printed IR receiver mount, added a LegoDEI IR receiver, swapped out the commander's hatch for a metal one, and I de-emphasized all the little circles on the turret. On the real tanks those circles are supposed to be where bolts were installed and then welded over. So for more randomness to their look, some got removed, some got made smaller, and some were made just a tad smaller as they were just too big to look real.


On the front I added weld lines around the add on armor plate, replaced the light with a metal one that looks better, randomized the weld circles on the front nose, made the driver's hatch functional, and added the two cables. The light does look purple as it has a layer of Maskol on it getting ready for paint.

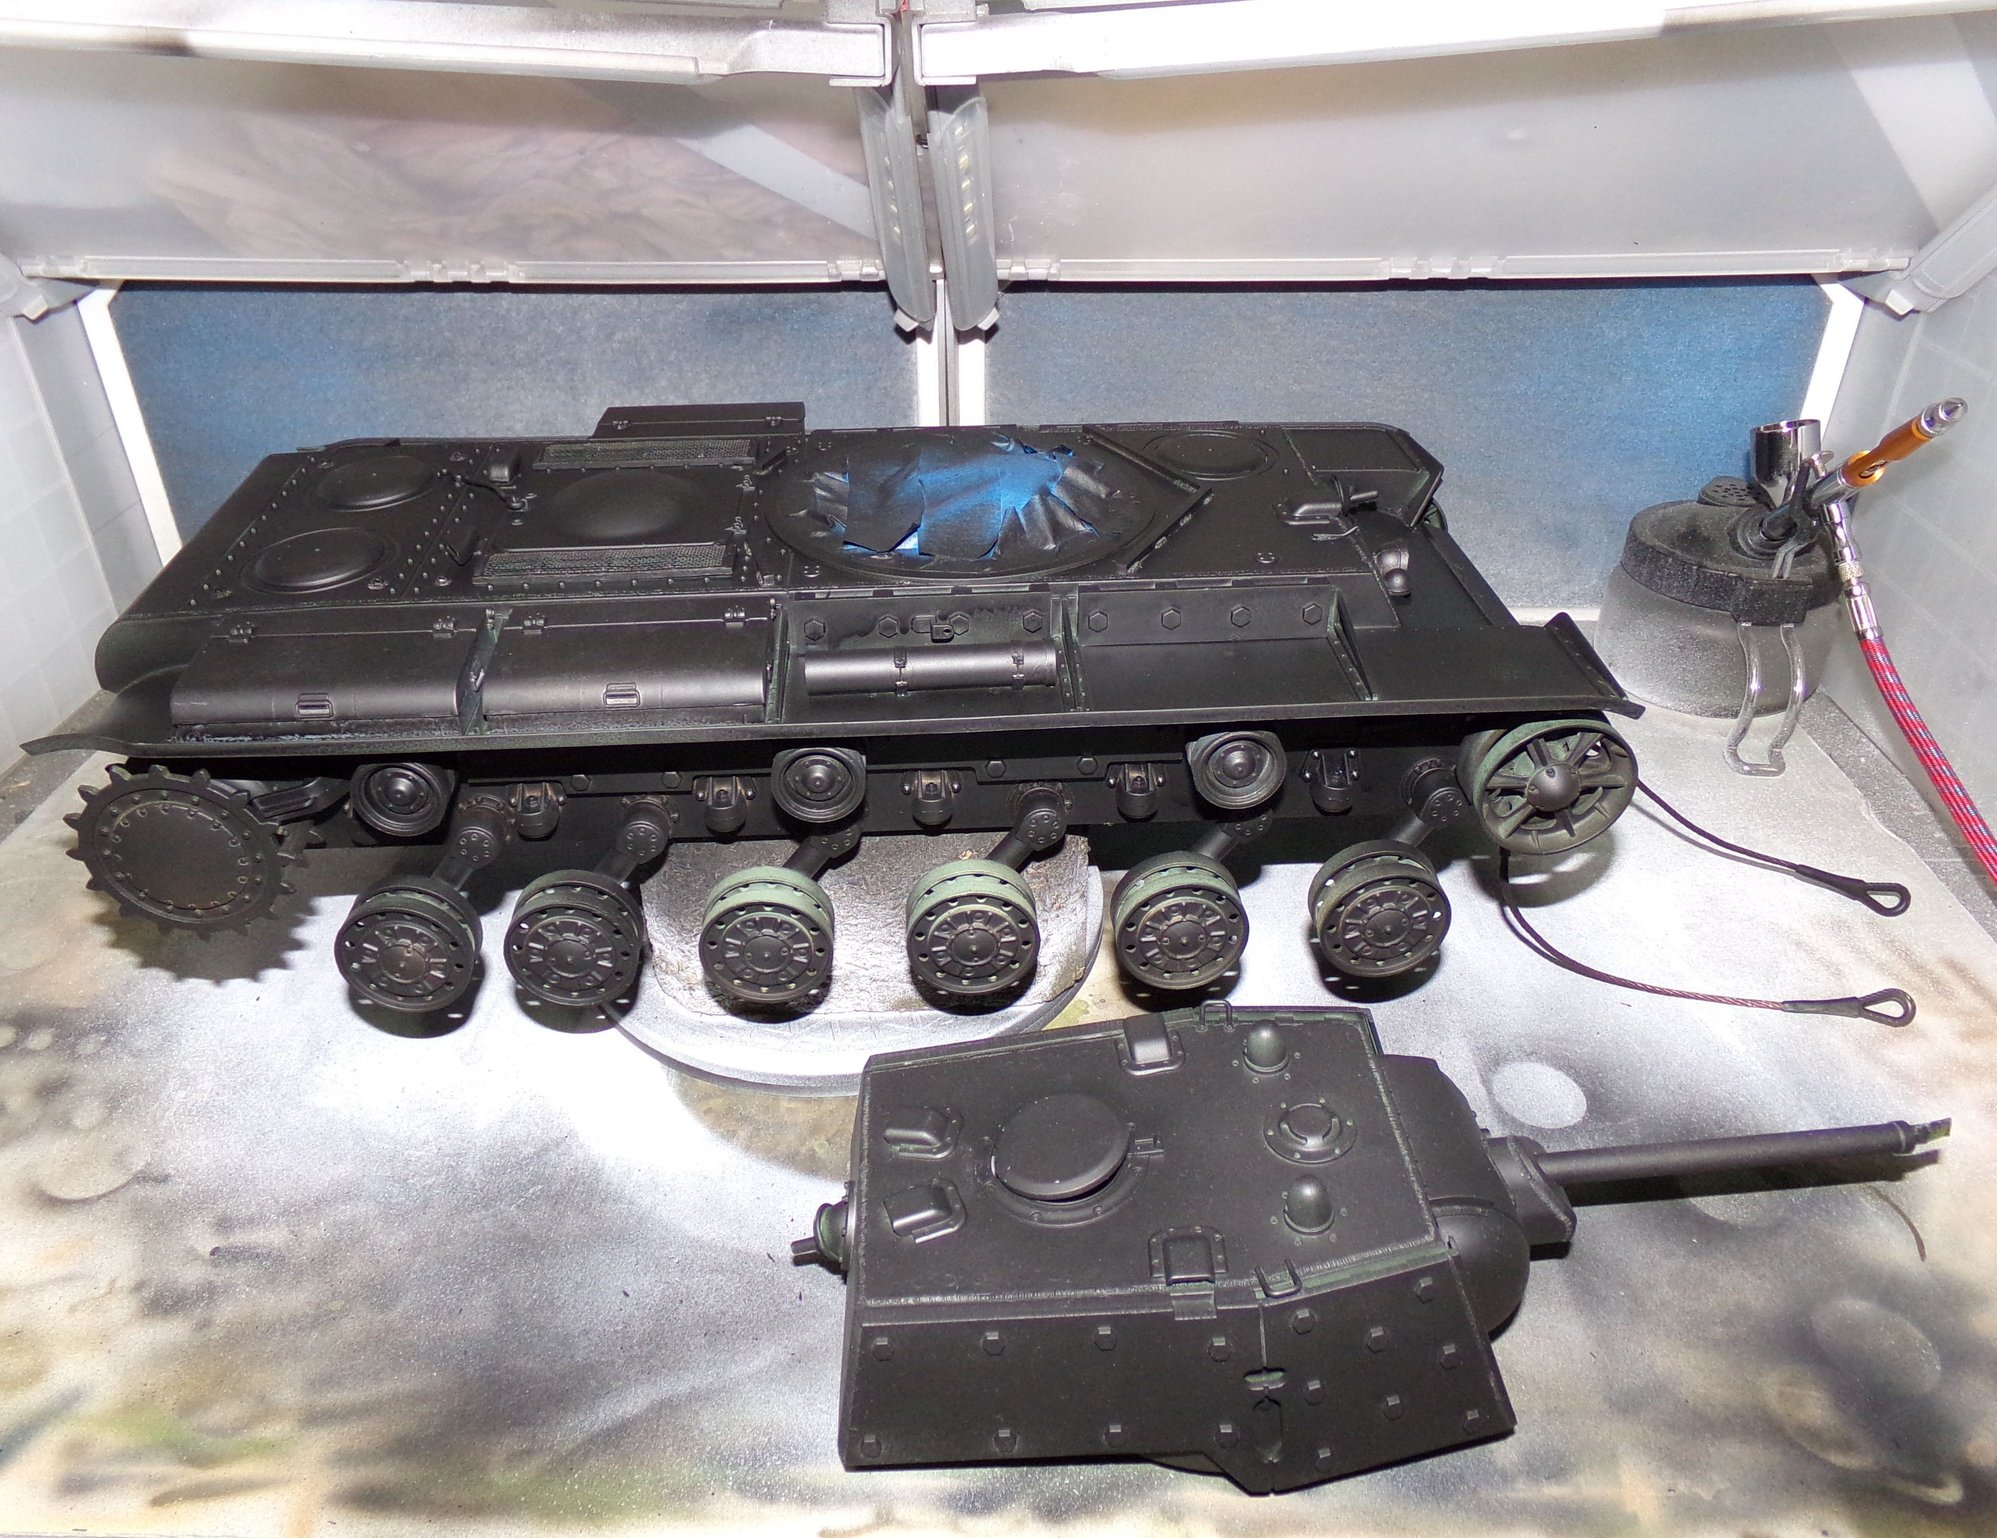
At this point it's basically ready for primer and paint. I have some of the box fuel tanks to got on it after it's painted.
A note on the weld lines. You may have noticed they are three different colors because I experimented with three different materials to make them. The white are Miliput, the black ones are Apoxie Sculpt, and the green ones are Kneadatite (aka: Green Stuff). After using all three I'd have to say my new favorite is Green Stuff.
This KV-1E was cobbled together from other builds and piece mail parts. The turret came from the first KV-1E I bought that got converted into the SU-152.
It's using the newer Taigen/Torro KV-1 lower. I custom fit a set of the Heng Long all enclosed CNC machined 1/56 ratio (slow) gearboxes to the Taigen hull. It also got a metal turret ring and metal turret drive motor. Installed a FRS7S Visaton speaker in an off the shelf plastic box and printed a speaker grill from ABS for it. It's being controlled by a Clark TK-50SP board and Flysky FS-I6S radio/FS-iA6B receiver.
I added the turret ring guards, reoriented the saw so it pointed the right direction, added the antenna, added the lifting rings, replaced the engine deck vent mesh with real mesh guards, added weld lines, and added a brass gun cleaning kit to the fender.
Added some weld lines around the towing eyes and some mesh to the engine vent.
That turret was gutted and the innards were replaced with a Clark 3D printed recoil and elevation specifically made for the KV-1 (from DAK RC). IR LED was installed in the front of the turret along with a Taigen high intensity flash unit. Turret is held on with magnets. You can also see I decided to add some more texture to the flat plates not seen in the rest of the photos.
Turret got some weld lines as well, some light Mr. Surfacer texture, added a 3D printed IR receiver mount, added a LegoDEI IR receiver, swapped out the commander's hatch for a metal one, and I de-emphasized all the little circles on the turret. On the real tanks those circles are supposed to be where bolts were installed and then welded over. So for more randomness to their look, some got removed, some got made smaller, and some were made just a tad smaller as they were just too big to look real.
On the front I added weld lines around the add on armor plate, replaced the light with a metal one that looks better, randomized the weld circles on the front nose, made the driver's hatch functional, and added the two cables. The light does look purple as it has a layer of Maskol on it getting ready for paint.
At this point it's basically ready for primer and paint. I have some of the box fuel tanks to got on it after it's painted.
A note on the weld lines. You may have noticed they are three different colors because I experimented with three different materials to make them. The white are Miliput, the black ones are Apoxie Sculpt, and the green ones are Kneadatite (aka: Green Stuff). After using all three I'd have to say my new favorite is Green Stuff.
 09-08-2022 | 03:46 PM
#3
Thread Starter
My Feedback: (1)
Yes it is compatible with the Tamiya standards. The IR receiver was purchased from Etsy: https://www.etsy.com/listing/7103851...89&ref=hp_rv-5 It is the same version DAK RC sells.
They make two different versions - one for Clark/Tamiya/IBU/Elmod type boards and one for Heng Long tanks. The Heng Long version will burn out if used on the other boards so there are some current limiting resistors added to the Tamiya version so that doesn't happen. You can also change the top to receive 360 degree hits or limit hits the same 45 degree standard the Tamiya apple uses. They also come in red or blue LED versions. The blue actually seems to show up better in the Texas sun. When used on a HL tank a circuit for the LEDs need to be wired up. There are instructions on his site showing how to do that.
They make two different versions - one for Clark/Tamiya/IBU/Elmod type boards and one for Heng Long tanks. The Heng Long version will burn out if used on the other boards so there are some current limiting resistors added to the Tamiya version so that doesn't happen. You can also change the top to receive 360 degree hits or limit hits the same 45 degree standard the Tamiya apple uses. They also come in red or blue LED versions. The blue actually seems to show up better in the Texas sun. When used on a HL tank a circuit for the LEDs need to be wired up. There are instructions on his site showing how to do that.
09-10-2022 | 02:30 AM
#4
Thread Starter
My Feedback: (1)
Got to throw some paint on it...Stynylrez black primer followed by Mig-0019 4BO. Still in the middle of doing some work on the external fuel boxes and tow cables, but it's getting there. I ordered some markings for it so I should be able to wrap this project up next week.


09-25-2022 | 01:03 AM
#6
Thread Starter
My Feedback: (1)
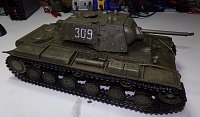
Decided that I was just going to use the decal sheets as a guide and paint the markings on. I scanned them on the printer and cut out some templates to lay down the markings. Afterward I removed the masks and hand painted them a little darker. The markings are based on a real KV-1E photo. I also decided to try my hand at some chipping effects. I've never done this before so I think it came out OK. I still have a lot to do and weathering effects to add after the chips are done.


10-27-2022 | 02:07 AM
#7
Thread Starter
My Feedback: (1)
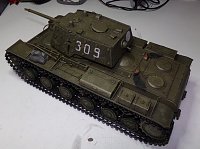
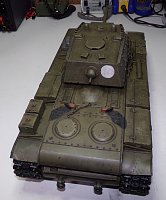
So I may have gone a little overboard on the chipping...it was a learning process. I tried to make it look like soldiers were sliding off the tool boxes after riding into battle. Overall I'm not completely dissatisfied with the outcome.
There are some dust effects I have to add yet, but waiting on some pigments to arrive to do that. The paint still needs to be sealed with a dull coat after that.

There are some dust effects I have to add yet, but waiting on some pigments to arrive to do that. The paint still needs to be sealed with a dull coat after that.
The following users liked this post:
tiger rampage (10-27-2022)


 01-25-2023 | 02:47 AM
#13
My Feedback: (1)
Looks good and I like the chipping effect. Can you please explain the technique that you used to get that? I have that SAS Jeep that's going to need a lot of chips so I'm exploring all the different ways of making that happen. You got good results so I would really like to know exactly how you did that.
01-27-2023 | 08:13 PM
#14
Thread Starter
My Feedback: (1)
Looks good and I like the chipping effect. Can you please explain the technique that you used to get that? I have that SAS Jeep that's going to need a lot of chips so I'm exploring all the different ways of making that happen. You got good results so I would really like to know exactly how you did that.
Night Shift Models
01-30-2023 | 03:47 AM
#16

Thanks. Found Night Shift's vids on YouTube and applied some of his techniques to do the chipping. The lighter chips (lighter green than the base coat) are done with a sponge for randomness and then the darker centers are added to the lighter chips. I think I used a rusty looking brown color for the bigger chips (simulation of the ones that go all the way through the paint).
If you're uncomfortable with the Airbrush you can get a similar effect using an Artcraft Graphite Pencil scraping it over raised portions of the model to deposit some Graphite and then rubbing the model using your fingers =)
Using the Silvering, Graphite Pencil and Airbrush method is was gives my E-100 that slight metal sheen under certain angles.


