


3D printed 1/10th Jagdtiger
 08-19-2023, 03:07 PM
#1

Thread Starter
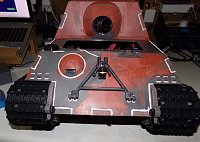
Being a fan of 1/10th scale, Jerry should love this project. For the last few weeks I've been printing a 1/10th scale Jagdtiger out of PETG. The suspension hasn't been adjusted yet and I may need to reprint some of the torsion bars to make them a little less stiff. Still need to print finish printing the side skirts and tracks. Been an interesting project so far.

The following 3 users liked this post by tankme:

The following 2 users liked this post by marshall:
JeeSib (09-07-2023),
rb67mustang (08-21-2023)
08-20-2023, 03:34 PM
#3
Thread Starter
Nice. I bought the STLs for that KV-1 and they are very good IMO. I was seriously thinking of trying to scale that up to 1/6th...  The Comet is really nice also. I don't have the STLs for it, but I do know where to buy them. I guess I've gotten bitten by the larger tank bug as I can't battle my 1/16th tanks much anymore. Since the airplane club kicked us off their property, the battle locations are now like 3 hours away. That makes a 6 hour driving commitment just to battle for a few hours. The Bambu printer can print stuff so fast that 1/10th and 1/6th tanks are now possible within a reasonable amount of time.
The Comet is really nice also. I don't have the STLs for it, but I do know where to buy them. I guess I've gotten bitten by the larger tank bug as I can't battle my 1/16th tanks much anymore. Since the airplane club kicked us off their property, the battle locations are now like 3 hours away. That makes a 6 hour driving commitment just to battle for a few hours. The Bambu printer can print stuff so fast that 1/10th and 1/6th tanks are now possible within a reasonable amount of time.
08-21-2023, 12:39 PM
#6
Marshall, Tankme - great looking models. I think ASA is probably the best all round material for printed tanks. My 1/6 Hetzer is ASA, esp the tracks. I'm printing a 1/6 RSO in mostly PLA+. I'm impressed by its strength and ease of printing.
I think 1/10 is the perfect scale - although I've been fighting the urge for another scale (1 have mostly 1/6, few 1/16). Perhaps with printing 1/10 will make a resurgence? Need some nice figures to complement these. I've been eyeing the 1/10 Chaffee. There's some great models out there for very cheap.
Nice work,
Bob
08-21-2023, 01:18 PM
#7
Thread Starter
Marshall, Tankme - great looking models. I think ASA is probably the best all round material for printed tanks. My 1/6 Hetzer is ASA, esp the tracks. I'm printing a 1/6 RSO in mostly PLA+. I'm impressed by its strength and ease of printing.
I think 1/10 is the perfect scale - although I've been fighting the urge for another scale (1 have mostly 1/6, few 1/16). Perhaps with printing 1/10 will make a resurgence? Need some nice figures to complement these. I've been eyeing the 1/10 Chaffee. There's some great models out there for very cheap.
Nice work,
Bob
I think 1/10 is the perfect scale - although I've been fighting the urge for another scale (1 have mostly 1/6, few 1/16). Perhaps with printing 1/10 will make a resurgence? Need some nice figures to complement these. I've been eyeing the 1/10 Chaffee. There's some great models out there for very cheap.
Nice work,
Bob
I do like ASA to print with as I said above, but I have noticed it doesn't take screws as well as PETG. ASA has to be threaded where as I can usually let screws in PETG make their own threads for the most part. Screws in ASA pull out much easier and are much easier to strip. I guess I could invest in some brass inserts and solve that problem also. The Jagdtiger uses a lot of M3 nuts as backers so stripping out not much of a concern.
08-21-2023, 03:34 PM
#8
Thread Starter
08-25-2023, 01:41 PM
#9
Ah yes, at times past I often felt like John the Baptist preaching in the Wilderness regarding the virtues of 1/10 scale armor.
Ironic that it took 3D printing to wake up the modeling world to this wonderful scale....
I happen to have a 1/10 JagdTiger in progress, not sure when I'll get back to it. It already weighs about 55 pounds and it's no where
near finished.
There are several Models I'd love to have in 1/10 scale still but more likely than not I'd use 3D printed parts, assuming they're made a certain way, as patterns
for casting aluminum parts. I have some 50 1/10 scale armor models so I have enough projects for now but I'd always make room for a Semovente da 75/18,
a Ha-Go or a Cromwell in 1/10...
I've been spending a good part of my modeling time in 1/6 oddly- presently building an Armortek King Tiger (2019 vresion).
Keep up the good works..
Jerry
The following users liked this post:
JeeSib (09-10-2023)
09-07-2023, 04:55 AM
#11
Nice. I bought the STLs for that KV-1 and they are very good IMO. I was seriously thinking of trying to scale that up to 1/6th... The Comet is really nice also. I don't have the STLs for it, but I do know where to buy them. I guess I've gotten bitten by the larger tank bug as I can't battle my 1/16th tanks much anymore. Since the airplane club kicked us off their property, the battle locations are now like 3 hours away. That makes a 6 hour driving commitment just to battle for a few hours. The Bambu printer can print stuff so fast that 1/10th and 1/6th tanks are now possible within a reasonable amount of time.
The Comet is really nice also. I don't have the STLs for it, but I do know where to buy them. I guess I've gotten bitten by the larger tank bug as I can't battle my 1/16th tanks much anymore. Since the airplane club kicked us off their property, the battle locations are now like 3 hours away. That makes a 6 hour driving commitment just to battle for a few hours. The Bambu printer can print stuff so fast that 1/10th and 1/6th tanks are now possible within a reasonable amount of time.Your Jagdtiger looks very good.
09-07-2023, 12:10 PM
#12
Thread Starter
The KV-1 files I got do have the KV-2 turret and were free on Cults so it's probably the same one you have. It is a very detailed model in 1/10th. I have started printing a few items from it in 1/6th and the parts are huge. I had to cut the engine deck in four pieces to get it on my printer. The cover deck with the round access panels had to be cut in two pieces to print.
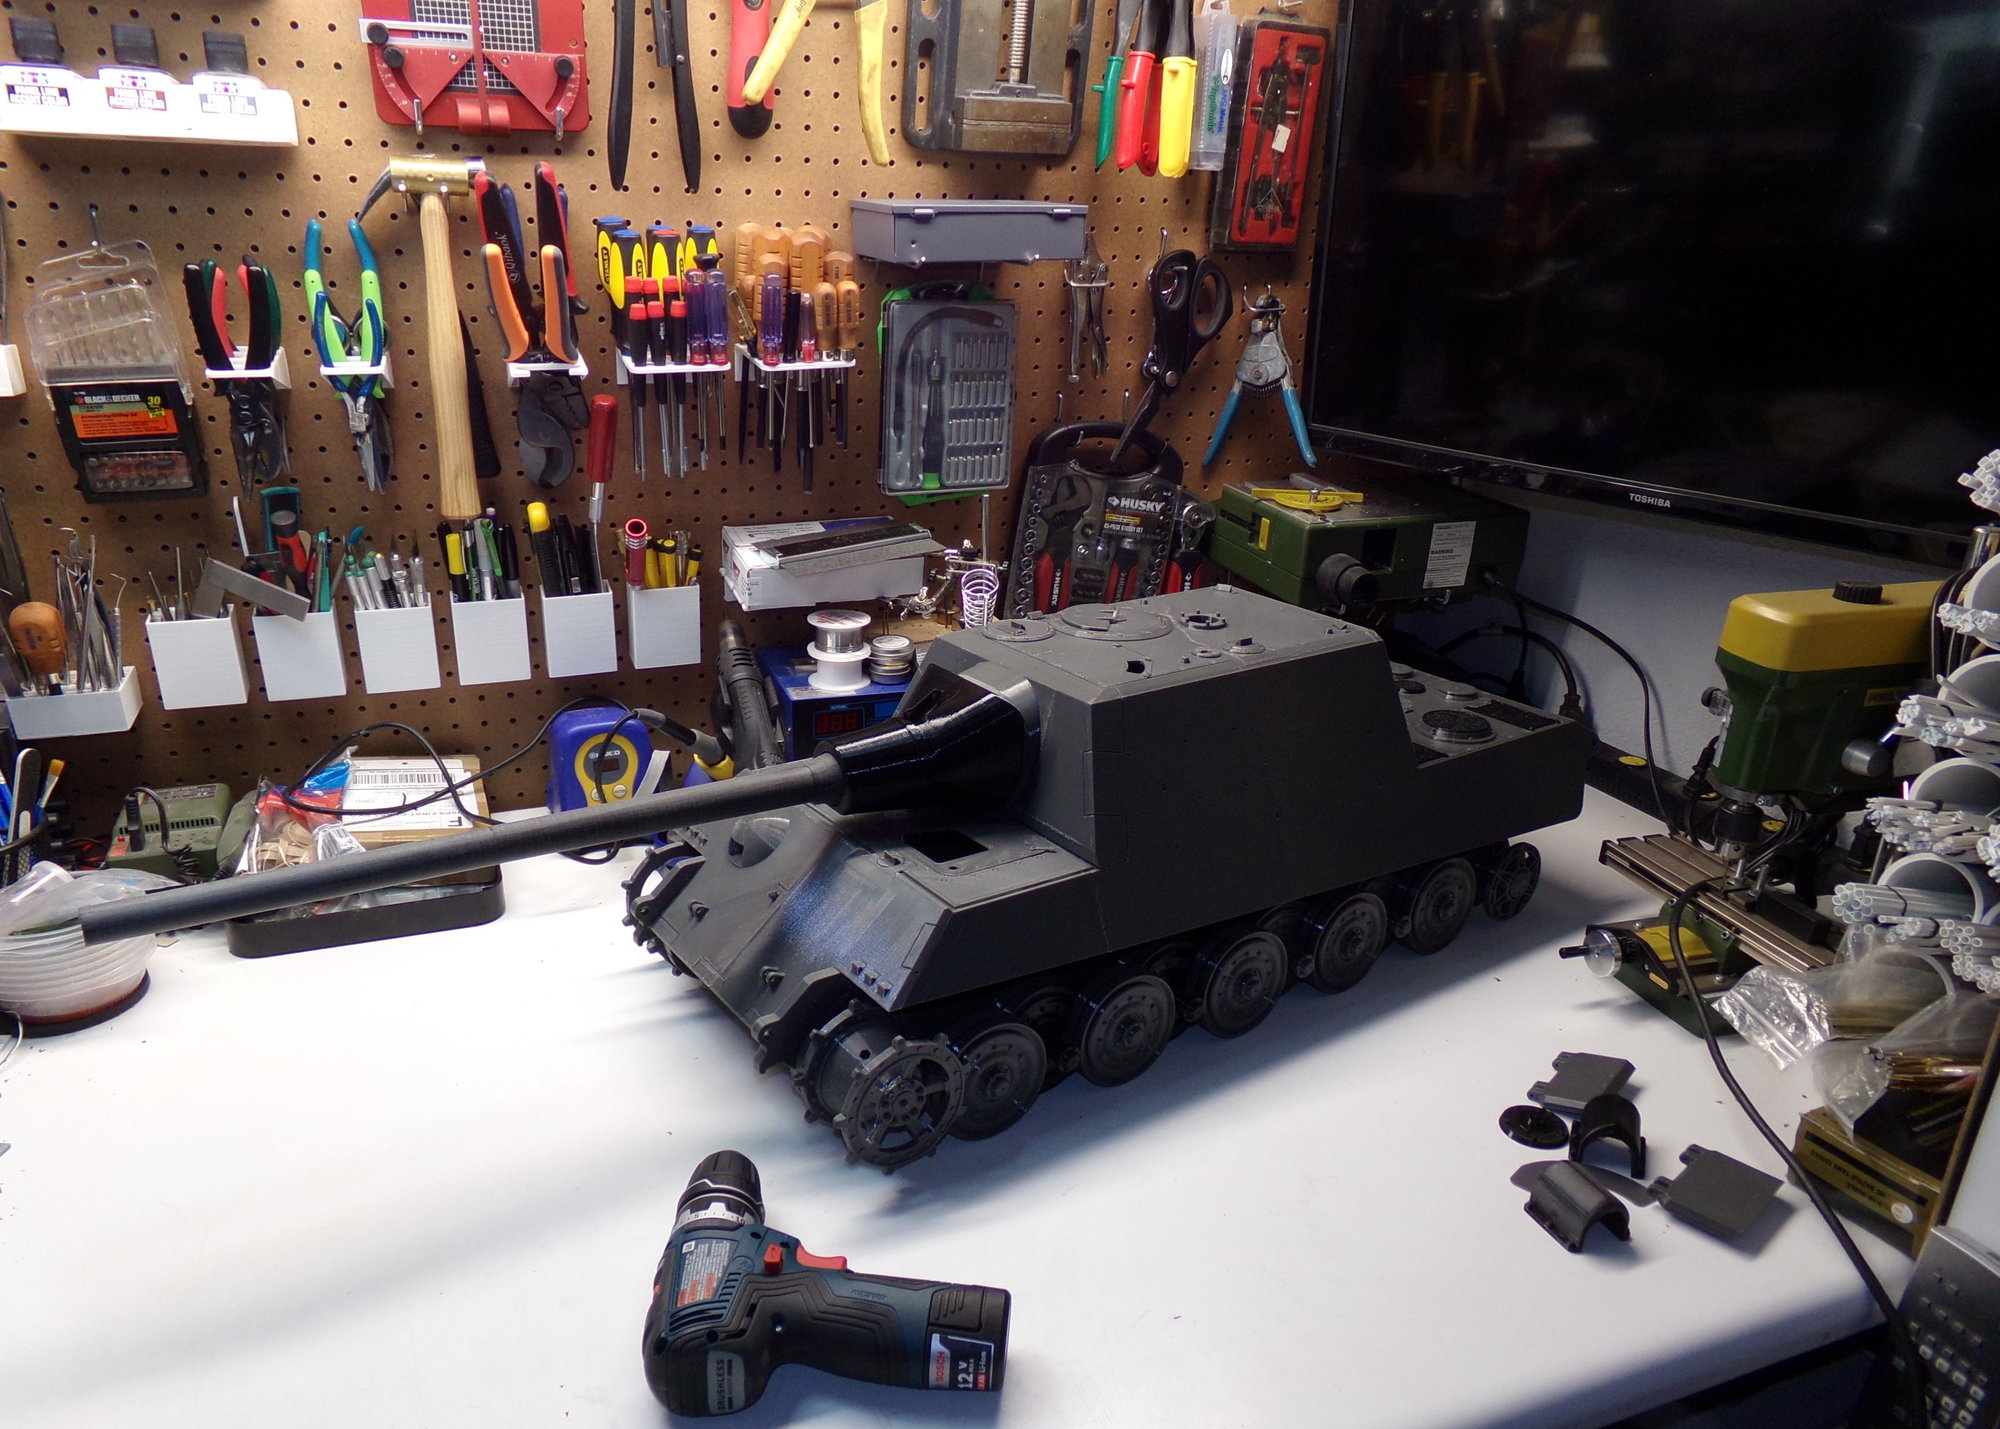
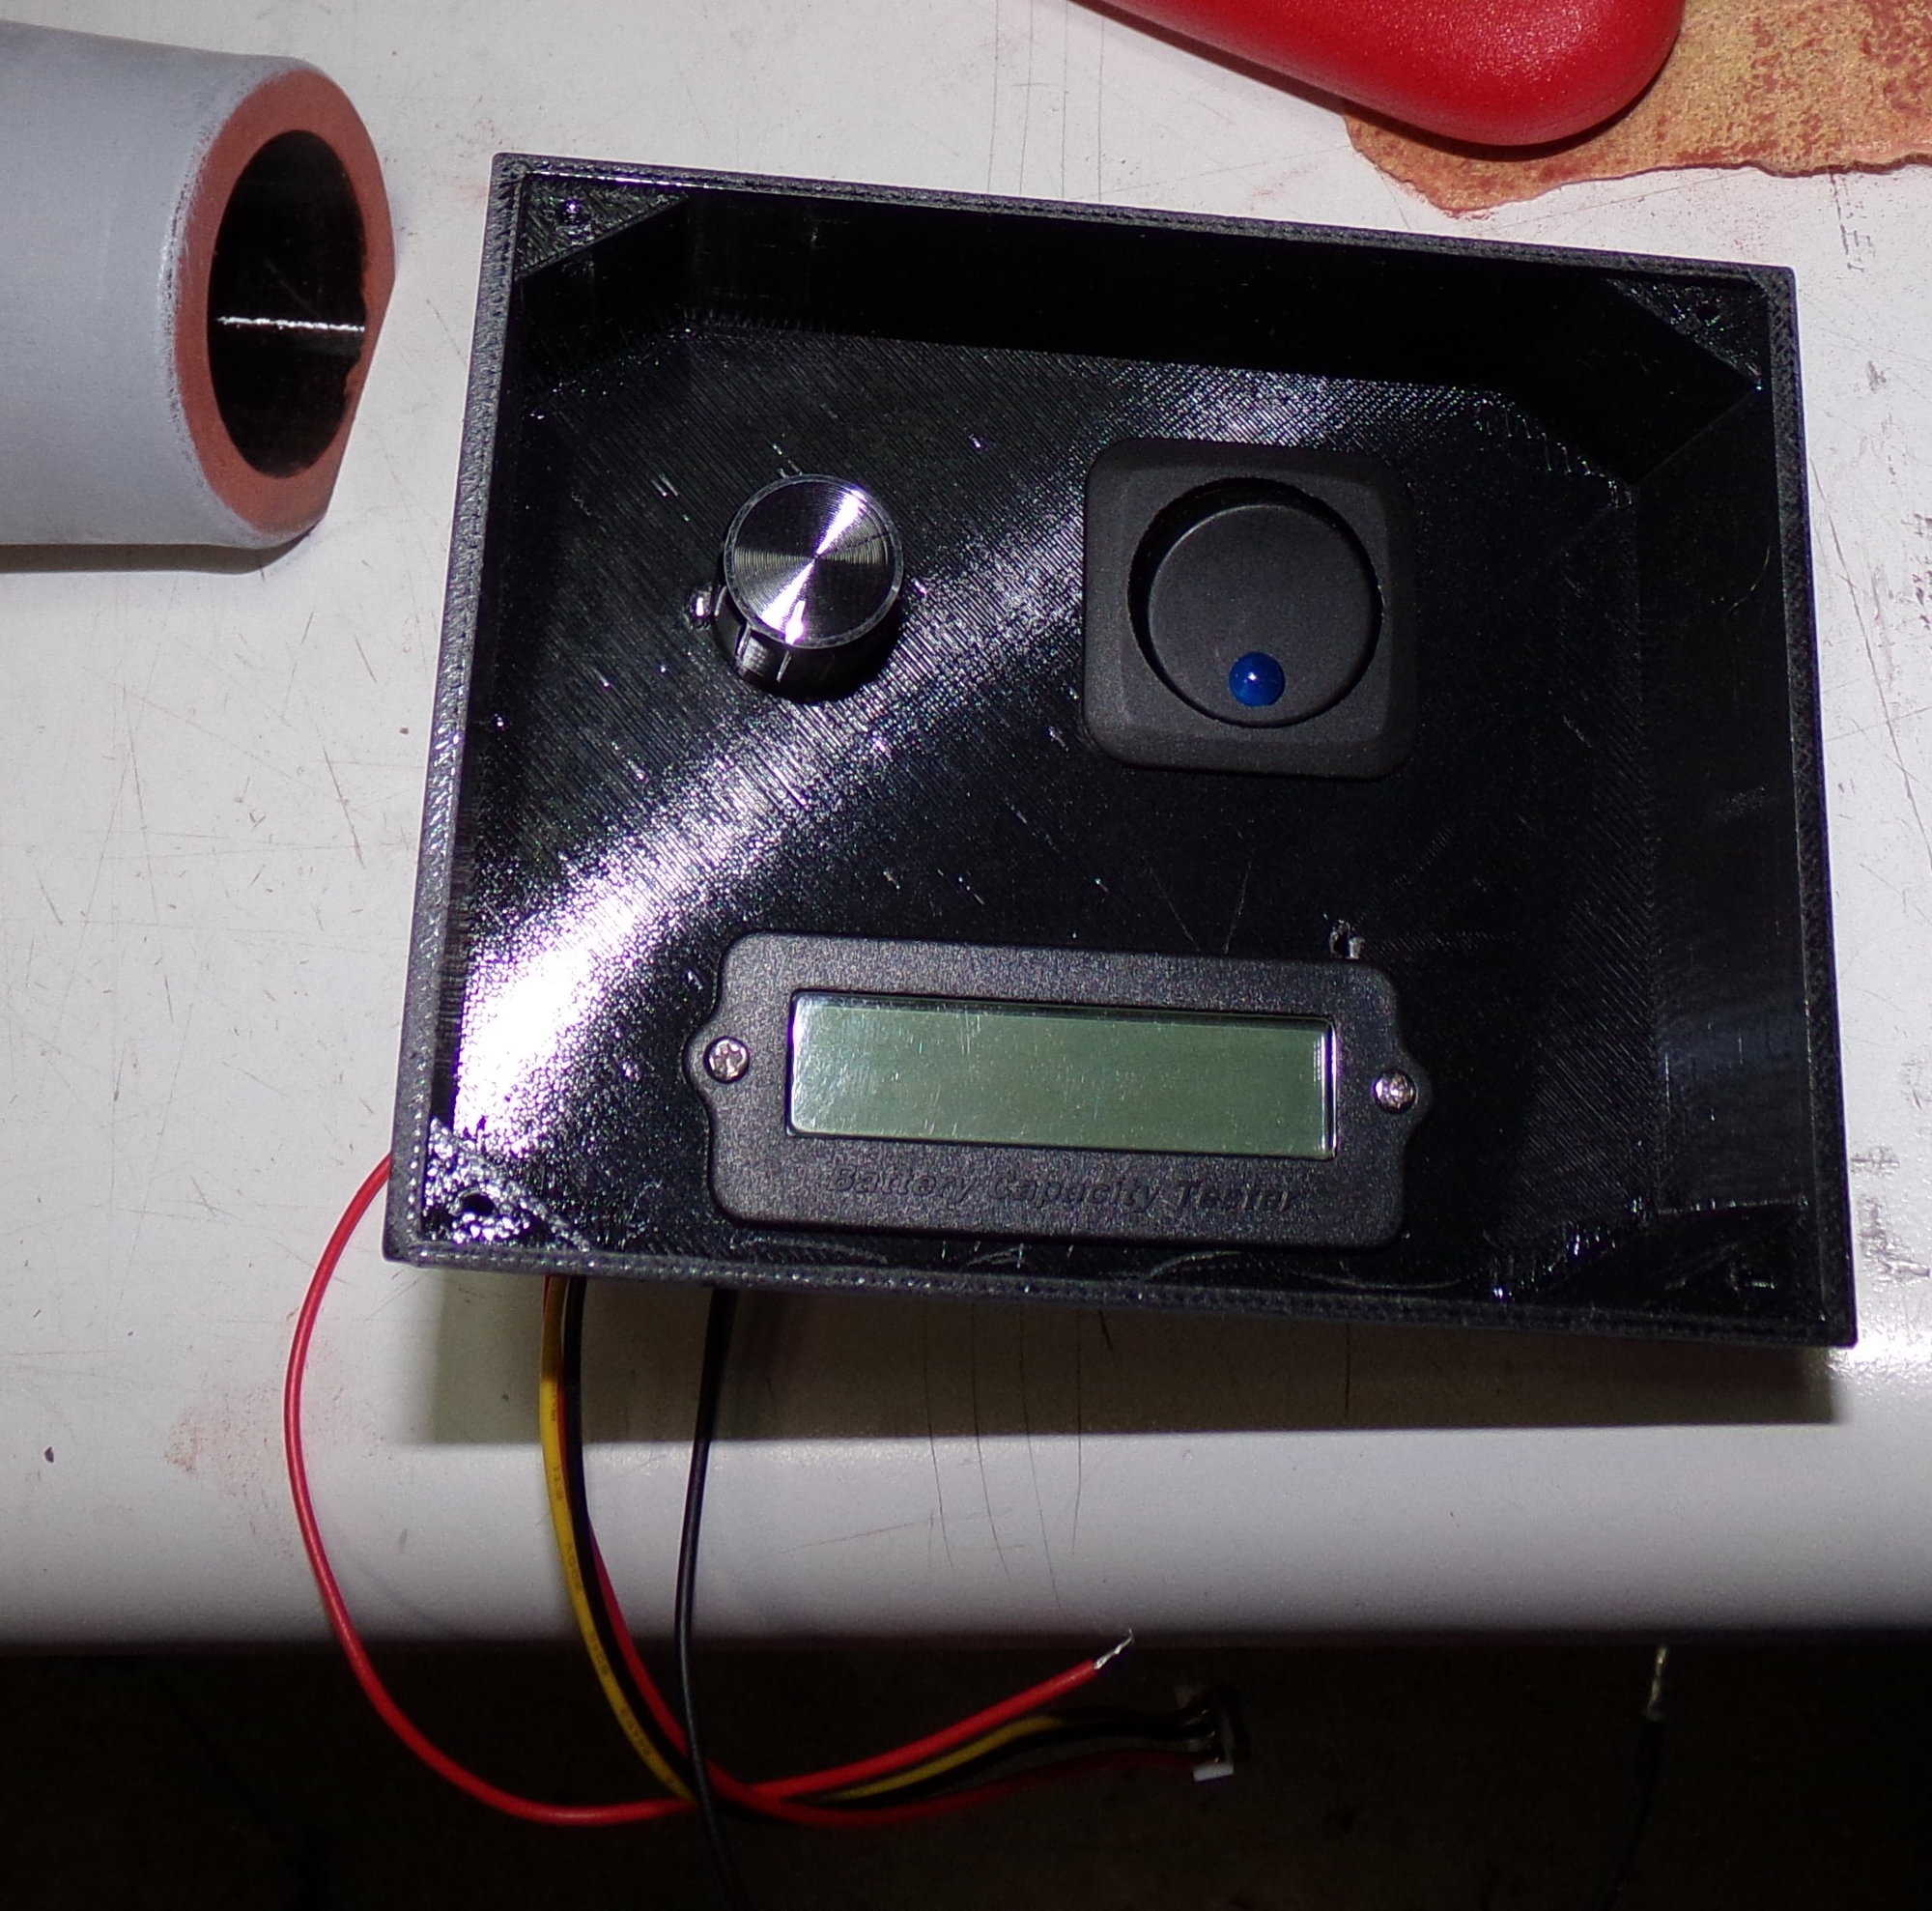
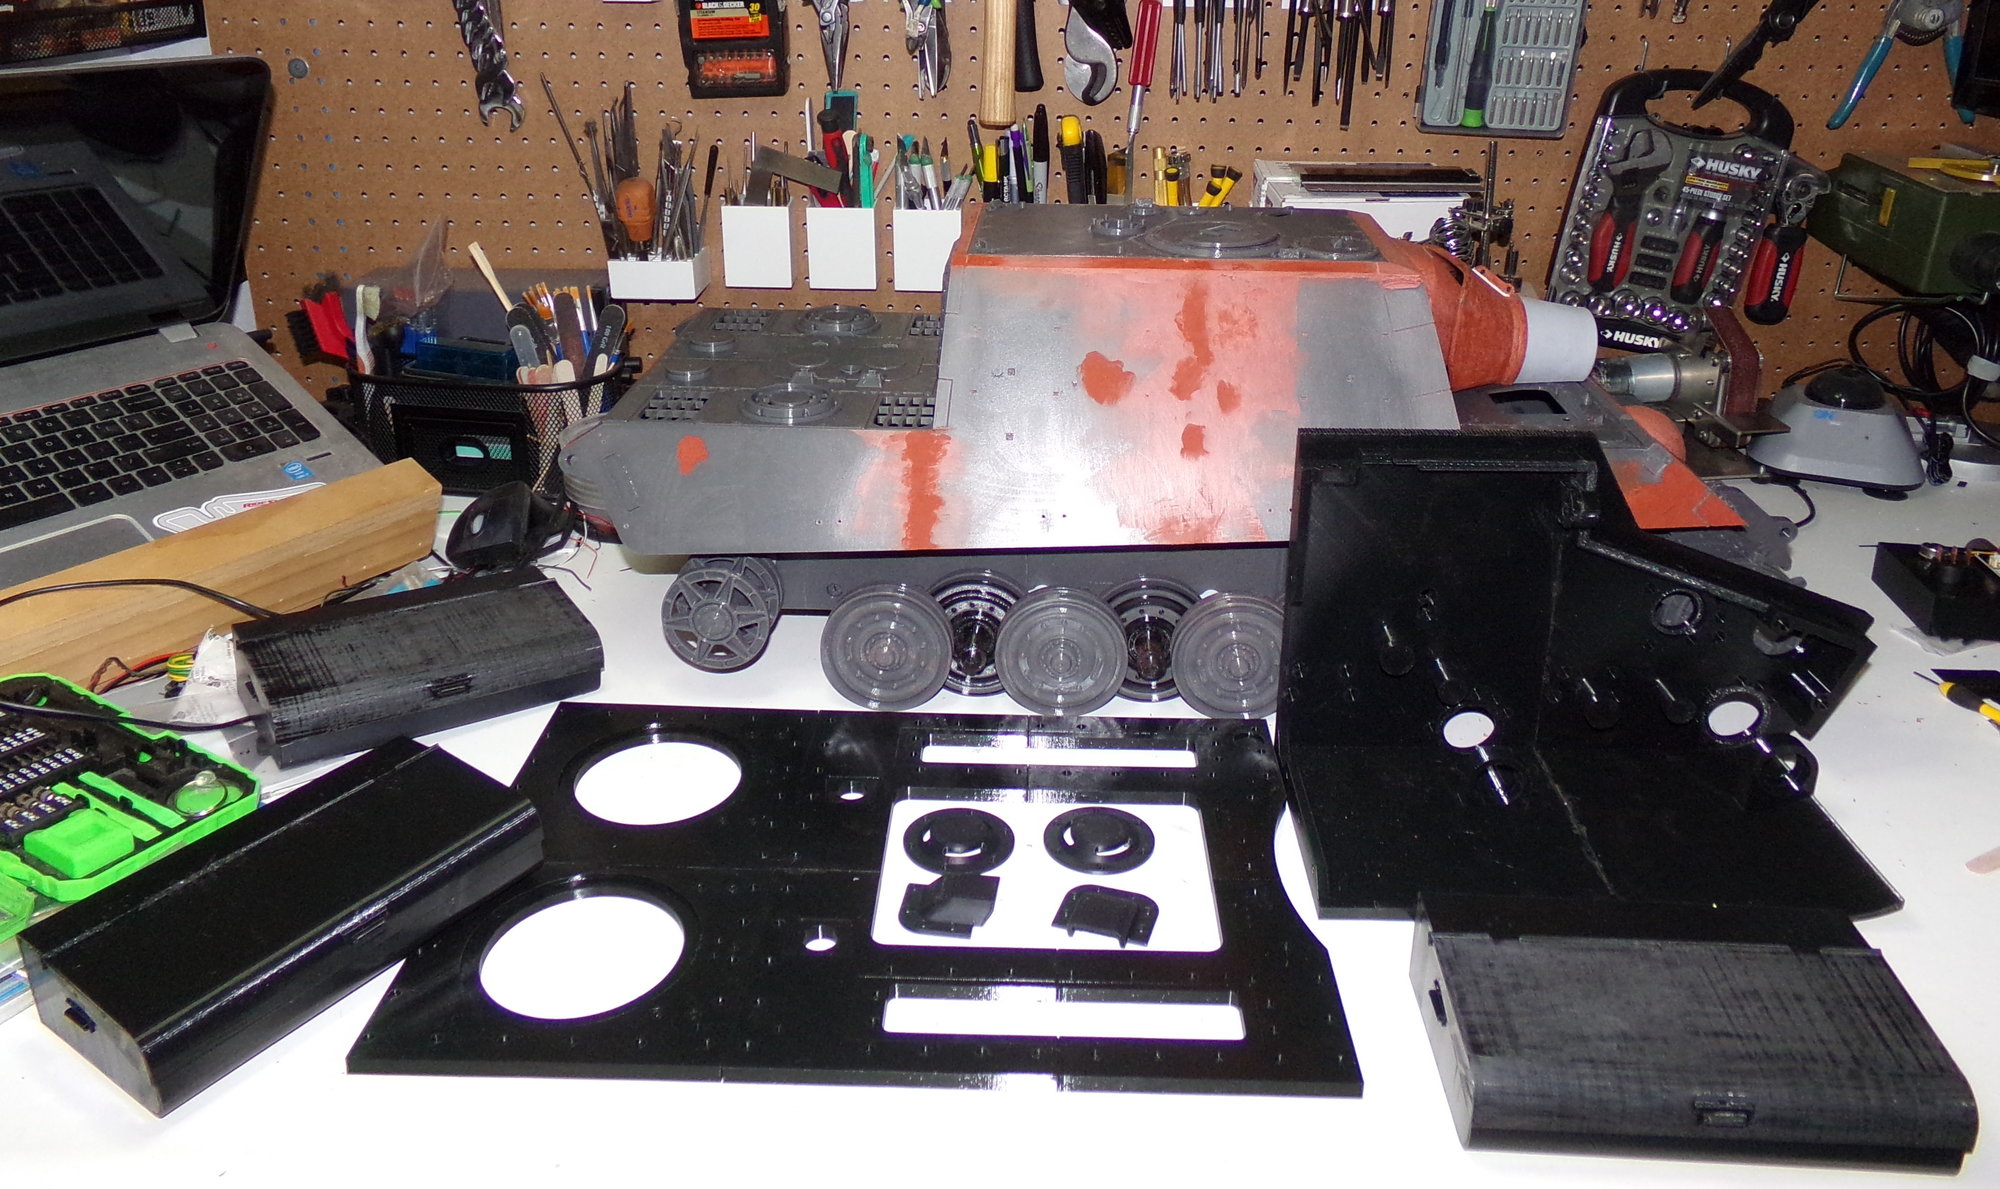
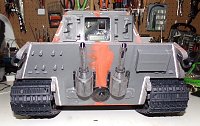
On the Jagd front, I've gotten pretty much the whole thing printed at this point and the initial assembly complete. Last night I worked on doing some filing of plate joints and got the mantlet detailed. I also 3D printed a box that will house a battery monitor, the volume control and the on/off button behind the rear doors on the upper casemate. I do have a larger 40A switch coming so I haven't mounted the box to the casemate yet. The one in there is 25A which is probably fine, but I always over build rather than under build. I also printed a tray for the 12V battery, but need to get it mounted. The vehicle is now also sitting at the correct ride height as the suspension is fully installed and pre-loaded. It may need to have some of the torsion bars swapped out depending on how it drives. The TCB and ESCs I have will run at 12V so I don't think I will need to install a voltage buck (step down) on this build.

On the Jagd front, I've gotten pretty much the whole thing printed at this point and the initial assembly complete. Last night I worked on doing some filing of plate joints and got the mantlet detailed. I also 3D printed a box that will house a battery monitor, the volume control and the on/off button behind the rear doors on the upper casemate. I do have a larger 40A switch coming so I haven't mounted the box to the casemate yet. The one in there is 25A which is probably fine, but I always over build rather than under build. I also printed a tray for the 12V battery, but need to get it mounted. The vehicle is now also sitting at the correct ride height as the suspension is fully installed and pre-loaded. It may need to have some of the torsion bars swapped out depending on how it drives. The TCB and ESCs I have will run at 12V so I don't think I will need to install a voltage buck (step down) on this build.
Last edited by tankme; 09-07-2023 at 12:34 PM.
09-08-2023, 11:21 AM
#14
Thread Starter
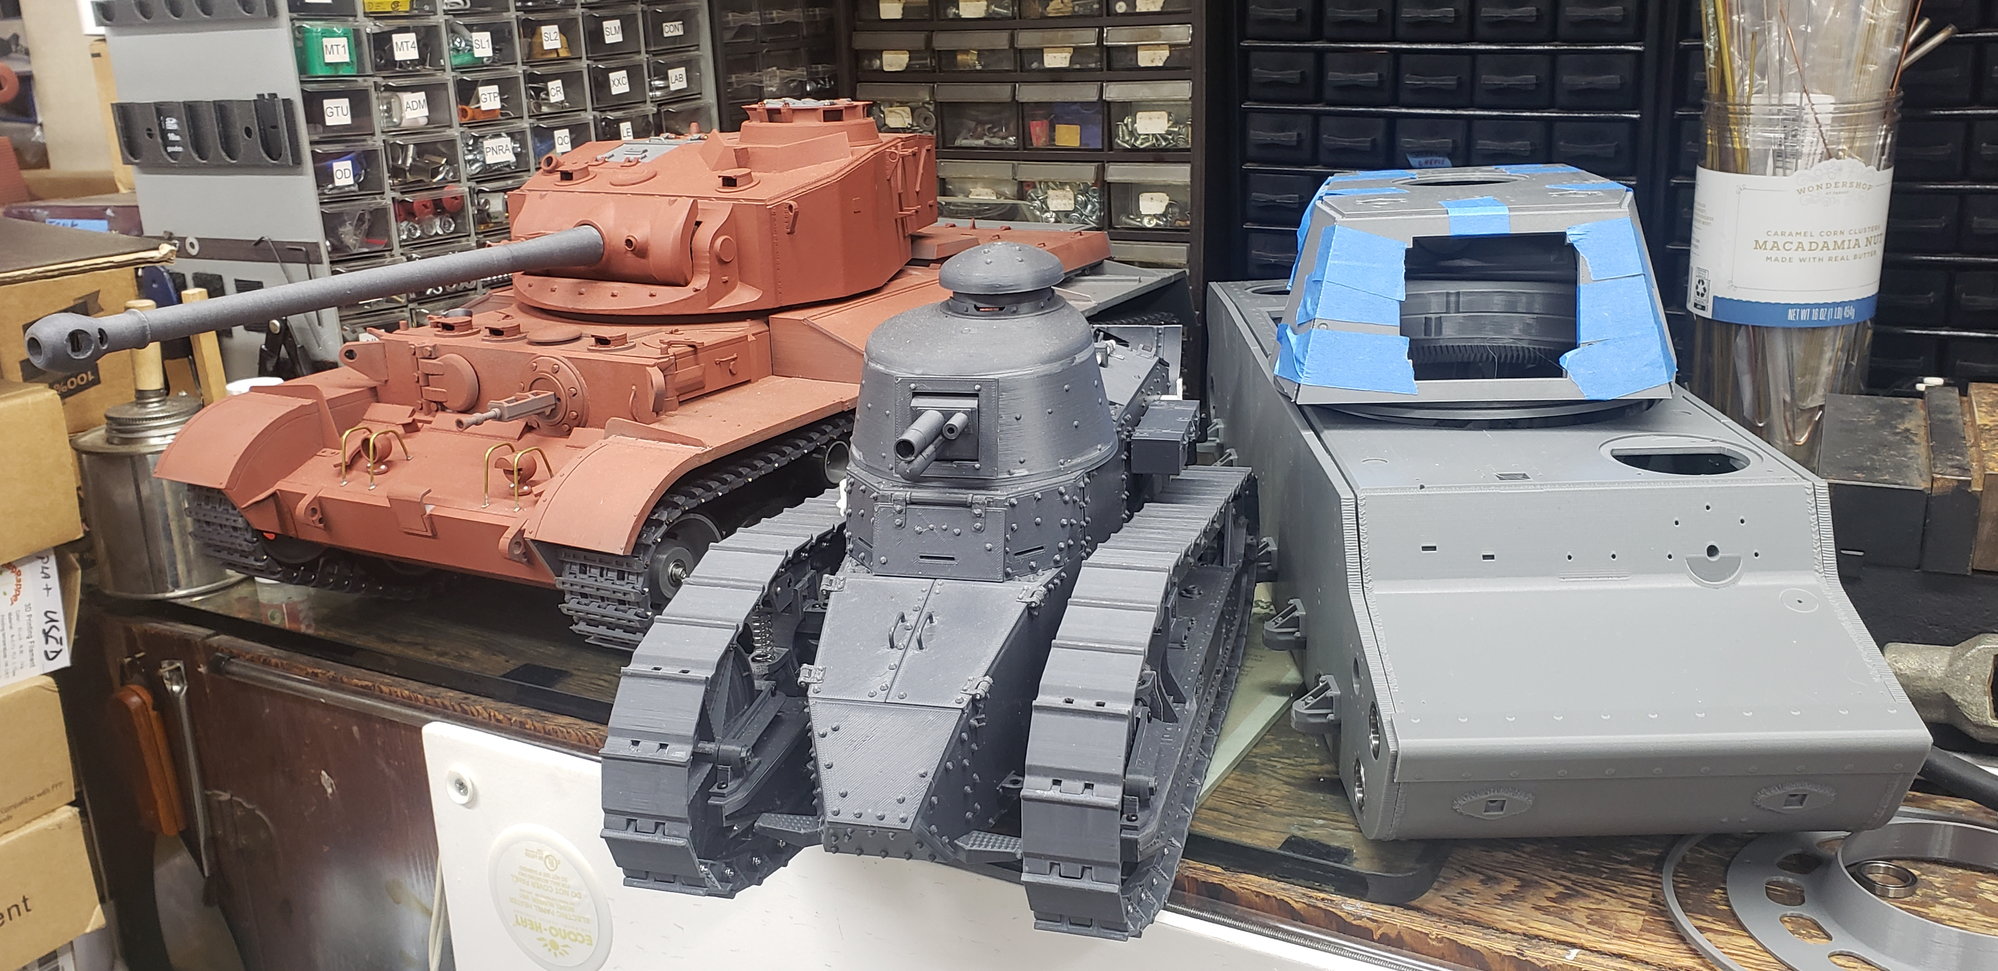
Thanks Bob. And this is what happens while I am in the middle of the body work on the 1/10th Jag and the printer has nothing to print at the moment...
Bad things start to happen like delusions of grandeur (luckily I got 30kg of PETG on sale for $9/kg recently):
Bad things start to happen like delusions of grandeur (luckily I got 30kg of PETG on sale for $9/kg recently):
Last edited by tankme; 09-08-2023 at 11:24 AM.
09-10-2023, 12:32 AM
#15
Both the Jagdtiger and the KV-1 look awesome.
Do you think for the KV-1 the construction will be strong enough when upscaled to 1/6? It will be quit a big tank. Or will you add additional parts for strength?
Do you think for the KV-1 the construction will be strong enough when upscaled to 1/6? It will be quit a big tank. Or will you add additional parts for strength?
09-10-2023, 02:11 AM
#16
Thread Starter
So far I have 80% of one side printed and it seems pretty strong even printed at 30% infill. The hull thickness is just under 3/8" on the scaled up parts. After the current print finishes tomorrow afternoon, I will have 9 more build plates to print at 9-11 hours per plate to just finish the lower hull plates. That's roughly another 90hrs of print time before I can assemble the lower hull. On a slow 3D printer that would be more like 300 hours (12.5 days). I typically start a print before I go to work and it prints until I get home. Then I pull it off the plate and start another one. That way I'm getting around two parts a day on the hull. There is a total of 16 build plates to print so not even half way there. Total print time for the lower hull will be around 160 hours (6.5 days). I started printing the left side of the tank and somehow got confused during my part slicing as I unknowingly started printed the right side parts. It's not a big deal, but I'm glad I caught it as I had a couple duplicate parts ready to print and that would have been a waste of like 600g of filament.
It's definitely going to be a project...
11-29-2023, 04:18 AM
#17
Thread Starter
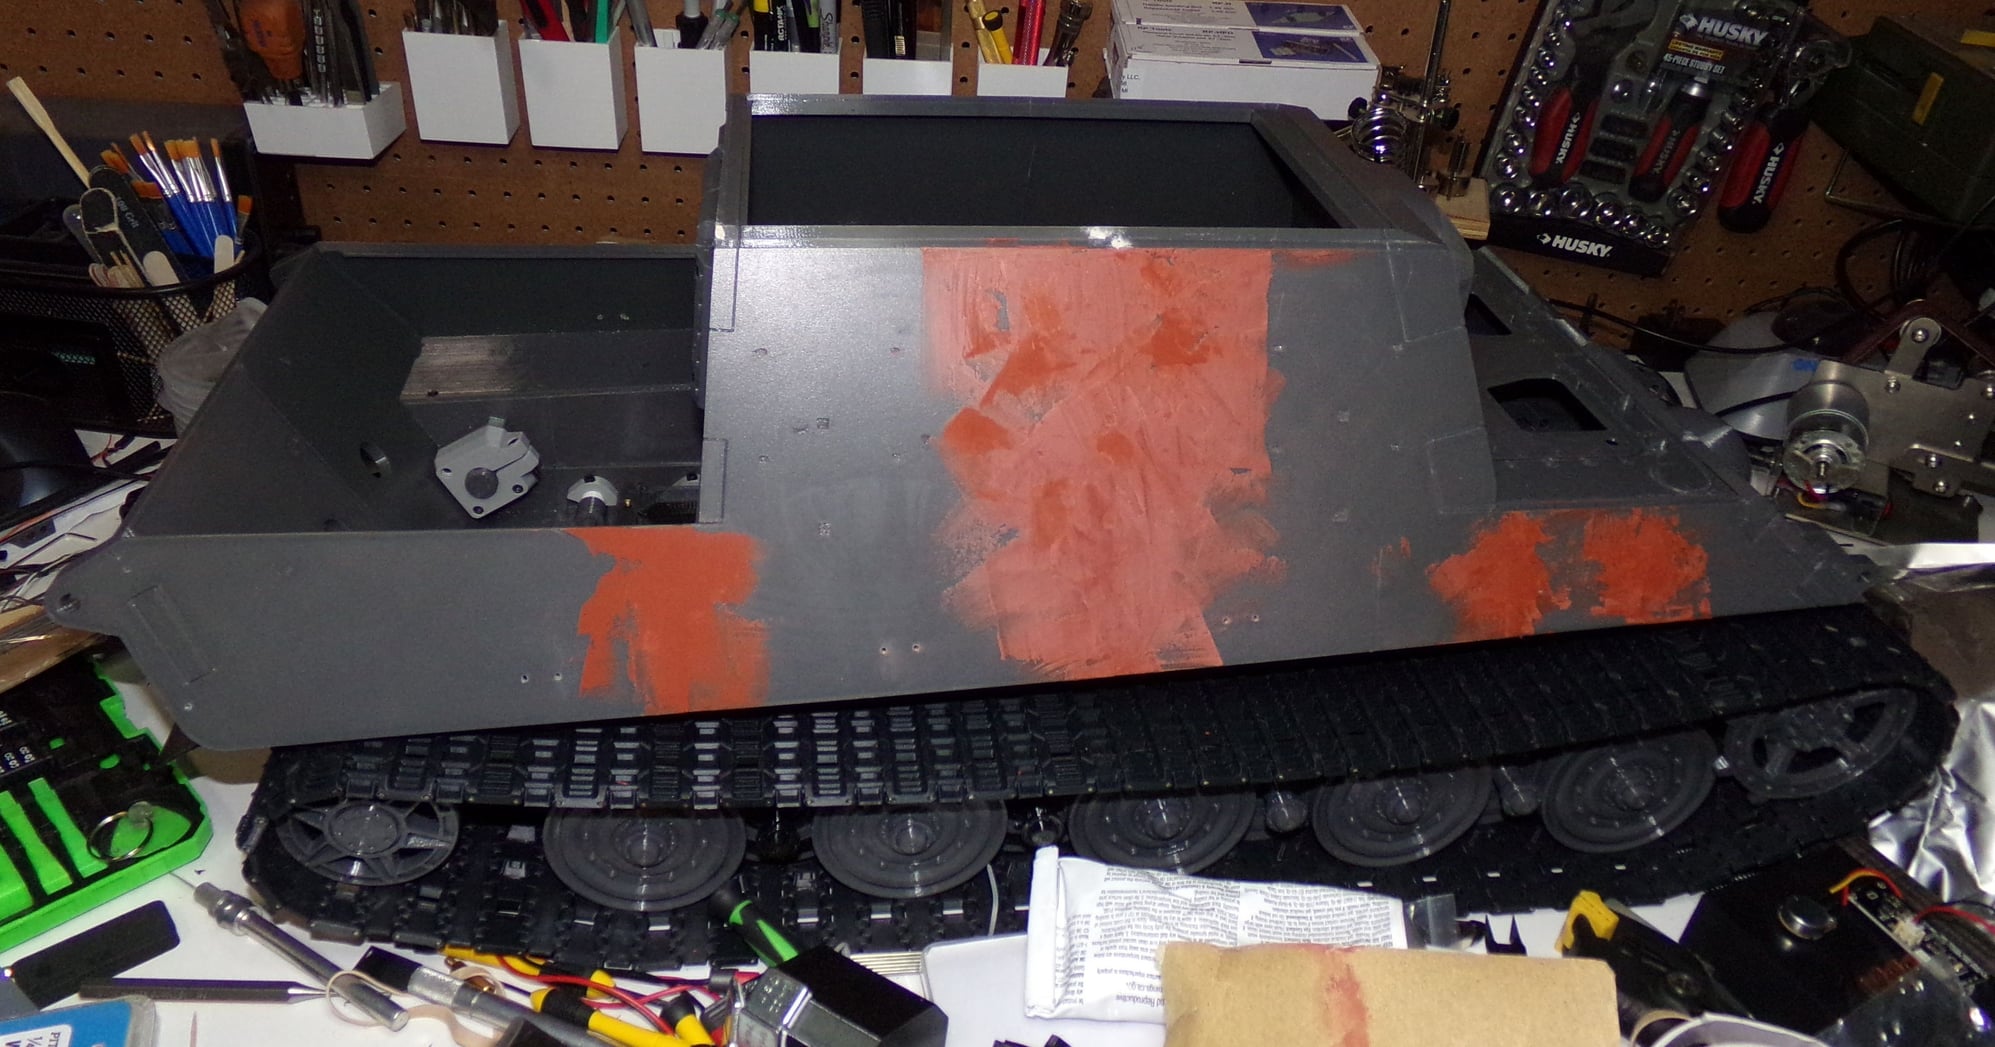
Decided to get a little work done on this project over the past few days.
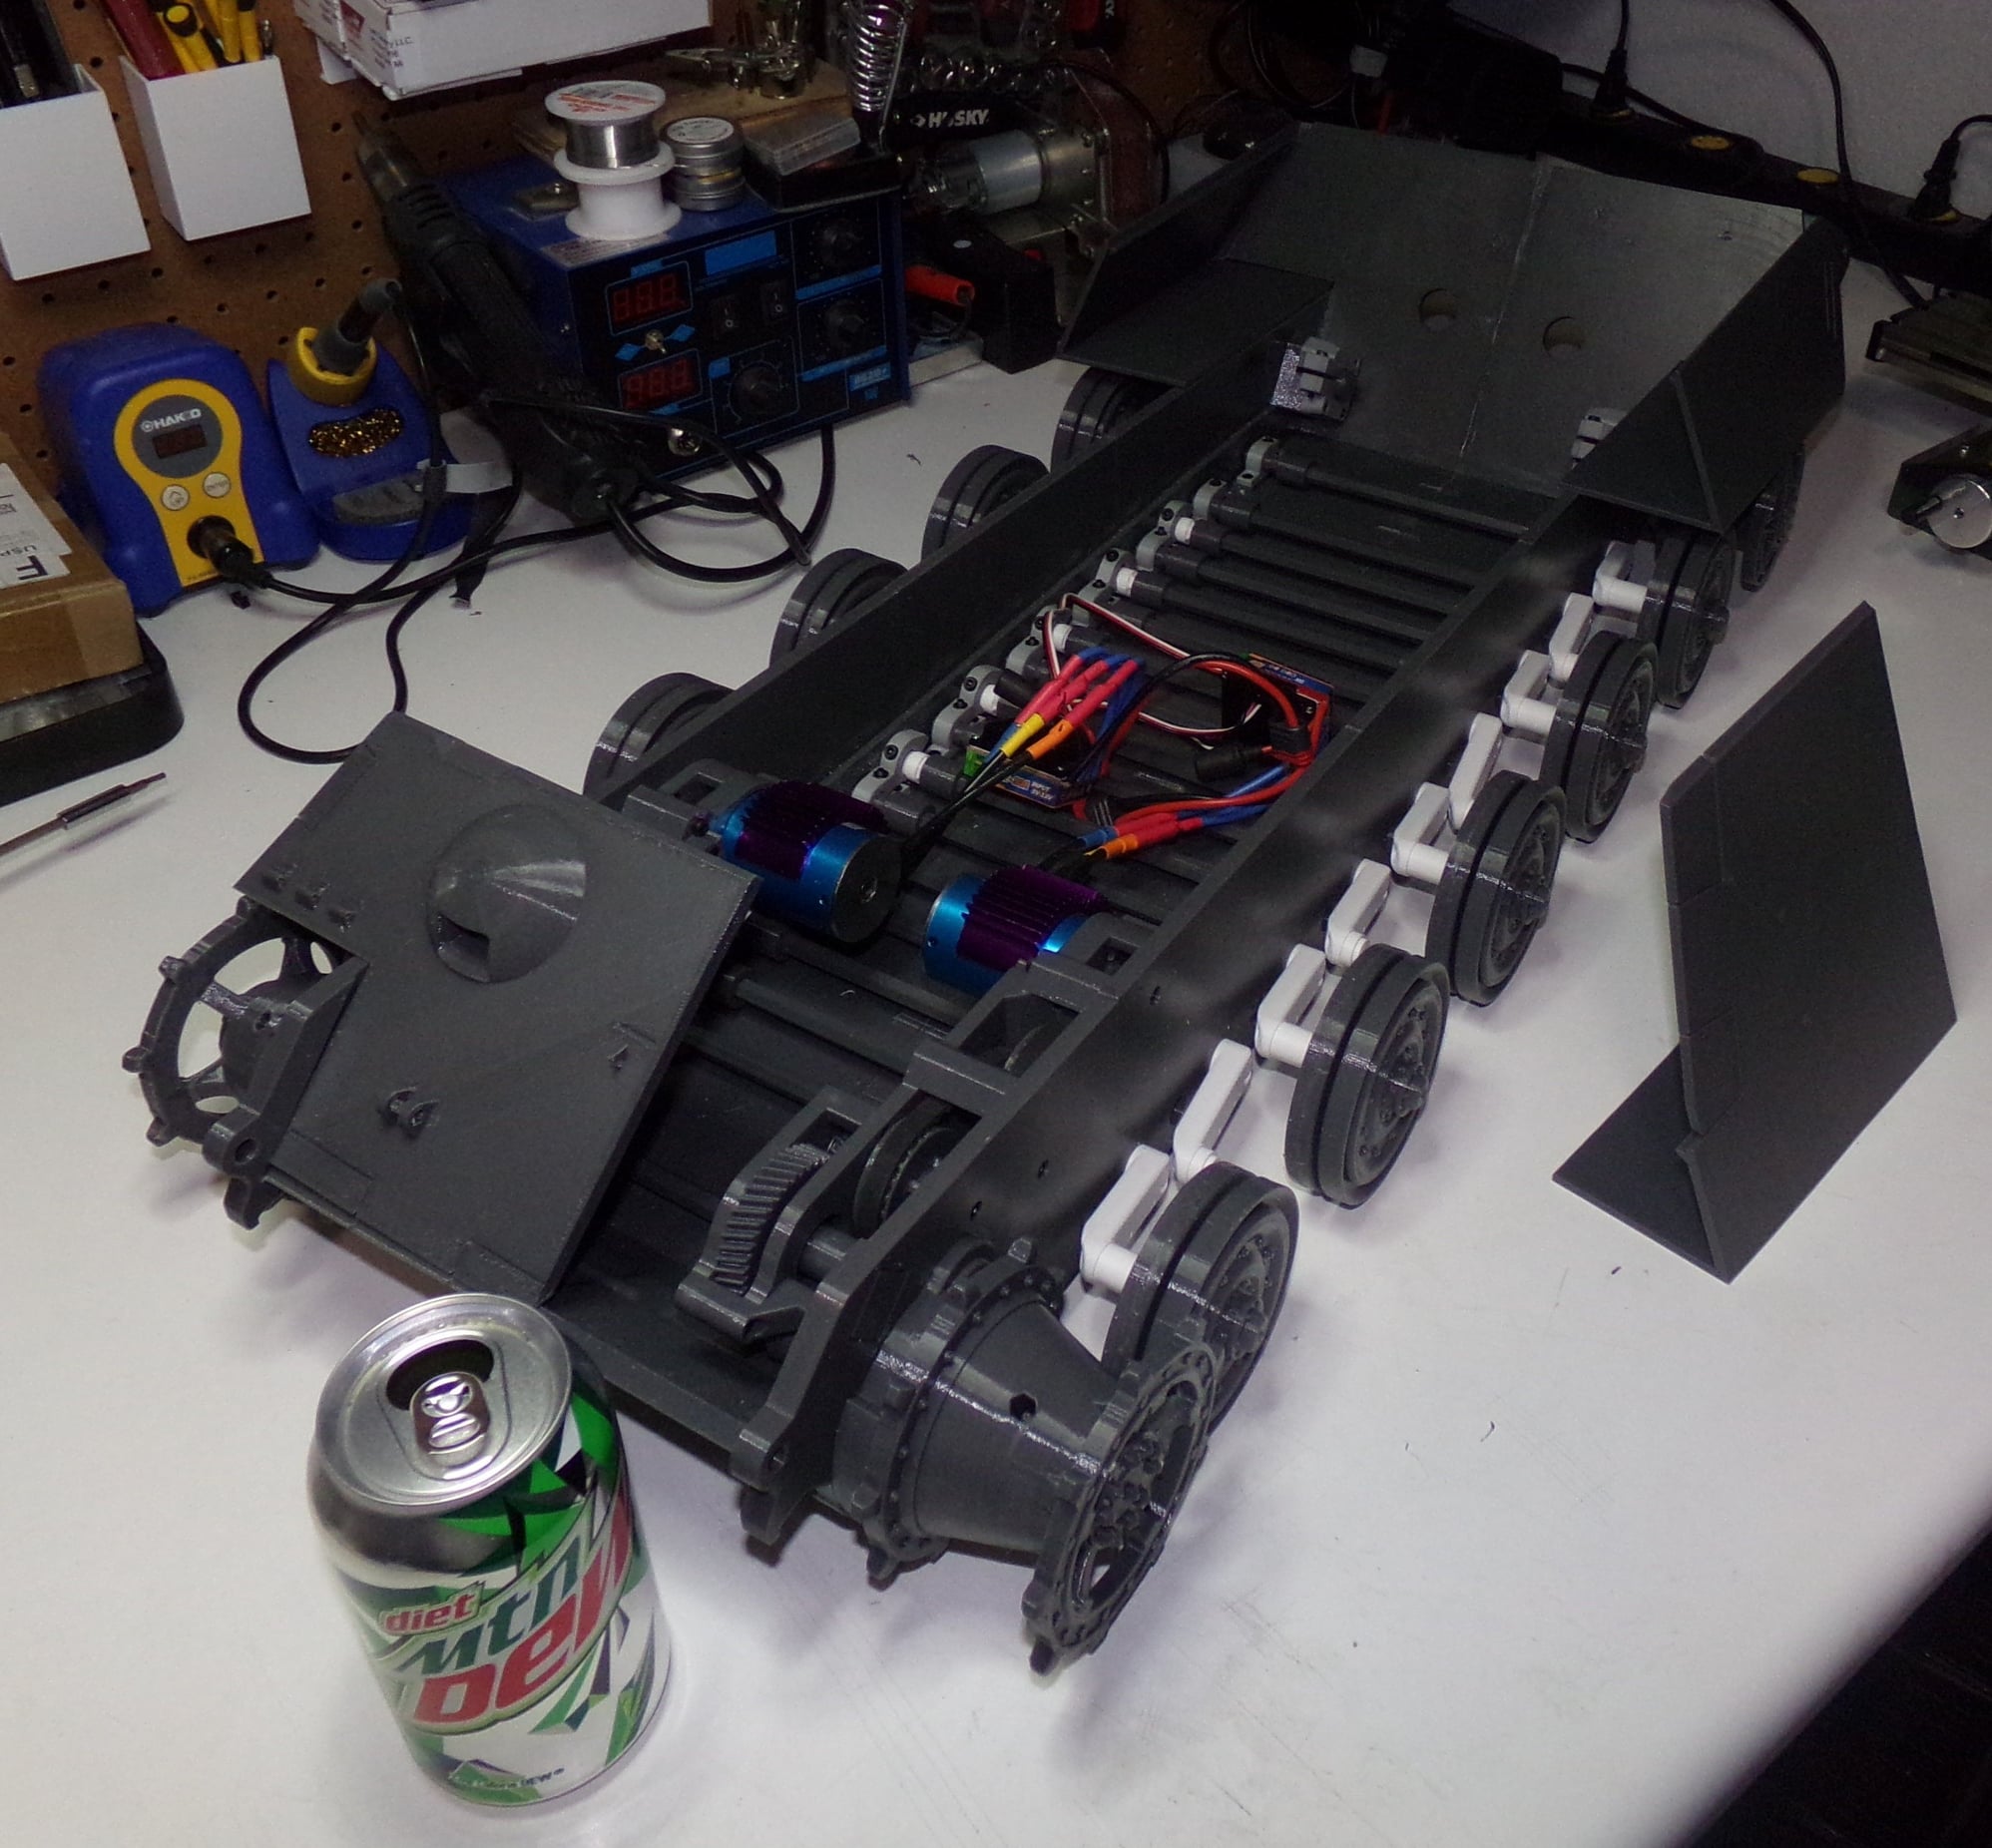
The tank suspension is based on torsion bars. Works pretty well.
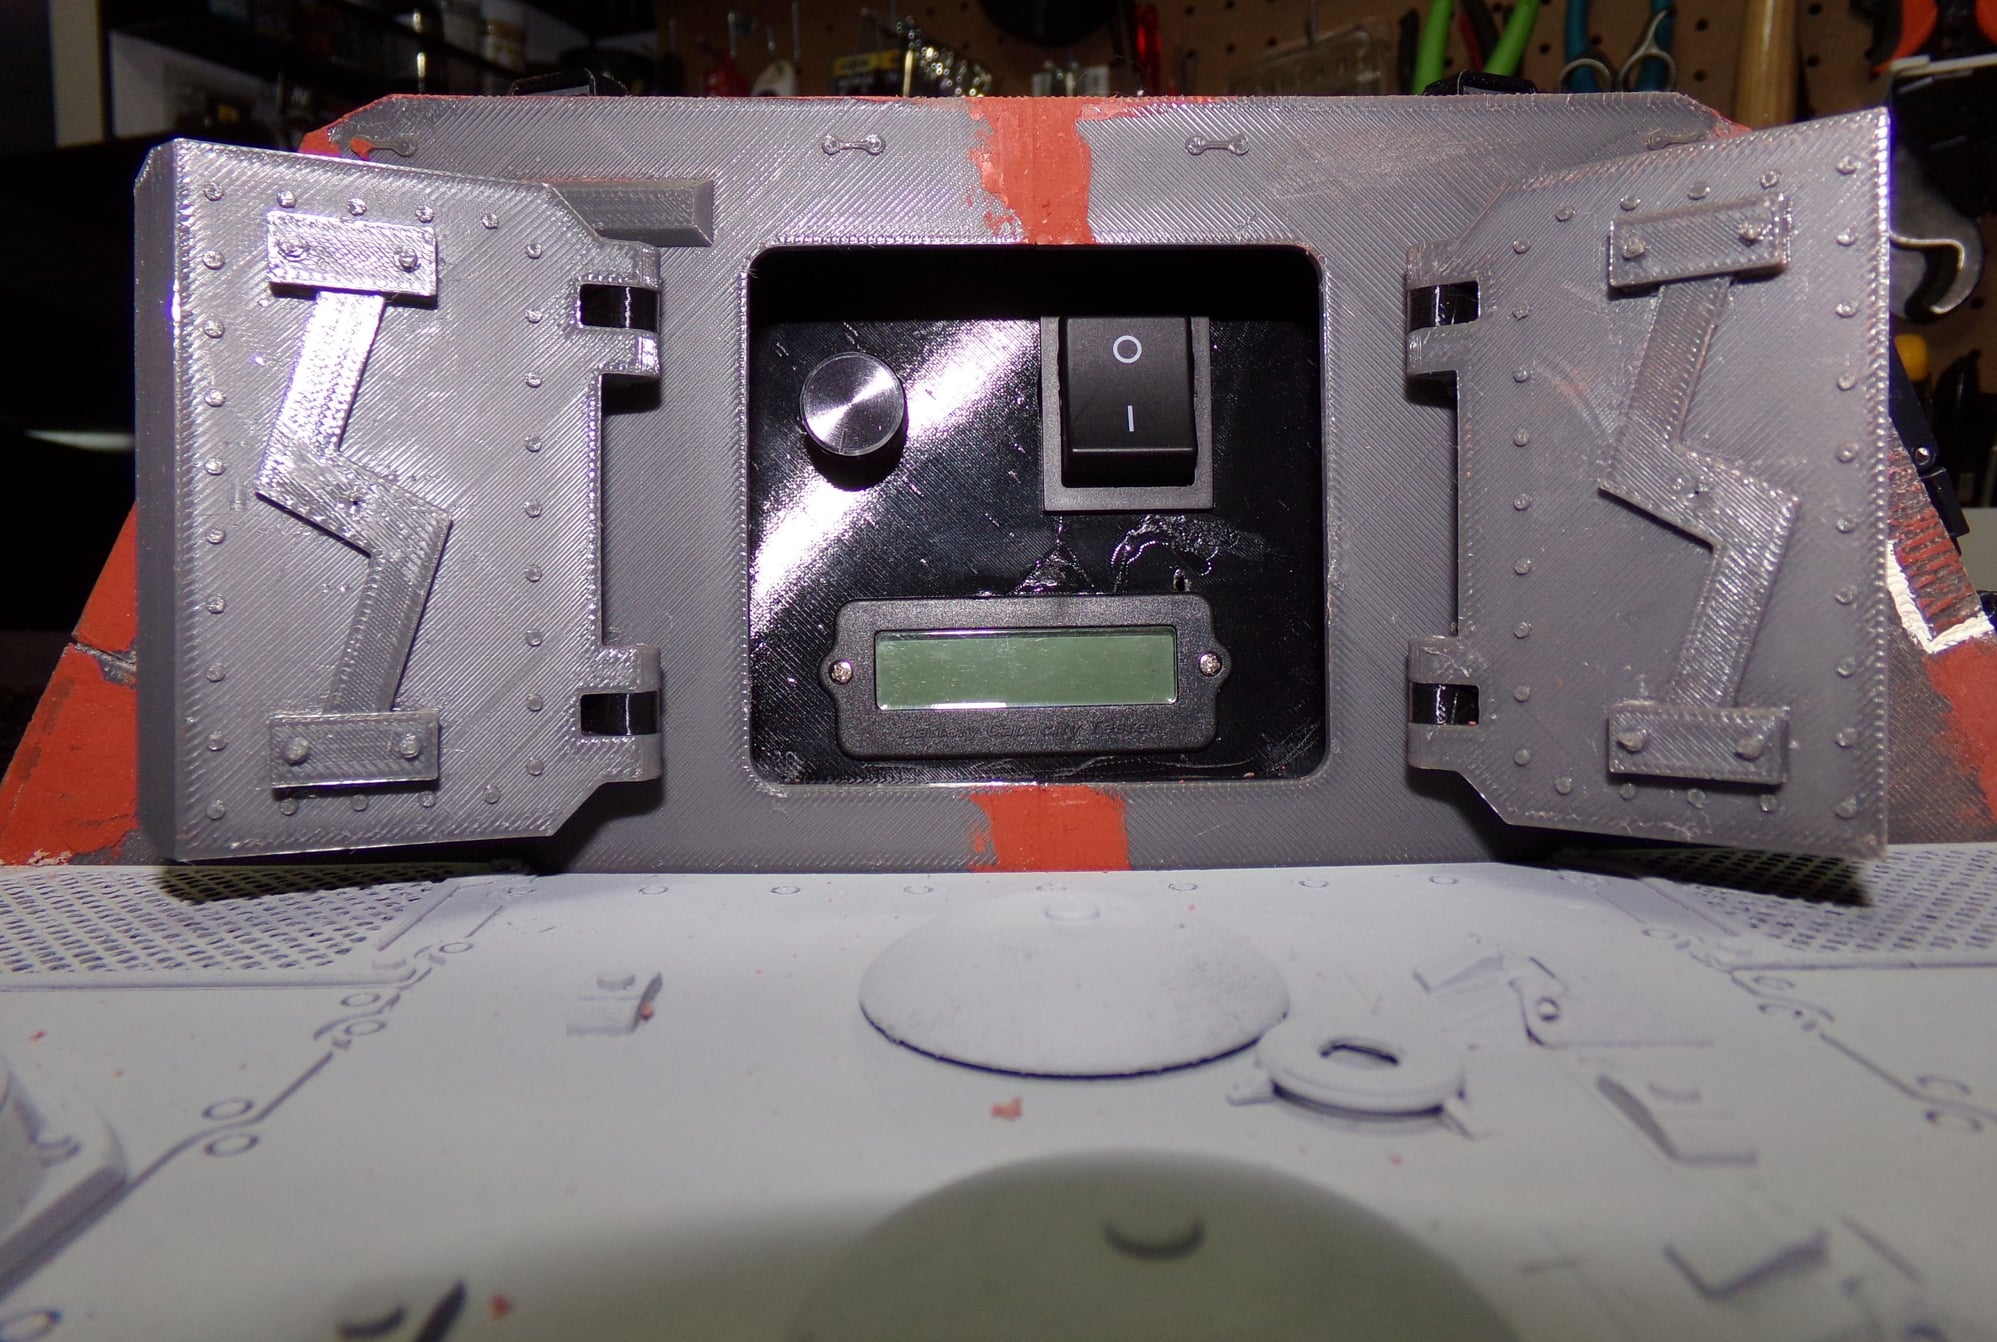
Got the electronics box mounted behind the rear doors.
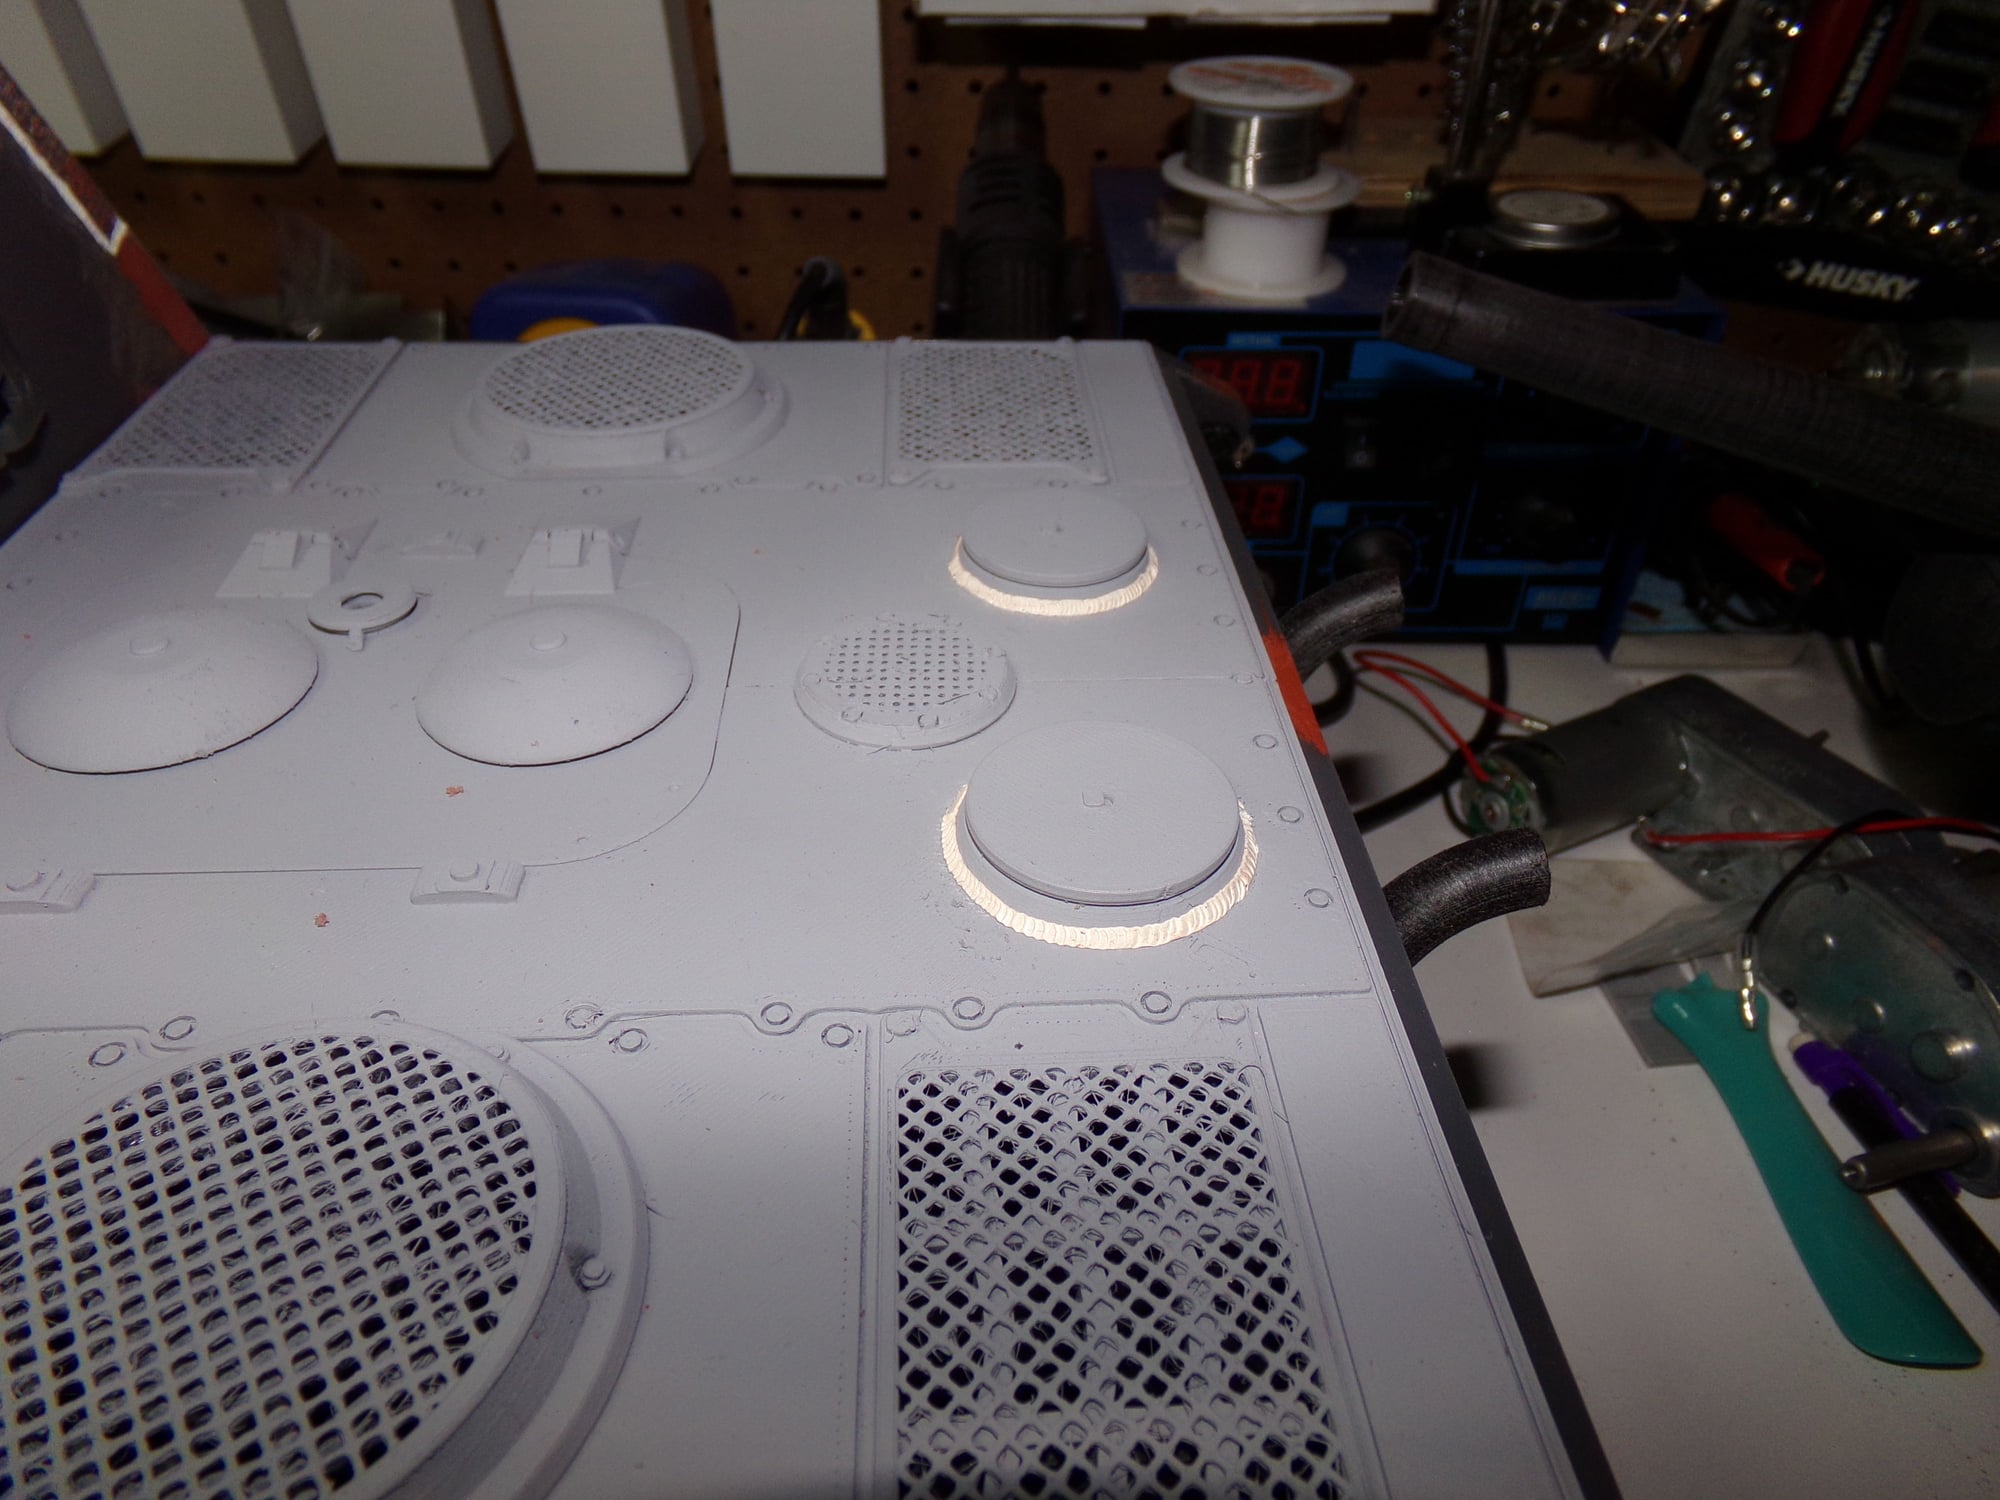
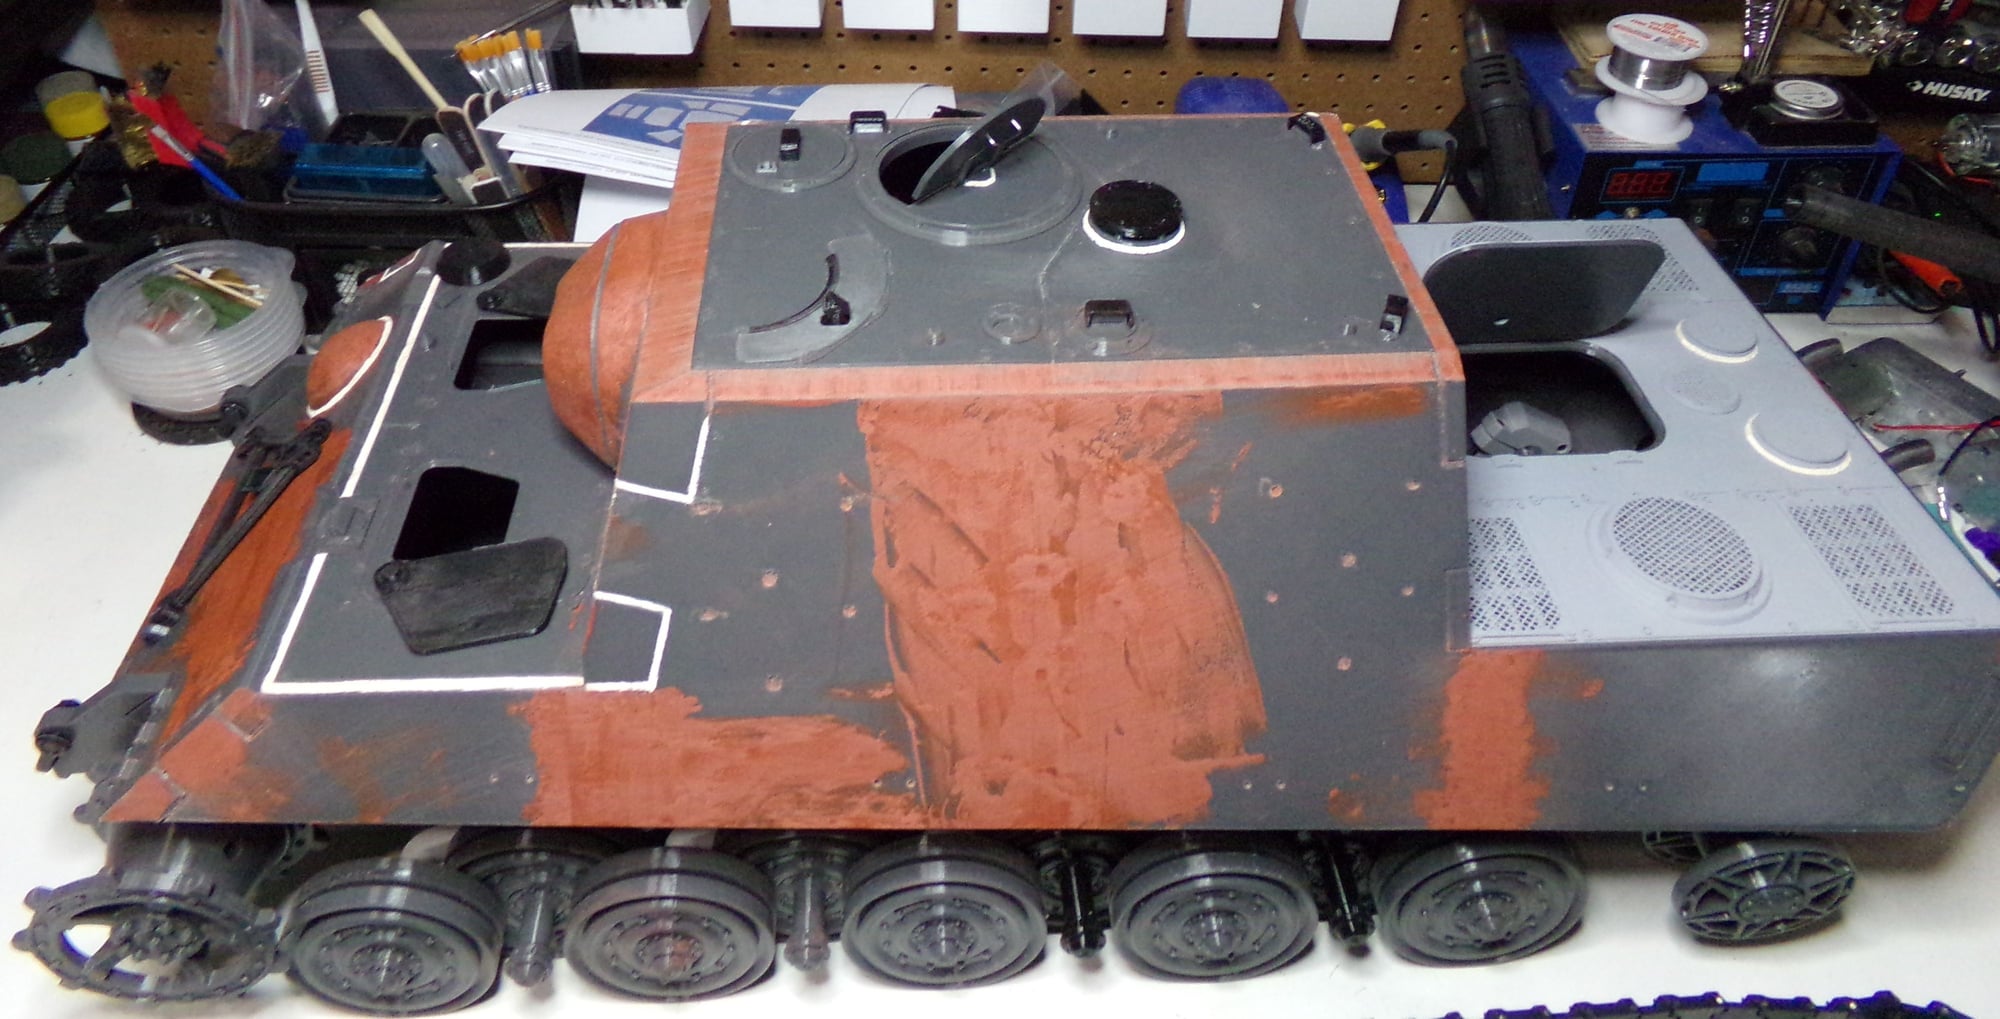
Rear deck details were added, it was primed, and some of the weld beads added to the rear deck. The grills are 3D printed on an FDM printer.
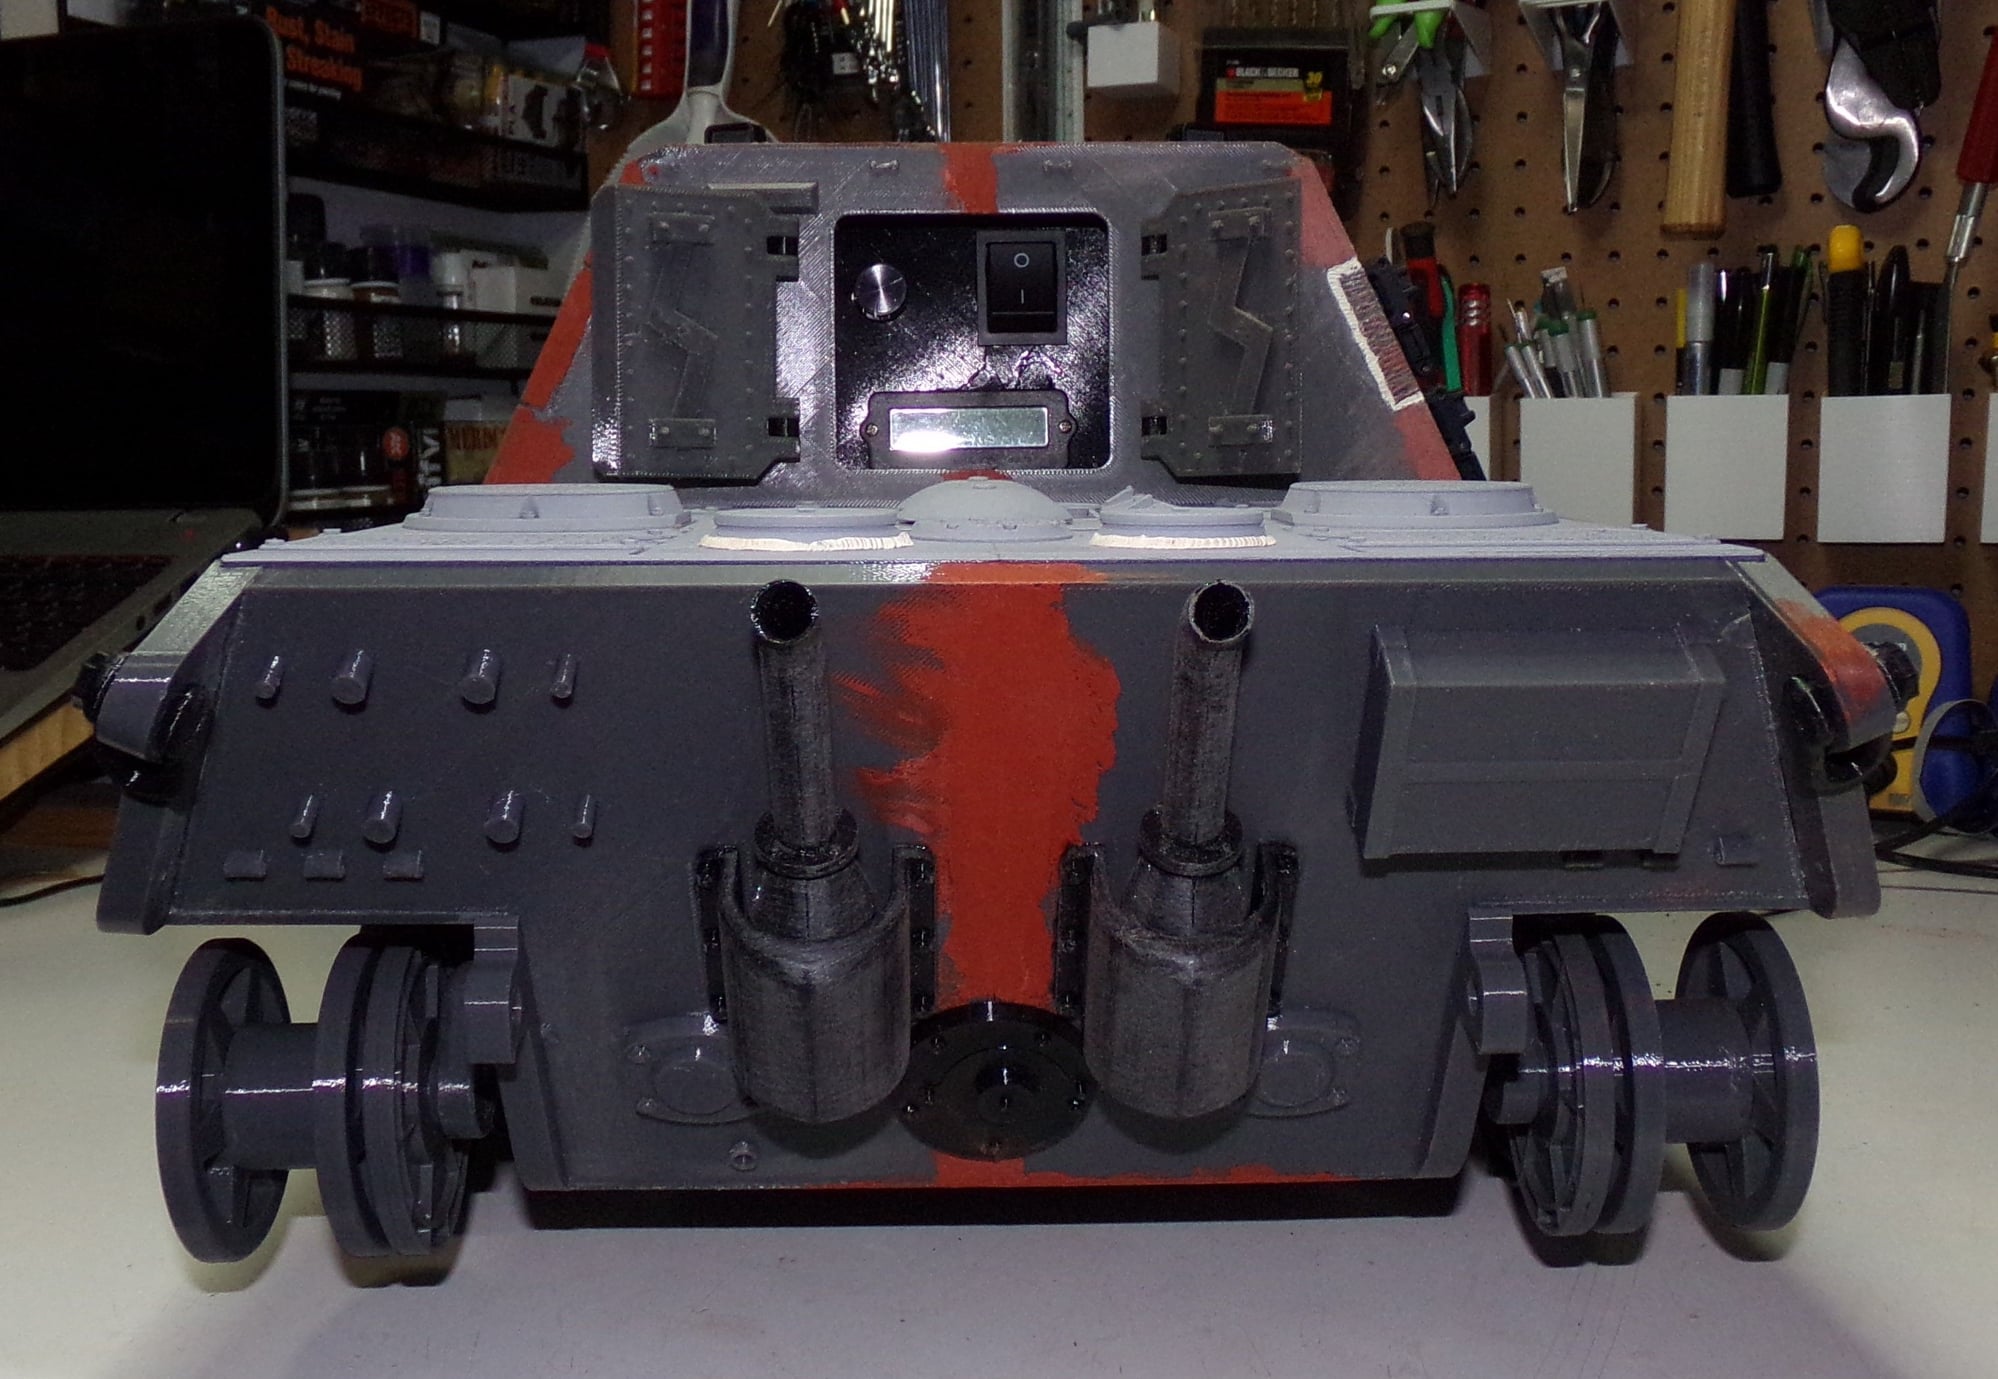
Exhaust detail added to the rear. Still need to add the little anti-grenade rods in the pipes. Lots of work to be done on the rear.
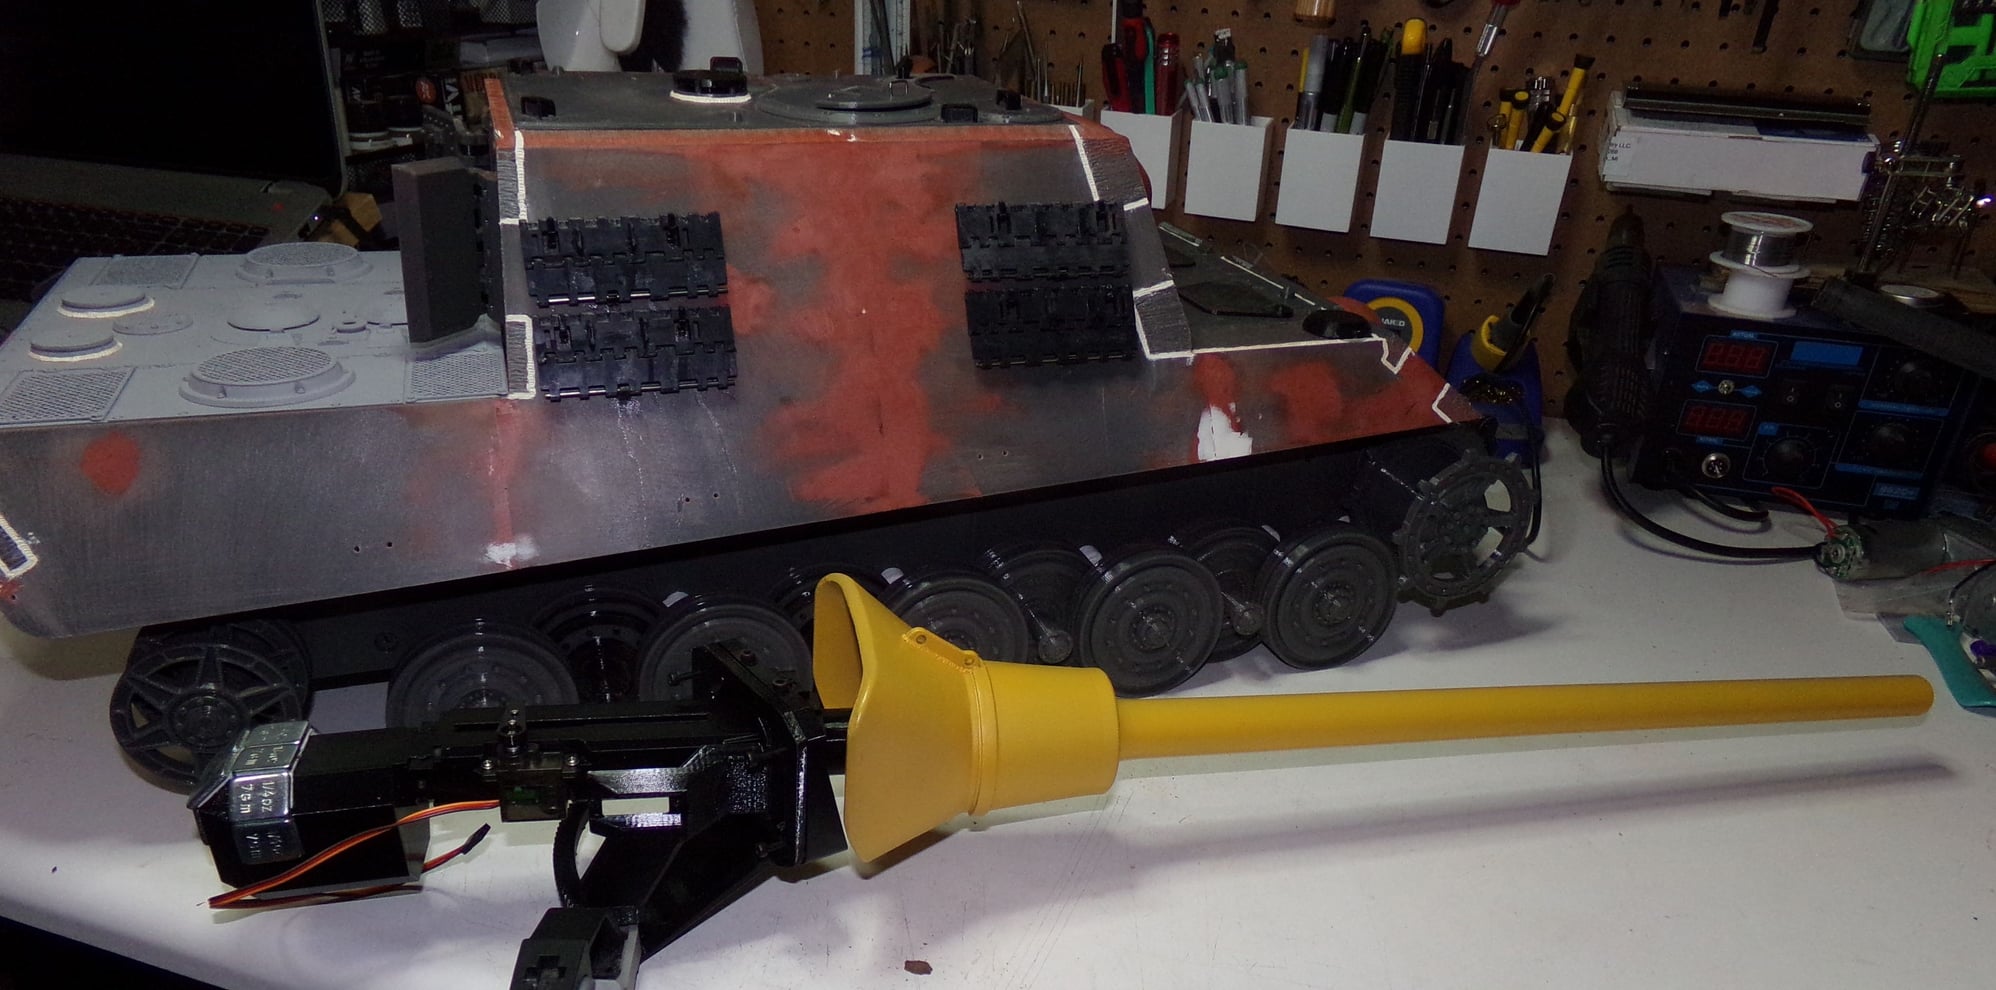
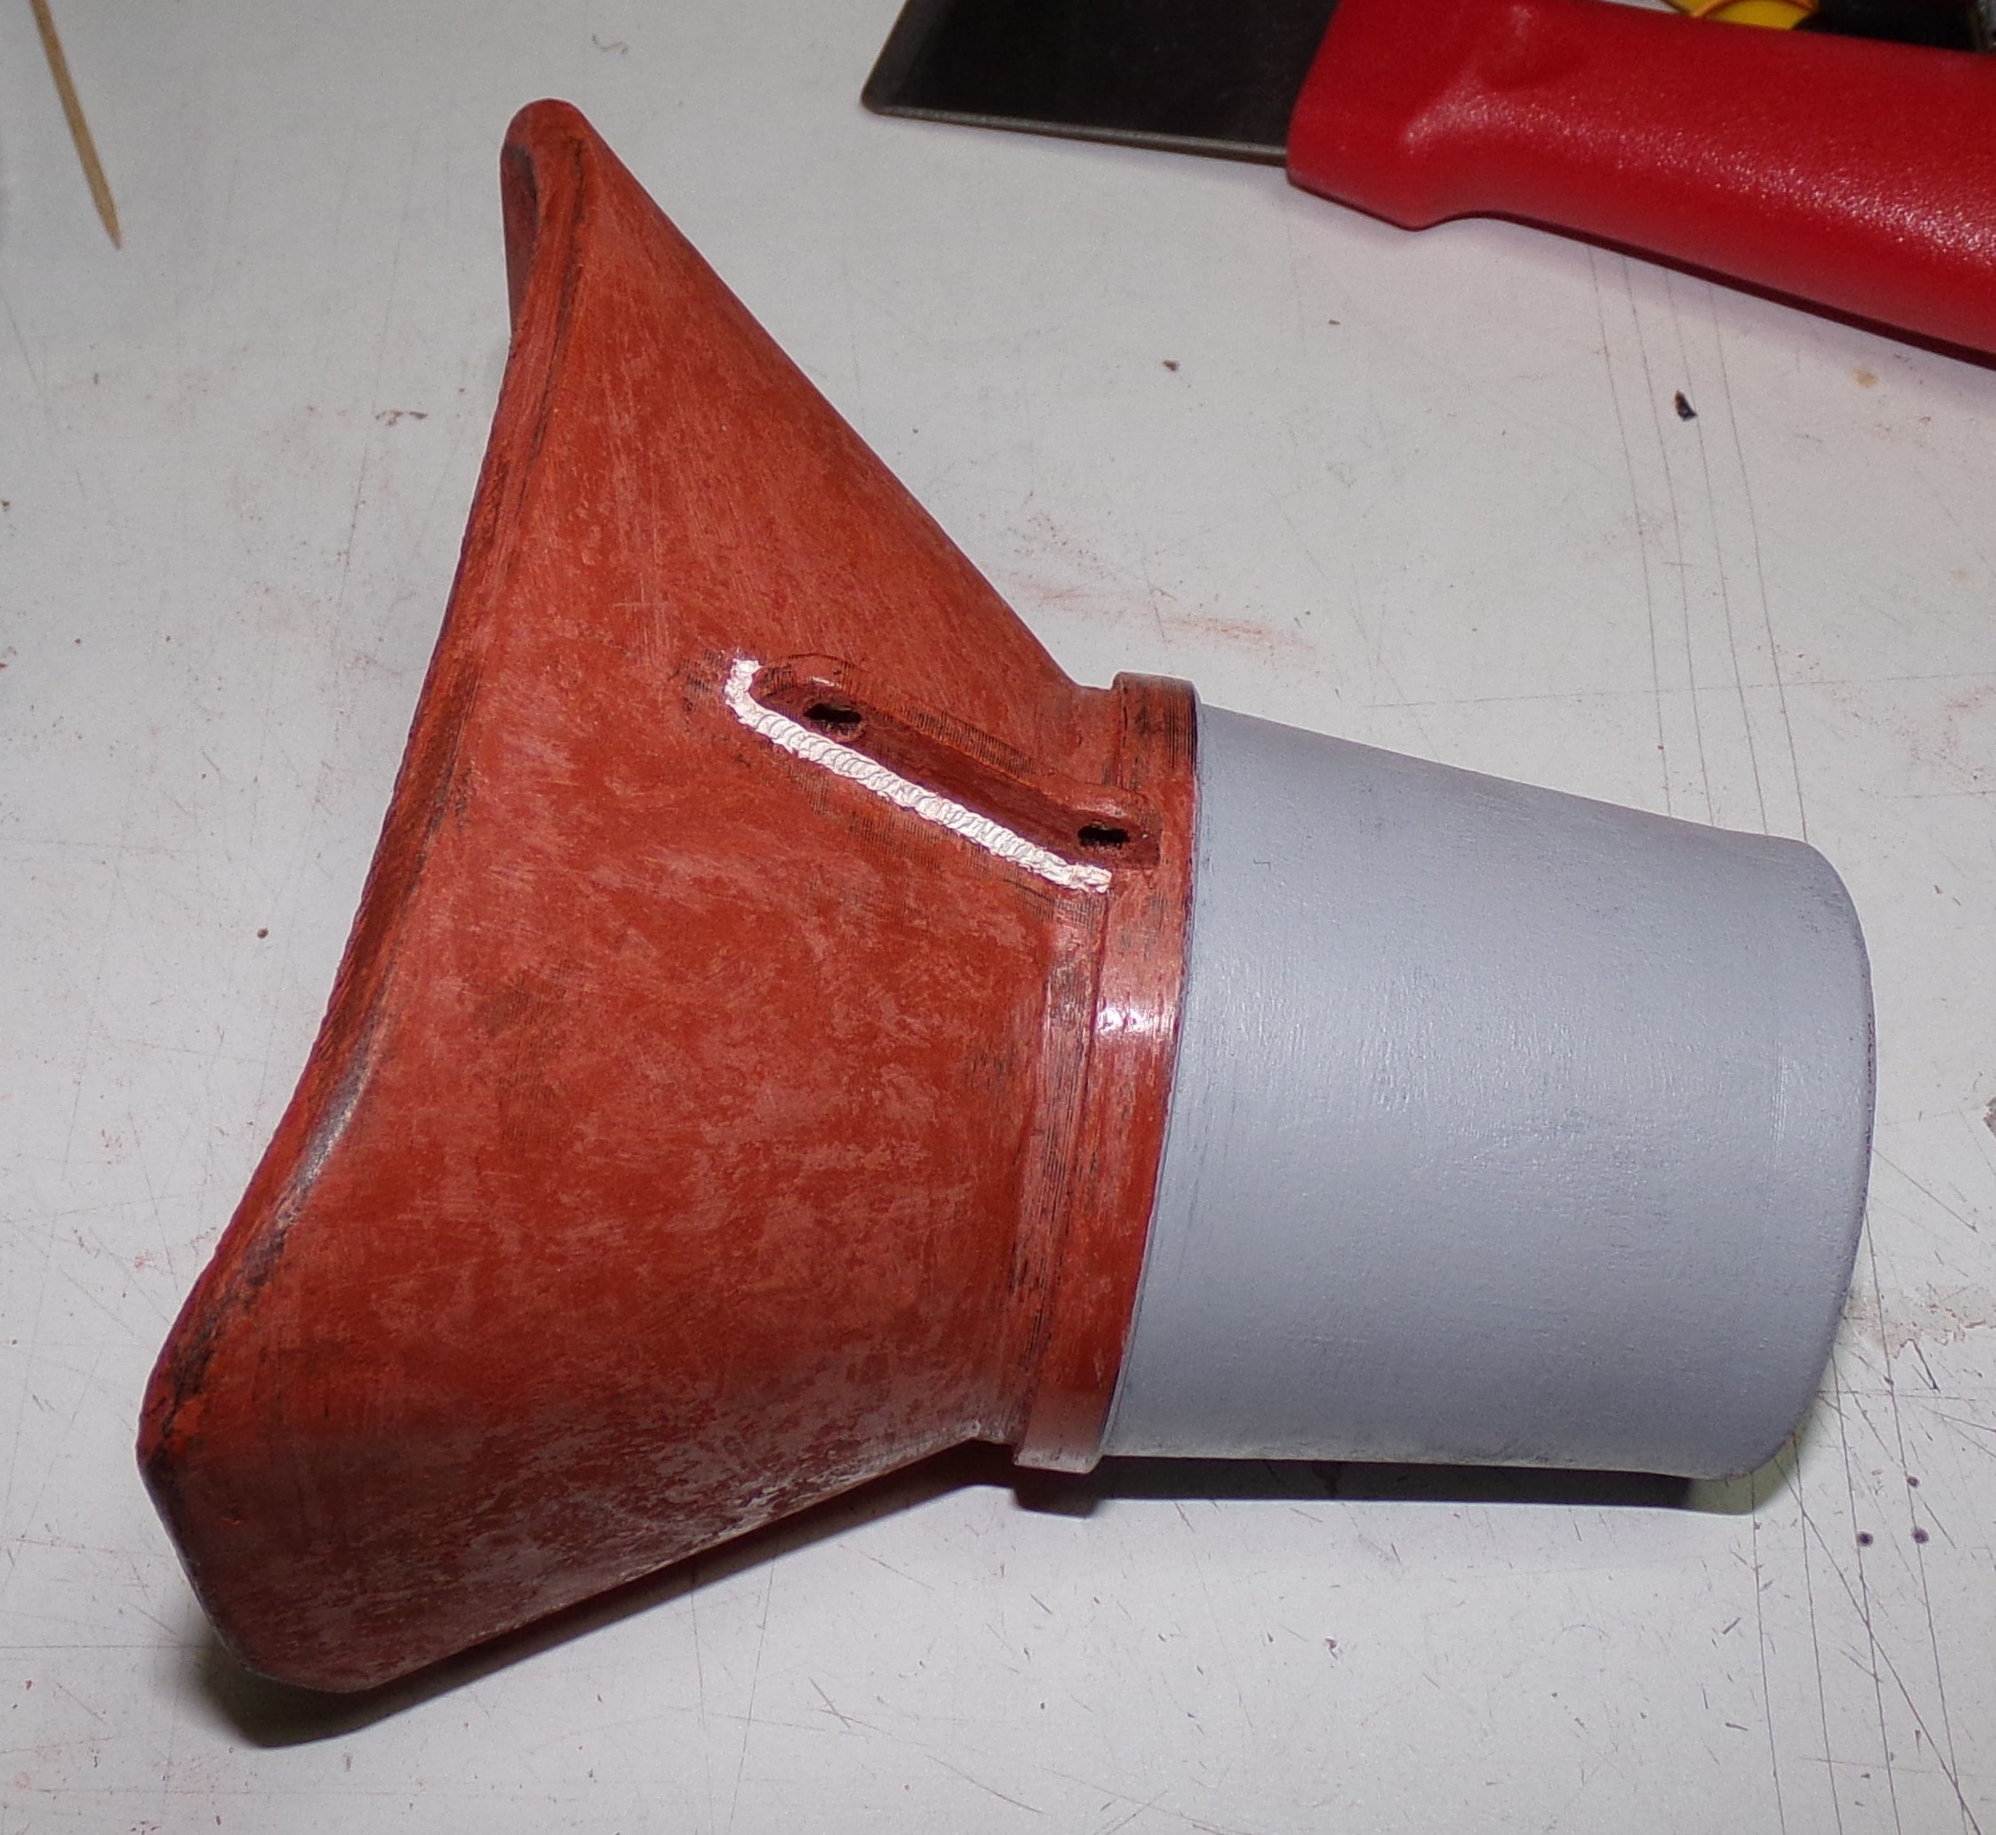
Rotation, elevation, and recoil mechanism has been printed and assembled. Barrel and shield have been fully detailed and painted in a base color - not the final color as it's too bright. Barrel has a massive weight on the back with added lead wheel weights to counterbalance the barrel.
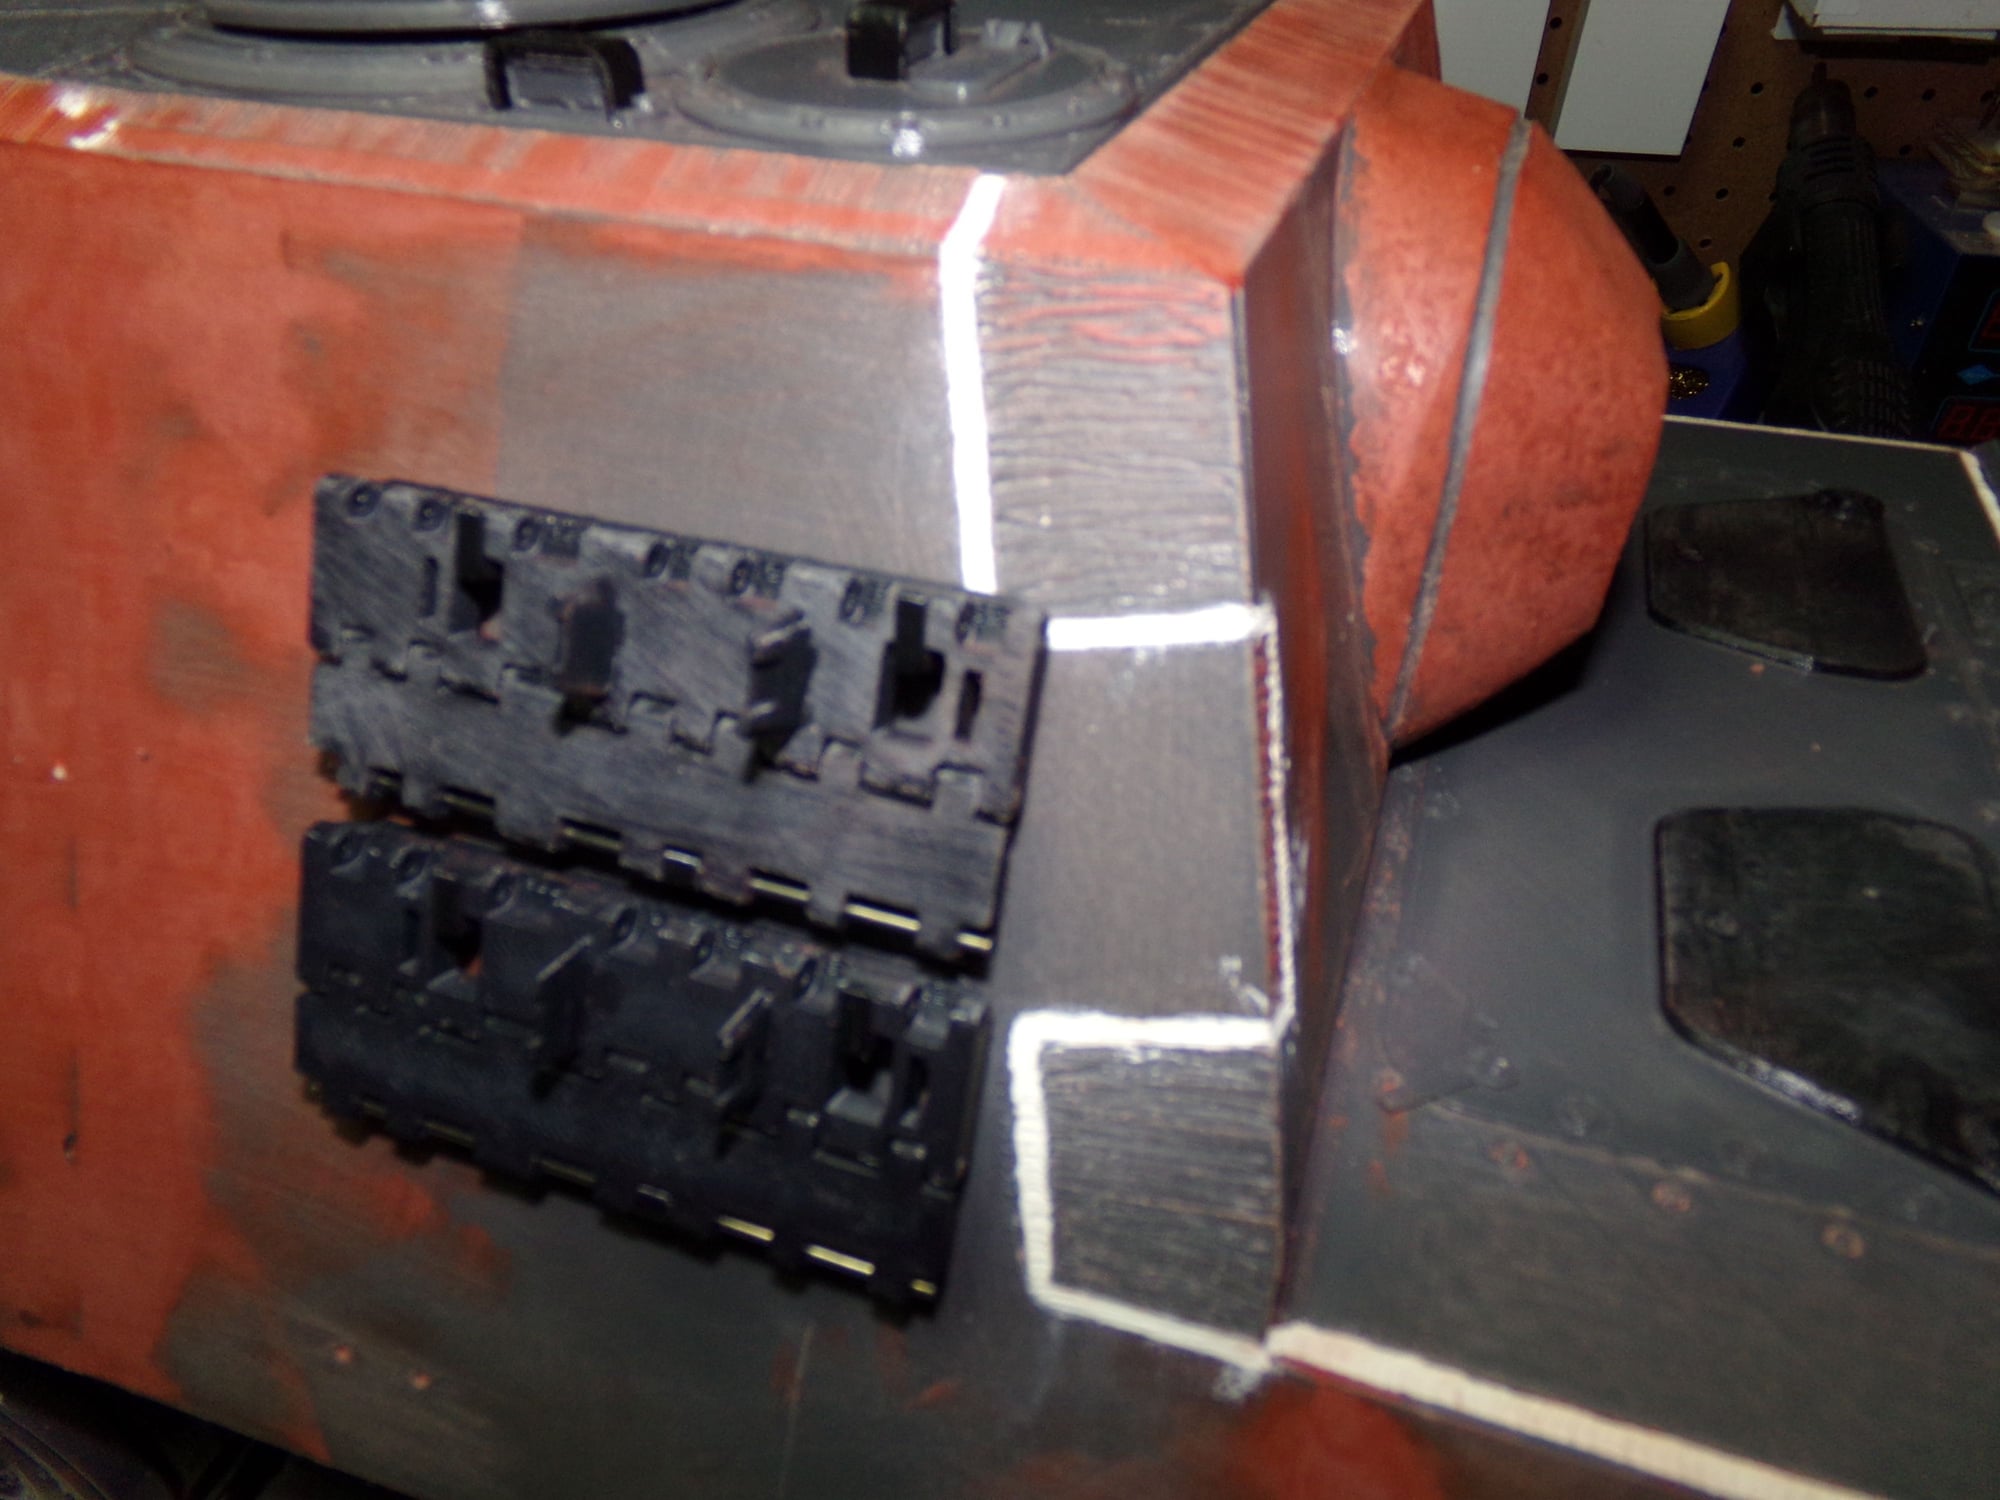
Flame cuts added and weld beads. Weld lines were widened with a Dremel bit.
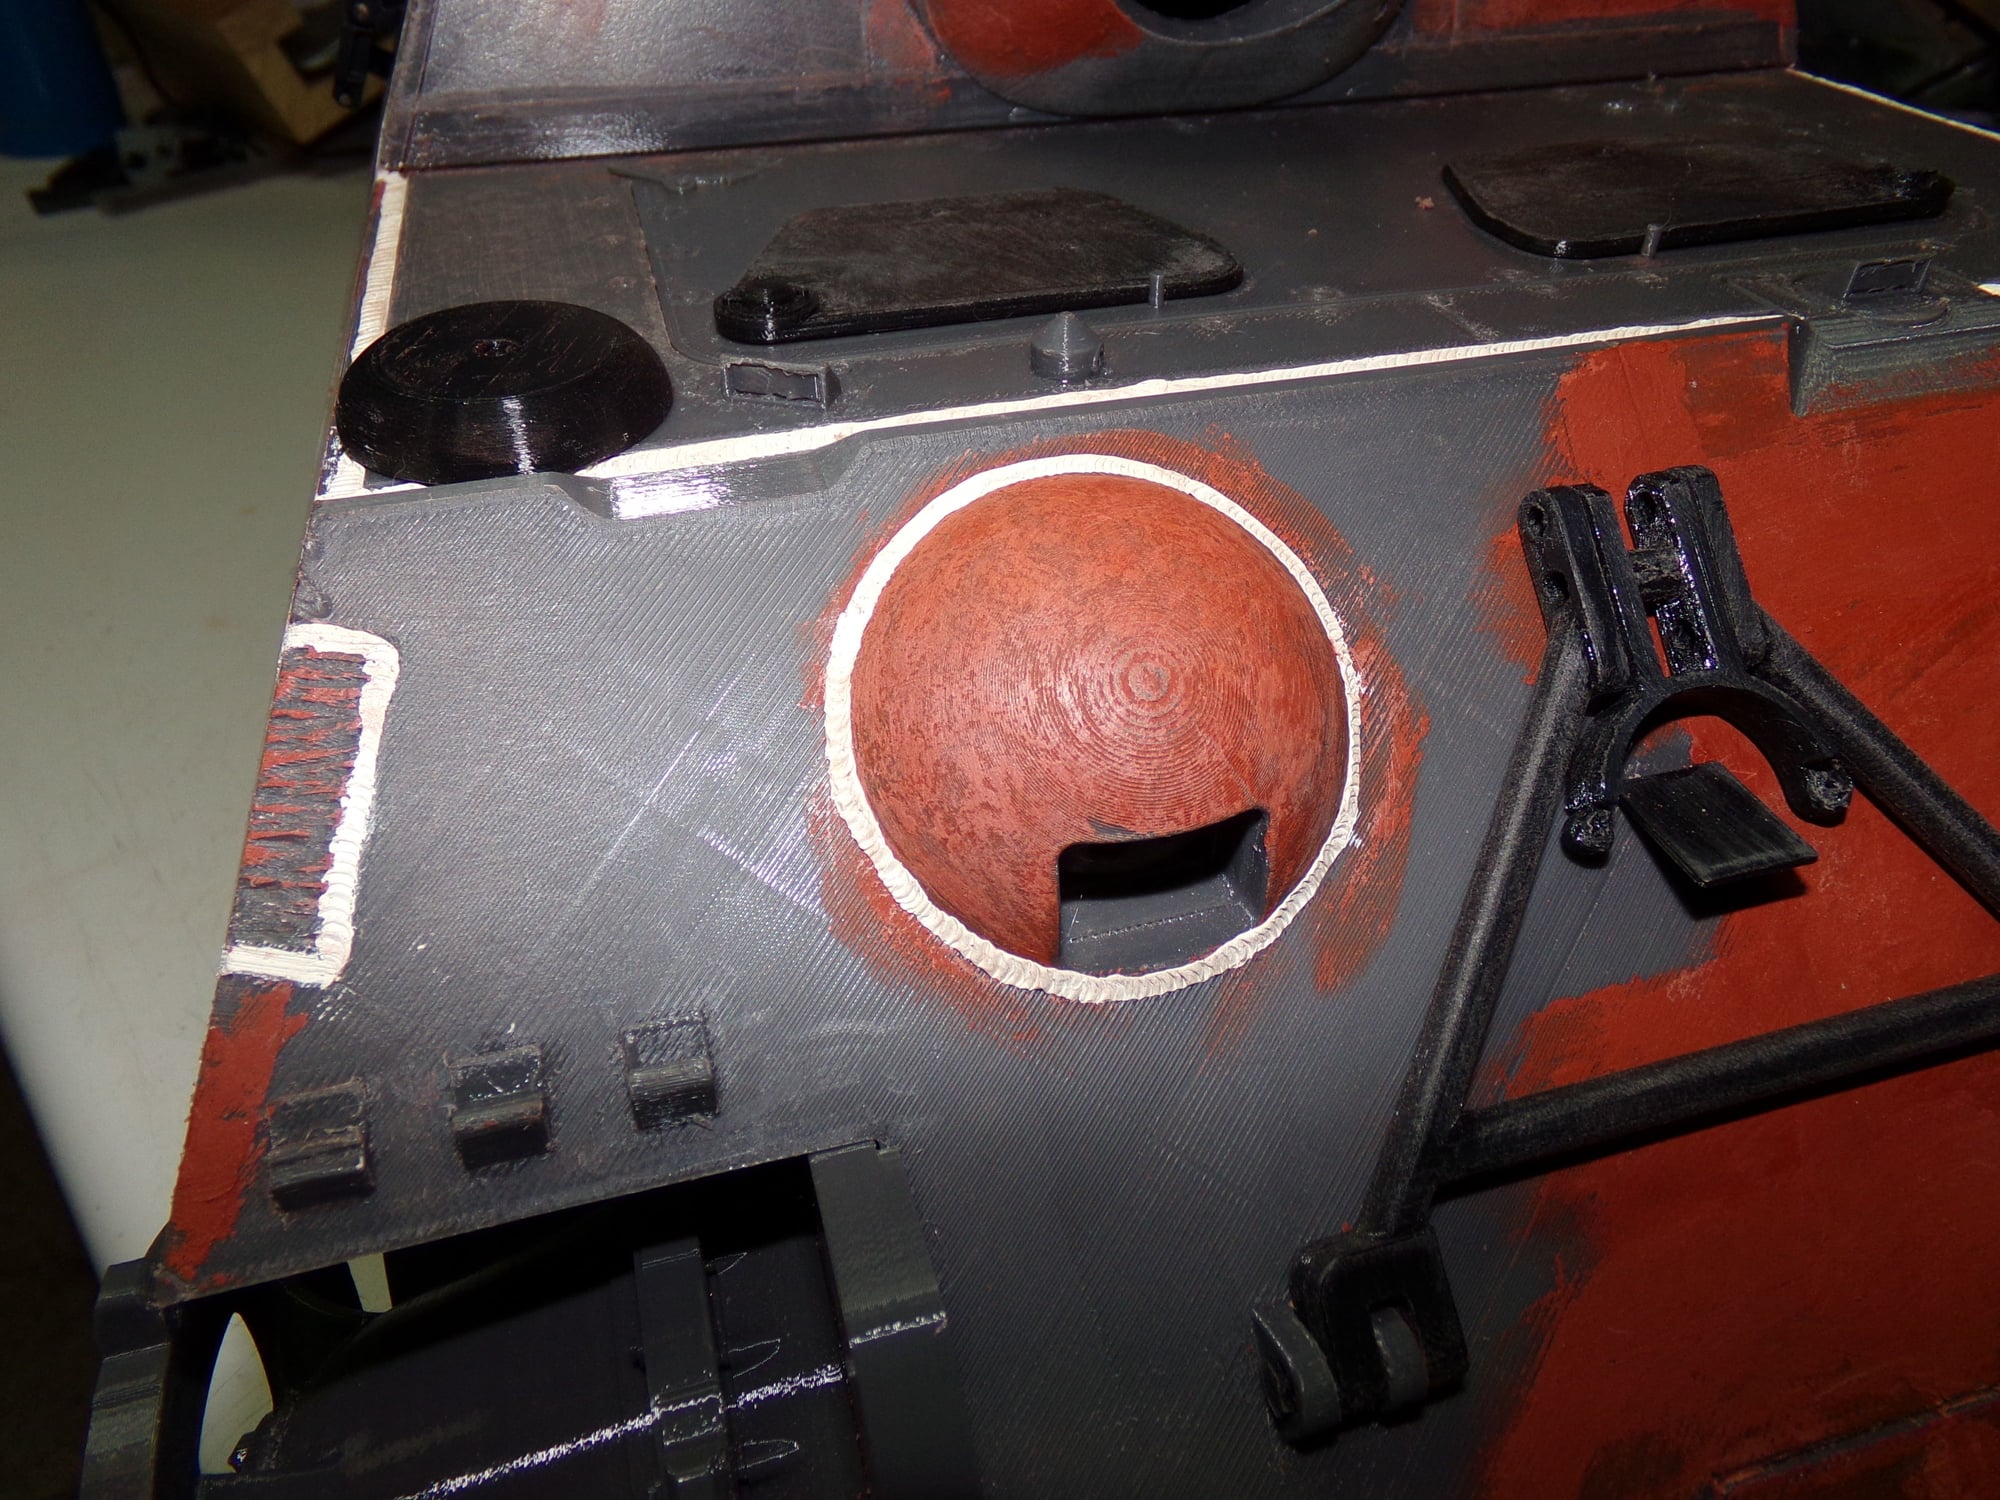
Weld beads added around the armor interlocks and the machine gun port.
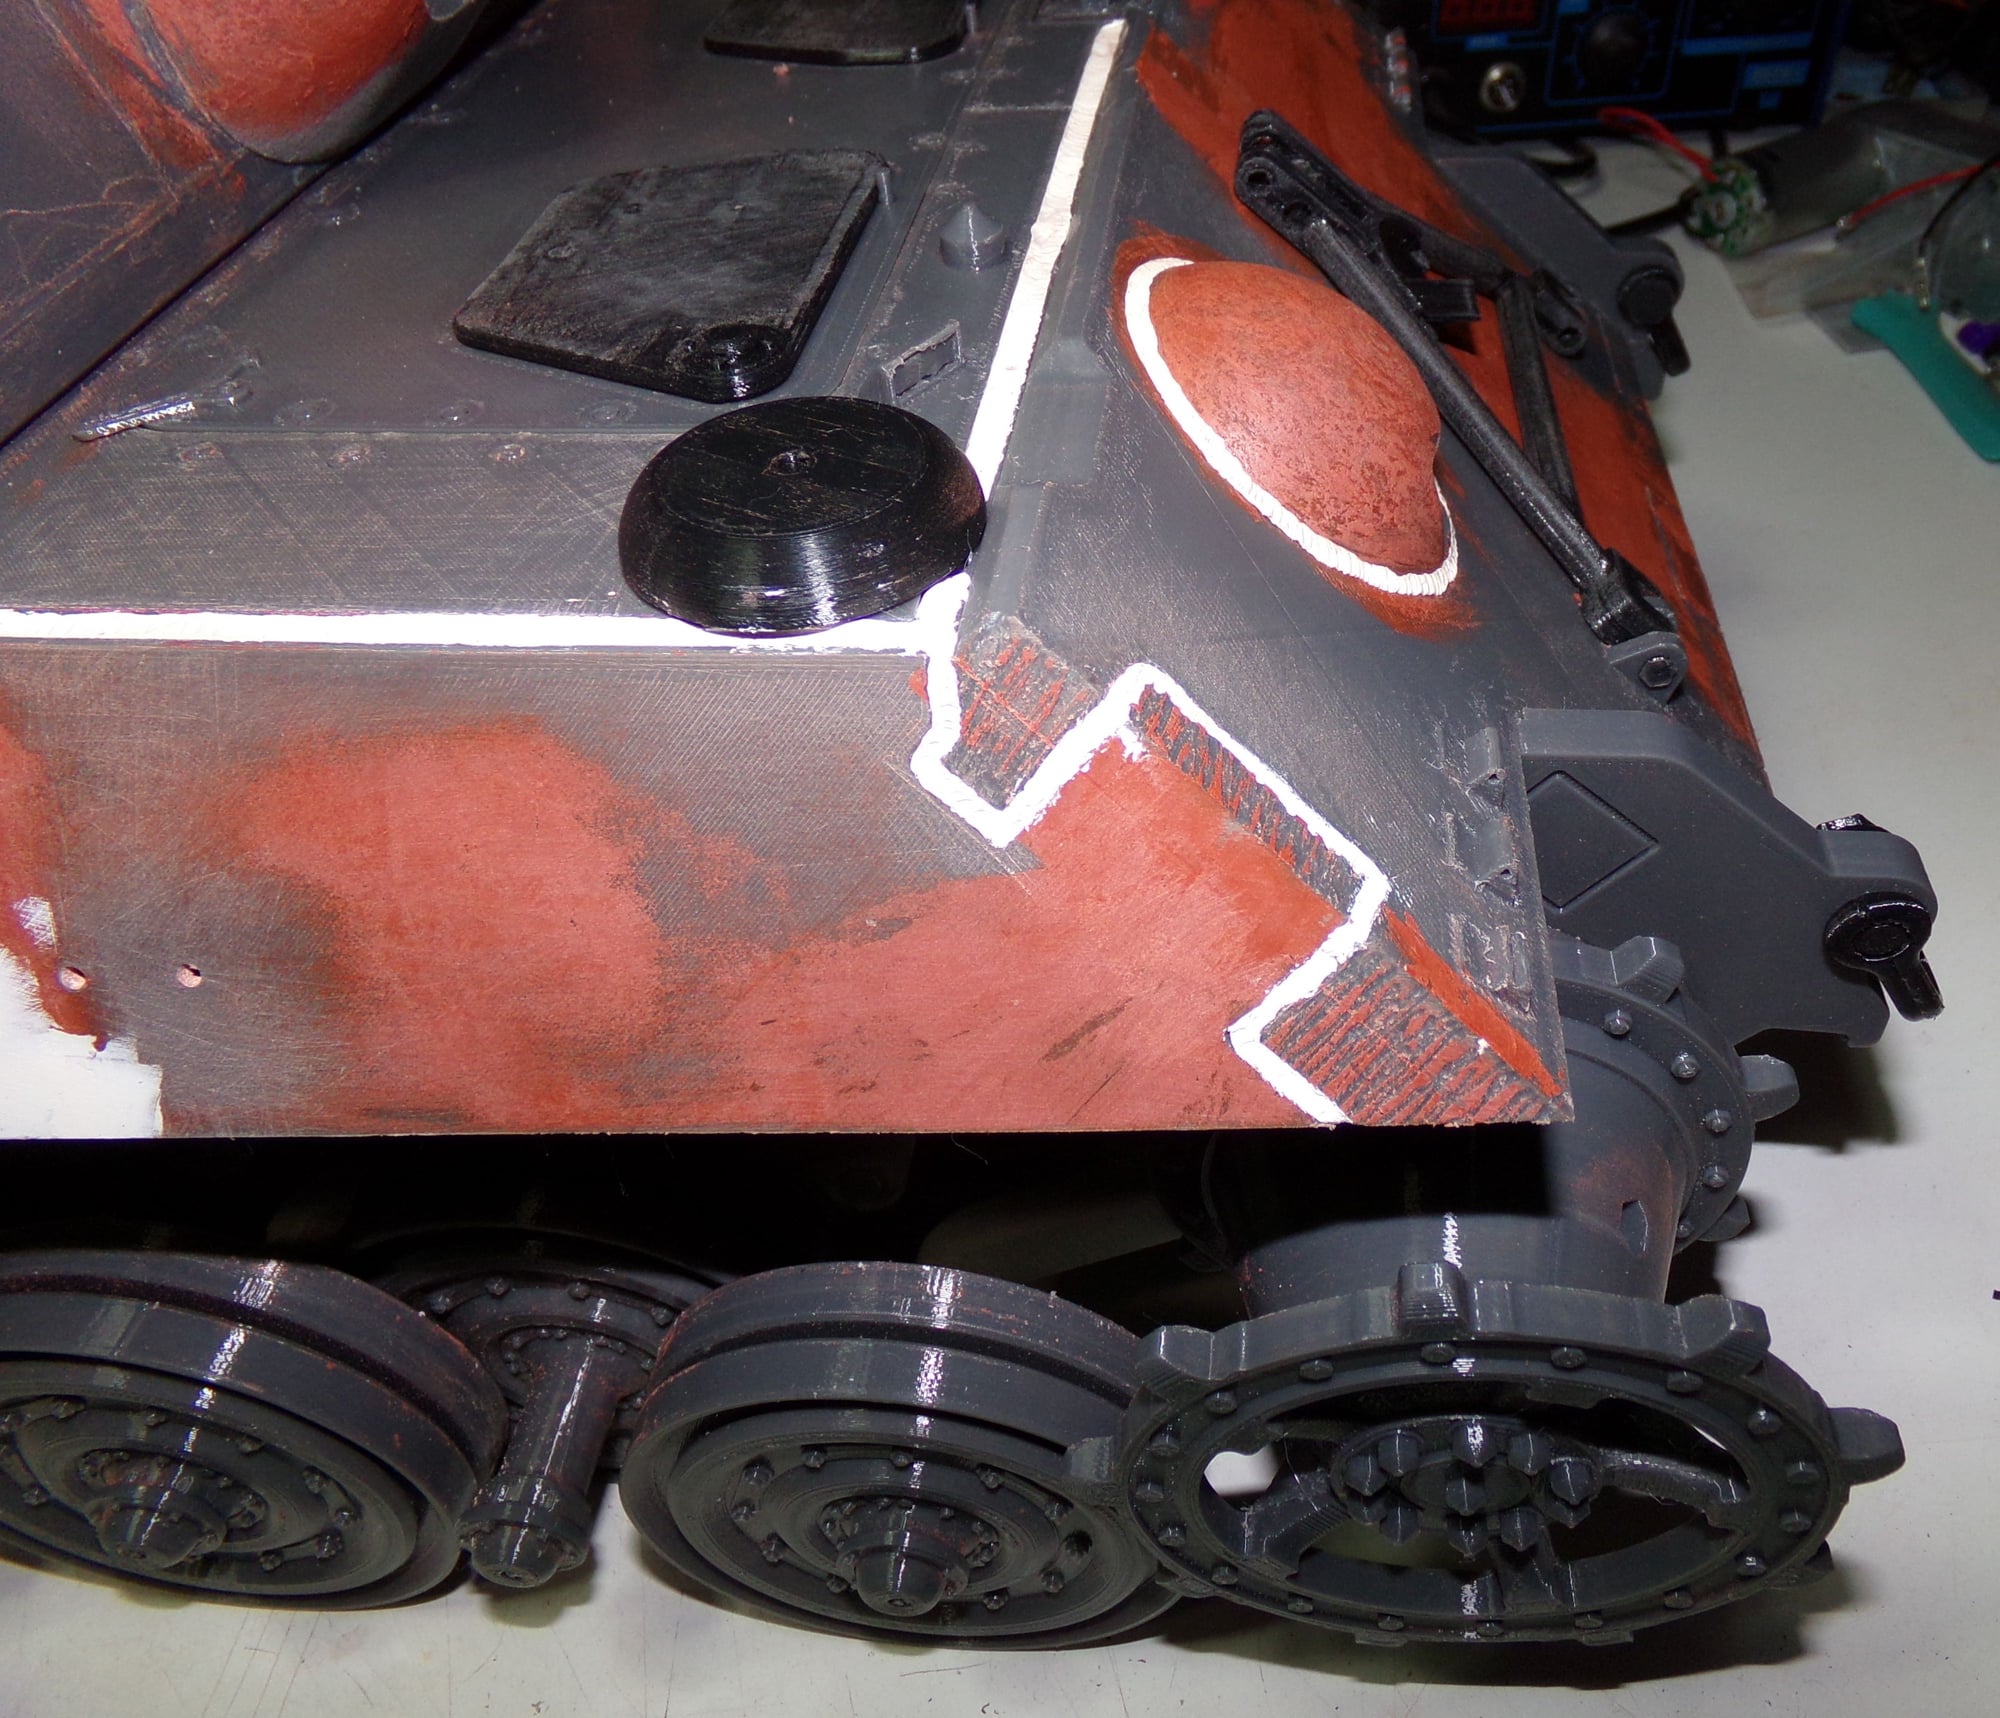
More flame cuts and weld beads
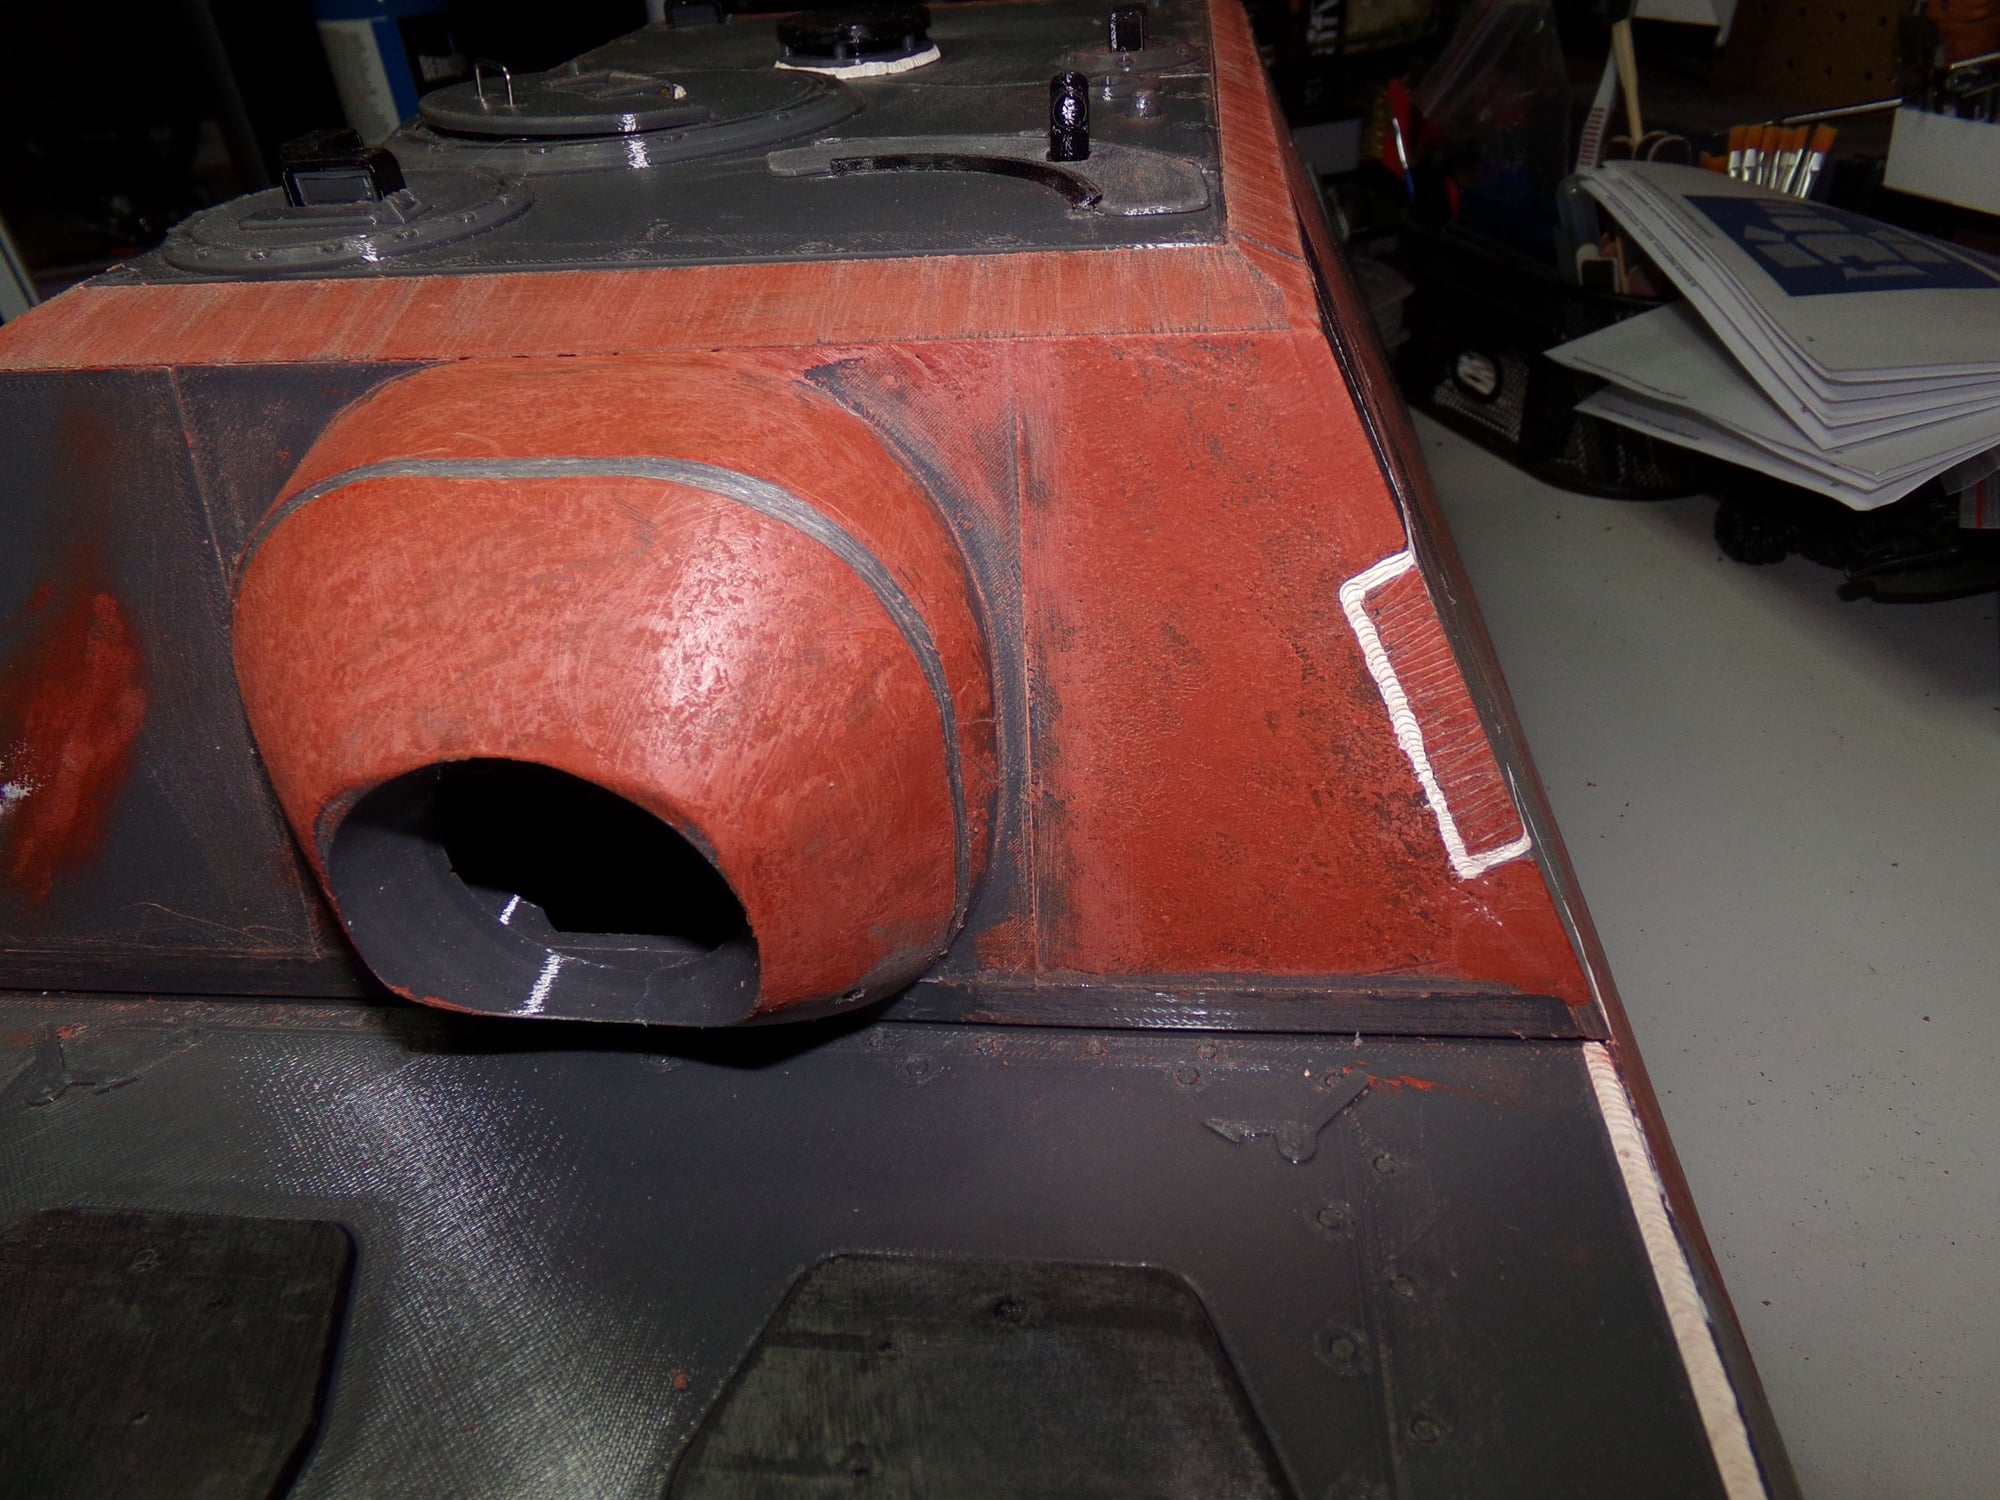
Texture and detail cut added around the mantlet.
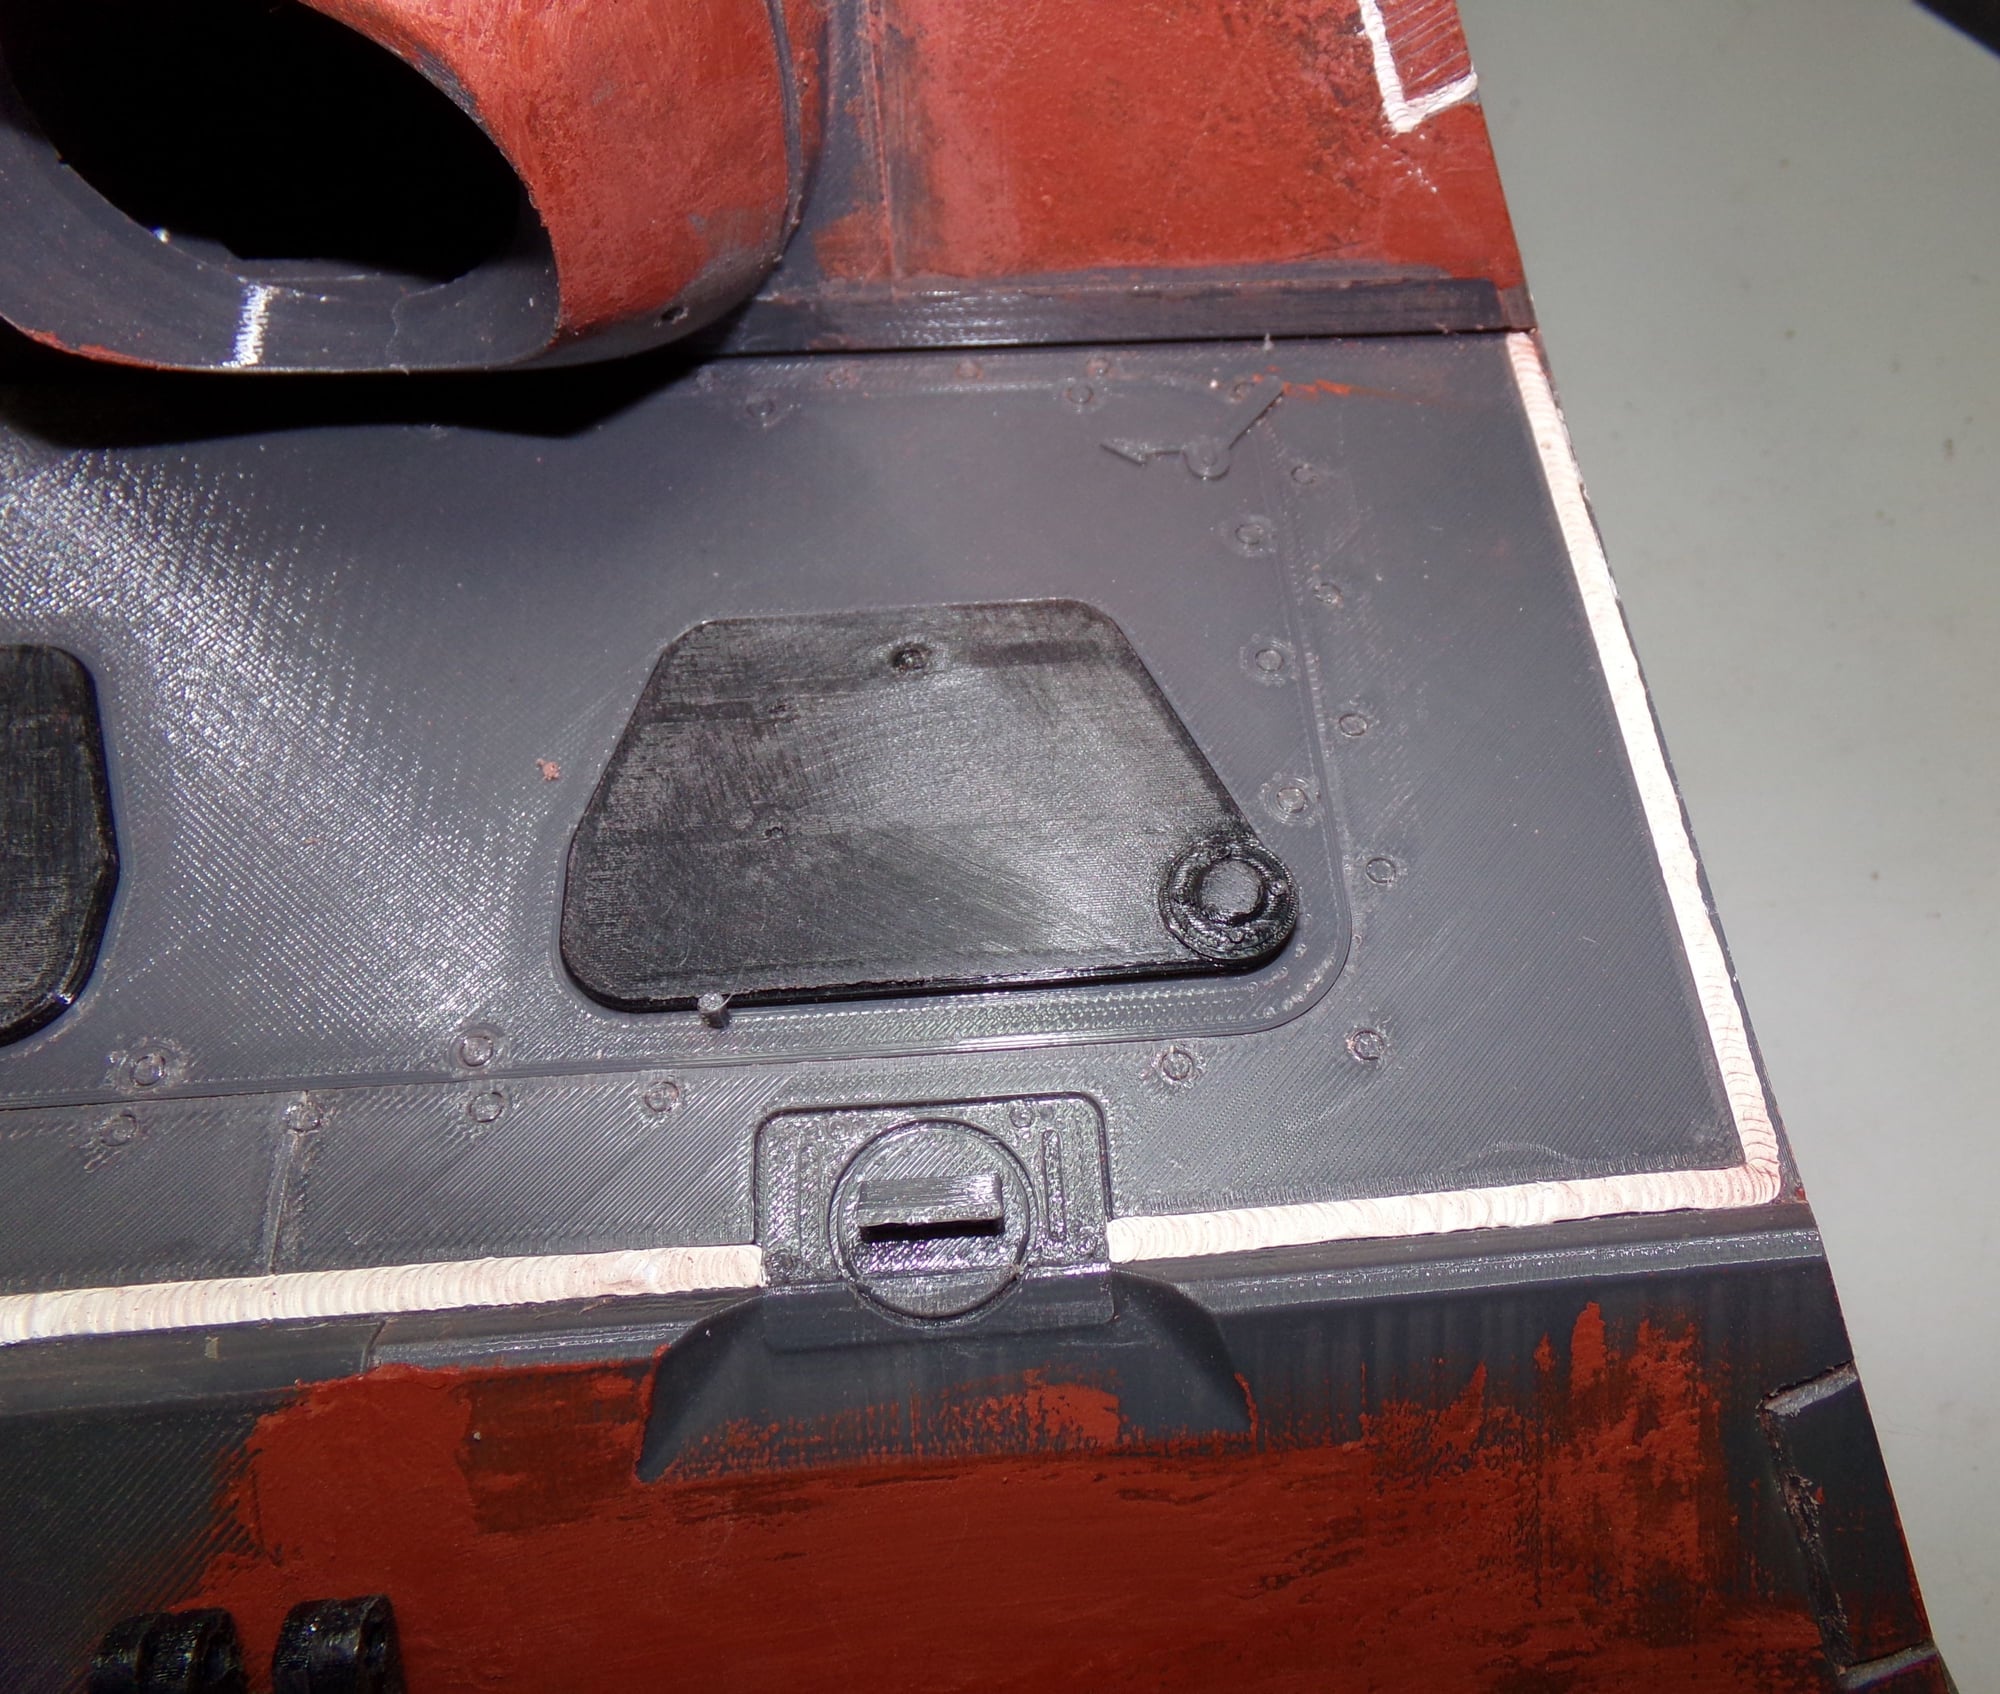
Weld bead added around the driver/gunner area.
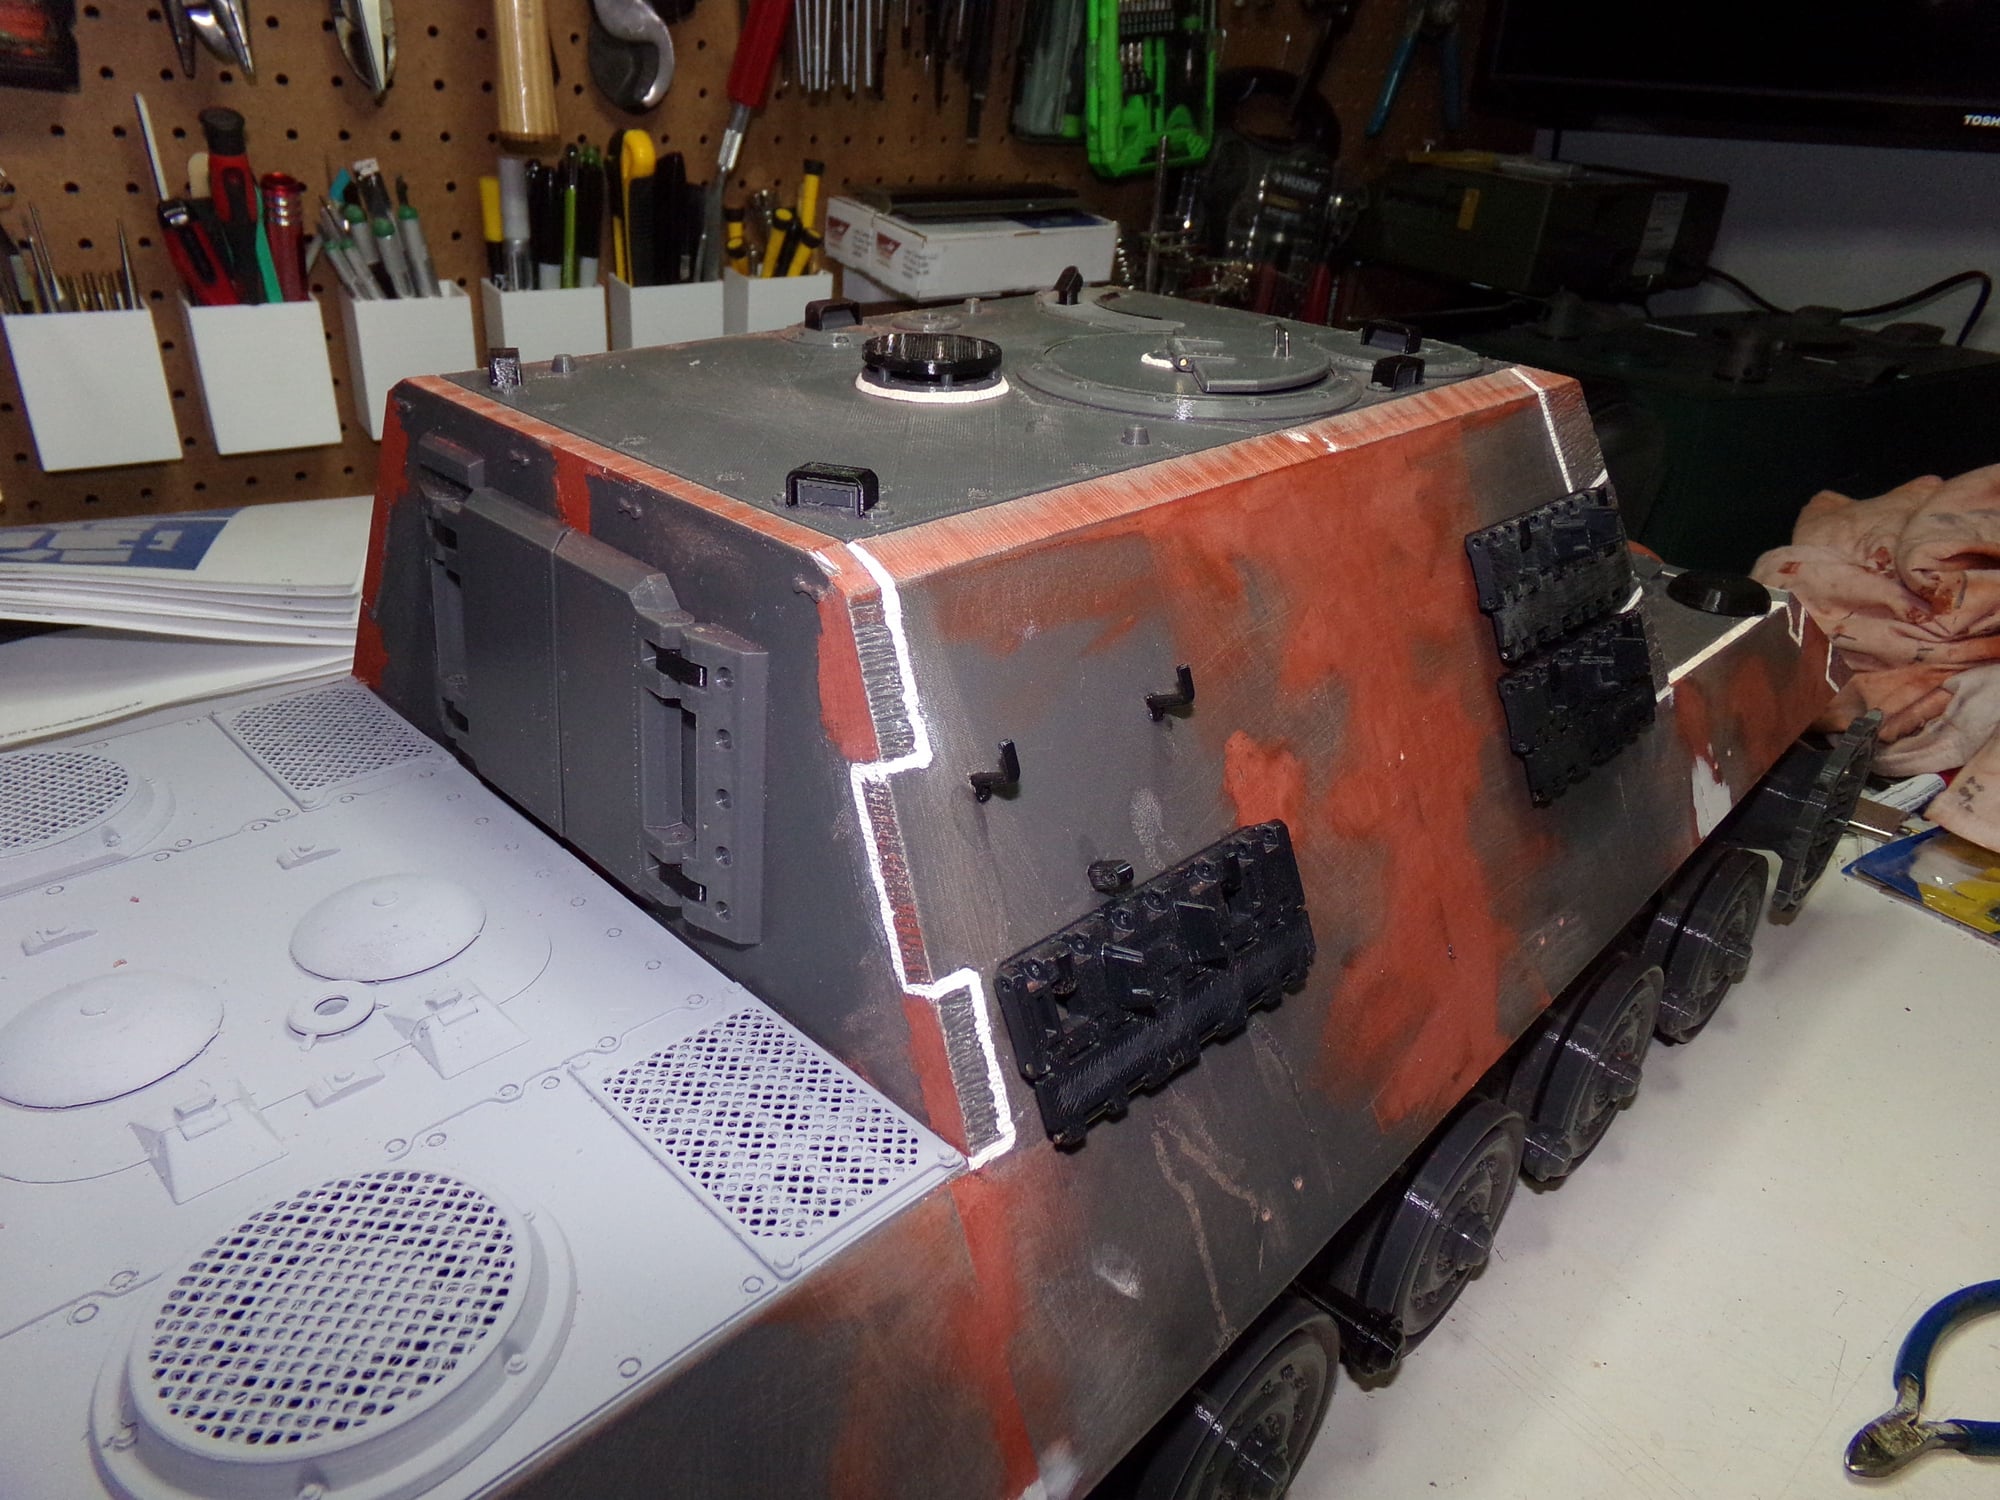
Spare track hangers installed and they are fully functional.
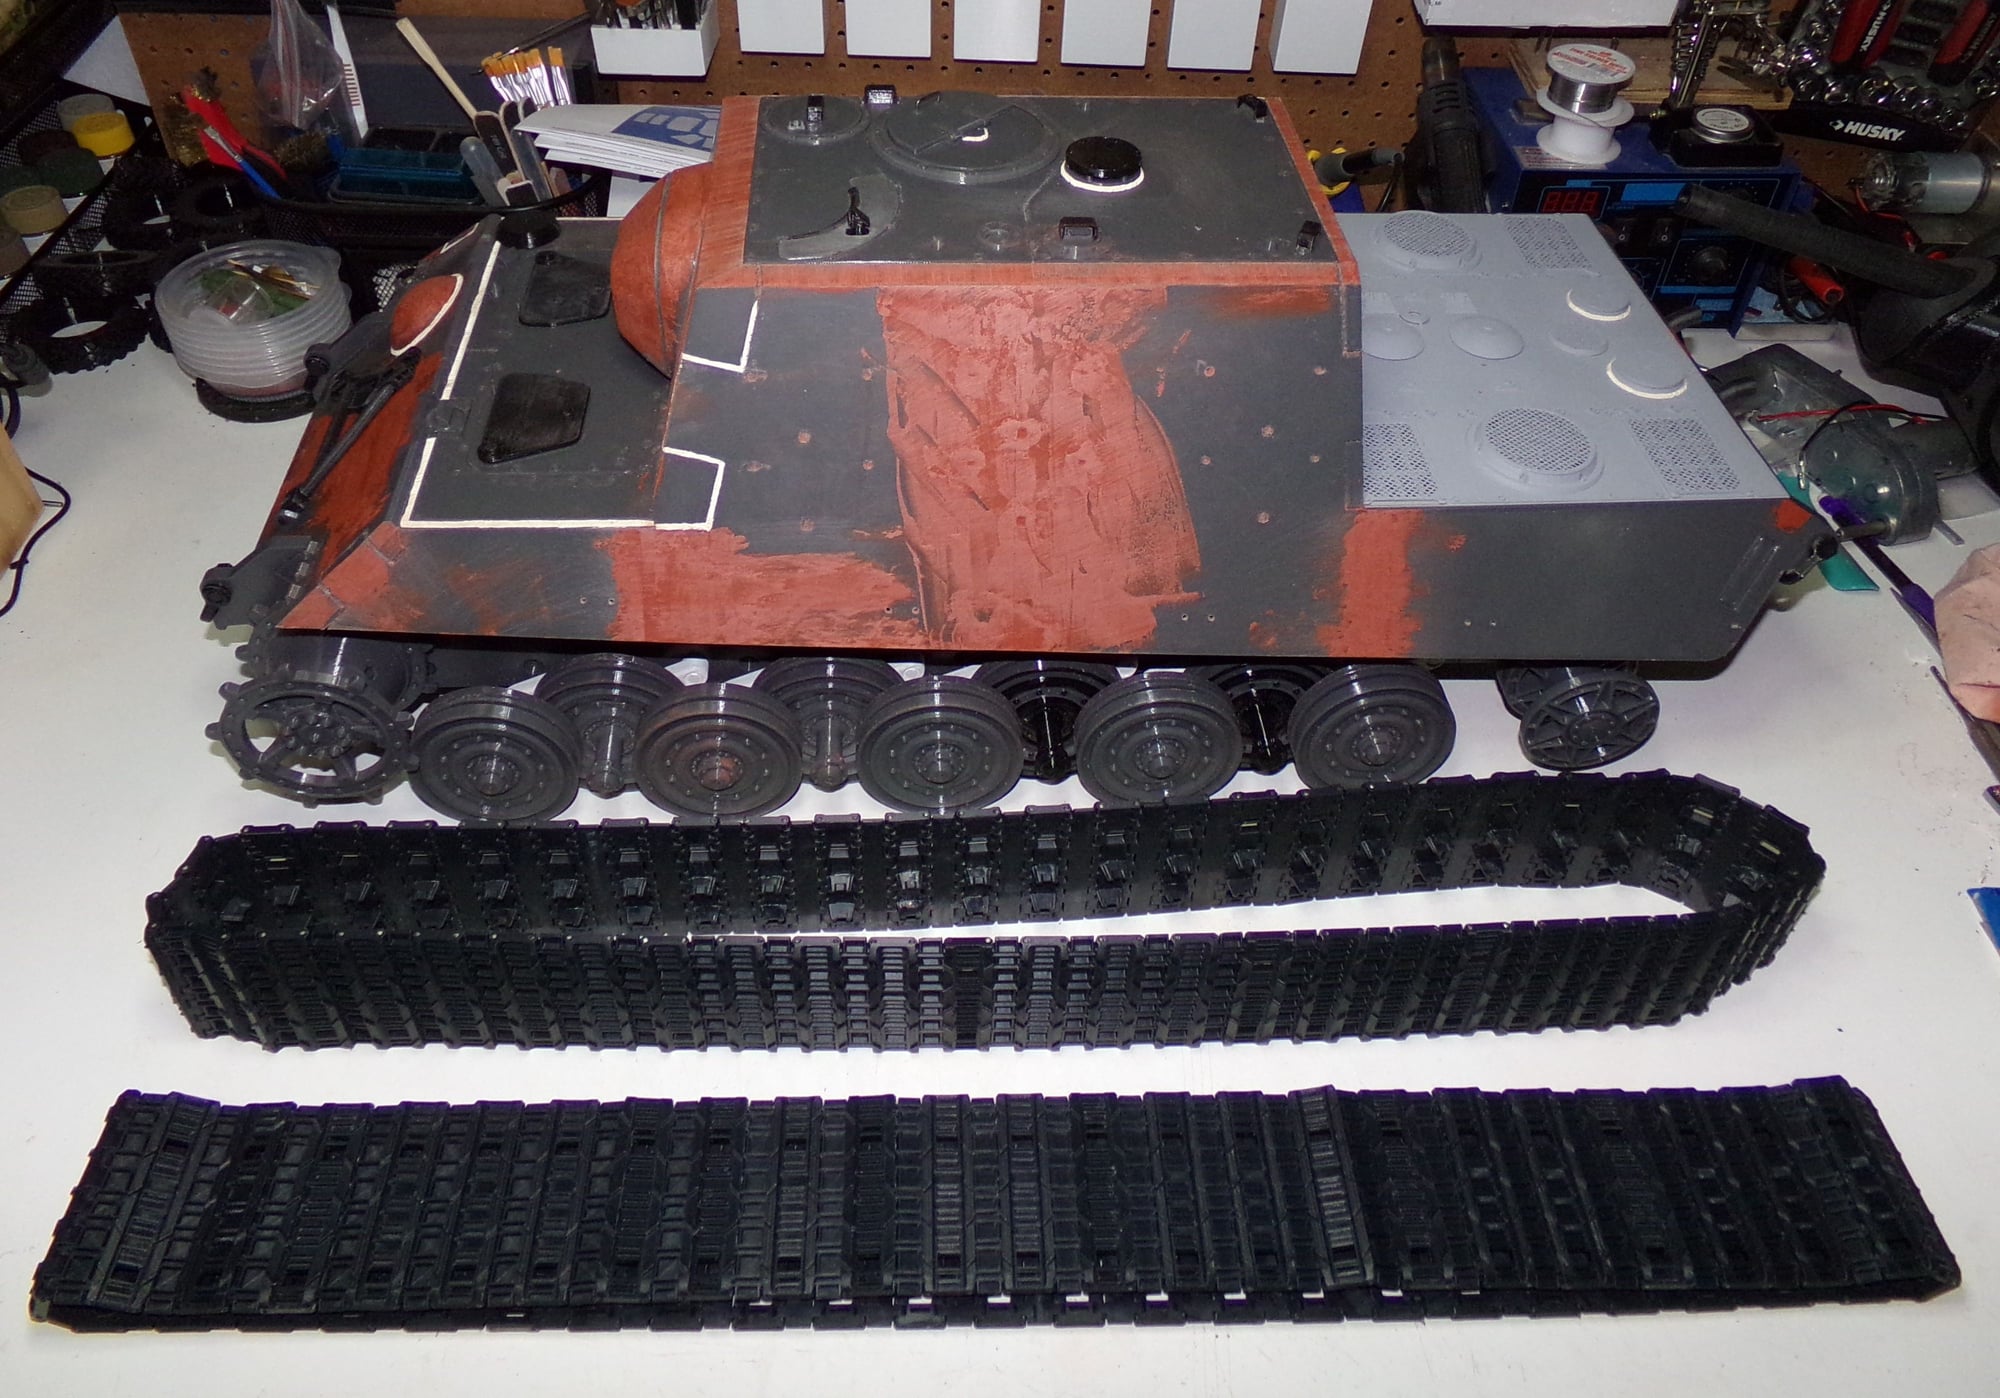
Both tracks are complete, but removed to do the finishing work.
Track shown installed.
All the hatches are functional.
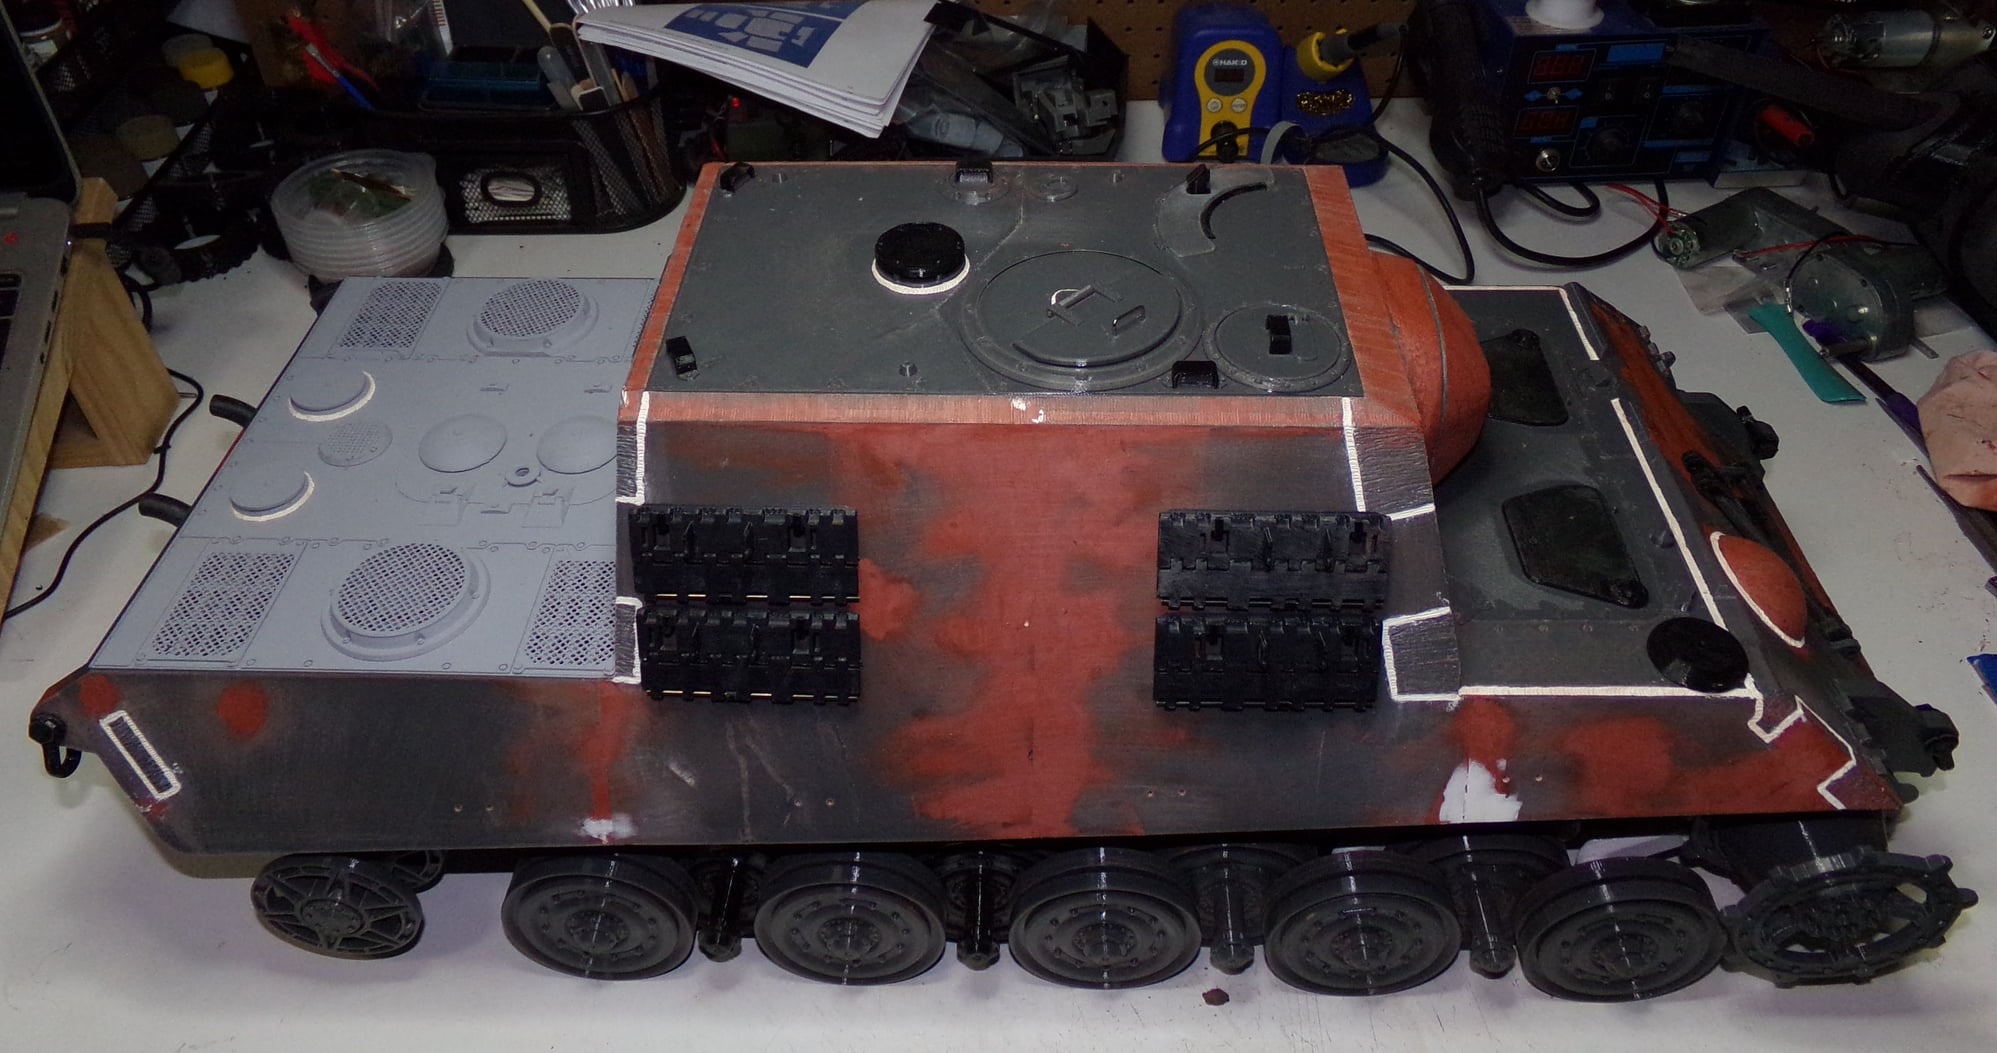
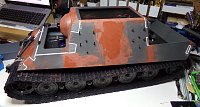
Overall look as she stands today.
That's all for now.
The tank suspension is based on torsion bars. Works pretty well.
Got the electronics box mounted behind the rear doors.
Rear deck details were added, it was primed, and some of the weld beads added to the rear deck. The grills are 3D printed on an FDM printer.
Exhaust detail added to the rear. Still need to add the little anti-grenade rods in the pipes. Lots of work to be done on the rear.
Rotation, elevation, and recoil mechanism has been printed and assembled. Barrel and shield have been fully detailed and painted in a base color - not the final color as it's too bright. Barrel has a massive weight on the back with added lead wheel weights to counterbalance the barrel.
Flame cuts added and weld beads. Weld lines were widened with a Dremel bit.
Weld beads added around the armor interlocks and the machine gun port.
More flame cuts and weld beads
Texture and detail cut added around the mantlet.
Weld bead added around the driver/gunner area.
Spare track hangers installed and they are fully functional.
Both tracks are complete, but removed to do the finishing work.
Track shown installed.
All the hatches are functional.
Overall look as she stands today.
That's all for now.
The following users liked this post:
PE YOUNG (11-29-2023)
The following users liked this post:
tankme (11-29-2023)
11-29-2023, 09:21 AM
#19
I've always thought 1/10 is a really great scale, it's the total lack of accessories that has kept me working in 1/6. When I did the SAS Jeep, I was able to add a lot of very, very cool details, mainly just because they were available. I was able to get all the right weapons and even the British teapot that they issued to their tankers. That's not something I would be able to do in 1/10 scale.
12-07-2023, 04:19 PM
#20
Thread Starter
When I get to this point in a build it starts to get exciting as the wiring is being done so that I can test out the mechanicals of the build. I don't like to finish all the detail work until after the mechanicals are straightened out because if the damn thing doesn't run it doesn't matter to me how pretty it is. 
I did mention I needed to finish weld beads and flame cuts so I finished them along with wiring up the Bosch headlight with a soft white LED (currently battery powered for testing). I will need to wire in a resistor as the TCB supplies 5V and the LED only needs 3.3V. I've found the TCB board is very effective at blowing up LEDs without resistors.
Finished weld beads on the back and added the anti-grenade posts to the exhaust.
More weld bead and flame cut work finished. Added the track hangers. Still have some sanding to do on this side.
Weld beads and handles installed. More on the speaker setup in a second.
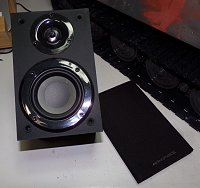
I had an old 5.1 Monoprice speaker system that had two defective satellite speakers so I grabbed one of the working ones and decided to put it to good use.
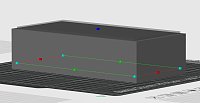
With my new found 3D printing skills I've learned that my Bambu slicer can do all kinds of simple drawing things. So rather than build a box out of flat material I would need to cut and glue, the decision was made to make one in the slicer. The slicer can make simple spheres, cubes, cylinders, cones, or discs. I disassembled the Monoprice speaker, measured all the components, and designed a simple top plate from a flattened cube. I then added negative cylinders for the openings. The speaker had a primary 5W 4ohm woofer and a tweeter both connected to the speaker posts/crossover circuit. I decided to incorporate all of the components.

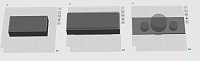
To get as much volume as possible for the box, I decided to design it in a way that it drops down in the main hull and uses the sponson area above the tracks. The box was designed as two parts. The first part was a simple cube that I elongated and added a negative box to the interior. You can see that the negative box doesn't go all the way down to the bottom of the cube which ensures this part of the enclosure has a solid bottom.
The last part of the enclosure is another cube with a negative space cut out for the main body of the enclosure. This space doesn't go all the way through the bottom, but leaves a couple of mm so that the part of the box that goes over the sponson is sealed. The smaller negative space at the bottom is to allow the previous box to fit into place dropping down into the hull. It will make sense when you see the final box.

All three parts of the enclosure before printing. I printed the box in one go. It's just easier to see on three plates instead of two.
And the two parts of the enclosure after printing.
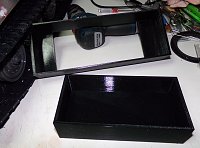
Here they are fitted together...perfectly without any fitting. They will be glued together eventually.
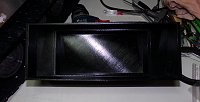
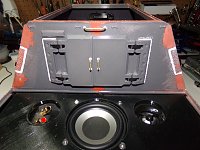
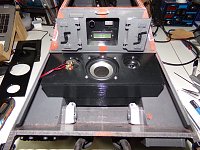
Everything loaded onto the lid of the box.

Here is the final mock up of the box. I will be adding some screws to the corners to hold the lid on. I'll be recycling a failed lid print to make the mounting points.
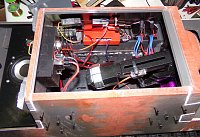
Some preliminary wiring of the interior that includes the OpenPanzer TCB, a Taranis compatible RX, the Taigen sound card, two Hobbyking brushless ESCs, and the electrical distribution blocks.
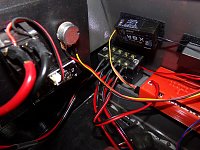
Closer view of the electrical distribution blocks.
Tonight I'll probably work on getting the batteries wired up and the servos for the elevation/recoil/traverse.
That's all for now!
I did mention I needed to finish weld beads and flame cuts so I finished them along with wiring up the Bosch headlight with a soft white LED (currently battery powered for testing). I will need to wire in a resistor as the TCB supplies 5V and the LED only needs 3.3V. I've found the TCB board is very effective at blowing up LEDs without resistors.
Finished weld beads on the back and added the anti-grenade posts to the exhaust.
More weld bead and flame cut work finished. Added the track hangers. Still have some sanding to do on this side.
Weld beads and handles installed. More on the speaker setup in a second.
I had an old 5.1 Monoprice speaker system that had two defective satellite speakers so I grabbed one of the working ones and decided to put it to good use.
With my new found 3D printing skills I've learned that my Bambu slicer can do all kinds of simple drawing things. So rather than build a box out of flat material I would need to cut and glue, the decision was made to make one in the slicer. The slicer can make simple spheres, cubes, cylinders, cones, or discs. I disassembled the Monoprice speaker, measured all the components, and designed a simple top plate from a flattened cube. I then added negative cylinders for the openings. The speaker had a primary 5W 4ohm woofer and a tweeter both connected to the speaker posts/crossover circuit. I decided to incorporate all of the components.
To get as much volume as possible for the box, I decided to design it in a way that it drops down in the main hull and uses the sponson area above the tracks. The box was designed as two parts. The first part was a simple cube that I elongated and added a negative box to the interior. You can see that the negative box doesn't go all the way down to the bottom of the cube which ensures this part of the enclosure has a solid bottom.
The last part of the enclosure is another cube with a negative space cut out for the main body of the enclosure. This space doesn't go all the way through the bottom, but leaves a couple of mm so that the part of the box that goes over the sponson is sealed. The smaller negative space at the bottom is to allow the previous box to fit into place dropping down into the hull. It will make sense when you see the final box.
All three parts of the enclosure before printing. I printed the box in one go. It's just easier to see on three plates instead of two.
And the two parts of the enclosure after printing.
Here they are fitted together...perfectly without any fitting. They will be glued together eventually.
Everything loaded onto the lid of the box.
Here is the final mock up of the box. I will be adding some screws to the corners to hold the lid on. I'll be recycling a failed lid print to make the mounting points.
Some preliminary wiring of the interior that includes the OpenPanzer TCB, a Taranis compatible RX, the Taigen sound card, two Hobbyking brushless ESCs, and the electrical distribution blocks.
Closer view of the electrical distribution blocks.
Tonight I'll probably work on getting the batteries wired up and the servos for the elevation/recoil/traverse.
That's all for now!
12-08-2023, 07:14 AM
#21
I think one of the main advantages to the larger scales like 1/10 or 1/6 ( as compared to 1/16) is the incredible amount of extra room you have inside. The hetzer was one of the smallest tanks made in World War 2, but my 1/6 model of it has so much room inside compared to a 1/16th model it's just ridiculous. I run 2 four inch speakers in my hetzer and the amount of additional room in there is just wonderful. Not only do I have plenty of room for speakers, I also run the paintball cannon and all the FPV stuff and still have lots and lots of room to spare.
This 1/10 project is looking really good and I can't wait to see it when it's done. I've also wondered about scale performance in a 1/10 scale tank compared to a 1/6 scale. I would also imagine that the metal tanks would perform a little differently from the 3D printed versions with all that extra weight.
This 1/10 project is looking really good and I can't wait to see it when it's done. I've also wondered about scale performance in a 1/10 scale tank compared to a 1/6 scale. I would also imagine that the metal tanks would perform a little differently from the 3D printed versions with all that extra weight.
12-09-2023, 12:19 AM
#22
Thread Starter
Some 3D printed tanks can get pretty heavy depending on how they are printed. More infill = heavier tank. I'm not quite sure what the final weight will be of this tank, but I have zero issues moving it from the bench to the floor and back. I'm going to guess it weighs less than 30lbs without battery. I realized I didn't have a suitable breaker for the power feed so I've got to wait a few days before finishing up the wiring.
12-09-2023, 05:44 AM
#23
"Pretty heavy" is a relative term. An armortek jagdtiger weighs about 185 pounds without the batteries. I think that will make quite a difference in performance. The 3D printed tank being much lighter should be much faster and more maneuverable, and also should put a lot less stress on just about everything. I think you'll also have a lot less trouble transporting a 3D printed yagdtiger. I can definitely see the advantages to a 3D printed tank, but there's just something about metal!!
