


t-34 build
 07-08-2009 | 09:40 PM
#1

Thread Starter

I’ve been working on my T-34 and I remembered to take pic’s as I go along.
So to start-
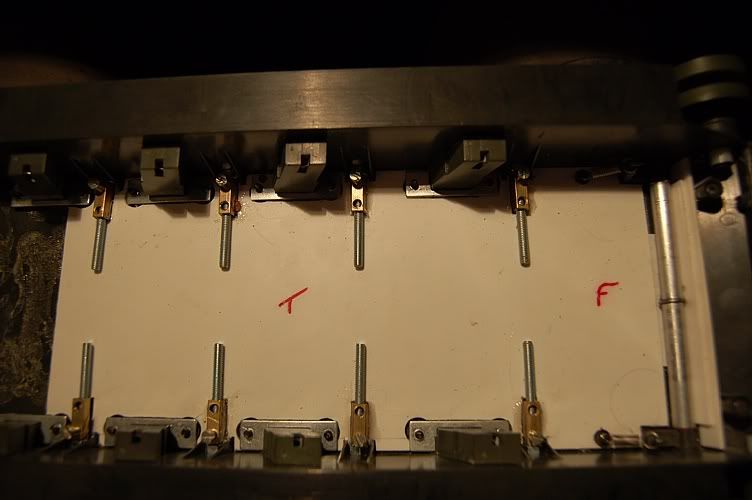
I filled in each of the suspension arms to make them stiffer then bolted the to the chassis which has been strengthened with plasticard (I’m using plasticard because I’m trying to keep the weight down) –
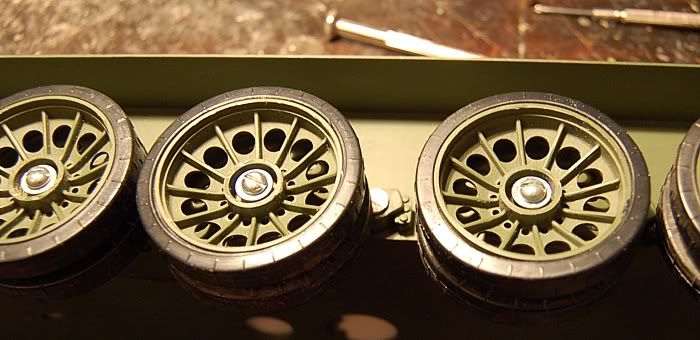
Then the wheels are bolted on
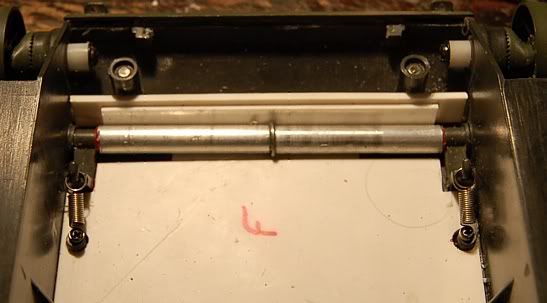
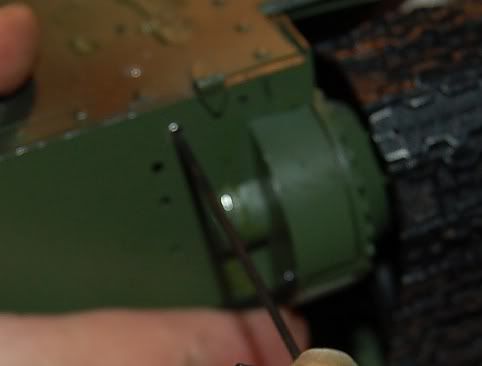
The front has been braced with some metal tubes. The front suspension arm is bolted into the tubes using Rawplugs and there is a metal rod running tubes so the can still turn independently-
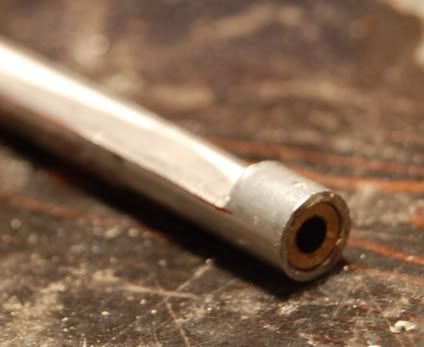
I’ve put a metal tube with bushes in the ends between the rear gears-

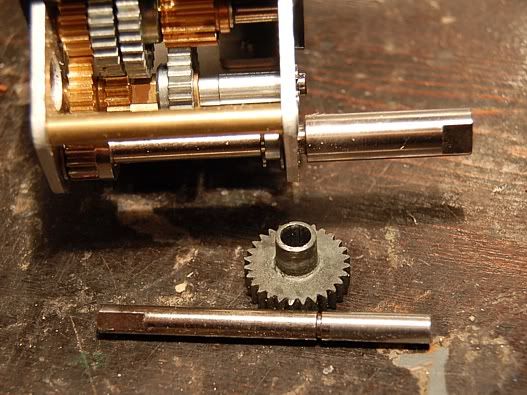
I picked up some cheap Tam gearboxes but had to grind down the drive shaft to fit a gear off an old HL, and mounted the GB’s to an aluminium plate.-
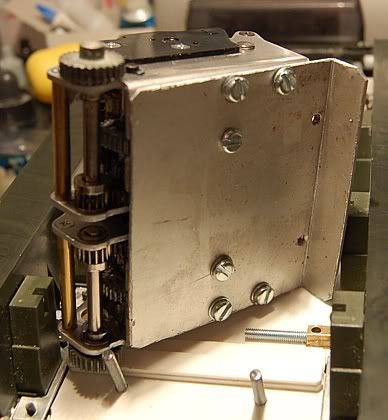
The GB’s slot into a bracket and are held in place with two bolts. This’ll allow me to be able to take the GB’s out easily for maintenance-
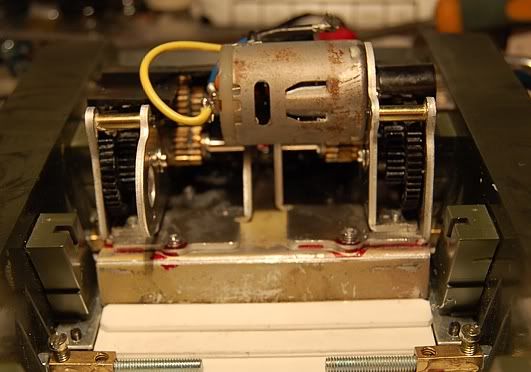
(The bolt heads need grinding down a bit)
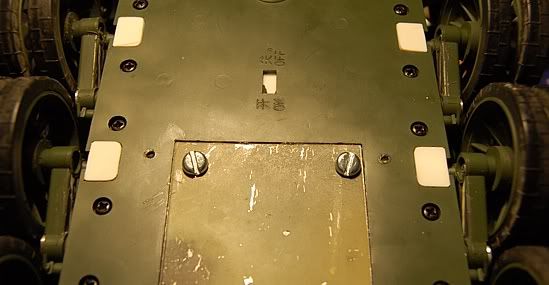
I glued the front onto the tank and added a sheet of plastic card to the front with two tabs sticking out. I also added small magnets where the screws would go in the top and bottom. Now the top just slots into place.
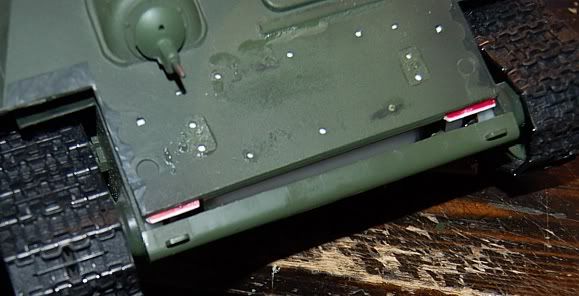
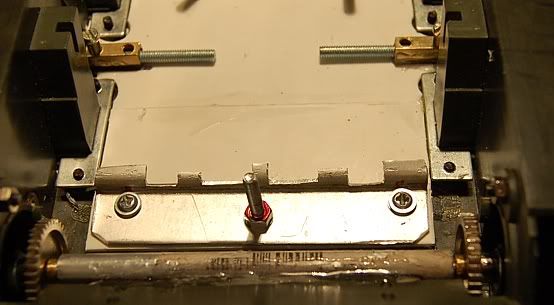
I added a all’y bracket to the back and threaded it so the back is held in place by two grub screws-

(don’t worry the last pic is blurred, it’s not your eyesight going.)
Hmm things are looking tight-

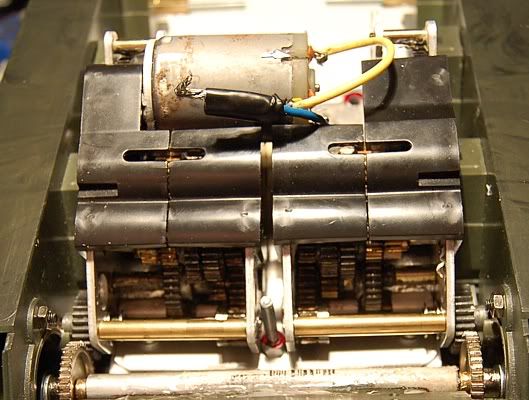
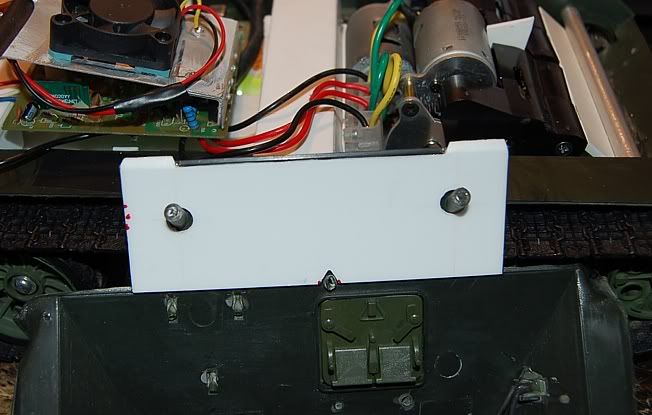
Decided to flip the main board and give it a test run ( I’ve just taped things in place for now).
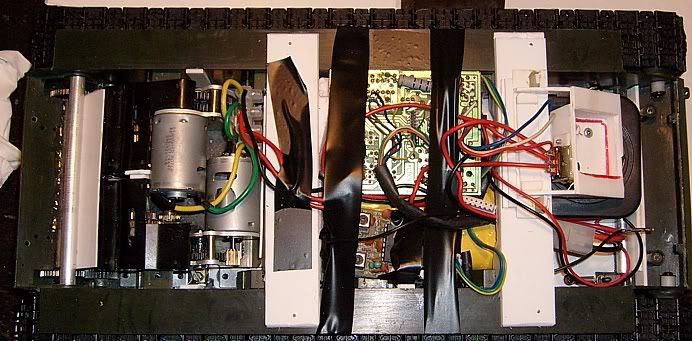

Everything works great so far.
Forgot to add that the suspension springs have been blocked up with bits of plasticard to stop the entire thing dropping on it’s belly. The 2nd and 3rd road wheels have had 4mm added and the 4th 5mm and the 5th road wheel has had 6mm added. It worked just fine and the tank sits at about the right height and the suspension still works fine.
So to start-
I filled in each of the suspension arms to make them stiffer then bolted the to the chassis which has been strengthened with plasticard (I’m using plasticard because I’m trying to keep the weight down) –
Then the wheels are bolted on
The front has been braced with some metal tubes. The front suspension arm is bolted into the tubes using Rawplugs and there is a metal rod running tubes so the can still turn independently-
I’ve put a metal tube with bushes in the ends between the rear gears-
I picked up some cheap Tam gearboxes but had to grind down the drive shaft to fit a gear off an old HL, and mounted the GB’s to an aluminium plate.-
The GB’s slot into a bracket and are held in place with two bolts. This’ll allow me to be able to take the GB’s out easily for maintenance-
(The bolt heads need grinding down a bit)
I glued the front onto the tank and added a sheet of plastic card to the front with two tabs sticking out. I also added small magnets where the screws would go in the top and bottom. Now the top just slots into place.
I added a all’y bracket to the back and threaded it so the back is held in place by two grub screws-
(don’t worry the last pic is blurred, it’s not your eyesight going.)
Hmm things are looking tight-
Decided to flip the main board and give it a test run ( I’ve just taped things in place for now).
Everything works great so far.
Forgot to add that the suspension springs have been blocked up with bits of plasticard to stop the entire thing dropping on it’s belly. The 2nd and 3rd road wheels have had 4mm added and the 4th 5mm and the 5th road wheel has had 6mm added. It worked just fine and the tank sits at about the right height and the suspension still works fine.

 07-09-2009 | 09:07 AM
#4
Joined: Oct 2007
Posts: 349
Likes: 0
Received 0 Likes
on
0 Posts
From: , ON, CANADA
That is a great job... the WSN T34 is a perfect platform for upgrading.... you're going to have one sweet tank when you're finished.
I really want to do one with the 76 turret... one day, perhaps.
Shep
I really want to do one with the 76 turret... one day, perhaps.
Shep
07-09-2009 | 10:27 AM
#5

Senior Member
Thanks for the build thread. I found the T-34 hull needs lots of beefing up. The plastic flexes and twists a lot under load. I ended up cutting some aluminum plate to stiffen it up.
 07-10-2009 | 01:59 AM
#7
Senior Member
My Feedback: (3)
Joined: Dec 2004
Posts: 1,930
Likes: 0
Received 0 Likes
on
0 Posts
From: Ottawa,
ON, CANADA
Guys...
I've found the T-34 I've got has very little suspension throw... about 2-3mm and the tracks are up rubbing on the sponson blocking plate. This ~is~ supposedly one of the old LED units, not the new IR ones, and I seem to remember my other one having much more suspension throw... like a Tamiya. Even my M41 chassis has more throw in the suspension. Do I have to rip out some of the lower suspension stops to let the springs 'lift' it more? Cut off the sponson plates and fab a vertical guard inside the hull? (like the old KT's needed)
I note that this is being checked with the tank dead empty, no battery, not even the upper body/turret on.
Or should I give up, and hand it over to Daryl to 'fix'...
07-10-2009 | 02:01 AM
#8
Senior Member
My Feedback: (3)
Joined: Dec 2004
Posts: 1,930
Likes: 0
Received 0 Likes
on
0 Posts
From: Ottawa,
ON, CANADA
Guys...
I've found the T-34 I've got has very little suspension throw... about 2-3mm and the tracks are up rubbing on the sponson blocking plate. This ~is~ supposedly one of the old LED units, not the new IR ones, and I seem to remember my other one having much more suspension throw... like a Tamiya. Even my M41 chassis has more throw in the suspension. Do I have to rip out some of the lower suspension stops to let the springs 'lift' it more? Cut off the sponson plates and fab a vertical guard inside the hull? (like the old KT's needed)
I note that this is being checked with the tank dead empty, no battery, not even the upper body/turret on.
Does anyone make replacement suspension components/chassis, like they do for the HL's?
Or should I give up, and hand it over to Daryl to 'fix'...
07-10-2009 | 05:32 AM
#9
Thread Starter
Thanks
@Rebellion13 - Making them "better" is all part of the fun.
@borealis - I stuck the shaft in an electric drill and used a file.
@WhiteWolf McBride - This is the old WSN version and the suspension seems OK.
"I note that this is being checked with the tank dead empty, no battery, not even the upper body/turret on." - the batery is in (it's hidden under the small circuit board), I tried it first without the top on then again with the top one (not point putting the top on until I know it worked).
07-10-2009 | 09:05 AM
#10
Looks great! [sm=thumbs_up.gif] I like seeing these T34 resurrections. I had alot of fun with mine.
07-10-2009 | 11:45 AM
#11

Joined: Nov 2005
Posts: 15
Likes: 0
Received 0 Likes
on
0 Posts
From: Plymouth, IN
I see that you did not do any mods to the roadwheels. On the 2 T-34s that I worked on, I used brass tubing to make bushings for all of the roadwheels and for the front idlers. I put tubing on the suspension arms and in the roadwheels themselves. It removes a lot of drag off of the tracks. Also removes any wear from the roadwheels.
07-10-2009 | 08:16 PM
#12

Looks really good. I like that you fixed the turret seperation plane. Got rid of that hard plastic ridge from sticking out.
One comment on the suspension. Mine is a 'low rider too' It happens to these. It's not so much that the springs sag, it's more of a torsional bend on the arms. You will find out after a while, especially if you run the tracks loose, that the tracks will jam against the sponson plates. It has happened to all my T-34's. Your mods should get around that. You need bushed axles on the wheels. Must have. Also, you will notice that the suspension arms are hollow. I filled mine with milliput. It strengthens them considerably.
Looks really good, anxious to see more.
Perry
07-10-2009 | 10:37 PM
#13

Senior Member
Joined: Jul 2006
Posts: 136
Likes: 0
Received 0 Likes
on
0 Posts
From: Rockville, MD
Here is a build one of my members did for me. I've ran it several times at the AAF museum's battlefield. It seems to be holding up pretty good. The gears are the metal replacement ones. The suspension arms are Daryl Turner's machined aluminum ones that he makes and sells. And yes, you really need to beef up the chassis as it has lots of flex to it. I have also had Daryl install an aluminum drive sprocket and steel shaft with ball bearings on the idler as I have snapped two of them off by just running into something. Both of which he makes and sells as well.


