


Hangar 9 60cc Corsair
 08-23-2013, 08:38 AM
#326
Senior Member
Join Date: Nov 2005
Location: Frisco,
TX
Posts: 485
Likes: 0
Received 0 Likes
on
0 Posts
Got mine yesterday. Overall, I'm pretty pleased. The port wing tip doesn't fit very well. Large gap at the front. The wing joiners are true, so it must be the pockets themselves. I think the easiest solution is to put a little bend into the aluminum joiner so the wing tip sits flat against the center section. Also, I'm missing one of the aileron control rods. As I was taking the largest of the three boxes out of its shipping box, I heard the one control rod hit the concrete floor. No telling where the other one came out.
I like the idea of two servos for the flaps. I've never run both sides from one servo. The flaps might have been smoother operating if they use G-10 or something like it, rather than aluminum; a little less friction.


I like the idea of two servos for the flaps. I've never run both sides from one servo. The flaps might have been smoother operating if they use G-10 or something like it, rather than aluminum; a little less friction.


 08-23-2013, 02:07 PM
#329

My Feedback: (1)

Join Date: Oct 2004
Location: STAFFORD,
TX
Posts: 171
Likes: 0
Received 0 Likes
on
0 Posts
not sure about extensions on lights - we ordered exactly what it said in the instruction manual and I'm pretty sure extensions were on that list .
I had someone else instal the lights so I am not sure exactly what it took but I know it was very quick and easy install
I had someone else instal the lights so I am not sure exactly what it took but I know it was very quick and easy install
Last edited by RCHS1; 08-23-2013 at 03:37 PM.
08-23-2013, 06:44 PM
#331
Member
Join Date: Feb 2013
Location: Adelaide, South Australia, AUSTRALIA
Posts: 44
Likes: 0
Received 0 Likes
on
0 Posts
That gap sucks Frisco. Very poor QC. They should at least test fit everything before it is packed. Mine will go back if it's like that.
The lighting extensions are listed in the manual, which can be downloaded from HH or H9. The list includes 2 x 18", 1 x 24" and 2 x 36".
Sean
The lighting extensions are listed in the manual, which can be downloaded from HH or H9. The list includes 2 x 18", 1 x 24" and 2 x 36".
Sean
08-24-2013, 08:31 AM
#332
My Feedback: (1)
Join Date: Oct 2004
Location: STAFFORD,
TX
Posts: 171
Likes: 0
Received 0 Likes
on
0 Posts
Im thinking pinecar graphite dry lube or teflon dry lube might help flaps operate smoother as well -
Frisconick - If you are not in a rush i bet HH would send you a new center section if you reference this thread with your pics.
Frisconick - If you are not in a rush i bet HH would send you a new center section if you reference this thread with your pics.
08-24-2013, 10:23 AM
#333
Senior Member
Join Date: Aug 2008
Location: ADDLESTONESURREY, UNITED KINGDOM
Posts: 321
Likes: 0
Received 0 Likes
on
0 Posts
Hi All.
Took delivery of my "kit" today....Must say very nicely packed in all of the three boxes,nothing loose and so far no "packing-damage" found !!! I did check out my wing attachment to see if all was square.........when the ali spar was fitted and the "wings" slipped on perfectly.......so ok there !!! The finish thus far appears to be very,very good and at the moment no wrinkles showing ( give it time !!! ).
As I already have a FS Corsair cowl ( which I beleive is "moulded" from the T/F plastic one ),I thought that I would compare them both.........they appear to be pretty close in most respects,the FS cowl appears to be slightly larger on dia,but slightly shorter on length and the "cowl-flaps" are not as "open" as the H9 cowl ( which I must sat say has a very nice finish to it ).
I managed to fit my Saito 450R3 in the H9 cowl ( less exhaust ring )..this is the same size as the Saito F84,I also allowed some right thrust,but not any down thrust.......it is tight as expected and the H9 cowl mountings could present a problem whe a collector ring is used,but I think this would not be the case if the 3 seperate exhaust tubes were used.The "fins" on the rocher box covers,could quite easily be "removed",this would give adequate spce between the top ot the valve covers and inner cowl dimension.I know that this has been done when the Saito 450 R3 was used in an early FS cowl as I sure that the later ones are slightly bigger on dia....The FS cowl that I have has plenty of clearance even with the fins on and right thrust put in.
This is just a thought for the thread with respect to anyone who may consider the 450 of F84 as a power option.........I know that there are plenty of great "builders" out there !!!
I have taken some photos,so will try to get them posted.....if I can work out this "new" systen RC Univers has changed to ...!!!
Regards.............Nick (UK).
 08-24-2013, 12:01 PM
#335
My Feedback: (1)
Join Date: Oct 2004
Location: STAFFORD,
TX
Posts: 171
Likes: 0
Received 0 Likes
on
0 Posts
I posted all my pics so far on my information website for easy access:
http://www.rchouston.com/rchs-builds-h9-60cc-corsair-pics.html

The pic below shows the next round of (screws) rivets to replicate - I will use #0 x 3/16 for these once my graphics arrive - Then she will really get cleaned up and looking pretty


http://www.rchouston.com/rchs-builds-h9-60cc-corsair-pics.html
The pic below shows the next round of (screws) rivets to replicate - I will use #0 x 3/16 for these once my graphics arrive - Then she will really get cleaned up and looking pretty
Last edited by RCHS1; 08-25-2013 at 06:54 PM.

 09-02-2013, 03:36 PM
#341
Senior Member
Join Date: Aug 2008
Location: ADDLESTONESURREY, UNITED KINGDOM
Posts: 321
Likes: 0
Received 0 Likes
on
0 Posts
Hi Nick.
Will be starting my build next week,still waiting parts ( probably like everyone else !! ),tail gear,bombs + drop tanks on their way.....but no actuator for the tail mechanism or servoless re-lease as yet :-(
Painted the "scissors" on the main gear ( don't know why Robart did not paint them....gues it's down to $'s again ).
7-77 all run in now,using ( at the moment ) Biela 22" x10,getting around 5800 rpm ( static ),so going to try a 22" x 12...............to lower the rpm and hence allow un-load in the air so as not too exceed 6300 rpm.
Correct me if I'm wrong,but NO dimension from back of prop washer to firewall shown anywhere............so I guess it is mount the cowl and work that out for yourself to get the correct "stand-off's" for whatever power source being used..?
All in all very pleased so far,but a few more items to look at yet..........I see that the fuel tank is already fitted out for petrol ( hence it's small size !! )
Hope everbody's kits are ok and post if any problems found ( like Nick's )???
Regards.................Nick (UK).
Last edited by njmheli; 09-14-2013 at 08:18 AM.
09-02-2013, 06:03 PM
#342
Member
Join Date: Feb 2013
Location: Adelaide, South Australia, AUSTRALIA
Posts: 44
Likes: 0
Received 0 Likes
on
0 Posts
Nick & Nick. Just about to collect mine this week. Saito twin and all the other parts are on the way. I have to finish a Sea Fury before I start on the Corsair, so you'll undoubtedly finish well ahead. Keep the posts coming. I too would like to know the firewall to prop washer distance. I asked this before, but no reply from any of the HH guys. Cheers. Sean
09-03-2013, 06:58 AM
#344
My Feedback: (22)
Join Date: Sep 2002
Location: Monticello ,
IL
Posts: 53
Likes: 0
Received 0 Likes
on
0 Posts
Hey Guys
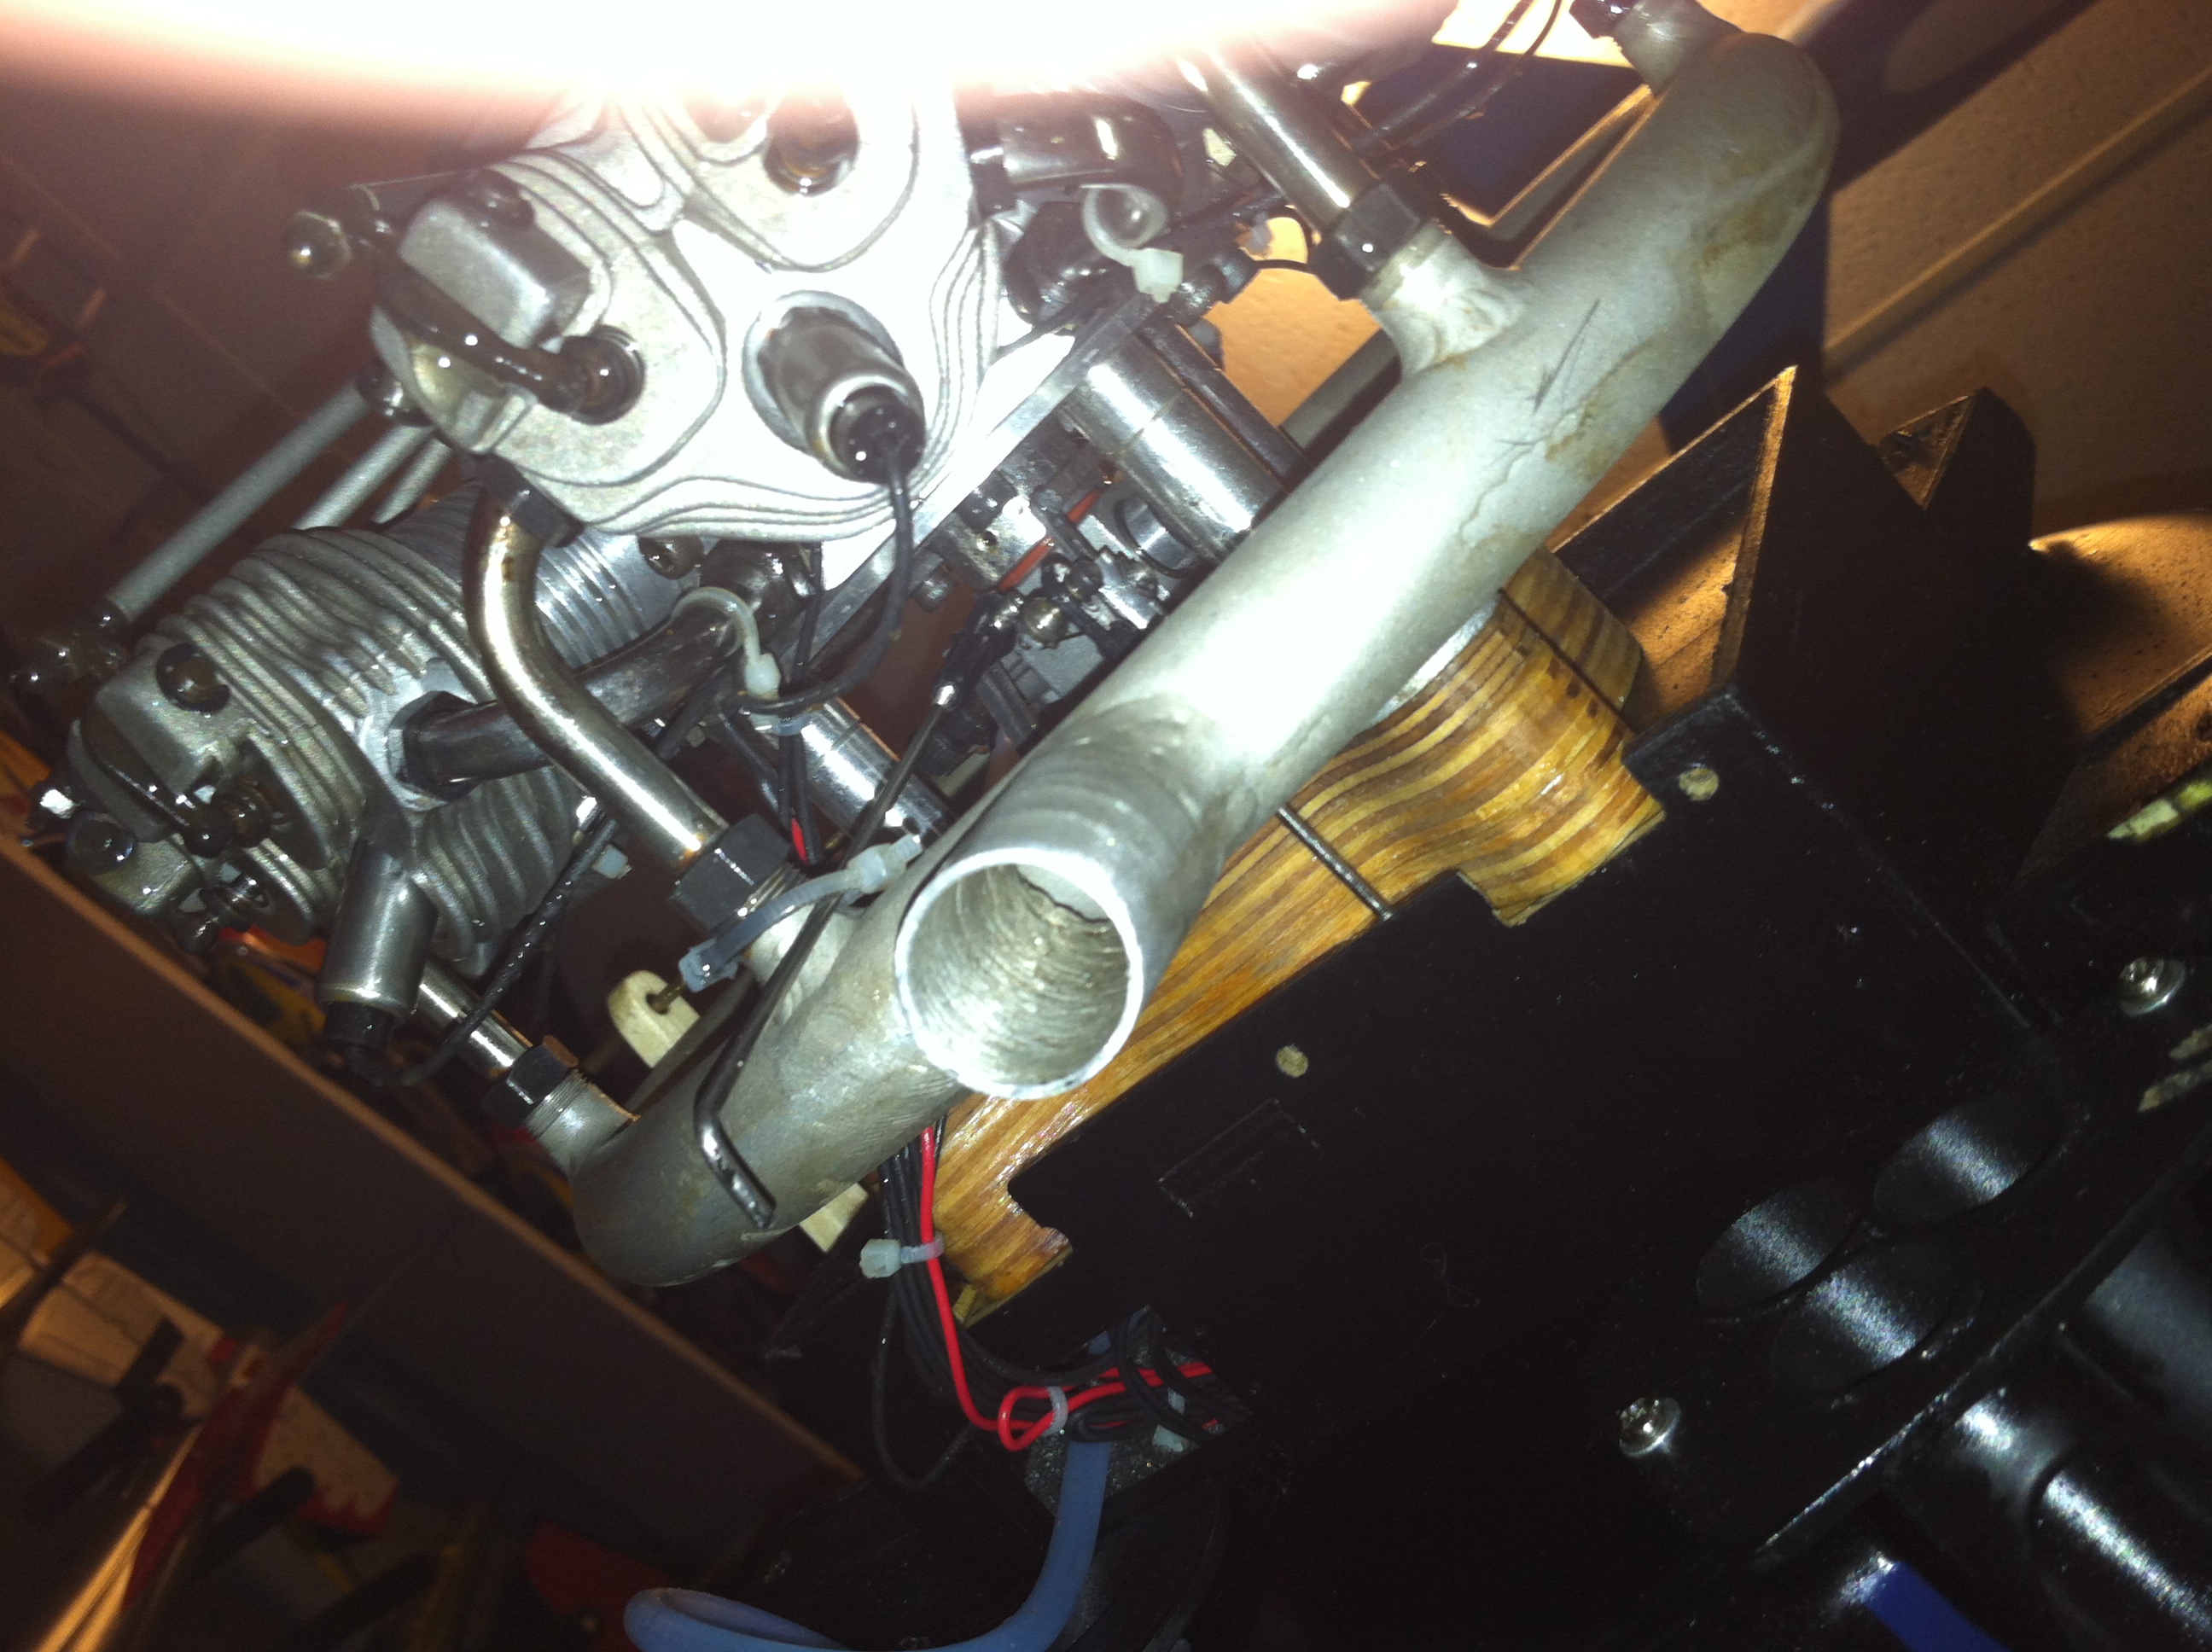
Glad to see that some of you are getting the plane and starting to build it. Here are a few pics from my bird that might help with the motor installs and gear doors. The EVO 777 requires a spacer that is 1inch. The Saito twin does not need any spacers.
I found that the EVO 777 is very happy with a carbon 22 x 12 prop and the FG-57 on a 22x10. The Falcon and Mejzlik both work very well.
I am also running Rich's Brew fuel on the 777. 10% nitro and 9% oil.
Sorry for the images of the radial. I took them on my phone
09-03-2013, 07:02 AM
#345
My Feedback: (22)
Join Date: Sep 2002
Location: Monticello ,
IL
Posts: 53
Likes: 0
Received 0 Likes
on
0 Posts
Here are the pics of the Doors. On the mains I used the Spektrum wing servos and on the tailwheel the doors are attached to the retract unit using the wire from a sonic tronics hinge kit. All the part numbers are in the manual. I also painted the tailwheel retract unit to match the mains.


Hope this helps some!
Hope this helps some!
Last edited by D PAYNE; 09-03-2013 at 07:04 AM.
09-03-2013, 07:11 AM
#346
Senior Member
Join Date: Nov 2005
Location: Frisco,
TX
Posts: 485
Likes: 0
Received 0 Likes
on
0 Posts
Looks great. I just finished putting gear doors on a Meister P-47. Not sure I want to go through that beating again. I may just do the strut covers and rear door.
09-03-2013, 07:32 PM
#348
Senior Member
Join Date: Nov 2005
Location: Frisco,
TX
Posts: 485
Likes: 0
Received 0 Likes
on
0 Posts
From the firewall on the motor box to the cowl rim is 6.25" on the right side (from the pilot's view). So the prop hub will need to be more than that from the firewall.
09-03-2013, 09:26 PM
#349
Hey Guys
Glad to see that some of you are getting the plane and starting to build it. Here are a few pics from my bird that might help with the motor installs and gear doors. The EVO 777 requires a spacer that is 1inch. The Saito twin does not need any spacers.
I found that the EVO 777 is very happy with a carbon 22 x 12 prop and the FG-57 on a 22x10. The Falcon and Mejzlik both work very well.
I am also running Rich's Brew fuel on the 777. 10% nitro and 9% oil.
Sorry for the images of the radial. I took them on my phone
09-04-2013, 05:46 AM
#350
My Feedback: (22)
Join Date: Sep 2002
Location: Monticello ,
IL
Posts: 53
Likes: 0
Received 0 Likes
on
0 Posts
Cristian2fast4you
I don't think that the 22x10 3 blade will work. The diameter usually goes down when adding a blade and normally the pitch needs to increase. The radials will work well with a 3 blade but the problem I have found is finding a good 3 blade prop with the correct diameter and enough pitch. I think to get good performance and speed out of the combination you will need a 20 or 21" 3 blade prop with around 14" of pitch maybe even 16.... I have not found that prop to try yet unless you want to spend the money for a Solo. They make great props and I think that you could get a good working solution with that prop because it is adjustable.
I don't think that the 22x10 3 blade will work. The diameter usually goes down when adding a blade and normally the pitch needs to increase. The radials will work well with a 3 blade but the problem I have found is finding a good 3 blade prop with the correct diameter and enough pitch. I think to get good performance and speed out of the combination you will need a 20 or 21" 3 blade prop with around 14" of pitch maybe even 16.... I have not found that prop to try yet unless you want to spend the money for a Solo. They make great props and I think that you could get a good working solution with that prop because it is adjustable.