


Top RC Zero from Gator R/C


 06-01-2016, 11:45 AM
#254

Well... for those interested, I couldn't solve my xport damage issue, and since my LHS didn't seem to be interested in providing customer service and accept one of the solution provided, the Zero was returned to them...
So, it looks like no Zero for me at the moment. Which is a pity, since I since it is a beautiful shape in the sky, of very good quality, and above all, quite different to those Spits, Mustangs and what have you...
Have hours of fun and pleasure with yours, looked like a very satisfying model to me ;-)
Last edited by DeeCee 57; 06-01-2016 at 11:51 AM.
06-13-2016, 01:44 AM
#255
 06-14-2016, 06:45 PM
#256

My Feedback: (41)
https://www.youtube.com/watch?v=T6-t...ature=youtu.be
Now the video's are starting to roll in.
This from Jose Vergara in Chile.
He bought the plane from me. His reports are that he's thrilled with the in air performance. On Yotube there's a number of videos from him.
One shows how they got an Evolution 77 to fit.
Thanks Jose. Have fun.
Mike Mueller
Now the video's are starting to roll in.
This from Jose Vergara in Chile.
He bought the plane from me. His reports are that he's thrilled with the in air performance. On Yotube there's a number of videos from him.
One shows how they got an Evolution 77 to fit.
Thanks Jose. Have fun.
Mike Mueller
07-15-2016, 12:55 PM
#257

Join Date: Jul 2016
Posts: 69
Likes: 0
Received 0 Likes
on
0 Posts
Hey guys. Just purchased a Top RC Zero from Mike today. He is one cool cat. Would anyone be able to recommend me a place where I can purchase a cg tool for these kind of giant scale models? Thanks in advance.
07-22-2016, 08:40 AM
#259
Join Date: Jul 2016
Posts: 69
Likes: 0
Received 0 Likes
on
0 Posts
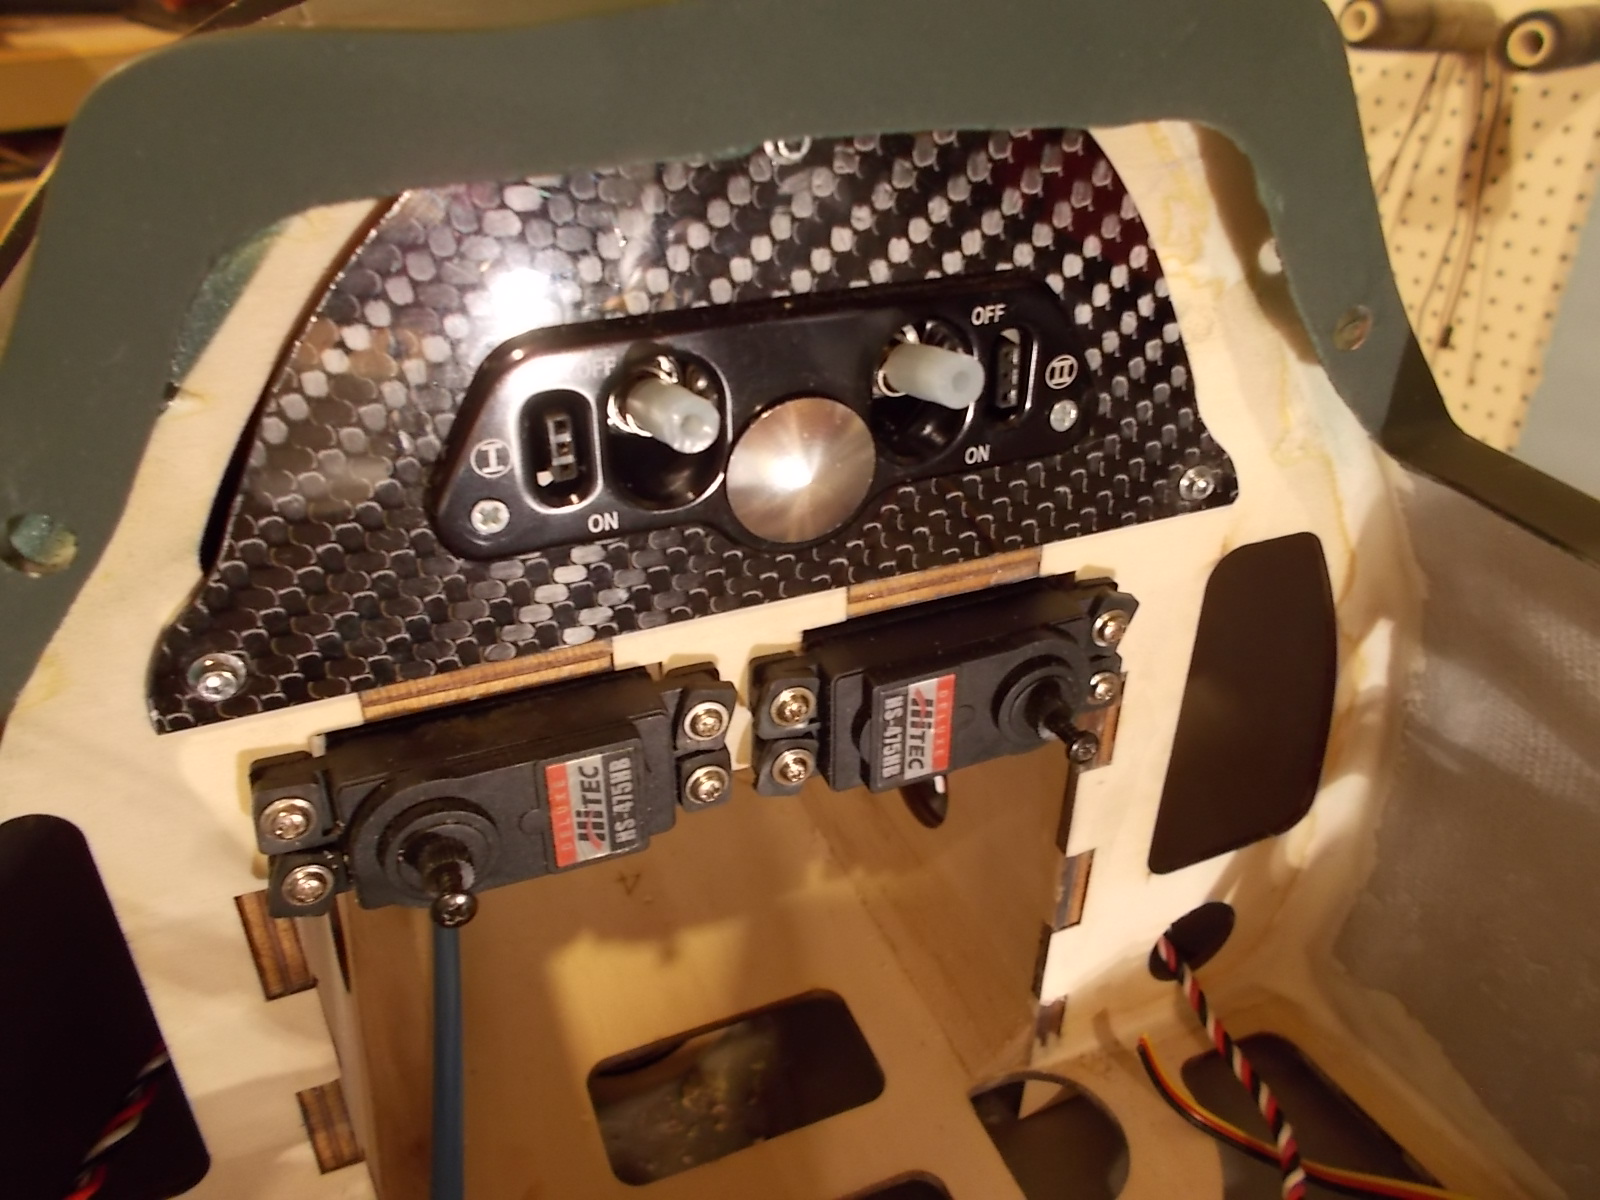
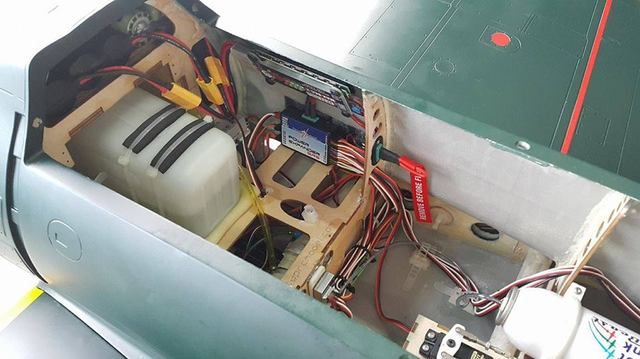
I did some mounting of the other switches and receiver. Because of the size of the Smart fly module I had to mount the receiver down out of the way (and a bit more to the rear than I would have liked). I had to keep most of that tray clear or it would interfere with the front floor of the scale cockpit. For switches I have the two for the main receiver batteries mounted on the panel shown earlier, and one on the front floor for the ignition battery and charge. One more switch goes to the smart fly module, and that's mounted to allow it to be switched from outside. If you hit that switch it turns the receiver and ignition off.
07-22-2016, 09:03 AM
#261
Join Date: Jul 2016
Posts: 69
Likes: 0
Received 0 Likes
on
0 Posts
I was planning on using 2x life batteries (2s 2400mah) for the receiver. These two batteries will be hooked up with a Miracle Dual switch.
Another Life 2s 1300mah for the engine ignition, and a separate Life 2s 1300mah for the landing gear. These two batteries will be hooked up with another Miracle Dual switch. I figure this will provide some redundancy and limit failures.
Too, where is everyone placing their fuel dots?
Another Life 2s 1300mah for the engine ignition, and a separate Life 2s 1300mah for the landing gear. These two batteries will be hooked up with another Miracle Dual switch. I figure this will provide some redundancy and limit failures.
Too, where is everyone placing their fuel dots?
07-22-2016, 09:31 AM
#262
I had a smart-fly Power Expander sport Plus laying around, so I used it. It provides dual battery switching, impedance matching for the servo lines, and an optical ignition kill. It's not really needed. You can use a simple kill switch like the DLE. If you want dual batteries, there are even receivers that handle that. I don't think it's needed though. A battery is a very reliable device provided you have your act together when charging.
Because I have the smart-fly module, I was able to power the retracts directly off of one of the receiver batteries. If the retracts kill that battery, the smart fly will switch the receiver over to the other without an issue. Of course it's just fine to use a separate battery for the retracts and one for the receiver (plus one for the ignition).
I mounted my fuel dot on the dual switch under the hatch. I think I would have liked it better mounted externally, but it's been working OK.
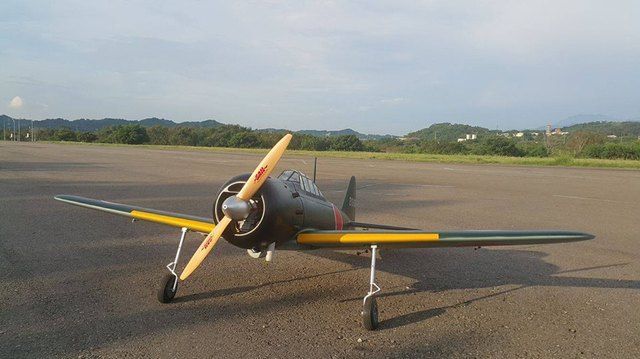
Photo of the switch, and my Zero at the Show-me Warbird event in Missouri.

Because I have the smart-fly module, I was able to power the retracts directly off of one of the receiver batteries. If the retracts kill that battery, the smart fly will switch the receiver over to the other without an issue. Of course it's just fine to use a separate battery for the retracts and one for the receiver (plus one for the ignition).
I mounted my fuel dot on the dual switch under the hatch. I think I would have liked it better mounted externally, but it's been working OK.
Photo of the switch, and my Zero at the Show-me Warbird event in Missouri.
07-23-2016, 12:26 PM
#263
Has anyone else had trouble with the getting the main wing spar into the wing and then into the fuselage? I've tried several ways...constant twisting...very sticky...almost like the aluminum spar tube is too wide...Mike? Can you help?
Jim
Jim
 07-23-2016, 01:00 PM
#265
I need two strong people...one to hold...one to push.
Do you put the main spar in the wing first...then slide into the fuselage?
07-23-2016, 01:58 PM
#266
They will get broken in over time and become smoother when assembling.
07-27-2016, 06:59 PM
#268

Join Date: Jun 2015
Posts: 7
Likes: 0
Received 0 Likes
on
0 Posts
Hi Guys
I'm not an excellent builder.
Just wanted to share my experience.
It is good model airplane...easy to finish & easy to fly
but use DJ-72cc Lightweight Engine
if reference manual It is must to add a lot of Lead block.
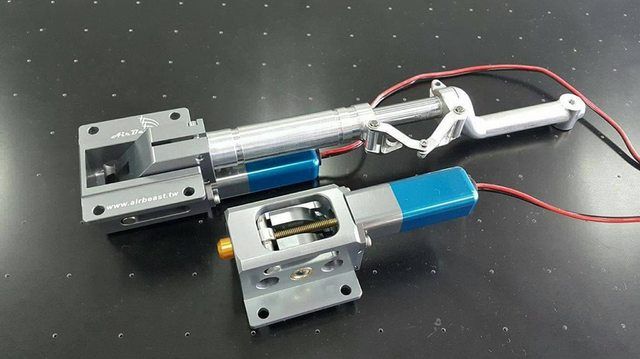
the landing gear I use Taiwan "AirBeast Main Air- Hydraulic Oleo Legs 175-16-49"
It no Spring use Compressed air to change elastic force with the body weight.
https://www.youtube.com/watch?v=O-CWl5nHB2I


https://www.youtube.com/watch?v=G-33iGwmp80
I'm not an excellent builder.
Just wanted to share my experience.
It is good model airplane...easy to finish & easy to fly
but use DJ-72cc Lightweight Engine
if reference manual It is must to add a lot of Lead block.
the landing gear I use Taiwan "AirBeast Main Air- Hydraulic Oleo Legs 175-16-49"
It no Spring use Compressed air to change elastic force with the body weight.
https://www.youtube.com/watch?v=O-CWl5nHB2I
https://www.youtube.com/watch?v=G-33iGwmp80
07-28-2016, 10:08 AM
#269
My Feedback: (41)
Nice flying video Okimo.
Jim on the tubes twisting when installing seems to do the trick for me. They wear in and I suspect that is why they start out tight. Sanding with 400 grit sometimes cleans them off enough to make a difference.
I'm down to two Zeros in stock. Have more coming in about two to three months.
As people get more and more familiar with the value of the TopRCModel products we can see the increase in sales.
It's been a process but fun to watch it take hold.
Thanks for the support we have received. This sport has the best of the best people in the world.
Mike Mueller
07-28-2016, 01:49 PM
#270
Join Date: Jul 2016
Posts: 69
Likes: 0
Received 0 Likes
on
0 Posts
I have a Spektrum DX9 tx and is planning to purchase the Spektrum 9 channel AS3X receiver. Will that be sufficient for this aircraft will all the flaps, ailerons, elevator, rudder, throttle, landing gears, clam shell doors?
08-01-2016, 03:13 PM
#272
Nice flying video Okimo.
Jim on the tubes twisting when installing seems to do the trick for me. They wear in and I suspect that is why they start out tight. Sanding with 400 grit sometimes cleans them off enough to make a difference.
I'm down to two Zeros in stock. Have more coming in about two to three months.
As people get more and more familiar with the value of the TopRCModel products we can see the increase in sales.
It's been a process but fun to watch it take hold.
Thanks for the support we have received. This sport has the best of the best people in the world.
Mike Mueller
Jim on the tubes twisting when installing seems to do the trick for me. They wear in and I suspect that is why they start out tight. Sanding with 400 grit sometimes cleans them off enough to make a difference.
I'm down to two Zeros in stock. Have more coming in about two to three months.
As people get more and more familiar with the value of the TopRCModel products we can see the increase in sales.
It's been a process but fun to watch it take hold.
Thanks for the support we have received. This sport has the best of the best people in the world.
Mike Mueller
Baby powder helped a lot.
08-18-2016, 05:52 PM
#274
Hey Builders,
I'm getting ready to glue in the rudder. Things look tight inside the tail wheel area. Before I finalize and glue...permanently...any thoughts? Did you all use the existing hardware?
Nervous Jim...
I'm getting ready to glue in the rudder. Things look tight inside the tail wheel area. Before I finalize and glue...permanently...any thoughts? Did you all use the existing hardware?
Nervous Jim...
08-19-2016, 07:31 PM
#275
I have lost track , but I have about 25-35 flights on mine to date. I am bringing it back to the shop for an engine valve check ( EVO 777) and add more detail.
Last edited by TimD.; 08-19-2016 at 07:36 PM.