TopRCModel FW-190
 06-09-2020, 02:09 PM
#876
i also decided to make the rudder removable; just in case i ever had to work on the retract, i wanted some kind of access other than going through the tailwheel location. I found some aluminum hinge points from Vogelsang https://www.aeroscale.shop/collections/hinges. There is a E-clip that can be removed that allows the hinges to separate.
Last edited by jraycut; 06-09-2020 at 04:06 PM.
 06-09-2020, 02:18 PM
#877
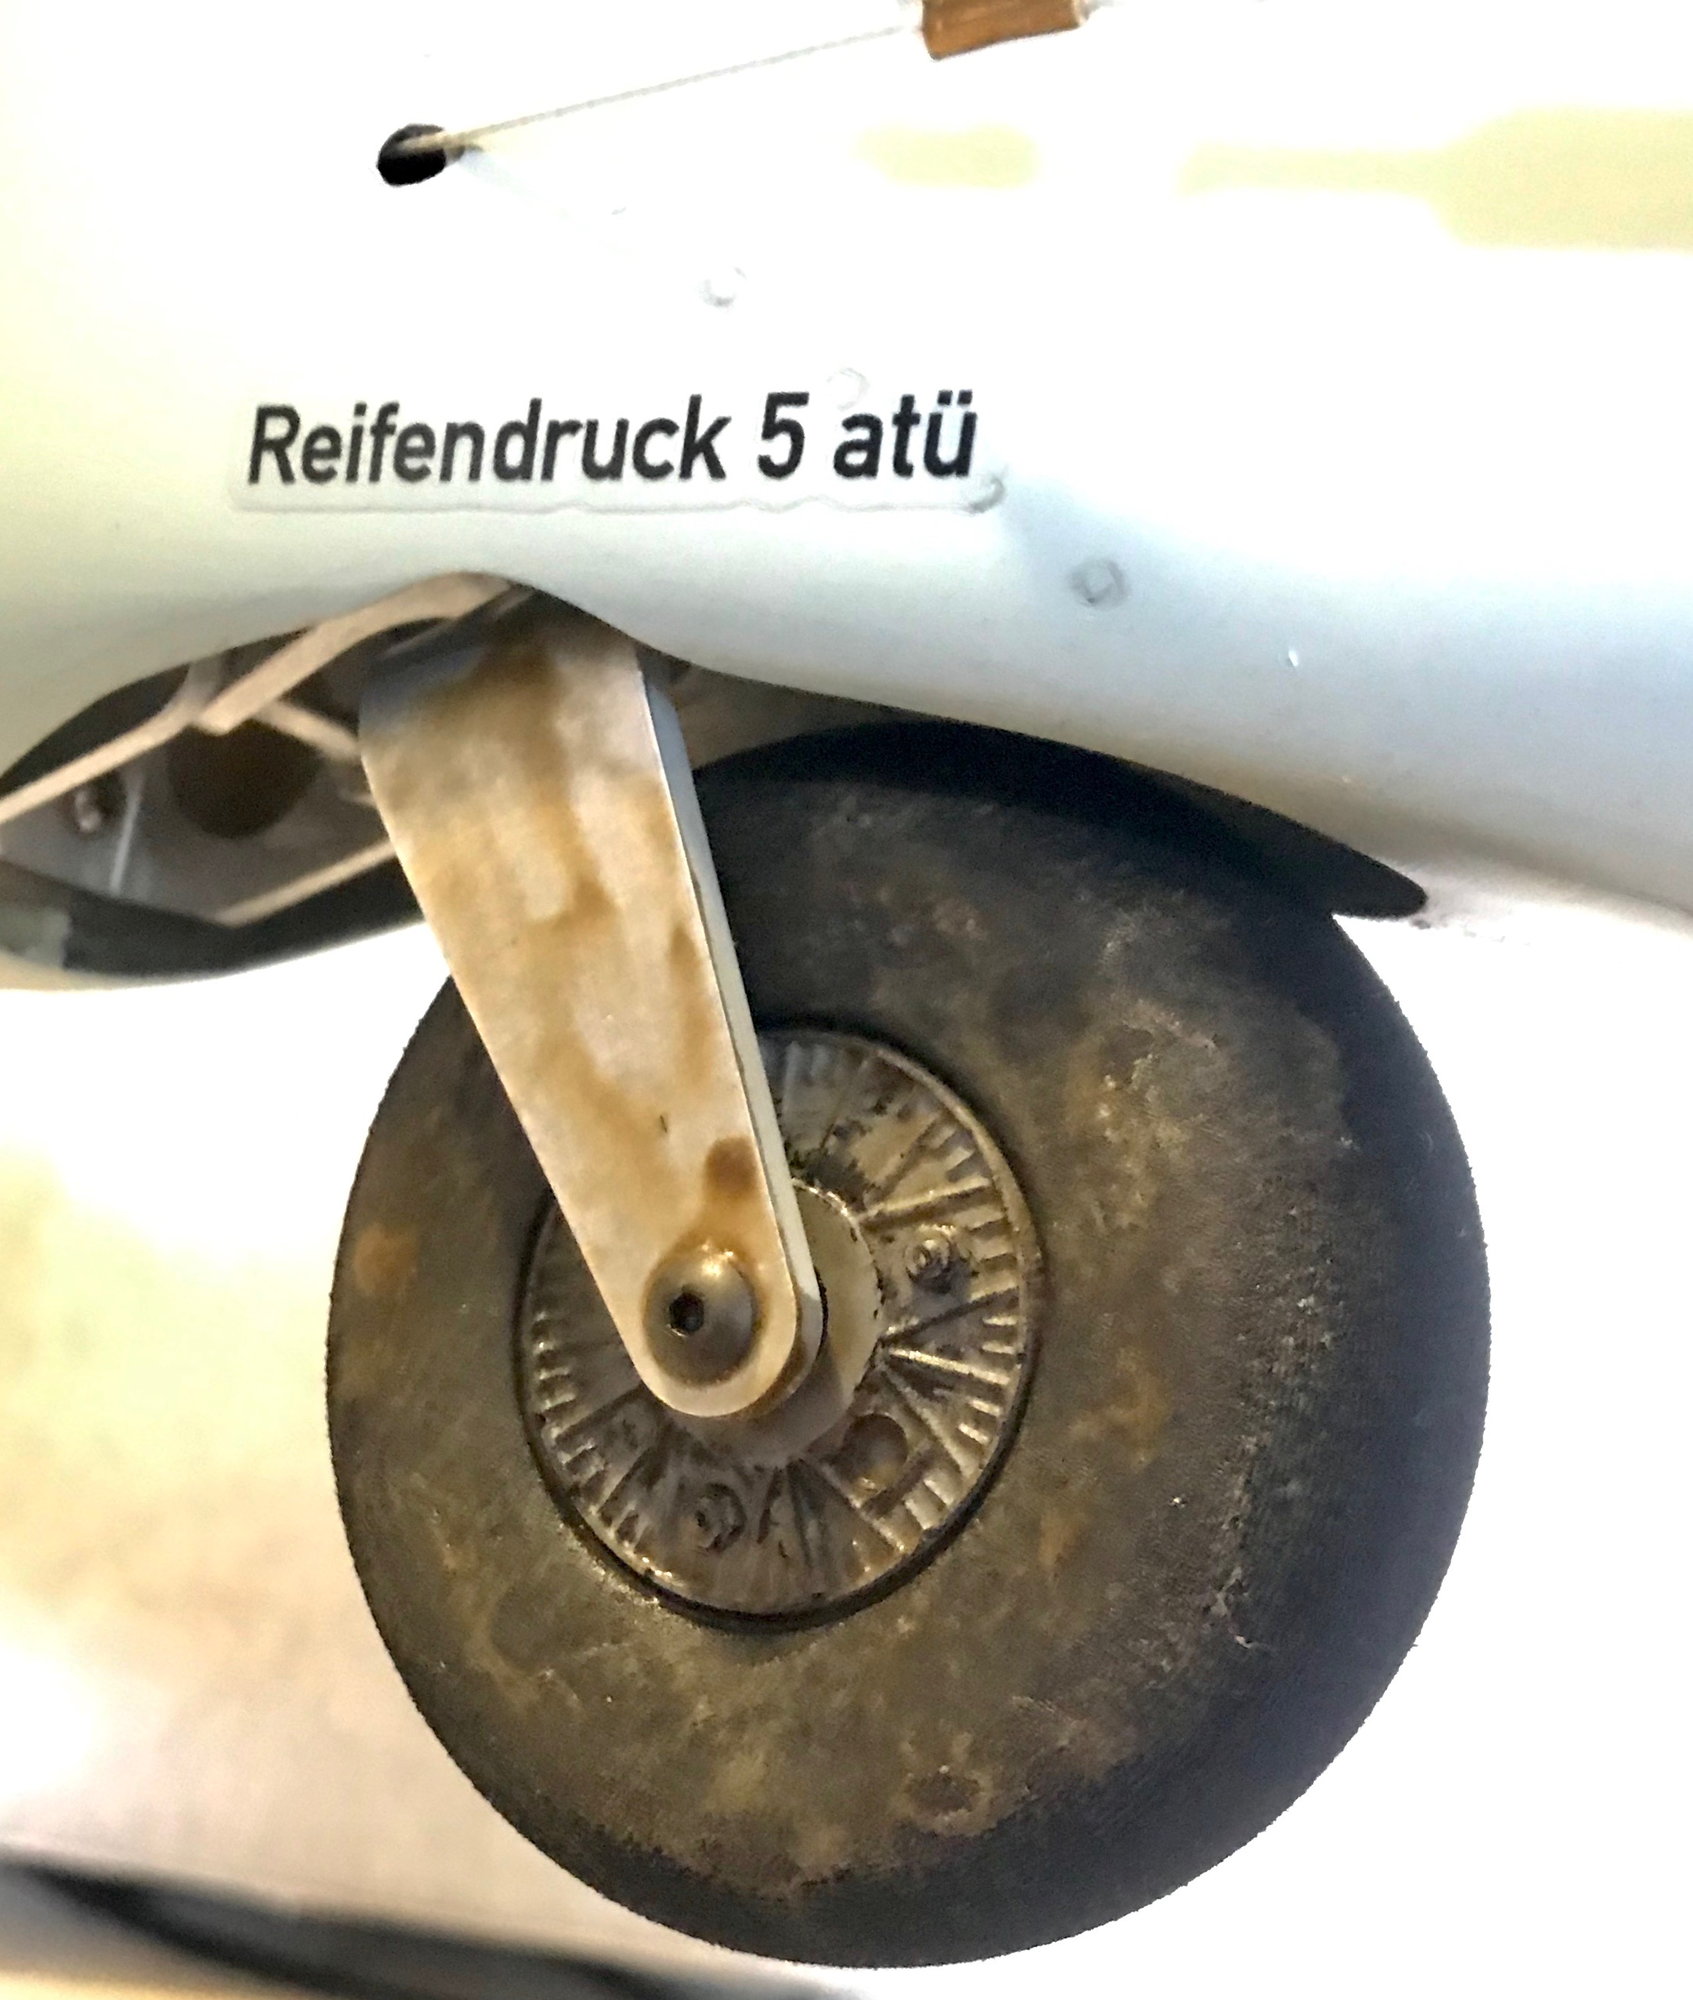
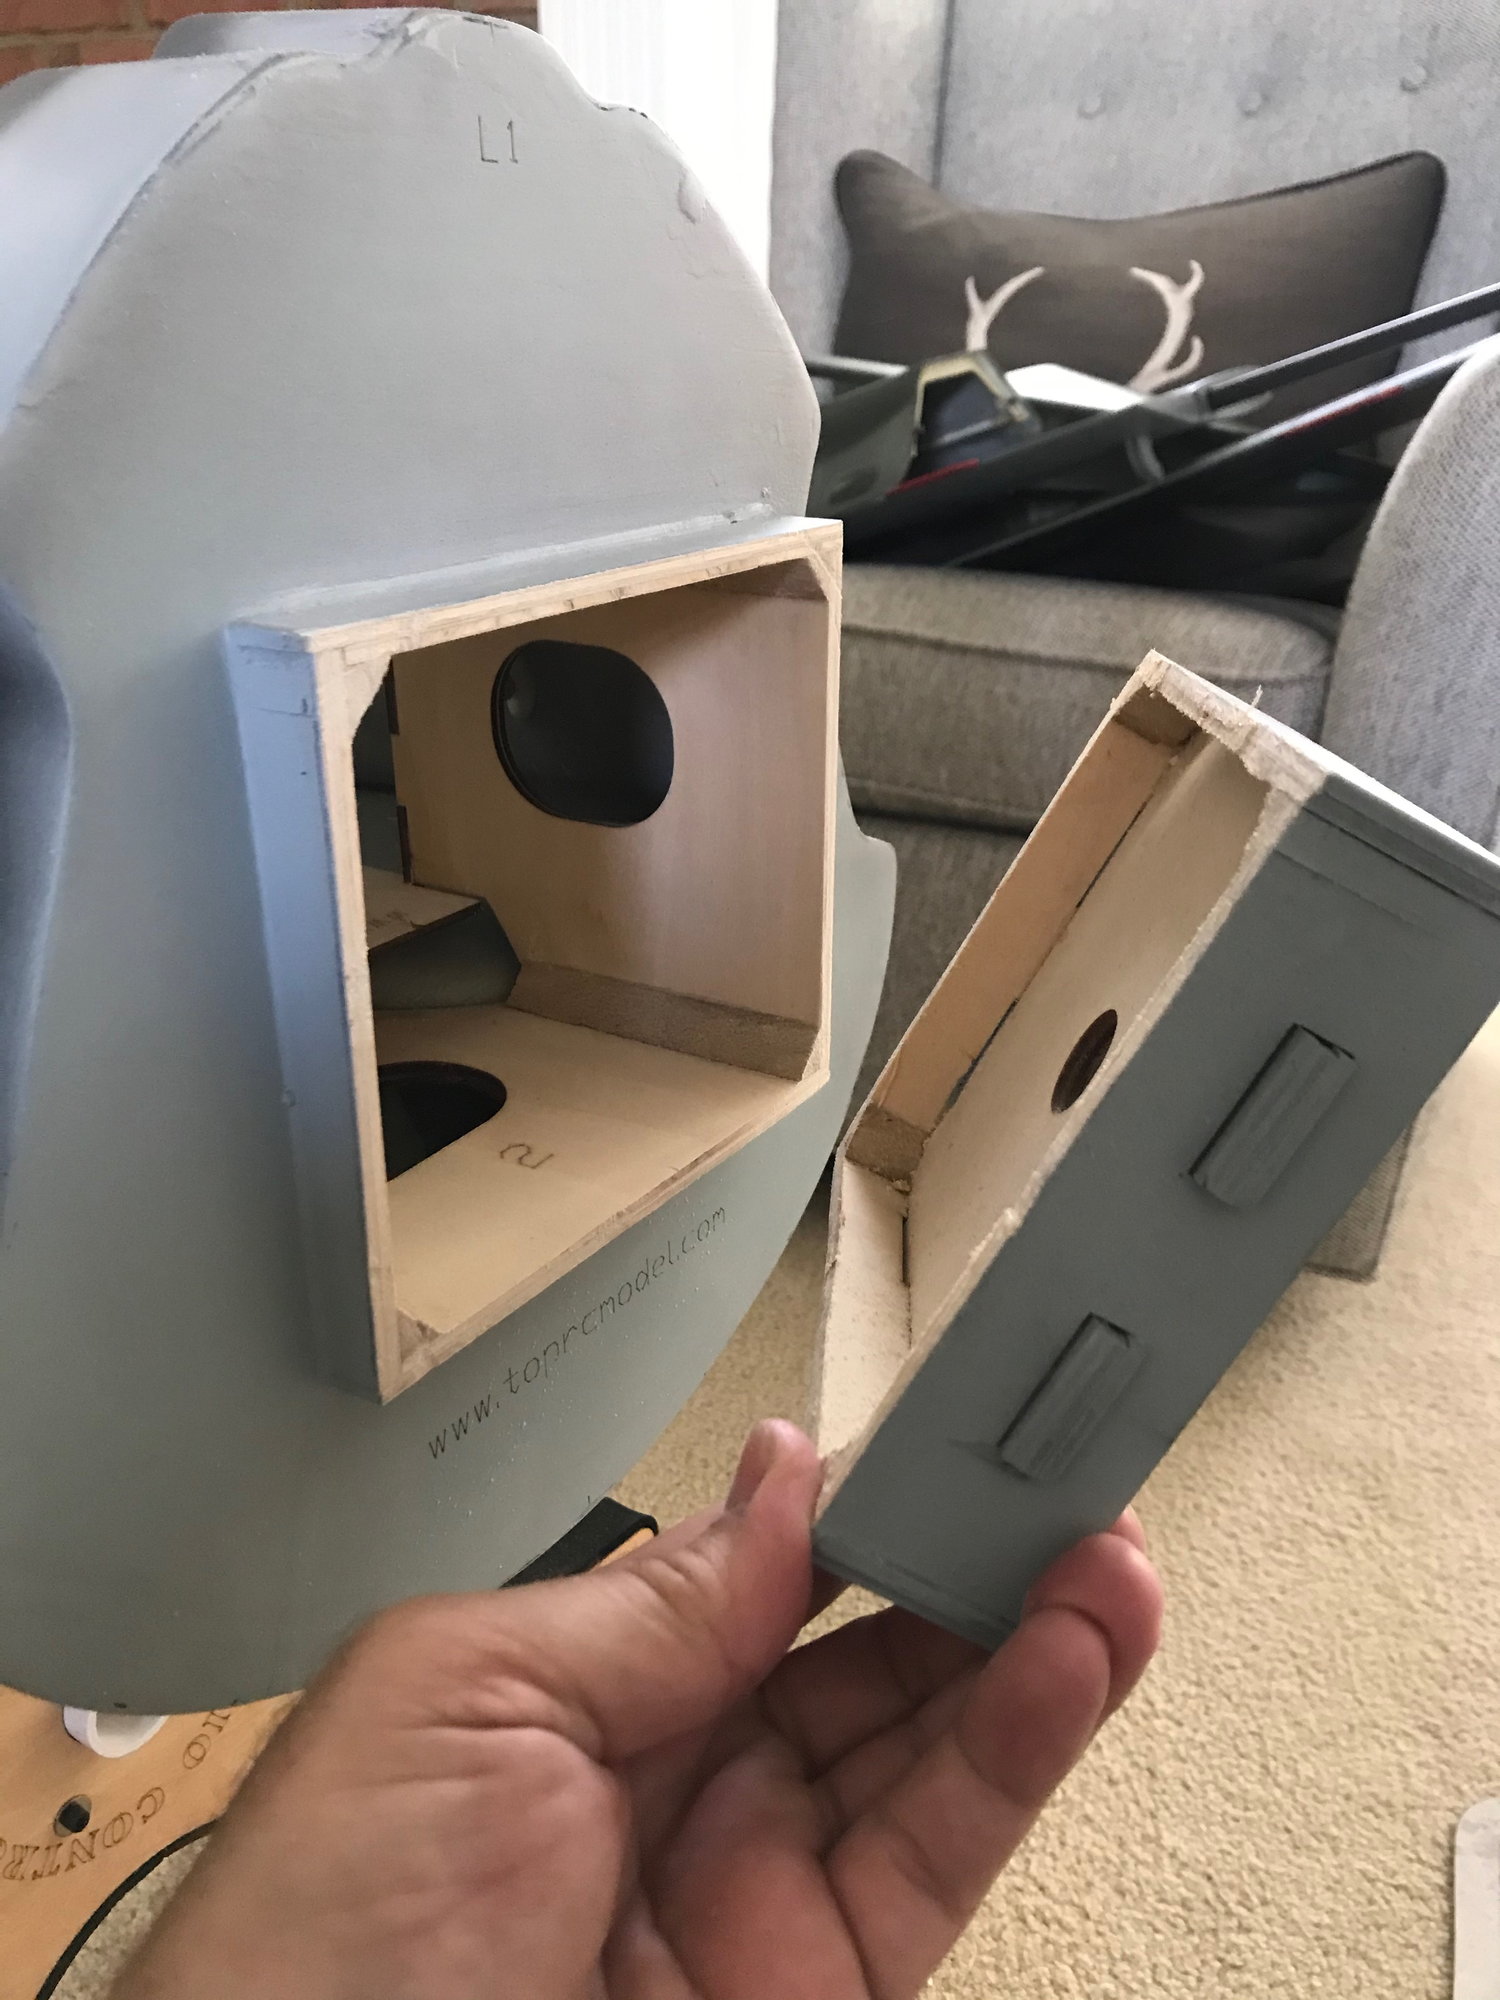
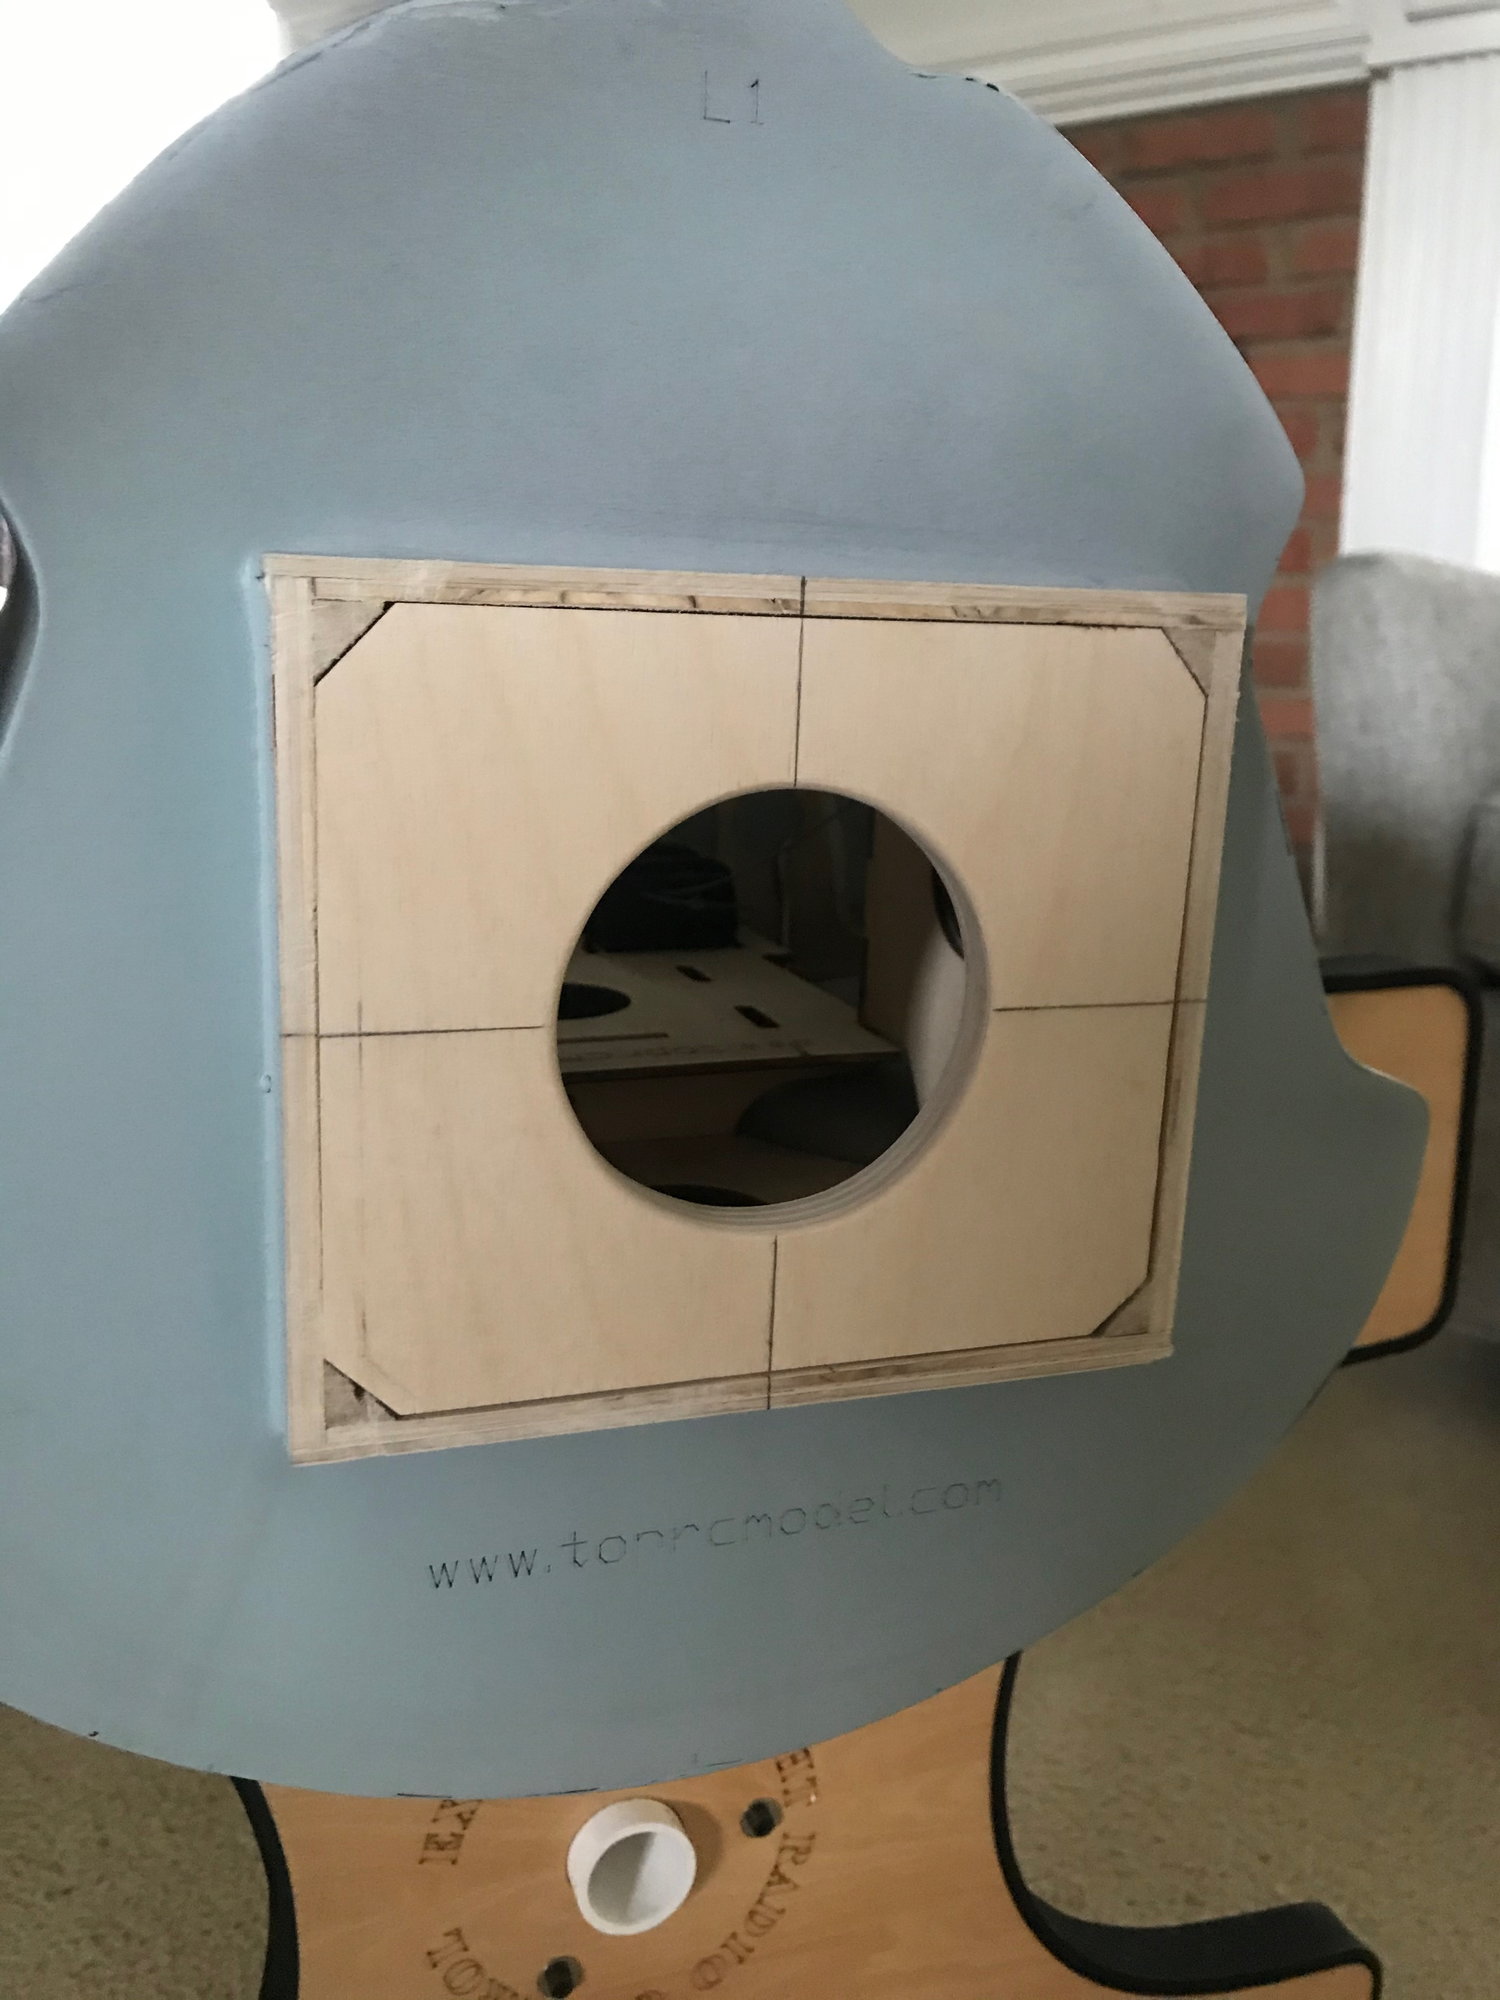
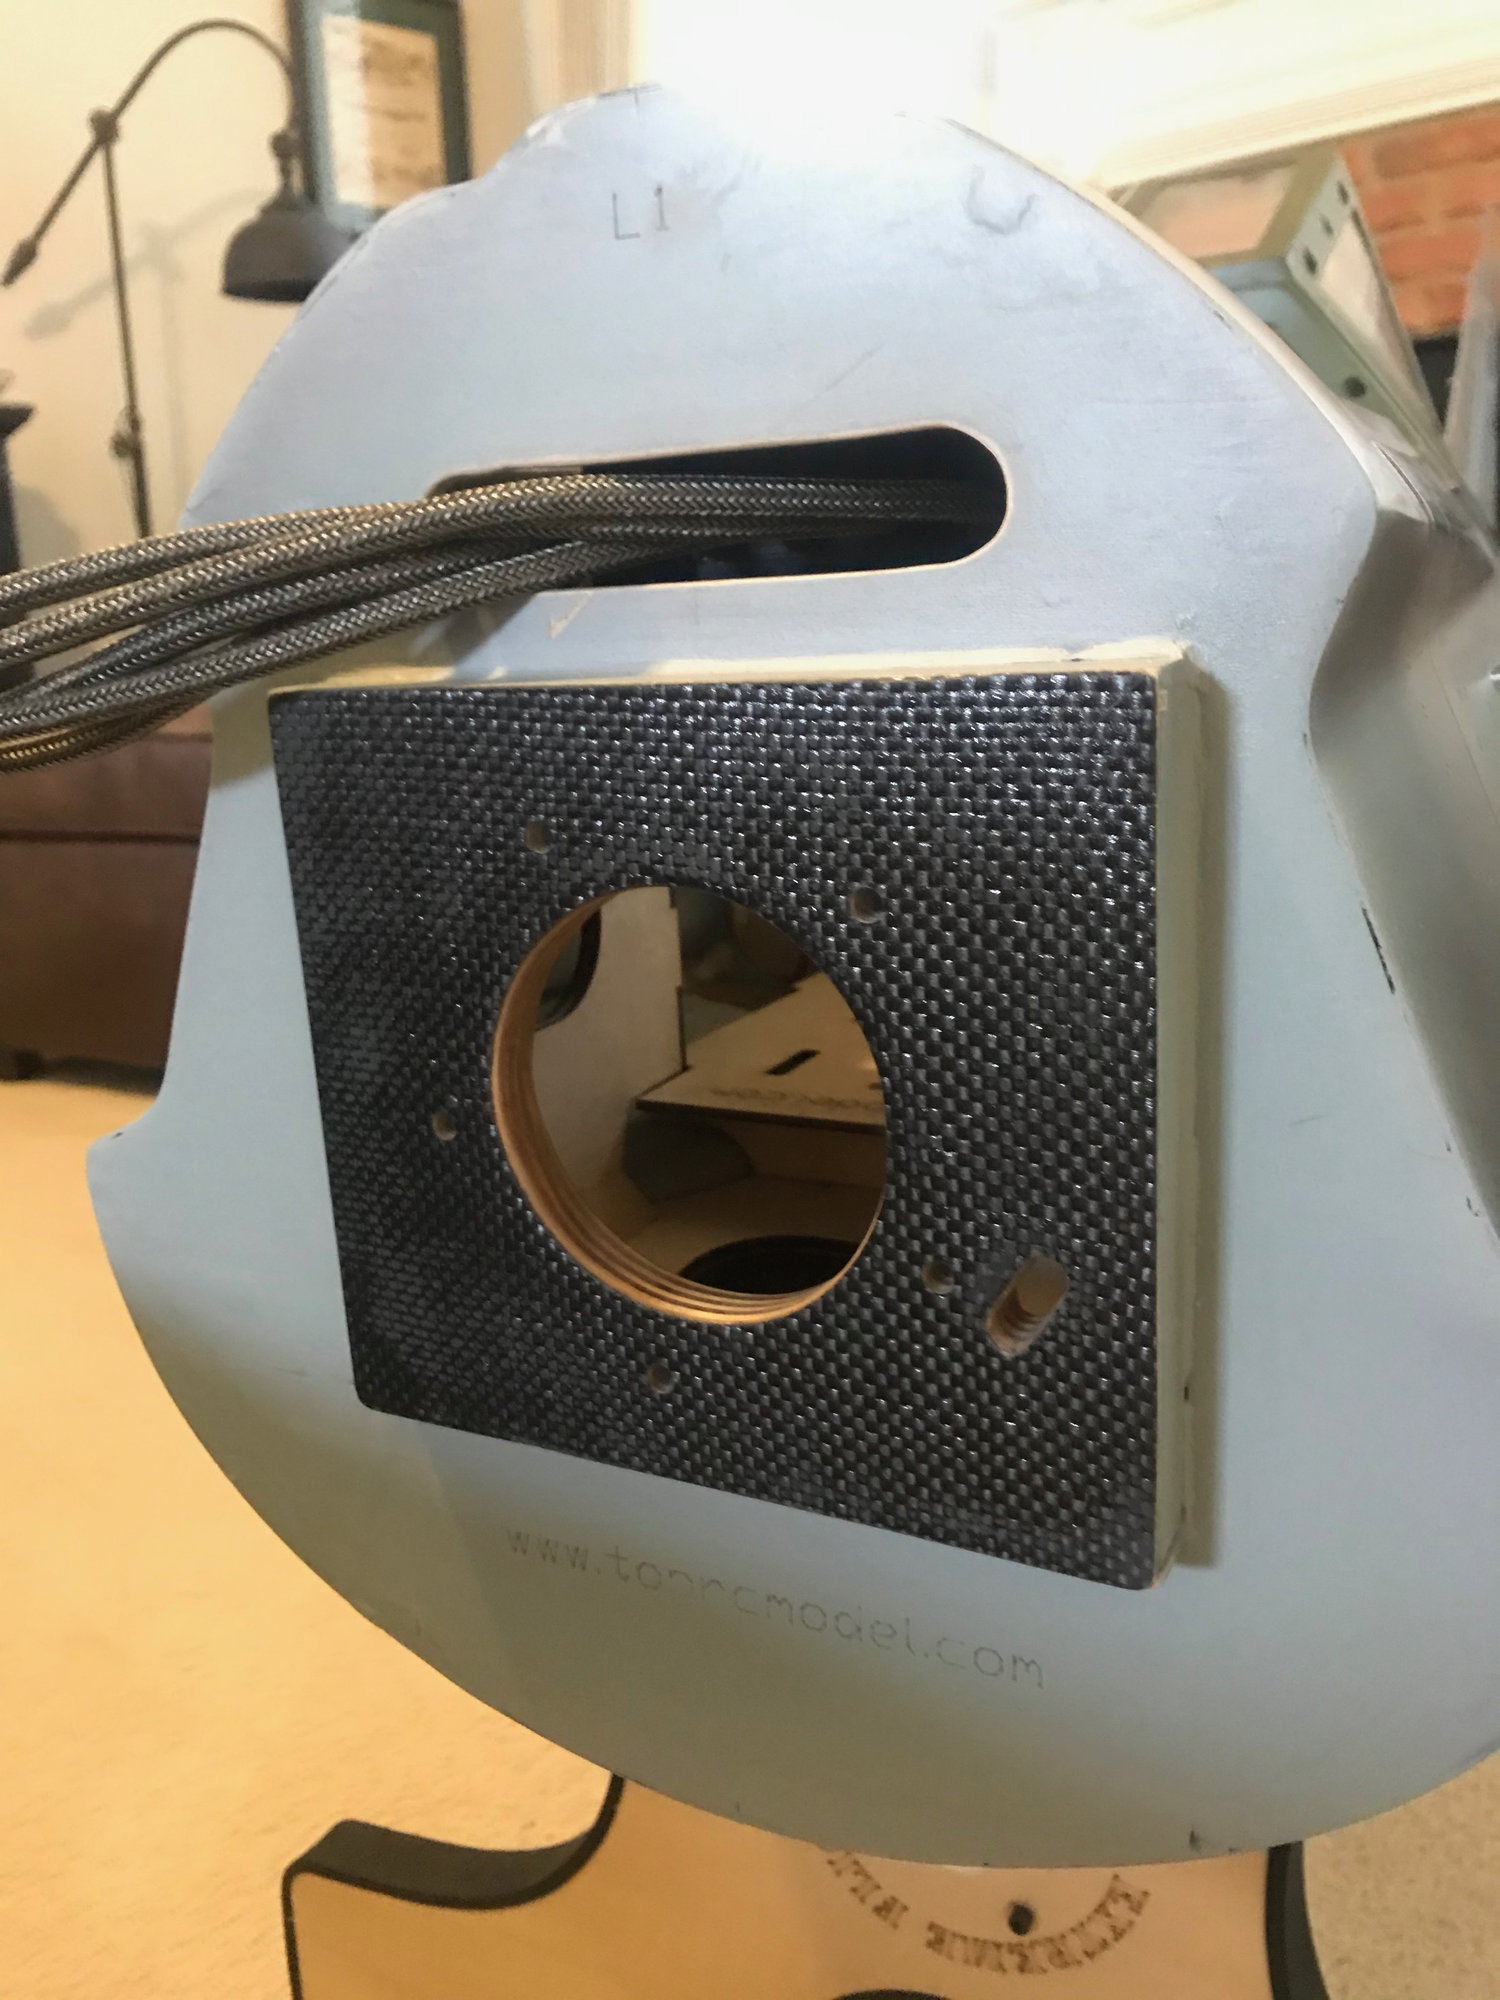
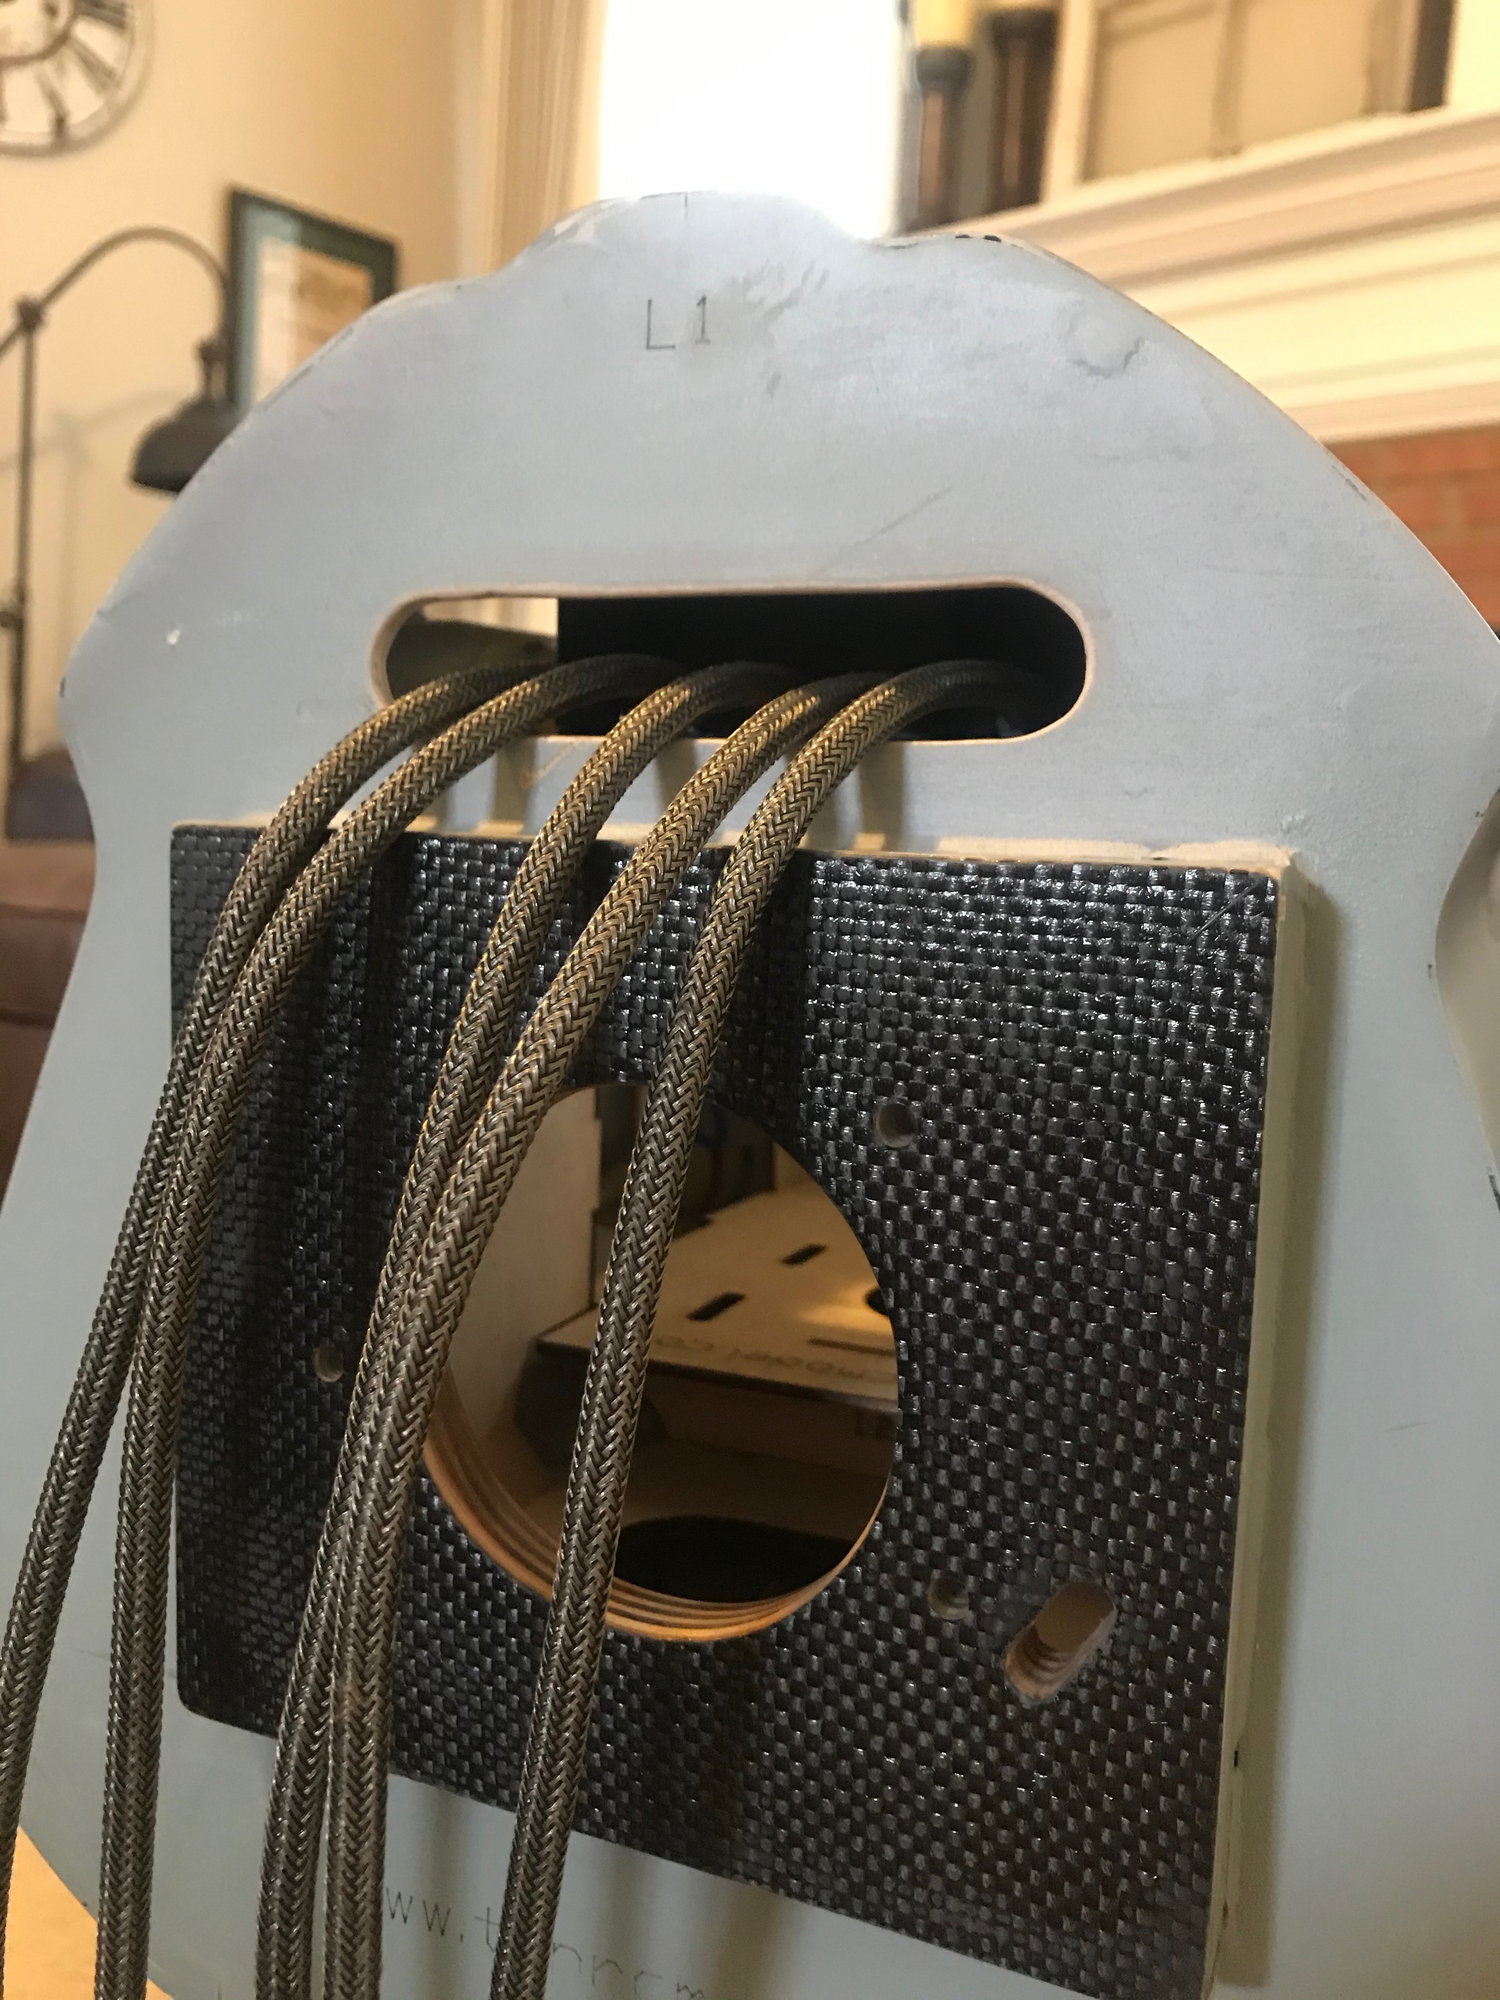
With the former installed, retract located and steering cables ran. I'm at the point where I have to locate the exit holes for the rudder cables. I also want to mention that I deviated from using the nyrod locations in the aft former for the steering cables to pass through. I decided to drill some holes 3/8" above the retract mount and then slot the former (need to clean them up a little more) to allow the cables to move freely up and down.
Last edited by jraycut; 06-09-2020 at 04:03 PM.
06-09-2020, 02:27 PM
#878
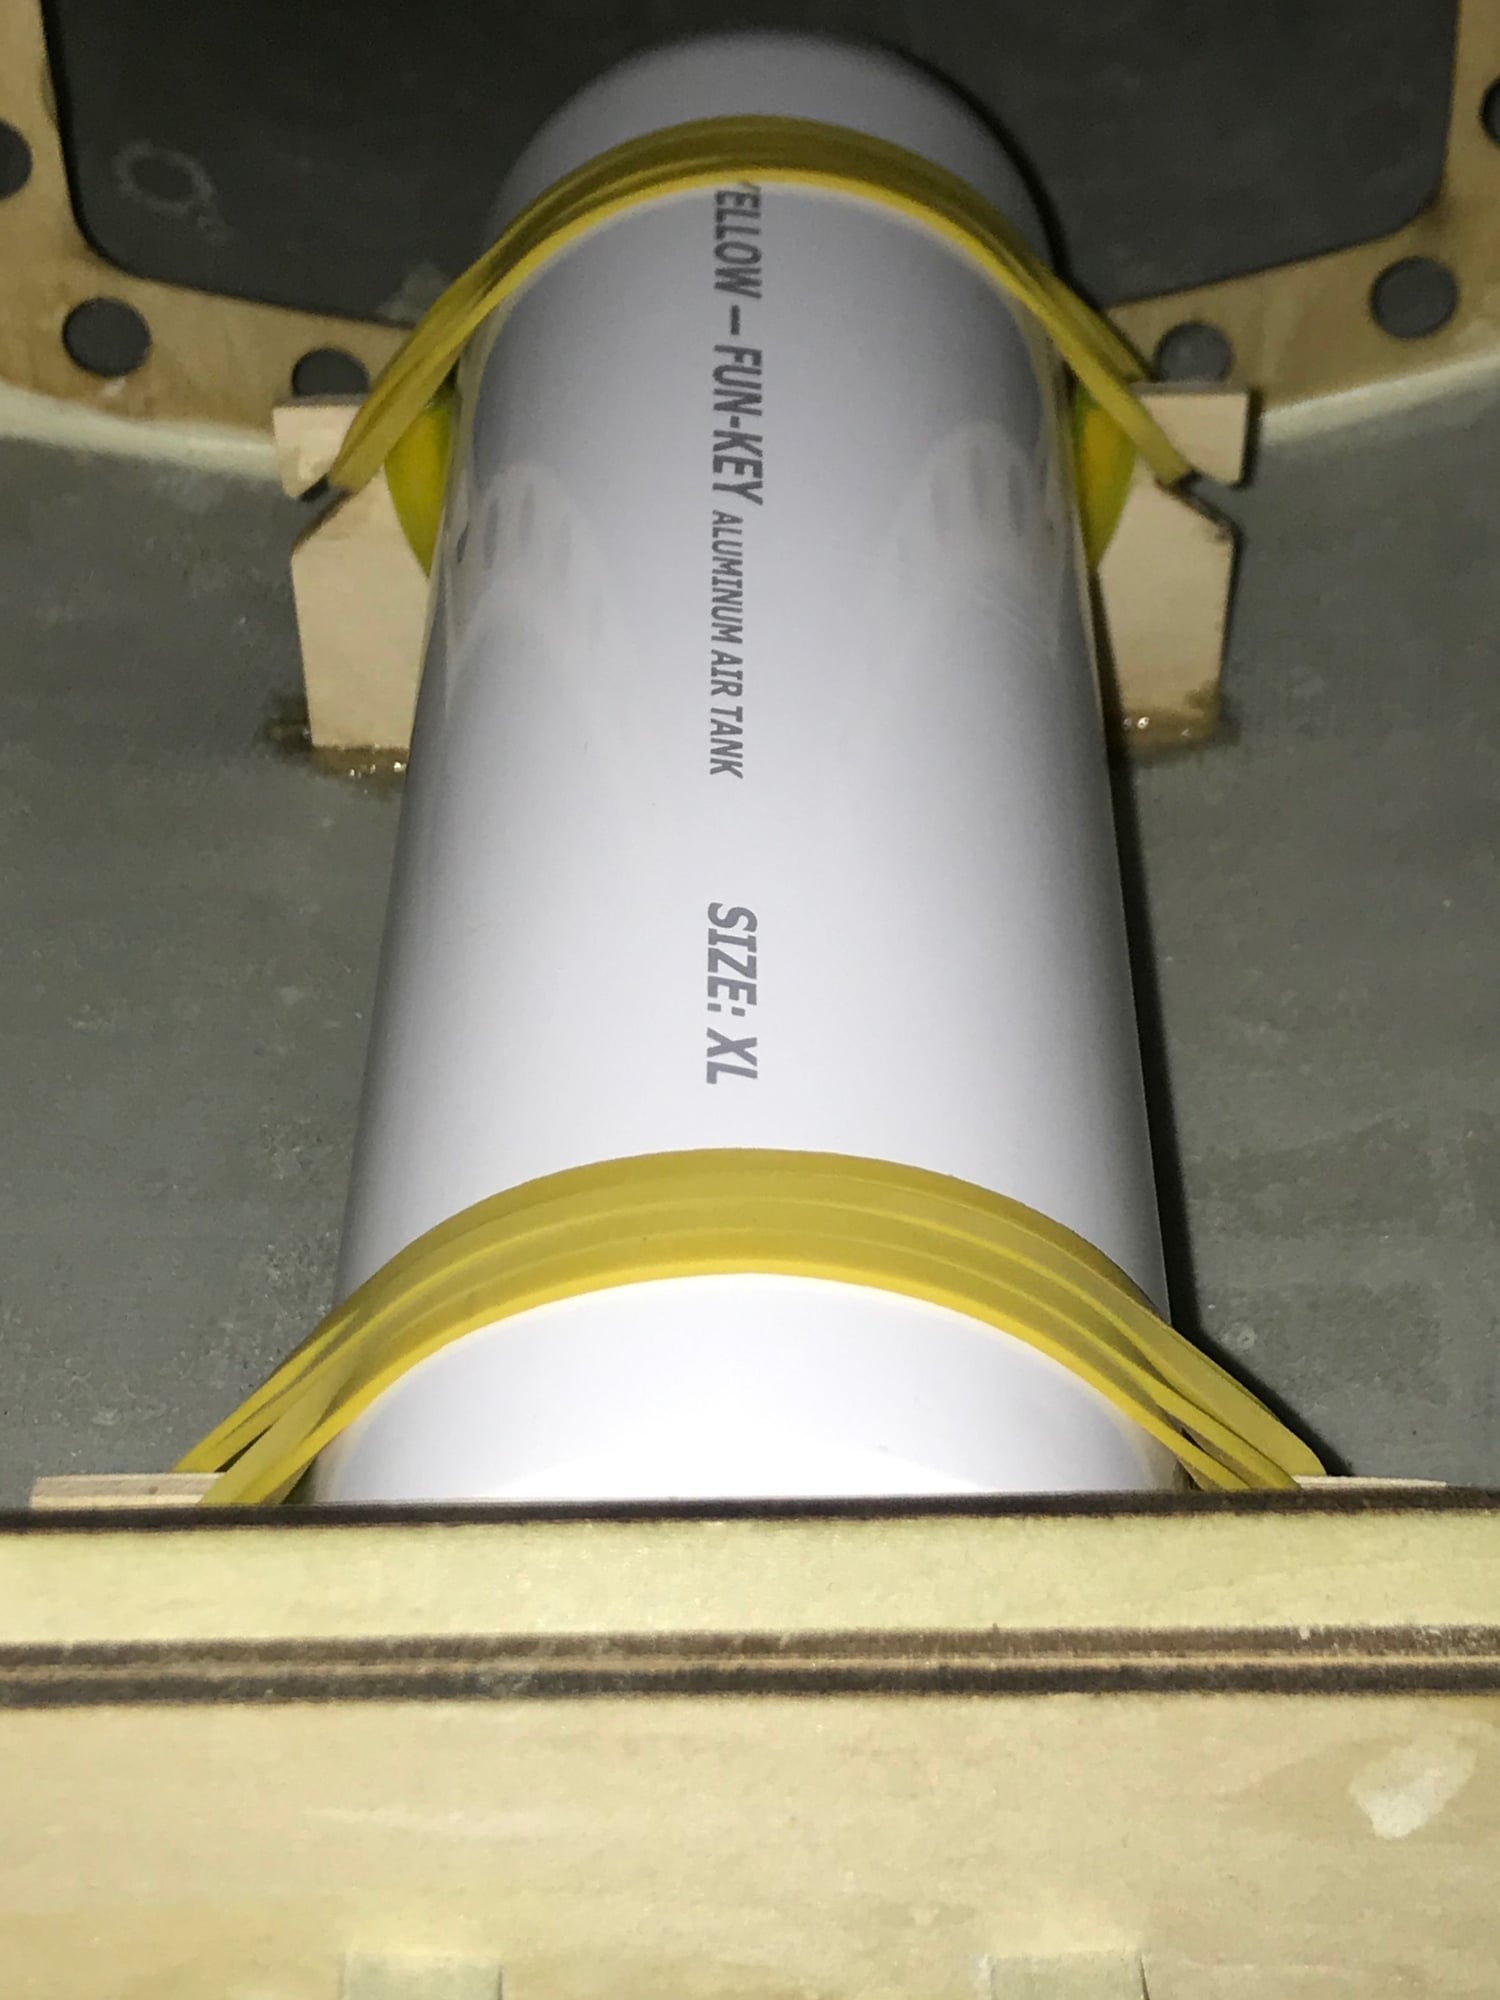
Another deviation was using one air tank for the plane. When i ordered the Sierra Retracts I also got an XL tank. Knowing that i couldn't install the tank in the factory recommended locations over the main wheel wells, i opted to install it under the cockpit location on the belly of the fuselage. i made two cradles to accommodate the tank and used tygon fuel tubing to help cushion the tank w rubber bands securing it all together. I have the air nipple facing aft.
06-09-2020, 02:38 PM
#879
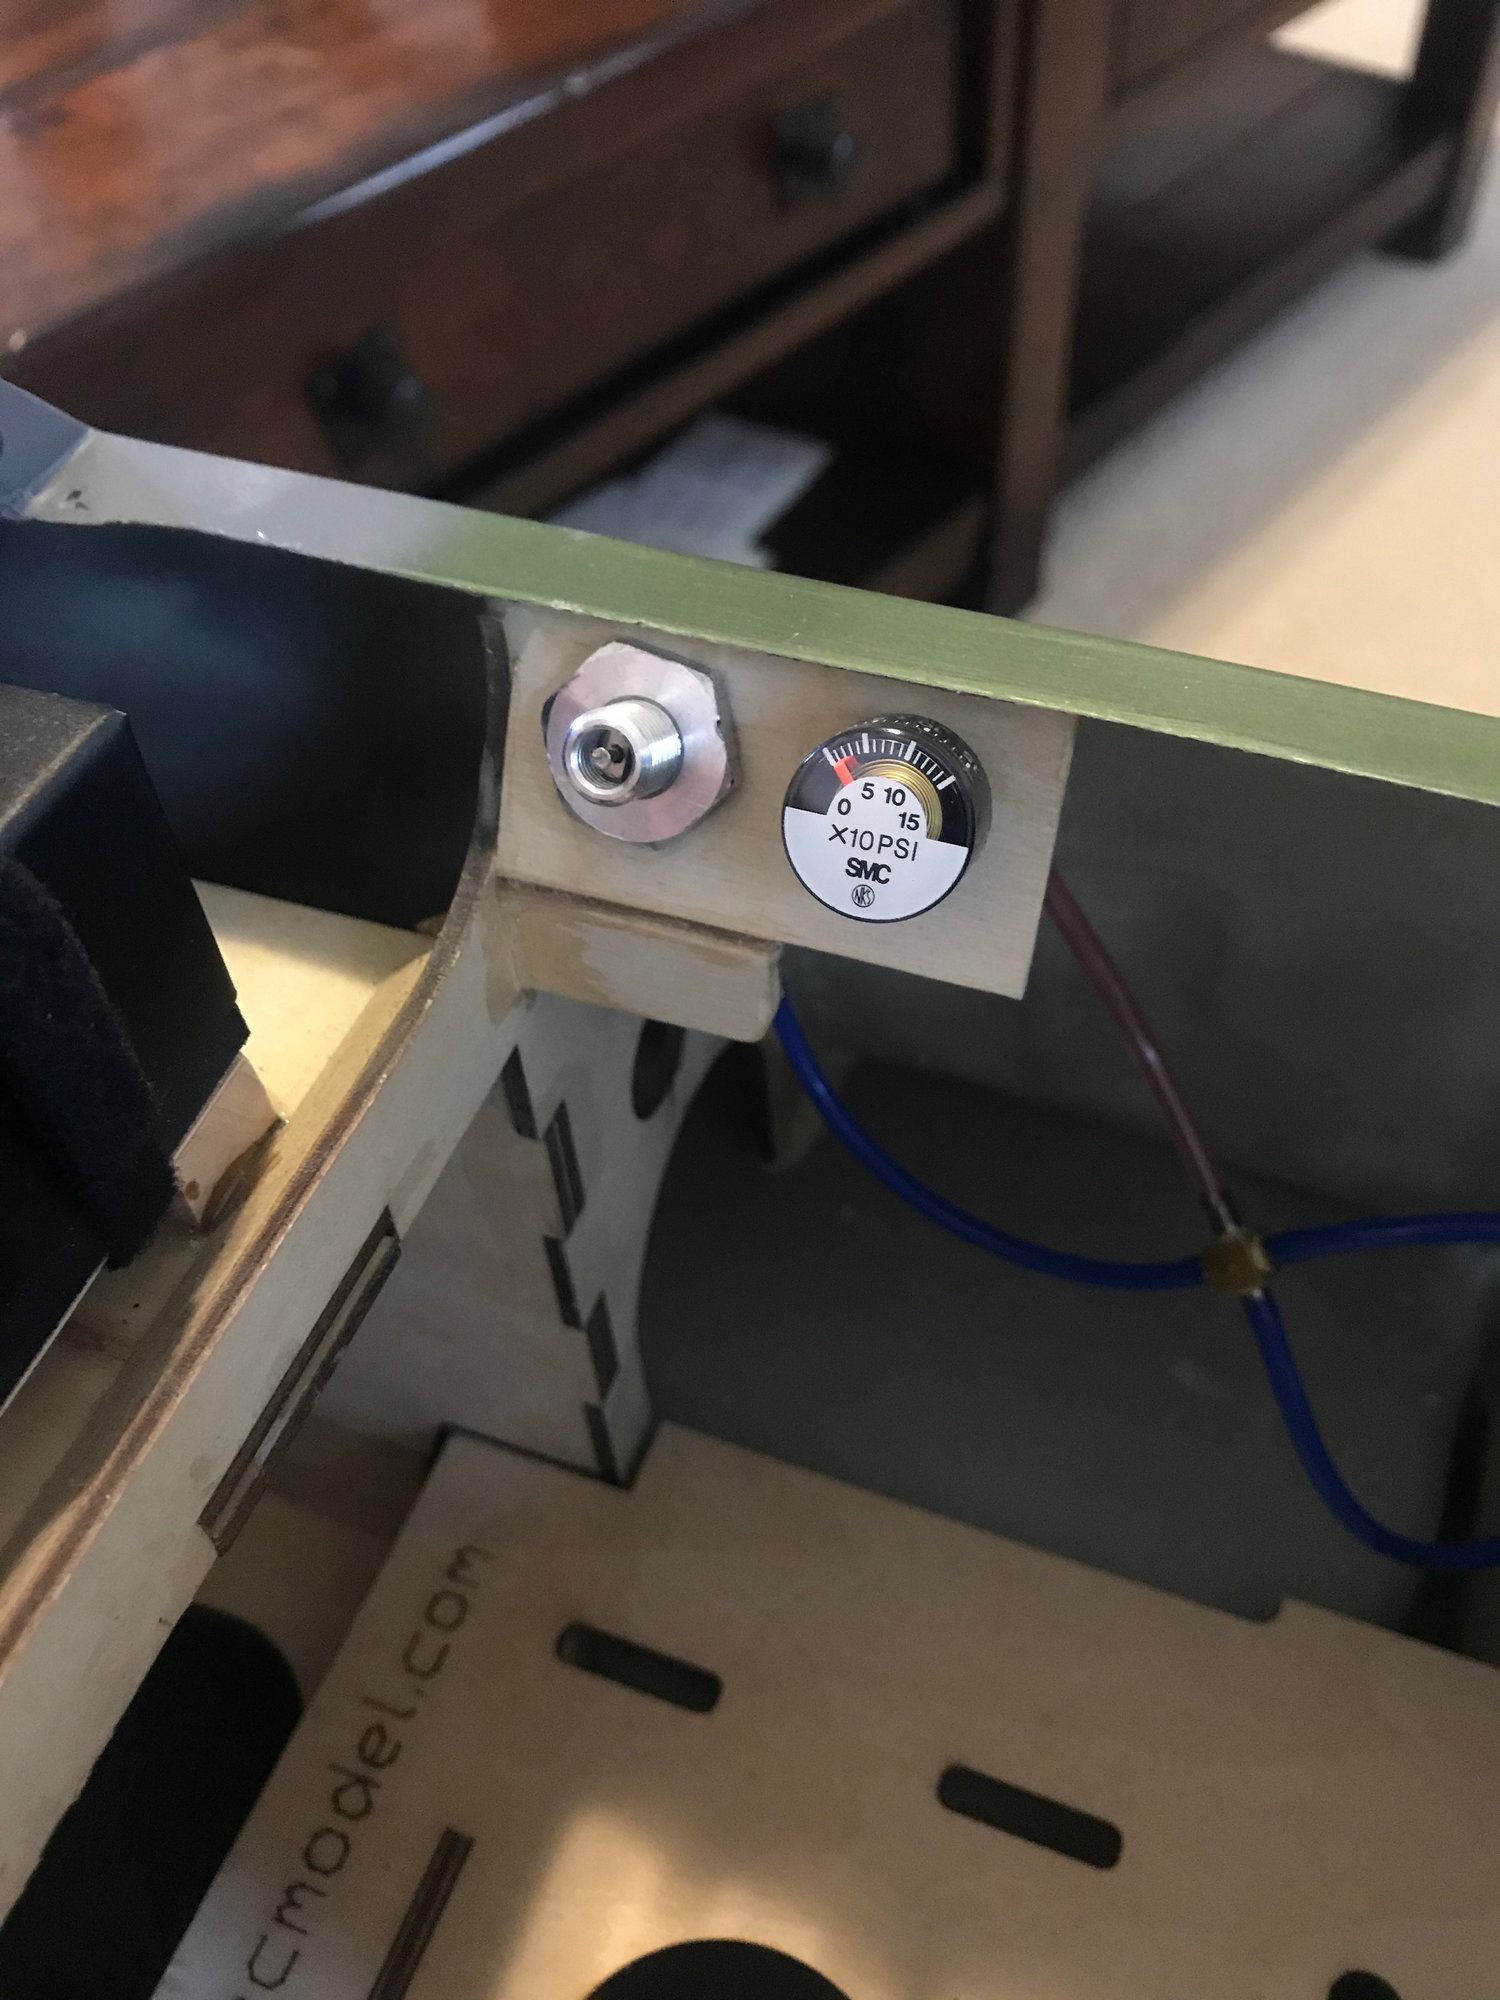
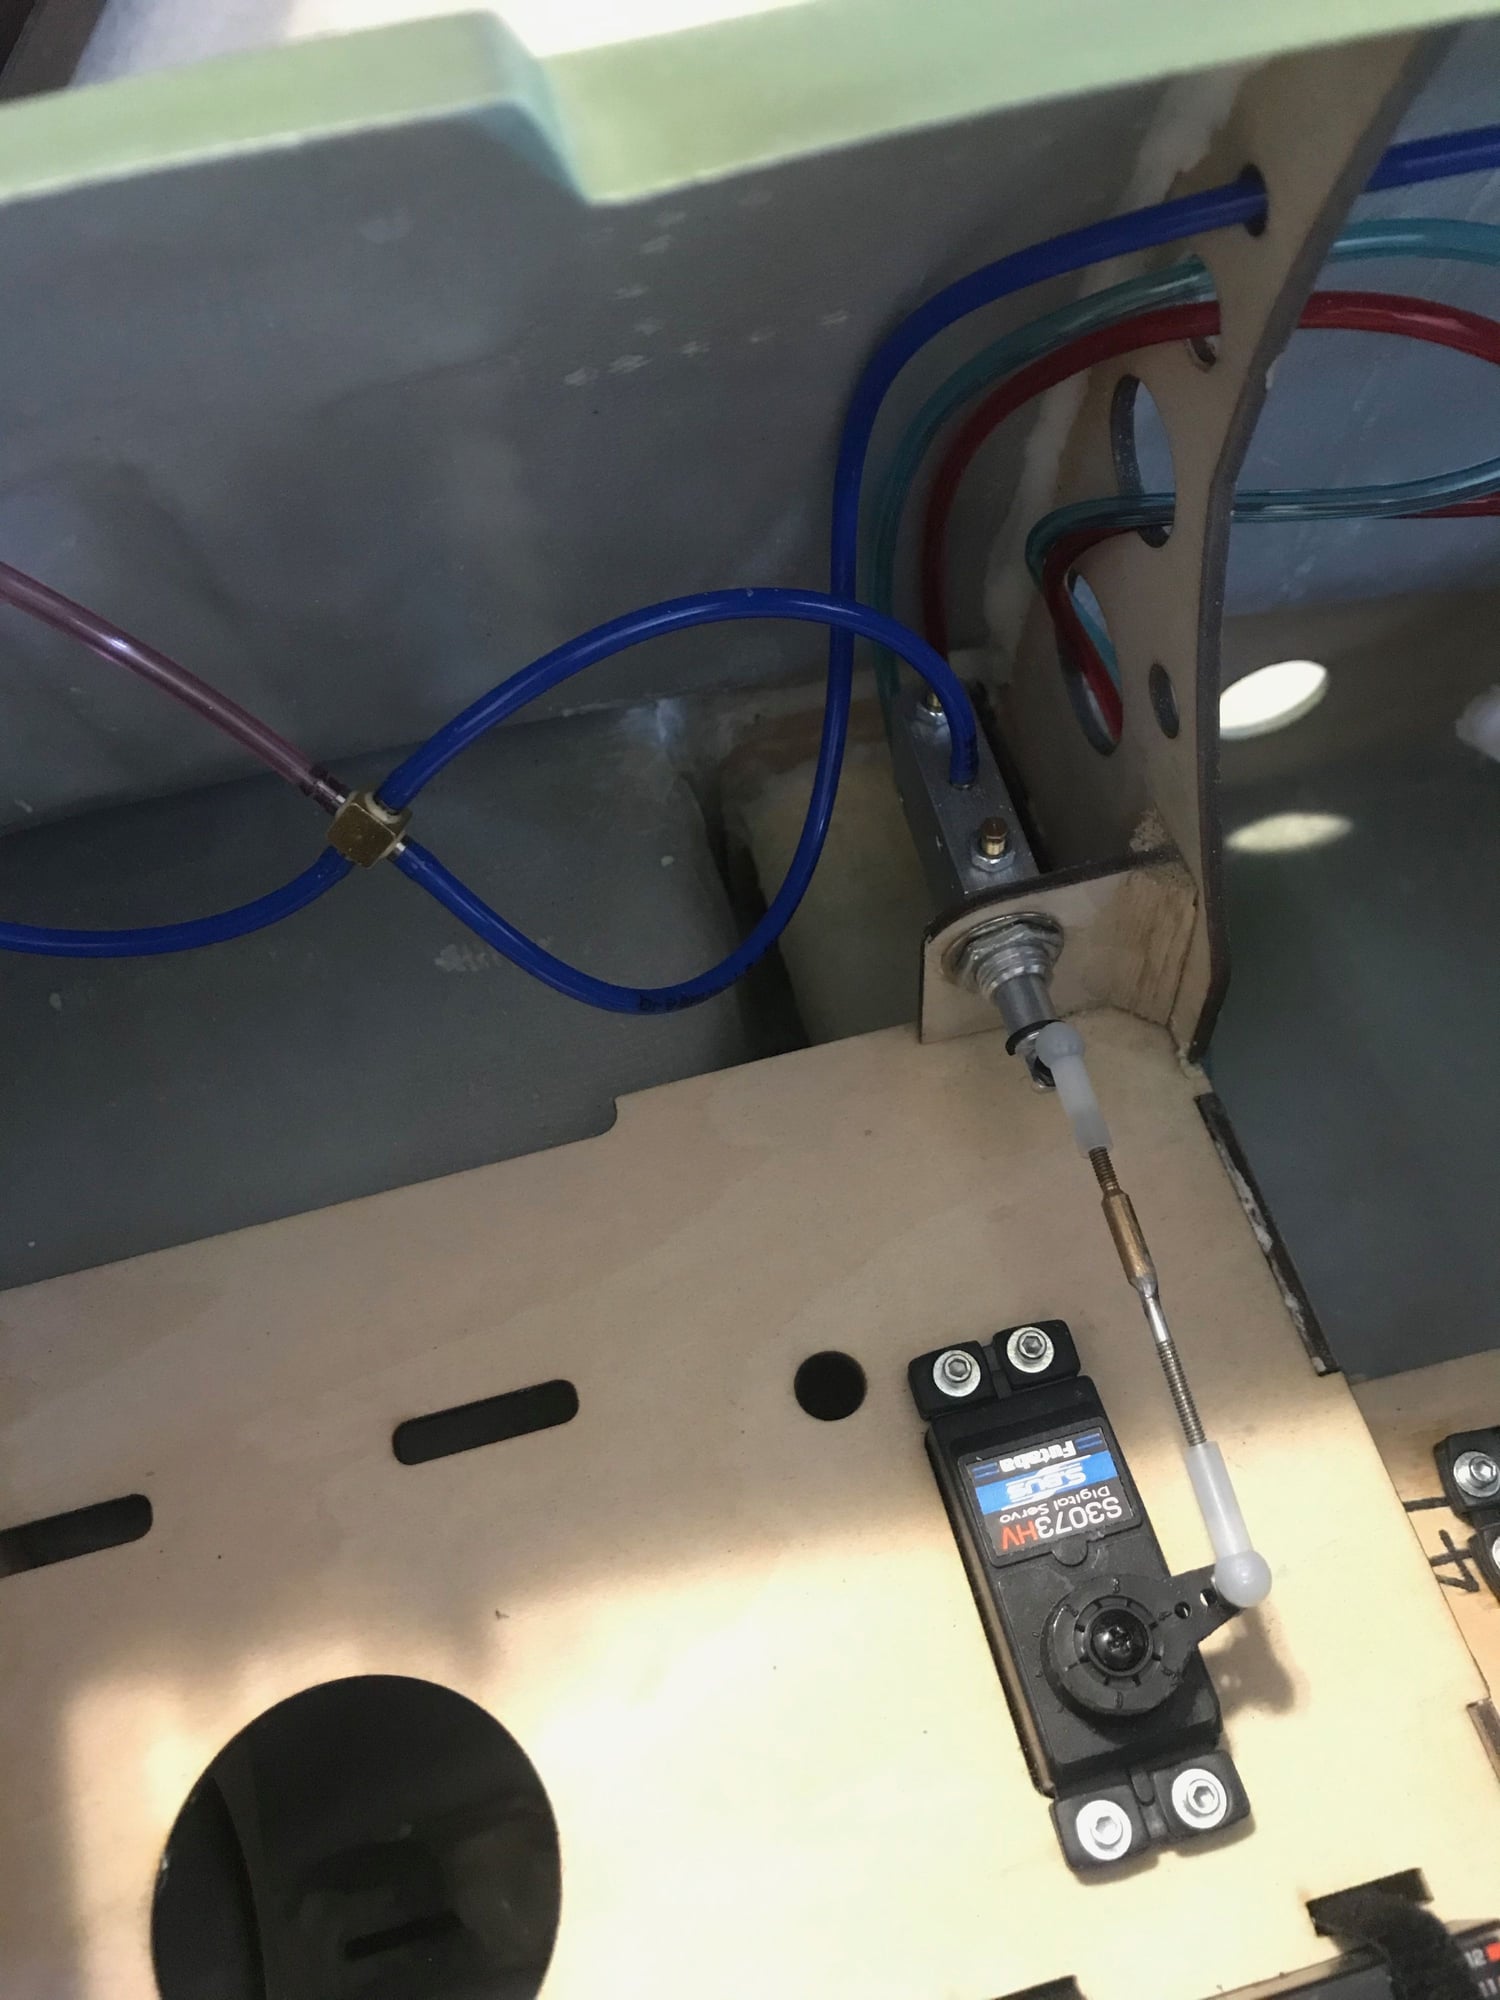
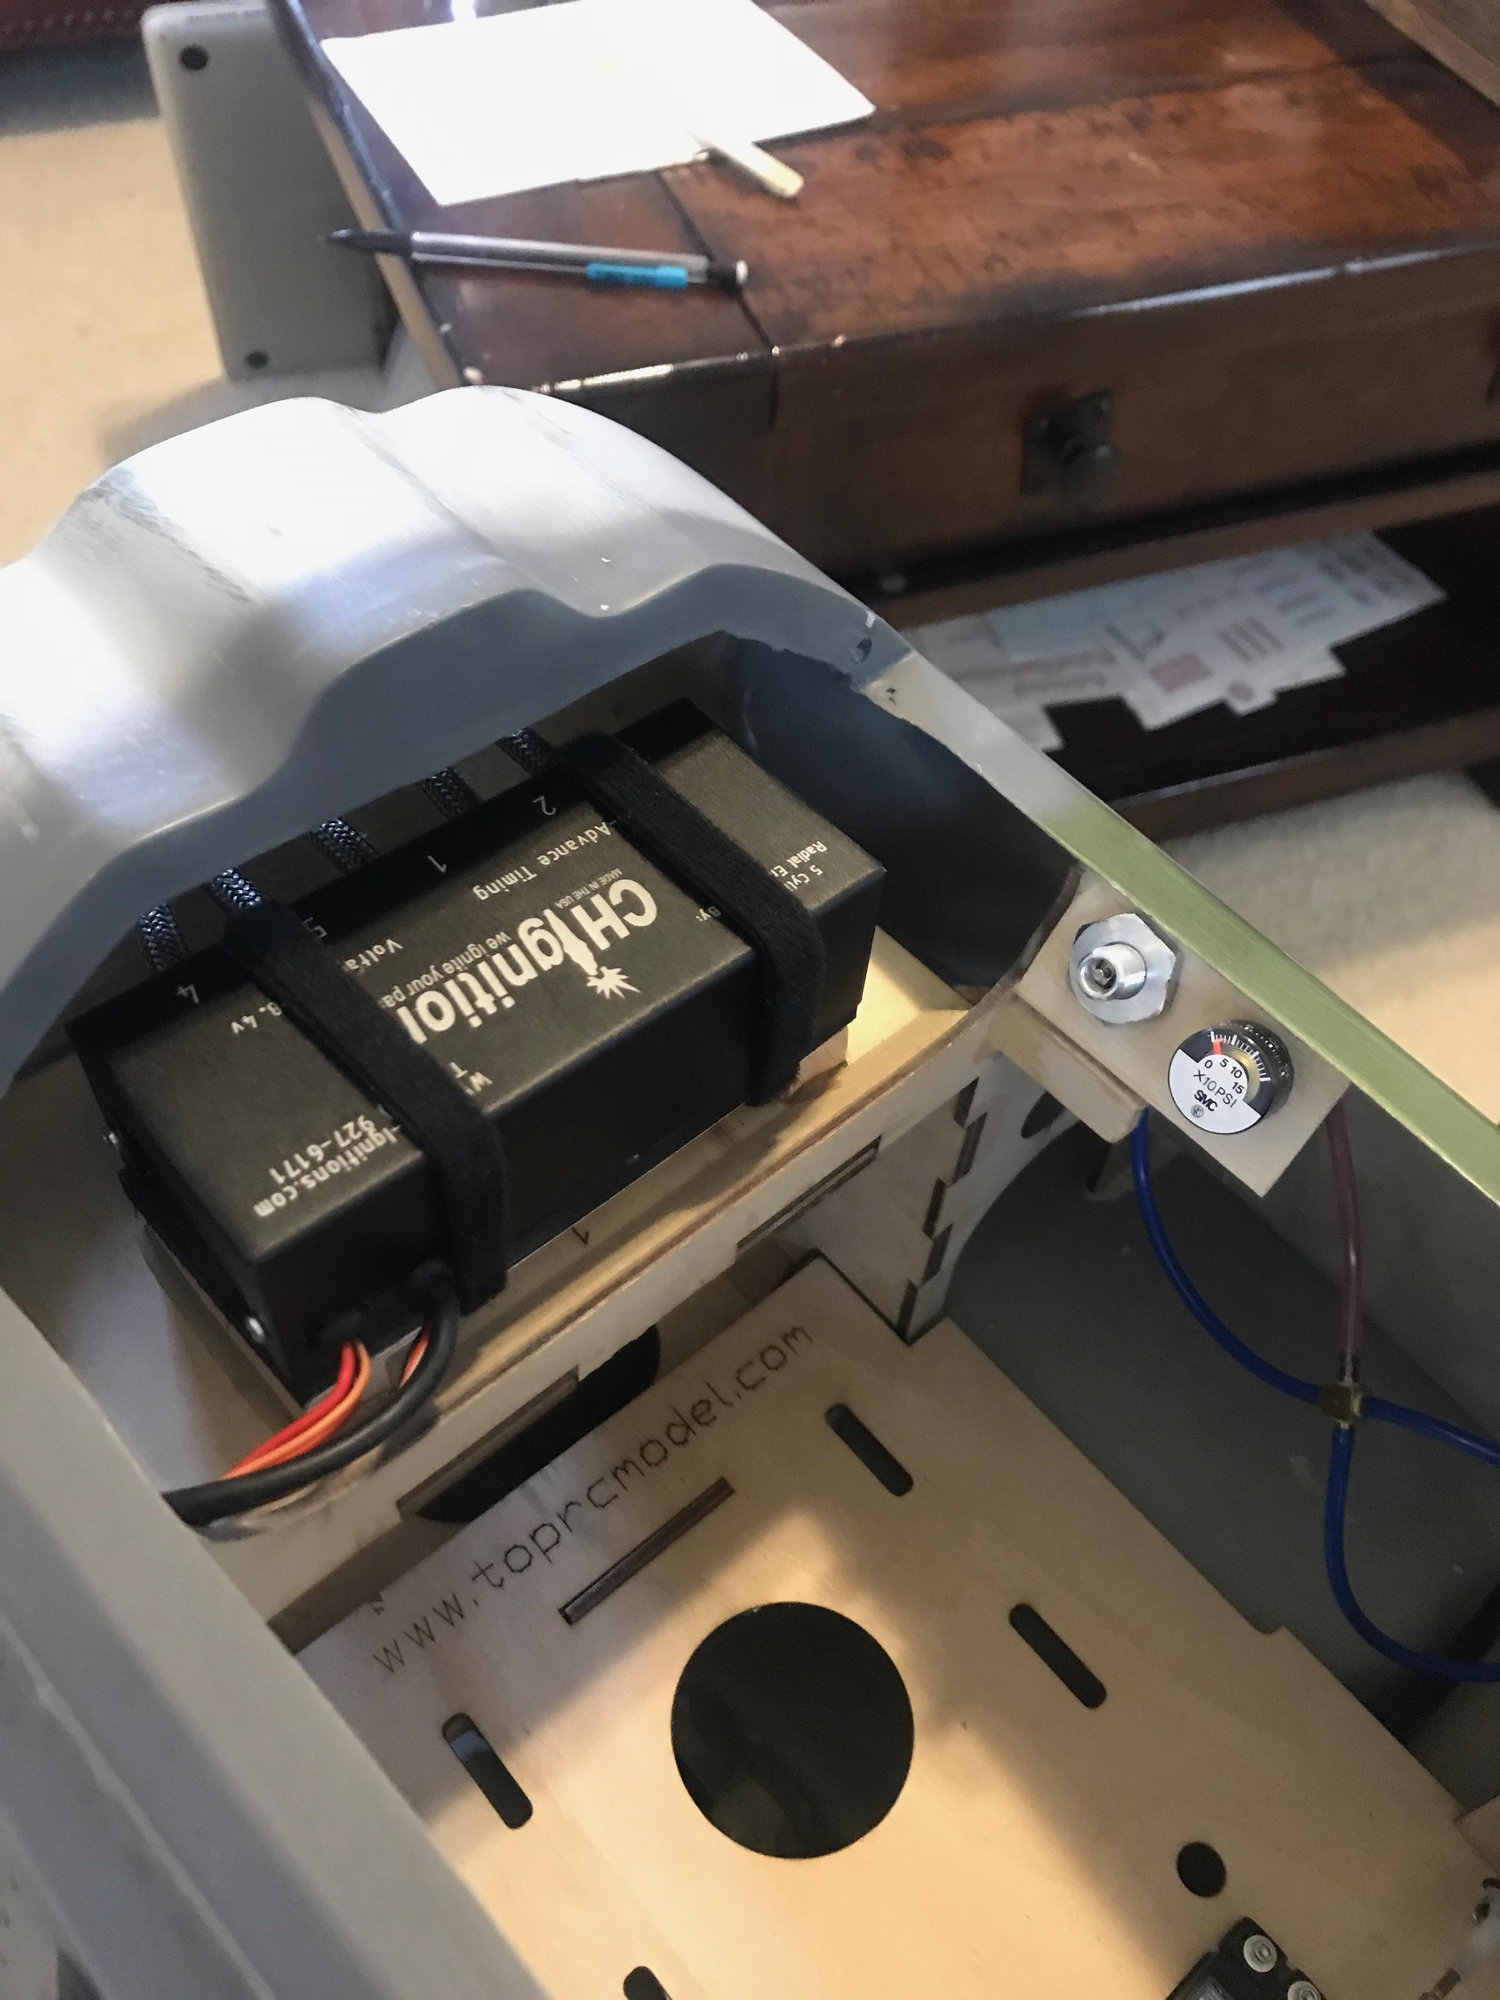
With all the airlines ran, I decided to get the filler, pressure gauge and sequencing valve installed. I used 2-56 ball links and soldered up a pushrod for the job.
06-09-2020, 03:02 PM
#880
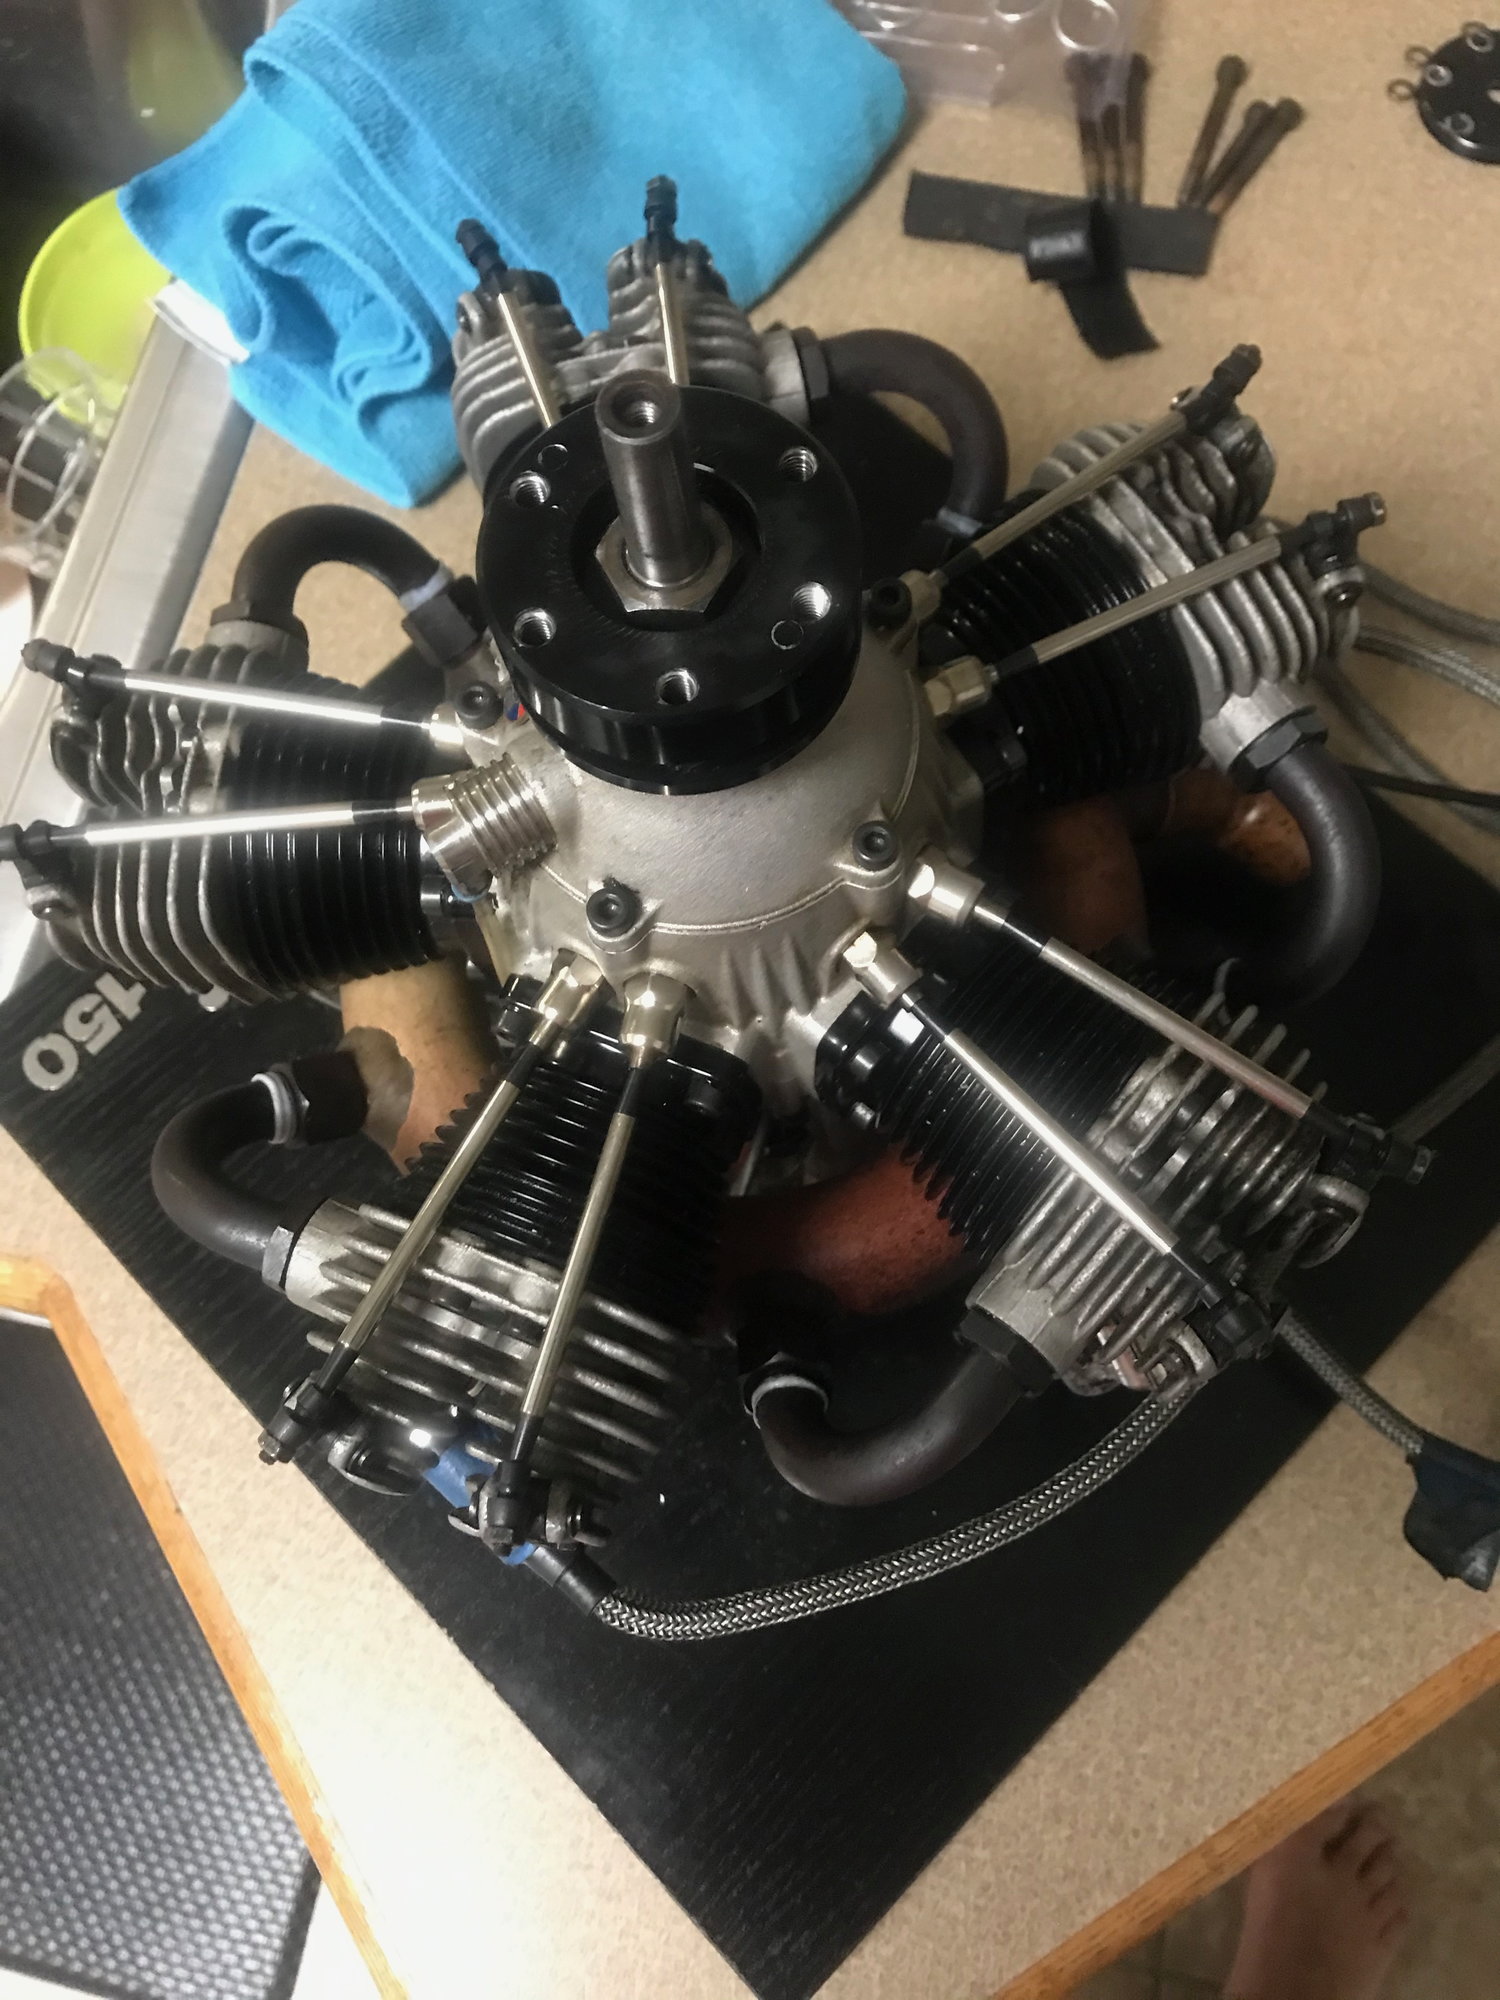
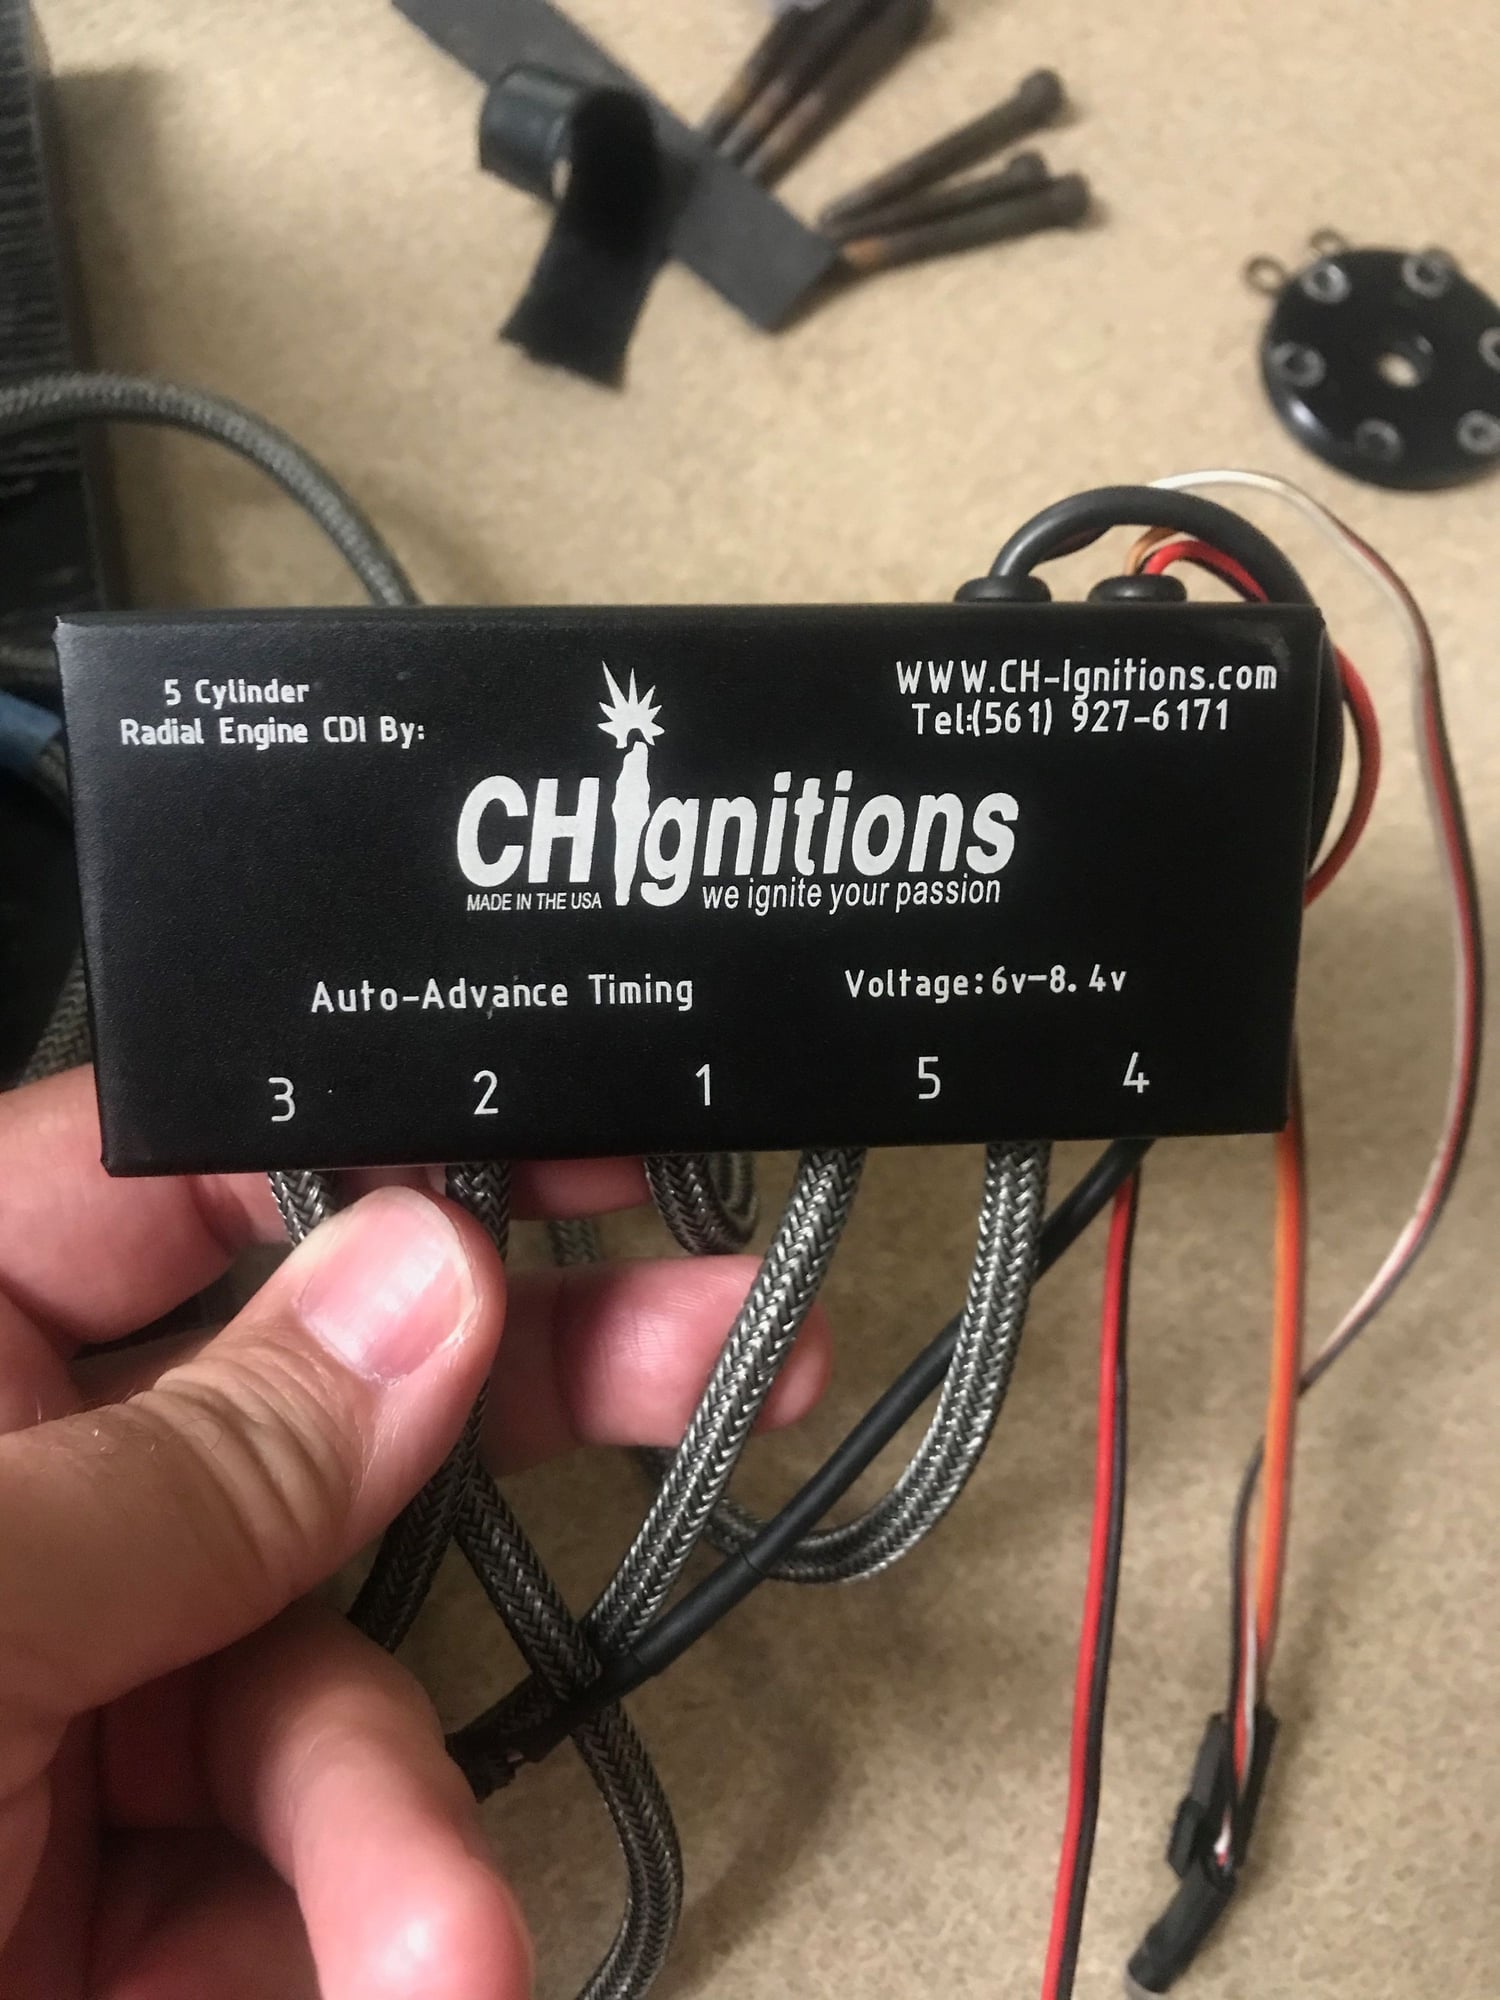
When I first got this plane, i was already contemplating on what engine to use. I just couldn't see myself using anything other than a radial...but the cost! UGGhhhh. So, I kept my eyes open for any opportunity that arose for a used Moki radial 150/180 as it was the perfect diameter for this plane. As you know, they just don't show up very often and if they do - you're timing better be right, lol. During this time, I was also looking at the Saito FG90, but it appears the overall concern was that it has just enough power w no reserve and couldn't swing the diameter prop i was wanting for this plane. I then started looking at a 4 cylinder like the 3W112 iB4, and considered the Moki 100BVT and Valach 85 twin - unfortunately the latter two engines are too wide for this FW. Long story short - I ended up finding a used Moki 150 for a great price! It is already outfitted w CH ignition. Quick measuring and it looked like I had to cut the firewall off about an inch to make this engine work. Replaced the firewall w 1/2" thick ply

06-09-2020, 03:14 PM
#881
With the new firewall fitting snuggly, i then chose to apply Carbon Fiber to the firewall to prevent any wood crushing as well as prevent any oil/gas soaking into the wood. I also plan on adding some wood screws to all sides of the motorbox to secure the new firewall to the fuselage. With that being completed I then made a tray for the ignition that raised the module high enough to prevent the cables from rubbing on the fuselage going into the cowling.
Last edited by jraycut; 06-10-2020 at 07:00 AM.
06-09-2020, 03:21 PM
#882
Thats pretty much where i am at right now. I just received my fuel tank today and my batteries and switches should be arriving in another day or two. I am planning on installing an iflytailies cockpit https://www.iflytailies.com/store/co...pit-sets/wwii/ which I already have) along w a scale pilot. I am also planning to make the canopy a sliding canopy (opening much more than the factory currently allows). Stay tuned as I still need to install the landing gear doors, guns, and misc items here and there. I'll update as I progress more in the build.
Last edited by jraycut; 06-09-2020 at 03:26 PM.
06-09-2020, 03:53 PM
#883

My Feedback: (8)
Thats pretty much where i am at right now. I just received my fuel tank today and my batteries and switches should be arriving in another day or two. I am planning on installing an iflytailies cockpit https://www.iflytailies.com/store/co...pit-sets/wwii/ which I already have) along w a scale pilot. I am also planning to make the canopy a sliding canopy (opening much more than the factory currently allows). Stay tuned as I still need to install the landing gear doors, guns, and misc items here and there. I'll update as I progress more in the build.
06-09-2020, 06:03 PM
#884

My Feedback: (6)
This road looks well traveled! Keep at it. Tevan pulled the wood platform Out. If I had it to do again I would have done the same and installed the airtank in that huge void underneath and then replaced the floor.
There are some modifications needed to the CP kit to make it fit. Also in my research for the canopy the original FW canopy had a hinge at the top of the canopy to allow for the side rails to get narrower as it slid back anmd it flexed the top of the canopy.
Sparky
There are some modifications needed to the CP kit to make it fit. Also in my research for the canopy the original FW canopy had a hinge at the top of the canopy to allow for the side rails to get narrower as it slid back anmd it flexed the top of the canopy.
Sparky
06-10-2020, 07:03 AM
#885
Thats pretty much where i am at right now. I just received my fuel tank today and my batteries and switches should be arriving in another day or two. I am planning on installing an iflytailies cockpit https://www.iflytailies.com/store/co...pit-sets/wwii/ which I already have) along w a scale pilot. I am also planning to make the canopy a sliding canopy (opening much more than the factory currently allows). Stay tuned as I still need to install the landing gear doors, guns, and misc items here and there. I'll update as I progress more in the build.
06-10-2020, 07:09 AM
#887
Thanks guys! I have an idea on the sliding canopy project, probably will be one of the last things I do on the plane. I�m hoping to get the fuel tank, switches, and batteries located and secured over the weekend as well as getting the MLG doors completed.
If life would slow down a little a bit I might be able to get this plane done sooner rather than later, lol.
If life would slow down a little a bit I might be able to get this plane done sooner rather than later, lol.
06-10-2020, 07:12 AM
#888
yes, I was willing to wait as long as I had to for the motor; but the opportunity arose and I jumped on it. Have any pics or mods to share of your build?
06-12-2020, 08:42 AM
#894
Finally got my fan from Phillip in Austria. Cool guy.
The fan fits perfectly in the cowl with just a little sanding of the inner lip.
This is due to the right thrust built into the firewall.
Engine has never flown but has been modified by Ray English.
I've run about a half-gallon of gas through the Saito on the ground with very little tuning.
The engine will idle for a long time at 1100 rpm. Peak is 6200+-.
The engine had not run for two months. Yesterday it started with just one flip.
I did not notice a big decrease in RPMs. Seems right around what it was without the fan.
Now I have to figure out how to balance the spinner, prop, back-plate, and fan.
I'm thinking an 12 mm aluminum shaft the that goes through the back-plate, then transitions through the spinner bolt hole. Ideas?
Enjoy the sound.
jim
The following 2 users liked this post by jimkron:
scottme262 (06-13-2020),
Stephen Crisp (06-22-2020)
 06-15-2020, 06:35 AM
#896
My Feedback: (8)
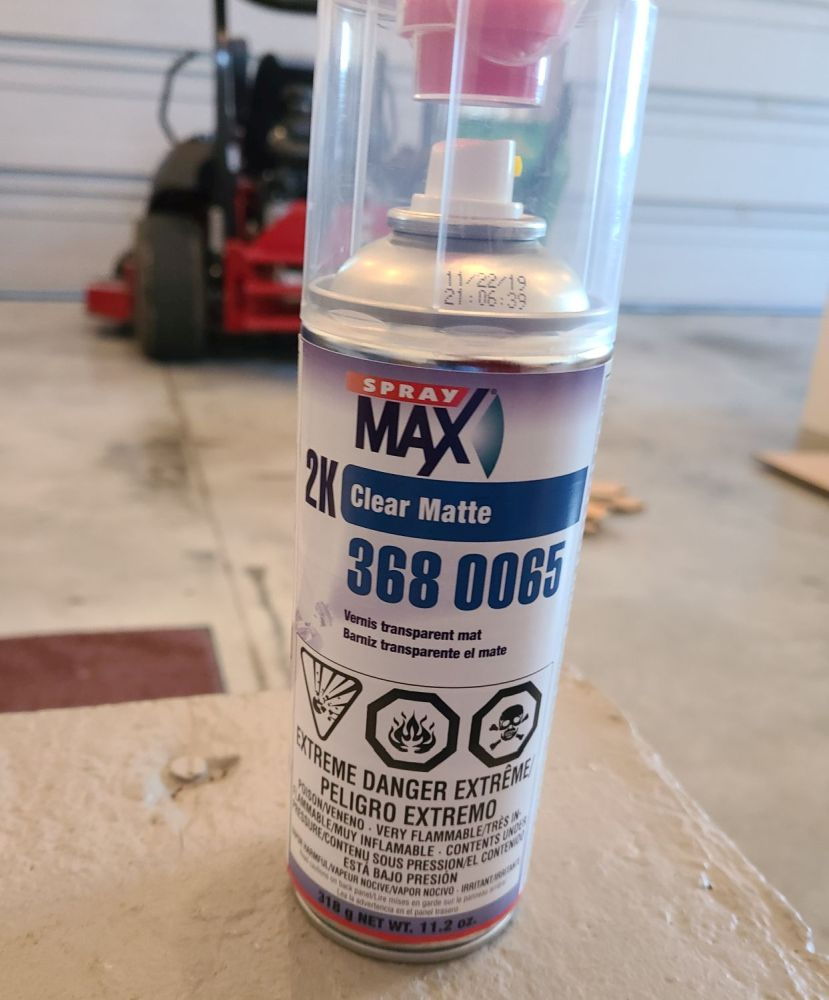
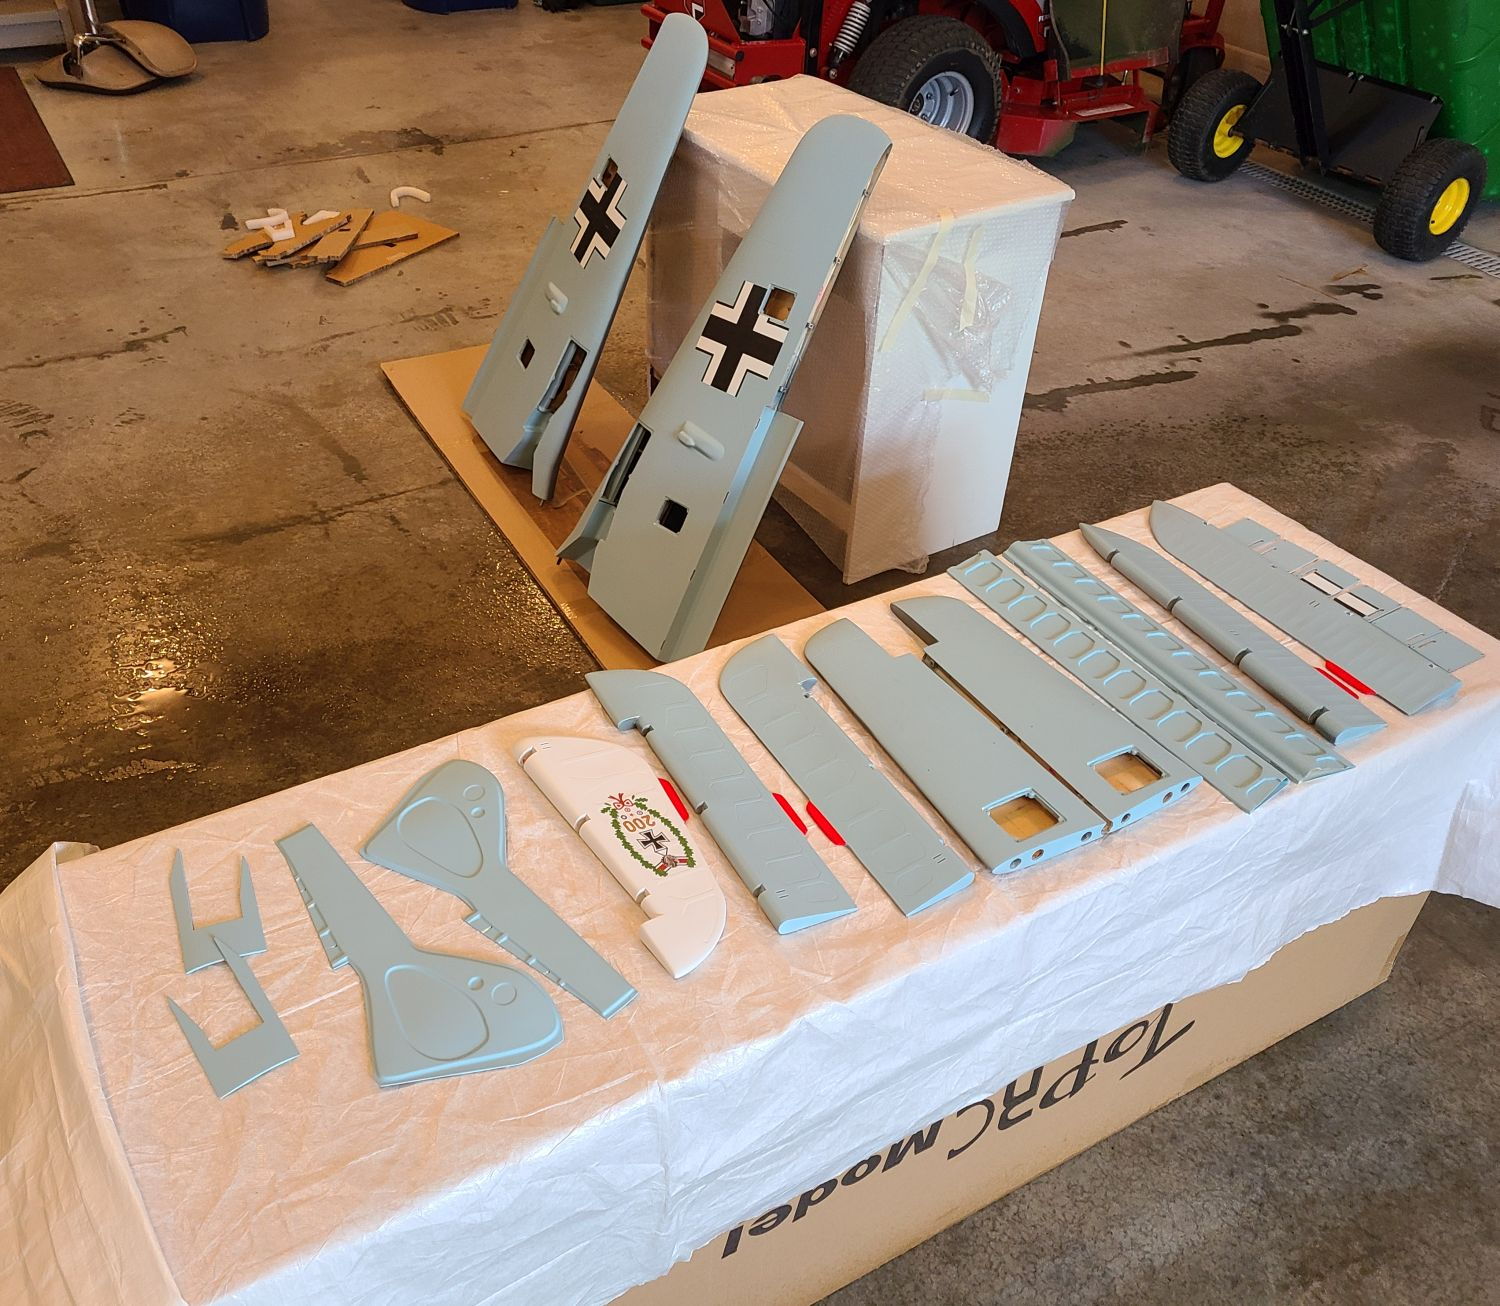
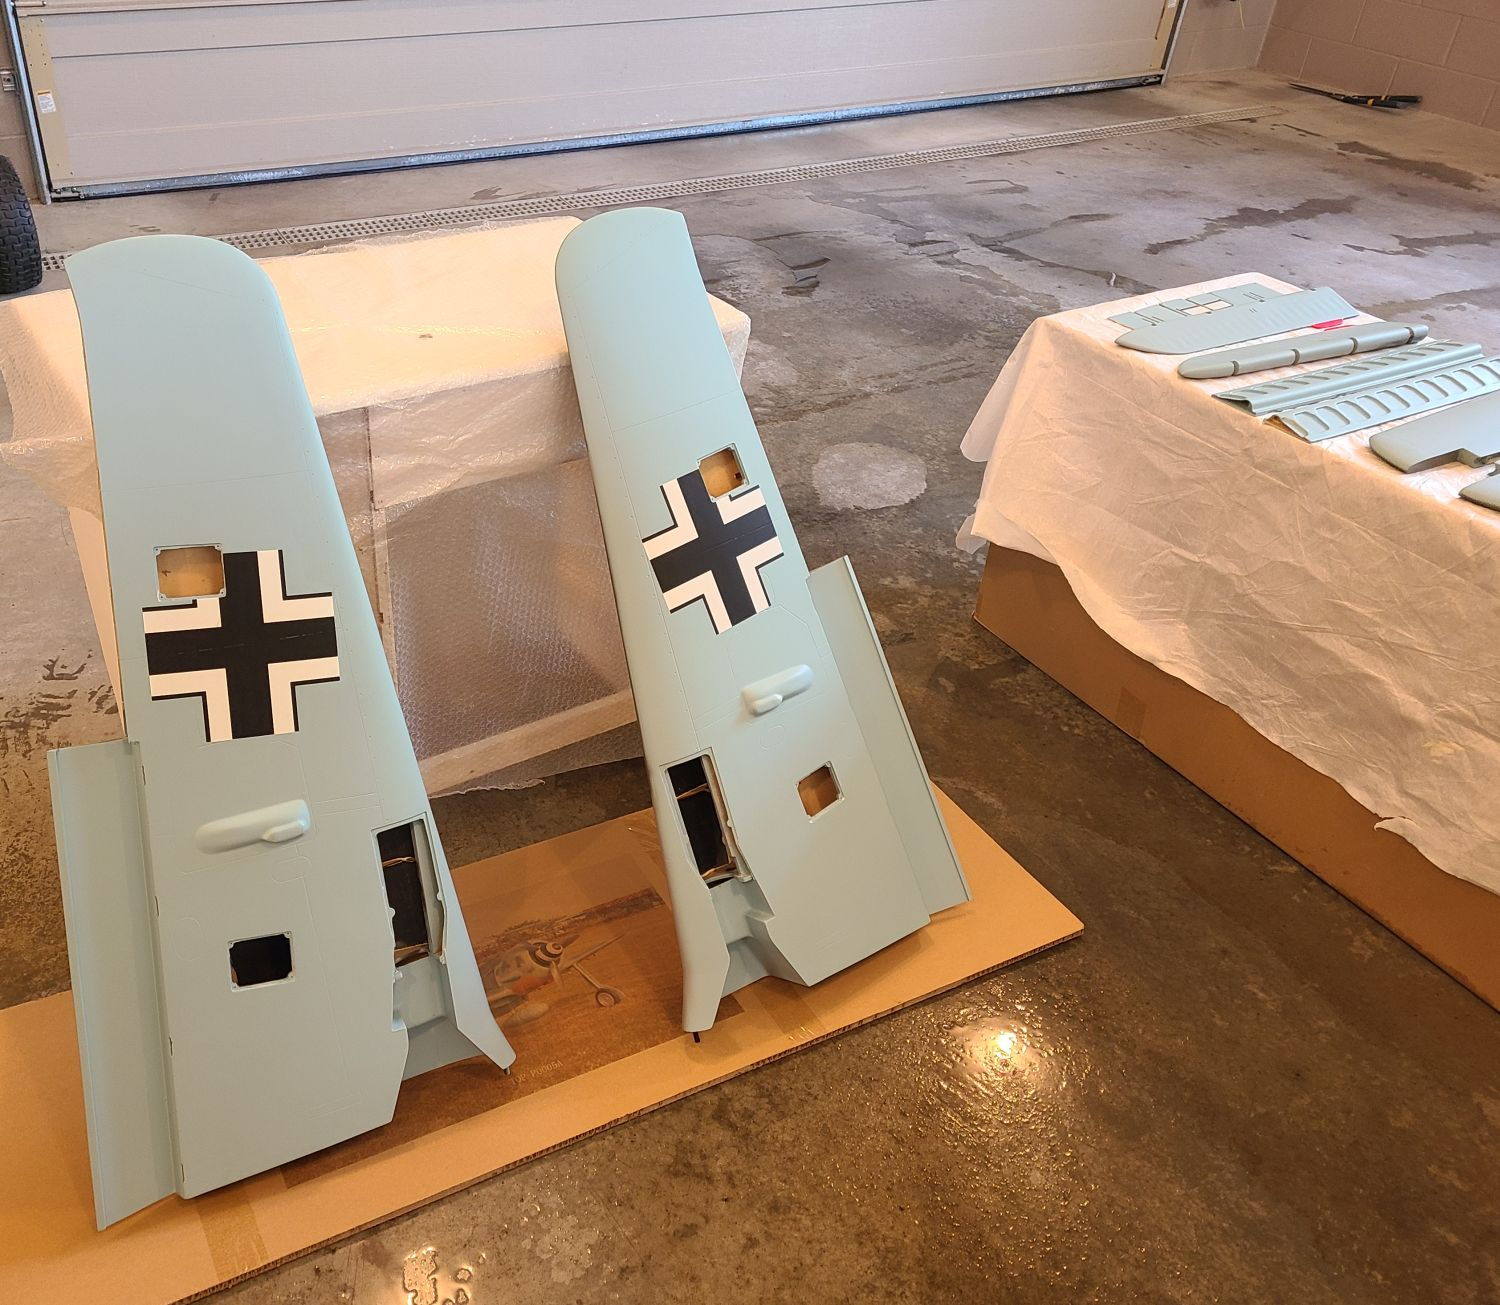
After reading through 38 pages worth of invaluable information, I am not in position to repaint my airframe, rather improve on it. Many have commented on the fragility of the factory paint and particularity the supplied decals. I thought it was time to consider a better finish option.
This is the fourth job I've done with this 2K paint and it works better than anything I've used in the past. It's a 2 part urethane aerosol paint that mixes in the can once you activate the ingredients, simply by depressing a plunger. It's made in Germany, and sold in many places under the name "SprayMax 2K Clear". they offer three flavors, gloss, semi gloss, and matte. I chose the matte finish (part #3680065) for the 190.
I wiped down at the parts (shown in the photo) with Denatured Alcohol and followed with a tack cloth.
Once you activate the aerosol can you have 48 hours to use it, I and many others believe you have less than 12 hours, your mileage may vary.
I purchased (2) cans, not knowing how far a single can will cover. The parts were placed on a box with a drop cloth and spaced closely together. I wanted to avoid wasting the clear coat and it was simply too difficult hanging all these parts and wasting the clear.
I applied the first tack coat, waited 10 minutes, applied a second coat, waited 10 minutes, applied a third coat. Once the clear coat dries it looks like you did nothing, zero change in the gloss, the matte was the right choice.
After 2-3 hours of dry time it was time to flip the parts over and finish the other side. As an FYI, I flipped over the drop cloth as well, it was a bit tacky. Once that was done I repeated the same process as above. After 1 hour I removed the parts and allowed them to stand vertically with little to no contact. You really need 24 hours before it's fully cured.
It's now 24 hours later and it appears I did nothing, and that's a good thing. The final finish matches up perfectly with no change in gloss.
As I stated earlier I had no idea how much I needed for this job. It took exactly (2) cans of 2K clear coat to apply (3) coats to everything you see in the photos. I ordered (3) additional cans to complete the fuselage, cowl, canopy, and hatch. If I'm correct in coverage guess the entire plane will take (5) can to complete the entire plane.
An an FYI, the clear coat I used is the favorite among auto body repair shops. It's the same formula used by the auto manufactures & body shops.
The following users liked this post:
scottme262 (06-15-2020)
06-15-2020, 04:50 PM
#898
Mgosson - thanks for sharing! I have a buddy that had done a fantastic job a Jet w spray paint. Very similar to what you had used, he got the paint from a place called 66 Auto Color - https://www.66autocolor.com.
06-15-2020, 05:04 PM
#899
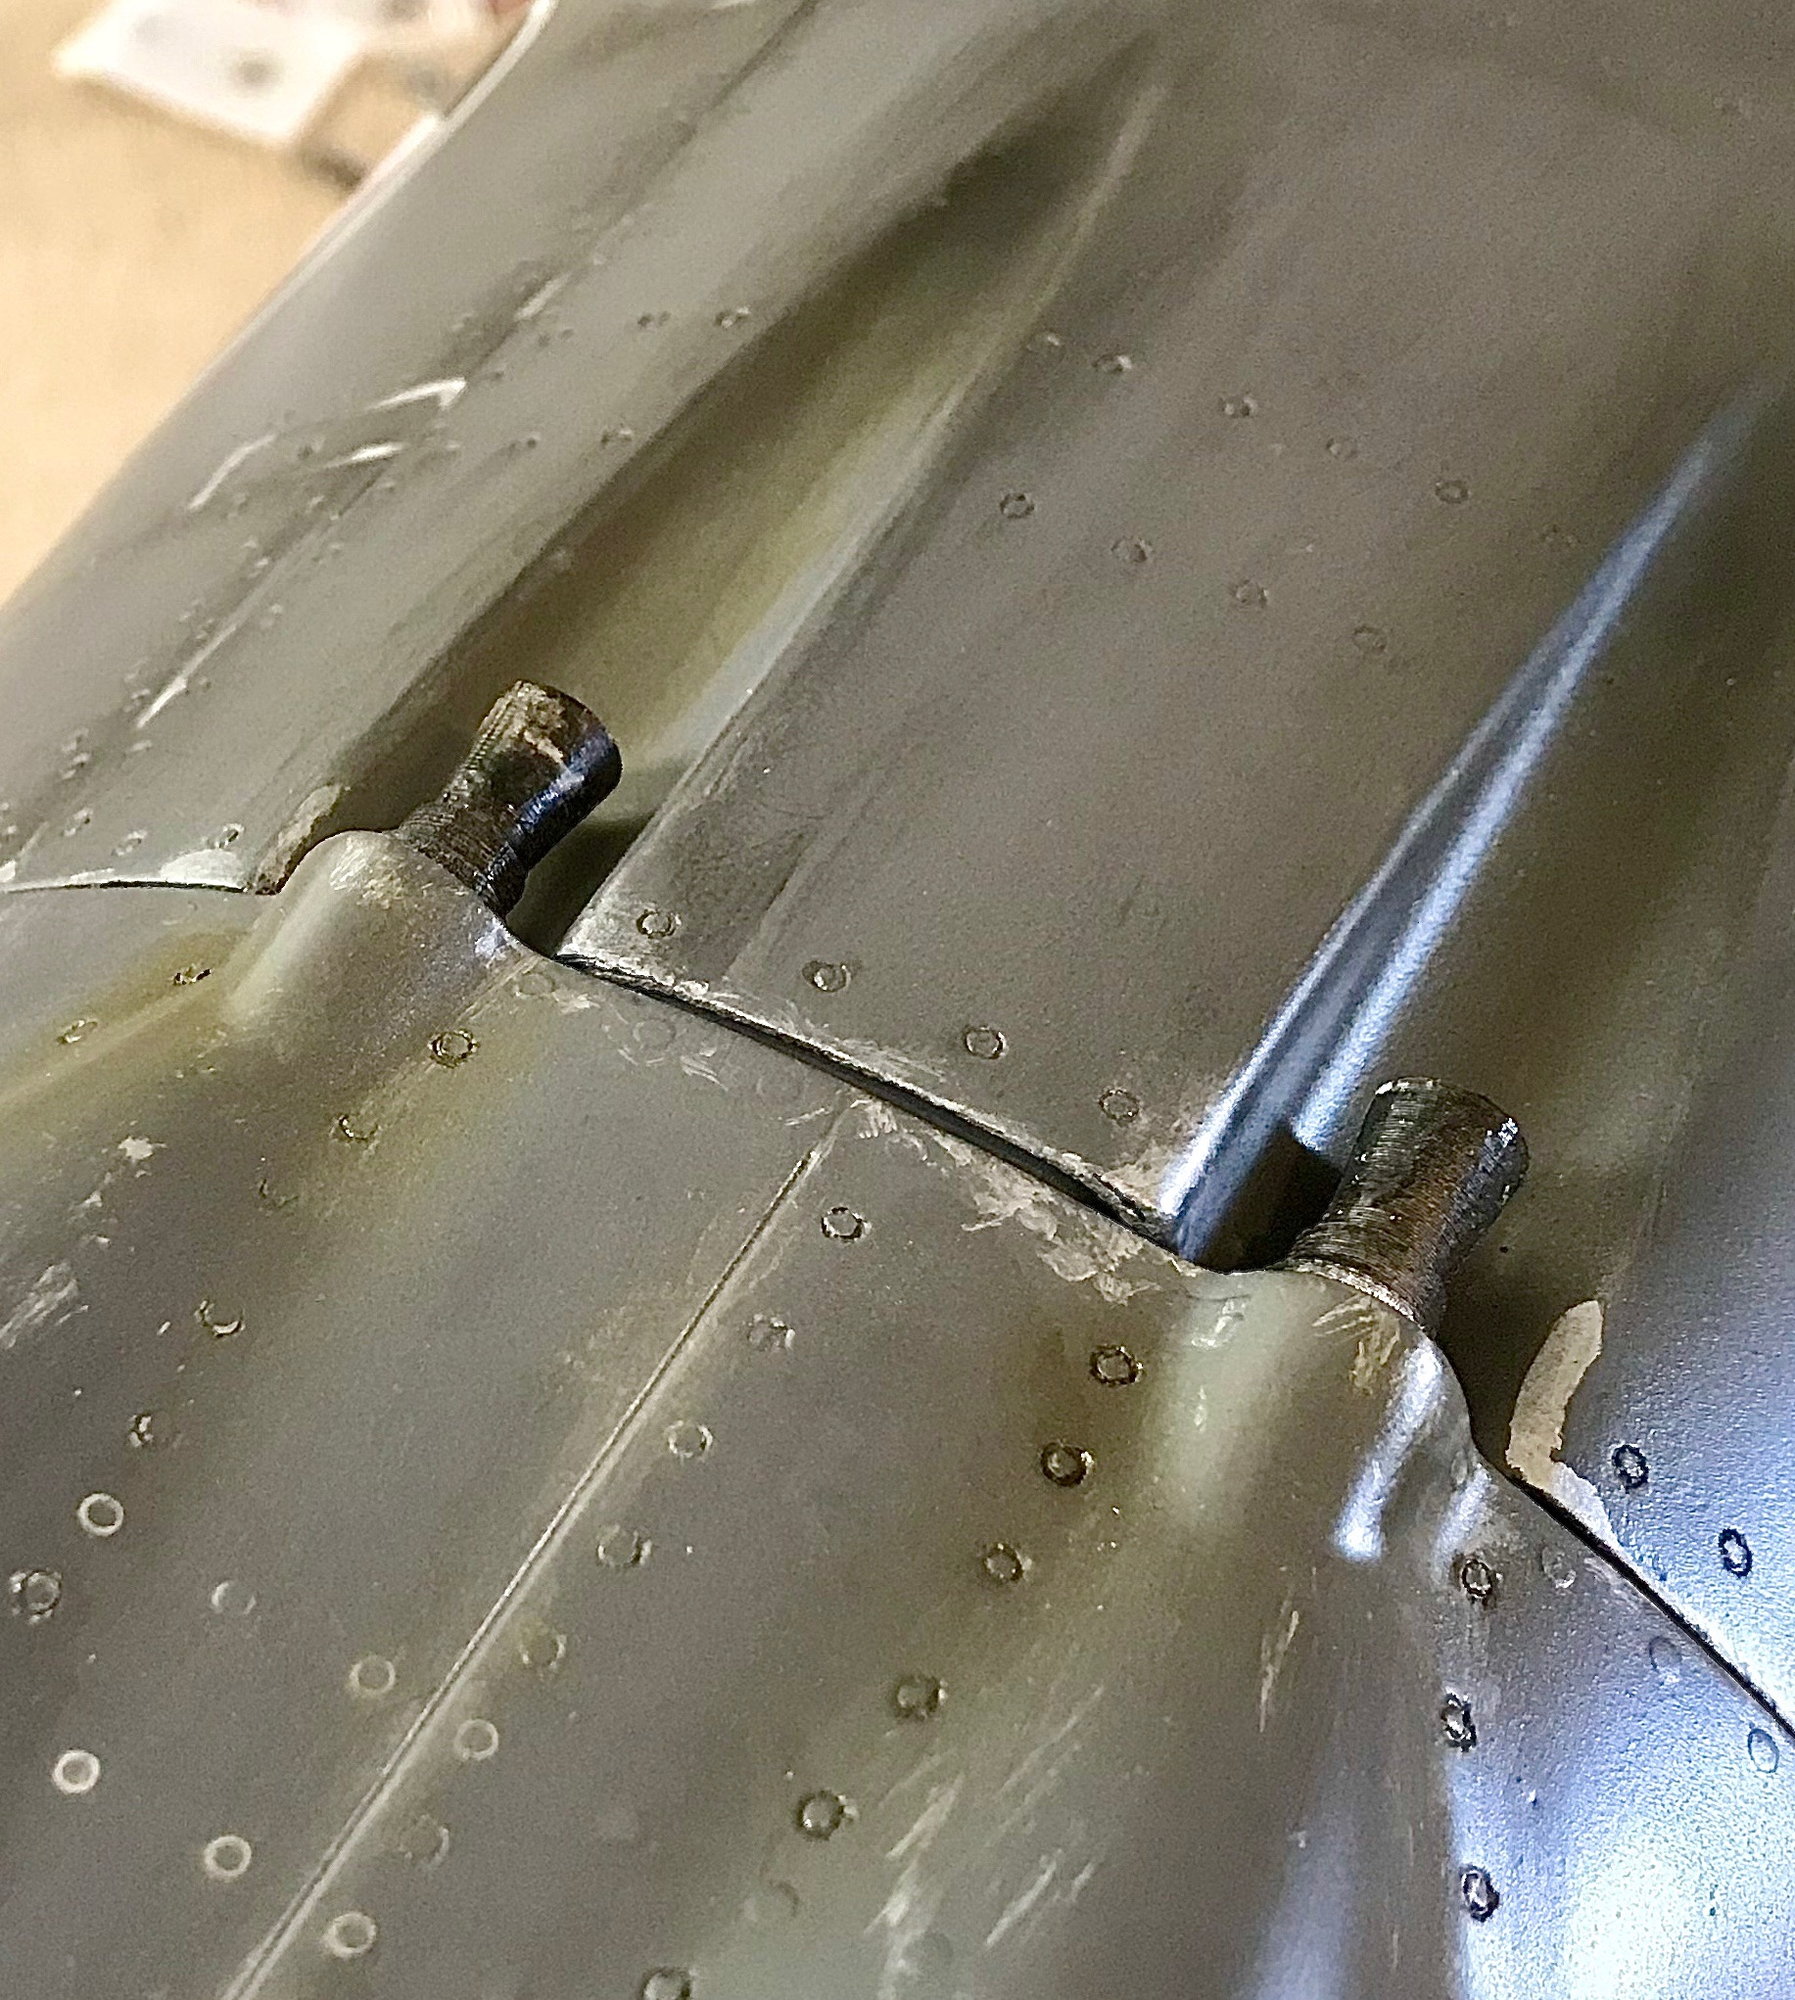
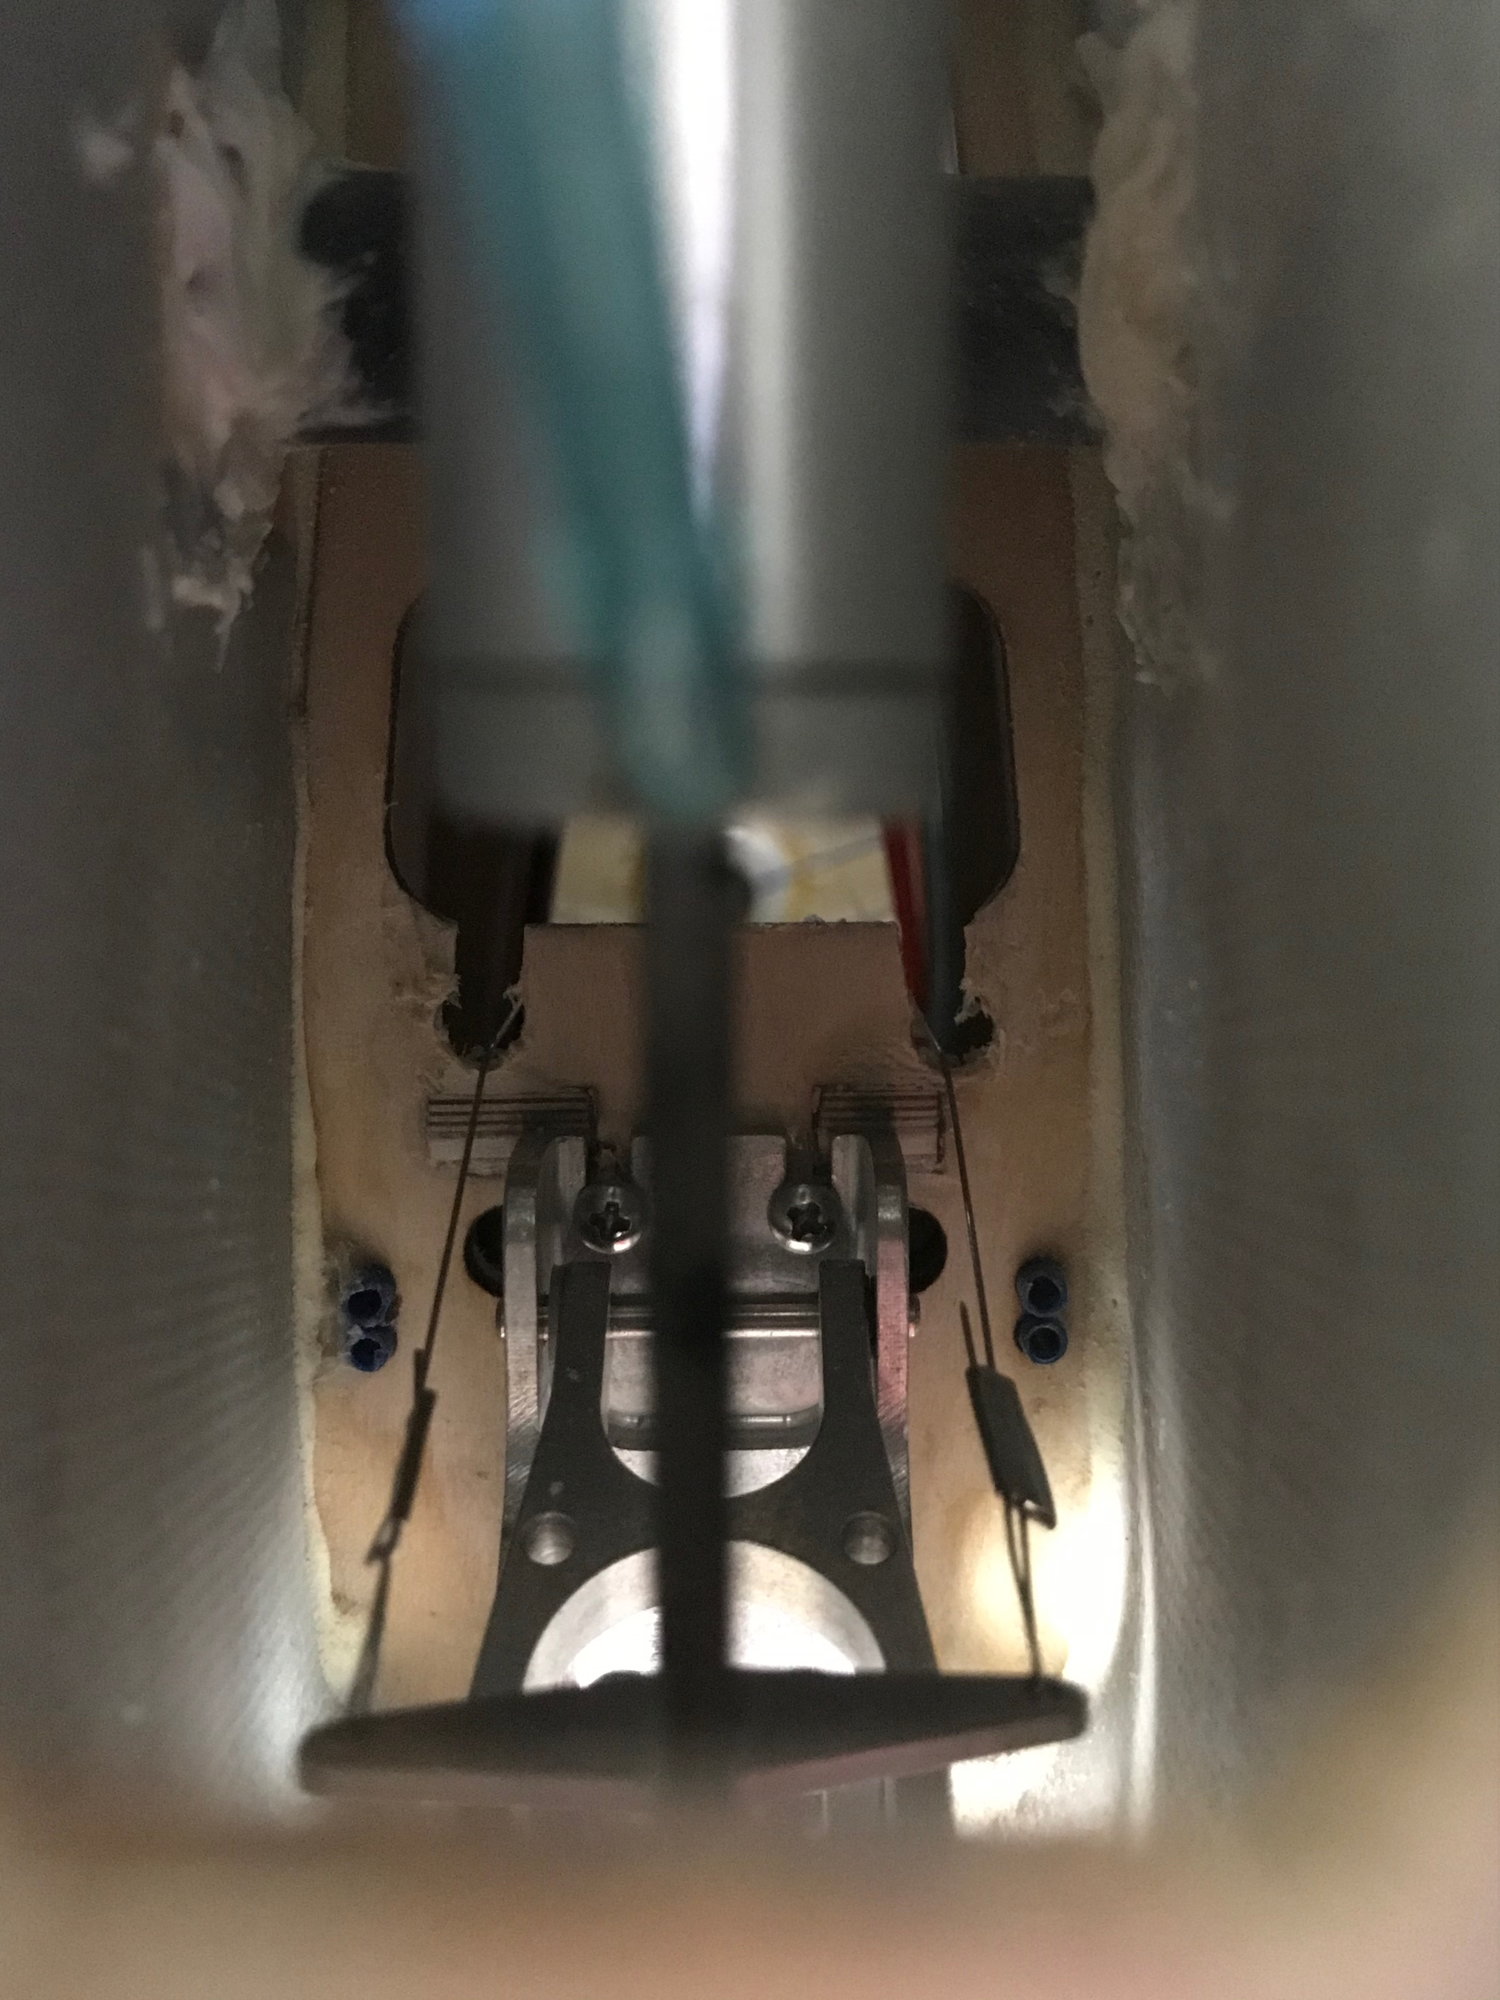
Messed around w the plane a little this weekend, I didn't get the batteries and switches until today, so I'll try and get that knocked out before the weekend comes. In the meantime I had worked on the back end of the plane and got it all buttoned up.
First thing was to get the Rudder glued on and then drill the exit holes for the rudder cables. I squared up the rudder by using the vertical fin and rudder counterbalance to ensure it was straight. I used the top location of the two nyrods that are in the tailwheel bulkhead. I measured from the center of the control horn and drew a horizontal line from the end of the fuselage skin 80mm or 3.15" long and then from there down 27mm or 1.15". (Thanks to Carlo Vangompe the measurements!). i do have some rubbing of the cable on the fuselage and may extend that hole (made into a slot) forward to help remove some of the rubbing condition.
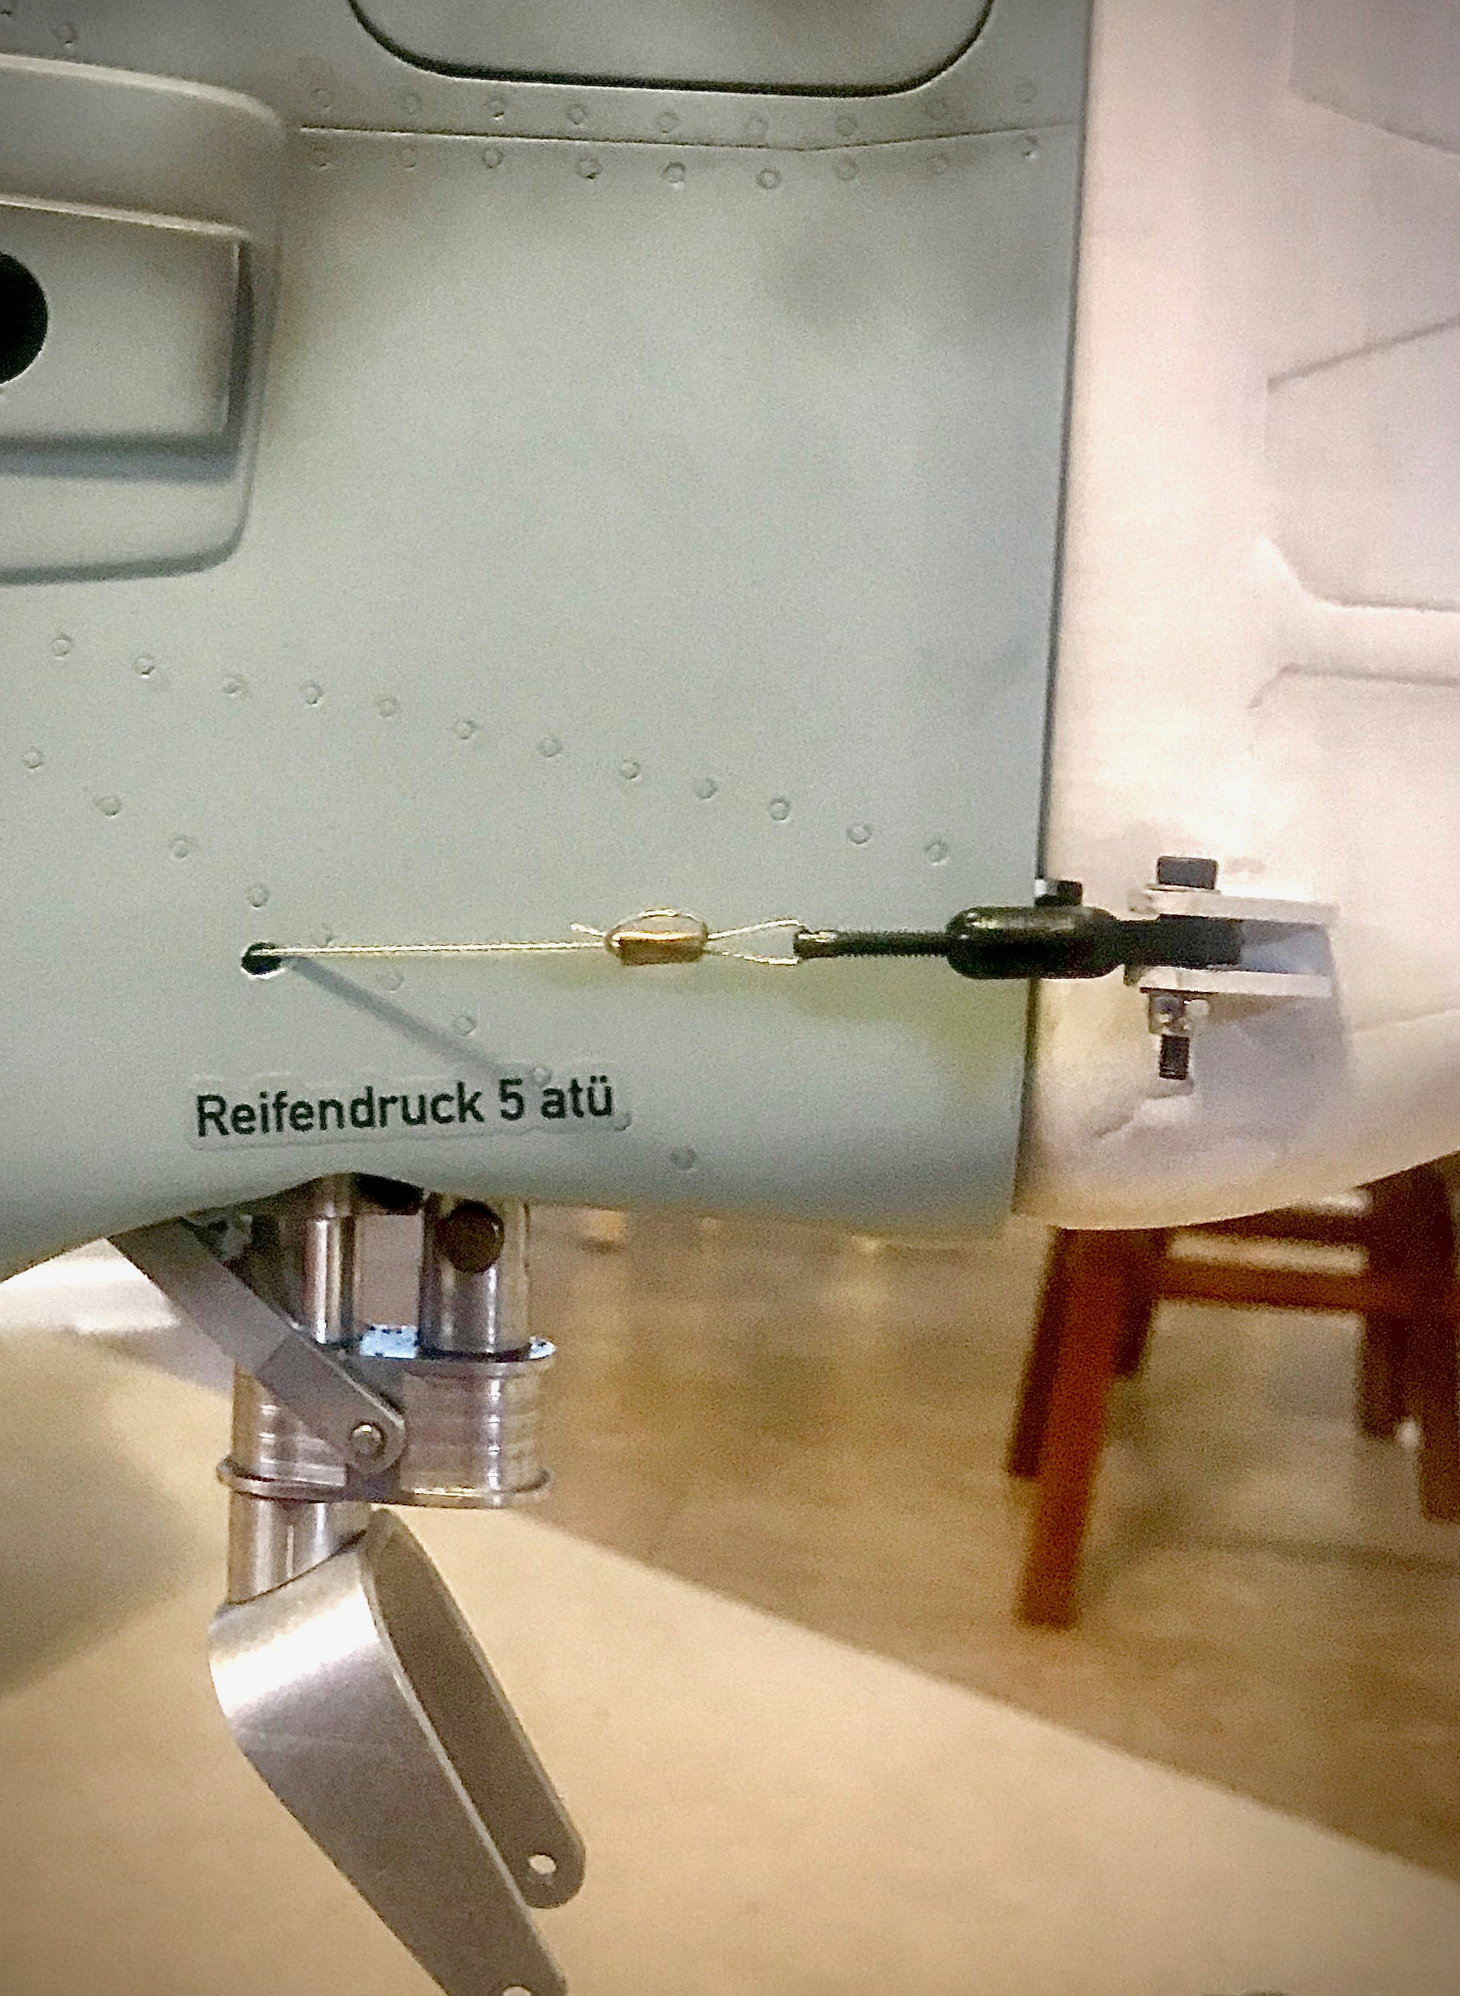
First thing was to get the Rudder glued on and then drill the exit holes for the rudder cables. I squared up the rudder by using the vertical fin and rudder counterbalance to ensure it was straight. I used the top location of the two nyrods that are in the tailwheel bulkhead. I measured from the center of the control horn and drew a horizontal line from the end of the fuselage skin 80mm or 3.15" long and then from there down 27mm or 1.15". (Thanks to Carlo Vangompe the measurements!). i do have some rubbing of the cable on the fuselage and may extend that hole (made into a slot) forward to help remove some of the rubbing condition.
Last edited by jraycut; 06-15-2020 at 05:25 PM.
06-15-2020, 05:14 PM
#900
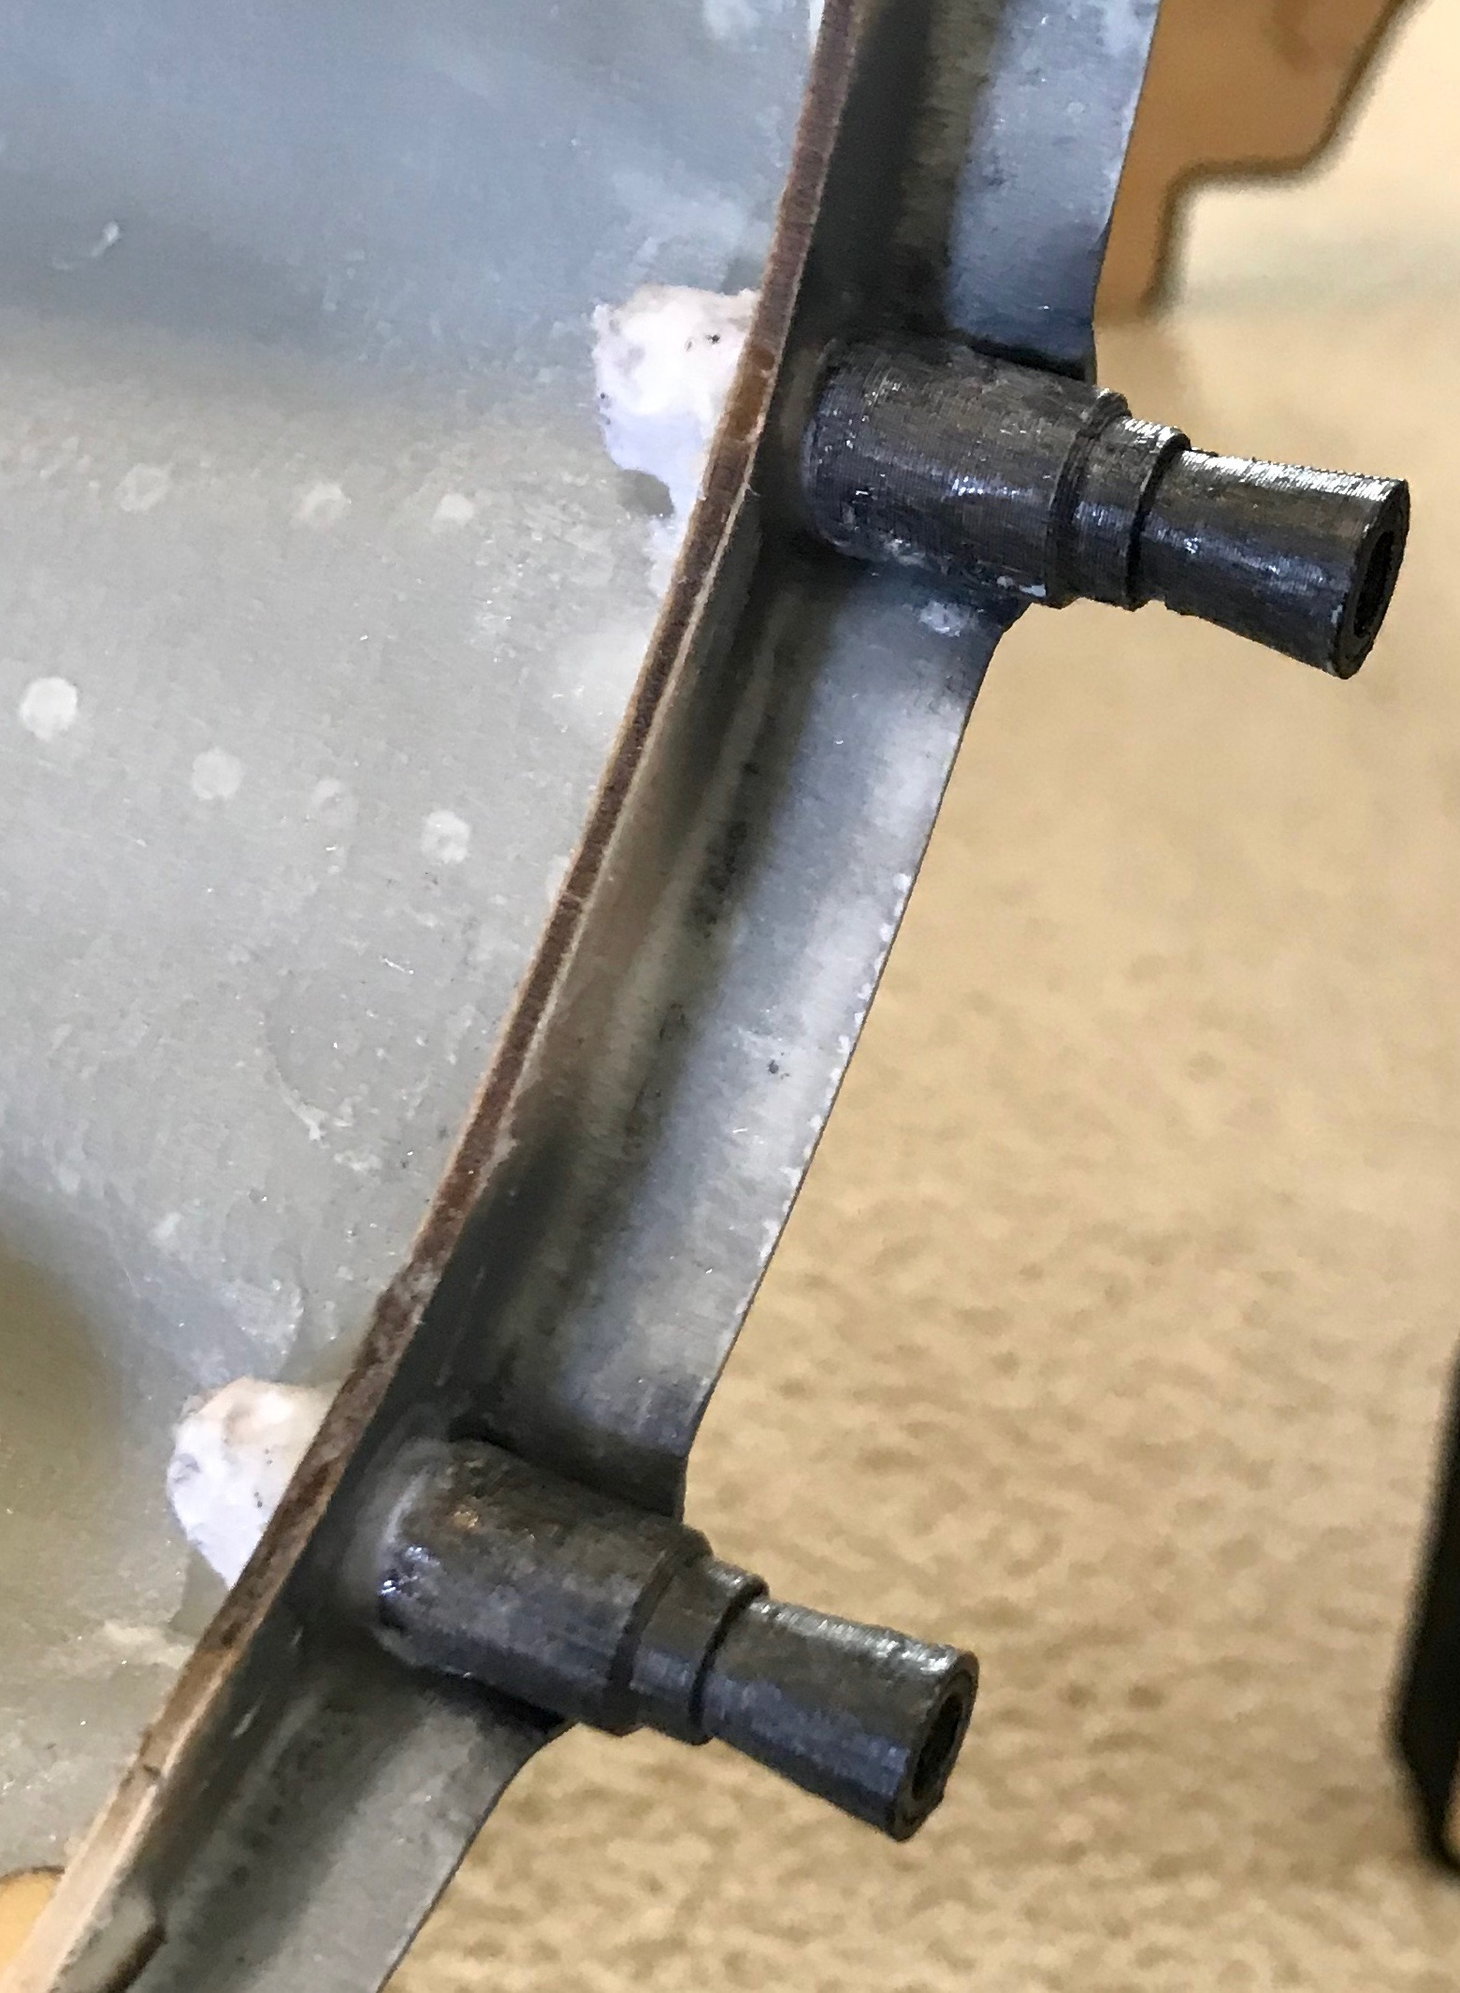
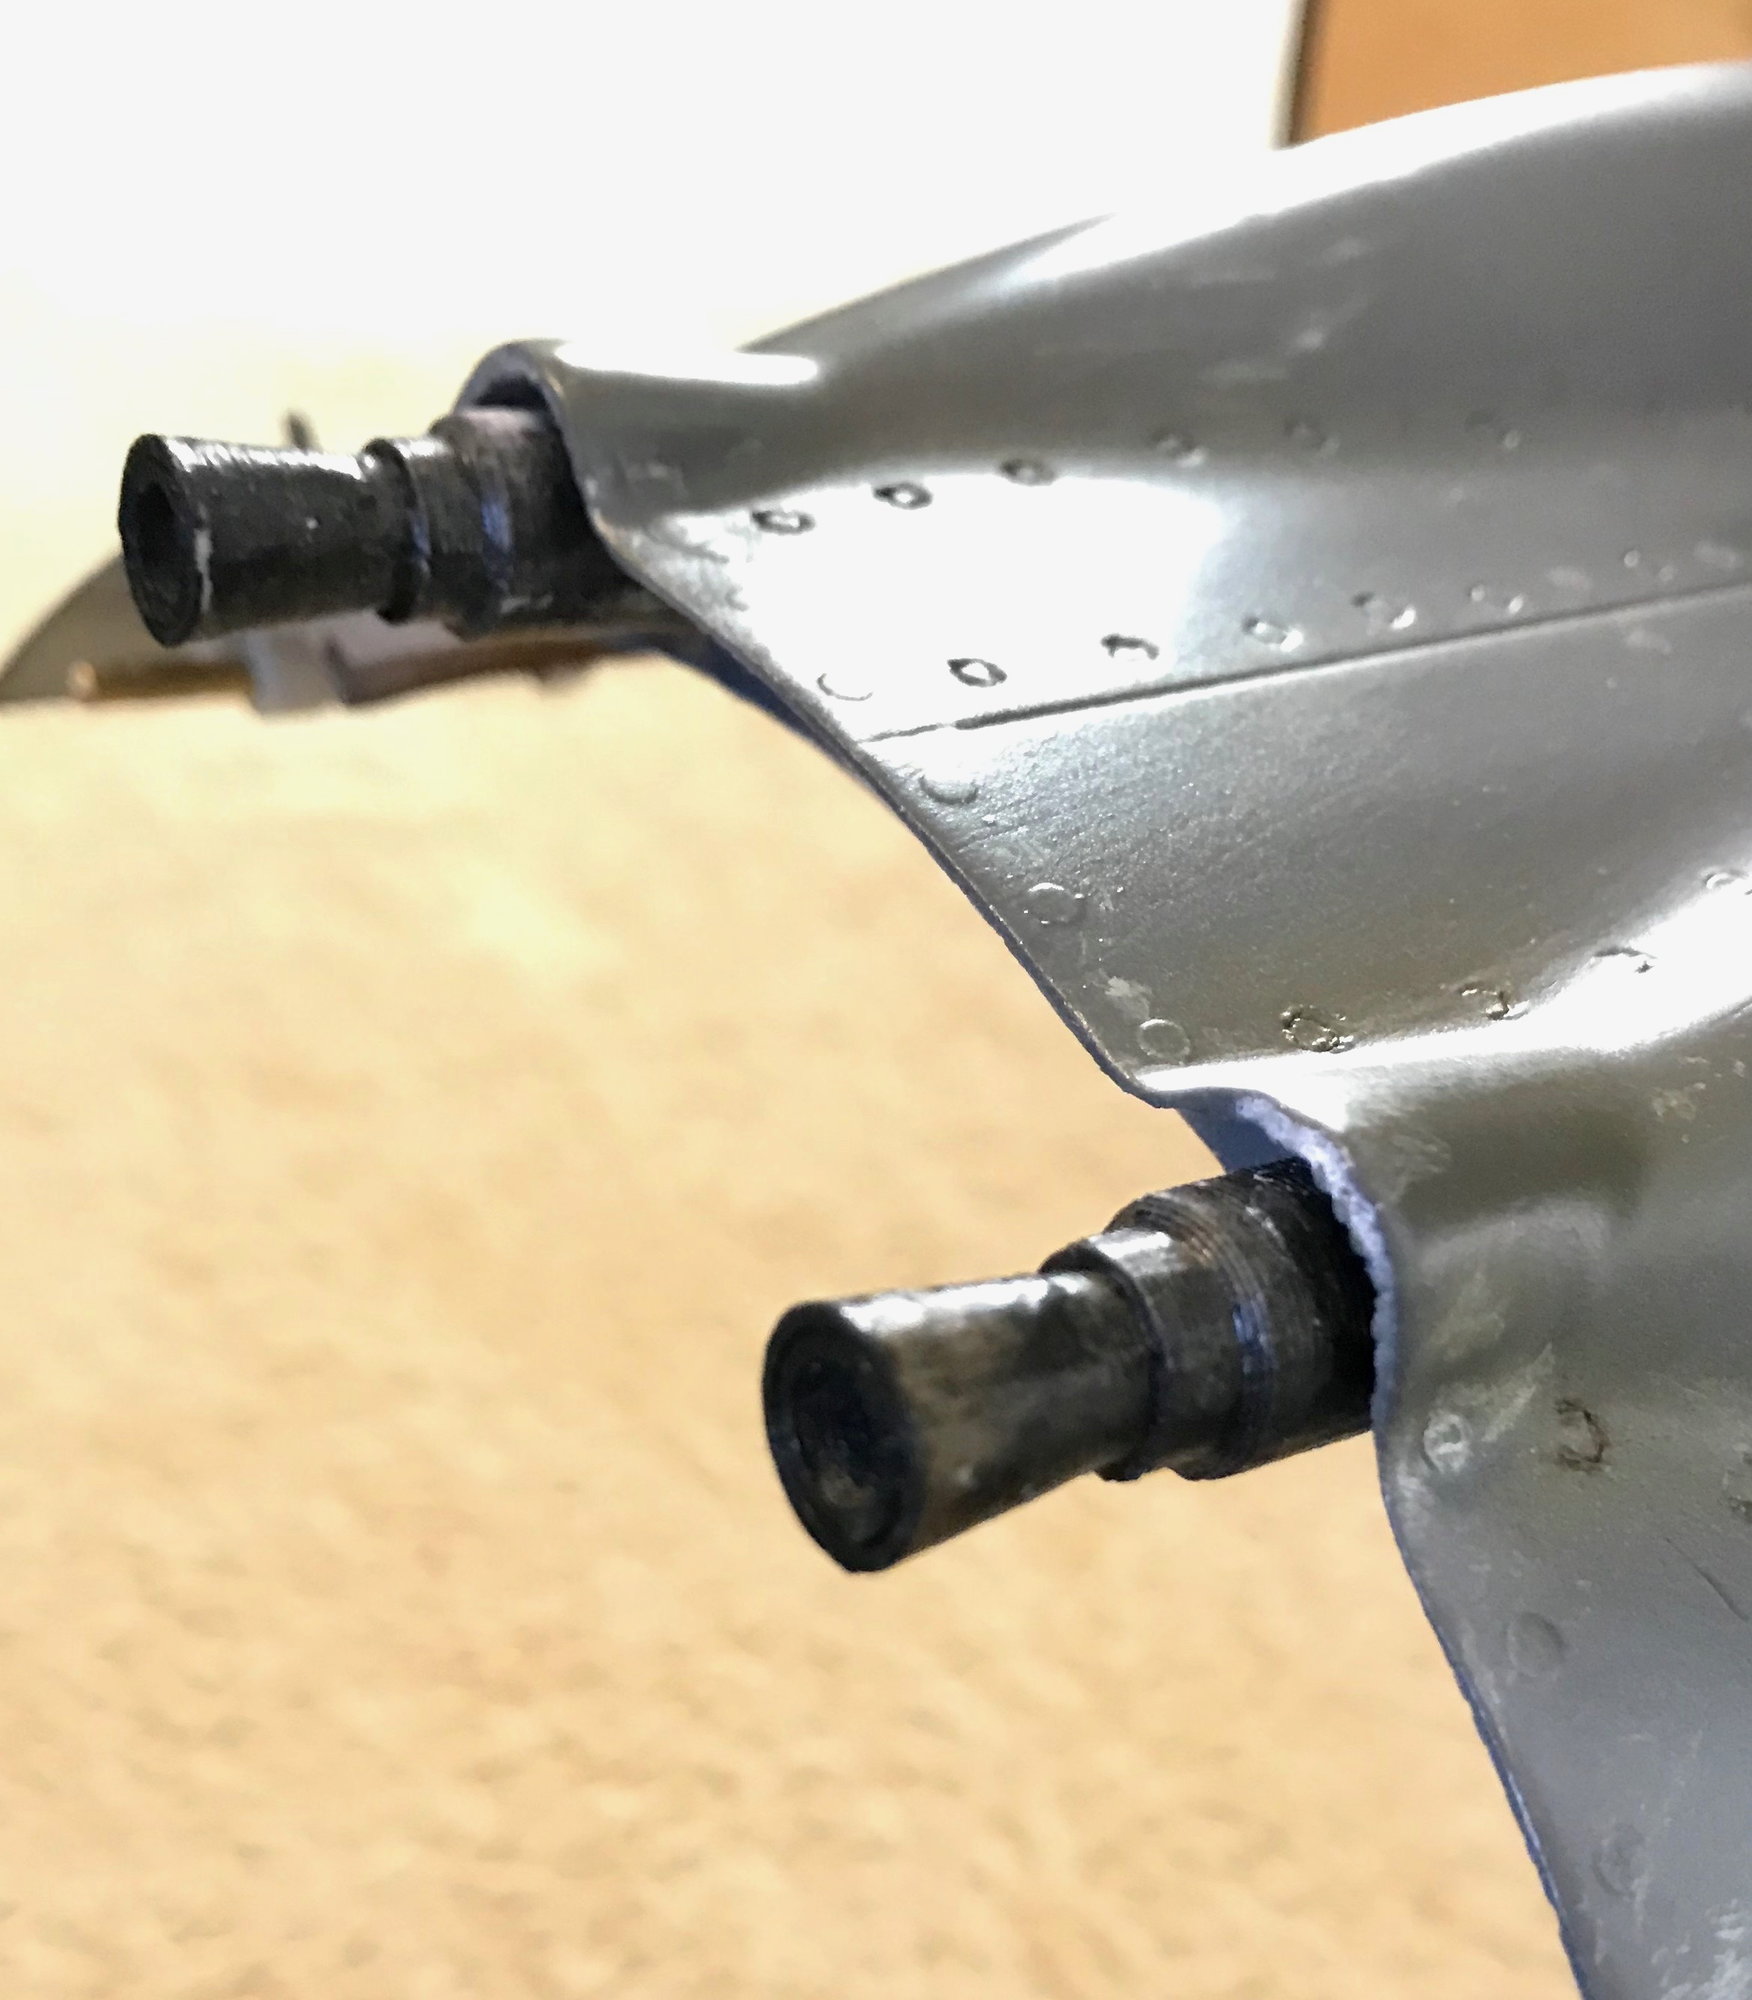
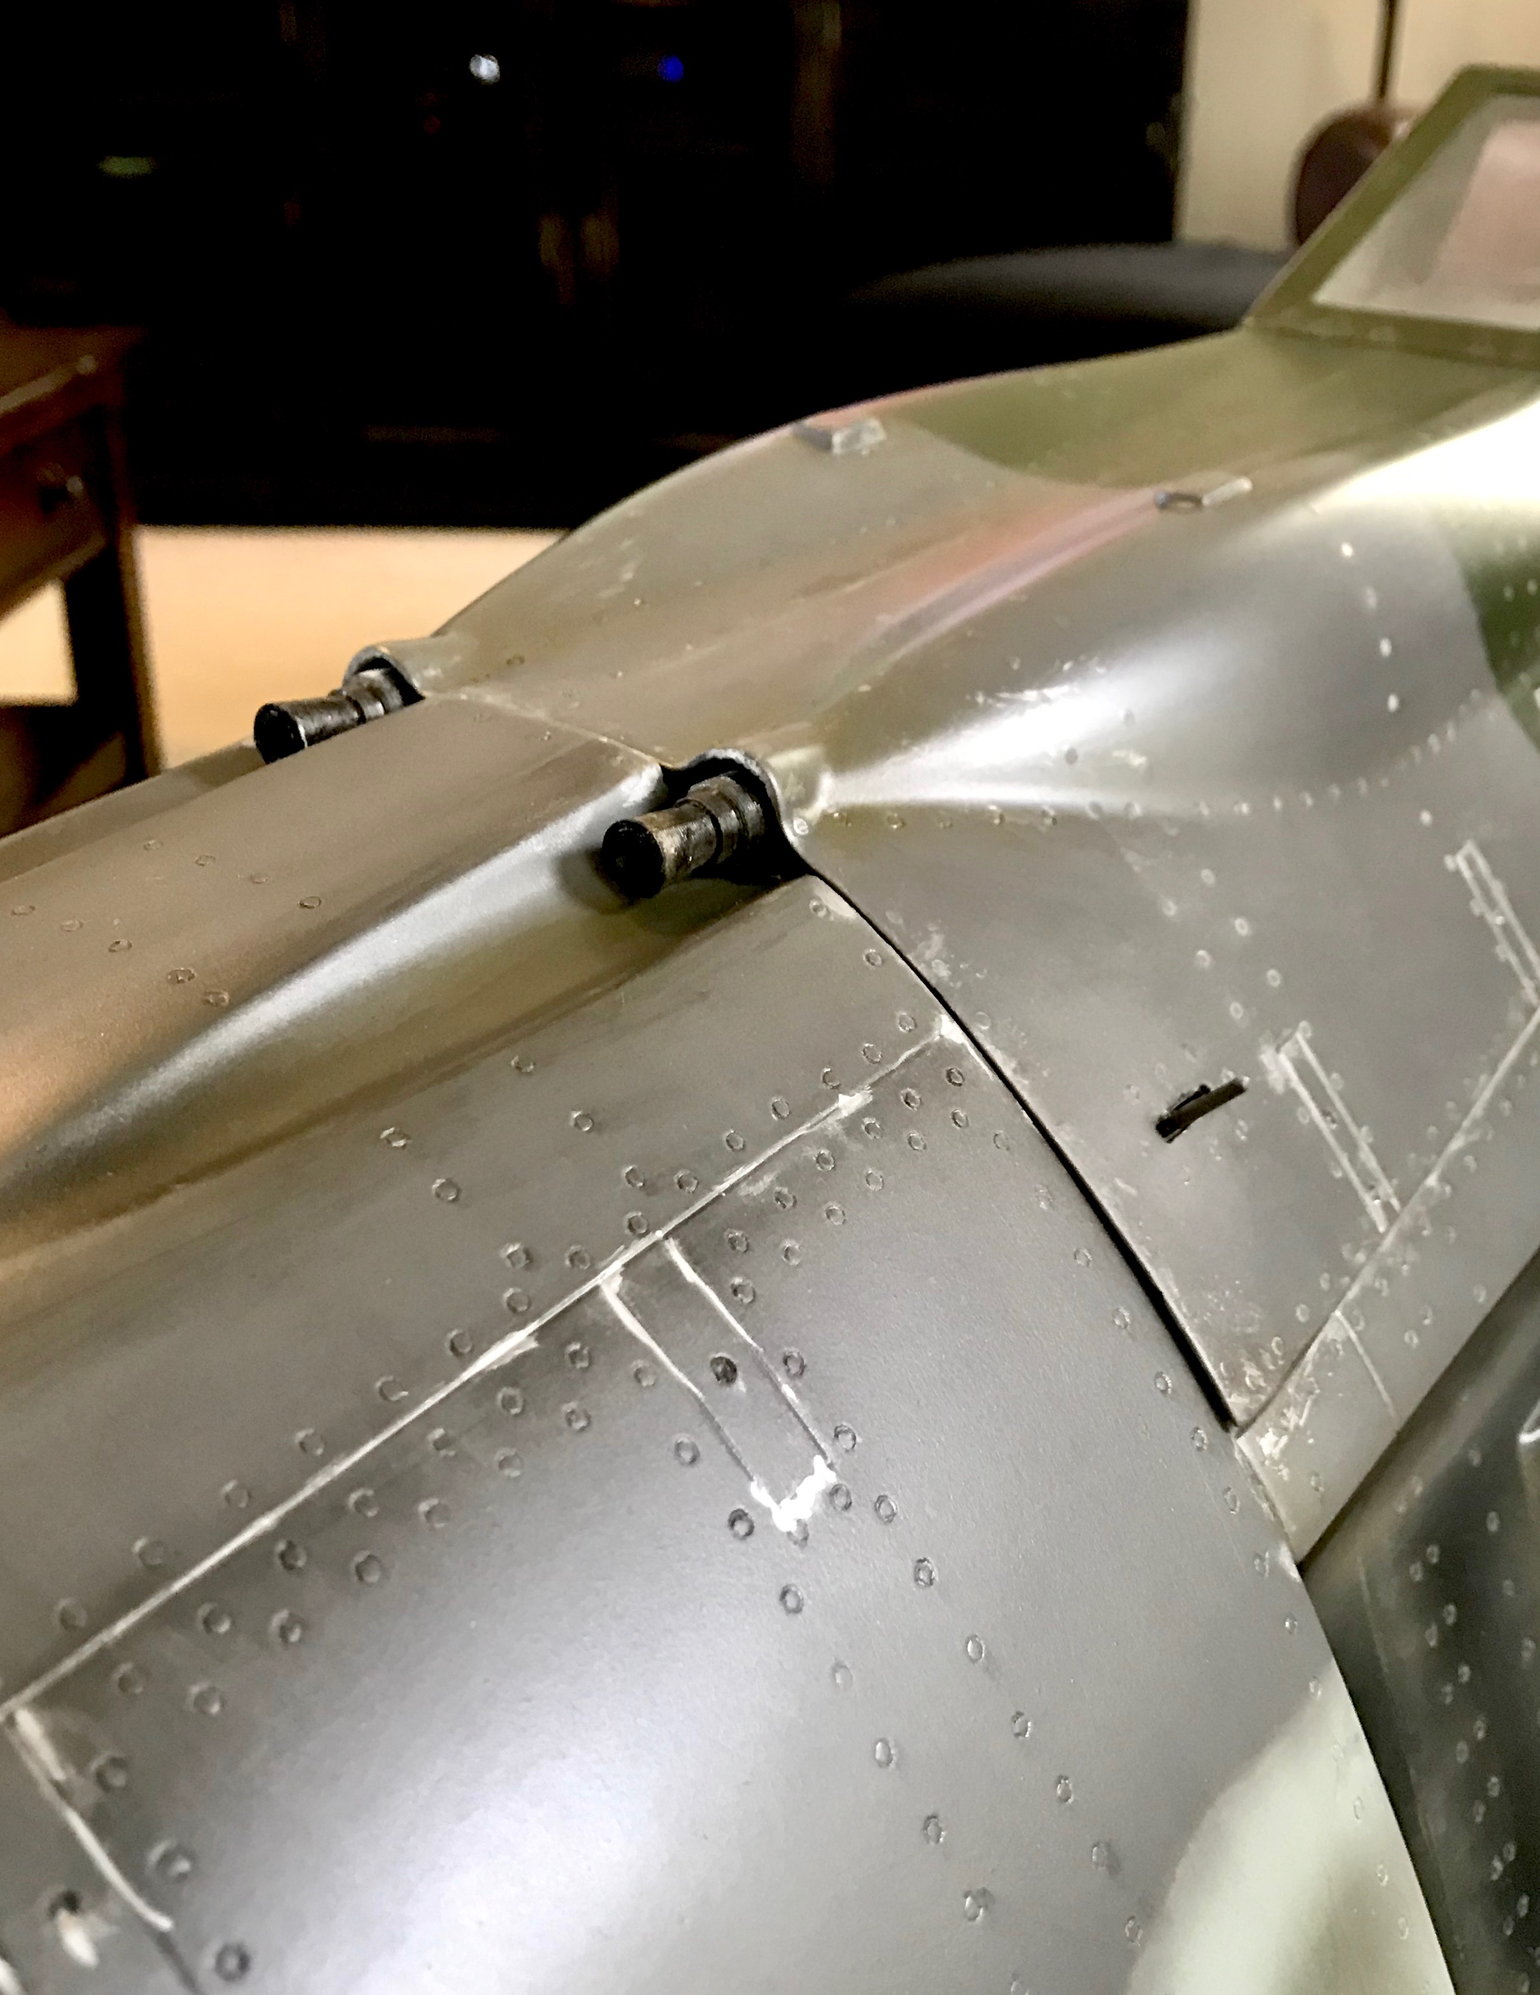
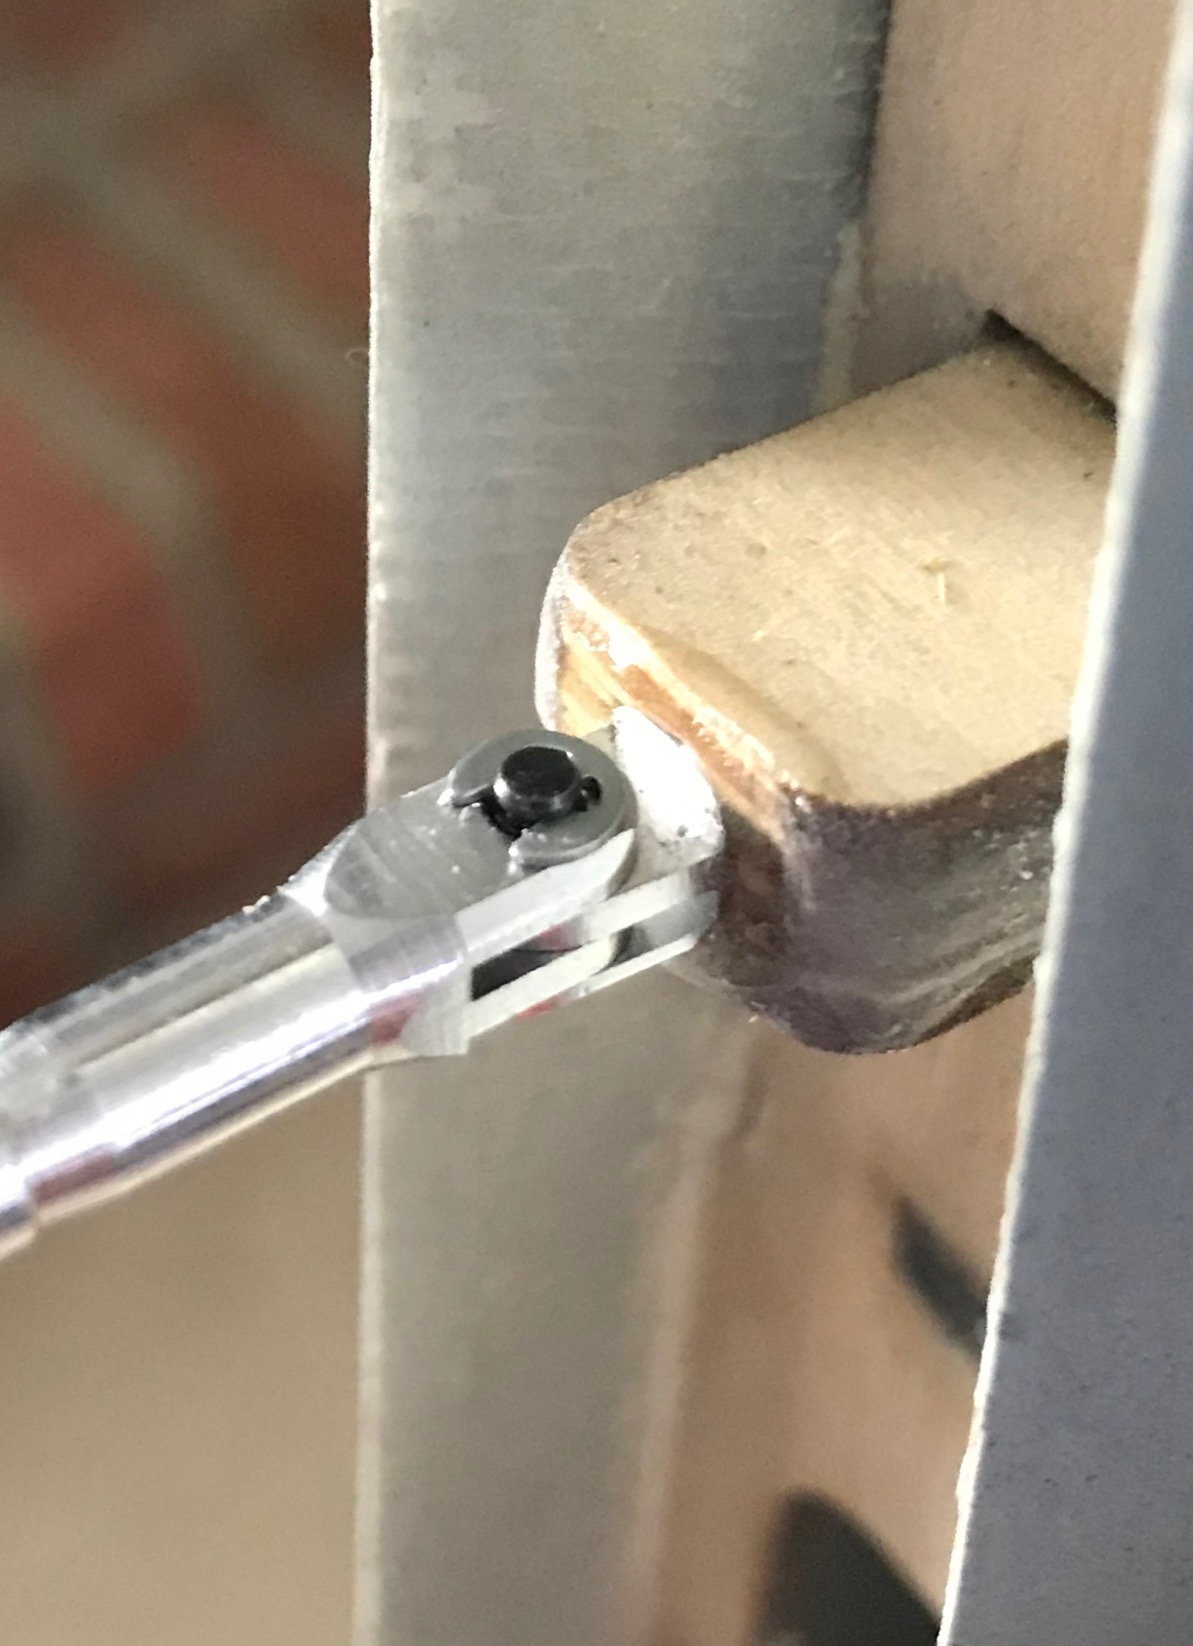
Once the cables were ran and rudder access panel closed up, then installed the tailwheel - muddied it up a bit and then moved on to the guns at the front of the fuselage. I got the guns for the hood and the wings from iflytailies https://www.iflytailies.com/store/guns-ordnance/. cut the guns down as i didn't the full length - painted em up and got them glued in.